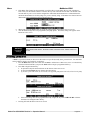
1
SYYRRIINNGGEE INNFFUUSSIIOONN PUUMMPP Manufactured by: Medex Inc. Duluth, Georgia 30096 USA Authorized EU Representative: Medex Medical Ltd., Haslingden, Rossendale, Lancashire, England BB4 4PW Operation Manual MEDFUSION 3500 Medfusion 3500 MEDEX Table of Contents 1. IMPORTANT NOTICES................................................................................................................................................1 2. INTRODUCTION............................................................................................................................................................2 3. INTENDED USE, FEATURES & CONTROLS........................................................................................................3 Correct Use of This Pump ....................................................................................................................... 3 Features & Controls................................................................................................................................. 4 Keypad & Functions................................................................................................................................ 5 Using Front Panel Control Buttons ......................................................................................................... 5 Understanding Front Panel Indicators ..................................................................................................... 6 What Indicators Mean ............................................................................................................................. 6 4. TECHNICAL SPECIFICATIONS & DEFINITIONS...............................................................................................7 Technical Definitions .............................................................................................................................. 8 Syringe Manufacturers & Standard Sizes................................................................................................ 9 Trademark Information ...................................................................................................................... 9 5. OPERATION WARNINGS & CAUTIONS............................................................................................................ 10 Warnings................................................................................................................................................ 10 Cautions................................................................................................................................................. 12 6. ALARMS & REMEDIES............................................................................................................................................ 13 Alarms / Alerts ...................................................................................................................................... 13 “Neglected Pump” Alarm...................................................................................................................... 13 “Syringe Near Empty” Alarm During Delivery .................................................................................... 13 “Syringe Empty” Alarm During Delivery ............................................................................................. 14 “Syringe Empty − Manual” Alarm During Delivery............................................................................. 14 General System Alarms & Alerts .......................................................................................................... 14 7. GUIDELINES FOR ENHANCED PUMP PERFORMANCE ............................................................................. 17 Always Use Smallest Syringe for Volume of Fluid Being Delivered .............................................. 17 Use Small Internal Diameter Tubing................................................................................................ 17 8. SETUP & LOAD SYRINGES .................................................................................................................................... 18 Turning on the Pump ............................................................................................................................. 18 What if the Pump Does Not Turn On? ............................................................................................. 18 Selecting Delivery Mode ....................................................................................................................... 19 Syringe Manufacturer/Type Setup......................................................................................................... 19 What if Only One Syringe Manufacturer is Setup?.......................................................................... 19 Loading the Syringe onto the Pump ...................................................................................................... 20 Priming the System................................................................................................................................ 21 Unloading the Syringe ........................................................................................................................... 22 9. STARTING & STOPPING INFUSION DELIVERY............................................................................................. 23 Start Delivery from Pause...................................................................................................................... 23 Starting Delivery from Standby............................................................................................................. 23 Making Changes During Delivery......................................................................................................... 24 Stopping Delivery.................................................................................................................................. 24 Turning Off the Pump ........................................................................................................................... 24 10. PROGRAMMING DELIVERY MODES ................................................................................................................ 25 Overview of Programming Steps .......................................................................................................... 25 Medex Part # G6000608 Revision 3 – Operation Manual Page ii MEDEX Medfusion 3500 Apparently Missing or Different Steps ............................................................................................ 25 A Repeated Warning ........................................................................................................................ 25 Continuous Mode: ML/HR ..................................................................................................................... 26 Mass Modes........................................................................................................................................... 27 Body Weight Infusion Deliveries .......................................................................................................... 28 Volume / Time – ML/HR ........................................................................................................................ 28 Intermittent Volume / Time................................................................................................................... 30 Recall Last Settings ............................................................................................................................... 31 Custom Dilution .................................................................................................................................... 32 Types of Custom Dilution Available................................................................................................ 32 Calculating Dilutions............................................................................................................................. 32 11. BOLUS DOSING.......................................................................................................................................................... 35 Setup Bolus Dosing ............................................................................................................................... 35 Delivering a Bolus Dose........................................................................................................................ 36 12. LOADING DOSES....................................................................................................................................................... 38 Setting a Loading Dose ......................................................................................................................... 38 Delivering a Loading Dose.................................................................................................................... 39 13. VOLUME LIMIT.......................................................................................................................................................... 40 Setting Volume Limit ............................................................................................................................ 40 14. KEEP VEIN OPEN (KVO) RATE............................................................................................................................. 42 Programming KVO Rate ....................................................................................................................... 42 Delivery at KVO Rate ........................................................................................................................... 43 15. STANDBY...................................................................................................................................................................... 44 Programming Standby ........................................................................................................................... 44 16. DELAYED START ...................................................................................................................................................... 45 Programming Delayed Start .................................................................................................................. 45 17. OVERRIDE AND TOGGLE FEATURES IN THE INFUSION PROGRAM OPTIONS............................... 46 18. DELIVERY .................................................................................................................................................................... 47 Starting Delivery ................................................................................................................................... 47 Stopping Delivery.................................................................................................................................. 47 Occlusion Trend Graph During Delivery .............................................................................................. 47 FlowSentry (Rapid Occlusion Detection).............................................................................................. 48 Post Occlusion Bolus Reduction ........................................................................................................... 49 Time to Occlusion ................................................................................................................................. 49 Flow Delivery Graphs ........................................................................................................................... 50 Flow Delivery Graphs ........................................................................................................................... 51 19. CHANGING DELIVERY RATE............................................................................................................................... 52 Titrate Rate During Delivery ................................................................................................................. 52 Changing Rate During Delivery ............................................................................................................ 53 Changing Rate When Paused ................................................................................................................ 53 20. TOTAL VOLUME, PROGRAM VOLUME / DOSE DELIVERED ................................................................. 54 Displaying Program Volume Delivered / Program Dose Delivered...................................................... 54 Clearing Total Volume, Program Volume, or Program Dose Delivered Display ................................. 55 21. KEYPAD LOCK ........................................................................................................................................................... 56 Medex Part # G6000608 Revision 3 – Operation Manual Page iii MEDEX 22. Medfusion 3500 USER DEFINED LIBRARIES ................................................................................................................................... 57 What Are Libraries? .............................................................................................................................. 57 For What Are Libraries and Templates Used? ................................................................................. 57 Who Can Use These Libraries of Templates?.................................................................................. 57 Types of Programmable Libraries .................................................................................................... 57 Library and Template Warnings & Cautions ................................................................................... 58 Using “Standard” Libraries ................................................................................................................... 58 How to Tell Whether E-Plates Are Enabled For Use ............................................................................ 59 E-Plates is Disabled.......................................................................................................................... 59 E-Plates Is Enabled........................................................................................................................... 59 Using E-Plates ....................................................................................................................................... 59 Enabling E-Plates & Standard Libraries................................................................................................ 60 Creating Library Templates................................................................................................................... 60 Saving a New Template to a Library..................................................................................................... 61 Template Naming Conventions........................................................................................................ 62 Libraries Must Be Enabled to Use ................................................................................................... 62 Transferring Libraries from Pump to Pump .......................................................................................... 63 23. BATTERY, AC & EXTERNAL DC POWER OPERATION .............................................................................. 64 Onscreen Display of Internal Battery Power Level Gauge ................................................................... 64 Battery guidelines............................................................................................................................. 64 External DC Power Option.................................................................................................................... 65 24. CLEANING AND CARE............................................................................................................................................ 66 25. MAINTENANCE & SERVICE.................................................................................................................................. 67 Periodic Maintenance ............................................................................................................................ 67 Using Medex Service Assistance .......................................................................................................... 68 Returning a Medfusion 3500 Pump for Repair ...................................................................................... 68 Medex Limited Warranty ...................................................................................................................... 69 26. APPENDIX 1: SYRINGE FLOW RATE BY MANUFACTURER & SIZE................................................... 70 27. APPENDIX 2: FLOW DELIVERY CALCULATIONS...................................................................................... 71 Mass modes ........................................................................................................................................... 71 Body Weight modes .............................................................................................................................. 71 Volume / Time & Intermittent modes ................................................................................................... 72 Custom Dilution Algorithm................................................................................................................... 72 The Results from the Dilution Calculation....................................................................................... 72 How the Calculation is Performed ................................................................................................... 73 Goal of This Dilution Calculation .................................................................................................... 73 28. APPENDIX 3: SERIAL COMMUNICATIONS................................................................................................... 74 Serial Conversion Box........................................................................................................................... 74 Medex Cloning Block............................................................................................................................ 74 29. APPENDIX 4: POLE CLAMP ASSEMBLY & USE........................................................................................... 75 3000 Series Pump Rotating/Detachable Pole Clamp (standard) ........................................................... 75 Assembling the 3000 Series Pump Rotating/Detachable Pole Clamp................................................... 75 3000 Series Pump Stationary Pole Clamp ............................................................................................. 76 Assembling the 3000 Series Pump Stationary Pole Clamp ................................................................... 77 30. APPENDIX 5: MRI ROOM USAGE ........................................................................................................................ 78 MRI Room Usage for the Medfusion 3500 ........................................................................................... 78 Medex Part # G6000608 Revision 3 – Operation Manual Page iv Medfusion 3500 MEDEX ♦ ♦ Proper Placement of Pump ................................................................................................................ 78 Pulse Sequences for MRI when using the Medfusion 3500 ................................................................... 78 Medex Part # G6000608 Revision 3 – Operation Manual Page v Medfusion 3500 MEDEX 1. IMPORTANT NOTICES The notices in the table below contain important information you need to know and understand before beginning to use the Medfusion 3500 pump. All users of this pump are responsible for knowing this information. ! Warning! Before using any Medfusion 3500, you the operator must be thoroughly familiar with the contents of the operations manual, including all warnings, cautions, and instructions for use. If you use this pump, you are responsible for knowing these things. This syringe infusion pump is intended for use only under direction of trained medical professionals. Caution United States Federal law restricts this device to sale by or on the order of a physician. Usability This manual and its contents are valid for use with all software versions starting with 3.0.x; for example, 3.0.0, 3.0.1, etc. 1998 − 2003 by Medex Inc. All Rights Reserved. 0120 Manufacturer: Medex Inc., Carlsbad, CA, USA Tel: 800-848-1757 Authorized EU representative: Medex Medical Ltd., St. Crispin Way, Haslingden Rossendale, Lancashire, BB4 4PW Great Britain Tel: +44 (0) 1706-233826 Medex Part # G6000608 Revision 3 – Operation Manual Page 1 Medfusion 3500 MEDEX 2. INTRODUCTION The Medfusion 3500 syringe infusion pump is designed for use in critical care areas for the administration of fluids requiring precisely controlled infusion rates. Because of the pump’s simplicity and ease of use, this pump can also be used successfully in the non-critical areas of a clinical setting. The only people authorized to setup & monitor any infusion are nurses, physicians, or other health-care professionals with training in infusion therapy and operation of the syringe pump. The Medfusion 3500 syringe pump is indicated for use with the following delivery routes: • Arterial • Spinal • Epidural • Subcutaneous • Intravenous The Medfusion 3500 syringe pump is indicated for delivering the following fluids: • Intravenous solutions • Drug solutions • Blood or blood products The Medfusion 3500 syringe pump is indicated for use with the following delivery modes • Continuous • Body weight • Volume / Time • Custom dilution • Mass • Intermittent Volume / Time WARNING! Pump Usage This syringe infusion pump is intended for use only under direction of trained medical professionals. Before using any Medfusion 3500, you must be thoroughly familiar with this manual, including all Warnings, Cautions, and instructions for use. Medex Part # G6000608 Revision 3 – Operation Manual Page 2 Medfusion 3500 MEDEX 3. INTENDED USE, FEATURES & CONTROLS This chapter defines basic use parameters, features, and control options of the Medfusion 3500 infusion pump. Correct Use of This Pump The correct use of the Medfusion 3500 infusion pump should be based on the following principles: 1. This syringe pump is intended for intravenous, subcutaneous, epidural, spinal, and arterial infusions of critical medications or fluids requiring precisely controlled infusion rates. 2. Use only syringe manufacturers and sizes listed in the technical specifications of this manual. 3. Ensure all medications or fluids are compatible with the syringe, catheters, tubing, and fittings used in the infusion setup. 4. Always ensure fluids are compatible with each other when infusing more than one fluid or medication through the same infusion site. If connecting more than one pump to the same infusion site, use one-way check valves to prevent pumps from interfering with each other. Verify that the pumps will operate together without alarming. Warning! Failure to strictly adhere to these principles of use can cause over infusion or under infusion, with possibility of serious injury or death. Warning! Do not use on the inlet side of Extracorporeal Membrane Oxygenation (ECMO) systems where the negative pressure is greater than –100mm Hg as the high negative pressures can result in uncontrolled fluid flow. ECMO use Warning! Check Magnetic Fields Above 150 Gauss Never use the pump in magnetic fields above 150 gauss. Always secure the pump to a non-moveable object. In magnetic fields above 150 gauss, the attraction of the pump to the magnet may be a hazard. This pump may be operated in static magnetic fields up to 150 gauss for specific MRI devices identified in Appendix 5. Medex Part # G6000608 Revision 3 – Operation Manual Page 3 Medfusion 3500 MEDEX Features & Controls Below is an illustration of the pump in a front view, with callouts identifying major elements: A B D C E G F H A − Handle B − Tubing Holders C − Display D − Syringe Barrel Clamp E − Syringe Plunger Holders F − Syringe Plunger Release Lever G − Syringe Barrel Flange Clip H − Syringe Plunger Driver Medex Part # G6000608 Revision 3 – Operation Manual Page 4 Medfusion 3500 MEDEX Keypad & Functions Below is an illustration of the front panel of the Medfusion 3500, with tables below identifying functions and effects: Control Button Power When Pump is Paused When Pump is Delivering Push and hold to turn OFF pump. Push & release, then push & hold to turn OFF. Start Starts delivery. N/A Stop N/A Stops delivery. Bolus Begins priming after confirmation. Begins programmed bolus after confirmation. Silences audible alarm. Allows operator to switch the backlight from bright to dim, or dim to bright Silences audible alarm. Allows operator to switch the backlight from bright to dim, or dim to bright N/A Indicates pump controls are locked. Set number values or selects options. Set number values or selects option. Reverts to previous step or level. Reverts to previous level or step if adjusting settings. Function defined on screen. Function defined on screen. – Alarm Silence ±– Lock Numerals & Decimal Back “Menu Buttons 1-4” Using Front Panel Control Buttons Below is a table of the Medfusion 3500 front panel buttons and their assigned functions: Button Function Push and hold to turn the pump ON. Push and hold to turn the pump OFF. Power Pressing the power button while the pump is infusing results in a message asking you to press the power button a second time to turn OFF power. Start Starts an infusion after settings are made. Press this button to start infusing after all infusion parameters have been set & reviewed. Stop Stops an infusion. All delivery (including Keep-Vein-Open) pauses. Starts bolus infusion or primes the pump. Bolus • • Press Bolus button when the pump is paused to call up the PRIMING screen, then press and hold this button to prime. Press Bolus button when the pump is infusing to call up the BOLUS CONFIRM screen, and then press the menu button to confirm the bolus dose and start the bolus delivery. Alarm Silence Silences an alarm for a programmed delay period. The usual is 2 minutes. Any new alarms occurring within the delay period sound immediately. When the delay period expires, any audible portion of the highest priority alarm still present will sound. Back Pressing this button exits the current data entry operation and reverts to previous operation screen. Menu Buttons The four buttons directly below the display are software-defined buttons, with assigned function varying from screen to screen. The bottom line of the display defines the function for these buttons. Medex Part # G6000608 Revision 3 – Operation Manual Page 5 Medfusion 3500 MEDEX Understanding Front Panel Indicators Below is a table of function indicators and their effects while using the pump. Indicator − AC Line Indicator – Battery Indicator Pump Off ON when AC powered. ON when charging. Pump Paused Pump Delivering ON when AC powered. ON when AC powered. ON when charging. ON when charging. Flashing when battery in use. Flashing when battery in use. – Lock Indicator OFF OFF ON when keypad is locked. − Infusing Indicator OFF OFF Flashing from right to left. What Indicators Mean Below is a table of front panel indicators and what each of them means: Indicator What it means − Alarm Indicators The ALARM indicators (yellow or red) are on whenever the pump is in an alarm condition. The specific details of each alarm are covered in the Alarm section later in this manual. - AC Line Indicator The AC LINE indicator (green) is ON whenever the pump is connected to “mains” line power. It is OFF when the pump is not connected to an active AC line. – Battery Indicator The BATTERY indicator (green) blinks ON&OFF whenever the pump is operating on internal battery power, and remains ON when battery is charging. The LOCK indicator (±) tells you the pump has been locked into its current operational mode. – Lock Indicator − Infusing Indicator While this indicator is lighted, the keypad is locked and no changes can be made to settings. Attempting to stop or change an infusion while locked will result in an alarm and an advisory message. The Infusing indicators are 3 green lights, which illuminate in sequence right to left when the pump is infusing. During intermittent delivery mode, a single Infusing indicator lights during the time between infusions. Medex Part # G6000608 Revision 3 – Operation Manual Page 6 Medfusion 3500 MEDEX 4. TECHNICAL SPECIFICATIONS & DEFINITIONS Below are the technical specifications of the Medfusion 3500 infusion pumps: Category Specification Dimensions (pump only) 10.5” wide x 5.1” high x 5.5” deep (27 cm x 13 cm x 14 cm) Weight (pump only) 3.8 lbs. (1.7 kg) Accuracy Nominal ± 2% excluding syringe variations (for infusion back pressures of -100 mm Hg to +300 mm Hg) Flow Rate Range (depends on syringe size) 0.01 ml/hr to 1130 ml/hr 3500 Delivery modes (user customized) ml/hr Volume / Time Mass Delivery options (user customized) AC power source Body Weight Custom Dilution Intermittent Volume / Time KVO Rate Delayed Start Standby Override Alarm Volume Volume Limit Override Occlusion Limit Toggle PVD/PVD Bolus Dose Save to Library Toggle Empty Tone Loading Dose Toggle Near Empty Tone Toggle Rapid Occlusion Detection 100-240 VAC, 50/60 Hz, 30VA Safety Class II – Type CF External DC power source (Optional) External DC Input 6 – 14 VDC, 7 Watts Safety Class II – Type CF (must meet IEC 601-1 Medical Equipment Standards) Internal Battery Capacity (at 25°C) Rechargeable. 10 hours at 5.0 ml/hr with 60 ml syringe − (from fully charged battery) User-defined Delivery Libraries Four libraries with 16 profiles per library One library option is “E-Plates” for rapid setup Normal Operating Conditions Temperature: 5° to 40° C (40° to 104° F) Relative Humidity: 15 to 95% non-condensing Ambient Pressure: 70 kPa to 106 kPa (10.2 psia to 15.4 psia) Infusion Back Pressure: -100 mmHg to 300 mmHg Medex Part # G6000608 Revision 3 – Operation Manual Page 7 Medfusion 3500 MEDEX Technical Definitions Below is a table of technical definitions as required per international standards: Term Definition Class II Equipment in which protection against electrical shock relies on double or reinforced insulation instead of basic insulation. Accessible metal components of pump enclosure use this higher level of insulation instead of safety grounding. Type CF Equipment in which level of protection from electrical shock is defined by leakage current (C) exposure and insulation by isolated or floating (F) metal of pump enclosure relative to earth grounding. Under normal conditions, users are exposed to no more than 100 microamps – when measured though the pump, and patients to no more than 10 microamps – when measured through IV path. Infusion Class 4 An infusion pump that combines the functions of continuous infusion flow, intermittent flow, and discrete bolus delivery. Infusion Class 5 An infusion pump that functions as a profile pump, providing a programmed sequence of delivery rates. IPX3 Equipment that is ingress protected from fluid spraying at vertical angle from above, and from angles to 60° on either side of vertical. V~ Symbol for operating voltage range for alternating current (i.e. AC or mains) power source. Symbol for infrared serial communications port on pump. Symbol for external DC jack connection. Tip (negative sign) is for power ground and ring (positive sign) is for positive power connection. [See warning below.] Warning! External Power must be IEC 601-1 Certified Any external power source connected to the DC jack must be IEC 601-1 certified for medical equipment Type CF and meet Safety Class II. Connecting any external power source to the pump creates a medical system. Therefore, the user is responsible for compliance with IEC 601-1 standards. Refer all questions to the Medex Technical Service Department. Medex Part # G6000608 Revision 3 – Operation Manual Page 8 Medfusion 3500 MEDEX Syringe Manufacturers & Standard Sizes Below is a table of syringe manufacturers for which the Medfusion/or 3500 has been designed, and the specific syringe sizes programmed into the pump database for use with the pump. Manufacturer Syringe Sizes Omnifix 5, 10, 20, and 50 ml Luer Lock B. Braun Perfusor 20 and 50ml Luer Lock Becton-Dickinson Luer Lok Becton-Dickinson Glass B-D 1ml Luer Lock, and 1ml Tuberculin 1, 2.5, 5 and 10 ml Luer Slip 3, 6, 12, 20, 35, and 60 ml Luer Lock Monoject 1ml Slip 3, 5, 10, 20, 30, and 60 ml Luer Lock Terumo 1ml Slip AstraZeneca Warning! Critical Volume B-D 3, 5, 10, 20, 30, and 60 ml Luer Lock 50 ml pre-filled Diprivan Luer Lock The critical volume (for volume limit) which could be infused in the event of a single point positional failure in this infusion pump is 1/100th of the syringe fill volume. At any rate the critical volume (for rate) in this infusion pump is 1/400th of the syringe fill volume. TRADEMARK INFORMATION Below is a table of registered trademarks and the manufacturers owning them: Trademark “Omnifix” and “Perfusor” “B-D” Owner / Manufacturer B.Braun Medical AG Becton Dickinson and Co “Monoject” Sherwood Medical “Diprivan” AstraZeneca Pharmaceutical Medex Part # G6000608 Revision 3 – Operation Manual Page 9 Medfusion 3500 MEDEX 5. OPERATION WARNINGS & CAUTIONS This chapter contains vital information in the form of warnings and cautions that apply to operation of this infusion pump. As an operator of this pump, you are responsible for knowing and using this information. Warnings Below is a table of warnings and conditions for operation of the Medfusion3500 infusion pump. Other warnings are posted throughout this manual. A Warning defines a potentially serious life-safety hazard, specific limitations for using this device imposed by the hazard, and the steps for avoiding the hazard. Operational Warnings Avoid Air Emboli Flammables Always purge all air from syringe and infusion lines before connecting to the patient. Air infused into a patient may cause serious injury and/or death. Never use pump in presence of flammable anesthetics, oxygen-enriched atmospheres, or explosive gases. Manufacturer Guidelines Always read manufacturer precautions and guidelines for medications or fluids infused with this pump. Medications or fluids may interact with the plastic components of the infusion syringe and sets. This interaction may result in serious injury and/or death to the patient. Priming New Syringes Always use the Prime function on the pump when loading a new syringe in order to remove any mechanical slack. Failure to prime correctly can delay infusion delivery and cause Total Volume Delivered to read higher than what is actually delivered to the patient. Don’t Prime the Patient Never operate the Prime function while pump is connected to the patient infusion site. Using the pump in the Prime function may cause over-infusion, with possible serious injury or death to patient. Confirm All Settings Before starting ANY delivery, ALWAYS confirm correctness of ALL infusion values you just set. Syringe Matching Only use syringe sizes and manufacturers listed in this manual. Use of other syringe manufacturers or sizes may possibly cause an under-infusion or over-infusion to the patient that could result in serious injury and/or death. Verify Syringe Make & Size Always confirm syringe manufacturer and syringe size displayed on the pump match the manufacturer and syringe size loaded into the pump. Mismatching syringe make or size may possibly cause an under-infusion or over-infusion to the patient that could result in serious injury and/or death. Check Magnetic Fields Above 150 Gauss Never use the pump in magnetic fields above 150 gauss. Always secure the pump to a nonmovable object. In magnetic fields above 150 gauss, the attraction of the pump to the magnet may be a hazard. This pump may be operated in static magnetic fields up to 150 gauss for specific MRI devices identified in Appendix 5. Vertical Displacement Once the syringe and tubing system is connected to the patient, raising the system above the patient (even briefly) can cause significant bolusing due to changes in hydrostatic pressure. Lowering the system below the patient (even briefly) can cause significant interruptions in flow due to changes in hydrostatic pressure. Select right syringe size Use the smallest syringe size to deliver the fluid or medication. Running a large syringe at very low rates may cause under-delivery, e.g. a long time to occlusion alarm. See the section on guidelines for enhanced performance and review startup curves and time to occlusion information when selecting a syringe. Trained Users Only use this pump under direction of trained medical professionals. Before using this pump, you must become thoroughly familiar with this manual, including warnings, cautions, and instructions for use. Turn Off Fluid Flow When Loading a Syringe Always turn OFF fluid flow to patient in tubing via clamp or stopcock before loading or unloading syringe onto the pump. Uncontrolled fluid flow can occur when fluid set is not clamped or turned off, and may cause serious injury and/or death. Medex Part # G6000608 Revision 3 – Operation Manual Page 10 Medfusion 3500 MEDEX Secure the Syringe Always be sure to secure the syringe barrel, flange and plunger, with tubing threaded through holding clamp. Failure to properly secure the syringe and tubing can result in uncontrolled fluid flow into a patient, which can result in serious injury and/or death. ECMO Use Do Not use on the inlet side of Extracorporeal Membrane Oxygenation (ECMO) systems where the negative pressure is greater than –100 mm Hg as the high negative pressures can result in uncontrolled fluid flow. Horizontal Operation Only Always operate this pump in horizontal position to prevent fluid leakage into the pump. If you suspect fluid has leaked into it, remove pump from service until a trained biomedical technician can test it. External DC Power must be IEC 601-1 Certified Any external power source used with this pump must be IEC 601-1 certified for medical equipment Type CF and meet safety class II. Connecting an external power source to the pump creates a medical system. The user is responsible for complying with IEC 601-1 standards. Refer all questions to Medex Technical Service Department. AC Power The only means of removing AC power is to disconnect the AC power cord. While the AC power cord is attached to the pump and plugged into an AC outlet, live main voltage is present inside the pump. 1ml Syringe Occlusion Pressure When a 1ml syringe is entered into the programming the occlusion pressure setting is fixed at very high - 35psi Service Warnings Pump Maintenance Only trained biomedical service personnel may service this pump. Service personnel should disconnect the AC power cord before servicing the pump. Manufacturer Recommended Maintenance Always maintain this pump following manufacturer recommended instructions in the Service Manual. Improperly maintained pumps may cause either under-infusion or overinfusion to patient. Never open pump case Users should never open the pump case or battery compartment for any reason. Service personnel should always disconnect the AC power cord before servicing the pump. System Failure Alarm Never use a pump when it has signaled a system failure alarm. Withdraw it from service and send it to a trained biomedical technician for service. Dropped or Damaged Pumps Never use a dropped or obviously damaged pump. Withdraw it from service until a trained biomedical service technician can test it. Medex Part # G6000608 Revision 3 – Operation Manual Page 11 Medfusion 3500 MEDEX Cautions Below is a table of Cautions and conditions related to operation of the Medfusion3500 infusion pump. Other cautions are posted throughout this manual. An operational Caution defines any special care you must exercise for safe & effective use of this device. Operational Cautions Who Can Buy This Pump Don’t Dunk the Pump Never Autoclave Avoid Strong Solvents United States of America Federal law restricts this device to sale by or on the order of a physician. Never immerse the pump in water or other fluids. This pump is not waterproof. NEVER sterilize the pump in a steam autoclave or gas sterilizer. Using autoclave or gas sterilization can seriously damage the pump and void the warranty. Never use organic solvents to clean or disinfect the pump. Refer to the CLEAN & CARE section of this manual. Use Correct Manuals Always ensure the software version of the pump and operations manuals agree. Refer to this manual’s front page. Avoid Sharp Objects Never use sharp objects to depress control buttons on the pump. They may damage the pump by rendering buttons inoperable. Check for Leaks Always periodically check the fluid pathway and connections for leaks. As with any infusion system, leaks may cause patient or infusate fluid loss. Correct Disposal Follow your institution’s procedures and applicable laws regarding the proper disposal or recycling of device components. Medex Part # G6000608 Revision 3 – Operation Manual Page 12 Medfusion 3500 MEDEX 6. ALARMS & REMEDIES The Medfusion3500 infusion pump has numerous alarms built into it. These are triggered by situations, as a means of warning or advising you something is not functioning within normal parameters. Alarms / Alerts Below is a table of the alarms and alerts generated by the pump, including definitions and remedies: Type Definition and Remedy High-priority A high-priority alarm is initiated by either any condition that halts an ongoing infusion, or any pump system fault, which effect infusion. High-priority alarms are signaled with a flashing red indicator, a viewing screen backlight that oscillates between bright and dim, and an audible signal. Press the Alarm Silence button to return the viewing screen backlight to bright, and silence the audible alarm for the programmed alarm silence period. If the front panel controls are locked when a high-priority alarm occurs, the pump controls do unlock. A high-priority alarm that stops delivery during loading dose or bolus will not return to the pause screen until the alarm is silenced – allowing the user to record the bolus volume delivered Medium-priority A medium-priority alarm indicates any condition requiring operator intervention but does not halt infusion. Medium-priority alarms are signaled with a flashing yellow indicator, a viewing screen backlight that oscillates between bright and dim, and an audible signal. Pressing the Alarm Silence button will return the viewing screen backlight to bright, and silence the audible alarm for the programmed alarm silence period. If the front panel controls are locked when a medium-priority alarm occurs, the pump controls do not unlock. A low-priority alarm indicates any condition not requiring immediate operator intervention. Low-priority Low-priority alarms are announced with a continuous yellow indicator, a viewing screen backlight that oscillates between bright and dim and an audible signal – 2 Medex “Bing-Bongs”, or three international tones (on 1 sec – off 1 sec, on 1 sec – off 1 sec, on 1 sec – off) signal If the front panel controls are locked when a low-priority alarm occurs, the pump controls do not unlock. A limit-priority alarm sounds a tone and displays an advisory message onscreen for 3 seconds. Limit Priority If the front panel controls are locked when a low-priority alarm occurs, the pump controls do not unlock. “Neglected Pump” Alarm The “Neglected Pump” alarm is a medium priority alert. It is simply reminding you to finish what you started. Once you begin programming any infusion delivery, the pump expects you to continue until setup is complete. If you “forget” and leave the pump paused too long (30 seconds) on a data entry screen, then the pump initiates a medium-priority “user callback” alarm. There are several basic resolutions: • Press the Alarm Silence button “” or ANY button to silence the alarm for another 30 seconds. • Go to the BEGIN INFUSION screen. There the alarm silence interval is at least 2 minutes or longer − depending on custom configuration. • Press the Start button to begin the infusion. • You can cancel the infusion and return to the SELECT THE MODE screen, where no alarms sound. • You can press & hold the Power button and turn off the pump. “Syringe Near Empty” Alarm During Delivery Medex Part # G6000608 Revision 3 – Operation Manual Page 13 Medfusion 3500 MEDEX The “Near Empty” alarm is a low-priority alarm during delivery telling you the syringe is “just about” empty. The pump sound the low priority alarm tone, displays the near empty alarm message appears on screen, and does not stop delivery. 1. 2. 3. Press the Alarm Silence button “” to clear the alarm message. Confirm how long you have before the infusion ends. Then be prepared to load a new syringe onto the pump if necessary, and then start a new infusion. Calculating Near Empty Status Near empty status is calculated by checking the volume remaining in the syringe against the near empty alarm time setting divided by current delivery rate. “Syringe Empty” Alarm During Delivery The SYRINGE EMPTY alarm is a high priority alarm advising the syringe is empty. 1. The EMPTY alarm stops delivery immediately. 2. Press the Alarm Silence button “” to clear the alarm tone & message. 3. Unload the syringe. 4. Either prepare and load another syringe, return to the SELECT THE MODE screen, where no alarms sound or turn off the pump. Calculating Empty Status Empty status is determined by measuring plunger position of syringe against the set value for syringe size & manufacturer. Caution Monoject 3ml Because of variations in syringe manufacturing, the Monoject 3ml syringe may in some cases not fully empty. Here, the empty alarm sounds with some fluid left in the syringe. “Syringe Empty − Manual” Alarm During Delivery It is possible to override a “syringe empty” alarm sounded during delivery. There will be times when the pump calculates the syringe is empty and yet there remains a residual volume of medication or fluid in the syringes. A common cause is variation in manufacturing of syringes. 1. Press the Alarm Silence button. The pump has stopped delivery and is at the BEGIN INFUSION screen. 2. If you do not wish to deliver this remaining fluid, then: a) Unload the syringe. b) Either prepare and load another syringe, return to the SELECT THE MODE screen, where no alarms sound or turn off the pump. 3. If you do wish to deliver the remaining fluid, then press the Start button. 4. The pump begins delivery, and continues until no fluid remains in the syringe. 5. As soon as the pump senses an occlusion, it halts delivery and displays the “Syringe Empty − Manual” message onscreen. 6. Press the Alarm Silence button. The pump has stopped delivery and is at the BEGIN INFUSION screen. 7. Either prepare and load another syringe, return to the Select the Mode screen, where no alarms sound or turn off the pump. General System Alarms & Alerts This section contains a table of the general system alarms you may encounter while operating the Medfusion 3500 infusion pumps. This table identifies the alarm by message and type, and provides a definition and possible remedies. Medex Part # G6000608 Revision 3 – Operation Manual Page 14 Medfusion 3500 MEDEX Alarm Message Priority Battery Communication Timeout Low The internal battery is not working. The pump may be used on AC power on a conditional basis. As soon as possible, remove pump from service for repair by a trained biomedical service technician. Battery Not Charging Low The internal battery is not charging. The pump may be used on AC power on a conditional basis. As soon as possible, remove pump from service for repair by a trained biomedical service technician. Battery Not Working Medium The internal battery is not working. The pump may be used on AC power on a conditional basis. As soon as possible, remove pump from service for repair by a trained biomedical service technician. Calculated Rate Out of Range High The calculated rate is not valid. Verify that all infusion parameters have been entered correctly. Check Clutch / Plunger Lever High The syringe is not loaded correctly. Check the plunger lever and ensure it is all the way up. Check Syringe Flange Sensor High Sensor is active when syringe is not loaded. Check the syringe flange holder. Ensure the flange holder pulls back to the side of the case. If holder does not operate correctly, immediately remove the pump from service for repair. Check Syringe Plunger Sensor High Sensor is active when syringe is not loaded. Check the syringe plunger holders. Ensure the holders move freely. If they do not operate correctly, immediately remove the pump from service for repair. Completing System Initialization Limit Allow pump startup to complete self-testing. Infusion Complete High Either begin a new infusion, return to the SELECT THE MODE screen, where no alarms sound or turn off the pump. Low Battery (Each 1% drop in capacity following initial signal if power cord is not plugged in) Limit Plug in the power cord and run pump on AC mains while recharging the battery. Low Battery (Initial Signal) Medium Plug in power cord and run pump on AC mains while recharging the battery KVO in Progress Medium Advisory message that volume limit has been reached and KVO infusion is in progress. Invalid Rate for Syringe Size High Advisory message in custom dilution program. Consult syringe flow delivery tables in appendix to determine appropriate syringe size. Invalid Syringe Size High Syringe size not recognized for the manufacturer selected. Review syringe sizes in the technical specifications section. Occlusion − Check Infusion Line High Check infusion line for blockage. Clear or remedy any discovered occlusion. Press the Start button to begin infusion. Pressure Increasing − Check Infusion Line Medium Check infusion line for blockage. Clear or remedy any discovered occlusion. Outside Range Limit Medium The entered rate is outside of the library limits. Press Alarm Silence button “” to continue. You may then chose to override the range limit or change the value entered. Limit Keypad has been locked to prevent changes during infusion. The alarm initiated by pressing any button except Power or Unlock. Press Unlock if you need to make changes to delivery settings. Or press Power button twice to end delivery. Pump is Locked Restricted Flow – Bolus Rate Reduced Medium Remedy If the bolus rate is high enough to trigger an occlusion alarm, the 3500 software will reduce the bolus rate until the bolus is successfully delivered. With each rate reduction, this process repeats. Once silenced, the audible alarm tone will not reactivate, even if the process repeats. Medex Part # G6000608 Revision 3 – Operation Manual Page 15 Medfusion 3500 MEDEX Alarm Message Priority Remedy Syringe Barrel Not in Place High The syringe is not loaded correctly. Make sure the syringe barrel clamp is correctly positioned and is holding the syringe in place. Proceed with the infusion. Syringe Flange Not in Place High The syringe is not loaded correctly. Make sure the syringe flange is properly inserted into the flange clip. Proceed with the infusion. Syringe Plunger Not in Place High The syringe is not loaded correctly Make sure the syringe plunger head is properly inserted. Proceed with the infusion. Syringe Does Not Match Library Entry Limit Program the delivery for the type of syringe you are actually using. Then proceed with infusion setup and start it. The pump has halted infusion at empty. You may either: Prepare and load another syringe, then begin another infusion. Syringe Empty High Press the Start button to override the empty alarm and deliver any remaining fluid in the syringe. Return to the SELECT THE MODE screen, where no alarms sound. Turn off the pump. The pump has halted infusion after overriding empty alarm. You may either: Syringe Empty − Manual High Prepare and load another syringe, then begin another infusion. Return to the SELECT THE MODE screen, where no alarms sound. Turn off the pump. Syringe Near Empty Low The pump is telling you the syringe will soon be empty. System Advisory − Maintenance is Recommended Low As soon as possible, remove pump from service for testing and checkout by a trained biomedical service technician. System Advisory − Set Time and Date Low As soon as possible, remove pump from service for testing and checkout by a trained biomedical service technician. System Advisory − xx Data Corrupted Low Infusion will continue using backup copy of xx data. As soon as possible, remove pump from service for testing and checkout by a trained biomedical service technician. System Failure − aa bb cc High Press Power button to turn off pump. Immediately remove pump from service for repair by a trained biomedical service technician. Below Recommended Rate Limit Reminds user that the programmed rate is below that recommended for the syringe size - no remedy required Medex Part # G6000608 Revision 3 – Operation Manual Page 16 Medfusion 3500 MEDEX 7. GUIDELINES FOR ENHANCED PUMP PERFORMANCE The following are guidelines for enhanced syringe pump performance. Review occlusion time and flow delivery graphs in Delivery section. Because of the way syringe pumps operate, clinicians should use appropriate syringe size, tubing, and inline devices for expediting delivery of medication or fluid. Certain factors enhance syringe pump performance, where performance is defined as: a) Time to Detect Occlusion b) Continuity of Flow c) Startup Time ALWAYS USE SMALLEST SYRINGE FOR VOLUME OF FLUID BEING DELIVERED It is all too easy to fall into a pattern of using the same syringe size, or sizes to infuse medications or fluids. It is recommended to always using the smallest syringe that can get the job done. This can help avoid a variety of problems. Friction and compliance of the syringe plunger tip affect delivery startup and flow continuity. The bigger the syringe, the greater the friction and compliance, the slower the startup. Use a smaller syringe when running at a lower rate. The table below recommends minimum delivery rates by syringe size, when programming flow rates, a limited priority alarm will be activated with an advisory message on the screen if a rate below those recommended here is entered: Syringe size Lowest Recommended Rate 60 ml 20 ml 2.0 ml/hr 1.0 ml/hr 0.67 ml/hr 10 ml 0.33 ml/hr 5 ml 0.17 ml/hr 0.10 ml/hr 0.03 ml/hr 30 ml 3 ml 1 ml Note: this table is only a guideline because syringes and infusion setups vary. USE SMALL INTERNAL DIAMETER TUBING For the most consistently precise control of all fluids and medications, it is recommended always using small internal diameter tubing. Always minimize residual volumes between syringe and patient by reducing: a) Tubing length b) Size of in-line filters c) Number of stopcocks. This makes the infusion setup less variable or compliant, which in turn reduces the start time for fluid to reach the patient – and reduces time required for detecting an occlusion. Medex Part # G6000608 Revision 3 – Operation Manual Page 17 Medfusion 3500 MEDEX 8. SETUP & LOAD SYRINGES Pump setup and syringe loading is a multi-step process, based on your daily practice of infusing patients with medication or other fluids. Turning on the Pump Below are an illustration of the startup screen, and a list of basic steps for turning on the infusion pump. 1. 2. 3. Press and hold the Power button until the dark screen appears. Verify the screen shows all pixels on, then all pixels off. The pump should “beep” twice and then the indicators flash for Alarm, Infusing, and Lock as the self-test cycles. The pump ID, if it has one, appears in the upper left corner. In this case, it is called “Jobara”. The pump serial number will appear at the middle right, if it has been set in the software. In this case, it is “M01234”. You should now verify the display indicates successful completion of system startup self-tests. WHAT IF THE PUMP DOES NOT TURN ON? If the pump does not turn ON with successful completion of self-tests, remove it from service and have it checked by a trained biomedical technician. Medex Part # G6000608 Revision 3 – Operation Manual Page 18 MEDEX Selecting Delivery Mode Medfusion 3500 Below are the steps for selecting a delivery mode for programming with infusion settings: 1. After successfully completing its system startup self-tests, the pump displays the SELECT THE MODE screen. • The delivery modes on this screen were setup by Custom Configuration, which was completed by the person responsible for custom configuration before the pumps were delivered to your work area. • 2. 3. 4. 5. Also, if the pump has been configured with “E-Plates” enabled, the first screen is the SELECT THE LIBRARY ENTRY screen (see User Programmable Libraries). If the SELECT THE LIBRARY ENTRY screen appears, press the Main Menu button to call the SELECT THE MODE screen. Press any Number button to select the desired delivery mode. If you make a mistake use the Back button to undo it. If you do not see the mode you need, press the More button to display the next page of delivery modes. At the next menu, either: a) Select an option by pressing its number, and continue. b) Or press the Beginning button to return to the beginning screen. Syringe Manufacturer/Type Setup Below is an example for syringe manufacturer/type setup for use with the Medfusion 3500 pump: 1. Use your standard protocol for preparing your syringe & tubing and filling the syringe. 2. When delivery mode is chosen, set the syringe information. If more than one manufacturer is configured for the pump then the SELECT SYRINGE MANUFACTURER / TYPE screen appears. The syringe manufacturers on this screen were setup in Custom Configuration, which was completed by the person responsible for custom configuration before the pumps were delivered to your work area. 3. Press any number button to select the syringe manufacturer. If you make a mistake use the Back button to undo it. WHAT IF ONLY ONE SYRINGE MANUFACTURER IS SETUP? If only one syringe manufacturer has been setup for use by this pump (through custom configuration), then this entire level, and its screen, is skipped during infusion programming. Medex Part # G6000608 Revision 3 – Operation Manual Page 19 MEDEX Loading the Syringe onto the Pump Medfusion 3500 Below are the steps for loading a syringe onto the infusion pump: Warning! Always Turn Off Fluid Flows Always turn OFF fluid flow to patient in tubing via clamp or stopcock before loading or unloading syringe onto the pump. Uncontrolled fluid flow can occur when fluid set is not clamped or turned off, and may cause serious injury or death. After you set the syringe manufacturer information setup in the pump, it is time to install the syringe itself. Load the syringe using to the following steps: 1. Using standard protocol, prepare the syringe by filling it with medication or other fluid, and attaching the tubing. 2. Lift and swivel the syringe Barrel Clamp “A” out of the way. 3. Squeeze Plunger Release Lever “B” on the syringe plunger driver and pull gently to extend it all the way. 4. Load the syringe onto the pump as illustrated, making sure the flange of syringe barrel is pressed or rolled into Flange Clip “C”. A D B C 5. Squeeze Plunger Release Lever “B” on the end of the syringe plunger driver and slip the end of the syringe plunger into place, then release the lever to close it around the syringe. Be sure both holders close around the syringe plunger. Warning! Capture Plunger 6. Verify the plunger holders securely capture the syringe plunger. Failure to capture the syringe plunger may result in siphoning the syringe. Turn and lower Barrel Clamp “A” onto the barrel of the syringe. The size should appear in the display. If the syringe is incorrectly loaded, guide arrows appear onscreen to identify the problem. Down arrow “↓“ onscreen means check syringe barrel clamp “A” Right arrow “←“ onscreen means check syringe plunger holders “B”. Up arrow “↑” onscreen means check syringe flange clip “C”. Medex Part # G6000608 Revision 3 – Operation Manual Page 20 Medfusion 3500 MEDEX 7. 8. There are no arrows onscreen when the syringe is correctly loaded. Make sure the pump correctly recognizes the syringe size, and the syringe manufacturer is correct. If not, verify that the manufacturer and size are listed in the technical specifications of this manual. 9. Thread the tubing through the 3 Tubing Holders “D” on the top left side of the pump. 10. Then press the Enter button to confirm this information. Warning! Match Syringes The syringe manufacturer & size displayed onscreen must ALWAYS match the actual syringe you are loading. Mismatching syringe manufacturer or size may cause either under-infusion or over-infusion to the patient − with possible serious injury or death. Priming the System Priming is accomplished as a secondary function of the Bolus button. Always prime a new syringe after loading it onto the pump. This removes the mechanical slack in the pump and syringe, and significantly reduces start-up time. Warning! Never Prime the Patient NEVER prime any syringe while connected to a patient infusion site, as this may cause over-infusion, with possible serious injury or death. 1. Press the Bolus button to call the priming screen illustrated below. 2. To prime a loaded syringe, press and hold the Bolus button while observing for fluid movement at the patient end of the system. For safety reasons there is a built-in priming cutoff at 15 seconds. To continue priming after cutoff, release the Bolus button then press & hold again. 3. Priming Data NOT counted in TVD The total priming volume accumulates onscreen, but is NOT counted in the Total Volume Delivered display. This is because the prime should never be delivered to the patient. Priming infusion rate is 300 ml/hr, or the default maximum Bolus rate for the syringe size being used, whichever is lower. The priming sequence is extremely important to assure the accuracy of the delivery and reduce the start-up time. The priming sequence is performed after the infusion is programmed, and before the delivery is started. The message at the top of the "BEGIN INFUSION" screen will alternate between "Press <START> To Begin Infusion", and "Press <BOLUS> To Prime" to remind the operator of the prime sequence. Medex Part # G6000608 Revision 3 – Operation Manual Page 21 Medfusion 3500 MEDEX Unloading the Syringe You unload a syringe exactly the opposite way as you load it. Just use the following steps: 1. Press the Stop button to end delivery. 2. Clamp or close infusion line from the syringe to patient. 3. Unthread the tubing from the Tubing Holder “D” on the top left side of the pump. 4. Lift and swivel the syringe Barrel Clamp “A” out of the way. 5. Squeeze the Plunger Release Lever “B” on the syringe plunger and remove the syringe. A D B C Warning! Turn Off Fluid Flow Always turn OFF fluid flow to patient in tubing via clamp or stopcock before loading or unloading syringe onto the pump. Uncontrolled fluid flow can occur when fluid set is not clamped or turned off, and may cause serious injury and/or death. Medex Part # G6000608 Revision 3 – Operation Manual Page 22 Medfusion 3500 MEDEX 9. STARTING & STOPPING INFUSION DELIVERY You can start an infusion delivery at any time after you have setup a delivery mode. You can start infusion from a pause, standby, or delayed start screen. Start Delivery from Pause Whenever you begin an infusion setup and progress all the way through the setup levels, the pump pauses at the BEGIN INFUSION screen. 1. 2. 3. 4. Program the delivery mode by setting its variables like rate, volume limit, and so on. When you finish setting the delivery mode, the pump pauses at the BEGIN INFUSION screen. Press the Start button on the face of the pump. The pump begins the infusion. Starting Delivery from Standby You can start the infusion at any time when the pump is on standby. It is unnecessary to either cancel standby or wait until its period ends. 1. 2. To start infusion from standby, delayed start or pause, press the Start button. Before starting the infusion, you may also: a) Return to the Main menu. b) Change the Rate. c) Change delivery options, such as volume limit or bolus dose. d) Clear Totals Medex Part # G6000608 Revision 3 – Operation Manual Page 23 MEDEX Making Changes During Delivery Medfusion 3500 Below is an illustration of a delivery screen. There are six options available during any standard infusion. While running an infusion, you may: • Lock the keypad. • Change the Dosage Rate. • Titrate the Rate. • Clear TVD • Press the Bolus button to set, change, or deliver a bolus. • Press the Stop button to pause or end the infusion delivery. Stopping Delivery You can stop infusion delivery at any time, in any delivery mode. 1. Press the Stop button. 2. The infusing indicators turn OFF and the pump pauses. You may restart infusion, or change settings and restart. Or turn OFF the pump. Turning Off the Pump You can turn off the pump at any time, in any delivery mode, while the pump is running. 1. Press and hold the Power button. This calls the SHUTDOWN OR CONTINUE screen. Infusion has not stopped at this point. 2. 3. Press and hold the Power button to turn OFF the pump. To cancel press the Continue or Back buttons. Infusion stops when you turn OFF the pump. Medex Part # G6000608 Revision 3 – Operation Manual Page 24 Medfusion 3500 MEDEX 10. PROGRAMMING DELIVERY MODES The Medfusion 3500 infusion pumps come with a variety of delivery modes ready for you to program to meet your specific patient care needs. In fact, all modes are customizable by the user. The actual modes available in a given pump, and their location on a given screen, depend on the custom setup performed by your in-house technician, or service representative. The following modes described in this chapter, and the steps given for programming them, are based on general setup parameters. Overview of Programming Steps This chapter describes the basic steps for programming the different delivery modes. However, there is a difficulty in describing these steps for an “average user”. This is caused by the extensive customization available in the Medfusion 3500 infusion pumps. APPARENTLY MISSING OR DIFFERENT STEPS As you learn to program infusion deliveries on your infusion pump, you may find that certain features or screens do not appear when you program a delivery mode in your pump. In an effort to simplify the use of this manual, all features were not enabled for the writing of this operation manual. What steps you actually pass through in programming a delivery depend entirely on which features have been either “enabled” or “disabled” in the custom configuration process. So if you are programming and you find a step not included in these directions, it is because the step describes an optional feature that has been enabled for your particular machine. For a better understanding of the enabled or disabled features of your infusion pump, refer to the Configuration Manual and to the chapter titled “Tables of Default Settings for Anesthesia, General, and NICU”. All Medfusion 3500s are shipped with the standard default settings for “Anesthesia” units or departments. These may be unchanged in your pump. Or they may have been used as a foundation for configuring your pump to meet the specific needs of your unit, department, organization, or hospital. A REPEATED WARNING You will see the following warning placed repeatedly throughout the steps for programming and starting all of the infusion delivery modes. Warning! Confirm All Settings Before starting ANY delivery, ALWAYS confirm correctness of ALL infusion values you just set. It is possible to fall into a pattern of expecting an infusion pump to function in a specific way. But each pump can be configured to be programmed differently. So a pump in one unit or department can be setup quite differently from one in the next unit or department or hospital. You are responsible for always verifying the correctness of any infusion delivery you program and start. Medex Part # G6000608 Revision 3 – Operation Manual Page 25 MEDEX Continuous Mode: Medfusion 3500 ML/HR Continuous infusion is programmed by setting a flow rate in ml/hr. Actual range limits for flow rate are determined by syringe size (see table in Appendix) or custom configured maximum rate. If needed, a volume limit, loading dose, or bolus dose can be set. Neglected Pump Alarm If you stop in the middle of a numerical entry, you will hear the “Neglected Pump” alarm. You can: • Press the Alarm Silence button “” to silence the alarm for another 30 seconds. • Finish numerical entries and reach the BEGIN INFUSION screen with the normal alarm silence interval. 1. Use the number buttons to set flow rate and decimal point. Press Clear to clear an entry. Press Backspace to erase a character. Press the Enter button to accept the setting. 2. After all infusion values are set, the pump pauses at the BEGIN INFUSION screen. E-PLATES or MAIN MENU – returns you to the beginning of setup. CHG RATE – allows modifying the set rate without starting from scratch. OPTIONS – lets you select from a list of variables (e.g., bolus, or volume limit). CLEAR TOTALS– lets you clear total volume delivered, and PVD or PDD. 3. 4. 5. You may now accept the settings and start the infusion, or use the four menu buttons to modify the settings. Prior to beginning the infusion, press <BOLUS> to initiate the priming sequence (page 21). When ready, press the Start button to begin infusion. Medex Part # G6000608 Revision 3 – Operation Manual Page 26 Medfusion 3500 MEDEX Mass Modes Mass Modes: mg/min − mg/hr − mcg/min − mcg/hr − mU/min − mU/hr − u/min − u/hr: This Mass Mode is a continuous infusion mode you program by setting: • Drug concentration (i.e., mg/ml or U/ml). • Dose rate in mass/hr (e.g., mg/hr or µg/min). • You can also set volume limit, loading dose, or bolus dose. CLEAR − deletes an entry. BACKSPACE − deletes a character backward. 1. 2. Use the number buttons to set the fluid concentration. Concentration is limited to 4 digits. When ready, press the Enter button to accept the concentration value and go to the ENTER DOSE screen. 3. Use the number buttons to set dosage rate. Range limits for dose rate are determined by syringe size. The maximum and minimum rates display onscreen. When ready, press the Enter button to go to the BEGIN INFUSION screen. At the BEGIN INFUSION screen all values are set and the pump pauses. You may now accept the settings and start the infusion, or use the four menu buttons shown below to modify the settings. 4. 5. 6. E-PLATES OR MAIN MENU – RETURNS YOU TO THE BEGINNING OF SETUP. E-PLATES − When present, indicates E-Plates are enabled & returns you to beginning of setup. CHG DOSE – allows modifying the set dosage without starting from scratch. OPTIONS – LETS YOU SELECT FROM A LIST OF VARIABLES (E.G., BOLUS, OR VOLUME LIMIT). CLEAR TVD – LETS YOU CLEAR TOTAL VOLUME DELIVERED. 7. 8. Prior to beginning the infusion, press <BOLUS> to initiate the priming sequence (page 21). When all delivery settings are correct, press the Start button to begin infusion. Medex Part # G6000608 Revision 3 – Operation Manual Page 27 Medfusion 3500 MEDEX Body Weight Infusion Deliveries Body Weight Infusion Deliveries: mcg/kg/min − mcg/kg/hr − mg/kg/min − mg/kg/hr – Units/Kg/Min The body weight rate calculation allows programming by: • Drug Concentration • Patient’s Weight • Drug Dosage The pump calculates the correct flow rate in ml/hr to achieve the required drug dose. If desired, a volume limit, loading dose, or bolus dose can be set. From the SELECT THE MODE screen select the desired Body Weight Delivery Mode. These directions use select Micrograms / Kg / Minute as an example. This calls the ENTER CONCENTRATION Screen. 1. Press the number buttons to set medication concentration. Concentration is limited to 4 digits. 2. Press the Enter button to accept the concentration setting and go to the PATIENT WEIGHT screen. 3. At the PATIENT WEIGHT screen, press the number buttons to set the patient’s weight in kilograms. Weight is limited to the indicated range. Press the Enter button to accept the patient weight setting and go to the DOSE RATE screen. 4. 5. 6. 7. 8. At the DOSE RATE screen, press the number buttons to set the dose rate. Range limits here for dose rate are determined by installed syringe size. When ready, press the Enter button to accept the dosage rate go to the BEGIN INFUSION screen. Confirm all settings are correct. Prior to beginning the infusion, press <BOLUS> to initiate the priming sequence (page 21). You may now accept the settings and start the infusion, or use the four menu buttons to modify the settings. When ready, press the Start button to begin the infusion. Volume / Time – ML/HR The volume over time rate calculation allows programming by: Medex Part # G6000608 Revision 3 – Operation Manual Page 28 Medfusion 3500 MEDEX • • Dose Volume Delivery Time The pump calculates the correct flow rate by dividing the volume by the delivery time. Volume limit, loading or bolus dose can not be set in this mode. Find and select VOLUME / TIME from the SELECT THE MODE screen. You may have to press the More button to find it. 1. When ready, press the Enter button to accept the syringe. This calls the VOLUME TO INFUSE Screen. 2. 3. 4. 5. 6. 7. 8. At the VOLUME TO INFUSE screen, press the number buttons to program the volume setting. Volume is limited to the maximum fill volume for the syringe size – and minimum volume is 1/600th of the selected syringe size. When ready, press the Enter button to go to the DELIVERY TIME screen. At the DELIVERY TIME screen press the number buttons to set delivery time. Time is always limited by maximum and minimum rates for selected syringe size. When ready, press the Enter button to accept the setting to go to the BEGIN INFUSION screen. All settings are made, and the pump pauses at the BEGIN INFUSION screen. Confirm all settings are correct. You may now accept the settings and start the infusion, or use the three menu buttons to modify the settings. Prior to beginning the infusion, press <BOLUS> to initiate the priming sequence (page 21). When ready, press the Start button to begin the infusion. Medex Part # G6000608 Revision 3 – Operation Manual Page 29 Medfusion 3500 MEDEX Intermittent Volume / Time This Intermittent Volume / Time Mode lets you specify a delivery volume for a specific delivery time, after which the delivery stops for a programmed interval … then the pattern recycles. In other words, the pump delivers for a set period, then pauses a set period, then infuses for a set period, and so on. • The delivery stop interval equals “Time Between Starts” minus “Delivery Time.” • The pattern repeats at “Time Between Starts” interval. Below are the steps for programming an Intermittent Volume / Time infusion. Select Intermittent Volume / Time from the SELECT THE MODE screen. This calls the VOLUME TO INFUSE screen. 1. 2. 3. 4. 5. 6. 7. Use the number buttons to set the volume. Volume here is limited to the maximum fill volume for the syringe size, and minimum volume is 1/600th of syringe size. When ready, press the Enter button to accept the Volume to Infuse setting, and call the DELIVERY TIME screen. Use the number buttons to type in the Delivery Time setting. Maximum and minimum times are calculated for the syringe you are using. When ready, press the Enter button to call the TIME BETWEEN STARTS screen. Use the number buttons to set the Time Between Starts value. Time must be greater than delivery time and less than or equal to 24 hours. When ready, press the Enter button to accept the setting go to the BEGIN INFUSION screen. All settings are made, and the pump pauses at the BEGIN INFUSION screen. Confirm all settings are correct. You may now accept the settings and start the infusion, or use the four menu buttons to modify the settings. Prior to beginning the infusion, press <BOLUS> to initiate the priming sequence (page 21). After confirming all settings are correct, press Start to begin intermittent volume / time infusion. Medex Part # G6000608 Revision 3 – Operation Manual Page 30 Medfusion 3500 MEDEX Recall Last Settings The Medfusion 3500 will remember the settings used to run the last infusion indefinitely (or at least 10 years). This means you can reuse the same delivery settings to repeat an identical dosage of medication or fluids to a patient. 1. You may reuse the last settings by selecting RECALL LAST SETTINGS from the SELECT THE MODE screen. (If you don’t see it, press the More button and search for it.) When selected, you must then press the Enter button to confirm data for each screen that applies for the last infusion. This includes all settings and options. The actual screens that appear depend on how your pump is configured and which features are enabled or disabled. 2. 3. 4. 5. After reviewing these previously used settings, the pump pauses. If you wish to clear the TVD and PVD or PDD, press the <CLEAR Totals> button Prior to beginning the infusion, press <BOLUS> to initiate the priming sequence (page 21). Be sure all pump settings are correct before starting infusion. TVD and PVD / PDD Retention The pump also retains TVD and PVD or PDD from the last infusion. If you do not want to use these values, you must manually clear them before beginning a new infusion. Medex Part # G6000608 Revision 3 – Operation Manual Page 31 Medfusion 3500 MEDEX Custom Dilution The Custom Dilution mode is a form of body weight delivery where you tell the pump a target delivery rate and the pump calculates the custom drug dilution to meet that target. The settings required are: a) Patient’s weight b) Initial (undiluted) drug concentration c) Target dose rate d) Target total volume (medication plus diluting fluid). From this data, the pump then calculates: a) Amount of fluid required to dilute the initial drug concentration b) Actual dose rate c) Actual total volume (as close to target rate & volume as possible by rounding dilution). Reasonable Dilution Range Enable / Disable Custom Dilution You must use a volume of diluent 20 ml or larger to give reasonable range for dilutions. If you do not see CUSTOM DILUTION, or any of these listed on the SELECT THE INFUSION UNITS screen for Custom Dilution, you must enable them through custom configuration. TYPES OF CUSTOM DILUTION AVAILABLE There are four different types of custom dilution infusion available in the Medfusion3500 infusion pump. Dilution Mode What the Pump does Micrograms / Kilogram / Minute Calculates micrograms of medication or fluid per kilogram of patient body weight per minute of infusion to determine the mixing formula. Micrograms / Kilogram / Hour Calculates micrograms of medication or fluid per kilogram of patient body weight per hour of infusion to determine the mixing formula. Milligrams / Kilogram / Minute Calculates milligrams of medication or fluid per kilogram of patient body weight per minute of infusion to determine the mixing formula. Milligrams / Kilogram / Hour Calculates milligrams of medication or fluid per kilogram of patient body weight per hour of infusion to determine the mixing formula. Calculating Dilutions Calculating Dilutions for: mcg/kg/min − mcg/kg/hr − mg/kg/min − mg/kg/hr This custom dilution mode calculates a mixing formula for dilutions of drug to reach a target dose rate for a given volume of fluid to be delivered. 1. At the SELECT THE INFUSION screen, use the number buttons to select delivery mode Micrograms/KG/Minute, Micrograms/KG/Hour, Milligrams/ KG/Minute, or Milligrams/Kg/Hour. This calls the TARGET RATE screen. Medex Part # G6000608 Revision 3 – Operation Manual Page 32 Medfusion 3500 MEDEX 2. Use the number buttons to set the desired target infusion rate. The target rate should be based from the desired volume that you wish to give the patient over a given time. Syringe size limits the range of infusion rates. 3. When ready, press the Enter button to accept the target rate setting, and go to INITIAL CONCENTRATION screen. 4. At the INITIAL CONCENTRATION screen, set the value for initial or undiluted drug concentration. You are limited to 4 digits. When ready, press the Enter button to accept this value and go to the PATIENT WEIGHT screen. 5. At the PATIENT WEIGHT screen, set the patient’s weight in kilograms (2.2 lbs/kg). Weight is limited to the range indicated. Press the Enter button to accept the value and go to the set target DOSE RATE screen. 6. Use the number buttons to enter the desired target dose rate. The target dose rate is the desired rate for infusion of diluted drug into the patient. Units for this dose rate were set in the SELECT THE INFUSION screen. When ready, press the Enter button to accept the value and go to the set FINAL VOLUME screen. Medex Part # G6000608 Revision 3 – Operation Manual Page 33 Medfusion 3500 MEDEX 7. 8. 9. Use the number buttons to set the Final Volume to be infused. This can go to only one decimal place, and final volume must be equal-to-or-less-than the maximum fill volume of the syringe being used. When ready, press the Enter button. The pump calculates the formula for the Custom Dilution and displays it onscreen. Using aseptic techniques, prepare the dilution with this formula. Fill the syringe. Load syringe onto the infusion pump (see “Syringe Loading”). Warning! Always confirm compatibility between drug and diluent. Verify that the actual dose & delivery rates are acceptable settings. Actual rate may differ from target rate because Fluids of “rounding” of volumes in the dilution formula. Compatibility 10. When ready, press the Continue button to call the SELECT SYRINGE MANUFACTURER screen. Now you will complete setup of the pump and begin infusion. 11. At the Select SYRINGE MANUFACTURER / TYPE screen, select the syringe you are using, and then load the syringe. Step through the remaining levels, pressing the Enter button to verify each setting. 12. After all values are confirmed, the pump pauses at the BEGIN INFUSION screen. 13. Prior to beginning the infusion, press <BOLUS> to initiate the priming sequence (page 21). 14. When ready, press the Start button to begin infusion. Medex Part # G6000608 Revision 3 – Operation Manual Page 34 Medfusion 3500 MEDEX 11. BOLUS DOSING A Bolus dose is an optional parameter of some delivery modes wherein you specify a bolus volume to be delivered over a specified time. You may also configure bolus dose to be automatically “prompted” or called up in the programming steps. Enable / Disable Bolus You can permanently disable Bolus programming through pump custom configuration, or temporarily through the BOLUS DOSE screen. Setup Bolus Dosing Below are the steps for adding a bolus doing to an infusion you are about to begin, or to one you have paused to include a bolus: 1. When paused at the BEGIN INFUSION screen, press the Options menu button to find bolus dose programming. 2. 3. Select bolus dose programming by pressing its number button. This calls the ENTER BOLUS DOSE screen. Use the number buttons to set the bolus volume desired for this infusion. Volume is limited to the maximum fill volume of the current syringe size, and minimum volume is 1/600th the syringe size. If the initial infusion is programmed in one of the body weight modes (eg. mcg/Kg/min), the bolus “dose” will be programmed in the parameters of that dose mode (eg. mcg/Kg) Disable – turns Bolus OFF. Clear – deletes an entry. Backspace – erases a character. 4. When ready, press the Enter button to accept the volume setting (or dose setting if in body weight or mass mode). Medex Part # G6000608 Revision 3 – Operation Manual Page 35 Medfusion 3500 MEDEX 5. If the Bolus Time feature has been enabled, you will be able to set the bolus delivery time at the BOLUS TIME screen, use the number buttons to set bolus delivery time in minutes and seconds. The default value for bolus delivery rate is set in custom configuration. Maximum & minimum time is calculated from the maximum & minimum rate for the syringe size you are currently using. If the Bolus Time feature has been disabled the pump will default to the maximum bolus rate. 6. 7. When ready, press the Enter button to accept the settings and go to the BEGIN INFUSION screen. After the bolus settings have been programmed, the pump pauses. The Bolus setting now appears on the BEGIN INFUSION screen. Warning! Confirm All Settings Before starting ANY delivery, ALWAYS confirm correctness of ALL infusion values you just set. Delivering a Bolus Dose A bolus is a specified volume (or dose) to be delivered over a specified, usually short, period of time. You must have started a delivery before you can deliver a bolus dose. 1. Press the Bolus button (the “” button next to Start) to call the BOLUS DELIVERY screen. A bolus delivery cannot be initiated until after you press the Start button to begin a programmed delivery. 2. Press Yes to begin bolus delivery. • Or press No to skip the bolus and return to the NORMAL DELIVERY screen. • Or press the Chg Bolus button to change the bolus settings. • If you don’t press ANY button for 30 seconds, the neglected pump alarm will call you back to the pump. • 3. If the bolus settings have been programmed in body weight, the key labeled CHG IN ML will allow the bolus to be changed in ML directly. Pressing YES calls the BOLUS DELIVERY screen. Medex Part # G6000608 Revision 3 – Operation Manual Page 36 Medfusion 3500 MEDEX CANCEL – stops the bolus and returns to the normal delivery rate and screen. STOP – during a bolus delivery immediately halts all delivery and the pump pauses. 4. The bolus delivery continues at the bolus delivery rate until the bolus volume is delivered. On completion of bolus dosing … the pump beeps, then resumes the programmed infusion delivery. 5. The bolus volume delivered is automatically added to the Total Volume Delivered (TVD) as well as the Programmed Volume Delivered (PVD), or Programmed Dose Delivered (PDD) for that infusion. Medex Part # G6000608 Revision 3 – Operation Manual Page 37 Medfusion 3500 MEDEX 12. LOADING DOSES A loading dose is a specified volume (or dose) of drug infused as a one-time-only bolus prior to the start of normal delivery. You may also configure loading dose to be automatically “prompted” or called up in the programming steps. Enable / Disable Loading Dose You can permanently enable / disable the Loading Dose option through custom pump configuration. Setting a Loading Dose 1. When paused, pressed the OPTIONS menu button to find the loading dose feature. 2. Use the number buttons to call the ENTER LOADING DOSE screen. 3. At the ENTER LOADING DOSE screen, set the loading dose volume. Here, volume is limited to the maximum fill volume for the current syringe size, and minimum volume is 1/600th of syringe size. When ready, press the Enter button to accept the volume setting (or dose setting if in body weight or mass mode). Use the number buttons to set delivery time in minutes & seconds. The default value for loading (i.e. bolus) delivery rate is set in custom configuration. Maximum & minimum time is calculated from the maximum & minimum rate for the syringe size you are currently using. Disable – turns loading dose OFF. Clear – deletes an entry. Backspace – erases a character. 4. 5. 6. After the loading dose is set and accepted, the pump pauses at the BEGIN INFUSION screen. The Loading Dose setting now appears onscreen. Medex Part # G6000608 Revision 3 – Operation Manual Page 38 Medfusion 3500 MEDEX Warning! Confirm All Settings Before starting ANY delivery, ALWAYS confirm correctness of ALL infusion values you just set. Delivering a Loading Dose 1. When ready, press the Start button to begin infusion. The BEGIN LOADING DOSE screen appears. • Press Yes to confirm and begin loading dose delivery. • Press Chg Dose button to change the loading dose settings. • If the loading dose settings have been programmed in body weight, the key labeled CHG IN ML will allow the dose to be changed in ML directly. • Press No to skip the loading dose and return to the NORMAL DELIVERY screen. • If you don’t press ANY button for 30 seconds, the neglected pump alarm will call you back to the pump. 2. Pressing Yes calls the LOADING DOSE DELIVERY screen and begins the infusion. The pump automatically completes the Loading Dose, then switches to normal delivery rate and screen. The loading dose volume delivered is automatically added to the Total Volume Delivered (TVD) as well as the Programmed Volume Delivered (PVD), or Programmed Dose Delivered (PDD) for that infusion. CANCEL – stops the loading dose and returns to the normal delivery rate and screen. STOP – during a loading dose delivery immediately halts all delivery and the pump pauses. Medex Part # G6000608 Revision 3 – Operation Manual Page 39 Medfusion 3500 MEDEX 13. VOLUME LIMIT A Volume Limit is an Option available for most delivery modes (except volume/time and intermittent volume/time). On reaching the preset volume limit, the pump stops – or changes to KVO if a keep vein open rate has been programmed. Volume limit is based on the quantity of programmed volume delivered. Enable / Disable Volume Limit If Volume Limit Dosing is not currently available as a dosing option, you can enable it through custom pump configuration. Setting Volume Limit You can set a volume limit either before starting an infusion, or by pausing the pump during an infusion. Volume limit is found on the OPTIONS screen, which you select from the BEGIN INFUSION screen. 1. When pump is paused, press the Options button to find the volume limit feature. 2. Press the number button for volume limit to call the ENTER VOLUME LIMIT screen. Disable – turns Volume Limit OFF. CLEAR – deletes an entry. Backspace – erases a character. 3. 4. 5. Use the number buttons to set the volume limit. Volume is limited to the maximum fill volume for the current syringe size, and minimum volume is 1/100th the syringe size. When ready, press the Enter button to accept the settings and call the BEGIN INFUSION screen. With the volume limit set, the pump pauses at the BEGIN INFUSION screen. The volume limit setting now appears on the display. Program Volume Delivered (PVD) will appear on the screen directly above the V LIMIT. Medex Part # G6000608 Revision 3 – Operation Manual Page 40 Medfusion 3500 MEDEX 6. 7. If you are initiating a new infusion, Prior to beginning the infusion, press <BOLUS> to initiate the priming sequence (page 21). When ready, press Start to begin infusion. The infusion will stop when it reaches the preset volume limit. Warning! Confirm All Settings Before starting ANY delivery, ALWAYS confirm correctness of ALL infusion values you just set. Medex Part # G6000608 Revision 3 – Operation Manual Page 41 Medfusion 3500 MEDEX 14. KEEP VEIN OPEN (KVO) RATE The Keep Vein Open (KVO) rate is an Option available for most delivery modes (except volume/time and intermittent volume/time). • You must have a volume limit programmed for KVO to work. After a volume limit is reached, a low rate (KVO) is set to maintain patency of the infusion site. • The range of rates available appears on the ENTER KVO RATE screen. KVO rates are calculated by syringe size and its minimum flow rate. • The programmed KVO rate must be less than the normal delivery rate and greater than or equal to minimum flow rate for the syringe. Once the volume limit has been reached, the pump will begin infusing, at either the programmed KVO rate or the current infusion rate, which ever is less. Enable / Disable KVO dosing KVO dosing can be enabled or disabled through custom configuration pump. Programming KVO Rate 1. 2. You can set a KVO rate at the BEGIN INFUSION screen, either before starting an infusion, or by pausing the pump during an infusion. You can find it by pressing the Options button on the BEGIN INFUSION screen. When pump is paused, press the Options button to call the SELECT THE PROGRAM OPTION screen. 3. 4. 5. Find the KVO option. Press its number button call the ENTER KVO RATE screen. Use the number buttons to set the KVO rate within the minimum and maximum rates onscreen. When ready, press the Enter button. After the KVO setting is complete, the pump pauses. The KVO setting now appears on the BEGIN INFUSION screen 6. When ready, press the Start button to begin the infusion. Warning! Confirm All Settings Before starting ANY delivery, ALWAYS confirm correctness of ALL infusion values you just set. Medex Part # G6000608 Revision 3 – Operation Manual Page 42 Medfusion 3500 MEDEX Delivery at KVO Rate The keep vein open feature is intended for use when you are delivering a series of infusions to a patient, and wish to ensure the delivery site remains patent between the end of one infusion and the beginning of the next. 1. Set the delivery mode you want to use for infusion. 2. Select and set the Volume Limit option. 3. Select and set the KVO option. 4. Press Start to begin an infusion. 5. Normal delivery ceases when the pump reaches the programmed volume limit. The pump then begins to infuse at the preset keep-vein-open (KVO) delivery rate, or the infusion rate at the time the volume limit is reached, whichever is less. 6. Here, the pump triggers a KVO alarm – informing you the infusion is complete & the pump is infusing at KVO rate. 7. KVO delivery terminates when the syringe is empty, or if you press the Stop button. When the pump automatically stops keep vein open infusion, it sounds a “syringe empty” alarm. Stop KVO Infusion You can stop a KVO infusion at any time by pressing the Stop button. Silence KVO Alarm You can silence the alarm by pressing the Alarm Silence button. Medex Part # G6000608 Revision 3 – Operation Manual Page 43 Medfusion 3500 MEDEX 15. STANDBY STANDBY is an Option that allows setting the pump for an infusion, then delaying advisory alarms for a programmed interval of time. • The pump does not automatically start an infusion at the end of the standby. • Instead, the pump triggers an alarm at the end of the standby period to tell you to either Start or Cancel the infusion. Enable / Disable Standby The STANDBY option can be enabled / disabled through custom configuration Programming Standby 1. When the pump is paused at the BEGIN INFUSION screen, press the Options button to find the STANDBY utility. 2. Select Standby mode by pressing its number button. 3. Set standby time in hours & minutes. The maximum Standby setting is 24 hours. The default standby time is 1:00 Hr. 4. When ready, press the Enter button to accept the standby setting and go to the BEGIN INFUSION screen. 5. The standby timer then appears in the upper left corner onscreen “counting down”. The Distracted user alarm is disabled for this interval. Standby continues until timer has counted to zero. You can discontinue standby mode at any time, by pressing the Start button, or by setting standby to zero. When the counter reaches zero, the pump sounds an alarm reminding you to begin the infusion. 6. Medex Part # G6000608 Revision 3 – Operation Manual Page 44 Medfusion 3500 MEDEX 16. DELAYED START DELAYED START is an Option that allows setting the pump for an infusion, then delaying the start for a programmed interval of time. • The pump will automatically start an infusion at the end of the standby. Enable / Disable Delayed Start The DELAYED START option can be enabled / disabled through custom configuration Programming Delayed Start 1. When the pump is paused at the BEGIN INFUSION screen, pres the Options button to find the DELAYED START utility. 2. Select Delayed Start mode by pressing its number button. 3. Set Delayed Start time in hours & minutes. The maximum delayed start setting is 6 hours. The default delayed start time is 1:00 Hr. 4. When ready, press the Enter button to accept the Delayed Start setting and go to the BEGIN INFUSION screen. 5. The Delayed Start timer then appears in the upper right corner onscreen “counting down”. The Distracted user alarm is disabled for this interval. Delayed Start continues until timer has counted to zero. You can discontinue Delayed Start mode at any time, by pressing the Start button, or by setting Delayed Start to zero. When the counter reaches zero, the pump begins the infusion. 6. Medex Part # G6000608 Revision 3 – Operation Manual Page 45 Medfusion 3500 MEDEX 17. OVERRIDE AND TOGGLE FEATURES IN THE INFUSION PROGRAM OPTIONS The OPTIONS key, when the pump is paused at the BEGIN INFUSION screen, will give access to override and toggle options that will effect the current infusion only. The Option key will return to the default selection whenever the pump is turned off, or whenever the program is returned to the main menu prior to beginning the next infusion. The override and toggle features that will automatically return to their default settings at the conclusion of the current infusion are; • Override Occlusion Limit • Override Alarm Loudness • Disable/Enable Rapid Occlusion Detection • Disable/Enable Near Empty Alarm Tone • Disable/Enable Empty Alarm Tone Medex Part # G6000608 Revision 3 – Operation Manual Page 46 Medfusion 3500 MEDEX 18. DELIVERY In DELIVERY, the pump infuses at the rate setting for the pump. The infusing indicators are illuminated, and the total volume delivered (or total dose delivered) accumulates. Starting Delivery You can start the infusion at any time when the pump is on STANDBY or paused at BEGIN INFUSION screen. 1. To start infusion from standby or pause, press the Start button. 2. While you are running an infusion, you may: a) Lock the keypad. b) Change the Dosage Rate. c) Titrate the Rate d) Clear TVD. Volume / Time or Intermittent Volume / Time In Volume / Time Delivery (and Intermittent Volume / Time), the screen indicates the effective delivery rate and time remaining to complete the infusion. Bolus, changing rate, and titrating rate, are not allowed in this delivery mode Stopping Delivery You can stop infusion delivery at any time. 1. Press the Stop button. 2. The infusing indicators turn OFF and the pump pauses. You may: a) Restart infusion at any time b) Change settings and restart infusion. c) Cancel the infusion by returning to the Main menu screen. d) Turn off the pump. Occlusion Trend Graph During Delivery The pump automatically monitors occlusion or syringe backpressure during any infusion. This trend appears in a bar graph on the right side of the display during delivery. The letter at the top of the graph indicates the configured occlusion alarm level: Code VH Meaning Fixed for 1ml syringe at very high Relative Pressure 35 psi (248 kPa) H high 16 psi (110 kPa) N normal 12 psi (83 kPa) L low 8 psi (55 kPa) VL very low 4 psi (28 kPa) Pressures in above table are only approximations. This is because syringe friction affects the actual pressure level. Occlusion limit default is set in the custom configurations (see Configuration Manual). Medex Part # G6000608 Revision 3 – Operation Manual Page 47 Medfusion 3500 MEDEX The operator may override the default Occlusion limit for a particular infusion from the <OPTIONS> menu if that option is enabled. This bar graph indicates three pressure-reading values: 1. The right side of the bar is the current reading. 2. The left side of the bar is the oldest reading. 3. The update rate to the graphical readings depends on the flow delivery rate. Therefore: • If the graph slopes upward from left to right, then the pump is headed toward occlusion. • If the graph is level, then backpressure is steady. FlowSentry (Rapid Occlusion Detection) FlowSentry is an internal program unique to the 3500 that monitors and analyzes delivery pressure. When activated, FlowSentry will alert the clinician to the existence of an occlusion much more rapidly than conventional occlusion alert systems. How do you know if FlowSentry has been activated? 1. During startup and during the stabilization period following a rate change a pound sign (#) will appear to the left of the pressure trend graph. The presence of the # indicates that FlowSentry is active, and that the delivery pressure is stabilizing. 2. Once the delivery pressure has reached a stabile level the # sign will be replaced by a horizontal arrow (→). Medex Part # G6000608 Revision 3 – Operation Manual Page 48 Medfusion 3500 MEDEX If there is an increase in the delivery pressure the horizontal arrow will be replaced by a vertical arrow (↑). In this way the clinician can easily see a) that FlowSentry is activated, and b) whether the delivery pressure is stabilizing, steady, or increasing. In the event that the FlowSentry has not been activated there will be no # or arrow signs to the left of the pressure trend graph. Post Occlusion Bolus Reduction With large syringes, Bolus can accumulate or be “stored” in the syringe tip when an occlusion happens. This pump contains an algorithm for post occlusion bolus reduction. Using post occlusion bolus reduction, the pump withdraws the plunger a predetermined amount to reduce “stored” bolus in the syringe. However, this feature does not totally eliminate the occlusion bolus. Occlusion bolus will vary greatly with infusion setup and the fluid infused. The table below shows typical occlusion bolus volumes − after bolus reduction − for several syringes at different occlusion pressure settings. (Note: for syringes smaller than 10 ml, the occlusion bolus is very small.) VL Syringe Size BD10 BD20 BD30 BD60 L N H Volume of Bolus (ml) 0.01 0.08 0.05 0.19 0.05 0.23 0.19 0.24 0.08 0.25 0.28 0.16 0.08 0.28 0.28 0.14 Typical occlusion bolus volumes for Becton-Dickinson 10, 20, 30, and 60 ml syringes. Time to Occlusion The time for the pump to detect an occlusion is affected by three factors: 1. Occlusion Pressure Setting – High (H), Normal (N), Low (L), or Very Low (VL). 2. Flow Rate Setting. 3. Syringe & Tubing Compliance, (i.e., softness of syringe plunger tip or tubing). Below are typical time-to-occlusion graphs for several syringes. See guidelines for pump performance on time to occlusion. At lower rates smaller syringes have shorter occlusion times. Medex Part # G6000608 Revision 3 – Operation Manual Page 49 MEDEX Medex Part # G6000608 Revision 3 – Operation Manual Medfusion 3500 Page 50 Medfusion 3500 MEDEX Flow Delivery Graphs This section contains the flow delivery graphs for selected B-D syringes. Startup graph for B-D 60 ml. Trumpet curve for B-D 60ml. Startup graph for B-D 30 ml. Trumpet curve for B-D 30 ml. Startup graph for B-D 5 ml. Trumpet curve for B-D 5 ml. Medex Part # G6000608 Revision 3 – Operation Manual Page 51 Medfusion 3500 MEDEX 19. CHANGING DELIVERY RATE The Medfusion 3500 infusion pumps offer different ways of changing delivery rate, either before beginning infusion, during delivery, or when paused. Titrate Rate During Delivery You can change the infusion rate by titrating the dosage Up or Down during infusion. Titration changes infusion rate by increasing or decreasing the current setting. The increments of change depend on syringe size & fluid concentration. 1. Press TITRATE button at DELIVERY screen. This calls the ADJUST THE RATE screen. Infusion does not stop. 2. Press the “↑ or ↓” menu buttons to increase or decrease the setting. Or use the Back button to escape without titrating. Increments of Change 3. 4. Increments of change are based on syringe size. The smaller the syringe installed on the pump, the smaller the available increments. The larger the installed syringe, the larger the increments. The delivery rate does not change until you press the Enter button. If you change your mind, press Back to return to DELIVERY screen without making a change. Rate is limited by the maximum and minimum delivery rate for the syringe size. When ready press the Enter button to accept the new setting. The new rate is not effective until you press the Enter button. Titration Unavailable Titration is unavailable for either VOLUME / TIME or INTERMITTENT modes. Medex Part # G6000608 Revision 3 – Operation Manual Page 52 Medfusion 3500 MEDEX Changing Rate During Delivery You can change the infusion rate during any delivery session, except Volume/Time or Intermittent modes. 1. To change the rate during delivery, press the Chg Rate (or Chg Dose) button. 2. Use the number buttons to set the dose rate. Rate is limited by the maximum and minimum delivery rate for syringe size. 3. When ready press the Enter button to accept the new setting. The pump delivery rate does not change until you press the Enter button. If you change your mind, press Back to return to DELIVERY screen without making a change. Changing Rate When Paused You can change the dosage rate at any time the pump is paused: 1. If the pump isn’t already paused, then press the Stop button to pause the infusion. 2. To change the rate during any pause, press the Chg Rate (or Chg Dose) button. 3. Use the number buttons to change the delivery rate. Rate is limited by the maximum and minimum delivery rate for syringe size. 4. When ready press the Enter button to accept the new setting. a) The delivery rate entry does not change until you press the Enter button. b) You may exit without changing the rate by pressing the Back button. The pump is paused at the BEGIN INFUSION screen. When ready, press the Start button to begin delivery. 5. Medex Part # G6000608 Revision 3 – Operation Manual Page 53 Medfusion 3500 MEDEX 20. TOTAL VOLUME, PROGRAM VOLUME / DOSE DELIVERED The Medfusion 3500 infusion pumps monitor and maintain the total quantity of fluids being delivered during any given session of infusions. Total Volume Delivered (TVD) is displayed at the top of the screen directly above the Program Volume Delivered (PVD) or Program Dose Delivered (PDD). The TVD is the total volume delivered to the patient and it will continue to accumulate until the Clear Totals program key is pressed or the pump is turned off. Displaying Program Volume Delivered / Program Dose Delivered In most delivery modes, you have the option of viewing either “Program Volume Delivered” or “Program Dosage Delivered”. On the display, PVD or PDD accumulates as the volume or dose delivered to the patient while in the current programmed delivery. This display totals the boluses, loading dose, and normal delivery volumes. • Priming volume – which should never be delivered to the patient – does not accumulate on this display. • Program volume or dose delivered – Appears on screen during DELIVERY and while the pump pauses • Toggle between PVD or PDD – Available through Options menu when paused (provided this has been set). • Program Dose Delivered − Only available when concentration has been programmed. Medex Part # G6000608 Revision 3 – Operation Manual Page 54 Medfusion 3500 MEDEX Clearing Total Volume, Program Volume, or Program Dose Delivered Display Use the following steps to clear the total volume, and program volume or dosage and reset the counter to zero: 1. From the pause screen, press the Clear Totals program key. • Confirmation is required to clear totals delivered. • Press Yes to clear total volume delivered and program volume (or dose) delivered. Or press NO to exit without clearing. • 2. The program volume (or dose) delivered is cleared automatically whenever the pump’s delivery mode or syringe size is changed. The Total Volume Delivered does not clear automatically. From any run screen, press the Clear TVD program key. • Confirmation is required to clear the Total Volume delivered. • Press Yes to clear total volume delivered only. Or press NO to exit without clearing. • The program volume (or dose) delivered is cleared automatically whenever the pump’s delivery mode or syringe size is changed. The Total Volume Delivered does not clear automatically. Recovering TVD / TDD Information You can restore total volume delivered display after turning OFF the pump by using the Recall Settings selection from the Main menu. If you have cleared the TVD, then only the quantity infused since clearing will be stored in memory. Medex Part # G6000608 Revision 3 – Operation Manual Page 55 Medfusion 3500 MEDEX 21. KEYPAD LOCK The keypad can be locked during delivery. The lock feature is provided to make the delivery settings tamper resistant. Once the system is locked, a setting cannot be modified until the system is unlocked. The Medfusion 3500 offers a programmable unlock code option. To set an unlock code, refer to the Configuration Manual. 1. 2. Press the LOCK button to lock the front panel controls. The LOCK indicator lights. If you press any front panel buttons other than the UNLOCK button, a “PUMP IS LOCKED” message appears onscreen. 3. Press the Unlock menu button to unlock the front panel. If an Unlock Passcode has been set, you will be instructed to supply the passcode before the front panel will unlock. 4. Any high-priority alarm automatically unlocks the front panel. Medex Part # G6000608 Revision 3 – Operation Manual Page 56 Medfusion 3500 MEDEX 22. USER DEFINED LIBRARIES This chapter describes the Medfusion 3500 infusion pump “user defined libraries”, tells you how to use them, create and save them, and enable or disable their availability. What Are Libraries? The pumps have 4 libraries containing as many as 16 entries per library. Each library is here defined as an electronic storage place for a group of preset infusion delivery values. Each group of preset values is a user-programmable “template”. A template is defined here as a stored record of infusion settings that load from memory. These templates are stored in memory indefinitely (over 10 years) or until overwritten. FOR WHAT ARE LIBRARIES AND TEMPLATES USED? Every unit, department, organization, or hospital has standard ways of delivering medications or fluids. If you use the pump on a regular basis, you will find yourself typing the same values again and again when preparing the pump for delivery. By using the libraries and templates feature, you can make these settings once and then save those settings to a permanent file or template. These templates of stored presets are used for administering fluids or medications in standard infusions – without your having to setup individual dosage values each time you need to begin an infusion. So they are a means of automating the pump setup process. WHO CAN USE THESE LIBRARIES OF TEMPLATES? Anyone who is authorized to use the infusion pump can use templates in any of the 4 available libraries. Your facility should establish a policy for controlling setup, modification, and recording of libraries. TYPES OF PROGRAMMABLE LIBRARIES There are two types of libraries in the Medfusion 3500 infusion pumps: Type of Library What it Does E-Plates Library/ Library D The 1st is the E-Plates Library. Like the standard libraries, they contain templates with presets necessary for programming an infusion. But they do not pause at each level for you to verify the settings. Instead, the entire set of values is programmed at one step including syringe manufacturer and size. Then the pump pauses at the BEGIN DELIVERY screen and displays all the infusion values. At that point, you merely have to press the Start button to begin delivery. If the E-Plates library is not desired it can be converted to the 4th Standard Library (Library D) by simply disabling E-Plates and enabling library D in the custom program. Standard Libraries The last 3 are Standard Libraries and contain templates with presets necessary for programming an infusion. These libraries require you to step through and review each setting. This allows modifying standard settings while stepping through preset values. Medex Part # G6000608 Revision 3 – Operation Manual Page 57 Medfusion 3500 MEDEX LIBRARY AND TEMPLATE WARNINGS & CAUTIONS Before starting ANY delivery, ALWAYS confirm correctness of ALL infusion values you just set. Warning! Confirm All Settings When using E-Plates, preset values are automatically inserted without pausing to verify each setting. You go directly to the BEGIN INFUSION screen where all the infusion values are displayed at once. Be sure to verify their correctness before starting the delivery. Certain data fields may be programmed blank (eg. patient weight) and require data entry before the infusion will proceed Extra caution should be exercised when using E-Plates. It is recommended each organization, unit, or department maintain a written logbook of the contents of every EPlate, and have this logbook available as a reference resource for personnel using EPlates in their daily operations. Displaying E-Plate Options The steps in this section are hypothetical. The Medfusion 3500 infusion pumps are shipped with all the libraries both blank and disabled. So the actual E-Plates you have available depend entirely on whatever E-Plates and standard library entries your system operator has programmed into your pump. Using “Standard” Libraries If a standard library enabled, the pump displays this library selection under the Main menu. 1. If you don’t see a library listing on the SELECT THE MODE screen, press the More button to find it on another screen; otherwise it is necessary to enable that library using the custom configuration. 2. Select a library from the menu. For example: If “3” below is selected, then the LIBRARY C screen appears. Libraries may be specifically named per facility preference such as NICU, or Anesthesia, or Antibiotics, etc. Select a LIBRARY ENTRY (template) by pressing its number. For example: If you select template “1” you get the presets for infusing URDRUG-1. You are next prompted to load a syringe, then confirm & accept each level of settings by pressing the Enter button. Some data fields may require data input prior to proceeding (eg. Patient Weight). 4. When all settings are confirmed, you go to the BEGIN INFUSION screen. Press Start to begin the infusion. 3. Medex Part # G6000608 Revision 3 – Operation Manual Page 58 Medfusion 3500 MEDEX Warning! Confirm All Settings Before starting ANY delivery, ALWAYS confirm correctness of ALL infusion values you just set. How to Tell Whether E-Plates Are Enabled For Use Medex ships the infusion pump with all the libraries disabled. Whether they are enabled on the pump you are using depends entirely on its custom configuration. What actual E-Plates presets you have available depend on the configuration setup by the person responsible for custom configuration before the pumps were delivered to your work area. You can tell whether E-Plates is enabled for use by what you see onscreen when you start the pump, or when you progress to the BEGIN INFUSION screen, or when you return to the beginning screen. E-PLATES IS DISABLED Below is the rule of thumb for determining whether the E-Plates library is disabled and not available for you to use: When E-PLATES is disabled, or there is no stored template in the library, the SELECT THE MODE menu is what you see onscreen after you turn on the pump and it completes its startup self-check. It will look something like the screen below: E-PLATES IS ENABLED The infusion pump gives you visual cues when the E-Plates library is enabled. Below are some rules for determining whether the E-Plates library is enabled and ready for you to use: Normally … the SELECT THE MODE screen is the first thing you see on screen after you turn on the pump and it completes it startup self-checks. But when E-PLATES is enabled, and there is a stored template in the E-Plates library, the SELECT THE LIBRARY ENTRY menu is the first thing you see on screen after you turn on the pump and it completes its startup selfchecks. If you then press the Main Menu button from the above SELECT THE LIBRARY screen, this toggles the SELECT THE MODE screen or menu. Notice how E-PLATES now appears in the bottom left menu button. If you press the E-Plates button, you return to the SELECT THE LIBRARY screen. If you press the E-Plates button on the above screen, you return to the SELECT THE LIBRARY ENTRY screen. Using E-Plates E-Plates are much easier to use, in fact, than to describe how to use them. If E-Plates are enabled, and there is at least one saved template in the library, you just press a button to select it. Medex Part # G6000608 Revision 3 – Operation Manual Page 59 Medfusion 3500 MEDEX The E-Plate’s preset values are loaded automatically into the pump provided that you have loaded a syringe of the manufacturer and size programmed for this library entry. All you have to do then is press the Start button to begin the preset infusion after verifying infusion settings. Some Data fields may be preset as blank and require data entry to proceed. To determine enabled or disabled status, see the previous section titled “How to Tell Whether E-Plates Are Enabled For Use”. 1. To use E-PLATES from the SELECT THE LIBRARY screen. 2. Use the number buttons to select the template you wish to use. FOR EXAMPLE: 3. 4. If you select “1” above, the pump loads the stored settings for URDRUG-1 infusion and pauses at the BEGIN INFUSION screen. All the infusion settings display on the BEGIN INFUSION screen. Always check and verify their correctness. You are responsible for ensuring the safety of any infusion you tell the pump to deliver. When ready, press the Start button to begin the infusion. Enabling E-Plates & Standard Libraries Depending on the configuration of your pump, E-Plates and libraries may or may not be readily available. If you cannot find them as an option in your pump, then they must be enabled through custom configuration. • Refer to the Medfusion 3500 Syringe Infusion Pump Configuration Manual for setting E-Plate libraries and templates. • If you have authorization, you may use custom configuration to enable the E-Plates and/or standard libraries. If not, ask the person responsible for custom configuration to make library changes for you. All such standard dosage templates shall be setup according to the standards & practices of your hospital, unit, or organization. Displaying E-Plate Options Even though you may select to enable the E-Plates and standard libraries, the pump display will not offer E-Plates and/or libraries until you actually create and save a template inside a library. Creating Library Templates The infusion pump comes with 4 blank libraries built into it. There are 3 Standard Libraries, and 1 E-Plates/Standard library. Each library comes with 16 blank entries or templates. These may be filled with presets through custom configuration. • You are limited to creating 64 templates. This is 16 templates each, for the 4 libraries. • If you have authorization to reconfigure the pump settings, you can delete the contents of library templates, name & rename the templates, and save infusion presets in the templates. All such standard dosage templates shall be setup according to standards & practices of your hospital, unit, or organization. Medex Part # G6000608 Revision 3 – Operation Manual Page 60 MEDEX Saving a New Template to a Library Medfusion 3500 Any trained user of the Medfusion 3500 infusion pumps can save a group of presets to any library and template in the pump. You can save presets to any library whether or not the library is enabled. It is very easy. In fact, it is easier to do than to describe. The steps are given below: 1. Select and setup any infusion you want used as a standard delivery method. Any group of settings can be saved to a template. 2. Progress all the way to the BEGIN INFUSION screen. 3. Press the Options button. This calls the SELECT THE PROGRAM OPTION screen. 4. 5. 6. 7. You need to find the SAVE TO LIBRARY option. You may have to press the More button until it appears onscreen. When you find it, press the number button for SAVE TO LIBRARY and call the SELECT THE LIBRARY screen. Press the number button for the library you want to use. This calls the SELECT THE LIBRARY ENTRY screen. You may save to either a used or unused template. Make your choice and press its number button. You are now at the CHOOSE A CHARACTER screen. This is where you name the template. Use the “ ” and “ ” keys to put the highlight on the character or symbol you wish to use. Then press the Enter button to type the character onto the screen. 10. Repeat step 9 until you have named the new template. Use the Backspace key to make corrections. 8. 9. 11. When finished naming the new template, press the Stop button to save and exit. The new template is now stored permanently in the designated library. And it now appears on the SELECT THE LIBRARY menu. Medex Part # G6000608 Revision 3 – Operation Manual Page 61 Medfusion 3500 MEDEX TEMPLATE NAMING CONVENTIONS Basically, you can give any template any name you wish. The name serves only to identify the template for future use. Name the template following the naming convention established by your unit, department, organization, or hospital. If there is no naming convention, Medex recommends you establish one. The best approach is to name templates so you can readily identify its contents and function. You should also create and maintain a logbook of all libraries and templates, with a sheet for each template to describe its contents and function. • There is a 15 character limit on naming templates. • Use any combination of letters, spaces, symbols, and numbers you see on the naming screen. • It is possible to give the same name to two or more templates within any library. Avoid confusion by not doing this. • With E-plates it would be helpful to include syringe size, like “30ml” as part of the library name. LIBRARIES MUST BE ENABLED TO USE It is possible to save a template to any of the 4 libraries whether they enabled or disabled. But the library containing the template must be enabled before you use them to setup an infusion. Medex Part # G6000608 Revision 3 – Operation Manual Page 62 Medfusion 3500 MEDEX Transferring Libraries from Pump to Pump Libraries and their stored presets can be copied electronically from one pump to another through the serial communications interface. The process is called “Library Cloning” and involves one pump “Teaching” and the other pump “Learning”. To learn how to do this, refer to the Medfusion 3500 Syringe Infusion Pump Configuration Manual. If you have authorization, you may use custom configuration to clone libraries. If not, ask the person responsible for custom configuration to make library changes for you. Reusing Templates If you save to an existing template, you write over its contents, and the new template replaces the old. If you reuse a template, be sure to change its name to avoid confusion. PharmGuard: Dosage Protocol Protection 1. PharmGuard provides programmable upper and lower limits for library dose/rate parameters. 2. When attempting to enter or change a dose/rate of a library selection the PharmGuard limits will be displayed on the screen between the “MAX:” and “MIN:” values as “HIGH” and “LOW”. 3. If a value is entered that is outside the PharmGuard range an audible alarm will sound and the message “OUTSIDE RANGE LIMIT – SILENCE ALARM TO CONTINUE” will appear. 4. Once the alarm is silenced, the message “CONFIRM LIMIT OVERRIDE?” will appear. 5. If this message is answered in the affirmative, the rate will be accepted. If the message is answered in the negative, the rate entry screen will re-appear. Medex Part # G6000608 Revision 3 – Operation Manual Page 63 Medfusion 3500 MEDEX 23. BATTERY, AC & EXTERNAL DC POWER OPERATION The infusion pump is normally operated by an AC power supply. This pump may also be operated by an external DC power supply. Each pump contains a rechargeable battery that is continually charged by the power supply – as long as the pump is connected to AC or external DC power. If the AC or external DC power is disconnected − while the pump is turned ON − the pump automatically begins drawing power from the internal battery. Onscreen Display of Internal Battery Power Level Gauge Whenever you turn ON the power, the internal battery charge level briefly appears on the “battery shaped” gauge in the bottom left corner of the display. When you begin running an infusion on internal battery, this “battery shaped” gauge also appears briefly in the upper right corner of the display at the start of delivery. And you can briefly display this “battery shaped” gauge at any time while the pump is infusing on battery by pressing any number button. BATTERY GUIDELINES Power & Battery Limits When To Charge The Battery When you see the “Battery Low” message, you should plug the pump into a power outlet for recharging. The battery indicator remains on continuously when charging. If the pump IS plugged into an outlet and fails to charge the battery, withdraw the pump from service for testing by trained biomedical service personnel. When You Can Run On Battery Alone The internal battery in intended for allowing you to infuse medications and fluids when an external power outlet is not conveniently available or when the patient is being moved. When You Cannot Run On Battery When battery becomes fully depleted, all infusion stops, and a “Battery Depleted” alarm begins sounding. For a fully depleted battery, you must plug in the AC power cord, turn OFF the pump to clear the alarm, and then turn ON the pump. See “Alarm Priorities & Messages” table to identify battery message status. Medex Part # G6000608 Revision 3 – Operation Manual Page 64 MEDEX External DC Power Option Medfusion 3500 The infusion pump can also be run by an optional external DC power supply. The external DC power supply must supply Input 6 – 14 VDC, 7 Watts. This optional DC power supply is connected through a terminal on the rear of the pump. The connection can be used for either an external battery or other low voltage DC input. Use only Medex approved cabling and power supplies. Refer to Service Manual and pump labeling for this information. Warning! External Power must be IEC 601-1 Certified Any external power source connected to the DC jack must be IEC 601-1 certified for medical equipment Type CF and meet Safety Class II requirements. Connecting any external power source to the Medfusion 3500 pumps creates a medical system. Therefore, the user is responsible for compliance with IEC 601-1 standards. Refer all questions to the Medex Technical Service Department. Medex Part # G6000608 Revision 3 – Operation Manual Page 65 Medfusion 3500 MEDEX 24. CLEANING AND CARE Below are common methods and cautions relating to cleaning and caring for the infusion pump: Power Source Before cleaning, always switch electrically operated equipment off and disconnect from AC power source. 1. Standard Cleaning of the Medfusion 3500 2. Avoid Using Solvents Spray Resistant Follow your institution’s guidelines for cleaning and disinfecting of devices. The syringe pump can be safely cleaned with the following agents: • Common bleach 10% solution diluted with water. • Mild detergent mixed with water. • Isopropyl alcohol 70% solution. • Surface disinfectants compatible with plastic materials. For best results: Clean by spraying cleanser directly onto a soft cloth and then wiping surfaces dry. Never use organic solvents (e.g., acetone), quarternary ammonia compounds, strong acids, or bases to clean any portion of the pump. The pump is “spray resistant” from the top and sides but not “water proof”. NEVER spray cleaning or other fluids directly into openings on the bottom of the pump. Not Waterproof The pump is not certified “water proof”. Never immerse the pump in water or other fluids. Avoid Oil Sprays Never use light oil sprays (e.g., WD40tm) to clean or lubricate pump. These oils contain chemicals that can damage the plastic of the pump. No user-added lubrication is necessary. Never Autoclave Never sterilize the pump in a steam autoclave or gas. Using autoclave or gas sterilization can seriously damage the infusion pump and void the warranty. Medex Part # G6000608 Revision 3 – Operation Manual Page 66 Medfusion 3500 MEDEX 25. MAINTENANCE & SERVICE This chapter includes information relating to both standard maintenance and service. Periodic Maintenance Trained biomedical service personnel should test the pump periodically to ensure continued safe operation. • This testing should be performed at least yearly, or whenever the pump has been damaged or dropped. • The occlusion and other sensors must be checked annually to ensure safe operation of the pump. • Refer to the Service Manual for specific details. The Medfusion 3500 Configuration Manual, (PN G6000609) provides information on customizing the settings and features of the pump, which in turn affect the use and operation of the pump on a daily basis. The 3000 Series Service Manual, (PN G6000278) provides technical information on this pump, including: • • Circuit Diagrams Functional Descriptions • • Theory of Operation Diagnosis and Testing • • Calibration Service Parts Service Warnings Pump Maintenance Only trained biomedical service personnel may service this pump. Service personnel should disconnect the AC power cord before servicing the pump. AC Power The only means of removing AC power is to disconnect the AC power cord. While the AC power cord is attached to the pump and plugged into an AC outlet, live main voltage is present within the pump. Manufacturer Recommended Maintenance Always maintain this pump following manufacturer recommended instructions in the Service Manual. Improperly maintained pumps may cause either under-infusion or over-infusion to patient. Never open pump case Users should never open the pump case or battery compartment for any reason. Service personnel should always disconnect the AC power cord before servicing the pump. Dropped or Damaged Pumps Never use a dropped or obviously damaged pump. Withdraw it service until a trained biomedical technician can test it. Medex Part # G6000608 Revision 3 – Operation Manual Page 67 Medfusion 3500 MEDEX Using Medex Service Assistance Use the following steps to make use of Medex technical service assistance: 1. Contact Medex Technical Service Department at one of the following telephone numbers: 2. 3. Toll free in continental United States 800-848-1757 Outside continental United States 614-889-2220 Contact via Fax in United States 770-497-0736 In Europe contact Medex Medical Ltd., England +44 (0) 1706-233826 When calling any of these numbers, please have the following ready: • Model name / number of pump • Pump serial number • Purchase date if pump is within warranty period • Description of problem in as much detail as possible The service representative will “talk you through” to a solution if possible. Returning a Medfusion 3500 Pump for Repair When the service representative cannot solve your problem by talking you through it, then it becomes necessary to return the infusion pump for service. 1. If the problem cannot be resolved through the assistance of the Technical Service Department, then you will be assigned a Return Authorization (RA) number. 2. Clean and decontaminate the pump and accessories prior to returning items to Medex. This is required before shipment by United States Occupational Safety & Health Administration (OSHA). 3. Package the infusion pump carefully for shipment. 4. Medex will not accept returns for service without the assigned RA number clearly printed on the shipping package. Mark the Return Authorization (RA) number clearly on the outside of the shipping package used to return the pump. 5. Ship the carefully packaged infusion pump to either of the addresses listed below: United States Service Medex 4350 River Green Parkway, Suite 200 Duluth, Georgia 30096 USA 770-623-9809 or 800-848-1757 Medex Part # G6000608 Revision 3 – Operation Manual European Service Medex Medical Ltd. St. Crispin Way Haslingden, Rossendale, Lancashire BB4 4PW Great Britain +44 (0) 1706-233826 Page 68 Medfusion 3500 MEDEX Medex Limited Warranty THIS WARRANTY IS GIVEN IN LIEU OF ANY EXPRESS OR IMPLIED WARRANTIES, INCLUDING WARRANTY OF MERCHANTABILITY, OR FITNESS FOR A PARTICULAR PURPOSE. Medex warrants to the purchaser that the Medfusion 3500 Syringe Infusion Pump shall be free from defects in material and workmanship for the period of one (1) year from the date of purchase. Medex’ sole obligation with respect to any such defect is limited to the repair, or at Medex’ option, replacement of the Syringe Infusion Pump. The Purchaser shall pay return freight charges. This limited warranty is made on the condition that prompt notification of a defect is given to Medex, within the warranty period, and that Medex shall have the sole right to determine whether a defect exists. This limited warranty does not apply to Syringe Infusion Pumps that have been partially or completely disassembled, altered, subjected to misuse, negligence, or accident; or operated other than in accordance to the instructions provided within this manual. While under this limited warranty, Medex recommends that personnel other than Medex service personnel shall not open the pump. Service by unauthorized personnel shall void this limited warranty. This limited warranty represents the exclusive obligation of Medex, and the exclusive remedy of the purchaser regarding defects in a Syringe Infusion Pump. No person is authorized to modify, in any manner, Medex’ obligation as described above. Medex reserves the right to make changes in or additions to pumps manufactured and/or sold by Medex at any time, without incurring any obligation to make the same or similar changes on pumps previously manufactured or sold by Medex. Medex Part # G6000608 Revision 3 – Operation Manual Page 69 Medfusion 3500 MEDEX 26. APPENDIX 1: SYRINGE FLOW RATE BY MANUFACTURER & SIZE Manufacturer Size Min. Rate Max. Rate ml ml/hr ml/hr B. Braun: Luer Lock Manufacturer Omnifix ml/hr 1ml 0.01 35.0 0.10 481.0 3ml 0.020 105.0 50 ml 0.10 1042 6 ml 0.030 213.0 5 ml 0.030 207.0 12 ml 0.07 325.0 10 ml 0.07 338.0 20 ml 0.10 536.0 20 ml 0.10 537.0 35 ml 0.10 735.0 50 ml 0.10 1042 60 ml 0.10 944.0 Terumo Medical: Luer Lock 1 ml 0.01 35.0 1 ml 0.01 35.0 3 ml 0.020 98.00 3 ml 0.020 106.0 5 ml 0.030 192.0 5 ml 0.030 225.0 10 ml 0.07 278.0 10 ml 0.07 333.0 20 ml 0.10 484.0 20 ml 0.10 541.0 30 ml 0.10 622.0 30 ml 0.10 712.0 60 ml 0.10 944.0 60 ml 0.11 1130 50 ml 0.40 952.0 Becton-Dickinson: Glass Glass Slip Max. Rate ml/hr 20 ml Becton-Dickinson: Luer Lock WWD Min. Rate ml Sherwood Medical: Luer Lock Monoject Perfusor Size Luer Lock AstraZeneca: Diprivan 1 ml 0.01 35.0 2.5 ml 0.020 100.0 5 ml 0.030 187.0 10 ml 0.07 271.0 Medex Part # G6000608 Revision 3 – Operation Manual Prefilled Glass Page 70 Medfusion 3500 MEDEX 27. APPENDIX 2: FLOW DELIVERY CALCULATIONS Rate calculations used by different delivery modes in the syringe infusion pump. Here, the maximum rate is limited by syringe size or the custom configured maximum rate limit. The minimum rate is limited by the syringe size. Mass modes Below is a table of mass modes and the formulae used to calculate them: Type of Mode mcg/min How it is Figured Rate is calculated as mass delivery rate (microgram/min) times 60 min/hr divided by concentration (mg/ml) divided by 1000. mcg/hr Rate is calculated as mass delivery rate (microgram/hr) divided by concentration (mg/ml) divide by 1000. mg/min Rate is calculated as mass delivery rate (milligram/min) times 60 min/hr divided by concentration (mg/ml). mg/hr mU/min Rate is calculated as mass delivery rate (milligram/hr) divided by concentration (mg/ml). Rate is calculated as mass delivery rate (milliUnits/min) times 60 min/hr divided by concentration (U/ml) divided by 1000. mU/hr Rate is calculated as mass delivery rate (milliUnits/hr) divided by concentration (U/ml) divided by 1000. U/min Rate is calculated as mass delivery rate (Units/min) times 60 min/hr divided by concentration (U/ml). U/hr Rate is calculated as mass delivery rate (Units/hr) divided by concentration (U/ml). Body Weight modes Below is a table of body weight modes and the formulae used to calculate them: Type of Mode How it is Figured mg/kg/min Rate is calculated as patient weight (kg) times dose delivery rate (milligram/kg/min) times 60 min/hr divided by concentration (mg/ml). mg/kg/hr Rate is calculated as patient weight (kg) times dose delivery rate (milligram/kg/hr) divided by concentration (mg/ml). mcg/kg/min mcg/kg/hr Units/Kg/min Rate is calculated as patient weight (kg) times dose delivery rate (microgram/kg/min) times 60 min/hr divided by concentration (mg/ml) divided by 1000. Rate is calculated as patient weight (kg) times dose delivery rate (microgram/kg/hr) divide by concentration (mg/ml) divided by 1000. Rate is calculated as patient weight (kg) times dose delivery rate (Units/kg/hr) divide by concentration (Units/ml). Medex Part # G6000608 Revision 3 – Operation Manual Page 71 Medfusion 3500 MEDEX Volume / Time & Intermittent modes Below is a table of volume / time and intermittent modes and the formulae used to calculate them: Type of Mode How it is Figured volume / time Rate is calculated as volume (ml) divided by time (hours:minutes) where time is rationalized as hours plus minutes divided by 60. intermittent mode Rate is calculated as volume (ml) divided by time (hours:minutes) where time is rationalized as hours plus minutes divided by 60; here, there is a time between deliveries with no flow. Custom Dilution Algorithm Below is a table of parameters needed to generate the custom dilution formula: Parameter Units Abbreviation initial drug concentration mg/ml IC target (volumetric) rate ml/hr TVR patient weight kg W target dose rate mcg/kg/min* TDR final (diluted) volume ml FV * Dose rate is chosen from list of: mg/kg/min, mg/kg/hr, mcg/kg/min, mcg/kg/hr. THE RESULTS FROM THE DILUTION CALCULATION Result Unit Type Volume of drug ml VDR Volume of diluent ml VDL Final (delivery) concentration mg/ml C Final (delivery) volumetric rate ml/hr R Medex Part # G6000608 Revision 3 – Operation Manual Page 72 Medfusion 3500 MEDEX HOW THE CALCULATION IS PERFORMED The custom dilution calculation performed is as follows: 1. Find target mass delivery rate = TDR times W times 60 min/hr; result is in mg/hr units. 2. [Note: for body weight modes in “/hr”, the “times 60 min/hr” is omitted in the equation]. 3. Find target concentration = target mass delivery rate / TVR; result is in mg/ml units. 4. Calculate dilution ratio = target concentration / IC. Result is ratio, unitless. 5. Calculate Volume of Drug: VDR = Dilution ratio * FV. Round result to nearest ml. 6. Calculate Volume of Diluent: VDL = FV − VDR. Result is in ml. 7. Calculate Final Concentration: C = VDR / FV * IC. Result is in mg/ml. 8. Given that Target Dose Rate = Final Delivery Dose Rate. 9. Calculate Final Volumetric Rate: R = Final Dose Rate * W / C. Result is in ml/hr. GOAL OF THIS DILUTION CALCULATION The goal of this calculation is providing a dilution which makes the target dose rate = the final dose rate, while trying to stay as close as possible to the target (volumetric) rate. In the result of the dilution calculation, the final volumetric rate may be different from the target (volumetric) rate. This is caused by the “round to nearest ml” occurring in step 4 above. Medex Part # G6000608 Revision 3 – Operation Manual Page 73 Medfusion 3500 MEDEX 28. APPENDIX 3: SERIAL COMMUNICATIONS This pump contains an optically isolated (Infrared) serial communications interface. With an optional Medex conversion box, this pump can be connected to a standard computer RS-232 serial interface. This process is called Configuration Cloning, and it allows pump setting information to be copied from one pump to another (see Configuration Manual). The interface provides capability for a remote computer to collect: • Pump Settings • Pump Libraries • Current Delivery Information Serial Conversion Box Another option is the Medex Serial Conversion Box, which allows direct connection between the Series 3000 pumps and a PC running the PC Cloning software. This software provides a full-featured simulation of the functioning of the Series 3000 pumps. This can be used as both a training tool and a configuration utility. As a configuration utility, the simulated pump can be setup exactly as a unit or department needs to use it. Then these configuration settings may be transferred en masse from the PC to actual pumps. Specific details on the serial interface protocol are provided with the conversion box, (P/N 3000RS232). Medex Cloning Block Two pumps can be interfaced without the use of the conversion box. Depending on your working surface, it may be difficult to perfectly align the infrared serial ports by hand. Instead use an optional, Medex Cloning Block, (P/N G6000200) to physically align the two pumps. This is a specially designed plastic plug which fits into the serial port notches on the backs of both pumps − providing simple alignment for both pumps every time. Medex Part # G6000608 Revision 3 – Operation Manual Page 74 Medfusion 3500 MEDEX 29. APPENDIX 4: POLE CLAMP ASSEMBLY & USE This appendix contains the instructions for assembling and using the Pole Clamp options available for the 3000 Series infusion pumps. 3000 Series Pump Rotating/Detachable Pole Clamp (standard) With the Rotating Clamp, you can align the pole clamp for mounting on any vertical or horizontal pole, bed rail, or similar solid structure small enough to fit within the clamp’s jaws. The light weight of the pump makes this convenient. 1. Open the clamp jaws wide enough to easily slip around the pole. 2. Tighten the clamp until it is securely fastened so the pump cannot be moved. The 3000 Series rotating/detachable pole clamp is packaged in two pieces that must be clipped together before it can be used: • The "L" Bracket and clamp anchor with release lever - is pre-attached to the pump base with 2 "flathead" screws • The Rotating pole clamp - which must be slid onto the clamp anchor at the back of the pump Assembling the 3000 Series Pump Rotating/Detachable Pole Clamp 1. 2. 3. 4. Unpack the pump and pole clamp assembly from the shipping container Slide the rotating pole clamp onto the pole clamp anchor at the rear of the pump until the retainer lock button audibly clicks into place Pull the round lock button at the top of the clamp assembly up and rotate the clamp to fit either a vertical or horizontal pole To remove the pump from the pole clamp, pull the release lever toward the pump and slide the pump off the pole clamp Using the 3000 Series Pump Rotating/Detachable Pole Clamp Pole Clamp Medex Part # G6000608 Revision 3 – Operation Manual Page 75 Medfusion 3500 MEDEX 3000 Series Pump Stationary Pole Clamp With the “L” bracket, you can align the pole clamp for mounting on any vertical or horizontal pole, bed rail, or similar solid structure small enough to fit within the clamp’s jaws. The light weight of the pump makes this convenient. 1. Open the clamp jaws wide enough to easily slip around the pole. 2. Tighten the clamp until it is securely fastened so the pump cannot be moved. Clamp with “L” bracket aligned for vertical pole mounting. Clamp with “L” bracket aligned for horizontal pole mounting. The 3000 Series stationary pole clamp is packed in a bag in pieces, which must be assembled before it, can be used: • The Pole Clamp assembly − with 4 “pan head” screws & 4 lock washers already inserted. • The “L” Bracket − which must be attached for mounting on either a vertical or horizontal pole. • 2 “flathead” screws and 2 “conical” lock washers − in a small plastic bag. Medex Part # G6000608 Revision 3 – Operation Manual Page 76 MEDEX Assembling the 3000 Series Pump Stationary Pole Clamp Medfusion 3500 You need a “Philips” head screwdriver. The steps for assembling the pole clamp are given below: 1. Unpack the pole clamp assembly from the shipping container. 2. The “L” bracket attaches the pole clamp to the pump. When you receive the pole clamp assembly, it is configured for use with a vertical pole. If you wish to change this assembly for use with a horizontal pole (e.g. bed rail), then you must reconfigure the “L” bracket using the following steps: • Remove the 4 “pan head” screws and their lock washers from the rear of the pole clamp. • Align the “L” bracket for horizontal mounting (see previous page). Install the 4 washers and pan head screws to mount the “L” bracket to the clamp. Tighten them to at least 10 in-lb (1.1 Nm) torque. 3. Use the small “flathead” screws and “star” lock washers to attach the pole clamp to the bottom of the pump. Tighten them to at least 10 in-lb (1.1 Nm) torque. Medex Part # G6000608 Revision 3 – Operation Manual Page 77 Medfusion 3500 MEDEX 30. APPENDIX 5: MRI ROOM USAGE MRI Room Usage for the Medfusion 3500 The magnetic resonance imaging (MRI) room usage information for MRI procedures (i.e., imaging, angiography, functional imaging, and spectroscopy) refers to the use of a shielded MRI system operating at a static magnetic field of 1.5 Tesla with radio frequency transmission and reception at 64 MHz. The effects of using other MRI systems have not been determined for this infusion pump. The Medfusion 3500 syringe infusion pumps have been determined to be acceptable for use in MRI rooms based upon the specific operating criteria indicated below. The pump, when correctly placed and operated within this 1.5 T/64 MHz MR environment, will not present an additional hazard or risk to the patient or MR user, or affect the image quality of the MRI examination. MRI procedures using the pumps must only be performed according to the specific operating guidelines as follows: ♦ Proper Placement of Pump The pump must be positioned in the MR environment of a 1.5 Tesla MRI system in a magnetic fringe field that does not to exceed 150 gauss. ♦ Warning! Placement of the pump in a magnetic fringe field greater than 150 gauss may present a projectile hazard to the patient or MRI user because of magnetic field interactions. In addition, the operation of the pump may be affected and/or degrade or alter the quality of the MR images that are obtained. Warning! The pump must be securely fastened to a non-moveable object while positioned in the MR environment. Pulse Sequences for MRI when using the Medfusion 3500 With the pump operating in a proper position relative to the 1.5 Tesla MRI system (i.e. a magnetic fringe field of 150 gauss or less), the use of standard spin echo, fast spin echo, and gradient echo pulse sequences for MRI examinations has been determined to produce no substantial alteration in image quality. The use of unconventional or non-standard MRI techniques has not been assessed and must be avoided. Note: Since the interface between the pump and the patient does not involve any thermally conductive material, there is no concern with respect to possible heating of this device during an MRI procedure. Medex Part # G6000608 Revision 3 – Operation Manual Page 78