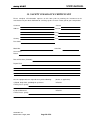
1
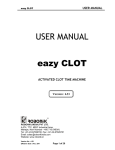
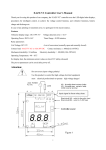
USER MANUAL
eazy CLOT
USER MANUAL
eazy CLOT
ACTIVATED CLOT TIME MACHINE
Version : 4.4
ROBONIK (INDIA) PVT LTD.
A-374, TTC, MIDC Industrial Area,
Mahape, Navi Mumbai – 400 710 (INDIA)
Tel: +91-22-67829700, Fax: +91-22-67829701
Email: [email protected]
Website: www.robonik.in
Version No.: 4.4
Effective Date : August, 2010
Page 1 of 26
USER MANUAL
eazy CLOT
TABLE OF CONTENTS
1. GENERAL INFORMATION.................................................................................................................................. 3
1.1. WARRANTY INFORMATION......................................................................................................................................3
1.2. TECHNICAL SERVICE ...............................................................................................................................................3
1.3. DISPOSAL INSTRUCTION: .........................................................................................................................................3
1.4. CONTACTS: .............................................................................................................................................................3
2. GENERAL SAFETY WARNINGS .......................................................................................................................... 4
2.1. DANGER – WARNINGS SYMBOLS ..............................................................................................................................4
2.2. USE OF THE INSTRUMENT ........................................................................................................................................5
3. INTRODUCTION .................................................................................................................................................... 6
3.1. DESCRIPTION: .........................................................................................................................................................6
3.2. SPECIAL FEATURES .................................................................................................................................................6
3.3. SPECIFICATIONS ......................................................................................................................................................7
4. PACKING, TRANSPORT AND STORAGE ........................................................................................................... 8
4.1. GENERAL WARNINGS ..............................................................................................................................................8
4.2. PACKING .................................................................................................................................................................8
4.3. INSTRUMENT TRANSPORTATION ..............................................................................................................................8
4.4. STORAGE OF THE INSTRUMENT ................................................................................................................................8
5. INSTALLATION AND START-UP INSTRUCTIONS....................................................................................... 9
5.1. INSTALLATION ........................................................................................................................................................9
5.2. START UP INSTRUCTION :........................................................................................................................................10
6. INSTRUMENT DESCRIPTION ........................................................................................................................... 12
6.1. PERSPECTIVE VIEW .................................................................................................................................................12
6.2. KEYPAD ..................................................................................................................................................................13
6.3. DISPENSING HOLES DESCRIPTION : .........................................................................................................................13
6.4. OPERATING PROCEDURE: ........................................................................................................................................14
7. PRECAUTIONS ..................................................................................................................................................... 16
8. GENERAL OPERATIONS .................................................................................................................................... 17
8.1. PRESS FUNC KEY ...............................................................................................................................................17
8.2. MENU KEY..............................................................................................................................................................18
8.3. CLEAR KEY...........................................................................................................................................................18
8.4. ENTER KEY ...........................................................................................................................................................18
8.5. TIMER KEY (NO 8)...............................................................................................................................................18
8.6. SAVING TEST ..........................................................................................................................................................18
8.7. LAMP AMPLITUDE ...................................................................................................................................................19
8.8. LISTING OF SAVED TEST ..........................................................................................................................................19
8.9. TO ENTER CLINIC NAME : ........................................................................................................................................19
8.10. MOTOR ON CHECK...............................................................................................................................................20
8.11. DELETING ALL TESTS ............................................................................................................................................20
8.12. SELECTION OF LANGUAGE ....................................................................................................................................20
8.13. LIST OF TEST NUMBERS ........................................................................................................................................20
9. PROGRAMMING MODES ................................................................................................................................... 21
9.1. CLOT TIME MODE:..................................................................................................................................................21
9.2. INR MODE / PT MODE:...........................................................................................................................................21
9.3. MULTI STANDARD MODE / FIBRINOGEN MODE:......................................................................................................22
10. TROUBLE SHOOTING....................................................................................................................................... 24
11. DECONTAMINATION........................................................................................................................................ 25
11.1. DECONTAMINATION PROCEDURE ..........................................................................................................................25
11.2. PURPOSE OF DECONTAMINATION ..........................................................................................................................25
11.3. GENERAL CONSIDERATIONS ..................................................................................................................................25
11.4. PROCEDURE ..........................................................................................................................................................25
12. SAFETY CLEARANCE CERTIFICATE............................................................................................................ 26
Version No.: 4.4
Effective Date : August, 2010
Page 2 of 26
USER MANUAL
eazy CLOT
1. General Information
1.1. Warranty Information
Each Instrument is completely tested and guaranteed for twelve months from delivery. The
warranty applies to all the mechanical and electrical parts. It is valid only for proper installation,
use, and maintenance in compliance with the instructions given in this manual.
ROBONIK will at its discretion repair or replace parts, which may be found defective in the
warranty period. The warranty does not include any responsibility for direct or indirect personal
and/or material damages, caused by improper use or maintenance of the instrument.
Parts that are inherently subject to deterioration are excluded from the warranty. In case of
defects due to misuse of the instrument, any incidental expenses like travel and man-hour service
charges will be charged extra.
1.2. Technical Service
Robonik is always accessible to the customers for any kind of information about installation, use,
maintenance, etc. While asking for service, please refer to this manual, and report the printed
serial number on the identification label.
Only qualified technicians are entitled to fix the instrument; the user, as described in this manual,
should carry out ordinary maintenance.
Robonik technical service or an authorized service center with specialized technicians, with
suitable instrumentation and original spare parts are always available for extraordinary
maintenance (repair), under a yearly maintenance contract or on specific demand.
1.3. Disposal instruction:
In case of removal or disposal of instrument, following instructions need to be followed
•
•
Do not dispose in municipal waste; follow local regulations for instrument disposal.
Plastic parts, Electronic PCBs and components can be recycled, so return back the
instrument to manufacturer.
1.4. Contacts:
Manufacturer:
European Authorized Representative
ROBONIK (INDIA) PVT LTD
A-374, TTC, MIDC Industrial Area,
MAHAPE, NAVI MUMBAI –400710
INDIA
Obelis s.a
34, Av. de Tervuren, bte 44
B-1040 Brussels, BELGIUM
Tel: (32) 2. 732.59.54
Fax: (32) 2.732.60.03
E-Mail : [email protected]
Tel: +91-22-67829700,
Fax: +91-22-67829701
Email: [email protected]
Website: www.robonik.in
Version No.: 4.4
Effective Date : August, 2010
Page 3 of 26
USER MANUAL
eazy CLOT
2. General Safety Warnings
2.1. Danger – warnings symbols
In this manual the following symbols are used to inform the user of the safety rules:
This symbol indicates generic danger. It means that, serious damage can occur to the
operator if described precautions are not observed.
This symbol indicates HIGH ELECTRIC VOLTAGE. It is dangerous to touch any part
having this label. Only qualified operators can access these components, after
unplugging the instrument from the Supply.
This symbol indicates that the instrument involves the handling of samples, which can
be infected (urine or human serum). In this condition, infection or contamination
might occur. Pay attention to the general safety warnings when in presence of such
biological substances. Use Protective clothes, gloves and glasses.
This symbol in the user manual indicates that damages to the instrument or erroneous
results could occur if the given warnings are not followed.
This symbol indicates a portion, which is particularly important, and should be studied
carefully.
This symbol indicates a Protective Earth or Ground terminal.
General Symbols
Symbol for “Manufacturer”
Symbol for “ IN VITRO DIAGNOSTIC MEDICAL DEVICE”
Symbol for “AUTHORISED REPRESENTATIVE IN THE EUROPEAN COMMUNITY”
Version No.: 4.4
Effective Date : August, 2010
Page 4 of 26
USER MANUAL
eazy CLOT
2.2. Use of the instrument
The instrument has to be used for the designed purposes under specified conditions, following
proper procedures and safety rules, by qualified personnel.
THIS MANUAL CONTAINS INSTRUCTIONS FOR OPERATION BY QUALIFIED PERSONNEL
ONLY.
A qualified user has to make sure that the environmental condition is suitable, the
installation is correct, the use and maintenance are proper, according to the general
safety rules as well as to the particular precautions described in the manual (However, he
is not entitled to repair the instrument).
A qualified technician is entitled to maintain and fix the instrument, according to the
instructions given, using the original spare parts.
Maintain room temperature and humidity as specified in the manual.
The instrument has to be used as described in this manual. If it is not use the protection
provided by the instrument may be impaired.
Alterations to the instrument are strictly prohibited. The user is liable and
solely responsible for any improper modification to the instrument, and for
the consequences derived as a result.
•
Should the instrument need extraordinary maintenance, contact ROBONIK service or an
authorized service center. Specialized technicians, who will be able to repair the
instrument using original spare parts, will carry out the maintenance.
•
This IVD equipment complies with the emission and immunity requirements as per IEC
61326 series.
•
Warning : This equipment has been designed and tested to CISPER11 Class A. In a
domestic environment it may cause radio interference, in which case, you may need to
take measures to mitigate the interference."
•
An advisory that the electromagnetic environment should be evaluated prior to operation
of the device.
•
Warning : Do not use this device in close proximity to sources of strong electromagnetic
radiation (e.g. unshielded international RF sources), as these may interfere with the
proper operation.
Version No.: 4.4
Effective Date : August, 2010
Page 5 of 26
USER MANUAL
eazy CLOT
3. Introduction
3.1. Description:
eazy CLOT is an Activated clot time machine with sophisticated on board software. Its
versatile and unique software supports most of the calculation required for interpretation of
results. It is a reliable, high precision machine. It is intended for in vitro diagnostic use.
3.2. Special Features
Designed to perform all routine tests such as PT, APTT, TT, FIB and clotting factors.
Results are both printed and displayed in seconds and in concentration.
Data is printed and stored with RATIO and INR values.
Prints and stores calibration graph.
Dry block incubator for 37 degree centigrade with multi timer.
Facility to enter clinic name
Uniform mixing of Sample & Reagent with magnetic stirrer.
Version No.: 4.4
Effective Date : August, 2010
Page 6 of 26
USER MANUAL
eazy CLOT
3.3. Specifications
Measuring System
Photometric
Optical measurement
Photodiode
Cuvette Volume
(Minimum Measurement Volume)
Sample & reagent mixing
150 µl
With magnetic stirrer
Dry block incubator
Number of cuvette Holders
10 + 1 Test tube holder
Temperature
37 c
Timer
2 channels for programming incubation time
0
Light source
LED
Warm Up Time
90 secs.
Display
Four line LCD, back lit, 4 X 20 characters
Printer
Built – in thermal printer, 20 column
Memory
32 KB Non Volatile RAM, Battery backup
supporting 35 open tests
Analysis mode
CLOT TIME, INR (PT) MULTI STD (FIB)
Results displayed in
Seconds
Ratio
INR (automatically calculated)
Concentration
RS232 Serial Port
2400 baud, 1 start, 8 data, 1 stop, no parity bits
Power
Wattage
50 Watts
Voltage
115 – 230 Volts ± 50 / 60 Hz.
Operating position
On horizontal flat, rigid and vibration free
surface
Operating conditions
0
0
Temperature
From + 18 c to 35 c
Relative humidity
Up to 85 %
Storage conditions
0
0
Temperature
From -10 c to 60 c
Relative humidity
Up to 85 %
Enclosure
ABS Fire retardant
Size (cms)
20 X 30 X 10 (l X b X h)
Weight (Approx)
3 Kgs.
Version No.: 4.4
Effective Date : August, 2010
Page 7 of 26
USER MANUAL
eazy CLOT
4. Packing, Transport and Storage
4.1. General warnings
Instrument has to be decontaminated before packing for transportation.
4.2. Packing
Packaging is needed whenever it is to be transported or shipped by courier or other means.
To pack the instrument follow the instructions as below described:
•
Decontaminate the instrument as explained IN Decontamination chapter (Refer Index for
page no.) of this manual.
•
Place the instrument into the original packaging box; Instrument has to be properly
protected by plastic protective material. Put copy of safety clearance certificate (copy of
Safety Clearance certificate is attached at the end of this manual)
•
Mark the package with address, instrument identification and warning labels.
4.3. Instrument transportation
The transportation of the instrument in unpacked condition must be limited within the room
where it is used, to avoid damage.
4.4. Storage of the instrument
Before storing the instrument for a long period, pack it carefully as described above and store
0
0
indoors. Relative humidity has to be less than 85%, and temperature between -10 c to 60 c
Version No.: 4.4
Effective Date : August, 2010
Page 8 of 26
USER MANUAL
eazy CLOT
5. Installation and start-up instructions
5.1. Installation
Step 1: Unpacking instructions
Unpack the instrument. Follow the symbols shown on outer packaging .
Check accessories as per packing list dispatch with the instrument.
Kindly store all packing materials so as to use it to repack and ship for maintenance or servicing.
NOTE: The user manual should be carefully read before startup to ensure an error free operation.
Step 2: Placing the instrument
The instrument has to be placed on a level bench.
Room temperature has to be between 18 and 35ºc with a relative humidity below 85%.
Protect it from direct sunshine
Step 3: Power supply requirements
Once the instrument has been placed, plug it into a power source by the locally available approved plugin cable. Power cord should be CE, CSA, and UL marked.
Voltage : 115-230 V ± 10% 60-50Hz.
Step 4: Protective Grounding
Warning: Please make sure that electrical power source is properly grounded.
Version No.: 4.4
Effective Date : August, 2010
Page 9 of 26
USER MANUAL
eazy CLOT
5.2. Start Up Instruction :
Step 1: Switch on the instrument. The instrument will display the model name.
The instrument initializes all the parameters internally, and carries out a power on self-test. It then
displays ‘ROBONIK’ and the time indicating that initialization is complete. If a printer is enabled, model
name, the time, and the date will be printed.
If the correct date and time are not displayed, switch off the instrument and switch ON again.
The instrument is now in IDLE mode, and ready for use.
Step 2 : Thermal printer
The eazy CLOT comes with built-in 20 columns Thermal Printer. User has to take proper care to handle
this delicate instrument.
SOME OF THE TIPS FOR CAREFUL USAGE OF PRINTER ARE AS FOLLOWS
1.
2.
3.
Do not pull the paper when loaded.
Lift the paper lever carefully and load the paper.
Keep the instrument clean and dust free.
eazy CLOT gives line feed automatically whenever it is necessary for clear reading like
a.
b.
While powering on.
In between character lines.
However user also can give additional line feed to move the paper forward by a character line.
How to insert the paper
Insert the thermal paper roll by placing the sensitive side facing down. The sensitive
paper side is recognizable by its smoother face.
Before inserting the paper
After inserting the paper
Version No.: 4.4
Effective Date : August, 2010
Page 10 of 26
USER MANUAL
eazy CLOT
Step 3: Printer setting operations
Press MENU key under Programming Mode.
Incase of any problems in thermal printer following message will displayed
“SET PRINTER PR ENTER”
Check for paper and printer cover and press
ENTER again to start printer.
“SKIP PRINTER PR YES”
:
User may operate the instrument by disabling the printer.
(press “YES” to disable the printer after above message)
To Set Printer again use following steps.
1)
Press FUNC key
Delete test Y/N
Press NO key
Set TIME Y/N
Press NO key
Set printer Y/N
Press YES key.
Step 4: Keyboard check.
Check key board by pressing MENU key first and all other keys later, one should get a beep and either
alpha numerical or numerical should appear on display
Step 5: Setting Date and Time
Setting of date and time can be done with the help of FUNC key
Press FUNC key
Delete test Y/N
Press NO key
Set TIME Y/N
Press YES key
DATE DD.MM.YY
Enter date month and year in the same format. Press ENTER key
TIME: HH.MM.SS
Enter hour, minutes, and seconds in 24 hr format. Press ENTER key
The instrument goes back to idle position
Version No.: 4.4
Effective Date : August, 2010
Page 11 of 26
USER MANUAL
eazy CLOT
6. Instrument Description
Components of different views of the below pictured instrument:
6.1. Perspective View
Front view
1.
2.
3.
4.
5.
Display,
Alphanumerical keypad
Printer
Incubation Block
Measurement Chamber
3
1
2
4
5
Rear View
ON/OFF SWITCH
RS232 POT
SMPS
Contrast POT
Version No.: 4.4
Effective Date : August, 2010
Page 12 of 26
USER MANUAL
eazy CLOT
6.2. Keypad
6.3. Dispensing Holes Description :
Press on the right side of the measurement chamber as shown in Fig1
1 ml pipette dispensing hole
PRESS
100 µl pipette dispensing hole
Fig. 1
Sliding cover holder
Sliding Cover
Version No.: 4.4
Effective Date : August, 2010
Page 13 of 26
USER MANUAL
eazy CLOT
6.4. Operating Procedure:
Refer chapter 9 for operating Modes. Follow the below steps when
Display will Show
1)
2)
3)
4)
“PLACE CUVETTE”
Lift the Chamber cover as shown in the figure (Fig.2) below.
Put the cuvette in the cuvette holder inside the chamber as shown in the figure (Fig.2)
(*Cuvette has to be inserted completely).
Ensure stirrer inside the cuvette before placing the cuvette in measurement chamber.
Ensure the required quantity of sample in cuvette as per Reagent Pack Insert.
Fig. 2
5)
Lock the cover by pressing down ward as shown below
Fig. 3
Display will Show
Reagent adding procedure:
If 1ml pipette is used for dispensing reagent, then Shift the slider on the left side and put the
Reagent through the big hole.
Slider
PRESS
Fig. 4
Hole for 1ml Pipette
dispensing
PRESS
6)
“Dispense Reagent”
If 100/50µl pipette is used for dispensing reagent then shift the slider on the right side and put
the reagent through the small hole.
Hole for 100 /50uL
PRESS
Fig. 5
Version No.: 4.4
Effective Date : August, 2010
Page 14 of 26
PRESS
Pipette dispensing
Slider
USER MANUAL
eazy CLOT
7) While putting the Reagent insert the pipette straight in to the dispensing hole. Ref. Fig. 6
Pipette
Fig. 6
8) Display will show the time
“3, 2, 1”
When it displays 1 it gives the beep.
Dispense the reagent when it gives the beep.
9) Display will show message
“PLEASE WAIT”
Indicating the measurement has started.
After clot detection this message will disappear and instrument will show the clotting time.
Version No.: 4.4
Effective Date : August, 2010
Page 15 of 26
USER MANUAL
eazy CLOT
7. Precautions
o
Keep the place dry and clean.
o
Check all the grounding wires properly.
o
Use original packaging for transportation.
o
Use clean Cuvettes.
o
If results are not reproducible check for the bubbles within reaction mixture and take
corrective action.
o
Avoid getting bubbles within the reaction mixture, which may lead to erroneous result.
o
Insert pipette tips straight down into the Cuvette and then dispense the reagent.
o
Use preferably yellow and blue tips of good quality, for dispensing Reagent.
o
Refer to pack insert with the Reagent and follow instruction of reagent manufacturer.
o
For routine screening procedures use total of 150 µl volume.
o
During critical assays when factor / factors concentration is depleted (During therapeutic
dose adjustment) use total volume of 300 µl instead of 150µl to minimize CV.
o
Cuvettes are specially design to read both micro and macro volumes.
Version No.: 4.4
Effective Date : August, 2010
Page 16 of 26
USER MANUAL
eazy CLOT
8. General Operations
8.1. PRESS FUNC KEY
Programming Mode
Idle Mode
Save Test Y/N
Name Test Y/N
YES
Delete Test Y/N
Deleting Test
NO
YES
Set Time Y/N
NO
Date DD.MM.YY
Time HH.MM.SS
Exit
Set Printer Y/N
YES
Press YES to enable printer
and NO to disable
Setting Printer
NO
Exit to Main menu
Exit Y/N
Version No.: 4.4
Effective Date : August, 2010
Page 17 of 26
USER MANUAL
eazy CLOT
8.2. Menu Key
This key is used to select the test numbers .
8.3. CLEAR Key
Press twice to initialize the instrument. Under data entry mode it will clear the entered
data while pressing once.
8.4. ENTER Key
This key is used to complete the command or data entry.
8.5. TIMER KEY (No 8)
Press Timer key
NO
YES
No
YES
SET TIMER 1 Y/N
Reset both Set Time
RESET TIMERS Y/N
SET TIMER Y/N
YES
Initial screen
TIME IN SECONDS
NO
SET TIMER 2 Y/N
YES
Enter the required incubation time and press
ENTER key. Once the time is completed the
instrument will start beeping. Intermediately press
clear key once to stop beeping.
8.6. Saving Test
To save the programmed test under any programming Mode. Press FUNC key
How to operate
Display
Save Test Y/N
Press YES Key
Yes
Press YES Key to Enter Name
No
Name Tests Y/N
Test Number will be
printed on the paper
Yes
ABCDEFGHIJKLMN
Save Test
without name
Select Arrow Keys (4 & 6) to select
Alphabets by moving curser
Press Enter after selection and proceed
Exit
Press Enter
Version No.: 4.4
Effective Date : August, 2010
Page 18 of 26
twice at last alphabet
USER MANUAL
eazy CLOT
8.7. Lamp Amplitude
Press MENU Key
Enter 128 Press Enter Key
Choose Test
Lamp amplitude will displayed on screen and can take printout.
It should be between 3 to 8
8.8. Listing of saved test
Press MENU Key
Choose Test
Enter 129 and press ENTER key.
Test Number
The instrument will print a list of all saved tests.
Recalling of saved test
Press MENU Key
Choose Test
Enter the test
number to be recalled
Test Number
8.9. To Enter clinic name :
Press MENU Key
Choose Test
Enter 132 press Enter Key
Clinic Name Y/N
Select Arrow
curser
YES
NO
ABCDEFGHIJKLMN
Press Enter after selection and proceed
Press Enter
FIRST SCREEN
INSTRUMENT
twice at last alphabet
OF
a maximum number of 15 characters can be entered.
Version No.: 4.4
Effective Date : August, 2010
Keys (4 & 6) to select Alphabets by moving
Page 19 of 26
USER MANUAL
eazy CLOT
8.10. Motor ON check
Press MENU Key
Enter 199 Press Enter Key
Choose Test
To check continuous rotation of stirrer.
8.11. Deleting all Tests
Press MENU Key
Choose Test
Enter 200 Press Enter Key
Programmed memory of all tests gets erased
To delete particular test, press menu key and select that particular test and press ENTER to delete it.
8.12. Selection of Language
Press MENU Key
Choose Test
Enter 254 Press Enter Key
Language option Y/N will displayed on screen .with following options.
LANGUAGE OPTION 1=EN=ENGLISH 2=GERMAN, 3=SPANISH, 4=FRENCH
To select the language press the number and ENTER key.
8.13. List of Test Numbers
Test Numbers
Use
128
Lamp Amplitude
129
Listing of Save Tests
132
To Enter Clinic Name
199
Continuous movement of Stirrer can be Observed.
200
To delete all the Tests.
254
To Select Language
Version No.: 4.4
Effective Date : August, 2010
Page 20 of 26
USER MANUAL
eazy CLOT
9. Programming Modes
9.1. Clot Time Mode:
Instrument measures only time there is no calculation, this mode is used to can Run APTT, PT
Tests.
Press “CLOT TIME” key
REMOVE CUVT CLOS
LID PRESS ENTER
Warning : Cuvette holder should be empty at this time.
Insert Sample Cuvette
PLACE CUVETTE
DISPENSE REAGENT
After dispensing reagent stirrer will start moving and
please wait message on display
PLEASE WAIT
Note : Remove cuvette before pressing ENTER KEY
REM CUV PRES ENT
CLEAR
Press ‘CLEAR’ twice to come out of test
9.2. INR Mode / PT Mode:
Instrument measures clot time of sample and by calculation gives INR ratio. INR mode is used to
run the PT test. (Prothrombin Time).
Press “INR” key
Enter ISI Index value, as
given in reagent manual.
ISI INDEX =
Enter Normal Patient’s
Prothrombin time or Control
time as Normalization.
ENTER MNPT TIME
REMOVE CUVT CLOS
LID PRESS ENTER
Warning : Cuvette holder should be empty at this time.
Insert Sample Cuvette
PLACE CUVETTE
DISPENSE REAGENT
After dispensing reagent stirrer will start moving and
please wait message on display
PLEASE WAIT
Note : Remove cuvette before pressing enter key
REM CUV PRES ENT
CLEAR
Press ‘CLEAR’ to come out of test
Version No.: 4.4
Effective Date : August, 2010
Page 21 of 26
USER MANUAL
eazy CLOT
9.3. Multi Standard Mode / Fibrinogen Mode:
In multi standard mode maximum 7 calibrators can be selected. It plots the graphs of clot time v/s concentration
based on best fit (Linear) method with Log-Log scale. This mode is used to run fibrinogen, and factor assay test.
Press “Multi Std.” key
UNIT
KEY
UNIT
1
U/L
2
U/ml
3
mU/ml
4
mEq/L
5
MIL
6
mmo/l
7
umo/L
8
nmo/L
9
%
•
ug/mL
−
g/dL
Cuvette holder
should be empty at
this time.
Insert Calibrator
Cuvettes one by one,
to get the clot time
of calibrators.
Select Unit. Enter specific
number to select correct unit.
UNIT
Enter “No. Of Cals =
Maximum seven Calibrators
YES
Enter Cal. Time
Y/N
NO
You can enter the
clot time for given
number of calibrator
directly without
running calibrators.
ENT 1 CAL. TIME
ENT 2 CAL. TIME
CAL 1
CAL 1
Enter Concentrations
of all calibrators.
CAL 2
CAL 2
REMOVE CUVT CLOS
LID PRESS ENTER
Plot Graph Y/N
Stored Test Y/N
PLACE CUVETTE
READ CAL 1, 2, ….
CLOSE THE LID
AND PRESS ENTER
Plot Graph Y/N
By pressing ‘YES’, we
can save the clot times of
calibrators.
Accept Test Y/N
Insert Sample Cuvette
PLACE CUVETTE
DISPENSE REAGENT
Save Test Y/N
Remove cuvette before
pressing enter key
YES
YES
REM CUV PRES ENT
Press ‘CLEAR’ to come out of test
Name Test Y/N
CLEAR
Version No.: 4.4
Effective Date : August, 2010
Press ‘FUNC’
key to save test
Page 22 of 26
ABCDEFGH….
Select the characters using arrow keys,
confirm by pressing ENTER on blinking
character. Conclude by pressing ENTER
key twice at the last character.
eazy CLOT
Sample Graph Printout in Multistandard Mode:
Version No.: 4.4
Effective Date : August, 2010
Page 23 of 26
USER MANUAL
USER MANUAL
eazy CLOT
10. Trouble Shooting
ERROR MESSAGES
CORRECTIVE ACTION
“Memory over range “
If Number of saved tests exceeds 40 tests then delete
the unwanted tests and save the test.
“SKIP PRIN. PR.YES”
1) Check printer paper or printer cover properly placed.
“SET PRI & PR.ENT “
2) Refer to Printer setting in Start Up Instructions.
1) Check whether cuvette is present while referencing.
(when display shows CLOSE THE LID AND PRESS
ENTER)
“Lamp Intensity Poor “
NOTE: While referencing cuvette should not be there.
2) Choose test 128, to see the lamp amplitude value. It
should not be below 3. 000
Other ERRORS
CORRECTIVE ACTION
1. Check stirrer inside the cuvette.
2. Follow the reagent volume as specified in Pack
Insert.
No consistency in Reading
3. Follow Reagent dispensing procedure carefully
Put the pipette straight and remove immediately in
straight direction –do not shake. ( Cuvette should not
shake from its position )
1. Follow Reagent dispensing procedure carefully
Random readings stops at 1.0 sec.
Put the pipette straight and remove immediately in
straight direction –do not shake
2. Check cuvette is inserted completely; It should not be
loose in cuvette holder.
Version No.: 4.4
Effective Date : August, 2010
Page 24 of 26
USER MANUAL
eazy CLOT
11. Decontamination
11.1. Decontamination Procedure
If the instrument is to be shipped after being exposed to potentially hazardous material, it
should be decontaminated. The following procedure outlines how to decontaminate the
instrument before packaging and shipment.
11.2. Purpose of Decontamination
Decontamination minimizes the risk to all who come in contact with the instrument during
shipping, handling, and servicing.
11.3. General Considerations
•
Any laboratory instrument that has been used for clinical analysis is considered a
biohazard and should be decontaminated prior to handling. Intact skin is generally
considered an effective barrier against infectious Organisms; however, small abrasions
and cuts may not be always being visible. Prophylactic gloves must be worn when
handling instruments that have not been decontaminated. Gloved hands should be
considered contaminated at all times and must be kept away from eyes, mouth and nose
at all times.
•
Mucous membranes are considered prime entry routes form infectious agents. Wear eye
protection and a surgical mask when there is a possibility of aerosols.
•
Eating and drinking while decontaminating instruments is not advisable.
11.4. Procedure
•
A solution of .5% Sodium Hypo Chlorite (NaOCL) solution (Bleach) is used. Commercial
bleach is 5% NaOCL; household bleach is 3% NaOCL. When using commercial bleach,
use a 10:1 mixture; if using household bleach, a 6:1 mixture is required. This is a caustic
solution. It is important to wear gloves and eye protection when handling it.
•
Wipe down the carrier and all exposed surfaces of the unit with the bleach solution.
Remove the top shroud of the instrument and wipe down the top surface of the
instrument base, as well as the inside of the top shroud.
•
Reassemble the unit and discard the used gloves and towels.
Version No.: 4.4
Effective Date : August, 2010
Page 25 of 26
USER MANUAL
eazy CLOT
12. SAFETY CLEARANCE CERTIFICATE
Please complete all information requests on this form prior to returning the instrument to the
manufacturer or your local distributor for servicing, repairs or return. Thank you for your co-operation.
Customer
Contact
Address
Position
Dept
Tel:
Country
Fax:
Post Code
Model No.
Serial No.
Accessories
Return
Date of Purchase (if known)
Report Fault
Has the equipment been exposed to any of the following:
(*delete as applicable)
a) Blood, body fluids, pathological specimens
If YES, please specify
*YES/NO
b) Other Biohazard
If YES, Please specify
*YES/NO
Version No.: 4.4
Effective Date : August, 2010
Page 26 of 26