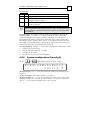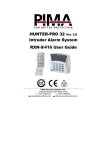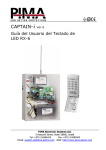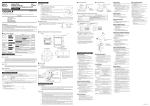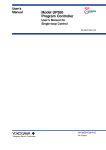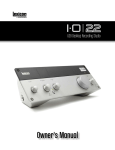
1
Ver 5 Intruder Alarm System Installation Guide PIMA Electronic Systems Ltd. 5 Hatzoref Street, Holon 58856, Israel ℡ +972-3-5587722 +972-3-5500442 [email protected] http://www.pima-alarms.com 2 CAPTAIN-I, Intruder Alarm System, Installation Manual PIMA Electronic Systems Ltd. does not represent that its Product may not be compromised and/or circumvented, or that the Product will prevent any death, personal and/or bodily injury and/or damage to property resulting from burglary, robbery, fire or otherwise, or that the Product will in all cases provide adequate warning or protection. The User understands that a properly installed and maintained equipment may only reduce the risk of events such as burglary, robbery, and fire without warning, but it is not insurance or a guarantee that such will not occur or that there will be no death, personal damage and/or damage to property as a result. PIMA Electronic Systems Ltd. shall have no liability for any death, personal and/or bodily injury and/or damage to property or other loss whether direct, indirect, incidental, consequential or otherwise, based on a claim that the Product failed to function. Warning: The user should follow the installation and operation instructions and among other things test the Product and the whole system at least once a week. For various reasons, including, but not limited to, changes in environment conditions, electric or electronic disruptions and tampering, the Product may not perform as expected. The user is advised to take all necessary precautions for his/her safety and the protection of his/her property. This document may not be duplicated, circulated, altered, modified, translated, reduced to any form or otherwise changed, unless PIMA’s prior written consent is granted. All efforts have been made to ensure that the content of this manual is accurate. Pima retains the right to modify this manual or any part thereof, from time to time, without serving any prior notice of such modification. Please read this manual in its entirety before attempting to program or operate your system. Should you misunderstand any part of this manual, please contact the supplier or installer of this system. Copyright 2005 by PIMA Electronic Systems Ltd. All rights reserved. You can contact us at: PIMA Electronic Systems Ltd. 5 Hatzoref Street, Holon 58856, Israel http://www.pima-alarms.com SAFETY INSTRUCTIONS Your CAPTAIN-i alarm system has been registered in accordance with EN60950 and its rules. EN 60950 requires us to advise you the following information: 1. In this alarm system exists hazards of fire and electric shock. To reduce the risk of fire or electric shock, do not expose this alarm system to rain or moisture. Pay attention: Telephone cords could be a good conductor for lightings energy. 2. Do not open the door of the alarm system. Dangerous high voltages are present inside of the enclosure. Refer servicing to qualified personnel only. 3. This alarm system should be used with AC 230V/110V, 50Hz, protected by anti electric shock breaker. To prevent electric shocks and fire hazards, do NOT use any other power source. 4. Do not spill liquid of any kind onto the unit. If liquid is accidentally spilled onto the unit, immediately consult a qualified service. 5. Install this product in a protected location where no one can trip over any line or power cord. Protect cords from damage or abrasion. 6. Disconnect all sources of power supply before proceeding with the installation. Pay attention: do not install low voltage wires near by AC power wires they should be separated. 7. Connect the AC transformer output to the terminal block on the control panel as marked. 8. Connect the AC line cord to line power terminals as marked. (GND; N; L) CAPTAIN-I, Intruder Alarm System, Installation Manual 3 Table of Contents Ch.1: 1.1 1.2 1.3 Introduction.................................................................................... 6 Main features of CAPTAIN-i .......................................................... 6 Alarm dialer ................................................................................ 7 The CAPTAIN-i panel and accessories............................................ 8 Ch.2: Partitioning ................................................................................... 11 Ch.3: Installation.................................................................................... 12 3.1 General .................................................................................... 12 3.2 Accessories and zones installation ............................................... 12 3.2.1 Zone inputs........................................................................................................ 13 3.2.2 Arming with key/remote control ...................................................................... 15 3.2.3 Sirens.................................................................................................................. 16 3.2.4 Keypad connection ........................................................................................... 17 3.2.5 Telephone.......................................................................................................... 18 3.2.6 Microphone unit MIC-200................................................................................ 19 3.2.7 Voice unit VU-20 .............................................................................................. 19 3.2.8 Mains voltage .................................................................................................... 20 3.3 Initial operation and programming............................................... 21 Ch.4: System Programming and Operation................................................ 22 4.1 General .................................................................................... 22 4.2 COMAX upload/download software............................................. 22 4.3 Quick local programming using PRG-22 ............................................. 23 4.4 LCL-11A: Adaptor for local programming ............................................ 23 4.5 Programming with the LCD keypad.............................................. 24 4.5.1 Key functions in the technician menu ............................................................. 25 4.6 Programming zones parameters................................................... 27 4.6.1 Zone sensitivity.................................................................................................. 27 4.6.2 Zone characteristics .......................................................................................... 27 4.6.3 Zone responses.................................................................................................. 28 4.6.4 Zone name ........................................................................................................ 29 4.7 Communication parameters ........................................................ 29 4.7.1 Communication with the monitoring station................................................... 29 4.7.2 Telephone communication with the CMS....................................................... 30 CAPTAIN-I, Intruder Alarm System, Installation Manual 4 4.7.3 4.7.4 4.7.5 GSM communication with the CMS................................................................ 30 Radio communication with the CMS............................................................... 30 Subscriber number, format, waiting time, hour for automatic test, & time between tests ..................................................................................................... 31 4.7.6 GSM-100 ........................................................................................................... 34 4.7.7 Programming area code number for GSM....................................................... 35 4.7.8 Setting report codes........................................................................................... 36 4.7.9 Setting monitoring station telephone numbers................................................ 37 4.7.10 Setting telephone line characteristics............................................................... 38 4.8 Programming system characteristics ............................................. 38 4.8.1 Setting siren and smoke output parameters.................................................... 38 4.8.2 System configuration 1 (config 1)..................................................................... 39 4.8.3 System configuration 2 (config 2)..................................................................... 40 4.8.4 System configuration 3 (config 3)..................................................................... 41 4.8.5 System configuration 4 (config 4)..................................................................... 42 4.8.6 System configuration 5 (config 5)..................................................................... 43 4.8.7 System configuration 6 (config 6)..................................................................... 44 4.8.8 Setting system responses to faults and events .................................................. 45 4.8.9 Setting entry delay time..................................................................................... 47 4.8.10 Setting exit delay time....................................................................................... 47 4.8.11 Allocating users to partitions............................................................................. 47 4.9 General programming options..................................................... 49 4.9.1 Changing the technician code.......................................................................... 49 4.9.2 Factory defaults ................................................................................................. 49 4.9.3 Fast loading........................................................................................................ 49 Ch.5: Faults and Troubleshooting............................................................. 50 5.1 General .................................................................................... 50 5.2 Faults displayed on the keypads................................................... 50 5.2.1 General fail indications..................................................................................... 50 5.2.2 Power fail indications........................................................................................ 51 5.2.3 Zones fail indications........................................................................................ 51 5.2.4 Communication & GSM fail indications ......................................................... 51 5.3 When the master code is unknown .............................................. 51 5.4 Troubleshooting......................................................................... 52 Ch.6: Accessories................................................................................... 55 CAPTAIN-I, Intruder Alarm System, Installation Manual 6.1 6.2 6.3 6.4 6.5 6.6 6.7 5 PRG-22 fast programmer ............................................................ 55 LCL-11A local upload adapter unit .............................................. 55 MIC-200 microphone unit .......................................................... 56 VU-20 voice unit ....................................................................... 56 Long-range radio transmitter ....................................................... 56 GSM transmitter......................................................................... 57 Keypads.................................................................................... 57 Ch.7: Appendixes................................................................................... 59 7.1 Appendix A – Default parameter tables ........................................ 59 7.1.1 Zones ................................................................................................................. 59 7.1.2 Codes and delays .............................................................................................. 60 7.1.3 Siren outputs...................................................................................................... 60 7.1.4 System configuration, general parameters....................................................... 60 7.1.5 Telephones dialer to subscriber........................................................................ 61 7.1.6 System responses to events............................................................................... 61 7.1.7 Monitoring station ............................................................................................. 62 7.1.8 Reporting codes (phone)................................................................................... 62 7.1.9 Reporting codes (radio)..................................................................................... 63 7.2 Appendix B – Programming formats table ............................................ 64 7.2.1 Pulse formats ..................................................................................................... 64 7.2.2 DTMF formats.................................................................................................... 67 7.3 Appendix C – Entering names...................................................... 68 7.4 Notes ....................................................................................... 69 CAPTAIN-I, Intruder Alarm System, Installation Manual 6 Ch.1: INTRODUCTION The CAPTAIN-i includes many sophisticated features that allow it to be tailored to customer requirements, yet it is easy to operate and program for both the users and the technicians. The CAPTAIN-i has been designed for immunity against RF and EMC (electromagnetic) interference to minimize false alarms. This manual includes installation instructions, a description of the programming options, and other information to make installation and maintenance quick and simple. For a basic understanding of the system and how to program and operate it on the user level, see the CAPTAIN-i User’s Guide. If questions remain or something is unclear, don’t hesitate to call your local PIMA distributor or PIMA directly at: PIMA Electronic Systems Ltd. Tel.: +972-3-5587722 Fax: +972-3-5500442 Email: [email protected] http://www.pima-alarms.com 1.1 ♦ ♦ ♦ ♦ ♦ ♦ Main features of CAPTAIN-i 6 programmable zones Two partitions Dialer: Up to three preset private telephone numbers and four Monitoring Station numbers Various modes of arming and disarming: keypad, key, remote control, automatic Four types of keypads: A simple LED keypad (RX/N-406), a seven segment and LED display keypad (RX-180), LCD keypads (RX/N-400 or RX/N-410) and Anti-vandal keypad RX/N-200 Up to six different keypads, connected in parallel CAPTAIN-I, Intruder Alarm System, Installation Manual ♦ ♦ ♦ ♦ ♦ ♦ ♦ ♦ ♦ 7 Two operating modes: Full or Home System Events is registered in memory Various operating codes: Primary Code, up to eight User Codes, and Short Code User Code #8 can function as DURESS code Optional temporary bypass of zones “Chime” mode per zone: operates the keypad buzzer when a zone is opened (e.g., to monitor a back door when system is disarmed) Monitoring Station Communicator: built-in dialer, integrated Long-Range Radio and Cellular Transmitters Inhibit system from arming in case of failure Short-keys for DURESS and FIRE codes 1.2 Alarm dialer The CAPTAIN-i includes an alarm dialer that is capable of calling three, predefined telephone numbers (programmed by the customer) via a PSTN connection or GSM transmitter1). NOTE: When using the GSM to call these private numbers to a telephone with caller ID support, it is advisable to assign a name, e.g. “Alarm at XXX”, to that number. The dialer calls these numbers under several programmed circumstances: activation of one of the zones, faults, etc. The dialer calls each subscriber twice and sounds an alarm tone. If the system configuration includes a voice unit, which has been defined as such, the dialer will not sound an alarm tone; instead the voice message recorded on the voice unit will be heard. The dialer terminates the calling cycle in the following circumstances: ♦ The system was disarmed ♦ All calls to the subscribers were completed (two calls to each subscriber) 1 Private dialer via GSM transmitter is supported with CAPTAIN-i version 5.5 and up and GSM-100 version 2 and up CAPTAIN-I, Intruder Alarm System, Installation Manual 8 1.3 The CAPTAIN-i panel and accessories P1 TRANSMITTER -i IN TA P CA U11 JP1 U7 (BATT.) JP2 F3 F2 BAT F1 AC F4 Z1 Z2 Z3 Z4 Z5 ZONES INPUT Z6 - +V SMOKE PGM SRN OUTPUTS - +V IN OUT KEYPAD AUD LINE SET TELEPHONE The circuit has four fuses: F1, F2, F3 and F4 ♦ Fuses F1 and F2 for Limiting Current: The circuit contains two automatic thermal fuses F1 - for the siren power supply (1.85A) F2 - for the keypad and detectors power supply (750mA) ♦ Fuses F3 (5A Fast) and F4 (1.6A Slow Blow) for Circuit Protection Fuses F3 and F4 protect the battery and the transformer, respectively, against high currents caused by card failure Detailed Description of Connection Terminals ♦ AC - Voltage Input: 14VAC input from the transformer. The cross-section area of the main AC cable must be at least 0.75mm2 ♦ Connection to Backup Battery: Two wires connect the back-up battery to the PCB. The red wire connects to the positive (+) contact of the battery, and the black wire connects to the negative (-) contact of the battery IMPORTANT! Ensure correct connections of battery contacts!!! Wrong connection can damage the PCB. ♦ ♦ Z1-Z6 - Zone Inputs: Zone inputs can be connected to all types of dry contact detectors. Each zone can be programmed to be an EOL protected zone (one or two EOL resistors) (+V) - Detector Voltage: Power supply for detectors that require operating voltage, such as: passive infrared detectors (PIR), ultrasonic detectors, etc. The F2 automatic thermal fuse protects all the +V outputs CAPTAIN-I, Intruder Alarm System, Installation Manual ♦ ♦ ♦ ♦ 9 SMOKE – Voltage Output for Smoke Detector and Auxiliary Devices: Switched minus power supply for smoke detectors that require reset for rearming. If a particular zone response is programmed as a smoke detector (See section “Zone responses” on page 28), its activation will cause disconnection of the power supply for certain duration of time, as preprogrammed (See section “Setting siren and smoke output parameters” on page 38). If there is no need for automatic reset (such as when several detectors are installed in the same zone and you wish to see which one caused the alarm), then reset may be done manually by pressing and . This output can be programmed to work inversely, i.e. holding normally disconnected and switched to (–) when activated PGM – Auxiliary Output: This is a general-purpose programmable output. It can be programmed to follow either the system status (i.e. if status is ON, the output is switched to GND; if status is OFF, it is disconnected) or follow a siren output (if a siren is ON, the output is GND and if a siren is OFF, the output is disconnected). For programming instructions see “System configuration 5 (config 5)” on page 43 and “Zone responses” on page 28 for further functions. A microphone MIC-200 or Voice Unit VU-20 can be connected to this output SRN - Siren Output: This output is connected to the siren. Two sirens in parallel may be connected with or without driver (See section “Sirens” on page 16). The F1 automatic thermal fuse protects this output KEYPAD - Connection to keypads: There are four terminals: (–) and (+V) for voltage supply to the keypad, data OUT from the control panel to the keypad and data IN from the keypad to the control panel. An automatic thermal fuse F2 protects the voltage supply. Up to six keypads can be connected in parallel. PIMA supported keypads are: RX/N-406, RX-180, RX/N-200, RX/N-400, and RX/N-410. IMPORTANT! Only one type of LED keypad (i.e. RX-130, RX-180, or RX/N-406) can be connected to a system. RX/N-200 is an exception and when its Status LED is used, it should be viewed as RX-180, otherwise it can be used with all keypad types. ♦ AUD - Connections to Microphone or Voice card: See sections “Microphone unit MIC-200” in “System configuration 3 (config 3)” on page 41 for programming instructions and sections 3.2.63.2.7 on page 19 for installation 10 ♦ CAPTAIN-I, Intruder Alarm System, Installation Manual LINE - Telephone Line Connections: A terminal for the telephone line in order to dial to private numbers and/or Monitoring Stations. For best results, connect the inputs as close as possible to the line source to provide best protection against tampering ♦ SET – Connections to telephone set: A terminal output to telephone, fax machine or answering machine (see “System configuration 3 (config 3)” on page 41) Jumpers ♦ JP1: Jumper used to control the polarity of the power connected to a DC Siren ♦ JP2: Jumper used to set the source of the Siren power: battery or unregulated voltage Jumper Jumper Siren Power Notes Position Source JP1 1-2 Negative The Siren Output supplies either negative (Common) or not-connected 2-3 Positive The Siren Output supplies either positive voltage or not-connected JP2 1-2 Battery Positive voltage is drawn from the battery 2-3 Unregulated Positive voltage is drawn from an unregulated power supply See section “Sirens” on page 16 for detailed description of Sirens installation CAPTAIN-I, Intruder Alarm System, Installation Manual 11 Ch.2: PARTITIONING CAPTAIN-i Ver 5 and up, can be divided into 2 partitions as follows: ♦ Each zone can be allocated either to partition #1, partition #2, or both ♦ Each user can be allocated either to partition #1, partition #2, or both ♦ Each partition can be programmed with a different Subscriber ID Number ♦ All keypads connected to the system share the same display For the following information on the topics listed below, please refer to the appropriate page: ♦ To program Subscriber ID Numbers to partitions: see page 31 ♦ To allocate Users to partitions: see page 47 ♦ LCD/LED keypad display with partitions used: see “User Manual” CAPTAIN-I, Intruder Alarm System, Installation Manual 12 Ch.3: INSTALLATION 3.1 General IMPORTANT! Before installing the system, make sure the battery and the main voltage are not connected. The COMAX Upload/Download DOS version does not support remote programming of CAPTAIN-i (version 3 and up). 3.2 Accessories and zones installation Connect the various accessories to the system according to the following diagram and instructions: IMPORTANT! Only one type of LED keypad (RX-180, or RX/N-406) can be connected to a system. RX/N-200 is an exception and when its Status LED is used, it should be viewed as RX-180, otherwise it can be used with all keypad types. Rechargeable battery BAT 2Vdc, 7.2AH max 14Vac, 17VA AC F4 Z1 Z2 Z3 Z4 Z5 ZONES INPUT - +V SMOKE PGM SRN OUTPUTS N.O. Detector connection (+) 10K ¼W - +V IN OUT KEYPAD (-) SMOKE Detector Keypad Connection AUD MIC-200/VU-20 10K ¼W 10K ¼W Z6 Yellow (OUT) Orange (IN) Red (+V) Brown (-V) Detector connection N.C. LINE SET TELEPHONE Telephone CAPTAIN-I, Intruder Alarm System, Installation Manual 13 IMPORTANT! Disconnect all sources of power supply before proceeding with the installation! 3.2.1 Zone inputs Each zone input can be connected with or without EOL resistor(s). When using one EOL resistor it should be a 10KΩ resistor and when using two EOL resistors they should be 10KΩ and 13KΩ (see figure on page 15). IMPORTANT! Each zone can be separately defined as either a regular zone or an EOL protected zone. But the whole system is configured to be protected with ONE or TWO EOL resistors. TAMPER NC + - RELAY NC Common Electrical Diagram PIR1 Zone + - Common Tamper Zone TAMPER NC RELAY NC JP1 JP1 Zone Common Common Connection without EOL resistor Zone 3.2.1.1 JP2 Connecting the TAMPER in serial to the Zone relay PIR1 JP2 The PIR relay and the TAMPER are separately connected; TAMPER is connected to 24 h Zone CAPTAIN-I, Intruder Alarm System, Installation Manual 14 3.2.1.2 Connection with one EOL resistor TAMPER NC TAMPER + - RELAY NC TAMPER NC Zone + - RELAY NC JP1 JP1 JP2 PIR1 Zone Common Tamper Zone 10K ¼W 10K ¼W 10K ¼W 10K ¼W Zone Common PIR (NC) Common EOL resistor with a Normally Closed (N.C) PIR JP2 PIR1 (-) Electric diagram for connecting an EOL resistor to a N.C PIR Connecting the EOL resistor in serial to the relay (zone) and the TAMPER The PIR relay and the TAMPER are separately connected (each with an EOL resistor); TAMPER is connected to 24 h Zone 10K ¼W TAMPER TAMPER NC + - RELAY NC JP1 Zone (-) Electric diagram for connecting an EOL resistor to a N.O PIR PIR1 TAMPER NC Common Zone Tamper Zone 10K ¼W 10K ¼W Common Zone PIR (NO) Common EOL resistor with a Normally Open (N.O) PIR 10K ¼W + - RELAY NC JP1 JP2 Connecting the EOL resistor in parallel to the relay (zone) and in serial to the TAMPER PIR1 JP2 The PIR relay and the TAMPER are separately connected (each with an EOL resistor); TAMPER is connected to 24 h Zone CAPTAIN-I, Intruder Alarm System, Installation Manual 15 3.2.1.3 Connection with two EOL resistors Two EOL resistors with a Normally Closed (N.C) PIR TAMPER NC 13K ¼W PIR (NC) Common 13K ¼W (-) RELAY NC TAMPER - Zone + JP2 Electric diagram for connecting two EOL resistors to a N.C PIR 3.2.2 JP1 PIR1 10K ¼W Zone 10K ¼W Connecting the EOL resistors to the relay (zone) and in serial to the TAMPER Arming with key/remote control +V SMOKE PGM SRN OUTPUTS Connect the key or relay output of the remote control receiver between Zone 6 and GND. Zone 6 must be programmed in the system as a key input (see section “System configuration 3 (config 3)” page 41). For better protection it is possible to connect a 10KΩ EOL resistor at the end of the line. The key can be of momentary or LATCH position type (see “System configuration 3 (config 3)” page 41). Electrical Diagram N.C. connection Z3 Z4 Z5 ZONES INPUT Z6 - 10K ¼W N.O. connection 10K ¼W Without EOL resistor GND 10K ¼W NOTE: When using an EOL resistor the input must be programmed accordingly (see section “Zone characteristics” on page 27). The key for the properties of Zone 6 may be set as either N.O. or N.C. CAPTAIN-I, Intruder Alarm System, Installation Manual 16 3.2.3 Sirens +V IN OUT KEYPAD +V SMOKE PGM SRN OUTPUTS - (BATT.) JP2 JP1 3.2.3.1 Speaker The siren is connected to the SRN and common (-) terminals. ♦ Connect JP1 between pins 2 and 3 ♦ Connect JP2 between pins 2 and 3 ♦ Program siren tone 1-8 (see “Setting Siren and Smoke Output Parameters” on page 38) (+) SPEAKER Z4 Z5 S INPUT Z6 - GND +V IN OUT KEYPAD +V SMOKE PGM SRN OUTPUTS Z6 Z4 Z5 S INPUT (BATT.) JP2 JP1 3.2.3.2 Low Current Siren When using a self-driven siren (e.g. Piezo) that consumes up to 2OO mA, connect the siren’s GND end to the SRN terminal and siren’s power to the +V terminal. ♦ Connect JP1 between pins 1 and 2 ♦ Connect JP2 between pins 2 and 3 ♦ Program siren tone 9 (see “Setting Siren and Smoke Output Parameters” on page 38) GND (+) SELF-DRIVEN SIREN CAPTAIN-I, Intruder Alarm System, Installation Manual 17 +V IN OUT KEYPAD +V SMOKE PGM SRN OUTPUTS (+) HIGH-CURRENT SIREN GND Z4 Z5 S INPUT Z6 - (BATT.) JP2 JP1 3.2.3.3 High Current Siren When using a high current siren that consumes more then 200 mA, connect the siren’s power end to the SRN terminal and siren’s GND to the common (-) terminal. ♦ Connect JP1 between pins 2 and 3 ♦ Connect JP2 between pins 1 and 2 ♦ Program tone 9 for the siren as described in “Setting siren and smoke output parameters” on page 38). NOTE: In this state, the siren consumes current from the control panel’s battery. 3.2.4 Keypad connection Connect all four wires coming from the keypad to the keypad terminal block, i.e. [-], [+V], [IN], and [OUT]. IMPORTANT! The keypad power should NOT be shared with any other device! NOTES: It is very important that the keypad wires are not passed through the same cable as the telephone wires. Doing this may cause the keypad signal to interfere with the telephone wires. Only one type of LED keypad (i.e. RX-180, or RX/N-406) can be connected to a system. RX/N-200 is an exception and when its Status LED is used, it should be viewed as RX-180, otherwise it can be used with all keypad types. CAPTAIN-I, Intruder Alarm System, Installation Manual 18 3.2.4.1 ♦ ♦ ♦ Accessing the programming RJ11 on RX/N-4XX keypads Release the screw (if fitted) holding the keypad’s cover and remove the cover by inserting a screwdriver into the two cracks (see left figure) Connect the RJ11 4x4 plug (from TC-3, LCL-11A, PRG-22, etc.) to the RJ11 female socket on the keypad PCB (see right figure) Replace the keypad’s front cover 3.2.5 Telephone Connect the pair of wires coming from the telephone line to the LINE connection terminals. Connect telephone sets, fax machines, etc., to the SET terminals SRN - +V IN OUT KEYPAD AUD LINE SET TELEPHONE Telephone Telephone line connection CAPTAIN-I, Intruder Alarm System, Installation Manual 3.2.6 19 Microphone unit MIC-200 AC F4 MIC-200 Z1 Z2 Z3 Z4 Z5 ZONES INPUT Z6 - +V SMOKEPGM SRN OUTPUTS - +V IN OUT KEYPAD AUD LINE SET TELEPHONE (-)12(+) CON.OUT. TAMP. Programming: ♦ In the “Zone Responses” screen, program (+) under PGM for each zone that will activate the MIC-200. ♦ In the “System Configuration 3” (page 41) program (+) under the letter G (PGM delayed). NOTE: Do not program delayed PGM and delayed SMOKE at the same time. In case both features are programmed together, the system will ignore delayed SMOKE. 3.2.7 - Voice unit VU-20 +V SMOKEPGM SRN OUTPUTS - +V IN OUT KEYPAD AUD LINE SET TELEPHONE AUDIO (blue) -Tr (yellow) +V (red) - (black) NOTE: Only one blue wire has to be connected to panel. Voice Unit VU-20 CAPTAIN-I, Intruder Alarm System, Installation Manual 20 Programming: ♦ In the “Zone Responses” screen (see page 28), program (+) under PGM for each zone that will activate VU-20– parameter “G”. ♦ In the “Config. 3” screen (see page 41), a (+) must appear under the letter V (voice unit). ♦ In the “Config. 3” screen (see page41), a (+) must appear under the letter G (PGM Delayed). 3.2.8 Mains voltage IMPORTANT! Verify that the end of the cord to be connected to the power supply is NOT connected to mains. ONLY A LICENSED ELECTRICIAN SHOULD CONNECT THE SYSTEM TO THE MAINS VOLTAGE. NOTE: 2 The cross-section area of the AC main cable must be at least 0.75 mm The hole through which the main cable passes must have either a grommet or bushing The wires of the main cable must be tied together with cable tie. The flammability of the cable tie must be UL 94 V-2 or better The system should be connected to an automatic circuit breaker that cuts off the power supply when necessary Connect the three wires to the connection terminals of the transformer housing. Be sure to connect them in the correct order. Check for continuity between the control unit grounding point and the electrical plug grounding point with an ohmmeter. The resistance must be less than 1 ohm. 3.2.8.1 Battery The CAPTAIN-i is designed to operate with a rechargeable 12-V battery. The charging voltage is 13.8 V. The system performs a battery test each time: ♦ The system is armed ♦ Every 24 hours ♦ Upon introduction of voltage to the system If the test fails, the system will respond as programmed in the failures responses (sounding sirens, dialing the Monitoring Station, etc.). CAPTAIN-I, Intruder Alarm System, Installation Manual 3.3 21 Initial operation and programming Check that all connections are as they should be. Then, connect the mains voltage to the system. After a few seconds, verify the following display on the LCD Keypad (type RX/N-400, RX/N-410): RX N - 4 1 0 V E R 1 . 7 P l e a s e w a i t . . . Connect the battery to the black and red fast-connect terminals: the red wire to the (+) and the black wire to the (-). IMPORTANT! Be sure this connection is done correctly NOTE: If the battery is connected before the mains voltage, “AC Fault” will be displayed until the main voltage is connected. Several seconds after power connection, the hour 00:00 and the status of the zones are displayed. In addition, the red Fault LED will be flashing and the word CLOCK will be displayed in the fault indication area. Other faults may also be displayed. At this point, enter the main code (factory default master code is 5555) and set the correct hour and date as follows: [ Master Code [ [ [current time (HH:MM 24 hours format) [current date (YY MM DD format) [ [ CAPTAIN-I, Intruder Alarm System, Installation Manual 22 Ch.4: SYSTEM PROGRAMMING AND OPERATION 4.1 General The CAPTAIN-i is supplied with pre-programmed default parameters (see “Appendix A – Default parameter table” on page 59). In general, for a standard installation, there is no need to change these parameters except for those that are user-specific, such as telephone numbers to be dialed in the event of an alarm. Some of the default parameters are: ♦ Zone 1 delayed ♦ Zone 2 entry delay ♦ Entrance delay of 20 seconds and exit delay of 60 seconds You can change the default parameters in one of four ways: 1. Manual programming using the LCD keypad; 2. Quick loading from the PRG-22 programmer, which connects to an RX/N-400/410 keypad and lets you program one of four different, predefined parameter groups (“programs”); 3. COMAX Up/Download remote programming with a PC and modem; 4. Local loading with a computer. 4.2 COMAX upload/download software The CAPTAIN-i can be programmed remotely via a telephone line. This is accomplished using an IBM PC compatible computer, a PIMA modem and the COMAX software. The COMAX Upload/Download software enables programming of all parameters, memory check, arming, disarming, etc. A complete description and explanations are in the COMAX User Manual. NOTE: COMAX DOS version CANNOT be used to program CAPTAIN-i version 3.0 and up! CAPTAIN-I, Intruder Alarm System, Installation Manual 4.3 23 Quick local programming using PRG-22 This type of programming can be done only via the installer menu and an LCD Keypad. Connect the PRG-22 to the designated connector according to the following drawing. In RX/N-400/410 LCD keypad models the RJ-11 connector is internal, on the PCB’s upper left side (see “Accessing the programming RJ11 on RX/N-4XX keypads” on page 18 for detailed connection information). IMPORTANT! OUT OUT IN +V -V F3 S1 SIREN KEY - JP5 S2 C N.O RELAY N.C - SMOKE - + IN KEYBOARD F4 ALARM ON/ OFF TMPR 1 TMPR 2 DO NOT connect the PRG-22 to an LED keypad. It may damage the programmer. PRG-22 NOTES: In CAPTAIN-i, versions 3.4-3.6, after loading parameters with the PRG-22, the power to the panel MUST be reset! To connect TC-3 with an LCD keypad to the RX/N-406 or to connect PRG-22 to RX/N-400/410, the keypad’s cover should be first removed as the RJ11 connector is internal. See “Accessing the programming RJ11 on RX/N-4XX keypads” on page 18. 4.4 LCL-11A: Adaptor for local programming The LCL-11A unit is used to program the CAPTAIN-i using PC and COMAX Upload/Download software. The unit provides the technician with an easy-to-use tool for quick programming. It is recommended that the system be programmed before installation of the LCL-11A. NOTE: The LCL-11A can be connected ONLY to an LCD keypad (RX/N-400, RX/N-410 with TC-3 Technician Cable). If the customer has a LED keypad, connect it to the technician’s LCD keypad, which you connect to the PC. CAPTAIN-I, Intruder Alarm System, Installation Manual F4 AC line ---A-B A 12:53 OUT IN +V -V S2 F3 S1 SIREN KEY - JP5 C N.O N.C RELAY SMOKE - + IN OUT KEYBOARD ALARM ON/ TMPR TMPR OFF 1 2 24 LLC A 11 COMAX D-type 9 pin to PC Serial (RS-232) Port e g COM1 PC 4.5 Programming with the LCD keypad The CAPTAIN-i is operated and programmed by means of two menus: A User menu and a Technician menu. To access the User enter the Master Code The Technician can be accessed in two ways: Enter Master Code, press and then enter Technician Code OR (CAPTAIN-i Ver 5 and up ONLY!) Direct access by entering the Technician Code At the Technician Menu, various options can be selected by pressing the number keys. Each key leads directly to a required menu, in certain cases, it is necessary to press afterwards. If you do not remember the key for the required operation, simply press one of the keys, use and until you reach the display for the required menu. Always press to confirm entered data. CAPTAIN-I, Intruder Alarm System, Installation Manual 25 The is used to exit from any state without saving the entered data. The following pages provide detailed instructions of each function. The CAPTAIN-i factory default codes are as follows: Master Code: 5555 Technicien Code: 1234 Some of the screens appear as an “options bar” in which you must determine whether certain option will be enabled (+) in the system or disabled (-). An example follows: BO F H I D E _- -+ + - - Bypass Z 1 ♦ Use ♦ Use the to enable (mark “+”) or disable (mark “-“) an option. The key has a toggle function ♦ ♦ To save the screen, press When the cursor is blinking, a description of the option appears at the top right side of the screen (Bypass in the above example) During programming of zone characteristics, the zone number appears at the bottom right side of the screen, for example Zn.Char4. To jump directly from one zone to another, press keys 1-6 to obtain the zone number or ♦ or to scroll between the options on the same screen to advance the zone numbers without saving. 4.5.1 Key functions in the technician menu Following entry of the correct technician code, the system enables modification and execution of functions that cannot be accessed by the end user. In this case, each key enables a specific function. The following are the keys and the function screens accessed from each. In some cases more than one function is allocated for one key, and in this case press key. or for the next function of that CAPTAIN-I, Intruder Alarm System, Installation Manual 26 Zone sensitivity p.27 Zone characteristics (24 hours, delayed, EOL, etc.) p.27 Zone responses (siren, PGM, communication, SMOKE, partition) p.28 Zone names Subscriber ID (telephone and radio, station format, auto tests) GSM Unit Report codes (telephone) p.29 p.31 p.34 p.36 Report codes (radio) p.36 Monitoring Station telephone numbers p.37 Telephone line connection characteristics (number of rings) Siren and SMOKE output parameters (type of ring and time of siren) System configuration (6 screens) p.38 p.38 Config 1 – telephone, automatic bypass, etc. P.39 Config 2 – zone reset, tone dial, etc. p.40 Config 3 – line snapping, voice unit, zone 6 key, etc. p.41 Config 4 – line test in mode ON/OFF, double report, etc. p.42 Config 5 – bypass report, keypad type, bypass request, etc. p.43 Config 6 – Panic, and disable arming during system failure. p.44 P.39 System responses to faults and events p.45 Delay times (Enter, Exit) p.47 User partitions p.47 Technician code p.49 System initialization – default parameters p.49 Fast Load (1-4) p.49 CAPTAIN-I, Intruder Alarm System, Installation Manual 4.6 4.6.1 27 Programming zones parameters Zone sensitivity [ , the display will show "sens.", desired zone sensitivity, then [ and enter the [ With the CAPTAIN-i, you may set the sensitivity level of each zone separately. Zone sensitivity: The length of opening time of the magnet/detector after which the zone causes an alarm. For a period less than this length of time, the opening is ignored by the system. The minimum length of time that can be set is 0.05 sec. (50 milliseconds) and the maximum length of time is 12.75 seconds. The zone sensitivity is set in increments of 0.05 sec. (50 milliseconds). For example, if you wish Zone 1 to respond to any opening longer than 200 milliseconds (=50 milliseconds x 4) and Zone 2 to respond to any opening longer than 400 milliseconds (=50 milliseconds x 8), you program Zone 1 for sensitivity 4, and Zone 2 for sensitivity 8 4.6.2 Zone characteristics [ , the display will show "Zone character.", enter the desired zone number To move between the zone functions, [ [ and or To enable a function change the cursor under the function to a “+” with . To disable a function change the cursor under the function to a “-“ with again To confirm the settings, [ CAPTAIN-I, Intruder Alarm System, Installation Manual 28 The characteristics can be programmed for each zone independently. The following is a description of the zone characteristics: BO F H I D E - - - + + - - B y p a s s Z n . C h a r 1 (B) Bypass - The system will ignore this zone. (O) N.O. - Used for detectors that are normally open, i.e. the dry contact is open when the detector is not activated. (F) 24 Hours - Opening the zone will cause an alarm in any system state: armed, home, or disarmed. (H) Active in “Home” Mode - Zone allocated to the group of zones active in “Home”. (I) Entry Delayed – opening this zone will start the Exit or Entry time. (D) Entry Follower - The zone will not cause an alarm if any delayed zone is open. No alarm during Entry Delayed. (E) End-of-line Resistor - The detectors connected to this zone are EOL protected. NOTE: A zone defined as entry-delayed or delay-dependent is also exit-delayed. NOTES: To navigate on bar, use and keys. Marking a “+” under a parameter enables it. Marking a “-” disables it. In order to change the mark from “-” to “+” (and vise versa) use 4.6.3 Zone responses [ the display will show "Zone response:" the desired zone number SP G F 1 2 + + - - + - [ and enter S i r e n Z n . R e s p 1 CAPTAIN-I, Intruder Alarm System, Installation Manual 29 The system responses are programmed for each individual zone. Thus, each alarm can initiate different responses depending on the zone that caused the alarm. Following is a description of the responses if “+” is programmed: (S) Siren - The siren will be activated. (P) Communicator - A zone opening shall cause the system to report to the CMS via phone (PSTN and/or GSM according to programming) and long-range radio. The system shall dial to a private account if one is programmed. (G) PGM - Switched PGM output (i.e. activating voice unit). (F) Fire - The ground connection to the SMOKE output will be disconnected for one minute to reset the detectors (see section Setting siren and smoke output parameters on page 38 to set the Smoke disconnected time). (1) Partition #1: Marking “+” for a zone will allocate it to partition #1 (2) Partition #2: Marking “+” for a zone will allocate it to partition #2 NOTE: If partitions #1 and #2 are marked, the zone will be activated only when both partitions are armed. 4.6.4 [ Zone name , the display will show "Zone response:” display will show "Zone names", [ , the [ Up to 8 characters can be written for each zone. This name will appear in the display of the LCD keypad when viewing the memory log, in cases of an alarm caused by this zone. See Appendix C – Entering names on page 68. 4.7 4.7.1 Communication parameters Communication with the monitoring station The CAPTAIN-i enables event reporting to the Central Monitoring Station (CMS) by telephone, GSM, and/or radio. A unique code can be programmed for each event in accordance with Monitoring Station and/or customer requirements, such as a response code to tampering with the box or to define zone number 5 as the zone connected to a Distress button. In the latter case, it is possible to program the Monitoring Station reporting code, telephone and/or radio, to report a distress event instead of a regular alarm by programming the appropriate code. CAPTAIN-I, Intruder Alarm System, Installation Manual 30 NOTE: Each of the reports mentioned above depends upon the corresponding option in the technician menu, i.e. for each type of event it is possible to include or exclude reporting to the Monitoring Station. For example, it is possible to cancel the reporting of arming/disarming using the phone communicator leaving radio reporting unchanged. If a fault event is reported to the Monitoring Station, the restoration of serviceability will also be reported as an event. For example, in the case of a low-battery fault, after the battery is re-charged “Battery restore” will be reported to the Monitoring Station. Each system/partition can be programmed with an account ID number of 1 to 9999 as well as the format types for telephone reporting and long-range radio reporting. 4.7.2 Telephone communication with the CMS Four telephone numbers to the Monitoring Station can be programmed, and the order of connection attempts to the Monitoring Station will be in the same order as programmed. Upon an unsuccessful connection attempt the system will try the next telephone number and so on until connection is established. When connection is established, the system will transmit to the Monitoring Station all events that accumulated until that time. 4.7.3 GSM communication with the CMS The GSM communicate with the CMS in the same manner the telephone communicator does with the following optional differences: ♦ When programmed, the GSM transmitter will use the account ID of the radio channel ♦ When programmed, the GSM transmitter will add the ‘area code for GSM’ number as programmed in the GSM programming screen 4.7.4 Radio communication with the CMS The CAPTAIN-i enables radio (wireless) communication to the Monitoring Station. The communication configuration is defined at installation. The reporting options and their control are similar to those for telephone communication with the Monitoring Station (see the preceding section). A separate account number to the radio Monitoring Station may be set up. CAPTAIN-I, Intruder Alarm System, Installation Manual 4.7.5 31 Subscriber number, format, waiting time, hour for automatic test, & time between tests The following screens program parameters for CMS reporting formats, accounts, and test times. 4.7.5.1 Subscriber ID for partitions and/or double report In this screen you program subscriber IDs for partitions and/or Double Report. The CAPTAIN-i allows each Monitoring Station subscriber to be given a personal customer ID for telephone communication and a number for radio communication. These numbers, which can be the same number or two different ones, identify the subscriber upon communication with the Monitoring Station. A second personal customer ID can be programmed for double reporting, i.e. reporting to two Monitoring Stations. In case partitions are used, the second programmed ID will be used for the second partition (see following table). Partitions enabled Double report enabled 2nd ID is used for... Not used 2nd CMS 2nd Partition 2nd Partition IMPORTANT! A subscriber number of 0 is understood as if no subscriber number was programmed, and thus there is no communication with the Monitoring Station The largest subscriber number for PIMA format is 8000 (for other formats, this depends on the specific format) Enter Technician Menu [ [ and receive the following display S u b s c r i b e r I . D P h : 0 0 0 0 R a d : 0 0 0 0 T e l. ( P S T N ) I D a c c o u n t n o . [ Program Telephone (PSTN) ID [ Either [ to exit, R a d io I D a c c o u n t n o . Radio ID CAPTAIN-I, Intruder Alarm System, Installation Manual 32 [ to program Subscriber IDs for second CMS or partition #2 and OR receive the following display D b l R e p . P h : 0 O r P a r t . R a d : 0 P h o n e (P S T N ) ID a c c o u n t n o . [ Program Telephone (PSTN) ID [ R a d io I D a c c o u n t n o . Radio ID [ 4.7.5.2 Setting Monitoring Station Format The CAPTAIN-i enables communication with various Monitoring Stations. The format definition determines the method of communication between the system and the Monitoring Station. See Appendix B – Programming formats on page 64 for a description of the possible formats, and select the format that is suitable for the specific Monitoring Station. [ [ X3 and receive the following display S t a t i o n 0 2 3 0 F o r m a t : < T = 5 8 8 9 [ Format numbers (see table on page 64) [ Radio format [ NOTE: The T= parameter in this screen is for radio format (given by the Monitoring Station). 4.7.5.3 Ack. time for PSTN & transmission count for radio In this section you can program the number of transmissions for the long-range radio channel (the default is 5). The Ack time (in seconds) is the time that the system will wait for a response from the Monitoring Station. Minimum waiting time: 20 seconds. Maximum waiting time: 60 seconds. CAPTAIN-I, Intruder Alarm System, Installation Manual 33 NOTES: The duration between the transmissions is 10 seconds, and cannot be changed. Ack Time is the time in seconds that the PSTN communicator would wait for CMS handshake signal after dialing. [ [ X4 and receive the following display A c k T i m e ( s e c ) R a d i o T r a n s . [ Program Ack Time (in seconds) as “20” [ Transmissions as “5” [ 2 0 5 Program number of Radio NOTES: Radio Trans. Is the number of transmissions per event in the radio channel. In Radio Trans. programming “0” means “5”. 4.7.5.4 Hour for Automatic Test The system will perform an automatic self-check with the Monitoring Station once every day at the hour set. [ [ X5 A u t o 0 : 0 and receive the following display t e s t h o u r [ Enter time (24 hours format HH:MM) for the automatic test [ 4.7.5.5 Time Between System Checks The system will perform an automatic self-check with the Monitoring Station at set intervals. This parameter sets the number of hours between checks, such as every 2 hours. CAPTAIN-I, Intruder Alarm System, Installation Manual 34 NOTE: In case you will define a test hour and a time interval for tests, the system will run a test at the preset hour AND between the time intervals you defined. [ [ X6 and receive the following display A u t o t e s t t i m e 0 h r . 0 m i n [ Enter time interval in hours and minutes [ 4.7.6 GSM-100 IMPORTANT! If GSM-100 is installed as a primary dialer with no PSTN connection, verify that the system is programmed as NOT connected to phone line (“-“ under P in the Config 1 screen, see page 39). For further information on how to install GSM-100, turn to GSM-100 Installation manual. To program CAPTAIN-i for GSM-100 do the following: Enter Technician Menu [ [ and receive the following display G S M U n i t E N T E R / N E X T / E N D [ and receive the following display G E R T P _ - - - - G S M E x i s t s (G) GSM Unit Installed: + - GSM unit installed and monitored by system GSM unit not installed CAPTAIN-I, Intruder Alarm System, Installation Manual 35 (E) Arming/Disarming Reports via GSM + - Arming/Disarming reported after one PSTN dialer failure Arming/Disarming reported after four successive PSTN dialer failures NOTES: When the alarm system identifies a failure in the PSTN line, the events are immediately transmitted through the GSM (including arming/disarming) regardless of the “E” parameter. While sending events via GSM, the system continues trying to send them via PSTN line. (R) Radio Account No. Reported via GSM + Account Number reported to CMS is taken from the Radio Account Config. Account Number reported is identical to PSTN. IMPORTANT! If a radio transmitter is not connected to the system, you must configure “t=0” in the “Comm. Format” screen (“t” represents wireless communication format). Otherwise, the events will be reported via radio as well! (T) Automatic Test Reports via GSM + - Automatic reports via GSM as well No automatic reports via GSM (P) Parallel Report via PSTN and GSM + - 4.7.7 All events are reported both via PSTN and via GSM No parallel report via PSTN and GSM Programming area code number for GSM The GSM Pre Number is the constant digit(s) that will be added to the CMS numbers for GSM communication. The pre number is usually used for adding the area code of the PSTN number. [ [ [ G S M P r e 0 1 9 2 and receive the following display N u m b e r [ Enter the designated pre number (up to 4 digits) [ CAPTAIN-I, Intruder Alarm System, Installation Manual 36 4.7.8 Setting report codes For telephone report codes, press <P>" press , the display will show "Report Codes , enter the required report codes and For radio report codes, press [ [ [ , the display will show "Report Codes <T>", enter the required report codes and [ The CAPTAIN-i allows you to set a reporting code to report each event to the Monitoring Station. The code can be comprised of one or two digits in accordance with the report format. Each digit of the code can take on the values 0 through 15, whereby the values 10 through 15 are represented by the letters A-F as follows: 10 – A 13 - D 11 – B 14 - E 12 – C 15 - F These values are entered using , as follows: Verify that the display cursor is on the digit that you wish to change. To obtain a digit between 0-9, press on the corresponding key directly. To obtain a digit between A and F, press until you obtain the desired letter. Each screen has several parameters, as follows: Z1-Z6 Alarm reporting codes according to zone RS1-RS6 Reporting code for zone restores Zone Fail Reporting code for zone fail AC/RESTR Reporting AC failure/ code for restore LB/RESTR Reporting code for low battery/ code for restore PF/RESTR Reporting code for low card voltage (less than 9V)/ code for restore PH/RESTR Reporting code for telephone failure (good for Radio reporting)/ code for restore TST Reporting code for testing (automatic, manual, remote) PNC FUS/RESTR Reporting code for panic (pressing of the Failure of detector power/ code for restore and keys) CAPTAIN-I, Intruder Alarm System, Installation Manual ONG/OFG ON1-OFF1, ON8-OFF8 37 Reporting code for system arming with a non-user code (short code, for example)/ Reporting code for system disarming with a non-user code Reporting code for system arming/disarming with User 1 to user 8 code BPS/RST Reporting code for arming with bypassed zones/ code for stopping of siren operation Reporting code FF is the control panel default for PIMA format (PAF) and for CONTACT ID. When the reporting codes are unchanged and another format is being used, the reporting code that will be sent is FF. NOTE: The PF reporting code (very low voltage) indicates that the battery is about to be empty. This should be defined at the Monitoring Station as an emergency event requiring immediate attention. 4.7.9 Setting monitoring station telephone numbers Press , the display will show “Station Phone”. Press , the display will show "Telephone 1", enter the telephone number and press . The display will show "Telephone 2", enter the telephone number and press , the display will show "Telephone 3", enter the telephone number and press , the display will show "Telephone 4", enter the telephone number and press The CAPTAIN-i is capable of calling the Monitoring Station and reporting various types of events. It is possible to program four different numbers (up to 16 digits per number). The system begins to call the first number. If the connection is unsuccessful, the system will try (8 trials) to dial the other numbers, until a successful connection is made or until eight trials have been made. If a successful connection is not established, a Communication Fault is recorded in the memory and FAULT Led will blink. NOTE: If dialing is done through a switchboard and there is a digit to get an outside line (usually 9), a 1-second delay between the dialing of that digit and the rest of the number may be programmed by entering . For example, if the number to be dialed via a switchboard is 03-5569313, the number should be programmed as follows: 9*035569313 CAPTAIN-I, Intruder Alarm System, Installation Manual 38 After setting “Telephone 4,” the display will show “Pre Number.” The installer may program one or more digits to be dialed before all the above four Monitoring Station telephone numbers. Programming this screen increases the number of digits available for the Monitoring Station telephone numbers from 16 to 22. This option should be used when the system will be dialing the Monitoring Station via a local service provider who requires the use of pre-dialing digits. Set “Pre Number,” and [ 4.7.10 Setting telephone line characteristics Program in this screen the number of rings is designed for remote programming with COMAX via telephone line. In general, the number of rings should be left at its default setting (10 rings). [ [ , the display will show "Phone Line:" enter the number of rings and [ , [ 4.8 Programming system characteristics 4.8.1 Setting siren and smoke output parameters Set the following in this screen: ♦ ♦ ♦ The duration (in seconds) of the siren alarm time The length of time that SMOKE output will disconnect the (-) [0 = 60 seconds] The type of siren tone which will sign (There is a choice of 10 types: 0-9) NOTE: Sound type 9 should be chosen only when a self-drive siren is being used (in which case, it is also necessary to move Jumper JP1 to the left side, see page 16). CAPTAIN-I, Intruder Alarm System, Installation Manual [ , the display will show “Siren & Smoke” duration (in seconds) of the alarm [ time (sec)”, enter the time (in seconds) “Alarm tones:”; enter the number 4.8.2 39 [ enter the the display will show “Smoke [ , the display will show [ System configuration 1 (config 1) [ , the display will show “System config.:” show “config 1” [ , the display will NOTES: Scroll through the various functions with and . Marking a “+” under a parameter enables it. Marking a “-” disables it. In order to change the mark from “-” to “+” (and vise versa) use To confirm [ P P T P T B + - - - - + P h o n e C o n f i g 1 (P) Telephone - The system will perform all the functions associated with the telephone, such as: dial to Monitoring Station, dial to private numbers, respond to a call, test the line during operation, etc. If the CAPTAIN-i is not connected to a telephone line, program a “-” to avoid telephone FAULT display. (P) Remote Test by Phone - If two or maximum three rings are detected while the system is ARMED, the system will dial to the Monitoring Station by telephone and report a TEST event. (T) Remote Test by Radio - If two or maximum three rings are detected while the system is ARMED the system will transmit a TEST event by radio. (P) Automatic Test to Monitoring Station by Phone - The system will send a TEST event to the Monitoring Station by telephone at a preset time interval. The time interval can be set in the screen “Time Between System Checks” (see page 33). CAPTAIN-I, Intruder Alarm System, Installation Manual 40 (T) Automatic Test to Monitoring Station by Radio - The system will send a TEST event to the Monitoring Station by radio. The time interval can be set in the screen “Time Between System Checks” (see page 33). (B) Automatic Zone Bypass - If this feature is enabled, a zone that causes an alarm 3 times will be automatically bypassed until the system is disarmed. Note that only the zone that caused the alarm will be bypassed. 4.8.3 System configuration 2 (config 2) [ [ [ the display will show "config 2" NOTES: Scroll through the various functions with and . Marking a “+” under a parameter enables it. Marking a “-” disables it. In order to change the mark from “-” to “+” (and vise versa) use To confirm [ T D Z B R T - - - - - + D i a l T n B p C o n f i g 2 (T) Dial Tone Bypass Enables the system to bypass dial tone detection before dialing. This is intended for places with non-standard dial tones. When this option is enabled, there will be no telephone line check when the panel is armed or disarmed. (D) Delayed on “+” The system will be armed after an arming report is received by the Monitoring Station. “Message received” is displayed in the LCD display area. (Z) Zone Display “+”: When the system is armed, the zone status is shown on the lower line of the LCD display (as it is when in disarmed mode). On the LED keypad, open zones are displayed in both ARMED and DISARMED states. CAPTAIN-I, Intruder Alarm System, Installation Manual 41 (B) Keypad Buzzer Activated with Alarm “-“: Keypad buzzer is not activated when the alarm is activated. “+”: Keypad buzzer is activated every time the alarm is activated. (R) Reset per Zone “-“: Restore is reported only for siren and is only after it stops, without indicating which zones are opened or closed. “+”: Restore of zone after alarm is reported. Reports which zones have been closed and which are still open after siren stops. NOTE: Do not use this parameter with PAF (PIMA) format. (T) Tone Dialing “+”: The system will dial using tones. “-“: The system will dial using pulses. 4.8.4 System configuration 3 (config 3) [ [ X3 S D V K K G - - - - - - the display will show "config 3" P h o n . S n a p C o n f i g 3 (S) Line Snapping - This feature allows the CAPTAIN-i to share the phone line with other devices such as telephone or answering machine. When calling to the control panel, the control panel picks up the line after a programmable number of rings (see section “Setting telephone line characteristics” on page 38). If “line snapping” is programmed (a “+” appears under the letter S), the control panel will “listen” to the line after the external device picks up the line and will wait for one minute to identify the COMAX code. Once the right code is identified, the panel will disconnect the external device and answer the call. NOTE: When using this option do not connect a Fax machine or Data Modem to the same line as that of the control panel. (D) Download Disable - Setting a “+” will block the Up/Download process if the primary code has not been entered. Thus, remote download via telephone lines cannot be done without the customer being present (Entering the master code CAPTAIN-I, Intruder Alarm System, Installation Manual 42 and pressing twice allows you to unblock the Up/Download process for 4 minutes). (V) Voice Unit -A “+” programs the system to a voice unit that is connected to the CAPTAIN-i. In this case the CAPTAIN-i will not sound the synthesized alarm tone when dialing to a telephone. NOTE: The voice unit is activated per zone. To fully program the system if a voice unit is connected, two things must be done: (1) A “+” must be set under the G option in the Zone Response screen (see section Zone responses on page 28), and (2) a “+” must be set under the G (PGM Delayed) in the Config. 3 screen (the current screen). (K) Zone 6 Key - A “+” defines Zone 6 as connected to a key. (K) Type of Key - A “-“: Momentary key. The normal state is N.O. When applying ground to the input for a short time and returning to “open circuit”, the system changes its state from armed to disarmed or vice versa. This application is suitable for momentary keys or wireless remote keys. A “+”: Two-state key. The system is armed if “open” is detected. If “close” is detected the system is disarmed. (G) PGM Delayed - When a voice unit is connected to the PGM. The output will switch the “-“ only after the system completes dialing a subscriber (so that the recorded message will not be heard at the same time as the dialing is occurring, which could cause communications problems). 4.8.5 [ System configuration 4 (config 4) [ x4 the display will show "config 4" L L D A S S L i n e C h e c k - - - - - C o n f i g 4 (L) Telephone Line Check in ON - In ON state, the system checks the telephone line every minute. (L) Telephone Line Check in OFF - In OFF state, the system checks the telephone line every minute. (D) Double report / (A) Double Report All – As you can see in the following table, the CAPTAIN-i can double report or split-report to two different central stations. CAPTAIN-I, Intruder Alarm System, Installation Manual 43 Programming: A - D + + + DESCRIPTION Regular report: Report only once Double report: Report all events to station 1 and report only irregular events to station 2 Double report: Report all events to station 1 and report all events to station 2 NOTE: When using double or split-reporting, telephone station #1 & #2 will report to central station #1, and telephone station #3 and #4 will call central station #2 (see page 33). (S) Invert Smoke - The smoke output will work in an inverted manner from the ordinary situation, i.e. when a “+” is displayed under the letter S, the smoke output is disengaged in an ordinary situation, and during an event (if thus programmed), the smoke output will be switched to GND. This is useful when this output is used to operate a Piezo siren or as an output to track the siren state. The length of time that the smoke output is active may be programmed in section Setting siren and smoke output parameters on page 38. (S) 2 Ring Snapping - Setting a “+ “ will enable connection to control panel at once. 1. Call the system for two rings. 2. Hang up the phone and wait 5 seconds. 3. Call again to the system. 4. The system will pick up the line immediately. 4.8.6 [ System configuration 5 (config 5) [ X5 and the display will show "config. 5" B K B 2 L S 4 B y P s R e p r t - - - - - - C o n f i g 5 (B) Bypass Report - If a “+ “ is set, the control panel will report when zone(s) are bypassed. (K) RX-130 Keypad – Selecting keypad type (see Table 1). (B) Bypass Request- If a “+” is set, while arming the system, if one or more zones that programmed to be “Delayed” or “Entry Follower” are open, the system will alert. If “-“ is set, only the immediate open zones will alert. CAPTAIN-I, Intruder Alarm System, Installation Manual 44 NOTE: In order to arm the control panel, zones must be closed. (2) EOL 2 Res. – For zones defined as End of Line protected (See Zone characteristics), sets the system to work with two EOL resistors for short and cut protection. See figure on page 15. (L) Listen-in – For operation of microphone with CMS. Zones that are programmed to operate PGM (see “Zone responses” on page 28), and Delayed PGM (see System configuration 3 (config 3) on page 41), will activate the microphone after reporting to the CMS, and will keep the line open for 3 minutes. NOTE: Relevant only for Contact ID format. (S) Delay Smoke – When a voice unit is connected to the SMOKE output. The output will switch the “-“ only after the system completes dialing a subscriber (so that the recorded message will not be heard at the same time as the dialing is occurring, which could cause communications problems). (4) RX/N-406 Keypad – Selecting keypad type (see Table 1). LED Keypad Used K 4 RX-180 RX-130 + RX/N-406 + RXN-6 + + Table 1 - Setting Keypad Type 4.8.7 System configuration 6 (config 6) Technician Menu P D X - - - [ [ U s e r X6 and receive the following display 8 = P a n i c C o n f i g 6 (P) Panic - A “+” defines that User Code 8 will send Duress event to Monitoring Station. (D) Disable Arm with fails - A “+” defines that in case of an AC Failure or Low Battery, or Telephone, the system could not be armed. (X) For future use CAPTAIN-I, Intruder Alarm System, Installation Manual 4.8.8 45 Setting system responses to faults and events [ the display will show: “System Response” Response. The display will show: SP G F - - - - [ or [ for Panic S i r e n Pa n i c R e s p to scroll between responses. (S) Siren: A (+) will activate the siren. (P) Communication: A (+) will cause the system to dial and/or send radio transmission to the Monitoring Station and the private account (if programmed.) (G) PGM: A (+) will switch the PGM output (F) Fire: A (+) will switch the smoke output (see section Setting siren and smoke output parameters on page 38 to set the Smoke disconnected time.) NOTE: Press to confirm and/or to move to the next fault/event. This operation must also be repeated in each of the following faults/events as well. [ for AC Voltage drop. The display will show: "AC Fail.” [ or SP B G - - - - to scroll between responses. S i r e n A C F a i l (S) Siren: A (+) will activate the siren. (P) Communication: A (+) will cause the system to dial and/or send radio transmission to the Monitoring Station and the private account (if programmed.) (B) Buzzer: A (+) will activate the keypad buzzer. (G) PGM: A (+) will switch the PGM output. CAPTAIN-I, Intruder Alarm System, Installation Manual 46 [ for Response Time. Enter the response time in minutes [ for Battery Fail SP B G - - - - S i r e n B a t f a i l (S) Siren: A (+) will activate the siren. (P) Communication: A (+) will cause the system to dial and/or send radio transmission to the Monitoring Station and the private account (if programmed.) (B) Buzzer: A (+) will activate the keypad buzzer. (G) PGM: A (+) will switch the PGM output. [ for Telephone line failure SP B G - - - - S i r e n P h n . f a i l (S) Siren: A (+) will activate the siren. (P) Communication: A (+) will cause the system to dial and/or send radio transmission to the Monitoring Station and the private account (if programmed.) (B) Buzzer: A (+) will activate the keypad buzzer. (G) PGM: A (+) will switch the PGM output. [ for response time in minutes. [ for zone failure (zones defined as EOL protected) SP B G - - - - S i r en Z o n . f a i l CAPTAIN-I, Intruder Alarm System, Installation Manual 47 (S) Siren: A (+) will activate the siren. (P) Communication: A (+) will cause the system to dial and/or send radio transmission to the Monitoring Station and the private account (if programmed.) (B) Buzzer: A (+) will activate the keypad buzzer. (G) PGM: A (+) will switch the PGM output. [ for Arming/Disarming Report ST P G - - - - S i r e n C h e c k K e y s t a t (S) Siren: A (+) will activate one short beep in arming( and two beeps in disarming (only when the system is armed with Key). (T) Report by Radio Transmission: A (+) will send radio transmission every time the panel is armed or disarmed. (P) Report by Phone: A (+) will dial central station. (G) PGM: A (+) will switch the PGM output. Response Time: Time between the moments the system identifies a fault until it is reported. Each fault has a different time response. Response time 0 means immediate report. 4.8.9 Setting entry delay time [ [ , the display will show: “Delay times", and the display will show: "Ent. Delay time:” enter the required delay time in seconds (up to 250 seconds) 4.8.10 Setting exit delay time [ [ [ , the display will show: “Delay times", and the display will show: "Exit Delay time:” enter the required delay time in seconds (up to 250 seconds) 4.8.11 Allocating users to partitions In this screen you assign user codes for partitions #1 and #2. A user allocated to both partitions can arm/disarm the entire system. CAPTAIN-I, Intruder Alarm System, Installation Manual 48 [ Technician Menu following screen is displayed [ (“User Partitions”) U s e r s f o r + + + + + + + + 1 2 3 4 5 6 7 8 9 [ The P a r t 10 11 12 13 14 1 15 16 [ Mark “+” above the user/s no. designated for partition #1 [ allocate users to Partition #2, in the same manner. When finished To exit at any stage, press to [ . [ NOTES: To navigate on bar, use and keys. Marking “+” allocates the user to the partition. Marking “-“ excludes him. In order to change the mark from “-” to “+” (and vise versa) press IMPORTANT! Entering the Master Code + when one of the partitions is already armed will arm the other partition as well. Entering the Master Code + disarm the entire system. when both partitions are armed will CAPTAIN-I, Intruder Alarm System, Installation Manual 4.9 General programming options 4.9.1 49 Changing the technician code [ [ , the display will show: “Technician code” and enter the new technician code (4-6 digits) The technician code provides access to the Service menus from the customer menu. IMPORTANT! When the control panel is re-connected to power, the Master Code and the Technician Code default to the factory settings for 30 seconds (i.e., Master Code is 5555 and Technician Code is 1234). This is useful when these codes where lost and new ones should be programmed. In case the technician code begins with 0, it will not default to 1234 when reconnecting the power, e.g., 012345. 4.9.2 Factory defaults [ ' the display will show: "Defaults?", press , the display will show: "Are you sure?"' press The CAPTAIN-i allows restoring all system parameters to their factory defaults (except for the Master and Technician codes). See Appendix A – Default parameter table on page 59 for the factory default values. NOTE: Default erases all previous programming (memories, codes, etc.). 4.9.3 [ Fast loading [ , the display will show: "Fast-Load?"' press 1, 2, 3 or 4 Connect the PRG-22 to an LCD keypad using a special connector. The CAPTAIN-i allows fast programming with the use of PRG-22, saving programming time of parameters such as Monitoring Station. CAPTAIN-I, Intruder Alarm System, Installation Manual 50 IMPORTANT! In case the system was installed with an LCD keypad, connect the programmer to the installed unit. In case the system was installed with a LED/digital keypad, connect the keypad to an LCD keypad, and connect the LCD keypad to the programmer. See figure on page 23. Ch.5: FAULTS AND TROUBLESHOOTING 5.1 General The CAPTAIN-i possesses many operating parameters and options. Some of the system operations depend on the manner of programming, and if one of the parameters is not programmed correctly, the operation depending on it will not be executed. This chapter describes the faults displayed on the keypad and their meanings, as well as various problems that may be encountered due to improper programming, and options for troubleshooting the faults that can occur due to incorrect installation and/or programming. 5.2 Faults displayed on the keypads In the event of a system fault, the “Fault” lamp flashes. On the LCD keypad, a description of the fault appears on the left side of the upper line in the display area. On the SEVEN SEGMENT keypad, a description of the fault or faults appears (and remains) in the alphanumeric display area. The following are the faults displayed when they occur: 5.2.1 General fail indications LCD (RX/N 400/410) Clock Keyboard not connected LED (RX-180) DESCRIPTION Appears after initial power input or after total power reset (AC and battery) A problem with keypad connection to the panel CAPTAIN-I, Intruder Alarm System, Installation Manual 5.2.2 Power fail indications Battery Low DC DC FUSE AC Line 5.2.3 Low battery power Very low DC supply to the PCB Failure in detectors power line (+/-) AC mains power failure Zones fail indications Trouble 5.2.4 51 Failure in one or more EOL protected zones (i.e., detector was shorten or cutoff) Communication & GSM fail indications Communic. Phone GSM Unit GSM Sgnl GSM SIM GSM Com. Communication problem between control panel and the Monitoring Station The system did not recognize a dial tone GSM is not connected/operating properly Bad reception or interference in GSM channel No SIM Card detected in GSM or fault detected with card Communication failure between GSM and CMS NOTE: For further information on how to install GSM-100, turn to GSM-100 Installation manual. 5.3 When the master code is unknown To assure the user maximum protection and security, it is not possible to program the system without entering the master code. When the master code is not known, however (if it is forgotten, for example), the following operations must be performed: 1. Disconnect mains AC voltage from the system 2. Open the control unit box 3. Disconnect the battery 4. Wait several seconds, connect the battery 5. Wait until the display with the clock appears on the keypad 6. Enter the factory default master code (5555) CAPTAIN-I, Intruder Alarm System, Installation Manual 52 7. Program a new master code (it is not possible to see the old code) 8. Close the control unit box 9. Connect mains AC voltage NOTE: After battery connection the system enables access by means of the factory code for 30 seconds only. If you do not gain entry in this time, repeat the operations from the beginning. The above procedure is to be followed also if the technician code has been forgotten (unless the technician code was programmed to begin with digit 0). 5.4 Troubleshooting Clock This fault appears after initial power input such as first time operation, or operation after AC failure and battery failure. ♦ Enter new time and date (see section “Initial operation and programming” on page 21) Battery Indicates low battery power and appears after battery test and after a prolonged AC failure. ♦ Allow the battery to recharge; wait for about 24 hours ♦ If the fault persists replace the battery Low DC Indication of a very low DC supply to the PCB. This failure is a result of a prolonged AC failure. The system parameters cannot be programmed while the system displays this message. Expected duration of operation with this fault is approximately one hour depending on the detectors’ power consumption. ♦ Connect AC ♦ Replace battery if necessary AC Line AC power failure. If other electrical appliances are working, check the switch or fuse connected to the system. ♦ Connect AC power ♦ Blown AC fuse (F4) CAPTAIN-I, Intruder Alarm System, Installation Manual 53 Trouble Indicates either a short line or an open line and can appear only if the zone is EOL protected. The flashing red failure light will be accompanied by an indication, “F”, above the zone number on the LCD display KEYBOARD NOT CONNECTED This is an indication that there is no data transfer between the control panel and the keypad. Check the following: ♦ A proper connection between the “OUT” terminal block on the control panel and the input to the keypad via the yellow wire ♦ The Jumper at the back of the keypad is set over the leftmost and middle pins ♦ Low DC voltage indication if the PCB is connected without AC. If this is the case replace the battery ♦ Check for malfunction in the keypad and replace keypad if necessary ♦ Replace the control panel PCB if the problem persists If there are several keypads connected to the control panel and all show the same indication then either the control panel PCB is malfunctioning or there is a short on one of the wires. Telephone Indicates no dial tone for the telephone line connected to the control panel. This fault appears if there was no dial tone the last time the system checked the line. If this fault appeared when the system was in disarmed mode, it will continue to appear even when the line returns, unless there is a telephone line check in the OFF state. To remove the fault indication in this case, arm and then disarm the system. No telephone communication to Monitoring Station, including while in test mode (the display shows “communic.”) This indication appears if the CAPTAIN-i phone communicator cannot transfer reports to the Monitoring Station. Possible reasons for this: phone failure or line is not connected. Check the following: ♦ The telephone line is properly connected to the IN inputs on the terminal block ♦ In “Config 1” the P for telephone is programmed with “+” ♦ At least one telephone number is programmed for the Monitoring Station ♦ The telephone Customer ID for the Monitoring Station is different than 0 ♦ The station telephone ID corresponds to the Monitoring Station ♦ Format is compatible with the one used in the Monitoring Station ♦ Correct dial method, i.e. pulse or tone 54 ♦ ♦ CAPTAIN-I, Intruder Alarm System, Installation Manual Correct telephone numbers have been entered A prefix (usually 9) is programmed if the system works through a switchboard No radio transmission to Monitoring Station Check the following: ♦ Proper connection from the Captain-i PCB to the transmitter ♦ Radio Customer ID is not 0 ♦ Station radio ID corresponds to the Monitoring Station ♦ Format is compatible with the one used in the Monitoring Station No telephone connection to private telephone numbers Check the following: ♦ The telephone line is properly connected to the IN inputs on the terminal block ♦ In “Config 1” the P for telephone is programmed with “+” ♦ At least one telephone number is programmed for private numbers ♦ Correct telephone numbers have been entered ♦ Correct dial method (pulse or tone) ♦ A prefix (usually 9) is programmed if the system works through a switchboard System is not answering telephone calls Check the following: ♦ The telephone line is properly connected to the IN inputs on the terminal block ♦ In “Config 1” the P for telephone is programmed with “+” ♦ The system is programmed to pick up after a reasonable number of rings – Not more than 10 Automatic arming is not functioning Check the following: ♦ Clock fault (clock is set to the correct time) ♦ The Automatic arming feature is activated. See user’s manual. Activation of a zone does not cause an alarm Check the following: ♦ The Zone is not temporarily or permanently bypassed ♦ The zone is programmed for the correct response (siren, relay, etc.) ♦ Power supply is not low – AC or correct battery backup power supply ♦ Detectors are installed correctly and not malfunctioning CAPTAIN-I, Intruder Alarm System, Installation Manual 55 Ch.6: ACCESSORIES 6.1 PRG-22 fast programmer Used for fast programming of the control panel from 4 predefined programs. See section Quick local programming using PRG22 on page 23 and section Fast loading on page 49. 6.2 LCL-11A local upload adapter unit The LCL-11A unit is an uploading adaptor for local system programming using COMAX software. This add-on allows the technician to program the panels through the PC. NOTE: The LCL-11A can be connected ONLY to an LCD keypad (RX-150, RX-160, RX-400, RX-410 or UPR-3) version 10 and up! 56 6.3 CAPTAIN-I, Intruder Alarm System, Installation Manual MIC-200 microphone unit Used for listening in via the telephone line. See section Microphone unit MIC-200 page 19 for a description of the connection of this unit to the control panel. 6.4 VU-20 voice unit The system can be connected to a voice unit. In case of burglary, the unit calls a private phone number and plays the message recorded on the voice unit instead of a siren tone (see page 19.) 6.5 Long-range radio transmitter Used to connect the wireless Monitoring Station to the system. Long range radio that transmits full data in VHF or UHF. CAPTAIN-I, Intruder Alarm System, Installation Manual 6.6 57 GSM transmitter Used to connect the Monitoring Station to the system via the cellular network (GSM). A triple-band g18 Motorola engine. IMPORTANT! Make sure you connect correctly! Disconnect the main power before installation!!! 6.7 Keypads RX/N-400/410 Regular and large 2X16 characters LCD keypads RX/N-406 LED keypad 58 CAPTAIN-I, Intruder Alarm System, Installation Manual RX-180 Numeric LED Keypad RX/N-200 External anti-vandal keypad CAPTAIN-I, Intruder Alarm System, Installation Manual 59 Ch.7: APPENDIXES 7.1 Appendix A – Default parameter tables 7.1.1 Zones Zone Definition/Zone Number 1 2 3 4 5 6 Bypass Fire detector + + + + - + + + + - + + + - + + + - + + + - + + + - Sensitivity Partition #1 Partition #2 8 + - 8 + - 8 + - 8 + - 8 + - 8 + - N.O. 24 hours Home Entry Delayed Entry Follower End of line Siren Communication PGM CAPTAIN-i Intruder Alarm System Installation Manual 60 7.1.2 Codes and delays To program these parameters, except the Technician Code, enter the master code and then press (“CODE”). The Technician’s Code is programmed through the Technician Menu. Master Code: 5555 User Code #1 to #8: ------ Technician Code: 1234 Short Code: -- Entry Delay: 20 seconds Exit Delay: 7.1.3 60 seconds Siren outputs Siren (Alarm) Time: 240 seconds SMOKE exit timer: 60 seconds Siren (Alarm) tones: 0 seconds 7.1.4 System configuration, general parameters Telephon e (P) Remote test (P) Remote test (T) Auto Test (P) Auto Test (T) Auto Bypass (B) + - - - - + Dial Tone Bypass (T) Delayed ON (D) Zone Display (Z) Buzzer with Siren (B) Reset by Zone (R) Tone Dialing (T) - - - - - + Line Snapping (S) Download Disable (D) Voice Unit (V) Zone 6 Key (K) Type of Key (K) Delayed PGM (G) - - - - - - Report All (A) SMOKE Invert (S) 2 Ring Snapping (S) Telephone Telephone Double Test in ON Test in Report (D) (L) OFF (L) - - - - - - Bypass Report (B) RX-130 Keypad (K) Bypass Request (B) 2 EOL (2) Listen-In (L) SMOKE DELAY (S) RX/N-406 - - - - - - - (4) CAPTAIN-I, Intruder Alarm System, Installation Manual 61 Panic (P) Failure disables Arming (D) Not used- TDB (X) - - - Automatic testing time: 00.00 7.1.5 Interval between tests: 00:00 Telephones dialer to subscriber Telephone 1: ------ Dialing Method: Tone Telephone 2: ------ Number of Rings: 10 Telephone 3: ------ 7.1.6 System responses to events Fault Siren (S) Communication (P) PGM(G) Smoke Detectors (F) Panic - - - - Fault Siren (S) Communication (P) Buzzer (B) PGM (G) AC Fail - - - - Fault Siren (S) Communication (P) Buzzer (B) PGM (G) Low Battery - - - - Fault Siren (S) Communication (P) Buzzer (B) PGM (G) Telephone Line - - - - Fault Siren (S) Buzzer (B) PGM (G) Zone - - - Communication (P) - Response Time (sec) 240 Response Time (sec) 240 62 CAPTAIN-i Intruder Alarm System Installation Manual Event Siren (S) Key State - Radio Report (T) - Telephone Report (P) - PGM (G) - Fault GSM unit installed (G) Arming/Disar ming Reports via GSM (E) Radio Account No. Reported via GSM (R) Automatic Test Reports via GSM (T) GSM - - - - 7.1.7 Monitoring station Parallel Report via PSTN and GSM (P) - Telephone 1: ------ Subscriber I.D: Phone=0 Auto Test Hour: 0 Telephone 2: ------ Subscriber I.D: Radio=0 Auto test time = 0 Telephone 3: ------ Second Subscriber Number: 0 Station Format: 0 0 T=0 Telephone 4: ------ Subscriber I.D: Phone=0 Time for Acknowledge=20Sec Pre-Number: ------ 7.1.8 Reporting codes (phone) Zone Z1 Z2 Z3 Z4 Z5 Z6 Alarm Phone Reports FF FF FF FF FF FF Reset Phone Reports FF FF FF FF FF FF Event Mains Voltage Battery Card Voltage Telephone Line Fault OK Low OK Low OK Fault OK FF FF FF FF FF FF FF FF Telephone Event Panic (“#”+”*”) Phone FF End Arming/ Arming/ Arming General Detector of Disarming Disarming with Reset Power Siren Main Code User 1 to Bypassed Time user 8 Zones FF FF FF FF FF FF CAPTAIN-I, Intruder Alarm System, Installation Manual 7.1.9 63 Reporting codes (radio) Zone Z1 Z2 Z3 Z4 Z5 Z6 Alarm Radio Reports FF FF FF FF FF FF Reset Radio Reports FF FF FF FF FF FF Event Mains Voltage Battery Card Voltage Telephone Line Fault OK Low OK Low OK Fault OK Radio FF FF FF FF FF FF FF FF Event Panic (“#”+”*”) Radio (T) FF End Arming/ Arming/ Arming General Detector of Disarming Disarming with Reset Power Siren Main Code User 1 to Bypassed user 8 Zones FF FF FF FF FF FF 64 CAPTAIN-i Intruder Alarm System Installation Manual 7.2 7.2.1 Name Appendix B – Programming formats table Pulse formats Rate (pps) ACK (Hz) Error Control Double Round 1400 Checksum Ademco Slow 10 Double Round 2300 Checksum ID Event 3-1 3-2 4-1 4-2 3-1 3-2 4-1 4-2 3-1 3-2 4-1 4-2 3-1 3-2 4-1 4-2 A 162 163 162 163 162 163 162 163 162 163 162 163 162 163 162 163 B 1 1 129 129 65 65 193 193 17 17 145 145 81 81 209 209 CAPTAIN-I, Intruder Alarm System, Installation Manual Name Rate (pps) ACK (Hz) Error Control Double Round 1400 Checksum Silent Knight Fast 14 Double Round 2300 Checksum Double Round 1400 Checksum Franklin 20 Double Round 2300 Checksum 65 ID Event 3-1 3-2 4-1 4-2 3-1 3-2 4-1 4-2 3-1 3-2 4-1 4-2 3-1 3-2 4-1 4-2 3-1 3-2 4-1 4-2 3-1 3-2 4-1 4-2 3-1 3-2 4-1 4-2 3-1 3-2 4-1 4-2 A 170 171 170 171 170 171 170 171 170 171 170 171 170 171 170 171 208 209 208 209 208 209 208 209 208 209 208 209 208 209 208 209 B 1 1 129 129 65 65 193 193 17 17 145 145 81 81 209 209 1 1 129 129 65 65 193 193 17 17 145 145 81 81 209 209 66 CAPTAIN-i Intruder Alarm System Installation Manual Name Rate (pps) ACK (Hz) Error Control Double Round Universal HighSpeed 20 2300 Double Round 40 1400 Checksum Double Round Radionics 40 A B 3-1 82 83 82 83 17 3-2 4-1 4-2 3-1 Checksum Radionics ID Event 2300 Checksum 3-2 4-1 4-2 3-1 3-2 4-1 4-2 3-1 3-2 4-1 4-2 3-1 3-2 4-1 4-2 3-1 3-2 4-1 4-2 17 145 145 81 82 83 82 83 120 121 120 121 120 121 120 121 81 209 209 1 1 129 129 65 65 193 193 120 17 121 120 121 120 121 120 121 17 145 145 81 81 209 209 CAPTAIN-I, Intruder Alarm System, Installation Manual 7.2.2 Name DTMF formats Rate (pps) ACK (Hz) Error Control Double Round DTMF 1400 Checksum Double Round 2300 Checksum Contact ID PAF™ NPAF™ 67 1400/2300 1400 2300 ID Event 3-1 3-2 4-1 4-2 3-1 3-2 4-1 4-2 3-1 3-2 4-1 4-2 3-1 3-2 4-1 4-2 A 0 1 0 1 0 1 0 1 0 1 0 1 0 1 0 1 B 2 2 130 130 66 66 194 194 18 18 146 146 82 82 210 210 0 230 0 5 0 21 Call PIMA support CAPTAIN-i Intruder Alarm System Installation Manual 68 7.3 Appendix C – Entering names For entering names (zones, secondary codes, or service company name) by means of the LCD unit, each key represents 3 letters and a number. When you want to enter a particular letter, press its key until the desired letter or number is obtained. Then press the “NEXT” key for the next letter. Following is the allocation of letters to keys: 1 A B C 2 D E F 3 G H I Cancel 4 J K L 5 M N O 6 P Q R Next char. 7 S T U 8 V W X 9 Y Z Prev. char. \ 0 + . , Confirm CAPTAIN-I, Intruder Alarm System, Installation Manual 7.4 Notes 69 70 CAPTAIN-i Intruder Alarm System Installation Manual CAPTAIN-I, Intruder Alarm System, Installation Manual 71 P/N 4410061 Rev. J (May-2005)