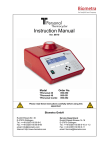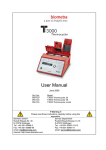
1
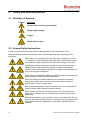
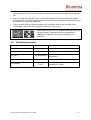
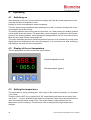
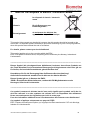
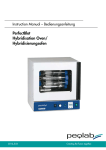
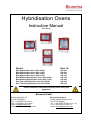
Hybridisation Ovens
Instruction Manual
Ver. 09/10
Modell
Best. Nr.
Mini-Hybridisation Oven OV1 (230V)
Mini-Hybridisation Oven OV1 (115V)
Mini-Hybridisation Oven OV2 (230V)
Mini-Hybridisation Oven OV2 (115V)
Mini-Shaking-Hybridisation Oven OV3 (230V)
Mini-Shaking-Hybridisation Oven OV3 (115V)
Duo-Therm-Hybridisation Oven OV5 (230V)
Duo-Therm-Hybridisation Oven OV5 (230V)
052-000
052-090
052-100
052-190
052-200
052-290
052-300
052-390
Please read these instructions carefully before using this
apparatus!
Biometra GmbH
Rudolf-Wissell-Str. 30
D-37079 Göttingen
Tel.: ++49 (0)551-50 68 6-0
Fax: ++49 (0)551-50 68 6-66
email: [email protected]
Internet: http://www.biometra.com
Service Department
Rudolf-Wissell-Strasse 14-16
D-37079 Göttingen
Tel.: ++49 (0)551-50 68 6-10 or -12
Fax: ++49 (0)551-50 68 6-11
email: [email protected]
This document describes the state at the time of publishing. It needs not necessarily agree with
future versions.
Subject to change!
2
Instruction Manual Hybridisation Ovens 10/2009
Contents
1
Introduction......................................................................................................................... 5
1.1 Field of Applications ......................................................................................................... 5
1.2 Special features................................................................................................................ 5
1.2.1
Vacuum double glass door ................................................................................... 5
1.2.2
Rotor and oven interior ......................................................................................... 5
1.2.3
Shaking platform................................................................................................... 5
1.3 Technical specifications.................................................................................................... 5
1.3.1
Temperature ......................................................................................................... 5
1.3.2
Rotor ..................................................................................................................... 5
1.3.3
Rotor speed .......................................................................................................... 6
1.3.4
Electrical connection values ................................................................................. 6
1.3.5
Dimensions ........................................................................................................... 6
1.4 Legal Notes ...................................................................................................................... 6
1.4.1
Copyright .............................................................................................................. 6
1.4.2
Liability.................................................................................................................. 7
1.4.3
Meaning of the Instructions................................................................................... 7
2
Safety and Warning Notices .............................................................................................. 8
2.1 Definition of Symbols........................................................................................................ 8
2.2 General Safety Instructions .............................................................................................. 8
3
Installation......................................................................................................................... 10
3.1 Content of delivery.......................................................................................................... 10
3.2 Unpack and Check ......................................................................................................... 10
3.3 Installation Conditions .................................................................................................... 10
3.4 Operating elements ........................................................................................................ 11
4
Operating........................................................................................................................... 12
4.1 Switching on ................................................................................................................... 12
4.2 Display of the set temperature........................................................................................ 12
4.3 Setting the temperature .................................................................................................. 12
4.4 Set rotor speed and shaking frequency.......................................................................... 13
4.5 Inserting the hybridisation bottles ................................................................................... 13
4.6 Removing the hybridisation bottles................................................................................. 13
4.7 Auto Restart.................................................................................................................... 14
4.8 Working at ambient temperature .................................................................................... 14
5
Accessories: ..................................................................................................................... 15
6
Service............................................................................................................................... 16
6.1 Instructions for return shipment ...................................................................................... 16
Instruction Manual Hybridisation Ovens 10/2009
3
6.2 Equipment Decontamination Certificate..........................................................................17
7
Note for the disposal of electric / electronic waste. ......................................................19
8
EU - Konformitätserklärung/ EU - Declaration of Conformity .......................................20
9
Warranty.............................................................................................................................21
10
4
Subject index.................................................................................................................22
Instruction Manual Hybridisation Ovens 10/2009
1
Introduction
1.1 Field of Applications
The hybridization ovens described herein have been designed for incubation of materials in
closed and heat resistant vessels (bottles, basins) within the conditions described in chapter
1.3.4, technical data.
The ovens are not suited for incubation in open vessels or for drying of glasses or other things.
1.2 Special features
1.2.1 Vacuum double glass door
The ovens OV2, 3 und 5 have a metal framed double glass vacuum door. The door protects the
user as far as possible from low energy radiation like β-emission and provides for optimal
thermal insulation.
1.2.2 Rotor and oven interior
All ovens have at least one rotor that can be equipped with different size spring clamps and
therefore offers maximal flexibility. Underneath the rotor is drip tray made of stainless steel that
safely collects spills that may occur. Moreover the complete oven interior is lined with easy to
clean stainless steel.
1.2.3 Shaking platform
The ovens OV3 and OV5 are equipped with an additional platform that shakes with 1 to 10 rpm
and may be used for different kind of applications.
1.3 Technical specifications
1.3.1 Temperature
- Digital temperature setting:
Ambient temperature to 85 oC (0,1 oC steps)
- Regulation range:
Ambient temperature +10oC to 85oC
- Digital display of actual temperature:
Ambient temperature to 85.0oC ±0,1 oC
- Heating up from 20 to 60 oC:
≤ 15 min
- Temperature varieties inside the chamber:
± 1.0 oC
Note: In the DUO-Therm Hybridisation oven, in case of using both chambers at the same time,
the minimal regulation temperature in the chamber used with the lower temperature may be
shifted to a higher temperature.
1.3.2 Rotor
Capacity
•
6 large hybridisation bottles (300 x 35 mm) or
Instruction Manual Hybridisation Ovens 10/2009
5
•
12 medium hybridisation bottles (150 x 35 mm)
•
12 small hybridisation bottles (100 x 35 mm)
or
1.3.3 Rotor speed
Continuously adjustable: about 1 to 9.5 rpm
(Shaking speed: Mini-Shaking-Hybridisation oven OV3 and DUO-Therm Hybridisation oven
OV5: about 10 to 160 times back and forth)
1.3.4 Electrical connection values
- Power supply:
230 Volts, 50Hz (052-000,-100,-200,-300)
115 Volts 50/60 Hz (052-090,-190,-290,-390)
- maximum power consumption:
0.63 kW (OV5), 0.32 kW (OV3),
0.31 kW (OV1/2)
- Fuses:
2 x 2.0 AT (OV1,2/230 Volt), 2 x 3.15 AT
(OV3/230 Volts) 2 x 4 AT (OV5/230 Volts), 2 x
3.15 AT (OV1,2/115 Volts, 2 x 4.0 AT (OV3/115
Volts), 2 x 8 AT (OV5/115 Volts)
- class:
IP20
- ambient conditions:
15 oC to 30 oC; ≤ 85% relative humidity
1.3.5 Dimensions
(B x T x H)
Outer dimensions
433 x 400 x 432 mm (OV1, OV2)
433 x 400 x 605 mm (OV3)
433 x 400 x 726 mm (OV5)
Chamber dimensions
355 x 240 x 245 mm (OV1, OV2)
355 x 240 x 400 mm (OV3)
355 x 240 x 245 mm (OV5)
Weight
(excluding bottle and mains cable)
20,05 kg (OV1); 21,25 kg (OV2)
26.05 kg (OV3); 36,25 kg (OV 5)
1.4 Legal Notes
1.4.1
Copyright
All rights reserved. It is not allowed to copy and publish the manual or parts of it in any form as
copies, micro film or other methods without a written authorisation from Biometra.
Biometra is pointing out that applied company and brand names are usually protected trade
marks.
6
Instruction Manual Hybridisation Ovens 10/2009
1.4.2
Liability
Biometra is not liable for damages and injuries caused by use not considering these operating
instructions in parts or completely.
1.4.3
Meaning of the Instructions
Biometra recommends that you first read these instructions carefully. This operation instruction
is part of the product and should be kept over the full life-time of the instrument. It should also
be forwarded to subsequent owners and users. Make sure that additions and updates are
inserted into the operation instructions.
Instruction Manual Hybridisation Ovens 10/2009
7
2
Safety and Warning Notices
2.1 Definition of Symbols
Symbol
Definition
Caution! Refer to instruction manual!
Danger! High voltage!
Fragile!
Danger! Hot surface!
2.2 General Safety Instructions
Please read this manual carefully before starting operation the hybridisation ovens
General safety precautions for laboratory work must be observed when working with the
instrument.
Parts in the oven and parts of the housing may be heated to up to 85
°C. Avoid any contact especially with metal parts, hybridization bottles
and solutions at high temperatures in the bottles: Danger of burning!
Hybridization bottles containing hot solutions must not be opened or
handled without safety protection. Bottles containing hybridization
solution must not be transferred rapidly from high to low temperature or
vice verse. Danger of explosion!
When opening hybridization bottles at high temperatures hot steam will
escape: Danger of burning and contamination.
Due to the sealing and heat insulation of the incubation chambers,
cooling down takes quite some time with doors closed. Danger of
burning after too short cooling times!
Before unscrewing parts to open the housing of the oven disconnect it
from the mains power: Danger by electric shock!
Open vessels with aqueous solutions must not be used in the oven.
Vapor may condense on inner surfaces and penetrate into drive and
electronics.
Biometra hybridisation ovens contain no user serviceable parts. Do not
open the instrument housing! Service and repair may only be carried out
by the Biometra Service department or otherwise qualified technical
personal.
8
Instruction Manual Hybridisation Ovens 10/2009
Do not use the instrument when damages of the housing, block, cable
or other parts are visible.
This instrument is designed and certified to meet EN 61010-1 safety
standards. It should not be modified or altered in any way. Alteration of
this instrument will void the warranty, void the EN61010-1 certification,
and create a potential safety hazard.
The instrument must not be used to dry, temperate or shake substances
that may lead to concentrating an explosive gas inside the oven.
When using Biometra hybridisation bottles, a temperature of 70 °C
Celsius must not be exceeded.
Closed vessels must be suited for the vapor pressure resulting from the
temperature chosen.
Make sure that the appliance connector and the plug of the supply cord
are accessible, so you can separate the instrument from the mains.
Connect the hybridisation oven to a grounded socket.
Appropriate safety regulations must be observed when working with
infectious, pathogenic or radioactive material. Ask the responsible local
safety inspector for details.
The hybridisation oven must not be used with explosive, flammable or
volatile liquids.
Do not move the rotor by hand. To change the rotor position, close the
hybridization oven door and switch the rotor "on".
Be careful when loading the oven with sharp or hard items. Do not abut
against the glass door! Danger of breakage of glass and implosion.
Do not use abrasives to clean the instrument.
For transports always use the original Biometra box.
Instruction Manual Hybridisation Ovens 10/2009
9
3 Installation
3.1 Content of delivery
a)
b)
c)
d)
e)
f)
Hybridisation oven
Dip tray/shaking platform
Rotor
wide-necked hybridization bottles (300 x 35 mm) with meshes (5 pcs., 230 x 230 mm)
Power cable
Instruction manual
Please keep the original packaging material for return shipment in case of servicing
3.2 Unpack and Check
Unpack and carefully examine the instrument. Report any damage to Biometra. Do not attempt
to operate this device if physical damage is present.
Please keep the original packing material for return shipment in case of service issues
!! Attention !!
Please fill out and send back the warranty registration card. This is important for you to
claim full warranty.
3.3 Installation Conditions
•
Place the hybridisation oven on a stable surface in a dry, safe environment.
•
Let equilibrate the hybridisation oven to room temperature before starting operation (1 to
6h).
•
Make sure that the appliance connector and the plug of the supply cord are accessible, so
you can separate the instrument from the mains.
•
Connect the hybridisation oven to a grounded socket.
•
The maximum temperature that can be used in the Biometra hybridization ovens OV 1,2,3
or OV 5 is 85 °C. Higher values should not be set, as the built in temperature fuse will switch
off the heater at about 90 degrees. The fuse will start the heater again after cooling down.
Thereby of course an undefined temperature regulation with temperature fluctuating a lot will
result.
Note: When opening the doors, rotor, shaking platform, fan and heater will be switched off from
safety reasons. The temperature setting will remain in store and the oven will heat to the set
temperature again as soon as the door is closed.
•
10
The rotors in the incubation chambers can hold up to 6 large bottles (300 x 35 mm) or six
small bottles (150 x 35 mm or 100 x 35 mm). Any combination of large and small bottles can
be used. The rotor speed can be set from about 1 to 9.5 revolutions per minute. For longest
lifetime of the drive system the rotor should be loaded as balanced as possible; e. g. when
Instruction Manual Hybridisation Ovens 10/2009
three bottles are incubated do not place them beside each other but leave one clamp empty
before placing the next. If just one bottle is used an empty bottle should be placed opposite
to it.
•
Make sure that the ventilation slots on the bottom and the rear are not obstructed. Make
sure that there is no object underneath the instrument that may block the ventilation slots at
the bottom (e.g. a piece of paper etc.)
•
There must be sufficient distance between the ventilation slots on the rear side of the
hybridisation oven and a wall or another instrument (min 10 cm).
Ensure that both the rear and bottom ventilation slits of the
rear and bottom of the instrument are unobstructed.
Insufficient ventilation can cause overheating of the
instrument.
3.4
Operating elements
function
Key
Description
switch (Green)
Power
Mains switch for on/off
set keys
∇Δ
set-temperature value
Key “SET”
Set temperature
Turning knob
rotor
LCD-display
╔═══╗
╚═══╝
Instruction Manual Hybridisation Ovens 10/2009
Setting and storing of desired
temperature
Set rotor speed
Actual temperature = red, set
temperature = green
11
4
4.1
Operating
Switching on
After switching on the oven (Power-switch) the display will show the actual temperature in the
oven and the last set temperature value.
Heating up to the set temperature starts immediately.
The rotor starts turning immediately after switching on as well, in case the turning knob for the
rotor speed is not at the left stop.
The shaking platform starts moving with the speed set, too. When starting the shaking platform
a slow speed should be chosen. The speed then can be regulated up adequate to the vessels
placed on the shaking platform. When placing the shaking platform into the oven care must be
taken the drive slips into the central guide rail.
The upper red display shows the actual temperature inside the oven chamber; the lower green
display shows the temperature value set (see chapter 4.2). In continuous use, after heating up,
both displays will show the same temperature.
4.2
Display of the set temperature
The set temperature is shown in the lower green display
°C
058.3
SV
065.0
Actual temperature (red)
Set temperature (green)
SET
4.3
Setting the temperature
The temperature is set by pressing the ∇ and Δ keys on the controller (Increase Δ or decrease
∇ the value).
Therefore first the SET key is pressed until “SV” starts blinking left above the set value. Now
one of the ∇ Δ keys is pressed several times or permanently. With a key kept pressed the set
value increases/decreases slowly at first. The longer the key is held the faster the set
temperature value will change. This allows the user to easily perform large temperature
changes.
12
Instruction Manual Hybridisation Ovens 10/2009
The new temperature value set must be confirmed by the SET key (SV is not blinking any
more). Immediately after confirmation the controller will regulate to the new temperature.
Note: The set temperature should be at least 10oC above the ambient temperature. Otherwise
in continuous use the set temperature might be exceeded.
4.4 Set rotor speed and shaking frequency
At the left limit of the knob for setting the rotor speed is the function to turn the rotor on or off. To
switch the rotor drive off turn the knob counter clock wise over the left limit.
The ovens containing an integrated shaker (Mini-Shaking-Hybridization oven OV3 and DUOThermo Hybridization oven OV5) provide an additional turning knob marked “Shaker” for the
shaking speed; this one as well has an on/off switch at the left stop.
In the OV 3 it can be used together with the rotor, in case the vessels to be shaken are not
higher than16.5 cm.
The shaking speed can be set from about 10 to 160 per minute.
4.5
Inserting the hybridisation bottles
The rotor axis is connected to the drive by a coupler, it fits in two positions. After positioning the
rotor in the coupler on the left side it must be slightly pushed to the left and afterwards
downwards into the holder on the right side. By slightly lifting the rotor on the right side it can be
taken out. To load the bottles the rotor should be taken out of the oven. This way the bottles can
be pushed into the clamps from the sides. Pushing the bottles into the rotor from the front side
may dilate the clamps after some time. Clamps can be exchanged easily and are available as
spare parts.
To additionally allow the hybridization solution to move back and forth the bottles can be placed
slightly inclined. Therefore the left clamp disk on the rotor can be dismantled by a knurled screw
on the axis on the disks inner side. The left clamp disk can be fixed in any position by this
knurled screw.
4.6
Removing the hybridisation bottles
To remove the bottles take out the rotor from the instrument (see chapter 4.5) and pull the
bottles out of the spring clamps from the side. Pulling out the bottles off the rotor from the front
side may dilate the clamps after some time.
Hybridization bottles containing hot solutions must not be opened or
handled without safety protection. Bottles containing hybridization
solution must not be transferred rapidly from high to low temperature or
vice verse. Danger of explosion!
When opening hybridization bottles at high temperatures hot steam will
escape: Danger of burning and contamination.
Parts in the oven and parts of the housing may be heated to up to 85
°C. Avoid any contact especially with metal parts, hybridization bottles
and solutions at high temperatures in the bottles: Danger of burning!
In case the hybridization oven is not used for a longer period please remove all liquids from the
bottles and from inside the chambers. Remove the rotor from the oven and also remove all
bottles from the rotor clamps.
Instruction Manual Hybridisation Ovens 10/2009
13
4.7 Auto Restart
The hybridization ovens OV1, OV2, OV3 and OV5 have an auto restart function.
In case the mains power supply is interrupted for a few seconds up to several hours the
oven will restart automatically as soon as the power is present again. The last
temperature set will be regulated to.
4.8 Working at ambient temperature
For working at ambient temperature the value should be set to about five degrees below the
ambient temperature in the laboratory. The controller this way will never switch on the heater.
14
Instruction Manual Hybridisation Ovens 10/2009
5 Accessories:
Hybridisation bottle 300 x 35 mm
052-001
Hybridisation bottle 150 x 35 mm
052-002
Hybridisation bottle 100 x 35 mm
052-003
Spare lid (incl. O-ring)
052-011
O-ring for lid
052-012
Meshes, 5 pieces 230 x 230 mm
052-005
Meshes, 5 pieces 150 x 100 mm
052-105
Instruction Manual Hybridisation Ovens 10/2009
15
6 Service
Should you have any problems with this unit, please contact our service department or your
local Biometra dealer:
Biometra GmbH
Service Department
Rudolf-Wissell-Straße 14 - 16
D-37079 Göttingen
Phone:++49 (0)5 51 50 68 6 - 10 or 12
Fax: ++49 (0)5 51 50 68 6 -11
e-mail: [email protected]
If you would like to send the unit back to us, please read the following
return instructions in chapter 6.1.
6.1
Instructions for return shipment
In case of an instrument failure that cannot be fixed please proceed as follows:
•
•
•
•
Return only defective devices. For technical problems which are not definitively recognisable
as device faults please contact the Technical Service Department at Biometra (Tel.: +49 55150881-10/12, Fax: +49 551-50881-11, e-mail: [email protected]).
Please contact our service department for providing a return authorization number (RAN).
This number has to be applied clearly visible to the outer box. Returns without the RAN will
be not be accepted!
Important: Carefully clean all parts of the instrument of biologically dangerous, chemical or
radioactive contaminants. If an instrument is contaminated, Biometra will be forced to refuse
to accept the device. The sender of the repair order will be held liable for possible losses
resulting from insufficient decontamination of the device.
Please prepare written confirmation that the device is free from biologically dangerous and
radioactive contaminants. The declaration of decontamination (see section 6.2) must be
attached to the outside of the packaging.
•
Use the original packing material. If not available, contact Biometra or your local distributor.
•
Label the outside of the box with “CAUTION! SENSITIVE ELECTRONIC INSTRUMENT!”
•
Please enclose a note which contains the following:
16
a)
Sender’s name and address,
b)
Name of a contact person for further inquiries with telephone number,
c)
Description of the fault, which also reveals during which procedures the fault occurred, if
possible
Instruction Manual Hybridisation Ovens 10/2009
6.2 Equipment Decontamination Certificate
To enable us to comply with german law (i.e. §71 StrlSchV, §17 GefStoffV and §19 ChemG)
and to avoid exposure to hazardous materials during handling or repair, please complete this
form, prior to the equipment leaving your laboratory.
COMPANY / INSTITUTE
__________________________________________________
ADDRESS
______________________________________________________________
PHONE NO
_________________________
E-MAIL
______________________________________________________________
EQUIPMENT
FAX NO_________________________
Model
______________
Serial No
______________
______________
______________
______________
______________
______________
______________
If on loan / evaluation Start Date: __________________
Finish Date __________________
Hazardous materials used with this equipment:
__________________________________________________________________________
__________________________________________________________________________
__________________________________________________________________________
Method of cleaning / decontamination:
__________________________________________________________________________
__________________________________________________________________________
__________________________________________________________________________
The equipment has been cleaned and decontaminated:
NAME __________________________________ POSITION _______________________
(HEAD OF DIV./ DEP./ INSTITUTE / COMPANY)
SIGNED ________________________________ DATE ____________________________
PLEASE RETURN THIS FORM TO BIOMETRA GMBH OR YOUR LOCAL BIOMETRA
DISTRIBUTOR TOGETHER WITH THE EQUIPMENT.
PLEASE ATTACH THIS CERTIFICATE OUTSIDE THE PACKAGING. INSTRUMENTS
WITHOUT THIS CERTIFICATE ATTACHED WILL BE RETURNED TO SENDER.
Instruction Manual Hybridisation Ovens 10/2009
17
General Information for Decontamination:
Please contact your responsible health & safety officer for details.
Use of radioactive substances:
Please contact your responsible person for details.
Use of genetically change organism or parts of those:
Please contact your responsible person for details.
18
Instruction Manual Hybridisation Ovens 10/2009
7
Note for the disposal of electric / electronic waste.
Note
for disposal of electric / electronic
waste
Hinweis
für die Entsorgung von
Elektroaltgeräten
Renseignement
du traitement des déchets des
appareils électrique / électronique
This symbol (the crossed-out wheelie bin) means, that this product should be brought to the
return and / or separate systems available to end-users according to yours country regulations,
when this product has reached the end of its lifetime.
For details, please contact your local distributor!
This symbol applies only to the countries within the EEA*.
EEA = European Economics Area, comprising all EU-members plus Norway, Iceland and
Liechtenstein.
------------------------------------------------------------------------------------------------------------------------------Dieses Symbol (die durchgestrichene Abfalltonne) bedeutet, dass dieses Produkt von
der Firma Biometra für eine kostenlose Entsorgung zurückgenommen wird. Dies gilt nur
für Geräte, die innerhalb Deutschlands gekauft worden sind.
Kontaktieren Sie für die Entsorgung bitte die Biometra Service-Abteilung!
Außerhalb Deutschlands wenden Sie sich bitte an den lokalen Händler.
Dieses Symbol gilt nur in Staaten des EWR*.
*EWR = Europäischer Wirtschaftsraum, umfasst die EU-Mitgliedsstaaten sowie
Norwegen, Island und Liechtenstein.
------------------------------------------------------------------------------------------------------------------------------Cet symbol (conteneur à déchets barré d´une croix) signifie que le produit, en fin de vie,
doit être retourné à un des systèmes de collecte mis à la disposition des utilisateurs
finaux en conséquence des régulations par la loi de votre pays.
Pour des information additionel nous Vous demandons de contacter votre distributeur!
Cet symbole s´ápplique uniquement aux pays de l´EEE*.
EEE = Espace économique européen, qui regroupe les États membres de l´UE et la Norvège,
Islande et le Liechtenstein.
Instruction Manual Hybridisation Ovens 10/2009
19
8 EU - Konformitätserklärung/
Conformity
EU
-
Declaration
of
Göttingen, den 24. 08. 2004
im Sinne der EG-Richtlinie über elektrische Betriebsmittel zur Verwendung innerhalb
bestimmter Spannungsgrenzen 73/23/EWG
following the EC directive about electrical equipment for use within certain limits of voltage
73/23/EEC
und / and
im Sinne der EG-Richtlinie für die elektromagnetische Verträglichkeit 89/336/EWG.
following the EC directive about the electromagnetic compatibility 89/336/EEC .
Hiermit erklären wir, daß folgende Hybridisierungsöfen
Herewith we declare that the following Hybridization Ovens
Typen /
types:
Mini-Hybridisierungsofen OV1, Mini-Hybridisierungsofen OV2, Mini-ShakingHybridisierungsofen OV3, DUO-Therm Hybridisierungsofen OV5
Mini-Hybridization Oven OV1, Mini Hybridization Oven OV2, Mini Shaking
Hybridization Oven OV3, DUO-Therm Hybridization Oven OV5
Best.-Nr. /
Order No
052-000, 052-090, 052-100, 052-190, 052-200, 052-290, 052-300, 052-390
den grundlegenden Anforderungen der
corresponds to the basic requirements of
EG-Niederspannungsrichtlinie 73/23/EWG und der
EC low voltage directive 73/23/EEC and the
EG-Richtlinie über die elektromagnetische Verträglichkeit 89/336/EWG entsprechen.
EC directive about the electromagnetic compatibility 89/336/EEC .
Folgende harmonisierte Normen wurden angewandt:
The following harmonized standards have been used:
EN 61000-3-3:1995 + A1:2001
Formular 006, Ver. 03
EN 55011:1998 + A1:1999 + A2:2000
EN 61000-3-2:2000
EN 61000-6-1:2001
EN 61010-1: 2004
Dr. Jürgen Otte
Quality Manager
20
Instruction Manual Hybridisation Ovens 10/2009
9
Warranty
This Biometra instrument has been carefully build, inspected and quality controlled before
dispatch. Hereby Biometra warrants that this instrument conforms to the specifications given in
this manual. This warranty covers defects in materials or workmanship as described under the
following conditions:
This warranty is valid for 24 month from date of shipment to the customer from Biometra. This
warranty will not be extended to a third party without a written agreement of Biometra.
This warranty covers only the instrument and all original accessories delivered with the
instrument. This warranty is valid only if the instrument is operated as described in the manual.
Biometra will repair or replace each part which is returned and found to be defective. This
warranty does not apply to wear from normal use, failure to follow operating instructions,
negligence or to parts altered or abused.
Instruction Manual Hybridisation Ovens 10/2009
21
10 Subject index
Accessories
Auto Restart
Declaration of Conformity
Decontamination Certificate
Disposal
Hybridisation bottles
Operating
Operating elements
22
15
14
20
17
19
13
12
11
Rotor speed
Safety and Warning Notices
Safety precautions
Service
Shaking frequency
Shaking platform
Technical specifications
Warranty
6, 13
8
8
16
13
5
5
21
Instruction Manual Hybridisation Ovens 10/2009