1
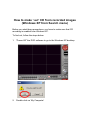
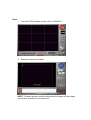
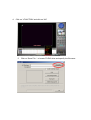
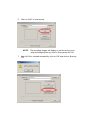
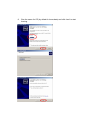
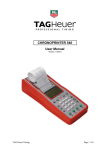
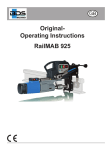
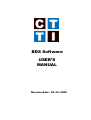
BDS Software
USER’S
MANUAL
Revision Date : 02. 09. 2005.
How to make '.avi' CD from recorded images
(Windows XP from Search menu)
Before you start these procedures, you have to make sure that CD
recording is enabled from Windows XP.
To find out, follow the steps below.
1.
“Power Off” the DVR software to go to the Windows XP desktop.
2. Double click on 'My Computer'
3.
Right click on CD-RW drive (X:).
4. Click on 'Properties' and go to 'Recording' tab.
5. On 'Recording' tab, make sure there is a check mark on check box
for 'Enable CD recording on this drive'
6. Click on 'OK' to exit from CD-RW Drive properties.
Note: Once you confirm or configure, you do not have to follow these
procedure anymore.
After it is confirmed, put a blank CD into the CD-RW Drive and follow
the steps below.
Steps:
1.
From the DVRS software screen, click on 'SEARCH'.
2.
Select the cameras and date.
NOTE: The dates shown in yellow indicate that the images of those dates
are currently available in your hard drive.
3.
By click and hold on vertical red line, move the red line to set as starting
point of image that need to be burn on CD.
OR
You could set the specific hours and minutes by clicking up or down arrows.
4.
Click on '+FUNCTION' and click on 'AVI'
5.
Click on 'Save File...' to locate CD-RW drive and specify the file name.
Click on down arrow.
Locate 'CD-RW Drive'
Specify the file name on 'File name:' field.
then, click on 'Save'
6.
Click on 'GO!!!' to start record.
NOTE:
7.
The recording images will display on screen and you can
stop recording anytime by click on 'Stop saving AVI file'.
After AVI file is created successfully, click on 'OK' and click on 'Burning
CD'.
8.
Give the name for CD (by default it shows date) and click 'next' to start
burning.