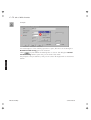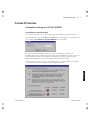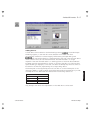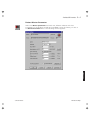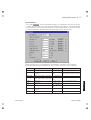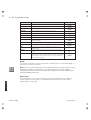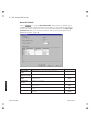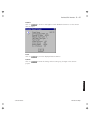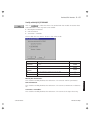
1
MITSUBISHI ELECTRIC Info ON Index MELSEC ProfiMap V3.0 Configuration System for Open Networks Software Manual Specifications subject to change. Art. No.: 65778-C MITSUBISHI ELECTRIC EUROPE B.V. MITSUBISHI ELECTRIC MELSEC ProfiMap 3.0 Configuration System for Open Networks Software Manual About this Manual The texts and illustrations in this manual are provided exclusively as a guide to the open network configuration system MELSEC ProfiMap. Separate manuals are available for MITSUBISHI ELECTRIC’s various series of MELSEC programmable logic controllers. The MELSEC ProfiMap software is supplied under a legal License Agreement and may only be used and copied subject to the terms of this License Agreement. All rights reserved. Without the prior explicit consent in writing from MITSUBISHI ELECTRIC no part of this manual may be reproduced, stored in a retrieval system of any kind, or transmitted, in any form, or by any means, electronic, mechanical, photocopying, recording or otherwise, or translated into another language. MITSUBISHI ELECTRIC reserves the right to make changes to the technical specifications and information in this handbook at any time and without prior notice. The IEC 1131.3/DIN 19245 standard cited in this manual is available from the publishers Beuth Verlag in Berlin (Germany). 3rd edition Copyright December 1999 MITSUBISHI ELECTRIC EUROPE B.V. Factory Automation Gothaer Straße 8 D - 40880 Ratingen Germany Phone: Fax: +49 (21 02) 486-0 +49 (21 02) 486-717 Printed in Germany Article number: 65778-C Contents I CONTENTS Chapter 1: Introduction . . . . . . . . . . . . . . . . . . . . . . . . . . . 1 - 1 This manual... . . . . . . . . . . . . . . . . . . . . . . . . . . . . . . . . . . 1 - 1 If you’re not yet familiar with MS Windows ... . . . . . . . . . . . . . . . . . . 1 - 1 If you have problems with parameter settings, ... . . . . . . . . . . . . . . . . 1 - 1 If you get stuck... . . . . . . . . . . . . . . . . . . . . . . . . . . . . . . . . 1 - 1 Typographic conventions and other hints . . . . . . . . . . . . . . . . . . . . 1 - 2 Chapter 2: Installation. . . . . . . . . . . . . . . . . . . . . . . . . . . . 2 - 1 Before You Begin . . . . . . . . . . . . . . . . . . . . . . . . . . . . . . . . 2 - 1 Software Purpose . . . . . . . . . . . . . . . . . . . . . . . . . . . . . . 2 - 1 General Features . . . . . . . . . . . . . . . . . . . . . . . . . . . . . . . 2 - 1 System Requirements . . . . . . . . Minimum hardware configuration Recommended enhancements . . Software requirements . . . . . . Copyright . . . . . . . . . . . . Chapter 3: . . . . . . . . . . . . . . . . . . . . . . . . . . . . . . . . . . . . . . . . . . . . . . . . . . . . . . . . . . . . . . . . . . . . . . . . . . . . . . . . . . . . . . . . . . . . . . . . . . . . . . . . . . . . . . 2-2 2-2 2-2 2-2 2-2 Software installation. . . . . . . . . . . . . . . MELSEC ProfiMap software setup . . . . . . Installing MELSEC ProfiMap on your hard disk Button functions . . . . . . . . . . . . . . . . . . . . . . . . . . . . . . . . . . . . . . . . . . . . . . . . . . . . . . . . . . . . . . . . . . . . . . . . . . . . . . . 2-3 2-3 2-3 2-4 The Menus . . . . . . . . . . . . . . . . . . . . . . . . . . . . 3 - 1 Starting MELSEC ProfiMap. . . . . . . . . . . . . . . . . . . . . . . . . . . . 3 - 1 Menu after Start. . . . . . . . . . . . . . . . . . . . . . . . . . . . . . . . . 3 - 1 File menu . . . . . . . . . . . . . . . . . . . . . . . . . . . . . . . . . . . . 3 - 3 Command New . . . . . . . . . . . . . . . . . . . . . . . . . . . . . . . 3 - 4 Command Open . . . . . . . . . . . . . . . . . . . . . . . . . . . . . . 3 - 14 Command Save . . . . . . . . . . . . . . . . . . . . . . . . . . . . . . . 3 - 15 Command Save As . . . . . . . . . . . . . . . . . . . . . . . . . . . . . 3 - 15 Command ASCII Import. . . . . . . . . . . . . . . . . . . . . . . . . . . 3 - 16 Command ASCII Export . . . . . . . . . . . . . . . . . . . . . . . . . . . 3 - 18 Command Print . . . . . . . . . . . . . . . . . . . . . . . . . . . . . . . 3 - 20 Command Printer Setup . . . . . . . . . . . . . . . . . . . . . . . . . . 3 - 20 Command Page Setup . . . . . . . . . . . . . . . . . . . . . . . . . . . 3 - 21 Software Manual MELSEC ProfiMap II Contents Project Select . . . . . . . . . . . . . . . . . . . . . . . . . . . . . . . . 3 - 21 Command Exit . . . . . . . . . . . . . . . . . . . . . . . . . . . . . . . 3 - 22 Setup menu . . . . . . . . . . . . Command Serial Port Selection . Command MXChange support . Command GSD Device Database . . . . . . . . . . . . . . . . . . . . . . . . . . . . . . . . . . . . . . . . . . . . . . . . . . . . . . . . . . . . . . . . . . . . . . . . . . . . . . . . . . . . . . . . 3 - 23 3 - 24 3 - 25 3 - 26 View menu . . . . . . . . . . . . . . . . . . . . . . . . . . . . . . . . . . . 3 - 27 Command Toolbar . . . . . . . . . . . . . . . . . . . . . . . . . . . . . 3 - 27 Command Status bar . . . . . . . . . . . . . . . . . . . . . . . . . . . . 3 - 27 Window menu . . . . . . . . . . . . . . . . . . . . . . . . . . . . . . . . . 3 - 27 Help menu . . . . . . . . . . . . . . . Command Index . . . . . . . . . . Command Using Help. . . . . . . . Command About MELSEC ProfiMap Chapter 4: . . . . . . . . . . . . . . . . . . . . . . . . . . . . . . . . . . . . . . . . . . . . . . . . . . . . . . . . . . . . . . . . . . . . . . . . . . . . . . . . 3 - 28 3 - 28 3 - 28 3 - 29 802.3 / MAP3.0 Interface . . . . . . . . . . . . . . . . . . . . 4 - 1 Parameter Setting for AJ71M56EF2 . . . . . . . . . . . . . . . . . . . . . . . 4 - 1 Introduction and Overview . . . . . . . . . . . . . . . . . . . . . . . . . . 4 - 1 Command OSI PARAMETER . . . . . . . . . . . . . . . . . . . . . . . . . 4 - 3 Command SAP/AE PARAMETER . . . . . . . . . . . . . . . . . . . . . . . 4 - 6 Command NAMED VARIABLE . . . . . . . . . . . . . . . . . . . . . . . . 4 - 10 Monitoring Mode . . . . . Button Initial Check . . . Button Error Status . . . Button Software Version Button Statistics . . . . Chapter 5: . . . . . . . . . . . . . . . . . . . . . . . . . . . . . . . . . . . . . . . . . . . . . . . . . . . . . . . . . . . . . . . . . . . . . . . . . . . . . . . . . . . . . . . . . . . . . . . . . . . . . . . . . . . . . . . . . . . . . . . . . . . . . . . . . . 4 - 15 4 - 16 4 - 17 4 - 18 4 - 20 Profibus/DP Interface . . . . . . . . . . . . . . . . . . . . . . 5 - 1 Parameter Setting for A(1S)J71PB92D . . . . . . . . . . . . . . . . . . . . . . 5 - 1 Introduction and Overview . . . . . . . . . . . . . . . . . . . . . . . . . . 5 - 1 Button Device Database . . . . . . . . . . . . . . . . . . . . . . . . . . . 5 - 4 Button Master Parameter . . . . . . . . . . . . . . . . . . . . . . . . . . 5 - 9 Button Define I/O Slaves . . . . . . . . . . . . . . . . . . . . . . . . . . 5 - 15 Check Unit . . . . . . . . . . . . . . . . . . . . . . . . . . . . . . . . . 5 - 25 Start DP. . . . . . . . . . . . . . . . . . . . . . . . . . . . . . . . . . . 5 - 26 Stop DP . . . . . . . . . . . . . . . . . . . . . . . . . . . . . . . . . . . 5 - 27 Write to AJ71 . . . . . . . . . . . . . . . . . . . . . . . . . . . . . . . . 5 - 28 Verify . . . . . . . . . . . . . . . . . . . . . . . . . . . . . . . . . . . . 5 - 30 MELSEC ProfiMap Software Manual Contents III Chapter 6: Profibus/FMS Interface . . . . . . . . . . . . . . . . . . . . . 6 - 1 Parameter Setting for A(1S)J71PB96F . . . . . . . . . . . . . . . . . . . . . . 6 - 1 Introduction and Overview . . . . . . . . . . . . . . . . . . . . . . . . . . 6 - 1 Button Param. Settings. . . . . . . . . . . . . . . . . . . . . . . . . . . . 6 - 3 Calculation of the Target Rotation Time (TTR) . . . . . . . . . . . . . . . . 6 - 6 Button CRL Settings (Communications Reference List) . . . . . . . . . . . . 6 - 7 Editing an FMS CRL Entry . . . . . . . . . . . . . . . . . . . . . . . . . . 6 - 10 Button Client Features . . . . . . . . . . . . . . . . . . . . . . . . . . . 6 - 16 Button Server Features . . . . . . . . . . . . . . . . . . . . . . . . . . . 6 - 18 Button Header . . . . . . . . . . . . . . . . . . . . . . . . . . . . . . . 6 - 20 Button CRL Check: . . . . . . . . . . . . . . . . . . . . . . . . . . . . . 6 - 22 VFD - Local Object Dictionary . . . . . . . . . . . . . . . . . . . . . . . . 6 - 24 Data Type Structure List . . . . . . . . . . . . . . . . . . . . . . . . . . 6 - 27 VFD Variable Setting: . . . . . . . . . . . . . . . . . . . . . . . . . . . . 6 - 31 Record Variable: . . . . . . . . . . . . . . . . . . . . . . . . . . . . . . 6 - 36 Remote Mode . . . . . . . . . . . . . . . . . . . . . . . . . . . . . . . 6 - 38 Remote OD Set: . . . . . . . . . . . . . . . . . . . . . . . . . . . . . . 6 - 39 Remote OD Index: . . . . . . . . . . . . . . . . . . . . . . . . . . . . . 6 - 40 Remote OD Display:. . . . . . . . . . . . . . . . . . . . . . . . . . . . . 6 - 42 Monitor Selection: . . . . . . . . . . . . . . . . . . . . . . . . . . . . . 6 - 44 Software Version Monitor: . . . . . . . . . . . . . . . . . . . . . . . . . 6 - 45 Initial Check Monitor: . . . . . . . . . . . . . . . . . . . . . . . . . . . . 6 - 46 Trouble Information Monitor: . . . . . . . . . . . . . . . . . . . . . . . . 6 - 47 FMS CREF Check: . . . . . . . . . . . . . . . . . . . . . . . . . . . . . . 6 - 48 Read from A(1S)J71PB96F: . . . . . . . . . . . . . . . . . . . . . . . . . 6 - 50 Write to A(1S)J71PB96F: . . . . . . . . . . . . . . . . . . . . . . . . . . 6 - 51 Verify with A(1S)J71PB96F: . . . . . . . . . . . . . . . . . . . . . . . . . 6 - 53 Chapter 7: Network Database . . . . . . . . . . . . . . . . . . . . . . . 7 - 1 Introduction . . . . . . . . . . . . . . . . . . . . . . . . . . . . . . . . . . . 7 - 1 Supported network configurations . . . . . . . . . . . . . . . . . . . . . . 7 - 1 Supported connection types . . . . . . . . . . . . . . . . . . . . . . . . . 7 - 2 Database Handling . . . . . . . . . . . . . . . . . . . . . . . . . . . . . . . 7 - 3 Opening the network database . . . . . . . . . . . . . . . . . . . . . . . 7 - 3 Defining a CPU port network connection. . . . . . . . . . . . . . . . . . . 7 - 5 Defining an Ethernet connection . . . . . . . . . . . . . . . . . . . . . . . 7 - 7 Network connection test . . . . . . . . . . . . . . . . . . . . . . . . . . 7 - 11 Changing the network symbolic name . . . . . . . . . . . . . . . . . . . 7 - 14 Clearing a network connection index . . . . . . . . . . . . . . . . . . . . 7 - 15 Transferring the network database . . . . . . . . . . . . . . . . . . . . . 7 - 16 Software Manual MELSEC ProfiMap IV Contents MELSEC ProfiMap Software Manual Introduction 1 – 1 This manual... ...is a compact guide to using MELSEC ProfiMap software suitable both for beginners and experienced users upgrading from other systems. The manual includes explanations of the terms and structural concepts about the software and the configuration of an open network system. The manual provides a precise step-by-step description of how to use MELSEC ProfiMap including sample projects. These executable application is used to demonstrate the operation of the program with the help of the exercises provided in this manual. If you’re not yet familiar with MS Windows ... ... please at least read the Windows Fundamentals section in the Windows User’s Guide, or work through the Windows Tutorial accessible through the Help menu of the Windows Program Manager. This will teach you what you need to know about using the basic elements of MS Windows, and the operating procedures that are identical in all Windows application programs. If you have problems with parameter settings, ... ... please refer to the user´s manuals of the concerning open network modules. If you get stuck... ... don’t despair, help is never far away! If you run up against seemingly insoluble problems, or if you have questions about MELSEC ProfiMap or the connected programmable logic controller (PLC) configuration, please first refer to the manuals and documentation. Many answers and solutions can also be found directly in the MELSEC ProfiMap context-sensitive online help system, which can always be accessed by pressing . Make use of the Index command in the Help menu as well, as this will often locate the information you need. If you cannot find answers to your questions in any of these places, contact your local MITSUBISHI ELECTRIC representative or call our European headquarters in Ratingen directly. The addresses and phone numbers are provided on the back covers of all our manuals. Software Manual MELSEC ProfiMap Introduction Introduction 1 – 2 Introduction Typographic conventions and other hints Introduction Menu names, menu commands, submenu commands and dialog box options are printed in boldface type. Buttons are generally presented in the same way as they appear in the window (e.g. ). These two symbols are used to identify the separate instructions for mouse and keyboard users. Examples: This symbol identifies examples. Note: This symbol draws your attention to notes, hints and valuable or useful information. WARNING: Always pay particular attention to the warnings marked with this symbol. Failure to follow these instructions may lead to data loss, damage to your hardware or other serious problems. MELSEC ProfiMap Software Manual Installation 2 – 1 Installation Before You Begin Software Purpose ꔴ PROFIBUS/DP interface A(1S)J71PB92D ꔴ PROFIBUS/FMS interface A(1S)J71PB96F ꔴ 803.3/MAP interface AJ71M56EF1/2 Installation This software is a configuration utility software package which will be used to configure network interface modules of MELSEC A-series’ PLC such as: General Features This software package has the following features: Software Manual ꔴ Editor windows ꔴ Network parameter checking functions ꔴ Download/Upload/Verify possibilities to the network modules ꔴ Monitor windows ꔴ Import/Export functions ꔴ Parameter file handling on floppy disk / hard disk ꔴ Parameter print feature ꔴ Screen resolution independent MELSEC ProfiMap 2 – 2 Installation System Requirements To install the MELSEC ProfiMap software package, your computer has to meet the following requirements. Installation Minimum hardware configuration ꔴ Pentium PC, 60 MHz ꔴ 16 MB RAM ꔴ Hard disk with at least 20 MB free space ꔴ CD-ROM drive ꔴ VGA compatible graphics adapter ꔴ One serial port for communication with the PLC system ꔴ 14"/35 cm diag. VGA monitor Recommended enhancements ꔴ Pentium PC, 200 MHz or higher ꔴ 32 MB RAM ꔴ 2nd serial port and mouse ꔴ 1 printer port ꔴ Printer Software requirements The software is able to run on the following graphical operating systems: ꔴ Windows 95 ꔴ Windows NT (V4.0 or higher) Copyright IMPORTANT NOTICE: This software is protected by copyright. By operating the distribution disks package you automatically accept terms and conditions of the Licence Agreement. You are only permitted to make one single copy of the original distribution disks for your own backup and archiving purposes. MELSEC ProfiMap Software Manual Installation 2–3 Software installation MELSEC ProfiMap software setup Please close all other running software before installation and do not run other installation programs during the installation of the MELSEC ProfiMap software. Installing MELSEC ProfiMap on your hard disk To start the installation, proceed as follows: 햲 If you have not done already, start Windows. 햳 Insert the installation CD-ROM into your CD-ROM drive. 햴 On the Desktop select the Start menu and the Run... command. 햵 Enter: d:\ProfiMap300\disk1\setup.exe (for "d:" enter the drive letter of YOUR CD-ROM drive) 햶 Hit Return or click on the OK button to proceed with the installation. The Welcome screen appears. Follow the given instructions that guide you through the installation procedure. Continue with Next. 햶 Then you are in the licence agreement window. Please read these terms carefully. 햷 Click on Yes if you want to proceed or No if you want to abort. You are then in the User Information screen. You must enter your name and company here. 햸 Click Next > to proceed with the installation. You are now asked about the installation location. Enter the destination directory where you want the MELSEC ProfiMap software to be installed (default setting is C:\ProfiMap_3_00). 햹 If you agree with the default setting, just click on Next >. If you want to choose another destination click Browse and enter your desired drive and directory. Software Manual MELSEC ProfiMap Installation To install the MELSEC ProfiMap software (hereafter called MELSEC ProfiMap) from CD-ROM under Windows 95 or Windows NT, you need to have Windows installed properly. You do not need to be logged in to Windows NT with administrator privileges. 2 – 4 Installation 햺 You can now choose between three types of setup options: 컄 컄 컄 Typical (default): This selection installs MELSEC ProfiMap and the device data base for Profibus/DP on your harddisk. This is the recommended option. Compact: This selection installs MELSEC ProfiMap without device data base for Profibus/DP on your hard disk. This option is especially suitable, if you intend to use this software for the setup of 803.3/MAP 3.0 or either only for MMS or FMS. Custom: With this selection you can decide yourself. Installation After having made your decision click Next > again. 햻 Depending on your Windows version you can select the program folder which you want to have installed. Enter a new folder name or accept the displayed one and click on Next >. 햽 At last you will see an overview of the current settings. You can accept the settings and start the installation with Next >. The installation will start. After the installation was successfully finished, you will see an appropriate message. Please refer to the file CONTENTS.TXT in the root directory of the installation CD-ROM for further details on its contents. The MELSEC EasySocket software is required for network connections to the ProfiBus master module only. If you intend to configure the master module exclusively via the programming port, you do not need to install MELSEC EasySocket. If MELSEC EasySocket is not installed but required afterwards you will be prompted for the installtion. Button functions With the Next button you will leave the current menu and enter the next menu. The Cancel button ends the ProfiBus installation procedure and with the Back button you go to the previous window. MELSEC ProfiMap Software Manual The Menus 3 – 1 The Menus Starting MELSEC ProfiMap 햲 Double-click on the MELSEC ProfiMap icon. This starts the MELSEC ProfiMap software and displays the start-up screen. 햳 Confirm with a click on the button or simply hit «. Menu after Start Menus After pressing the button the menu bar becomes active. The menu bar offers the following pull-down menus: The pull-down menus can be selected via mouse or keyboard. File: ¦F Setup: ¦S View: ¦V Help: ¦H The items in the open pull-down menus can be accessed via mouse or keyboard. The underlined character will start the function. In addition there are some menu items which may be started using predefined hotkeys. Software Manual MELSEC ProfiMap 3 – 2 The Menus The toolbar just below the main menu contains buttons for an instant access of the most frequently used functions of MELSEC ProfiMap. (The MXChange button is only available, if MXChange actually is installed on your computer): New Starting a new project §N Open Opening an existing project §O Save Saving a modified project §S Print Printing the current project §p Print Setup Opening the printer setup Page Setup Defining the parameters to be printed Menus Network Database Managing the records of the network database MELSEC ProfiMap §d Serial Port Select COM port 1 or 2 §e MXChange MXChange support properties §m GSD GSD device database §g Help Getting context help Help Tool Getting help on items you click on About Displaying program information Software Manual The Menus 3 – 3 File menu Menus After having started the MELSEC ProfiMap software, this is the first menu to work with. With the help of this menu you can create a new project, load an existing project, import and export a project. The menu commands have the following functions. Command Purpose Shortcut Hotkey New Starting a new project N Open Opening an existing project O Save Saving a modified project S Save as Saving a modified project with a new name A — ASCII Import Reading a project generated by a different software* I — ASCII Export Writing a project to other format to be read by different software* E — Print Printing the current project P Printer Setup Opening the printer setup R — Page Setup Defining the parameters to be printed T — Project select Opening one of the four latest used projects 1,2,3,4 — Exit Leaving the software X — §N §O §S §p *The marked items are only valid for configuration of 803.3/MAP3.0 network. All these menu commands are described in detail on the following pages. Note: PROFIBUS/DP-Projects and device databases from MELSEC ProfiMap Ver. 1.0 can only be used in Ver. 2.0 after conversion with the included conversion tool. Software Manual MELSEC ProfiMap 3 – 4 The Menus Command New The menu command New is used to create a new project. The purpose of this menu command is to setup network parameters for a MELSEC A/Q and AnS/QnAS series network interface module. Up to 8 projects can be opened at the same time. First you have to select one of the following network modules you want to setup: n n Menus n Profibus DP (A(1S)J71PB92D) Profibus FMS (A(1S)J71PB96F) 802.3 / MAP (AJ71M56EF2) Then the project dialog box appears where you configure and access the selected network module: MELSEC ProfiMap Software Manual The Menus 3 – 5 Section "Config Module" in the project dialog box Here you edit the dedicated parameters for the selected network interface module in specific editors. All buttons and functions within the "Config Module" section depend on the module type selected. At present 3 network interface modules are supported. The following parameters can be edited depending on the selected module: AJ71M56EF2 In case of AJ71M56EF2 MAP3.0 / ETHERNET network interface: n n n OSI parameters SAP/AE parameters Named variables A(1S)J71PB92D Menus Chapter 4 of this manual contains a detailed description of the meaning and setting of these parameters In case of A(1S)J71PB92D Profibus DP network interface: n n n Device database Master parameters Definition of I/O slaves Chapter 5 of this manual contains a detailed description of the meaning and setting of these parameters. A(1S)J71PB96F In case of A(1S)J71PB96F Profibus FMS network interface: n n n Parameter settings CRL settings OD settings Chapter 6 of this manual contains a detailed description of the meaning and setting of these parameters. Software Manual MELSEC ProfiMap 3 – 6 The Menus Section "Access Module" in the project dialog box These functions interact with the network interface modules. Therefore, it is necessary that the parameter setting cable is installed either to COM1 or COM2 of the personal computer and to the network module. Note: Depending on the network interface module different parameter setting cables must be used. 쐍 For the AJ71M56EF2 use the red programming cable SC09. 쐍 For the A(1S)J71PB92D or A(1S)J71PB96F use the blue ProfiCab cable. It is included in the software package. Refer to (Setup/Serial Port) for further details. The following buttons and functions are provided (refer to chapters 4, 5, 6 for detailed descriptions of the individual module setups): Item (button) Menus Remote Mode Purpose 햲 햳 Loads the object dictionary from the remote station Monitor 햲 Opens a dialog box for monitor selection. Depends on the selected network module Read from ... 햲 Reads parameters from the connected network module Write to ... Writes the created parameters to the network module Verify Checks whether the created parameters and the parameters in the connected network module are equal 햲 햳 Shortcut ¦e ¦M ¦R ¦T ¦y Not available for Profibus DP module Not available for MAP3.0 module Button Remote Mode This function is supported by the FMS modules only and accesses the remote mode management dialog. Here you can load the object dictionary from the remote station via the current CREF. MELSEC ProfiMap only provides an overview of the loaded remote object dictionary. MELSEC ProfiMap Software Manual The Menus 3 – 7 Button Monitor Depending on the network interface module different monitor functions are available. If the network interface module AJ71M56EF2 has been selected the following dialog box appears: A(1S)J71PB96F If the network interface module A(1S)J71PB96F has been selected the following dialog box appears: A(1S)J71PB92D The network interface module A(1S)J71PB92D does not support the monitor function. Software Manual MELSEC ProfiMap Menus AJ71M56EF2 3 – 8 The Menus Read/Write/Verify operations from/to/with the master module Before you start the transfer: n Ensure that no other data is transferred from or to the network module (FROM/TO instructions) n Ensure that the serial cable is connected correctly to your personal computer and to the network module n Set the master module to the parameterize mode n Reset the PLC CPU After the transfer is completed: n Set the master to the operating mode n Reset the PLC CPU Button Read from A(1S)J71 Menus The purpose of this function is to upload the module configuration from the selected network interface module. To start this function click on the button. Only for an FMS project you can additionally specify the items to be transferred: When is selected this dialog box will be closed. To start the upload operation click on the button or simply press «. The upload operation will be started if there are no errors. MELSEC ProfiMap Software Manual The Menus 3 – 9 If the network interface does not respond, the following dialog box appears: If there is a positive response from the network interface module the reading operation starts and the following status window appears: The bar graph informs you about the status of the upload operation. When you click on the button during the upload operation, the interaction with the network interface module will be stopped. A new message appears informing you that the upload operation has been interrupted and that the old parameter data are still valid. This means that the parameters defined previously are not overwritten by the uploaded parameters. The old parameters will only be updated by the uploaded data if the upload operation was done completely and successfully. Software Manual MELSEC ProfiMap Menus If the serial port is not configured, the following dialog box appears: 3 – 10 The Menus Button Write to A(1S)J71 The purpose of this function is to download the generated parameter set to the network interface module. To start this function press the button. Only for an FMS project you can additionally specify the items to be transferred: Menus When is selected this dialog box will be closed. To start the download operation click on the button or simply press «. The download operation will be started if there are no errors. If the network interface does not respond, the following dialog box appears: If the serial port is not configured, the following dialog box appears: MELSEC ProfiMap Software Manual The Menus 3 – 11 When the configuration software detects that the network interface module is write protected the following message appears: AJ71M56EF2 A(1S)J71PB96F A(1S)J71PB92D “AJ71M56EF2 is write protected. Please set dip switch 1 and 2 to right position.” “A(1S)J71PB96F is write protected. Please set rotary switch to position 1.” - no message - The bar graph informs you about the current status of the download operation. When you click on the button the interaction with the network interface module will be stopped at the next possible protocol and the status window will be closed. A new message box appears: “Download has been interrupted. Data may be inconsistent. Retry download”. Software Manual MELSEC ProfiMap Menus If there is a positive response from the network interface module the writing operation starts and the following status window appears: 3 – 12 The Menus Button Verify The purpose of this function is to verify whether the parameters in the software and those in the connected network interface module match. Menus If the network interface module A(1S)J71PB96F has been selected the following dialog box appears. Only for an FMS project you can additionally specify the items to be verified: When the Click on button is pressed this dialog box will be closed. to start the verify operation. If the network interface does not respond, the following dialog box appears: If the serial port is not configured, the following dialog box appears: MELSEC ProfiMap Software Manual The Menus 3 – 13 If there is a positive response from the network interface module the verify operation starts and the following status window appears: If the verify function finds differences between the parameters at the network interface module and those in the software a message states which set of parameters are not equal. WARNING: Do not forget to save your current project under File/Save as... in the main menu otherwise your new project and your changes made will be lost! Software Manual MELSEC ProfiMap Menus If the verify function does not find any difference between the parameters in the network interface module and those in the software a message appears informing that the parameter settings are equal. 3 – 14 The Menus Command Open Menus The menu command Open allows to open a project, which has previously been saved. This command uses the Windows dialog box for file open operation. The Open dialog box lists only files of the type n n n *.DP2 *.FMS *.MMS (project of A(1S)J71PB92D – Profibus/DP network) (project of A(1S)J71PB96F – Profibus/FMS network) (project of AJ71M56EF2 – 803.3/MAP3.0 network) In case of a *.DP2 project MELSEC ProfiMap is looking for an *.EXT project with the same name, stored in the same directory. In case that the *.EXT file exits MELSEC ProfiMap searches for missing GSD Database entries of the *.DP2 project. This functionality ensures that any MELSEC ProfiMap V. 2.0 PROFIBUS/DP project can be opened generated on any other personal computer running MELSEC ProfiMap V. 2.0. The shortcuts defined by the Windows dialog box for file open are valid. Note: *.DP-projects generated with MELSEC ProfiMap V. 1.0 cannot be opened. MELSEC ProfiMap Software Manual The Menus 3 – 15 Command Save This menu command is used to save a modified project. The project will be saved to the assigned file name. If no file name exists (e.g. new project) the standard dialog box for Save as will be opened. In case of a A(1S)J71PB92D there are two possibilities to save an existing project . n n Saving only the project with the extension *.DP2 where Profibus/DP network configuration is stored. This is usually done. Saving the project with the extension *.DP2 and an extract of the currently used GSD-database File. This extract contains all the attributs stored in the GSD-database file of those slave devices which are used in the network. The extract will have the same name as the project file but has the extension *.EXT. In order that both files are generated by MELSEC ProfiMap the function Export GSD-database must be enabled (Export GSD Database in the Menu Setup). Command Save As This menu command is used to save a modified project with a new assigned file name. This command uses the dialog box for file saving. The appropriate file extension is appended automatically depending on the module type you selected: n n n Software Manual *.DP2 *.FMS *.MMS MELSEC ProfiMap Menus In case that both files (*.DP2 and *.EXT) are stored on a floppy disk or any other media any computer running MELSEC ProfiMap V. 2.0 can open the project and modify the whole PROFIBUS/DP-Network, independently which GSD-database file exists on this computer. 3 – 16 The Menus Command ASCII Import Note: The menu command ASCII Import is only valid for the 802.3/MAP3.0 network. The ASCII import provides two features: n n Read the global variable list generated by MELSEC MEDOC plus. Read the whole project generated by any other ASCII editor. Menus The purpose of reading the global variable list generated by MELSEC MEDOC plus is to avoid the generation of named variables twice. This reduces your programming efforts. The purpose of reading a whole project generated by any other ASCII editor is that you can use this software package just for downloading the parameter set to the network interface. Any other intelligent network software can produce files for each specific node in the network. The ASCII reading function enables you to use these files easily. However you must follow an ASCII structure defined by MELSEC ProfiMap. Import ASCII Project Before the ASCII Import can be executed you need to have a network interface module selected and a project opened. When you select Import ASCII-Project a dialog box for file open operations appears. The format of the ASCII import file is predefined. If you want to get familiar with this features, create a small project with MELSEC ProfiMap. Perform an ASCII export and look at the syntax. This syntax will be used by the ASCII import function as well. It is quite easy to emulate this syntax. MELSEC ProfiMap Software Manual The Menus 3 – 17 Import Global Variables from MM+ If you select Import Global Variables from MM+, the import function is able to transfer the following variable formats: IEC 1131.3 variable supported by MM+ MAP 3.0 MMS variable supported by AJ71M56EF2 BOOL Boolean INT Integer DINT Octet string, 2 octet WORD Octet string, 2 octet DWORD Octet string, 4 octet ARRAY Array DUT (Data Unit Type) Not possible Refer to the MELSEC MEDOC plus Reference Manual how to generate an ASCII export file of the global variables. How to import arrays IEC 1131.3 array MMS array BOOL Boolean INT Integer DINT Not possible WORD Integer DWORD Not possible All other array variables cannot be imported. A message box appears on the screen: “Cannot import an array variable.” Since MMS-type projects require a MELSEC NET address which is not supplied by the MELSEC MEDOC plus global variables, this import function will set the MELSEC NET address to “Host Station = 0xFF” automatically (default). If an MMS-type project is selected, up to 100 global variables may be imported. Software Manual MELSEC ProfiMap Menus To be able to import global variables in MELSEC ProfiMap from MM+ it is necessary to perform an ASCII export of the “Global Variables” from MELSEC MEDOC plus. 3 – 18 The Menus If the number of global variables exceeds these 100 variables, a message dialog box appears: “Warning: Too many global variables. Cannot import all of them.” If the import is finalized, a message dialog box appears: “Import done. XX global variables imported” Command ASCII Export Note: This menu command is not available for PROFIBUS network. The ASCII export provides two features: n Menus n Export the named variable list to the global variable list which can be imported by MELSEC MEDOC plus. Export the whole project to an ASCII file which can be read by an ASCII editor. The purpose of exporting the named variable list to the global variable list which can be imported by MELSEC MEDOC plus is to avoid the generation of global variables twice. This reduces your programming efforts. The purpose of exporting the whole project to an ASCII file is that you have the possibility to include the generated parameter setting to other vendor configuration utilities. Export to ASCII Project If you select Export to ASCII-Project, a dialog box for file saving operation appears and a name for the project can be defined. The format of the ASCII export file is the same as for the menu command ASCII Import (see page before). MELSEC ProfiMap Software Manual The Menus 3 – 19 Export Named Variables to MM+ Global Variables If you select Export Named Variables to MM+ Global Variables, the export function transfers the following variable formats: IEC 1131.3 Variable supported by MELSEC MEDOC plus Boolean BOOL — Not possible Integer INT — DINT — Not possible — WORD — DWORD Octet-String Not possible Bit-String Not possible Array of Boolean/ Array of Integer Array of BOOL/ Array of INT If a named variable cannot be exported to a MELSEC MEDOC plus global variable, a message dialog box appears: “Cannot export variable ”XYZ" to MM+ global variables". Software Manual MELSEC ProfiMap Menus MAP 3.0 MMSvariable supported by AJ71M56EF2 3 – 20 The Menus Command Print The purpose of this menu command is to print the generated parameters of the selected network unit. This window states the actual printers and offers to select the print quality. Menus If you want to use another printer you can select it from the Name item. Command Printer Setup If you select the menu command Printer Setup the standard Windows dialog box for the printer setup appears. MELSEC ProfiMap Software Manual The Menus 3 – 21 Command Page Setup When you choose Page Setup you can select which parameters will be printed. The selections to be checked depend on the used network interface. Additionally you can indicate the position of the printed header on the page: top or bottom. If you select No header the header information will not be printed. Menus The project header belongs to the project and is saved in the project file. Project Select The pull-down menu shows you the last four used projects. You can open one of them by pressing the shortcut 1 to 4 or selecting it with the mouse cursor. Software Manual MELSEC ProfiMap 3 – 22 The Menus Command Exit You can use this menu command to quit the software. If anything in the current project has been modified and has not yet been saved the following message appears: If you want to save the last changes before leaving this software choose all modifications are lost. Menus If you choose . MELSEC ProfiMap Software Manual The Menus 3 – 23 Setup menu In the Setup menu you select the following menu commands. Command Purpose Shortcut Network Download Settings Serial Port Selection MXChange Support Provides a dialog to select and setup a network connection setting from the network database (for details refer to chapter 7). Selection of the serial port which will interact with the parameter setting port of the network interface. Provides a dialog to set up the properties of the MXChange connection. MXChange support is only selectable in case that MXChange is installed on the computer or on a LAN connected to the personal computer. Provides a dialog to access the GSD device database. D The current GSD-database of MELSEC ProfiMap can be exported in order that MELSEC ProfiMap installed on a different computer can import the database. Available in future versions. — GSD DeviceDatabase Export GSD Database Export MELSECNET Settings Software Manual E Hotkey §d §e §M G §g — MELSEC ProfiMap Menus M 3 – 24 The Menus Command Serial Port Selection The purpose of this menu command is to select the serial port of the personal computer which communicates with the network interface. This port setting is valid only for direct module access via RS232/422, not for CPU/network access. The following dialog box appears: The serial port selection will be stored on the hard disk after pressing the button. The port selection is a global setting and valid at once for all open projects. Menus Note: Depending on the network interface module different parameter setting cables must be used. 쐍 For the AJ71M56EF2 use the red programming cable SC09. 쐍 For the A(1S)J71PB92D or A(1S)J71PB96F use the blue ProfiCab cable. MELSEC ProfiMap Software Manual The Menus 3 – 25 Command MXChange support MXChange is an external software package made by Mitsubishi Electric. An A(1S)J71PB92D PROFIBUS/DP module project can use MXChange to generate a suitable PLC CPU sequence program at MELSEC MEDOC plus V. 2.32 or later. The PLC CPU program update is done automatically with saving the A(1S)J71PB92D project. For this purpose the MXChange server must be installed and MELSEC ProfiMap must be connected to this server. Menus This dialog is used to setup the MXChange connection: Item Meaning MXChange Connection Usage Local MXChange Server Select Server Instance IP Address Enable/disable the MXChange function Specifies that MXChange is installed locally on the same system as MELSEC ProfiMap (not in a LAN) Selects one of up to 16 available servers to connect to User Name Specify the IP address of the MXChange server in the LAN (ask your network administrator) Enter your user name for the MXChange server Password Enter your password for the MXChange server Test Tests, if a connection to the MXChange server can be established with the specified settings Shortcut §M §l §I §U §P §t You can set the MXChange connection usage for the A(1S)J71PB92D project by enabling the MXChange Connection Usage check box. Software Manual MELSEC ProfiMap 3 – 26 The Menus When the user prefers a local MXChange server, it is compulsory to install the server on the local PC. The local MXChange server is selected by enabling the Local MXChange Server check box. For correct remote MXChange support it is compulsory to install the TCP/IP services of the operating system. The correct IP address of the remote station where the server is located can be set by disabling the Local MXChange Server check box. The correct account, subdivided by the User Name and Password is also compulsory for remote connection usage. Command GSD Device Database The device database contains information about slave devices from Mitsubishi or 3rd party manufacturers. This item is used to add or delete devices from the internal database (so called GSD files from PROFIBUS/DP slave devices) and to import extracted GSD data from other computers running MELSEC ProfiMap. Menus The purpose of this function is to add or delete devices from the internal database of available devices. The software is distributed with a predefined list of groups, which provide a general structure for all added slave devices. The Device Database can be modified in the following dialog box: Note: Refer to chapter 5 for a detailed description of the GSD Device Database features. MELSEC ProfiMap Software Manual The Menus 3 – 27 View menu In the View menu you can select the following menu commands: Command Purpose Shortcut Hotkey Tool bar Enable / disable tool bar none none Status bar Enable / disable status bar none none These two menu commands allow you to select whether the tool bar and the status bar will be displayed or not. A check mark in front of the commands shows that this function is currently activated. If the toolbar is enabled you will find additional buttons for creating documents, opening documents, saving documents or the help menu. Command Status bar If this command is enabled a status bar will be displayed at the bottom of the window informing you about the selected item and the current status of the project. Window menu This menu provides the standard "window" functions where you can switch over to one of several projects that you keep open simultaneously. Either click on the loaded project you want to switch over to or enter the according number. Up to 8 projects can be opened at the same time. Software Manual MELSEC ProfiMap Menus Command Toolbar 3 – 28 The Menus Help menu Within the Help menu you can select between the following menu commands: Command Purpose Shortcut Hotkey Index Searching for keywords none none Using Help Call Windows „Using Help function“ none none About MELSEC ProfiMap Display software release none none Command Index Menus With the help of this function you can search for a keyword. Just type in the term you need information about and you will get help. In addition you will be supported by a context-sensitive help. If you have opened any dialog box you can access the help function by pressing the key. Command Using Help The purpose of this function is to start the Windows help informing you on how to use the help system. MELSEC ProfiMap Software Manual The Menus 3 – 29 Command About MELSEC ProfiMap This function displays information about your software release. Since MITSUBISHI ELECTRIC wants to include further network interface modules to this configuration software package it is possible to distinguish the software by its version number. Menus The following message box appears: Software Manual MELSEC ProfiMap Menus 3 – 30 The Menus MELSEC ProfiMap Software Manual 802.3 / MAP3.0 Interface 4 – 1 802.3 / MAP3.0 Interface Parameter Setting for AJ71M56EF2 Introduction and Overview This chapter describes how to generate the AJ71M56EF2 parameter settings. After selecting the command New in the File menu (see chapter 3 for details) choose the module type 802.3 / MAP (AJ71M56EF2) from the menu. MAP 3.0 The project dialog box shown below for the network setup appears. It is subdivided into two sections, one for the offline configuration and one for the online access of the module. The following functions are provided: Config Module n n n OSI Parameter SAP / AE Parameter Named Variable Access Module n n n n Software Manual Monitor Read from AJ71 Write to AJ71 Verify MELSEC ProfiMap 4 – 2 802.3 / MAP3.0 Interface MAP 3.0 The parameter for this network interface module are grouped into three different items as follows: MELSEC ProfiMap Item Purpose OSI Parameter Setup of layer 3 and 4 parameter of the OSI model. This function is used to define a watch dog timer which checks whether a connection is still active. In addition there are timer settings which are important in case of communication errors. Shortcut ¦O SAP / AE Parameter Setup of layer 7 parameter of the OSI model. This item defines logical connections to other network nodes. ¦S Named Variables Setup of layer 7 parameter of the OSI model. This item defines variables being server for other network nodes. ¦N Software Manual 802.3 / MAP3.0 Interface 4 – 3 Command OSI PARAMETER The purpose of this function is to define a watch dog timer which checks whether a connection is still active or not. In addition there are timer settings which are important in case of communication errors. If you select this function without having modified these values before, the default values will be loaded. The default values are defined as follows: Item Configuration timer (CT) Redirection timer (RT) Max. No. of transmission (N) Local acknowledge time (A(I)) Local retransmission time (TI) Window time Default value 30 60 3 10 15 10 MAP 3.0 The OSI parameters can be modified in the following dialog box: You can use the button to set the “OSI Parameter” entries to default values as defined in the previous table. If you select or press the ° key this dialog box will be closed without updating the “OSI Parameter” setting. Software Manual MELSEC ProfiMap 4 – 4 802.3 / MAP3.0 Interface The timers n n n Inactivity Time (I) Persistence Time (R) Bound on ref & Seq Numbers (L) will be calculated based on the settings currently made in this dialog box. For this purpose the following formulars are valid: n n n I=2xNxW L = (N-1) x Tl R = 2 x Tl + R You can select an entry box by clicking on it or using the shortcuts and/or the © key. MAP 3.0 If you select or press « a range checking operation will be started. If no errors are found the modified “OSI Parameter” values will be accepted and this dialog box will be closed. The project dialog box will be active. The range checking operation looks for entries which are out of range. The following error message will be displayed: The setting ranges are as follows: MELSEC ProfiMap Item Range Configuration timer (CT) Redirection timer (RT) Max. No. of transmission (N) Local acknowledge time (A(I)) Local retransmission time (TI) Window time 5 – 40 40 – 65 2 – 10 1 – 30 5 – 30 5 – 60 Software Manual 802.3 / MAP3.0 Interface 4 – 5 Example: and Select or press « in the message box to close it. The dialog box OSI Parameter Setting remains open and you can enter a new value. The purpose of this procedure is, that you can correct all ranges until no more errors remain. Select or press « after entering the new value. If no more error message appears all values are entered correctly. Software Manual MELSEC ProfiMap MAP 3.0 If a message box of the checking operation is open the buttons in the dialog box OSI Parameter Setting cannot be accessed. 4 – 6 802.3 / MAP3.0 Interface Command SAP/AE PARAMETER This function defines logical connections to other network nodes. There are two types of connections: n n Local_AE: This is an application entry being server for other nodes. Remote_AE: There are application entries which will act as client to other nodes. If you select this function without having modified these values before, the default values will be loaded. The default values are defined as follows: Item Application entry (AE) AEname APtitle AEqualifier Default values Local Remote 1 Remote 2 ---- Remote 24 MELSEC_A empty empty ---- empty 1,3,9999,3,7 empty empty ---- empty ---- 00000000 00000001 00000000 00000000 PSAP 0001 empty empty ---- empty TSAP 0001 empty empty ---- empty 49 00 01 02 00 00 00 02 00 01 empty empty ---- empty NSAPaddress One “Local_AE” and up to 24 “Remote_AE” can be defined. MAP 3.0 The term “empty” in the above table means that there is no value or ASCII character present. MELSEC ProfiMap Software Manual 802.3 / MAP3.0 Interface 4 – 7 If you select this function the following dialog box appears displaying only “Application Entry (AE)” and “AEname”: If you select or press ° the previous setting (before opening this dialog box) is still valid and this dialog box will be closed. button the default values will be loaded (see table above). The last “Entry No.” having an “AEname”, which is not empty, will be deleted after pressing . Note: The “Entry No.” called “Local” has to remain, it cannot be deleted. If the button or « is pressed, then the modified values will be updated and this dialog box will be closed. and open the same dialog box. If you select , you can define new parameters. The “Append” function reaches the first “Entry No.” which is empty. If the default values are loaded the first “Entry No.” is “Remote 1". Software Manual MELSEC ProfiMap MAP 3.0 If you click on the 4 – 8 802.3 / MAP3.0 Interface If you select , you can modify a parameter set which has already been defined. If you have selected “AEname: Local” the following dialog box will be displayed: While this dialog box is open all buttons in the dialog box SAP/AE Parameter Setting cannot be accessed. MAP 3.0 When you select the button or press the ° key the previous setting (before opening this dialog box) is still valid and this dialog box will be closed. This parameter set becomes equal to “Remote 1" of default parameters. this dialog box and in the dialog box SAP/AE Parameter Setting are similar. With the button you delete the “Entry No.” currently selected. If “Local” is loaded “Clear” has no function. in If you select the button or press the « key a range checking operation will be started. If no error is found the dialog box SAP/AE Parameter Setting will be closed and all modifications will be accepted. The range checking operation stops after having found the first error. A triangle shaped red pointer on the left side of the dialog box SAP/AE Parameter Setting points on the error. The range checking operation checks whether there is any entry out of range and whether the “AEname” is already used for another setting. MELSEC ProfiMap Software Manual 802.3 / MAP3.0 Interface 4 – 9 The following error message will be displayed: If the “AEname” has already been used at another setting there will be a special message. Item Range AEname max. 8 characters; a previously registered AEname cannot be used APtitle String of ASCII character “0" – ”9"; If more than 16 characters are set max. every 16 characters must be devided by a comma (“,”). String of ASCII characters “0" – ”9"; max. 8 characters; range 1 – 99999999 AEqualifier PSAP SSAP TSAP NSAPaddress String of ASCII characters “0" – ”9" and “A” – “F”; max. 32 characters; range 1 – FFFFFFFFFFFFFFFFFFFFFFFFFFFFFFFF String of ASCII characters “0" – ”9" and “A” – “F”; max. 32 characters; range 1 – FFFFFFFFFFFFFFFFFFFFFFFFFFFFFFFF String of ASCII characters “0" – ”9" and “A” – “F”; max. 64 characters; range 1 – FFFFFFFFFFFFFFFFFFFFFFFFFFFFFFFFFFFFFFFFFFFFFFFFFFFFFFFFFFFFFFFF String of ASCII characters “0" – ”9" and “A” – “F” and “Space”; max. 34 characters (without space); space is allowed but has no meaning; makes it more readable; range 1 – FFFFFFFFFFFFFFFFFFFFFFFFFFFFFFFF Example: If a message box is open all buttons in the dialog box SAP/AE Parameter Setting cannot be accessed. If you select or press the « key in the message box, the box will be closed and the red pointer will be erased. The dialog box SAP/AE Parameter Setting remains open. The purpose of this procedure is that you are able to correct the errors until all of them are corrected. Software Manual MELSEC ProfiMap MAP 3.0 The ranges are defined as follows: 4 – 10 802.3 / MAP3.0 Interface Command NAMED VARIABLE In a factory automation network the supervising computers exchange current production data. If one computer wants to get data from a PLC (programmable logic controller) it reads the contents of a variable from another PLC. If the computer wants to send data to a PLC it writes data to variables in another PLC. A network interface must provide variables which can be accessed by other network nodes. This means variables are server data. The purpose of this function is to define variables for a specific network interface. Other network interfaces can access these variables by calling the name of a variable. If you select this function without having modified any variables before the default setting for variables will be loaded. One network interface is able to store up to 100 variable definitions. The default values are defined as follows: No. Variable name Data structure Data type Length PLC device PLC device MELSECNET start address access 1 empty none none empty none empty Host (=255) 2 empty none none empty none empty Host (=255) .... empty none none empty none empty Host (=255) 100 empty none none empty none empty Host (=255) MAP 3.0 In the above table “none” means that “none” will be displayed in the dialog box Named Variable Setting - Variable No. If the item Named Variable is selected, the following dialog box appears: MELSEC ProfiMap Software Manual 802.3 / MAP3.0 Interface 4 – 11 If the button is selected or the ° key is pressed the previous setting (before opening this dialog box) is still valid and this dialog box will be closed. When you select or press « the modified values will be updated and this dialog box will be closed. If you select loaded. and the default setting as described in the previous table will be open the same dialog box. If you selected the “append” function searches the first “Name” entry which is empty. If the maximum number of 100 variables is reached this function is no more accessible. MAP 3.0 If you select you can modify a parameter set which has already been defined. The following dialog box will be displayed: When this dialog box is open then all buttons with dialog box Named Variable Setting cannot be accessed. If is selected or the ° key is pressed, the previous setting (before opening this dialog box) is still valid and this dialog box will be closed. If you select values. or press the ¦C key, all parameters will be set to the default in this dialog box and are similar. in the dialog box Named Variable Setting With you delete the variable currently selected. However, the variable number will still exist. The other variables will not be renumbered. Note: Since the AJ71M56EF2 does not support “Array” variables at present, make sure to select Object Type “Simple”. Otherwise the AJ71M56EF2 will have a malfunction. Software Manual MELSEC ProfiMap 4 – 12 802.3 / MAP3.0 Interface Name: Specifiy the name of the variable. A variable name can consist of 1 to 32 characters. Object Description: If the Object Type “Array” is selected, the data types “Integer” or “Boolean” can be specified. “Number of Octets“ will be disabled (grayed). They will be calculated by the software itself. After selecting the Object Type “Simple” you can select from the following data types n n n n Boolean Integer Octet-String Bit-String “Number of Array Elements” will be disabled (grayed). This entry is invalid. If MELSECNET Access “Host” is selected “Station No.” is disabled (grayed). This entry is invalid. If MELSECNET Access “Master” is selected “Station No.” is still disabled. If MELSECNET Access “Slave” is selected “Station No.” is valid. You can define a “Station No.” (range 1 to 64). MAP 3.0 If you select or press the « key the range checking operation will be started. If no error is found the dialog box Named Variable Setting - Variable at Idx will be closed and all modifications will be accepted. The range checking operation stops after having found the first error. A triangle shaped red pointer on the left side of the dialog box Named Variable Setting Variable at Idx points on the error. The range checking operation checks whether there is any entry out of range and whether a variable name is used twice. The following error message will be displayed: If the variable name has already been used for another variable, there will be a special mark. MELSEC ProfiMap Software Manual 802.3 / MAP3.0 Interface 4 – 13 The ranges are defined as follows: M, L X, Y B T, C, F CC D SD W R TN, TM CN, CM A V, Z Head address Simple Boolean bit string 0 – 8191 0 – (8191 - data length + 1) Array Boolean 0 – (8191 - array elements + 1) Simple Boolean bit string 0 – 7FF 0 – (7FF - data length + 1) Array Boolean 0 – (7FF - array elements + 1) Simple Boolean bit string 0 – FFF 0 – (FFF - data length + 1) Array Boolean 0 – (FFF - array elements + 1) Simple Boolean bit string 0 – 2047 0 – (2047 - data length + 1) Array Boolean 0 – (2047 - array elements + 1) Simple Boolean bit string 0 – 1023 0 – (1023 - data length + 1) Array Boolean 0 – (1023 array elements + 1) Simple Integer octet string 0 – 6143 0 – (6143 - [data length / 2] + 1) Array Integer Simple Integer octet string Array Integer 0 – (255 - array elements + 1) Simple Integer octet string 0 – FFF 0 – (FFF - [data length / 2] + 1) Array Integer 0 – (FFF - array elements + 1) Simple Integer octet string 0 – 8191 0 – (8191 - [data length / 2] + 1) Array Integer 0 – (8191 - array elements + 1) Simple Integer octet string 0 – 2047 0 – (2047 - [data length / 2] + 1) Array Integer 0 – (2047 - array elements + 1) Simple Integer octet string 0 – 1023 0 – (1023 - [data length / 2] + 1) Array Integer 0 – (1023 - array elements + 1) Simple Integer octet string 0–1 0 – (1 - [data length / 2] + 1) Array Integer 0 – (1 - array elements + 1) Simple Integer octet string 0–6 0 – (6 - [data length / 2] + 1) Array Integer 0 – (6 - array elements + 1) Data Length Array Elements 1 1 – 8192 n. v. n. v. 1 1 – 8192 1 1 – 2048 n. v. n. v. 1 1 – 2048 1 1 – 4096 n. v. n. v. 1 1 – 4096 1 1 – 2048 n. v. n. v. 1 1 – 2048 1 1 – 1024 n. v. n. v. 1 1 – 1024 2 1 – 1024 n. v. n. v. 0 – (6143 - array elements + 1) 2 1 – 512 0 – 255 0 – (255 - [data length / 2] + 1) 2 1 – 256 n. v. n. v. 2 1 – 128 2 1 – 1024 n. v. n. v. 2 1 – 512 2 1 – 1024 n. v. n. v. 2 1 – 512 2 1 – 1024 n. v. n. v. 2 1 – 512 2 1 – 1024 n. v. n. v. 2 2 1–4 n. v. n. v. 2 1–2 2 1 – 14 n. v. n. v. 2 1–7 Note: Do not use “Array” elements for the existing version of AJ71M56EF2! Software Manual MELSEC ProfiMap MAP 3.0 Device Object Type Data Type 4 – 14 802.3 / MAP3.0 Interface Example: If the message box of the checking operation is open, all buttons in the dialog box Named Variable Setting cannot be accessed. MAP 3.0 Select or press « in the message box to close it. The dialog box Named Variable Setting remains open and you can enter a new value. The purpose of this procedure is, that you can correct all ranges until no more errors remain. MELSEC ProfiMap Software Manual 802.3 / MAP3.0 Interface 4 – 15 Monitoring Mode This paragraph describes the possibilities of monitoring with the AJ71M56EF2 MMS interface. To activate the monitor selection window click on the button in the project dialog box. The monitoring options with the AJ71M56EF2 MMS interface are grouped into four different items. Purpose Initial check The AJ71M56EF2 will boot after power on or reset. During boot procedure it will perform a self diagnostics. With this item the self diagnostics result can be made visible. Shortcut ¦C Error status Using this item any error during network communication can be made visible. ¦E Software version Using this item the current ROM software version can be read. Statistics Using this item layer 2 and 4 statistical information can be made visible. ¦V ¦S Note: If a monitor dialog box is open, all the buttons in the project dialog box cannot be accessed. Software Manual MELSEC ProfiMap MAP 3.0 Item 4 – 16 802.3 / MAP3.0 Interface Button Initial Check MAP 3.0 The purpose of this function is to perform a self diagnostics check of the AJ71M56EF2 and to monitor the result in a window. The following dialog box appears: On the left side the items of the self diagnostics function are displayed. When is selected or the ° key is pressed this dialog box will be closed. Afterwards the dialog box “Monitor Selection” will be active. If you select or press the « key, the connected AJ71M56EF2 will be asked for the self diagnostics result once. The result will be displayed in the “Error Information area”. If there is no error, the corresponding message will appear. If an error occured during the self diagnostics function, then “Error” message will be dispayed at the “Error Information” area. If the serial communication fails, the following message will be displayed: MELSEC ProfiMap Software Manual 802.3 / MAP3.0 Interface 4 – 17 In this case please check the transmission cable and the correct type of the serial interface. It must be the SC-09 cable. Please check the serial port choosen in MELSEC ProfiMap as well. Then try the diagnostics function again. Button Error Status If you select or press the ° key, this dialog box will be closed. Afterwards the dialog box Monitor Selection will be active. If you select or press the « key, the connected AJ71M56EF2 will be read for the current error status. The result will be displayed as follows: Now you can decide if you want to clear the error buffer once. Press the button and the software will force the AJ71M56EF2 to clear the error buffer of the module. Software Manual MELSEC ProfiMap MAP 3.0 The purpose of this function is to check the current error status at the AJ71M56EF2. The following dialog box appears: 4 – 18 802.3 / MAP3.0 Interface If the serial communication fails, the following message will be displayed: In this case please check the transmission cable and the correct settings of the serial interface. Then try the error status function again. Button Software Version MAP 3.0 The purpose of this function is to read the current software releases of AJ71M56EF2. The following dialog box appears: If you select or press the ° key this dialog box will be closed. Afterwards the dialog box Monitor Selection will be active. MELSEC ProfiMap Software Manual 802.3 / MAP3.0 Interface 4 – 19 When you click or press the « key the connected AJ71M56EF2 will be asked for the software version currently installed. The result will be displayed as follows: n n n n 1st row: 2nd row: 3rd row: 4th row: Version of the ProfiBus communication software Version of the boot ROM that manages the operation of AJ71M56EF2 Module name in column “Software Type” Protocol type in column “Software Type” MAP 3.0 If the serial communication fails the following message will be displayed: In this case please check the transmission cable and the correct settings of the serial interface. Then try the software version function again. Software Manual MELSEC ProfiMap 4 – 20 802.3 / MAP3.0 Interface Button Statistics The purpose of this function is to monitor the current layer 2 and layer 4 information of the connected AJ71M56EF2. The following dialog box appears: MAP 3.0 When you select or press the ° key then this dialog box will be closed. Afterwards the dialog box Monitor Selection will be active. If you click on the button or press the « key the connected AJ71M56EF2 will continuously be asked for the current physical data layer and transport layer statistics information. The result will be displayed in the dedicated message areas. If the serial communication fails the following message box will be displayed: Then try this function again. MELSEC ProfiMap Software Manual Profibus/DP Interface 5 – 1 Profibus/DP Interface Parameter Setting for A(1S)J71PB92D Introduction and Overview This chapter describes how to generate the A(1S)J71PB92D parameter settings. After selecting the command New in the File menu (see chapter 3 for details) choose the module type Profibus DP (A(1S)J71PB92D) from the menu. The following dialog appears where you select the operation mode of your PROFIBUS/DP master module. The Profibus DP (A(1S)J71PB92D) modules support an advanced buffer memory management in 244 byte mode with larger and more flexible data telegrams and thus less delay in the sequence program. Profibus/DP The 32 byte mode is provided for compatibility reasons with the MELSEC ProfiMap V 1.0 software and with the previous A1SJ71PB92D modules. Software Manual MELSEC ProfiMap 5 – 2 Profibus/DP Interface The dialog box shown below for the network setup appears. It is subdivided into two sections, one for the offline configuration and one for the online access of the module. The following functions are provided: Config Module n n n Device Database Master Parameter Define I/O Slaves Access Module n n n n n Check Unit Start DP Stop DP Write to A(1S)J71 Verify Profibus/DP If one setting dialog box is open (e.g. Master Parameter) the other buttons in the dialog box Config Module can not be accessed. MELSEC ProfiMap Software Manual Profibus/DP Interface 5 – 3 The functions that can be invoked within this network setup dialog are listed below and will be described in detail in the following: Item Purpose Device Database The device database contains information about slave devices from Mitsubishi or 3rd party manufacturers. This item is used to add or delete devices from the internal database (so called GSD files from PROFIBUS/DP slave devices) and to import/export extracted GSD data. Master Parameter Define I/O-Slaves Check Unit Start DP Stop DP Write to A1(SJ)71 ¦D ¦p ¦o ¦c ¦s ¦t ¦i ¦y Profibus/DP Verify This item is used to set the bus parameter and all main parameters for the master in the Profibus network. This item is used to configure the Profibus/DP network. All network devices can be selected and configured. This item is used to check the master for its slot number, head address, ident string, firmware revision, and operating mode (Function available for network connections only. A network connection can be selected in the master settings). This item starts DP data transfer for the master (Function available for network connections only. A network connection can be selected in the master settings). This item stops DP data transfer for the master (Function available for network connections only. A network connection can be selected in the master settings). This item uploads the module configuration from the current project into the module. This item checks the current project against the module configuration online. Shortcut Software Manual MELSEC ProfiMap 5 – 4 Profibus/DP Interface Button Device Database The purpose of this function is to add or delete devices from the internal database of available devices. The software is distributed with a predefined list of groups, which provide a general structure for all added slave devices. The Device Database can be modified in the following dialog box: When a group is selected in the box “Slave Device Group”, the model names of the devices belonging to the selected group are displayed in the lower list box “Available Slave Systems”. Profibus/DP Upon selecting a device entry in this list box the bitmap, which has been assigned to the device, is displayed on the right side of the list box. Additionally both vendor name and revision string are displayed, as well as the name of the GSD file and the bitmap file. The so called GSD file describes the features of the slave such as the supported baud rate and the slave structure (modular slave/compact slave). The displayed vendor name and revision are included in the GSD file as well. Please ask the manufacturer of the slave device for the proper GSD file. MELSEC ProfiMap Software Manual Profibus/DP Interface 5 – 5 A slave device can be added to the database by pressing . A standard Open File-dialog appears, so the GSD file can be selected. Each added GSD file is automatically checked for its data integrity. When leaving the Open-dialog with , the user will be asked for some bitmap files (optional). Then the GSD device data is saved in the local GSD device database. The GSD file itself is no longer required. If the GSD file itself refers to a drawing picture of the slave device MELSEC ProfiMap searches automatically for the file. In case that the file is not found another Open File-dialog is displayed, so the user can select the bitmap file, which he wants to be linked to the GSD file, representing the corresponding device. The bitmap file can be supplied by the user from disk. It can be a bitmap file of the data type *.BMP or *.DIB. However the Profibus/DP standard recommends to provide a bitmap file for the dedicated slave device with the following restrictions: Bitmap Width 70 pixels Hight 40 pixels Colors 16 File extension DIB Only bitmaps that match the requirements in the table above can be used. Software Manual MELSEC ProfiMap Profibus/DP Adding devices 5 – 6 Profibus/DP Interface When both GSD and bitmap file have been selected, you will be asked to confirm the operation. Profibus/DP If you confirm, both files are copied to the internal directories for GSD and bitmap files. An entry is added to the internal device database for that device. MELSEC ProfiMap Software Manual Profibus/DP Interface 5 – 7 Importing GSD-Extract Files The GSD-Extract feature allows the transfer of the entire device information of one project from one personal computer to another without passing on each single GSD file for any parameterized devices. Click on to load any existing GSD-extract file or a complete GSD-database file: If this menu item is checked, any time you save your DP2-project the according GSD-extract file with the same name but the extension .EXT will be created in the same directory as well. Software Manual MELSEC ProfiMap Profibus/DP Creating GSD-Extract Files In order to create a *.EXT file containing all device information for the current project check the Export GSD Database item in the Setup menu. 5 – 8 Profibus/DP Interface Removing devices A device can be removed from the database by selecting the entry in the left list box and pressing the button. This deletes only the entry in the database reference file. It does not delete the GSD and bitmap files for that device. These files have to be removed manually. The reason for this is that it is possible to undo the delete function. button. Profibus/DP Note: The entry is immediately removed after clicking on the However you can add it once again later on. MELSEC ProfiMap Software Manual Profibus/DP Interface 5 – 9 Button Master Parameter Profibus/DP Within the Master parameters the baud rate, different adresses and other parameters for the Profibus module A(1S)J71PB92D can be set. When you click on the Master Parameter button the following window appears: Software Manual MELSEC ProfiMap 5 – 10 Profibus/DP Interface You can define the following parameters: Communications parameters of Master Settings Parameter Range Meaning I/O Mode O or E Toggles the operation mode (O = 32 Byte, E = 244 Byte). Name — States that the A(1S)J71PB92D is a master. Baud Rate 9.6 kbps – 12.000 Mbps Transfer rate for the communication. Define a baud rate that is supported by all slaves. FDL address 0–125 FDL address (station number) Head address 0–3F Module head address on the base unit Get HA — Get the head address of the installed master module (function available for network connections only). Error action flag — Output processing after failure. Type “G” or click on the white square if you want to have the outputs shut off in case of error occurence (recommended for drives, inverters etc.). In practice this means: After occurrence of any network error all outputs of the network are turned OFF. Download Selection — Uses a network connection to the master module for the download of the configuration data. Toggles Select Port/ Select Network button. Note: If you change the baud rate, power off the slaves. Otherwise the slaves cannot synchronize with the newly defined baud rate. Timing parameters of Master Settings Parameter Range Meaning Profibus/DP Min. slave interval 0 – 65535 x 100 µs Smallest allowed period of time between two slave poll cycles. This ensures that the sequence of function requests from the DP master can be handled by the DP slave. This value is valid for all installed slaves. The slowest slave defines this value. Polling timeout 0 – 65535 x 1 ms In case of master-master communication this parameter specifies the max. amount of time it may take the requestor to fetch the response. Data control time 0 – 65535 x 10 µs This parameter defines the period of time during which the A1SJ71PB92D notifies the slave operation status. This time is 6 times longer than the watch-dog control of slaves. If you want to use the factory set default values click on set to the standard values. MELSEC ProfiMap and all values are Software Manual Profibus/DP Interface 5 – 11 Bus Parameter This function allows to select the baud rate and to modify any parameters like timeouts, which are related to the baud rate. The last settings made are stored independently for each baud rate, so that by selecting a different baud rate these settings are shown again. Parameter Meaning Range Remark Baud Rate Transfer rate see selection Must be supported by all slaves T_sl Slot time 1 – 65535 x t_bit Max. Interval to wait for response min T_sdr Min. Station delay of responder 0 – 65535 x t_bit max T_sdr Max. Station delay of responder 0 – 65535 x t_bit T_qui Quiet time 0 – 255 x t_bit T_set Setup time 1 – 255 x t_bit T_tr Target rotation time 1 – 1048576 x t_bit GAP factor Controls the GAP update time (T_gud ) 1 – 100 HSA Highest station address 2 – 126 T = 0, if no repeater present When pressing the button all values are set to their default values, especially for the currently selected baud rate. Software Manual MELSEC ProfiMap Profibus/DP General timing factors are displayed in recalculated form based on the selected baud rate and absolute time durations. The conversion factors are the following: 5 – 12 Profibus/DP Interface Note: If you change the baud rate of an existing PROFIBUS/DP network, power off the slaves. Otherwise the slaves cannot synchronize with the newly defined baud rate. The inputs are checked against the input limits when leaving the dialog with the button. Additionally the following consistency checks are performed: n min T_sdr < max T_sdr n T_qui < min T_sdr n max T_sdr < T_sl n T_sl < T_tr Note: If you are not an experienced Profibus network administrator the Bus Parameters should not be changed except in the following cases: − more than 15 slave stations are implemented (target rotation time has to be calculated again) − the network consists of more than 1 master (target rotation time has to be calculated again) − Profibus/DP and Profibus/FMS operation are used in mixed mode (FMS parameters have to be defined) Profibus/DP For the correct parameter setting of the target rotation time TTR (t_tr) please refer to the Profibus standard DIN19245 part 3. However, it is important that the target rotation time is large enough to enable the A(1S)J71PB92D to poll each defined slave once per token cycle. MELSEC ProfiMap Software Manual Profibus/DP Interface 5 – 13 Download Selection If ProfiMap is connected to the master module via the CPU port or an Ethernet module, you have to select a network connection for the download of the configuration data. Network connections can be selected from the network database (for details refer to chapter 7). Activate the Use CPU/Network checkbox in the Master Settings dialog to use a network connection. The Select Port button toggles to the Select NW (select network) function. Select NW (select network) This button in the Master Settings dialog opens the network database. From the network database different network connections can be defined, edited, and selected. Refer to chapter 7 for details on the network database. Get HA (get head address) Click on to search for further master modules. Click on to accept the displayed one and transfer the corresponding head address to the master settings. Further master modules will be displayed, if searched for. Software Manual MELSEC ProfiMap Profibus/DP Click on this button in the Master Settings dialog to search for installed master modules and retrieve their head address. The found head address can be transferred to the corresponding parameter. 5 – 14 Profibus/DP Interface Profibus/DP The following message appears, if no further master module has been found. MELSEC ProfiMap Software Manual Profibus/DP Interface 5 – 15 Button Define I/O Slaves Profibus/DP This function defines the network configuration with the help of a graphical editor. This graphical editor allows you to select those slave stations from the device database, which are attached to the master and to modify their settings. The settings of the master and the other devices can be changed by double-clicking on the according icon. Double-click on the PROFIBUS connecting line to edit the bus parameters. Double-click on the ProfiMap PC to edit the connection to the master station. Move your mouse cursor on any item to obtain information on it. When you click on the Define I/O-Slaves button a symbolic graphical display of the network comes up, which contains only the master station and the ProfiMap PC with the currently selected connection to the master station. Within this window you can edit and add additional devices. For this purpose the current window is devided into hidden squares. When you click on the window a square appears and you can add a new device. Software Manual MELSEC ProfiMap 5 – 16 Profibus/DP Interface Pressing the right mouse button calls up a context menu with the commands Insert DP-Slave, Delete DP-Slave, and Modify Settings. Selecting Insert DP-Slave opens the Device Database dialog. You can also double-click directly on any item to modify it. Instead of clicking the right mouse button for adding and deleting devices you can use the ± and µ key. Profibus/DP Right-click within the graphical network configuration editor and select Insert DP-Slave to access the Device Database. After having selected a group in the window Device Database, a list of all slave models assigned to the respective group is displayed. For the selected slave the vendor and revision string, the bitmap and the path of the GSD file and the bitmap file are displayed (refer to the section DEVICE DATABASE for further details). MELSEC ProfiMap Software Manual Profibus/DP Interface 5 – 17 When a model is selected and the Parameter Settings dialog appears. button has been pressed, the Slave If you have selected a wrong device you can leave this window with the button. You then jump back to the Network Configuration menu. When the correct model is displayed you have to set the parameters listed in the following table. When pressing the Software Manual button all values are set to their default values. MELSEC ProfiMap Profibus/DP In the upper part of the window, the name of the selected device and the vendor name are displayed. 5 – 18 Profibus/DP Interface Parameters in the Slave Parameter Settings have the following meaning: Item Purpose Name The name of the slave can be defined. This is for documentation purpose only. FDL_address This item is used to define the station address of the slave. Watchdog Click on the white box or type the shortcut if you want to use the watchdog timer for this device. The check box enables the watch dog control of the slave. The slave will check whether the master was in communication with the slave within the defined watchdog time. If the watchdog time is exceeded the outputs are turned to the save state. ¦W If you have selected the Watchdog function you must define the watchdog time interval of the slave. Make sure that the data control time in the Master Parameter setting is 6 times longer than the slaves watchdog time. ¦T min T_sdr This is the minimum waiting time for a DP slave until it is allowed to send response frames to the DP master. Do not change this value. ¦M Group identification number Profibus/DP allows to transmit control commands (such as sync or freeze) from the master to one slave, a group of slaves or all slaves at the same time. The control commands are based on multicast function. This means that slaves with the same group number operate in a synchronized way with each other. A slave can belong to several groups. You can use the boxes to allocate the group for the slave. ¦G Profibus/DP Watchdog time Active When this option is activated you get information whether the defined slave really exists (max. 60 slaves are possible). With this function you can define slaves which are not really existant but should be added physically later on. Sync* If this option is activated a synchronous switching of all outputs in the network (for simulation of a time shifted END instruction) is possible. Freeze* If this option is activated a synchronous switching of all inputs in the network (for simulation of a time shifted END instruction) is possible. Shortcut ¦N ¦D * only available for slaves where this function is possible (stated at GSD file). After having made all the necessary entries the start address for devices corresponding to the I/O buffer memory of the master module must be defined in the section Start Adress in CPU Memory. The according device range used in the CPU memory is calculated automatically. This dialog will match Profibus/DP data to PLC devices. MELSEC ProfiMap Software Manual Profibus/DP Interface 5 – 19 The Extended User Parameters are not standardized but depend on the slave. The purpose of the user parameters is to parameterize the individual slave. For example the slave is an analog input device and the operating mode of the input channel is to be parameterized by the startup of Profibus/DP. Then you can specify this operating mode here. Click on the value setting if you want to change and select the desired setting. All supported settings are displayed in clear but can also be changed within a simple hex editor. If you prefer to edit unsigned integer values as hex values, check the box. The width of the columns can be varied by placing the mouse pointer between two table headings until it changes to a double-arrow and then clicking and dragging to the left or to the right. Software Manual MELSEC ProfiMap Profibus/DP Extended User Parameters The user parameters for the slave device can be defined individually. In case that the products GSD file supports extended user parameter click on to access the following dialog box. 5 – 20 Profibus/DP Interface Click on to access the Hex Editor for the Slave User Parameters. The relevant area for the selected module is indicated by coloured background and arrows. The address is shown in clear as "tool tip". Be careful when editing these parameters via the hex editor. You should have a detailed slave documentation by the manufacturer to prevent errors in the parameterization. Profibus/DP Note: These parameters should only be changed by experienced network administrators. In general the Slave User Parameters should not be changed. If no extended user parameters are available at the slaves GSD file, this dialog is opened. Consult your slave device manufacturer to generate correct settings. MELSEC ProfiMap Software Manual Profibus/DP Interface 5 – 21 Slave Module Selection When an I/O module is selected the type of module can be defined after clicking on . This button is enabled depending on the GSD file of the selected Profibus/DP slave. Profibus/DP offers the possibility to support modular slave devices. The slave device is the summary of all modules installed to the slave. The GSD file includes all selectable modules for the slave device. You have to select the modules and to add them to the installed area. The slot number they are added to is shown beside the installed modules. MELSEC ProfiMap automatically determines the maximum possible number of modules per slave, the maximum allowed length of the data telegram depending on the installed modules, and the maximum user parameter data size . It also calculates the number of I/O bytes used by the modules you install and user parameter bytes thus preventing you from exceeding the supported length of telegram. If you have created a new Profbus DP project with a 32-byte array (operation mode 0), it is not allowed to have more than 32 input bytes plus 32 output bytes. In case you exceed the maximum telegram length MELSEC ProfiMap will ask you to reduce the amount of installed modules. Software Manual MELSEC ProfiMap Profibus/DP The following dialog box is displayed: 5 – 22 Profibus/DP Interface After cklicking the Slave Parameter Settings dialog appears again. Note: After having made all settings in the Slave Modules windows you have to define the start address in the CPU memory in the dialog box Slave Parameter Settings. DP-Network Layout Profibus/DP When the device configuration has been entered click and the bitmap for that model is inserted into the graphical network layout. The bitmap of the installed slave device is shown in the window. In addition the name and the FDL address (defined in the Slave Parameter Setting dialog) is stated. A device is deleted by selecting it and activating the Delete DP-Slave command in the context menu (right mouse button) or pressing the µ key. To modify the settings of a device, you can right-click on it and select the Modify Settings command from the context menu or double click on the device bitmap. MELSEC ProfiMap Software Manual Profibus/DP Interface 5 – 23 This opens the Slave Parameter Settings dialog, if the mouse pointer is placed on a slave station. If it is currently placed on the master station, the Master Settings dialog pops up (see MASTER PARAMETER for further details). You can as well double-click on either the master, any slave, or the RS485 line to modify either the master settings, the slave parameter settings, or the bus parameters. Profibus/DP The Select Modules and User Parameters dialogs can also be accessed from the context menu. Software Manual MELSEC ProfiMap 5 – 24 Profibus/DP Interface When the whole network creation is complete, the project should be saved with the help of the File menu. Note: When you select Save instead of Save as ... the former saved project will be overwritten! Now you can transfer the whole configuration data to the connected Profibus master module with the button in the Network Setup menu (for data transmission to the A(1S)J71PB92D refer to chapter 3). The button opens a Save File As dialog, where you select the name of the file, in which a POU in ASCII format is generated for MELSEC MEDOC plus. After typing in a project name and clicking the your selected drive. button the file is saved to Profibus/DP POU means Program Organisation Unit and is installed for a MELSEC MEDOC plus program. Basically the POU includes FROM/TO instructions to access the buffer memory of the master module. This POU must be included into the PLC program to have the I/O data of each slave copied to the given address in CPU memory. For further informations please refer to the MELSEC MEDOC plus Reference Manual. Note: It is not allowed to start the file name with a number (0 to 9). Otherwise you will get an import error in MELSEC MEDOC plus since the file name is equal to the task and POU name which is generated. MELSEC MEDOC plus does allow POU names which are beginning with a number. MELSEC ProfiMap Software Manual Profibus/DP Interface 5 – 25 Check Unit The master can be checked for its slot number, head address, ident string, firmware revision, and operating mode (The check function is available for network connections only. A network connection can be selected in the master settings). The check function can be started from the main network setup dialog or from the master module context menu in the graphical network configuration layout. The performed checks and returned messages are shown below. The slot number where the master is installed and the head address: The module ident string and firmware revision: Profibus/DP The operating mode: (The freeze function is determined in the Write to A(1S)J71 dialog.) Software Manual MELSEC ProfiMap 5 – 26 Profibus/DP Interface The final test result: Start DP The PROFIBUS/DP data transfer can be started or stopped manually (This function is available for network connections only. A network connection can be selected in the master settings). Profibus/DP The PROFIBUS/DP data transfer has been started: MELSEC ProfiMap Software Manual Profibus/DP Interface 5 – 27 Stop DP The PROFIBUS/DP data transfer can be started or stopped manually (This function is available for network connections only. A network connection can be selected in the master settings). Profibus/DP The PROFIBUS/DP data transfer has been stopped: Software Manual MELSEC ProfiMap 5 – 28 Profibus/DP Interface Write to AJ71 This function writes the configuration data to the master module. The freeze mode maintains the operating mode of the master even after a CPU reset. To activate the freeze mode activate the respective checkbox when writing the configuration data. To deactivate the freeze mode deactivate the respective checkbox and write the configuration data again. Profibus/DP The required mode for the data transfer is set automatically. MELSEC ProfiMap Software Manual Profibus/DP Interface 5 – 29 The operation mode was not "freezed". The configuration data was written successfully. Profibus/DP Communication errors Communication errors will be indicated by appropriate messages: Check the hardware configuration and network settings. Then try to write to the AJ71 again. Software Manual MELSEC ProfiMap 5 – 30 Profibus/DP Interface Verify This function compares the settings of the master to the configuration data in the ProfiMap project. The contents of the master and the project must match after writing the configuration data. The required mode for the verification is set automatically. Profibus/DP The configuration data was verified successfully. MELSEC ProfiMap Software Manual Profibus/FMS Interface 6 – 1 Profibus/FMS Interface Parameter Setting for A(1S)J71PB96F Introduction and Overview This chapter describes how to generate the A(1S)J71PB96F parameter settings. After selecting the command New in the File menu (see chapter 3 for details) select the module type Profibus FMS (A(1S)J71PB96F) from the menu. The project dialog box shown below for the network setup appears. It is subdivided into two sections, one for the offline configuration and one for the online access of the module. The following functions are provided: Config Module n n n Parameter Settings CRL Settings OD Settings n n n n n Software Manual Profibus/FMS Access Module Remote Mode Monitor Read from A(1S)J71 Write to A(1S)J71 Verify MELSEC ProfiMap 6 – 2 Profibus/FMS Interface If one setting dialog box is open (e.g. Param. Settings) the other buttons in the dialog box Config Module cannot be accessed. The functions that can be invoked within this network setup dialog are listed below and will be described in detail in the following: Item Purpose Parameter Settings This item calls the Master Settings dialog and the Busparameter Settings dialog. This item lists all defined CRL entries; used to append, delete, and change a CRL entry; parameterize the CRL header; support online check of all CRL entries. This item lists all defined FMS variables; used to append, delete, and change a variable; set the start index of the local OD; call the structure dialog. This item supports the reading of the remote OD of the selected CREF. This item offers a choice of monitor options. CRL Settings OD Settings Remote Mode Monitor Read from A(1S)J71 Write to A(1S)J71 Profibus/FMS Verify MELSEC ProfiMap This item downloads the module configuration from the network interface module into the current project. This item uploads the module configuration from the current project into the module. This item checks the current project against the module configuration online. Shortcut ¦p ¦c ¦o ¦e ¦m ¦r ¦i ¦y Software Manual Profibus/FMS Interface 6 – 3 Button Param. Settings Click on to start the Master Settings dialog needed to generate the A(1S)J71PB96F parameter settings. The Master Settings dialog box contains the following items: The individual items in the Master Settings dialog are listed in the table below and commented in the following: Software Manual Meaning Range Name Project specific name of the master device. — Baud rate Used to select a supported baud rate. 9,60 Kbps 1.500 Mbps FDL Address Set the local station number address of the A(1S)J71PB96F. 0 - 126 Module Priority Set the module priority of the master device within the network. high/low OK Leave this dialog and save the data in the project. — Cancel Leave this dialog without saving the changes in the project. — Default Overwrite the data in the dialog with default values. — Bus Param. Define the timing of the network. — Shortcut ¦n ¦a ¦d ¦h/l « ° ¦f ¦b MELSEC ProfiMap Profibus/FMS Parameter 6 – 4 Profibus/FMS Interface Name The name is only shown in the project. It will not be transferred to the master device. The name only is of symbolic character in order to assist you in managing your different projects. Baud rate The purpose of this item is to determine the timing of the network. Since the network can operate at different baud rates, the operator has to select the appropriate baud rate from the displayed values (master specific). The maximum baud rate supported by the A(1S)J71PB96F unit is 1.5 MB. The baud rate within a PROFIBUS network must be uniform. FDL address The operator may set the FDL address among 0 and 126 for a unique identification of the master within the profibus network. It states the local address for all CREFs of this station. Module Priority Set the module priority for non confirmed services. High priority and low priority are supported. With selected high priority this master is able to send one request even if the target rotation time (TTR) has expired. With selected low priority this master is not able to send any request after the TTR has expired. OK If you select , all data from this dialog will be stored into the current project and the Master Settings dialog will be closed. Cancel If you select , all data from this dialog will be restored to the previously defined values and the Master Settings dialog will be closed. Profibus/FMS Default If you select , all changes within this dialog will be lost. Be careful! The data will be restored to the default values. MELSEC ProfiMap Software Manual Profibus/FMS Interface 6 – 5 Bus Parameter If you select , the bus parameter dialog box is displayed. This function allows to select the baud rate and to modify any parameters like timeouts, which are related to the baud rate. The last settings made are stored independently for each baud rate, so that by selecting a different baud rate these settings are shown again. General timing factors are displayed in recalculated form based on the selected baud rate and absolute time durations. The conversion factors are the following: Parameter Meaning Range Remark Baud rate Transfer rate see selection Must be supported by all slaves Slot time 37 – 16383 x t_bit Max. Interval to wait for response min T_sdr Max. Station delay of responder 37 – 65535 x t_bit T_qui Quiet time 0 – 127 x t_bit T_set Setup time 1 – 255 x t_bit Target rotation time 256 – 16777215 x t_bit GAP factor Controls the GAP update time (T_gud ) 1 – 100 HSA Highest station address 1 – 126 max T_sdr T_tr Software Manual Min. Station delay of responder 11 – 1023 x t_bit T = 0, if no repeater present MELSEC ProfiMap Profibus/FMS T_sl 6 – 6 Profibus/FMS Interface When pressing the set to default values. button, all values of the currently selected baud rate are The inputs are checked against the input limits when leaving the dialog with the button. Additionally the following consistency checks are performed: n n n n min T_sdr < max T_sdr T_qui < min T_sdr max T_sdr < T_sl T_sl < T_tr Note: If you are not an experienced PROFIBUS network administrator you should not change the Bus Parameters. Calculation of the Target Rotation Time (TTR) TTR = ETRT + (ATT x baud rate) + ((NOM x TSL)/2) Notation: TTR ETRT ATT NOM = Target Rotation Time = Empty Token Rotation Time = Average Transmission Time = Number of installed masters Worst case calculation example based on 500 kBaud: = NOM x 1033 + NOM x 28726 + NOM x 3500/2 = NOM x 31509 Bit times = NOM x 63 ms Profibus/FMS TTR MELSEC ProfiMap Software Manual Profibus/FMS Interface 6 – 7 Button CRL Settings (Communications Reference List) Click on to start the CRL Static Entry Setting dialog needed to define communication references (max. 32 per master), to display all defined CREFs and to check the CRL (Communications Reference List) online. You can also set the CRL header and the FMA7 connection usage. The list of CREF entries displays the number and the name of all CREFs. The status of all connections is displayed as well. The error value is described in the user manual of the A(1S)J71PB96F module. Software Manual Meaning CRL Check Header Test all CREFs online. Make sure that the PROFIBUS/FMS parameters are downloaded to the A(1S)J71PB96F. Parameterize the CRL header and set the FMA7 usage. Append Append a CREF. Delete Delete the selected CREF. Change Reset the selected CREF. OK Leave the dialog and save the data in the project. Cancel Leave the dialog without saving any changes in the project. Default Reset the entire CRL to default values. Shortcut ¦r ¦e ¦a ¦d ¦c « ° ¦f MELSEC ProfiMap Profibus/FMS Item 6 – 8 Profibus/FMS Interface CRL Check After selecting all existing CRL entries of the project (not the entries from the unit) will be tested online by sending an FMS connection_open.request. Therefore, it is only useful to check Master/Master and Master/Slave connections. Be sure that all connections are written down to the unit. The error value is described in the user manual of the A(1S)J71PB96F unit. Result Code Meaning OK Connection was verified successfully. 2055 FMS refused the connection. 2061 Connection already exists and cannot be tested. 2062 The specified CREF is not a valid connection. 2067 A transmission error occurred on PROFIBUS. 206C This connection does not allow the CRL Check function. 2071 The connection is established by another station. 2077 The CREF attributes do not allow the execution of the CRL Check function. 2258 The other specified station is not available or denied the access. Note: Only acyclic Master/Slave (MSxx/D) and Master/Master (MMAC/D) connections can be checked by the "CRL Check" function. Header: After selecting can be set. the CRL header parameters and the FMA7 connection usage Append: After selecting a dialog comes up to set the Connection Attributes and the Protocol Attributes. 32 CREF entries are possible. If you select the FMA7 connection usage, only 31 entries are usable. In case that 32 CREF entries are defined and FMA7 shall be enabled, the number of CREF must be reduced to 31 entries. After that FMA7 can be enabled. Note, that the CREFs are sorted automatically after deleting. Profibus/FMS Delete: Click on to delete the selected CREF. The CRL will be sorted automatically. This means that all following entry numbers are decremented by one. If you want to avoid the renumbering of the CREF number, use the CREF to be deleted as dummy. In this case disable all client and server features. Change: Click on MELSEC ProfiMap to edit the selected CREF entry. Software Manual Profibus/FMS Interface 6 – 9 OK: Click on project. to leave this dialog and save all data from this dialog in the current Cancel: Click on project. to leave this dialog without saving any changes in the current Default: Click on to reset the entire CRL to default values. All data from this dialog and subdialogs will be lost. Be careful! The data will be restored to the default values for the CRL. Profibus/FMS Note: The CRL Header is not affected by the Default button. Software Manual MELSEC ProfiMap 6 – 10 Profibus/FMS Interface Editing an FMS CRL Entry Via this dialog you define individual communication references. That is, to set the connection attributes and the protocol attributes. A special feature is a detailed editor for client and server features. Click on to edit an exitsting CRL entry or on to append and edit a new CRL entry. Profibus/FMS The FMS CRL Entry dialog box appears: MELSEC ProfiMap Software Manual Profibus/FMS Interface 6 – 11 Item Meaning Range Symbol User-definable name of the connection. This is the unique name within the project. 32 characters max. ¦Y Password FMS password protection for connections. 0 - 255 Access Groups Defines relations of different groups of connections. 0 - 255 ¦W Local LSAP Sets the local Service Access Point. It has to be equal to the 0, 2 - 60, 63, Poll List SAP for MSxx/D connections. 128 Remote Address Sets the FDL address of the remote station. 0-127, 255 Remote LSAP Sets the service access point of the remote station. 0, 2 - 63, 128, 255 Connection Type Select the type of the current connection. See selection Connection Attribute Sets the attribute for connection-oriented relations. See selection Control Interval Sets the WDT time interval for connection control. The selected CREF is supervised by this WDT. 04294967294 x 10 ms Max SCC Sets the maximum value for the Send Confirmed Request Counter. 0-1 Max RCC Sets the maximum value for the Receive Confirmed Request Counter. 0-2 Max SAC Sets the maximum value for the Send Acknowledged Request Counter. Necessary for unconfirmed services. 0-1 Max RAC Sets the maximum value for the Receive Acknowledged Request Counter. Necessary for unconfirmed services. 0-1 Max send PDU(H) Sets the maximum permissible length of PDUs sending high 0 - 241 priority. ¦H Max send PDU(L) Sets the maximum permissible length of PDUs sending low 0 - 241 priority. ¦L 0 - 241 Max receive Sets the maximum permissible length of PDUs receiving low priority. PDU(L) 0 - 241 Features Supported Displays the hexadecimal feature supported string for this connection. — Client Features Specifies the kind of supported FMS services and options for the current connection as client. — Server Features Specifies the kind of supported FMS services and options for the current connection as server. — OK Leave the dialog and save the data in the project. — Cancel Leave the dialog without saving any changes in the project. — Default Reset the opened CREF to default values. — Software Manual ¦G ¦O ¦E ¦P ¦T ¦U ¦I ¦M ¦A ¦X ¦R ¦V ¦D ¦C ¦S « ° ¦F MELSEC ProfiMap Profibus/FMS Max receive Sets the maximum permissible length of PDUs receiving high priority. PDU(H) Shortcut 6 – 12 Profibus/FMS Interface Symbol: Every CREF has a symbolic name. The name consists of a maximum of 32 ASCII characters. This name is used to separate the CREFs significantly. A name which is unique must be specified here. Password: The password is a decimal number, used for access protection relating to the current connection. The default value is 0 (not protected). In the case of a station supporting access with password, the value of the password received with the service "Initiate" shall be unique for this relationship. This parameter is optional and thus should be left to 0. Access Groups: The Access Groups is a decimal number, used to specify different groups of connections. The default value is 0. The value must be binary interpreted. There are eight different access groups supported. This parameter is optional and thus should be left to 0. Local LSAP: Specify the Local Link Service Access Point of this station, used for the communication of the current CREF. Valid values are 0 to 63 for SAPs and 128 for NIL. This parameter is unique for MMAC connections but must be equal to the Poll List SAP for MSxx/D connections. Remote Address: The Remote Address specifies the FDL address of the remote station for this CREF. If the value 255 is set, all stations in the FMS network are selected (one to any), otherwise the connection type is one to one. Remote LSAP: Specify the Remote Link Service Access Point of the remote station, used for the communication of the current CREF. Valid values are 0 to 63 for SAPs, 128 for NIL and 255 for all. For the connections with connection attribute /D the remote LSAP must range within 0 - 63. Profibus/FMS Connection Type: The Connection Type specifies the kind of this communication relationship. Valid values are: n n n n n n n MELSEC ProfiMap MMAC for acyclic master-master data transfer MSAC for acyclic master-slave data transfer without slave initiative MSAC_SI for acyclic master-slave data transfer with slave initiative MSCY for cyclic master-slave data transfer without slave initiative MSCY_SI for cyclic master-slave data transfer with slave initiative BRCT for broadcast communication (master to all others) MULT for multicast communication (master to few others) Software Manual Profibus/FMS Interface 6 – 13 Connection Attribute: This parameter contains further information on the connection type of connection oriented relationships. Valid values are: n n n D for defined connections (master-master or master-slave) I for open connection at the requester (master-master connections) O for open connections at the responder (master-master or master-slave connections) Control Interval: The Control Interval specifies the length of the time interval for the connection control of connection oriented relationships. This value is multiplied by 10 ms to determine the time (acyclic: including ACI, cyclic: including CCI). If the connected FMS device does not support the "Control Interval" feature, set this value to 0. Max SCC: This parameter specifies the maximum permitted number of parallel confirmed services to the partner station. Rule: Max SCC must be smaller than or equal to Max RCC of the other station. Max RCC: This parameter specifies the maximum permitted number of parallel confirmed services from the partner station. Rule: Max RCC must be greater than or equal to Max SCC of the other station. Max SAC: This parameter specifies the maximum permitted number of parallel unconfirmed services to the partner station. Max RAC: This parameter specifies the maximum permitted number of parallel unconfirmed services from the partner station. Rule: Max RAC must be greater than or equal to Max SAC of the partner station. Software Manual MELSEC ProfiMap Profibus/FMS Rule: Max SAC must be smaller than or equal to Max RAC of the partner station. 6 – 14 Profibus/FMS Interface Max send PDU(H): This parameter contains the maximum permissible length of an FMS PDU for sending with high priority on this CREF. Rule: Max send PDU (H) must be smaller than or equal to Max receive PDU (H) of the partner station. Max send PDU(L): This parameter contains the maximum permissible length of an FMS PDU for sending with low priority on this CREF. Rule: Max send PDU (L) must be smaller than or equal to Max receive PDU (L) of the partner station. Max receive PDU(H): This parameter contains the maximum permissible length of an FMS PDU for receiving with high priority on this CREF. Rule: Max receive PDU (H) must be greater than or equal to Max send PDU (H) of the partner station. Max receive PDU(L): This parameter contains the maximum permissible length of an FMS PDU for receiving with low priority on this CREF. Rule: Max receive PDU (L) must be greater than or equal to Max send PDU (L) of the partner station. Note: If the FMS communication partner does not support the high priority function, set the Send and Receive PDU (H) to 0. The Send PDU (H) and PDU (L) values of the master should be less than or equal to the Receive PDU (H) and PDU (L) values of the FMS partner. Features Supported: This field displays the feature supported string for the current CREF. It specifies which FMS services and options are supported by this relationship. This value is read only. For changes use the Client Features or Server Features dialog. Profibus/FMS Client Features: Click on Server Features: Click on features. MELSEC ProfiMap to open a detailed editor for editing the supported client features. to open a detailed editor for editing the supported server Software Manual Profibus/FMS Interface 6 – 15 OK: Click on project. to leave this dialog and save all data from this dialog in the current Cancel: Click on project. to leave this dialog without saving any changes in the current Profibus/FMS Default: Click on to reset all data within this dialog to default values. Be careful, all your changes made will be lost! Software Manual MELSEC ProfiMap 6 – 16 Profibus/FMS Interface Button Client Features This dialog provides a transparent display of the supported client features of the selected CREF and calculates the client feature string which is defined in the standard. Features not supported by the A(1S)J71PB96F are greyed. Select these services for connection-design carefully. For a detailed description of all services, refer to DIN 19245 part 2. Click on to access the Client Features dialog: Item Meaning OK Leave the dialog and save the data in the project. Cancel Leave the dialog without saving the data in the project. Default Reset the whole client feature string to default values. Shortcut « ° ¦f Profibus/FMS Rule: The client features must be equal to or less than the server features of the partner station. In case that the server features of the partner station are not known, enable and only. These services are compulsory and must be supported by the partner station. MELSEC ProfiMap OK: Click on project. to leave this dialog and save all data from this dialog in the current Cancel: Click on project. to leave this dialog without saving any changes in the current Software Manual Profibus/FMS Interface 6 – 17 Profibus/FMS Default: Click on to reset all data within this dialog to default values. Be careful, all your changes made will be lost! Software Manual MELSEC ProfiMap 6 – 18 Profibus/FMS Interface Button Server Features This dialog provides a transparent display of the supported server features of the selected CREF. Features not supported by the A(1S)J71PB96F are greyed. Select these services for connection-design carefully. For a detailed description of all services, refer to DIN 19245 part 2. Click on to access the Server Features dialog: Item Meaning OK Leave the dialog and save the data in the project. Cancel Leave the dialog without saving the data in the project. Default Reset the entire client feature string to default values. Shortcut « ° ¦f Profibus/FMS Rule: The server features must be greater than or equal to the client features of the partner station. Therefore, all supported features of the A(1S)J71PB96F are enabled. Only disable a feature in case you do not want the partner station to use this service. However, this might affect the client feature setting of the partner station. MELSEC ProfiMap Software Manual Profibus/FMS Interface 6 – 19 OK: Click on project. to leave this dialog and save all data from this dialog in the current Cancel: Click on project. to leave this dialog without saving any changes in the current Default: Click on to reset all data within this dialog to default values. Be careful, all your changes made will be lost! Profibus/FMS After closing the FMS CRL Entry dialog a bit string for the "Features Supported" with specified information on the specified server and client features is generated. The minimum configuration items for FMS partners are the read and write features. Software Manual MELSEC ProfiMap 6 – 20 Profibus/FMS Interface Button Header The CRL Header is used to store general information for all CREF entries. There is only one CRL Header with the index null for the CRL defined. An extra feature is the selection of the FMA7 connection usage. Click on to access the Header dialog: Item Meaning Range Poll List SAP Specifies the SAP containing the poll list of layer two. 0, 2-60, 128 Ass/Abt CI Time interval for control of connection establishment/release. 0-4294967294 x 10 ms FMA7 Connection Usage Enable/disable FMA7 usage. Enable/disable Shortcut ¦p ¦a ¦u Poll List SAP: This item specifies the Local Service Access Point, which contains the poll list of layer two. Valid values are 0, 2-62 for SAP, 128 for NIL, and 255 if no Poll List SAP is used in the current CRL. The SAP manages all slaves connected to this master. Profibus/FMS Ass/Abt CI: This parameter contains the time interval for the control of the connection establishment (Assemble) and the connection release (Abort). The value is multiplied by 10 ms to obtain a time value. Note: This control interval must range within 0 - 4294967294. MELSEC ProfiMap Software Manual Profibus/FMS Interface 6 – 21 FMA7 Connection Usage: Check to enable the FMA7 connection and access the FMA7 Connection Settings dialog where you can set the FMA7 connection specific parameters. When the FMA7 connection is to be used, the maximum number of CREFs that can be set in the CRL is 31. The number of the FMA7 CREF is fixed to 1. Item Meaning Range Max Send PDU (low) Maximum permissible length of PDUs sending low priority. 0-241 Max Receive PDU (low) Maximum permissible length of PDUs receiving low 0-241 priority. Shortcut ¦s ¦r Max Receive PDU(low): This parameter contains the maximum permissible length of a PDU for receiving with low priority on this CREF. Software Manual MELSEC ProfiMap Profibus/FMS Max Send PDU(low): This parameter contains the maximum permissible length of a PDU for sending with low priority on this CREF. 6 – 22 Profibus/FMS Interface Button CRL Check: This function checks online all defined CREFs displayed in the CRL static Entry Setting. In order to ensure correct operation it is essential to download or verify the PROFIBUS/FMS parameters to the A(1S)J71PB96F before selecting this function. Otherwise wrong test results are displayed in the column "State" in the dialog box "CRL Static Entry Setting". This function only tests MSAC/D and MSxx/D connections. Other connections will automatically result in an error. After the online test, the column "State" in the CREF list shows OK for a valid master connection or a hexadecimal error value. Please see the manual of the unit for detailed information. Click on to access the CRL Check dialog: Item Meaning Yes Execute CRL online check. No Abort CRL online check. Shortcut y n Profibus/FMS Yes: Click on to check the entire CRL from the current project online. The dialog shown below comes up and displays the number of the CREF currently being checked. Here you can still abort the CRL online check with No: Click on MELSEC ProfiMap . to abort the CRL online check. Software Manual Profibus/FMS Interface 6 – 23 CRL Check result codes: Meaning OK Connection was verified successfully. 2055 FMS refused the connection. 2061 Connection already exists and cannot be tested. 2062 The specified CREF is not a valid connection. 2067 A transmission error occurred on PROFIBUS. 206C This connection does not allow the CRL Check function. 2071 The connection is established by another station. 2077 The CREF attributes do not allow the execution of the CRL Check function. 2258 The other specified station is not available or denied the access. Profibus/FMS Result Code Software Manual MELSEC ProfiMap 6 – 24 Profibus/FMS Interface VFD - Local Object Dictionary Click on to access the VFD - Local Object Dictionary dialog box. Profibus/FMS This dialog is used to define local FMS object types such as structures and variables. Furthermore, there are a maximum of 128 predefined FMS variables set. As standard, structures are not defined. Objects are used for data transfer with partner stations. For further information refer to Profibus Specification EN50170, volume 2, page 188. MELSEC ProfiMap Software Manual Profibus/FMS Interface 6 – 25 Item Meaning Start Index Set the start index of the object dictionary. Shortcut Structs Call the dialog of the static type dictionary (structure definition). List of FMS Variables Display the defined static variable object list. Append Append one variable object to the list. Delete Delete the currently selected variable object. Change Change/edit the current variable object. OK Leave this dialog and save all data from this dialog in the current project. Cancel Leave this dialog without saving any changes in the current project. ° Default Reset all data within this dialog to default values. Be careful, all your changes made will be lost! ¦f ¦i ¦s ¦l ¦a ¦d ¦c « Start Index: The index (logical address) serves as a key to the object. Before a remote station is able to access an object it must "know" the index. The Start Index is the index of the FMS variable object. Make sure that the index of an FMS variable is not overlapping with the index of a structure. In this case the defined structure will be ignored, but not deleted. Structs: Click on to access the Data Type Structure List dialog where you can define structures as a part of the static type dictionary. Profibus/FMS List of FMS Variables: This list box displays all defined variable objects. By default the maximum number of variables is already defined. Supported objects are simple, array, null and record objects. Domain objects (from older configurations) can be read and written, but not changed. Software Manual MELSEC ProfiMap 6 – 26 Profibus/FMS Interface Append: Click on to append a new variable object to the local object dictionary and to access the Select Type of LOD-Entry dialog. As standard, no new object can be appended because the maximum number of entries (128) is already set. After deleting individual entries new ones can be appended. Note: Before you can append an object of the type "Record Variable" you have to specify the values in the Data Type Structure List dialog. The object type "Domain" is currently not implemented. Delete: Click on to delete the current variable object. If the selected variable object is not the last entry in the object dictionary, it will be cleared. This means, the current object is set to a null object. The purpose of null objects is to hold the index order. Profibus/FMS Change: Click on to change and edit the object and device descriptions. The object type cannot be changed from record to simple or array, but only from simple object to array object and vice versa. Detailed changes of a domain object read from the unit are not allowed. Any variable object can be changed to a null object. OK: Click on project. to leave this dialog and save all data from this dialog in the current Cancel: Click on project. to leave this dialog without saving any changes in the current Default: Click on to reset all data within this dialog to default values. Be careful, all your changes made will be lost! does not set the structures to default values. MELSEC ProfiMap Software Manual Profibus/FMS Interface 6 – 27 Data Type Structure List The Data Type Structure List shows the definition of the static type dictionary. By default the structure types are not defined. The maximum number of supported structure types is 32. For further information see the Profibus Specification EN50170 volume 2, page 190. to access the Data Type Structure List dialog: Profibus/FMS Click on Software Manual MELSEC ProfiMap 6 – 28 Profibus/FMS Interface Item Meaning Shortcut Display the first possible index of variable objects, read only. First allowed index of variables Display the current number of defined structures, read only. Number of defined structures Current OD index Display the index of the current structure. to edit Define/Undefine Structures Enable sheet. OK Leave this dialog and save all data from this dialog in the current project. Cancel Leave this dialog without saving any changes in the current project. Undefine Undefine the current structure. ¦s « ° ¦ First allowed index of variables: The displayed value is the first allowed index for the object dictionary, read only. Number of defined structures: The displayed value presents the current number of defined structures, read only. Profibus/FMS Current index to edit: The displayed value presents the index of the current structure, read only. MELSEC ProfiMap Software Manual Profibus/FMS Interface 6 – 29 Define/undefine Structures: First select the OD index you want to edit via the tabs at the bottom of the Data Type Structure List dialog box: The according OD index is displayed (read only) in the upper section of the dialog box: Only the entries within the column "Value Setting" can be edited. Click on the first field below "Value Setting" and enter a number n from 1 - 10 to specify the number of structure elements you want to edit afterwards: Then click on the following rows (01...n) within the column "Value Setting" on the drop-down button to select the desired data type for each element: Note: A new defined structure provides the comment "unreferenced". Once the structure is used to define a Record variable its comment is changed to "referenced" and the structure cannot be undefined. Software Manual MELSEC ProfiMap Profibus/FMS As you have edited one OD index you can proceed with the next one by clicking on the according tab: 6 – 30 Profibus/FMS Interface ➜ ➜ Entry sheet. 햲 © steps through ¦ s activates the entry sheet at once. Activate the entry sheet. 햳 Press µ to delete the "0" from the row "No. of Elements" and enter a number from 1 - 10. 햴 Press ¢ to confirm your entry and to step downwards to the first data type selection. 햵 Press ´ to open the listbox and select the desired data type with ¢ and £. Confirm with «. 햶 Proceed with � until all structure elements are defined. Once the entry sheet is activated § and ¨ serve as toggle keys: Press (and release) § to toggle to the OD index selection mode: n © steps through the current OD indexes to edit. Press (and release) ¨ to toggle the direction of © ; index up/index down. Press (and release) § to toggle back to the "regular" mode: n © steps through ➜ ➜ Entry sheet Profibus/FMS Note: A new defined structure provides the comment "unreferenced". Once the structure is used to define a Record variable its comment is changed to "referenced" and the structure cannot be undefined. OK: Click on project. to leave this dialog and save all data from this dialog in the current Cancel: Click on project. to leave this dialog without saving any changes in the current Undefine: Click on to delete the current structure type. This is only possible, if the comment of the structure states "unreferenced". MELSEC ProfiMap Software Manual Profibus/FMS Interface 6 – 31 VFD Variable Setting: MELSEC ProfiMap supports the following object types: n n n n n Null Object Simple Object Array Object Record Object Domain Object (not changeable) The variable setting dialog is the same for null, simple, and array objects. to change/edit the varible settings in the VFD Variable Setting Profibus/FMS Click on dialog: Software Manual MELSEC ProfiMap 6 – 32 Profibus/FMS Interface Item Meaning Name The symbolic name of the variable object. Object Type Set the null, simple or array object. Data Type Set the data type of the current object. Elements Set the number of elements for an array object. Length Set the length of the elements for data type string. Network No. Set the network number within the MELSECNET/10. Station No. Set the PLC number within the MELSECNET (/B /II /10). Address Type Select device or special function module buffer memory and memory capacity. Device Name Set the type of device used for object mapping. Device Number Set the offset in the selected device address space. OK Leave this dialog and save all data from this dialog in the current project. Cancel Leave this dialog without saving any changes in the current project. Clear Clear all data from this dialog and set the current variable to a null object. The cleared variable serves as dummy object in the current index of the object dictionary to keep the numbering of the remaining objects. Shortcut ¦n ¦o ¦d ¦e ¦l ¦t ¦s ¦a ¦v ¦i « ° ¦c Name: This item is the symbolic name of the current variable object. The maximum length of the string is 32 ASCII characters. Note: If you use special characters for the Name generation, be aware that the ASCII code of the currently used character set is downloaded to the A(1S)J71PB96F PROFIBUS/FMS master module. This might cause problems to call the variable from another PROFIBUS/FMS node. Profibus/FMS Object Type: The object type is used to define simple, array and null variable objects. When the operator selects the null object, the variable will be cleared in the current index (place-marker of the index). MELSEC ProfiMap Software Manual Profibus/FMS Interface 6 – 33 Data Type: MELSEC ProfiMap supports the following data types for variable definitions: n n n n n Boolean Integer8, Integer16, Integer32 Unsigned8, Unsigned16, Unsigned32 Floating Point Visible, Octet, Bit String. For further information on coding these data types, refer to the Profibus Specification EN 50 170 volume 2, part six. Elements: In case the selected object type is an array object, this parameter is changeable. In this case it represents the number of elements of the selected array object. In case an array of string data type is selected you need to define the number of elements of the string data AND you need to define the length of the string in units of bytes. This means that even the length of a bit string is defined in units of bytes. If the object type Simple Object is selected, the variable length needs to be set for string data types only. Note: 128 ≥ Elements x Length Network No.: This parameter represents the network number of the MELSECNET/10 data link system for the current variable object. For further information, please refer to your module manual. Address Type: This parameter selects the device memory or buffer memory for the current variable object. A special case is the memory capacity. The memory capacity is a special array variable. If you select memory capacity, all data will be overwritten. Software Manual MELSEC ProfiMap Profibus/FMS Station No.: This parameter represents the PLC number of the MELSECNET (/B /II /10) data link system for the current variable object. For further information, please refer to your module manual. 6 – 34 Profibus/FMS Interface This parameter Address Type offers three different selections: Selection Meaning Device Memory The defined PROFIBUS/FMS variable is directly connected to PLC CPU devices such as X, Y, M, D, R. Buffer Memory The defined PROFIBUS/FMS variable is directly connected to another special function module memory. For example, the value of an analog module can directly be accessed without a PLC sequence program. Memory Capacity The defined PROFIBUS/FMS variable can read the current PLC CPU memory size which is used for application variables. For example, the memory size used for file register (R) can be read. Depending on the selection different settings have to be specified. Device Memory: For Device Memory the PLC CPU Device Name and start address need to be specified. Buffer Memory: For Buffer Memory you need to specify which special function module is selected (Y No.) and which data from the buffer of the special function module is to be accessed (Buffer Memory Byte). Setting the Y No.: The Y No. is calculated very similar to the head address of a special function module. The Y No. is the last occupied I/O address of the special function module without the last digit. Example: A special function module occupies X/Y 120...13F then the Y No. is 13. Setting the Buffer Memory Byte: Profibus/FMS Generally, the buffer memory of a special function module is limited to 16 kByte (0x0 - 0x3FFF). The PLC CPU can access the buffer memory in units of words. In contrast to this, the A(1S)J71PB96F PROFIBUS/FMS module allows to access the buffer memory in units of bytes. In order to read or write data from or to a special function module the buffer memory address described in the User´s Manual of the selected special function module has to be multiplied by two and set into the buffer memory byte selection. Buffer Memory Byte = Buffer memory of special function module x 2 Memory Capacity: For Memory Capacity MELSEC ProfiMap automatically determines the variable correctly. Device Name: The device name is a symbolic name for the device at the PLC. The device name is in conjunction with the data type. MELSEC ProfiMap Software Manual Profibus/FMS Interface 6 – 35 Device Number: The device number is the offset of the device at the PLC. OK: Click on project. to leave this dialog and save all data from this dialog in the current Cancel: Click on project. to leave this dialog without saving any changes in the current Profibus/FMS Clear: Click on to clear all data from this dialog and set the current variable to a null object. The cleared variable serves as dummy object in the current index of the object dictionary to keep the numbering of the remaining objects. Software Manual MELSEC ProfiMap 6 – 36 Profibus/FMS Interface Record Variable: Click on to access the Record Variable dialog where you define record variables in the static object dictionary. As standard, no record objects are defined. One record stays in conjunction with one structure type defined in the Data Type Structure List dialog. For further information refer to the Profibus Specification EN50170 volume 2, page 190. Item Meaning LOD Variable Index Display the index of the current record, read only. Shortcut Profibus/FMS Display the number of defined structures, read only. Number of defined structures MELSEC ProfiMap Choose Structure Index Select a structure defined in the Data Type Structure List Dialog by index. Parameterize Record Enable the record sheet. OK Leave this dialog and save all data from this dialog in the current project. Cancel Leave this dialog without saving any changes in the current project. ° Clear Clear all data from this dialog and set the record object to a null object. ¦c ¦i ¦r « Software Manual Profibus/FMS Interface 6 – 37 LOD Variable Index: This value represents the index of the current record object, read only. Number of defined structures: This value represents the number of defined structures, read only. Choose Structure Index: This list box contains the indexes of all defined structure types. OK: Click on project. to leave this dialog and save all data from this dialog in the current Cancel: Click on project. to leave this dialog without saving any changes in the current Profibus/FMS Clear: Click on to clear all data from this dialog and set the current record object to a null object. The cleared variable serves as dummy object in the current index of the object dictionary to keep the numbering of the remaining objects. Software Manual MELSEC ProfiMap 6 – 38 Profibus/FMS Interface Remote Mode Click on to access the remote mode management dialog. Here you can load the object dictionary from another station via the current CREF. MELSEC ProfiMap provides only an overview of the loaded remote object dictionary of the other stations. For further information refer to the Profibus Specification EN50170 volume 2. First, you have to select a CREF for the communication with the remote station: Item Meaning CREF Number/Symbol Set the CREF for remote OD download to MELSEC ProfiMap. Shortcut OK Leave this dialog and save all data from this dialog in the current project. Cancel Leave this dialog without saving any changes in the current project. ¦n « ° CREF Number/Symbol: Select a CREF from this list box for the communication with the remote station. To obtain a valid CREF for the data transfer with the remote station, please use the monitor function Check CREF. Profibus/FMS Note: This function is valid only for MMAC/D and MSxx/D connections. OK: Click on project. to leave this dialog and save all data from this dialog in the current Cancel: Click on project. to leave this dialog without saving any changes in the current After you confirm your CREF selection with displayed. MELSEC ProfiMap , the following dialog will be Software Manual Profibus/FMS Interface 6 – 39 Remote OD Set: Via this dialog you reselect the chosen CREF, get the remote OD, and display the remote object dictionary. You can only display the object dictionary of the other stations, if the Get OD (see below) was successful. Item Meaning Get OD Set the index to get, start the remote data transfer. Display OD Display the remote object dictionary. Select CREF Set the CREF for remote OD download. Cancel Leave this dialog without saving any changes in the current project. Get OD: Click on Shortcut ¦g ¦d ¦e ° to set the index range of the remote objects you want to get. Select CREF: Select a CREF from this list box for the communication with the remote station. To obtain a valid CREF for the data transfer with the remote station, please use the monitor function Check CREF. Cancel: Click on project. Software Manual to leave this dialog without saving any changes in the current MELSEC ProfiMap Profibus/FMS Display OD: Click on to show the downloaded remote object dictionary. You can only display a loaded remote object dictionary. 6 – 40 Profibus/FMS Interface Remote OD Index: Profibus/FMS Click on to reselect the chosen CREF, get the remote OD and display the remote object dictionary. You can only display the remote object dictionary, if the Get OD was successful. Item Meaning Current Index Displays the current index of the remote object, read only. Static Types Displays the start/end index of the remote static types, read only. Static Data Displays the start/end index of the remote static objects. Get Range Select the range of the types/objects to get remotely. Start Start the data transfer. Get Header Download the header of the remote object dictionary to MELSEC ProfiMap. Cancel Leave this dialog without saving any changes in the current project. Shortcut ¦r ¦s ¦h ° Get Header: First click on to download the header of the remote object dictionary. If the download was successful, you can edit the range or download the whole Remote Object Dictionary. MELSEC ProfiMap Software Manual Profibus/FMS Interface 6 – 41 Current Index: Displays the current index of the remote object which is in download process to MELSEC ProfiMap, read only. Static Types: Displays the start/end index of the remote static types, read only. Static Data: Displays the start/end index of the remote static objects. Start: By pressing this button, all remote objects/types between the selected range will be downloaded. The Current Index displays the index of the current remote object/type. Cancel: Click on project. Software Manual to leave this dialog without saving any changes in the current MELSEC ProfiMap Profibus/FMS Get Range: The Get Range represents the start index and the end index of the remote objects/types to get. You can select between the start index of the static types and the end index of the objects. 6 – 42 Profibus/FMS Interface Remote OD Display: This dialog displays the downloaded remote object dictionary. The remote objects are displayed including index, name (depending on the defined Client Features of this connection), and object type. Detailed information on all entries is displayed by pressing . Item Meaning OD Version Displays the version of the remote object dictionary, read only. Name Length Displays the length of all object names. Details Displays details of the selected remote object. Print Prints the Remote OD list. Shortcut ¦d ¦p Profibus/FMS OD Version Displays the version of the remote object dictionary, read only. Name Length Displays the length of all object names. MELSEC ProfiMap Software Manual Profibus/FMS Interface 6 – 43 Details: Click on remote object: Print: Click on to print the displayed remote OD list. to leave this dialog without saving any changes in the current Profibus/FMS Cancel: Click on project. to obtain a message box with detailed information on the current Software Manual MELSEC ProfiMap 6 – 44 Profibus/FMS Interface Monitor Selection: Click on to access the Monitor Selection dialog. This dialog allows you to get the Software Version of the current module, to perform an Initial Check of the connected module, to get the Trouble Information buffer area, and to Check CREFs online. For all monitoring functions the module must be in operation mode 0. A detailed description follows. Item Meaning S/W Version Call the software version dialog. Initial Check Call the initial check dialog. Trouble Information Call the trouble information monitor. Check CREF Perform an online check of CREFs. Cancel Leave this dialog without saving any changes in the current project. Shortcut ¦v ¦c ¦i ¦r ° S/W Version: Click on to read the current software version implemented in the module. Initial Check: Click on to perform a hardware test of the connected module. Profibus/FMS Trouble Information: Click on to display the error buffer area of the PLC. Check CREF: Click on Cancel: Click on project. MELSEC ProfiMap to check a selected CREF online. to leave this dialog without saving any changes in the current Software Manual Profibus/FMS Interface 6 – 45 Software Version Monitor: Click on to access the Software Version Monitor dialog. This dialog allows you to read the implemented software version from the connected module. Item Meaning Start Start the data transfer for the Software Version Monitor. Cancel Leave this dialog in the current project. Shortcut ¦s ° to display the software version of the connected module by version, Cancel: Click on project. to leave this dialog without saving any changes in the current Profibus/FMS Start: Click on date, and type. Software Manual MELSEC ProfiMap 6 – 46 Profibus/FMS Interface Initial Check Monitor: Click on to access the Initial Check Monitor dialog. This dialog allows you to perform a hardware check of the connected module. Perform this test in operation mode 0. Item Meaning Start Start the data transfer for the Initial Check Monitor. Cancel Leave this dialog in the current project. Start: Click on Profibus/FMS Cancel: Click on project. MELSEC ProfiMap Shortcut ¦s ° to perform the initial check of the connected module. to leave this dialog without saving any changes in the current Software Manual Profibus/FMS Interface 6 – 47 Trouble Information Monitor: Click on to access the Trouble Information Monitor dialog. This dialog allows you to read the trouble information buffer from the connected module. The connected module needs to be in online mode for this operation. The trouble area (buffer) is divided into eight sections. Each section represents a trouble type with the referring trouble subcodes. Please refer to the manual of the unit for detailed information on the trouble subcodes. Meaning Start Start the data transfer for the Trouble Information Monitor. Cancel Leave this dialog in the current project. Start: Click on Cancel: Click on project. Software Manual Shortcut ¦s ° to read the trouble information buffer from the connected module. to leave this dialog without saving any changes in the current MELSEC ProfiMap Profibus/FMS Item 6 – 48 Profibus/FMS Interface FMS CREF Check: Click on to check a selected CREF online (real FMS communication). The connected module must be in online mode for this operation. At first, a dialog for the CREF selection comes up. Then, the internal test sends an initiate.req and checks the response. Please refer to the manual of the unit for detailed information. Item Meaning CREF Nr. to check Displays the CREF number to be checked, read only. Error Attr. Displays the error attribute, read only. Error Code Displays the error code, if existing, read only. Error Detail Displays a detailed error code, read only. Check Results Interprets the result as a string, read only. Select CREF Perform a reselection of the CREF to be checked. Start Start the data transfer for the FMS CREF Check. Cancel Leave this dialog in the current project. Shortcut ¦e ¦s ° Profibus/FMS CREF Nr. to check: This field displays the current number of the selected CREF. Error Attr.: The error attribute represents the response of the performed FMS service: n n MELSEC ProfiMap Error attribute 1: The received FMS PDU is an Initiate Response. Error attribute 2: The received FMS PDU is an Abort. Software Manual Profibus/FMS Interface 6 – 49 Error Code: The error code represents the buffer memory of the receive area. For detailed information please refer to the manual of the module. Error Detail: The error detail is an additional error information. For detailed information, please contact your vendor. Check Results: This field displays a description of the obtained failure. Select CREF: Click on to reselect of the CREF to be checked. Start: Click on to start the data transfer for the FMS CREF Check. to leave this dialog without saving any changes in the current Profibus/FMS Cancel: Click on project. Software Manual MELSEC ProfiMap 6 – 50 Profibus/FMS Interface Read from A(1S)J71PB96F: Click on to select the data to be read from the module. There are three selectable items. Check any item to be read: n n n Master/Bus Parameters CRL Information Structures + Variables. Item Meaning Shortcut Master/Bus Parameters Select the master and bus parameters to be read from the module. ¦m CRL Information Select the whole CRL to be read from the module. Structures + Variables Select the local OD to be read from the module. ¦c OK Start the transfer from the module, and save all transferred data in the current project. « Cancel Leave this dialog without saving any changes in the current project. ° ¦s Master/Bus Parameters: This checkbox enables/disables the upload of the master and bus parameters. Profibus/FMS CRL Information: This checkbox enables/disables the upload of the entire communication reference list. Structures + Variables: This checkbox enables/disables the upload of the entire local object dictionary. OK: Click on to leave this dialog, start the transfer, and save all data read from the module in the current project. Cancel: Click on MELSEC ProfiMap to leave this dialog without reading the project from the module. Software Manual Profibus/FMS Interface 6 – 51 Write to A(1S)J71PB96F: Click on to select the data to be written to the module. There are three selectable items. Check any item to be written: n n n Master/Bus Parameters CRL Information Structures + Variables For a successful download the module must be set to the parameter set mode: 햲 Set the dip switch on the module to 1 (parameter set mode). 햳 Reset the PLC and set it to STOP. 햴 Start the transfer. 햵 After the successful transfer set the module to operation mode 0. Reset the PLC and set it to RUN. Meaning Master/Bus Parameters Select the master and bus parameters to be written to the module. Shortcut ¦m CRL Information Select the whole CRL to be written to the module. Structures + Variables Select the local OD to be written to the module. ¦c OK Start the transfer to the module. Cancel Leave this dialog without starting the download to the module. ¦s « ° Master/Bus Parameters: This checkbox enables/disables the download of the master and bus parameters. Software Manual MELSEC ProfiMap Profibus/FMS Item 6 – 52 Profibus/FMS Interface CRL Information: This checkbox enables/disables the download of the entire communication reference list. Structures + Variables: This checkbox enables/disables the download of the entire local object dictionary. OK: Click on to leave this dialog, start the transfer, and write all data to the module. A successful transfer will be confirmed by "Transfer completed". to leave this dialog without downloading the project to the module. Profibus/FMS Cancel: Click on MELSEC ProfiMap Software Manual Profibus/FMS Interface 6 – 53 Verify with A(1S)J71PB96F: Click on to select the data to be verified with the module. There are three selectable items. Check any item to be verified: n n n Master/Bus Parameters CRL Information Structures + Variables. The module does not need to be set to the online mode. Item Meaning Master/Bus Parameters Select the master and bus parameters to be verified with the module. Shortcut ¦m CRL Information Select the whole CRL to be verified with the module. Structures + Variables Select the local OD to be verified with the module. ¦c OK Start the verification transfer from the module. Cancel Leave this dialog without starting the verify function. ¦s Master/Bus Parameters: This checkbox enables/disables the verification of the master and bus parameters. CRL Information: This checkbox enables/disables the verification of the entire communication reference list. Structures + Variables: This checkbox enables/disables the verification of the entire local object dictionary. Software Manual MELSEC ProfiMap Profibus/FMS « ° 6 – 54 Profibus/FMS Interface OK: Click on to leave this dialog, start the transfer, and verify all data with the module. A successful verification will be confirmed by "All settings verified". to leave this dialog without verification of any settings. Profibus/FMS Cancel: Click on MELSEC ProfiMap Software Manual Network Database 7 – 1 Network Database Introduction ProfiMap is capable of downloading PROFIBUS/DP configuration data to the PB92D master module via MELSEC Ethernet or MELSECNET/10. The master module can be configured via the CPU port of a local or remote MELSEC PLC or via an Ethernet connection to your personal computer (PC). Up to 1000 different network settings can be configured and stored in a network database. From this database the suitable network connection for a ProfiMap project can be selected in the Master Settings dialog. For successful network settings you should be familiar with the characteristics of MELSEC Ethernet and MELSECNET/10 and refer to the corresponding manuals. Supported network configurations ProfiMap 3.00 supports MELSEC Ethernet and MELSECNET/10 connections with the following restrictions. Restrictions: n No support for combined MELSECNET/10 and MELSECNET/II systems n No support for MELSECNET/II, MELSECNET/B n No support for MELSECNET/10 multi-layer systems n No support for MELSECNET/10 remote network systems n Support for AnN, AnA, AnU CPU port access only as local host (no network connection) Network DB Combination of AnU and QnA(S) CPUs in a network n If ProfiMap is connected to a QnA(S) station in a MELSECNET/10 network, the QnA(S) CPU must be switched to A mode by hardware switch, if transfer to an AnU is required. n If QnA(S) CPUs are existing in a MELSECNET/10 network, a QnA(S) CPU must be the control station. n If QnA(S) and AnU CPUs are existing in a MELSECNET/10, a QnA(S) CPU must be the control station. The AnU CPU can only be accessed from a QnA(S) CPU with hardware switch in A mode. Software Manual MELSEC ProfiMap 7 – 2 Network Database Supported connection types PC (ProfiMap) to PLC n COM port to QnA-CPU (RS422 CPU port) n Ethernet board to QE71 (QnA Ethernet module) n COM port to A-CPU (RS 422 CPU port) only locally, no network connection Network DB PLC to PLC n None (local CPU is the PB92D host) n MELSECNET/10 (PB92D is located on remote CPU rack) MELSEC ProfiMap Software Manual Network Database 7 – 3 Database Handling Opening the network database Click on the network database button in the toolbar or select Setup/Network Database from the main menu to open the network database. Network DB Network database main dialog Software Manual MELSEC ProfiMap 7 – 4 Network Database Meaning Change Network Symbolic Name Change the name of the selected network connection index. Search Network by Symbolic Name Search for a network connection index by name. Chose Network by Number Chose a network connection index by number. Down Switch network connection index number down. Up Switch network connection index number up. Parametrize CPU/Network Displays various parameters of a defined network connection. The parameters displayed depend on the selected MELSEC unit and network connection. Define Define the selected network connection index. Clear Clears a defined network connection index. OK Leave this dialog and save all data from this dialog in the network database. Cancel Leave this dialog without saving any changes in the network database. Test Test the network connection settings online. Shortcut ¦s ¦n ¦b ¦o ¦u ¦p ¦d ¦c « ° ¦t Network DB Item MELSEC ProfiMap Software Manual Network Database 7 – 5 Defining a CPU port network connection Select a network connection index to be defined either by symbolic name or by number. The default names of undefined network connections are "Network Connection No. x". If you have selected an undefined index, the the button. button becomes active. Click on Select the MELSEC unit your PC is connected to. You can either access the PLC via the CPU port with a special serial programming cable or via an Ethernet board. Below the serial connection is selected. The CPU port network connection is defined using default values. Now you can edit the values directly in the network properties table. Software Manual MELSEC ProfiMap Network DB Select the MELSEC network across which the host CPU of the PROFIBUS master module can be accessed. The PROFIBUS master module can either be installed together with the target CPU on the same rack or on a remote CPU rack accessible across MELSECNET/10. Below the local installation is selected. 7 – 6 Network Database Network properties for the CPU port connection Item Meaning Range Target Network No. Specify the MELSECNET/10 target network number (0 = none/local). 0x0, 0x1 ... 0xFF Target Station No. Specify the target station number within MELSECNET/10 (FF = none/local). 0x0 ... 0x40, 0xFF Target CPU Type Select the target CPU type. Select from drop-down list Serial Port Number Select the serial port number of your PC connected to the CPU. COM 1 ... COM 10 Serial Baud Rate Select the serial baud rate for the connection between PC and 9600, 19200, PLC. 38400 bps Time Out Specify the communication time out value for the serial connection. 6000 ... 100000 ms Network DB The values for the Target CPU Type, Serial Port Number, and Serial Baud Rate can be selected from drop-down lists. MELSEC ProfiMap Software Manual Network Database 7 – 7 Defining an Ethernet connection Select a network connection index to be defined either by symbolic name or by number. The default names of undefined network connections are "Network Connection No. x". If you have selected an undefined index, the the button. button becomes active. Click on Select the MELSEC unit your PC is connected to. You can either access the PLC via the CPU port with a special serial programming cable or via an Ethernet board. Below the Ethernet connection is selected. The Ethernet network connection is defined using default values. Now you can edit the values directly in the network properties table. Software Manual MELSEC ProfiMap Network DB Select the MELSEC network across which the host CPU of the PROFIBUS master module can be accessed. The PROFIBUS master module can either be installed together with the target CPU on the same rack or on a remote CPU rack accessible across MELSECNET/10. Below the local installation is selected. 7 – 8 Network Database Network DB Network properties for the Ethernet connection MELSEC ProfiMap Software Manual Network Database 7 – 9 Item Meaning Range Target Network No. Specify the MELSECNET/10 target network number (0 = none/local). 0x0, 0x1 ... 0xFF Target Station No. Specify the target station number within MELSECNET/10 (FF = none/local). 0x1 ... 0x40, 0xFF Station No. of QE71 Specify the station number of the QE71 Ethernet module the ProfiMap PC is connected to (Melsec Medoc plus programming via instruction required). 0x0, 0x1 ... 0x40 Target CPU Type Select the target CPU type. Select from drop-down list Port Number PC Side Specify the IP port of the Ethernet board. 256 ... 65535 IP Address of (Q)E71 Specify the IP address of the Ethernet board. a.b.c.d Time Out Specify the communication time out value for the network connection. 6000 ... 100000 ms Network No. PC Side Specify the MELSECNET/10 network number the PC is connected to (virtual MELSECNET/10). 0x1 ... 0xFF Station No. PC Side Specify the MELSECNET/10 station number the PC is connected to (virtual MELSECNET/10). 0x1 ... 0x40 Network DB The Target CPU Type can be selected from a drop-down list. Software Manual MELSEC ProfiMap 7 – 10 Network Database Structural overview of the Ethernet connection PC ProfiMap 3.0 virtual MELSECNET/10 MELSECNET/10 network Station No. PC Side Network No. PC Side (real existing MELSECNET/10 network number) Station No. QE71 QnA CPU MELSECNET/10 ETHERNET QE71 Station No. IP Adress Target Network No. QnA CPU Target CPU type MELSECNET/10 PROFIBUS Master Target Station No. Ethernet communications (FB init, FB connect) must be executed in the CPU. Network DB The settings must correspond to the FB_GPRSET instruction. MELSEC ProfiMap Software Manual Network Database 7 – 11 Network connection test The network connection settings can be tested online. Click on the button in the network database dialog to run the test (the test function is available for network connections only. A network connection can be selected from the network database or in the master settings). The Connection Test dialog appears. You can either search for available PB92D ProfiBus master modules or check for available QE71 Ethernet modules. The Check for QE71 unit(s) function is only available for CPU port connections. Search PB92D unit(s) This function will return the slot number and I/O address of installed PB92D ProfiBus master modules. Network DB Click on to search for other PB92D units. All further units will be displayed as well. If no further unit is found, the following message will appear. Software Manual MELSEC ProfiMap 7 – 12 Network Database Check for QE71 unit(s) This function is only available for CPU port connections. This function will return the slot number and I/O address of installed QE71 Ethernet modules. Network DB You can also check the UPD port and IP address of the corresponding module. Click on to start checking. MELSEC ProfiMap Software Manual Network Database 7 – 13 Network DB This function is especially helpful to get the IP address of an Ethernet module needed to setup an Ethernet network connection. The found IP address will be entered in the Connection Test dialog. Software Manual MELSEC ProfiMap 7 – 14 Network Database Changing the network symbolic name You can change the symbolic name of any network connection index. Select the network connection index you want to change. Enter the new name in the Change Network Symbolic Name entry field and confirm with . Network DB The symbolic name for the network connection has changed and can be selected from the Search Network by Symbolic Name drop-down list. MELSEC ProfiMap Software Manual Network Database 7 – 15 Clearing a network connection index You can clear any defined network connection index. Select the network connection index to be cleared. Click on the button. Confirm the following dialog with . Network DB The network connection index is cleared to the undefined status. Software Manual MELSEC ProfiMap 7 – 16 Network Database Transferring the network database Network DB The network database is not exported automatically and is not part of the *.dp2 project file. The network connection settings are stored in the ProfiMap subdirectory net in the file mels_net.mdb. If you want to transfer the network database to other PCs copy it manually. MELSEC ProfiMap Software Manual Index – i Index A G Address Type, 6–33 ASCII Export, 3–18 ASCII Import, 3–16 Ass/Abt CI, 6–20 Bus Parameter, 6–5 Get head address, 5–13 Get Header, 6–40 Get OD, 6–39 Get Range, 6–41 GSD Device Database, 3–26 GSD-Extract, 5–7 GSD-Extract Files, 5–7 C H B Cables, 3–24 Check CREF, 6–44 Check for QE71 units, 7–12 Check unit, 5–25 Choose Structure Index, 6–37 Client Features, 6–16 Communications Reference List, 6–7 Connection test, 7–11 CPU port connection, 7–5 CREF Number/Symbol, 6–38 CRL Check, 6–8, 6–22 CRL Information, 6–50, 6–52, 6–53 CRL Settings, 6–7 CRL Static Entry Setting, 6–7 Current Index, 6–41 Current index to edit, 6–28 D Data Type Structure List, 6–27 Define I/O Slaves, 5–15 Define/undefine Structures, 6–29 Device Database, 5–4 Device Name, 6–34 Device Number, 6–35 Display OD, 6–39 Download selection, 5–13 Header, 6–8, 6–20 Help, 1–1 I Initial Check, 6–44 Initial Check Monitor, 6–46 Installation, 2–1 L LOD Variable Index, 6–37 M Master Parameters, 5–9 Master Settings, 6–3 Master/Bus Parameters, 6–50, 6–51, 6–53 MELSEC EasySocket, 2–4 Module Priority, 6–4 Monitor Selection, 6–44 MXChange support, 3–25 N Editing an FMS CRL Entry, 6–10 Ethernet connection, 7–7 Name Length, 6–42 Network configurations, 7–1 Network connection, 5–13 Network database, 5–13, 7–1 Network No., 6–33 Network symbolic name, 7–14 Number of defined structures, 6–28, 6–37 F O E FDL address, 6–4 First allowed index of variables, 6–28 FMS CREF Check, 6–48 FMS CRL Entry, 6–10 Freeze mode, 5–28 Software Manual OD Version, 6–42 P Page Setup, 3–21 Param. Settings, 6–3 Parameter Setting for A(1S)J71PB96F, 6–1 Poll List LSAP, 6–20 Print, 3–20 Printer Setup, 3–20 Profibus/FMS Interface, 6–1 Project dialog box, 6–1 R Read from A(1S)J71PB96F, 6–50 Record Variable, 6–36 Remote mode, 6–38 Remote OD Display, 6–42 Remote OD Index, 6–40 Remote OD Set, 6–39 S S/W Version, 6–44 Search PB92D units, 7–11 Select CREF, 6–39 Select network, 5–13 Serial Port Selection, 3–24 Server Features, 6–18 Slave Module Selection, 5–21 Software Version Monitor, 6–45 Start DP, 5–26 Static Data, 6–41 Static Types, 6–41 Station No., 6–33 Stop DP, 5–27 Structures + Variables, 6–50, 6–52, 6–53 System Requirements, 2–2 T Target Rotation Time (TTR), 6–6 Toolbar, 3–2 Transfer of network database, 7–16 Trouble Information, 6–44 Trouble Information Monitor, 6–47 U User Parameters, 5–19 V Verify, 3–12, 5–30 Verify with A(1S)J71PB96F, 6–53 VFD - Local Object Dictionary, 6–24 MELSEC ProfiMap Index – ii MELSEC ProfiMap Software Manual MITSUBISHI ELECTRIC Specifications subject to change. Art. No.: 65778-C MITSUBISHI ELECTRIC EUROPE B.V.