1
Enterprise Manual
i
Table of Contents
Campaign Enterprise User Manual .......................................................................5
Who should use this guide?...........................................................................5
Who should use Campaign Enterprise? ........................................................5
Other considerations for using Campaign Enterprise: ...................................5
Using this guide .............................................................................................6
Quick Start Guide..................................................................................................6
Datasource ....................................................................................................6
The Message .................................................................................................6
Send to the SMTP Server ..............................................................................7
Run Campaign...............................................................................................7
Installation.............................................................................................................8
Installation and Configuration ............................................................................8
Installation......................................................................................................8
Install Enterprise................................................................................................9
Bandwidth .......................................................................................................11
Activation/Serial Numbers ...............................................................................12
Campaign Service ...........................................................................................12
Admin Settings....................................................................................................15
Admin Settings ................................................................................................15
Default Campaign Configuration .....................................................................16
Server Manager Status ...................................................................................17
Database Shortcuts.........................................................................................18
Email Accounts................................................................................................19
SMTP Connections .........................................................................................19
Blackout Dates ................................................................................................21
Manage Users .................................................................................................22
Manage Groups...............................................................................................23
Email Footers ..................................................................................................23
Software Update..............................................................................................23
Manage Email Campaigns..................................................................................24
Managing Email Campaigns ...........................................................................24
Elements of a Successful Email Campaign .....................................................24
Main Menu ......................................................................................................26
2
Quick Start Guide
Template Campaign ........................................................................................29
Campaign Edit Screens...................................................................................29
Campaign Edit Screens ...............................................................................29
Campaign Settings ......................................................................................30
Data Source.................................................................................................31
Compose Email Message ............................................................................40
Send Settings ..............................................................................................50
Click-Throughs.............................................................................................51
Conversion Events.......................................................................................51
Bounce-Backs..............................................................................................52
Unsubscribe.................................................................................................55
Subscribe.....................................................................................................59
Misc. Settings ..............................................................................................61
Advanced Write Back Options .....................................................................64
Campaign Types .............................................................................................71
Set Up Confirmation Campaign ...................................................................71
Set Up Follow Up Email ...............................................................................72
Set Up Campaign Series .............................................................................74
Edit Campaign.................................................................................................75
Copy Campaign...............................................................................................75
Note Feature ...................................................................................................76
Reports............................................................................................................76
Reports ........................................................................................................76
Overview Report ..........................................................................................78
Bounce Report.............................................................................................79
Click-Through Tracking Report ....................................................................81
Unsubscribe Report .....................................................................................82
Export Subscribers ......................................................................................83
Opened Email Report ..................................................................................83
Log Files ......................................................................................................85
Test Campaign ................................................................................................85
Run Campaign ................................................................................................86
Schedule Campaign ........................................................................................87
Connect To an Email List....................................................................................90
Connect To A Database ..................................................................................90
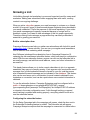
Growing a List .................................................................................................94
Databases .......................................................................................................96
MS Access ......................................................................................................97
MS SQL Server .............................................................................................100
MySQL ..........................................................................................................101
Text Files.......................................................................................................103
Subscriber Lists.............................................................................................106
Other Databases ...........................................................................................107
Connect to a Mail Server ..................................................................................109
Connect to a Mail Server...............................................................................109
SMTP Servers ...............................................................................................109
3
Enterprise Manual
Securing The Mail Server ..............................................................................113
Other SMTP Considerations .........................................................................114
Domain Keys/DKIM .......................................................................................116
SPF ...............................................................................................................117
Troubleshooting ................................................................................................121
Troubleshooting.............................................................................................121
Success/Fail Log Files ..................................................................................122
Access Troubleshooting ................................................................................123
Trace Logs ....................................................................................................123
Web-server Log Files ....................................................................................124
Glossary............................................................................................................125
4
Campaign Enterprise User Manual
This manual is meant to be a detailed guide to using Arial Software’s Campaign
Enterprise email marketing program. We will touch briefly on installing and
configuring Campaign Enterprise but the primary purpose will be to guide email
marketers using Campaign Enterprise to improve email marketing techniques to
utilize and learn best practices for permission email marketing.
Campaign Enterprise is one "link" of a three-link chain, consisting of a database
of email addresses, Campaign Enterprise and a Simple Mail Transfer Protocol
(SMTP) mail server or Mail Transfer Agent (MTA). Each "link" will be discussed
in detail.
Who should use this guide?
This guide is for licensed users and evaluators of Campaign Enterprise email
marketing program by Arial Software, LLC. Many of the features listed in the
manual apply to Campaign Enterprise version 11, (it is always a good idea to
upgrade).
Who should use Campaign Enterprise?
Campaign Enterprise is designed for small and large businesses that want to
communicate to their customers via personalized email messages. Campaign
Enterprise is a permission based email marketing tool and as such it is not
suitable for spammers. Campaign Enterprise will not help "get around" any of
the provisions in any spam law. To maximize the use of a legitimately obtained
list of email addresses, Campaign Enterprise is a great solution. Drop the
expensive ASP email-marketing model and move to Campaign Enterprise, which
allows email marketing in-house and avoids costly recurring fees typically
charged by ASP providers.
Other considerations for using Campaign Enterprise:
•
•
•
•
The list of email addresses is greater than 50,000 and is becoming
unmanageable.
No longer want to pay per email costs on sending.
Greater control of email sending, design and database integration.
Tap into the permission marketing economy by tapping into existing, or
expanding list of customers.
This manual is broken down into two broad sections, Installation and
Configuration and Features. When describing features, we will explore the basic
feature set up and capabilities, and then expand each feature to explore the full
5
Enterprise Manual
functionality. It is best to understand the basic concept of a feature first, and then
expand the features based on growing expertise.
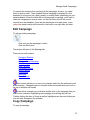
Using this guide
The following conventions are used in this manual.
Commands, buttons and actions are Bolded.
Examples are given in Times New Roman Font.
File paths are Italicized.
Merge fields are enclosed in {Curly Braces} and may be italicized or in Times
New Roman Font as necessary for clarity.
•
•
•
Use the left side index to navigate to portions of the manual you need.
Use the search feature to find specific information on particular terms.
Use in text links to discover definitions of common terms or move to
another section of the manual.
Quick Start Guide
After logging into Campaign Enterprise, the start up menu opens. This is where
the fun begins. The initial set up presented here will help you create a simple
campaign, and get emails out the door. Details will be provided later as we
discuss the variety of features, and how they can help you get more from
Campaign Enterprise. As mentioned above, there are three main elements
necessary to get started with sending an email campaign. The database list of
email addresses, the message to send, and the SMTP server to send through.
Datasource
The easiest database to start with is MS Access because Campaign Enterprise
can connect to it directly. Before connecting to Campaign Enterprise, ensure that
the list of email addresses is entered into an Access database table correctly.
Once the table of email addresses is configured it is time to connect Campaign
Enterprise to the database.
1. Create a New Campaign
2. Name it
3. Click on the Datasource tab
4. Select MS Access as the database type
5. Browse to MS Access database
6. Select the table
7. Select the email address field
8. Select the unique ID, typically the primary key for the selected table
The Message
6
Admin Settings
The next step is to create, or load the message to send. Campaign Enterprise
can send both plain text and HTML messages in a multipart format. Detailed
explanations of the message types, the email addresses, the templates, and the
editor are explained later in the guide. To get started right away keep it basic.
1. Click the create message tab
2. Enter the email address from whom the message is coming
3. Write a comprehensive subject line
4. Click Edit HTML or Email Templates to enter the HTML part of the
message
5. Create a message and save
6. Click on Edit Plain Text Message
7. Create a plain text message and save
Send to the SMTP Server
The final step is to connect to the SMTP server to send the messages through.
This is typically the one already in use in the network, Campaign Enterprise just
needs to connect to it. A network administrator must do any configuration of the
SMTP server to allow Campaign Enterprise to work properly. Further details on
the SMTP server configuration are specified later in the guide.
1. Click the Send Settings tab
2. Enter the name of the SMTP server
3. Enter the username and password if authentication is required
4. Save
Run Campaign
That is all there is to it, the first campaign is now ready to run.
1. Click Run
2. Verify the count is correct, preview the message one last time
3. Click Ok
Check the inbox of the test email accounts to which the email message was
delivered to verify that it was received.
7
Installation
Installation and Configuration
Regardless of the version of Campaign Enterprise selected, the installation is
generally the same. Arial Software recommends checking for updates frequently
and upgrading to the latest version of the program since features and
functionality are continually improving.
Installation
Minimum System Requirements
Campaign Enterprise can be installed on virtually any off the shelf PC. This is
fine for smaller lists or small business just getting started with email marketing.
The following are the minimum basic requirements for the PC or server on which
Campaign Enterprise is installed.
• Operating systems: Windows 2000 / NT workstation / NT server / 2000
Server / 2003 Server / Windows XP / Windows 2003 or XP SP2/ Windows
Vista / Windows 7
• 5GB free disk space
• 256MB RAM
• Internet Explorer 6.0
• Bandwidth to the Internet (DSL, T1, etc.)
• Access to source database. (Supported databases include MS SQL,
Oracle, FoxPro, MS Access, dBase, comma separated values text files
and many other formats. Campaign will not directly read ACT! databases
(unless it has a SQL backend) or Excel spreadsheets, but you can save
these data as csv files or export them into MS Access as a solution.)
• SMTP mailers supported: Campaign supports any standard SMTP mailer,
including: SendMail, LSMTP, MS IIS, Post.Office, Exim, MS Exchange,
etc.
Enhanced System Requirements
When utilizing huge lists, with hundreds of thousands to millions of email
addresses, Arial Software recommends the following system to increase
performance.
• Operating systems: Windows 2000 / 2000 Server / 2003 Server / Windows
XP Professional / Windows 7
• 10GB free disk space (or better)
• Pentium 4 processor (or better)
• 7200 rpm IDE hard drives or faster (SCSI for extreme performance)
• Bandwidth to the Internet (DSL, T1, etc.)
• Dedicated IP address (static)
8
Admin Settings
•
•
•
•
OLE DB connection to source database (preferred)
SMTP mailers supported: Campaign supports any standard SMTP mailer,
including Imail, SendMail, LSMTP, MS IIS, Post.Office, Exim, MS
Exchange, etc. For high performance, consider Port25 solutions or
Ironport servers.
512MB for stand alone Campaign Computer. At least 1GB of RAM if
Campaign resides on the same computer as your SMTP server or
database. (More is even better, memory is still relatively cheap so add
more if you can).
Internet Explorer 7.0
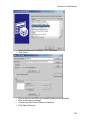
Install Enterprise
Download the evaluation version of Campaign Enterprise from Arial Software's
website, download page. The installation files are rather large; exceeding 34 MB
depending on the version available so make sure you have enough room on your
computer. Arial Software recommends that when you download, you place a
copy of the downloaded file in a directory on your computer. If there were a
problem with the installation, then you would not necessarily need to download
the file again, simply reinstall from where you saved the copy of the file.
Once you download the file, simply open it, and run the installation executable.
Follow the instructions on the installation process. If you change the pathway to
where Campaign Enterprise is installed, make sure you note the drive and the
folders. By default Campaign Enterprise is installed on to the following directory:
C:\Program Files\CampaignEnterprise. When this book refers to the pathway for
Campaign Enterprise for any reason, we will assume the default pathway to the
program files.
Once the installation is complete a detailed installation log file called
"INSTALL.LOG" is available in the main Campaign Enterprise directory,
C:\Program Files\CampaignEnterprise. If there were a problem during the
installation, you can refer to this file for troubleshooting. If you require technical
support, this file may be requested.
Configuration
Campaign Enterprise is meant to run at all times while a campaign is being sent,
or if campaigns are scheduled. Many of the advanced features like click through
or opened email tracking require Campaign Enterprise to be up and running to
ensure their proper function. Install Campaign Enterprise on a computer that is
capable of acting as a server, even if it is not a server class computer.
Sample Configurations
9
Enterprise Manual
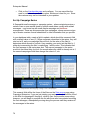
There is no specific recommended configuration for how you want to set up
Campaign Enterprise in your network. The system resources available for each
component of Campaign Enterprise, the database, and the SMTP server
determine the configuration. The following examples are basic configurations;
you will likely need to discuss considerations with your network administrator.
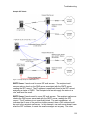
This diagram represents the Database, Campaign Enterprise and SMTP server
on three separate computers. Recommended connections between the SQL
type Database and the Campaign Enterprise computer are via an OLE DB
connection. Between the Campaign Enterprise computer and the SMTP server,
we recommend a 10/100 mbs Ethernet connection.
This diagram represents the Database on a separate computer, Campaign
Enterprise and SMTP server on the same computer. To eliminate the need for a
connection between Campaign Enterprise and the SMTP server, you might
consider putting them on the same computer. Make sure that your computer has
enough resources to run both applications.
This diagram represents Database and Campaign Enterprise on the same
computer, SMTP server on a separate computer. If you are using an Access
type database, you need to put the database and Campaign Enterprise on the
same computer. If you need to do this, you may want to split out your SMTP
server, again we recommend using a 10/100 mbs Ethernet connection.
This diagram represents all three components on the same computer. If you
decide to put all of your components on the same computer, make sure you have
enough hard disk space and RAM to run all the applications efficiently.
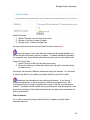
Starting Campaign Enterprise
Start Campaign Enterprise in one of two ways; application mode or service
mode. Initially you want to start in "Application Mode" until everything is
configured properly. To start in "Application Mode" simply click "Start > All
Programs > Campaign Enterprise > Campaign Enterprise" a splash screen
10
Manage Email Campaigns
followed by a small window, called the Server Manager window opens. If this is
the first time starting Campaign Enterprise, an application browser window opens
automatically leading to a product registration page.
At this point you are prompted to enter your serial number if you already
purchased a license, or continue with an evaluation. The evaluation version of
Campaign Enterprise is fully functional, meaning you can test any of the features
available. The only limitations of an evaluation are on the number of emails you
can send at one time (100) and the number of users available (1 in addition to
the Admin user). Each message that is sent is appended with a tagline
promoting Arial Software. After you enter a serial number, or continue with the
evaluation, you are asked to log into the Campaign Enterprise server. The
default username is "Admin" and the default password is "Admin", these can be
modified in the Administration area of Campaign Enterprise after the initial log in.
The other way to start Campaign Enterprise is to run it as a service, or "Service
Mode." During installation the campaign executable is registered as a service,
which allows Campaign Enterprise to run in the background, and start
automatically when the computer is turned on. To set up the Campaign
Enterprise service, click "Start > Control Panel > Administrative Tools >
Services". Find the Campaign Enterprise service in the list of services and
highlight. Click on the properties icon and examine the service properties. When
running as a service, it is important to set up Campaign Enterprise with full
privileges so that there are no obstructions to running Campaign Enterprise or
connecting to your database. Setting up a user logon is recommended. Please
see your network administrator to ensure that the user logon has all the
privileges that are required.
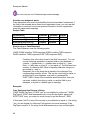
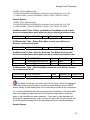
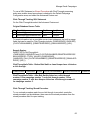
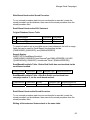
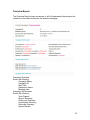
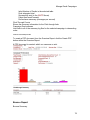
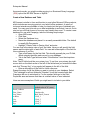
Bandwidth
There is no simple translation of bandwidth to how many emails per hour your
configuration will send, the primary bottlenecks for sending speed are the SMTP
server and the bandwidth. The more bandwidth you have, the faster your emails
will go out. This table assumes you do not have any limitations on your SMTP
server at all, this is just pure bandwidth speed and that you have a 1 kb
message.
Available Bandwidth
28.8K Modem:
56K Modem:
ISDN:
T1:
Cable Modem:
DSL:
T3:
Approximate Average
emails/hour
1,300
2,500
5,800
72,000
23,000-140,000
23,000-370,000
2,000,000
Data Rate (bits per
second)
28.8 Kbps
56 Kbps
128 Kbps
1.544 Mbps
512 Kbps to 3 Mbps
512 Kbps to 8 Mbps
44.736 Mbps
11
Enterprise Manual
OC-256:
620,000,000
13.271 Gbps
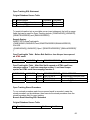
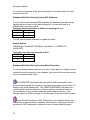
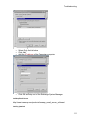
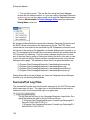
Activation/Serial Numbers
Serial Number
The Serial Number unlocks the Enterprise edition you purchased. Once you
enter your serial number you will not be asked for it again.
To verify or modify your Serial Number click Administration > Manage
Configuration.
The current edition of the software is displayed at the top of every page.
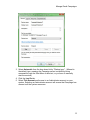
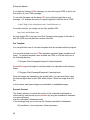
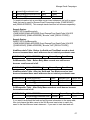
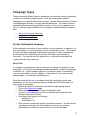
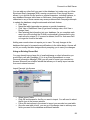
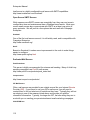
Campaign Service
Campaign Enterprise can run automatically in the background as a service.
Meaning that as long as the machine on which Campaign is installed is up and
running, Campaign will be running in the background. While running as a
service, Campaign can automatically start up when the machine is booted.
1. Go to Start > Settings > Control Panel > Administrative Tools > Services
2. Double click CampaignEnterprise11 in the list of services, the Properties
window will appear.
12
Manage Email Campaigns
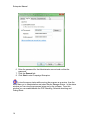
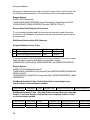
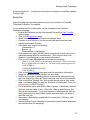
3. Select Automatic from the drop down list by "Startup type:". (Manual is
the default type, meaning the Campaign server is started by being
accessed through the Start Menu or shortcut, or you have to manually
start the service.)
4. Click the Log On tab.
5. Select This account and browse to an Administrator account on your
system. Selecting an Administrator account will ensure that Campaign has
access to all the system resources.
13
Enterprise Manual
6. Enter the password for the Administrator account and confirm the
password.
7. Click the General tab.
8. Click Start to start Campaign Enterprise.
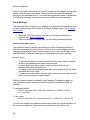
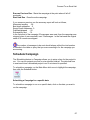
To view the server status while running the program as a service, from the
Main Menu go to Administration and select Server Manager Status. In the status
window you can view the processes being run by the software. From this
window you can enable/disable the POP checking, Schedule checking and
Debug Mode.
14
Admin Settings
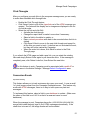
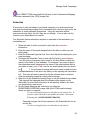
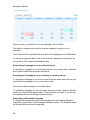
Admin Settings
The administration tab is located at the top of the Main Menu screen of
Campaign Enterprise after you log in.
The tab is only available to Admin users, which include the main Admin user and
any user account that is designated as an Admin user. The Administration tab
allows the user to access the following sections:
• Default Campaign Configuration – default and global Campaign Enterprise
settings.
• Server Manager Status – to monitor the events occurring on the
Campaign Enterprise server, also allows you to enable debug mode, and
manage some of the server functions remotely.
• SMTP Connections – create and manage global sending configurations.
• Blackout Dates – limit dates on which campaigns can be scheduled.
• Database Shortcuts – allows you to set up different connection strings to
various databases. Ideal for multi user editions of Campaign Enterprise
where you are managing several client configurations. This feature must
be enabled in the Default Campaign Configuration section.
• Email Accounts – create and manage bounce and unsubscribe email
accounts globally.
• Manage Users – set up and edit user accounts. In the evaluation and
single license versions only the Admin user and one additional user are
available.
• Manage Groups – only available with a multi-user license. Allow you to
create and edit groups of users.
• Email Footers – configure and manage email footers to be appended to
campaigns.
• Software Update – look to see if you have the latest version of Campaign
Enterprise.
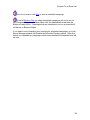
You can also access the various sections from the bottom of the page by clicking
the corresponding icon. Hover over the icon to see where it will take you.
Only users with administrator privileges have access to the administration
functions in Enterprise.
15
Enterprise Manual
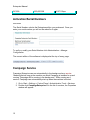
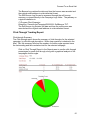
Default Campaign Configuration
Click the Manage Configuration button to edit the following.
Registration Information
This is where the Serial Number to activate the program is entered. If an
additional user license was purchased, first enter primary serial number and click
save, then return to the configuration page and enter the user license serial
number.
Campaign System Settings
•
•
•
Set the Admin port number. The default is 82. This port is used for
remote access via a web browser.
Set the ports used by Campaign Enterprise, the default ports are 81 for
click through and opened email tracking features.
Set the domain name or IP addressed used by Campaign Enterprise for
tracking click through links and opened emails. The default is 127.0.0.1
which is the localhost IP address. (This IP or domain must be accessible
to the public in order for the click through, opened email tracking,
subscribe, or web unsubscribe processing to work. Many new browsers
will not serve up pages using an IP address so it is highly recommended
that you use a domain name. A firewall or router rule must also be set to
allow requests coming to that domain, on the specified port, to be served
up by the Campaign computer instead of the normal web server).
Remember that this domain name must be accessible from the internet
in order to allow the above processes to work.
•
•
•
16
User session time out is set to 15 minutes by default. When accessing
Campaign Enterprise remotely using a web browser, closing the browser
window will not kill the session. If you have people logging in remotely,
you may want to decrease the time out period to something more
reasonable.
POP account monitoring cycle is set for 5 minutes, this is how often
Campaign Enterprise checks the POP accounts for bounce and email
unsubscribe processing.
You can also enable the POP processing to only occur at certain times.
Just enter the start and end times in the appropriate fields using the
following format: 12:15AM.
Manage Email Campaigns
•
•
•
•
Database Shortcuts are useful when you have many clients from different
sections and you want to separate database connections. The default
setting is disabled.
Stored Procedure updates are advanced write back options. The default
setting is disabled.
Run authorization required is off by default.
Web server logs are disabled by default.
Feedback Loop
Campaign can monitor an email account that is signed up for one or more
feedback loops. Campaign can then scan the original email and execute the
unsubscribe feature automatically. We recommend that you use a secondary
account to which your typical feedback loop messages are copied.
• Enter the server type, POP3 or IMAP4.
• Enter the name of the server.
• Check the SSL box if the account requires a secure connection.
• Enter the username and password for the account you are checking.
• If you are using IMAP4, select the folder you want to check.
Database Cursor types
This is how Campaign Enterprise marks the database for updates. The default is
Client Side cursors.
• Client side cursors allows Campaign to set the markers on the database in
order to find the records to update.
• Server side cursors uses the default markers set by the database.
IP Binding
IP Binding should only be adjusted if you have a public assigned exclusively to
campaign. You would enter the IP here. To log in, you would use the bound IP
even if attempting to log into campaign locally.
You should check with technical support prior to setting up IP binding to
ensure that it is something you need. Adding an IP before you have everything
configured properly can result in making Campaign inaccessible.
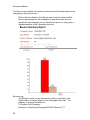
Server Manager Status
The Server Manager Status window shows the events that occur on the server.
The same data that can be viewed on the Server Manager Window when it is
operating appears on this screen. Events are recorded in this window, like click
17
Enterprise Manual
throughs, opened emails, bounces and unsubscribe requests as the requests
come into the server and update the database.
• Enable Email-based Response Monitoring is basically the POP account
checker for managing bounces and email unsubscribe/subscribe requests.
If you disable this feature, the POP checker will not log in to the bounce,
unsubscribe or subscribe POP accounts and gather the email unless you
perform the function manually.
• Enable Scheduler Monitoring – If you disable this feature, scheduled
campaigns will not execute until you re-enable. This is useful if you are
troubleshooting a problem, and you don’t want a bunch of campaigns
being sent, and possibly failing or clogging your resources while
debugging.
• Debug mode is disabled by default to prevent huge files being written
during normal operations. If you are troubleshooting an issue, you would
enable debug mode, which will record various activities that could be
causing you problems. The debug logs are located in the Campaign
Enterprise program folder, C:\Program
Files\CampaignEnterprise\www\Debug. These files can also be accessed
from the Server Manager window, or here in the Server Manager Status
window.
• Trace.log – this log records interactions between Campaign
Enterprise and your database.
• Batch.log – this log records actions processed by the batch
processor which collects all data from click throughs, opened email
tracking, bounces, unsubscribes and subscribe features, and
updates the database.
• POP.log – this log records the conversations with the POP
accounts that are set up for bounce processing, email unsubscribe
and email subscribe processing.
• SMTP.log – this log records the conversations with the SMTP
server to which a particular campaign is connected.
• To clear the list of actions from the list, simply click the clear status list
button on the left.
• To execute the Email-based Response checker and the Batch processor
click the Execute response check button on the left. You will need to
refresh to see the most recent results.
Database Shortcuts
Database shortcuts allow the administrator to protect the database connections
by assigning connections to specific users and groups. By default, Database
Shortcuts are disabled and may be enabled in the Default Campaign
Configuration screen.
•
18
If you select a built-in list, select the particular table you want to use from
the drop down list.
Manage Email Campaigns
•
•
If you select access
• Click browse and find the pathway to your Access database. A
typical pathway may look like, C:\Documents and Settings\user\My
Documents\dbname.mdb.
• Click Select to return to the datasource tab
If you select a different type of database, click browse and select the DSN
connection from the list of System DSNs.
Assign the shortcut to the users and or groups to whom you want to give
permission. If a user logs in and does not have any shortcuts available, they will
get a warning message to contact an admin user to set one up for them.
Email Accounts
Campaign uses POP3 or IMAP4 email accounts to help manage bounces and
email unsubscribe processing. In the email accounts area, you can configure
any number of email accounts to be used for this purpose. The options will be
available in the campaign edit screens for those features.
•
•
•
•
•
•
•
•
•
•
Click new to create a new email account.
Name the account using something descriptive to make it easy to select.
Set as default if you want this to be the default account.
Enter the email address for this account.
Select the server type, Campaign can use either POP3 or IMAP4 mail
protocols.
Enter the name of the email server.
Check the box to enable SSL if required by the server.
Enter the username, typically the email address of this account.
Enter the password.
Click test to ensure the connection works.
WARNING: Do not use a personal email account for bounce processing,
campaign reads the emails then DELETES them. Campaign will delete all emails
in the account once processed.
The Email Account management manages both unsubscribe email accounts and
bounce email accounts. Steps should be taken to ensure that the account is used
for its intended purpose. You do not want to use a bounce email account for
managing unsubscribes as important information may be lost. When you name
the account, make it clear what type of account it should be used for.
SMTP Connections
19
Enterprise Manual
To send a campaign to a mail server, you must create some sort of SMTP
connection. These are managed globally in the Admin Settings > SMTP
Connections area, or through the campaign edit screens on the Send Settings
page. On the SMTP Connections page, you will see a list of all the available
connections already created. When updating from an earlier version of
campaign, a connection should be made for each separate connection listed in
the earlier version's .sto file. If not, they will need to be recreated.
Edit Existing Connection
•
To edit an SMTP connection, highlight the name of the connection and
click edit, or double click the entry.
Edit New Connection
•
•
•
To create a new connection, click New.
Name the connection, differentiate the connections through the name to
make them readily identifiable. E.g. "Marketing Connection".
Select the type of connection it will be:
• SMTP - the standard connection to a mail server
• Multi-SMTP - choose up to ten servers to send the emails to. The
servers are used in a round robin, not simultaneous fashion.
• To EML Files - drop the EML files directly into the network mail
server's email message queue.
SMTP
•
•
•
•
•
•
•
•
Enter the name or IP address of the server, e.g. mail.server.com, or
192.10.10.1
Add an alternate port if required by the server, e.g mail.server.com:2525
Check the box for SSL if the mail server requires SSL or TLS.
Enter an alternate HELO header. This will eliminate the server pointing
back to the computer name, which many remote ISPs check.
Set the number of emails per connection, zero is the default. When you
enter a number, Campaign breaks the connection at that point, then
immediately reconnects.
Lengthen the SMTP time out if necessary.
Delay the emails by entering the number of messages per hour to send to
the server, formerly called throttling.
Select the authentication options as required by the SMTP server. Contact
support for the server to find out what sort of authentication may be
required.
Multi-SMTP
20
Manage Email Campaigns
•
Enter the name or IP of each additional server you want to use, enter the
alternate port as above if required. No authentication is currently available
for the multiple SMTPs.
To EML Files
If Campaign resides in the same network of the email server, you can bypass the
SMTP connection and drop the emails directly into the message queue of the
mail server. The drive must be mapped so that Campaign has access to it, e.g.
C:\WINDOWS\~\~\mailserver message Queue
Blackout Dates
Blackout Dates can be set so that scheduled campaigns will not be sent on the
specific dates. To set a Blackout Date from the Main Menu click the
Administration link, then the Blackout Dates icon.
To create a new Blackout Date:
1. In the Blackout Dates Menu click the New Blackout button.
2. Give the Blackout Date a description.
3. Enter the Month, Day, and Year for the Blackout Date.
4. Click Save Settings to save your Blackout Date.
To edit a Blackout Date:
1. Highlight the Blackout Date and click the Edit icon.
2. Make any changes to the Blackout Date and click Save Settings.
To Delete a Blackout Date:
1. Highlight the Blackout Date and click the Delete icon.
21
Enterprise Manual
2. Click Delete to delete the Blackout Date, or Cancel to cancel deleting the
Blackout Date.
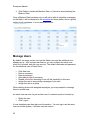
Once a Blackout Date has been set you will not be able to schedule a campaign
on that date, it will be displayed in the scheduler as shown below, this is a global
setting for all campaigns, it is not campaign specific.
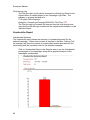
Manage Users
By default, the users section only has the Admin user and the additional user
already set up. With a single user license, you can configure an admin user,
which isn't counted, and one user account. The default username and password
for the additional user is Demo Demo.
•
•
•
•
•
•
•
Click New user.
Enter a username.
Enter a password.
Allow admin rights if necessary.
Disable attachment browsing to turn off this capability for this user.
Assign the user to any existing campaigns if you want.
Assign the user to a group.
When deleting a user with assigned campaigns, you are prompted to reassign
them to another user.
An admin user can also log out another user if a session needs to be freed up.
•
•
Select the user.
Click Logout.
A user elsewhere can then take over the session. If a user logs in as the same
user on another system, it will take over the session.
22
Manage Email Campaigns
Manage Groups
By default, the group section is unavailable in the evaluation mode since it is has
just a single user and an admin user. Standard edition also does not have a
multi user option and will not have group management available.
•
•
•
Click New.
Name the group.
Assign the users.
Users can be assigned to more than on group.
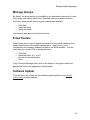
Email Footers
Email footers can be used to append information to every email campaign that
enables that feature in the create message area. Legal, privacy policy,
unsubscribe, and company address information can all be included. You can
enter plain text or use HTML to design the footer.
•
•
•
•
Click New.
Name the footer, e.g. "Legal."
Enter the footer information.
Save.
In the Compose Message Area, scroll to the bottom of the page to select the
appropriate footer to be appended to all the emails.
Software Update
Click the link to see if there are any software updates posted on the revision
history page on Arial's website.
23
Manage Email Campaigns
Managing Email Campaigns
After logging into Campaign Enterprise, the start up menu opens. The initial set
up presented in the Quick Start Guide will help you create a simple campaign,
and get emails out the door.
The following pages provide more details on managing and configuring your
email campaigns.
Main Menu
Template Campaign
Campaign Edit Screens
Types of Campaigns
Elements of a Successful Email Campaign
As mentioned previously, there are three mechanical elements to creating a
campaign with Campaign Enterprise; connecting to a database list of email
addresses, composing a personalized email message and sending the
messages to an SMTP server for ultimate delivery. Creating a good campaign,
which maximizes your customer knowledge to its fullest potential, is a different
story. Before we get into how to make your campaigns better, we will go over
what makes a campaign good.
Personalization
Industry experts all agree that a personalized email message is far more effective
than anonymous mass mailing, whether in the print world or in the electronic mail
world, personalization is key. Campaign Enterprise was designed as the first
personalized bulk email program in the industry, and has since grown to the
extremely flexible and robust program it is today. Message personalization and
permission marketing have always been a part of Arial Software’s philosophy,
and over the years we have been proved right in our assumption that people
don’t want email from people they don’t expect to send them any. Campaign
Enterprise can only use the data that you gather, so the more you know about
your customers, the more Campaign Enterprise can help you with your email
marketing.
In addition to the email address, you should collect the following information from
your customers when they agree to let you email them.
• First Name
• Last Name
24
Manage Email Campaigns
•
•
•
Company information
Date subscribed
Date and type of any purchases if applicable
Other things you might want to know:
• Gender
• Age
• Location
• Phone/Fax numbers
• Specific Interests, hobbies, books read whatever you need to get a sense
about your customer.
It is best to get as much information as possible up front when the client
subscribes for whatever it is you are sending. That way, should something come
up in the future, you don’t have to continually pester them for further information.
Privacy
It is imperative that you guarantee the privacy of the data you collect. As part of
your marketing strategy a privacy policy should be displayed and easily accessed
on your website. The CAN-SPAM act actually requires legitimate email
marketers to put the statement in the email, or have a link to it along with the
company’s physical address. It is assumed that spammers would not do this, or
if they did, it would make it easier to find them. But how many criminals actually
obey the rules, it is only legitimate marketers that will follow these guidelines.
Once you put your policy in place, make sure you follow it; your reputation is at
stake.
Permission
It is also imperative that you get permission from your contact to send them
email. The CAN-SPAM law allows one unsolicited email however; we feel that
NO unsolicited emails be sent. By assisting in creating a permission culture, the
so-called permission economy can blossom and eradicate spam altogether.
Pertinence
Make sure that you send messages to your clients that pertain to what it is they
expect. If you are going to send out a weekly newsletter on gardening, and they
agree to that, don’t start sending matchmaking emails. The content you promise,
should be what you deliver. That is what the customer expects.
Honor Unsubscribe Requests
It is imperative for your reputation, and for CAN SPAM compliance that you
immediately honor unsubscribe requests. The law allows several days of leeway
on the amount of time that can pass before someone is removed, but why not
25
Enterprise Manual
remove them immediately? Campaign Enterprise makes it easy to mark your
unsubscribe requests, and filter them from any, or selected future email
campaigns.
Stop Delivering to Dead Email Addresses
It is a waste of processing time to continually send emails to dead addresses. A
good bounce email policy must be adhered to. Not only will this help you keep
your lists clean, it can help you deliver email. Some remote mailers can detect
how many dead emails you are attempting, and will cut you off if you have too
many, assuming that you are spamming. Campaign Enterprise can also process
both hard and soft bounce emails, and allow you to filter those out, or better yet,
determine which are truly dead, and delete them forever from your database.
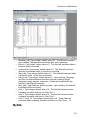
Main Menu
When you first log into Campaign Enterprise you will be taken to the Main Menu.
From here you can create new campaigns, edit existing campaigns, view
reports, set a schedule, test a campaign or run a campaign. By default the
campaigns are listed in the order in which they were created. The campaigns
can also be sorted by owner, schedule date, date last run, campaign id, or
campaign name. A total of twenty campaigns appear on a page. There are no
limits on the number of campaigns you can create. Search tools are available for
when you have too many campaigns to find at a glance.
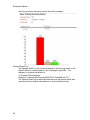
After a campaign is started, the progress will also show on the main menu with a
small graphic that is updated every minute or so.
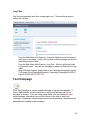
A note can be appended to each campaign as well. In the note section you can
leave instructions, or indicate what remains to be completed on a campaign if
you are working corroboratively.
Main Menu Components
The program edition and version number is displayed at the top of the
page.
The user account you are using is also displayed at the top of the page.
Click Logout to logout as one user and back in as another or before closing the
window to free up a user session.
Click Campaigns to return to the Main Menu from any other page in the program.
Click Subscriber Lists to import and manage email addresses in the built-in
database.
Click Admin Settings to manage global campaign connection settings and
monitor the server manager, and manage users and groups.
26
Manage Email Campaigns
Click New to create a new campaign.
Highlight a campaign and click Edit, to edit an existing campaign. You can also
double mouse click on a campaign to edit.
To copy a campaign, select the campaign, then click Copy and name the copied
campaign.
Highlight a campaign and click Delete to remove a campaign from the list. This
action cannot be undone.
Click the Refresh button to refresh the status of the campaign projects displayed
on the Main Menu.
To add a note to a campaign, highlight and click the Note icon.
To schedule a campaign, highlight the campaign and click Schedule.
Click the Reports icon to see the reports for a selected campaign.
27
Enterprise Manual
To run a test campaign to an address you specify, highlight the campaign and
click the Test icon.
To run the campaign manually, as opposed to scheduling, highlight the campaign
and click the Run icon.
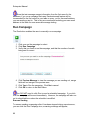
Search for Campaign
The search function is made available so that you can search through the pages
of campaign names you have created.
• Campaign Name
• Enter the name or a portion of the name of a campaign you are trying to
find.
• Click Search.
• To clear click All.
Category
Select a category from the drop down menu to find all the campaigns assigned to
that category.
Sort by
Allows you to sort the Main Menu by the Campaign Name, Campaign ID, Owner,
Last Run date, and Scheduled date, click on the header row of the list of
campaigns in order to sort.
Page Number
(If there is only one page of campaigns, the page feature will not be displayed.)
• Select the Page number from the drop down menu.
• Click on the Next or Previous buttons to move to the next or previous
page.
Bottom Toolbar
The technical bulletin and marketing bulletin buttons at the bottom of the page
flash when new information or alerts pertaining to Campaign Enterprise are
available. Each user is alerted when they login. When the button is clicked, a
web page will open containing links to information like version upgrades, new
28
Manage Email Campaigns
documentation or other important information pertaining to Campaign Enterprise.
Once the message is read, the button will stop flashing, but the information will
still be available by clicking the technical bulletin button.
Direct access to the administrative features are available through the bottom
toolbar as well, including, Default Campaign Configuration, Server Manager
Status, Blackout Dates, Database Shortcuts, Email Accounts, Send Connections,
Groups and Users.
Template Campaign
The template campaign is where you can configure some of the default settings
like the sending connection, the database connection or any other optional
settings that you want to include for new campaigns. When you set up a
template, any new campaign will already have the settings included in the
template.
In a multi-user environment where you are setting up campaigns for a variety of
clients with different connections, you would want to ensure that the default
campaign is not set up with sensitive information, or is turned off altogether.
You can also set up one or more campaigns that are meant to be copied as
additional templates.
Campaign Edit Screens
Campaign Edit Screens
To create a new campaign, click New on the Main Menu. You can create a blank
campaign or base it on the designated Template Campaign.
To edit an existing campaign, select the campaign in the Main Menu list and click
the Edit icon, or double mouse click on the campaign.
The following pages are included in the campaign edit screens.
• Campaign Settings
• Data Source
• Compose Email Message
• Send Settings
• Click-Throughs
• Conversion Events
• Bounce-Backs
29
Enterprise Manual
•
•
•
Unsubscribe
Subscribe
Misc. Settings
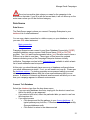
Campaign Settings
Campaign Settings
The first page on the edit screen allows you to add and modify basic campaign
settings:
• Change the name of the campaign
• Enter a category name, “marketing”, “client a” for example. Or leave blank.
• Admin users can change the owner of the campaign.
• Archive campaigns using a specific date, or check the archive box. This
disables the campaign from being running, but allows it to listen for
straggler updates like click throughs and opens.
• When run approval is enabled in the Default Campaign Configuration
area, an admin user must check the Authorize Run checkbox in order for
the campaign to be sent.
• Each campaign may be designated as the Template campaign.
Archiving Campaigns
Archiving a campaign removes the campaign from the main menu, but still allows
all the tracking in the campaign to take place. The campaign cannot be run
again unless it is un-archived. To view the archived campaigns go to Filter List
by Category and select *Archived*.
If you need to run an archived campaign, you will need to restore the campaign
by un-checking the archive check box on the Campaign Settings page within the
campaign. It will re-appear on the main menu where you can run the campaign.
30
Manage Email Campaigns
Do not set an archive date unless you mean for the campaign to be
archived on that date. If you fill in with the current date, it will not show up on the
main menu unless you hit the Archived category.
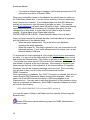
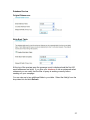
Data Source
Data Source
The Data Source page is where you connect Campaign Enterprise to your
database list of email addresses.
You can use a basic connection to a table or query on your database, or write
your own SQL select statement.
Basic connection
SQL Statement
Campaign Enterprise can connect to any Open Database Connectivity (ODBC)
compliant database using a system Data Source Name (DSN) or OLE DB
provider. Text (.txt) and comma separated value (.csv) files also need to have a
DSN set up in order to use them. These types of files cannot be updated
however rendering many of the Campaign Enterprise features virtually
ineffective. Campaign now has built-in Subscriber List available to which a basic
list of email addresses can be imported.
At this point you should already have some sort of database configured where
your email addresses are stored. If not, you will need to set one up. Please see
the database section. For testing purposes we recommend setting up a small
table on your primary database with just a few email addresses that you can
access. A selection of internal and external email accounts will allow you to see
how your campaign appears in different environments.
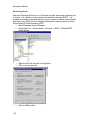
Connect To A Database
Select the database type from the drop down menu:
• If you are using database shortcuts, simply pick the shortcut name from
the list for which you are approved.
• If you select a built-in list, select the particular table you want to use from
the drop down list.
• If you select access
• Click browse and find the pathway to your Access database. A
typical pathway may look like, C:\Documents and Settings\user\My
Documents\dbname.mdb.
• Click Select to return to the datasource tab
31
Enterprise Manual
•
If you select a different type of database, click browse and select the DSN
connection from the list of System DSNs.
When you successfully connect to the database you should now see options in
the Table/Query Name field. If you do not see anything, it does not necessarily
mean you are not connected. If your database has more than 300 tables and
queries you may have to type the name of the table you want. For example,
most Oracle databases can easily have 500 tables in them. Rather than wasting
resources pulling all of that information into Campaign Enterprise, the field
changes from a drop down, to a text field and you need to enter the name
yourself. A typical name for an Oracle table might be
OWNER.ORACLETBL.FIELDS. (Oracle likes the tables to be in all caps).
Once you have successfully selected the table, the Email address is populated
with the fields found in the selected table.
• Select the email address field. This is the field in your database
containing the email addresses.
• Select the unique ID. This step is optional for now, but is important for the
advanced features. If your email addresses are truly unique, you can use
the email address field here.
To ensure that you are connecting ok, click on the Preview button and examine
the table. You can look at the other fields from the additional drop down menus
and clicking the Refresh button. Click Return to get back to the data source tab.
The preview only shows the first 100 records in your database, but displays the
total number of records at the top of the page. If the number of records in your
table exceeds the limits of the evaluation, or the licensed edition of Campaign
Enterprise, you will see a warning message next to the total. Prior to sending,
you will need to filter your list to only send the authorized number.
ODBC Connection
When connecting to a database, if an ODBC Connection is selected, then a list of
current System DSN (Datasource Name) entries will be displayed. When you
select one of the DSN sources from the list, a DSN string appears in the
Datasource box. You may need to add other information to this connection string
such as a username and password. Most ODBC Connection Datasource entries
will look like the following:
DSN=MYDATASOURCE;UID=username;PWD=password;
You have the option of filling in the Datasource box manually without using the
Browse button.
System DSN entries can be added by going to the ODBC Administrator in
the Control Panel.
32
Manage Email Campaigns
OLE DB Connection
If you have a very large database or are using complex filters to coordinate your
campaigns, we recommend that you use an OLE DB connection string for your
database connection. Here are some of the more popular database formats with
their basic connection strings. Simply enter the OLE DB string in the connection
field directly.
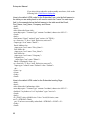
Sample OLE DB Connection Strings (variable portions are indicated in RED)
MS Access
For Standard Security:
Provider=Microsoft.Jet.OLEDB.4.0;Data
Source=C:\\DatabasePath\\MmDatabase.mdb;
User Id=Username;Password=Password;
Using a Workgroup:
Provider=Microsoft.Jet.OLEDB.4.0;Data
Source=C:\\DataBasePath\\mydb.mdb;Jet OLEDB:System
Database=System.mdw;
MS SQL Server
For Standard Security:
Provider=sqloledb;Data Source=ServerName;Initial
Catalog=DatabaseName;
User Id=Username;Password=Password;
For Trusted Connection security: (Microsoft Windows NT integrated
security):
Provider=sqloledb;Data Source=ServerName;Initial
Catalog=DatabaseName;Integrated Security=SSPI;);
To connect to a "Named Instance" (SQL Server 2000) you must to specify
Data Source=Server Name\Instance Name like in the following example:
Provider=sqloledb;Data Source=ServerName\InstanceName;Initial
Catalog=DatabaseName;
User Id=Username;Password=Password;
To connect with a SQL Server running on the same computer, you must to
specify the keyword (local) in the Data Source like in the following example:
Provider=sqloledb;Data Source=(local);Initial
Catalog=DatabaseName;User ID=Username;Password=Password;
33
Enterprise Manual
To connect to SQL Server running on a remote computer ( via an IP
address):
Provider=sqloledb;Network Library=DBMSSOCN;Data
Source=90.1.1.1,1433; Initial Catalog=DatabaseName;User
ID=Username;Password=Password;
Oracle
MSDAORA is the OLE DB Provider from Microsoft:
Provider=MSDAORA;Data Source=OracleDB;User
Id=Username;Password=Password;
OraOLEDB is the OLE DB Provider from Oracle:
Provider=OraOLEDB.Oracle;Data Source=DatabaseName;User
Id=Username;Password=Password;
MySql
You must get the syntax exactly correct. The 'yourdatabase' is the name of
the database not the server name. This string will connect to the first
MySQL Server running. If you have multiple options, you may have to
inquire how to make the string work with your server. You will need the
logins to your database. You must replace the 'mysql' part of the above
connection string with the exact name of the MySQL driver installed on your
computer. To find that name you go to the Control Panel > Administrative
Tools > Data Sources (ODBC) and look at the Drivers tab. Track down the
MySQL driver. It must be installed to use the OLE DB connection. They
are available from the internet for free.
driver={mysql};
database=yourdatabase;server=yourserver;uid=username;pwd=password;
option=16386;
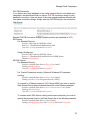
Use Basic Filter
If you only want a subset of your list to receive an email, for example only
customers in Idaho, you will need to apply some the basic filter to select your
data.
• Select the field by which you want to sort, in this case “State”
• Select the operand. For numeric values use the “=” sign, for text strings,
you will want to use “Like”
• Enter the value by which you want to sort, in our example “Idaho”
• Click the preview button to ensure that only those records that have a
value of Idaho in the State field are displayed. If you see no records
returned, you likely do not have anything matching your criteria.
The basic filter contains six columns, and five rows. Select the records in the
specified table where the field in selected in the first column equals some value.
In this case:
34
Manage Email Campaigns
WHERE bounce = 0
There are no additional values specified in the rows across, only records that
have not previously bounced are included in the record set.
Each row can be thought of as an AND parameter of a select statement.
WHERE bounce = 0
AND
WHERE unsubscribe = 0
Now records that have not previously bounced, and that have not submitted an
unsubscribe request are included in the record set.
The values going across from left to right can be thought of as OR parameters of
a select statement.
WHERE salesrep LIKE Stan OR LIKE Beth
In this case, the records where the sales rep are either Stan or Beth and that
have not bounced or submitted an unsubscribe request are included in the record
set. Any other records associated with sales reps other than Stan or Beth will not
appear. Depending on the type of database, wildcards like * or % may need to
be used when filtering text data. For example: *Stan* or %Beth%. To verify that
the correct records are selected, click the preview button.
When you create your filters, make sure they make logical sense or you will not
get the expected results.
You can also use the LIKE and NOT LIKE filters enter criteria that you would like
more than one record to match with, for example if you want to send to all
hotmail.com addresses in your table use the following filter,
Use SQL Statement
The advanced filter is much more flexible and allows full SQL (structured query
language) select statements. To use a full select statement, choose advanced in
the feature set selector. When using a select statement, the table or tables from
which data is pulled need to be specified in the statement.
SELECT * FROM dbo.tablename
35
Enterprise Manual
The * sign indicates all the fields in the table. All fields are included in the record
set and any field is available as a merge field in the email message.
To exclude tables use the following format.
SELECT (ID),(email),(firstname),(lastname),(bounce),(unsubscribe),(salesrep)
FROM dbo.tablename
Only those fields specified are included in the source record set, and only those
fields are available as merge fields in the email message. The ID and the email
address field must be included. A field not listed can still be used as a filter, but it
is harder to determine what is going on if it is not included in the output.
SELECT (ID),(email), FROM dbo.tablename WHERE bounce = 0
After selecting the fields, the data can be filtered in the same way as shown
above. Here is the select statement representation of the simple filter example.
SELECT * FROM dbo.tablename WHERE bounce = 0 AND WHERE unsubscribe
= 0 AND WHERE salesrep LIKE %Stan% OR LIKE %Beth%
To verify the correct records are selected click the preview button.
Queries and Views
Another option is to connect to a pre-filtered query or view that resides on the
database. This is the same thing as the advanced select statement, but it is
placed on the database rather than sitting in Campaign Enterprise. This option is
highly recommended for extremely complex queries or views since such
functions are best handled on the database itself.
The query or view is selected in the Table/Query drop down if properly
configured and accessible through the database connection in use. The simple
or advanced filtering options can further apply to a query or view, but it is best to
manage everything on the database when using this option.
When using a query, it is a good idea to select a write back table since many
queries and views are not updatable. The write back table specified should be
the one containing the email addresses and the primary key of used in the query.
36
Database Preview
Original Datasource:
Write-Back Table:
At the top of the preview pane the message count is displayed and the first 100
email addresses are listed. If you filter your database or use an advanced select
statement you can verify that the filter or query is working correctly before
sending out your campaign.
You can view up to two additional fields in your table. Select the field(s) from the
drop down list and click Refresh.
37
Enterprise Manual
Duplicate records are included in the total message count in the database
preview. Duplicates are not processed until the campaign is run.
Write Back Tables
When you enable an advanced feature in the Set Up tab that requires a write
back table, you will be prompted to update that information before proceeding.
Write Back to the Source Table
Select the unique ID field from the Original database source, do not check
Select Write-Back table.
Write Back to the Source Table (with SQL Statement checked)
The Select Alternate Write-Back Table check box will be checked
automatically.
Select the original datasource table to update from the drop down list.
Select the unique ID field of the table, query or view to which you want to
write back.
Write Back to an Alternate Table
• Check the Select Write-Back Table check box.
• Select the alternate table to update from the drop down list.
• Select the unique ID field of the table, query or view to which you want to
write back.
• Make sure the email address field is included in the table, query or view to
which you are writing back, you can then preview the table you have
selected for the write-back table.
38
Manage Email Campaigns
Response Lookup Table (Optional)
Select a table and a unique ID below in order to lookup email addresses quickly
for response write-backs. When the SQL statement above gets too complicated
you can use this setting to speed up the write-back performance.
• Select the table, this should be the main table where your email addresses
reside.
• Select the unique ID field, should be indexed and numeric.
• Select the email address field.
In order to write back to a separate table the unique ID fields need to have a
one to one correlation. Meaning that each record in both tables must have the
same unique ID. If you do not have a one to one relationship campaign will not
be able to find the email address field and update the records appropriately. The
email address field also needs to be in both the original and Write-Back tables.
One-to-One relationship:
39
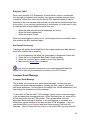
Response Table
When using complex SQL Statements, the write backs, bounce, unsubscribe,
click through and opened email tracking may take an inordinate amount of time
to execute. Rather than executing the source SQL statement again, it may be
beneficial to link to a separate table call that can execute the desired connections
more quickly. If you see poor performance on write backs, you make elect to use
a response table to help manage the email look ups.
•
•
•
Select the table where the email addresses are stored.
Select the email address field.
Select the unique ID field.
When any email address lookup occurs, it will simply call the source table, rather
than execute the SQL statement again.
Bad Format Processing
Campaign will update the selected field in the original datasource table when an
email with a bad format is identified.
1.
2.
3.
4.
On the Datasource tab select the Intermediate or Advanced Feature Set.
Check the box to Enable the Bad Email Format Handling.
Select the database field to update from the drop down list.
Make sure the Email Filter is enabled.
If you have non-standard characters in your email addresses leave this
feature off to allow all your addresses to be sent to the SMTP server.
Compose Email Message
Compose Email Message
This is where you compose your actual email message. On this page you
configure the email message headers, including the from, reply to, and return
path email addresses. You also specify the subject line, include attachments, and
can change the character set of the message.
To send both a Plain text and HTML message, simply compose both messages
in the corresponding message edit area. When the email goes out, there will be
a Plain text portion and an HTML portion. The recipient email client will
determine which message to display. It is a good practice to ask when your
subscribers sign up whether or not they can read HTML messages. If not, you
can indicate that in your database and send those people a Plain text only
message. Then for those who don’t know, or can read HTML, you can send the
40
Manage Email Campaigns
two part message (just in case something changes and that option is suddenly
taken away, you want them to be able to see the plain text).
•
To send a plain text only message, check the plain text only box.
If you would rather compose your HTML and plain text messages using a
different editor and do not want to copy and paste the messages, you can
browse to your message files using the Use Files for Message Bodies option.
•
To use files for message bodies, check the box and browse to where the
files reside on the local campaign computer. Remote users will not have
the ability to browse to a file on the server and you will need to use the
HTML and plain text editors instead.
Split testing a message allows you to determine which of two messages to
determine which message gets a better response. You can change the subject
line, the style of the message, or different calls to action. Split testing will allow
you to set up two HTML and plain text messages, half of your list will receive
message A, the other half message B. You will need a field in the database to
indicate which message an individual received.
•
•
To enable split testing, check the box and then fill in both messages as
necessary.
Select the field in the database to indicate which message that individual
received.
Address Headers
Enter the email addresses you want to use for this email blast.
• From Name, this is the name the recipient will see in the from line of their
email client.
• From Address, this is the address from whom the email is coming, if there
is no From Name, the address will be shown in the recipient's from line.
• Reply to, the Reply to address can be different than the from address.
When the recipient click reply in their email client, this is the address that
is used.
• CC email, if you want to copy someone on this message, enter the name
here. This will send a copy of every email in your list to this address so
beware. Recipients will be able to see who was copied.
• BCC email, you can also blind carbon copy the email. Recipients will not
be able to see who was copied using bcc, but this will send a copy of each
email to the specified address. (This feature is useful if you need to
archive each eamil that goes out, simply point the bcc to an address
where those emails can be stored).
41
Enterprise Manual
•
Bounce email, this is also called the Return Path email and is where
delivery failure notifications are sent. You can set up campaign to monitor
this account to manage bounced eamils.
You can use merge fields in any of the address headers. For example, if each
individual has a sales representative associated with them, the From Name and
From Address can be pulled out of the database dynamically.
So a field named "Sales_Rep" in the table can be pulled into the From Name
field using a merge field:
{Sales_Rep}
The email address can also be pulled in dynamically:
{Sales_Rep_Address}
The Email Message
By default, Campaign sends a multi-part message containing both an HTML and
a plain text portion. While you do not necessarily need to edit the plain text
portion, we advise that you do use both parts. Some spam filters like to see both
parts in a balanced message. The recipient's email client will determine which
message to display, if the plain text portion is not filled out, some of your clients
might get a blank message.
•
•
•
Enter a clear and concise subject line that induces the recipient to open
the email message. The subject line is plain text and is uses regardless of
whether the message is HTML or plain text.
Click Edit HTML or Use Template to get to the HTML editor and compose
the actual email message.
Click Edit Plain Text to edit the plain text message. If you compose your
HTML message first, you can pull in the text of the HTML message into
the Plain Text editor to make minor modifications.
Attachments
On the Message tab select Fixed Attachments to attach from a file on the local
computer or select Variable attachments to select a field from the table. The
options will change depending on your selection.
42
Manage Email Campaigns
Attach Filename
1. Select Filename from the drop down menu
2. Browse to the file you want to attach
3. Repeat step 2 to attach multiple files
Everyone who receives an email will have the same attachment.
If you are logged in as a user that has attachment browsing disabled, you
will not be able to browse to the file to attach. To disable attachment browsing
for a specific user, check disable attachment browsing in the user details area.
Attach File from Field
1. Select File from Field from the drop down menu
2. Select the field in your table that contains the file path to the attachment
for each record
Everybody can receive a different attachment using this method. You will need
to ensure the field in your table is populated with the correct file or path.
Remember that attachments can reduce performance. If you have a 1
megabyte attachment, it will be attached to and sent with each email. We
recommend that you create a hyperlink that points to the file on a web-server
instead. This helps maintain email delivery performance, and the recipient of the
email does not have to download the attachment; an important consideration for
dial-up connections.
Other Features
If you elect to use split testing, select the field to update to identify which
message was sent.
43
Enterprise Manual
Change the character set from the default, ISO-8859-1, which is Western
European, to any other character set you need. This affects the subject line and
plain text messages primarily. Alternate character sets should also be configured
properly in the HTML headers as well.
A Custom Header can also be added to the message. This is often used for
deliverability tracking with services like Return Path. You can also change the
priority of your email message here, but doing so may affect deliverability or trust
with the recipients.
The custom header must be preceded with an X-, e.g.
X-Priority: 1
Auto line wrap can wrap the email lines at a set number of characters. This
feature is only needed for sending to really old email clients and should not be
necessary.
You can set up one or more standard email footers with company information.
To attach a footer to all the emails going out, select a footer from the drop down
list.
Merge Fields
The merge fields are the key to message personalization. In your message you
can use merge fields to pull information from the database. For example, the
merge field {First_Name} corresponding to the First_Name field in your database
will pull the customers first name into that field when the message is sent to the
SMTP server. To view the merge fields, click on the merge field list button
located in the HTML editor toolbar. Make sure the cursor is in the message
where you want the link to appear, then click Insert Merge field. You can also
type the name of any field in the table surrounded by { } curly braces.
Database Merge Fields
Database merge fields are those that correspond to your source database.
{First_Name}
{Last_Name}
{Email}
{Company}
etc.
To use the merge fields, simply copy them and paste them in the message body
where you want the information to appear, “Dear {First_Name},”
44
Manage Email Campaigns
Built-in Merge Fields
Built-in merge fields are the same for all campaigns and consist of several merge
fields necessary to execute the advanced features like click throughs and opened
email tracking. If a feature is not activated, the built in merge field is displayed in
Red.
{UNSUBSCRIBEHYPERLINK}
{SUBSCRIBEHYPERLINK}
{ENCODEDUNIQUEID}
{UNIQUEID}
{CAMPAIGNID}
{CAMPAIGNNAME}
{FULLCAMPAIGNID}
etc.
The built-in merge fields are in upper case so you can more easily identify them.
They also appear at the bottom of the list. To use the merge fields, simply copy
them and paste them in the message body where you want the information to
appear. “To be removed from the list, {UNSUBSCRIBEHYPERLINK}”
Edit HTML
Enterprise comes with a built-in, easy to use visual HTML editor. The
comprehensive toolbar at the top of the page allows you to edit your HTML with
simple word processor type commands. It also allows you to dig into the code
and manage things on an even deeper level. There are several editing options
on this page.
The default uses the built-in HTML editor, to paste in plain code, you can disable
the visual editor.
In the toolbar, you can edit the HTML by clicking this button in the toolbar,
You can then copy and paste code from a third party HTML editor like
Dreamweaver or Frontpage.
Right mouse clicking in the message area allows you to manage several of the
editor's tools as well.
Edit Plain Text
The plain text editor allows you to type your message. It will appear exactly as
you type it allowing for the line wrapping of the recipient's email client.
45
Enterprise Manual
If you have an existing HTML message, you can click Import HTML to pull in the
text version of your HTML message.
To use click throughs, use the base URL of your click through links in your
message. For example the code of a typical hyperlink looks like this in HTML:
<a href="http://www.arialsoftware.com">Arial Software</a>
For a plain text link, you simply use the fully qualified URL
http://www.arialsoftware.com
As long as that URL is set up in the Click Through tracking page, it will track in
both the HTML and the plain text version of the link.
Use Template
You can pull down one of our basic templates that are included with the program.
You can also upload your own HTML templates and make those available to all
users. To upload a template, save as either an HTML or HTM file and put it in
the following directory:
C:\Program Files\CampaignEnterprise11\www\templates
Embedded images that might be included need to be uploaded to the following
folder:
C:\Program Files\CampaignEnterprise11\www\uploads
Once the images are uploaded to the upload folder, you can insert them using
the insert image button in the HTML editor toolbar. Select the image from the
file.
In most cases, web based images are preferable to embedded images.
Dynamic Content
This feature allows you to alter the content of the outbound email based on
criteria met by each record in your database by using an immediate if statement
or a case statement.
How the immediate if statement works
In the message body you would use the following immediate if statements:
iif((<condition>),<true response>,<false response>)
46
Manage Email Campaigns
<condition> The condition must be delimited by brackets ( ) and you can
use =, >, <, <=, >=, != as the operator
<true response> If the condition is true, this string is replaced
<false response> If the condition is false, this string is replaced
Here are some different uses available using the merge field scenario (notice the
braces on each end):
=============================================================
======
String Literals
{iif((ID=22),"Yes the ID is 22","No the ID is not 22")}
=============================================================
======
Field Includes
{iif((ID=22),"{FIELD1}","{FIELD2}")}
=============================================================
======
File Includes
{iif((ID=22),"{FILE:C:\TRUETEXTFILE.TXT}","{FILE:C:\FALSETEXTFILE
.TXT}")}
Note: you can also use combinations:
{iif((SALES>0),"{SALES}","YOU HAVE NO SALES YET")}
=============================================================
======
Field with a NULL value
{iif((FirstName=""),"Customer","{FirstName}")}
If the FirstName field is null Customer will be displayed, if the FirstName field is
not null the data in the field will be displayed. You can also use the alternate
merge field formatting to place a value in the email message if the merge field is
null for a record.
47
Enterprise Manual
You can only use one iif statement per email message.
How the case statement works
Case statements offer much more flexibility than the immediate if statements. If
the field in the example above listed more organization types, you can use that
information to send out even more dynamic information to each organization
using the same email campaign.
Sample Table
emailaddress
[email protected]
[email protected]
[email protected]
firstname
Jerry
Cheryl
Stephen
lastname
Macaroni
Montana
Munson
orgtype
0
2
1
How to set up a Case Statement
The Case Statement uses the following syntax:
{CASE WHEN condition THEN response WHEN condition THEN response
WHEN condition THEN response ELSE THEN response END}
Condition: this is the value found in the field "occupation". You can
use the following operands to compare fields in your database; =
(equals), > (greater than), >= (greater than or equal to), < (less
than), <= (less than or equal to, <> (not equal to). The field may be a
numeric, or character field. When comparing character strings you
are limited to = and <>.
Response: this is the string that is placed in the message if the
corresponding condition is true. This can be a text string or value, or
another field in your database, or a path to a message file.
ELSE THEN: if none of the conditions specified are true, then you
can enter a default text string or value, or another field in your
database, or a path to a default type of message.
Examples:
Case Statement that Returns a String:
{CASE WHEN OrgType=1 THEN "yes, you are eligible for a discount." WHEN
OrgType=2 THEN "small businesses may or may not be eligible, please call."
ELSE THEN "sorry, you make too much money to get the discount." END}
In this case if the ID in any of the records in your database is equal to 1 the string
"yes, you are eligible for a discount" will appear in the email message. If the
OrgType is equal to 2, the string "small businesses may or may not be eligible,
48
Manage Email Campaigns
please call." will appear in the message. In all other cases, the string "sorry, you
make too much money to get the discount." will appear in the message.
"Dear Stephen, yes, you are eligible for a discount."
"Dear Cheryl, small businesses may or may not be eligible, please call."
"Dear Jerry, sorry, you make too much money to get the discount."
Case Statement that Returns a Field from the Database:
{CASE WHEN OrgType=1 THEN "{Field1}" WHEN OrgType=2 THEN "{Field2}"
ELSE THEN "{Field3}" END}
Field1 and Field2 are additional fields stored in your database table. In this case
if the OrgType in any of the records is equal to 1 the value in the table for the
field named Field1 will appear in the message. If the ID is equal to 2 then the
value in the table for the field named Field2 will appear. In all other cases, the
value in Field3 will appear in the message.
"Dear Stephen, the discount is 15%."
"Dear Cheryl, the discount is 10%."
"Dear Jerry, sorry, you still make too much money to get the discount."
Case Statement that Returns a File:
{CASE WHEN OrgType=1 THEN "{FILE:C:\messagefolder\OrgType1textfile.txt}"
WHEN OrgType=2 THEN "{FILE:C:\messagefolder\OrgType2textfile.txt}" ELSE
THEN "{FILE:C:\messagefolder\default.txt}" END}
In this case if the OrgType in any of the records in your database is equal to 1
then message contained in OrgType1textfile.txt will appear in the message. If the
OrgType is 2 the OrgType2textfile.txt will appear. In all other cases, the
OrgType2textfile.txt will appear in the message. Using this method you can
change whole paragraphs on the fly or send entirely different messages to the
people on your list.
It is possible to use a combination of the above methods to dynamically compose
your messages. The statement could return a field for one response, and a file
for another response in whatever combination works best. For example:
{CASE WHEN OrgType=1 THEN "{FILE:C:\messagefolder\ID22textfile.txt}"
WHEN OrgType=2 THEN "{Field2}" ELSE THEN "sorry, you make too much
money to get the discount." END}
Different constraints can also be used in the same Case Statement, for example:
{CASE WHEN OrgType=1 THEN
"{FILE:C:\messagefolder\OrgType22textfile.txt}" WHEN Name=Cheryl THEN
{Field1} ELSE THEN "sorry, you make too much money to get the discount."
END}
49
Enterprise Manual
Keep in mind that if a record is true for both constraints, for example the OrgType
equals 1 and the name does equal Cheryl, only the first constraint listed will
merge into the message body. If you would like to place both types of information
into the email message, you will need to use two different case statements.
Send Settings
The third major step in setting up a campaign is to determine the mail server you
will be sending through, this is done on the Send Settings page in the campaign
edit screens.
•
•
•
Select the SMTP Connection from the list of existing connections or,
Create a new SMTP Connection
Test the connection to ensure that you can reach the selected server
Advanced Write Back Features
The write back feature records events that occur when Campaign Enterprise
pulls the information from the database. Since it occurs at the beginning of the
campaign generation process, the write backs occur on the source table, not the
write back table. There are three types of write back events upon sending.
Write Back on Send
•
•
•
•
To record the number of times a record is sent an email, select a number
field from the database, and select increment one
To count down from a set number, select a number field from the
database and select decrement one
To update a date field with the current date, select a date field in the table
and select set current date
To enter some value, text or numeric string, select set value, and enter the
text or numeric string in the third column.
With the stored procedures enabled in the Campaign Configuration page, an
insert statement can be used to write this information to a different table, for
example:
To increment a field:
UPDATE Othertable SET UpdateField=UpdateField+1 WHERE UNIQUE
ID={UNIQUEID}
To set a date:
UPDATE Othertable SET UpdateDateFieldNow() WHERE ID={UNIQUEID}
You can now digitally sign outbound emails using either your digital certificate, or
the receiver's certificate. Check the box for the method you wish to use.
50
Manage Email Campaigns
Click-Throughs
After you configure your web links in the compose message area, you are ready
to make them trackable click-through links.
•
•
•
Enable the Click-Through feature.
Click Extract Links to pull all the hyperlinks out of the HTML message you
created. The links and the display text or images are displayed in the list
of click-throughs.
Select the top link and click Edit.
• Activate the click-through.
• Change the report label to make it more clear if necessary.
• Select a field in the table to update, or
• Enter a stored procedure write back to be executed when the link is
clicked.
• Click Save & Next to move to the next click-through and repeat for
all the links you want to track. Links that are not activated will work,
but they will not be tracked by Campaign.
• When the entire list is done, click Save to return to the ClickThrough page.
If you refresh the HTML page and add a new link, you can retain the existing
links and simply Extract Links again to pull down new links. If the message is
completely new, click Delete Links first, then Extract the new links.
For this feature to work, Campaign must be associated with a public IP or
domain name in the Admin Settings > Manage Default Configuration area.
Conversion Events
Open Email Tracking
This feature allows you to track customers who open your email. It uses a small
1x1 pixel image request from the Campaign Enterprise server. This feature only
works with HTML messages, there is no way to track opens on plain text
messages.
To implement this feature, select a field in your database to update. (Make sure
the name of the field is not OPEN as that is a reserved name on most
databases).
When the message is sent, Campaign places the {OPENEDEMAILMARKER}
merge field inside the body tags of your HTML message automatically. If the
check box is turned off, the image marker will not be added.
51
Enterprise Manual
For this feature to work, Campaign must be associated with a public IP or
domain name in the Admin Settings > Manage Default Configuration area.
Bounce-Backs
The Bounce email processing functionality allows the Campaign system to record
when an email failed able to reach its destination, prompting a delivery failure
notice by the server. Bounces may occur for many reasons including destination
mail server outages, general Internet outages, full mailboxes, etc.
1. On the Bounce-backs page select the bounce field to update from the
drop down list.
2. Select the soft bounce field to update from the drop down list if you would
like to track soft bounces separately from hard bounces.
3. Select from the list of current bounce email accounts, or create a new
Email Account.
4. Test the connection.
The bounce email address you specify in the create message page must
correspond to the account settings you select.
Using SQL Statements and Stored Procedures
To use a SQL Statement or Stored Procedure with Bounce Email processing
make sure enable stored procedures is checked in the Default Campaign
Configuration area.
Using a Bounce Email Processing SQL Statement
Original Database Source Table
ID
1
2
3
EmailAddress
[email protected]
[email protected]
[email protected]
FirstName
Joe
Betty
Tom
LastName
Smith
Mass
Blank
To insert information into a new table use an insert statement, the built-in merge
fields that can be used for Bounce Email Processing include: {CAMPAIGNID}
{EMAILADDRESS} and {RESULTCODE}. This example tracks hard and soft
bounces separately.
Sample Syntax:
52
Manage Email Campaigns
INSERT INTO HardBounceInfo
(CAMPAIGNID,EMAILADDRESS,Event,RequestType,ResultCode) VALUES
({CAMPAIGNID},'{EMAILADDRESS}','Bounce','Hard','{RESULTCODE}')
Sample Syntax:
INSERT INTO SoftBounceInfo
(CAMPAIGNID,EMAILADDRESS,Event,RequestType,ResultCode) VALUES
({CAMPAIGNID},'{EMAILADDRESS}','Bounce','Soft','{RESULTCODE}')
HardBounceInfo Table - Before Joe Smith and Tom Blank record as hard
bounces because those email addresses do not exist at yourdomain.com.
CAMPAIGNID
EMAILADDRESS
Event
RequestType
ResultCode
SoftBounceInfo Table - Before Betty Mass records as a soft bounce
because email account is full.
CAMPAIGNID
EMAILADDRESS
Event
RequestType
ResultCode
HardBounceInfo Table - After Joe Smith and Tom Blank record as hard
bounces because those email addresses do not exist at yourdomain.com.
CAMPAIGNID
4
6
EMAILADDRESS
[email protected]
[email protected]
Event
Bounce
Bounce
RequestType
Hard
Hard
ResultCode
5.11
5.11
SoftBounceInfo Table - After Betty Mass records as a soft bounce because
her email account is full.
CAMPAIGNID
9
EMAILADDRESS
[email protected]
Event
Bounce
RequestType
Soft
ResultCode
4.11
The Result Codes are returned by your SMTP server, to find out what each
result code means you will need to consult the documentation for your SMTP
server, usually a code starting with a 5 is a hard bounce and a 4 is a soft bounce.
If you want to write back the hard and soft bounce information to the same table,
then just change the table name in the Soft Bounce insert state to match the
name in the Hard Bounce insert statement. If you want to track hard and soft
bounces as a generic bounce, and not record if it was a hard of soft bounce, use
the following insert statement for the hard and soft bounce stored procedures.
Sample Syntax:
53
Enterprise Manual
INSERT INTO BounceInfo (CAMPAIGNID,EMAILADDRESS,Event,RequestType)
VALUES ({CAMPAIGNID},'{EMAILADDRESS}','Bounce')
Bounce Email Processing Stored Procedure
To run a stored procedure each time a bounce is recorded, create the stored
procedure on the database, then execute the stored procedure from the stored
procedure field.
Sample Syntax:
EXECUTE SP name '{EMAILADDRESS}'
Using Stored Procedures or SQL Statements is an advanced feature that
should only be implemented by database administrators. Writing your stored
procedure or SQL statement is outside the scope of Arial Software support.
WARNING: Do not use a personal email account for bounces, campaign
reads the emails then DELETES them. Campaign will delete all emails in the
account once processed.
Bounce Accounts:
In order for the bounce handling feature to work properly you will need to create
a separate bounce account for each database table to which you will be
connecting. If you have two separate projects, with two distinct tables, listening to
the same account, you will not get accurate bounce reporting. The first project
may remove any bounced email it does not recognize from the POP account,
even though they may be valid for the second project. By having a separate
bounce account for each table you can eliminate this potential problem.
If you no longer wish to access the bounce account for a particular project, make
sure you disable the checkbox for Bounce-Back Processing.
If you are sending several projects using the same database, all bounces will be
recorded back to the database regardless from which project the email
originated. Bounced emails could easily be identified and cleaned up or filtered
out for subsequent projects. (You can set up a bounce account for each project if
you wish to track that information).
Also make sure that all your response handling accounts are different, for
example do not use the same account to handle bounces as you would for email
unsubscribes.
54
Manage Email Campaigns
For additional information on managing bounces more effectively, read
about Variable Envelope Return Paths.
Unsubscribe
When sending permission based email campaigns it is imperative to honor
unsubscribe or removal requests within ten days of receiving the request.
Enterprise helps you do that using either an email based unsubscribe or web
based unsubscribe process.
You will need to have a field in your database that Enterprise can update when
an unsubscribe request occurs. In the datasource page, a filter should be set
against this field to ensure that only those subscribers who have not requested
removal from the list receive an email.
Email-Based
The Email-Based Unsubscribe feature allows the recipient to unsubscribe using
an email response.
Select an Email Account from the list, or add a new one.
Using SQL Statements and Stored Procedures
To use a SQL Statement or Stored Procedure with Email-Based Unsubscribe
processing make sure enable stored procedures is checked in the Default
Campaign Configuration area.
Email-Based Unsubscribe SQL Statement
Original Database Source Table
ID
1
2
EmailAddress
[email protected]
[email protected]
FirstName
Bob
Jane
LastName
Smith
Hooper
To insert information into a new table use an insert statement, the built-in merge
fields that can be used for Email-Based Unsubscribes include: {CAMPAIGNID},
{UNIQUEID}, and {EMAILADDRESS}.
55
Enterprise Manual
Sample Syntax:
INSERT INTO EmailBasedUnsubInfo
(CAMPAIGNID,UNIQUEID,Event,RequestType,EMAILADDRESS) VALUES
({CAMPAIGNID},{UNIQUEID},'Unsubscribe','Email','{EMAILADDRESS}')
EmailBasedUnsubInfo Table - Before Bob Smith has unsubscribed via the
email-based method.
CAMPAIGNID
UNIQUEID
Event
RequestType
EMAILADDRESS
EmailBasedUnsubInfo Table - After Bob Smith unsubscribed from
campaign number 2, via the email-based method.
CAMPAIGNID
2
UNIQUEID
1
Event
Unsubscribe
RequestType
Email
EMAILADDRESS
[email protected]
Email-Based Unsubscribe Stored Procedure
To run a stored procedure each time an unsubscribe is recorded, create the
stored procedure on the database, then execute the stored procedure from the
stored procedure field.
Using Stored Procedures or SQL Statements is an advanced feature that
should only be implemented by database administrators. Writing your stored
procedure or SQL statement is outside the scope of Arial Software support.
WARNING: Do not use a personal email account for unsubscribes,
campaign reads the emails then DELETES them. Campaign will delete all emails
in the account once processed.
56
Manage Email Campaigns
Campaign does not automatically remove email records marked unsubscribe
from your database. You can use the information that is provided to write a script
to remove them, or simply filter them out of all subsequent campaigns.
Web-Based
Select web-based unsubscribe in the unsubscribe method field to switch from
email unsubscribe. The web-based method requires that Campaign Enterprise
be configured with a public IP and access to the Campaign Enterprise Server on
some port, the default being port 81. If click through or opened email processing
is configured already, then web-based unsubscribe is all ready to use.
•
1. Enter text in the Custom Confirmation text box, or use the default
information provided, this will be displayed when the recipient clicks on the
unsubscribe link.
2. Include the {YES} merge field in the confirmation text box. The yes merge
field will be where they confirm the unsubscribe request. You can also
use the {HREF} merge field in place of the {YES} merge field to create a
customized link for the unsubscriber to click. For example if you want the
person who is unsubscribing to click on a link that says "Please
unsubscribe me", you would use the following HREF merge field,
<href="{HREF}">Please unsubscribe me</a>.
3. Enter the Yes button destination URL for the confirmation page, this is the
page the person unsubscribing will be taken to when they confirm their
opt-out request, you can use the default provided, or specify a different
webpage (if you use a different page make sure you use the fully qualified
URL).
4. You can include other merge fields on the unsubscribe tab to personalize
the unsubscribe message.
5. On the Message Tab, place the {UNSUBSCRIBEHYPERLINK} in the
message body where you want the unsubscribe link to appear.
Using SQL Statements and Stored Procedures
To use a SQL Statement or Stored Procedure with Web-Based Unsubscribe
processing make sure enable stored procedures is checked in the Default
Campaign Configuration area.
Web-Based Unsubscribe SQL Statement
Original Database Source Table
ID
EmailAddress
FirstName
LastName
57
Enterprise Manual
1
2
[email protected]
[email protected]
Bob
Jane
Smith
Hooper
To insert information into a new table use an insert statement, the built-in merge
fields that can be used for Web-Based Unsubscribes include: {CAMPAIGNID},
{UNIQUEID}, {EMAILADDRESS}, and {REMOTEADDRESS}.
Sample Syntax:
INSERT INTO WebBasedUnsubInfo
(CAMPAIGNID,UNIQUEID,Event,RequestType,REMOTEADDRESS,EMAILADDRE
SS) VALUES
({CAMPAIGNID},{UNIQUEID},'Unsubscribe','Web','{REMOTEADDRESS}','{EMAI
LADDRESS}')
WebBasedUnsubInfo Table - Before Bob Smith or Jane Hooper have
unsubscribed via the web-based method.
CAMPAIGNID
UNIQUEID
Event
RequestType
REMOTEADDRESS
EMAILADDRESS
WebBasedUnsubInfo Table - After Bob Smith unsubscribes from campaign
number 7 and Jane Hooper unsubscribes from campaign number 5, both
via the web-based method.
CAMPAIGNID
7
5
UNIQUEID
1
2
Event
Unsubscribe
Unsubscribe
RequestType
Web
Web
REMOTEADDRESS
200.235.689.741
12.45.74.1
Web-Based Unsubscribe Stored Procedure
To run a stored procedure each time an unsubscribe is recorded, create the
stored procedure on the database, then execute the stored procedure from the
stored procedure field.
Using Stored Procedures or SQL Statements is an advanced feature that
should only be implemented by database administrators. Writing your stored
procedure or SQL statement is outside the scope of Arial Software support.
Campaign does not automatically remove email records marked as
unsubscribes from your database. You can use the information that is provided to
write a script to remove them, or simply filter them out of all subsequent
campaigns.
58
EMAILADDR
bobsmith@y
janehooper@
Manage Email Campaigns
The {YESBUTTON} merge field will still work in the Confirmation Webpage,
it has been replaced by the {YES} merge field.
Subscribe
A good way to take advantage of viral email marketing is to invite people who
may have received the message that is forwarded from a friend to sign up for the
newsletter or email publication themselves. Using the subscribe feature,
someone can sign up for the list if they are not already. You can also use it to
introduce your subscribers to a new list.
The Subscribe feature allows the recipient to subscribe to the newsletters you
are sending out.
1. Select the table to which you want to write back the subscriber
information.
2. Enter the name of the email address field in the table to which you are
writing back.
3. Enter the Subscribe Hyperlink text, this is text that will be displayed in your
email message.
4. Configure the Subscribe Form to work with the fields in your database.
You will need to change the Input name for the form fields to match the
names of the fields in your database. For example if you want to record
the subscribers email address and the name of the email address field in
your table is email, your HTML code for the email address text box would
be,
. You will need to change each input name for each text box
to match the name of the field in the table you are inputting the information
into. This form will then be served up by the software when a recipient
clicks the subscribe hyperlink in their email message.
5. Enter text for the Subscribe Landing Page or use the default text provided.
This page will be displayed when the recipient clicks submit on the
Subscribe Form and their information is successfully added to the table
you specified as a new record.
6. On the Create Message tab, make sure you place the
{SUBSCRIBEHYPERLINK} merge field in the HTML email message
where you want it to appear:
You are receiving this letter as a subscriber to our website.<br> If
you also wish to subscribe to the monthly newsletter, click on the
following link: {SUBSCRIBEHYPERLINK}
Campaign merges the link text entered on the Subscribe tab into an
anchor tag.
You are receiving this letter as a subscriber to our website.
59
Enterprise Manual
If you also wish to subscribe to the monthly newsletter, click on the
following link: Click Here to Subscribe .
Here is the default HTML code for the Subscribe Form, note the field names in
the table you are writing back to will need to match the "name" for each input
field, in the example below the field names in the table would be Email,
First_Name, Last_Name, Company, and Phone.
<html>
<head>
<title>Subscribe Form</title>
<meta http-equiv="Content-Type" content="text/html; charset=iso-8859-1">
</head>
<body>
<form name="form1" method="post" action={ACTION}>
<p><font size="2" face="Arial, Helvetica, sans-serif">
<input type="text" name="Email">
Email Address<br>
<input type="text" name="First_Name">
First Name<br>
<input type="text" name="Last_Name">
Last Name<br>
<input type="text" name="Company">
Company<br>
<input type="text" name="Phone">
Phone # (Optional)</font></p>
<p><font size="2" face="Arial, Helvetica, sans-serif">
<input type="submit" name="Submit" value="Submit">
<br>
</font></p>
</form>
</body>
</html>
Here is the default HTML code for the Subscribe Landing Page.
<html>
<head>
<title>Subscribe Confirmation</title>
<meta http-equiv="Content-Type" content="text/html; charset=iso-8859-1">
<link href="stylesheet.css" rel="stylesheet" type="text/css">
</head>
<body>
<P><FONT color=#000099 size=3 face="Arial, Helvetica, sansserif"><STRONG>Thank
you! You have successfully subscribed.</STRONG></FONT></P>
</body>
</html>
60
Manage Email Campaigns
You can add additional fields to the default form or create your own form,
just make sure the input name matches the field name in the table that has been
selected to write back the subscriber information.
Misc. Settings
The miscellaneous settings section allows you to enhance the performance and
reporting functions of Enterprise.
•
•
•
•
•
•
Check the clear counters after campaign box if you want the overview
report to clear out data each time the campaign is run. If unchecked, the
numbers in the overview will aggregate over the life of the campaign.
Check create success/fail logs if you are having trouble identifying emails
that appear to be failing.
Suppress summary logs if you do not want to log the activities of the
campaign. This is highly recommended for repeating campaigns that run
every few minutes to prevent logs from building up.
For very complex queries, you might want to check the box to turn off a
message count. When disabled, when you click Run Campaign, you will
not be able to see the number of emails that are meant to go out.
You can also turn off the merge field prescan. If you use nested merges
you must leave this feature enabled.
If you are not using embedded images (recommended), you can disable
the image prescan. This will speed delivery.
Summary Reports
A summary log file can be sent to up to three email addresses.
•
•
Enable the check box
Enter email addresses, separated by commas. These must be just normal
email addresses, e.g. "[email protected]"
The summary report shows the following information on the campaign sending:
Campaign ID : 5
Campaign : Clever Campaign Name
Executed on : 1/15/2006 3:22:55 PM
Sending Email
Attempted sending : 15
Bad email addresses : 5
Empty Email Addresses : 0
Duplicate/skipped : 1
61
Enterprise Manual
Successfully sent : 10
Time completed
: 1/15/2006 3:23:21 PM
Successful address file created:
C:\Program Files\CampaignEnterprise11\www\logs\CampaignID5Success-20060130152255.TXT
Failed email address file created:
C:\Program Files\CampaignEnterprise11\www\logs\CampaignID5Failed-20060130152255.TXT
Emailed log file to: [email protected]
Emailed log file to: [email protected]
Emailed log file to: [email protected]
Response Log Method
The response log method determines what format the details of each report will
be generated in. There are three options:
No Response Details - The counters for each report will be incremented
but no information will be written to the details of any of the reports.
Record Email Addresses - Records the email address in the details of
each report. For example the open tracking details report would show the
following information for a record that has opened your HTML email
message,
2/11/2006 4:36:59 PM [email protected]
Record Unique ID - Records the unique id in the details of each report.
For example the open tracking details report would show the following
information for a record that has opened your HTML email message,
2/11/2005 4:45:16 PM UniqueID:1
Meaning the record where the Unique ID is 1, opened the email message.
Recording the unique id instead of the email address allows for faster
processing of the writebacks to the database.
The default is to record email addresses to the report details.
Chain Campaign
You can have another campaign start sending when the current campaign is
completed using the chaining option.
On the Miscellaneous tab select the Intermediate Feature Set
Select a campaign from the list of available campaigns.
On the main menu a campaign with another campaign chained to it, will
have the chain symbol below the Campaign ID, so that you know running
this campaign will also run another campaign. Hovering over the chain
icon will display the name of chained campaign.
62
Manage Email Campaigns
Advanced Features
Pre and Post processing stored procedures. You can fire off a stored procedure
in your database before or after the campaign is run. The stored procedure can
be used to clean out bounced emails or however else you want to manipulate
your data on the database. Simply enter the execute stored procedure
statement. Statements may vary depending on your database.
Click Campaign Security to allow other users or groups to have read, edit, or run
privileges.
63
Advanced Write Back Options
Campaign Enterprise allows SQL statements to manage your database using the
advanced features; Open Tracking, Click-Through Tracking, Bounce Handling,
and Unsubscribe Processing.
The built in fields which you can write back to a table using a SQL statement
include:
{UNIQUEID} - The unique id of the email recipient, this field can only be used
when working with Database Write Back During Sending, Click-Throughs,
Unsubscribes, and Opened Email Tracking.
{REMOTEADDRESS} - Collects the IP address of the email recipient, this field
can only be used when working with Click-Throughs, Web-Based Unsubscribes,
and Opened Email Tracking.
{EMAILADDRESS} - The email address of the email recipient, this field can be
used with Database Write Back During Sending, Click-Through Tracking,
Opened Email Tracking, Bounce Email Processing, and Unsubscribe Processing.
{CAMPAIGNID} - The campaign id that is recording the Bounce, Click-Through,
Opened Email, or Unsubscribe requests and Database Write Back During
Sending.
{CLICKTHRUNUMBER} - The number assigned to the click through on which the
email recipient is clicking.
{RESULTCODE} - The result code returned from a bounced email message, the
code contains information on why the email address bounced.
{URL} - Records the destination url for the click through that was clicked on by
the recipient.
{ABmessage} - Writes back a 1 for message A and 2 for message B, used for
Database Write Back During Sending.
You can insert additional data into an alternate table, other options include
DATE() to record the date/time of the last event (be sure to check your database
help files for the correct syntax of databases keyword). You can update a string
using a character type field, or write a specific number to a numeric type field, to
assist you with enhancing the relevance of your recorded data. See the
examples below for INSERT statement examples for each process that allows
stored procedures.
Click-Through Tracking SQL Statement
On the Click-Through tab select the Advanced Feature set.
Using SQL Statements and Stored Procedures
64
Manage Email Campaigns
To use a SQL Statement or Stored Procedure with Click Through processing
make sure enable stored procedures is checked in the Default Campaign
Configuration area, and select the Advanced Feature set.
Click-Through Tracking SQL Statement
On the Click-Through tab select the Advanced Feature set.
Original Database Source Table
ID
1
2
EmailAddress
[email protected]
[email protected]
FirstName
Bob
Jane
LastName
Smith
Hooper
To insert information into a new table use an insert statement, the built-in merge
fields that can be used for Click-Throughs include: {CAMPAIGNID},{UNIQUEID},
{CLICKTHRUNUMBER}, {REMOTEADDRESS}, {EMAILADDRESS}, {URL}.
Sample Syntax:
INSERT INTO ClickThroughInfo
(CAMPAIGNID,UNIQUEID,Event,CLICKTHRUNUMBER,REMOTEADDRESS,E
MAILADDRESS, CTURL) VALUES ({CAMPAIGNID},
{UNIQUEID},'Click',{CLICKTHRUNUMBER},'{REMOTEADDRESS}','{EMAILADD
RESS}','{URL}')
ClickThroughInfo Table - Before Bob Smith or Jane Hooper have clicked on
a click through.
CAMPAIGNID
UNIQUEID
Event
CLICKTHRUNUMBER
REMOTEADDRESS
ClickThroughInfo Table - After Bob Smith clicked on a click through
number 1 from campaign number 7, and click through number 3 from
campaign number 2, and Jane Hooper clicked on click through number 11
for campaign number 5.
Click-Through Tracking Stored Procedure
To run a stored procedure each time a click through is recorded, create the
stored procedure on the database, then execute the stored procedure from the
stored procedure field for open tracking.
65
EMAILAD
Open Tracking SQL Statement
Original Database Source Table
ID
1
2
EmailAddress
[email protected]
[email protected]
FirstName
Bob
Jane
LastName
Smith
Hooper
To insert information into a new table use an insert statement, the built-in merge
fields that can be used for Open Tracking include: {CAMPAIGNID},{UNIQUEID},
{REMOTEADDRESS} and {EMAILADDRESS}.
Sample Syntax:
INSERT INTO OpenTrackingInfo
(CAMPAIGNID,UNIQUEID,Event,REMOTEADDRESS,EMAILADDRESS)
VALUES
({CAMPAIGNID},{UNIQUEID},'Open','{REMOTEADDRESS}','{EMAILADDRESS}'
)
OpenTrackingInfo Table - Before Bob Smith or Jane Hooper have opened
an HTML email.
CAMPAIGNID
UNIQUEID
Event
REMOTEADDRESS
EMAILADDRESS
OpenTrackingInfo Table - After Bob Smith opened an HTML email from
campaign number 7, and from campaign number 2, and Jane Hooper
opened an HTML email from campaign number 5.
CAMPAIGNID
7
5
2
UNIQUEID
1
2
1
Event
Open
Open
Open
REMOTEADDRESS
200.235.68.74
12.45.74.1
200.235.68.74
EMAILADDRESS
[email protected]
[email protected]
[email protected]
Open Tracking Stored Procedure
To run a stored procedure each time a opened email is recorded, create the
stored procedure on the database, then execute the stored procedure from the
stored procedure field for open tracking.
Bounce Email Handling SQL Statement
Original Database Source Table
ID
EmailAddress
FirstName
LastName
66
Manage Email Campaigns
1
2
3
[email protected]
[email protected]
[email protected]
Joe
Betty
Tom
Smith
Mass
Blank
To insert information into a new table use an insert statement, the built-in merge
fields that can be used for Bounce Email Processing include: {CAMPAIGNID}
and {EMAILADDRESS}. This example tracks hard and soft bounces separately.
Sample Syntax:
INSERT INTO HardBounceInfo
(CAMPAIGNID,EMAILADDRESS,Event,RequestType,ResultCode) VALUES
({CAMPAIGNID},'{EMAILADDRESS}','Bounce','Hard','{RESULTCODE}')
Sample Syntax:
INSERT INTO SoftBounceInfo
(CAMPAIGNID,EMAILADDRESS,Event,RequestType,ResultCode) VALUES
({CAMPAIGNID},'{EMAILADDRESS}','Bounce','Soft','{RESULTCODE}')
HardBounceInfo Table - Before Joe Smith and Tom Blank record as hard
bounces because those email addresses do not exist at yourdomain.com.
CAMPAIGNID
EMAILADDRESS
Event
RequestType
ResultCode
SoftBounceInfo Table - Before Betty Mass records as a soft bounce
because email account is full.
CAMPAIGNID
EMAILADDRESS
Event
RequestType
ResultCode
HardBounceInfo Table - After Joe Smith and Tom Blank record as hard
bounces because those email addresses do not exist at yourdomain.com.
CAMPAIGNID
4
6
EMAILADDRESS
[email protected]
[email protected]
Event
Bounce
Bounce
RequestType
Hard
Hard
ResultCode
5.1.1
5.1.1
SoftBounceInfo Table - After Betty Mass records as a soft bounce because
her email account is full.
CAMPAIGNID
9
EMAILADDRESS
[email protected]
Event
Bounce
RequestType
Soft
ResultCode
4.1.2
If you want to write back the hard and soft bounce information to the same table,
then just chance the table name in the Soft Bounce insert state to match the
name in the Hard Bounce insert statement. If you want to track hard and soft
67
Enterprise Manual
bounces as a generic bounce, and not record if it was a hard of soft bounce, use
the following insert statement for the hard and soft bounce stored procedures.
Sample Syntax:
INSERT INTO BounceInfo
(CAMPAIGNID,EMAILADDRESS,Event,RequestType,ResultCode) VALUES
({CAMPAIGNID},'{EMAILADDRESS}','Bounce','{RESULTCODE}')
Bounce Email Handling Stored Procedure
To run a stored procedure each time a bounce is recorded, create the stored
procedure on the database, then execute the stored procedure from the stored
procedure field.
Web-Based Unsubscribe SQL Statement
Original Database Source Table
ID
1
2
EmailAddress
[email protected]
[email protected]
FirstName
Bob
Jane
LastName
Smith
Hooper
To insert information into a new table use an insert statement, the built-in merge
fields that can be used for Web-Based Unsubscribes include:
{CAMPAIGNID},{UNIQUEID}, {EMAILADDRESS}, and {REMOTEADDRESS}.
Sample Syntax:
INSERT INTO WebBasedUnsubInfo
(CAMPAIGNID,UNIQUEID,Event,RequestType,REMOTEADDRESS,EMAILADD
RESS) VALUES
({CAMPAIGNID},{UNIQUEID},'Unsubscribe','Web','{REMOTEADDRESS}','{EMAI
LADDRESS}')
WebBasedUnsubInfo Table - Before Bob Smith or Jane Hooper have
unsubscribed via the web-based method.
CAMPAIGNID
UNIQUEID
Event
RequestType
REMOTEADDRESS
EMAILADDRESS
WebBasedUnsubInfo Table - After Bob Smith unsubscribes from campaign
number 7 and Jane Hooper unsubscribes from campaign number 5, both
via the web-based method.
CAMPAIGNID
7
5
68
UNIQUEID
1
2
Event
Unsubscribe
Unsubscribe
RequestType
Web
Web
REMOTEADDRESS
200.235.68.74
12.45.74.1
EMAILADDR
bobsmith@y
janehooper@
Manage Email Campaigns
Web-Based Unsubscribe Stored Procedure
To run a stored procedure each time an unsubscribe is recorded, create the
stored procedure on the database, then execute the stored procedure from the
stored procedure field.
Email-Based Unsubscribe SQL Statement
Original Database Source Table
ID
1
2
EmailAddress
[email protected]
[email protected]
FirstName
Bob
Jane
LastName
Smith
Hooper
To insert information into a new table use an insert statement, the built-in merge
fields that can be used for Email-Based Unsubscribes include:
{CAMPAIGNID},{UNIQUEID}, and {EMAILADDRESS}.
Sample Syntax:
INSERT INTO EmailBasedUnsubInfo
(CAMPAIGNID,UNIQUEID,Event,RequestType,EMAILADDRESS) VALUES
({CAMPAIGNID},{UNIQUEID},'Unsubscribe','Email','{EMAILADDRESS}')
EmailBasedUnsubInfo Table - Before Bob Smith has unsubscribed via the
email-based method.
CAMPAIGNID
UNIQUEID
Event
RequestType
EMAILADDRESS
EmailBasedUnsubInfo Table - After Bob Smith unsubscribed from
campaign number 2, via the email-based method.
CAMPAIGNID
2
UNIQUEID
1
Event
Unsubscribe
RequestType
Email
EMAILADDRESS
[email protected]
Email-Based Unsubscribe Stored Procedure
To run a stored procedure each time an unsubscribe is recorded, create the
stored procedure on the database, then execute the stored procedure from the
stored procedure field.
Writing all the advanced features back to the same table.
69
Enterprise Manual
If you were to write back all the above information to the same table, the table
would look like this,
Database Write-Back During Sending SQL Statement
You can also use an advanced SQL Statement for database write-back during
sending which is found on the Send Settings tab, you can write-back to a
different table using this method.
Table you want to write-back to before the campaign is run:
UNIQUEID EmailSent
1
0
8
0
You can use an update statement to update this table.
Sample Syntax:
UPDATE dbo.TestWB SET EmailSent = EmailSent + 1 WHERE ID =
{UNIQUEID}
Table after you have sent an email to ID #1:
UNIQUEID EmailSent
1
1
8
0
Database Write-Back During Sending Stored Procedure
To run a stored procedure each time you want to write back for a specific record,
create the stored procedure on the database, then execute the stored procedure
from the stored procedure field.
The {UNIQUEID} field cannot be used with the SQL statements on the
bounce processing tab, the unique id is not used during bounce processing, it is
based on the email address field. The {REMOTEADDRESS} field cannot be
used for email-based unsubscribe, or bounce email processing because the
remote address is only recorded when the email recipient clicks on a click
through, opens an HTML message, or unsubscribes via the web-based method.
Using Stored Procedures or SQL Statements is an advanced feature that
should only be implemented by database administrators. Writing your stored
procedure or SQL statement is outside the scope of Arial Software support.
70
Campaign Types
There are several different types of campaigns you might be running, depending
on what your marketing objectives are. Here are some sample types of
campaigns you might be interested in running. Several things should be included
in all campaigns, primarily to comply with the federal law. You need to have an
unsubscribe mechanism (except where noted), a privacy policy statement or a
link to it, and the physical address of the company on whose behalf the email is
sent.
•
•
•
Set Up Confirmation Campaign
Set Up Follow Up Email
Set Up Campaign Series
Set Up Confirmation Campaign
When somebody subscribes on your website to your newsletter, or whatever it is
you are sending, it is a good practice to send a confirmation email. This ensures
the user that they successfully subscribed to whatever it is they intended and
prevents them from duplicating the process, thinking they did something
incorrectly. You can also use this opportunity to confirm the subscription by
creating a double opt-in process.
Set Up Tab
It is always a good practice to set up some sort of naming conventions for your
campaigns. It should be something somewhat descriptive of what the campaign
is meant to do. A good example might be "confirmation email" or something.
You may also want to set up a category, "confirmations" if you have several
different types of confirmation emails going on.
Since this email will be run on a schedule, and will continually monitor new
subscribers, it is not recommended that you enable the Run Authorization on
these types of campaigns.
• Enable the database write back, and click through tracking options.
• Click on the Data source page
• Select Intermediate from the feature set selector menu
• Connect to your database, find the correct table and select the email
address and unique ID fields
• In the basic filter, select the following:
Subscribe = 0
Unsubscribe = 0
• Click preview to ensure the proper records are returned. The filter should
only show records that are in the database, but have not yet been
subscribed (or confirmed), and that have not yet unsubscribed.
71
Enterprise Manual
•
•
•
•
•
•
•
•
•
•
•
•
•
•
•
•
•
Click on the Create Message tab and create your welcome message:
Thank you {First_Name} for subscribing to our newsletter. Please confirm
your subscription, {CLICKTHROUGH1}.
If you received this email in error simply disregard and you will not be
included in our subscriber list.
Click on the Send Settings and enter the connection information
Select the Advanced feature set from the drop down
Enable the De-dupe on sending feature to ensure that each person only
gets one confirmation email
Click on the Click through page
Type the URL of a confirmation thank you page hosted on your website.
Type "confirm" in the click through text field
Select the "subscribe" field in your table to update, this field will be
incremented by one when the subscriber confirms. Since the number is
now 1 or greater, they will no longer show up in the filtered list on the
Datasource tab.
Click on the Writeback Tab
Select a field in your database to record the date the confirmation email
was sent, "confirmation_date" for example.
Select "set current date" from the drop down menu
Enable the bad format processing
Select the "bad_format" field from your table to update. This feature
allows you to weed out those people who just enter junk in the email
address field.
Click Save changes and return to the Main Menu.
Test the campaign to make sure it works.
Set the schedule to repeat every 5 minutes (or whatever interval you
decide), this will ensure that shortly after someone subcribes, they will be
detected by the filter you set up, and sent the confirmation email.
Since this email is going out so frequently, you may want to disable the log
files for this campaign.
Since this is a confirmation email, you do not need to include an unsubscribe
option since technically they are not yet fully confirmed. If you decide to include
an option to unsubscribe, make sure you enable the unsubscribe feature and
include the {UNSUBSCRIBEHYPERLINK} merge field in your confirmation
message.
Set Up Follow Up Email
If somebody makes a purchase, or downloads something off your website, but is
not yet a current customer, you can contact them with follow up information.
According to the CAN SPAM law, anybody with whom you have a legitimate
business relationship is a legitimate customer to whom you can send emails. It is
a good idea to follow up with customers who purchase goods from you, but not to
72
Manage Email Campaigns
be annoying about it. You can also invite them to continue to send them updates
if they so wish.
Set Up Tab
Name the campaign something pertinent to the use for which it is intended
"Download Follow-up" for example.
Do not enable the Run Authorization on this campaign since it will be a
scheduled campaign.
• Enable the Writeback tab, the Unsubscribe Tab and the Click Through
tracking page
• Click on the Data source page
• Select Intermediate from the feature set selector menu
• Connect to your database, find the correct table and select the email
address and unique ID fields
• In the basic filter, select the following:
Unsubscribe = 0
Bounce = 0
DownloadDate > mm/dd/yyyy
• Click preview and verify that the records returned all records that show a
download request after the specified date. (This field will need to be
updated in your database by your download process).
• Click on the Create Message tab and create your message:
Thank you {First_Name} for downloading our program. Please let us know
how we might assist you further, etc. For more on our products please visit
{CLICKTHRU1}.
{UNSUBSCRIBEHYPERLINK}
{CLICKTHRU2}
• Click on the Send Settings page and enter the connection information
• Select the Advanced feature set from the drop down
• Enable the De-dupe on sending feature to ensure that each person only
gets one email even if they are listed more than one time in the database
• Click on the Click Through Tab. Set up click through one for your home
page, or whatever page you want the customer to be directed. Enter your
privacy policy for Click Through 2.
• Pick a writeback option and select a field to update, it should be a numeric
field with a default value of zero. When the follow up email is sent, this
field will be incremented. If you have a series of campaigns this field can
show you exactly how many follow emails have been sent, and when to
send the next one.
• Also select a Date field to update with the current date, "followup_date"
for example.
• Enable the Bad Format checking to ensure that incorrect email addresses
are excluded from the campaign.
73
Enterprise Manual
•
Click on the Unsubscribe page and configure. You can use either the
email or web based unsubscribe option, whichever is best for you. Since
the customer may not be interested in your updates.
Set Up Campaign Series
A Sequential email messages or campaign series -- where recipients receive a
series of two or more emails timed by specific send dates, usually with related
messages -- can be set up with some simple campaign and database
management. These are autoresponder-type campaigns, where someone signs
up to receive a series of email newsletters or other information that you provide.
In your database table, create a field to update, which should be a numeric field
with a default value of zero (0.) When someone subscribes to the series, they will
start out at 0, and your campaign filter will look for the value of the field to
determine which records to include. Upon sending, you would set that field to 1,
either by incrementing the field, or specifying 1 as the value. This indicates that
the first message in the series was sent. The second campaign in the series
would do the same thing, but look for records where the value is already set at 1,
the second campaign would then change the value to 2, etc.
Figure 1. Sequential Messaging Using Four Campaigns
This numeric field will be the focus of the filters on the Data source page using
Campaign Enterprise. If you are just starting your series, nobody should be found
in the filter for campaigns 2 through 4, which is fine. As the series moves along
however, you will begin to populate the list with those who have started receiving
the first messages, subsequently moving along the process until they receive all
the messages in the series.
74
Manage Email Campaigns
To prevent the recipient from receiving all the campaigns at once, you chain
them in reverse order. Then schedule the last campaign (campaign 4 in this
example) to be sent out on a daily, weekly or monthly basis, depending on your
series schedule. Since the fields will be incremented on sending, you’ll want to
chain the campaigns in reverse order, so that the filters will pull the correct
records from the database. If you ran the campaigns in forward order, a new
subscriber would receive all the emails in the series, one right after the other. .
Edit Campaign
To edit an existing campaign:
Click once on the campaign to select.
Click the Edit button.
The project will open to the Message tab.
There are ten edit screens:
Campaign Settings
Data Source
Compose Email Message
Send Settings
Click-Through
Conversion Events
Bounce-Backs
Unsubscribe
Subscribe
Misc. Settings
Each screen allows you to save your changes and close the edit area or exit
without saving. Changes made on one edit screen are saved when you click on
the tab of another edit screen.
In the above example you could also double click on the campaign that you
want to edit, instead of highlighting the campaign and clicking the edit icon.
Double clicking the item of focus as well as highlighting an item and clicking an
icon will work throughout the software.
Copy Campaign
To copy a campaign:
75
Enterprise Manual
1.
2.
3.
4.
5.
Click once on the campaign to highlight it
Click Copy to copy a campaign's entire configuration (minus the reports)
Enter a new name
Click Copy
The new (copied) campaign is highlighted on the main menu. Double click
the new campaign or click Edit to open
Only an Admin user, the owner of a campaign, or a non-owner with read/edit
privileges can copy a campaign.
Note Feature
To add notes to a campaign, single click the Notes icon at the top of the page, or
next to the campaign name on the main menu.
1. Highlight a campaign and click the notes icon.
2. Enter a note, the note icon in the campaign list will turn yellow.
Reports
Reports
Click on the Reports icon to view the reports generated for each campaign. The
summary reports count the given action since the last time the campaign was run
and the cumulative count for the selected campaign. The log files are written in
tab delimited format for easy conversion using your preferred report writing tool.
To view a report:
Click once on the campaign to select.
76
Manage Email Campaigns
Click the Reports button.
Double click the Report to be viewed. The Log Detail report shows the
raw data in a text file, whereas the Create PDF report is a graphical
representative of the data for the campaign.
Overview Report
Bounce Report
Click-Through Report
Unsubscribe Report
Export Subscribes
Opened Email Report
Log Files
When transferring information from version 10 to version 11, you can
transfer the Logs folder over to version 11, but reports will be generated only
when the campaign is run in version 11. All the previous information from
version 10 will be in the Logs folder brought over from version 10, but will not be
displayed in the Reports area because of the new reporting method.
77
Overview Report
The Overview Report shows a summary of all of the advanced features plus the
statistics on the latest sending for the selected campaign.
Campaign Overview
Shows the following:
Campaign Name
Campaign ID
Start Time
Datasource Name
Message size
Campaign Performance
Shows the following:
Time Elapsed
Bounce Summary
Softbounce Summary
Unsubscribe Summary
Subscribe Summary
Opened Emails
78
Manage Email Campaigns
Initial Number of Emails in the selected table
Final attempted total
Successfully sent (to the SMTP Server)
Failed (bad email formats)
Performance summary (messages per second)
Click-Through Counts
Shows the summary information for the Click-through links
Campaign Run Instances
Lists links to all of the summary log files for the selected campaign in descending
order.
Create an Overview Report PDF
To create a PDF document from the Overview Report click the Create PDF
button within the Overview Report.
A PDF document is created, which you can save or print.
Bounce Report
Bounce Summary
79
Enterprise Manual
The Bounce report shows the summary of hard and soft bounced emails for the
campaign(s) using the account.
Click on Bounce Report in the Reports area to see the Hard and Soft
Bounce percentages for the campaign(s) using the bounce account
specified for the campaign you are viewing the reports for, along with a
graphical analysis of the campaigns bounces.
Bounce Logs
The Bounce Log file can be accessed by clicking Log Detail on the
Reports Menu or viewed directly in the Campaign Logs folder. The
pathway on a typical installation is:
C:\Program Files\Campaign
Enterprise11\www\Logs\CampaignID0000001-Bounce.TXT.
80
Connect To an Email List
The Bounce log contains the date and time the bounce was recorded and
the original email address in a tab delimited format.
The Soft Bounce Log file can be accessed through the soft bounce
summary or viewed directly in the Campaign Logs folder. The pathway on
a typical installation is:
C:\Program Files\Campaign
Enterprise11\www\Logs\CampaignID0000001-SoftBounce.TXT.
The Soft Bounce log contains the date and time the soft bounce was
recorded and the original email address in a tab delimited format.
Click-Through Tracking Report
Click-through Summary
The Click-through report shows the summary of click-throughs for the selected
campaign, by click-through description. When clear counters is checked in the
Misc. Tab, the summary will show the number of click-throughs reported since
the last sending and the cumulative total for the selected campaign.
Click on Click Through Report in the Reports area to see the click through
percentages for each click through, along with a graphical analysis of the
campaigns click throughs.
81
Enterprise Manual
Click-through Log
The Click-through Log file can be accessed by clicking Log Detail on the
Reports Menu or viewed directly in the Campaign Logs folder. The
pathway on a typical installation is:
C:\Program Files\Campaign
Enterprise11\www\Logs\CampaignID0000001-ClickThrus.TXT.
The Click-through log contains the date and time the click-through was
recorded, the click-through number and the original email address in a tab
delimited format.
Unsubscribe Report
Unsubscribe Summary
The Unsubscribe report shows the summary of unsubscribed email for the
selected campaign. When clear counters is checked in the Misc. Settings Tab,
the summary will show the number of unsubscribed emails reported since the
last sending and the cumulative total for the selected campaign.
Click on Unsubscribe Report in the Reports area to see the Unsubscribe
percentages for the campaign, along with a graphical analysis of the
campaigns unsubscribes.
82
Connect To an Email List
Unsubscribe Log
The Unsubscribe Log file can be accessed by clicking Log Detail on the
Reports Menu or viewed directly in the Campaign Logs folder. The
pathway on a typical installation is:
C:\Program Files\CampaignEnterprise11\www\Logs\CampaignID0000001Unsubscribe.TXT.
The Unsubscribe log contains the date and time the unsubscribe was
recorded and the original email address in a tab delimited format.
Export Subscribers
Click the Log Detail report to export the selected campaigns new subscribers to a
text file.
The report shows the date and time the subscribe was record, the unique id of
the original recipient of the email message, the email address of the new
subscriber, and the subscribers public <A class=glossterm x-usepopup=#POPUP43214 x-popup-type=expanding
href='javascript:TextPopup(this)' id=HotSpot43214>IP address.
If there is a value in the unique ID column it is related to the source email in
which the subscribe link was clicked.
Opened Email Report
Opened Email Summary
The Opened Email report shows the summary of opened email for the selected
campaign. When clear counters is checked on the Miscellaneous Tab, the
summary will show the number of opened emails reported since the last sending
and the cumulative total for the selected campaign.
Click on Opened Email Report in the Reports area to see the Opened
Email percentages for the campaign, along with a graphical analysis of the
campaigns opened emails, and unique opened emails. Unique Opened
Emails represent 1 instance of a person who has opened the message
more than once, whereas the total number of opened emails, counts all
83
Enterprise Manual
the times a person may have opened the email message.
Opened Email Log
The Opened Email Log file can be accessed by clicking Log Detail on the
Reports Menu or viewed directly in the Campaign Logs folder. The
pathway on a typical installation is:
C:\Program Files\Campaign
Enterprise11\www\Logs\CampaignID0000001-OpenedEmail.TXT.
The Opened Email log contains the date and time the opened email was
recorded and the original email address in a tab delimited format.
84
Log Files
Log files are generated each time a campaign is run. There are three ways to
access the log files:
From the Main Menu click Reports > Overview Reports and scroll down to
the bottom of the page. Links to the log files for this campaign are listed in
descending order by date.
From the Main Menu click Reports > Log Files. All the log files are listed
in Ascending order. You can use this page to delete log files from the logs
folder.
Open Windows Explorer and browse to the Campaign Enterprise Logs file:
C:\Program Files\CampaignEnterprise11\www\logs\CampaignID0000001LogFile-2009013001017812.TXT.
Test Campaign
Click Test Campaign to send a sample message to the specified address. A
Return Path Address must be specified on the Create Message tab for the
message to be sent. If you are using merge fields from the database in your
email message, information from the first record in the table to which the
campaign is connected, will be merged into the email message. Attachments are
attached when sending a test campaign.
85
Enterprise Manual
Since the test message merges information from the first record in the
database, if you run a campaign that uses Each advanced feature will be
incremented for the first record in your table or query, not for the email address
you are sending a test to. This is why we recommend including your own email
address in the table for more accurate message testing.
Run Campaign
The Run button enables the user to manually run a campaign.
1. Click once on the campaign to select.
2. Click Run Campaign.
3. Verify that you want to run the campaign, and that the number of emails
being sent is correct.
4. Click Preview Message to view the message you are sending out, merge
fields will not merge in the preview area.
5. Click Yes to Run the campaign. Click No to cancel.
6. Click OK to return to the Main Menu.
You DO NOT need to click Run to send a scheduled campaign. If you click
Run the campaign will be sent immediately. However, the campaign will also run
on its scheduled time unless the schedule is modified.
Resume Sending
To resume sending a campaign after it has been stopped during a previous run,
you can click the Run Campaign icon; a warning message will appear,
86
Connect To an Email List
Resume Previous Run - Starts the campaign at the point where it left off
previously.
Start New Run - Runs the entire campaign.
If you resume a previous run the summary report will look as follows,
Attempted sending : 96
Bad email addresses : 0
Empty Email Addresses : 0
Duplicate/skipped : 22
Successfully sent : 74
In the first send of the campaign 22 messages were sent, then the campaign was
stopped, when it was resumed it sent 74 messages. In the final send the original
send of 22 records are skipped.
The number of messages to be sent should always reflect the total number
of records in the table or query that you are connecting to for the campaign you
are running.
Schedule Campaign
The Scheduling feature in Campaign allows you to setup a time for the project to
run. You can run projects one time or at a specified interval. The date and time
is reset each time a scheduled project is run if an interval is specified.
To schedule a campaign, on the Main Menu click once to highlight the campaign,
then click the Schedule button.
Scheduling a Campaign for a specific date.
To schedule a campaign to run on a specific date, click on the date you want to
run the campaign.
87
Enterprise Manual
Enter the time you would like to run the campaign, and click Add.
The date box change colors and the time the campaign is going to run is
displayed.
Click Close and the scheduled date and time will be displayed on the Main Menu.
To remove a scheduled date, click on the time the campaign is scheduled to go
out, and click OK to delete the scheduled time.
Scheduling a Campaign to run on a short interval.
To schedule a campaign to run once every minute or once every hour, check the
Short Interval check box and enter the interval.
Scheduling a Campaign to run on a weekly or monthly interval.
To schedule a campaign to run once or more during the week check the day you
would like the campaign to run on, and enter a time.
The next run date will appear on the Main Menu.
To schedule a campaign to run on the same day every month, check the Monthly
check box, and enter the day and time. Keep in mind if you enter 31 for the day
the campaign will not run during all twelve months.
Suspending a Scheduled Campaign
To suspend all scheduled events for a campaign click the Suspend Schedule
check box at the bottom of the Campaign Schedule screen. The Schedule status
on the Main Menu will show Suspended.
88
Connect To an Email List
You do not need to click Run to send a scheduled campaign.
To set a Blackout Date (or a date scheduled campaigns will not be run on,
like Christmas Day) from the Main Menu click the Administration tab then the
Blackout Dates button. Campaigns that are scheduled to run on an interval will
not be run on Blackout Dates.
If you need to stop Campaign from checking for scheduled campaigns, go to the
Server Manager window and Disable the Schedule Checking option. Once this
feature is re-enabled any campaigns which have reached the scheduled time will
be sent.
89
Connect To an Email List
Connect To A Database
Select the database type from the drop down menu:
• If you are using database shortcuts, simply pick the shortcut name from
the list for which you are approved.
• If you select a built-in list, select the particular table you want to use from
the drop down list.
• If you select access
• Click browse and find the pathway to your Access database. A
typical pathway may look like, C:\Documents and Settings\user\My
Documents\dbname.mdb.
• Click Select to return to the datasource tab
• If you select a different type of database, click browse and select the DSN
connection from the list of System DSNs.
When you successfully connect to the database you should now see options in
the Table/Query Name field. If you do not see anything, it does not necessarily
mean you are not connected. If your database has more than 300 tables and
queries you may have to type the name of the table you want. For example,
most Oracle databases can easily have 500 tables in them. Rather than wasting
resources pulling all of that information into Campaign Enterprise, the field
changes from a drop down, to a text field and you need to enter the name
yourself. A typical name for an Oracle table might be
OWNER.ORACLETBL.FIELDS. (Oracle likes the tables to be in all caps).
Once you have successfully selected the table, the Email address is populated
with the fields found in the selected table.
• Select the email address field. This is the field in your database
containing the email addresses.
• Select the unique ID. This step is optional for now, but is important for the
advanced features. If your email addresses are truly unique, you can use
the email address field here.
To ensure that you are connecting ok, click on the Preview button and examine
the table. You can look at the other fields from the additional drop down menus
and clicking the Refresh button. Click Return to get back to the data source tab.
The preview only shows the first 100 records in your database, but displays the
total number of records at the top of the page. If the number of records in your
table exceeds the limits of the evaluation, or the licensed edition of Campaign
Enterprise, you will see a warning message next to the total. Prior to sending,
you will need to filter your list to only send the authorized number.
90
Connect To an Email List
ODBC Connection
When connecting to a database, if an ODBC Connection is selected, then a list of
current System DSN (Datasource Name) entries will be displayed. When you
select one of the DSN sources from the list, a DSN string appears in the
Datasource box. You may need to add other information to this connection string
such as a username and password. Most ODBC Connection Datasource entries
will look like the following:
DSN=MYDATASOURCE;UID=username;PWD=password;
You have the option of filling in the Datasource box manually without using the
Browse button.
System DSN entries can be added by going to the ODBC Administrator in
the Control Panel.
OLE DB Connection
If you have a very large database or are using complex filters to coordinate your
campaigns, we recommend that you use an OLE DB connection string for your
database connection. Here are some of the more popular database formats with
their basic connection strings. Simply enter the OLE DB string in the connection
field directly.
Sample OLE DB Connection Strings (variable portions are indicated in
RED)
MS Access
For Standard Security:
Provider=Microsoft.Jet.OLEDB.4.0;Data
Source=C:\\DatabasePath\\MmDatabase.mdb;
User Id=Username;Password=Password;
Using a Workgroup:
91
Enterprise Manual
Provider=Microsoft.Jet.OLEDB.4.0;Data
Source=C:\\DataBasePath\\mydb.mdb;Jet OLEDB:System
Database=System.mdw;
MS SQL Server
For Standard Security:
Provider=sqloledb;Data Source=ServerName;Initial
Catalog=DatabaseName;
User Id=Username;Password=Password;
For Trusted Connection security: (Microsoft Windows NT integrated
security):
Provider=sqloledb;Data Source=ServerName;Initial
Catalog=DatabaseName;Integrated Security=SSPI;);
To connect to a "Named Instance" (SQL Server 2000) you must to specify
Data Source=Server Name\Instance Name like in the following example:
Provider=sqloledb;Data Source=ServerName\InstanceName;Initial
Catalog=DatabaseName;
User Id=Username;Password=Password;
To connect with a SQL Server running on the same computer, you must to
specify the keyword (local) in the Data Source like in the following example:
Provider=sqloledb;Data Source=(local);Initial
Catalog=DatabaseName;User ID=Username;Password=Password;
To connect to SQL Server running on a remote computer ( via an IP
address):
Provider=sqloledb;Network Library=DBMSSOCN;Data
Source=90.1.1.1,1433; Initial Catalog=DatabaseName;User
ID=Username;Password=Password;
Oracle
MSDAORA is the OLE DB Provider from Microsoft:
Provider=MSDAORA;Data Source=OracleDB;User
Id=Username;Password=Password;
OraOLEDB is the OLE DB Provider from Oracle:
Provider=OraOLEDB.Oracle;Data Source=DatabaseName;User
Id=Username;Password=Password;
92
MySql
You must get the syntax exactly correct. The 'yourdatabase' is the name of
the database not the server name. This string will connect to the first
MySQL Server running. If you have multiple options, you may have to
inquire how to make the string work with your server. You will need the
logins to your database. You must replace the 'mysql' part of the above
connection string with the exact name of the MySQL driver installed on your
computer. To find that name you go to the Control Panel > Administrative
Tools > Data Sources (ODBC) and look at the Drivers tab. Track down the
MySQL driver. It must be installed to use the OLE DB connection. They
are available from the internet for free.
driver={mysql};
database=yourdatabase;server=yourserver;uid=username;pwd=password;
option=16386;
93
Growing a List
List building through viral marketing is a new and important trend for mass email
marketers. Adding new subscribers while engaging them with useful, exciting
content is an ongoing challenge.
When an active subscriber passes your email message to a dozen or so friends,
wouldn't it be great if some of those second-degree recipients also subscribed to
your email newsletter? That's the essence of viral email marketing. If you notice
your email messages are frequently forwarded because of unique and /or
excellent content, you'll want to take advantage of this list growth opportunity.
Therefore offering viral customers a page where they can easily subscribe is
essential to growing your email list.
Built-in subscription form
Campaign Enterprise can help you gather new subscribers with its built-in email
subscription form. If done correctly, you can turn your regular email newsletters
into an effective viral marketing email campaign.
Arial Software introduced the subscription form in Campaign Enterprise 10,
replacing the old email-based subscribe feature, which was simply a confirmation
email. With the new subscribe feature, anyone can click on the subscribe link in
an email message, and add their email address, name, and other information to
an email list.
This handy feature allows you to invite current subscribers to join to a separate
newsletter they may not currently receive. It lets a person who received the email
message from a friend subscribe himself or herself to your list, and the person
who forwarded the email message can be indicated in the database. This feature
also can be used as an opt-in confirmation for email contacts obtained from a
tradeshow or convention, and can be a point where more contact information is
obtained.
To use the subscribe feature, Campaign Enterprise must be configured with a
public <A class=glossterm x-use-popup=#POPUP37487 x-popuptype=expanding href='javascript:TextPopup(this)' id=HotSpot37487>IP address
or domain in the main configuration area. If click through tracking or opened
email tracking is enabled and working properly, everything should be all set to
use the subscribe feature.
Configuring the subscribe feature
On the Setup Campaign tab in the campaign edit screen, check the box next to
the Subscribe Processing feature to enable. The Subscribe tab will appear.
Campaign Enterprise requires that the campaign be connected to a table before
94
Connect To an Email List
editing the Subscribe tab. Once the source table, email address and unique ID
are selected in the Datasource tab, you can edit the Subscribe tab.
At the top of the Subscribe tab, select the table to which records will be added. It
does not have to be the same as the source table specified in the Data source
page, but it does need to be a table in the same database. Once the table is
selected, enter the name of the email address field for the specified table. As with
all table and field names, there should be no spaces or special characters in the
names.
Next, enter the hyperlink text for the subscribe link. This is the link on which the
reader will click in order to open the subscription form. This can be a simple text
invitation like "click to subscribe," or a web based image. When using an image,
simply input the HTML image tag in the subscription text field. Make sure you
include a "border =0" in the tag so there is no blue box around the image in the
email message. Here is a sample image tag:
<img src="http://www.domain.com/imagefolder/image.gif" border="0">
When the subscribe link or image is clicked, the server hosting Campaign
Enterprise serves the subscription page, which is why it is necessary to configure
Campaign Enterprise with a public IP address or domain name.
The code for the web form and the confirmation page are shown in the text areas
at the bottom of the Subscribe tab. These are both fully configurable. You can
preview how the pages look by enabling the editor, but modifications to the web
form should occur in the HTML code directly. Campaign Enterprise offers a
default form, which is a good starting point for those who are not familiar with
web forms. The form is bare, and other elements need to be added to the page
to brand it, and inform the person signing up more about what they are getting
into. The web form must contain the merge field {Action} in the form post line:
<form name="form1" method="post" action={ACTION}>
The default form provides an email address field, first name, last name, company
and phone number field available, but only the email address field is required.
The field names in the input types need to match the names of the fields the form
is updating in the table. For example, if the email address field is
"email_address," then the input type must be "email_address." Any other
modification of the form will work as long as the {Action} merge field is included.
A web designer should be consulted to make major changes to the form or
submit button.
The confirmation page is also fully customizable and is served up by the
Campaign Enterprise server. Links on the confirmation page could lead the new
subscriber to the index page, or other areas of your website.
95
Don't forget the subscribe link
In the message tab, ensure that the {SUBSCRIBEHYPERLINK} merge field is
placed somewhere in the message body. When the email message is sent, the
pertinent campaign information is merged in the link, including the unique id of
the original recipient. This way the original referrer of the email can be tracked
and noted when the new record is added to the selected table. Make sure you
test everything out before including the subscribe link in a live email marketing
campaign.
If there is a subscription page already on your website, you can track subscribers
that reach it through an email message by setting up a click-through tracking link
to that page.
With a little work, the content you provided to your subscribers can generate high
interest and drive a viral campaign. Take advantage if your newsletter is getting
passed around and make it easy for those who receive it subscribe for a copy
themselves. This is a great way to build a solid email list with people who have
already demonstrated an interest in what you offer.
Arial MySubscribe
Arial Software recently introduced a free email subscription widget that you can
place on your website and invite people to subscribe. The widget can be
configured here, http://www.arialsoftware.com/MySubscribePage.html.
Databases
The database list of email records is the first link in the permission email chain.
A database is a program where your data is stored and managed. There are
several types of databases available, MS Access, MS SQL Server, MySQL and
Oracle to name just a few. Campaign Enterprise can connect to any Open
Database Connectivity (ODBC) compliant database. This document will use the
acronym ODBC when referring to the general types of databases.
Selecting the Right Database
The database to which you connect Campaign Enterprise may already be
determined for you depending on where you work and what you have available.
Assuming there is a choice in determining where email records are stored, we
will discuss the various options available beginning with the most basic to the
more advanced. A relational database is required when using any of the
advanced features of Campaign Enterprise.
Built-in Subscriber Lists
Text Files
96
Connect to a Mail Server
MS Access
MS SQL Server
MySQL
Oracle
Other database types
Campaign works with any other database not specifically listed if it is ODBC
compliant. To use a database file not listed above select ODBC Connection from
the drop down list in Data Source Tab or Database Shortcuts.
Naming Conventions
Campaign follows standard Structured Query Language (SQL) naming
conventions. Database, table, query and field names should not have spaces or
special characters in them. Even though MS Access allows spaces and special
characters, you should not use them. Special characters include (but are not
limited to) !, @ ,#, $, %, &, - and + signs.
Database Fields
Many of the advanced features of Campaign require specific fields in your
database in order to update information correctly. For example, in order for the
bounce field in your database to increment when a bounce email enters the POP
account, you need to make sure the bounce field is a number field, with a default
value of zero.
Campaign also uses your field names for the mail merge functions. You can use
any field in the table to which you are connected as a merge field. This will input
the information found for each record corresponding to that field in the message.
This is how you personalize your emails with customer specific data. The format
for merge fields is always {field_name}.
MS Access
MS Access is one of the most common and intuitive database applications
available and is a great database to use with Campaign software. It is the only
database for which Campaign does not require an ODBC connection. Since it is
so common, we will address a few of the considerations that need to be made
when configuring your Access database for use in your email campaigns. MS
Access must reside on the same computer as Campaign Enterprise.
Access is a good choice for you if you are just getting started with email
marketing. The database can easily store several hundred thousand email
addresses. However, if you are performing a lot of procedures on the data,
updating many fields or using a lot of queries, the database can become large
and cumbersome and will need to be compacted. After a couple hundred
97
Enterprise Manual
thousand records, you might consider moving to a Structured Query Language
(SQL) option like MS SQL Server or MySQL.
Create a New Database and Table
MS Access is similar in form and function to most other Microsoft Office products,
which includes an annoying and not very helpful office assistant. A variety of
tools and wizards are available to help you create just the type of database you
need. You may need to brush up on what a database is and what it can do, but to
start out you will find Access to be more user friendly than most. To create a new
database for use with Campaign, take the following simple steps:
• Open MS Access
• Click New
• Select the Database Icon
• Name the database and place it in an easily accessible folder. The default
is usually My Documents.
• Highlight "Create Table in Design View" and enter.
You are now in the design view of your first table. Here you will specify the field
names and the data types of each field. You can add a description of the field for
future reference if you like.
• Type a field name for the first field. This should generally be your ID field,
which uniquely identifies each record in your database.
• Tab to the Data Type field and select "AutoNumber" from the drop down
menu.
Note: The ID field should be your primary key. To set it as your primary key right
mouse click on the black arrow to the left of the field where you entered the name
and click "Primary Key", a key symbol will appear to the left of the field.
• Enter a description of the field for future reference.
Repeat the steps for all the fields you want to include in your database. Select
"Text" datatype for all text fields and "Number" for all the numeric fields that
Campaign will use to write-back to. For the number fields go to the Field
Properties area and ensure that there is a default value of zero indicated.
Here are some examples of fields you might want to include in your table.
Text Fields
Email_Address
First_Name
Last_Name
Address
City
State
Zip
98
Numeric Fields with a
default value of "0" (zero)
Bounce
Unsubscribe
Bad_Email_Format
Click_1
Click_2
Click_3
Click_4
Connect to a Mail Server
You can add any other field you want to the database, but make sure you follow
Structured Query Language (SQL) naming conventions. Even though Access
allows it, you should not use spaces or special characters, including hyphens, in
any database filename, table name or field name. Having spaces or special
characters in any of those names may cause problems when Campaign attempts
to update the database using the advanced write-back feature.
• Click Save
• Name the table (remember no spaces or special characters)
• Click View > DataSheet View (to get back to design view, click View >
Design View).
• Start entering the information into your database. As you complete each
record you will note that the ID field is automatically incremented to give
each record a unique ID. If a record is deleted, the ID for that record will
no longer be found in the table.
Adding new records does not require you to save. The only changes to the
database that need to be saved are modifications to the table design. Access will
not let you modify the table design without prompting you to save your changes.
Using an Existing Record Set
You may already have a large list of email addresses or client information you
would like to use with Campaign. If it is in an Excel Spreadsheet or some
Personal Information Manager (PIM) you will need to import your records into
Access. Microsoft has a helpful wizard that allows you to easily import records
from most external sources.
Import Records Into Access
• Open the Database and click New
•
•
•
•
Select Import Table
Click OK and browse for the file you want to import. You will need to select
the file type in the browse window.
Follow the instructions in the wizard to import your records to a new table.
Once the new table is built, you can go to the design view to add any new
fields you need for the database write-back features.
99
Enterprise Manual
•
•
Select the new table and click View > Design View
Add any new fields you need as explained above.
A Microsoft Access database template is available at
http://www.arialsoftware.com/downloads/Campaign_Template.mdb.
MS SQL Server
MS SQL Server database is more scaleable and more robust than MS Access
database. Once you reach the practical limits of MS Access you may find
yourself moving to SQL Server. It is by far the most popular database for
Windows operating systems. Advanced SQL Server administrators will likely not
find this article helpful, it is geared more toward someone who is considering
moving from a less advanced database to SQL Server.
SQL Server is a very powerful database application and a great database to use
with Campaign Enterprise software. In order to connect to a SQL Server
database, an ODBC or OLE DB connection must be established. We will
address a few of the considerations that need to be made when configuring your
SQL database for use in your email campaigns.
Creating a New Database and Table
Speak to your Database Administrator about creating a database; and tables
within that database. Arial Software can only make suggestions on what fields to
include in your new table and their properties.
In order to use the click-thru tracking, bounce handling, subscribe and
unsubscribe features with in Enterprise, your table must contain integer type
fields with a default value of zero.
Suggested fields:
100
Connect to a Mail Server
•
•
•
•
•
•
•
•
•
Message_sent: Type integer, default value of 0. This field will increment
upon sending. The table will indicate who was sent a message
Bounce: Type integer, default value of 0. This field will increment when a
bounced email is recorded.
Unsubscribe: Type integer, default value of 0. This field will increment
when an unsubscribe email, or click-thru is recorded.
Subscribe: Type integer, default value of 0. This field will increment when
a subscribe email, or click-thru is recorded..
bad_format: Type integer, default value of 0. Upon sending, Campaign
can filter out email addresses that have incorrect formating (illegal
characters, empty records, spaces etc.). When bad format emails are
identified, this field will increment.
Sent_date: Type Datetime, default any date. Upon sending, this field will
be updated with current date.
click_1: Type integer, default value of 0. This field will increment when
Campaign records a click-thru for Click-Thru 1.
click_2: Type integer, default value of 0. This field will increment when
Campaign records a click-thru for Click-Thru 2
click_3 - click_10: Type integer, default value of 0. These fields will
increment when Campaign records a click-thru for Click-Thru 3 - 10.
MySQL
101
Enterprise Manual
MySQL is another open source database frequently used by email marketers.
Here are some general guidelines for MySQL
default integer fields (50) no zero fill, not auto, no default - works
Id field wont work if it is auto - error 'cant find row to update'
Text field will not work for the email address field, should be varchar
Provider=MySQLProv;Server=10.10.35.100;DB=campaign;UID=root;PWD=;
datetime datatype doesn't work.v.3.23.29 - change the datatype to varchar and it
writes back. Even leaving that field in the table but not writing back to it, will
break it. 3/15/07 used date datatype and could send. Pre-populated it with 00-000000. Did not test write back.
On large email lists - you must have a big enough KeyBuffer so that the entire
appropriate index fits into memory. This goes along with indexing appropriate
fields. Assuming the Unique ID is PK so already indexed, email address field,
and field used as a merge field in the message., write back fields.
The driver now available on the internet requires advanced feature set selector
on the data source page. The fields have to be listed in the SQL SELECT
statement, the * no longer works. Also, I tried the auto feature and it worked but I
did not try write back with it.
If using a select statement that does not explicitly use the JOIN keyword, the
query will take a long time to run. Do not try to JOIN two tables with the WHERE
clause there must be a JOIN keyword in the SELECT before the WHERE clause.
Otherwise, Campaign will run the entire record set of the two tables and run the
where clause against that record set.
How to connect to a MySQL database without using a Data Source Name (DSN).
MySQL OLE DB (DSNless) connection: driver={mysql};
database=databasename;server=serverip;uid=username;pwd=password;option=
16386;
The syntax must be exact. Use the IP address in place of 'serverip'. The
'databasename' is the name of the database not the server name.
This string will connect to the first MySQL Server running. If there are multiple
server options, you will need to inquire how to make the string work with the
server to which you are connecting.
Make sure you know the login information to the database and enter that in place
of username and password.
102
Connect to a Mail Server
Replace 'mysql' with the exact name of the MySQL driver installed on the
computer on which Campaign Enterprise resides.
To find the name of the driver go to: Control Panel > Administrative Tools > Data
Sources (ODBC) and look at the Drivers tab. Track down the MySQL driver that
is installed.
Example: MySQL ODBC 3.51 Driver. A driver must be installed in order to use it.
Drivers are available from the internet free.
http://www.basic-ultradev.com/articles/ADOConnections/
http://dev.mysql.com/doc/refman/5.1/en/connection-parameters.html
Text Files
Setting up a Text List
Text files cover .txt and .csv flat files. These types of files must be in a certain
format in order to be useful to Campaign Enterprise. CSV stands for comma
separated value and is basically what you want to consider when creating your
text file. There must be a header row, with field names separated by commas.
Records are separated by carriage return line feeds or CRLF (which is where
you end your line of text and click return).
Cost wise, text and csv files are virtually free everything is available in a typical
Windows installation. The problem is these types of files are not very flexible. If
you are considering using the more advanced features of Campaign Enterprise,
you will need to use a relational database, which can be updated. Text and csv
files are not updateable and are therefore very limited in their usefulness.
Simple Text data source (.txt)
Open your text file, and enter the name of "column" on the first line followed by
an email address line by line. You need to specify a column name or the first
email in the list will become the column name.
email_address
[email protected]
[email protected]
[email protected]
[email protected]
etc . . .
Complex Text Data Source (.txt, .csv)
103
Enterprise Manual
Open your text file and enter the name of each column. You can use these field
names to customize your message using the merge function. (Note: each column
must be surrounded by double quotes and separated by a comma, e.g. " " , " ").
Enter the email, first name, last name, and any other column name you want to
use for each record. (Note: Do not try to line the records up under the column
headings, tabs and spaces will render the table useless).
"email_address","first_name","last_name"
"[email protected]","first","last"
"[email protected]","first","last"
"[email protected]","first","last"
"[email protected]","first","last"
etc . . .
Text ODBC
Simply browsing to a text file in the Datasource tab will not work in Campaign
Enterprise, you need to set up a text ODBC Datasource Name (DSN) to connect
to the file.
Go to your Database connection utility. On most Windows Operating Systems
this can be found in the Control Panel > Administrative Tools > Data Sources.
•
104
In the System DSN tab, click Add
Connect to a Mail Server
•
•
Select the Microsoft Text Driver (*.txt *.csv) option
Click Finish
•
•
•
•
Enter a name for the DSN, use something that you will remember
Enter a description (optional)
Uncheck the Use Current Directory check box
Click Select Directory
105
Enterprise Manual
•
•
•
Browse for the folder where your text datasources reside. Make sure you
include the .txt and .csv extensions
Click OK
Click OK
When you are ready to connect to your .txt or .csv file, go the Datasource Tab in
the campaign edit screen and do the following.
• Select Text File from the database type drop-down field
• Click Browse
• Select the new DSN you just created
• Select the file from the table/query drop-down field; all available files from
the folder you set will be included
• Select the email address field
A text file cannot be written back to. If you intend to track bounces, opens,
unsubscribes or click-throughs you must use a relational database, not a .txt or .csv file.
Subscriber Lists
Campaign Enterprise now comes with some simple built-in tables you can use if
you do not have your own database.
To access, click the Subscribe Lists link at the top of the Main Menu.
New List
1. Click the New Icon
2. Name the list and click create, you will not be permitted to put spaces in
the name
3. Enter subscriber information adding them one at a time, or by importing.
Add New Subscribers
1. Click the New Icon
2. Enter the information you want to save starting with the email address, this
is the only required field
3. Click New to save the current record and move to adding another
4. When finished adding names, click Save
Import Subscribers
1.
2.
3.
4.
106
Edit the list
Click Import Subscribers
Browse to the .txt or .csv file and select
Match the fields in the source list to the fields in the subscriber list
Connect to a Mail Server
5. Click Import
The .txt and .csv source file must be in comma separated format.
Other Databases
Oracle
When using a basic connection to an Oracle database, the table/query string on
the Datasource Tab converts from a drop down menu, to a text field. You have
to type the name of the table to which you want to connect. If the table is inside
a schema on your database, you may need to specify the schema as well. For
example: schemaname.tablename.
When connecting to an Oracle database the email address field should be a
CHAR field type.
The unique ID needs to be NUMBER field type.
DBF Databases
There are many types of databases that fall into the Database Format (DBF)
category. FoxPro , DBIII, DBIV etc. These types are not as flexible as a SQL
type database, or even as and Access database. Like Access, these files must
reside on the same computer as Campaign Enterprise you cannot connect to
them using across networks. DBF files also require a DSN set up using an
ODBC driver. Typically these drivers are included with Microsoft Data Access
Components (MDAC), which is part of the operating system. Occasionally, a
newer or better driver may need to be downloaded to optimize performance with
these databases. These databases are only recommended if those are the only
options available to you because of your corporate environment.
Filemaker
Follow these steps in order to user a Filemaker database with Campaign
Enterprise.
Sharing Filemaker
Filemaker needs to be opened and shared. If you are using the write-back
features, Filemaker will need to remain open until your are satisfied that your
project is complete, including recording click throughs,and opened email tracking.
1. Open the database
2. Click File > Sharing
3. Check Multi-User (ensure that the file is being shared by 'TCP/IP')
107
Enterprise Manual
4. Check Local Data Access Companion
5. Click OK
If the connection is not 'TCP/IP'
1. Click Edit > Preferences > Application
2. In the General tab, select TCP/IP from the drop down box
3. Click OK
Campaign can now access and write back to your Filemaker Database using an
ODBC connection. Connecting to a Filemaker Database does not work when
Campaign Enterprise is run as a service, you must run Campaign Enterprise in
application mode.
Setting-up Filemaker Database Fields
1.
2.
3.
4.
5.
Enter the ID field name
Select the Number type
Click Create
Click Options
Check the serial number box and start the count (next number) at any
number you choose and increment by 1.
6. Click OK
Enter the other fields for your database in the same manner. These should at
least include an email address field and a first and last name field.
Some other fields you may need if you use the database write back features:
bounce
unsubscribe
subscribe
date_sent
click_thru_1
opened_email
etc.
Visual FoxPro
Connections strings for Visual FoxPro (The Visual FoxPro Driver needs to be
installed on the computer):
With a database container
*************************
Driver={Microsoft Visual FoxPro
Driver};SourceType=DBC;SourceDB=c:\somepath\mySourceDb.dbc;Exclusive=N
o
108
Connect to a Mail Server
Without a database container (Free Table Directory)
***************************************************
Driver={Microsoft Visual FoxPro
Driver};SourceType=DBF;SourceDB=c:\somepath\mySourceDbFolder;Exclusive
=No
Connect to a Mail Server
Connect to a Mail Server
The SMTP server is the third link in the chain of permission email marketing.
Campaign Enterprise connects to your database list of email addresses on one
end, creates a personalized message, then delivers them to the SMTP server,
which will deliver the final email to the remote mail addresses.
Selecting the Right SMTP Server
There are many varieties of Mail servers using different sending protocols. The
only protocol used by Campaign Enterprise is Simple Mail Transfer Protocol
(SMTP). Therefore the primary consideration when selecting a mail server for
use with Campaign Enterprise is that it is capable of communicating using SMTP.
Most mail servers are capable of communicating with SMTP, but it may not be
the default configuration and may need to be enabled. Please refer to your mail
server documentation to determine how to enable SMTP if it is not already
configured.
SMTP Servers
SMTP Servers
Windows Based Servers
Campaign Enterprise only runs on Windows Operating systems, therefore it
makes sense that somewhere in your network, you will have access to a
Windows based mail server.
IIS (SMTP)
Internet Information Services (IIS) comes installed with Windows 2000, Windows
XP Professional and Windows 2003 Server operating systems. Inside IIS there
is an SMTP component, which can be configured to deliver your email. If you
want to separate your regular email processes from your Campaign Enterprise
email marketing, this may be an option for you.
109
Enterprise Manual
MS Exchange Server
Microsoft Exchange Server is one of the most popular, and widely available type
of server. It is capable of using several mail protocols including SMTP. It is
possible to maintain a separate protocol for your regular in house email activities
and while using SMTP for your Campaign Enterprise marketing email activities.
Allow Relaying for MS Exchange 2000
• Open Exchange System Manager
• Expand Servers > ServerName > Protocols > SMTP > Default SMTP
Virtual Server
•
•
Right mouse click and click on Properties
Click on the Access Tab
•
Click on Relay button
110
Troubleshooting
•
•
•
Select Only the list below
Click Add
Add the IP address of the Campaign computer
•
Click OK and step out of the Exchange System Manager
IceWarp Email Server
http://www.icewarp.com/products/icewarp_email_server_software/
Imail by Ipswitch
111
Enterprise Manual
Imail server is a highly configurable mail server with SMTP capabilities.
http://www.imailserver.com/tour/imail/
Open Source SMTP Servers
While opens source SMTP servers are essentially free, they may cost more in
configuration time and maintenance than a Windows based server. Most open
source email servers also communicate with SMTP as at least one option of
many protocols. We will just list a few options that work well with Campaign
Enterprise.
Sendmail
One of the first mail servers around, it is still widely used, and is compatible with
Campaign Enterprise.
http://www.sendmail.org/
Qmail
Based on Sendmail, it makes some improvements to the code to make things
easier to configure.
http://www.qmail.org/top.html
Dedicated Mail Servers
Port25 solutions
This server is highly recommended for extreme mail sending. Many of Arial’s top
emailing companies use Port 25 mail servers.
http://www.port25.com/products/prod_index.html
Ironport server
http://www.ironport.com/products/
ISP Mail Servers
Often, mail servers are provided by an outside source like your Internet Service
Provider (ISP). If you intend to use your ISP’s mail server, you will need to
contact them to find out what sort of restrictions they have. Typically they will set
up relaying in one of the manners listed above and provide you with the
connection information. Typically, the larger the ISP, the less willing they are to
work with you on sending your permission based email marketing campaigns.
CAN-SPAM Law
112
Troubleshooting
In 2002, Congress passed, and the President signed a bill that became the CANSPAM law. This bill attempts to define spam, and set punishments for breaking
the law. So far the best thing about the law is the provision overriding various
state anti-spam laws that would have placed huge monetary and resource losses
on legitimate email marketers.
Securing The Mail Server
In the past, mail server default configurations were rather light on security,
defaulting to an Open Relaying configuration. However, with the increase in
SPAM and other security concerns, default mail server configurations are more
secure, not less. Campaign Enterprise can send email through a server that has
open relaying, but so can any spammer that finds such a server on a public
domain. Regardless of what mail server you use, it is imperative that you create
a closed relaying system. Not only does this protect you from spammers using
your server to send their email, it will ensure that your legitimate email makes it
to the intended destination. Many remote mail servers check to see if the
sending server is a closed system, and deny emails outright if it is not.
All reputable mail servers will have a section where you can specify who is able
to send email through the server. There are several different layers that can be
configured. We will go through generalities of how each of these processes
work. For specific information, seek documentation on your particular mail
server.
Relaying
Typically in the relaying section, you will have an area where you can add either
the static IP address of the Campaign Enterprise computer, or a range of IP
addresses on which Campaign Enterprise is installed. If your network uses
Dynamic IP assignments, you will want to add the entire range. It is better
however to assign a static IP to your Campaign Enterprise computer to minimize
potential complications. When the Campaign Enterprise computer connects to
the SMTP server, it verifies that the IP address is listed, or is included in the
specified ranges. If it is approved, the emails are accepted and delivered to the
remote addresses. If not, an error message is generated indicating that relaying
is denied. Please see the debugging section for more on connection issues.
Authentication
Another method of securing a mail server is by requiring the Campaign
Enterprise to authenticate with a username and password. Typically, in the
relaying options there will be a place to enter usernames and passwords for
authorized connections. This can be used with or without relaying enabled.
When the Campaign Enterprise connects, it indicates that it is going to try to
authenticate. The SMTP server will then request the username and password
113
Enterprise Manual
and verify that it is valid. Typically, authentication can occur on computers not
explicitly listed on the list of approved relayers, but can also be used in
conjunction with relaying for improved security.
SSL
An additional security measure is to only allow connection requests using the
Secure Socket Layer (SSL).
Other SMTP Considerations
When configuring your SMTP you need to also consider the following in order to
ensure your email is delivered properly.
Domain Name Servers
In order to understand just how a mail server is supposed to tie to a particular
domain as an approved mail exchange server, a high level understanding of the
Domain Name System and how it operates is helpful. Once you understand what
the DNS is all about, it is easier to understand where your mail server fits in the
grand scheme, and why it is so important to ensure that the servers are "wellbehaved."
What is the Domain Name System?
The Domain Name System (DNS) is a huge distributed database with the sole
function of resolving domain names. With over 16 billion requests a day, this
database works harder than any other anywhere in the world, and all it does is
convert domain names to IP addresses. At the apex of the DNS are the 13 root
servers, labeled A-M. These servers are located on 80 locations in 34 countries
throughout the world, most of them outside the United States. Using Anycast
technology, several servers can maintain one of the root servers authoritatively.
This type of redundancy helps manage all the domain name requests that occur
worldwide.
The DNS, from the root server zone files to the end user can be viewed as a
large corporation. Tiny issues and problems can be resolved clear down at the
user, or employee level, with larger issues being passed up the chain, clear to
the CEO, or root name server level. Each DNS server in the chain is responsible
for a particular zone, which is like a department or sub-zone of the root zone.
Each server will resolve requests if it has the information stored or cached. If a
request for a particular domain occurred recently, it could be resolved through
the cache, which is a history of previously resolved requests, or stored memory,
of that information. The caching can occur at any level in the DNS from the
individual web browser to the root server. If a request cannot be resolved at that
level, the query moves up the chain until a DNS computer can supply the
information.
114
Troubleshooting
Resolving Domain Requests
The requests that are made resolve domain names to IP addresses, for example
when a user types www.arialsoftware.com, the name is converted to our IP
address, 204.17.32.94. Since humans can't read and remember IP addresses
easily, domain names are used for most of the websites on the Internet.
Computers however can't resolve domain names, and must connect to remote
computers using the IP address. The DNS resolves domain names to IP
addresses authoritatively, meaning that the results are accurate.
Many local requests are handled at the web browser level, where the first simple
caching occurs. When someone visits a website, the resolved IP address for a
particular domain is stored in a local cache for quick retrieval when the user goes
back. No query needs to be made to the next level of name server until the cache
expires. The next level of the DNS is the most active; most of the minor details
are handled at what is called the recursor level.
The root servers are queried less frequently, since the information they store
seldom changes. The root servers manage the IP addresses for the top-level
domains (TLD), .org, .com, .net etc. Like the CEO of a corporation, the root level
operations manage the strategic direction of the entire organization and delegate
to the next level of DNS the lesser operations. If the request goes unresolved by
the local cache or the recursor cache, the query is passed up to check for
changes at the next level, and so on up the chain. The root name server may
change only a few times per year, but sub domain name servers change more
frequently the lower they appear in the hierarchy.
Use Proper DNS Entries
This is where it becomes imperative to link your domain with a well-behaved
domain name server. Typically this is one managed by a web host, or even in a
company IT department. A particular name server may resolve a number of
domain names, and will have a larger cache from where it can find more
information if necessary. If a query was made from a different computer to a
particular domain, that cached information can be pulled up for any new request
made by a different entity. This caching keeps the load off of the upper tiers of
the domain name system.
"DNS also distributes the responsibility for assigning domain names and
mapping them to IP networks by allowing an authoritative server for each
domain to keep track of its own changes, avoiding the need for a central
registrar to be continually consulted and updated."
The domain name server for a particular domain can include additional information
regarding the zone for which it is responsible. This is where mail exchange information,
authoritative DNS and reverse DNS are configured to ensure that a particular mail server
is authorized to send mail for a particular domain.
115
Enterprise Manual
These are typically text records appended to the DNS and list the appropriate
information. This is information that needs to be provided to the DNS server by
you, or your representative.
SPF and Domain Keys
Sender Policy Framework and Domain Keys are new authentication methods
being incorporated to validate the servers sending bulk email. Configuring these
features on your mail server will help with deliverability and your email reputation.
•
•
SPF
Domain Keys/DKIM
Domain Keys/DKIM
DomainKeys is an authentication system that is Independent of Simple Mail
Transfer Protocol (SMTP). Email messages are still sent using SMTP, but
DomainKeys is not an SMTP extension. Unlike SPF it deals with the email
headers that are outside the message envelope. DomainKeys was designed to
identify email spoofing and does not prevent abusive behavior, simply makes it
easier to track. Yahoo! implemented DomainKeys in 2004 for outbound email,
and since 2005 has tracked incoming keys.
To implement DomainKeys, the SMTP server operator specifies a public/private
key pair. The public key is located on the DNS server, and the private key is
configured on the SMTP server. When sending, the SMTP checks in with the
DNS and if verified, adds a DomainKeys-signature to the message headers. The
receiving server then reads the signature and checks the public key on the DNS
server and verifies the signature. It then uses that information to apply a rule or
deliver the email to the final recipient. If there is no match, the message can be
ignored since it is apparently a spoof. When Yahoo! receives an email that
doesn't have a key pair specified, it will simply indicate that in the message
headers as a neutral domain key signature. Someday however, they may
eventually reject email messages that are not digitally signed. To determine if a
remote server currently implements DomainKeys, look at the full headers of the
email received. A typical DomainKeys header looks like this:
Authentication-Results: mail.someisp.com from=email.somedomain.com;
domainkeys=pass (ok)
116
Troubleshooting
DomainKeys Check
Figure 2 DomainKeys Signature Check
SPF
Sender Policy Framework (SPF) is an extension of Simple Mail Transfer Protocol
(SMTP). SPF specifically addresses email spoofing, which is a common spam
practice. Spoofing refers to forging a sender's address. SPF verifies information
from the message envelope, focusing on the return-path email address. Like a
regular mail envelope, the email message envelope describes who the email
message is from and to whom it is going. There are other headers outside the
envelope headers that contain additional information that do not pertain to SPF.
The SPF record on the Domain Name System (DNS) server responsible for a
particular web domain is what determines the status, pass, fail, or softfail etc. that
is passed to the recipient mail server.
The SPF record specifies which email servers are allowed to send email for a
particular domain. The DNS server manages the network of computers
connected to a domain. These include the A record, which indicates the web
server for that domain, a pointer record (PTR) that manages the reverse DNS
lookups, and mail exchange (MX) records which are the mail servers responsible
for delivering email for the domain. SPF simply performs a check on one or more
of these computers to verify to the recipient mail server their status. In other
words; it authenticates them. SPF by itself does not prevent spam, the recipient
mail server reads the information in the SPF file and then makes some sort of
determination based on the status. There are many ISPs using SPF, MSN and
Gmail for example. The way to tell for sure is to look for the SPF status in the
email headers. A typical response from a server with SPF implemented may
have a header that looks like this: Received-SPF: pass
The SPF record is a text file built of mechanisms and qualifiers and is located on
the DNS server.
117
Enterprise Manual
Mechanisms:
all
Matches always, used for a default result like -all for all criteria not
matched by prior mechanisms.
a
If the domain name has an A record corresponding to the sender's
address, it will match. (That is, the mail comes directly from the
domain name.)
ip4
If the sender is in a given IPv4 range, match.
ip6
If the sender is in a given IPv6 range, match.
mx
If the domain name has an MX record resolving to the sender's
address, it will match. (That is, the mail comes from one of the
domain's mail servers.)
ptr
The domain Pointer record which manages reverse-DNS lookup
exists
If the given domain resolves, match (no matter the address it resolves
to).
include
If the included policy passes the test this mechanism matches. This is
typically used to include policies of more than one ISP.
Each mechanism can be combined with one of four qualifiers:
Qualifiers:
+
for a PASS result, this can be omitted, +mx is the same as mx.
?
for a NEUTRAL result interpreted like NONE (no policy).
~
for SOFTFAIL, a debugging aid between NEUTRAL and FAIL.
for FAIL, the mail should be rejected.
A very basic SPF text file may look like this:
"v=spf1 a mx ptr ip4:10.0.0.0 include:anotherdomain.com ~all"
The mechanisms go in order, so if the first mechanism matches, the
corresponding qualifier is assigned, and the rest of the SPF text is ignored. In
this example, the A record, MX record and PTR record are checked and any
computer listed as such will PASS, as well as the specific IP address 10.0.0.0.
All others will SOFTFAIL.
118
Troubleshooting
Sample SPF Check
Figure 1 A Simple Sample of an SPF Check
SMTP Server 1 sends mail to some ISP mail servers. The recipient mail
servers make a check on the DNS server associated with the SMTP server,
reading the SPF record. The IP address is specifically listed in the SPF record,
assigning a status of PASS. The Recipient mail servers apply the status to a
rule, and send the email.
SMTP Server 2 sends email to some ISP mail servers. The recipient mail server
checks the DNS server associated with the SMTP server, reading the SPF
record. The IP address is not specifically listed. The next mechanism, -all
indicates that if none of the previous checks passed, then a FAIL status should
be sent to the recipient mail server. In this example, one mail server doesn't care
what the SPF indicates; it sends the email messages out anyway. The other
119
Enterprise Manual
implements a rule based on the FAIL status passed to it from the DNS server
and sends a bounce email notification.
120
Troubleshooting
Troubleshooting
Debugging
If you run into trouble with your Campaign software, there are a few things you
should check before calling technical support.
If your click-through/opened email tracking links do not work:
Check your Default Campaign Configuration, make sure you have a public
domain name assigned when using click-throughs, opened email tracking,
and web-based unsubscribes.
Make sure you have the proper merge fields in your message.
Make sure you have a number field in your database with a default value
of zero (0) selected to update.
If you do not see any table/query information when you connect to a database:
Check your Database Connection in the Database Shortcuts section. You
may need to check the source DSN and make sure that it is configured
properly.
Make sure you have permission to read and write back to the database.
Check your filter criteria and SQL syntax.
Make sure that your table name does not have a space or special
character in it, only text and underscores.
If database write back features are not getting updated in your database:
Check your Database to ensure there are no spaces or special characters
in the database, table, query or field names.
Check your POP account username and password, reenter if necessary.
You can test the POP account connection using the Test button on the
appropriate tabs.
Check to make sure your bounce and unsubscribe email addresses are
set up properly.
If emails are not being delivered, or are only going to internal addresses:
Check your SMTP server to ensure that relaying is allowed for the
Campaign machine.
Make sure that if your SMTP server requires authentication you have the
username and password entered on the Sending tab.
Debug Mode
The debug feature of Campaign can assist with troubleshooting issues with mail
delivery and POP account checking.
121
Enterprise Manual
1. Turn on debug mode. This can be done using the Sever Manager
window like the example below, or if you are running Campaign Enterprise
as a service you can turn debug mode on through the Administration area.
Click on Administration > Server Manager Status and then check the
Debug Mode check box.
By activating Debug Mode the conversation between Campaign Enterprise and
the SMTP server is recorded in the tracesmtp.log log file. The POP server
conversations is recorded in the tracebatch.log file. Database connection errors
will record to the trace.log file regardless of whether debug mode is turned on or
not. The tracepop.log file records the conversation between the software and the
POP accounts it is checking. From the server manager window you can view
any of the trace files by going to Debug and clicking on the file you want to view,
or you can view the files by clicking on their corresponding icons on the Server
Manager Status page. The pathway to these files for a typical installation are:
C:\Program Files\CampaignEnterprise11\www\debug\tracesmtp.log
C:\Program Files\CampaignEnterprise11\www\debug\trace.log
C:\Program Files\CampaignEnterprise11\www\debug\tracebatch.log
C:\Program Files\CampaignEnterprise11\www\debug\tracepop.log
Debug Mode will be turned off when you close the Campaign Server Manager
window or by un-checking Debug Mode.
Success/Fail Log Files
The success/fail log files show which emails were sent to the SMTP Server and
which ones were not sent. The check box on the Miscellaneous tab must be
checked in order for the success/fail logs to be generated.
The log files can be found in the Campaign Enterprise Logs folder. On a
typical installation the path to the file will be as follows:
C:\Program Files\CampaignEnterprise11\www\Logs\CampaignID1Success-2005113001017812.txt
C:\Program Files\CampaignEnterprise11\www\Logs\CampaignID1Failed-20051130017812.txt
122
Troubleshooting
If the email filter is not checked on the Data source page (Intermediate Feature
Set), then no failed log files are generated.
Access Troubleshooting
Does your Table/Query Name drop down list look like the picture below? Spaces
in the table name may be the problem.
If your Table/Query Name drop down list is not populated there may be a space
or a character other than underscores and text in your table name. Remove any
spaces or special characters, and then click refresh on the Datasource tab. If
the drop down list is still not populated check the Database Source and make
sure that it is pointing to the correct directory. If you are using a DSN connection
make sure it is pointing to the directory where your databases are stored.
If you are able to see the Table/Query Name but the Email Address Field drop
down list is not populated, check your field names for spaces or special
characters, remove the spaces and any characters other than underscores and
text.
Trace Logs
Trace.log: This log file records errors when writing to the database. Some
problems will record automatically even if debug mode is not yet enabled. It can
be found in the following path for a typical installation
c:\program files\CampaignEnterprise11\www\debug\trace.log
SMTP.log: When Debug Mode is enabled, Campaign will write the entire
conversation with the SMTP server to this log file. It can be found in the following
path for a typical installation
c:\program files\CampaignEnterprise11\www\debug\tracesmtp.log
Batch.log: When Debug Mode is enabled, Campaign will write the entire
conversation with the database when writing back Bounces, Unsubscribes, ClickThroughs, Opens and Subscribe handling. It can be found in the following path
for a typical installation
c:\program files\CampaignEnterprise11\www\debug\tracebatch.log
123
Enterprise Manual
POP.log: When Debug Mode is enabled, Campaign will write the entire
conversation with the POP server used for Bounces, Unsubscribe and Subscribe
handling. It can be found in the following path for a typical installation
c:\program files\CampaignEnterprise11\www\debug\tracepop.log
Install.log: During the campaign installation a log file is generated. It can be
found in the following path for a typical installation
c:\program files\CampaignEnterprise11\www\install.log.
Web-server Log Files
Once Web-server logging has been enabled in the default campaign
configuration area, log files will be generated in the following directory,
C:\Program Files\CampaignEnterprise11\Logs. The file names will start with
DART and include the date they were generated, for example,
DART06122004.log. The file contains information about each request made to
the Campaign Enterprise web-server:
#Version: 1.0
#Date: 2006-01-06 09:01:00
#Fields: time c-ip s-ip s-port cs-method cs-uri-stem sc-status
09:01:32 10.10.35.9 10.10.35.26 81 GET / 403
This file can then be read by a web log analyzing tool.
The log files generated by web-server logging will grow very quickly since
each request to the web-server is logged in the DART files.
124
Glossary
.
.csv: The file extention for a comma separated file.
.txt: The file extention for a text file.
A
attachment: A file that can be added to the messages and massively increaing
the message size.
B
bandwidth: The size of your Internet connection.
C
CAN-SPAM: The law in the US that describes how you can legally send bulk
email.
cursors: Database markers used to retrieve information more readily.
D
database: A program that stores and manages data in relational or flat tables.
DNS: Domain Name System
DSN: Data Source Name
E
EHLO: A secure command to initate an email through a mail server. Unsecured
is HELO.
embedded images: Images stored on the local campaign computer. They are
sent as specialized attachments so will greatly affect the message size.
EML Files: EML is the file extension for the email files that are going out. EML
files can be dropped directly into the message queue.
ESP: Email Service Provider
F
Feedback Loops: An email account that monitors third party recipients for "this
is spam" complaints.
125
Enterprise Manual
fully qualified URL: The full web address to an image or document including the
http:// reference.
H
HELO: A command send to an SMTP server to initiate a mail connection. HELO
is unsecured, EHLO is secured.
HTML: Hypertext Markup Language, the code used to build web pages and send
web emails.
hyperlinks: The text in the email on which a user clicks to be taken to a web
page.
I
IMAP4: Another mail box protocol used by Campaign to manage bounces and
email based unsubscribe requests. When configured properly, an IMAP
account can manage both bounces and unsubscribe requests.
IP address: Internet Protocol address, the way computers identify each other.
ISP: Internet Service Provider
M
MX record: Mail Exchange record
O
ODBC: Open Database Connectivity. Campagin can connect to an ODBC
compliant database.
OLE DB: A DSNless database connection used in place of an ODBC.
P
POP3: A mail box protocol used by Campaign to manage bounced emails and
email based unsubscribe requests.
Port: The endpoint of a pathway for a TCP/IP connection used for computer
networking.
privacy policy: A written statement that must be included or linked to in your
emails to be CAN-SPAM compliant.
Public IP: An IP addressed that is exposed to the world through the Internet.
Domain names resolve to IPs when computers communicate.
Q
126
Glossary
queue: A line. The emails are lined up to go out through the server.
R
relative image paths: These are abbreviated image paths used frequently for
web pages. Web based images in email must have a fully qualified URL,
not a relative path.
S
service: A computer application that can be configured to run all the time, even if
the computer reboots.
SMTP: The main sending protocol used to send emails, Stands for Simple Mail
Transfer Protocol.
SP: Abbreviation for stored procedure.
SPAM: Unsolicited bulk email.
SQL: Structured query language, the syntax used to write select statements for
database record selection.
SSL: Secure Socket Layer also called TLS by some servers.
Stored Procedure: A command that runs on your database that can update
records, write to files, or generate reports, also abbreviated SP. These
commands are extremely versitile.
subscriber: Someone who signs up to receive the email messages you are
sending.
T
TLS: Transport Layer Security, interchangable with SSL.
U
URL: Uniform Resource Locator
W
web based images: Images hosted elsewhere on a public web server.
Recommended over embedded images.
127