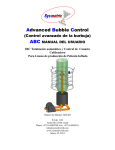
Download ABC Manual - Sysmetric. Simply accurate.
Transcript
Advanced Bubble Control ABC USER MANUAL Fully Automatic IBC and Calibrator Cage Control For Blown Film Production Lines Manual Number: ABC203 P.O.B. 1122 Afula Illit 18550, Israel Phone: +972-4-6405857, Fax: +972-4-6405911 [email protected] www.sysmetric-ltd.com October 25, 2013 User Manual ABC Table of Contents 1. 2. 3. 4. 5. General Description .......................................................................................................................... 4 1.1. Principle of Operation ....................................................................................................................4 1.2. Width Control – Radius Sensors .....................................................................................................5 1.3. Calibrator Cage Control – Cage Sensors .......................................................................................6 1.4. Blowers and Balancing Valve Control ............................................................................................7 1.5. Width Calibration ...........................................................................................................................8 1.6. Modeling Control ............................................................................................................................9 1.7. Operator Display ..........................................................................................................................10 1.7.1. Main Screen .......................................................................................................................11 1.7.2. Width Graph ......................................................................................................................12 1.7.3. Service Screen ...................................................................................................................13 1.7.4. Sensor Service Screen ........................................................................................................14 1.7.5. IBC Service Screen ............................................................................................................15 1.7.6. General Service Screen ......................................................................................................16 Installation ....................................................................................................................................... 17 2.1. Radius Sensors Installation...........................................................................................................17 2.2. Compensation Sensor Installation ................................................................................................18 2.3. Cage Sensors Installation .............................................................................................................19 2.4. DBC Installation and Sensor Wiring ............................................................................................21 2.5. Control Cabinet Installation .........................................................................................................22 2.6. Electrical Wiring...........................................................................................................................23 2.6.1. Sensors and DBC Wiring ...................................................................................................23 2.6.2. Balancing Valve Wiring ....................................................................................................23 2.6.3. Power Wiring .....................................................................................................................23 2.6.4. Control Signals Wiring ......................................................................................................23 2.7. Installation Parameters ................................................................................................................25 2.7.1. Sensors Installation Parameters .........................................................................................25 2.7.2. IBC Blowers and Balancing Valve Installation Parameters...............................................26 2.7.3. General Parameters ............................................................................................................27 Checking the System ....................................................................................................................... 28 3.1. Line On and Line Speed Signals ...................................................................................................28 3.2. Extruder On Signal .......................................................................................................................29 3.3. Intake and Exhaust Blowers..........................................................................................................29 3.4. Balancing Valve ............................................................................................................................30 3.5. Calibrator Cage Control ..............................................................................................................31 3.6. Sensors ..........................................................................................................................................31 Tuning .............................................................................................................................................. 32 4.1. Cage Factor – Coarse Tuning ......................................................................................................33 4.2. Blowers Ratio and Intake Blower Capacity ..................................................................................34 4.3. Balancing Valve Control Value ....................................................................................................35 4.4. Cage Factor – Fine Tuning...........................................................................................................36 4.5. Finishing the Tuning Procedure ...................................................................................................36 System Operation ............................................................................................................................ 37 5.1. Starting Production.......................................................................................................................37 -2- www.sysmetric-ltd.com ABC User Manual 5.2. Control Mode and Control Stages ................................................................................................38 5.3. Changing Product (Changing Width) ...........................................................................................39 5.4. Width Calibration .........................................................................................................................40 5.5. Automatic Width Calibration ........................................................................................................41 6. Service and Maintenance ................................................................................................................ 42 6.1. Alarms ...........................................................................................................................................42 6.1.1. Alarm Log..........................................................................................................................42 6.1.2. Alarms Messages ...............................................................................................................43 6.2. Ultrasonic Sensors ........................................................................................................................47 6.3. Calibrator Cage ............................................................................................................................49 6.4. Troubleshooting ............................................................................................................................50 Appendix A – NS10 Screens ...................................................................................................................... 52 Appendix B – Parameters Synopsis and Common Values ...................................................................... 53 Appendix C – Assembly Example ............................................................................................................. 55 www.sysmetric-ltd.com -3- User Manual 1. ABC General Description 1.1. Principle of Operation The basic IBC (Internal Bubble Cooling) operation is to synchronize the volume of cold air, pumped into the bubble, with the volume of hot air being drawn out of the bubble. To increase the bubble width, the exhaust rate should be reduced correctly (or intake increased) causing the bubble to inflate by the extra air intake to the right size. The opposite action is carried out in order to reduce web width. To improve the accuracy, by enabling fast reaction, a balancing valve is added and located (usually) on the exhaust pass. Since the width accuracy and stability highly depends on the calibrator cage position it should be fixed to an optimum diameter. There are two basic cage–bubble relationships (Cage Gap). The first and most widely used is whereby the cage acts as a calibrator, meaning that the bubble is “blown into” the cage and freezes in it. The second is when the cage is larger than the bubble and only supports the bubble. While the first Cage Gap produces better accuracy, it may also lead to some scratches and marks on the web. Sysmetric’s ABC system controls all these variables. It uses eight ultrasonic sensors that measure the “frozen” bubble size, the calibrator cage diameter, the cage-bubble distance (Gap) and compensate for atmospheric changes. The ABC system uses “modeling” technique. This technique is the most advanced control method available on the market today. It can forecast changes that will affect the web and take the required actions in time. The system controls the calibrator cage motor, the blowers speed and the balancing valve, allowing continuous changes of any parameter during line operation. -4- www.sysmetric-ltd.com ABC User Manual 1.2. Width Control – Radius Sensors Four long range ultrasonic sensors (Radius Sensors) are statically mounted above the cage where the bubble is almost frosted. Sensors 1, 2 and 3 measure the distance to the bubble and by knowing their exact position, three radiuses of the bubble are calculated. The fourth sensor is used to calculate a barometric compensation parameter which is used for eliminating barometric effects on the width accuracy. The four sensors are synchronized (the sonic pulses are sequenced) to eliminate any possible interference and to allow fast and stable distance reading. 1 Static target 2 R1 R2 R3 4 Barometric Compensation Sensor 3 Cage Rollers Bubble Figure 1.2-1 – Radius Sensors Note: barometric compensation covers temperature change as well as pressure, humidity and other effects that produce sonic errors but although accurate bubble size is measured here, the accurate web width cannot be calculated directly. The bubble at this point is very hot and is about to shrink as its temperature reduces to the ambient temperature. This shrinkage is also compensated by the ABC system as explained in the width calibration chapter. www.sysmetric-ltd.com -5- User Manual ABC 1.3. Calibrator Cage Control – Cage Sensors Four short range sensors (Cage Sensors), sensors 5, 6, 7 and 8, are mounted on the calibrator cage arms. They measure the gap between the cage and the bubble. Sensors 5 and 6 are used for positioning the calibrator cage at the correct diameter. Using the readings from the radius sensors and adding to it the average top distance (CP5 and CP6), the system “knows” the exact actual cage diameter. It calculates the required diameter according to the expected radius (taking into account the bubble shrinkage), and the desired gap (either positive or negative). The required and the actual values are used for controlling the cage position and bringing it to the correct position automatically. Sensors 7 and 8 measure the gap between the cage and the bubble at the bottom of the cage. This gap is compared to a required gap and the error is used to control the position of the balancing valve. R 1, 2, 3 CP5 CP6 6 5 Cage Rollers 8 7 FP8 Bubble FP7 Extruder die Figure 1.3-1 – Cage Sensors Note: the four cage sensors (sensors 5, 6, 7 and 8) are optional. With production lines that either do not have a calibrator cage when the cage acts only as a support, the cage sensors can be omitted. -6- www.sysmetric-ltd.com ABC User Manual 1.4. Blowers and Balancing Valve Control Intake blower pushes ambient air through a heat exchanger and into the bubble, while an exhaust blower pulls the hot air out. The speed of the intake blower is set according to the desired cooling power and the exhaust blower speed is controlled by the system so that the speeds of the two IBC blowers are fully synchronized. The blowers follow parabolic curve that perform linear cooling behavior so that the cooling power can be changed from 10% to 100% during production with minor (if any) effect on the bubble width. To overcome the limited respond of the blowers’ drivers, because of the blower’s inertia, a servo operated throttle (Balancing Valve) is mounted into the exhaust pipe and allows fast air flow changes. This balancing valve is operated by a servo actuator that does not allow any backlash, friction or air flow drag to reduce its accuracy. The control scheme positions the balancing valve at a constant steady position until it slowly adjusts the exhaust blower’s speed. Bubble 0/4-20mA or 0-10V or Modbus or Devicenet 0/4-20mA or 0-10V Balancing Valve Figure 1.4-1 – Blower and Balancing Valve Notes: The throttle is mounted at the exhaust pipe so that the extra heat produced due to its existence will not affect the cooling power and will not change the frost level (with positive gap value). Unlike throttle actuators that use spring and pneumatic pistons, the servo actuator always has pin point accuracy and maintains a stable position. www.sysmetric-ltd.com -7- User Manual ABC 1.5. Width Calibration Though physics state a clear relationship between the radius of the bubble and the width of the lay-flat, this is not true in a blown film line. The radius should be controlled to a slightly larger size so that the shrinking effect, caused by the temperature change, will bring the lay-flat to the exact required lay-flat width. This is done either automatically or manually: 1. Automatic calibration – when a web guiding system is installed its reading can be directed to the ABC system for automatic calibration. This allows the system to automatically update the shrinkage parameter of the product and maintain accurate lay-flat width. 2. Manual calibration – in manual mode the operator enters a manually measured width and the system calculates the shrinkage parameter accordingly. R W W ≠ л×R Figure 1.5-1 – Width Calibration Note: the shrinkage parameter changes slightly as capacities, cooling power or ambient temperature vary, so it is best to have automatic feedback. -8- www.sysmetric-ltd.com ABC User Manual 1.6. Modeling Control Several types of control formulas are usually used. The most common is the PID control and its derivatives. A better and newer control type is the Fuzzy-Logic. These two control formulas calculate the error between the set and the actual width and adjust the control accordingly. A third control formula, modeling, takes into consideration the “whole picture” with the actual process dimensions: T – the tower height C – the collapsing frame height F – the feedback distance (either manual or automatic) The modeling control follows the reading taken from the bubble all along the production line. This enables very accurate control according to the actual effecting parameters. For example, when a temporary width error occurs, it usually “copies” itself as it gets to the take-off nip. This effect extends the stability time. Modeling “waits” until the interference reaches the nip and at the right time it changes the air flow in the opposite direction. Thus, if any interference occurs, the bubble will stabilize immediately. Modeling even takes into consideration the fact that the bubble “flows” into the nip via the collapsing frame that gradually folds the web. The same technique is used to synchronize the exhaust blower to the intake blower speed. It enables vast changes in blower speed with minor effect on the lay-flat width. It is so stable that for many processes the balancing valve can be eliminated. C T F R Figure 1.6-1 – Modeling Control www.sysmetric-ltd.com -9- User Manual ABC 1.7. Operator Display Figure 1.7-1 – System Display The system display is Omron’s standard industrial color touch-screen panel. Every operation on the display is carried out by gently pressing on the display. Activating a button is carried out by gently pressing on the display where the button appears. Changing numeric values is carried out by gently pressing on the display where the value is written. Different sizes of display are available: 5, 8, 10 and 12 inch. The commonly used display is the 5 inch. The 10 inch display is used where the ABC is part of a full line control system. The advantage of the 10 inch display is the ability to contain a great deal of data in one screen. This is useful mainly during the installation of the system and for monitoring the system when trying to identify a source of a control error. For normal operation the 5 inch display is as good as the 10 inch. For convenience only, this manual uses pictures of the 5 inch screens in the explanations and examples. The 10 inch display holds the same data although it is arranged differently in the screens. General views of the 10 inch screens are shown in the appendix. Several screens have one or more editable numeric items (e.g. the required lay-flat width). To modify the value of an item, take the following steps: 1. Select the item that you want to edit by pressing gently on the display where that item is written. A numeric keypad will appear on the display. 2. Enter the new value using the numeric keypad. 3. Press the Enter key to confirm the change. The keypad screen will close and the item will receive the new value. Cancel editing by pressing the X button in the keypad screen. - 10 - www.sysmetric-ltd.com ABC User Manual Figure 1.7-2 – Numeric Keypad Note: in cases where the ABC is part of a line control system, it can be equipped with a communication unit (Omron CLK, Devicenet, Modbus, Profibus etc.) so that the local display can be omitted and the operation will be from the line’s operation panel. This enables “tailored” adaptation by any manufacturer’s line control system. The following is a brief description of the screens of the ABC system. More detailed descriptions appear further on in this manual in the relevant chapters. 1.7.1. Main Screen The main screen is used in the regular operation of the ABC system. This screen enables setting the required lay-flat width and the bubble-cage gap, calibrating the width and it indicates the system’s status. Figure 1.7-3 – Main Screen Set/Act Width – the set and the actual lay-flat width. Set/Act Gap – the set and the actual gap between the bubble and the calibrator cage. Width Calibration – manual calibration of the shrinkage parameter. I, II, III – indication flags showing the current system’s control stage. Line Speed – the current line speed. www.sysmetric-ltd.com - 11 - User Manual ABC Intake – the intake blower’s speed. Exhaust – the exhaust blower’s speed. Pressing Graph shows graphs of the width error and calibrator cage movement. This screen is useful for tracking the system’s performance. Service includes several screens for setting the system’s parameters. The Service screens are used during installation, tuning and maintenance of the system. Pressing Alarms opens the alarm log of the system. 1.7.2. Width Graph The Width Graph screen shows the width error and the movements of the calibrator cage (opening and closing). This graph is useful for verifying the accuracy of the width. The graph can show the last 5 minutes or the last 60 minutes. Maximum Cage Opened Minimum Cage Closed Figure 1.7-4 – Width Graph 5min – shows a graph of the last 5 minutes. 60min – shows a graph of the last 60 minutes. EXIT – closes the graph screen. Maximum – the maximum value on the error axis. Press it to change the value. Minimum – the minimum value on the error axis. This value updates automatically according to the maximum value. - 12 - www.sysmetric-ltd.com ABC User Manual 1.7.3. Service Screen The Service Screen enables changing the display’s data: date and time, brightness and contrast and selecting the interface language. A set of service screens are available from this screen: SENSOR, IBC and GENERAL. Figure 1.7-5 – Service Screen Date & Time – set the current date and time (used in the alarm log). Brightness – select high, middle or low display brightness. Contrast – select high or low display contrast. Language – select the interface language (contact Sysmetric for additional languages). SENSOR – switch to the Sensor Service screen. IBC – switch to the blowers, balancing valve and cage service screen. GENERAL – switch to a service screen with general control data. www.sysmetric-ltd.com - 13 - User Manual ABC 1.7.4. Sensor Service Screen The Sensor Service screen shows the current reading of each sensor. Pressing Radius Sensors and Cage Sensors buttons opens detailed service screens for the sensors. It is used during installation and for maintenance. See the relevant chapters for further details. Figure 1.7-6 – Sensor Service Screen Radius 1, 2, 3 – three radiuses of the bubble measured by sensors 1, 2 and 3. Reference 4 – the distance measured by the compensation sensor 4. Cage 5 and 6 – the gap between the rolls and the bubble at the top of the cage. Gap 7 and 8 – the gap between the rolls and the bubble at the bottom of the cage. Barometric Factor – a calculated factor for compensating barometric effects on the measured bubble’s radius. - 14 - www.sysmetric-ltd.com ABC User Manual 1.7.5. IBC Service Screen The IBC Service Screen is used for controlling the IBC blowers, the balancing valve and the calibrator cage. Pressing Balancing Valve, Cage Control or IBC Blowers opens detailed service screens for the balancing valve, the cage and the blowers accordingly. These screens are used during installation and for maintenance. See the relevant chapters for further details. Figure 1.7-7 – IBC Service Screen Control Value – determines the balancing valve’s response level. Open - Close – shows the current position of the balancing valve. 0% the valve is completely open, 100% the valve is completely closed. Cage Factor – this factor represents the time to movement ratio of the calibrator cage. Set and Actual Radius – the set and the actual radius of the calibrator cage. Blowers Ratio – the ratio between the intake blower and the exhaust blower. Control Range – the allowed range for the Control Ratio. Control Ratio – the calculated ratio between the intake and the exhaust blowers. Actual Ratio – the current actual ratio between the intake and the exhaust blowers. Intake Speed – the current speed of the intake blower. Exhaust Speed – the current speed of the exhaust blower. www.sysmetric-ltd.com - 15 - User Manual ABC 1.7.6. General Service Screen The General Service screen is used for entering some general control parameters and selecting the control mode of the system. For convenience it also enables changing the set width and gap as in the Main screen. This screen is used mainly during installation and for maintenance. See the relevant chapters for further details. Figure 1.7-8 – General Service Screen Tower Height – the height of the production tower. Collapsing Frame – the height of the collapsing frames. Feedback – the distance to the feedback point. Width Error Threshold – a threshold for width error alarm. Maximum and Actual Line Speed – the maximum and the current line speed. Manual, Auto and Continue – control modes of the ABC system. I, II, III – indication flags showing the current control stage of the system. Set and Actual Width and Gap – the set and the actual width and gap. Cal – width calibration value. - 16 - www.sysmetric-ltd.com ABC 2. User Manual Installation 2.1. Radius Sensors Installation The three radius sensors (sensors 1, 2 and 3) are 30mm cylindrical ultrasonic gages. They should be mounted on top of the calibrator cage with the following points taken into consideration: The sensors should be pointing at the bubble’s center and placed at about 120° from each other. They should be mounted 250–400mm above the top bubble supporting arm. The minimum distance between the gage and bubble surface should be 250mm (when producing the maximum lay-flat width). The maximum reading distance is 1500mm (different gages can be used for larger/smaller bubbles). The exact distance from the gages to the center of the die should be measured and entered as the installed distance parameter at the radius sensors service screen. The system is supplied with standard brackets for the radius sensors. Some cages might require different brackets. Max 1500mm Min 250mm 250-400mm Top supporting arm Figure 2.1-1 – Radius Sensors Installation Figure 2.1-2 – Radius Sensor www.sysmetric-ltd.com - 17 - User Manual ABC 2.2. Compensation Sensor Installation The compensation sensor (sensor 4) used for compensating barometric effects reads a fixed known distance. It should be installed close to the radius sensors (on top of the cage) with the following points taken into consideration: It should be mounted in front of a static 100x100mm rectangular target. The path to the target should be clear from any objects. The distance to the target should be 200-300mm. The exact distance should be measured and entered in the Reference Target parameter in the Service screen. The system is supplied with a bracket for the compensation sensor. 200-300mm Figure 2.2-1 – Compensation Sensor Installation Figure 2.2-2 – Compensation Sensor - 18 - www.sysmetric-ltd.com ABC User Manual 2.3. Cage Sensors Installation The four cage sensors (sensors 5, 6, 7 and 8) should be mounted on the arms of the calibration cage so that they move with the cage as it opens and closes. They can be mounted on the cage either vertically or horizontally with the following points taken into Arms consideration: hinge The sensors should be installed vertically above (vertically below for sensors 7 and 8) the center of the "roller area". The sensors must point to the center of Cage ΦΦ the bubble. Arms The top gages (sensors 5 and 6) should be 100-200mm above the top arm at a distance of 80mm from the bubble Measuring surface. Arms Direction The bottom sensors (sensors 7 and 8) Binding Bar should be at about the same height of the bottom rolls at the same (80mm) Top support ring distance (usually they will be mounted on the second row of rolls). Make sure that the sensors do not About 10mm Measuring area collide with any part of the cage From Ring pointing at mechanism when opening the cage bubble center to its maximum diameter and when Cage Sensor (back view) closing the cage to its minimum diameter. The sensors are supplied with standard brackets but depending on the arm mechanism some cages might need special brackets. Measuring area directed to bubble center Cage Sensor (side view) Cage Rollers 80mm Figure 2.3-1 – Cage Sensors Installation www.sysmetric-ltd.com - 19 - User Manual ABC Figure 2.3-2 – Standard Bracket for Cage Sensors Figure 2.3-3 – Cage Sensor - 20 - www.sysmetric-ltd.com ABC User Manual 2.4. DBC Installation and Sensor Wiring The Digital Bubble Controller (DBC) is Sysmetric’s special electronic controller for operating the ultrasonic sensors. The DBC is installed in a protective box (Junction Box) that should be mounted on the cage. After mounting the junction box on the cage, wire the 8 sensors (3 radius sensors, the compensation sensor and the 4 cage sensors) to the DBC and wire the DBC to the PLC. See electrical drawings for details. Figure 2.4-1 – Digital Bubble Controller (DBC) www.sysmetric-ltd.com - 21 - User Manual ABC 2.5. Control Cabinet Installation The control cabinet contains the PLC, the operation display and terminals for wiring the ABC system. The wiring includes the: Digital Bubble Controller (DBC) Balancing valve Intake blower speed – input signal from the blower’s driver 0-10V Exhaust blower speed – output signal to the blower’s driver 0-10V Take-off nip speed (line speed) – input signal from the nip’s driver 0-10V Calibrator cage position motor – output signals for opening and closing the cage See electrical drawings for details. Two types of layout are possible: Integrated version – when the ABC is part of a full line control the cabinet can be mounted close to the calibrator cage and wired via communication to the line control system (Modbus, Profibus, Devicenet or CLK). Some or all of the control signals can be sent to the ABC system through the communication instead of being wired to the ABC cabinet. In this layout operation is carried out via the operation panel of the line control system. Standalone version – when the ABC is a standalone system the operation display is on the ABC cabinet and should be mounted in a position where it will be easy and convenient for the operator to reach the display. In this layout all the signals will be wired directly to the cabinet. Note: the operation display can still be mounted remotely (integrated in the main operation panel of the production line). Contact Sysmetric regarding this option. 600mm 150mm 400mm Figure 2.5-1 – ABC control cabinet Note: wire entry is possible via the bottom and/or top cover. - 22 - www.sysmetric-ltd.com ABC User Manual 2.6. Electrical Wiring Electrical wiring of the ABC system includes the following: 1. Wiring the sensors to the DBC in the junction box and wiring the DBC to the PLC. 2. Wiring the balancing valve to the PLC. 3. Wiring power to the PLC. 4. Wiring control signals between the PLC and the production line: a. Line speed (take-off nip speed). b. Intake blower speed. c. Exhaust blower speed. d. Opening and closing the calibrator cage. e. Line on (take-off nip on) and extruder on signals. The following is a short description of the electrical wiring and signals. Refer to the electrical wiring for details. 2.6.1. Sensors and DBC Wiring Each sensor is wired with a 4 lead cable to the DBC. 8 cables for wiring the sensors are supplied with the system. The DBC is wired to the PLC with a shielded pair 3x2 cable. The system is supplied with a 15m cable for that purpose. 2.6.2. Balancing Valve Wiring The balancing valve is wired with a shielded pair 3x2 cable. The system is supplied with a 15m cable for that purpose. 2.6.3. Power Wiring The PLC cabinet should be wired to the power supply. The power supply to the ABC system should be 110-230Volt, 50/60Hz, 6Amp. 2.6.4. Control Signals Wiring a. Line speed – an analog signal 0-10VDC from the take-off nip motor driver to the PLC. This signal indicates the current speed of the line (the speed of the take-off nip) where 0VDC is when the line is at zero speed and 10VDC is when the line is at maximum speed. b. Intake blower speed – an analog signal 0-10VDC from the intake blower motor driver to the PLC. This signal indicates the current speed of the intake blower where 0VDC is when the blower is at zero speed and 10VDC is when the blower is at its maximum speed. c. Exhaust blower speed – an analog signal 0-10VDC from the PLC to the exhaust blower motor driver. This signal controls the speed of the exhaust blower where 0VDC is zero speed and 10VDC is maximum speed. d. Opening and closing the calibrator cage – the manual opening and closing signals from the buttons (or joystick) on the operator panel should be wired to the PLC and the PLC should be wired to the contactors that open and close the cage. In this www.sysmetric-ltd.com - 23 - User Manual ABC way, during manual operation (when the line is off) the PLC opens and closes the cage according to the commands of the operator and during automatic operation (when the line is working) manual commands are ignored and only the PLC controls the cage. e. Line On and Extruder On signals – these two on/off signals indicate when the take-off nip is working and when the extruder is working. - 24 - www.sysmetric-ltd.com ABC User Manual 2.7. Installation Parameters Several control parameters should be entered during the installation of the system via the Service screens. These parameters include sensor installation parameters, production line dimensions and more. 2.7.1. Sensors Installation Parameters Press SERVICE on the main screen (enter the password “4321”) and press SENSOR to switch to the Sensor Service screen. Figure 2.7-1 – Sensor screens 1. Press Radius Sensors and enter the installation distance of each sensor. For the radius sensors (Radius 1, 2 and 3) it is the distance from the face of the sensor to the center of the die. For the compensation sensors (Ref 4) it is the distance from the face of the sensor to the reference target. 2. Press Cage Sensors and enter the installation distance of the cage sensors (Cage 5, 6 and Gap 7, 8). This is the distance from the face of the sensor’s housing to the face of the cage’s rolls (the distance to the bubble). Note: although each sensor can have a different installation distance it is important that each group of sensors will have the same installation distance (the groups are: radius sensors 1, 2, 3 the cage sensors 5, 6 and the gap sensors 7, 8). Use a different installation distance only if there are mechanical limitations in the installation. www.sysmetric-ltd.com - 25 - User Manual ABC 2.7.2. IBC Blowers and Balancing Valve Installation Parameters Initial values should be set for the IBC blowers and the balancing valve. These initial values are for starting the ABC control and they should be adjusted later as explained in the Tuning chapter. Press IBC to switch to the IBC service screen (from the main screen first press SERVICE and enter the password “4321”). Figure 2.7-2 – IBC screen Press Balancing Valve and enter the following parameters: Zero Position – 50.0%. This will set the balancing valve to its center position. Valve Type – normally open or normally closed according to the valve’s type. The type of the valve indicates its position when the control signal is zero. To change the type, press the Normally Open button. Note: Sysmetric’s balancing valve is a normally open valve. Press IBC Blowers and enter the following parameters: Blowers Ratio – 1.000. This will make the exhaust blower speed the same as the intake blower speed. In blower – 2.000M3/s. This is the intake blower capacity (the exact capacity will be adjusted later). Ramp Time – the time of accelerating the blowers from zero to full speed and decelerating from full to zero. The ramp time is a parameter of the blowers’ motors drivers. The ramp time must be equal for accelerating and decelerating and it must be - 26 - www.sysmetric-ltd.com ABC User Manual equal in the intake blower and the exhaust blower. For best performance of the ABC system the ramp time should be as low as possible, recommended values are 5-10 seconds. Note: the blowers need braking resistors to enable short ramp time. Max speed – is the resolution of the blowers’ speed (usually the resolution of the analog input and output of the PLC). In the standalone version of the ABC system the resolution is 2047. 2.7.3. General Parameters Press General to switch to the General Service screen (from the main screen first press SERVICE and enter the password “4321”) and enter the following parameters: Tower Height – the distance from the radius sensors (the top of the calibrator cage) to the take-off nip. Collapsing Frame – the height of the collapsing frames. Feedback – the distance from the radius sensors (the top of the calibrator cage) to the calibration point (whereby the width is measured for calibrating the shrinkage parameter). Maximum Line Speed – the maximum speed of the take-off nip. Figure 2.7-3 – General screen www.sysmetric-ltd.com - 27 - User Manual 3. ABC Checking the System After completing the installation of the ABC system, follow these steps to verify correct installation and operation of the system: 3.1. Line On and Line Speed Signals 1. In the main screen press SERVICE and then press GENERAL. 2. Turn on the take-off nip. 3. Increase the take-off speed and verify that the Actual Line Speed in the display is correct (matches the real speed of the nip). If not, check the electrical wiring (the line on signal and the line speed signal) and the value of Maximum Line Speed. 4. Turn off the take-off nip. Note: it is recommended to measure at this time the real line speed with a tachometer directly on the take-off nip. Errors in the line speed will reduce the performance of the system and will be hard to detect afterwards. Figure 3.1-1 – Checking the Line Speed - 28 - www.sysmetric-ltd.com ABC User Manual 3.2. Extruder On Signal 1. 2. 3. 4. Press Main in the control display to switch to the main screen. Turn on the take-off nip and the extruder. Set the take-off speed above 5 Meter/min. Make sure that stage I flag starts blinking. If not, check the electrical wiring and that the line speed is above 5Meter/min. 5. Turn off the take-off nip and the extruder and make sure that the stage I flag turns off. Stage I Flag Figure 3.2-1 – Checking Extruder On 3.3. Intake and Exhaust Blowers 1. Make sure that the take-off nip is off. 2. In the main screen press SERVICE (enter the password “4321”) and then press IBC. 3. Make sure that Blowers Ratio is 1.000, In Blower is 2.000M3/s and that Ramp Time and Max Speed are set correctly as explained in the installation chapter. 4. Turn on the intake blower and look at the Intake Speed value in the IBC service screen. Change the intake blower speed from zero to full speed and verify that the Intake Speed value changes from 0 to 100% accordingly. If not, check the electrical wiring. 5. While changing the speed of the intake blower check the speed of the exhaust blower at Exhaust Speed. The speed of the exhaust blower should follow 1:1 the speed of the intake blower. Verify that the exhaust blower is actually running at the correct speed corresponding to the value at Exhaust Speed. If not, check the electrical wiring. 6. Make a rapid change in the intake blower’s speed from zero to full and verify that both blowers (the intake and the exhaust) ramp up to the full speed by the time defined in Ramp Time. Make a rapid change in the intake blower’s speed from full to zero and verify that both blowers (the intake and the exhaust) ramp down to the zero speed by the time defined in Ramp Time. If the blowers do not ramp up or down by the Ramp Time check the ramp time parameters in the blowers’ motors drivers or adjust the Ramp Time value. Note: the Model control technique of the ABC system makes fast maneuvers in the exhaust blower speed so the ramp time must be as low as possible (5-10 seconds). Both www.sysmetric-ltd.com - 29 - User Manual ABC blowers, the intake and the exhaust, must have braking resistors to enable a short ramp time. Ramp time longer than 10 seconds will reduce the system’s performance and will extend the time for reaching a correct lay-flat width. Figure 3.3-1 – Checking the IBC Blowers 3.4. Balancing Valve 1. Make sure the intake blower is off. 2. In the main screen press SERVICE (enter the password “4321”) select the IBC screen and press the Balancing Valve button. 3. Change the value of Zero Position and check that the balancing valve changes its position as follows: At 0% the valve should be completely open (air will flow freely in the pipe). At 100% the valve should be closed (the valve is blocking the air flow). If the valve does not move check the electrical wiring. If the valve moves to the opposite position change the Valve Type. 4. Set the Zero Position back to 50.0%. Figure 3.4-1 – Checking the Balancing Valve - 30 - www.sysmetric-ltd.com ABC User Manual 3.5. Calibrator Cage Control 1. Make sure that the take-off nip is off. 2. In the main screen press SERVICE (enter the password “4321”) select the IBC screen and press the Cage Control button. 3. Press and hold the Open Cage for more than 2 seconds and check that the cage opens. Press and hold the Close Cage for more than 2 seconds and check that the cage closes. If the cage does not change position or moves in the wrong direction check the electrical wiring. Figure 3.5-1 – Checking the Calibrator Cage Control 3.6. Sensors 1. In the main screen press SERVICE (enter the password “4321”) and select the SENSORS screen. 2. If possible, assemble the IBC pipe on the die and lower the calibrator cage so that the radius sensors will “see” the IBC pipe. If not, place some other cylinder object, with a known radius, in the center of the calibrator cage so that it will simulate the bubble. 3. Check the readings of the radius sensors 1, 2 and 3. The three sensors should have similar readings (allow +/-2mm difference) and the average radius that they read should be equal to the radius of the IBC pipe. If the readings are not equal check that all the three sensors are installed at the same distance from the center of the calibrator cage. If the sensors read a wrong radius check the Install Distance parameters of the sensors. If they don’t show any reading check the electrical wiring. 4. Check that the compensation sensor reads a correct distance. Reference 4 should show the real distance to the reference target (allow 5% error). If not, check the installation distance parameter. Verify that Barometric Factor is 0.9500-1.0500. Note: only check the barometric factor if the compensation sensor is installed and works for more than an hour. If not, wait and check it later. 5. Close the calibrator cage so that the cage sensors 5, 6, 7 and 8 will be less than 200mm from the IBC pipe. www.sysmetric-ltd.com - 31 - User Manual ABC 6. Check the readings of the cage sensors. The four sensors should have similar readings (allow +/-2mm difference). Their reading should be the distance between the cage’s rolls and the IBC pipe. If the readings are wrong, or not equal, check installation distance parameters. If there are no readings, check the electrical wiring. Figure 3.6-1 – Checking the Sensors 4. Tuning After installing and checking the ABC system it is now ready for first time operation. During the first operation some of the system’s parameters need to be tuned in order for the system to control correctly. Tuning the parameters requires the following steps: 1. Finding the Cage Factor for the calibrator cage. 2. Calibrating the Exhaust Ratio and the Intake Blower Capacity parameters. 3. Tuning the balancing valve control parameters. 4. Adjusting the Cage Factor parameter. The following explanations describe how to tune the system. In some cases the explanations give some common initial values for some of the parameter. Note that different lines might need different values. It also assumes that all the installation parameters are set as explained in the installation chapter. - 32 - www.sysmetric-ltd.com ABC User Manual 4.1. Cage Factor – Coarse Tuning When controlling the calibrator cage position the actual cage position feedback has a long delay. For this reason the system uses a pulse technique to operate the cage motor according to a fixed ratio between the cage position error and the motor operation time. This ratio is called Cage Factor and it can be found using the Cage Factor screen. In the IBC screen press the Cage Factor button and follow this procedure to find the cage factor: 1. Place a target in front of the gap sensors 7 and 8. The best method is to assemble the IBC pipe on the die. 2. Press and hold Close Cage to close the calibrator cage until both sensors 7 and 8 show readings. 3. Press and hold Close Cage for about 7 second and release. The system will show a value at Calculated Factor. 4. Press and hold Open Cage for about 7 seconds. The system will update the Calculated Factor. 5. Repeat opening and closing the cage several times and check the Calculated Value. It is recommended to test the factor at longer and shorter movements of the cage and at different positions of the cage. The Calculated Factor will later be used as the Cage Factor. Figure 4.1-1 – Cage Factor Tuning www.sysmetric-ltd.com - 33 - User Manual ABC 4.2. Blowers Ratio and Intake Blower Capacity 6. 7. 8. 9. Open the calibrator cage to its maximum position. Select MANUAL mode in the General Service screen. In the Balancing Valve screen set Maximum Travel to 0%. In the IBC Blowers screen set Control Range to 0 and set Intake Blower capacity to 2.000M3/s. 10. Start the line with a safe bubble width (a medium size width). For stability, use only about 20% intake blower speed and the line speed should be about 10-15 M/Min. Wait until the width stabilizes. This might take several minutes and the actual width will not necessarily be equal to the set width. If the bubble does not stabilize increase the Intake Blower capacity parameter. 11. While monitoring the bubble, increase the intake blower speed to some average normal operating speed (about 40-50%). The width will change and stabilize after some minutes. 12. When the width is stable, copy the Actual Ratio parameter into the Blowers Ratio parameter. This should bring the actual width close to the set width. If needed wait several minutes and repeat this step. The expected width accuracy at this phase is ±20mm or better. 13. While the line is running enter a new Set Width and monitor the width change. The system should react to the new width within 5 seconds and the change should be fast. The bubble should be as close as ±40mm before the initial width gets to the nip. 14. If the change is too big (the width overshoots) then the Intake Blower capacity should be increased and vice versa. Repeat this step 3 to 4 times until fast stability is achieved. The test can be performed in both directions. Make sure that during the change the exhaust blower will not run below 20% or above 80%. If it does then longer stability time is normal and expected. Note: if at this stage the width varies a lot and it takes a very long time for the width to stabilize, check the Tower Height and Collapsing Frame Height parameters in the General screen. Figure 4.2-1 –Blower Ratio and Intake Blower Capacity Tuning - 34 - www.sysmetric-ltd.com ABC User Manual 4.3. Balancing Valve Control Value During the first control stages (I and II) the balancing valve control is minor. During the last control stage of the system (III) the balancing valve control action goes into full operation. The error between the set and actual gap is multiplied with the Control Value and the result is delivered to the valve. Its activity can be seen on the display on Open/Close Valve value. 15. After calibrating the Blowers Ratio and the Intake Blower capacity, close the calibrator cage up to the point where the rolls just start touching the bubble, that is, a zero gap between the cage and the bubble. 16. Verify that the Actual Gap in the screen is zero. If not, check the installation (and the installation distance parameter) of the gap sensors 7 and 8. 17. In the IBC screen, verify that the Actual Radius is equal to the Set Radius (allow up to 5mm error at this stage). If not, check the installation (and the installation distance parameter) of the cage sensors 5 and 6. 18. In the Balancing Valve screen set the Control Value to 2.0% and the Maximum Travel to 20.0%. 19. Enter 0 in the Set Gap. 20. In the General Service screen change the control mode to Automatic. The system should move to the third control stage (I and II flags are lit green and III is blinking). 21. In the Balancing Valve screen slowly increase the Control Value. A high value will increase the valve activity reducing the width small changes. This is true until the control over reacts and the width starts to shift and jump. The maximum value found should be reduced by about 40% and stored into Control Value. If for example a value of 14.0% produced maximum stability and beyond that the system is not stable, then a value of 10.0% should be used. 22. Change the Set Gap to +5mm and check that the Actual Gap reaches +5mm in a few seconds. Change the Set Gap back to zero and then to -5mm and check that the Actual Gap reaches -5mm in a few seconds. If the reaction is too slow increase the Control Value of the Balancing Valve (remember that a too high value will reduce the width stability). If the Actual Gap responds quickly to one direction but slowly to the other direction change the Zero Position accordingly. For example if the Actual Gap reacts quickly to a positive change in Set Gap (changing the Set Gap from 0 to +5mm) and slowly to a negative change in the Set Gap (changing the Set Gap to -5mm) increase the Zero Position and vice versa. In any case don’t use Zero Position larger than 70% or lower than 30%. Note: changing the Zero Position of the balancing valve affects the Blowers Ratio parameter. If you want to change the Zero Position first set the system back to Manual control mode. Then change the Zero Position, wait for the bubble to stable and copy the new ratio from Actual Ratio to Blowers Ratio in the IBC Blowers screen. 23. Set Zero Range to 10% and Zero Integral to 10z. www.sysmetric-ltd.com - 35 - User Manual ABC Figure 4.3-1 – Control Value and Zero Position Tuning 4.4. Cage Factor – Fine Tuning During normal operation the bubble is pressed to the calibrator cage and this affects the motion of the cage. Thus, examination and fine tuning of the Cage Factor is required. 24. In the Cage Control screen set the value of Calculated Factor into the Cage Factor. 25. Enter a new Set Width and monitor the cage correction steps. When the Cage Factor is proper the first correction cycle will bring the cage to ±4mm from target. If the value is too low the control will need more correction cycles to reach the Set Radius. If the value is too high the system will overshoot and will make a correction step in the opposite direction. If necessary, adjust the Cage Factor value and repeat this action until good cage control is achieved. Easy monitoring of the cage’s correction steps can be carried out using the width graph. This graph shows, along with the width error, the cage’s movements. Press the Graph button in the Main screen or the Width button in the General Service screen to reach this graph. 4.5. Finishing the Tuning Procedure 26. In the IBC screen set Control Range – 0.200. This will start the automatic blower control process. 27. In the General screen turn on the Continue control mode to enable continuous control on the calibrator cage. 28. Bring the production line to normal operation and test the system in various widths to verify proper operation. The mentioned parameters may require minor adjustments in order to reach the best performance. - 36 - www.sysmetric-ltd.com ABC 5. User Manual System Operation The ABC system was designed for ease of operation and requires minimum operator supervision and intervention. During normal operation only the main screen is used. All other screens are for service and maintenance only. 5.1. Starting Production When starting production carry out the following: 1. Enter the required lay-flat width 2. Enter the required gap. 3. Start the production. 4. After the width has stabilized measure the produced lay-flay. If it is not equal to the actual width showed on the ABC screen perform a width calibration. Figure 5.1-1 – Main screen Note: the gap can be changed during production with a small temporary effect on the layflat width. A larger gap will keep the rolls away from the bubble. This is useful to prevent the rolls from scratching the bubble in delicate products. A smaller or negative gap will cause the cage to hold the bubble tightly and will improve the width’s accuracy and stability. www.sysmetric-ltd.com - 37 - User Manual ABC 5.2. Control Mode and Control Stages The ABC system has 3 control modes: 1. Manual – calibrator cage control is disabled. The system brings the bubble to the required width only by controlling the speed of the exhaust blower. 2. Auto and Continue – the system brings the bubble to the required width by controlling the speed of the exhaust blower and by positioning the calibrator cage in the correct diameter. 3. Auto (Continue is off) – same as Auto and Continue mode but 10 minutes after reaching the required width the cage control is disabled. The normal operation of the ABC system is Auto and Continue control mode. Manual mode can be used if there is a problem with the calibrator cage and the cage cannot be moved. In some cases, mechanical backlash in the calibrator cage or instability in the production process can cause the system to continuously move the cage in and out as it tries to find the correct position that yields the correct width. In such cases the Auto mode (Continue is off) can be used and it might improve the system performance. In this mode, after the cage has been locked, the ability of the system to keep the required width is limited so set a value in the Width Error Threshold parameter to trigger an alarm in case there is a large width error. Figure 5.2-1 –Control Mode Selection - 38 - www.sysmetric-ltd.com ABC User Manual Depending on the control mode, the ABC system has up to 4 control stages. The three control stage flags I, II, III indicate the current control of the system. The following table details the different control stages of each control mode and describes the system function at each stage: Mode Manual Auto and Continue Stage 0 1 0 1 2 3 0 Auto (Continue is off) 1 2 3 4 Flag I Off Blink Off Flag II Off Off Off Flag III Off Off Off Function Control is off Bringing bubble to the correct width ±50mm Control is off Bringing bubble to the correct width ±50mm Blink Off Off Bringing cage to its set radius ±5mm Adjusting cage position for correct width On Blink Off Bringing gap to its set value ±5mm Adjusting cage position for correct width On On Blink Keeping gap in its set value Off Off Off The control is off Bringing bubble to the correct width ±50mm Blink Off Off Bringing cage to its set radius ±5mm Adjusting cage position for correct width On Blink Off Bringing gap to its set value ±5mm Adjusting cage position for correct width On On Blink Keeping gap in its set value On On On Keeping gap in its set value (cage is locked) 5.3. Changing Product (Changing Width) Changing the set width does not require any significant change in the production. While the line is still running carry out the following: 1. Enter the new width. 2. If necessary, change the gap. 3. After the width has stabilized measure the produced lay-flat. If it is not equal to the actual width showed on the ABC screen perform a width calibration. Note: changing the width while the line is running might require lowering the line speed and/or the intake blower speed until the system stabilizes the new width. This depends on the initial speeds and other production parameters and varies from one production line to another. In most cases the width can be changed without changing any other parameters. www.sysmetric-ltd.com - 39 - User Manual ABC 5.4. Width Calibration As the bubble moves away from the die and towards the reception unit the plastic cools down and causes the width to shrink. The ABC system features a simply calibration procedure to compensate for this shrinkage effect and to ensure correct width production. After the width stabilizes carry out the following to calibrate the width: 1. Measure the lay-flat width at the feedback point. 2. Enter the measured width in the Width Calibration in the display. A Value Accepted flag will indicate that the calibration succeeded and the calibration value will reset back to zero. Figure 5.4-1 – Width Calibration Note: some production parameters, such as line speed and production capacity, affect the shrinkage factor. After changing any production parameter verify the product width and calibrate if necessary. Once the production is stable the shrinkage is stable and the system will maintain the correct width. - 40 - www.sysmetric-ltd.com ABC User Manual 5.5. Automatic Width Calibration When a web guiding system is installed its reading can be directed to the ABC system for automatic calibration. This allows the system to automatically update the shrinkage parameter of the product and maintain accurate lay-flat width. If the automatic calibration is installed it can be operated by switching its control switch in the calibration control screen. Press the Cal button in the General Service screen to reach the automatic calibration control switch. Figure 5.5-1 – Automatic Width Calibration Control When the automatic width calibration is enabled and the system reaches a stable width it will start the automatic calibrations. An Automatic flag will indicate that the automatic mode is on, the manual calibration will lock and a small flag (EL in the example below) will indicate that the actual width is now received from the web guiding system. Figure 5.5-2 – Automatic Width Calibration Note: the automatic width calibration option is not included in the standard ABC system. Contact Sysmetric regarding the addition of this option to the system. www.sysmetric-ltd.com - 41 - User Manual 6. ABC Service and Maintenance 6.1. Alarms An alarm condition exists whenever the system recognizes that a fault has occurred. When an alarm condition occurs the system does the following: A corresponding alarm message appears on the display. The alarm is written in the alarm log. The alarm button on the operator display turns red. The system tries to maintain the correct width. The alarm output in the PLC turns on. This output can be wired to an external alarm device (light, siren or any central alarm system in the factory). Pressing the ALARM button deletes the alarm message. Further pressing the ALARM button toggles messages of all active alarms. Alarm Message Figure 6.1-1 – Alarm Message 6.1.1. Alarm Log The system creates an alarm log. Press and hold the ALARM button for more than 1 second to switch to the alarm log screen. Active Alarm Cancelled Alarm Delete, Mark, Mark All and Unmark Buttons Figure 6.1-2 – Alarm Log - 42 - www.sysmetric-ltd.com ABC User Manual The alarm log shows the following details: The alarm that was activated. The time at which the alarm was activated. The status of the alarm – red if the alarm is still active or blue if the alarm was cancelled. The log can be cleared by marking some or all the alarms and pressing the delete button. 6.1.2. Alarms Messages The following is a list of alarm messages that can appear on the display according to the active alarm, the possible causes for the alarm and the actions to take. When trying to solve an error follow and execute the recommended actions in the order they appear in this manual i.e. only try the second action if the first did not solve the problem. SENSOR # ERROR (For all sensors 1-8) This alarm indicates an error in the specified sensor. See the Ultrasonic Sensors maintenance section for more details. Action: Switch to the sensors screen, check which error flag is on and act accordingly: For NS error, check the electrical wiring. If they are intact replace the sensor. If the electrical wiring is intact and the error remains after replacing the sensor, replace the DBC card. For NT, BR and CE errors, clean the sensor and check that it is perpendicular and facing directly to the center of the bubble. If this does not solve the error, replace the sensor. Note: use a dry rag for cleaning the sensors. Do not use any chemical substance, it can damage the sensors. BUBBLE WIDTH ALARM When the continuous control mode is off, the system stops moving the calibrator cage 10 minutes after entering control stage III. If during production in this mode the width error is greater than defined in the Width Error Threshold the system triggers the bubble width alarm. Action: Try to identify the source of the width error. Usually it happens if one of the production conditions changes such as temperatures, line speed, production capacity etc. Check the value of the Width Error Threshold and increase it if necessary. If the production is not stable enough either increase the value of Width Error Threshold or turn on the continuous control mode so that the system can keep adjusting the calibrator cage position and maintain the required width. www.sysmetric-ltd.com - 43 - User Manual ABC BUBBLE BREAK If during production the radius sensors stop detecting the bubble the system triggers the bubble break alarm. Action: Restore the bubble. EXHAUST BLOWER TOO FAST This alarm indicates that the exhaust blower is running at more than 95% of its maximum speed. Action: Decrease the intake blower speed and the system will decrease the exhaust blower speed accordingly. Verify that the balancing valve is not blocked. Clean the exhaust blower and all the exhaust pipes from production remains such as plastic pieces and wax. PLC BATTERY LOW The PLC has a backup battery to maintain data while the power supply is off. This alarm indicates that the power in the backup battery is running low. Action: Replace the backup battery in the PLC. Note: use only Omron's original battery (3G2A9-BAT08). EXCEPTIONAL BLOWERS RATIO The system determines the required exhaust blower speed according to the Blowers Ratio parameter but since this ratio depends on various production parameters and varies with time, the system automatically adjusts this parameter in order to find the correct value. In order to do this the system first copies the Blowers Ratio into the Control Ratio parameter when the operation starts and then during the production it adjusts the Control Ratio within a range defined by the Control Range parameter. For example if the preset Blowers Ratio is 1.000 and the Control Range is 0.200 then the system can adjust the Control Ratio to a value between 0.800 and 1.200. The exceptional blowers ratio alarm indicates that the Control Ratio parameter reached the limit defined by the Control Range parameter. With respect to the last example it means that the value of Control Ratio reached either 0.800 or 1.200. By principal the ratio between the intake and the exhaust blower cannot change. It is determined by their physical structure. Actually the ratio depends on some production parameters such as temperature and the blowers’ speeds and it varies during production especially when the exhaust pipes start containing production remains such as wax and plastic pieces. Assuming that the Blowers Ratio parameter was set correctly during the installation and tuning of the system, if the Control Ratio has reached the limit of the Control Range it must be a consequence of some mechanical change in the production - 44 - www.sysmetric-ltd.com ABC User Manual line. For example if a plastic piece accidently enters the exhaust pipe and is now blocking some of the air flow the exhaust blower will need to run faster in order to drive the same amount of air. In such a case the system automatically increases the Control Ratio to compensate for that air blockage. Action: Search for the origin of the problem and try to identify the cause of the change in the blower ratio. Common problems are: o Air leaks in the exhaust pipes. o Something clogs the exhaust pipes such as wax, plastic pieces, a bent pipe etc. o Something clogs the balancing valve. o Significant change in the temperature of the air in the IBC. o Significant change in the raw material or the production capacity. If the exhaust blower runs at a relatively high speed (above 80%) try to decrease its speed (decrease the intake blower speed and the system will decrease the exhaust’s speed accordingly). In some blowers the capacity is not linear and it drops down at high speeds. This can cause a high Control Ratio when the blowers run at high speeds. To fix the error during production, take the half way value between the Blowers Ratio and the Control Ratio and set it as the new value of the Blowers Ratio. For example if the Blowers Ratio is 1.000 and the Control Ratio is 1.200 change the Blowers Ratio to 1.100. Remember the original value of Blowers Ratio and once production is stopped re-enter the original value and search for the origin of the problem as explained in the previous note. BUBBLE WAVES This alarm indicates that the surface of the bubble below the cage (in front of the gap sensors 7 and 8) is waving. This can reduce the width stability. When such an error occurs the system automatically reduces the balancing valve reaction level until the bubble re-stabilizes. Action: Check the calibrator cage height. The gap sensors 7 and 8 should be at about the height of the frost line. If the calibrator cage is too high it will cause the bubble to wave. Decrease the Control Value of the balancing valve. Check the balancing valve. Make sure nothing disturb its movements. DBC CONTROLLER ERROR This alarm indicates an error in the Digital Bubble Controller (DBC). Action: If the alarm is persistent replace the DBC card. If the alarm was temporary read the DBC error code in the cage sensors screen and press Clear. If the error returns replace the DBC card. www.sysmetric-ltd.com - 45 - User Manual ABC Note: please advise Sysmetric of the error code when replacing a DBC card. DBC COMMUNICATION ERROR This alarm indicates that the PLC fails to communicate with the Digital Bubble Controller (DBC). Action: In the DBC check that the green LED marked 24V is on. If it is off check the 24VDC power supply from the main cabinet to the DBC. Check the electrical wiring between the PLC and the DBC. In the DBC check that that green LED marked COM1 is on. If not replace the DBC card. Check the 5VDC supply from the PLC to the DBC (see electrical wiring). If there is no 5VDC supply, replace the PLC. BALANCING VALVE ERROR When the actual position of the balancing valve is equal to its set position the valve controller sends an OK signal to the PLC. If this signal is missing for more than 1 second the system triggers the balancing valve error alarms. Action: - 46 - Clean the balancing valve pipe, butterfly and shaft and make sure nothing disturbs the valve from turning freely in the pipe. Press and hold the TEST button on the balancing valve for 5 seconds. The valve should run a test cycle in which it first goes to its center point (45º), opens all the way, closes all the way and then goes back to the position defined in the Zero Position parameter in the balancing valve screen. Check the electrical wiring between the PLC and the balancing valve. Open the cover of the valve’s controller. Check that the power green LED on the bottom electronic card is on. If not check the 24VDC power supply from the main cabinet. Check that the 5V power green LED on the top electronic card is on. If not replace the electronic card. Check that the yellow LED marked ON is lit. Change the Zero Position parameter in the balancing valve screen. The yellow LED should turn off while the valve moves to the new position and then turn on again. Test the valve at different positions by setting different values between 0% and 100% in the Zero Position parameter. If there is a position in which the yellow LED does not turn on replace the actuator motor of the valve. www.sysmetric-ltd.com ABC User Manual AUTOMATIC CALIBRATION ERROR* This alarm indicates an error in the automatic width calibration. Action: Check that the automatic width source is working properly (the web centering unit). Check the electrical wiring and communication units between the PLC and the automatic width source (the web centering unit). * This alarm is relevant only if the automatic width calibration option is installed and activated. 6.2. Ultrasonic Sensors The ultrasonic censors are operated and controlled by the Digital Bubble Controller unit (DBC). As part of the control process, the DBC monitors each read cycle of the digital ultrasonic sensors. Thus, in addition to measuring the distance to the target, it indicates each sensor’s status and gives specific alarms for different error conditions in the sensors. For each error condition in the sensor the system will raise a corresponding error flag in the Radius Sensors and Cage Sensors screens. In addition the system monitors the percentage of faulty read cycles and alarms for a sensor error if the error percentage goes above 50% (20% for the radius sensor during control stage I). This means that more than 50% of the sensor’s read cycles are faulty. The alarm goes off if the error percentage goes below 30%. The error conditions and its corresponding error flags are: NS – No Sensor. The DBC does not detect any sensor wired to it. NT – No Target. The sensor does not “see” any target (no echo is returned) BR – Bad Reading. The sensor receives bad echo signal. CE – Cov Error. The DBC receives bad signal from the sensor. The error flags might flash on and off during normal operation but as long as the errors are minor and the error percentage remains zero, no action is needed. If the error percentage is not zero it is recommended to check the sensors even if the error percentage is below 50% and the system did not alarm yet. Although the system is expected to work well under such conditions, fixing the error will ensure the width’s accuracy. In order to ensure best performance of the system it is recommended to monitor the Radius Sensors and Cage Sensors screens as part of scheduled routine maintenance. If an error percentage is above zero or if the system alarms for a sensor error act as follows: For NS error, check the electrical wiring. If they are intact replace the sensor. If the electrical wiring is intact and the error remains after replacing the sensor, replace the DBC card. www.sysmetric-ltd.com - 47 - User Manual ABC For NT, BR and CE errors, clean the sensor and check that it is perpendicular and facing directly to the center of the bubble. If this does not solve the error, replace the sensor. Note that the gap sensors 7 and 8 might need to be tilted slightly so that they will be perpendicular to the bubble’s surface. Note: use a dry rag for cleaning the sensors. Do not use any chemical substance, it can damage the sensors. The following example shows an NT alarm in sensor number 1 and a minor BR error in sensor number 7. Figure 6.2-1 – Sensor Errors - 48 - www.sysmetric-ltd.com ABC User Manual 6.3. Calibrator Cage The system sometimes bypasses the normal cage control and forces the cage to close or open or it disables the cage’s movements. This is done when the system detects hazardous situations whereby the cage might collide with the bubble or when the cage’s position disturbs the normal cage control. These situations are more common during control stage I when the system tries to stabilize a new width. When the system bypasses the normal cage control it lights a corresponding indication flag in the Cage Control screen. If the cage seems to “freeze” in its place or it opens/closes unexpectedly, switch to the Cage Control screen to check if it is a control bypass. The bypass indication flags are: TO – Too Open. The cage is too open and the cage sensors do not “see” the bubble. The system will force the cage to close until getting readings from the cage sensors. CR – Collision Recover. When the system detects that the cage collides with the bubble it forces the cage to open. After such event it does not allow the cage to close until a full bubble height has run through the cage. TC – Too Close. The system detects that the cage is too close and it disables further closing until the bubble draws away. FL – Frost Line. When the frost line is too high (relatively to the cage position) it can create a situation in which at the top side of the cage the bubble radius is large and the bubble is close to the cage while on the bottom side of the cage the bubble radius is small and the bubble is far away from the cage. In such case the system does not allow the cage to close until the frost line is taken back down and the bubble’s radius is similar along the cage. WM – Wait for Model. When decreasing the required width the system does not allow the cage to close to its new radius before the model control has decreased the bubble’s width (using the blowers) and it is less than 100mm from the required new width. Figure 6.3-1 – Cage Control Bypass Flags (Example of CR shown) www.sysmetric-ltd.com - 49 - User Manual ABC 6.4. Troubleshooting The following table lists some error conditions in which the system does not work well without alarming for any errors. Problem System does not respond Symptoms Control stage I flag is off The width is jumping up and down System hangs in control stage I and it takes a long time to reach the correct width The width is stuck on wrong value System hangs in control stage II - 50 - Cage’s actual radius is not equal to its set radius Cage’s actual radius is not equal to its set radius The actual gap is not equal to the set gap Possible Cause Take-off nip signal is off Action Check the electrical wiring Extruder signal is off Check the electrical wiring Line speed is zero Check the electrical wiring Wrong Blowers Ratio Tune the Blowers Ratio parameter Wrong Intake Blower capacity Wrong line speed Tune the Intake Blower capacity parameter Calibrate the line speed Wrong Tower Height Fix the Tower Height parameter Wrong Collapsing Frame Fix the Collapsing Frame parameter Wrong Blowers Ratio Tune the Blowers Ratio parameter The cage is stuck or the Cage Factor is too low Cage Factor is too high or too low Cage Factor is too high or too low The balancing valve response is too low Check the cage and increase the Cage Factor parameter Fix the Cage Factor parameter Fix the Cage Factor parameter Check the valve and its parameters www.sysmetric-ltd.com ABC Problem Width is not stable User Manual Symptoms The cage is closing too much and opening too much The cage makes a lot of movements before fixing the width The gap is not stable After some time the system locks on wrong width The width in the ABC screen is not equal to the actual width measured on the lay-flat Bubble crashes on the cage during startup www.sysmetric-ltd.com Control stage flags I, II, III are all on Possible Cause The Cage Factor is too high The Cage Factor is too low The cage is too high or too low The valve response is too low The system is in discontinue mode The width is not calibrated Wrong Blowers Ratio Action Decrease the Cage Factor parameter Wrong Intake Blower capacity Tune the Intake Blower capacity parameter Increase the Cage Factor parameter Adjust cage’s height so that the gap sensors will be at the frost line height Increase the Control Value parameter Change the control mode to Continue Perform Width Calibration Tune the Blowers Ratio parameter - 51 - User Manual ABC Appendix A – NS10 Screens Cage Control IBC Blowers Balancing Valve Main Screen Sensors - 52 - Width Graph www.sysmetric-ltd.com ABC User Manual Appendix B – Parameters Synopsis and Common Values The following table lists all the parameters of the ABC system with a short description and common value of each parameter. It also specifies whether the parameter is controlled by the user or by the system. Some values such as set width or installation distance are completely dependent on the specific production line and were therefore left blank. Note: for best performance each system must be tuned for its specific production line and the values of the parameters may vary from the values given in the following table. Parameter Controlled By Set width Act width Set gap Act gap Calibration Width Control I Control II Control III Line Speed Intake Exhaust User System User System User System System System User User System Radius 1, 2, 3 Reference 4 Cage 5, 6 Gap 7, 8 Barometric Factor System System System System System Radius 1, 2, 3 Install 1, 2, 3 Ref 4 Install 4 Errors 1, 2, 3, 4 System User System User System Cage 5, 6 Gap 7, 8 Errors 5, 6, 7, 8 DBC Error Code System System System System Control Value Open – Close Cage Factor Set Radius Actual Radius Blowers Ratio Control Range Control Ratio Actual Ratio User System User System System User User System System www.sysmetric-ltd.com Common Function Values Main Screen The required lay-flat width The actual produced width -10 to +10mm The required gap The actual gap Width shrinkage calibration Off/Blink/On System Off/control stage I/finish stage I Off/Blink/On Control stage I/control stage II/finish stage II Off/Blink/On Control stage II/control stage III/finish stage III The line speed 0-100% The intake blower speed 0-100% The exhaust blower speed Sensor Screen Radius at sensors 1, 2, 3 Distance to target at sensor 4 Cage-bubble gap at sensors 5, 6 Cage-bubble gap at sensors 7, 8 0.9800-1.02000 Calculated barometric factor Radius Sensors Screen Radius at sensors 1, 2, 3 Distance from sensors 1, 2, 3 to die center Measured distance to reference target Distance to reference target 0-100% Percentage of fault sensors readings Cage Sensors Screen Cage-bubble gap at sensors 5, 6 Cage-bubble gap at sensors 7, 8 0-100% Percentage of fault sensors readings 0-9 Current or last DBC error code IBC Screen 5-10% Valve’s response level 30-70% Current valve’s position 500-1500 Cage’s time to movement ratio Cage’s set radius (according to set width) Cage’s actual radius 0.900-1.100 Intake to exhaust blowers ratio 0.100-0.200 Allowed range for the control ratio 0.800-1.200 Calculated intake to exhaust ratio Current actual blowers ratio - 53 - User Manual ABC Intake Speed Exhaust Speed Controlled By User System Zero Position Zero Range Zero Integral Actual Zero Control Value Max Travel Open – Close Valve Type User User User System User User System User Cage Factor Calculated Factor Gap 7, 8 User System System Blowers Ratio Control Range Control Ratio Actual Ratio In Blower Ramp Time Max Speed User User System System User User User Tower Height Collapsing Frame Feedback Width Error TH Line Speed Maximum Line Speed Actual Control Manual Control Auto Control Continue Control I Control II Control III Set Width Actual Width Set Gap Actual Gap Calibrate User User User User User System User User User System System System User System User System User Set Width Minimum Width Maximum Width User User System Parameter - 54 - Common Function Values 0-100% The intake blower speed 0-100% The exhaust blower speed Balancing Valve Screen 40-60% Start point for the valve 10% Allowed range for actual zero position 10 Zero position adjustment factor 45-55% The adjusted zero position 5-10% Valve’s response level 20% Allowed range for the valve’s position 30-70% The current position of the valve N.C.-N.O. Normally open or normally closed valve Cage Control Screen 500-1500 Cage’s time to movement ratio 500-1500 Calculated cage factor Cage-bubble gap at sensors 7, 8 IBC Blowers Screen 0.900-1.100 Intake to exhaust blowers ratio 0.100-0.200 Allowed range for the control ratio 0.800-1.200 Calculated intake to exhaust ratio Current actual blowers ratio 1.000-2.000 Intake blower capacity 5-10sec Ramp time of the blowers 2047/4000 Blower’s speed range (AD and DA range) General Screen 8.00-12.00m Height from top of cage to take-off nip 2.00-4.00 Collapsing frames length 20.00-30.00 Distance to width feedback point 10-20mm Width error alarm threshold (discontinue mode) 100-150m/sec The line speed when analog input is 10V The current line speed On/Off Disable cage control On/Off Enable cage control On/Off Continuous or discontinuous cage control Off/Blink/On System Off/control stage I/finish stage I Off/Blink/On Control stage I/control stage II/finish stage II Off/Blink/On Control stage II/control stage III/finish stage III The required lay-flat width The actual produced width -10 to +10mm The required gap The actual gap Width shrinkage calibration Width Limits Screen The required lay-flat width 500-1000mm Minimum allowed set width Maximum set width www.sysmetric-ltd.com ABC User Manual Appendix C – Assembly Example The following drawings show an example of the ABC system assembly on a blown film production line. Note that different lines may require different assembly. Radius Sensors (1, 2, 3) Cage Sensors (5, 6) Compensation Sensor (4) Gap Sensors (7, 8) Intake Blower Balancing Valve Exhaust Blower www.sysmetric-ltd.com ABC System Assembly – General View - 55 - User Manual ABC Radius Sensors (1, 2, 3) and Compensation Sensor (4) Assembly Cage Sensors (5, 6) and Gap Sensors (7, 8) Assembly If you have any further questions please do not hesitate to contact us: [email protected] www.sysmetric.com Phone: +972-4-6405857 Fax: +972-4-6405911 - 56 - www.sysmetric-ltd.com NOTES:


