1
Star-B-Q for 2013
SVAS Event Calendar
Star-B-Q Schedule & Rules
Star-B-Q Sponsors
SVAS News
Discovery Museum Solar Viewing
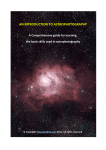
Astro Photography Chapter-4, Wayne Lord
Darkest Night Observing, Davin Engil
Gibson Ranch, Wayne Lord
Telescope Workshop, Lonnie Robinson
Officers, New Membership
1
2
3
5
7
9
12
18
22
24
26
July / Aug 2013
1
July 5-6
July 8 New Moon
July 19th, “No” General Meeting, Held at Star-B-Q
August 6
New Moon
August 9-10
Blue Canyon
Star Party Schedule 2013
July 5-6 Star-B-Q
August 9-10
September 6-7
October 4-5
November 1-2 & 29-30
December 6-7
August 16 General Meeting Friday at 8:00pm
Sacramento City College, Mohr Hall Room 3, 3835 Freeport Boulevard, Sacramento, CA.
July / Aug 2013
2
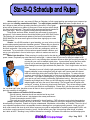
Arrive early if you can, say around 2:00pm on Saturday, to find a great parking spot and get your scope set up
before we start cooking steaks about 4:00pm. The raffle begins around 5:30pm and lasts a couple hours, so
don’t follow my lead and end up eating late during the raffle! Lots of great
prizes will be spread out on tables for everyone to view and pre-select should
you have a winning ticket! There will be club announcements and awards following the raffle. Then on to a great viewing evening under the stars.
Rules Rules and more Rules, however they are meant for everyone's
enjoyment! It’s the same rules we should be following at all HGO Star Parties.
The following is a summation and update of the formal rules posted in the
SVAS Web Site, the ones we all agree to follow when signing up as a new
SVAS member.
Guests: As a SVAS member in good standing, you may invite up to four
guests unless special permission has been granted. Please ask you guests to
park outside the permitted area and tarmac, to preserve space for members
and their equipment. Also make sure not to block any emergency vehicle access lanes! Try to park with a 4 foot maximum space between vehicles, and
set up your equipment in front or behind your vehicle to make more room for
parking!
White Light discipline: Friday evening is usually more for the dark sky oriented photographers and deep
space viewers, so please pay extra attention to white light. It takes at least 30 minutes for the eye to adapt to full
darkness, so it’s very irritating when someone shines a white light requiring another 30
minutes for your eyes to readapt to dark skies. It goes without saying that stray white
light will ruin a cameras exposure! Red light protects the dark adapted vision, so
cover flashlights and car lights with dark red plastic film. Don’t forget interior and trunk
lights.
Saturday is more of a family night geared toward general observing. One of the
biggest problems is cars coming and going all night, and it seems each one has at
least one white light shining be it backup lights or running lights. To reduce this annoyance, we would like to request that you arrive on the tarmac no later than an hour
after sunset. If you plan on leaving early, try to park near the exit road and back into
your spot so you won’t need to use backup lights when leaving. Also plan your exit
between say midnight and 1:00am, so the folks staying overnight can get their eyes
adapted again and enjoy the rest of the evening! The old guard are all familiar with
turning off, covering, or removing interior and trunk lights. They all are willing to guide
you out to the exit with their red flashlights. Please don’t yell at anyone who violates
the “no white light” rules, because we are all there to have a good time. Lets respectfully assist newcomers, and explain the necessity of red lighting.
These areas are off limits to SVAS members:
*Aircraft runway, because aircraft can and do land at any time!
*The dirt “aircraft overrun“ strip between the runway and tarmac.
*Private observatories south of HGO.
*The south end of the tarmac is reserved for aircraft parking , CHP helicopters, and private observatories.
Safety: Airplane traffic has priority at all times. You may be asked to move your observing site if additional
aircraft parking is required. Please no bicycles, skateboards, rollerblades, roller skates, or Frisbees! There is a lot of
very expensive equipment that is susceptible to serious damage from youngsters goofing around. Keep your children under control and close by at all times, because you could be responsible for replacing a damaged $3,000+ mirror let alone running someone's evening (year)!! Alcohol affects your night vision among other things, so please
don’t drink at HGO. Smoking is very hard on delicate lens coatings. Be aware of the benches and telescope piers
July / Aug 2013
3
permanently mounted in the ground at the south side of HGO, they are really dangerous in the dark! Be sure to bring
mosquito repellent, sunscreen, and a hat!
Camping: Camping with, RVs, 5th wheels, camping trailers, and tents is a very sensitive subject, but remember we are the guests of Placer County Airport when we use the tarmac! As SVAS members, we are only allowed to
camp in RVs, Campers, and Tents on our own permit property defined by the east edge of the asphalt airport tarmac
and the tree line behind HGO to the east.
An emergency evacuation plan, for large events like Star-B-Q, was worked out between SVAS, the
Forrest Service, and Placer County. To allow for an ample sized emergency exit lane, and three to four rows
of parking, we must only use a 12’ width of tarmac for the first row nearest HGO. This means all vehicles in
that row should be parked mostly on the SVAS permit dirt area, to allow room for equipment setup behind
your vehicle inside the 12’ tarmac space.
There is only room for a maximum of “Six” RVs. They must be parked entirely on the SVAS permit dirt
area, completely off the tarmac, and should remain all night. Please park with a 4’ space or less between vehicles. Set up your telescopes and seating area only to the front or rear of your
RV or camper, not to the side. Check
with our observatory director for further
information.
Campers, and camping trailers
may park close together on the northern
end of the SVAS permit area, off the tarmac and towards the exit road. Keep
the 12’ tarmac equipment space in mind.
Tent camping is OK only on the
SVAS permit dirt area, behind and to the
north of HGO. Please stay clear of the
observatories to the south of HGO.
Again, no tents, campers, camping trailers, or RVs on the airport tarmac!
“Car Camping” on the tarmac is
now permissible! You may sleep in your car or next to it, in a sleeping bag or on a cot, under the stars.
Due to Fire Restrictions no BBQ grill of any type will be allowed, except for the official SVAS grills. No
other open flames are allowed. Fire restriction may worsen to no grill at all.
Please don’t use any power outlets from HGO for your camping needs, you may trip a main breaker
that we don’t have access to! We don’t have a garbage pickup or RV hookups, so please carry your waste
(including sewage) back with you, and clean up the area when you leave.
OK, now we have reviewed the rules, lets have a safe and fun Star-B-Q!
SVAS officers and board of directors
*Please read the formal rules on the SVAS web site, wwwSVAS.org, but it is slow updating. Any questions? Call or
e-mail the observatory director, a board member, or a SVAS officer.
July / Aug 2013
4
July / Aug 2013
5
July / Aug 2013
6
HGO’s front porch
and ramp are finished.
Thank you Stuart! Fantastic job! We will be attempting to schedule a
cleanup day, so we will
present our best at the
Star-B-Q in July. The
commissary ceiling has
been repaired and all the
various stuff stored everywhere has been sorted
through and reorganized.
The SVAS 16” Dob is
cleaned with new wheel
barrel handles, ready for
members to roll out on
the tarmac.
As usual, HGO
presents some of the best sunsets I have ever seen. We
should run a contest for the best sunset photos? I have one
from a few years back, of a parasail outlined by a total outrageous sunset sporting festoons of color and globs of detail!
Observer Editor
July / Aug 2013
7
The SVAS board of directors has
unanimously voted for July 1st to be the
new annual membership renewal due
date. It will be the same date for all members. We have been discussing this for
several months, listening to our members
suggestions, and decided it would be easier for all concerned to have one date.
Here are the discussion points:
Easier for members to remember when their annual memberships are due.
We can remind everyone a few months ahead of time.
Dues may be paid at Star-B-Q.
Membership cards can be handed out at Star-B-Q.
Dues will already be paid prior to SVAS elections.
Easier for our treasurer to plan our yearly budget expenditures.
In order to make it easier to prorate existing and new memberships to the new date, we changed the amount
slightly so it would be evenly devisable by 12 months.
Here are the new rates:
Student
Family or Individual
Observatory
Was $20,
Was $35,
Was $40,
now $24 or $2 per month.
now $36 or $3 per month.
now $48 or $4 per month.
Please make an additional one time adjustment payment from your current expiration date to the new July 1st
due date. Then everyone's membership will come due each July.
We, the SVAS officers and board of directors, hope this will be a smooth and welcome transition for everyone!
July / Aug 2013
8
July / Aug 2013
9
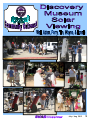
The Discovery Museum, located on Auburn Blvd near Watt Ave., is such a fun beautiful place to hold a SVAS
Outreach solar viewing. There were a lot of visitors on this Saturday, May 4th, and you can see by the photos on the
beginning page there were no shortages of young and
older viewers. The picture at left, of a sun dial clock
painted on the entry patio with my hat’s shadow pointing
at the time (use the upper light colored numbers for daylight savings time), shows we were there around noon. A
slight breeze kept the temperature in the barley warm
spectrum making our extremely hard work very pleasant
(bottom photo shows the excessive physical activity of the
powers that be). Kidding! The entire grounds area is like
a giant park showcasing some very large redwoods,
ponds, and nature walking trails. There are numerous
picnic tables and bench seats scattered throughout the
property. Bring the family, spend the afternoon, and have
a pick nick.
The previous page’s pictures pretty much tell the whole story, check out the faces of people possibly experiencing their first views of our star, the Sun. The kids always ask such simple questions like, what are the sunspots,
do they have an intensity cycle, how long is the cycle, and how fast does the sun rotate on it’s axis. Of coarse we
were up to the
task, and answered with
great authority
and conviction.
Kidding again!
Honestly, we did
well considering
they were asking
questions
straight from
their school
teachers lectures. I explained how the hydrogen in the Sun is always circulating
from the interior up to the surface, and how sunspots have
extremely strong magnetic fields which repel the circulating
hot gases. This causes the sunspots to cool down slightly
and look darker relative to the rest of the surface. All the
while the youngsters were saying “ you are right” ”you are
right”, because they knew the answers all along. These
kids are amazing! It’s great fun sharing our views them.
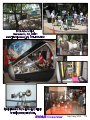
The next page has several photos from the inside of
the Discovery Museum. There are so many great displays,
many about space exploration. You can even cook or buy
the same freeze dried meals our astronauts eat.
Looking foreword to doing it again next year!
July / Aug 2013
10
Lonnie Robinson
July / Aug 2013
11
In the previous chapters we have gone over all the equipment needed to take
pictures of the heavens. In doing so it was necessary to mention a number of things
dealing with processing those images, but covering the processing has been postponed until now. In processing images there are almost as many ways to tackling them than there are different types
of telescopes, cameras, and mounts, so once again I will deal with ones with which I am familiar and have found to
work for me.
Taking pictures of the stars, nebulae and galaxies is very different from normal, terrestrial photography. For one
thing, many of the objects we take pictures of are so faint we can’t even see them with our un-aided eyes, and some
are so faint we can’t even see them in our telescopes, so we must capture them with seconds- or minutes-long exposures to even be sure we are aimed at the correct position in the heavens. So it is definitely not a “point and shoot”
experience!
I am going to provide a Sample Workflow here. Yours may be different due to differences in equipment or software, but mine should provide a general guide for you to modify as needed:
Step 1 – Set up equipment. Do this in the early evening so you have light to work by. Get the mount as closely
polar aligned as you can, either by using a compass (remember to offset to True North), GPS, or pre-established
marks. Pier mounted, you are good to go! Attach the telescope, finders, etc. and the camera(s) and balance the head
so that you have it slightly east heavy. Attach all the USB and power cords needed to use your mount and camera(s),
and get your laptop powered up and ready to go.
Step 2 – Polar alignment. When Polaris is visible, polar align your mount using whichever alignment method you
prefer to get an accurate alignment. If you have a polar alignment scope in your mount, use it to get a reasonably accurate alignment, and then use a more accurate technique to get it closer (drift alignment being the most accurate,
iterative polar alignment or ??). If you are autoguiding, it has been my experience that polar alignment does not need
to be very accurate and I have occasionally just positioned my mount by eye if I am pressed for time.
Step 3 – Star alignment. Do a two- or three-star alignment, or more, to get your mount’s pointing accuracy working well. These days I use EQMOD and Cartes du Ciel to provide the pointing model for my mount. The alignment
points are saved in a database so I sometimes have as many as ten stars/planets stored there to provide accurate
pointing in the area of the sky I’m imaging. If you are using just the hand-controller for your mount, Celestron seems
to have only a 2-star alignment, but it allows you to add another star close to your target area. Most others have at
least a 3-star alignment. Check your mount’s user manual for details. This is a good place to make sure your primary
imaging system (main scope and camera) is properly focused. Use a Bahtinov Mask if you are using a non-reflector
scope, or the secondary mirror spider spikes to get your focus sharp. If your system is still cooling down, it is a good
idea to recheck periodically throughout the session to make sure focus hasn’t drifted.
Sidebar note: I rarely find the need to use visual eyepieces in my sessions these days unless I have made a
major change in focus or alignment of my pointing tools. I have a red-dot finder to mount on either of my scopes and
it is usually sufficient to get a target star in the Field-of-View (FOV) of my autoguider camera and PHD, the guiding
program used almost universally. Center the star in its Bulls-eye display and if it and the main scope are properly
aligned, the target star should be close to the center of the main display. Center the star in it, accept the position, and
make whatever minor adjustments are needed to get the autoguider centered again, and you have no need to mess
July / Aug 2013
12
with removing cameras, looking in eyepieces, refocusing, replacing cameras, or refocusing, etc.
Step 4 – Slew to Target, Frame and Focus. Put your target into your hand-controller or planetarium program and
have the mount slew to it. If your star alignment is good it should be pretty well centered, at least in your Finder
scope or Autoguider display. Center in the main scope as needed, checking your capture program display to verify
framing. Now, here is a problem: What if you can’t see your target, i.e., it is too faint or diffuse to see? Patience is
needed here, because you need to increase your exposure length until you CAN see it, but when it takes a minute or
more to do so, it involves a lot of waiting. If you need to, use small incremental movements of the mount to get your
object centered or framed the way you want it, and then wait for the next few minutes to see the effect of your movement. Hopefully the focusing you did previously is still holding good, otherwise you will also have to refocus. Here
you will depend more on stars in the FOV to check the focus, so can use shorter exposures. If you are using Nebulosity (www.stark-labs.com) for capture, it provides a Fine Focus mode to further refine focus on a star in the FOV.
Step 5 – Calibrate autoguiding. In PHD (also from Stark Labs, although provided frequently as part of the software with guiding cameras) you will pick a smaller, unsaturated star in the PHD view screen and click on it. If all the
settings are correct (see the literature and both written and video tutorials for how to make setting adjustments) PHD
will start the calibration process by moving the mount in the four cardinal directions in increments. It should take up to
20 steps in each direction to figure out how to move your mount to keep it guiding on that star. If it takes many more
than 40 or so steps, you need to adjust the “Brain” parameters! Once it has completed the process, the green crosshairs should be centered on the selected star. Selecting to display the graph will give you a visual image of how guiding is doing. It is best to let guiding run for a while to settle down before starting to image.
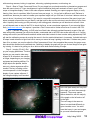
Step 6 – Imaging (Finally!). Set
up your imaging parameters. For faint
objects you may need to take many
images of 30 seconds to ten minutes
or longer, depending on your imaging
equipment and tracking abilities. For
bright objects like planets, double
stars, etc. shorter exposures will be
needed. The key to finding out the
correct exposure is in the histogram
display of your capture software. If
the histogram display is all bunched
to the left (dark areas) and very little
to the right, you don’t have enough
exposure. The screen capture
above shows this, with the majority
of the graph on the left and cut off
on the right.
The next image is the same as
above, but stretched differently to
get a smoother curve. You won’t
have that luxury in your raw images,
so you must increase exposure
July / Aug 2013
13
length to capture more photons. There are, however, cases where you just can’t do that, either due to light pollution,
or noise from other sources. In that case you will need to take a larger number of exposures to make up the difference in a process called “stacking” which I will cover later. The best approach is to take a few test exposures to see
how your histogram looks. If it looks reasonable, go ahead and take a series of lights, usually as many as you can
afford to spend time on since the more lights you get the more photons you capture and the better your signal-tonoise ratio will be. Plan to spend some time also in shooting darks (with the shutter closed or the dust cap on your
scope. These need to be of the same exposure length as your lights and, ideally, at the same chip temperature as
the lights. Shooting alternating lights and darks would be ideal, but tedious. Usually it is safe to shoot darks after a
series of lights. Darks are used to subtract out hot pixels from your lights. For short exposures, darks are not usually
critical but as your exposures get longer, more and more hot pixels will show up.
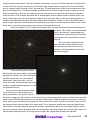
Here is an example. This is a single frame image of M15, non-dark subtracted. All the colored pixels are
hot pixels. This is rather an extreme example
since it was taken on a camera where the
thermoelectric cooling chip (TEC) had failed,
allowing many more hot pixels than usual to
show up.
The next image is still M15 but this
time with a dark image subtracted from it.
Note that there are only a few hot pixels
showing. It still has problems though since
the focus is way off.
There are other types of frames
that may help improve an image, such as bias
frames and flat frames, but I am not going into
that kind of detail here. You may research
what they do, how to take them, and use
online. Be aware, though, that there are many
opinions, some diametrically opposite, on how
to implement their use.
Once you have a good exposure length
set, checked focus, made sure guiding is
working satisfactorily, and given a name for
the series of images you will be taking, you are finally ready to start imaging. Now is when all the hard work and effort
starts to pay off! Set the series going and you can take a break while the capture program works for you. It will chug
away, capturing your minutes long sub-exposures until it reaches the number of them you selected. Put the cover on
the scope and take a series of darks of the same length. There is always a question as to how many darks to take.
Some people recommend taking as many darks as lights. I generally take about 1/3rd the number of lights. There is
also some evidence that the algorithms used in processing darks work better if there are an odd number of them, so I
take the odd number sequence. Set it going and once again take a break while the darks are captured.
July / Aug 2013
14
Step 7 – Completing the capture process. When you are done taking lights and darks for one target, if that is all
you will be doing in this session, you can stop guiding (remember to do this every time before slewing or moving the
scope), park the scope and shut everything down. If you have another target in mind, go back to Step 4 and continue
from there. If you will be using the same machine to stack and finalize the processing of the images, you can take it
inside to be ready for that. I find that my desktop computer, with a larger screen, more processing power, and more
memory, works better to handle this so usually either send the raw files via LAN or copy to a mass memory device to
transfer the files. Since it is usually fairly late when I get done imaging, I don’t plan on processing anything that night
and postpone any serious work until I can approach it the next day with a fresh, alert mind. I will admit, though, that I
sometimes do a real quick process to see how things came out if it is a real interesting target.
Skip to the next morning…
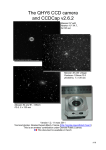
Now it is time to start converting the raw images from last night into finished products. If you purchased a CCD
camera, and were able to capture the CCD images from the previous session, you likely have at least one of the
tools needed to complete the process. Most, if not all, CCD cameras come with some sort of capture and processing
software. If you are using a DSLR, however, the software that comes with them may let you capture images of a sort,
but don’t provide the tools needed for astro-imaging. Fortunately, there are a number of free stacking programs available, among which are two that I use on occasion. They are Registax (http://www.astronomie.be/registax/), and the
current release is Version 6; and DeepSkyStacker (http://deepskystacker.free.fr/english/download.htm) at release
3.3.2. Both are totally free for download. Two more are worth mentioning here, FitsWork4 and FITSView; most CCD
cameras capture images in a specialized format called FITS (Flexible Image Transport System) which is the standard
format used by NASA and other astronomical organizations. To enable processing of these images, NASA/ESA have
provided plug-ins for PhotoShop to allow users to process FITS images. These plug-ins are also free, but imply that
you have PhotoShop. If you do, that is great, and if you don’t you may want to consider buying it or the less expensive Photoshop Essentials. You will find it very useful to have this software for final tweaking of your images. Orion
(www.telescope.com) provides a program called Maxim DL with their imagers. However, it is only a partially enabled
version of Cyanogen’s MAXIM DL (www.cyanogen.com) that sells for $199 for the basic version. The Orion proprietary version will work for basic use, but I had some bad experience with it initially and found it cumbersome to use.
They may have improved it recently, but I have never gone back to try it again since I found and purchased Nebulosity, another Stark Labs product. Yes, I said purchased, and I feel that the $80 price tag is well worth it. All of my image captures and most of my processing is accomplished with Nebulosity. Rather than going through a step-by-step
process here, which would only repeat what is available elsewhere, I suggest reading or viewing the available tutorials online. Here are a few:
http://www.youtube.com/watch?v=OMhLYg-xPuc
Astronomy Shed video
http://www.stark-labs.com/help/nebulositytutorials/files/PreProc%20Walkthrough_comp.pdf Stark Labs step-bystep walkthrough
http://www.youtube.com/watch?v=3PEFIUxpzt4
This tutorial covers Nebulosity and several other software
packages.
Stacking – I mentioned stacking earlier, and almost all of the good pre-processing packages will involve stacking, but what is it? Back in the days of film photography most imaging was done using large glass plates that fit in
astronomical telescopes that were essentially large cameras. Various techniques were used to make this “film” more
sensitive to light, but long exposures were still needed. This resulted in good images, but they also had a lot of noise.
Astronomers tried to find ways of reducing the noise in these images and when one astronomer tried placing two images of the same object one on top of the other he discovered that, after aligning the plates, due to the random noise
but constant stellar position of stars, the noise was partially cancelled while leaving the stars and other fixed objects
visible. Adding a third plate reduced the noise more. This reduction via stacking is called the “Signal-to-Noise Ratio”
or SNR. You can imagine how tedious it must have been to stack plates and get them aligned properly, but it worked.
July / Aug 2013
15
In the digital age, things get much easier. Stacking pixels is a lot simpler than stacking glass plates! And to make it
even simpler, the pre-processing programs do all the work for you. You just give the program a list of dark files and
light files, tell it what kind of stacking you want to do, and it does it for you. Here is an example:
July / Aug 2013
16
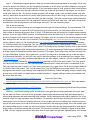
Final Tweaking
Normally stacking programs provide some basic tools for stretching and enhancing a stacked image, but to bring
out the subtle details, smooth out gradients and provide a finished look to your images, you will need to do some
post-processing. There are quite a few programs available to do image enhancement, and even a few free ones, but
in my experience and that of most other APers, the premiere program is Adobe Photoshop. Photoshop Elements is a
less expensive alternative, but with less capability. I use Photoshop CS3 Extended version that provides a few more
useful tools than the non-extended version. Photoshop also opens up the ability to use Actions that perform various
processing steps in a repeatable fashion. One of the most capable and versatile sets of actions tailored to astroimaging is Noel Carboni’s Tool Set
(http://www.prodigitalsoftware.com/
Astronomy_Tools_For_Full_Version.html). At $21.95 it is well worth the relatively low cost. Since I have used M42 as
a sample for previous images, it is fitting that the final image be a recent one that I post-processed in Photoshop using Noel Carboni’s tools, one of which provides the astro-frame.
July / Aug 2013
17
The darkest nights for these months are July 8-9th and August 6-7th from Midnight to 3 a.m. Summer has
shorter time periods of darkness compared to the other seasons. We will explore many of the New General Catalog
(NGC) objects and a few Index Catalog (IC) objects. All NGC and IC objects have numbers. Most paper-based sky
charts, electronic sky charts, and Go To telescope systems have the locations for NGCs. The best electronic/paper
(pdf) sky chart for NGCs and ICs is "Lonnie's Scribble Chart". It is available for free as a PDF or MS Publisher file,
and was created by our own SVAS member Lonnie Robinson. I also recommend Philip S. Harringtion's (2011) Cosmic Challenge book for further reference, for charts and more information (especially on the ICs). See also the modern NGC project (1993): http://www.ngcicproject.org/
The NCG list of 7,849 objects was completed by John Louis Emil Dreyer in 1888. It is an updated version of
John Herschel's Catalogue of Nebulae and Clusters of Stars of 1786. NGCs are better organized and usually dimmer
than Messier's list of 1771. NGCs are the next logical step for amateur astronomers beyond Messier and Caldwell
objects. I recommend a ten-inch diameter mirror reflector-type telescope or larger. After exploring the NGCs it's natural to want to see the even dimmer ICs with a 16-inch reflector or larger. Refractor telescopes in general, do not have
enough light gathering power to see most of the NGC or IC objects. The lists start at 00:00 Right Ascension (RA)
turning left to get higher numbers and include both Northern and Southern hemisphere declination (Dec) locatedobjects.
For a complete list of objects, see:
https://en.wikipedia.org/wiki/Category:Lists_of_astronomical_objects
See NGCs: https://en.wikipedia.org/wiki/List_of_NGC_objects
See the original publications of ICs at: http://ngcicproject.org/legacy/iconline/default.htm
Index Catalogue of Nebulae and Clusters of Stars
The IC list (Index Catalogue of Nebulae and Clusters of Stars) is a group of updated lists, to the NGC list and
has an additional 5,386 objects for a total of (7,849 + 5,386) 13,235. The IC list is basically the new galaxies, clusters
and nebulae discovered between 1888 and 1907, and corrected in 1912. If you want to look further into the ICs, I
suggest finding these: IC 349 Barnard's ("Merope" Nebula), IC 405 (Flaming Star Nebula), IC 410 (nebula near the
Flaming Star Nebula), IC 434 (bright nebula around "Horsehead" nebula), IC 1396 (Garnet Star Nebula), IC 2118
(Witch Head Nebula), IC 2220 (Toby Jug Nebula), IC 2574 (Coddington's Nebula), IC 2602 (Southern Pleiades), IC
4703 (Eagle Nebula), IC 5070 (Pelican Nebula), IC 5146 (Cocoon Nebula). Not all are visible from Blue Canyon or at
this time of year. But they are still worth looking-up.
Tip: Why can't I see low surface brightness objects considering my telescope is rated for even dimmer magnitudes?
Because the SVAS has a powerful 16-inch reflector telescope available for club member's use, I will concentrate on objects for that telescope's limiting magnitude of 15.1. Besides magnitude the "surface brightness" (usually
July / Aug 2013
18
for galaxies and planetary nebulae) is important. For instance if the stars in a spiral galaxy are spread-out flat as in
the face-on galaxy orientation, then the telescope may not see a 15.1 magnitude object (surface brightness is too
low). Yet if the stars are stacked on top of each other (as in an edge-on spiral galaxy), then the telescope will potentially see down to a faintness of 15.1 magnitude. Spherical-shaped galaxies do not have this difference.
Tip: To what maximum magnification I can push my telescope?
The practical maximum magnification for 8-inch mirrors (and up to 30-inches mirrors) is only 300x. However,
the SVAS's Ritchey–Chrétien telescope (RC16) can be pushed to about 960x on the best seeing nights. On dim objects like ICs, it is best to push the magnification as high as possible to "blacken" the dark background of space.
Magnification artificially increases the contrast between the object and it's background and therefore the dim object
can be seen better.
Suggested Observing List for July and August 2013
Legend: NGC#, name (if known), magnitude (if known) , type of object, RA & degrees declination location, Scribble
chart number.
NGC 6027 Seyfert's Sextet galaxies (gx). NGC 6027A and E 14.8/14.4 magnitude Seyfert's Sextet galaxies (gx), see
also nearby NGC 6040 14.1, 6041 14.2, 6042 14.9, 6041 14.2. See also IC 1178 14.1, IC 1182 14.2, IC 1183 14.2,
and IC 1185 13.8. Located at 16 hours RA and +20 degrees (16:00 +20). Lonnie's Scribble Chart does not have
every object in this suggested list, but the RA/Dec is usually well marked with near-by objects for star hopping to the
unmarked location. See Chart 12.
NGC 7333 Deer Lick group of eight galaxies. See nearby: NGC 7320, 7319, 7318, 7317 Stephan's Quintet
(Southwest of 7331). 22:37 +34, Chart 21
Near M81 and 82: NGC 3077, 2959 and 2976 and integrated flux nebula. 10:03 +68, Chart 2
NGC 6578 13.1 planetary nebula (pn) and nearby IC 4732 13.3 pn. 18:16 -20 Chart 19 See also 6440, Little Gem
and NGC 6445
NGC 6309 Little Ghost, Box nebula. 17:14 -12, Chart 16, See also 6356, 6235, 6287, 6284
NGC 6572 pn, 18:12 +6, Chart 14
NGC 6337 pn, 17:22 -38, Chart 14
NGC 6537 pn, Red Spider Nebula. 18:05 -19, Chart 19
NGC 6323 gx, 17:13 +43 Chart 14, See also 6239, 6229
NGC 6578 pn, 18:16 -20, Chart 13
NGC 6500 12 gx, and 6501, 13 gx, 17:56 +18, Chart 19
NGC 6503 10 gx, 17:49 +70, Chart 13
NGC 6504 13 gx, 17:56 +33, Chart 14
NGC 6521 13 elliptical gx, 17:55 +62, Chart13, See also 6411, 6223
NGC 6549 14 gx, 18:05 +18, Charts 14 and 15, See also 6548, 6555
NGC 6369 12.9 pn, 17:29 -23, Chart 16, See also 6401, 6325, 6355
NGC 6781 11.8 pn, 19:18 +6, Chart 18
July / Aug 2013
19
NGC 6803 11.3 pn, 19:31 +10, Chart 18
NGC 6804 12.2 pn, 19:31 +9, Chart 18
NGC 6822 9.3 gx, and 6818 pn, 19:44 -20, Chart 19
NGC 6445 13.2 pn, 17:49 -20, Chart 19, See also 6440 Little Gem
NGC 6453 10.2 globular cluster (gc), 17:50 -39, Chart 19 Near M7, see also 6475, 6396, 5441
NGC 6520 10-12 magnitude stars oc near dark nebula B86, 18:03 -27, Chart 19
NGC 6886 12.2 pn, 20:12 +19, Chart 18, Near M71, 6838
IC 4997 11.6 pn, 20:20 +16, Chart 18, See also 6891, 6879
NGC 6505 11.9 pn, 17:51 +65, Chart 13, Near C-6, 6543
IC 10 11.8 - 11.3 gx, 00:20 +59, Chart 20, See local galaxy group NGC 103, 7789 "hundreds of galaxies" on Scribble Chart.
Near M13: NGC 6207, 6196, 6194, 16:43 +36, Chart 14
NGC 188 8.1 oc, 00:44 +85, Chart 1, See also NGC 40
NGC 147 and 185, 10 gx, 00:33 +48, Chart 20, See local galaxy group on Scribble Chart.
NGC 404, 7.1 gc, near the star Mirach in Beta-Andromeda, 01:09 +35, Chart 23
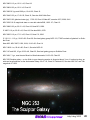
NGC 253 Sculptor galaxy -- a nice finish to your observing session in August at about 3 a.m. It is about as long, as
wide and as spectacular as the Andromeda Galaxy. 00:47 -25, Chart 26. Caldwell 65, See also NGC 247 and 12th
magnitude IC 1558.
July / Aug 2013
20
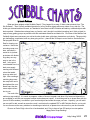
What are these widgets called Scribble Charts? They began life as mag-13 Astro chart printouts from “The
Sky Software”. Then I literally scribbled (penciled in) all my favorite objects and many others on my wish list. The
charts got cluttered and hard to read, so I decided to scan them into MS Publisher and add my selected objects with
basic symbols. Galaxies have always been my favorite, and I thought it would be interesting (and I think original) to
map as many galaxy groups as possible with their estimated distances and basic info. Of course all the Messier and
Caldwell objects were necessary, as well as favorite double stars, globulars, planetaries, and nebula. Things quickly
got challenging, complicated, and very slow going at first. I planned the 35 maps to cover North to South sections
that progress West to
East for viewing convenience. Notice the
extra large map numbers, and when inserted in vinyl sheet
protectors with binder
rings they are very
easy to see in the
dark. I also spent
considerable time in a
dark room experimenting with different
colors that would
show up under red
light. After creating a
matching large number map index and a
planisphere like numbered map, they became super convenient to use.
Too much information on map making? It’s a work in progress, a labor of love so to speak, and when I find new cool objects they
are scribbled in until the next computer session and subsequent reprint. It would be great fun to share them with you
(free to SVAS members), to scribble in your favorite objects and make the maps your own. Hopefully, you will send
me new stuff to add, as well as corrections, and I could return the updated PDF or MS Publisher files for you to print.
I’m sure there must be many mistakes in something so technical, so please let me know so they can be corrected.
Give me or Davin Enigl a shout for a free download, and I’ll try to have a free CD handy at our star parties.
Happy Astro Scrap Booking!
July / Aug 2013
21
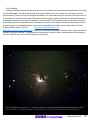
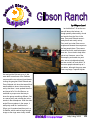
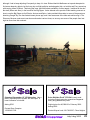
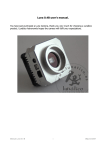
I arrived before 7:30 so the sun
was still above the horizon, although partially obscured by clouds
and smoke from the fires in the
area. Perry and Richard were already there and mostly set up.
Perry and I put solar filters on our
scopes and showed the sunspots to
the few people there. There were
several boys with small telescopes
there too, so we tried to help them
get set up. However, one of the
telescopes, purchased at a yard
sale, was so misaligned optically
that we couldn't do much with it. A
few more people showed up as it
got darker, although the group was
never very large. I spotted Jupiter
first and got the Dob set up on it. We
were able to see three of the Galilean
moons and the two colored cloud bands
circling the gas giant. Both Richard and
Perry followed suit since that was all that
was available to show, the sun having
set by that time. I soon spotted Arcturus
and keyed off of it to find Saturn, so
switched my scope over that way to
show the group something different. Saturn was a pretty red colored due to the
smoke in the atmosphere. With the wideangle 35mm eyepiece in the scope, it
was pretty small so I switched to a
25mm, got it centered and then put in a
2x Barlow, which made a large enough
image so the rings were clearly visible,
July / Aug 2013
22
although I had to keep adjusting it frequently to keep it in view. Richard had his Mallincam set up and attempted to
find some deep-sky objects, but the hazy sky and light pollution worked against him, so both he and Perry wound up
with varying views of Saturn. That being the case, and with limited availability of other targets, I switched to the double stars (Mizar and Alcor) in the handle of the Big Dipper. It also allowed me to provide a little teaching moment on
how to use the Big Dipper to find Polaris, Arcturus and Spica. I also provided information to some of the parents on
obtaining Google Sky, the free Android smart phone app, and I later saw some of the kids and adults using it. The
Discovery Museum solar event was also mentioned at various times, so we may see some of the people from last
night at some time this weekend.
Celestron Skywatcher 12” f/5 Dobsonian. Has a
factory encoder push to system with hand pad. A
Laser collimator is included.
Orion SkyView Pro 8” OTA f/4.9, rarely used.
Includes original instruction manual and zippered
heavy duty padded carry case.
Asking $700
Original price for all $368.85 in February 2006.
Asking $300.
Contact Dave Compton
1-530-346-7259
Contact Wayne Lord, 916-729-5537, Citrus Heights
July / Aug 2013
23
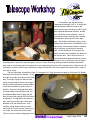
A few months ago we had the first
Telescope Workshop for 2013. A young lady
named Emerald called me earlier in the
week, asking if we could align an old 6” Orion
type equatorial Newtonian reflector, and Bill
and I invited her to the workshop. After inspecting the mirror it was obvious it needed
cleaning and a center spot for laser alignment. We finished cleaning the mirror, put a
Sharpie mark dead center, reinstalled it in the
optical tube, and inserted the laser collimator
only to discover a fuzzy blob of returning
light. Further inspection of the system reveled a corrector lens installed in the bottom of
the focuser tube. This is the first time I’ve
seen a Newtonian designed like this, and we
decided to remove the lens before doing the
initial alignment. Later at the April star party, some of us were discussing telescopes and a member mentioned it
was common some years ago for a Newtonian to use a spherical main mirror with a corrector lens. News to me! Unfortunately, we were unable to get a satisfactory image for Emerald? We even cleaned the corrector lens! It wasn’t
for a lack of trying!
The next workshop, scheduled for April 27, was great fun! Greg (pictured next page on left) owns a 8” Meade
Newtonian that refused to collimate. Try as
he might, he couldn’t find anyone that could
help. We finally figured out that the main
mirror was mounted off center, far enough
that the existing collimation screws couldn’t
reach the tilt required to pull the mirror in
position. Greg and I changed the screws
for some longer ones that did the job, but
he understandably wasn’t happy with the
idea his scope was looking out of the tube a
bit sideways. We decided to do some surgery; and removed the mirror which was
attached to the cell with silicone. Very
carefully cutting the glue with our mirrorcratic oath of “first do no harm” foremost in
our minds, the mirror came loose nicely.
Then it was just a matter of applying a bit of
July / Aug 2013
24
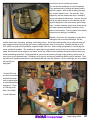
new silicone and re-centering the mirror.
You can see the toothpicks we used for spacers.
They worked great by utilizing the tapered end to
adjust the space. After double checking the spacing, we set it aside to cure. The next day, Greg
stopped by and we cleaned the mirror, installed it,
and re-collimated the Newtonian. Success, the rear
cell fell into place square on the tube and now the
physical alignment is the same as the optical alignment. In other words the scope sees where the optical tube is pointed, absolutely necessary if you
want to use encoders. The next photo is the freshly
cleaned mirror waiting for installation.
Mostafa , (third from left), dropped by to talk about
making his own mirror and telescope. Bill described the process of grinding, polishing, and testing mirrors. We all discussed the best size to start with, and I always suggest making a big enough first mirror to satisfy aperture fever for a long time. Mostafa decided on a 18”
f/4.5, which is a great size for portability, eyepiece height, and cost. With our help and guidance, a quality big first
mirror is definitely possible. The workshop is a great place to get started, and once the size and type decisions are
made, the serious work can begin at your home, and at my or Bills home workshops where we have the mirror machines and testing equipment. Getting started on your mirror and working through rough grinding, can be done at
your home, at your personal pace. Polishing is a lot of work, and we can schedule machine time for that task. Figuring takes a lot of planning and advice, and ultimately Bill and I can help finish up. Quite a challenge, but very rewarding to push your
own glass!
Contact Bill or me
any time to schedule
a special telescope
tune up appointment
or telescope building
experience. There
is ATM help available in the SVAS!
Lonnie Robinson
July / Aug 2013
25
General Meetings the third Friday of
each month beginning at 8:00pm.
Board Meetings begin at 6:30 on the
same day. All members are welcome.
Star Parties on weekends nearest
the new Moon.
Sacramento City College
Mohr Hall Room 3
3835 Freeport Boulevard
Sacramento, CA.
WWW.SVAS.ORG
Membership
Resources
Star-B-Q
Newsletter
SVAS Web Site
Outreach Director
Community Star Parties
Observatory Director
First Light Team
HGO Maintenance Director
Telescope Loaner Program
Amateur Telescope Making
Ross Gorman / Nerissa Adams
Ross Gorman / Walt Heiges
Walt Heiges
Lonnie Robinson / Walt Heiges
Margaret Minnick
Walt Heiges / Perry P. Porter
Perry Preston Porter
Perry Preston Porter
Perry Preston Porter
Stuart Schultz
Tim Tingey
Lonnie Robinson / Bill Thomas
To Subscribe– First send in your membership application form
below, with your dues, and upon approval by the board of directors the Observer (published bi-monthly) will be sent to your supplied email address in .pdf format. Second, request to join the
SVAS Yahoo Group at http://groups-yahoo.com/group/svasmembers. This group will keep you informed with the day to day
current events and discussions.
Articles– Manuscripts and letters are welcome in MS Word, MS
Publisher, or plain text format, and emailed to the SVAS Editor.
Deadline is the 22nd of the month prior to the newsletter release.
Advertising– Commercial, non-personal advertising, business
card, and full page are available. Classified advertising is free to
SVAS members.
Copyrights- Except for individually copyrighted articles, permission is granted to other amateur astronomy organizations to reproduce articles in whole or in part, for internal non-profit use,
provided credit is given to the SVAS Observer and the authors of
the reproduced materials. Copyrighted material appears in this
publication solely for non-profit educational and research purposes, in accordance with title 17 U.S.C. section 107
Notice: It may take the
board of directors 30 or
more days to process and
approve this
application.
Choose a Membership Level:
New: ___ or Renew:___
Student- (student ID required)
$24/yr or $2/mo ________
Family or Individual- (one household)
$36/yr or $3mo ________
Observatory- (Add to membership + approval) $48/yr or $4mo ________
Supporting- (membership + contribution)
$75/yr ________
Contributing- (membership + contribution)
$150/yr ________
Additional tax deductible contribution:
Amt $ _________
(Prorate Dues to July 1st renewal date)
Total $ _________
Name___________________________________________
Address_________________________________________
City ___________ Zip___________ (Please Print)
Phone_______________
Email_________________________________ (For SVAS Newsletter)
Detach and mail
with payment to:
SVAS Membership Application
PO Box 15274
Sacramento, California. 95851-0274
Observatory Membership
Approval
The benefits of a regular membership plus
private use of the Henry Grieb Observatory (HGO) at Blue Canyon. You must be
a regular member for six months or longer,
be certified and approved by the Observatory Director, and then be approved by the
SVAS Board of Directors.
By signing this application, I acknowledge
I have accessed the SVAS website, read
and understand the SVAS bylaws and the
rules governing the USFS Special Use
Permit. In doing so, I agree to abide by
the respective “terms and conditions” of
each as they relate to the SVAS, use of its
property and its facilities. I further understand and acknowledge that failure to
abide by these “terms and conditions” can
result in revocation of use privileges and/
or SVAS membership.
Signature
___________________________
July / Aug 2013
26