1
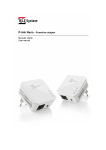
Dear Customer,
we would like to thank you for buying our product. Please read carefully this user manual before using the device.
Only by doing so the device can work in the correct way and it can meet all your needs. We reccomend you to keep
the product box in case you need to send back the device to customer care.
The Staff of TELE System
TELE System Electronic Srl states that, due to hardware or software changes (needed to improve the
product itself), the user could find differences between the content of this user guide and the product.
Indice
1
2
3
4
5
Safety Regulation . . . . . . . . . . . . . . . . . . . . . . . .
Product Description . . . . . . . . . . . . . . . . . . . . . . .
2.1
Introduction to Wi-lly 0.2 Plus . . . . . . . . . . . . . .
2.2
Contents of the package . . . . . . . . . . . . . . . . .
2.3
System requirements . . . . . . . . . . . . . . . . . .
2.4
Top and Back cover . . . . . . . . . . . . . . . . . . .
2.5
Input/Output Connectors . . . . . . . . . . . . . . . .
Installation and Basic Settings . . . . . . . . . . . . . . . . .
3.1
Features of Wi-lly 0.2 Plus . . . . . . . . . . . . . . .
3.1.1
Wireless Router/Access point mode . . . . .
3.1.2
Client mode . . . . . . . . . . . . . . . . . .
3.1.3
Extender mode . . . . . . . . . . . . . . . .
3.2
Automatic Configuration of Wi-lly 0.2 Plus . . . . . . .
3.3
Manual Configuration . . . . . . . . . . . . . . . . . .
3.3.1
Configuring the IP address of your computer
3.3.1.1
Windows XP . . . . . . . . . . . . .
3.3.1.2
Windows 7 . . . . . . . . . . . . . .
3.3.2
Web Interface of Wi-lly 0.2 Plus . . . . . . .
3.4
Graphic Interface of Wi-lly 0.2 Plus . . . . . . . . . . .
3.5
Setup Wizard . . . . . . . . . . . . . . . . . . . . . . .
3.5.1
Client/Extender Mode . . . . . . . . . . . . .
3.5.2
Router/Access Point mode . . . . . . . . . .
3.6
Advanced Settings . . . . . . . . . . . . . . . . . . . .
3.6.1
Setup Wizard . . . . . . . . . . . . . . . . .
3.6.2
Operation Mode . . . . . . . . . . . . . . . .
3.6.3
Wireless . . . . . . . . . . . . . . . . . . . .
3.6.3.1
Basic Settings . . . . . . . . . . . .
3.6.3.2
Advanced Settings . . . . . . . . .
3.6.3.3
Security . . . . . . . . . . . . . . .
3.6.3.4
Access Control . . . . . . . . . . .
3.6.3.5
Network Scan . . . . . . . . . . . .
3.6.3.6
WPS . . . . . . . . . . . . . . . . .
3.6.3.7
Scheduling . . . . . . . . . . . . . .
3.6.4
TCP/IP Settings . . . . . . . . . . . . . . . .
3.6.5
Firewall . . . . . . . . . . . . . . . . . . . . .
3.6.5.1
Port Filtering . . . . . . . . . . . . .
3.6.5.2
IP Filtering . . . . . . . . . . . . . .
3.6.5.3
MAC Filtering . . . . . . . . . . . .
3.6.5.4
Port Forwarding . . . . . . . . . . .
3.6.5.5
URL Filtering . . . . . . . . . . . . .
3.6.5.6
DMZ . . . . . . . . . . . . . . . . .
3.6.5.7
VLAN . . . . . . . . . . . . . . . . .
3.6.6
QoS . . . . . . . . . . . . . . . . . . . . . . .
3.6.7
Management . . . . . . . . . . . . . . . . . .
3.6.7.1
State . . . . . . . . . . . . . . . . .
3.6.7.2
Statistics . . . . . . . . . . . . . . .
3.6.7.3
DDNS . . . . . . . . . . . . . . . .
3.6.7.4
Time settings . . . . . . . . . . . .
3.6.7.5
Denial-of-Service . . . . . . . . . .
3.6.7.6
Log . . . . . . . . . . . . . . . . . .
3.6.7.7
Upgrade Firmware . . . . . . . . .
3.6.7.8
Save/Load Settings . . . . . . . . .
3.6.7.9
Password . . . . . . . . . . . . . . .
3.6.8
Logout . . . . . . . . . . . . . . . . . . . . .
Technical Specs . . . . . . . . . . . . . . . . . . . . . . . . .
Glossary . . . . . . . . . . . . . . . . . . . . . . . . . . . . .
.
.
.
.
.
.
.
.
.
.
.
.
.
.
.
.
.
.
.
.
.
.
.
.
.
.
.
.
.
.
.
.
.
.
.
.
.
.
.
.
.
.
.
.
.
.
.
.
.
.
.
.
.
.
.
.
.
.
.
.
.
.
.
.
.
.
.
.
.
.
.
.
.
.
.
.
.
.
.
.
.
.
.
.
.
.
.
.
.
.
.
.
.
.
.
.
.
.
.
.
.
.
.
.
.
.
.
.
.
.
.
.
.
.
.
.
.
.
.
.
.
.
.
.
.
.
.
.
.
.
.
.
.
.
.
.
.
.
.
.
.
.
.
.
.
.
.
.
.
.
.
.
.
.
.
.
.
.
.
.
.
.
.
.
.
.
.
.
.
.
.
.
.
.
.
.
.
.
.
.
.
.
.
.
.
.
.
.
.
.
.
.
.
.
.
.
.
.
.
.
.
.
.
.
.
.
.
.
.
.
.
.
.
.
.
.
.
.
.
.
.
.
.
.
.
.
.
.
.
.
.
.
.
.
.
.
.
.
.
.
.
.
.
.
.
.
.
.
.
.
.
.
.
.
.
.
.
.
.
.
.
.
.
.
.
.
.
.
.
.
.
.
.
.
.
.
.
.
.
.
.
.
.
.
.
.
.
.
.
.
.
.
.
.
.
.
.
.
.
.
.
.
.
.
.
.
.
.
.
.
.
.
.
.
.
.
.
.
.
.
.
.
.
.
.
.
.
.
.
.
.
.
.
.
.
.
.
.
.
.
.
.
.
.
.
.
.
.
.
.
.
.
.
.
.
.
.
.
.
.
.
.
.
.
.
.
.
.
.
.
.
.
.
.
.
.
.
.
.
.
.
.
.
.
.
.
.
.
.
.
.
.
.
.
.
.
.
.
.
.
.
.
.
.
.
.
.
.
.
.
.
.
.
.
.
.
.
.
.
.
.
.
.
.
.
.
.
.
.
.
.
.
.
.
.
.
.
.
.
.
.
.
.
.
.
.
.
.
.
.
.
.
.
.
.
.
.
.
.
.
.
.
.
.
.
.
.
.
.
.
.
.
.
.
.
.
.
.
.
.
.
.
.
.
.
.
.
.
.
.
.
.
.
.
.
.
.
.
.
.
.
.
.
.
.
.
.
.
.
.
.
.
.
.
.
.
.
.
.
.
.
.
.
.
.
.
.
.
.
.
.
.
.
.
.
.
.
.
.
.
.
.
.
.
.
.
.
.
.
.
.
.
.
.
.
.
.
.
.
.
.
.
.
.
.
.
.
.
.
.
.
.
.
.
.
.
.
.
.
.
.
.
.
.
.
.
.
.
.
.
.
.
.
.
.
.
.
.
.
.
.
.
.
.
.
.
.
.
.
.
.
.
.
.
.
.
.
.
.
.
.
.
.
.
.
.
.
.
.
.
.
.
.
.
.
.
.
.
.
.
.
.
.
.
.
.
.
.
.
.
.
.
.
.
.
.
.
.
.
.
.
.
.
.
.
.
.
.
.
.
.
.
.
.
.
.
.
.
.
.
.
.
.
.
.
.
.
.
.
.
.
.
.
.
.
.
.
.
.
.
.
.
.
.
.
.
.
.
.
.
.
.
.
.
.
.
.
.
.
.
.
.
.
.
.
.
.
.
.
.
.
.
.
.
.
.
.
.
.
.
.
.
.
.
.
.
.
.
.
.
.
.
.
.
.
.
.
.
.
.
.
.
.
.
.
.
.
.
.
.
.
.
.
.
.
.
.
.
.
.
.
.
.
.
.
.
.
.
.
.
.
.
.
.
.
.
.
.
.
.
.
.
.
.
.
.
.
.
.
.
.
.
.
.
.
.
.
.
.
.
.
.
.
.
.
.
.
.
.
.
.
.
.
.
.
.
.
.
.
.
.
.
.
.
.
.
.
.
.
.
.
.
.
.
.
.
.
.
.
.
.
.
.
.
.
.
.
.
.
.
.
.
.
.
.
.
.
.
.
.
.
.
.
.
.
.
.
.
.
.
.
.
.
.
.
.
.
.
.
.
.
.
.
.
.
.
.
.
.
.
.
.
.
.
.
.
.
.
.
.
.
.
.
.
.
.
.
.
.
.
.
.
.
.
.
.
.
.
.
.
.
.
.
.
.
.
.
.
.
.
.
.
.
.
.
.
.
.
.
.
.
.
.
.
.
.
.
.
.
.
.
.
.
.
.
.
.
.
.
.
.
.
.
.
.
.
.
.
.
.
.
.
.
.
.
.
.
.
.
.
.
.
.
.
.
.
.
.
.
.
.
.
.
.
.
.
.
.
.
.
.
.
.
.
.
.
.
.
.
.
.
.
.
.
.
.
.
.
.
.
.
.
.
.
.
.
.
.
.
.
.
.
.
.
.
.
.
.
.
.
.
.
.
.
.
.
.
.
.
.
.
.
.
.
.
.
.
.
.
.
.
.
.
.
.
.
.
.
.
.
.
.
.
.
.
.
.
.
.
.
.
.
.
.
.
.
.
.
.
.
.
.
.
.
.
.
.
.
.
.
.
.
.
.
.
.
.
.
.
.
.
.
.
.
.
.
.
.
.
.
.
.
.
.
.
.
.
.
.
.
.
.
.
.
.
.
.
.
.
.
.
.
.
.
.
.
.
.
.
.
.
.
.
.
.
.
.
.
.
.
.
.
.
.
.
.
.
.
.
.
.
.
.
.
.
.
.
.
.
.
.
.
.
.
.
.
.
.
.
.
.
.
.
.
.
.
.
.
.
.
.
.
.
.
.
.
.
.
.
.
.
.
.
.
.
.
.
.
.
.
.
.
.
.
.
.
.
.
.
.
.
.
.
.
.
.
.
.
.
.
.
.
.
.
.
.
.
.
.
.
.
.
.
.
.
.
.
.
.
.
.
.
.
.
.
.
.
.
.
.
.
.
.
.
.
.
.
.
.
.
.
.
.
.
.
.
.
.
.
.
.
.
.
.
.
.
.
.
.
.
.
.
.
.
.
.
.
.
.
.
.
.
.
.
.
.
.
.
.
.
.
.
.
.
.
.
.
.
.
.
.
.
.
.
.
.
.
.
.
.
.
.
.
.
.
.
.
.
.
.
.
.
.
.
.
.
.
.
.
.
.
.
.
.
.
.
.
.
.
.
.
.
.
.
.
.
.
.
.
.
.
.
.
.
.
.
.
.
.
.
.
.
.
.
.
.
.
.
.
.
.
.
.
.
.
.
.
.
.
.
.
.
.
.
.
.
.
.
.
.
.
.
.
.
.
.
.
.
.
.
.
.
.
.
.
.
.
.
.
.
.
.
.
.
.
.
.
.
.
.
.
.
.
.
.
.
.
.
.
.
.
.
.
.
.
.
.
.
.
.
.
.
.
.
.
.
.
.
.
.
.
.
.
.
.
.
.
.
.
.
.
.
.
.
.
.
.
.
.
.
.
.
.
.
.
.
.
.
.
.
.
.
.
.
.
.
.
.
.
.
.
.
.
.
.
.
.
.
.
.
.
.
.
.
.
.
.
.
.
.
.
.
.
.
.
.
.
.
.
.
.
.
.
.
.
.
.
.
.
.
.
.
.
.
.
.
.
.
.
.
.
.
.
.
.
.
.
.
.
.
.
.
.
.
.
.
.
.
.
.
.
.
.
.
.
.
.
.
.
.
.
.
.
.
.
.
.
.
.
.
.
.
.
.
.
.
.
.
.
.
.
.
.
.
.
.
.
.
.
.
.
.
.
.
.
.
.
.
.
.
.
.
.
.
.
.
.
.
.
.
.
.
.
.
.
.
.
.
.
.
.
.
.
.
.
.
.
.
.
.
.
.
.
.
.
.
.
.
.
.
.
.
.
.
.
.
.
.
.
.
.
.
.
.
.
.
.
.
.
.
.
.
.
.
.
.
.
.
.
.
.
.
.
.
.
.
.
.
.
.
.
.
.
.
.
.
.
.
.
.
.
.
.
.
.
.
.
.
.
.
.
.
.
.
.
.
.
.
.
.
.
.
.
.
.
.
.
.
.
.
.
.
.
.
.
.
.
.
.
.
.
.
.
.
.
.
.
.
.
.
.
.
.
.
.
.
.
.
.
.
.
.
.
.
.
.
.
.
.
.
.
.
.
.
.
.
.
.
.
.
.
.
.
.
.
.
.
.
.
.
.
.
.
.
.
.
.
.
.
.
.
.
.
.
.
.
.
.
.
.
.
.
.
.
.
.
.
.
.
.
.
.
.
.
.
.
.
.
.
.
.
.
.
.
.
.
.
.
.
.
.
.
.
.
.
.
.
.
.
.
.
.
.
.
.
.
.
.
.
.
.
.
.
.
.
.
.
.
.
.
.
.
.
.
.
.
.
.
.
.
.
.
.
.
.
.
.
.
.
.
.
.
.
.
.
.
.
.
.
.
.
.
.
.
.
.
.
.
.
.
.
.
.
.
.
.
.
.
.
.
.
.
.
.
.
.
.
.
.
.
.
.
.
.
.
.
.
.
.
.
.
.
.
.
.
.
.
.
.
.
.
.
.
.
.
.
.
.
.
.
.
.
.
.
.
.
.
.
.
.
.
.
.
.
.
.
.
.
.
.
.
.
.
.
.
.
.
.
.
.
.
.
.
.
.
.
.
.
.
.
.
.
.
.
.
.
.
.
.
.
.
.
.
.
.
.
.
.
.
.
.
.
.
.
.
.
.
.
.
.
.
.
.
.
.
.
.
.
.
.
.
.
.
.
.
.
.
.
.
.
.
.
.
.
.
.
.
.
.
.
.
.
.
.
.
.
.
.
.
.
.
.
.
.
.
.
.
.
.
.
.
.
.
.
.
.
.
.
.
.
.
.
.
.
.
.
.
.
.
.
.
.
.
.
.
.
.
.
.
.
.
.
.
.
.
.
.
.
.
.
.
.
.
.
.
.
.
.
.
.
.
.
.
.
.
.
.
.
.
.
.
.
.
.
.
.
.
.
.
.
.
.
.
.
.
.
.
.
.
.
.
.
.
.
.
.
.
.
.
.
.
.
.
.
.
.
.
.
.
.
.
.
.
.
.
.
.
.
.
.
2
3
3
3
3
3
4
5
5
5
5
5
5
6
6
6
7
7
7
7
7
8
8
8
9
9
9
9
10
10
10
10
11
11
12
12
12
12
12
12
12
12
13
13
13
13
13
13
13
13
13
13
14
14
15
15
1
Wi-lly 0.2 Plus
1
Safety Regulation
We advise you to read the following advice concerning the safety regulations carefully in order to ensure safe use of
the appliance.
ELECTRICAL SUPPLY
The appliance should be supplied by using the microUSB-USB cable (please verify that the USB port can supply
external devices) or by using the external power supply unit you can find inside the product box. The appliance
must not be repaired in any way by the user, in case of breakages or failures please refer to the nearest center for
assistance. Do not remove the cover. The inside of the appliance could contain higher voltages than that of the
supply voltage which could endanger the user. The device should be disconnected from the electrical supply before
performing any intervention. Non-authorised removal will mean that the warranty is no longer valid!
POWER CABLE
Before installing the appliance make sure that the cable is intact, paying particular attention to its connection to the
power supply and to the appliance. If the cable is damaged do not attempt to connect the appliance and refer the
problem to an authorised center for assistance. When installing the cable make sure that it can not be flattened in any
way by items placed above or next to the appliance. Avoid placing the cable in an area where it could accidentally be
stepped on, removed from the wall or damaged in any way. If the cable is damaged in any way carefully disconnect
from the appliance and refer to specialised techinicans or the center for assistance to get a replacement.
LIQUIDS
Keep the appliance far from any liquids. Do not place any objects containing liquids on the appliance, such as vases,
humidifiers etc. The appliance must not be installed in areas where it could come into contact with sprays or drops
of water or in an environment with a high level of humidity where condensation could occur. If the device should
accidentally come into contact with liquids, disconnect immediately from the power socket. DO NOT TOUCH the
device until it has been disconnected.
SMALL OBJECTS
Keep the receiver away from coins or other small objects. Objects which fall into the appliance via the ventilation
gaps could cause serious damage.
CLEANING
Before cleaning, disconnect the device from the power supply. To clean the outside of the reciever use a soft and
dry or slightly damp cloth. Avoid using products which contain chemicals or solvents.
VENTILATION
Make sure that the area where the appliance is to be installed has good air circulation so that the heat can be
dissipate well in order to avoid overheating. In order to allow enough ventilation it is necessary to have a distance of
at least 10 cm on either side of the appliance and 15cm above the appliance. The vents must be kept clear from any
obstructions such as newspapers, table cloths, furnature material, curtains, carpets etc. Avoid installing the receiver
close to any heat sources (i.e. radiators, stoves etc) or on top of any other appliances which omit heat (video players,
DVD etc).
WARNING!!!
Keep the appliance out of reach of children. The plastic bags used for packaging can be dangerous. To avoid
suffocating keep the bags out of reach of children. Do not expose the receiver or remote control to direct sunlight.
The appliance must be placed on a solid and stable base.
Connect the device to the power supply only after installation is complete. Dispose of the product
correctly so as to avoid damage to the environment and human health as well as to facilitate recycling
of the components/materials used in the appliance. If the product is not disposed of properly this
could be punishable according to the involved law. The manufacturers recommend that the parts are
recycled seperately and are taken to sites which conform to current regulations.
2
TELE System
2
Product Description
2.1
Introduction to Wi-lly 0.2 Plus
Wi-lly 0.2 Plus is an high-performace wireless device. The data rate (up to 300 Mbps using 802.11n, up to 54 Mbps
in 802.11g and up to 11 Mbps in 802.11b) the device can reach make it suitable for applications that widely use
internet. This device can be used in different ways: as a wireless client (and in this operative mode it can extend
internet access also to the devices connected via ethernet port to Wi-lly 0.2 Plus), as wireless extender (in order to
increase the range of your existing wireless network), as router or as root access point (you can connect Wi-lly 0.2
Plus to your broadband modem/router via ethernet (WAN port)). Each of these operative modes will be described in
next sections of this user manual.
NOTE:
The device has a very small housing so it can become hot during the normal usage. This is the normal
behaviour of the product and not a defect of the product. In any case we suggest to put the device in a
place with good air circulation during its usage.
2.2
Contents of the package
Please check the content of the package before installing Wi-lly 0.2 Plus. The kit consists of:
• 1 x ethernet-wifi adapter Wi-lly 0.2 Plus;
• 1 x LAN ethernet cable RJ45 (50 cm);
• 1 x microUSB-USB cable;
• 1 x external power supply;
• 1 x user guide;
• 1 x warranty card.
2.3
System requirements
Wi-lly 0.2 Plus does not have any particural requirement. It can be used with any computer or device which has an
operating system with networking support. The only requirement is that the computer or device to connect has a
network card with ethernet port or it can support wifi 802.11b/g/n (depending on the operative mode of Wi-lly 0.2
Plus). In order to access to the web interface of Wi-lly 0.2 Plus you must have a computer or device with an internet
browser.
If you will use WPS (in client mode) for configuring Wi-lly 0.2 Plus you must have a wifi network with no protection
or with a WPA2(AES)-PSK protection. WEP, WPA(TKIP)-PSK or WPA/WPA2-PSK mixed mode passwords are not
allowed from the device by using WPS because such protections are not included in the standard WPS 2.0 for
security reasons (less robustness to brute-force attack).
2.4
Top and Back cover
1. PWR Led: if it is on (blue), the device is operative; if it is off, then the device is not powered.
2. WPS Led: the colour of this led represents one of these states:
• steady red: if the led is steady red and PWD led is steady blue, the device is booting. When WPS turns
off, then the device is fully operative.
• blinking red: WPS connection on going
3
Wi-lly 0.2 Plus
• off: WPS connection finished (if the device is in client mode, if WLAN led is blinking (3 blinks a second)
then the WPS connection was unsuccessfull otherwise if WLAN led is steady (for steady we mean blinking
very fast because data are transmitted) then the WPS connection was successfull.
3. WLAN led: off if wireless network is disabled, blinking blue(3 blinks a second) if wireless netowrk is on, blinking
blue (very fast blinking) if data are transmitted.
4. LAN led: off if there are no devices connected to LAN port or if connection is not active, on if there are
connected devices (but no transmitted data), blinking if there are connected devices and data are transmitted.
5. WAN led: off if there are no devices connected to WAN port or if connection is not active, on if there are
connected devices (but no transmitted data), blinking if there are connected devices and data are transmitted.
6. WPS/Reset button: if pressed (and not held on) the button starts the WPS connection (and WPS led starts to
blink); if the button is pressed (and held on for more than 5 seconds) the fectory reset will start and the device
will be reset to its factory settings.
ATTENTION!!
If WPS button is pressed and held on for more than 5 seconds, the device will take about 60 seconds
for coming back to its factory settings, do not disconnect from power source for any reason during
this process otherwise the device could be damaged.
2.5
Input/Output Connectors
The input/output connectors are the following:
1. LAN/SETUP ethernet port: here you can connect a computer or any other device with ethernet interface by
using a RJ-45 ethernet cable (not cross).
2. INTERNET ethernet port: here you can connect your broadband modem/router (by using a Rj-45 ethernet
cable) or, in client mode, you can use this port as a normal LAN ethernet port.
3. micro-USB port: connect here the microUSB power cable. You can connect the cable to an USB port or to
the external power supply.
ATTENTION:
Before connecting the microUSB - USB cable, check if the USB port can power on the device without
any issue ( 5V/0.6A DC). If not, please use the external power supply unit.
4
TELE System
3
Installation and Basic Settings
This section will give you details about the installation and the basic settings of Wi-lly 0.2 Plus. If you need further
information about the configuration of the computer (or device with ethernet interface) to connect to Wi-lly 0.2 Plus
please take a loop here: TELE System: http://www.telesystem-world.com/settings-willy02.
3.1
Features of Wi-lly 0.2 Plus
Wi-lly 0.2 Plus can be used in 3 different operation modes:
• router/wireless access point
• client
• extender
Depending on the chosen operation mode, you will have different features. By default Wi-lly 0.2 Plus is configured in
client mode so, even after a factory reset, the product will be reset to this operation mode. This user manual will give
the user all the necessary details about the settings of Wi-lly 0.2 Plus.
3.1.1
Wireless Router/Access point mode
In this operation mode Wi-lly 0.2 Plusacts as a router/access point (AP) by routing the packages to their destination
on LAN network. In AP mode Wi-lly 0.2 Plus is used as access point and it is connected to internet by using the
WAN port (by connecting it via ethernet cable to the broadband modem/router). In this operation mode the clients in
your local network can connect to Wi-lly 0.2 Plus in 2 different ways:
• by using an ethernet cable via LAN/SETUP port
• by using WiFi; Wi-lly 0.2 Plus can generate a WiFi network in order to share internet with wireless clients.
3.1.2
Client mode
This is the default mode of the device. Wi-lly 0.2 Plus is used for connecting to an existent wireless home network as
a client. The clients can have internet access by connecting using the ethernet cable to LAN/SETUP or WAN port.
In this operation mode WAN port has same features of LAN/SETUP port and all WAN features are not enabled.
3.1.3
Extender mode
This operation mode is a variation of client mode: Wi-lly 0.2 Plus acts both as client and AP. Wi-lly 0.2 Plus acts as a
client by connecting to an existent wireless network and, at the same time, it acts as an AP by extending the existent
wireless network. In order to do this, you need to check that the wireless network generated by Wi-lly 0.2 Plus has
the same features (for features we mean protection, channel, protocol and so on) of the original wireless network
you want to extend. Wi-lly 0.2 Plus will generate a new wireless network that will extend your original home network:
the clients could connect to the new wireless network by using WiFi or by ethernet cable (by using LAN/WAN port).
NOTE:
If you get a timeout error in connecting to the new wireless network that extends the original one, please
check that the protection type and password of the new wireless network are the same of your original
network. You can check this on section Wireless -> Security in web interface.
3.2
Automatic Configuration of Wi-lly 0.2 Plus
There are 2 different ways for configuring Wi-lly 0.2 Plus. You can choose which way to follow depending on the
features of your wireless network and your broadband modem/router. The two ways for configuring the device are
the following:
• automatic configuration by using WiFi Protected Setup (WPS 2.0)
• manual configuration
If your broadband modem/router can support WPS and the protection of your wireless network is WPA2-AES, then
the connection between Wi-lly 0.2 Plus and your broadband modem/router can be done automatically, that is:
• switch on Wi-lly 0.2 Plus: you need to connect Wi-lly 0.2 Plus to an USB port (that can support 5V/0.6A DC)
by using the microUSB-USB cable. If the USB port does not manage to power on the device, then please use
the external power supply unit.
• wait for about 30 seconds (boot time of Wi-lly 0.2 Plus). When PWR led is steady blue and WLAN is blinking
blue the device is fully operation.
5
Wi-lly 0.2 Plus
• press (and instantly release) WPS button on the back cover of Wi-lly 0.2 Plus. WPS led will start blinking (red
colour). This means that the WPS pairing is started.
• within 2 minutes press WPS button on your broadband modem/router.
NOTE:
WPS 2.0 standard supports only no protection or protection WPA2-AES. Different kinds of passwords (WEP,
WPA2-TKIP, WPA/WPA2 mixed) are not allowed for security reasons.
NOTE:
WPS connection can take up to 5 minutes. Once the procedure is started, please do not switch off the device
but wait untile the end of the pairing. If the pairing is successful the PWR led will be steady blue, WPS led
will be switched off and WLAN led steady on (fast blinking). If the WPS procedure is unsuccessfull WLAN
led will be blinking (3 blinks a second). In this case, please check that the protection set on your broadband
modem/router is WPA2-AES. In order to have WPS connection working please change, if possible, the
protection of your broadband modem/router in WPA2-AES. If this is not possible of if you faced any issue
by using WPS procedure, please follow the manual configuration which is explained in next section(3.3).
3.3
Manual Configuration
In order to configure Wi-lly 0.2 Plus you need a computer with a working browser. For first time configuration you
need to follow the steps below:
• switch on Wi-lly 0.2 Plus: you need to connect Wi-lly 0.2 Plus to an USB port (that can support 5V/0.6A DC)
by using the microUSB-USB cable. If the USB port does not manage to power on the device, then please use
the external power supply unit.
• connect Wi-lly 0.2 Plus to your computer by using ethernet cable.
NOTE:
If your computer has WiFi on, please turn it off. By doing so the only active network interface will be
ethernet.
Wi-lly 0.2 Plus is set in client mode and its network settings are:
• IP address: 192.168.100.1
• Subnet Mask: 255.255.255.0
• IP Range: 192.168.100.100 - 192.168.100.200
This means that Wi-lly 0.2 Plus is reachable by digit on your browser the following url http://192.168.100.1 after
changing the IP address of your computer to: 192.168.100.xxx, where xxx is a number between 100 and 200.
3.3.1
Configuring the IP address of your computer
As said in previous section, in order to have access to the web interface of Wi-lly 0.2 Plus you need to set the IP
address of your computer to 192.168.100.xxx, where xxx is a number between 100 and 200. From now on we will
use this IP address for the computer: 192.168.100.100. Here below you can find the procedure to change IP address
of a computer with operating system Windows XP and Windows 7. If you face any issue during the configuration,
please visit our website: http://www.telesystem-world.com/settings-willy02. You can find detailed information on the
procedure of configuration.
3.3.1.1 Windows XP
In order to change IP address in Windows XP, please follow the steps below:
1. Click on Start -> Control Panel -> Network and Internet -> Network Connections
2. Select LAN local network, clink on right mouse button and select Properties
3. On tab General, select Internet Protocol (TCP/IP) and click on Properties button below
4. Select Use the following IP address and set the fields as the following:
•
•
•
•
•
6
IP address: 192.168.100.100
Subnet Mask: 255.255.255.0
Default Gateway : <empty>
Preferred DNS Server: <empty>
Alternate DNS Server: <empty>
TELE System
3.3.1.2 Windows 7
In order to change IP address in Windows 7, follow the steps below:
1. Click on Start -> Control Panel -> Network and Internet (in View by Category) -> Network and Sharing Center
2. In View your active networks you can find a Local Area Network connection. Below Access type: no access,
click onLocal Area Connection and then on Properties button
3. Now select Internet Protocol Version 4 (TCP/IPv4) and then click on Properties button below
4. Select Use the following IP address and set the fields as the following:
•
•
•
•
•
3.3.2
IP address: 192.168.100.100
Subnet Mask: 255.255.255.0
Default Gateway: <empty>
Preferred DNS server: <empty>
Alternate DNS server: <empty>
Web Interface of Wi-lly 0.2 Plus
After setting the IP address of your computer, the web interface of Wi-lly 0.2 Plus can be reached by digiting in your
browser the following address: http://192.168.100.1. Via web interface you can configure Wi-lly 0.2 Plus and you
can find a detailed description of all the settings of Wi-lly 0.2 Plus in the next sections. A popup asking you for
username and password will appear and please notice that default username and password are admin admin. After
authenticating you can see the web interface of Wi-lly 0.2 Plus. Next section will cover all the details of web interface.
ATTENTION!
Please consider that, after configuring Wi-lly 0.2 Plus in order to use internet, the user needs to restore the
computer to original settings (we suggest to put the IP address of your computer to Obtain an IP address
automatically and Obtain DNS server address automatically).
3.4
Graphic Interface of Wi-lly 0.2 Plus
The user interface of Wi-lly 0.2 Plus consists in 2 sections: the left section represent a navigation menu, divided into
sections and subsections, while the right section give details on the selected entry. The settings of the menu can
change a bit with regards to the oprative mode of the device. Section 3.5 represents the procedure of first installation
while section3.6 give the user all the necessary details about the entries of the menu.
3.5
Setup Wizard
In order to configure in a quick way Wi-lly 0.2 Plus and use it as a router/access point wireless, client or extender,
please follow the steps below.
3.5.1
Client/Extender Mode
This operation mode is the default one. It is the mode active in first installation but also the active mode after a factory
reset of the device. The goal of this operation mode is to connect Wi-lly 0.2 Plus to an existent wireless network and
share internet access to the clients connected via ethernet interface to LAN/SETUP and WAN port of Wi-lly 0.2 Plus.
NOTE:
In client mode, WAN section in the graphic interface is not enable because WAN port acts as a LAN port in
Wi-lly 0.2 Plus.
In order to activate/configure this operation mode you need to:
• select Operation mode from navigation menu and set as operation mode AP Client (skip this step if you are
on first installation);
• select Setup Wizard from navigation menu and follow the procedure on screen.
For Client mode the setup wizard consists in the following steps:
1. select wifi network: choose from the table the wifi network to connect to and click on Connect.
2. In this window you can see the protection settings of the network you are connecting to. Insert the passord/protection key of your network (if the network is protected) and click on Next.
3. Initialization: Wi-lly 0.2 Plus is connecting to the selected wifi network by using the password you digit. If the
connection is unsuccessfull, please check the correctness of the inserted password and check that the network
you are connecting to does not have poor quality/strength. If the connection is successful, please click on Next.
7
Wi-lly 0.2 Plus
4. Finalization: if the connection is successful, Wi-lly 0.2 Plus need to save the data regarding the selected
network. This process takes up to 30 seconds.
NOTE:
In order to check the connection of Wi-lly 0.2 Plus to the wireless network, check in section Management ->
Status that the table Wireless Configuration shows Connected on State field.
ATTENTION!
Please notice that, in the case of manual configuration, after a successful connection to the wifi network
and the check on Wireless Configuration table you need to change back the IP address and NDS server of
your computer to the original values. We suggest to use, if possible, Obtain an IP address automatically
and Obtain a DNS server automatically. This is crucial in order to have internet access from the computer
used to configure Wi-lly 0.2 Plus.
3.5.2
Router/Access Point mode
The goal of this mode is to connect Wi-lly 0.2 Plus by using ethernet cable (on WAN port) to your broadband
modem/router and share internet with all the client that can connect to the wifi network generated by Wi-lly 0.2 Plus
or to LAN port.
In order to activate/configure this operation mode:
• select Operation mode from the navigation menu and set as operation mode Gateway ;
• select Setup Wizard from the navigation menu and follow the procedure of first installation
For access point mode, the first installation consists in the following steps:
1. Time zone: you can choose your time zone and also a NTP server in order to sync the time automatically
2. LAN settings: you can choose the IP address of Wi-lly 0.2 Plus and the subnet mask (default IP address:
192.168.100.1)
3. WAN settings: you can choose the WAN settings (see section 3.6.4 for further details)
4. Basic network settings: you can enable/disable the wifi network generated by Wi-lly 0.2 Plus. Moreover you
can choose the band and the protocol to use, the wireless mode (if AP or client), the channel width, sideway
bands and channel number. We suggest to keep the default settings. The settings can be changed any time
in section Wireless in navigation menu. For further details please see section 3.6.3.1.
5. Security on wireless network: you can choose the protection of the wifi network generated by Wi-lly 0.2 Plus.
NOTE:
We stronglu suggest to set a protection/password on your wifi network generated by Wi-lly 0.2 Plus in order
to avoid unauthorized access to your home network.
NOTE:
The Bridge operation mode of Wi-lly 0.2 Plus is almost the same of Gateway operation mode (as AP/client)
but DHCP server is disabled together with all the WAN features.
3.6
Advanced Settings
In this section all the settings of the web interface are explained with more details. We refer to the settings when
Wi-lly 0.2 Plus is in access point/router operation mode because these settings are the same of client mode with the
adding of WAN section.
3.6.1
Setup Wizard
This section consists in all the necessary steps in order to quick install Wi-lly 0.2 Plus in your home network. Depending on the operation mode of Wi-lly 0.2 Plus (AP client by default), the steps of the wizard change a bit but they are
described in section 3.5.
8
TELE System
3.6.2
Operation Mode
Here you can find the 3 different operation modes of Wi-lly 0.2 Plus. They are:
• AP Client: select this mode if you want to use Wi-lly 0.2 Plus as a client of an existent wifi network or as
extender/repeater for extending the existent wifi network.
• Bridge: in this mode wifi and ethernet interfaces are bridged together and firewall, NAT, DHCP and WAN
functionalities are not enable.
• Gateway: select this mode if you want to connect Wi-lly 0.2 Plus by using ethernet cable (WAN port) to your
broadband modem/router and use Wi-lly 0.2 Plus as access point/router.
NOTE:
If you change the operation mode (and you apply the change), you need to reboot Wi-lly 0.2 Plus. The
reboot process will take about 30 seconds.
3.6.3
Wireless
This section regards all the settings concerning with the wifi network generated by Wi-lly 0.2 Plus. This section
consists in the following subsections:
3.6.3.1 Basic Settings
Here you can find the basic settings of the wireless network generated by Wi-lly 0.2 Plus. The complete list of the
parameters is the following:
• key for enabling/disabling the wifi network generated by Wi-lly 0.2 Plus.
• wireless mode: choose access point (AP) or client mode. Client mode is available only if the operation mode
of Wi-lly 0.2 Plusis AP Client or Bridge.
• Band: you can choose the protocol to use: 802.11b/g/n or both.
• multiple AP: click this button in order to see/change the settings of multiple access points. This feature is
enabled only if Wi-lly 0.2 Plusis in AP mode.
• SSID: Service Set IDentifier (name of the network generated by Wi-lly 0.2 Plus).
• Channel width: select 20 MHz or 40 MHz (40 MHz only with protocol 802.11n).
• Channel number: select the channel of the wifi network generated by Wi-lly 0.2 Plus.
• Country: USA (FCC), Canada (IC), Europe (ETSI), Spain, France, Japan (MKK).
• Broadcast SSID: if you enable it, the wifi network generated by Wi-lly 0.2 Plus will be available for all the
devices that ask for it.
• WMM: enable/disable Wi-Fi Multimedia on 802.11 networks
• Active Clients: the button shows a table with information on each client connected to the wifi network of Wi-lly
0.2 Plus.
• Enable MAC Clone: copy the mac address of the computer connected to the LAN/SETUP port of Wi-lly 0.2
Plus (available only if in client ).
• Enable universal repeater mode: in client mode, this feature is used for extending the wifi network Wi-lly 0.2
Plusis connected to. If this feature is enabled, Wi-lly 0.2 Plus will act as an AP and client at the same time.
In order to use this feature in the right way, remember that all the parameters like SSID, Bandwidth, channel
number and so on need to have the same value of the wifi network you want to extend. You need also to not
leave blank SSID field of extended interface.
Click on Appy Changes for saving and Reset for skip the changes.
3.6.3.2 Advanced Settings
Here you can change the settings concerning LAN.We strongly suggest to avoid the change of such settings because
these settings can affect the performances of Wi-lly 0.2 Plus.
• Fragment threshold: its value should be 2346. If you are facing an high percentage of lost packages you can try
to decrease such value between 256 and 2346. If you set a too low value you should have poor performances.
• RTS threshold: Request To Send threshold. This value should be 2347. If you are loosing frames in data
stream you can try to decrease such value (allowed range: 0-2347) in order to make data transfer more robust
to the interference introduced by other wireless network or other wireless devices in your network.
9
Wi-lly 0.2 Plus
• Beacon Interval: this interval should be 100ms. Il beacon is a packet sent to the client for checking if the
connection is active.
• Preamble Type: length of CRC block for the communication between geteway and wireless clients. If in your
network there are no 802.11b devices please keep Short in order to have the best performances. If in your
network you have both 802.11g and 802.11b devices please choose Long.
• IAPP: enable/disable Inter-Access Point Protocol
• Protection: enabling this feature will decrease the performances of the network but it can be useful if the
network has high traffic on 802.11b.
• Aggregation: enable the package aggregation and this allow an increase of the bandwidth.
• Short GI: using a short guard interval can increase the robustness of the wifi network with regard to interference.
• WLAN partition: se abilitata, i client wireless connessi alla rete non potranno comunicare tra loro.
• STBC: enable/disable Space Time Blocking Code (STBC) standard.
• 20/40 MHz coexist: enable/disable the coexistence of 20 Mhz and 40 Mhz in the same wifi network.
• RF power: power of the transmitted signal. If your wireless signal is overlapped to many wireless networks, it
can be useful to decrease this value in order to decrease interference.
Click on Appy Changes for saving and Reset for skip the changes.
3.6.3.3 Security
In this section the user can select the security of the wireless network generated by Wi-lly 0.2 Plus.
• Select SSID: you need to select the wireless network generated by Wi-lly 0.2 Plus.
• Protection: there are 5 available protections: disabled, WEP, WPA-PSK, WPA2-PSK and WPA-Mixed. WEP
and TKIP are not supported in 802.11n but only in 802.11g. WPA-mixed is not supported in client mode.
• Show password: you can show or hide the password.
Click on Appy Changes for saving and Reset for skip the changes.
Concerning protection, Disabled means that the network is not protected with any password. We suggest to protect
your wifi network with a password/protection in order to avoid unauthorized access to your home network. If you use
WEP protection there are 3 options: Open System, Shared Key and Auto. The length of the key can be 64 bit or
128 bit while the format can be ASCII or HEX. If you choose WAP or WPA2 the cipher default value is TKIP for WPA
end AES for WPA2. The format of the key can be Passphrase or HEX and its length must be between 8 and 64
characters. If you choose WPA-mixed the cipher suite is mixed (TKIP and AES) while the format and length of the
password are like the ones of WPA or WPA2 protection.
3.6.3.4 Access Control
This section allows the user to create the table of Access Control. If Access Control is enabled, then only the wireless
clients whose MAC address is listed in the table can connect to the wireless network. You can also insert a note
in order to easily see which device you are referring to. Click on Appy Changes for saving and Reset for skip the
changes. You can also delete a single entry in the table by using the keys below the table.
3.6.3.5 Network Scan
You can find this section only if Wi-lly 0.2 Plus is in client/extender mode. You can start a network scan by pressing
the key Network Scan and after a while you can see a table with the networks found. Select one of these networks
and then in next window enter the password and click on Connect button. After few seconds if the inserted data are
correct, the connection will be successful and in section Management -> State you can check the connection with
the selected network.
3.6.3.6 WPS
The main goal of Wi-Fi Protected Setup (WPS) is to simplify the connection of a wifi network. Wi-lly 0.2 Plus supports
WPS using both PIN and Push-Button-Configuration (PBC). Depending on the operation mode, WPS procedure can
grant the connection of wireless devices to Wi-lly 0.2 Plus (if you use Wi-lly 0.2 Plus as your main access point) or
the connection of Wi-lly 0.2 Plus to your wifi network (if you use Wi-lly 0.2 Plus as a client). In this section you can:
• enable/disable WPS feature
• check WPS status (configured or unconfigured) -> not available in client mode.
10
TELE System
• start WPS connection using PIN (we suggest to use PBC with regards to PIN)
• start the WPS connection using PBC
By using PBC you only need to press the button Start PBC on Wi-lly 0.2 Plus and, within 2 minutes, press WPS
button on the device you need to connect to. Please note that pressing WPS/RESET button on the back cover of
Wi-lly 0.2 Plus has the same function of WPS connection using PBC.
ATTENTION!
WPS button on the back cover of Wi-lly 0.2 Plus has 2 different features: if pressed (and not held on) it will
start WPS connection using PBC while if it is pressed (and held on for about 5 seconds) it will perform a
factory reset. During the process of factory reset please do not switch off and/or disconnet from power
source Wi-lly 0.2 Plus for any reason otherwise the device could be damaged. Before disconnetting Wi-lly
0.2 Plus after a factory reset, please check that the device is fully operative (that is PWR led steady blue,
WLAN led fast blinking and WPS led off).
ATTENTION!
Wi-lly 0.2 Plus can support WPS 2.0 standard, so WPS connection in client mode will be successful only if
the wifi network you are connecting to has WPA2-PSK (AES) protection. Other kinds of protection are not
allowed for security reasons.
3.6.3.7 Scheduling
This section can be used for scheduling activities on wireless network generated by Wi-lly 0.2 Plus. Before all you
need to set the time of the system in Management -> Time Settings, and then to enable the scheduling table abilitare
and to choose the starting/ending time for enabling/disabling the wireless network.
3.6.4
TCP/IP Settings
This section allows you to change all the parameters regarding LAN and WAN interface. Concerning LAN interface
you can change:
• IP address of Wi-lly 0.2 Plus (default: 192.168.100.1)
• Subnet Mask (default: 255.255.255.0)
• default gateway (default: 0.0.0.0)
• DHCP client range: this is the range of IP addresses that will be reserved for the devices which will connect
to Wi-lly 0.2 Plus (the default range is from 192.168.100.100 to 192.168.100.200). There is also Show active
clients button in order to check the clients currently connected to the wireless network.
• DHCP Lease Time: this is the time of resarvation of an IP address. If you set this value too low you can
generate an high data traffic on the network. If you set this value too high you can face issues by reserving IP
addresses in a wasteful way. We suggest to keep the default value.
• Static DHCP: by clicking on static DHCP the user can associate a particular IP address to a computer by using
its MAC address.
• Domain Name: insert the domain name if needed
• 802.1d Spanning Tree: enable/disable Spanning Tree protocol
• Auto IP Address Diversion: enable/disable IP address diversion (you can need it if you are facing conflicts in
IP addresses).
Concerning WAN interfaces you can:
• select WAN access type: you can choose among DHCP, Static, PPPoE, PPTP and L2TP.
• Host name
• select MTU size: maximum length of the packages. Every package with size more than the MTU size is cut in
the right size before transmission. An high size (in the range 1400-1492) will increase the performances.
• select DNS: you can obtain DNS automatically or setting it manually.
• MAC Clone: there are 2 ways, manual by digiting the mac address in the text field or cloning the mac address
from the computer connected via ethernet interface
• enable/disable UPnP
• enable/disable IGMP proxy
• enable/disable ping on WAN
• enable/disable web access on WAN
11
Wi-lly 0.2 Plus
• enable/disable IPsec on VPN
• enable/disable PPTP on VPN
• enable/disable L2TP on VPN
• enable/disable IPv6 on VPN
• enable/disable PPPoE on VPN
We suggest to keep the default values for the above settings. Click on Apply Changes to save and Reset for skip
the changes. The MAC table represents the history of stored MAC addresses. You can save up to 3 entries. Once
you fill the table, if you need to store more MAC addresses you need to remove old entries. By changing the WAN
access type all the settings in this section can vary a bit, for example if you choose PPPoE, PPTP or L2TP you will
see on screen also fields to be filled with the username and password you need for your ISP. If you choose static IP
you will need to insert the IP address, subnet mask and gateway your Service Provider gives you.
3.6.5
Firewall
This section consists in all the settings you need for filtering/blocking/redirecting the input/output packages. You
can need to add rules for security reasons or only for managing in a better way your local network. Click on Appy
Changes to save or Reset to skip the changes.
3.6.5.1 Port Filtering
If you enable this feature, you can insert in a table the ports that have no data transfert by using protocol TCP, UDP
or TCP/UDP. You can delete single rows of the table or the whole table. Click on Apply Changes to save or Reset to
skip the changes.
3.6.5.2 IP Filtering
By enabling this feature, you can insert into a table the IP addresses of the devices that will have no data transfer
by using protocol TCP, UDP or TCP/UDP. You can delete single rows of the table or the whole table. Click on Apply
Changes to save or Reset to skip the changes.
3.6.5.3 MAC Filtering
By enabling this feature, you can insert into a table the MAC addresses of the devices that will have no internet
access. It is possible to delete single rows of the table or the whole table. Click on Apply Changes to save or Reset
to skip the changes.
3.6.5.4 Port Forwarding
This feature, if enabled, allows you to redirect some services (like mail server or web server) on a specific machine
(identified from its IP address). You need to set the protocol type, the port range and the IP address. You can also
delete a single entry from the table you generate or the whole table. Click on Apply Changes to save or Reset to
skip the changes.
3.6.5.5 URL Filtering
This feature, if enabled, allows you to block some URLs for all the clients connected to Wi-lly 0.2 Plus. You can delete
a single entry from the table you generate or the whole table. Click on Apply Changes to save or Reset to skip the
changes.
3.6.5.6 DMZ
You can enable DMZ if you want to create a network segment (for example if you need to have some clients inside
your local network with full internet access but with limited rights inside your local network. DMZ can be useful for
granting security on your local network without affecting access to internet. Click on Apply Changes to save or Reset
to skip the changes.
3.6.5.7 VLAN
Enable this feature if you want to create virtual networks, isolated each other but laying in the same physical network.
You can enable the networks as tagged or untagged and enable for each one CFI byte. Click on Apply Changes to
save or Reset to skip the changes.
12
TELE System
3.6.6
QoS
Quality of Service (QoS) can help the user by giving priority to certain kinds of network traffic. Uplink and Downlink
speed can be set automatically or manually and QoS rules can filter from IP address or MAC addresses. For each
IP or MAC address listed in the table the user can choose if grant a minimum bandwidth or decrease the maximum
bandwidth by setting a downlink and uplink speed. Click on Apply Changes to save or Reset to skip the changes.
3.6.7
Management
This is last section of the navigation menu. Here you can find the status of Wi-lly 0.2 Plus, internet status and
statistics for networking. Moreover you can set system time, upgrade the firmware of Wi-lly 0.2 Plus, save or load
current settings of Wi-lly 0.2 Plus.
3.6.7.1 State
Here you have a table which describes the state of Wi-lly 0.2 Plus and of its running services. Please always check
the correctness of the connection to a wireless network if Wi-lly 0.2 Plus is used in client mode. You can also have
an overview of LAN, WAN and TCP settings.
3.6.7.2 Statistics
Here you can check network traffic statistics for LAN, WAN and wifi interfaces. You can see sent/received packages
for each interface. Click Refresh button for updating data shown on screen.
3.6.7.3 DDNS
If you enable this service, after your authentication with username and password to one of the providers that can
offer this kind of service, you can associate to your public IP address a string (URL). This is useful because the
associated string is bount to your public IP address even if your IP address changes. Click on Apply Changes to
save or Reset to skip the changes.
3.6.7.4 Time settings
The user can update the time of the system and choose a time zone. The time can be updated by syncing it with
a NTP server. Click on Apply Changes to save or Reset to skip the changes. Click on Refresh for updating time
shown on screen.
3.6.7.5 Denial-of-Service
In this section the user can prevent a Denial-of-Service attacks. There are different settings to be enabled/disabledin
order to make Wi-lly 0.2 Plus more safe with regards to this kind of attacks.
3.6.7.6 Log
Here you can enable the system log (this is useful mainly for debug purposes).
3.6.7.7 Upgrade Firmware
Here you can load a new firmware version for Wi-lly 0.2 Plus. Once you start the upgrading procedure you can’t
switch off Wi-lly 0.2 Plus until the end of the update. Please wait the end of the procedure defore disconnecting
Wi-lly 0.2 Plus from power source. With Choose File button the user can select image for updating and with Upload
button you can start the update process.
3.6.7.8 Save/Load Settings
You can save the current settings of Wi-lly 0.2 Plus in a file in your computer by using Save button. With Choose File
button you can choose the file previously stored and you can start the uploading process with Upload button. Once
started, the process need to finish before switching off the device. Reset button starts a factory reset if the device.
Even in this case, please do not switch off Wi-lly 0.2 Plus once the process is started but please wait until the end of
the procedure.
13
Wi-lly 0.2 Plus
3.6.7.9 Password
In this section you can change default username and password (for accessing the web interface of Wi-lly 0.2 Plus).
If username and password are left empty and you apply the changes, then the authentication before accessing
web interface will be disabled. We do not suggest to leave username and password empty. Default username and
password are admin admin. These username and password will be restored after every factory reset.
NOTE:
If you cahnge default username and password, please save the new password and username in a safe place.
If you loose the new username and password it is always possible to make a factory reset (by pressing WPS
button for more than 5 seconds) and restore username and password to their default valaues (that is admin
- admin).
3.6.8
Logout
Click here to logout and close the active session.
14
TELE System
4
Technical Specs
LEDs
Buttons
Ethernet ports
Ethernet interface
Bandwidth
WiFi Standards
WiFi data rate
WiFi protection
Sensitivity
Transmission power
WiFi range
Web interface
Operation Mode
Internal Antennas
Power Consumption
Input Voltage
Size (WxDxH)
Weight
Temperature
Humidity
5
5 LEDs: PWR, WPS, WLAN, LAN, WAN
1 (WPS/RESET, WPS if pressed and not held on, RESET if pressed and held
on for more than 5 seconds)
2 (WAN, LAN)
10/100 Mbps RJ-45
2.4 GHz
IEEE 802.11n, IEEE 802.11g, IEEE 802.11b, IEEE 802.3, IEEE 802.3u,
802.3ab IEEE802.3x
up to 300 Mbps @ 802.11n, up to 54 Mbps @ 802.11g, up to 11 Mbps @
802.11b
64/128-bit WEP, WPA, WPA2
802.11b: -84dBm, 802.11g: -70dBm, 802.11n: -67dBm
802.11b:
16 dBm, 802.11g:
13 dBm, 802.11n@20MHz:
12dBm,
802.11n@40MHz: 12 dBm
indoor: 30m, outdoor: 100m, these values can vary depending on the
environment
Default IP address: 192.168.100.1
AP, router, AP (client), repeater/extender
2
max 2.3 W
100-240 V, 50/60 Hz
56 x 42 x 14 mm
23 g
Storage: -10 - 70 °C, Operative: 0 - 40 °C
Storage: 10 - 90 % (non-condensing), Operative: 5 - 95 % (non-condensing)
Glossary
• LAN: Local Area Network represents a local network with an extension up to few Km
• WAN: Wide Area Network represents a network with an extension up to one or more geographic areas
• WLAN: Wireless Local Area Network represents a computer network among computers (belonging to a LAN)
that can communicate by using wireless
• WPS: Wi-Fi Protected Setup is a standard for create secure connections inside a WiFi home network
• DHCP: Dynamic Host Configuration Protocol allows to configure TCP/IP parameters of computers that are
connected to a DHCP server
• DNS: Domain Name System is an internet service that can translate web site names in IP addresses
• AP: Access Point is a device that allow the user to connect to wireless networks
• NAT : Network Address Translation translates IP addresses of your local network in a public IP address for
internet
• SSID: Service Set IDentification is an alpha-numeric string (up to 32 characters) that identifies a WLAN
• WEP: Wired Equivalent Privacy is a protection system based on a 64/128/152 bit shared-key algorythm
• WPA: Wi-Fi Protected Access is a protection system. Now it is replaced from WPA2 which is a more strong
and robust protocol with regard to WPA.
15
Codice Prodotto 23500056
Adattatore ethernet-wifi
Product Code 23500056
Ethernet-wifi Adapter
TELE System Wi-lly 0.2 Plus
TELE System Wi-lly 0.2 Plus
Dichiarazione di Conformità CE
TELE System Electronic dichiara sotto la propria responsabilità che questo prodotto soddisfa i requisiti fondamentali delle direttive europee
1999/5/CE, tra cui 2004/108/CE (EMC - Electromagnetic Compatibility) e 2006/95/CE (LVD - Low Voltage Directive), rispettando le seguenti normative
tecniche:
CE conformity declaration
TELE System Electronic states that this product meets the basic European requirements of
1999/5/EC, including 2004/108/EC (EMC - Electromagnetic Compatibility) and 2006/95/EC (LVD
- Low Voltage Directive), following the technical
directives:
- EN55022: 2010
- EN55024: 2010
- EN300328: v1.7.1
- EN301489-1: v1.8.1
- EN301489-17: v2.1.1
- EN50385: 2002
- EN60950-1: 2006+A11:2009+A1:2010+A12:2011
ITALY
Rev. 01, 30/01/2013
TELE System Electronic Srl
Via Dell’Artigianato, 35
36050, Bressanvido (VI), Italy
Web: www.telesystem-world.com
(Italy only) Tel. Assistenza Guasti: 199 214 455