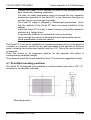
1
VX120P/150P/170P(-QM57)
User’s manual rev.0.0 (Preliminary)
VX120P/150P/170P(-QM57)
User’s manual rev. 0.0
Preliminary
I.P.S. Sistemi Programmabili srl
Via Piave 54
21040 Caronno Varesino (VA) Italy
Tel. +39 0331 980669
Fax +39 0331 980476
URL: http://www.ipscomputers.com
Technical support and service: [email protected]
Copyright 2011. All rights reserved.
MU-C654.xxxxxxxxxx r.0.0-EN
1 of 66
VX120P/150P/170P(-QM57)
User’s manual rev.0.0 (Preliminary)
About this manual
This manual is applicable to the equipments:
• VX120P-QM57 code number C654.xxxxxxxxxx (Panel PC with 12.1” LCD)
• VX150P-QM57 code number C754.xxxxxxxxxx (Panel PC with 15” LCD)
• VX170P-QM57 code number C854.xxxxxxxxxx (Panel PC with 17” LCD)
where x means configurations and options according to ordination code.
The identification code number is on the back side of the chassis.
In the continuation of this manual these equipments are called “Panel PC”.
The motherboard user’s manual is provided with the Panel PC.
The motherboard is CP100-NRM model.
If problems occur contact I.P.S. technical support.
The user’s manuals are a part of the product.
Take care of these manuals and refer to them in the future for information about
the Panel PC and the motherboard.
Target group
This manual has been written for the following readers:
• Installation engineers who perform the mechanical and electrical installation of
the VX120P/150P/170P(-QM57) Panel PC.
• Service and maintenance engineers who install upgrade or spare parts.
• OEM (Original Equipment Manufacturer) users.
2 of 66
MU-C654.xxxxxxxxxx r.0.0-EN
VX120P/150P/170P(-QM57)
User’s manual rev.0.0 (Preliminary)
Timetable of the revisions
Rev. Description
0.0 Preliminary (subject to change)
MU-C654.xxxxxxxxxx r.0.0-EN
Applicable
VX120P/150P/170P
(-QM57) Rev. 0.0
Date
08/11/2011
3 of 66
VX120P/150P/170P(-QM57)
User’s manual rev.0.0 (Preliminary)
Contents
1 General notes .................................................................................................. 6
1.1 Safety guidelines......................................................................................... 6
1.2 Correct usage and general safety information ............................................. 7
1.3 Battery ........................................................................................................ 9
1.4 Application permitted................................................................................... 9
1.5 Applications not permitted ......................................................................... 10
1.6 Exclusion of Liability.................................................................................. 10
1.7 Copyright................................................................................................... 11
1.8 Software license agreement for end user .................................................. 11
1.9 Warranty ................................................................................................... 12
1.10 Procedure for repairing the products: ........................................................ 12
1.11 Electromagnetic compatibility and safety................................................... 13
2 Unpacking ...................................................................................................... 14
3 General description ........................................................................................ 15
3.1 Features.................................................................................................... 15
3.2 Description ................................................................................................ 15
4 Installing......................................................................................................... 20
4.1 Permitted mounting positions .................................................................... 21
4.2 Panel mounting with clamps...................................................................... 22
5 Connecting..................................................................................................... 26
5.1 Connecting 115/230Vac power supply ...................................................... 26
5.2 Uninterruptible AC power supply (UPS) .................................................... 27
5.3 Connecting 24Vdc power supply (option) .................................................. 28
5.4 Connecting the serial I/O ports. ................................................................. 30
5.5 Connecting the shields .............................................................................. 30
5.6 Equipotential bonding................................................................................ 31
5.7 Connecting external keyboard/mouse ....................................................... 31
5.8 Connecting USB devices........................................................................... 32
5.9 Connecting the Ethernet (LAN) port .......................................................... 33
5.10 Connecting audio devices ......................................................................... 33
5.11 Connecting the monitor display ................................................................. 33
5.12 Connecting a VGA monitor........................................................................ 34
5.13 Connecting a DVI monitor ......................................................................... 34
6 Switching on................................................................................................... 35
6.1 Power on................................................................................................... 35
6.2 Power off................................................................................................... 36
6.3 Power button............................................................................................. 36
6.4 BIOS setup................................................................................................ 36
7 Operator controls ........................................................................................... 37
7.1 Touchscreen control.................................................................................. 37
8 Technical specifications ................................................................................. 38
4 of 66
MU-C654.xxxxxxxxxx r.0.0-EN
VX120P/150P/170P(-QM57)
User’s manual rev.0.0 (Preliminary)
8.1 Mechanical specifications.......................................................................... 38
8.2 Climatic conditions .................................................................................... 40
8.3 Power consumption................................................................................... 41
8.4 Internal Power supply 115/230Vac............................................................ 42
8.5 Internal Power supply 24Vdc (option)........................................................ 43
8.6 Motherboard.............................................................................................. 45
8.7 RAM.......................................................................................................... 45
8.8 Hard disk................................................................................................... 46
8.9 Hard disk RAID ......................................................................................... 46
8.10 Compact Flash disk................................................................................... 47
8.11 Hard disk 2,5” + Compact Flash................................................................ 48
8.12 Serial ports................................................................................................ 49
8.13 Keyboard/mouse interface ........................................................................ 49
8.14 USB port ................................................................................................... 50
8.15 Ethernet (LAN) .......................................................................................... 50
8.16 Audio controller ......................................................................................... 50
8.17 Graphics controller .................................................................................... 51
8.18 LCD display............................................................................................... 51
8.19 Touchscreen ............................................................................................. 53
9 Maintenance .................................................................................................. 55
9.1 General ..................................................................................................... 55
9.2 Spare parts ............................................................................................... 55
9.3 Replacing the motherboard ....................................................................... 55
9.4 Replacing the Compact Flash disk (CF) .................................................... 57
9.5 Replacing the 2,5’’ hard disk ..................................................................... 58
9.6 Replacing the power supply ...................................................................... 59
9.7 Replacing the battery ................................................................................ 60
9.8 Checking the CPU fan............................................................................... 61
9.9 Checking the Power Supply fan ................................................................ 61
9.10 Checking the chassis fan .......................................................................... 61
9.11 Cleaning the fan filter ................................................................................ 61
9.12 Cleaning the display.................................................................................. 62
10 Troubleshooting........................................................................................... 63
10.1 Troubleshooting procedure ....................................................................... 63
10.2 Troubleshooting check list......................................................................... 63
11 Decommissioning ........................................................................................ 65
11.1 Disposal .................................................................................................... 65
MU-C654.xxxxxxxxxx r.0.0-EN
5 of 66
VX120P/150P/170P(-QM57)
User’s manual rev.0.0 (Preliminary)
1 General notes
1.1 Safety guidelines
This manual contains notices, which you should observe to ensure your own
personal safety as well as to protect the Panel PC and connected equipment.
These notices are marked as follows.
Danger
Indicates an imminently hazardous situation which, if not avoided, will
result in death or serious injury.
Warning
Indicates a potentially hazardous situation which, if not avoided, could
result in death or serious injury.
Caution
Indicates a potentially hazardous situation which, if not avoided, may
result in minor or moderate injury.
Caution
Used without the safety alert symbol indicates a potentially hazardous
situation which, if not avoided, may result in property damage.
Notice
Notice indicates notes on use of equipment and useful practical tips.
Indicates also that unwanted events or status can occur if the relevant
information is not observed
Draws your attention to particularly important information on the
product, using or handling the product
This symbol reminds you of the possible consequences of touching
electrostatic sensitive components.
6 of 66
MU-C654.xxxxxxxxxx r.0.0-EN
VX120P/150P/170P(-QM57)
User’s manual rev.0.0 (Preliminary)
This symbol reminds you the high temperature of a device or a Panel
PC component.
1.2 Correct usage and general safety information
Warning
The Panel PC is intended for professional use only in an industrial
environment.
The information contained in this manual is intended for technical
staff who has adequate knowledge of the structures hardware and
software and of the operation of personal Panel PCs.
The equipment must be installed, maintained and serviced only by
qualified or instructed personnel in accordance with safety standards.
The Panel PC may only be used for the “Application permitted”
specified in this manual.
Appropriate transport and appropriate storage, installation and
assembly as well as careful operation and maintenance are required
to ensure that the product operates safely.
Caution
For correct usage of the Panel PC observe the following indications:
• Read carefully this manual and that of the motherboard before
installing or using the Panel PC.
• If on removing the Panel PC from its packaging you observe
obvious signs of damage do not connect it and inform the I.P.S.
technical service (see the “Procedures for repairing the products”
paragraph).
• Make sure that the operating conditions (temperature and
humidity) are as indicated in the “Climatic conditions” paragraph
later in this manual.
• Make sure that the supply voltage falls within the range indicated in
the specifications.
• Before removing the Panel PC back cover switch the Panel PC
OFF and detach the power cord. Do not use the Panel PC without
the back cover installed. An electrical shock hazard exists. The
back cover also functions as an EMI shield.
• While Panel PC working the back cover has to be fasten to the
chassis.
MU-C654.xxxxxxxxxx r.0.0-EN
7 of 66
VX120P/150P/170P(-QM57)
User’s manual rev.0.0 (Preliminary)
• Before working on the rear part or inside the Panel PC the person
performing the operation must discharge any static electricity by
touching a metal part connected to the ground. Perform work in a
static safe environment. Check the 5Vsb (5V stand-by) is off (turn
off the input power then disconnect the power cord).
• When making any interface connections to the Panel PC
(expansion cards, serial ports, PS/2 keyboard and mouse, etc.)
switch the system off. Only the connection of the USB ports can be
performed with the Panel PC on.
• Avoid thermal shocks to the Panel PC.
• Do not obstruct the ventilation slits.
• Avoid turning the system ON and OFF frequently. After shutting
the system OFF, do not turn it ON back again until the hard disk
has come to a complete stop (takes about 20 seconds).
• Always use the proper power down procedures as required by your
Operating System such as “Shut Down” command in WinXP.
• The user should have considerations for data safety and integrity
on the hard disk drive or solid state disk (flash) and perform data
backup. Standard hard disks are not suitable to operate 24houres
x 7 days continuously.
• During a thunderstorm do not make connection and do not touch
power supply and data transmission cables.
8 of 66
MU-C654.xxxxxxxxxx r.0.0-EN
VX120P/150P/170P(-QM57)
User’s manual rev.0.0 (Preliminary)
Caution
If the LCD display glass breaks, avoid contact with the liquid that may
leak out. If the liquid crystal material leaks from the panel, it should be
kept away from eyes or mouth. In case of contact it must be washed
away immediately and thoroughly with water then consult a doctor.
In case of contact with hands, legs or clothes, it must be washed
away immediately and thoroughly with water and soap.
Warning
The power cord (115/230Vac version) must be connected to an outlet
with protective earthing.
Failure to follow this warning could result in severe electrical shock.
1.3 Battery
The Panel PC contains a lithium battery. The batteries must be replaced by an
authorized qualified technical only.
Warning
Danger of explosion and harmful material emission if lithium battery is
incorrectly replaced. Replace only with the same or equivalent type
recommended by the manufacturer. The battery module contains
lithium. Do not attempt to dispose of it in a fire or incinerator, do not
overheat up to 80°C, do not short-circuit, do not i nvert poles, do not
disassemble it: the battery may explode.
Don’t try to recharge the lithium battery, the battery may explode.
Don’t allow the battery to come in contact with water.
Always follow regulations in your area for lithium battery disposal.
1.4 Application permitted
The Panel PC use is permitted as stationary equipment for building-in for indoor
applications in an industrial environment.
The equipment is suitable for use as Human Machine Interface (HMI).
Because of the variety of uses for the Panel PC those responsible for the
application and use of this Panel PC must satisfy themselves that all necessary
steps have been taken to assure that each application and use meet all
performance, safety requirements, including any applicable laws, regulations and
standards. Following the results of a risk analysis, additional protection equipment
on the machine or the system is necessary to avoid endangering persons.
MU-C654.xxxxxxxxxx r.0.0-EN
9 of 66
VX120P/150P/170P(-QM57)
User’s manual rev.0.0 (Preliminary)
1.5 Applications not permitted
The Panel PC has not been designed and not been tested and so it is not
authorized for use different from the one described in “Application permitted”.
Particularly, but not limited to them, the Panel PC is not authorized for the
following applications:
• use in an atmosphere potentially explosive;
• use for radiology and medical purpose;
• use on ships, aircraft and railways and other transports;
• use in life support devices or systems;
• use outdoor;
• use in all the application or environment where the EMC and SAFETY
standards cited on the “Electromagnetic compatibility and safety” paragraph in
this manual are not applicable or not satisfactory that is where other or
additional standards must be applied.
1.6 Exclusion of Liability
I.P.S. Sistemi Programmabili reserves the right to make modifications to its
products without warning to improve features or design.
The information contained in this document is supplied only as reference for the
use of the product itself.
I.P.S. accepts no responsibility for the use of the information contained in this
document or the products cited in it.
Any reference to the compatibility with a PC (personal computer) does not warrant
that any kind of software, created for a PC, works well with the Panel PC without
fitting and/or modifying it.
While reasonable efforts have been made to assure the accuracy of this
document, I.P.S. assumes no responsibility or liability for any errors, inaccuracies
or omissions that may appear in this manual, including the products and software
described in it. However, the information in this document is reviewed regularly
and any necessary corrections are included in subsequent editions.
Because of the variety of uses for the Panel PC described in this manual, those
responsible for the application and use of this Panel PC must satisfy themselves
that all necessary steps have been taken to assure that each application and use
meet all performance, safety requirements, including any applicable laws,
regulations and standards.
The user should have considerations for data safety and integrity on the storage
devices (e.g. hard disk drive) and perform data backup.
I.P.S. accepts no responsibility for damage suffered by the User (including, but not
limited to this, that for loss of commercial profits, and interruption of activity and
similar) which derive from the data integrity on the storage devices.
10 of 66
MU-C654.xxxxxxxxxx r.0.0-EN
VX120P/150P/170P(-QM57)
User’s manual rev.0.0 (Preliminary)
1.7 Copyright
This document may contain references to or information concerning products back
covered by copyright or patent.
No right concerning these products is however conceded through this manual.
All trademarks showed in this manual are the property of their respective holders.
All the rights of this document are reserved.
1.8 Software license agreement for end user
The Panel PC contains intellectual property, i.e. software programs, which are
supplied under license to be used by the End User, who is any Panel PC owner or
user.
The Panel PC could contains parts of programs distributed under license by
Microsoft Corporation and other brands including software, which belongs to I.P.S.
Sistemi Programmabili.
The transfer of the Panel PC does not constitute a sale of this intellectual
property. The End User must not copy, disassemble or decompile the
software programs.
The programs are supplied to the End User as they are, with no guarantee of any
sort, either implicit or explicit, including but not limiting the guarantees of
adaptability to a particular task.
The End User is entirely responsible for the program quality and performance.
I.P.S. Sistemi Programmabili and its suppliers are not responsible for damage
suffered by the End User (including, but not limited to this, that for loss of
commercial profits, and interruption of activity and similar) which derive from the
supply, use or performance of the software programs.
These provisions are subject to Italian law. If one or more provisions are in
contrast with the laws in force they should be considered not valid, the remainder
however remaining completely valid and operative.
No modification to these provisions is valid unless released in writing by an
authorized representative of I.P.S. Sistemi Programmabili srl.
MU-C654.xxxxxxxxxx r.0.0-EN
11 of 66
VX120P/150P/170P(-QM57)
User’s manual rev.0.0 (Preliminary)
1.9 Warranty
I.P.S. Sistemi Programmabili guarantees its products for 12 (twelve) months
from the date they leave the factory. The warranty is limited to repair or
replacement, at our factory, of the parts which are not working because of
manufacturing defects and does not back cover products which have been
tampered with, are missing components, have been incorrectly repaired or have
been used differently from the specified conditions of use. Damage caused by
electrical phenomena, including lighting and electric and electrostatic discharges
in general and the materials provided to protect the circuits (e.g. fuses etc.) are
excluded from the warranty.
Moreover the warranty does not back cover products from which the
product identification marks have been removed or altered in some way.
Follow the procedure in the next paragraph to send the defective products. I.P.S.
Sistemi Programmabili will repair them after having ascertained that the warranty
conditions apply. If the conditions for applying the warranty do not apply the
product will still be repaired, but debiting the repair costs.
The material replaced remains the property of I.P.S. Sistemi Programmabili.
1.10 Procedure for repairing the products:
Contact technical after-sales service
by fax at +39 0331 980476
by email at [email protected].
Report what type of service is required, model and code number of the product to
be repaired and person to be contacted.
I.P.S. after-sales service will contact you to settle ways and means for the service.
Any dispatch must be authorized from I.P.S. by written communication and
products sent carriage free.
Products that are not authorized to be sent will not be accepted for
repairing.
12 of 66
MU-C654.xxxxxxxxxx r.0.0-EN
VX120P/150P/170P(-QM57)
User’s manual rev.0.0 (Preliminary)
1.11 Electromagnetic compatibility and safety
The VX120P/150P/170P(-QM57) industrial Panel PC, used as intended in the
user manual, conforms to the following standards:
Electromagnetic compatibility
EN61000-3-2
EN61000-3-3
EN61000-6-2
EN61000-6-4
EN55024
EN55022
Current Harmonics limits
Limitation of voltage fluctuation and flicker
EMC Generic Immunity Standard – Industrial
EMC Generic Emission Standard – Industrial
Immunity requirement – ITE
Radio Disturbance requirement – ITE
Notice
This is a Class A product. In a domestic environment this product may
cause radio interference, in which case the user may be required to
take adequate measures.
The domestic environment is an environment where the use of broadcast radio
and television receivers may be expected within a distance of 10m of the
apparatus concerned.
Safety
EN60950
Safety of ITE (Information Technology Equipment)
Equipment for building-in.
MU-C654.xxxxxxxxxx r.0.0-EN
13 of 66
VX120P/150P/170P(-QM57)
User’s manual rev.0.0 (Preliminary)
2 Unpacking
Unpack and visually inspect the Panel PC for damage, which may have occurred
in shipment.
Retain all packing material and shipping documentation in case reshipment
becomes necessary.
If damage has occurred in shipment, notify the carrier at once to initiate a damage
claim.
Caution
If on removing the Panel PC from its packaging you observe obvious
signs of damage do not connect it and inform the I.P.S. technical
service.
If you have inspected and checked the product and if you are in order to install the
Panel PC later, put the Panel PC in its packaging with this manual and all the
enclosed documentation.
Caution
Make sure that the temperature of the storehouse falls within the
range indicated in the “Climatic conditions” paragraph.
14 of 66
MU-C654.xxxxxxxxxx r.0.0-EN
VX120P/150P/170P(-QM57)
User’s manual rev.0.0 (Preliminary)
3 General description
3.1 Features
•
•
•
•
•
•
•
•
•
•
•
•
•
•
•
•
•
•
Flat-screen Industrial Panel PC
CPU Intel Core i5-520M or Celeron P4500. Chipset Intel QM57;
Integrated graphics controller Intel Gen5.75;
12.1” TFT color LCD 1024x768, 15” 1024x768, 17” 1280x1024;
LCD with LED backlight;
8 wire resistive touchscreen with RS232 interface (option);
Motherboard Mini ITX;
Up to 8 GB DDR3 DRAM (Dual Channel memory interface) ;
2.5’’ Sata HDD (2 HDD RAID-1 option);
IDE Compact Flash socket (option);
Up to 4 RS232 serial ports (port COM4 reserved for touchscreen);
4+1 USB type A connectors, USB rev. 2.0/1.1;
2 RJ45 connectors for Gigabit Ethernet ports (Intel + Realtek controller);
2 PS/2 style connectors for external keyboard and mouse;
Line in, line out e mic. connectors;
Power supply 115/230Vac 50-60Hz (24Vdc option);
Front panel with IP65 level protection capabilities;
IP20 rear side protection.
3.2 Description
The VX120P/150P/170P(-QM57) is a powerful and compact Panel PC, specially
designed to meet the requirements for an industrial Human-Machine-Interface.
The chassis is constructed with an aluminium front panel and steel back case.
The case is designed for panel mounting.
The TFT LCD display with LED backlight provides high brightness, high contrast
and long life.
The touchscreen (option) is 8-wire resistive type, which provides very good touch
point resolution and long term calibration over temperature range.
Touchscreen interface requires RS232 COM port and, if present, is connected to
COM4.
The Panel PC is equipped with Intel QM57 chipset and Intel Core i5-520M or
Celeron P4500 processor.
The Panel PC is provided with 2,5’’ magnetic hard disk drive Sata.
As option it can be equipped with two 2,5’’ Sata HDD RAID-1.
MU-C654.xxxxxxxxxx r.0.0-EN
15 of 66
VX120P/150P/170P(-QM57)
User’s manual rev.0.0 (Preliminary)
As alternative to the magnetic hard disk and as an order option the Panel PC is
provided with one or two sockets for solid state disk Compact Flash (CF).
As option it’s possible to have a version with CF plus 2,5” HDD.
If compared to a magnetic disk, the solid state disk CF offers lower power
consumption and improved temperature range.
The CF is easy removable opening a protection cover.
On the I/O panel of the Panel PC there are 2 PS/2 style connectors for an external
keyboard and mouse , a 15-pin VGA connector, a 24-pin DVI-D connector, 4 USB
type A connectors, USB rev. 2.0/1.1 compliant, up to 3 RS232 serial ports and 2
RJ45 connectors for Gigabit Ethernet ports.
A further USB type A connector is available on the front panel (except for True
Flat panel version)
The Panel PC is equipped a 115/230Vac power supply or 24Vdc DC/DC converter
(option).
16 of 66
MU-C654.xxxxxxxxxx r.0.0-EN
VX120P/150P/170P(-QM57)
User’s manual rev.0.0 (Preliminary)
Front view
Pos.
1
2
3
4
Description
Led ON
Led HD
LCD Display and touchscreen (opt.)
USB connector
MU-C654.xxxxxxxxxx r.0.0-EN
Note
it indicates the Panel PC is ON
it indicates operation on HDD
Behind a protection cover
(except for True Flat panel version)
17 of 66
VX120P/150P/170P(-QM57)
User’s manual rev.0.0 (Preliminary)
Connectors side view
Pos.
1
2
3
4
5
6
7
Description
Equipotential Bonding screw
Power supply connector
Compact Flash socket
I/O panel
Power on switch
Reserved
Reserved
Note
For earthing
115/230Vac or 24Vdc (option)
option (protected by a cover)
depends on the motherboard (see picture)
Soft power ATX (inside the hole)
DB9 connector cut-out
Antenna connector cut-out
I/O Panel
18 of 66
MU-C654.xxxxxxxxxx r.0.0-EN
VX120P/150P/170P(-QM57)
User’s manual rev.0.0 (Preliminary)
Upper side view
Pos. Descrizione
1
Fan filters
MU-C654.xxxxxxxxxx r.0.0-EN
Note
40x40mm.
19 of 66
VX120P/150P/170P(-QM57)
User’s manual rev.0.0 (Preliminary)
4 Installing
Before installing the Panel PC, please read carefully the following information.
Caution
The Panel PC is permitted for indoor fixed applications only.
The Panel PC is set up for installation in a prepared recess such as in
the panel of a cabinet or a console.
Warning
Disconnect all electrical power and unplug the power cord before
installing the Panel PC.
Make sure the installation of the Panel PC maintains proper earthing.
The Panel PC requires connection to a power source having a quite
earthing.
Failure to follow these precautions may result in personal injury or
damage to the Panel PC or to the components.
Caution
A power outlet provided with an earthing connection and a mains
disconnect switch are required nearby and easily approachable.
The display should not be exposed to direct sun light or other strong
light sources.
Make sure the ambient temperature stays within the operating
temperature range as specified in the “Climatic condition” paragraph
later in this manual.
Be aware of other nearby devices, which may raise the ambient
temperature in the cabinet. Besides take in consideration the heating
of the Panel PC itself.
Make sure there is adequate room for airflow through the chassis
vent. The power supply fan cooler draw out the inside air flowing it
toward the bottom side. Avoid hot air heap up in the bottom area of
the Panel PC. Leave a free area all around the Panel PC: at least 20
cm on bottom side and 10 cm. from the other sides. More free area
could be required by the application.
20 of 66
MU-C654.xxxxxxxxxx r.0.0-EN
VX120P/150P/170P(-QM57)
User’s manual rev.0.0 (Preliminary)
Position the Panel PC so that the air vents in the housing are not
back covered by following installation.
The max. air intake temperature must not exceed the max. operative
temperature provided for the Panel PC in use. Moreover the input air
must be free of corrosive gas or powder.
The Panel PC weigh is indicated in “Mechanical specification”. Verify
that the addition of the Panel PC does not cause instability of the
cabinet.
Install the Panel PC in a way it doesn’t cause a potentially hazardous
situation (e.g. falling down).
If required use stiffeners to reinforce the cut-out mounting.
Leave enough free room for disassemble and maintenance service
Avoid condensation inside the cabinet
The Panel PC is set up for installation in a prepared recess such as in the panel of
a cabinet or a console, so that the only part accessible to the operator is the front
panel, including the touchscreen (option) and the LCD. This is the use for which it
is designed.
Place the screen in an ergonomic position for the operator and select a
corresponding installation height.
The maximum panel thickness allowed is 5mm. The minimum suggested is 2mm.
4.1 Permitted mounting positions
The Panel PC is designed to be installed in vertical position only with a +45° / -5°
deviation in the direction indicated.
+
-
Mounting position
MU-C654.xxxxxxxxxx r.0.0-EN
21 of 66
VX120P/150P/170P(-QM57)
User’s manual rev.0.0 (Preliminary)
4.2 Panel mounting with clamps.
Use protection gloves to install the Panel PC.
Four/six (depend on the model) clamps with grub screws are provided with the
Panel PC for panel mounting.
To perform the installation of the Panel PC follow these steps:
• Make a cut-out hole dimensioned as indicated in pictures (depend on the
model). Make sure the area around the panel cut-out is clear.
316
249
12.1”
Cut-out for VX120P-QM57 mounting (specification in mm tolerance ±0.5mm)
22 of 66
MU-C654.xxxxxxxxxx r.0.0-EN
VX120P/150P/170P(-QM57)
User’s manual rev.0.0 (Preliminary)
15”
Cut-out for VX150P-QM57 mounting (specification in mm tolerance ±0.5mm)
17”
Cut-out for VX170P-QM57 mounting (specification in mm tolerance ±0.5mm)
MU-C654.xxxxxxxxxx r.0.0-EN
23 of 66
VX120P/150P/170P(-QM57)
User’s manual rev.0.0 (Preliminary)
• Fit the Panel PC into the cut-out.
1
2
3
Fitting into the cut-out on user panel
Pos.
1
2
3
Description
User’s panel
rear part of the Panel PC
front panel of the Panel PC
Note
• Screw two grub screws into the holes present in each clamp, with the tips of
the grub screws towards the concave side of the clamp, (this step is
performed at the factory). Insert clamps into the holes present all around the
Panel PC.
4
5
4
Inserting clamps into holes all around the Panel PC
Pos. Description
Note
4
Holes for clamps coupling Around the Panel PC there are 4/8 on the
upper/lower side and 4 on the left/ight side.
5
Clamp
Panel PC panel mounting needs 4/6 clamps.
24 of 66
MU-C654.xxxxxxxxxx r.0.0-EN
VX120P/150P/170P(-QM57)
User’s manual rev.0.0 (Preliminary)
• Screw grub screws clockwise.
Screw grub screws
The recommended tightening torque for the grub screws is 0.3 Nm (30 cNm).
Pos. Description
6
Grub screws
Note
To fasten the Panel PC to the panel, screw grub
screws clockwise.
Once the Panel PC is fitted into the housing and the grub screws tightened, the
gasket on the edge of the frame adheres to the panel and it provides a seal
against infiltration of liquids and/or dust.
Caution
The class protection of the front is only obtained by correctly fastening
the Panel PC to the panel. Besides the cover of the USB connector
must be closed and the screw well tighten. The gasket forms a
compression type seal, do not use other sealing compounds.
Be careful not to damage the sealing gasket when installing the Panel
PC. A damaged seal may result in damage to the Panel PC and other
panel components due to a leaking seal.
Be sure the cabinet panel is planar and it does not bend itself when
the screws grub of the clamp are tightened. If the panel bent the
gasket does not press well and the sealing is not guarantee.
If necessary use stiffeners to reinforce the cut-out on the panel.
When the USB cover panel is open during an USB device connection,
the class protection is downgraded.
MU-C654.xxxxxxxxxx r.0.0-EN
25 of 66
VX120P/150P/170P(-QM57)
User’s manual rev.0.0 (Preliminary)
5 Connecting
Before connecting and switching on the Panel PC, please read carefully the
following information.
Caution
During a thunderstorm do not make connection and do not touch
power lines and signals cables.
5.1 Connecting 115/230Vac power supply
The Panel PC is equipped (except for different order option) with a 115/230Vac
input power supply provided with standard IEC60230 3 pin C14 connector.
The power supply input will accept 115/230Vac auto-ranging.
A standard IEC60320 3 pin C13 power cord is provided for plug-in to an outlet
having a protective earthing.
Warning
The power cord must be connected to an outlet having a protective
earthing. Failure to follow this warning could result in electrical shock.
Since the Panel PC does not have a power switch, turning off and
completely disconnecting power require pulling the power plug.
A power outlet provided with a protective earthing and a mains
disconnect switch are required nearby and easily approachable.
Notice
To prevent an unintentional unplugging of the power plug from the
Panel PC, we recommend fastening the power cord.
The internal power supply has protection against overcurrent by means of a fuse.
Warning
Do not try to disassemble the power supply unit to replace the fuse or
other parts.
If a failure occurs on the power supply, the whole power supply unit
must be replaced with an equal or equivalent approved spare part.
26 of 66
MU-C654.xxxxxxxxxx r.0.0-EN
VX120P/150P/170P(-QM57)
User’s manual rev.0.0 (Preliminary)
Inside the Panel PC there is an insulated AC\DC converter (power supply) which
converts the input voltage into the ATX standard low voltages needed for the
Panel PC to operate (see “Internal Power supply 115/230Vac” paragraph).
The 0V (GND) of the internal supply ATX is connected to the metal frame and
then to the Equipotential Bonding screw for earthing.
When the Panel PC is connected, through any not insulated I/O port, (e.g. serial,
or other port) to another equipment also with GND connected to earth both of
them must be connected to the same earth point to avoid circulation of current
because of the difference of potential between earth points.
5.2 Uninterruptible AC power supply (UPS)
The paragraph indications are referred to a use of the Panel PC connected to an
uninterruptible AC power supply (AC UPS).
Due to legal regulations finalized to reduce the reactive power in the electrical
networks, the Panel PC power supply has a built-in active PCF (Power Factor
Correction). The active PFC needs a sinusoidal wave input voltage.
Caution
The uninterruptible AC power supply (UPS) with non sinusoidal wave
can damage the power supply with active PFC.
Be careful the UPS, if connected to VX120P/150P/170P(-QM57) with
active PFC, supplies a sinusoidal wave output voltage during normal
and back-up mode.
MU-C654.xxxxxxxxxx r.0.0-EN
27 of 66
VX120P/150P/170P(-QM57)
User’s manual rev.0.0 (Preliminary)
5.3 Connecting 24Vdc power supply (option)
The Panel PC can be provided (as an order option) with an isolated DC/DC
converter with 24Vdc input. The DC/DC converter has a forced-air cooling by fan.
The user must supply the 24Vdc by connecting 2 conductors to the connector of
the DC power supply.
The cross-section of the conductors shall be adequate for the supplied current
(see “Internal Power supply 24Vdc”) and must be sufficiently oversized so that in
case of a short circuit on the Panel PC no damage can be caused by the cable.
Warning
The insulation towards the main voltage depends on the external
power supply to the Panel PC. The Panel PC must be supplied by a
limited power source according to EN60950. Use a switching power
supply protected against overcurrent which complies with the
requirements of safety extra low voltage (SELV) which conforms to
the safety standard EN60950 or equivalent.
It’s recommended using a power supply reserved for the Panel PC.
None of the wiring terminals is designed to be connected to parts at
hazardous voltage.
The wiring from the external power supply to the Panel PC must
comply with the requirements of safety extra low voltage (SELV).
Caution
The terminal on the 24Vdc input power supply is not suitable to switch
the Panel PC ON and OFF. Use a power switch on the external
power supply to switch ON-OFF the Panel PC.
Notice
The external power supply must provide the inrush current required
by the internal DC/DC converter at power-up without enter self
protecting mode otherwise the system start up is not guaranteed (see
“Internal Power supply 24Vdc” paragraph).
The internal DC\DC converter is protected against overcurrent by a fuse.
Warning
Do not try to disassemble the power supply unit to replace the fuse or
other parts. If a failure occurs on the power supply, the whole power
supply unit must be replaced with an equal or equivalent approved
spare part.
28 of 66
MU-C654.xxxxxxxxxx r.0.0-EN
VX120P/150P/170P(-QM57)
User’s manual rev.0.0 (Preliminary)
The Panel PC must be connected to earth by means of a conductor of suitable
cross section connecting the Equipotential Bonding screw on the chassis to the
quiet earth point.
The 0V (GND) of the internal supply ATX is connected to the metal frame and
then to the Equipotential Bonding screw for earthing.
When the Panel PC is connected, through a not insulated I/O port, (e.g. serial or
other port) to another equipment also with GND connected to the earth both of
them must be connected to the same earth point to avoid circulation of current
because of the difference of potential between earth points.
MU-C654.xxxxxxxxxx r.0.0-EN
29 of 66
VX120P/150P/170P(-QM57)
User’s manual rev.0.0 (Preliminary)
5.4 Connecting the serial I/O ports.
The Panel PC can be equipped with up to three RS232 serial ports according to
order options .
Refer to the motherboard user’s manual for further information.
• Shielded cable must be used for the RS232 serial ports. Inside the cabinet the
cables of the serial ports must be kept separate from the power signal cables.
• If RS485 port is used, cable must be of twisted pair type. The positive signal
must be twisted with the respective negative signal (e.g. D+ with D-). Moreover
if one is not sure that the common mode voltage will remain within the
maximum values allowed of –7V or +12V with respect to GND the GND
reference signal connection must also be made. If there is connection between
distant appliances (e.g. different buildings or even different departments in the
same building) a possible difference of voltage between the earth must be
considered (even momentarily because of faults of disturbances) which might
make a high current circulate in the GND reference signal and consequently
damage the Panel PC or the connected appliance or the connection cable. In
these cases it is recommended to use an external RS422/RS485 insulated
adapter connected to a RS232 port.
Caution
Do not connect or disconnect the cables of the serial ports with the
Panel PC or the external apparatus switched on.
Notice
The maximum length of the RS232 connection is 15m.
5.5 Connecting the shields
The braids (shielding) of the shielded cables have to be connected to the Panel
PC, directly to the metal casings of the serial port connectors. Those metal casing
are connected to the chassis and to the internal earth point. For proper shielding,
for high frequencies, the shield has to be connected at both ends to ground
reference. If the shield is connected to earth on both ends, care must be taken to
avoid circulating currents.
30 of 66
MU-C654.xxxxxxxxxx r.0.0-EN
VX120P/150P/170P(-QM57)
User’s manual rev.0.0 (Preliminary)
5.6 Equipotential bonding
Low impedance connections toward earth reduce the interference current from
external power supply cables, signal cables and peripheral connection cables.
The Panel PC equipotential bonding is located near the input terminal of the
power supply.
Between different parts of an electric plant it makes electrical potential that, in
some cases, can generate high equalization currents. It occurs for example when
both sides of the shield of a cable are grounded at different point of the plant.
Potential differences can be for example different power supply.
If necessary is possible to reduce the potential difference by laying the
equipotential bonding cable as the electronic devices function properly.
For the equipotential bonding see as follow:
• If two system parts are connected trough shielded cable and their shields
are connected both sides to ground or protection conductor, the following
must be observed: the impedance of the equipotential bonding cable should
be having an impedance max. of 10% of the shield impedance.
• The section of the equipotential bonding cable has to be sized for the
maximum compensation current present. The cross-section in any case
should be not less than 5mm2 and bigger size is better.
• Use equipotential bonding cables made of copper or galvanized steel.
Connect the cables to ground over a wide area. Protect the ground or the
protective conductor against the corrosion.
• The surface area between the signals cable and the equipotential bonding
cable should be as small as possible.
5.7 Connecting external keyboard/mouse
Two PS/2 style connectors allow the connection of an external keyboard and
mouse. These connectors are on the I/O panel. The mouse connector is green
while the keyboard one is violet.
Notice
If commercial PS/2 peripheral are used, the EMC immunity often is
suitable for office use only. For the start up and for the assistance
these devices are enough.
Moreover for industrial use of industry-standard devices are
recommended. Furthermore proper EMC practice must be considered
in cabling the external keyboard or mouse.
Caution
Do not connect or disconnect the external keyboard or mouse when
the Panel PC is switched on. Switch off input power before
connecting or disconnecting the keyboard or the mouse.
MU-C654.xxxxxxxxxx r.0.0-EN
31 of 66
VX120P/150P/170P(-QM57)
User’s manual rev.0.0 (Preliminary)
5.8 Connecting USB devices
The Panel PC is equipped with four USB type A connectors on the I/O panel.
USB port name on the label is for reference only.
USB ports are hot plugging that is USB connectors can be plugged or unplugged
even if the Panel PC is switched on.
A further USB connector is available on frontal panel covered by a little door
(except for “True Flat” panel version).
The USB ports are compliant with USB rev. 2.0/1.1. The USB external devices
(e.g. printers) require a specific software driver. Follow the manufacturer’s
instructions to install USB devices.
The total max. current, for external USB devices, absorbed from the USB
connectors must not exceed 0.5A for each connector. Furthermore the total power
(5V) absorbed must be within the limit (for expansion devices) specified in the
“Internal power supply” paragraph in this manual.
Refer to the motherboard user’s manual for further information.
Notice
Use a cable 5m max long to connect an external USB device to an
USB connector on the I/O panel.
Use a cable 4m max long to connect an external USB device to the
USB connector on the front panel.
After having unplugged a USB device wait for at least 10 sec. before
to plug it in again or plug in a different one.
If commercial USB type is used, the EMC immunity often is suitable
for office use only. For commissioning and servicing this devices are
enough. Moreover for industrial operation industry-standard devices
are recommended.
Caution
If the protection door that cover the USB interface on front panel is
opened to connect a USB device, the protection grade is
downgraded.
32 of 66
MU-C654.xxxxxxxxxx r.0.0-EN
VX120P/150P/170P(-QM57)
User’s manual rev.0.0 (Preliminary)
5.9 Connecting the Ethernet (LAN) port
The Panel PC provides two Gigabit Ethernet ports (10/100/1000).
Two RJ45 connectors on the I/O panel are provided for the connection.
One LAN is by an Intel controller and the other one by a Realtek controller.
LAN number on the label is for reference only.
LAN number on the OS (e.g. WinXP) depends on the detection when installing
drivers.
Use approved cables CAT.5E or better for connection to Gigabit Ethernet.
The WinXP device drivers for the Ethernet controller are in the motherboard DVDROM. Refer to the motherboard user’s manual for further information.
5.10 Connecting audio devices
On the I/O panel there are 3 connectors (line out, line in e mic). These connectors
are provided for the connection of speakers, microphones and other audio
devices.
The WinXP device drivers for the audio controller are in the motherboard DVD.
Refer to the motherboard user’s manual for further information.
5.11 Connecting the monitor display
The computer motherboard has three types of video interface for display.
1-LVDS interface for internal LCD panel (main display)
2-VGA interface for external CRT/LCD analog monitor
3-DVI-D interface for external LCD digital monitor
The display interface is under Bios control until WinXP boots (WinXP logo
included) afterwards the Intel Graphics Drivers keep the control.
The Intel Graphics Drivers are in the motherboard DVD.
The Bios Setup provides options for the display.
The picture shows the Setup for VX170P-QM57 with LCD 17” 1280x1024.
For VX120P-QM57 and VX150P-QM57 the “LCD Panel Type” setting is
[Type 3 1024x768].
MU-C654.xxxxxxxxxx r.0.0-EN
33 of 66
VX120P/150P/170P(-QM57)
User’s manual rev.0.0 (Preliminary)
By the Intel Graphics Drivers it’s possible to select the Graphics Properties for the
display. The display are named:
Built in Display = internal LCD panel
Monitor
= external monitor with VGA interface
Digital Display = external monitor with DVI interface
The Intel Graphics Drivers detect if a VGA or a DVI monitor is connected to the
computer and adjust the Graphics Properties options.
The Panel PC allows display on internal LCD panel and, at the same time, on one
external monitor (VGA or DVI) by the Graphics properties “Clone Displays”.
5.12 Connecting a VGA monitor
The computer supports a connector for an analog monitor standard 15 pin VGA
(blue color) placed on I/O panel.
Notice
The VGA monitor can be connected to the Panel PC by a standard
2m. VGA cable
A plug and play VGA monitor could be detected as “PnP Monitor” if only the VGA
cable is full pin type (pin 9 included). Otherwise it is detected as “Default monitor”.
The following picture shows the Graphics Properties for the LCD+Monitor VGA.
5.13 Connecting a DVI monitor
The computer supports a connector standard 24 pin DVI-D (white color) placed on
I/O panel.
The DVI monitor must be connected to the computer before boot time.
The following picture shows the Graphics Properties for the LCD+Monitor DVI.
34 of 66
MU-C654.xxxxxxxxxx r.0.0-EN
VX120P/150P/170P(-QM57)
User’s manual rev.0.0 (Preliminary)
6 Switching on
Caution
Ensure that there is no condensation on or inside the Panel PC when
transporting it at low temperature or when it is exposed to
temperature fluctuations.
Before switching it on, the Panel PC must be brought to room
temperature slowly. In case of condensation, wait approximately 12
hours before switch the Panel PC on.
6.1
Power on
The power supply inside the Panel PC is ATX standard. The power on sequence
follows the ATX specifications.
• The 5Vsb is a stand-by output that is active whenever the 115/230Vac power
input (or 24Vdc opt.) is present . 5Vsb provides a power source for circuits that
must remain operational when the main DC outputs are in disable state (e.g.
soft power control).
• When the power button is pressed the main DC outputs are enabled and the
Panel PC starts the boot sequence.
If the “Restore AC Power Loss” in the BIOS Setup is set ON, the power on
sequence is executed automatically (without pressing the power button) whenever
the power input is switched on.
An Auto power-on jumper on the motherboard can bypass the BIOS Setup
(default). In this case isn’t necessary to set to ON “Restore on AC Power Loss”.
If the computer is switched on by power input then the boot starts about 5
seconds after power on.
Notice
Whenever the battery loses power, system settings (BIOS Setup)
stored in CMOS RAM are cleared. If the Auto power-on jumper isn’t
installed you must press the power button to switch the Panel PC on
(soft power).
Caution
Detach power plug before to open the Panel PC.
5Vsb could be active!
MU-C654.xxxxxxxxxx r.0.0-EN
35 of 66
VX120P/150P/170P(-QM57)
6.2
User’s manual rev.0.0 (Preliminary)
Power off
Power off can be executed as follow:
• Execute the shut down command (WinXP).
• Switch off the power input.
Caution
We recommend executing and terminating proper shut down
procedure before switching off the power input otherwise data may be
lost.
After the power input is switched off you must wait about 15 seconds before
switch it on again otherwise the computer could not restart.
Time is needed to allows 5Vsb capacitors discharge.
6.3
Power button
The power button (soft power) is available on the I/O panel. A stylus or similar is
needed to push the button.
Pressing the button switches the system between ON and Soft OFF, depending
on the BIOS or OS settings.
If the computer is Soft Off condition pressing the button switches the system ON.
6.4
BIOS setup
Some configuration settings are stored in a battery backed-up static RAM as part
of the BIOS setup.
Notice
We recommend you keep a note of the Setup settings. You will need
to reset some settings if the battery that provides power for the CMOS
RAM will get exhausted.
To enter Bios Setup you need a keyboard.
Read carefully the motherboard user’s manual before to attempt to
change BIOS Setup.
The Panel PC is provided with BIOS setup setting for manufacturer tests.
If operating system is installed by user refer to the pertinent documentation.
36 of 66
MU-C654.xxxxxxxxxx r.0.0-EN
VX120P/150P/170P(-QM57)
User’s manual rev.0.0 (Preliminary)
7 Operator controls
7.1 Touchscreen control
The touchscreen display is sensitive to touch and it shows some applicationspecific elements like e.g. a button.
Pushing the button by finger, the system will execute the corresponding function
as provided by the application software.
Caution
Always touch one point on the touchscreen and not several points at
one time. Otherwise unintended reactions can occur.
Caution
If the touch point and the activated action are not corresponding the
touchscreen can be not calibrated and unintended reactions can
occur.
If necessary calibrate the touch using an external mouse.
If the problem is not resolved do not use the touchscreen.
Caution
The touchscreen is active even if the display shows anything (black
screen) due for example of a LCD lamp damage.
If you push the touchscreen in this condition unintended reactions can
occur.
In these following situations the touchscreen must not to be touch:
• During booting operation and until the boot process is completed.
• When plugging or unplugging USB devices.
Caution
The touchscreen requires only a light strength to work.
Do not push strongly on the touchscreen especially if you are using a
plastic pen.
MU-C654.xxxxxxxxxx r.0.0-EN
37 of 66
VX120P/150P/170P(-QM57)
User’s manual rev.0.0 (Preliminary)
8 Technical specifications
8.1 Mechanical specifications
Front panel:
Back case:
Display window:
Dimensions:
Weight:
aluminium
steel
Touchscreen or transparent plastic sheet
see drawings
VX120P-QM57 approx. 5,5 Kg (depends on the configuration)
VX150P-QM57 approx. 6,5 Kg (depends on the configuration)
VX170P-QM57 approx. 8 Kg (depends on the configuration)
VX120P-QM57 dimensions (all specification in mm. ± 0.3mm)
38 of 66
MU-C654.xxxxxxxxxx r.0.0-EN
VX120P/150P/170P(-QM57)
User’s manual rev.0.0 (Preliminary)
VX150P-QM57 dimensions (all specification in mm. ± 0.3mm)
VX170P-QM57 dimensions (all specification in mm. ± 0.3mm)
MU-C654.xxxxxxxxxx r.0.0-EN
39 of 66
VX120P/150P/170P(-QM57)
User’s manual rev.0.0 (Preliminary)
8.2 Climatic conditions
Operating temp.:
0 to 45°C;
Storage temp.:
-20 to +60°C.
Relative Humidity: 10 to 90% at 25°C without conden sation.
Notice
It is prohibited to apply sunlight or fluorescent light to the display
during the store.
It is highly recommended to store the Panel PC with temperature from
0 to 35°C and relative humidity of less than 70%.
The operating and storage conditions are dependent on the combination of the
subsystems. The max temperature permitted for the CPU can reduce the max
operating temperature (see the “motherboard” paragraph).
The LCD has not the same display characteristics over full temperature range.
Refer to “LCD” paragraph for further information.
The operating temperature must be measured inside the rack or cabinet where
the Panel PC is installed.
The Panel PC can operate up to max. operating temperature under the following
conditions:
• The factory-approved heat sink with cooling fan is installed on the CPU and
well operating.
• The fan on the power supply and on the chassis are well operating.
• The maximum air inlet temperature for the Panel PC must not exceed the max
operating temperature.
• The maximum case temperature of the Processor is not exceeded (see the
“Motherboard” paragraph).
• Power absorbed by expansions (e.g. USB) is less than 10W.
Notice
Make sure there is suitable room for airflow through the Panel PC
chassis vent.
The power supply fan cooler draw out the inside air flowing it toward
the bottom side. Avoid hot air heap up in the bottom area of the Panel
PC.
40 of 66
MU-C654.xxxxxxxxxx r.0.0-EN
VX120P/150P/170P(-QM57)
User’s manual rev.0.0 (Preliminary)
8.3 Power consumption
The following table reports the typical input power consumption for some Panel
PC model. The data doesn’t include the power consumption of expansions and
peripherals connected to the Panel PC (e.g. USB,PS/2 etc.)
Model
Power
supply
Processor
Memory
VX120P
VX120P
VX120P
VX120P
VX150P
VX150P
VX150P
VX150P
VX170P
VX170P
VX170P
VX170P
230Vac
24Vdc
230Vac
24Vdc
230Vac
24Vdc
230Vac
24Vdc
230Vac
24Vdc
230Vac
24Vdc
Intel Celeron P4500
Intel Celeron P4500
Intel Core i5-520M
Intel Core i5-520M
Intel Celeron P4500
Intel Celeron P4500
Intel Core i5-520M
Intel Core i5-520M
Intel Celeron P4500
Intel Celeron P4500
Intel Core i5-520M
Intel Core i5-520M
1x2GB DDR3
1x2GB DDR3
1x2GB DDR3
1x2GB DDR3
1x2GB DDR3
1x2GB DDR3
1x2GB DDR3
1x2GB DDR3
1x2GB DDR3
1x2GB DDR3
1x2GB DDR3
1x2GB DDR3
HD
Input
(note 1) power
(typ.)
1 x 2,5” 59W
1 x 2,5” 55W
1 x 2,5” 69W
1 x 2,5” 65W
1 x 2,5” 57W
1 x 2,5” 53W
1 x 2,5” 67W
1 x 2,5” 63W
1 x 2,5” 64W
1 x 2,5” 59W
1 x 2,5” 74W
1 x 2,5” 69W
Note 1: power consumption of HD could be different depending on the model.
Notice
The heat dissipation of the Panel PC itself have to be considered for
the choice of a cabinet or a case where the Panel PC should be
installed inside
The external power supply which provides 24Vdc to the Panel PC
must be over dimensioned in comparison to the power on the table.
MU-C654.xxxxxxxxxx r.0.0-EN
41 of 66
VX120P/150P/170P(-QM57)
User’s manual rev.0.0 (Preliminary)
8.4 Internal Power supply 115/230Vac
Type:
Input voltage:
Input frequency:
Input current:
Efficiency:
MTBF:
Certifications:
ATX.
115/230Vac ±10% auto-range.
50-60Hz.
4A (rms) for 115Vac / 2A (rms) for 230Vac.
68% min.
100.000 hours at full load at 25°C (fan not include d).
UL, CSA, TUV, CE.
Output power:
up to 150W (at 25°C)
Output
voltage
(dc)
+3.3V
+5V
+12V
-12V
+5Vsb (stand by)
Output current Tolerance
(max)
12A
5%
12A
5%
10A
5%
0.3A
10%
2.0A
5%
Notice
The total output power on +5V & +3.3V is 80W max.
The total output power on +5V & +3.3V & +12V is135W max.
The total power available for expansions (e.g. USB) is 10W.
Inside the Panel PC the common (0V) of the output voltages is connected to the
metal frame.
Warning
The power cord must be connected to an outlet having a protective
earthing.
Failure to follow this warning could result in electrical shock.
Since the Panel PC does not have a power switch, turning off and
completely disconnecting power, 5Vsb included, require pulling the
power plug.
42 of 66
MU-C654.xxxxxxxxxx r.0.0-EN
VX120P/150P/170P(-QM57)
User’s manual rev.0.0 (Preliminary)
8.5 Internal Power supply 24Vdc (option)
Type:
Input voltage:
Input current:
Inrush current:
Efficiency:
MTBF:
Standards:
ATX.
18 to 30Vdc, nominal 24Vdc.
14A (rms) for 24Vdc.
20A at nominal input, 25°C cold start.
75% min at nominal input and rated output.
100.000 hours at full load at 25°C (fan not included).
UL,CSA,TUV, CE.
Output power:
up to 150W (at 25°C)
Output voltage
(dc)
+3.3V
+5V
+12V
-12V
+5Vsb (stand by)
Output current
(max)
12A
12A
10A
0.3A
2A
Tolerance
5%
5%
5%
10%
5%
Notice
The total output power on +5V & +3.3V is 80W max.
The total output power on +5V & +3.3V & +12V is135W max.
The total power available for expansions (e.g. USB) is 10W.
Inside the Panel PC the common (0V) of the output voltages is connected to the
metal frame.
Warning
The insulation towards the main voltage depends on the external
power supply to the Panel PC. The Panel PC must be supplied by a
limited power source according to EN60950. Use a switching power
supply protected against overcurrent which complies with the
requirements of safety extra low voltage (SELV) which conforms to
the safety standard EN60950 or equivalent.
It’s recommended using a power supply reserved for the Panel PC.
None of the wiring terminals is designed to be connected to parts at
hazardous voltage. The wiring from the external power supply to the
Panel PC must comply with the requirements of safety extra low
voltage (SELV).
MU-C654.xxxxxxxxxx r.0.0-EN
43 of 66
VX120P/150P/170P(-QM57)
User’s manual rev.0.0 (Preliminary)
Caution
The terminals on the 24Vdc input power supply are not suitable to
switch the Panel PC ON and OFF.
Use a power switch on the external power supply to switch ON-OFF
the Panel PC.
Notice
The external power supply must provide the inrush current required
by the internal DC/DC converter at power-up without enter self
protecting mode otherwise the system start up is not guaranteed.
44 of 66
MU-C654.xxxxxxxxxx r.0.0-EN
VX120P/150P/170P(-QM57)
User’s manual rev.0.0 (Preliminary)
8.6 Motherboard
The Panel PC is provided with a Mini ITX motherboard with Intel QM57 chipset
and Intel Core i5-520M or Celeron P4500 processor.
The processor requires a heat sink with fan to operate. Furthermore the
motherboard provides a hardware monitoring for CPU temperature and fan speed.
The hardware monitor works only with special software for WinXP supplied with
the motherboard DVD.
We recommend do not exceed +85°C for CPU temperatur e.
Caution
The motherboard must work only with the (factory-approved) heat
sink installed on the CPU and the fan working.
Refer to the motherboard user’s manual for further information.
I.P.S. Sistemi Programmabili reserves the right to change the motherboard model
without warning to update features or design.
8.7 RAM
The Panel PC is equipped with one or two 204pins SoDIMM 1GB, 2GB, 4GB
modules.
If two modules are use they must be of the same model (dual channel).
At boot time, the BIOS find and sizes memory present in the system.
Memory over 4GB is available only by 64bit OS.
32 bit OS supports 4GB max. but, because of Video and PCI overlapping, only
3GB or less are available as system memory.
Refer to the motherboard user’s manual for further information.
Caution
Switch off input power before installing/removing Dram modules
MU-C654.xxxxxxxxxx r.0.0-EN
45 of 66
VX120P/150P/170P(-QM57)
User’s manual rev.0.0 (Preliminary)
8.8 Hard disk
The Panel PC can be equipped with a 2,5’’ SATA Hard Disk Drive (HDD) as order
option.
Hard disk auto detect must be selected and enabled on BIOS Setup (default).
Notice
To avoid hard disk failure or file loss we recommend observing the
following indications.
Never turn the system off when the hard disk indicator led on front is
illuminated.
After shutting the system off, do not turn it back on again until the
hard disk has come to a complete stop (takes about 20 seconds).
Always use the proper power down procedures as required by your
Operating System such as the Shut Down command in
Win2000/WinXP.
Although there is an extremely low possibility of drive malfunction and
data error, the user should provide for their occurrence. The user
should have considerations for data safety and integrity such as data
backup.
Standard hard disks are not suitable to operate 24h x 7 continuously.
The Setup IDE adapter menu allows BIOS to be informed about the
current hard disk in use. Auto detect hard disk option allows the BIOS
to determine the proper settings of the drive, based on the
manufacturer’s information. Avoid manually enter information for a
pre-formatted disk drive. If the specific cylinder, head and sector
information used was different than the manufacturer’s settings the
system will be unable to boot the Operating System.
8.9 Hard disk RAID
The Panel PC can be equipped with two 2,5’’ HDD SATA RAID-1 configuration as
order option.
For information about HDD RAID-1 refer to the specific user’s guide.
Refer also to the motherboard user’s manual.
46 of 66
MU-C654.xxxxxxxxxx r.0.0-EN
VX120P/150P/170P(-QM57)
User’s manual rev.0.0 (Preliminary)
8.10 Compact Flash disk
As an order option the Panel PC can be equipped with a solid state disk Compact
Flash (CF). The CF installation is committed to the user.
The CF is an embedded solid state data storage system that electrically complies
with the PCMCIA ATA standard. The CF also supports a IDE Mode that is
electrically compatible with the IDE (PC/AT) interface, requiring no additional
device drivers to run existing applications in a DOS Operating System.
Caution
The Panel PC supports CF in IDE Mode only (PATA).
To configure the CF in IDE Mode, the CF must be inserted in the 50
pin socket before power is switched on. Removing and reinserting the
CF while the power is on will reconfigure the CF to PC Card ATA and
system hang or damage may occur.
The sector size of the CF is the same as in a magnetic disk drive: 512bytes.
When compared to magnetic disk drives the CF offer lower power consumption,
faster seek and access times and higher reliability for increase data integrity.
Notice
Any Flash based data storage system has a limited number of erasewrite cycles. In some application data files are updated very
frequently. The user must verify the number of update cycles against
the expected working life on the field.
CF has expected erase-writes cycles guaranteed per logical sector (reading a
logical sector is unlimited). In some applications the program requires more files
update than the guaranteed erase-write cycles within the expected time. In that
case it is better to use an alternative disk to store those files.
The CF on the market are of different type and reliability; refer to specific
characteristic indicated by the manufacturers.
The SETUP allows BIOS to be informed about the current IDE disk in use. Auto
Detect Hard Disk menu allows the BIOS to determine the proper settings of the
drive, based on the manufacturer’s information. Avoid manually enter information
for a pre-formatted disk drive. If the specific cylinder, head and sector information
used was different than the manufacturer’s settings the system will be unable to
boot the Operating System.
The Panel PC supports one or two Compact Flash disks (as order option). A CF
socket is available opening the little cover on the bottom side of the chassis. The
second socket, if provided, is internal and it’s available opening the cover
The CF must be in inserted into the 50 pin socket placed on the adapter board.
MU-C654.xxxxxxxxxx r.0.0-EN
47 of 66
VX120P/150P/170P(-QM57)
User’s manual rev.0.0 (Preliminary)
Caution
The socket is polarized and CF insertion is one way only requiring a
light strength. If the CF does not enter into the socket please do not
force, probably you inserted the CF in the wrong way.
Notice
The CF to be inserted in the Panel PC must be Compact Flash 3.0
specification or previous. The CF must be max. IDE UDMA2 or PIO
Mode 4.
To allow Windows XP booting the CF must be fixed disk type.
The CF must be configured as Master IDE or Slave IDE (by jumper on the adapter
board) depending on the application.
Notice
If two CF are connected as master/slave devices sharing the same
IDE cable then one must be configured as Master and the other one
as Slave
The use of flash disk requires the same operating rules of the hard disk (with the
exception of the 20 seconds power off delay and that it is suitable for 24h x7
operating continuously).
8.11 Hard disk 2,5” + Compact Flash
The Panel PC can be equipped (as order option) with a 2,5’’ HDD Sata plus a CF
socket.
The CF installation is committed to the user.
48 of 66
MU-C654.xxxxxxxxxx r.0.0-EN
VX120P/150P/170P(-QM57)
User’s manual rev.0.0 (Preliminary)
8.12 Serial ports
The Panel PC is equipped with four RS232 serial ports NS16C550 compatible.
The COM4 serial port is reserved for the touchscreen controller (option).
The DB9-M serial port connectors COM1-2 and COM3 (option) are on the I/O
panel. The following table indicates the pinout of the RS232 COM1-3 connectors.
Pin
1
2
3
4
5
6
7
8
9
Signal
DCD
RXD
TXD
DTR
GND
DSR
RTS
CTS
RI
Description
Carrier Detect
Received Data
Transmitted Data
Data Terminal Ready
signal GROUND
Data Set Ready
Request To Send
Clear To Send
Ring Indicator or Reserved
Caution
Do not connect/disconnect COM cables with the Panel PC or the
external apparatus switched on.
Notice
For COM port connection use a shielded cable. The max. length of
the RS232 connection is 15m. The cases of the DB9-M connectors
are connected by the metal chassis to the internal 0V.
The BIOS Setup provides a menu to set the serial port settings (address/IRQ).The
COM1-3 labels on the Panel PC refer to the default BIOS Setup as set at the
factory. If you change the serial port settings the reference could mismatch.
Refer to the CPU board user’s manual for further information.
8.13 Keyboard/mouse interface
Two PS/2 style connectors on the I/O panel allow connection of external keyboard
and mouse. The mouse connector is green while the keyboard one is violet.
Caution
Do not connect or disconnect the external keyboard or mouse when
the Panel PC is switched on. Switch off input power before
connecting or disconnecting the keyboard or the mouse.
MU-C654.xxxxxxxxxx r.0.0-EN
49 of 66
VX120P/150P/170P(-QM57)
User’s manual rev.0.0 (Preliminary)
8.14 USB port
The USB controller is on board. Four USB type A connectors, compliant with rev.
2.0/1.1, are provided on the I/O panel.
A further USB connector is available on front panel covered by a little door (except
for True Flat panel version)
The total max. current, for external USB devices, absorbed from the USB
connectors must not exceed 0.5A for each connector. Furthermore the total power
(5V) absorbed must be within the limit (for expansion devices) specified in the
“Internal power supply” paragraph in this manual.
Refer to the motherboard user’s manual for further information.
Notice
Use a cable 5m max long to connect an external USB device to an
USB connector on the I/O panel.
Use a cable 4m max long to connect an external USB device to the
USB connector on the front panel
8.15 Ethernet (LAN)
The Panel PC is equipped with two Gigabit Ethernet 10/100/1000 with RJ45
connectors on the I/O panel. The following are used.
• Intel 82577LM for LAN1
• Realtek RTL811C for LAN2 (see picture).
The WinXP device drivers for the Ethernet controllers are in the motherboard CDROM. Each controller has its specific driver.
Refer to the motherboard user’s manual for further information.
8.16 Audio controller
The Panel PC is equipped with a Realtek ALC262 High Definition Audio controller.
On the I/O panel there are 3 connectors (line out, line in e mic).
The WinXP device drivers are in the motherboard DVD.
Refer to the motherboard user’s manual for further information.
50 of 66
MU-C654.xxxxxxxxxx r.0.0-EN
VX120P/150P/170P(-QM57)
User’s manual rev.0.0 (Preliminary)
8.17 Graphics controller
The Panel PC is equipped with an integrated graphics controller.
The graphics controller has three types of video interface for display.
1-LVDS interface for internal LCD panel (main display)
2-VGA interface for external CRT/LCD analog monitor (15 pin VGA).
3-DVI-D interface for external LCD digital monitor (24 pin DVI-D).
The Intel Graphics Drivers for WinXP/Win7 are in the motherboard DVD.
Refer to the motherboard user’s manual for further information.
8.18 LCD display
The Panel PCs are equipped with TFT LCD as follow:
VX120P-QM57: 12.1’’ 1024x768 pixels 18 bit (single channel LVDS)
VX150P-QM57: 15’’ 1024x768 pixels 18 bit (single channel LVDS)
VX170P-QM57: 17’’ 1280x1024 pixels 48 bit (dual channel LVDS)
LCD Active area /
Pixel pitch
(mm)
12.1” 245.76x184.32
0.240x0.240
15” 304.12x228.09
0.297x0.297
17” 337.92x270.33
0.264x0.264
Brigthness
(typ.) 25°C
(note1)
500 cd/m2
400 cd/m2
350cd/m2
Contrast Viewing angle
Ratio (CR) CR ≥ 10
center(typ) (degree)
700:1
H 80/80
V 80/80
700:1
H 80/80
V 70/70
1000:1
H 85/85
V 80/80
Backlight type /
Backlight life (typ)
25°C (note2)
LED
50000 h
LED
50000 h
LED
50000 h
Note 1: values in the table are referred to a device working at least 15 minutes
after power on.
I.P.S. Sistemi Programmabili reserves the right to change the LCD without notice
to update the project.
Note 2: the typical lamp service life is defined as the time when the brightness
becomes 50% of the original value (at 25°C)
MU-C654.xxxxxxxxxx r.0.0-EN
51 of 66
VX120P/150P/170P(-QM57)
User’s manual rev.0.0 (Preliminary)
Display of static images
The permanent display of a bright picture can lead to a burn in effect in the case
of a TFT LCD. Shadows of the previous image could remain on the screen even
changing the image. This is known as Temporary Image Retention (TIR) or Image
sticking.
TIR doesn’t affect LCD’s life or reliability.
The best way to avoid TIR is to limit the amount of static content on the display.
When this is not an option, you can use a screensaver to display moving images
(e.g. flying stars).
Display modes
The LCD has a fixed number of pixels so some video modes are supported in
expansion mode.
Expansion mode is a function to expand the screen size in different resolutions
(e.g. 800x600 on an 1024x768 LCD) so the image can be displayed almost fully
on the screen.
In Expansion mode the display quality can look not very good in some cases.
Faulty pixels in LCD
A minimum number of faulty pixels are permissible.
The production process for TFT LCD does not currently guarantee that all pixels in
the screen are error free. As long as it is not a case of an accumulation of locally
faulty pixels, there are not relevant functional restrictions.
LCD panel selection by Bios Setup
LCD panel selection is by Bios Setup on the “Advanced – Video Function
Configuration” menu.
VX120P-QM57 LCD Panel Type 3 : 1024x768 18 bit
VX150P-QM57 LCD Panel Type 3 : 1024x768 18 bit
VX170P-QM57 LCD Panel Type 13: 1280x1024 48 bit
Notice
We recommend you keep a note of the Setup settings. You will need
to reset some settings if the battery that provides power for the CMOS
RAM will get exhausted.
A keyboard is necessary to select/modify Bios Setup.
If you find problems on LCD panel running Bios setup, please
temporary connect an external monitor on the VGA connector.
Read carefully the motherboard user’s manual before to attempt to
change BIOS Setup.
52 of 66
MU-C654.xxxxxxxxxx r.0.0-EN
VX120P/150P/170P(-QM57)
User’s manual rev.0.0 (Preliminary)
8.19 Touchscreen
The touchscreen is an order option.
Characteristics
Type:
Light transmission:
Surface pencil Hardness:
Controller:
8-wire analog resistive with antiglare surface
80% (typ.)
3H (ASTM-D-3363-92A)
TSHARC 12bit (RS232 serial interface 9600 baud to
COM4).
Functional description
The analog resistive touchscreen is a sensor consisting of two opposing layers,
each coated with a transparent resistive material, separated by a pattern of very
small transparent insulating dots. Touching the top surface compresses the
flexible top layer to the supported bottom layer causing electrical contact of the
two layers between the span of insulating dots. Determining a touch location
requires two measurements, one to obtain an X-axis coordinate and one to obtain
a Y-axis coordinate. Applying a drive voltage across one layer produces a voltage
on the other layer that can measured using an A/D (Analog to Digital) converter.
The touchscreen interface is made by a dedicated microcontroller. Touch point
coordinates are reported to the Motherboard through the serial communication
port (COM). The A/D converter used is a 12-bit type that can resolve up to 4096
different input values in each the horizontal and vertical direction. The analog
resistive touchscreen used in the Panel PC is 8-wire type. This design
compensates for resistance changes inherent to any touch system. Resistance
changes are caused by ageing, use, temperature, and humidity.
The layers of the touchscreen are laminated to a chemically strengthened glass
backing panel. The backing panel gives the layers rigidity and protects the display
used behind the touchscreen.
The layers are made of polyester (PET) with the external side coated with an
abrasion and chemical resistant anti-glare hard coat.
Use and care
The touchscreen assembled on the Panel PC is useful for use with fingers,
gloves, pen tip, or other pointing device with rounded edge.
Caution
Avoid pressing the touchscreen with sharp pointing device.
Permanent damage to the touchscreen can occur.
MU-C654.xxxxxxxxxx r.0.0-EN
53 of 66
VX120P/150P/170P(-QM57)
User’s manual rev.0.0 (Preliminary)
To maintain clear the front surface of the touchscreen, keep it free of dirt, dust,
fingerprints, and other materials that could degrade optical properties. Cleaning
the touchscreen surface regularly can do this.
See the “cleaning the display” paragraph later in this manual.
Long-term contact with abrasive or sharp materials will scratch the front surface,
decreasing image quality.
UV Resistance
Not recommended for applications where touchscreen is exposed to direct
sunlight for long periods of time.
Yellowness, brittleness and reduced adhesion on PET layers can occur.
Software drivers
The Panel PC is provided with software drivers for the touchscreen controller as
well as utility functions. The software emulates much of the functionality of a
standard mouse device, which is based on relative movement. Mouse motion is
translated into a count of discrete movement steps for both the horizontal and
vertical axis. The touchscreen mouse emulation is based on absolute movement.
A touch will initiate both a cursor absolute movement and a mouse click event.
Refer to the manuals provided on the CD-ROM for more information.
Software license agreement
The software drivers and utilities for the touchscreen are provided under a license
agreement. The user must read the license agreement file on the CD-ROM before
using the Panel PC.
Calibration
Calibration orients and aligns the touchscreen with the LCD display.
If the Panel PC is supplied with WinXP/Win7 OS installed on disk then the
touchscreen is calibrated at the factory; if necessary re-calibration can be
performed.
Refer to the manuals provided on the CD-ROM for more information about
calibrating the touchscreen under Operating Systems.
An external mouse could be required to calibrate the touchscreen.
54 of 66
MU-C654.xxxxxxxxxx r.0.0-EN
VX120P/150P/170P(-QM57)
User’s manual rev.0.0 (Preliminary)
9 Maintenance
9.1 General
In normal use the Panel PC must be fitted with its back cover. The cover must be
screw fastened to the chassis. During installation and maintenance operations the
back cover can be opened by unscrewing the screws, which fasten it.
Maintenance operations must only be performed by trained staff.
The Panel PC contains components, which are sensitive to
electrostatic discharges (ESD).
Before working on the part inside the Panel PC the person performing
the operation must discharge any static electricity by touching a metal
part connected to the earth.
Perform work in a static safe environment.
Caution
Risk of damage.
Switch power input off and detach power plug before opening the
Panel PC. 5Vsb could be active!
9.2 Spare parts
For spare parts please get in touch with I.P.S. service.
9.3 Replacing the motherboard
Caution
If the motherboard has to be replaced be sure that the proper BIOS
Setup is installed otherwise damage or system fault may occur.
The motherboard is accessible by removing the back cover of the chassis.
To remove the motherboard:
• Switch power off and detach power cord.
• Remove any cable connected to the board. Keep a note of the cabling (wiring).
• Remove the riser card (unscrew the 2 locking screw)
MU-C654.xxxxxxxxxx r.0.0-EN
55 of 66
VX120P/150P/170P(-QM57)
User’s manual rev.0.0 (Preliminary)
• Remove the 4 screws securing the motherboard to the bottom of the chassis
and the 2 nuts on the DVI-D connector (see picture).
• Remove and store the motherboard in an antistatic wrapper.
To install a new motherboard (of the same type as the replaced one):
• Set any jumpers as the replaced board (refer to the motherboard user’s
manual).
• Install the processor into its socket, the heatsink with fan cooler and the DRAM
memory modules (follow motherboard user’s manual instructions).
• Align the holes on the motherboard with the spacers on the bottom of the
chassis and fasten the motherboard screws and the nuts on the DVI-D
connector.
• Restore the cabling.
• Close the back cover.
56 of 66
MU-C654.xxxxxxxxxx r.0.0-EN
VX120P/150P/170P(-QM57)
User’s manual rev.0.0 (Preliminary)
9.4 Replacing the Compact Flash disk (CF)
The Panel PC supports one or two Compact Flash disks (as order option). A CF
socket is available opening the little cover on the bottom side of the chassis. The
second socket, if provided, is internal and it’s available opening the cover
The CF must be in inserted into the 50 pin socket placed on the adapter board.
Caution
The socket is polarized and CF insertion is one way only requiring a
light strength. If the CF does not enter into the socket please do not
force, probably you inserted the CF in the wrong way.
Notice
The CF to be inserted in the Panel PC must be Compact Flash 3.0
specification or previous. The CF must be max. IDE UDMA2 or PIO
Mode 4.
To allow Windows XP booting the CF must be fixed disk type.
MU-C654.xxxxxxxxxx r.0.0-EN
57 of 66
VX120P/150P/170P(-QM57)
User’s manual rev.0.0 (Preliminary)
9.5 Replacing the 2,5’’ hard disk
To replace the 2.5” hard disk:
• Switch power off and detach power cord.
• Open the back cover.
• Keep a note of the cabling (wiring).
• Remove the cable from the hard disk.
• Unscrew the 4 screws securing the hard disk holder to the stand-offs. Remove
completely the holder. Unscrew the four screws that lock the hard disk to the
holder (see picture).
• Replace the hard disk and fix it to the holder with the 4 screws as before. Use
original screws type. Different type of screws can damage it.
• Install the holder and lock it to the stand-offs.
• Connect the cable to the hard disk.
• Close and screw the back cover.
• Switch power on and check that the BIOS detect the new hard disk.
• Install the Operating System and all the software you need.
58 of 66
MU-C654.xxxxxxxxxx r.0.0-EN
VX120P/150P/170P(-QM57)
9.6
•
•
•
•
•
•
•
•
•
•
User’s manual rev.0.0 (Preliminary)
Replacing the power supply
Switch power off then detach the power cord from the power supply.
Open the back cover.
Keep a note of the cabling (wiring).
Detach power cables from devices inside the Panel PC.
Unscrew the 4 screws securing the hard disk holder to the stand-off. and
remove it.
Remove the power supply, unscrewing the 2 screws on the cable side and the
2 screws on the I/O panel side of the chassis (see picture).
Install a new power supply (use approved type only) and secure it to the
chassis.
Install the hard disk holder and lock it to the stand-off.
Restore the cabling.
Plug in the power cord then switch power on and check the system starts up.
MU-C654.xxxxxxxxxx r.0.0-EN
59 of 66
VX120P/150P/170P(-QM57)
User’s manual rev.0.0 (Preliminary)
9.7 Replacing the battery
Battery replacement must be performed only by authorized qualified personnel.
A not rechargeable lithium battery on the motherboard provides power for the
Real Time Clock (RTC) and CMOS Ram.
This battery has an estimate life expectancy of 20.000 hours (at 25°C).
Notice
When the battery loses power, BIOS Setup settings stored in CMOS
RAM are cleared and the time and date is wrong. In such condition it
could be required pressing the power button to switch power on.
The replacement battery must be a 3V 220mAh coin cell lithium type compatible
with the Maxell CR2032 battery (verify the exact type on the exhausted cell).
Replacing the battery:
•
•
•
•
•
Switch power off. Detach power cord. Open the back cover.
Remove the battery (keep a note of the plus “+” side).
Install the new battery with the plus “+” as the exhausted cell.
Install any removed boards and close the back cover.
You will need to set the system date and time and any settings different from
default.
Warning
Danger of explosion and harmful material emission if lithium battery is
incorrectly replaced. Replace only with the same or equivalent type
recommended by the manufacturer. The battery module contains
lithium. Do not attempt to dispose of it in a fire or incinerator, do not
overheat up to 80°C, do not short-circuit, do not i nvert poles, do not
disassemble it: the battery may explode.
Don’t try to recharge the lithium battery, the battery may explode.
Don’t allow the battery to come in contact with water.
Always follow regulations in your area for lithium battery disposal...
60 of 66
MU-C654.xxxxxxxxxx r.0.0-EN
VX120P/150P/170P(-QM57)
User’s manual rev.0.0 (Preliminary)
9.8 Checking the CPU fan
On the CPU (processor) there is a heatsink with cooling fan.
Check the CPU fan frequently under normal conditions.
The fan can be checked with “hardware monitor” software supplied with the
motherboard. This software can warn the operator if the fan speed is under a
minimum threshold setup.
The heat sink + fan provided from the factory is a long life type, but if the
temperature of the heatsink often rise over 70°C th e lifetime of the fan can
considerably drop.
Caution
The motherboard must work only with the (factory-approved) heatsink
+ cooling fan installed on the processor and well operating.
If the fan fails, it must be replaced with a factory-approved one.
To replace the heat-ink with fan cooler follow instructions on the motherboard
user’s manual.
9.9 Checking the Power Supply fan
Check the Power Supply fan.
If the fan fails, the whole power supply unit must be replaced.
9.10 Checking the chassis fan
Check the chassis fan.
If the fan fails, it must be replaced with a factory-approved one.
9.11 Cleaning the fan filter
Clean the chassis fan filter at least once a month under normal conditions. You
may need to clean the filter more frequently if the Panel PC is located in an area
with high levels of dust.
The Panel PCs has one fan filter (60x60mm. fan) on the upper side of the chassis.
To clean the fan filter:
• Switch the Panel PC off.
• Unscrew the filter retainer from the chassis. The filter pad can be removed (see
picture)
• Replace the filter or (if you can’t replace it) clean it with soap and water and
allow drying before installing.
• Place the filter pad on the filter retainer.
• Hook the filter retainer on the chassis and secure it by the screw.
MU-C654.xxxxxxxxxx r.0.0-EN
61 of 66
VX120P/150P/170P(-QM57)
User’s manual rev.0.0 (Preliminary)
9.12 Cleaning the display
Switch power off and detach power cord before cleaning the Panel PC front panel.
Caution
Use of abrasive cleansers or solvents may damage the display
window. Do not scrub or use brushes.
To clean the display window:
• Disconnect power from the Panel PC at the power source.
• For best results on touchscreen, use a clean, damp non-abrasive cloth and a
standard glass cleaner but avoid products containing ammonia.
Caution
Spray the window cleaner on the cloth and not directly on Panel PC.
• Dry the display window with a chamois leather to avoid water spots.
Warning
Do not use alcohol or inflammables to clean the display window or
any part of the Panel PC.
62 of 66
MU-C654.xxxxxxxxxx r.0.0-EN
VX120P/150P/170P(-QM57)
User’s manual rev.0.0 (Preliminary)
10 Troubleshooting
10.1 Troubleshooting procedure
To help identify and isolate a problem, we recommend the following procedure
when a problem occurs:
1. Turn off the power to the Panel PC.
2. Disconnect any peripheral devices.
3. Monitor the Power On Self Test (POST) on the display. One of 3 events can
occur:
• The Panel PC will complete the boot process.
• An error message will occur indicating a non-fatal error.
• The boot process will terminate with a fatal error.
4. If the system boots, isolate the problem by connecting the peripheral devices
one at a time until the problem occurs. If the problem is with a specific software
package, you may want to re-install the software.
5. If there is a problem not related specifically to a software installation or
peripheral device, refer to the following troubleshooting checklist.
10.2 Troubleshooting check list
The system does not display any message:
Check if the power LED on the front panel is illuminated. If not check the power
supply. Try pushing power button (soft power).
Check if all the connections between the Motherboard, the power supply and
the front panel are firmly inserted.
Check if the RAM module is firmly inserted in the socket.
Check if the speaker beeps during Power On Self-Test. If not, probably there is
a fault in the Motherboard.
If there is a problem during boot:
Are all connections secured?
Are the device drivers installed?
Is the Operating System properly installed on the hard disk drive?
Did your hard disk loose a file? Run Scandisk to check for clusters or open
files.
Is BIOS properly configured? Refer to the motherboard user’s manual.
MU-C654.xxxxxxxxxx r.0.0-EN
63 of 66
VX120P/150P/170P(-QM57)
User’s manual rev.0.0 (Preliminary)
If there is a problem after boot:
If the problem is intermittent, you may have a loose connection. Check all
connections including any add-on cards. Check that the memory modules
(DIMM) are fully installed.
Does your system have a virus? Run anti-virus software.
Did your hard disk loose a file? Run Scandisk to check for clusters or open
files.
If you are running a software package, try to re-install the software.
Although the Panel PC has a protected power supply, a transient voltage in the
power line or peripheral cable may cause unexpected reboots or a locked up
system. If so exit the application and start over. Check cabling and grounding.
Is the system overheating? Verify that the CPU fan and the power supply fan
work.
If there is a problem running new software:
Does the software have a hardware requirement that is not present?
Are you using an authorized copy of the software? Some items of software will
not work.
Did the software install correctly? Re-install the software.
Are you following the software’s instructions? Refer to the software manual.
The system loses time and date after power off:
The battery on the motherboard is probably exhausted. Replace the battery as
indicated in paragraph “Replacing the battery”.
If you have verified the CHECK LIST troubleshooting and the problem is still
present, contact I.P.S. follow the indications suggested in “Procedure for repairing
the products” paragraph.
64 of 66
MU-C654.xxxxxxxxxx r.0.0-EN
VX120P/150P/170P(-QM57)
User’s manual rev.0.0 (Preliminary)
11 Decommissioning
11.1 Disposal
When this crossed-out wheeled bin symbol is attached to a product it means this
equipment must not be disposed as urban waste but it must be separated and
collected as laws and order in force about waste electrical and electronic
equipment (WEEE).
Because of the substances present in the equipment, improper use or disposal
can cause damage to human health and to the environment.
The correct disposal of the old appliance will help prevent potential negative
consequences for the environment and human health.
For more detailed recycling information contact your local waste collection body.
In case of illicit disposal, sanctions will be levied on transgressors.
MU-C654.xxxxxxxxxx r.0.0-EN
65 of 66
VX120P/150P/170P(-QM57)
User’s manual rev.0.0 (Preliminary)
Notes
66 of 66
MU-C654.xxxxxxxxxx r.0.0-EN