1
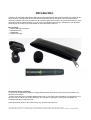
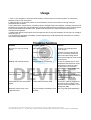
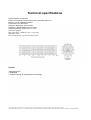
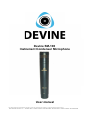
Devine SM-100
Instrument Condenser Microphone
User manual
Any information and illustrations shown in this user manual are subject to change without further notice.
User manual version: 1.0 Creation date + author initials: 27-01-2014 DK Revision date + author initials: 27-01-2014 DK
Introduction
Thank you for purchasing this Devine SM-100 Instrument Condenser Microphone. Before you unpack all the
received items, carefully read this manual to become familiar with the functions of the microphone. Also
check the contents of the box to make sure all necessary parts are included. If any parts are missing, or if the
microphone fails to operate properly, or if you have any problems while using it, disconnect it from phantom
power supply and contact your local dealer for more information and help.
Box contents:
- 1 Devine SM-100 microphone
- 1 Microphone clip
- 1 Windshield
- 1 Leather-look bag
Unit and accessory inspection
- If the unit is not going to be used for a longer period of time, disconnect it from its source and store it in a
dust-free environment.
- Always check the unit for possible damage before use. If you suspect that something is wrong with the unit,
do not connect it. When you suspect that your unit is broken or damaged, contact your local dealer or a
certified technician to inspect the unit.
Note: Illustrations shown in this manual may vary from the actual product.
Any information and illustrations shown in this user manual are subject to change without further notice.
User manual version: 1.0 Creation date + author initials: 27-01-2014 DK Revision date + author initials: 27-01-2014 DK
Description
The Devine SM-100 is an instrument condenser microphone for recording applications. The SM-100 adopts
a 16 mm high quality capsule and a high quality electric circuit. It has a high sensitivity and low self noise, a
(cardioid) Uni-directional polar pattern and a 3-pin XLR output connector for perfect signal transmission. The
SM-100 can be widely used for recording acoustic instruments, overheads, piano, orchestra sound, etc.
IMPORTANT: Phantom power
This instrument condenser microphone requires +48V phantom power from a PA-mixer, studio-mixer, audiointerface or phantom power supply. Consult the manual of your equipment or contact your local dealer when
in doubt if your equipment is capable of providing a +48V voltage.
This microphone will not work properly when there is no proper +48V voltage activated. Always check this if
you suspect that your microphone might be damaged or broken.
Any information and illustrations shown in this user manual are subject to change without further notice.
User manual version: 1.0 Creation date + author initials: 27-01-2014 DK Revision date + author initials: 27-01-2014 DK
Usage
1. Turn on your amplifier or mixing board and set the volume control to minimum position to connect the
phantom power to the microphone.
2. While turning on the phantom switch, accommodate the volume control from low to high until your
preferred level is reached.
3. If the head of the microphone is covered by hand or brought close to the speaker, a howling sound may be
generated. To prevent this, first decrease the volume and then place the microphone in such a manner that it
is not pointed towards the speaker. Also, please make sure there is a sufficient distance between the
microphone and speaker.
4. Please note that the components of this microphone have a very fine sensitivity. Do not drop, hit or apply a
strong shock to it.
5. To maintain the sensitivity and quality of sound reproducing, avoid exposing the microphone to moisture
and extreme temperatures.
Troubleshooting
Problem
Possible Cause
Solution
No sound, or very low sound
signal
No phantom power
Connect or activate phantom
power supply
Volume set too low
Increase incoming volume and
gain on your mixer, interface or
other sound processing device
Microphone positioned too far
away
Place the microphone closer to the
sound source
Rattling and cracking sounds
Moist inside the microphone
Let the microphone dry on room
temperature and avoid use of the
microphone in humid or moist
environments. Do not let the
microphone come in contact with
water or liquids.
Loud high frequencies coming
from the speakers
Microphone positioned too close to Move the microphone further away
the speakers, which causes
from the speakers, or change the
feedback
position to prevent the microphone
to be aimed directly at the
speakers.
Interruptance of the microphone
signal
Loose cable or broken cable
Check if the cable is plugged into
the microphone correctly. If that
does not solve the problem, try to
change the cable.
Distortion and/or noise in the
captured sound
Too much airflow caused by vocal
airflows
Use a pop filter (sold separately)
Any information and illustrations shown in this user manual are subject to change without further notice.
User manual version: 1.0 Creation date + author initials: 27-01-2014 DK Revision date + author initials: 27-01-2014 DK
Technical specifications
Small condenser microphone
Perfect for recording acoustic instruments, overheads, piano, etc.
Element: 16 mm condenser capsule
Polar Pattern: Uni-directional
Freqeuncy Response: 30 Hz-18 kHz
Sensitivity: -38±3dB (0dB=1V/Pa at 1KHz)
Output Impedance: 100Ω±30% (at 1 kHz)
Self Noise: 24dB A
Max. input SPL: 135dB (at 1 kHz ≤1% T.H.D)
S/N Ratio: 70dB
Power requirement : 9V-52V Phantom Power
Includes:
1 Microphone clip
1 Windshield
1 Leather look-bag, for safe transport and storage
Any information and illustrations shown in this user manual are subject to change without further notice.
User manual version: 1.0 Creation date + author initials: 27-01-2014 DK Revision date + author initials: 27-01-2014 DK