Transcript
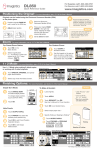
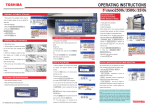
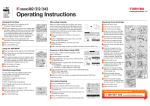
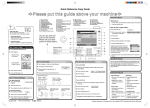
For Supplies call:1-800-462-6797
For Service call:1-800-243-5556
DL460/550
Quick Reference Guide
www.imagistics.com
Positioning the Original: For more information, see the User's Manual
Using the Reversing Automatic Document Feeder (RADF):
1
2
NOTES:
• For different size originals,
see p. 2-2 in the User's
Manual.
Place original(s) image side up in the feeder tray.
• If using optional Finisher, make sure the originals are
placed so that the desired staple location is in the far
left hand corner (for corner staple/ letter copies only).
• Place originals face down
if copying from the glass.
• For paper select info. see
the User's Manual p. 3-9.
Adjust paper guides to the width of the paper.
Zoom: For more information, see the User's Manual
The Zoom menu provides four options for reducing/enlarging
1
a
Under the
"Basics" tab,
touch "Zoom"
then choose
zoom option
(a-d) that best
suits your needs.
b
a
c
d
Fixed Zoom:
d
This option allows you to enlarge
or reduce an original to a different
preset copy size.
• Make sure to select the correct paper
size from the paper select menu.
b
Auto Size:
c
The machine automatically sets the
reduce/enlarge ratio to fit the selected
paper size.
10 Key/Custom Zoom:
You can use the 10-Key Pad
to enter the zoom ratio.
3
4
5
6
7
8
9
0
C
• For additional information
on using the Zoom
functions, see p. 3-14
in the DL460/550
User's Manual.
• You can hold down the arrow key
to change the ratio quickly.
• Select paper size from the paper
select menu.
2
NOTES:
Zoom Up/Down Keys:
The Up/Down arrows allow you
to adjust the zoom ratio in
increments of 0.001.
• Touch [Auto Size]
1
Original4Copy Screen: For more information, see the User's Manual
Use the Original4Copy screen when making 2-sided copies
or working with 2-sided originals.
1
2
3
Load your originals
Touch [Orig.4Copy] tab
NOTES:
• For other Orig.4Copy
options, see p. 3-36 in
User's Manual.
To make two sided
copies from one
sided originals, touch
[Double Sided]
button.
• If you have 2-sided
originals, be sure to
touch [Double Sided]
original.
Finishing Options: For more information, see the User's Manual
Machine Sort and Staple
1
2
Touch [Finishing].
Creating and Binding a Booklet**
Finishing Options
1
Select either Letter R
or 11x17" paper.
6
Touch [Crease].
7
Touch [2-Point Staple];
then [Enter].
Original
*See note
2
Touch [Orig.4Copy].
3
Touch [4in1/Booklet].
Touch [Sort].
NOTES:
4
3
Touch [Corner Staple]
or [2-Point Staple].
5
Touch [Booklet Creation];
then [Enter].
Open [Finishing] menu (select
Basics then Finishing).
Touch [Sort] then [Folding].
Copy
• For more finishing
instructions, see Chapter 3
of User's Manual.
- *Letter R for 5.5" x 8.5"
booklet.
- *11" x 17" for an
8.5" x11" booklet.
**Finishing option only
available with folding
and stapling finisher(s).