1
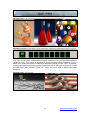
DOF PRO Version 4.0 User Manual DOF PRO v4.0.28, © 2005-2009 Richard Rosenman & Martin Vicanek. Initial Release Date: 05/01/05 Latest Update: 02/09/09 INSTALLATION Simply unzip "dofpro40.zip" and copy "dofpro.8bf" and "convert.exe" to your "\Photoshop\Plug-Ins\" folder, or whichever plugin folder your host program uses. Load your program, open an image, go to the filter menu and under “DOF PRO" select "DOF PRO." INSTALLATION FOR REGISTRATION Installation for registration requires three simple steps. 1. Register your copy of DOF PRO at http://www.dofpro.com/registration.htm 2. Launch the filter as described above in the installation section. On the bottom right hand corner of the filter, you will notice a request code. Please send this code, along with your full name and your purchase order receipt to [email protected]. Alternately, you can click on "SAVE" next to the request code and email the saved "DOFPRO.REQ" file along with your full name and your purchase order receipt. As soon as we receive this information, your license will be generated and emailed back to you promptly. 3. Once you have received your license file for DOF PRO, simply place the file into THE SAME FOLDER AS YOUR "dofpro.8bf" FILE. This is very important as placing the license file in a different folder than the one it currently resides in will not switch your copy of DOF PRO to REGISTERED mode. As an example, if you followed the steps outlined in the above INSTALLATION section, you would also place the license file into the "\Photoshop\Plug-Ins\" folder. REGISTRATION If you would like to register DOF PRO, please visit http://www.dofpro.com/registration.htm LICENSING You may freely download the plugin and try it as much as you want, whenever you want, wherever you want, by whomever you want, while in DEMO mode. Once registered, ONE (1) DOF PRO license entitles ANY user to UNLIMITED use of the software, for an INDEFINITE period of time, on ONE (1) workstation ONLY. Currently, there is no floating license option. If you wish to use DOF PRO on multiple workstations such as in a studio environment, multiple licenses are required: one for EACH node. 2 http://www.dofpro.com/ COMPATIBILITY For program and OS compatibility information regarding DOF PRO, please visit http://www.dofpro.com/compatibility.htm MINIMUM SYSTEM REQUIREMENTS DOF PRO will run on any PC capable of running Adobe Photoshop v4.0 or higher, or any applications compatible with Adobe's plugin specifications. For software compatibility information, please refer to http://www.dofpro.com/compatibility.htm DOF PRO will NOT run on Macintosh systems. This is unfortunately a compiler limitation, not a developer decision. DOF PRO has been specifically developed for use with high-resolution displays. Therefore a minimum display resolution of 1024x768 is required although a minimum display resolution of 1280 x 1024 x 24 bit color is recommended. DOF PRO works with all common graphics file formats including .bmp, .gif, .jpg, .jpeg, .png, .tif, .tiff, .tga. Support for additional image file formats may be added in the future. Alpha channels are discarded as DOF PRO is meant to be used as a final pass over composited images. DOF PRO works exclusively on 24 bit images (8 bits per channel). 48 bit (16 bits per channel) support is intended to be implemented into future updates. If you see the plugin greyed out in your plugins menu, you are most likely not in a compatible color mode. DOF PRO is 100% multithreaded and fully capable of using an unlimited number of rendering cores. This results in performance increases of up to 400% on a quad-core system compared to previous versions of DOF PRO. In addition, DOF PRO can use up to 3GB of RAM under 32bit Windows (2000, XP, Vista) and up to 4GB of RAM under 64bit Windows. A minimum processor speed of 800 MHz is recommended and a minimum memory capacity of 512 MB is required for using DOF PRO. If at any time there is any doubt regarding DOF PRO's compatibility or functioning, simply try the demo version. If it works, the registered version will too. 3 http://www.dofpro.com/ RELEASE HISTORY v1.1 v1.2 – v1.5 v1.5 v2.0 v3.0 v3.0 v3.0 v3.0 v3.0 v3.0.73 v3.0.73 v3.0.78 v4.0.28 v4.0.28 v4.0.28 – v4.0.28 – v4.0.28 – v4.0.28 – v4.0.28 – Implemented preview window zoom feature. Implemented autoload depth map feature on filter invocation. New and improved Highlight preservation algorithm. New and improved Bokeh visibility algorithm. Implemented full batch / animation capabilities. Implemented common image file formats. Implemented custom aperture maps. Implemented spherical aberration. Implemented full feature grain rendering engine. Implemented full keyframing support for all sliders. Accept image files and depth maps with embedded alpha channels. 169 frame batch processing error fixed. Windows Vista compatibility. Multithreading capabilities implemented. 3GB RAM under 32bit Windows, 4GB RAM under 64bit Windows “Cat’s Eye” aperture implemented. Spherical Aberration Thickness implemented. Chromatic Aberrations implemented. Dialogue resizing, maximize, minimize, restore implemented. Improved conversion speed & corrected time-out errors. KNOWN BUGS v4.0.28 - 8 Bit BMP depth maps and aperture maps with palettes not set to 256-color greyscale may not load properly. V4.0.28 – DOF PRO will not work with Adobe Photoshop® CS4 64 bit. It will work with most other 64bit hosts, as well as with Adobe Photoshop® CS4 32 bit. COMMENTS Programming by Martin Vicanek and Richard Rosenman. Special thanks to the FMML Group and ImageMagick LLC. 4 http://www.dofpro.com/ DOF PRO HOMEPAGE http://www.dofpro.com DOF PRO REGISTRATION http://www.dofpro.com/registration.htm DOF PRO SUPPORT FORUM http://www.dofpro.com/forum/ FEEDBACK If you have any feedback regarding DOF PRO, please feel free to let us know at [email protected]. 5 http://www.dofpro.com/ DOF PRO v4.0 FEATURE SET Realistic simulation of complex depth of field camera effects Full Batch / Animation / Keyframing support, including: Industry standardized sequentially padded file reader Support for all common graphics file formats including .bmp, .gif, .jpg, .jpeg, .png, .tif, .tiff, .tga Source, Depth Map and Output image specification Hold frame option for single source frames requiring sequential depth maps Hold frame option for single depth Map frames requiring sequential source maps Automatic Start and End frame counter Start and End frame adjustment / range selection Log file generation and display Automatic preview window updater Full keyframe animation support of all sliders complete with animation curves Graphic display and interactive editing of all animation curves Broad range of animation curve interpolation methods Custom interpolation mode for ease in/out, hard in/out etc. Keyframe jump-to features Keyframe copy and paste features Interactive timeline scrubbing Frame preview Various Depth Map modes, including: Fixed Defocus Vertical Gradient Radial Gradient External Depth Map Powerful focal point adjustment and visualization tools, including: Focal Depth controller allowing the user to change the focal point of an already existing depth map Preview window clickable option for interactively selecting the focal point Option to display the currently selected depth map or focal point Option to overlay the depth map over the source image for visual representation of the focal plane Numerous Depth Map editing tools, including: Inversion Brightness Contrast Gamma Rotation Stretch Range Clamp Range Scale Range Depth Map Edge Management for artifact reduction/elimination, including: Alias Depth Map Adjustable Edge Threshold Adjustable Edge Blurring Option to display selected edges 6 http://www.dofpro.com/ Full Aperture / Bokeh control, including: Custom Aperture Maps (Create your own aperture shapes in any external application) Selectable Aperture Shape (Circular, Pentagonal, Hexagonal, Heptagonal, Octagonal, Custom Aperture Map, Cat's Eye) Adjustable Pixel Aspect Ratio (PAR) with pre-defined values for NTSC, PAL, 16:9, Custom Adjustable Aperture Size Adjustable Bokeh Angle Adjustable Bokeh Curvature / Roundness Adjustable Bokeh Spherical Aberration (Bokeh 'rings') Adjustable Bokeh Chromatic Aberration (Bokeh 'color spectrum') Adjustable Bokeh Edge Thickness (Edge 'crispness') Option to toggle between low and high aperture sizes (to accomodate film and print requirements) Option to display selected Bokeh Highlight Enhancement Tools, including: New and improved Highlight preservation algorithm New and improved Bokeh visibility algorithm Adjustable Highlight Threshold Adjustable Highlight Enhancement Ability to Tint Highlights with selectable color Option to display selected highlights (both processed and unprocessed) Sophisticated Grain Rendering Engine, including: Animated or static grain Monochromatic or random color grain Uniform, Photometric, Additive or Subtractive modes Fixed, Depth Map or Blur Amount-controlled distribution Ability to Tint Grain with selectable color Instant display of selected grain on a gradient strip Highly Detailed Rendering Console, including: Single-Frame Progress Bar Indicator Detailed graphical batch progress bar Detailed numerical batch progress bar Detailed single frame and batch mode timer Detailed status messaging window Option to disable preview window for faster workflow Resolution controlled menu for faster workflow Selected aperture shape visual display Full preview rendering statistics Full final image rendering statistics Zoom preview options for faster workflow Easy interface navigation and usability, including: Interactive dialog resizing Dialog maximize, minimize, restore, default Saving and loading of user settings Help display Source Image Information display Global reset option Local reset options (per category) Powerful rendering technology, including: 100% multicore rendering technology capable or using unlimited system cores Multigigabyte memory management (3GB of RAM under 32bit Windows (2000, XP, Vista) , 4GB of RAM under 64bit Windows) 7 http://www.dofpro.com/ OVERVIEW DOF PRO v4.0 DOF PRO is the result of ongoing research, development and programming collaboration between Richard Rosenman and Martin Vicanek in an effort to produce a Photoshop® compliant plugin capable of delivering high quality, sophisticated Depth of Field and Bokeh effects quickly and efficiently as a post process. DOF PRO Artists - Left: Mark LaFrenais, Right: Adrian Jackson 8 http://www.dofpro.com/ Depth of field (DOF) is the amount of distance between the nearest and furthest objects that appear in acceptably sharp focus as seen by a camera lens. This field varies with the focal length of the lens, its f-stop setting, and the object distance from the camera. DOF PRO Artists - Jason Lee Depth of field is heavily used in photography, film and computer graphics as a creative element, in typical examples ranging from portraiture to macro photography. In photography, DOF is governed by three factors: aperture, lens focal length and shooting distance. Many consumer class cameras, however, do not provide sufficient and independent control of these parameters. Digital cameras, in particular, usually show a wide depth of field - i.e. they are more tolerant to defocus effects. While this may be welcome in some instances (e.g. snapshot applications), it is often a serious deficiency in others (e.g. portraiture/macro photography). In computer graphics, physically accurate DOF can be effectively generated using complex raytracing techniques that tend to increase rendering times significantly. As a result, computer generated broadcast, print and film production often lacks DOF as a consequence of the lengthy calculation times. DOF PRO Apertures - Custom apertures allow you to create your own aperture maps The term "Bokeh", which in Japanese literally means "blurring", has been introduced into the film, photography and computer graphics industries to describe these particular outof-focus blur characteristics. It is determined mainly by the shape of the camera lens and can be best seen on out-of-focus highlights which assume the shape of the lens aperture. A lens with few aperture diaphragm blades (say 5) tends to produce pentagonal highlights, whereas a lens with more aperture blades (say 7-8) tends to produce rounder (heptagonal/octagonal) highlights. Ultimately, a higher number of aperture blades will produce more circular highlights. 9 http://www.dofpro.com/ DOF PRO Artists - Redrover Studios Ltd. DOF PRO features numerous modes of operation to suit virtually any requirement. In its most powerful mode, DOF PRO uses a specified depth map to derive an accurate DOF effect. A Depth Map is a greyscale image where the grey level at any given point represents the distance of the object from the camera at the same point in the original image. Most 3D computer graphics applications are easily capable of producing depth maps along with the rendered image. For photographic images, the user has to create the depth map manually which can be greatly facilitated through the use of the filter's powerful gradient features. DOF PRO can not only accept single frame source and depth maps, but also animated sequences in a wide variety of file formats. DOF PRO Artists - Left: David Bazlinton, Centre: Martin Vicanek, Right: Daniel Danrich Why DOF PRO? Naturally occurring depth of field has extremely complex optical characteristics. It cannot be simply simulated through the use of a standard blur filter. Lens size, subject distance, aperture shape, lens curvature, film grain, spherical aberration, chromatic aberration, lens asymmetry, transparency, light refraction, motion blur and much more must be taken into account in order to achieve an accurate and convincing depth of field effect. A simple Gaussian blur is one of the least effective methods of reproducing a believable DOF effect. In addition, a competent DOF filter must also provide additional features for dealing with unavoidable post-processing artifacts such as edge management controls, depth map aliasing tools, and highlight 10 http://www.dofpro.com/ enhancement functions. DOF PRO carefully takes into consideration all of these aspects in order to produce the highest quality depth of field output possible. DOF PRO Artists - Keith Bruns DOF PRO comes with an impressive featureset to meet today's creative industry requirements. New and improved highlight preservation and Bokeh visibility algorithms deliver cutting-edge output. Various automatic depth map generation and modification tools are available to assist artists in the creation of hand-made depth maps. Numerous aperture shapes are available (including the new "Cat's Eye" Bokeh), each with the ability to control it's size, angle, curvature and even aberration characteristics such as spherical and chromatic abberations combined with Bokeh edge thickness control. Custom aperture maps have been implemented in DOF PRO (along with a massive online apeture map library) allowing artists to create his or her own aperture shapes thus providing unlimited flexibility and control over your Bokeh effects. Support for all common graphics file formats including .bmp, .gif, .jpg, .jpeg, .png, .tif, .tiff, .tga allows DOF PRO to be easily integrated into your studio pipeline. Pixel aspect ratios can be set to accomodate a wide variety of broadcast standards such as NTSC, PAL, 16:9 and more. A powerful grain generation engine has been developed to assist in the realistic simulation of today's digital imaging pixel noise effects often present in both photographic and monte-carlo raytraced images. Industry-standardized keyframing complete with editable animation curves allow artists to freely animate any / all sliders along with fully-editable function curves. This allows common effects such as focus sweeps to be easily created in very little time. The DOF PRO interface has been greatly improved and most effects now offer realtime visualization including aperture display, grain representation, function curve updates and slider animation. The dialog can now be interactively resized, maximized and minimized thus allowing larger preview displays. The aperture size limit has been significantly extended to further assist high resolution print and film studio production houses. A highly advanced rendering console provides the artist with detailed status messages, concise progress meters and estimated processing timeframes. Multicore rendering technology and gigabyte memory management boasts significantly improved performance. All of these new code implementations produce depth of field camera effects that are extremely accurate and precise in simulating real-world phenomena. 11 http://www.dofpro.com/ DOF PRO Spherical Aberrations - Real-world examples of spherical aberrations emphasizing Bokeh edges DOF PRO fully supports spherical aberrations, a particular effect that occurs when an increased refraction of light strikes the lens edge as opposed to the center. While a perfect lens focuses all incoming rays to a point on the optical axis, a real lens with spherical surfaces suffers from spherical aberration: it focuses rays more tightly if they enter further from the optical axis than if they enter closer to the axis. It therefore does not produce a perfect focal point. When the focus is closer to the lens than the axial focus, it is called under corrected spherical aberration and is often exhibited by a brighter halo around the focus point. Conversely, when the focus is located further than the axial focus, it is called overcorrected spherical aberration and is often exhibited by a brighter core and faint halo around the focus point. DOF PRO can handle positive and negative spherical aberration for any of the predefined aperture shapes, including aberration thickness, in order to achieve stunningly realistic bokeh effects. 12 http://www.dofpro.com/ DOF PRO Spherical Aberration Thickness - DOF PRO offers control over spherical aberration thickness DOF PRO now offers the capability to independently control the spherical aberration edge thickness, an important characteristic of optically-correct bokeh effects. This results in crisp bokeh edges matching real-world bokeh abnormalities. DOF PRO Artists - Bertrand Benoit 13 http://www.dofpro.com/ DOF PRO Chromatic Aberrations - Real-world examples of chromatic aberrations emphasizing Bokeh edges DOF PRO now features chromatic aberrations, a unique effect caused by a lens having a different refractive index for different wavelengths of light. Longitudinal and lateral chromatic aberration of a lens is seen as "fringes" of color around the subject since each color in the optical spectrum cannot be focused at a single point on the optical axis. DOF PRO chromatic aberration features produce spectacular optical imperfections neverbefore seen in any commercial DOF filter. DOF PRO Pixel Aspect Ratio - DOF PRO allows full control over pixel aspect ratio DOF PRO now offers fully customizable (and 100% animateable) pixel aspect ratio (PAR) features. DOF PRO ships with commonly used PAR values for NTSC, PAL, 4:3 and 16:9 aspects, as well as programmable settings, all of which can be fully 14 http://www.dofpro.com/ animateable through the batch processing engine. DOF PRO PAR capabilities allow for international multi-format display output. DOF PRO Artists - Daniel Lieske DOF PRO "Cat's Eye" Effect - Real-world examples of the Cat's Eye effect 15 http://www.dofpro.com/ DOF PRO now supports "The Cat's Eye" effect, also known as optical vignetting. Because the shape of an out-of-focus highlight mimics the shape of the clear aperture, an increasing distance from the optical axis results in out-of-focus highlights progressively narrowing and beginning to resemble a cat's eye. The larger the distance from the image center, the narrower the cat's eye becomes. Optical vignetting tends to be stronger in wideangle lenses and large aperture lenses, but the effect can be noticed with most photographic lenses. Zoom lenses also tend to produce a fair amount of optical vignetting. DOF PRO Artists - Left: Thomas Schneck, Right: Marian Cepeha DOF PRO Custom Aperture Maps - Online library examples of DOF PRO custom apertures DOF PRO also offers the capability to use custom aperture maps. Custom aperture maps are images that can be personally created as your own aperture shapes. This is a significant feature as users can now produce specialized Bokeh effects in addition to DOF PRO's built-in aperture shapes. Starbursts can replace your standard Bokeh effects for enhanced photographic optical glitters, polygonal aperture shapes with more than 8 blades can be used, highly-specific spherical aberration profiles can be created, unique apertures containing refractive dispersion can be designed, and best of all, real-world Bokehs can be extracted from photographic images to produce extremely realistic depth of field effects. Access our DOF PRO Aperture Map Library or create your own and share it with other users on our forum. Custom aperture maps will take your DOF PRO renderings to a much higher level than previously possible. 16 http://www.dofpro.com/ DOF PRO Artists - Left: Tyrone Marshall, Right: Christian Weckmann DOF PRO features full batch / animation / keyframing capabilities internally from within the filter. This completely eliminates the setup time required for Adobe Photoshop® actions and allows batch / animation / keyframing capabilities to be used from within any host capable of running Adobe Photoshop® compliant filters. For a list of compatible hosts, please see the DOF PRO compatibility list. DOF PRO uses industry-standardized keyframing techniques combined with fully editable animation curves and interactive updates. Any number of sliders in DOF PRO can now be keyframed over any number of frames using single or batch RGB and / or depth map sequences. Eight different interpolation schemes are provided including custom curves for user-defined ease-ins and ease-outs. A new timeline slider provides the user with realtime animation scrubbing control and additional keyframing tools have been implemented such as keyframe jumping, copying and pasting. Existing keyframed data can be saved and reloaded for future use and a preview frame option allows the user to see the results of the keyframed sequence at any frame within the timeline. DOF PRO's powerful keyframing features provide a complete DOF animation and processing package suitable for use in any production environment capable of running Adobe Photoshop® compliant filters. 17 http://www.dofpro.com/ DOF PRO Artists - Tom Larsen DOF PRO now includes an advanced pixel grain rendering engine for producing even more realistic DOF effects. Noise and grain are important naturally-occurring byproducts of most monte-carlo raytraced images, digital CCD cameras and conventional film stocks. The introduction of grain and noise in defocused image areas is crucial in producing a realistic DOF effect. This is often difficult to achieve due to varying degrees of defocusing throughout the image which therefore requires varying degrees of pixel grain. DOF PRO easily compensates for this and additionally allows pixel grain to be applied in an animated or non-animated fashion and in monochromatic or random color channel methods. The grain can be applied uniformly, photometrically (luma-sensitive), additively, or subtractively and can be distributed in a fixed manner, or even through the use of the focus map which effectively allows the user to recover lost grain of varying intensity. The grain can be tinted in color and a realtime GUI window displays a preview of your currently selected noise attributes. DOF PRO's new pixel grain rendering engine takes your images from a realistic to a photorealistic level. DOF PRO Photometric Burnout - Photometric burnout resulting in corroded edges Photometric Burnout is a specific effect that occurs when a subject is photographed in front of an intense backlight (natural or artificial). This produces overexposed image areas in which the subject appears to be silhouetted against the background and it's edges become corroded and contracted. Burnouts are quite different than blurs because the corroded edges of the subject(s) remain sharp and faithfully represent the camera's aperture shape. Since DOF PRO uses optically correct DOF algorithms, photometric burnouts can be easily simulated with virtually no setup time involved. 18 http://www.dofpro.com/ DOF PRO Artists - Left: John Seymour, Centre: Tim Borgmann, Right: Ross Marshall DOF PRO Performance - DOF PRO is 100% multithreaded, optimized for multigigabyte memory allocation DOF PRO is now 100% multithreaded and fully capable of using an unlimited number of rendering cores. This results in significantly improved performance increases of up to 400% on a quad-core system compared to previous versions of DOF PRO. In addition, memory management has been greatly improved and DOF PRO can now use up to 3GB of RAM under 32bit Windows (2000, XP, Vista) and up to 4GB of RAM under 64bit Windows. DOF PRO Artists - Jan-Ove Rust 19 http://www.dofpro.com/ DOF PRO is a production tested plugin currently being used by thousands of satisfied customers worldwide. Our users range from individual freelance digital artists and photographers to major broadcast, film and print production studios. DOF PRO has been developed with quality output being the number one priority - to produce the most sophisticated and photorealistic DOF effects possible as a post process thus providing a faster alternative to computationally-intensive traditional 3D raytracing techniques. We work closely with our users and production studios in an effort to further develop DOF PRO and meet the digital community's creative demands. We continue to maintain our commitment to making DOF PRO as accessible as possible, often by working directly with other software developers to ensure third-party applications are fully compatible. DOF PRO has been reviewed by numerous publishers world-wide, always receiving outstanding reviews, honorary mentions and feature publications. Most important of all, DOF PRO has become the chosen tool for uncompromised, high-quality DOF effects. 20 http://www.dofpro.com/ USAGE Control Groups The Graphical User Interface (GUI) is structured into groups of controls which belong to a logical unit. Individual controls or entire control groups may be enabled or disabled, depending on the settings of other controls. Depth This section contains all the controls related to the image's depth map information. Generally speaking, the depth map information determines the amount of blur applied to a particular region of the image. DOF PRO provides a rich feature set of tools in order to non-destructively modify the depth map. Mode: Specifies the mode of operation of the filter. The following modes are available: Fixed Defocus - applies a uniform blur to the entire image. This is the simplest (although not the fastest) of all modes. It can be useful for background images. Vertical Gradient - provides a simple depth model based on a vertical gradient, assuming objects at the bottom to be closest. For many landscape images, this option may be a reasonable choice in absence of an appropriate depth map. Radial Gradient - allows you to set a focal point with a gradually increasing blur as you move away from that point. This option may be a reasonable choice for portraiture applications. Depth Map - performs a DOF simulation based on an externally loaded depth map. Load Depth Map Opens a host dialog to select and load the depth map. If the depth map has been loaded successfully, its filename will be displayed. You no longer have to reload the depth map upon filter invocation if you previously had it loaded. Invert The default assumption is that black areas in the depth map represent distant objects while white areas represent close objects. Use the Invert option if the depth map is the other way around, or if you want the depth map reversed. Note that the result will be inconsistent if the depth order is wrong. This control will be disabled in Fixed Defocus mode as there will be no depth map present. View Depth Displays the depth model used; bright for close objects, dark for distant objects. Disabled in Fixed Defocus mode. 21 http://www.dofpro.com/ View Focus Displays a focus map. White represents objects in focus, black represents objects completely out of focus, grey in between. Note: you can click on the preview window to set the focal depth or you can adjust it with the focal depth slider. Disabled in Fixed Defocus mode. Overlay Overlays the currently selected Focus Depth Map over the source image as a representation of the focus. Stretch Stretches the imported Depth Map range to full coverage, from 0 to 255. Clamp/Scale (toggle): Clamp Clamps the currently selected Depth Map with the specified upper and lower range colors. Clamp/Scale (toggle): Scale Scales the currently selected Depth Map to the range specified by the upper and lower range colors. Upper and Lower range colors Specifies the upper and lower range colors for Clamp / Scale feature. Focal Depth: Slider to adjust the focal depth to a particular grey level of the depth model used (Vertical Gradient or Depth Map). Use this to shift the focus from one object to another. Disabled in Fixed Defocus and Radial Gradient modes. Brightness: Controls the brightness of the currently selected Depth Map. Disabled in Fixed Defocus mode. Contrast: Controls the contrast of the currently selected Depth Map. Disabled in Fixed Defocus mode. Gamma: Controls the gamma of the currently selected Depth Map. Disabled in Fixed Defocus mode. Rotation: Controls the rotation of the currently selected Depth Map. Disabled in Fixed Defocus, Depth Map and Radial Gradient modes. Reset Resets the Depth parameters to default settings. 22 http://www.dofpro.com/ Edges This is an advanced and optional section to manage for reducing and eliminating possible artifacts at the edges of focused and defocused objects. Such artifacts may occur when using antialiased depth maps or when the difference in focus between two overlapping objects is severe. On the other hand, aliased depth maps tend to produce aliased edges in the processed image. If you encounter visible artifacts, our recommendation is to remove the antialiasing from the depth map using these tools and, if necessary, slightly blur the image at the edges of the depth map using the following controls. The controls in this section are only enabled in Depth Map mode. Alias Depth Map Option to remove antialiasing from depth map. Since most computer graphics applications antialias depth maps by default, we have provided an aliasing operator. View Displays edges in the depth map according the Edge Threshold setting. This identifies critical areas which may need slight blurring. Edge Threshold: Specifies a threshold for edge detection in the depth map. Blur Image Edge: Controls the amount of blur applied to the processed image at the edges of the depth map. Reset Resets the Edges parameters to default settings. Aperture Here is where you specify the size and shape of the aperture (i.e. the amount of defocus). Higher values may result in significantly longer processing times. Shape: Lets you select the aperture shape from circular, pentagonal, hexagonal, heptagonal, octagonal, custom and “Cat’s Eye”. PAR (Pixel Aspect Ratio) Lets you select the pixel aspect ratio for various broadcast standards such as NTSC, PAL, 16:9 and custom. To specify custom values, simply enter the values into the box. 23 http://www.dofpro.com/ Load Allows you to load an externally created aperture map. This option will only be enabled when "Custom " has been selected as the aperture shape. Custom Aperture Maps must be in 8 or 24 bit uncompressed BMP format, at a fixed resolution of 256x256. There is a known bug with some 8 bit BMP maps not loading correctly (See Known Bugs Below). View Displays the currently selected aperture shape and size in the preview window. Set the size to a larger value to see more detail. Size: Specifies the aperture size. The value corresponds to the radius in pixels at maximum out-of-focus. This slider controls the amount of defocus. 0-225 Toggles the range of the aperture size from 0 to 225. This is useful for print and film production in which high resolution renders are required with increased DOF. When selected, the "Aperture Size" slider will turn orange as higher values may result in significantly longer processing times. Angle: Allows you to specify aperture orientation. Moving from 0 to 100 covers all orientations without multiples - e.g. full scale (100) rotates a hexagon by 60 degrees. If "Custom" is selected, the value 0-100 will cover 360 degrees. This slider is disabled if Circle or “Cat’s Eye” are selected as aperture shapes. Curvature: Allows you to specify blade curvature. 0 corresponds to straight lines, -100 results in concave lines and 100 results in convex lines (circle). This slider is disabled if Circle or “Cat’s Eye” are selected as aperture shapes. S-Aber: (Spherical Aberration) Controls the light distribution across the aperture. Positive values will result in a 'halo' effect, negative values in a 'core' effect. Spherical Aberration is a particular effect that occurs when an increased refraction of light strikes the lens edge as opposed to the center. C-Aber: (Chromatic Aberration) Controls amount of (longitudinal) chromatic aberration. Chromatic Aberration is a unique effect caused by a lens having a different refractive index for different wavelengths of light. NOTE: Chromatic aberrations are computationally intensive and require approximately two times the processing time to compute. Please see “IMPORTANT NOTES” below. Thickness: Controls the thickness of the light distribution profile resulting in crisp bokeh edges matching real-world bokeh abnormalities. Reset Resets the Aperture parameters to default settings. 24 http://www.dofpro.com/ Highlights This control group deals with highlight management. Due to the limited dynamic range of the image, highlights are usually clipped as a trade-off to a reasonable overall exposure. When highlights are out of focus, this truncated light intensity may be restored using these tools as the light is distributed over a larger area. View Selected Displays the selected highlights only. The rest of the image below the threshold cutoff will not be displayed. Note that white areas (RGB = (255,255,255)) are always fully selected while darker areas are gradually less selected according to the threshold slider value. View Processed Displays the processed highlights only. The rest of the image below the threshold cutoff will not be displayed. This option is useful for faster preview of the highlight's Bokeh. Threshold: Determines the onset of highlights. Image areas with brightness values above threshold will be enhanced in order to restore their original (unclipped) brightness. Enhancement: Controls the amount of enhancement. Careful adjustment is recommended, as too high values will result in white and aliased highlights. Tint Color Allows you to tint the highlights. This may be useful to restore color information which has been clipped away in the image. The default color is set to white which contains the original highlight color information. Highlight tinting works in conjunction with highlight enhancement so that as the highlight is increasingly brightened, the tint color will be increasingly applied. Reset Resets the Highlights parameters to default settings. Grain DOF PRO supports a full-feature grain rendering engine. This engine allows you to add specific noise to the image in order to simulate pixel grain or to restore noise which was in the original image but has been reduced by blurring the out-of-focus areas. A gradient strip is provided to show the selected grain characteristics. Animated Press for randomized grain distribution in each frame of a sequence. Monochromatic Press for monochromatic grain. Otherwise red, green and blue channels will each receive independent noise. 25 http://www.dofpro.com/ Distribution Modes: Two drop-down boxes are provided to specify the way how noise is applied to the image. The following options are available: Uniform - applies the same amount of noise to each pixel. Photometric - applies more noise to darker pixels than to brighter pixels. This resembles the properties of digital photos or Monte-Carlo raytraced images. Additive - adds random color values to each pixel. Subtractive - subtracts random color values from each pixel. Fixed - generates spatially-independent grain. Focus Map - yields Focus Map-controlled grain, i.e. no grain in focus area, with gradually increasing grain for out-of-focus regions. Blur Amount - similar but not identical to the Focus Map option. Use the Blur Amount mode to recover grain lost by blurring. Tint Color Option to add colored noise. Note that in Subtractive mode, the grain will appear to have the complementary color. Reset Resets the Grain parameters to default settings. Rendering Console This control group deals with rendering statistics. Because DOF PRO performs some very complex and sophisticated calculations, render times may be slow. As a result, a great deal of effort has been placed into providing a powerful and robust rendering system that offers the user speed optimization options and detailed status messaging of exactly what is occurring at every stage of the operation and processing of the DOF. Progress: Indicates the currently processed percentage of the preview. Status: Indicates what controller is currently being used, what operation is currently being performed, or what errors, if any, have been encountered. Preview: Enables or disables the preview window for faster workflows. 26 http://www.dofpro.com/ Res/Zoom/100%/Fit: The “Res” feature controls the resolution of the preview window. This can significantly increase the speed of your rendering by having the filter process every 1st, 2nd, 3rd, 4th, or 5th line only. Make sure to switch it back to 1:1 before applying your final result. The Zoom buttons will display your image in various scaled down resolutions for faster previewing. The "100%" button will force the preview window to display at full resolution (100%). The "Fit" button will force the preview window to display the entire image. Batch Progress (Graphical Display): This will display a progress bar describing the percentage of the batch processing currently completed. Batch Progress (Numerical Display): This will display a numerical value describing the percentage of the batch processing currently completed. Preview: Displays the resolution and total time elapsed for rendering the preview. If batch mode is enabled, this will read "Frame:" and will display the total time elapsed for the currently processed frame. Full Image: Displays the resolution and total time estimated for rendering the full image. Please note that only estimates for Fixed Defocus mode are accurate. If batch mode is enabled, this will read "Batch:" and will display the estimated total time left for the completion of the currently specified batch process. Aperture Shape This group displays a visual and numeric representation of the currently selected aperture shape. Size If selected, the aperture preview is displayed at the currently selected size as opposed to a default fixed size. Information Dispay Field Displays the currently selected aperture shape, par, size, angle, curve, spherical aberration, chromatic aberration and thickness values. Batch These controls deal with the batch / animation / keyframing capabilities of DOF PRO. Please see “WORKFLOW TIPS” below for more information regarding this control group. 27 http://www.dofpro.com/ Configure Enables the batch control groups for configuring a batch process. Selecting this again will reset the variables and disable the control group. Execute Runs the configured batch process. Source Image Filename: Opens a file browser for selecting the source image for batch processing. Initially, the currently specified image file for single frame processing will be defaulted. Sequences should be labeled with sequentially padded file naming system. All standard image file formats are supported but alpha channels are discarded as DOF PRO is meant to be used as a final pass over composited images. Depth Map Filename: Opens a file browser for selecting the depth map for batch processing. Initially, if a depth map has been specified for single frame processing, the currently specified depth map will be defaulted. Sequences should be labeled with sequentially padded file naming system. All standard image file formats are supported but alpha channels are discarded as DOF PRO is meant to be used as a final pass over composited images. Output Image Filename: Opens a file browser for selecting the output image for batch processing. Initially, a suggested output filename based on the image filename will be defaulted. All standard image file formats are supported but alpha channels are discarded as DOF PRO is meant to be used as a final pass over composited images. Hold (Source Image): This will hold a single image frame throughout the batch processing. This is useful for when you have one image file with a sequence of depth maps. Hold (Depth Map): This will hold a single depth map throughout the batch processing. This is useful for when you have one depth map with a sequence of image maps. Start: This specifies the currently selected start frame of the sequence. If you change the start frame to a frame that does not exist, the slider will turn red and an "Out of Range" warning will be displayed. The start frame cannot be greater than the end frame. End: This specifies the currently selected end frame of the sequence. If you change the end frame to a frame that does not exist, the slider will turn red and an "Out of Range" warning will be displayed. The end frame cannot be less than the start frame. Create Log File: This will create a detailed log file containing important information regarding the batch process. 28 http://www.dofpro.com/ Display Log File: This will launch Notepad and display the log file. Keyframing DOF PRO supports industry-standardized keyframing of any / all sliders for the entire batch sequence. Keyframes are anchor points where all sliders have certain, userconfigurable values. For all other frames, slider values are determined by interpolation between keyframes. If the first or the last frame is not a keyframe, the outer frames are determined by extrapolation. For each slider, a graphical representation of the corresponding animation curve may be displayed. For more information regarding keyframing, please see “WORKFLOW TIPS” below. Slider selector for curve display: Selects the slider for which the curve (i.e. slider value as a function of frame number) should be displayed. Note that all DOF PRO sliders are animateable. Interpolation method selector: Specifies the method used for interpolating between keyframes. Options include: Linear - simple linear interpolation between keyframes. Flat (i.e. zero slope) extrapolation. Cubic Flat - cubic interpolation with zero slope at keyframes. Flat extrapolation. 5th Degree Flat - fifth degree polynomial interpolation with zero slope at keyframes, flat extrapolation. Similar to Cubic Flat, but with smoother behavior at keyframe transition points. Cubic - cubic interpolation, linear extrapolation with "natural" non-zero slopes. Cubic Ease Out - cubic interpolation with zero slope at first keyframe, "natural" slopes otherwise. Cubic Ease In - cubic interpolation with zero slope at last keyframe, "natural" slopes otherwise. Cubic Ease In/Out - cubic interpolation with zero slope at first and last keyframes, "natural" slopes otherwise. Custom - lets you specify incoming and outgoing slopes (see below, "In" and "Out" sliders) for the currently displayed slider curve at each keyframe individually. Curve Display Area Graphical representation of the slider values as a function of frame number. Keyframes are highlighted with yellow color. A white vertical bar represents the current frame position. 29 http://www.dofpro.com/ Frame: Slider that specifies the current frame. Its range extends from the start frame to the end frame. You can scrub through this timeline to see your keyframed sliders animate. << Previous Keyframe Navigates from the current frame to the previous keyframe. Copy Only enabled if the current frame is a keyframe. Press to copy all slider settings of the current keyframe. Paste Press to apply slider settings to current frame, which will thereby become a keyframe. The Paste button is only enabled if the Copy button was pressed before. >> Next Keyframe Navigates from the current frame to the next keyframe. View Frame This will render and display the current frame in the timeline with animated slider settings. It will also load the appropriate depth map if applicable. Set/Delete Keyframe Press to define current frame as keyframe. Note that all current slider values (not only the displayed one) will be set. Alternately, if the current frame is a keyframe, the button is depressed and renamed as "Del Keyframe". Clicking the button will release it and the current frame will no longer be a keyframe. Reset KFs Reset all keyframes. In/Out: Sliders to set the incoming/outgoing slope at the current keyframe. Only active in Custom interpolation mode. Other Controls These controls deal with the general functioning and operation of the filter. Dialog (Maximize, Minimize, Restore, Default, Close): Allows you to maximize, minimize, restore, bring back to default or close the DOF PRO dialogue window. Dialog Resize By clicking and dragging the bottom right hand corner of DOF PRO, you can interactively resize the dialogue. 30 http://www.dofpro.com/ LOAD/SAVE Allows you to load or save your current settings. Please note that if you have a depth map loaded, you will have to reload the map on filter invocation. Keyframing data will be automatically loaded or saved if applicable. RESET Resets all controllers to default settings. INFO Displays computer information and details regarding the source image. OK/CANCEL Apply or cancel the filter respectively. You must be a registered user in order to apply the filter. HELP Displays a general help window. Request Code: Displays your computer’s request code which is required for registration. You can select, cut and paste the code. SAVE (Request Code) Saves your computer’s request code which is required for registration in the filter's root directory as a file called "dofpro.req". This file can then be emailed as an attachment during your registration process for convenience instead of having to manually cut and paste the code. 31 http://www.dofpro.com/ WORKFLOW TIPS DOF PRO has been optimized for quality. As a result, it is important to understand the basic functioning of the software in order to know how to get the most out of it. The controls have been arranged in a logical order which make it very intuitive to use. However, the most efficient workflow is not necessarily top down. Below is a quick start tutorial for single frame and batch processing. You may need to come back to sliders already set and do several such operations until you achieve the desired result. SINGLE FRAME QUICKSTART: 1. Open the RGB image in your paint program and run DOF PRO from the filters menu. 2. Select the depth mode, load a depth map if desired, check that it is actually there ("View Depth"), set focus using the F-Depth slider or by clicking in the preview window. 3. Select aperture shape, par, size, angle, curvature, spherical aberration, chromatic aberration, and finally thickness. Note that the processing time scales as the square of the aperture size. You may want to set the preview zoom level to a smaller size in the "Rendering Console" for faster previews. Alternately, you can temporarily disable the preview window if you want to readjust sliders, or change your preview resolution to a lower setting using the "Res" dropdown menu in the "Rendering Console". 4. Set the highlights processing sliders as desired. Use "View Selected" and "View Processed" for faster previews. 5. Check for possible edge artifacts. If necessary, select "Alias Depth Map" and blur edges appropriately to eliminate artifacts. BATCH / ANIMATION QUICKSTART: 1. Open the sequentially padded RGB image in your paint program and run DOF PRO from the filters menu. Generally, you would want to open the frame which would be most suitable for applying the DOF effect. While this is most often frame 0, you can open any frame from the sequence. 2. Select the depth mode, load the respective sequentially padded depth map if desired, check that it is actually there ("View Depth"), set focus using the F-Depth slider or by clicking in the preview window. It is important to use the same frame depth map as the RGB image or your DOF effect will be incorrect. Therefore, if your RGB image is frame 30, you would also load the corresponding frame 30 depth map. 3. Select aperture shape, par, size, angle, curvature, spherical aberration, chromatic aberration, and finally thickness. Note that the processing time scales as the square of the aperture size. You may want to set the preview zoom level to a smaller size in the "Rendering Console" for faster previews. Alternately, you can temporarily disable 32 http://www.dofpro.com/ the preview window if you want to readjust sliders, or change your preview resolution to a lower setting using the "Res" dropdown menu in the "Rendering Console". 4. Set the highlights processing sliders as desired. Use "View Selected" and "View Processed" for faster previews. 5. Check for possible edge artifacts. If necessary, select "Alias Depth Map" and blur edges appropriately to eliminate artifacts. 6. Enable Batch processing. You will see the source, depth map and output filenames automatically change to the currently specified RGB and depth map images. An output filename will also be suggested. If you have loaded an RGB image that is not sequentially padded (no counter), you will get a warning. If you have only one RGB image that has a corresponding sequence of depth maps, click on the "hold" button in the "Source Image" section. Likewise, if you have only one depth map that has a corresponding sequence of RGB images, click on the "hold" button in the "Depth Map" section. 7. Specify the start and end frames required for the batch processing. The start frame will have automatically been set to the currently loaded RGB frame and the end frame will have automatically been set to the end frame of the sequence. If you specify a new start or end frame which is out of the currently existing sequence range, the respective controller will turn red indicating those frames do not exist. Make sure all three filenames have matching frame numbers or you will get an error when you run the batch process. 8. Click on "Execute" to start the batch processing. If "Create Log File" is enabled, a file containing detailed information pertaining to the batch processing will be saved in the filter's root directory. Clicking on "Display Log File" will automatically launch Windows Notepad and display the file. During the batch process, various status messages will continuously be displayed containing information about the current activity, time elapsed, time required, time per frame, etc. You can press “Escape” to cancel the sequence processing at any time. KEYFRAMING QUICKSTART: 1. Open the sequentially padded RGB image in your paint program and run DOF PRO from the filters menu. Generally, you would want to open the frame which would be most suitable for applying the DOF effect. While this is most often frame 0, you can open any frame from the sequence. 2. Select the depth mode, load the respective sequentially padded depth map if desired, check that it is actually there ("View Depth"), set focus using the F-Depth slider or by clicking in the preview window. It is important to use the same frame depth map as the RGB image or your DOF effect will be incorrect. Therefore, if your RGB image is frame 30, you would also load the corresponding frame 30 depth map. 3. Select aperture shape, par, size, angle, curvature, spherical aberration, chromatic aberration, and finally thickness. You may want to set the preview zoom level to a 33 http://www.dofpro.com/ smaller size in the "Rendering Console" for faster previews. Alternately, you can temporarily disable the preview window if you want to readjust sliders, or change your preview resolution to a lower setting using the "Res" dropdown menu in the "Rendering Console". 4. Set the highlights processing sliders as desired. Use "View Selected" and "View Processed" for faster previews. 5. Check for possible edge artifacts. If necessary, select "Alias Depth Map" and blur edges appropriately to eliminate artifacts. 6. Enable Batch processing. You will see the source, depth map and output filenames automatically change to the currently specified RGB and depth map images. An output filename will also be suggested. If you have loaded an RGB image that is not sequentially padded (no counter), you will get a warning. If you have only one RGB image that has a corresponding sequence of depth maps, click on the "hold" button in the "Source Image" section. Likewise, if you have only one depth map that has a corresponding sequence of RGB images, click on the "hold" button in the "Depth Map" section. 7. Specify the start and end frames required for the batch processing. The start frame will have automatically been set to the currently loaded RGB frame and the end frame will have automatically been set to the end frame of the sequence. If you specify a new start or end frame which is out of the currently existing sequence range, the respective controller will turn red indicating those frames do not exist. Make sure all three filenames have matching frame numbers or you will get an error when you run the batch process. 8. Set the "Frame" slider to the first frame of your sequence, adjust your DOF parameters and select "Set Keyframe". You will notice the "Frame" slider turns yellow to indicate a key has been set. 9. Set the "Frame" slider to the last frame of your sequence, adjust your DOF parameters and select "Set Keyframe". You will notice the "Frame" slider turns yellow to indicate another key has been set. 10. Switching between the various controllers in the keyframing drop-down menu will now display their respective animation curves. Likewise, scrubbing through the animation sequence using the "Frame" slider will show you the animated the controllers in DOF PRO. At this point, you can also define an alternate animation curve interpolation method by selecting one from the right drop-down menu under the keyframing control group. 11. Click on "Execute" to start the batch processing. If "Create Log File" is enabled, a file containing detailed information pertaining to the batch processing will be saved in the filter's root directory. Clicking on "Display Log File" will automatically launch Windows Notepad and display the file. During the batch process, various status messages will continuously be displayed containing information about the current activity, time elapsed, time required, time per frame, etc. 34 http://www.dofpro.com/ IMPORTANT NOTES - It is important to recognize the difference between a depth map and a focus map. They are not the same. A depth map contains information regarding the location of objects within the scene. A focus map contains information regarding the focal point of the camera. It is not recommended that you use a focus map as your depth map because this will confuse DOF PRO since there are two depth map branches. Instead, it is recommended that your depth map is output from white to black and then the focus set within the filter using the Focal Depth slider. For instance, if you wish to have an object located in the distance in focus, you would not generate a black to white depth map despite the fact that white generally means objects will be in focus and black that objects will be defocused. Instead, you would generate a standard white to black depth map, and then set the focal depth controller (F-Depth) within the filter from 255 to 0. This will effectively change the focal point from the foreground to the background, as seen by clicking on the "View Focus" button. - Bokeh effects work best on small, bright highlights. If the highlight is too large, the Bokeh effect will get lost within it and it will not be as clearly visible. If you wish to enhance the Bokeh effects, play with the "Highlight Enhancement" tools by adjusting the "Threshold" and "Enhancement" settings until you achieve the desired result. Be careful when increasing the "Enhancement" controller as values too high can result in aliased highlights. - The BMP file format is natively supported by DOF PRO while everything else requires a conversion process using “convert.exe.” Previous conversions relied on a timer and sometimes resulted in time-out errors during large file conversions. The new algorithm will effectively wait until the file has been successfully converted, regardless of its size. In addition, it is much faster than before with smaller sized files. Should any difficulties be encountered during the file conversion process, please revert to BMP file formats which will present no difficulty for DOF PRO. - Memory allocation has been significantly improved and users are now able to use 3GB RAM under 32bit Windows and 4GB RAM under 64bit Windows. In addition, while running DOF PRO with Adobe Photoshop®, default memory is now allocated from the Photoshop® preferences. If Photoshop® cannot provide the necessary memory, DOF PRO will attempt to get it from Windows. It is therefore recommended to set the Photoshop® Memory Usage preference setting to a high value. If DOF PRO is not running in Photoshop®, the memory allocation will still be done by the host, but that usually means that the memory will be allocated from Windows, since most hosts do not have their own memory management system like Photoshop®. - Multithreading is now supported by DOF PRO and is distributed across the number of physical and / or virtual CPU’s. A quad-core system will provide speed increases of up to 400% compared to previous versions of DOF PRO. - If you find the preview updates to be too slow, you can significantly improve the speed by setting the preview zoom level to a smaller size in the "Rendering Console". Alternately, you can temporarily disable the preview window if you want to 35 http://www.dofpro.com/ readjust sliders, or change your preview resolution to a lower setting using the "Res" dropdown menu in the "Rendering Console". - Highlight tinting works in combination with highlight enhancement. As the highlight is increasingly brightened, the tint color will be increasingly added. Setting a tint color and leaving the highlight enhancement at 0 will have no tint effect on highlights. - Chromatic Aberrations are computationally intensive and require approximately two times the processing time to complete. A value of “0” bypasses the new and complex algorithm while anything above will enable it. - Batch processing works with industry standardized sequentially padded image files. If your source, depth or output filenames do not contain matching padded counters, you will produce an error. Some acceptable examples of sequentially padded filenames are: test_0000.bmp (if less than 10,000 frames) test_000.bmp (if less than 1,000 frames) test_00.bmp (if less than 100 frames) test0000.bmp (if less than 10,000 frames) test000.bmp (if less than 1,000 frames) test00.bmp (if less than 100 frames) Some unacceptable examples are: test_0.bmp test0.bmp - DOF PRO offers support for all common graphics file formats including .bmp, gif, .jpg, .jpeg, .png, .tif, .tiff, .tga. Alpha channels are discarded as DOF PRO is meant to be used as a final pass over composited images. - Setting a keyframe will set a key for ALL sliders, regardless of what curve you currently have selected. - Pressing 'Escape' will always cancel the current operation for both single and batch mode processing. CONCLUSION This concludes the DOF PRO v4.0 user manual. 36 http://www.dofpro.com/