1
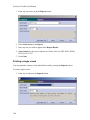
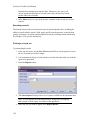
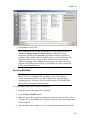
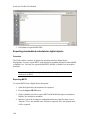
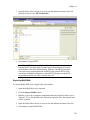
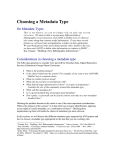
Chapter 14
Generating outputs
Overview
The Toolkit produces two distinct types of outputs: reports and exports. Reports include
both administrative and descriptive products, such as lists of acquisitions for a given time
period or a collections guide. Exports are typically, but not exclusively, XML files
conforming to standards such as EAD, METS, and MARC.
A complete list of reports, along with their description and a sample of each report, is
available in the appendices.
Printing reports
Overview
The Toolkit allows you to print an individual screen or record, to generate a report
containing data from all records, or to produce a report that draws upon data in only a
subset of records. When generating reports for multiple records, the output reflects the
order and result set displayed in the list screen for a specific functional area.
You may print, preview, or create a file of the report. File options are: PDF, XML,
HTML, RTF, Excel, or CSV.
Printing a list screen
You may print the contents of any list screen. When printing list screens, the output will
match the content, order, and sorting of elements found in the screen.
To print a list screen:
179
Archivists' Toolkit User Manual
1. From any list screen, press the Reports button.
2. Select Print Screen as the Report.
3. Enter any text you wish to appear in the Report Header.
4. Select Output for the report. Options are: Printer, Preview, PDF, XML, HTML,
RTF, Excel, or CSV.
5. Press Print.
Printing a single record
You may print the contents of any individual record by pressing the Reports button.
To print a single record:
1. From any record press the Reports button.
180
Chapter 14
2. Select the functional area record as the Report. For example, to print a name
record, select namesRecord as the Report.
Note: The functional area record report will print out the entire contents of
the open record, but you are not limited to this option for outputting data
from a single record. You can select any report to be printed from a single
record, by selecting the desired output from the Report list.
4. Enter any text you wish to appear in the Report Header.
5. Select Output for the report. Options are: Printer, Preview, PDF, XML, HTML,
RTF, Excel, or CSV.
6. Press Print or Save.
Printing multiple records
Overview
Any of the reports can be generated for a record set of more than one record. To print a
formatted report containing data from multiple records, you must first create the list of
records you wish to be output into the report. You can do this by using the List All button
to generate a report of all records of a given type. Or, you can generate a report for a
subset of records by using the filter or search options to create a subset. For example, you
could use the search tool to generate a list of accession records where the accession date
is between January 1, 2006 and December 31, 2006 in order to generate a report
calculating the year's acquisitions.
The list screen and query editor can be customized using the configuration tools if
necessary to provide the desired search and sort options. See Chapter 16 for
customization instructions.
Filtering records
The filter allows you to quickly generate a subset of records directly in the four primary
list screens. The text you type into the filter box will be used to match text found
anywhere within the fields included in the list. It will not query fields not displayed in the
list. It will retrieve all occurrences of the text string, however. For example, typing in the
string "alum" would retrieve records beginning with the term "Alumni" as well as the
record "Distinguished Alumni Achievement."
To create a subset of records using the filter:
1. Select the functional area containing the records you wish to view.
2. Press List All to generate a complete records list.
Note: If you have previously run a query with the search tool or run a
filter, you must delete any text in the Filter box and press the List All
181
Archivists' Toolkit User Manual
button before entering terms into the filter. Otherwise, your query will
only be applied to the subset of records retrieved by the previous search,
not the entire list of records.
3. In the Filter entry box, type in the term(s) contained in the records you wish to
retrieve.
Searching records
The Search tool provides more advanced retrieval options than the filter, including the
ability to search within a specific field, apply specific search operators, create Boolean
queries, and retrieve accession and description records by searching related information.
See Chapter 15 for specific instructions.
Printing a records set
To print multiple records:
1. From any list screen, use the List All button and filter or search options to create
the set of records you wish to output.
2. Use the buttons at the top of each column to sort the list in the order you wish the
report to be generated.
3. Press the Reports button.
4. The Select Report field provides a list of reports available for the functional area.
Note: A list of reports for each functional area, along with a description
and a sample of each report, is available in the appendices.
4. Enter any text you wish to appear in the Report Header.
182
Chapter 14
5. Select Output for the report. Options are: Printer, Preview, PDF, XML, HTML,
RTF, Excel, or CSV.
6. Press Print or Save.
Customizing reports
Customization of reports is not possible within the Toolkit interface. To create and
generate reports, the Toolkit employs a third party open source product called
JasperReports, which utilizes a complex report generating syntax. JasperReports can be
used on its own or in conjunction with iReports, another open source application that
provides a graphical user interface for designing JasperReports. You may use these
applications if you wish to customize the Toolkit's reports or create your own. You may
also use other reporting applications designed to work with MySQL, the Toolkit's
underlying database. Instructions for doing so are out of scope for the Toolkit's user
manual, but the JasperReports manual may be purchased at
http://jasperreports.sourceforge.net/more.docs.html and the iReports user manual is freely
available at http://jasperforge.org/sf/projects/ireport. Those wishing to create or
customize their own reports will also need to make use of the Toolkit's application
programming interface (API), which is available on the Archivists' Toolkit web site.
Exporting data
Overview
The Toolkit supports export of data from resource description and digital object
description records. For archival resources, you can export EAD and resource-level
MARCXML (e.g., collection-level MARCXML records). For digital objects, you can
export METS, MARCXML, MODS, and Dublin Core. For each type of export, a map of
the AT field to export field and an example export are located in the appendices.
Exporting data with mixed content
Mixed content is data that contains both text and mark up. The Toolkit allows the
existence of mixed content in many of the description elements. This is because mixed
content is allowed in EAD, currently the primary standardized output for archivists in the
United States. The Toolkit's model for mixed content is, indeed, based on EAD and
therefore not relevant to other descriptive outputs. For this reason, mixed content is only
retained for EAD exports. It is stripped when exporting MARCXML, METS, MODS,
and Dublin Core. Users should be aware, however, that mixed content that is not wellformed XML may not be stripped accurately.
Exporting standardized metadata for archival resources
Overview
183
Archivists' Toolkit User Manual
The Toolkit provides the ability to export EAD and MARCXML for archival resources.
EAD export will include all data in the resource description and any linked resource
component records. You also have the option of exporting any linked digital object
descriptions as <dao> elements within the EAD. MARCXML export will only export
data from the resource level description. It will include a link to an online finding aid if
noted in the resource description but not to any digital objects linked to the resource.
Exporting EAD
To export EAD from a resource description:
1. Open the resource description to be exported.
2. Press the Export EAD button.
3. Indicate if you wish to output numbered component levels (<c01> as opposed to
<c>).
Note: EAD only defines twelve component levels. If you choose to output
numbered component levels and the description exceeds twelve levels, the
Toolkit will indicate that numbering more than twelve levels is not
supported by the EAD DTD.
4. Indicate if you wish to suppress components and notes when the status is set to
"Internal." If yes, the internal notes will not be exported. If no, the internal notes
will be exported with the audience attribute set to "internal."
5. Indicate if you wish to include <dao> elements in your output. This is only
relevant when there are digital object records linked to the description. If no, the
EAD will not include any <dao> elements. If yes, the <dao> will reference the
METS identifier where there is one. Where there is no METS identifier, the
<dao> will reference the file versions and their file use statements, and output the
file versions listed according to their sequence.
6. Open the folder where the file is to be saved, and indicate the name of the file
(usually the same as the EAD Identifier).
184
Chapter 14
7. Press Save to export EAD.
Note: Upon export, the Toolkit will check to see if the repository record
includes an Agency Code and Country Code, and that the resource
description contains an FA Location. These three fields are exported as
attributes of the <eadid> element, attributes that are recommended, but not
required, in EAD. If one or more of these elements are not present, the
Toolkit will prompt you to Cancel the operation if you wish to enter data
in the missing field(s) before export, or press OK if you wish to output the
EAD without this information.
Exporting MARCXML
Note: The granularity of certain fields, such as subject headings, is not the
same in the AT as in MARCXML. In addition, the AT's mapping of
certain elements into MARC may differ slightly from your repository's
existing practices. Therefore, you may wish to edit the AT's MARCXML
after it has been exported from the system.
To export MARCXML from a resource description:
1. Open the resource description to be exported.
2. Press the Export MARC button.
3. Indicate if you wish to suppress components and notes when the status is set to
"Internal." If yes, the internal notes will not be exported. If no, the internal notes
will be exported.
4. Open the folder where the file is to be saved, and indicate the name of the file.
185
Archivists' Toolkit User Manual
5. Press Save to export MARCXML.
Exporting standardized metadata for digital objects
Overview
The Toolkit offers a number of options for exporting data from digital object
descriptions. You may export METS, with descriptive metadata encoded in either MODS
or Dublin Core. You may also export MARCXML, MODS, or Dublin Core descriptive
metadata.
Note: It is also possible to export digital object descriptions as <dao>
elements in an EAD.
Exporting METS
To export METS from a digital object description:
1. Open the digital object description to be exported.
2. Press the Export METS button.
3. Choose whether you wish to export METS with MODS descriptive metadata or
Dublin Core descriptive metadata.
4. Indicate if you wish to suppress components and notes when the status is set to
"Internal." If yes, the internal notes will not be exported. If no, the internal notes
will be exported.
186
Chapter 14
5. Open the folder where the file is to be saved, and indicate the name of the file
(usually the same as the METS Identifier).
6. Press Save to export METS.
Note: The METS files created by the AT are designed to be compliant
with the METS Navigator (http://metsnavigator.sourceforge.net/) created
by the Indiana University Digital Library Program. The METS Navigator
is an open source application made available to the general METS using
community. Minimal configuration of the METS Navigator is required to
accommodate the file use values utilized in the AT.
Exporting MARCXML
To export MARCXML from a digital object description:
1. Open the digital object to be exported.
2. Press the Export MARC button.
3. Indicate if you wish to suppress components and notes when the status is set to
"Internal." If yes, the internal notes will not be exported. If no, the internal notes
will be exported.
4. Open the folder where the file is to be saved, and indicate the name of the file.
5. Press Save to export MARCXML.
187
Archivists' Toolkit User Manual
Exporting MODS
To export MODS from a digital object description:
1. Open the digital object to be exported.
2. Press the Export MODS button.
3. Indicate if you wish to suppress components and notes when the status is set to
"Internal." If yes, the internal notes will not be exported. If no, the internal notes
will be exported.
4. Open the folder where the file is to be saved, and indicate the name of the file.
5. Press Save to export MODS.
Exporting Dublin Core
To export Dublin Core from a digital object description:
1. Open the digital object to be exported.
2. Press the Export Dublin Core button.
3. Indicate if you wish to suppress components and notes when the status is set to
"Internal." If yes, the internal notes will not be exported. If no, the internal notes
will be exported.
4. Open the folder where the file is to be saved, and indicate the name of the file.
5. Press Save to export Dublin Core.
Managing data exports
The Archivists’ Tookit is designed to produce data exports, or metadata records, such as
EAD, MARCXML, MODS, DC, METS. The application does not, however, provide the
means to manage, access, or display those export products. It is assumed the exports will
be added to external access delivery systems such as an EAD database, an Integrated
Library System (ILS), or a METS database where the objects can be searched and
displayed to end users. However, you can and should edit the data in the AT.
188