1
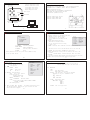
WARNING:TO prevent fire or shock hazard,do not expose to
unit to rain or moisture.
ABOX4520-27
DSP varifocal intergrated color CCD camera user manual
The symbol is intended to alert the user to the presence
of important operating and mainenance(servicing)
Instructions in the liteure accompanying the appliance
22 X
AUTO FOCUS
DSP COLOR CCD CAMERA
The symbol is intended to alert the user to the presence
of uninsulated(dangerous voltage)within the product's
enclosure that may be of sufficient magnitude to constitute
a risk of electric shock to persons
DIGITAL ZOOM CAMERA
1
Warning
Auto camera specifications caution
CAUTION:
TO PREVENT ELECTRIC SHOCKS
AND RISK OF FIRE HAZARDS, DO
NOT USE OTHER UNSPECIFIED
POWER SOURCE
Warning: This equipment has been tested and found to comply with
the limits for a class A digital device , pursuant to part 15 of the FCC
rules .These limits are designed to provide reasonable protection against
harmful interference when the equipment is operated in a commercial
environment .This equipment generates,uses , and can radiate radio
frequency energy and if not installed and used in accordance with the
instruction manual , nay cause harmful interference in which case the
user will be required to correct the interference as his own expense.
Caution: Any changes or modification in construction of this device
which are not expressly approved by the party responsible for compliance
could void the user's authority to operate the equipment.
1.Do not attempt to disassemble the camera.ln order to prevent electric shock,
do not remove screws or cover.There are no user-serviceable parts inside. Refer
all servicing to qualified service personnel.
2.Handle the camera with care.The camera could be damaged by improper
handling or storage.
3.Do not expose the camera to rain or moisture,or try to operate it in wet
areas.Take immediate action if the camera becomes wet.Turn the power off
and refer servicing to qualified service personnal Moisture can damage the
camera and also create a danger of electric shock.
4.Do not use strong or abrasive detergents when cleaning the canera body.Use
a dry cloth clean the camera when dirty.In case the dirt is hard to remove,
use a mild detergent and wipe gently.
5.Never point the canera toward the sun,Whether the camera is used outdoors
or not,never point it toward the sun.Use cautionwhen operating the camera in
the vicinity of spot lights or other bright reflecting objects.
6.Do not operate the camera beyond its Temperature.humidity or power source
ratings.Do not use the camera in an extreme environment where high
temperature or high humidity exists.Use the camera under conditions where
temperatures are between -10℃~+50℃,and humidity is below 85%.For the
correct power supply,refer to the specification sheet.
3
2
Technical paramete(
r I)
Technical paramete(
r II)
Model
Auto AGC control
ABOX4520-27
System of
signal
Pickup device
Horizontal
resolution
S/N ratio
Minimum illumination
PAL
Backlight compensation
1/4" SONY CCD
The line control
520TV line
Focus Mode
50dB
Bus control
0.1Lux
3.9~89.9mm/3.9~105.3mm
Lens
View angle
49.6°~2.5°
Electronic Shutter
White Balance
Auto control(set by user)
Auto /Manual (Set by user)
Open/close option(set by user)
DC±3V~±12V
Bus control focus /button control focus
Pelco-D/2400/9600
Video output
1.0Vp-p,75Ω
Power supply
DC12V±10%、3.6W
Weight
285g
Dimension
62×63×127mm
White balance auto tracking(Set by user)
4
5
Familial break down expels
Break doen
1
No picture
2
No picture
Expel method
The power supply
Did not mount
The power supply
is bad
Line did not mount
Expel the
Mount the power
supply
Replace the
power supply
Connect to
open the power
3
4
The key has
no effect
Snow flakes
Switch on electricity
first to comect again
the line
AGC too much
Break to open the
power supply,switch
on electricity
AGC turn down
485A+
485B-
Camera NO.1
485A+
485B-
Camera NO.2
… …
Index
RS485Bus controlling connection instuction
Camera NO.xxx
485A+
485B-
485B-
Transfer connector
RS485/RS232
Camera NO.255
picture 1
6
7
Computor/
Digital video recorder
Bus control instuction
T picture enlarge/menu option
W Picture reduce/menu option
N zoom adjust+/menu option
F zoom adjust-/menu option
M menu display/close/enter
Key-press
Bus control
1
N
T
MENU
F
3
Video output
4
Power LED
VIDEO OUT
W
Menu operation instruction
Push MENU enter to main menu,pushN、F up and down chose menu,
push MENU enter to submenu,push T、W set the parameter.
485bus control menu setting
Aperture+/Aperture- display/Menu closed/Confirm
Zoom+/Zoom- up and down choose the menu
focus+/Focus- parameter setting
1 2
3
+12V
GND
COM
FOCUS
ZOOM
MENU
485B485A+
POWER
1.Present camera focus pattern
2.Present camera 485ID code
3.Present camera zoom times
2
MF
01X
AF
001
Monitor
Power, cable control,
bus control connector
8
Lens controller/
keyboard
Ⅱ
9
Menu operation instruction
Menu operation instruction
● 1.CONTROL parameter setting
● Main Menu
1.1 FOCUS model ch o sen, MT/Manual,AT/Auto
1.2 RANGE autofocus distance,Choose
Norm when far, so can fo quickly,
Choose NEAR when near(<5m),so can do
quickly.
1.3 LOCK button locked,NO/close,
YES/ button .locked(if the fuction
can not work,please check the setting
is right or not.
MENU
1.CONTROL
2.DSP SETUP
3.RESET
4.EXIT
1. CONTROL
2.DSP SETUP
Control parameter
Photo parameter
3. RESET
4.EXIT
Factory leave reconvert
Exit
CONTROL
1.FOCUS
2.RANGE
3.LOCK
4.485ID
5.485DIR
6.RATE
7.IDDISP
8.EXIT
MT/AT
NORM/NEAR
NO/YES
001 ~255
NORM/INV
2400/9600
NO/YES
1.4 485ID camera ID, when one485 bus contrl the several cameras the
( Above parameter can be set by bus control,485ID can only
be set by camer button. )
same time,need to set the controller ID the same as the camera ID.
1.5 485DIR bus control pattern ,NORM frontal ,INV inverse
1.6 RATE Baud rate,bus control speed rate,should set the same as the
controller
1.7 ID DISP camera ID display , NO close/YES open ,when set for YES,
the present camera ID will be showed on the upper left corner of the screen
1.8 EXIT exit the present menu setting, back to the upper menu
10
11
Menu operation instruction
Menu operation instruction
DSP SETUP
● 2.DSP SETUP
Picture parameter setting
2.1
LENS
lens pattern
MANUAL
Manua
VIDEO
DC
2.2
2.3
1.LENS
2.SHUTTER
3.BLC
4.AGC
Video servo
DC serco
5.WHITE BAL
6.FUNCTION
MANUAL
AUTO
ON
ON
ATW
SHUTTER electronic Shutter
7.ADJUST
8.EXIT
AUTO
(Set to Auto, push the
button enter into the
brightness adjustment)
→BRIGHTNESS
087
MANUAL
→SHUTTER M.
Electronic shutter
FIXED
→1/50→1/120→1/250→1/500→1/2000→1/5000→
1/10000 →1/100000
FLK flashing pattern
(set forON, push the button enter
BLC ON/OFF BLC ON/OFF
into the BLC intension adjustment,can get to the best the result
when the intension is biggest.)
12
2.4
AGC ON/OFF ( Set for ON, push button enter into AGC set,
)
make the night vision get to the best result
2.5
WHITE BAL
AWB
ATW
Auto white balance
White balance auto tracking
MANUAL
push the button, enter into the aberration
adjustment,so can get to individuation color
↓
RED 0~255(113)
↓
BLUE 0~255(255)
White balance Mode
FIXED
AWB FIXED : MODE 1
MODE 2
MODE 3
MODE 4
RETURN
back to the upper menu
13