1
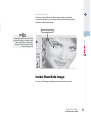
add-on
Auto Cross-Stitch
®
User’s Manual
Futura - Auto Cross-Stitch Option - Portuguese 3-01
Futura - Auto Cross-Stitch Option - Portuguese 3-01
Open Wizard
You must launch the Software (see section
called “How to Open FUTURA) to use the
Auto Cross-Stitch wizard.
Step Action
>1 Select Auto Cross-Stitch...
from the Create drop-down
menu.
>2 Click Next.
Result
Auto Cross-Stitch Wizard/
Introduction page will open.
>1: Open Image
This is the step to choose the image, or artwork to be used with
Auto Cross-Stitch. If you are familiar with any Cross-Stitch embroidery, you will appreciate the fact that, simple is better when
it comes to artwork. It is important to use a clean image for this
process. A vector type Image (.WMF) like “clipart” works best. If the
image was scanned, it is a Bitmap type (millions of pixels) image
– either .bmp or .jpg, and must have a reasonably “high resolution”.
150-300 DPI is good. The software will reduce the colors so that it
is feasible to stitch the art in embroidery.
Step Action
>1 Choose the Select from the
Select Image box.
>2 Choose Image (of your
choice) from folder where
your images are stored.
>3 Click Next.
Result
The Open Image dialogue
box will open.
Auto Cross-Stitch®:
Inside Auto Cross-Stitch
1
®
add-on
Auto Cross-Stitch is designed to automatically digitize an image
(artwork) into an embroidery design with Cross-Stitches. Auto
Cross-Stitch has a Wizard that walks you through a step-by-step
process for creating an automatic embroidery design. In this segment, each step and process will be defined.
See the section called “How to Use Auto Cross-Stitch” for a quick
description of using the Auto Cross-Stitch wizard.
Auto Cross-Stitch
Inside Auto Cross-Stitch
Futura - Auto Cross-Stitch Option - Portuguese 3-01
®
Auto Cross-Stitch
add-on
>2: Crop Image
In the 2nd step the Wizard is supplying the option to Crop (cut) the
Image. Though it is not necessary to crop, there may be some
areas that are not desired in the embroidery design.
Step Action
Result
>1 Click on square on the frame
around image.
>2 Drag square to Crop.
>3 Click Next.
>3: Set Dimensions
The 3rd step is your chance to change the Dimensions (size) of the
image.
Step Action
Result
>1 Click Width (or Height) box.
>2 Type new value.
Both dimensions will change
at once.
>3 Click Next.
>4: Color Selection
In this step the software is prepared to reduce the number of colors
in the image. The Wizard is very self-explanatory. Remember when,
in referring to a “Bitmap” type of image, we said it has “millions of
pixels”? How many threads/colors do you want to change?
Step Action
>1 Check Reduce Colors Automatically in the Color set
suggestion box.
>2 Click Suggest.
2
Auto Cross-Stitch®:
Inside Auto Cross-Stitch
Result
This box is enabled by default.
The Wizard will look at the
image and suggest some
colors.
It is possible to change the Unit (of measurement) from CM to MM or Inches in the
“Units” box.
2. It is also possible to delete segments
that you do not want to be digitized. Simply highlight the color in the suggested
color box, and select “Remove”
Step Action
Result
>1 Click Cross Size and move up The Cross-Stitch will change
or down.
size according to the set
value. The preview of the
image will reflect proposed
size.
>2 Check use a Jump Stitch
All Blocks will be connected
box.
with a Jump Stitch.
Continues >
Auto Cross-Stitch®:
Inside Auto Cross-Stitch
3
®
add-on
>:5 Cross-Stitch
This 5th step is designed to offer some control over the way that the
software “automatically” handles the Cross-Stitch elements of the
image. The size of the Cross-Stitch and connection policy (how
to travel between blocks) will affect the outcome of the CrossStitch design. It is also possible to stitch the “background color” of
the art (often, white) – or not.
Auto Cross-Stitch
Futura - Auto Cross-Stitch Option - Portuguese 3-01
1. It is possible to “Pan” the image in the
small screen on the right-hand side of the
dialogue box.
Simply right-click and drag the image.
Step Action
Result
or
>1 Check Reduce Colors to and
Type in number of desired
(thread) colors.
>2 Click Suggest.
The Wizard will look at the
image and suggest (the
amount entered) colors.
>3 Click Next.
Futura - Auto Cross-Stitch Option - Portuguese 3-01
®
Auto Cross-Stitch
add-on
Step Action
Result
>3 Stitch Background:
Check Stitch Background if
color is vital to design.
>4 Click Finish.
The image will be processed
showing progress bars
until complete.
Voila! Now, you have an embroidery design that was created with a
minimum of labor, and a maximum of control.
Image 1
finished embroidery design
4
Auto Cross-Stitch®:
Inside Auto Cross-Stitch
add-on
®
Auto Cross-Stitch
Futura - Auto Cross-Stitch Option - Portuguese 3-01
5
Auto Cross-Stitch®:
Inside Auto Cross-Stitch
®
Auto Cross-Stitch
Scan Image
Scan Image is a function used to Scan an Image, or take a “snapshot” of the physical artwork. A scanner must first be installed
on your computer. Since each scanner has its own software, the
instructions are generalized. You must become familiar with your
own scanner and software.
Futura - Auto Cross-Stitch Option - Portuguese 3-01
add-on
Inside Scan Image
How to Scan Artwork
Step Action
>1 Place artwork on the scanner bed.
>2 Select File/Scan Image.
>3
>4
Select Preview (if available).
Select Scan.
Result
The window for the scanning
software will open.
The scanner will take a snapshot of your artwork for your
approval.
The scanner will take a
snapshot of your artwork
employing any options that
you selected and bring the
image into your screen.
Tip! for step>3
1. This is your opportunity to crop
your artwork to capture the portion
that you desire and make desired changes.
2. A DPI of 100-150 is sufficient
for digitizing manually.
If “Magic Wand” is to be used,
choose a DPI of 200 or more.
Your Scanner Here
If you want to save an image
to the computer,
you must scan and save it at the Desktop.
6
Auto Cross-Stitch®:
Inside Auto Cross-Stitch
Futura - Auto Cross-Stitch Option - Portuguese 3-01
Use Draw Package
Choose “New Bitmap” in the Create drop-down menu. You will
be directed to the Draw Package screen after approving or setting
the size for the drawing.
Main Tool Bar
The tool bar has different sections for drawing needs. Just click
on a tool, and draw in the white box.
Sections
Active Scenario
Selection
Render
Pencil tool
Line
Paint
Shapes
Text
Active tool options
Active color
Lightest line
weight
Black lIne color
Basic colors
Auto Cross-Stitch®:
Inside Auto Cross-Stitch
7
®
add-on
FUTURA has a bitmap drawing package on-board. Create new drawings and modify existing images to be used for embroidery.
Auto Cross-Stitch
Inside Draw Package
Active color
Futura - Auto Cross-Stitch Option - Portuguese 3-01
®
Auto Cross-Stitch
add-on
Change Color
Whether you are about to use a drawing, painting, or text tool, you
may need to establish a color for drawing. If there isn’t a color in the
basic color blocks, double-click the foreground (front) color to open
the color palette. Choose a color and value, and save as a Custom
color if desired.
Active hue & value
Click anywhere
Add to Custom list
Create Text
If there is lettering in your logo, create it with the Draw Package.
Simply click on the Text icon and follow the dialogue box.
8
Auto Cross-Stitch®:
Inside Auto Cross-Stitch
Selected font
Justification
Available style
Current (Windows) font
Approve
text setup
Typing area
Draw With Polyline
There is a Pencil and Polyline tool for freehand drawing. Use the
Polyline like digitizing with left clicks at short distances (for curves).
Simply right-click to complete the line.
Choose Polyline
Click to join lines
Choose line weight
Auto Cross-Stitch®:
Inside Auto Cross-Stitch
9
®
add-on
Special handling
Auto Cross-Stitch
Futura - Auto Cross-Stitch Option - Portuguese 3-01
View of current text
Futura - Auto Cross-Stitch Option - Portuguese 3-01
®
Auto Cross-Stitch
add-on
Fill With Color
If you close a line, it can be filled with color using the Paint Bucket.
Also, make geometric shapes with the different tools.
Click Paint Bucket
Click inside line
Continue Drawing
Use all the different tools and have fun making a new drawing.
Use the Airbrush to add sophistication.
Choose
Airbrush
Spray size...
“Spray”
...and
paint color
10
Auto Cross-Stitch®:
Inside Auto Cross-Stitch
Futura - Auto Cross-Stitch Option - Portuguese 3-01
Choose
Magic Wand
& click!
Modify Existing Images
The Draw Package has a sophisticated Image Processor to enhance
images. For example, most images need to have “Brightness & Contrast” adjusted to be a good candidate for PhotoStitch.
Auto Cross-Stitch®:
Inside Auto Cross-Stitch
11
®
add-on
Click to exit
Draw Package
Auto Cross-Stitch
Use New Drawing
Exit the Draw Package and create embroidery in Stitch & Sew.
Use Magic Wand to make easy work of it.
Futura - Auto Cross-Stitch Option - Portuguese 3-01
®
Auto Cross-Stitch
add-on
Import Image and Open Draw Package
Choose “Import Image” from the Create drop-down menu.
Then choose “Draw Package”. Click on the Image Processing icon
and choose from a variety of options.
EXPERIMENT for desired results.
Image Processing Icon & Box
Current image
Proposed changes
Click to Zoom
Reduce colors
Bright & Contrast
Clean & soften
Flip & Rotate
Resize image
Relevent information
Mirror Image
Categories change
relative to subject
12
Auto Cross-Stitch®:
Inside Auto Cross-Stitch
Enhancing images for PhotoStitch helps
to make better quality. For example, draw
darker nostrils; thicker eyelashes, lips,
and brows; add or erase hair... “Bolder
is better” for PhotoStitch!
Inside Show/hide image
Turn on or off image, as background on the working screen.
Auto Cross-Stitch®:
Inside Auto Cross-Stitch
13
®
add-on
Draw new eye color
Auto Cross-Stitch
Futura - Auto Cross-Stitch Option - Portuguese 3-01
Draw on Image, too
Have you ever had the irresistible urge to paint a moustache
on your friend? Now’s your chance. Use any of the drawing tools
to further enhance the image.