1
[Type text]
Mamut Active Services
Introduction
Introduction to Mamut
eZ Publish
Version 4
EZ.BKL.UK.043.1
1
Introduction to Mamut
eZ Publish
Contents
About Mamut eZ Publish ...................................................................................................... 2 News in Mamut eZ Publish version 4 ..........................................................................................2 Introduction......................................................................................................................... 4 Users and Login .........................................................................................................................4 MyAccount ................................................................................................................................5 Administration Menus in Mamut eZ Publish ................................................................................8 The Menus in the Program..........................................................................................................8 Working with Mamut eZ Publish .......................................................................................... 11 Getting Started with the Frontpage .......................................................................................... 11 Control Panel ......................................................................................................................... 14 Publishing .............................................................................................................................. 23 The Text Editor ........................................................................................................................ 30 Custom Design Template ........................................................................................................ 32 Components in Mamut eZ Publish ....................................................................................... 38 Blog ....................................................................................................................................... 38 Photo Gallery .......................................................................................................................... 41 Contact Pages and Feedback Forms........................................................................................ 44 Articles................................................................................................................................... 46 Folders ................................................................................................................................... 47 Calendar ................................................................................................................................ 49 File Folders............................................................................................................................. 53 Forum .................................................................................................................................... 55 Intranet/Extranet.................................................................................................................... 57 Video Media ........................................................................................................................... 59 Word Processor Integration ..................................................................................................... 63 © 2010 Active 24 All rights reserved. Right reserved to change the product. Active 24 and the Active 24 logo are
registered trademarks for Mamut. All other trademarks are registered trademarks of their respective companies.
1
Introduction to Mamut eZ Publish
ABOUT MAMUT EZ PUBLISH
Mamut eZ Publish is a simple publishing tool with complete frames and functions. It makes
it simple for you to adjust the design and contents of your website so that you can rapidly
compose your own professional presence on the internet. Mamut eZ Publish is a part of
Mamut One.
You can easily and quickly create new content and in addition are able to change your
website design. Mamut eZ Publish has all the tools that you require to develop your website
so that your business or your personal needs are satisfied. Mamut eZ Publish is supported
by most web browsers. Read more about web browser support online at
www.mamut.com/system.
News in Mamut eZ Publish
A brief overview over the new functionality and improvements can be found in the following
section.
Documentation
The documentation provides you with access to all the information required to create a
professional website with Mamut eZ Publish. In order to get the most out of Mamut eZ
Publish, we recommend that you read through the documentation before you begin. More
information, together with FAQ's can be found on our support page:
http://support.active24.co.uk
News in Mamut eZ Publish version 4
Mamut eZ Publish has now launched a new version which includes new functionality and
features along with general improvements. The changes are relevant for both new and
existing customers. Below you will find an overview of these changes.
New Functionality
Below is a brief description of the new functionality:
eZ Flow – An entirely new way to create your own, unique frontpage. You can also create
building blocks using both internal and external material. Read more about getting started
with the frontpage in the section "Working with Mamut eZ Publish" below.
External Links – Create menu items which are linked directly to a website of your choice.
Read more about external links in the section "Publishing" below.
Sorting – Sort the material on your website by using the predefined sorting options, or by
using the ”drag-and-drop” feature. Read more about sorting your published content in the
section "Publishing" below.
RSS Import – Add an external RSS feed to your frontpage. Read more about the frontpage
in the section "Working with Mamut eZ Publish" below.
Social Medias – Let your visitors share links to your website via, among others, Facebook,
LinkedIn and Twitter. The feature makes it easier to attract traffic. Activate the feature via
Control panel - Site Settings. Read more in the section "Site Settings" below.
2
About Mamut eZ Publish
Printer-friendly Pages – Makes it easier for your visitors to print tidy printouts from your
website.
Map – Include a Google map in your articles, blogs, calendar events etc. The feature
requires a Google account. Activate the feature via Control panel - Site Settings. Read
more in the section "Site Settings" below.
Star Rating – Lets your visitors rate your published content by selecting one to five stars,
giving you an effective tool for feedback. This tool can be used instead of, or as a
complement to, the comment feature.
Other Improvements
Below is a list of the most important improvements:
Embedded Video – Anywhere you find a text editor in Mamut eZ Publish, you can now
insert embedded video clips from YouTube and Vimeo. Read more about this in the section
"Video Media" below.
The Control Panel – The Control Panel has been given a more logical layout as well as
several new features. Read more about the Control panel in the section "The Control
Panel".
Video – Mamut eZ Publish now supports Flash (swf, flv), Quicktime (mov, mp4, avi, m4v,
mpeg), Windows media (wm, wmv) and Silverlight (xap). Read more about this in the
section "Video Media" below.
Forum – The functionality has been extended to include the possibility to create
moderators, lock/remove forum topics, create "sticky" forum topics, BBCode, emoticons, as
well as a feature for reporting abusive postings to the administrator/moderator. Read more
about forums below.
Contact Page – The e-mail form is now optional and you have the possibility to create an
unlimited number of addresses/contacts including digital business cards (vCard). Read
more about contact pages and feedback forms below.
The Design Tool (CSS Editor) – The tool is now even easier to use and has been given a
number of new features. Read more about the custom design tool in the section "Custom
Design Template" below.
Design Templates – Mamut eZ Publish now includes more predefined design templates.
Read more in the section "Templates" below.
Editors – Create several website editors and grant or restrict their access to the different
parts of the website (only available in Professional or higher). Read more in the section
"Users and Login" below.
Calendar – You can now create recurring events, include Google maps, and add, for
example, external invitations as an attached file. Read more about calendars below.
3
Introduction to Mamut eZ Publish
INTRODUCTION
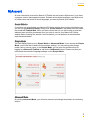
Users and Login
There are several different types of users within Mamut eZ Publish. All have different
functions and purposes:
Administrator
The administrator has full control over the entire application and can change all contents of
the website. The administrators username and password are created through MyAccount.
Please note that there can be only one administrator in the system.
Intranet user
The intranet user has the ability to enter information on the intranet, but is not able to edit or
remove information. The user is created by the administrator through MyAccount. More
information can be found in the section "Intranet/Extranet".
Extranet user
The extranet user has the ability to enter information on the extranet, but cannot edit or
remove information. The user is created by the administrator through MyAccount. More
information can be found in the section "Intranet/Extranet".
Forum user
The forum user has access to participate in discussions on the forum that are not protected
by the intranet or extranet. The user can register him-/herself as a forum user via the
website.
Forum moderator
A forum moderator is a user who is responsible for taking action when abusive language is
reported within the forum. Any registered forum user can be assigned to the role of
moderator. The moderator is a forum administrator and can be assigned to the entire forum
or to a specific forum topic.
More information can be found in the section "Getting Started with Forums".
Editor
The administrator can assign the role of editor to any user by clicking Control panel - User
Accounts. The editor can be given access to edit certain parts of your website, for example
creating blog posts, writing articles or registering calendar events. You can restrict/grant
access to all the different areas of the website.
Read more about how to assign Editor rights in the section "User Accounts" below.
4
Introduction
MyAccount
All user information relevant for Mamut eZ Publish can be found in MyAccount. If you have
a program version that supports Intranet, Extranet and multiple languages, use MyAccount
to create users and select in which languages you want to publish your website.
Create Website
If you have not yet activated your Mamut eZ Publish website when logging into MyAccount,
you can (in the Advanced mode) simply click Create website in the menu to the left under
the header eZ Publish Web. When you have clicked the link you will be able to enter the
address (www.yourtitle.yourdomain.com) you wish to use for your Mamut eZ Publish
website before creating the website. Once activated, you can perform all administrative
tasks described below.
Simple Mode
You can display MyAccount in Simple Mode or Advanced Mode. If you choose the Simple
Mode, you will be able to define the most basic settings. You can among other things
create, edit or remove users. In the Simple Mode, you will also find a shortcut link for
logging in to Mamut eZ Publish as well as the GetStarted feature. Please note that you
cannot edit the website's language settings via the Simple Mode.
Advanced Mode
By clicking Advanced Mode, you will have access to all settings described in the following
section.
5
Introduction to Mamut eZ Publish
General Information
You can define the following settings in MyAccount:
Create users and edit user information
Login
Manage languages
View available storage space
Access the Get Started menu
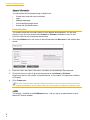
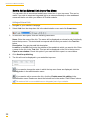
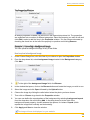
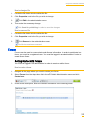
Create a New User
You need to know the new user's name, e-mail address and password. You can also
choose to give the user access to the Intranet or Extranet (available in the Pro and
Premium versions) by clicking the check boxes.
1.
Click the eZAdmin link in the menu to the left and then click New user in the window that
opens.
2.
Enter the user's first name, last name, username (e-mail address) and password.
3.
Check the boxes in order to give the user access to the Intranet or Extranet.
Read more about in the section "Intranet/Extranet" in the chapter "Components in Mamut
eZ Publish".
4.
Click Create user.
The user has now been created. Please note that a user can have access to both the
Intranet and Extranet, which means that you do not have to create two separate users.
Log in
The feature - available in the GetStarted menu - lets you log in as administrator to your
Mamut eZ Publish website.
6
Introduction
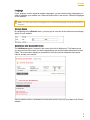
Language
If your program version supports multiple languages, you can choose which languages you
want to translate your website into. Read more about this in the section "Different languages
on the website".
Note! You can only select a language once. Selected languages cannot be removed or
changed.
Storage Space
By navigating to the eZAdmin menu, you can get an overview of the total and used storage
space on your website.
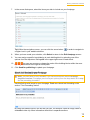
Get Started with Mamut eZ Publish
The GetStarted option is located in the menu to the left in MyAccount. The feature gives
you an overview of the users you have registered as well as information about their access
rights. The screen also displays a complete list of all the Internet addresses that can be
used to access your website.
Use the shortcut links in GetStarted to create new users or log in to your Mamut eZ Publish
website.
7
Introduction to Mamut eZ Publish
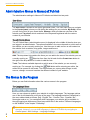
Administration Menus in Mamut eZ Publish
The administration settings in Mamut eZ Publish are divided into two parts.
User Menu
The User menu is located in the upper right-hand corner. The user menu lets you navigate
to the Control panel, where you can define the settings for your website, My drafts, where
you will find a list of all your saved drafts, Sitemap, which provides an overview of the
website, and Tag cloud, which contains a list of keywords registered with the various
content of your website.
The eZ Publish Menu
The eZ Publish Menu (administration menu) is displayed in the middle of the site when you
are logged in as administrator. The options available in the menu depends on which area of
the website you are currently working on. Use the menu to add, remove or edit content on
the website such as articles, blog posts, images and forums.
Add: The drop-down list contains the items you can add to the area of the website your are
currently working on.
Select an item from the list and click the Create here button to
the right of the drop-down list in order to add the item.
Tools: The buttons available depends on which area of the website you are currently
working on. For example, by clicking the
Edit button while reviewing an article, the
article will be opened in edit mode. The menu allows you, among other things, to add,
remove, change, move and translate the different content of your website.
The Menus in the Program
Below you can find information about the various menus in the program.
The Language Menu
Here you can choose to publish your website in multiple languages. The language options
are on the far left-hand side, at the top of the page. The language selection is displayed in
the menu abbreviated as follows: Eng - English, Ger - German, Swe - Swedish, Nor Norwegian and so on. You can define which languages your website will be available in,
through logging into MyAccount. Read more about this in the section "Different Languages
on the Website" in the chapter "Publishing".
Note! You can only select a language once. Selected languages cannot be removed or
changed. However, you can hide languages in Mamut eZ Publish by navigating to
Control panel - Site Settings - Language Settings.
8
Introduction
The User Menu
The menu can be found on the right-hand side, at the top of the page. The menu displays
different links, depending on whether you are logged in or not.
Control Panel: In the control panel you will find the settings for your website.
Log in/out: Click here to log in or log out of the website. It is possible to log in as an
administrator, intranet user, extranet user and forum user.
Register: Register a new forum user here; all other types of users must be registered in
MyAccount. The option is only displayed when you are logged out.
My Drafts: Here you can find, among other things, the articles that you have created and
saved from earlier that have not yet been published. The option is only displayed when you
are logged in to the website.
Site map: Displays an overview of the entire contents of your website.
Tag Cloud: Displays your tag cloud. A tag cloud displays all of the key words that you
mention in the contents of an article, blog or other feature that you have written on your
website.
Top Menu
This is a part of the menu selection that you can choose to be on your site and it is
positioned across the upper part of your website. You can choose if you would like it to be
single or double. In addition, it can also be combined with a side menu.
The Top Menu May Contain:
Calendar: A calendar can be used to record private or business events, important dates,
trips and much more.
Forum: Forums can be used to communicate and discuss information.
Blog: A blog is a website or a part of a website, which displays all the information the author
has written in chronological order.
Photo Gallery: You can create as many galleries as you want.
Contact Form: The contact form in Mamut eZ Publish is created from a default template
and gives you the opportunity to use the vCard (digital business card) feature along with the
standard functionality.
Intranet/Extranet: The intranet and extranet are password-protected pages where you can
share information within a company, with partners and with clients.
You can read more about all available functionality in the chapter "Components in Mamut
eZ Publish".
9
Introduction to Mamut eZ Publish
Side Menu
The side menu can also be referred to as the left-hand menu. If you select this menu
setting, which can be found on the left hand side of the screen. You can choose a stand
alone menu or you are able to combine it with a top menu.
eZ Publish Menu/Administration Menu
The administration menu is used to change or remove the contents of your website.
You can read more about the buttons on the administration menu in the section "Edit
Content" in the chapter "Publishing".
10
Working with Mamut eZ Publish
WORKING WITH MAMUT EZ PUBLISH
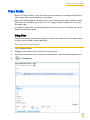
Getting Started with the Frontpage
The frontpage is often the most important part of any website since it is the first thing the
visitor sees. Mamut eZ Publish gives you the opportunity to design the frontpage and
choose which information will be displayed from the website.
You must be logged in as administrator in order to change the frontpage settings.
The frontpage already contains sample data, which means that you only have to edit the
existing information. The fastest way of navigating to your frontpage is by clicking your logo.
On your frontpage, click Edit in the administration menu.
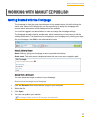
Step 1: Enter a Name
Name: Start by giving your frontpage a name (required information).
Short name: The short name is displayed below the user menu as a navigation path.
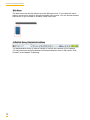
Step 2: Set a Billboard
You can upload an image or banner to your frontpage.
How to upload an image to your frontpage
1.
Click the Browse button and locate the image on your computer.
2.
Select the file.
3.
Click Open.
4.
You can now publish your website.
The image will be scaled to fit the page automatically.
11
Introduction to Mamut eZ Publish
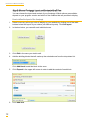
Step 3: Choose Frontpage Layout and Content with eZ Flow
You can choose the layout and content of your frontpage. Which options are available
depend on your program version and which of the modules that are possible to display.
How to define the layout of the frontpage
1.
Select how many zones you wish to display on your website by clicking one of the radio
buttons below the layout of your choice (six different layouts). Click Set layout.
2.
In the box below, you can edit each individual zone.
3.
Click Edit in the zone you wish to edit.
4.
Add the building blocks that will make up the selected zone from the drop-down list:
Click Add block to add the block to the zone.
12
5.
Click Expand in the upper-left corner in order to add the content of each block.
6.
Click Add item.
Working with Mamut eZ Publish
7.
In the screen that opens, select the items you wish to include on your frontpage.
Tip! Within the navigation screen, you can click the arrow button
a higher level in your website structure.
in order to navigate to
8.
When you have made your selection, click Select to return to the Edit frontpage screen.
9.
You can assign a specific layout/design to each building block by selecting one of the
options from the drop-down list Layout in the upper-right corner of each block.
10.
You can now remove or change the order of the building blocks within the zone
by using the buttons to the right on each panel.
11. Click Send for publishing to update your frontpage.
Step 4: Add Content to your Frontpage
Note! This text editor is only available if you have selected the block Frontpage,
simplified version (Frontpage, previous layout options) from the drop-down list in step
4 of the preceding procedure.
Use this field to write a text for your frontpage. Read more about text formatting in the
section "Text Formatting" below.
By using the different tools in the tool bar you can, for example, insert an image, table or
embedded video clip. More information about this in separate sections.
13
Introduction to Mamut eZ Publish
Tags
At the bottom of the settings screen, you can enter tags for your frontpage.
The tags are used by your website's internal search engine. The search engine will return
more relevant results when you enter exact tags.
Note! The internal search engine is not available in Mamut eZ Publish Express.
Control Panel
From the control panel, you can access the website's settings, design, search engine
settings, drafts, file library, and user accounts.
Site Settings
Here you can edit your website settings. Read more about the site settings in the section
"Site Settings" below.
Design Settings
Here you can edit your website's design settings. Read more about the design settings in
the section "Design Settings" below.
Search Engine Optimisation
Here you can enter keywords which will be used by search engines to categorise and rank
your website. Read more about meta data in Mamut eZ Publish in the section "Search
Engine Optimisation" below.
Drafts
Click the icon to navigate to a list of your stored drafts. Read more about drafts in the
section "Managing Drafts and Versions" below.
File Library
Here you can find all files you have uploaded to your website. Read more about the file
library in the section "File Library" below.
User Accounts
Click the icon in order to view a list of all registered users. Read more about user accounts
in the section "How to create a user account" below.
14
Working with Mamut eZ Publish
Site Settings
Mamut eZ Publish offers many ways to customise the website to fit your needs. Some
settings do not change the appearance of the website, but are used to adjust underlying
information which makes it easier for search engines such as Google to find your website.
You can also connect your website to Google Analytics in order to get visitor statistics.
Title
Enter the name of the website which will be displayed in the web browser's upper left-hand
corner. The title does not have to be the same as your domain name.
Note! If you want to use a logotype instead of the name, go to Control Panel - Design
Settings.
Language settings
Applicable for websites with more than one languages. Select which languages will be
displayed on the website. By using this feature, the administrator can "hide" an activated
language until the website has been fully translated.
Footer Text
Use the field to enter a footer text which will be displayed on all pages of your website. A
footer usually contains contact information or other important information.
Hide "Powered by"
Select the check box if you want to hide the text "Service provided by Mamut and eZ Powered by eZ Publish" in the footer of your website.
Google Analytics Web Property ID
You can connect Mamut eZ Publish to Google Analytics. Register for a free account at
www.google.com/analytics and paste the web property ID that you receive from Google
Analytics into the field.
The ID number - "AB-123456-1" in the following example - can be found in the java script on
the following line:
<code>
var pageTracker = _gat._getTracker("AB-123456-1");
</code>
Google Maps Key
If you want to use maps by Google Maps in your articles or blog posts, and you have a
Google Account, you must enter your Google Maps Key in this field. The Google Maps
functionality can be found when opening an article or blog post in edit mode. You can
register for a Google Maps Key on Google's website.
15
Introduction to Mamut eZ Publish
Social Media List
This option lets you and your visitors share your published content on social medias such
as Facebook, Twitter, MySpace etc. Select which social medias you want to include in your
published content. Your visitors will be able to share your articles on the social medias you
select here.
Tag Cloud
Select this option to display an overview of the keywords you have registered for your
various content throughout your website.
Site Map
Activate this setting to add a site map to your website. The Site map gives you and your
visitors an overview of your entire website.
Register Users
This setting gives you the possibility to hide or show the Register user link in the user
menu.
Show Getting Started information (at login)
If you have previously selected the check box Don't show this page again in the Get
Started screen when logging in, check the Activate box to display the screen again at next
login.
Design Settings
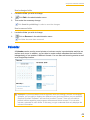
Templates
The Templates menu contains the design templates available for your website.
You can choose between one of the predefined templates, or choose the Custom Design
template. Read more in the section "Design - Custom Defined Template" below.
When you have selected a design template, click Send for publishing in order to update
your website.
16
Working with Mamut eZ Publish
Logotype
You can upload your own logotype to your website. The logotype will be displayed in the
upper-left corner of your website. If you want to use text instead of a logotype file, go to
Control Panel - Site Settings and enter the text in the Title field.
How to upload a logotype
1.
Click Browse and locate the logotype file.
2.
Select the file and click Open.
3.
Choose if you want Mamut eZ Publish to scale the image automatically or if you want to
upload the image in its original size.
4.
You can enter the image's size by adjusting the pixels in the Width and Height fields.
The logotype will be updated to your website when you click Send for publishing at
the bottom of the page.
Tip! The best result is achieved when you use a logotype with a transparent
background.
17
Introduction to Mamut eZ Publish
Menu Design
Depending on the menu layout you choose, Mamut eZ Publish offers several different
options when it comes to the structure of the menu.
Click the radio button beneath the configuration alternative of your choice. Click Send for
publishing to update your website with the new menu structure.
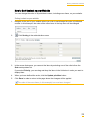
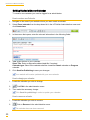
Search Engine Optimisation
Here you can enter keyword (meta data) which will be used by search engines to categorise
and rank your website.
Meta data is the technical term for information about data. Meta data is short and
descriptive keywords used by most search engines. These keywords are for instance used
by Google in order to display search results.
The most common forms of Meta data are keywords, description, copyright and author. The
table contains information on what you should use as Meta tag names and what kind of
content every tag name should have. You can define the exact values yourself.
18
Type
Name
Content
Author
author
Copyright
copyright
Description
descriptions
Company, organisation or person who is the author of the
material of the website.
Company, organisation or person who holds the copyright
over the material of the website.
Description of the contents of the website.
Keywords
keywords
Language
language
Time
date
Keywords that best describe the website. The keywords are
separated using commas.
The language in which the content is written.
When the website was last updated. Enter values in the
following format:
YYYY-MM-DD HH:MM:SS <Time zone>
Example:
2010-09-11 16:53:00 +0200
Working with Mamut eZ Publish
You can add two and more rows at the same time be selecting the number from the list and
clicking Add rows.
Remove Meta tags by selecting the tag and removing the row.
Click the check box in front of the row you wish to remove and click Remove selected.
You can find more information about Meta data on Mamut's support pages and Wikipedia.
Drafts
Managing Drafts and Versions
Mamut eZ Publish gives you the possibility to work with drafts and version management.
This means that you can create articles and other content on your website without having to
publish it instantly.
It also means that you can revert back to earlier versions, if for example some of the content
does not turn out as expected or if you have published temporary information which is no
longer relevant.
Publish a Previously Unpublished Version
If you have closed an article before you had a chance to finish it, and you saved it as a
draft, you can resume your work by clicking My drafts in the user menu or by navigating to
Control panel - Drafts.
You can edit your drafts by clicking the Edit button.
19
Introduction to Mamut eZ Publish
Edit an Existing Page
You can edit an already published page, an article for instance, by navigating to the article
and clicking Edit. You can choose to save and publish or save and close, in order to publish
the article at a later time.
Go Back to a Previous Version
If you are unhappy with the current version of your work, you can go back to a previous
version.
The screen contains three parts:
All versions
The field displays a list of all versions ever published (not including deleted versions).
Archived: Previous version replaced by a newer version.
Published: The version currently published online.
Draft: New version which is still under construction.
Published version
This field displays the currently published version.
New drafts
This field displays all unpublished drafts.
Tip! The version numbers in the list containing all versions gives you information about
both the published and the unpublished draft.
20
Working with Mamut eZ Publish
How to go back to a previous version
1.
Navigate to the published object you want to replace with a previous version.
2.
Click Edit.
3.
Click Manage versions.
Tip! The number within the square brackets in the title field represents the total number of
versions of the object.
You must create a working copy of the version before you can go back to a previous
version.
4.
5.
Click Create a copy.
A new version of the object will be added to the list. You can edit and publish the copy.
Click Edit in order to display the old version in edit mode.
6.
Add new information or edit existing text.
7.
Click Send for publishing in order to update your website.
If you chose to publish the changes, your website will now be published.
21
Introduction to Mamut eZ Publish
File Library
The File Library provides an overview over all types of files that have previously been
uploaded to your website. You can thereby keep track of which files are available on your
website so that you can avoid uploading the same file several times. The library can be
accessed by navigating to the Control panel and File Library.
Categories of Files
All elements in the file library are divided into the following categories:
Multimedia: Click the link in order to view all video clips that you have uploaded to your
website.
Images: In this category you will find all images that you have uploaded. Click the image in
order to view it in a larger format. Click the Images link to return to the list view.
Files: Click the link to view all uploaded data files, for example, PDF documents, word
processor files and spread sheets.
CSS Style (the design tool): This category contains all files you have uploaded via the
design tool. Read more about editing content with the design tool in the section "Advanced
Editing". Click the image in order to view it in a larger format.
Banners: Click the link to view all banners and design elements that have been uploaded
without the design tool. Click the image in order to view it in a larger format.
User Accounts
The User Account screen gives you an overview over all registered users and lets you add,
disable and edit user accounts by clicking Control Panel - User Accounts.
Via the User Account screen, you can also remove and add access roles to your different
users. Simply click the user name you wish to edit.
22
Working with Mamut eZ Publish
How to create a user account
As administrator you can create a Mamut eZ Publish user account from the Control Panel.
How to create a user account:
1.
Navigate to Control panel - User Accounts.
2.
In the screen that opens, select User from the Mamut eZ Publish menu and click Create
here.
3.
Enter the user's name, password, e-mail, signature, and image.
4.
Click Send for publishing.
5.
In the user list, you can now assign user access roles to the user by selecting one of the
following options from the drop-down list:
Forum moderator: Select this option and click Add new role in order to assign forum
responsibility to the user.
Editor: The role of editor gives the user access to add, remove or edit content to specific
areas of the website. Click Add new role, select the area of the website to which the user
will have access (you can only select one area/item at a time) and click Select.
Use the
arrow button above the list in order to navigate to a higher level of your website structure.
6.
Repeat step 5 if you wish to assign access to other areas. You can also remove user
access by selecting the relevant check boxes and clicking Remove selected roles.
The user has been registered with the specified access.
Publishing
All publishing of content in Mamut eZ Publish, whether it is folders, blog posts or articles, is
done in the same way. The tools you as administrator should get acquainted with when
publishing new content are described below.
At the bottom of every screen you will always find the following buttons:
Send for publishing: Publish the object you are working on.
Store draft: Save a copy of the object you are working on without closing the edit screen.
Discard draft: Closes the edit screen without saving the draft.
23
Introduction to Mamut eZ Publish
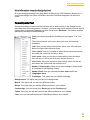
In the administration menu, you will also find the following buttons:
Create here: In order to add a new element, select the object of your choice from the
drop-down list and click Create here.
Edit: You can edit all existing content, regardless of whether it is a folder, a published
article or a blog post. Navigate to the object you wish to edit and click the button.
Store and exit: Click this button to save your draft and close the edit screen.
Preview: Click this button to preview the object you are working on.
Note! For example, if you are creating a new or editing an existing article, you must
click on one of the buttons mentioned above in order to navigate to other parts of the
website.
Edit Content
You can create a number of different types of content. For example, articles, forums and
blogs. When you are logged in as the administrator, the administration menu will be
displayed in the centre of the page.
The frontpage has a separate administration interface by which you can access a large
number of design options. Read more in the section "Getting Started with the Frontpage".
The menu adapts automatically to the area of the website you are currently working on and
the drop-down list to the left contains all elements which can be created on the page you
are currently on. Read more about the eZ Publish Menu in the section "Administration
Menus in Mamut eZ Publish" in the "Introduction" chapter.
The Buttons:
Create here: In order to add a new element, select the object of your choice from the
drop-down list and click Create here.
Edit: You can edit all existing content, regardless of whether it is a folder, a published
article or a blog post. Navigate to the object you wish to edit and click the button. Read
more about "Managing Drafts and Versions" above.
24
Working with Mamut eZ Publish
Move: This button lets you move content to other places on your website. If you have
uploaded pictures into one folder, but would like to split them into two folders, simply create
the new folder and click Move in order to move the files into the proper folders.
Remove: By clicking this button you are deleting the content of the particular area of
the website. Make sure that you only remove the unwanted content. The objects you
remove can be stored in your trash can, in case you are unsure if it is going to be used
again.
Sorting: By clicking this icon, you can sort the items displayed on the page you are
currently reviewing. You can use the drop-down lists Sort on if you want to use one of the
predefined sort options, or you can select the Priority option and then click and drag the
items in the list below the drop-down lists, if you wish to create a customised order. Click
Update priorities when you are happy with the order. Click Done to return to the page in
question. Read more below.
Enable menu link editing: If you have added an external link to your top menu, you
can click this button and then the link in question in order to edit or remove the link. Read
more about external links in the section "How to Add an External Link" below.
Setup RSS feed: (note plus sign). Click this button to give your visitors the opportunity
to subscribe to your news articles or blog posts via RSS feeds. The feature must be
enabled.
Disable RSS feed: (note minus sign). Click the button to disable the RSS feed from
your website.
Multi Upload: Upload as many images or files as you like at the same time.
Note! If you want to upload many files at the same time, you must be running Flash
Player 10 or a later version. Flash Player 10 is available for most browsers.
Manage versions: The version management functionality gives you the possibility to
revert back to earlier versions of the objects you have created, if some of the content does
not turn out as expected or if you have published temporary information that is no longer
relevant.
Custom design: Click this button in order to activate custom design tool. Read more
below.
Integration with Word Processors:
Some versions of the program includes an integration with Microsoft Word and Open Office.
Read more about the integration between Mamut eZ Publish and Word and Open Office in
the section "Word Processor Integration".
25
Introduction to Mamut eZ Publish
Different Languages on the Website
You can publish your website in different languages if you have a Pro or Premium edition of
Mamut eZ Publish.
Select Languages
In MyAccount you can choose which languages your site can be translated into. You must
first select Advanced Mode in order to select languages. Click eZAdmin i the left-hand
menu in MyAccount. The middle screen displays the language settings you can define.
Select a language from the drop-down lists. Click Save changes when you have selected
the languages.
Note! Additional languages are permanent and cannot be removed once added.
Languages in Mamut eZ Publish
When you have selected your languages, your Mamut eZ Publish website will display the
different language options in the upper left corner as international abbreviations of each
language.
You can hide languages by navigating to Control panel - Site Settings - Language
Settings.
26
Working with Mamut eZ Publish
How to Translate the Website
When you have defined the different languages, you can proceed with translating the
information which has already been published in your primary language.
How to translate your website
1.
Click on the language link representing the language you want to translate into.
2.
Navigate to the part of the website you want to translate.
3.
4.
5.
Click Edit.
Choose which language you want to translate to in the screen that is displayed.
You can use the original document as a template, or start over with an empty page.
Continue by clicking Edit.
If you want to use an empty page, continue in the same way as when you created the
original.
If you want to translate a primary language, continue as above. The only difference is the
reference text will be displayed above every text field.
6.
Finish by clicking Send for publishing.
Your translation will be published on your website. If you clicked Store draft in the last
step, the unpublished draft can be found by clicking My drafts in the upper right corner
of the window.
Tip! By navigating to Control panel - Site Settings, you can, under Language
settings, choose to hide languages. This may be useful if you are in the process of
translating your website and do not want to make available a partly translated website.
27
Introduction to Mamut eZ Publish
How to Add an External Link to your Top Menu
You can add a link to an external website as a menu item in your top menu. This can be
useful if you wish to create an integrated link to an external webshop or other webbased
resources that is not within your Mamut eZ Publish website.
Adding an External Link
1.
Navigate to your website's frontpage.
2.
Select Link from the drop-down list in the administration menu and click Create here.
3.
In the screen that opens, enter the following information:
Name: Enter the name of the link. The name will be displayed as a bread crumb link directly
below the top menu. This text should correspond with the text your enter in the Text field
below.
Description: You can also add link description.
Location: In the URL field, enter the address of the website to which you want to link. Enter
a name for the link in the Text field. This text will be displayed on the link in the top menu.
Open in new window: Check this option if you want the link to open in a new window.
4.
Click Send for publishing.
5.
The link will now be displayed in your website's top menu.
If you want to change the order in which the top menu items are displayed, click the
Sorting button in the administration menu.
If you want to edit or remove the link, click the Enable menu link editing in the
administration menu. Read more about the link edit tool in the section "Edit Content" above.
The external link is now available as an integrated part of you website.
28
Working with Mamut eZ Publish
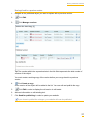
How to Sort Content on your Website
You can change the order of all published content, including menu items, on your website.
Sorting content on your website:
1.
2.
3.
Navigate to the part of your website where you wish to sort/change the order of published
content. In this example, the order of the menu items in the top menu will be changed.
Click Sorting in the administration menu.
In the screen that opens, you can sort the items by selecting one of the criteria from the
Sort on drop-down list.
If you select Priority, you can drag and drop the items in the list below in order you want to
display them.
4.
When you have defined the order, click the Update priorities button.
5.
Click Done in order to return to the page where the changes will be applied.
The order of the menu items (in this example) has now been changed.
29
Introduction to Mamut eZ Publish
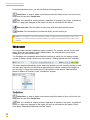
The Text Editor
Working with the Text Editor
In Mamut eZ Publish, you can format text in the same way as in a normal word processor,
such as Microsoft Word. The information in this section describes the text editor's different
features.
Tip! Place the mouse cursor directly above any given button in order to display a tool tip
describing the button's function.
Text Formatting
Text formatting: To the left of the tool bar, you can edit the formatting of the text. You can
either choose format before writing the text or assign a format to an already existing text by
highlighting the text and selecting style in the drop-down list.
Bold/Italic: Bold or italicise the selected text by clicking the buttons.
Lists: Create bullet or numbered lists by clicking one of the buttons.
Indent/Outdent: Format your lists in different levels by using the indent/outdent
buttons.
Undo/Redo: As in all word processors, you can also undo and redo commands.
Read more about the remaining buttons in the following section.
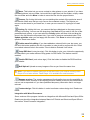
Inserting Elements
By using the tool bar, you can among other things, create links to other locations on your
website, to external websites, e-mail addresses or FTP servers.
30
Working with Mamut eZ Publish
Insert/edit link: Highlight the text you want use as a link and click the button.
The fields in the Link Properties Window:
Href: Choose which type of link to insert. Http is an normal website address, Mail is a
link to an e-mail address, File inserts a link to a file and so on.
Tip! If you wish to link to a calendar or to a news item on your page, click the
button and select the object you wish to link to.
Target: Choose this if you want to open the link in a new window. It is common to open
links to external websites in new windows.
Title: Write the text describing the link. The text will be displayed when the visitor
places the mouse cursor directly above the link.
ID: More advanced users can use the ID field to create links by using the Anchor
functionality. Read more under Anchor.
Insert link/remove link: Highlight the link text to activate the buttons. Click the
buttons if you wish to insert or remove a link.
Anchor: An anchor lets you create links within a text. Anchors are used both in
Microsoft Word and Open Office.
Insert/Edit Image: In the Upload tab, click the Browse button to insert an image.
The following information can be entered:
Name: The name will appear when you place the mouse cursor on the image.
Alternative text: Will be displayed instead of name when you place the mouse cursor
on the image.
Caption: The caption is displayed beneath the image.
Location: Choose where on your website the image will be displayed. You can use the
default value to insert the image into the object you are currently working on. You can
also choose to make the image available in different folders on your website.
Select the Browse tab in order to insert an object that has already been uploaded to your
website. By clicking the sub-menu Media, you can access your File Library. Click on one of
the categories in order to select a file. If you place the mouse cursor above the Preview
link, you can display a thumbnail of the image. Click OK when you have selected which
object you wish to insert.
Read more about the file library in the section "File Library".
31
Introduction to Mamut eZ Publish
Insert custom tag: You can insert fact boxes, quotes and separators by clicking the
button.
Fact box: The fact box can be adjusted in the following way: Enter left to place the
element to the left, right to place it to the right or centre to centre the element.
Quote: A quote can be adjusted in the following way: Enter left to place the element to
the left, right to place it to the right or centre to centre the element.
Sup: Superscript.
Sub: Subscript.
Separator: Separator.
Embed video: Lets you embed a video clip from YouTube or Vimeo. Enter the address
to the clip in the URL field, define Width, Height, and whether or not the clip should be
displayed Inline. Read more about embedded video clips in the "Embedded Video
Clips" section in the "Video Media" chapter below.
Insert literal text: This tool can be used to insert text that you do not want to format.
The text is inserted with the type face Courier, which means that all characters are equally
long. The text can be used to create tables or as an example of programming code. The
functionality is the same as <pre> and <code> in XHTML.
Insert special characters: Click the button to open a panel containing all special
characters that are difficult to insert by using the keyboard.
Insert a table: Click the button to insert a table.
Click this button to open a help window.
Custom Design Template
Design - Custom Design Template
In addition to the finished design templates, you are also able to create your own design.
With the Design tools you are able to change the graphic appearance. You are able to
among other things, upload your own back ground photos along with other colours for the
text and links on your website.
32
Working with Mamut eZ Publish
How to open the Design Tool
1.
Click on the Control panel in the top menu and select Design Settings.
2.
Click Templates.
3.
Select the template Custom Design.
4.
Click Send for publishing.
5.
Go to the website's frontpage and click the custom design button on the eZ Publish
Administration menu.
The design tool opens and you are able to begin creating your custom designed
template.
Read more about how to use the custom design tool in following sections.
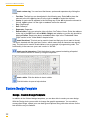
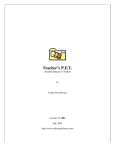
About the Design Tool
The design tool is divided into eight fields that are marked in the image below:
Field descriptions:
1. Style Body: This field constitutes the background for all the contents that you create via
Mamut eZ Publish.
2. Page: This field is the main window when the website's contents come on display.
3. Languages: The field contains any language links you may have added to your website.
4. Links: The field contains links to Site map and Tag cloud etc.
5. Header: In this field the page displays the main heading.
6. Top menu: This is the users menu that is displayed directly under the main heading.
7. Path: The path displays where the user can be found on the website.
8. Footer: In this field the pages footer is displayed.
33
Introduction to Mamut eZ Publish
You can change the colour or upload your own photos in all eight fields. Read more about
editing possibilities in the section "Advanced Editing" and "Format Special Text" .
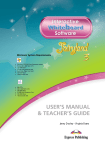
Measurements in the User-defined Design Template
The image below displays an overview of the graphical framework of your website. The
measurements makes it easier for you to customise the size of your images, especially if
you want to use images that stretches over two or more fields.
Advanced Editing
You can edit the different format properties in any of the fields described in the section
above.
Here follows some general information about the Properties window and some practical
examples of how to edit properties.
Tip! Please note that the Properties window offers a wide array of editing options
which are used in a similar way. We recommend you take some time to test the
different editing possibilities.
34
Working with Mamut eZ Publish
The Properties Window
All design properties available can be found in the topmost drop-down list. The properties
are organised into a number of different categories. Select the property you wish to edit and
click Add in order to add the item in the Properties window. You can remove elements by
checking the check box to the left of the property in question and clicking Remove.
Example 1: Uploading a background image
You can upload a background image to any of the fields.
How to upload a background image
1.
In the Custom Design tool, click the field of your choice to open the Properties window.
2.
From the drop-down list, select background image located in the Background category.
Click Add.
3.
To the right of the background image field, click Browse.
4.
In the window that opens, click on the Browse button and locate the image you wish to use.
5.
Select the image and click Open followed by the Upload button.
6.
Choose the image by clicking the radio button below the photo you have chosen.
7.
Then click on Choose to go back to the Properties window.
8.
You can now define the repeat pattern of the background by selecting background-repeat
from the drop-down list and clicking Add. In the drop-down list to the right of the
background-repeat property, choose between the options, for instance repeat (which
repeats the image both vertically and horizontally).
9.
Click Apply and Save to close the window.
The image will now be displayed on your website.
35
Introduction to Mamut eZ Publish
Tip! By selecting one of the other properties in the Background category, you can edit
background colour, and the position of the background image, etc.
Example 2: Editing font
You can define the font for all text in a given field.
How to edit font
1.
In the Custom Design tool, click the field of your choice to open the Properties window.
2.
From the drop-down list, select font family located in the Font category. Click Add.
3.
Select the font of your choice from the drop-down list.
4.
Click Apply to preview the font.
5.
Click Save to close the window.
The font will now be displayed on your website.
The font type that is chosen first is the one that visitors to the website will see. If the visitor's
computer does not support the font type, the second choice in the list will be used.
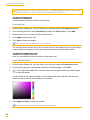
Example 3: Editing font colour
Here you can define the colour for all text in the given field.
How to edit font colour
1.
In the Custom Design tool, click the field of your choice to open the Properties window.
2.
From the drop-down list, select color located in the Font category. Click Add.
3.
To the right of the color field, enter the colour by clicking the button and selecting the
colour from the palette.
Use the meter on the right-hand side to select the desired colour and then use the main
field to the left to choose which shade you would like.
4.
Click Apply and Save to close the window.
The font colour will now be displayed on your website.
36
Working with Mamut eZ Publish
More Information about the Design Options
All of the design properties in the drop-down list follows the CSS Standard, allowing for a
very flexible design tool. More information about the individual properties can be found
online.
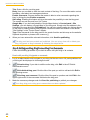
Format Special Text
General formatting of colour and the interface can be done directly in the Design tool as
described in the preceding section. However, you have many more options to format special
types of text, for example headings and links via the menu Elements. This feature requires
advanced knowledge of website design.
Read more about general text formatting in the chapter "The Text
Editor".
The various choices in the menu allow you to do the following
formatting:
Link: Here you are able to select which colour your links will have
before the visitor has clicked on them.
Link: visited: Here you are able to select which colour the links will
have after the visitor has clicked on them.
Link: active: Here you are able to select which colour the active
links will have. A link is active as soon as you click on it.
Link: hover: Here you are able to select which colour the link will
have when the visitor holds the mouse over it.
Header 1-6 (text style): Select one of the headings in order to edit
all instances of that heading number.
Header (field): Here you can edit the User menu and/or the
Languages menu.
Frontpages: The option lets you edit the frontpage.
Backgrounds: The option lets you edit your backgrounds.
Menus: The option lets you edit your different menus.
Boxes: The option lets you edit the different boxes on your website.
Custom tags: You can format your Quote tags and/or Factbox tags.
Tables: Here you can edit the format of the different tables on your website.
Lists: Here you can edit the format of the different lists on your website.
37
COMPONENTS IN MAMUT EZ PUBLISH
All features included in Mamut eZ Publish are similar regarding the folder and content
setup. This is to make it as simple as possible for the user. You are therefore always in a
familiar environment. If you know how to create a news article, you are also able to create a
blog post, a forum or a photo gallery. In order to edit any part of your website, you must be
logged in as the administrator.
You can read more about the various components of Mamut eZ Publish in the following
sections: blog, photo gallery, contact forms, articles, folder, calendar, file folders, forum,
intranet/extranet, video media, Word processor integration.
Blog
A blog is a website or part of a website, which displays all the information the author has
written in chronological order. The blog can be used both by private persons as well as by
businesses as a form of diary or as a mediating channel for important information or news.
If businesses use it as a communication channel for their customers, the author must
choose if they want to allow others to write comments regarding the contents of the blog.
Getting Started with Your Blog
Step 1: Set up your Blog
Follow the steps below to create and define the settings for your blog.
How to set up a blog
1.
Log in as administrator.
2.
On your website's frontpage, select Blog from the drop-down list Add in your eZ Publish
Administration menu and click Create here.
3.
In the screen that opens, enter a Name for your new blog which will be displayed in the user
menu. You should also write a Description, which will be displayed on the right-hand side
of the blog's main page. You can also register Tags for easy accessibility via the search
function or site map.
4.
Click Send for publishing.
The blog has now been created and can be accessed from your top user menu. You
can now proceed with creating your first blog post (step 2).
38
Components in Mamut eZ Publish
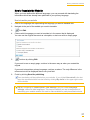
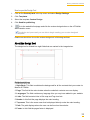
Step 2: Write a Blog Post
Follow the steps below to add content to your newly created blog.
How to write a blog post
1.
Log in as administrator and navigate to your blog via the user menu.
2.
Select Blog post from the eZ Publish Administration menu and click the Create here
button.
3.
In the screen that opens, enter information in the following fields:
39
Introduction to Mamut eZ Publish
Title: Enter a title for your blog post.
Body: Here you are able to write the main content of the blog. For more information on text
formatting, read about text management above.
Enable comments: Choose whether the reader is able to write comments regarding the
blog, by ticking the box Enable comments.
Star rating: Enabling this feature will give the reader the possibility to rate the blog post.
The reader can rate the post from 0 to 5 stars.
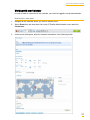
Google Map: If you have activated the Google Maps feature in Control panel - Site
Settings, you can display a Google Map in your blog post. Simply enter the address in the
field above the map and click Find address. You can also select location by clicking directly
on the map or entering latitude and longitude. Read more about this feature in the section
"Site Settings" in the "Control Panel" chapter.
Tags: Enter keywords for the blog post for the search function and site map on the website.
Separate keywords or phrases with a comma [,].
4.
When you have entered the relevant information, click Send for publishing.
The blog post has been posted and published. You can at any time edit or delete your
blog, blog posts or blog comments by following the steps below.
Step 3: Editing your Blog, Blog Posts or Blog Post Comments
Follow the following procedure if you want to add or edit your blog or its contents.
How to edit your blog, blog posts or comments
1.
Log in as administrator and navigate to your blog via the user menu. All posts published on
your blog will be displayed in chronological order.
2.
Edit entire blog: If you wish to edit the entire blog, click Edit in the eZ Publish
Administration menu.
Edit individual blog post: Click the title of the post you wish to edit and click Edit in
the following screen.
Edit a blog post comment: Click the title of the post in question and click Edit in the
upper-right corner of the comments field below the blog post.
3.
Make the necessary changes and click Send for publishing to publish your changes.
Your blog, blog post or blog post comment has now been updated.
40
Components in Mamut eZ Publish
Step 4: Remove Blog, Blog Posts or Blog Post Comments
If you want to delete your blog or any of its contents completely, follow the procedure below.
1.
Log in as administrator and navigate to your blog via the user menu. All posts published on
your blog will be displayed in chronological order.
2.
Remove entire blog: If you wish to remove the entire blog, click Delete in the eZ
Publish Administration menu. You will be asked if you are sure you want to delete the blog
and all of its contents.
Remove individual blog post: Click the title of the post you wish to remove and click
Delete in the following screen. Click Confirm if you are sure you want to delete the post.
Remove a blog post comment: Click the title of the post in question and click
Remove in the upper-right corner of the comments field below the blog post. Click Confirm
if you are sure you want to delete the comment.
The contents have now been removed from your website.
Photo Gallery
Create a New Photo Gallery
You can create as many galleries as you wish.
How to create a gallery
1.
Log in as administrator and navigate to the part of your website where you wish to create
your gallery.
2.
Select Gallery from the drop-down list in eZ Publish Administration menu and click the
Create here button.
3.
In the screen that opens you can enter the following information:
Name: The name of the gallery.
Short description: A short description of your gallery.
Description: Enter a more detailed description of your gallery.
Image: You can insert a cover image for your photo gallery.
4.
Click Send for publishing to make the gallery available on your website.
5.
You can now create sub-galleries if you wish to categorise your images further. Simply
navigate to the newly created gallery and repeat steps 1-4.
The new gallery has now been published on your website.
You can now upload images to your gallery. Read more about this in the following section.
41
Introduction to Mamut eZ Publish
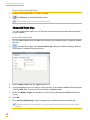
Uploading Images
You can add specific information for each image when you upload them one at a time. If
you upload several images at the same time, you are able to add information later by editing
your images. By default, the images will be given the same title as the file name.
All uploaded images are displayed as thumbnails on the start page of the gallery. Click the
link View as slide show in order to display the images in full size.
How to upload an image
1.
Log in as administrator and navigate to the gallery in question.
2.
Select Image from the drop-down list in the eZ Publish Administration menu and click the
Create here button.
3.
The Edit Image screen opens, where you can enter the following information:
Name: Enter the name of the image.
Caption: Enter a description of the image.
Image: Locate the image by clicking Browse. You can also add an alternative image text
which will be displayed when you place the mouse cursor directly above the image.
Star Rating: Enabling this feature will give the visitor the possibility to rate the image. The
visitor can rate the image from 0 to 5 stars.
Tags: Enter search keywords to be able to search for the image using the website's search
engine. Separate multiple keywords by using commas.
4.
Click Send for publishing when you are finished.
The website will be updated with the new image.
42
Components in Mamut eZ Publish
Multi Upload
Below is information on how to upload several images simultaneously.
Note! The Multi Upload tool will only work if you have Adobe Flash installed on your
computer. If you do not have it, you can download it from the Adobe Download Centre.
A message will inform you if your browser does not support the tool.
How to upload several images
1.
2.
Navigate to the gallery to which you want to upload your images.
Click Multi Upload.
3.
4.
Click Select files and locate the images on your computer.
Select the images you want to upload and finish by clicking Open.
Your images will be uploaded. The upload process is displayed in a process bar. If you want
to upload all of the content of a folder, you must open the folder and select all files
individually. You cannot upload an entire folder.
5.
If you wish to display the images in a different order, use the sorting functionality by
clicking the Sorting button on the eZ Publish Administration menu.
A preview of the uploaded images will be displayed.
Edit Image
If you have uploaded several images via the multi upload tool, you may have to change the
information on some of the images.
How to edit an image
1.
2.
Locate the image in question.
Click Edit.
3.
Edit the information in the same way as when uploading a new image.
4.
Click Send for publishing.
The edited image will now be published on your website.
43
Introduction to Mamut eZ Publish
Contact Pages and Feedback Forms
Mamut eZ Publish offers the possibility to create professional-looking contact pages. The
contact page functionality consists of two components: feedback form and contact
information with the possibility of Digital Business Cards (vCard). The contact information
part can be extended to include as many addresses as you wish.
The contact page in Mamut eZ Publish is created from a default template and gives you the
opportunity to use the Digital Business Card (vCard) feature along with the standard
functionality. The business card can be imported directly into your e-mail program.
By using the integrated Google Maps functionality, you can display the addresses on the
contact page as well as on the frontpage.
How to Create a Contact Page and Feedback Forms
You must be logged in as administrator to be able to add contact information.
How to create a Contact Page
1.
Log in as administrator and navigate to the area where you want to create the contact page.
2.
Select Feedback form from the drop down menu and click Create here.
3.
Enter the relevant information in the following fields:
Name: Enter the name of the contact form. The name is displayed in the menu.
Description: Enter a descriptive text for your form. For instance, what kind of information
you expect the visitor to enter.
4.
Activate Feedback form (optional).
If you activate the feedback form feature, you will also be able to enter the following
information:
Sender name: The name of the sender. You can enter a default value, such as: "Enter your
name/company name here".
Subject: In this field, the sender can enter the reason for contacting you. You can enter a
default value, such as: "Enter your subject matter here".
Message: In this field, the sender can enter the actual message. You can enter a default
value, such as: "Enter your message here".
Email: Enter a valid e-mail address in this field.
Recipient: In this field, you can enter your e-mail address.
5.
Click Send for publish.
The Contact Page will now be published.
44
Components in Mamut eZ Publish
How to add an address item within the Contact Page
1.
Navigate to the contact page.
2.
Select Address from the drop-down list in the eZ Publish Administration menu and
click Create here.
3.
In the screen that opens, you can enter the following information:
Name (Company or Person name): Enter the name of your organisation.
Address: Enter your address.
Zip: Enter your zip code.
City: Enter your city.
Country: Select your country.
Phone: Enter your telephone number.
Mobile: Enter your telephone number for your mobile phone.
Fax: Enter your fax number.
E-mail: Enter your e-mail address.
Skype: Enter your Skype details.
Instant Messaging address list: Click Add rows in order to add your instant messaging
details.
Website: Enter a website address.
Show business card: By enabling this option, the visitor will be able to download a digital
business card which can be imported into e-mail programs.
Business card link label: Enter the link text for the digital business card, for example:
"Download our business card".
Google Maps: Display the contact's address on the contact page map. You must first
activate the Google Maps feature in the control panel.
4.
Click Send for publishing when you have entered the relevant information.
The contact page will now display your address details and link to digital business card.
How to edit an existing Contact Page or Feedback Form
1.
2.
Navigate to the Contact Page.
Click Edit to add your information.
3.
Enter the information according to the steps described above.
4.
Click Send for publishing.
The website will now be updated with the edited content.
How to edit an existing contact object
1.
2.
Navigate to the Contact Page.
Click the Edit button below the contact's name.
3.
Edit the different fields according to the procedure "How to add an address item within the
Contact Page" above.
4.
Click Send for publishing.
The website will now be updated with the edited content.
45
Introduction to Mamut eZ Publish
Articles
In Mamut eZ Publish you are able to create everything from small news notices, to more
advanced news articles with images and text formatting.
In order to simplify management of your news articles, you can create your own folder
structure to arrange the articles. For example, based on the subject, time period or a
combination of both, depending on how many articles that you have written.
You are also able to select different objects from your website as an article or as access to
an article. The objects that you are able to make use of include: calendar, folder, forum,
video, and file folder.
Read more about this under Create/edit an article.
Create/Edit an Article
In order to create a new article or edit an existing article, you must be logged in as
administrator.
How to create a new article
1.
Navigate to area where you wish to create the article.
You can first create a folder in which you can add new articles. In this way, you can keep
track of your different articles. More information on how to create folders can be found in the
"Folders" section below.
2.
Select Article from the drop-down list in the administration menu and then click Create
here to begin creating your article.
3.
Enter the following information in the screen that is displayed:
Title: Enter the article's title.
Short Title: You can also enter an abbreviated version of the article's title.
Author: Here you are able to enter one or multiple authors.
Summary: Enter an introduction or summary of your article.
Body: Here you are able to write the contents of the article. Read more about the
possibilities in the text editor in the section "The Text Editor" above.
Enable comments: Select the check box if you want to give your visitors the chance to
comment the article.
Image: Upload an image for your article.
Caption: Enter a caption for the image.
Star Rating: Enabling this feature will give the visitor the possibility to rate the article. The
visitor can rate the article from 0 to 5 stars.
Google Map: If you have activated the Google Maps feature in Control panel - Site
Settings, you can display a Google Map in your article. Simply enter the address in the field
above the map and click Find address. You can also select location by clicking directly on
the map or entering latitude and longitude. Read more about this feature in the section "Site
Settings" in the "Control Panel" chapter.
Tags: Write in suitable search words for your article. Separate the search words with a
comma (,).
4.
Click on Send for Publishing in order to publish the article.
Your website will now be updated with the new article.
46
Components in Mamut eZ Publish
How to edit an existing article
1.
Navigate to the article you want to edit.
2.
Click Edit.
3.
Edit the article according to the procedure above.
4.
Click on Send for Publishing in order to publish the changes.
Your website will now be updated with the newly edited article.
Tip! You can add a comment to your article by selecting Comment from the
administration menu and clicking Create here. You can insert an existing object, for
instance, a calendar or blog, directly in the text editor by clicking the Insert/edit object
button in the tool bar.
Folders
Working with Folders
By using the folder tool, you can simplify the handling of information and make it easier for
your visitors to navigate around your website. You can create folders with sub-folders on
several levels.
Example: Your company specialises in cars. You can create one folder for every car
and create a forum, news article and even insert images for every model.
Getting Started with Folders
You must be logged in as administrator in order to create a new folder.
How to create a new folder
1.
Navigate to the area of the website where you want to add a folder.
2.
Select Folder from the drop-down list in the eZ Publish Administration menu and click
Create here.
47
Introduction to Mamut eZ Publish
3.
Enter the relevant information in the screen that opens.
Name: Enter the title of your folder.
Short name: Enter a short version of the folder name.
Summary: Enter an introduction or summary to the content of the folder.
Description: Write a longer text describing the contents of the folder.
Display sub items: When you are constructing a long article or a series of articles, you can
choose to hide the contents of a folder. Deselect the box in order to hide the objects.
Tags: Enter suitable keywords for your website's search engine. Separate the keywords
with commas.
4.
In the field Access control, you can choose to restrict access to the folder by passwordprotecting its content.
5.
Click Send for publishing to update your website.
Your website's folder structure will now be updated.
48
Components in Mamut eZ Publish
How to change a folder
1.
2.
3.
Locate the folder you wish to change.
Click Edit in the administration menu.
Then make the necessary change.
Click Send for publishing in order to save the changes.
How to remove a folder
1.
2.
Locate the folder you wish to change.
Click on Remove in the administration menu.
The folder has now been removed.
Calendar
A Calendar can be used to record private or business events, important dates and trips as
well as much more. In addition, you are able to create multiple calendars that can function
independently of one another in different formats. You can also add recurring events as well
as a Google Map location.
Example! If you sell software and at the same time are holding a course in managing
software, you are able to display two different menu choices (folders) on your website:
One that is called "Software" and one that is called "Course". Here you are able to
publish articles regarding new program software and future courses. You can also
include a calendar in each folder. In this way you get a calendar that only displays the
relevant information.
49
Introduction to Mamut eZ Publish
Getting Started with your Calendar
To create a new calendar you must be logged in as administrator.
How to create a new Calendar
1.
Navigate to the area of your website where you want create a calendar.
2.
Select Event calendar from the drop-down list in the eZ Publish Administration menu and
click Create here.
3.
In the screen that opens, enter the relevant information in the following fields:
4.
Title: Enter the title of your Calendar.
Short Title: Enter an alternative abbreviated title if required.
Calendar type: Select if the calendar shall be viewed as Classic calendar or Program
calendar.
5.
Click Send for Publishing to save your changes.
Your website will now be updated with your new calendar.
How to change your calendar
1.
2.
3.
Locate the calender you wish to change.
Click Edit in the administration menu.
Then make the necessary change.
Click Send for publishing in order to update your calender.
How to remove a calender
1.
2.
Locate the calender you wish to remove.
Click on Remove in the administration menu.
The calender has now been removed.
50
Components in Mamut eZ Publish
Working with your Calendar
In order to enter a new event in the calendar, you must be logged in as the administrator.
How to enter a new event
1.
Navigate to the calendar where you wish to add an event.
2.
Select Event from the drop-down list in the eZ Publish Administration menu and click
Create here.
3.
In the screen that opens, enter the relevant information in the following fields:
51
Introduction to Mamut eZ Publish
Title: Enter a title for the event.
Text: Enter all necessary information regarding the event.
Category: You have the possibility to categorise your events.
Event start time: Here you can choose if the event is a normal or full day event. Enter the
start date and time as well as the end date and time in the respective fields.
Recurrence: You can also define your events as recurring on a daily, weekly, monthly, or
yearly basis. You can limit the recurring event by defining an end date or number of
recurrences.
Google Map: If you have activated the Google Maps feature in Control panel - Site
Settings, you can display a Google Map in your calendar event. Simply enter the address
in the field above the map and click Find address. You can also select location by clicking
directly on the map or entering latitude and longitude. Read more about this feature in the
section "Site Settings" in the "Control Panel" chapter.
File: Click Browse in order to upload a file related to the calendar event.
4.
Click Send for publishing to save the changes.
Your calendar will now be updated.
How to change your event
1.
2.
3.
Locate the event you wish to change.
Click Edit in the administration menu.
Then make the necessary change.
Click Send for publishing in order to update your calendar.
How to remove an event
1.
2.
Locate the event you wish to remove.
Click Remove in the administration menu.
The event has now been removed.
52
Components in Mamut eZ Publish
File Folders
If you have files to distribute, you can create file folders. The folder can be displayed in the
top menu or as a sub-item in an existing menu.
A file folder can for instance be used to distribute manuals, product information, instruction
material and so on.
You must be logged in as the administrator in order to create a file folder.
How to create a file folder
1.
Navigate to the location on the website where you want to create a file folder.
2.
Select File folder from the drop-down in the eZ Publish Administration menu and click
Create here.
3.
In the screen that opens, enter the relevant information in the following fields:
Name: The name of the folder.
Description: Enter a description of the contents of the folder.
4.
Click Send for publishing to save your changes.
A new file folder will be added to your website.
How to change your file folder
1.
2.
3.
Locate the file folder you wish to change.
Click Edit in the administration menu.
Then make the necessary change.
Click Send for publishing in order to save the changes.
53
Introduction to Mamut eZ Publish
How to remove the file folder
1.
2.
Locate the file folder you wish to remove.
Click Remove in the administration menu.
The file folder has now been removed.
Uploading Files to a File Folder
When you have created a file folder, you can upload any file type that you wish to share.
How to upload a file to a file folder
1.
Navigate to the file folder to which you want to add a file.
2.
Select File from the drop-down list in the eZ Publish Administration menu and click Create
here.
3.
In the screen that opens, enter the relevant information in the following fields:
Name: Enter a name which will be visible for the visitor. The name does not have to be
identical to the file.
Description: You can enter a description of the contents of the file.
File: Locate the file on your computer.
Tags: Enter keywords for the search engine in Mamut eZ Publish. Keywords must be
separated by commas.
4.
Click Send for publishing.
The file will now be uploaded into your file folder.
54
Components in Mamut eZ Publish
How to change a file
1.
Locate the file folder which contains the file.
2.
Click Properties next to the file you wish to change.
3.
4.
Click Edit in the administration menu.
Then make the necessary change.
Click Send for publishing in order to save the changes.
How to remove a file
1.
Locate the file folder which contains the file.
2.
Click Properties next to the file you wish to change.
3.
Click Remove in the administration menu.
The file has now been removed.
Forum
Forums can be used to communicate and discuss information. In order to participate in a
forum, you must be a registered user. You must be logged in as administrator in order to
create a new forum.
Getting Started with Forums
You must be logged in as administrator in order to create or edit a forum.
How to create a forum
1.
Navigate to the page where you want to create your forum.
2.
Select Forum from the drop-down list in the eZ Publish Administration menu and click
Create here.
3.
In the screen that opens, enter the relevant information in the following fields:
55
Introduction to Mamut eZ Publish
Name: The name of the forum.
Description: Describe the purpose of the forum.
4.
Click Send for publishing.
The forum will now be published on your website.
How to create a new topic
1.
Navigate to the forum.
2.
Click the New topic button.
3.
Enter a Subject and a Message. Use the buttons in the tool bar in order format your text.
You can also insert emoticons by clicking the symbols to the right of the Message box.
4.
You can click Notify me about updates if you wish to receive an e-mail every time the
forum topic has been changed.
5.
Click Send for publishing.
6.
Click the published topic, and in the screen that opens, you can now click Set as sticky
topic if you want to pin the topic at the very top of the forum, Lock topic if you want to lock
the topic, or Move if you wish to move the topic.
The forum has now been updated with the new topic.
Tip! In order to regulate the content of your forum, you are recommended to publish a
topic called "Forum Rules" in which you specify the terms of the forum. All topics in
breach of the rules of the forum can be deleted.
Users
The visitor must be a registered user in order to create a new subject or reply to other
postings. If the forum is created on the Intranet or Extranet, you will automatically be a
registered user.
If the forum is open to the public, all visitors must be registered. The visitor registers
him/herself via the website - you do not have to register forum users manually.
How to register new forum users
1.
Click the Register link in the menu in the upper right-hand corner. The user can also
register a new user in the forum.
2.
Enter information about the user.
3.
Enter the following information:
First name: The user's first name.
Last name: The user's last name.
Account information: User name, password and e-mail address. You can also specify a
signature that will be inserted every time you reply to a new topic.
Image: The user can upload a personal image.
4.
Click Register.
An e-mail will be sent to the registered address. The user must confirm the registration
by clicking the link in the e-mail. The user will be activated once this has been done.
56
Components in Mamut eZ Publish
Forum Moderator
Any registered forum user can be assigned to the role of moderator. The moderator is a
forum administrator and can be assigned to the entire forum or to a specific forum topic.
You can assign moderator rights via the control panel. Read more about assigning
moderator rights in the section "How to create a user account" above.
How to report abusive language in a forum
1.
Navigate to the forum and click the topic you wish to report.
2.
Click Abuse alert.
You can also Edit and Remove the offensive topic by clicking the respective button.
3.
Select the relevant category and enter a Comment.
4.
Click Send.
The administrator and forum user will be notified via e-mail.
If you wish to disable certain forum users in violation of the forum's rules, you can set the
user as inactive via the Control panel.
How to disable users
1.
Navigate to the forum and click the topic containing the abusive text.
2.
Click the button Disable user.
You can at a later time enable the user by navigating to the same topic and clicking Enable
user.
The user has now been set as inactive and cannot create posts on the forum.
Edit Forum User
As a logged in forum user, the menu option My profile will be displayed in the user menu.
In the menu, you can change information such as password and e-mail address.
Create a new topic
All users who are logged in can create a new forum topic. You can thereby create a new
topic both as administrator or forum user.
Intranet/Extranet
The Intranet and Extranet are password-protected pages where you can share information
within a company, with partners and with clients. You are able to use the Intranet to share
information internally within your organisation or use the Extranet to share external
information.
If your program version includes these features, there will be a default version of both an
Intranet and an Extranet.
57
Introduction to Mamut eZ Publish
Intranet and Extranet Users
All users of your Intranet/Extranet are administered in MyAccount. Read more about
creating Intranet/Extranet users in MyAccount in the section "MyAccount" in the chapter
"Introduction" above.
Managing Intranet/Extranet
When creating a folder on your website, you have the possibility to make it accessible for
the public, or to limit access to your Intranet/Extranet users.
Note! The menu options Intranet and Extranet are only displayed for logged in users.
How to create an Intranet/Extranet folder
1.
2.
Select Folder from the drop-down list in the administration menu.
Click Create here.
3.
Enter the relevant information about the folder in the fields, Name, Short name, Summary,
Description and Tags. Read more about folder management in the section"Getting Started
with Folders" above.
4.
Choose between the options Intranet or Extranet in the Access control field at the bottom
of the page.
If you select Public, all visitors will have access. If you select Intranet or Extranet, only the
Intranet/Extranet users will have access.
Note! All content in the folder will have the same access rights as the folder. An article
created in a folder exclusive for Intranet users, will only be accessed by the users of the
Intranet.
5.
Click Send for publishing.
The new folder will be accessible for your Intranet or Extranet users.
58
Components in Mamut eZ Publish
Video Media
Mamut eZ Publish offers you the possibility to communicate your message with the aid of
video media which can be played on your website.
Mamut eZ Publish supports a majority of the most commonly-used video formats, such as
Flash (swf, flv), Quicktime (mov, mp4, avi, m4v, mpeg), Windows media (wm, wmv) and
Silverlight (xap).
In addition to video clips, you can also embed links to video clips on YouTube and Vimeo.
Read more about this below.
Using Video
Video files are widely used on the Internet. In order to play video files in your web browser,
you may need to install a plugin application.
How to use video on your website
1.
Log in as administrator.
2.
Navigate to the location where you want to insert a video.
3.
Select the video format of your choice from the drop-down list in the administration menu.
4.
Click Create here.
59
Introduction to Mamut eZ Publish
5.
Enter the following information:
Name: Enter the name of the video.
Description: Enter a description of the video.
File: Upload the video by clicking Browse.
6.
In the File field, you can also enter the Width and Height of the video, if you do not want to
use the standard size. You can also set the Quality of the video.
7.
Tick Autoplay if you want to start the video automatically, and tick Loop if you want the
video to be repeated.
8.
Click Send for publishing.
The video will now be added to your website.
How to change a video
1.
2.
3.
Locate the video you wish to change.
Click Edit in the administration menu.
Then make the necessary change.
Click Send for publishing in order to save the changes.
How to remove a video
1.
2.
Locate the video you wish to change.
Click Remove in the administration menu.
The video clip has now been removed.
Using Microsoft Silverlight
Just like Flash Player, Microsoft Silverlight is a so called "plug-in" program which must be
installed on the visitor's computer before the video can be played. The following procedures
describing how to use Microsoft Silverlight can be applied to all supported video formats.
Visit the official website at http://silverlight.net/ for more information.
60
Components in Mamut eZ Publish
How to use Silverlight
1.
Log in as administrator.
2.
Navigate to the location where you want to add your Silverlight element.
3.
Select Silverlight from the drop-down list in the administration menu.
4.
Click Create here.
5.
Enter the following information in the screen that is displayed:
Name: Enter a name for your Silverlight element.
Description: Write a descriptive text for your Silverlight element.
File: Click Browse to upload a Silverlight media element. You can also define the Width
and Height of the element manually.
6.
Click Send for publishing.
The Silverlight element will be added to your website.
How to change a Silverlight Video
1.
Locate the Silverlight Video you wish to change.
2.
Click Edit in the administration menu.
3.
Then make the necessary change.
Click Send for publishing in order to save the changes.
61
Introduction to Mamut eZ Publish
How to remove a Silverlight Video
1.
2.
Locate the Silverlight Video you wish to change.
Click Remove in the administration menu.
The Silverlight Video has now been removed.
Embedded Video Clips
You can embed video clips from YouTube and Vimeo directly into the text editor anywhere
on your website.
How to embed video clips
1.
Log in as administrator and navigate to the area on your website where you want to embed
the clip.
2.
In the text editor panel, click Insert custom tag. Read more about inserting elements
in the section "Inserting Elements" above.
3.
Select embed_video from the Tag drop-down list.
4.
Copy the address to the YouTube or Vimeo clip from your browser's address field and paste
it into the URL field. Do not use the full code for embedding video.
5.
Define the Width, Height, and whether or not the clip will be displayed Inline with the text
(if any).
6.
Click OK.
7.
Click Send for publishing in order to updated your website with the new video clip.
Using the options in the text editor, you can position the clip so it fits with the existing
content.
62
Components in Mamut eZ Publish
Word Processor Integration
In addition to writing and editing articles in Mamut eZ Publish, you can also use Microsoft
Word or Open Office to write text.
Note! Most word processors contain more functionality and options than is included in
Mamut eZ Publish. The uploaded document will therefore be interpreted according to
the functionality included in Mamut eZ Publish before it can be published.
When you have uploaded a document from a word processor, you can edit the text in
Mamut eZ Publish (as administrator).
Using the Word Processor Integration
The integration tool bar can be found in the administration menu:
How to use the word processor integration
Import: Click this button to upload the content of an Open Office or Microsoft Word
document anywhere on your website.
Export: Click this button to export content from your website to a word processor
document.
Replace: Click this button in order to replace a previously uploaded document on your
website.
63