1
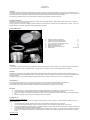
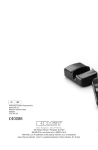
Instructions for use
Instructions
for use
Mode
oticed’emploi
d’instructio
1-800-667-9622
Synca Marketing Inc.
337 Marion, Le Gardeur,
QC., Canada, J5Z 4W8
Caution: U.S. Federal law restricts this device to sale by or on the order of dentist or dental technicians.
Splintvac instructions V3
2010-07-09
SPLINTVAC
Instructions for use
Thank you.
The ability to work quickly and precisely is indispensable in the realization of quality dentures and dental prosthetics. With this in mind, we wish to thank you for
acquiring the SPLINTVAC. SPLINTVAC is a simple and efficient device that will allow you significant time savings during denture fabrication, while offering the best
in esthetic results. Built from a rigid frame and silicone membrane (without latex), SPLINTVAC is both durable and biocompatible.
This instruction guide will permit you to use your device safely, to benefit from all its possibilities, and ensure its longevity.
Description and Function
SPLINTVAC is a vacuum forming device that operates at room temperature to adapt dental products to plaster models or directly onto dentures. It consists of a
vacuum forming chamber and a manual pump.
Forming occurs when a vacuum pulls a transparent silicone membrane over a dental product to contact and form onto a plaster model or a denture. The product
that that has been formed can then be polymerized through the transparent membrane.
Parts illustration and list
A.
B.
C.
D.
E.
F.
G.
H.
B
F
G
Aluminum vacuum forming chamber
Transparent silicone forming membrane
Aluminum vacuum forming chamber cover
Open / close vacuum valve with quick connector
Vacuum pump with quick connector
Flexible tubing with connector
Holding clip and attachment for tubing
Spacing beads
x1
x3
x1
x1
x1
x1
x1
100 to 150 ml
C
E
D
H
A
General Use
The SPLINTVAC is particularly suited for shaping of FIBER FORCE pre-impregnated splints, however it will allow you to complete several other low temperature
forming tasks using light- and self- curing dental products. For proper results, it is imperative to observe recommendations and follow instructions.
Indications
SPLINTVAC is recommended for the shaping of FIBER FORCE pre-impregnated splints during the fabrication of removable dentures, temporary bridges. It is
particularly useful in the forming of FIBER FORCE meshes on a plaster model, as it ensures an intimate contact between the mesh and the model both before and
during polymerization.
SPLINTVAC is also used for other FIBER FORCE pre-impregnated splints, when necessary to maintain contact to a model or removable prosthesis.
Contraindications
Do not place SPLINTVAC in an oven or in an environment of excessive heat. This will cause burning and deterioration of the SPLINTVAC.
Do not use SPLINTVAC with liquid products or solvents that may release fumes. Fumes may cause the pump to deteriorate.
Do not use SPLINTVAC with any product susceptible to deteriorate the silicone membrane or the aluminum vacuum chamber.
Precautions
Clean with alcohol only. Do not use products that are susceptible to deteriorate the silicone membrane or the aluminum vacuum chamber.
Do not use SPLINTVAC with shapes that are pointed or have jagged edges as this may rupture the silicone membrane.
Do not modify, scratch or sand surface joints between the chamber cover and the chamber (with cutting or abrasive tools) to maintain the SPLINTVAC
seal.
Burn Risk: Certain light-curing units may transmit significant heat to the SPLINTVAC.
Assembly and Use
SPLINTVAC assembly and preparation:
Inspect the box upon receipt to ensure that no parts are missing and that no damage has occurred in transport . If parts are missing, immediately contact your
vendor or service center.
I.
II.
III.
IV.
Push the Flexible tubing F into the connection on the valve D. Ensure the tubing is pushed to the end of the connector.
Push the other end of the flexible tubing F into the vacuum pump connector. Ensure the tubing is pushed to the end of the connector.
Pour part of the spacing beads H into the chamber A. These beads will help evacuate air during the vacuuming process, and will bring the plaster model
to a height that minimizes stretching of the silicone membrane.
Place the plaster model into the spacing beads. It should be placed so that the top of the model is 5 – 10 mm below the top of the aluminum chamber A.
Add or remove spacing beads as necessary. The model should be set to that the top of the beads are aligned with the functional limits of the plaster
model.
SPLINTVAC usage:
SPLINTVAC works by creating a vacuum in the vacuum forming chamber A that will pull down the silicone membrane B. A dental product that has been placed in
the chamber will simultaneously be pulled down to form a tight contact with either a plaster model or a removable prosthesis.
a)
b)
c)
d)
e)
f)
g)
h)
i)
Place the product to be formed (FIBER FORCE mesh for example) on the plaster model.
Center and place the silicone membrane B on the aluminum chamber A.
Place the aluminum cover C over the membrane B and aluminum chamber A. Be careful that the silicone membrane has no folds to prevent air leaks.
Exert light pressure on the aluminum cover C for a tight fit of the silicone membrane B. ATTENTION: Once closed, do not agitate the assembly to
prevent movement of the beads.
Open the vacuum valve D and manually start the pump E. The silicone membrane will stretch to come in contact with the product and press it onto the
plaster model or dental prosthesis. The vacuum is reached once pumping gets difficult. A small “click” will be heard in the pump. Ensure that there is
no air leak. If necessary, exert pressure again on the aluminum cover C to press tightly against the silicone membrane B. If an air pocket is visible,
smooth with a finger and the air pocket will resorb.
Close the valve.
Disconnect the Flexible Tubing F from the pump E by pulling back the flange on the quick connector and pulling on the Flexible tubing F. It should pull off
without excessive force. The SPLINTVAC may now be transported without risk of agitation of the beads.
Wrap the flexible tubing F around the aluminum chamber A and attach with the Holding clip G.
Bring the assembly to a light curing unit (PRO CURE for example) or to a hand-held curing light. Light cure the product as per manufacturer’s
instructions.
After polymerization of the product, open the vacuum valve D and remove cover C and silicone membrane B to access product.
Note: Clean the different surfaces of the aluminum chamber and silicone membrane after each use. In particular, the silicone membrane must be clean on both
surfaces as it will come in contact with products that are being formed, and it must remain transparent to allow for future light-curing processes. The silicone
membrane is a consumable part that is replaceable. Its useful life varies with usage. To avoid premature tears, handle with care. Do not apply excessive pressure
when closing cover or use for forming products with sharp edges.
Maintenance and cleaning
Clean with a mild soap and water solution, or with alcohol.
Regularly clean the aluminum chamber and cover. Remove traces of dental products with every use. Properly clean the membrane with every use as it comes in
contact with dental products.
To ensure the system is properly sealed, remove any residue that may be stuck to the joint between the cover and the chamber.
Do not adjust, scratch or sand the surfaces that join the cover to the chamber (with cutting or abrasive tools) to maintain the sealing capabilities of the SPLINTVAC.
Replace any silicone membranes that are punctured or torn.
Keep the pump clean and in working order.
Keep the valve, tubing and connectors free of dirt by cleaning as necessary.
Troubleshooting
Problem
Pumping is difficult or impossible and
the silicone membrane does not move.
The membrane is not coming into proper
contact during pumping
The membrane is coming into proper
contact, but loses contact after a few
seconds after pumping
The membrane loses contact when the
pump is disconnected.
The Flexible tubing will not disconnect
After use, the membrane maintains
contact when the valve is opened.
Cause of problem
The valve is closed
Insufficient pumping
Air leak in the connections
Air leak in system
The valve was left open.
The valve is open.
Error in handling the quick connector
The pump is still connected
Open the valve and pump
Solution
Pump harder
Ensure that both ends of the flexible tubing are fully inserted (pump and
value). If necessary, disconnect, inspect and clean.
Ensure that the membrane has no folds between the cover and the
chamber
Press down on the cover to improve contact with membrane
If necessary, remove the membrane and inspect all surface joints and
membrane. Remove any dirt.
Replace membrane if punctured or torn.
Close valve as soon as the desired vacuum has been attained.
Close the valve after pumping and before disconnecting the pump.
Pull back the flange on the quick connector and pull on the Flexible tubing.
It should pull off without excessive force.
Disconnect the flexible tubing from the connection to let air into the
SPLINTVAC.
It is also possible to let the air in by removing the cover.
Accessories
The following accessories are available for the SPLINTVAC
Référence
13003
13004
13005
13006
1x
1x
1x
1x
Désignation
SPLINTVAC unit (1 chamber + 1 cover + 1 valve + 1 flexible tubing + 1 holding clip)
SPLINTVAC vacuum pump (1 vacuum pump +1 quick connector)
3 SPLINTVAC silicone membranes (box of 3 transparent forming membranes)
SPLINTVAC spacing beads ( 1 box contains 100 to 150 ml of beads)
Limited warranty
Synca Marketing Inc. warranties each new SPLINTVAC to be free of defects in materials and workmanship.
The SPLINTVAC unit is covered by a warranty for 1 year from purchase date, with the exception of the silicone membrane, which is a consumable item. Breakage
due to defective materials or hidden defects will be repaired free of charge during the warranty period.
The foregoing warranty constitutes the sole liability of Synca Marketing Inc., and is in lieu of any other warranty, of merchantability of fitness.
Synca Marketing Inc.shall not be responsible for any incidental or consequential damages arising from use of product.
In case of warranty claim, the complete system must be returned with all accessories, transportation charges prepaid to Synca Marketing Inc., with a copy of
the original invoice. When possible use original packaging.
Procedure in case of repair.
Repairs must be completed solely by Synca Marketing Inc. or an authorized service center. If problems cannot be solved with the troubleshooting guide,
contact your local distributor for the return procedure. A clear description of the problem and the conditions surrounding the problem may help identify and resolve
the problem. Please provide this written information with return of any unit.
Limitation of responsibility
Except for where prohibited by law, Synca Marketing Inc. cannot be held responsible for any damage arising from use of product, including direct, indirect,
specific, accidental or consequential, under any circumstances, including any guaranty, contract, negligence or responsibility.
The user is responsible to determine proper use of product and Synca Marketing Inc. rejects any responsibility related to misuse of the unit or for any breakage
due to not following this instruction guide.
Use only parts and accessories supplied by Synca Marketing Inc. Synca Marketing Inc. refutes any responsibility from usage of other accessories and parts.
Note
Product for dental use only.
Keep away from children
Consult the user manual