1
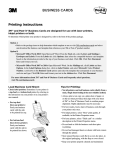
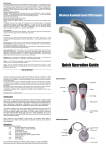
VersaCheck
®
Silver Express 2007
Getting Started:
STEP 1: Have an existing pre-printed blank check
from your bank with your bank information and (at the
bottom of the check) MICR line.
Step 3 continued...
Software Quick Start
Installing VersaCheck Software:
1. Disable any virus protection software on your
computer; restart your computer if necessary.
2. Windows 98 and Windows ME users: G7
recommends that you update your operating
system files before installing VersaCheck. Go
to: http://v4.windowsupdate.microsoft.com/en/default.asp
and click on ‘Scan for Updates.’ Download all
files recommended by Microsoft® and restart
your computer.
3. Insert the DVD into your DVD drive and follow
the steps of the installation wizard. If the install
wizard does not open automatically, select
Run from the Windows Start menu and type:
D:\autorun.exe, if D is your DVD drive.
4. After installation, click the
“VersaCheck” icon to launch
your program.
STEP 2: Set up an account and checkbook.
You must first set up an account to write and print
checks. From the Getting Started screen, click on
Create a new account. This will launch a 3-step new
account wizard. Complete all entries and click on “Finish.” Answer “Yes” when prompted with “Would you
like to edit the checkbook of this account?” This will
launch a 5-step Checkbook Information wizard. Click
on the Help button for detailed instructions.
Set up your own payee list: VersaCheck Silver
Express allows you to track up to 20 payees in
a simple-to-use list. Click on the Address Book
button, click on New and enter the payee’s
contact information. Classify your payees as
business, family, friends, or create your own
categories.
User’s Manual
VersaCheck contains “Quick Training Courses”.
The VersaCheck User’s Manual is in electronic
format and is found in the Help files on the main
tool bar.
Click on Help, Contents, then select a topic of
interest. Additionally, obtain instructions for a
specific feature by clicking on Help then Current
Window; by clicking on the Help button located
throughout the program; or by pressing the F1
key.
Highlights of Other Features:
Print checks to fill in by hand: Print compatible
pre-printed checks from VersaCheck’s builtin templates which replace costly pre-printed
check styles available through mail order
suppliers.
STEP 3: Write, print or send checks by email.
Click on the Write Checks button, select the account
to draw the check from in the drop-down menu in
the upper left-hand corner. Simply fill out the fields of
the on-screen check. Before recording a transaction,
select “Send” or “Print” from the check number field
to designate whether you would like to print locally or
deliver checks online. Click on Record and your check
will be placed in the register. To print checks, checkbook covers and deposit slips, click on Print from the
File menu. Click Send Checks to have checks sent for
you by U.S. mail or electronically using iVersaCheck.
com.
Silver 2007 Continued...
Express Check Designer™: For easy check
template customization! From existing templates,
edit text (font styles and sizes), modify and move
existing objects. This feature can be accessed
from step 5 of 5 in the Edit Checkbook feature.
Additional instructions can be located in the
Help files.
REGISTER ONLINE
INSTANTLY & CONVENIENTLY!
During software installation, you will be prompted to
enter your registration information. Fill out the registration screens and register by selecting the “Internet”
registration check box at the end of the session.
You may also register online by visiting:
www.g7ps.com/register
To register by mail select the “mail” registration check
box and print out a completed registration form at your
desktop, or send in a 3x5 card with your name, address, email address, phone/fax number, your product
serial number and software version.
STAY UP TO DATE
AND PREPARED
Use VersaCheck to access program updates and order blank check stock and
supplies. Never run out of checks again!
With VersaCheck’s Recycle4Dollars
program you can earn extra cash and
protect the
environment by recycling empty inkjet
and laser cartridges.
Mail to: Product Registration
P.O. Box 270459, San Diego, CA 92198
TIRED OF THIRSTY INKJETS?
Use VersaCheck software with the new VersaJette™
inkjet family and revolutionary VersaInk-nano™ for
efficient and precise results every time!
Send, Receive, and Process Payments on the
Internet: Click on the VersaCheck Online
icon, and follow the steps to take advantage of
VersaCheck features and more – all online! Send
someone a check via U.S. mail or electronically
using IVersaCheck.com. Now you can eliminate
postage, handling and saving time and money!
FREE CUSTOMER SUPPORT
By phone: 1-800-303-2620
Online: http://support.g7ps.com
©2006 G7 Productivity Systems, Inc. All trademarks and
company names are the property of their respective owners.
Quicken® and QuickBooks® are registered trademarks of Intuit Inc. Intuit is not affiliated or associated with VersaCheck®
or G7 Productivity Systems. Offers, terms and conditions
subject to change without notice. 1/06
VersaJette M300
InkJet Printer
VersaJette M400
Printer, Copier
and Scanner
www.versajette.com
P.O. Box 270459
San Diego, CA 92198
Tel: (858) 675-1095
Fax: (858) 675-0579
Email: [email protected]
www.versacheck.com
TM
SOFTWARE QUICK START
Installing Infinity BusinessCards & ProLabels 8.5
Disable any virus protection software on your computer and
be sure to close any running applications (email, browser,
etc.). Re-start your system if necessary. Insert CD into your
CD-ROM drive and follow the steps of the onscreen Install
Wizard. If the Install Wizard does not open automatically,
select Run from the Windows Start menu and type
D:\autorun.exe or D:\setup.exe to start the install wizard.
STEP 2 - CREATE A NEW DOCUMENT FROM PRE-DESIGNED
LAYOUT:
· Click File, then click Getting Started.
· Click Create a New Document from Pre-Designed Layout.
· Select appropriate project folder: Address and Shipping Labels,
Business Cards, Name Badges and Tags, or Stationery and
Envelopes.
· To enlarge a Pre-Designed Layout click on Preview.
· Double click to select a pre-designed layout to edit.
· To enter text from the Contact Manager, click Display Contact (on
the special menu bar) to display contact names.
Tip 3 - To Reposition:
· Single click on the text or graphics and hold down left
mouse button to reposition on the layout.
After installation, click on the “Infinity BusinessCards & ProLabels 8.5” icon to launch program.
STEP 1 - CONTACT MANAGER:
Enter company names, contact names, business, home, fax,
and mobile phone numbers, email addresses or store a logo
per contact. This information can be automatically entered in
project layouts using the Field Text Properties function.
·
·
·
·
·
Close Getting Started window and Tips and Tricks window.
Click Data at the top menu.
Click Contact Manager.
Click New.
Type data in the appropriate fields from the Contact
Information menus.
· Click OK to close the window when finished.
Tips and Tricks for the Contact Manager
If you need to create multiple contacts with similar information
(address and phone number) in your Contact Manager, enter the first
contact and then click “New from Current” to change the relevant
information for the next record. It’s quick and easy!
Tip 2 continued...
· Click OK and the data will automatically be entered from
the Contact Manager.
· Click once outside the box to continue.
Tip 2a - Change font, font size, font style, color and
alignment from [A] function:
· Double-click on the text
box to access the Field
Text Properties window.
· Click Data.
· Click Font and modify as
desired.
· Click on the desired person or business and then click OK. The
information is automatically entered into the data fields.
· Delete any unused fields.
· Click Save for reuse at a later date.
· Follow the step-by-step instructions for printing and your project is
finished.
Tips and Tricks for Modifying a Pre-Designed Layout
Tip 1 - Easily add your own text to your layout:
· Click Insert Text and click on layout and a text box automatically
appears.
· Type in desired text.
· Click outside the box to continue.
Tip 1a - Change font, font size, font style, color and alignment
from the Insert Text option:
· Double-click on the text to make a box.
· Highlight text you wish to modify.
· Use top menu options to modify text color, font and font size.
Tip 1b - Borders and Backgrounds:
· Click on Text.
· Click Format and Object Properties for menu.
Tip 2 - Add your own Field Text from the Contact Manager:
· Click [A] Insert Field Text on the side menu and click on your
layout to access the Field Text Properties window.
· Click Data, then click Field Name. Choose any additional fields you
wanted included in your layout.
STEP 3 - CREATE A NEW DOCUMENT FROM SCRATCH:
· Click Create a New Document From Scratch!
· Select the type of document you wish to create from the
list provided or click G7PS-General Purpose Labels for
additional selections. Click on your selection and click OK.
· A blank canvas will be displayed.
· To add a background or image click on Insert Image and
single click in the box and the Image Properties screen will
appear.
· Click Picture and Browse for a list of graphics and
backgrounds - see display on the right-hand side.
· Click Open and the selected graphic or background
appears in the Image Properties screen where additional
modification options are available.
· Click OK when ready to insert into document.
· Single click on the text or graphics and hold down left
mouse button to reposition on the layout.
· Place arrow on anchor points to enlarge or reduce
backgrounds, graphics and text boxes.
· Add your own Field Text from the Contact Manager.
· Click [A] Insert Field Text on the side menu and click on
your layout to access the Field Text Properties window.
· Click Data then click Field Name. Choose any additional
fields you want included on your layout.
· Click OK and the data will automatically be entered from
the Contact Manager.
· Click once outside text box to continue.
· To add your own text to your layout click Insert Text.
· Click on layout and a text box automatically appears.
· Type in desired text.
BUSINESS CARDS
& LABELS
Step 3 continued...
· Click Save when you finish modifying the layout for reuse at
a later date,
· Follow the step-by-step instructions for printing.
Tips and Tricks
· Open files with Control + O.
· Open the Select Template Window with Control + N.
· Click the F1 Key to open the Help Files for the screen or
window that is currently open.
· To delete an object from your design screen, click mouse
on the object and press Delete Key.
· Undo last action by holding down the Alt Key and
Backspace Key or Control + Z.
· Resize an object by holding down the Shift Key and
pressing 1 of the 4 Arrow Keys.
· To move an object 1 pixel at a time, hold down the Control
Key and press 1 of the 4 Arrow Keys.
· To reposition, hold the Shift Key down and left click the
mouse on data boxes. Next click on specific alignment box.
· To change the details about any object in your design,
right click the object and click on Format, select Object
Properties to modify the object.
· Alt + Enter opens the Object Properties dialog box for the
selected object.
· Rotate text or images after placed by opening the Object
Properties dialog box and selecting the rotate tab.
TO GET YOUR FREE UPDATES ONLINE,
REGISTER INSTANTLY AND CONVENIENTLY!
During installation of the program you will be prompted to enter your registration information. Fill out the registration screens and register instantly
by selecting the “Internet” registration check box at the end of the session.
Alternatively, you may select the “Mail” check box and print out a completed registration form at your desktop. Fold the form and mail it to G7
using the enclosed return envelope.
You may also register Online by visiting www.g7ps.com/register or send
in a 3x5 card with your name, address, email address, phone/fax number,
your product serial number and version.
Mail to: Product Registration, P.O. Box 270459, San Diego, CA 92198
P.O. Box 270459 San Diego, CA 92198
Tel: (858) 675-1095 Fax: (858) 675-0579
Email: [email protected]
HIGH QUALITY AT A GREAT LOW PRICE!
Mailing Labels G75160
$19.99
3,000 Labels 1” x 2-5/8”
30 Per Sheet - 100 Sheets
GLB/106004
Premium Business Cards
G78371
$29.99
1,000 Business Cards
High Quality
Clean-Edge Perforations
2” x 3-1/2” Cards
100 Sheets / 10 Per Sheet
Color: Arctic White
GVC/106479
400 Business Cards
Photo Quality
Clean-Edge Perforations
2” x 3-1/2” Cards
50 Sheets / 8 Per Sheet
Color: Arctic White
GVC/106486
$19.99
1,400 Labels 1-1/3” x 4”
14 Per Sheet - 100 Sheets
GLB/106011
Shipping Labels G75163
$19.99
1,000 Labels 2” x 4”
10 Per Sheet - 100 Sheets
GLB/106028
Glossy Edge-to-Edge Business Cards
G78373
$29.99
Mailing Labels G75162
Infinity Business Cards and Labels
are available at most major computer
retailers and office supply superstores
or Online at: www.g7ps.com
Create your own ID Badge Security System with included IDScape feature!
PLUS!
ID SCAPE TECHNOLOGY
IDScape is a system that encodes
pertinent employee information
into a secure barcode. Create your
company’s official expandable
security system at an affordable cost.
Use IDScape to encode contact
information into a barcode that
can be scanned and imported
into Outlook® , Act!™, Access,
SQL, ODBC compliant data
sources, and more!
www.g7ps.com
© 2006 G7 Productivity Systems, Inc. All rights Reserved. Trademarks and company names are the property of their respective owners.