1
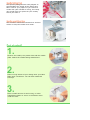
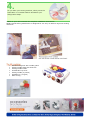
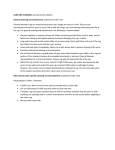
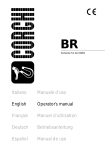
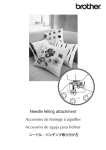
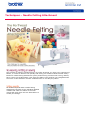
 Techniques – Needle Felting Attachment
The process of machine needle felting is so unlike anything you have ever experienced
before, it is hard to believe how quickly and easily your creative ideas become reality.
Brother's needle felting attachment quickly and securely punches wool roving, fabrics,
felt or yarns into a base fabric. Just move the fabric freely and let your imagination do
the work. Create beautiful surface embellishment on virtually any fabric.
No thread required! Each needle felting
attachment consists of five individual barbed
needles that catch the fibers of the wool
roving and push them into the base fabric to
create your design.
The specially designed foot easily adjusts to
accommodate the height of the fabrics and
fibers used in your project. If you choose to
create with yarn instead of roving, the handy
yarn guide helps you place the yarn exactly
where you want it.
The dust box collects accumulated lint and bits
of fiber to keep the bobbin area clean.
Remove the needle, the presser foot and the needle
plate. Attach the needle felting attachment.*
Draw a rough sketch of your design onto your base
fabric with a chalk pen. You can also needle felt
freestyle.
Place a small amount of wool roving, or other
embellishing fibers or yarns, in the pattern area
under the foot.
As you start your sewing machine, slowly move the
base fabric in a random fashion and watch your
design take shape.
*Refer to your user's manual for complete installation instructions.
NOTE: Needle felting attachment is designed for use only on Brother PQ-series sewing
machines.
•
•
•
•
•
•
•
Needle felting foot with needle guard
Felting needle plate with dust box
Felting needle holder
Thread take-up cover
Felting needle (2 pieces)
Screwdriver (2 types)
Wool roving