1
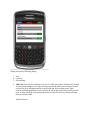
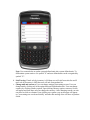
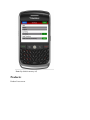
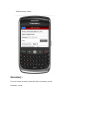
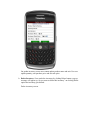
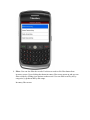
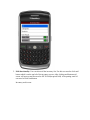
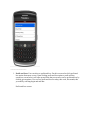
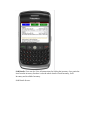
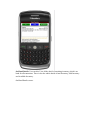
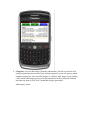
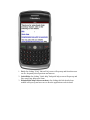
Goods Order Inventory System - BlackBerry User Manual Table of contents Introduction System Requirements Registration Settings Products My Orders Inventory Sales More Introduction: "Goods Order Inventory System" is an inventory tracking system that gives up-to-date details information on each item in inventory. You may track exactly how much inventory came in, how much is on hand and how much goes out. You can also manipulate the profit and loss based on inventory details. System Requirements: In order to use our Goods order application, you will need: a. BlackBerry OS 5.0 or above Application icon will show on your BlackBerry phone as shown below. Once the application icon is showing on device just Click the icon to run the application. Registration: When user open "Goods Order Application" first time Registration screen opens where user have to do registration. Note: Registration Screen appear only once when user uses application for the first time On Registration screen following things are there: 1. 2. 3. 4. 5. First name field(required field). Last name field(required field). Email ID field(required field). Terms and Condition. Registration button. The user can see Terms and Condition screen by clicking Terms and condition row. Terms and condition Screen For registration user need to fill following: 1. 2. 3. 4. First name(required field). Last name(required field). Email ID(required field). User need to click the check box which is at Terms and Condition. Settings: User can do the settings from this section of application. For this user need to click settings options from more screen. Upon clicking settings options settings screen will open up(see screen below). Setting screen have following things: 1. Unit. 2. Currency. 3. Sale tracking. a. Add Unit: User can also add units of its own. For this user need to click any unit say unit or metric from settings screen. Upon clicking any unit the units screen will open up and user need to click Add button which is on the right top of the setting screen. Upon clicking Add button add unit screen will open up and on that screen user need to put unit name in enter unit field. After putting the name user need to click save button and after that unit will get added. Add Unit Screen a. Delete Unit: User can delete the user defined units. To do this user need to select the unit from list. After that click on Delete there will be a pop up screen asking "do you want to delete this unit" if user click Delete option unit will get deleted. Delete Unit Screen: Note: User cannot delete or update system defined units also system defined units. To differentiate system unit we use symbol "S" and user defined units can be recognized by symbol "U". b. Sale Tracing: If track sale by inventory is ON then user will sale from sales list and if track sale by inventory is OFF then user will sale from product list. c. Change unit and currency: User can change settings from settings screen. User can change unit by clicking any of the option between English and metric. User can change currency by clicking currency option. Upon clicking currency option a currency Screen will appear and from there user can change the currency. After changing currency or unit user need to click save button. Upon clicking save option a pop up message will appear up "your settings are saved successfully" and after this message user will move to product screen. Note: By default currency is $ Products: Product Lists screen: User can add product from this section of application. There are two products by default and user can delete those products also. User cannot delete the product if it has been used in rest screens of application i.e. in my orders, sales, inventory etc. User can add product by clicking "Add" which is at the right top of the product screen. After clicking that button add product screen will open. On add product screen there are number of fields: a. b. c. d. e. f. Category(required field). Product name(required field). Purchase price(required field and user can enter value up to 10 digits). Sale price (required field and user can put enter value up to 10 digits). Unit(required field). SKU#(required field and user can put value up to 7 digits). Add product screen: Update and Delete Product: Update and delete products from product section of application: a. Delete Product: User can update product by clicking on any particular item in the product list. After clicking any Item there will appear a update screen on clicking "Update" button the item will be updated. On clicking Delete button there will be a popup screen saying “Do you want to delete this product “. If user clicked delete button the product will get deleted and if user clicked cancel button the product will not get deleted. Delete product screen: b. Update Product: User can update product by clicking on any particular item in the product list. After clicking any Item there will appear an update screen user can update purchase price and sale price and unit name. User cannot edit category, product. on clicking "Update" button the item will be updated Update product screen: Search functionality: User can also search products by their name. For this user need to put product name in the search field it will search required criteria. Note: 1. User can add two product of same name with different Sku# number. 2. Two products cannot have same SKU# number. My Orders: User can add orders from my orders section of application. My Orders screen: 1. Add Orders: User has to click Add button which is on right top of the orders screen. After clicking Add button product list opens up and from that product list user can select product. After selecting product and clicking on add button Add orders screen will open up. On add orders screen: a. Product name(user cannot change product name). b. Unit purchase price(user can update this field and user can put value up to 10 digits). c. Unit sale price(user can update this field and user can put value up to 10 digits). d. Quantity(required field and user can put value up to 10 digits). e. Unit (required field and user can also change the unit). After filling all these fields user can click save button. Upon clicking add button order gets added to order list. Add orders screen: 2. Update delete order: User can also update and delete the orders. a. Update order: User can update product by clicking on any item in Order List. After clicking on any Item update Screen will appear from here user can update unit purchase price, unit sale price, quantity and unit. User cannot edit product name. Update order screen: b. Delete orders: User can delete an item from Order List by clicking on delete button. After Clicking on delete button there will be a pop up message box which contains message "Do you want to delete this order ". click "Delete" button to delete the order product, click "Cancel" button the product will not get deleted. Delete order screen: 3. Mail functionality: User can also mail the order list. To do this user need to click mail button which is on the top left of the orders screen? After clicking mail button a mail screen will open up and user need to fill "To" field(required field). After putting email id user can click send button. Mail screen for orders: 4. Sorting functionality: User can also sort the orders. For this user need to click Sort button from my orders screen. Upon clicking sorting button order sorting screen will open up and from there user can sort order list by name ascending, name descending, date ascending and by date descending. Order sorting screen: 5. Filter functionality: User can also filter the records by clicking filter button from my orders screen. Upon clicking the filter button order filter screen will open up and from there user can filter records by clicking any of the given options. User can filter by all, by categories, by products and by date range. Order filter screen: 6. Fulfill order functionality: To fulfill order, user need to click "fulfill" button. scroll the cursor Down the Order List Items will appear with the checkbox select any of them to fulfill Inventory when checking any check box the corresponding item will be selected with green background color now "fulfill" button will be named as "Done" click on done the Inventory Add screen appears enter the required field values in Inventory Add screen click on "Save" button the fulfilled item will be removed from order list and new entry appears in Inventory List and Also record moves to "Closed Order" section in More section of the project. a. Product name(user cant edit the product name). b. Quantity(required field and user can insert up to 10 numeric digits). c. Unit(user can edit the unit field). d. Unit purchase price(required field and user can enter up to 10 numeric digits). e. Purchase total price(required field and user can enter up to 10 numeric digits). f. Unit sale price(required field and user can enter up to 10 numeric digits). After filling all required fields when user clicks "Save" button the record gets added in inventory. Add inventory screen: Inventory: User can create inventory from the below inventory screen. Inventory screen: 1. Add Inventory: User can add inventory by clicking Add button "in More Section's Inventory Listing" which is at the top right corner of the inventory screen. Upon clicking Add button a product list screen will open and from that screen user can select product. Select any Item from the Product List click on Add button the add inventory screen will open up(see below figure) which contains: a. Product name(user cant edit the product name). b. Quantity(required field and user can add up to 10 numeric digits). c. Unit(user can edit the unit). d. Unit purchase price(required field and user can add up to 10 numeric digits). e. Purchase total price(required field and user can add up to 10 numeric digits). f. Unit sale price(required field and user can add up to 10 numeric digits). Add inventory screen: After filling all the required values user need to click Save button. Upon clicking add button the record gets added up and user can see that record in inventory list on inventory screen. 2. Update delete Inventory: User can also update and delete inventory. a. Update Inventory: User can update inventory by clicking any Item in Inventory Lis. after clicking any item there will appear an update screen. (see screen below). click on update to update an inventory Item. Update inventory screen: On update inventory screen user cannot update product name and unit. User can update quantity, unit purchase price and unit sale price. b. Delete Inventory: User can delete inventory by clicking Delete button a pop up message will appear up “do you want to delete this inventory” on clicking Delete option the inventory gets deleted. Delete inventory screen: On update inventory screen user cannot update product name and unit. User can update quantity, unit purchase price and unit sale price. 3. Sorting: User can also sort the records. For this user has to click sorting button which is on inventory screen. Upon clicking that button inventory sorting opens up and from there user can sort record by clicking any of the given option. User can sort record by name ascending, name descending, date ascending and date descending. Inventory sorting screen: 4. Filter: User can also filter the records. For this user need to click filter button from inventory screen. Upon clicking that button inventory filter screen opens up and user can filter records by clicking given options on that screen. User can filter record by all, by categories, by products and by date range. Inventory filter screen: 5. Mail functionality: User can also mail the inventory list. For this user need to click mail button which is on the top left of the inventory screen. After clicking mail button mail screen will open up and user need to fill TO field(required field). After putting email id user need to click send button. Inventory mail screen: Sales: User can add records to sales also user can sort and filter the record. Sales screen: 1. Add Sales: User can add record to sales. For this user need to click Add button from sales screen. Upon clicking Add button a product list screen will open up and user need to select any product and click Add button. After clicking Add button any product sales entry screen will open up which comprises of: a. Product name(user cant edit this field). b. Unit(user can edit unit). c. Purchase price(user cant edit this field). d. Sale price(required field and user can put up to 10 numeric digits). e. Quantity(required field and user can put up to 10 numeric digits). Sales entry screen: After filling all required fields when user clicks Save button the record gets added and user can see that record on sales screen in sales list. 2. Update sales record: User can also delete and update the sales records. a. Update record: User can update Sales by clicking any Item in Sales Lis. after clicking any item there will appear an update screen. (see screen below). click on update to update the Sales Item. User can not update product name, unit and unit purchase price. However user can update quantity and unit sale price. Update sales screen: b. Delete record: User can delete Sales by clicking Delete button a pop up message will appear up “do you want to delete this inventory” on clicking Delete option the inventory gets deleted. Delete sales screen: 3. Sorting: User can also sort the sales record. For this user need to click sort button.Upon clicking sort button sales sorting screen(see below screen) will open up and user can sort the records according to given options. For sorting user need to click any of the options given on the screen. User can sort records by name ascending, by name descending, by date ascending and date descending. Sales sorting screen: 4. Filter: To filter records user need to click filter button from the sales screen. Upon clicking filter button sales filter screen(see screen below)will open up and from there user can filter the sales record. User can filter record by all, by categories, by products and date range. To filter the record user need to click any of the above options. Sales filter screen: 5. Mail functionality: User can also email the sales record list by clicking mail button which is on top left of the sales screen. Upon clicking mail button a new message screen will open up after that user need to put email id in To field (required field). After filling To field user need to click send button to send an email. Mail screen for sales screen: More: More section consist of: 1. Profit and Loss. 2. Closed orders. 3. Inventory on Hand. 4. Category. 5. Settings. 6. User Profile. 7. Support Feedback. 8. Export Database. 9. Referral Request. 10. Help. --------------------------1. Profit and Loss: User can also see profit and loss. For this user need to click profit and loss option from more screen. Upon clicking profit and loss option a profit and loss screen(see screen below) will open up and from that screen user can see profit and loss by clicking given options. User can see profit and loss for today, this week, this month, this year and by selecting begin and end date. Profit and Loss screen: 2. Closed order: User can also see closed orders. For this user need to click closed order option from more screen. Upon clicking closed order option a closed order screen will open up and from there user can see closed order list. User cannot edit the closed orders. User can sort and filter the closed order list by clicking sorting button and filter button respectively. Closed order screen: 3. Inventory on Hand: User can also see Inventory on hand. For this user need to click inventory on hand option from more screen. Upon clicking inventory on hand option a screen will open up and from there user can see inventory on hand list. User cannot edit the closed orders. User can sort and filter the closed order list by clicking sorting button and filter button respectively. Inventory on hand screen: Inventory Added: User can also View all transactions for Adding the inventory for a particular item in the inventory list there is also the whole details of total Inventory, Sold Inventory and Available Inventory. Added Inventory screen: Sold Details: User can also View all transactions for Sailing the inventory for a particular item from the inventory list there is also the whole details of total Inventory, Sold Inventory and Available Inventory. Sold Details Screen: On Hand Details: User can also View all the detail of remaining inventory which is on hand for all transactions. There is also the whole details of total Inventory, Sold Inventory and Available Inventory. On-Hand Details screen: 4. Categories: User can add category from this functionality. For this user need to click category option from more screen. Upon clicking categories screen will open up which contains category list. User can Add Category by clicking "Add" button. Upon clicking "Add" button Add Category screen will open up and user needs to fill name field and after that user need to click "Save" button and category gets added. Add category screen: Update Categories: User can also delete or update category from this screen by clicking "Edit" button scroll to down there will appear two buttons "Delete" and "Update" before updating and deleting user need to select an item from category list when user click on "update" new update screen will appear on clicking "Save" button category will be updated Update category screen: Delete Categories: User can Also Delete Category by on clicking on "Delete" button category will be deleted if having 0 Items. Delete Category screen: Note: a. There are two by default categories and user can also delete those categories. b. Also user cannot add two categories of same name. 5. All Transactions: User can View All Transactions through the All transaction Screen. there are items which are added into the inventory and sold from the inventory and product List. the item which are sold from the Inventory Having the green Icon beside its name. (see screen below). All transactions screen: 6. Settings: User can change settings from this section of application. For this user need to click settings options from more screen. Upon clicking settings options settings screen will open up(see screen below). Settings screen: a. Change unit and currency: User can change settings from settings screen. User can change unit by clicking any of the option between English and metric and also user can change currency by clicking currency option. Upon clicking currency option currency Screen will appear and from there user can change the currency. After changing currency or unit user need to click save button. Upon clicking save option a pop up message will appear up "If you change these settings, new settings will be applied throughout the system. Are you sure you want to apply these settings?". If user clicks "Yes" currency will be changed everywhere. Settings Screen b. Add Unit: User can also add units of its own. For this user need to click any unit say unit or metric from settings screen. Upon clicking any unit the units screen will open up and user need to click Add button which is at the top right of the Add unit screen. Upon clicking Add button add unit screen will open up and on that screen user need to put unit name in enter unit field. After putting the name user need to click save button. unit will get added . Add unit Screen Upon clicking save button a pop up message will appear as shown below. c. Delete Unit: User cannot delete the system defined unit. However user can delete User defined units. For this user need to click any of the unit English or metric unit. Upon clicking a unit screen will open up after that user need to select any unit which is user defined unit. Click on delete button a pop up message will appear up "Do you want to delete this unit" if user clicks "Delete" option a unit will get deleted. Delete unit Screen Note: User cannot delete system defined units. System defined units can be recognized by symbol "S" and user defined units can be recognized by symbol "U". d. Sale tracking: After clicking on Sale Tracking button scroll the cursor up it will change the Button Label On to Off and vice versa. If track sale by inventory is ON then user will sale from sales list and if track sale by inventory is OFF then user will sale from product list. 7. User profile: To view user profile user need to click user profile option from more screen. Upon clicking user profile, a screen will open up and user can update first name field, last name field and email id. User can also email, to do this user need to click mail button from user profile screen. Upon clicking mail button user mail screen will open up and on that user need to fill TO field (required field). After filling “TO” field user need to click send button for sending the mail. User profile screen: On clicking mail button user mail screen opens up. 8. Support/feedback: User can also give feedback. For this user need to click support/feedback option from more screen. Upon clicking support/feedback a screen (see screen below) will open up and user can type feedback. After typing feedback user need to click send button. Upon clicking send button feedback screen will open up and user can send email from there. Support/feedback screen: After clicking send button feedback screen will open up. 9. Export database: User can also take back up of database. For this user need to click “Export database” option from more screen. Upon clicking Export GOIS Database (see screen below) a screen will open up and user need to click Export GOIS Database button. Upon clicking button export database screen will open up and user need to fill TO field (required field). After that user need to click send button to send the email. Export GOIS database screen: After clicking Export GOIS Database button following screen will open up: 10. Referral request: User can also refer GOIS application to someone. For this user need to click referral request option from more screen. Upon clicking referral request, a screen (see screen below) will open up and user need to click “Invite Friends” button. Upon clicking the button invite screen will open up and user need to fill TO field (required email field). After filling TO field user need to click send button to send an email . Referral request screen: After clicking invite button below screen will open up. After that user need to click send button to send the referral request: 11. Help: From this section user can take help about the application. In help section user can see FAQ, Quick help and Help (detailed help with screen shot). For seeing help section user need to click help option from more screen. Upon clicking help option help screen will open up (see below screen). Help screen: 1. FAQ: On clicking "FAQ" link an FAQ screen will open up and from there user can see frequently asked questions and answers. 2. Quick Help: On clicking "Quick help" link quick help screen will open up and user can get any helps user wants. 3. Help(detailed help with screen shots): On clicking this link detailed user manual will open up and user can see how the application works in detail.