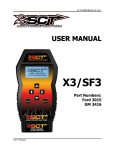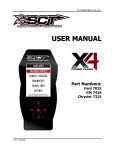
1
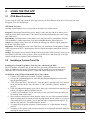
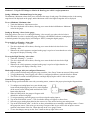
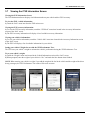
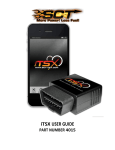
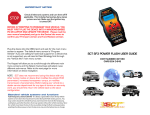
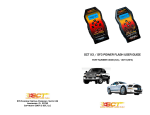
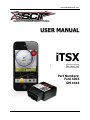
SCT PERFORMANCE, LLC. USER MANUAL iTSX Part Numbers: Ford 4015 GM 4416 User’s Manual SCT PERFORMANCE, LLC. *This product is not legal for sale or use in California on pollution controlled motor vehicles (Excludes 4015EO) IMPORTANT NOTES It is always a good idea to turn-off any vehicle systems that may become active during the tuning process such as cooling fans, fuel pumps etc. to avoid draining the vehicle’s battery. To disable these functions, consult your vehicle’s owner’s manual and remove the fuse for each of these systems. Also be sure to turn-off the vehicle's stereo and HVAC system. Make sure the ignition key is turned OFF before you connect your device to the vehicle. Plug the device into the OBD-II port and wait for them main menu screen to appear. The default menu screen is “Program Vehicle”. If you are using the device for custom tuning, you will need to read the vehicle strategy first through the “Vehicle Info” main menu screen and send that information to your custom tuning dealer. (See Section 4.1) SCT does not recommend using this device with any other tuning module or device that modifies the vehicle PCM parameters, increases horsepower, torque or modifies transmission characteristics. Before taking your vehicle to the dealer service department for any type of service or warranty work, you should first return the vehicle back to the stock configuration. Check engine warning lights can be reset by simply unplugging the battery cables from the battery for 5-10 minutes. Diagnostic trouble codes can also be read and cleared through the “Vehicle Info” menu. IMMEDIATE CONSUMER ACTION REQUIRED! YOU MUST REGISTER YOUR iTSX DEVICE WITHIN 30 DAYS OF PURCHASE TO VALIDATE YOUR 1 YEAR LIMITED WARRANTY. YOU CAN REGISTER YOUR DEVICE FROM OUR HOMEPAGE AT WWW.SCTFLASH.COM User’s Manual SCT PERFORMANCE, LLC. USER'S MANUAL TABLE OF CONTENTS 1. GENERAL INFORMATION ........................................................................................................... 1.1 Product Limited Warranty ............................................................................................................. 1.2 Device Firmware & Tune Revision Updates................................................................................. 1.3 About Your SCT Device ............................................................................................................... 2. GETTING STARTED ....................................................................................................................... 2.1 Installing the iTSX App ................................................................................................................ 2.2 Pairing the iTSX accessory to your mobile device ....................................................................... 2.3 Loading Custom Tunes to the iTSX .............................................................................................. 2.4 Reconnecting your iTSX accessory to the iTSX App ................................................................... 2.5 Un-Pairing the iTSX accessory for use with a different mobile device ........................................ 3. Using the iTSX APP.......................................................................................................................... 3.1 iTSX Menu Overview ................................................................................................................... 3.2 Installing a Pre-Loaded Tune File ................................................................................................. 3.3 Returning Your Vehicle to Stock .................................................................................................. 3.4 Using the iTSX Performance Test feature .................................................................................... 3.5 Using the iTSX Analogs and Gauges to Monitor & Data Log ..................................................... 3.6 Reading & Clearing Diagnostic Trouble Codes (DTC) using the iTSX ....................................... 3.6 Viewing the iTSX Information Screen .......................................................................................... 3.7 Reading Vehcile Strategy .............................................................................................................. 4. ADDITIONAL FEATURES ............................................................................................................. 4.1 Stock Upload for GM Vehicles ..................................................................................................... 5. iTSX TROUBLESHOOTING........................................................................................................... 6. CONTACTING SCT PERFORMANCE .......................................................................................... User’s Manual SCT PERFORMANCE, LLC. 1. GENERAL INFORMATION 1.1 SCT Performance, LLC Limited Warranty for iTSX What Does This Warranty Cover? This warranty covers any defects or malfunctions in your SCT iTSX product within the warranty period set forth below, subject to the following conditions and limitations. How Long Does The Coverage Last? This warranty lasts for a period of one (1) year following the date of sale by SCT of the iTSX product to the original SCT dealer/distributor; provided, however, the duration of this warranty will be extended to one (1) year from the date of original purchase by the consumer from the SCT dealer/distributor so long as the consumer submits the required online registration information within thirty (30) days of purchase, as provided below. All implied warranties, including warranties of merchantability and fitness for a particular purpose are limited to the warranty period set forth above. What Will SCT Do? SCT will, at its option and as its sole obligation under this warranty, replace or repair any iTSX product that has a defect(s) in manufacturing, material and/or workmanship provided that SCT is notified of the claim within the warranty period provided herein. SCT will not be liable for, nor will it reimburse the consumer for any fees, charges or expenses for shipping and/or handling costs associated with the return to SCT of any defective iTSX products sent in for replacement or repair. What Does This Warranty Not Cover? Any damage and/or other problem(s) caused by abuse, misuse, neglect, vandalism, accident, act of God (e.g., flood, fire, lightning), or other cause beyond the reasonable control of SCT is/are not covered. Also, any damage or problem resulting from faulty or improper installation is not covered and shall be the responsibility of the installer. SCT IS NOT LIABLE FOR AND HEREBY EXCLUDES ANY AND ALL INCIDENTAL, SPECIAL OR CONSEQUENTIAL DAMAGES RELATING TO THE PRODUCTS COVERED BY THIS WARRANTY. This is the consumer’s exclusive warranty and is in lieu of all other warranties, express or implied, except as may be required by applicable law. Without limiting the generality of the foregoing, SCT shall not be liable for any breach of any other written or oral warranties given to the consumer by any third party(ies) such as those (if any) given to the consumer by dealers or distributors of the products. How Do You Get Service? In order to be eligible for service under this warranty you MUST complete the online registration information within thirty (30) days of purchase. To register your iTSX product, please log on to www.sctflash.com, click on “Warranty Registration” and follow the simple steps provided on the website. If you do not have internet access, or encounter difficulties with the online registration process, please contact SCT at 407.774.2447. To initiate a claim under this warranty, you can either log on to the SCT website and follow the warranty claim instructions or you can call 407.774.2447 and instructions will be provided. Can This Warranty Be Transferred? This warranty is not transferable and applies only to the consumer who originally purchased the iTSX product. How Does State Law Apply? This warranty gives you specific legal rights, and you may also have other rights which may vary from state to state. Pertinent state law shall control for what period of time following the sale a consumer may seek a remedy under the implied warranty of merchantability or fitness for a particular purpose. Some states do not allow the exclusion or limitation of incidental or consequential damages so the above limitation or exclusion may not apply to you. For questions regarding SCT’s products or warranties please contact SCT at 407.774.2447. User’s Manual SCT PERFORMANCE, LLC. DISCLAIMER OF LIABILITY THIS IS A HIGH PERFORMANCE PRODUCT. USE AT YOUR OWN RISK. Do not use the iTSX product (the “Product”) until you (the “Buyer”) have carefully read this Disclaimer of Liability (this “Disclaimer”). The installation and use of this Product indicates that you have read and understand, and accept all of the following terms of, this Disclaimer: SCT Performance, LLC (the “Seller”), shall not be responsible for the Product’s proper installation, use and service. If you choose to install and use the Product without a dealer’s assistance, you assume full responsibility for the proper installation and application of the Product. If the Product was installed and/or programmed by a dealer, the Buyer shall look solely to the dealer who installed the Product and/or programmed the vehicle with respect to any responsibility for the installation or application of the Product, the programming of the vehicle, and any service and support needed by the Buyer with respect thereto, as well as any damage that may be done to vehicle components as a result of modifications made by the dealer. The Buyer is responsible to fully understand the capability and limitations of his/her vehicle according to manufacturer specifications, warnings and instructions and agrees to hold the Seller harmless from any damage or injury resulting from failure to adhere to such specifications, warnings and/or instructions. The Buyer is also responsible to obey all applicable federal, state, and local laws, statutes, and ordinances when operating his/her vehicle, and the Buyer agrees to hold Seller harmless from any violation thereof. The Seller’s Limited Warranty for this Product is the Buyer’s exclusive warranty and is in lieu of all other warranties, express or implied, except as may be required by applicable law. Without limiting the generality of the foregoing, the Seller shall not be liable for any breach of any other written or oral warranties given to the Buyer by any third party(ies) such as those (if any) given to the Buyer by dealers or distributors of the Product. Consult your vehicle warranty before using this Product. Under no circumstances will the Seller be liable for the voidance of the Buyer’s vehicle warranty. Rather, the Buyer assumes all risk and responsibility if an automotive manufacturer and/or dealer voids the Buyer’s vehicle warranty due to use of this Product. Operate your vehicle at all times in a safe manner. Regardless of any capability, feature or function of the Seller’s Products, the Buyer understands and acknowledges that it is the Buyer’s sole responsibility to ensure that (A) the motor vehicle is operated in a safe and legal manner, (B) the motor vehicle is not driven faster than the lower of the speed limit or the speed rating of the tires on the vehicle in which the Seller’s product is installed, and (C) the maximum RPM or speed rating of the engine is not exceeded while operating the motor vehicle. In no case will the Seller be held liable, and the Buyer assumes all risk and responsibility, for any property damage, personal injury and/or death that may occur in the event the Buyer operates the vehicle in an unsafe manner, violates the law or exceeds the above mentioned limits. Please check your local, state and federal laws to determine if you are within your rights to modify your vehicle’s controller. The Seller makes no representation or warranty, express or implied, that the use of its Products will comply with local, state, or Federal emission levels, noise levels or safety standards. The Buyer assumes all responsibility for such use and compliance. The Seller recommends that the Buyer temporarily remove this product from his/her vehicle when having the vehicle serviced by a dealership or other service facility. Failure to do so may cause erroneous diagnostic readings or misdiagnosis of vehicle problems. The Seller assumes no liability for failure to do so. Without limiting the foregoing, should the Buyer decide to conduct any performance tests in connection with the use of Seller's Products (including but not limited to tests in conjunction with the performance screens of any such Products), such performance tests should (A) only be conducted by a passenger in the vehicle (to avoid distracting the driver) and on a closed course and (B) never be conducted on streets, highways or other public ways. The Buyer acknowledges that he/she is not relying on the Seller’s skill or judgment to select or furnish goods suitable for any particular purpose, and the Buyer hereby waives all remedies or liabilities, expressed or implied, arising by law or otherwise, or whether or not occasioned by the Seller’s negligence. THE BUYER HEREBY WAIVES ALL LIABILITY CLAIMS AGAINST THE SELLER OF ANY KIND OR NATURE, INCLUDING LIABILITY FOR PROPERTY DAMAGE, PERSONAL INJURY OR DEATH, TO THE FULLEST EXTENT PERMITTED BY LAW. ADDITIONALLY, BUYER ACKNOWLEDGES AND AGREES THAT SELLER IS NOT LIABLE FOR AND HEREBY EXCLUDES ANY AND ALL INDIRECT, INCIDENTAL, SPECIAL OR CONSEQUENTIAL DAMAGES RELATING TO THE PRODUCTS COVERED BY THIS DISCLAIMER. The Seller’s Limited Warranty for this Product gives you specific legal rights, and you may also have other rights which may vary from state to state. Pertinent state law shall control for what period of time following the sale a consumer may seek a remedy under the implied warranty of merchantability or fitness for a particular purpose. Some states do not allow the exclusion or limitation of incidental or consequential damages so the above limitations or exclusions may not apply to you. THIS DISCLAIMER IS A MATERIAL CONDITION OF SELLER’S WILLINGNESS TO SELL THE PRODUCT TO BUYER. IN THE EVENT THAT THE BUYER DOES NOT AGREE WITH THIS DISCLAIMER, THE BUYER MAY PROMPTLY RETURN THIS PRODUCT, IN A NEW AND UNUSED CONDITION, WITH A DATED PROOF OF PURCHASE, TO THE PLACE OF PURCHASE WITHIN FOURTEEN (14) DAYS FROM DATE OF PURCHASE FOR A FULL REFUND. User’s Manual SCT PERFORMANCE, LLC. 1.2 Device Firmware & Tune Revision Updates From time to time, you may wish to update your device to the latest version of firmware or tune revision. For step by step instructions on how to update your SCT device, visit www.SCTFLASH.com and click on the Tech Support link. Make sure you have returned your vehicle back to stock before updating your unit. NOTE: If viewing this document online you can click on the following link to download the SCT Device Updater: SCT Device Updater 1.3 About your SCT Device Available Gasoline Tunes: 93, 91, 87 octane and economy as applicable. Available Diesel Tunes: Performance, Street, Towing. Note: Not all options are available for all vehicles. iTSX VIN locks (marries) to a single vehicle. You cannot use the device to tune a new or different vehicle, until you have returned the original vehicle back to stock, which will unlock the device. You can only change vehicles 5 times before the unit is permanently locked. To reset the Changes or Unlock device you will need to contact SCT. Service charges do apply. Standard pre-programmed tuning files are designed for vehicles with minor performance modifications such as; cold air kits, high-flow exhaust systems, and other basic modifications. Vehicles that have aftermarket superchargers or turbochargers will require custom tuning, which can be purchased only through authorized SCT Custom Tuning Dealers. To locate a dealer near you use the dealer locator on the SCT website at www.sctflash.com. If you later add a blower, turbo or nitrous to your vehicle or add a more ‘wild’ naturally aspirated combination of parts, you will need to obtain a custom tune from an SCT dealer. The iTSX programmer is flexible enough so that your original investment will not be lost – it can be loaded with a custom tune from the SCT dealer. Read your vehicle’s warranty carefully before installing or using this Product. You are solely responsible for determining whether use or installation of this Product will negate or diminish any applicable warranty coverage. Under no circumstances will the Seller be liable for the voidance of all or any part of the Buyer’s vehicle warranty. Rather, the Buyer assumes all risk and responsibility if an automotive manufacturer and/or dealer voids the Buyer’s vehicle warranty in whole or in part due to use or installation of this product. The stock file is stored during initial programming. The stock file stays on the programmer until returned to stock. You should always return your vehicle back to stock before taking your vehicle in to any auto service facility or before updating your device. The iTSX is NOT legal for sale or use in California on pollution controlled motor vehicles User’s Manual SCT PERFORMANCE, LLC. 2. GETTING STARTED 2.1 Powering on the iTSX Installing the iTSX App: The iTSX App is a free download from the Apple App store on your iPod, iPhone or iPad device. 1. To install the iTSX App on your mobile device, search the Apple App store for the phrase "iTSX". 2. Once located, touch the "Install" button within the store to automatically download and install the iTSX App. iTSX Installation & Setup: There two ways to power on the device. If you’d like to flash you vehicle, you will need to use the Vehicle instructions below. If you are looking to update or load custom tunes onto your device you will use the Computer instructions below. Using the Vehicle Locate the vehicle’s OBD Diagnostic port. This connector is usually located under the vehicles dash board on the driver’s side. The port may be covered with a cap or compartment door labeled OBD Diagnostic Port. If the connector pins are covered or the port is located behind a compartment door, remove the cap or open the compartment door. Connect the OBD connector from the Livewire TS to the vehicles OBD Diagnostic port. Using the Computer User’s Manual Install SCT Device Updater before connecting your unit via USB (Updater Download) Locate the computers USB port. This port can be found on the front or the back of the computer, if using a laptop the ports will usually be on either side of the laptop. Using the USB cable provided connect the USB end of the cable to the PC and the other to the bottom of the Livewire TS SCT PERFORMANCE, LLC. 2.2 Pairing the iTSX accessory to your mobile device Once you have connected the iTSX accessory to your vehicle's OBD-II diagnostic port, you can now "pair" the accessory to your iPod, iPhone or iPad using the Bluetooth wireless feature on your device. To "pair" the iTSX Accessory to your mobile device: 1. From the Home screen of your iPod, iPhone or iPad device, touch the Settings icon to enter the Setting area of your device. 2. Select the General option from the list of available settings and select Bluetooth from the list of menu items. 3. If the Bluetooth setting is currently "Off", turn the Bluetooth wireless feature "On" by sliding the "On / Off" switch to the "On" position. 4. Once Bluetooth is "On", your device will search for available Bluetooth signals that are currently within range and in "Discoverable" mode. 5. The iTSX accessory will appear in the list of available devices for "pairing". 6. If the iTSX is currently "un-paired", it will appear as "Not Paired" next to the device name. 7. To "pair" the iTSX accessory with your device, simply touch the iTSX item in the list of available devices. 8. Once "paired", the status of the iTSX accessory will change to "Connected" and "pairing" is complete. 9. To exit the Bluetooth Settings area, press the "Home" button on the face of your device. 10. If "pairing" of the the iTSX accessory is unsuccessful, see the "iTSX Troubleshooting" section of this manual for help. 2.3 Loading Custom Tunes to the iTSX Once your SCT custom tuning dealer has emailed you your custom tunes you will need to load them onto your iTSX accessory. 1. Locate the email containing the custom tune(s), touch the email to select it. 2. You will see your tune(s) attached. If you do not see the files, you must scroll to the bottom of the email to find them. 3. Touch the tune you would like to send to your iTSX device by touching the tune name. you will be prompted to open the tune in “iTSX, select it. 4. The iTSX app will open automatically, you will get a chance to rename the tune file if desired. If you wish to leave the name the same simply select OK. User’s Manual SCT PERFORMANCE, LLC. 2.4 Reconnecting your iTSX accessory to the iTSX App If you have already "paired" your mobile device to the iTSX accessory, there is no need to repeat the "pairing" procedure. Each time the iTSX accessory is plugged into the vehicle and your mobile device is within Bluetooth range, the iTSX accessory will automatically "reconnect" to your mobile device. If the iTSX fails to automatically "reconnect" to your mobile device, see the "iTSX Troubleshooting" section of this manual for help. 2.5 Un-Pairing the iTSX accessory for use with a different mobile device NOTE: Not properly "un-pairing" the iTSX accessory before attempting to use it with another device may result in the iTSX accessory becoming un-responsive and non-discoverable in the Bluetooth setup area. Be sure to follow the "UnPairing" procedure below to properly "un-pair" your iTSX accessory. Un-Pairing the iTSX accessory: 1. From the iTSX App, touch the "Info" menu item from the main screen. 2. When presented with the "Info" screen, touch the "Un-Pair from Accessory" menu item in the "Accessory Info" section of the "Info" screen. 3. The iTSX App will display a confirmation screen to confirm you wish to "un-pair" from the iTSX accessory. 4. To confirm you wish to "un-pair" the iTSX accessory, touch the "Yes, UnPair" button to "un-pair" the accessory, or touch "No, don't UnPair" if you wish to cancel "un-pairing". 5. When "un-pairing" from the iTSX accessory has completed, a message box will be displayed prompting you to complete the final steps in "un-pairing". 6. To complete the "un-pairing" procedure, exit the iTSX App by pressing the "Home" button on the face of your device. 7. From the Home screen of your iPod, iPhone or iPad device, touch the Settings icon to enter the Setting area of your device. 8. Select the General option from the list of available settings and select Bluetooth from the menu items. 9. The iTSX accessory will appear in the list of available devices and will be listed as "Not Connected". 10. Touch the blue circular arrow button to the right of the "Not Connected" text. 11. Once displayed, touch the "Forget this Device" button. 12. To confirm you wish to "Forget this Device", touch the red "Forget Device" button at the bottom of the screen. 13. The iTSX accessory is now "un-paired" and can be connected to another vehicle or another IOS mobile device. User’s Manual SCT PERFORMANCE, LLC. 3. USING THE ITSX APP 3.1 iTSX Menu Overview To start using the iTSX App, touch the iTSX App icon on your iPod, iPhone or iPad device. Once open, the main navigation screen will be displayed. iTSX Menu Overview: From the main navigation screen, you can choose the feature you wish to utilize. Program: The Program section allows you to install a "tune" into your vehicle or allows you to return the vehicle back to stock "tune" if the vehicle has already been loaded with a "tune" using your iTSX device. Performance: The Performance section allows you to test your vehicle's performance using the iTSX 0-60MPH, 1/4 Mile elapsed time, Top Speed, 60-0MPH Braking elapsed time test. Gauges: The Gauges feature allows you to monitor & data log your vehicle's engine parameters live on the iTSX gauge display. Diagnostics: The Diagnostic section of the iTSX allows you to Read & Clear Diagnostic Trouble Codes (also known as DTC, Check Engine or Service Engine Soon lights) found in the vehicle's computer. Settings: The Settings section contains valuable information on the iTSX accessory, allows you to successfully Un-Pair the wireless accessory from your mobile device, and allows you to set your vehicle's weight for use with the iTSX Performance Test. 3.2 Installing a Custom Tune File Installing a Pre-Loaded Performance Tune into your vehicle using the iTSX: The iTSX features pre-loaded, dyno proven tune files specifically calibrated for your vehicle. These pre-loaded tune files have been rigorously tested on both the street and on the dyno to ensure they deliver maximum Horsepower, Torque and Throttle Response to your vehicle. To install one of the iTSX pre-loaded tune files in your vehicle: 1. From the iTSX main screen, touch the “Program” menu item. 2. To begin the programming process, touch the Start Programming button located on the Start Programming panel. 3. iTSX will prompt you to “Turn Key On”. Turn the vehicle’s ignition to the “On” position, but do not start the vehicle. Once the vehicle is “On”, touch the “Continue” button to proceed. 4. iTSX will automatically identify your vehicle. Once your vehicle has been identified, your vehicle will appear in the Pre-Loaded Tunes list. 5. To install a pre-loaded tune file for your vehicle, select your vehicle from the vehicle list by touching on the vehicle name. 6. Once you have selected your vehicle from the vehicle list, you will be prompted with the option to change the User Options that will be programmed into the vehicle. If you do not wish to change the User Options, you can skip this step by using the default options. To skip this step, touch the “Use default Options” button. 7. To change the User options, touch the “Unlock Options” or “Adjust Options” button to proceed. 8. To change a User Option, select the option from the list of displayed adjustable options by touching the option in the list. User’s Manual SCT PERFORMANCE, LLC. 9. Select the desired setting for the User Option(s). 10. When you have finished adjusting the User Options, touch the “Approve these options” button to continue. 11. The iTSX will show a summary screen of the User Options you adjusted and is now ready to send the pre-loaded tune file and User Options to the vehicle. To proceed, touch the “Send this to the Vehicle” button. 12. iTSX will prompt you to “Turn Key Off”. Turn the ignition key to the “Off” position. 13. Once the ignition key is “Off”, you will then be prompted to touch the “Turn Key On”. Turn the ignition key to the “On” position, but do not start the vehicle. 14. Once the key is in the “On” position, the iTSX will begin the process of installing the preloaded tune file into your vehicle. During this process, your factory tune file will be backed up and stored in the iTSX accessory, and the iTSX will install the pre-loaded tune file. 15. IMPORTANT: During the installation process, do not remove the iTSX accessory from the OBD-II port or walk away from your vehicle with your mobile device. Doing so may cause the iTSX to lose the Bluetooth wireless connection. 16. Once the installation process is complete, the iTSX will display the “Download Complete. Turn Key Off” message box. To continue, touch the “End Programming” button. 17. It is now safe to remove the iTSX accessory if required and operate your vehicle. 3.3 Returning your Vehicle to Stock Returning your vehicle to the factory tune file: During the pre-loaded tune file installation, your factory tune file was backed up and stored in the iTSX accessory. If at any time you need to return your vehicle to the factory tune file, follow the procedure below: 1. From the iTSX main screen, touch the "Program" menu item. 2. When the Start Programming panel appears, touch the “Return to Stock” button to begin the process of returning your vehicle back to the factory tune file. 3. To return your vehicle to the factory tune file, touch the “Send this to Vehicle” button to proceed. 4. iTSX will prompt you to “Turn Key Off”. Turn the ignition key to the “Off” position. Once the ignition key is “Off”, you will then be prompted to touch the “Turn Key On”. Turn the ignition key to the “On” position, but do not start the vehicle. 5. The iTSX will install your factory tune file back into your vehicle. IMPORTANT: During the return to stock process, do not remove the iTSX accessory from the OBD-II port or walk away from your vehicle with your mobile device. Doing so may cause the iTSX to lose the Bluetooth wireless connection. 6. Once the installation process is complete, the iTSX will display the “Download Complete. Turn Key Off” message box. To continue, touch the “End Programming” button. 7. It is now safe to remove the iTSX accessory if required and operate your vehicle. User’s Manual SCT PERFORMANCE, LLC. 3.4 Using the iTSX Performance Test Feature Using the iTSX Performance Test to measure your vehicle’s performance: The iTSX Performance Test feature allows you to measure the 0-60MPH, 1/4 Mile ET, Top Speed & 60-0MPH braking ET all in one convenient test. NOTE: Prior to using the iTSX Performance Test, you must configure your vehicle’s weight in the iTSX Information screen. For information on entering / configuring your vehicle’s weight, see the “Setting your vehicle’s Weight for use with the iTSX Performance Test:” section of this user manual. To begin measuring the performance of your vehicle: 1. Touch the Performance menu item from the main iTSX screen. 2. Once the iTSX Performance screen is displayed, bring your vehicle to a complete stop. 3. While maintaining a complete stop with the vehicle, touch the "Test Start" button on the iTSX performance screen. 4. The iTSX is now ready to measure your vehicle's performance. 5. When ready, release the vehicle's brakes and accelerate. The iTSX will sense the vehicles movement and will automatically begin the test. 6. Once you have reached a 1/4 mile, the iTSX will automatically stop counting the elapsed time and will have measured the 1/4 Mile & 0-60MPH elapsed time. 7. To complete the 60-0MPH braking test, slow the vehicle and maintain 60MPH for a few seconds. When ready, safely apply the vehicle's brakes and bring the vehicle to a complete stop. 8. Once the vehicle has come to a complete stop, the iTSX will display the Performance Test Overview screen with the results of the performance test. Saving or E-Mailing the iTSX Performance Test results: iTSX allows you to share the results of your vehicle's performance tests with your friends or save them for later reference. Sharing your Performance Test Results: 1. To share the results of your vehicle's performance with your friends, touch the "Send" button at the bottom of the Performance Test Overview screen. 2. iTSX will automatically open an email message and attach a Performance Test Overview for you to email to your friends or to yourself. 3. To send the overview, simply enter an email address when prompted, and touch send. Saving your Performance Test Results: 1) To Save the results of your Performance Test for later reference, touch "Save" at the bottom of the Performance Test Overview screen. 2) Your Performance Test results will be saved in your photos for future reference. User’s Manual SCT PERFORMANCE, LLC. 3.5 Using the iTSX Gauges to Monitor & Data Log Using the iTSX Gauges to Monitor & Data Log your vehicle’s engine parameters: iTSX can monitor & data log your vehicle's engine parameters in real-time on the gauges included in the iTSX App. Monitoring & Data Logging Setup: In order to monitor your vehicle's data via your mobile device, some setup is required in the iTSX App. 1. To begin the setup of the gauges, touch Gauges from the iTSX main screen. 2. The iTSX gauges will appear on the screen. If you have previously setup monitoring & data logging, the gauges will automatically connect to your vehicle and begin displaying data from your vehicle. Selecting a Gauge Layout & Data Configuration Set to Monitor / Data Log: 1. To setup the gauges for the first time, touch anywhere on the screen to enter Editing mode and touch the "Edit" button when displayed. 2. When in Editing mode, the gauges will appear with dashed lines around each gauge. 3. Touch the Panel Settings button to open the Panel Settings screen. Selecting a Data Configuration Set: Data Configuration sets contain a group of parameters that are available for monitoring with your vehicle. 1. To select a Vehicle Data Configuration set, touch the Data Configuration box located at the top of the Panel Settings screen. 2. Choose from one of the available Vehicle Data Configurations by touching the set in the list. Selecting a Gauge Layout: 1. To select a gauge layout, navigate through the available layouts flick left or right on the gauge images. 2. Once you have selected a gauge layout, touch the "Save Panel" button to continue. Configuring each Gauge to Monitor Specific Vehicle Parameters: 1. To assign a vehicle parameter to each gauge, touch anywhere on the screen to enter Editing mode and touch the "Edit" button when displayed. 2. When in Editing mode, the gauges will appear with dashed lines around each gauge. 3. To assign a vehicle parameter to each gauge, touch the gauge you wish to assign the vehicle parameter to. Assigning a Data Source to the gauge: 1. To assign a parameter to the gauge, touch the Data Source box located at the top of the Configure Gauge panel. 2. In a drop down menu, a list of available parameters for monitoring will be displayed. 3. Using flick motion, scroll through the list of available parameters. 4. To select a parameter, simply touch the item in the list. Assigning a Custom Label to the gauge: 1. To assign a custom label or name to the gauge, touch the label text box. 2. The device keyboard will be shown, allowing you to enter a custom label / name for the gauge. User’s Manual SCT PERFORMANCE, LLC. Continued… Using the iTSX Gauges to Monitor & Data Log your vehicle’s engine parameters: Setting a Minimum / Maximum Range for the gauge: The Minimum / Maximum values allow you to customize the range of each gauge. The Minimum value is the starting range that will be displayed on the gauge, and the Maximum value is the highest range that will be displayed. To set a Minimum / Maximum value: 1. Touch the Minimum / Maximum text box. 2. The device keyboard will be shown, allowing you to enter the desired Minimum / Maximum value for the gauge. Setting up Warning / Alerts for the gauge: Each gauge allows you to set a Low & High Warning / Alert to notify you when a desired value is reached. When the set value is reached, the gauge will display a WARNING indicator (round gauges) or the background of the gauge display will change to “RED” (rectangular digital gauges). To set up the Low Warning / Alert value: 1. Touch the “Warning <=” text box. 2. The device keyboard will be shown, allowing you to enter the desired value for the Low Warning / Alert. 3. Whenever the vehicle parameter assigned to this gauge is equal to or lower than the set value, the gauge will display a Warning / Alert. To set up the High Warning / Alert value: 1. Touch the “Warning >=” text box. 2. The device keyboard will be shown, allowing you to enter the desired value for the High Warning / Alert. 3. Whenever the vehicle parameter assigned to this gauge is equal to or higher than the set value, the gauge will display a Warning / Alert. Monitoring the Gauges with your configured Parameters: 1. Once you have finished configuring the gauge, touch the “Save Gauge” button to return to Editing mode. 2. To begin Monitoring / Data Logging your vehicle’s configured parameters, touch the blue Save button. 3. The iTSX will scan the available parameters, and begin displaying the vehicle’s data on the gauges. Connecting External Analog Inputs Using the wiring specifications that came with your analog sensor, connect to the proper pins using the diagram below. 1. To configure an Analog Input, have your desired gauge layout already displaying on your device, touch anywhere on the screen to enter Editing mode and touch the “Edit” button when displayed. 2. When in Editing mode, the gauges will appear with dashed lines around each gauge. 3. To assign an Analog, touch the gauge you wish to assign the analog input to. 4. Tap on the field labeled “source”, a list of available analogs will appear to choose from. 5. Select the proper Analog Input based on the correct wire color used to hook up your analog sensor. 6. Tap on the field labeled “units”, in this list we have preloaded the most commonly used analog sensors. Choose the appropriate sensor, if the sensor you are using is not part of this list you will be able to input a custom equation at the bottom of this list. When done tap on the “save gauge” button. 7. To save the changes, now tap on the “Save” button on the top right of the screen. User’s Manual SCT PERFORMANCE, LLC. 3.6 Reading & Clearing Diagnostic Trouble Codes (DTC) Reading & Clearing Diagnostic Trouble Codes (DTC) using the iTSX: The iTSX allows you to Read & Clear any diagnostic trouble codes (DTC’s) found in your vehicle’s computer. Should a “Check Engine” or “Service Engine Soon” light appear on your dashboard, you can easily read & clear the DTC code(s) using the iTSX device once you have corrected the issue(s) causing the code(s). Reading your vehicle’s DTC Code(s): 1) From the iTSX main screen, touch the “Diagnostics” menu item. 2) When presented with the Diagnostics panel, touch the “Read Codes” button located at the bottom of the panel. 3) iTSX will prompt you to “Turn Key On”. Turn the vehicle’s ignition to the “On” position, but do not start the vehicle. Touch the “Ok” button to continue. 4) The iTSX will attempt to read any DTC codes stored in the vehicle’s computer. Clearing your vehicle’s DTC Code(s): Once you have corrected / repaired the issue(s) causing the displayed DTC code(s), you can clear these codes using the iTSX device. To clear the DTC Code(s) found in your vehicle’s computer: 1) From the iTSX main screen, touch the “Diagnostics” menu item. 2) When presented with the Diagnostics panel, touch the “Clear Codes” button located at the bottom of the panel. 3) iTSX will prompt you to “Turn Key On”. Turn the vehicle’s ignition to the “On” position, but do not start the vehicle. Touch the “Ok” button to continue. 4) The iTSX will attempt to clear any DTC codes stored in the vehicle’s computer. 5) If any DTC codes are found, touch the DTC Code number to view a brief description of the codes meaning. If you require more information on the displayed DTC code(s), consult with your local garage or dealership to determine the cause of the DTC code(s). Other resources such as www.obd-codes.com may have helpful information as to the cause of the code(s). User’s Manual SCT PERFORMANCE, LLC. 3.7 Viewing the iTSX Information Screen Viewing the iTSX Information Screen: The iTSX Information Screen displays vital information about your vehicle and the iTSX accessory. To view the iTSX / vehicle information: 1) Touch the “Info” menu item from the iTSX main screen. Viewing the iTSX accessory information: 1) To view the iTSX accessory information, touch the “iTSX Info” menu item located in the Accessory Information section of the “Info” screen. 2) The iTSX accessory information will display a list of available accessory information. Viewing your vehicle’s information: 1) To view your vehicles information, touch the “Vehicle Info” menu item located in the Accessory Information section of the “Info” screen. 2) The iTSX will display a list of available information for your vehicle. Setting your vehicle’s Weight for use with the iTSX Performance Test: The iTSX uses your vehicle’s weight to estimate the vehicle's performance during the iTSX Performance Test. To set your vehicle’s weight: 1) Touch the “Weight” menu item located in the Vehicle Information section of the “Info” screen. 2) When prompted, enter the weight of your vehicle in “lbs.” and touch the Save button when finished. NOTE: When entering your vehicle’s weight, if you add the weight of the fuel in the vehicle and the weight of the driver & any passengers, the iTSX Performance Test results will be more accurate. User’s Manual SCT PERFORMANCE, LLC. 4. USING DEVICE FEATURES 4.1 Stock Upload for GM Vehicles Upload Stock Feature gives the Customer / Dealer the ability to upload the file that is currently in the veihcle’s PCM onto the SCT Tuner. The dealer can then import this file to their SCT Advantage Tuning Software and use it as their tune starting point. The Upload Stock Feature will also give your SCT dealer the ability to tune 2008+ GM vehicles. 1. From the iTSX main screen, touch the "Program" menu item. 2. When the Start Programming panel appears, touch the “Upload Stock” button to begin the process of saving your vehicle stock file. 3. You will receive a brief description of what you are about to do, select “Continue” to proceed. 4. You will be presented with the options to choose between “Bluetooth” and “USB” a. Bluetooth – this will save the stock within your itsx and allow you to immediately email it to your custom tuning dealer. b. USB – choosing USB will save the stock file to your iTSX accessory. You will be able to connect your accessory via USB to your PC and use SCT software to retrieve your stock file. 5. Whichever one of the two options that you choose, please follow all “Key On” and “Key Off” instructions on the screen to successfully upload your stock file, 5. COMMON QUESTIONS When I connect the tuner to the vehicle, it doesn’t power on. - Check for blown fuses for OBDII/Cigarette Lighter. Does the tuner have to stay plugged in to keep the vehicle tune? - No. After tuning, you can disconnect the programmer. Can I stack/combine the SCT programmer with another chip or tuning module? - All Chips/Tuning Products must be removed before tuning with SCT. Can I tune more than one vehicle with this programmer? - You may only tune one vehicle at a time. You may return to stock and tune another vehicle up to 5 times. Can the vehicle be tuned while the engine is running? - No. This can cause severe damage to the vehicle and PCM. Should I return to stock before taking my vehicle to the dealer? - Yes. This prevents the tuner from becoming locked if the dealer updates the PCM. Can I use a lower octane fuel than the tune file lists? - No. You must use the same octane fuel that the vehicle is tuned for. Failure to use the proper octane can result in severe engine damage. I have a supercharger / nitrous oxide on my vehicle; can I use a pre-loaded tune? - No. The pre-loaded tune files within the iTSX are designed for minor performance modifications such as cold air kits, high flow exhaust systems and other basic modifications. For high horsepower modifications such as superchargers, nitrous oxide or turbo systems, you will need to have your vehicle tuned by an SCT Custom Tuning dealer. User’s Manual SCT PERFORMANCE, LLC. 6. CONTACTING SCT PERFORMANCE SCT Support Options Your first option for support is your SCT Dealer. SCT also offers several support options after you have purchased your iTSX. You can contact us via phone, Fax, Chat or US postal service. Phone Support – 1.866.297.6298 (Mon-Fri, 9am-7pm Eastern) Email Support : [email protected] Live On-Line Chat Support (available at www.sctflash.com) To initiate a claim under this warranty, you can call 407-774-2447 and instructions will be provided. 4150 Church Street - Suite 1024 Sanford, Florida 32771 www.SCTFLASH.com User’s Manual