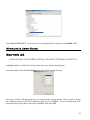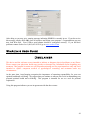
1
WinAura User’s Guide
Table Of Contents
Foreword............................................................................................................................................................................. 2
Introduction........................................................................................................................................................................ 3
Section 1: Input Configuration ....................................................................................................................................... 4
Section 2: Video Imaging Configuration...................................................................................................................... 6
Section 3: Printer Setup .................................................................................................................................................... 8
Section 4: Reports ............................................................................................................................................................ 11
Section 5: WinAura Modes and Languages .............................................................................................................. 12
Section 6: WinAura Display Screen............................................................................................................................. 14
Section 7: Advanced Camera Configuration............................................................................................................. 16
Section 8: Configuring Your Canon Webcam ........................................................................................................... 19
Section 9: Advanced WinAura Features .................................................................................................................... 21
Section 10: Recording A Session .................................................................................................................................. 22
Section 11: Saving A Session ......................................................................................................................................... 23
Section 12: Playing A Saved Session ........................................................................................................................... 26
Section 13: Snapshots...................................................................................................................................................... 28
Section 14: Helping Hand.............................................................................................................................................. 29
Section 15: Sessions ......................................................................................................................................................... 30
Section 16: Report Personalization and Text Editing .............................................................................................. 32
Section 17: Using The Aura Camera 6000 with WinAura ...................................................................................... 34
Section 18: Important Information about Your Dongle Security Key.................................................................. 35
Section 19: Additional Useful Information ................................................................................................................ 36
Section 20: Troubleshooting.......................................................................................................................................... 38
VIDEO......................................................................................................................................................................... 39
PRINTING ................................................................................................................................................................. 41
DONGLE .................................................................................................................................................................... 41
GENERAL .................................................................................................................................................................. 43
Section 21: Instructions for Installing your Sea-level RS232 USB to Serial Adapter......................................... 45
Section 22: Configuring your USB to Serial Adapter to Work Correctly ............................................................ 47
Disclaimer ......................................................................................................................................................................... 49
Index ............................................................................................................................................................................... 50
1
WinAura’s User Guide
FOREWORD
This document is part of an ongoing effort here at Aura Imaging to improve the customer support for
WinAura. You, as a user can be a great help to the WinAura community, with your feedback and new
findings. Together, we can evolve and further continue developing groundbreaking technology.
The best way to contact Customer Support is to telephone Aura Imaging at 650-261-0195 or to email us
at [email protected]. When sending an email place “WinAura Support” in the subject box and
provide the version number, date and time listings (there should be two of them). Please also include a
description of what computer, printer, and camera you are using. Then include a brief explanation of the
problem you are having. We at Aura Imaging pride ourselves in our ability to provide excellent on hand
Customer Support. Know that we will resolve your problem as soon as possible.
With those words in mind we hope that you find your on going experience with Aura Imaging a pleasant
one. Welcome to the WinAura community.
2
WinAura’s User Guide
Introduction
Congratulations, on the purchase and installation of your Progren Aura Imaging System for the PC.
This guide will take you through the steps to operate and make the best use of your WinAura program.
If you have not yet installed the software required, please refer to the WinAura Quickstart guide.
To activate the WinAura program, double click the WinAura icon on your desktop, you will then see the
WinAura Setup Menu (as seen in figure 1-A).
Figure 1-A
Please take time to become familiar with this screen, as it will be the main root window from which all
WinAura functions begin.
3
WinAura’s User Guide
Section 1
Input C onfigurat ion
Start with the input options on the top left side of the screen (as seen in figure 1-B). This is where you
select how the WinAura system will receive your aura information. If you are using the WinAura video
system without the Aura Cam 6000 always click on the
Aura Camera 6000 click on the
6000
button. If you are using the Polaroid®
button. If you wish to print directly from the Aura Camera
when you take a Polaroid® photo click
and click
if you also want
to print the image on the print out.
Figure 1-B
4
WinAura’s User Guide
Section 1
Input C onfigurat ion
You may be prompted to choose a port number. In most cases the default port of
should
work. In some unique cases the computer may communicate with the sensor box on a different port
number. If you are using a special serial adapter with your laptop PC, you will likely have to select a
port number that correlates to where your PC assigned the serial port to be.
For instructions on
configuring your serial adapter card please refer to the ‘USB to serial port adapter’ instructions included
with this system.
The other features inside the red outlined area of the dialog box (seen just below the Aura sensor
box button):
Expanded Spectrum makes the colors stand out.
High Sensitivity makes the colors change in response to the slightest change in your bio field.
Photo Stable mode stabilizes the colors so they tend not to change.
Accurate Colors makes the aura colors match the Aura Camera 6000. It adjusts colors to be warmer.
Deactivate this feature and the color balance will shift toward the cooler colors.
5
WinAura’s User Guide
Section 2
Vid eo Ima ging C onfigurat ion
Now we have to select our camera choices. The Creative Live Ultra web cam recommended for your
WinAura system will capture the image of the person in front of it and place that image on the aura
display. You may have to do some minor camera adjustments to get it to work properly, but once you
do, it is complete, stored and should not require adjustment again.
Figure 1-C
If you are using a web camera, select the box labeled
by clicking on it once. For the ‘Camera
Driver’ section just below you should not need to select a different driver unless you experience some
problems with the software. For reliable service, install only one camera driver. Some camera drivers
will make other camera drivers not work even if they have been uninstalled so we recommend leaving
that option alone. The option named Aura Live shown within the red-circled area will cause the aura
image to move along with the person’s movement in the camera image. Aura Live works best with a
solid black or white background and a light source coming from the same direction as the camera.
6
WinAura’s User Guide
Section 2
Vid eo Ima ging C onfigurat ion
A 40-watt full or wide flood lamp is about right. (Make sure you don’t purchase a beam style floodlight
sometimes called an energy saver as it will put a small bright light on the person’s face and leave the rest
of the person in the dark.) By selecting the Aura Live option the Holistic Session option becomes
available. ‘Holistic Session’ will show the healer’s aura color as it connects to the client’s aura color.
This coincides with the Helping Hand Colors option, which sets the colors. This advanced option will
set the aura to move only after the energy worker turns up their energy field.
Selecting the Initial Aura Sizes option will adjust the size of the display in which WinAura will startup
for example if you adjust to large WinAura will start in large size. We recommend you leave this set to
small.
Lastly
determines whether or not the WinAura program will play sound along with the
aura images. Please note that turning on the Audio will slow down the WinAura performance. This
advanced feature may freeze your WinAura program so keep this feature off most times.
7
WinAura’s User Guide
Section 3
Print er Setup
Figure 1-D
This section is where you configure and adjust your printer settings to work with the WinAura program.
If you have a printer installed on your computer, it should list the name of your printer in the large box
just below the word printer. Please click on that box to assure it turns yellow and will therefore be
useable by your system (as seen in figure 1-D).
For printing select the HTML output option just below it. You should start with “Print with Preview”
until you are certain of the correct hardware functions. In most cases use the standard
letter size paper option. In the next section you will have to perform a one-time adjustment to your
printer settings. Pay attention to the button marked ‘HTML Settings’ output that you see here. If you
turn off
you will get a slightly different style printout. You may have problems printing on
some printers. Try it out both and see for your self.
8
WinAura’s User Guide
Section 3
Print er Setup
One Time Printer Configuration Required:
At the WinAura Setup Menu click on the
button then the
button. On the next
screen click the Start button. On the next page click the Print button and wait for the page to load into
your browser. Once in the browser, select Page Setup (as seen in figure 2-A) from the File menu.
NOTE: If you print from the File menu, you can also change your printer speed.
Note to Cannon IP 5200 printer users: If you are using the Cannon printers, you can set the printer
from the printer setup menu to Photo Glossily high quality, so when printing form HTML With Preview,
you can print photo quality snapshots on a 4X6 photo paper, and then click on high speed from the
Cannon HTML print menu, and print the report very fast, in low quality high speed. This is so you can
give your customer a photo quality snapshot and the 18-page report in draft mode.
Figure 2-A
9
WinAura’s User Guide
Section 3
Print er Setup
In the Page Setup dialog use Size = 8 ½” X 11” USA or, for non-USA set =A4. Clear any text from the
Header and Footer box.
Enter the following settings:
Delete any text in the Header box
Delete any text in the Footer box
Set Left margin to .5”
Set Right margin to .2”
Set Top margin to .2”
Set Bottom margin to .2”
Set Orientation to Portrait
Please Note:
If your printer is correctly configured according to our instructions and guidelines then WinAura
will produce high quality images and text printouts. If you encounter any errors such as fading
text, streaks in the images, or low resolution pictures, then please consult your printer’s operations
manual and make any needed adjustments in the printer’s own control panel. We at Aura
Imaging are only familiar with the operations of the select few printers we approve for our service.
Your individual print problems cannot be corrected by contacting us. Please keep the information
to contact your printer manufacturer handy.
10
WinAura’s User Guide
Section 4
Rep orts
Figure 1-E
The
option checked (as seen in figure 1-E) will set the reports to be the highly detailed
ten plus page printout. Click
to get an eighteen-page printout that includes the graphs. In
some cases you’ll probably want to conserve printer paper and ink by turning this option off. To turn the
Long Printout option off select the
option. The
prints the short report with a
very large picture. WinAura can print from within WinAura what ever you see on the screen by clicking
on “Print this Screen,” “Snapshot” prints up to three different 4X6 photos, “Snapshot,” “Snapshot
with graphs”, and “Snapshot of screen.” If you do prefer a longer printout, look for the Aurakey.doc
file in the WinAura directory. By default C:\Program Files\WinAura\Aurakey.doc. You may want to
make a shortcut to this file on your desktop to this file for convenient use. Refer to your Windows Help
menu for an explanation on how to create a shortcut. Aurakey.doc is a Microsoft Word document and
requires that Microsoft Word be installed on your computer.
11
WinAura’s User Guide
Section 5
WinAura Mod es a nd La ngua ges
Figure 1-F
Here we select the language in which you want WinAura to display its text. Select it according to the
local language. You may need to load your language from the WinAura install disk or select specialized
language from a CD provided by your local representative. For Chinese and Japanese you will need to
install NJ STAR software to see the text on the screen. To modify the text so as to personalize it for your
customers simply click on the turquoise box
. Scroll down to the bottom of the box that
appears and adjust each file according to the personalized text you want. For example, use Zip for zip
code, and type your name in the Name.txt file, Address in Address.txt, etc. All should be obviously
marked except “Photo Line 1” and “Photo Line 2” For more information see Section 9. The ‘Edit
Text’ feature is explained in the advanced WinAura options section.
12
WinAura’s User Guide
Section 5
WinAura Modes and Languages
Available Modes:
Aura Live
For showing the effects of energy work, with Aura Live the aura moves with subject’s
movements.
7 Chakra
For displaying the individual charkas, this is the full body image 7 Chakra works best
in large display mode with the subject of the image 2 to 3 meters (6 to 10 feet) back
from the camera. In this mode you will see a full body display with a ‘Chakra Egg’
imposed over the body.
You may have to adjust the camera up or down in order to
align the Crown Chakra (top Chakra) over the person’s head. See the section on Aura
Live for more information on aligning the chakras with the subject.
Photo
This mode is for high quality photographs or to show the effects of products on the
aura. This mode is best for taking photo quality snapshots of the aura and person. (See
advanced WinAura features Section 8 for detailed instructions.)
Research
Is a plain simple aura, reduced to left, right, center, heart, and throat.
WinAura Star Shows the aura in various areas of the body, front and back.
13
WinAura’s User Guide
Section 6
WinAura Display Screen
That is the end of the Setup Menu. Now we will examine the screen where we actually view the aura in
action (as seen in figure 3-A). Complete this screen by pressing ‘OK’ in the top left hand corner. The
aura display screen will then load. You get past this by selecting ‘Start’ on the top right side.
Figure 3-A
The first element we should notice is the text options listed at the very top, starting from left to right they
are:
TEST – This is used to test the aura system, clicking on this choice will display a demo aura if
everything is ok. Test is only seen if you do not have a sensor box selected.
SCREEN SIZE – This allows you to adjust the size of the aura display. Click large and you will see the
aura as a full screen display.
PRINT– This allows you to print the aura and printed report. Uses two key points.
VIEW TEXT - To view the text on your pc, works if you do not have a printer selected.
PRINTER SETUP - Allows you to adjust print options, such as quality, size, or select a different
printer.
SNAPSHOT – Take a photo quality capture of the aura image and person for printing out to high quality
photo paper. In three views select any one use two points each additional 4X5 or 4X6 print will use only
one extra point. All there views use 4 key points.
14
WinAura’s User Guide
Section 6
WinAura Display Screen
SAVE SESSION – This is to save a recorded aura session to hard drive or CD. (Explained in greater
detail in chapter 8)
VIEW GRAPHS – Allows you to toggle on and off the detailed graphs mode
CHANGE SETTINGS – returns you to the main configuration screen.
PRINT SCREEN – Create an exact printout of the screen full-page size as you see it on the screen.
1)
This is your main aura screen and is where you see your face and the aura around it. This is
also where the chakras, and star man configurations are displayed in small size.
2)
The quick switch segment is for quickly switching between modes. Click on the Star Man
image to switch to the WinAura star mode, or click on the chakra egg to view the Chakra Mode.
When in either of those two modes the option to switch back to the Aura Live camera mode will
be there. Quick Switch will take you to the photo image. To use the Aura Live image, Change
Settings on the bottom right of the screen.
3)
The average color bar tells you what your average overall aura color is. The arrow currently
points to your average color.
4)
The emotion meter can be used like a polygraph to detect sudden changes in the aura, and the
balance meter shows left side / right side balance.
5)
The Play Options Bar (seen in figure 3-A) is used for recording or replaying Aura sessions.
Explained in greater detail in section 8.
6)
The bar graph shows relative aura frequency. Warm colors create higher readouts.
7)
The body mind spirit chart shows your unique energy qualities and how they relate to your
overall balance
8)
The chakra changes chart shows the effects of outside influences on the aura
9)
The thermometer compares your temperature to average temperatures of others
10)
The aura rate adjustment bar adjusts the speed at which the aura fluctuates. If set to ‘fast,’ the
aura moves faster and the video moves slower. If set to ‘slow’ the aura slows down and the
video image moves faster.
15
WinAura’s User Guide
Section 7
Advance Camera Configuration
For Inside out and Creative Cameras
Now we must complete a one-time camera configuration to set it to properly function with WinAura.
Begin by loading the WinAura program, only this time from the input selection choose
Press
and then
in the top left corner.
Figure 1-A
Choose Start on the following screen. This will take you into the WinAura test mode. You should see a
purple aura over a camera image. Double click on the image window that contains the aura and the
image of what the camera sees. This should cause a new box to appear. For optimal quality set image
size in this box to 640 x 480. However doing this can cause some performance issues, namely the aura
16
WinAura’s User Guide
Section 7
Advance Camera Configuration
rate will slow down and overall any motion will become less smooth. Leave the Image Color Format
alone. Click ‘OK’ to proceed to the next step.
This window should appear.
This dialog box is where you adjust sharpness, brightness, and color depth. Increasing or decreasing
these values will impact the image. It is recommended you leave these settings as they are and move
forward by pressing ‘More’ pens the next dialog box.
17
WinAura’s User Guide
Section 7
Advance Camera Configuration
The setting for Automatic Gain Mode is what is important in this section. Set it to AGC Peak Mode if
you are using a solid black background. This setting is ideal for ‘Holistic Session’ otherwise for normal
backgrounds use AGC Center Average. Once you complete your selection click OK to finalize it.
Congratulations your system should be functioning perfectly now.
18
WinAura’s U ser Guide
Section 8
Configuring Your Canon Web Cam
First install your Creative Web cam using the instructions from Creative if you have any problems
contact Creative customer support. In order for your creative Webcam to operate properly with
WinAura you must disable the face-tracking feature. To do this simply load up the Creative camera
center by going Clicking on your start button, then going to programs to creative, then creative Webcam
center.
After clicking on the Creative web center it will load and immediately a screen will appear
prompting you to activate or disable face tracking.
19
WinAura’s U ser Guide
Section 8
Configuring Your Canon Web Cam
Turn this feature off by clicking in the off option and pressing ok.
If you have problems with Holistic Session turn off auto exposure and set brightness by hand.
20
WinAura’s User Guide
Section 9
Advance WinAura Features
F11 Combine Options
To make the aura brighter or dimmer in comparison to the subject, from inside WinAura, adjust the
Aura Rate from the lower right corner of the WinAura Display Screen (Section 6 of this User Guide) to
slow. Then press the F11 key to bring up the Combine Options menu. From this menu you can also
adjust the Intensity and Softness of the aura.
21
WinAura’s User Guide
Section 10
Recording A Session
To record a WinAura session, wait until after calibration; click the red button located below menu bar to
initiate recording session. (As seen in figure 3-A)
Figure 3-A
After you start recording you will see the camera icon appear in the top right corner of the WinAura
Small View screen. This informs you that you have begun recording. You can start recording form the
startup screen, WinAura small screen or from the “Change Settings” menu. It is best to start recording
from the Small View. You may then continue recording in a larger window by clicking on a large screen
size list in the menu bar and select small. Then you must press the stop icon (the gray square)
and look for the stop sign icon
22
WinAura’s User Guide
Section 11
Saving A Session
Simply click on the Save Session menu at the top of the win aura screen, and the following window will
appear.
from here click on the Burn button to begin the CD writing wizard. Simply click next and the process to
burn the files to a CD will begin.
23
WinAura’s U ser Guide
Section 12
Playing A Saved A Session
Put the CD in the CD player of your computer when it opens click on the Session AVI icon, if this does
not work open windows media player, some computers may have a media player icon on the desktop, if
yours does not, go through the start menu, the icon can be found in the All Programs section.
From the media player screen, click File and then Open.
From the open screen, select your CD drive from the top menu where it says Look In
24
WinAura’s U ser Guide
Section 12
Playing A Saved A Session
From this screen now select “Session.avi” by double clicking. The recording should now play. You may
be able to click one or two times on the screen showing the video to get to fill the screen. If you see the
water mark Camtisa in the middle of your screen you are using the demo version you should be able to
purchase a copy of Camtasia from us if you see this water mark.
25
Very Important: This is a new feature and you should make sure your customers know what the
procedure is for playing the WinAura session CD.
26
WinAura’s U ser Guide
Section 13
Snap Shots
Snapshot printing is a feature that allows you to print photo quality images on 4x5 or 4x6 glossy photo
paper. To activate this feature you must be in the Photo Session aura mode as described in Section 5.
You also must have a high quality printer that is capable of being fed 4x6 or 4x5 glossy photo paper.
Also remember to set your printer to photo setting/glossy paper if it is capable of such a feature.
Consult your printer operations manual for instructions on how to do this. Using this setting will
typically cause most printers to print very slowly.
For best results taking a snapshot, set WinAura input to Photo Stable and use Photo Session to adjust the
brightness of your web camera and to adjust the aura brightness from the Combine Options menu. Begin
by first placing your 4x6 paper in your printer feeder, load WinAura and select Photo Mode from the
setup menu. Then press ok to load the WinAura Display screen. Stand in front of the camera and place
your hand on the sensor box until you see the desired aura image you would like to capture. When ready
press the Snapshot button. A box will appear asking you if you want Snapshot only, Snapshot with
graphs, Snapshot of Screen. You can print all three. Print this screen will print whatever you see on the
screen After making your selection a dialog box will appear asking you if you want to print a report
along with the snapshot. It is possible to print the snapshot in photo mode and print the report quickly in
draft. Once the photo is finished printing choose, Yes if you’d like a report or No if you would not. For
best quality set your printer to a glossy photo quality mode. Be sure you are in HTML and that it is set
to Print with Preview. Refer to Section 3: Printer Setup for more information. From your HTML
preview, select Print from the File menu and then select plain paper and a higher speed setting from your
HTML preview page. After your 4x6 glossy photo is printed you can adjust your printer when you are
in HTML to high speed or draft mode allowing you to print the eighteen-page report very fast. The
quality will be lower so your customers get a photo quality photo and a draft quality printout. To adjust
the printer click the Start button at the lower left of the screen, then click on control panel and find
printers.
27
WinAura’s U ser Guide
Section 14
Helping Hand
Shows the level of energy shift during a healing session
The room should be above 22° Centigrade or 72° Fahrenheit. To put on the Helping Hand sensor, click
the Helping Hand Trainer Icon and start the Helping Hand Trainer program. Have the subject sit near
you. They do not put their hand on the sensor box. Stand quietly, hold your hand about the same height
you will have your hand when projecting your energy. Do not talk. Wait until the program stabilizes.
As you project your energy you may see the meters move showing energy is being moved. If the
indicator moves to the end of the scale, the program will turn off.
For less sensitivity adjust the
sensitivity down arrow below the words Energy Field 1 or Energy Field 2 to a lower setting. The
helping hand colors option is used to set the colors. This advanced option will set the aura to move only
after the energy worker turns on their energy. It is ideal for healing classes and is to be used in
conjunction with the Helping Hand Trainer software. Have your students use the trainer program. Note
the color they produce. Plug in your Helping Hand sensor in to the side of the sensor box that has the
switch in the middle place the Velcro sensors on your finger tips tight enough so the metal sensors touch
the finger but no so tight that it cuts off circulation. Place a large rubber band around your wrist so that
the wires go toward your elbow. Turn on Aura Live than set the Helping Hand color to the same color
they produced while working with the trainer. Using the Helping Hand sensor the aura will not move
until they turn on their energy. WinAura will sense the energy change and the aura will move giving
your student validation that there was an energy shift.
28
WinAura’s U ser Guide
Section 15
Sessions
Aura Live
For best results use with Aura Live from the Aura Images menu seen to the right side of the Start Up
menu. Aura Live can be used to automatically line up the aura with the subject. Aura Live will work
with Aura Live, Aura Photo, 7 Chakra, and Research views. Aura Live will not work with the WinStar
view. Place the helping hand sensor on your fingers. Keep the helping hand switch, located on the side
of the box with the red lights, in the down position. Stand to the subjects left side use a black or white
background and place a 40-watt flood lamp behind the computer web cam. Use a wide beam lamp not a
spot light type. Avoid energy efficient lamps. The subject should be sitting low in the screen on a high
chair so you can see the energy worker better. After the subject places their hand on the WinAura sensor
and the healer puts on the sensors as described above in the Helping Hand section you can turn on the
Helping Hand switch just before the healer enters the camera view for best results come in from the left
and move toward the subject slowly. Line up the image so you can see your face.
As you project your energy the color seen to their left will change to the color you are projecting. If the
subject’s color moves in color toward your color and your color changes and moves toward the subject’s
color you have successfully merged energies. Aura Live often works best if you stand on the subject’s
left side. Be sure to turn off the Helping Hand switch before the subject takes their hand off the sensor or
WinAura will go out of calibration.
Once you manually line up the aura, WinAura’s Aura Live will automatically keep the aura aligned with
the subject as long as they do not move to far to the left or the right. Note, however, that Aura Live’s
motion is limited. Adjusting the range of motion too wide will cause Aura Live to be less stable. If you
want to adjust the size start WinAura and set Input to None from your set up menu. WinAura will then
start in test mode. From the WinAura small screen press the ALT key and press one of the arrow keys.
The size of the box seen represents the size of the range. When using 7 Chakras you may have to
29
purchase a serial cable extension so the sensor box will reach far enough back. Usually 2.5 to 3.5
meters, 8 to 11 feet from the camera to the subject, either the subject can hold the sensor box or you
WinAura’s U ser Guide
Section 15
Sessions
can place the sensor box on a table. To keep things in calibration turn the helping hand switch down
before the subject takes their hand off the sensor.
Holistic Session
Holistic session is part of the Aura Live image selected from the Aura Images menu located to the left in
the setup menu. Follow all the same procedures used with Aura Live. The difference is profound. You
should see the energy workers aura move from the left side to center and right sides as the worker moves
their body. For best results start from the subjects left side.
30
WinAura’s U ser Guide
Section 16
Report Personalization and Text Editing
It is possible to modify all WinAura Reports to feature your company’s name and subject’s name. You
can even set the entire report to include whatever text you desire. This allows you to submit your own
interpretation of the aura colors as you see them.
Before attempting any modifications it is
recommended you backup the existing text to another directory. To do so click on My Computer and go
to the C:\Program Files\WinAura\ folder and copy the ‘Lang” (Language) directory to another location.
Modifying Text
To modify a report’s text, first select your language from the WinAura Modes and Languages Section.
Then press the Edit Your Text button and the following screen will appear.
31
WinAura’s U ser Guide
Section 16
Report Personalization And Text Editing
This is a list of all the various text files in WinAura that make up the many reports in our program. Any
one of these files is editable to include the text of your choosing.
The following is a list of the most
commonly used files. Scroll down all the way to the bottom to access these files.
Specific Files to Change
PhotoLine1: This changes the first line of text that appears beneath the photo in a WinAura report.
PhotoLine2: This is the second line of text beneath the photo. Typically people put a person’s name and
address in these two lines.
Company: This is where you can put the name of your company.
Street: Modifies the street address line
City: Modifies the city name
State: Modifies the state name
Zip: Modifies the zip code
Country: Adjusts the country displayed
Available Languages (when using a language other than English):
View the drop down choice for languages from the WinAura Modes and Languages Section.
•
•
•
•
•
•
•
•
American setting uses typical American English.
Chinese setting uses Chinese. Should print in Chinese and it will require NJ Star to see Chinese
on the screen.
English uses typical UK grammar and spelling.
Spanish uses Castilian or European Spanish spelling and grammar.
Mexican setting uses typical Central American grammar and spelling.
The Brazilian setting uses Portuguese.
The Deutsch setting uses German.
The Francais setting uses French.
32
•
The Soma is specialized text for Aura Soma products try it.
WinAura’s U ser Guide
Section 17
Using The Aura Camera 6000 With WinAura
You can incorporate the Aura Camera 6000 into your WinAura system. This allows you to print photos
directly from the Polaroid® Aura Camera and simultaneously print a report from the WinAura system.
1) Disconnect the printer cable from the Sensor Box hooked into the Aura Camera 6000.
2) There is a 9 pin serial cable that came with your Aura Camera 6000. It is a serial connector at
one end and a DBX 1/8 connector on the other. DBX 1/8-style connectors are the typical
connectors used for plugging headphones into a stereo system. Connect the DBX end of the
cable into the sensor box port labeled ‘option.’
3) Now plug the other end of this cable into the serial port on the back of your PC.
4) Load WinAura and on the Input section of main setup menu. Select Aura Cam 6000 and then
check the box labeled Button On Cam.
5) If you are using a PC camera, typically called a Web Cam, with your WinAura system, attach
that camera to the Aura Cam 6000 so that you see the same image in WinAura that the Aura Cam
6000 will capture.
6) Aim the camera at the subject of the photo; take the picture and WinAura will print a picture
from its camera and a report to follow. We use WinStar HTML view for this feature.
33
WinAura’s U ser Guide
Section 18
Important Information About Your Dongle Security Key
The Dongle key is a software copy protection device. This device assures that your purchase of
WinAura remains yours and the financial gain from the sale of Aura photography will go to you the
legitimate user of WinAura.
In order to provide you this safety and security the dongle must maintain a series of counts. Each time
you start WinAura or a new person touches the hand plate one count is used. If a Print out is taken two
counts are used and the number of counts remaining on the dongle go down Now “Snapshot” prints up to
3 different 4X6 photos, “Snapshot”, “Snapshot with graphs”, and “Snapshot of screen” the first one uses
two key points the second and third use only one key point. ”Print this screen” uses one key point it will
print the screen full size. Save session uses one key point also. If you print long printout with graphs it
will use one extra key point for the graphs.
When the dongle reaches zero, no more pictures can be taken. Contact us at Progen at 1-650-261-0190
to purchase a replacement dongle.
34
WinAura’s U ser Guide
Section 19
Additional Useful Information
If your printer is correctly configured according to our instructions and guidelines then WinAura will
produce high quality images and text printouts. You have two printer options regular and HTML,
HTML should be more reliable than regular print mode. If you encounter any errors such as fading text,
streaks in the images, or low-resolution pictures then please consult your printer operations manual and
make any needed adjustments in the printer’s own control panel. We at Progen are only familiar with
the operations of the select few printers we approve for our service your own individual print problems
cannot be corrected by contacting us. Please keep the information to contact your printer manufacturer
handy.
Left Right Configure:
35
The right color is Violet and the left side is seen as Turquoise. If your camera is set to Mirror, your
image will be seen backward on the screen. We suggest using Mirror because most people see
themselves as they see themselves in a mirror. This also makes it less confusing when they move.
WinAura’s U ser Guide
Section 19
Additional Useful Information
Compatible Digital Cameras:
•
he Creative Live Ultra for Laptops is limited to up and down adjustment or Creative Live
had full range of adjusting but the clip that holds the camera to the laptop is cheap and flimsy.
Better to use the Ultra for Laptops and add small tripod if necessary Creative Video Blaster
Webcam II USB. Note: Creative also made a “Creative Webcam Pro III”.
While the
Webcam II worked with WinAura, the Webcam Pro III did not.
•
Inside Out Networks Watchport/V USB or “PC Digital Webcam.” An excellent camera, one
of the best. This camera is now made by Inside Out Networks. Contact Vivid
Communications at 888-862-3292 and order the Watchport V.
•
Intel PC Camera Pro Pack: A very good camera comes with good software.
Note: Some cameras like the Logitech driver will set you computer to use only their drivers. Many other
camera drivers will not work without reinstalling Windows or using the Restore feature.
36
WinAura’s U ser Guide
Section 20
Trouble Shooting
Handplate:
Q: I get the message “ No Hand plate Connected” when I start WinAura.
A: First verify that the hand plate is indeed plugged into a serial port and that WinAura’s setup screen
shows a dot next to the entry for the port that the hand plate is connected to. It sometimes takes
several tries to get the hand plate started. When the No Hand Plate message comes up turn the hand
plate on, click ‘Retry’ and if the message comes up again, click ‘Retry’ again. You may have to
click the spot in the startup screen to select COM 2. Verify that the hand plate is hooked up to COM
1. While WinAura should be able to find the port the hand plate is on, if the hand plate is connected
to a COM port that is not supported by your computer, WinAura will not be able to find it.
If you are using a USB to serial adapter, be sure its software is installed and configured correctly.
There probably are settings to tell the adapter which COM port to emulate. COM1 or COM2 are the
best choices. If you have an internal modem in the machine, check its configuration to see which
COM port assignment it is using and avoid that one when configuring the adapter. If nothing works
when connected to the USB port, check the USB configuration in the BIOS. For more information
see Section 15.
Q: I get the message ‘No Handplate has been detected”
A: This could mean the hand plate is not properly connected via the serial port to the computer. This
may be because you are using a 3rd party USB to serial adapter. If you are using an adapter please
refer to its installation guide for correct configuration. If you are using the Sealevel adaptor call their
customer service (888) 365-4440. Otherwise please check all handplate connections to the computer,
assure that the handplate is turned on, restart the computer and try again. If the problem persists see
Section 12. If your system was working and then stopped, as a last resort try restoring. See the
Quickstart instructions for easy to follow instructions on restoring.
Q: Can I test the hand plate without WinAura?
A: Yes. Use CheckHandplate to test your hand plate from C:\Program Files\WinAura\CheckHandplate.
Or if you have an Interactive I disk handy, use it as follows: After you start your computer put the
Interactive 1 floppy disk in your A: drive, click the Start button in the lower left corner of your
screen, then click on ‘Programs’, then select ‘MS-DOS Prompt’. When you see C:\Windows, type
A: and press return. When you see A: on the screen type AUTOEXEC and press enter. This will
bring up the Interactive I program. If the hand plate is plugged into COM 1 it should work.
Interactive I will give an error message if it cannot talk to the hand plate. Place a hand on the plate
37
WinAura’s U ser Guide
Section 20
Trouble Shooting
and Interactive I will show your aura. When finished, press the Escape key at the upper left of
keyboard. Then follow the instructions on the screen.
Alternatively, you can use a terminal program such as Hyperterminal, Procomm, or Crosstalk.
Hyperterminal comes with Windows. It should be under Start: Programs: Accessories:
Communications. If it’s not installed on your system, you can install it from the Windows System
disk that came with your computer. Set your terminal program up for 9600 Baud, 8 bits, no parity,
one stop bit, and no handshaking. Select “Direct to COM [whichever COM port the hand plate is on]
Turn the hand plate off, then back on.
Press your Caps Lock key, then press the ‘A’ key. You should get back a line of numbers. Put your
hand on the plate and hold down the ‘A’ key. The hand plate will keep sending lines of different
numbers. If you can’t get these tests to work, repeat on another computer. If things still don’t work,
contact us at the address at the end of this document.
Video:
Q: After the Aura screen is displayed, the bottom of the screen is not visible
A: To make the full screen mode a little bigger, set the bottom toolbar to auto hide.
Click on the bottom bar with the right mouse button, click properties, then click on auto hide.
Q: After I enter my settings in the Setup screen and click ‘OK’, I get a box asking me to choose my
video capture driver.
A: This happens when WinAura thinks it wants to use a camera driver that isn’t installed properly or
doesn’t work with WinAura. If you’ve installed other camera software besides the one that you’re
using with WinAura, remove it as long as you are not using it with another program. We’ve seen this
a few times when there is more than one video driver installed. Using the Multimedia control panel
to disable the unneeded (for WinAura) driver seems to fix this. When you need to use the other
driver, just re-enable it.
Whenever you start WinAura, look at the Camera Driver selection in the Setup screen and be sure it
is set for your camera. It has a habit of changing itself, especially if there is more than one video
38
WinAura’s U ser Guide
Section 20
Trouble Shooting
capture device (camera) driver installed. We recommend that you disable or remove unneeded video
capture device drivers with the Multimedia control panel.
Q: The video image of the subject is very grainy or the colors have a “paint-by-number” look.
A: You need to reset the camera resolution. The following instructions are written assuming you have a
Watchport camera. Other cameras have similar controls. To set the camera’s resolution, first start
WinAura with the camera operating so you see the subject in WinAura’s window. Then place the
arrow cursor anywhere in the video image and double-click. (Some cameras may want you to rightclick on the image) If the camera set up box does not come up, try setting the Aura Rate to slow. If
this does not work, see Section 7. You will get a camera control window. Click the OK button in this
window and another control window will appear. This one will give you a choice of resolutions such
as 640 X 480, 320 X 240, etc. 640 X 480 will look better and is ideal for taking photos or snapshots.
320 X 240 should run faster and is ideal for Aura Live or Holistic Session because it will move
faster.
Q: The Aura looks grainy.
A: Use F11 from inside WinAura and adjust the softness to the desired setting. See Section 8 for more
information.
Q: I get an error message saying “Capture device already in use.”
A: This can be caused by Windows or the camera driver software getting confused about which USB
port the camera is on. USB devices should “enumerate” themselves to their ports when the computer
starts up or when they are plugged in. Sometimes they don’t. If this port confusion is happening,
you will also get an error message when you start the camera’s own software. If this happens, quit all
applications, then shut down. Unplug the camera, and restart. Let the system boot to the desktop,
then shutdown. Plug the camera into any available USB port and restart. You may see the system
messages advising you that the system has found new hardware and is installing its software. Let it
proceed. This will often clear this problem.
Always use the same USB port that you first connected the camera to when you installed it. That
also holds true for USB printers.
If you are going to be using a USB camera or printer, please install Win98 second version or XP. If
you still have trouble with USB printers, do a Win98 Live Update. (Be sure you can get on the
Internet, then choose Windows Update from the start menu, install any suggested Critical Updates,
39
WinAura’s U ser Guide
Section 20
Trouble Shooting
then any other system stuff. You don’t need to update Internet Explorer to use WinAura.) If your
system was working and then stopped, as a last resort try restoring. See the Quickstart instructions
for easy to follow instructions on restoring.
Printing:
Q: Everything works until I print. Then the subject’s video image freezes up. I have to restart the
computer to get going again.
A: We’ve seen this when the computer’s printer port wasn’t configured as recommended by the maker
of the printer. It was a Canon BJC 6000 (an excellent printer) and the instructions for this printer tell
you to go into the BIOS and set the printer port mode to ECP. We had left the port set to BiDirectional. After this was corrected the camera continued to work after printing. The computer’s
user manual should tell you how to use the BIOS.
Q: I set language to Chinese or Japanese it prints in HTML but does not show Chinese on the
screen
A: Contact us for a copy of NJ STAR and you will see Chinese on the screen.
Dongle:
Q: I get the message “WinAura cannot find dongle”
A: First check that the dongle is correctly connected to the parallel port in the back of your computer. If
it is properly installed then the likely cause of this issue is a bad or missing dongle driver. You can
run SentMed found in your WinAura folder from C:\Program Files\WinAura, this should fix the
problem. Try running Check Dongle. To Click on the CheckDongle.Exe program from the Check
Dongle box, click View and look at number 37 to see how many counts you have left. If number 37
is over 10 counts, your WinAura should function. If that doesn’t work, check to see if the driver is
installed by going to Start-Control Panel – Add or Remove programs. Then from the list of
programs scroll down to look for Sentinel system driver once you find it, click on it and select the
Change button to the right.
Try going to the WinAura folder. The path is C:\Program Files\WinAura
40
WinAura’s U ser Guide
Section 20
Trouble Shooting
And click on SentMed.exe. If that does not work try unplugging and re-plugging the dongle.
If you did not find the Sentinel system driver listed, then this means the driver was not properly
installed and you will need to re-install it from the WinAura disk. Go to our website,
www.auraphoto.com and download ‘Dongle not found.doc’ or call and we can fax or send one to
you.
This will prompt a new screen indicating it will re-install the driver. Click next until you get a screen
asking if you want to modify, repair, or remove. In this case choose repair. Then click next. After
that screen fades, confirm your selection by clicking on the install button. This will repair the
system driver, which will take a few seconds and then be complete. This should resolve your issue.
If you are using the Parallel dongle key and it still does not work after trying the above and you have
the printer and the dongle in the same parallel (printer) port, try seeing whether it matters if the
printer is on or off when you turn on the computer or when you start WinAura. If this doesn’t help,
try getting an add-on parallel port card and install it in your computer. If you have a choice, set it for
SPP and plug the
dongle into it. Then plug the printer into the original printer port. Consult the printer’s user manual
about the proper port setting, SPP, ECP, or EPP. Some printers are picky about this. The dongle, on
some computers which are set to SPP may need to be on its own port. Whatever port the dongle is
41
WinAura’s U ser Guide
Section 20
Trouble Shooting
plugged into, WinAura should find it. If your computer has USB ports, ask us for a USB dongle and
try using that. If you use the little cute easy to brake USB key under rugged conditions “Shows” you
should have a spar as the new little plugs can brake. If your computer is not shut down properly it
may switch USB ports on you. If this happens, just switch the camera with the USB dongle.
Sometimes this works. Remember to always quit all open applications before shutting down the
computer. The printer port’s SPP/EPP/ECP settings are changed in the BIOS setup screens. Consult
the user instructions that came with the computer. If you are using a USB to parallel converter see
Section 15. If your system was working and then stopped, as a last resort try restoring. See the
Quickstart instructions for easy to follow instructions on restoring.
GENERAL:
Q: When I start WinAura I see a violet aura on the screen even though I haven’t put my hand on
the hand plate.
A: A new feature has been added to the hand plate as of May 2000 to support the Helping Hand Energy
Trainer product. These hand plates have an 8-pin socket for the Helping Hand finger strap sensor
and a switch (mounted near the socket) to activate the finger strap sensor. When you run WinAura
the switch should be in the down position. If it is left up, WinAura gets confused and puts up the
violet aura.
Q: WinAura freezes after I run it for a few minutes.
A: This may be caused by the “Audio” feature. To prevent this from happening again, turn off the Audio
feature. This can be solved by opening the task manager. To do so, press and hold your CTRL key
down, while holding CTRL, press and hold down the ALT keys found bottom left of your keyboard.
Now while holding both of those keys down, find the delete or DEL key found on your keyboard
upper right, and press it. This should load up a screen that says “Task Manager” in the top left
corner. On this screen look for a tab that says “Applications” and click on it. From there, find
WinAura. You may need to scroll down. Click on the words Winaura once to highlight it, then press
the button that says “End Task” You will be prompted with a confirmation window asking you if
your really want to shut down WinAura, click on “end task” again and it should close the program
entirely.
Q: I click on Start but nothing happens.
A: Place you hand on the sensor box.
42
Q: In the WinAura screen, the colors seen in the aura don’t agree with the colors appearing in the
color bar.
A: WinAura has only 15 colors, including gray and white to use for this graph and may not match
perfectly.
Q: My Aura Camera 6000 photo does not match my WinAura printout.
A: Use the “button on cam” feature, or if you have an Aura Camera 6000 and a separate WinAura
sensor box, use the short print or WinStar view and print the long printout with graphs.
Q: HTML page does not look the way it normally does or does not work at all or it has the letters
HTML at the top and extra text at the bottom.
Trouble Shooting
A: Install Internet Explorer 6.0 from your WinAura CD and follow the instructions from Section 3 of
this document.
Q: My printer is printing too slowly.
A. Turn on HTML settings and set your printer from inside HTML to a higher speed. Note: high speed
means low quality
Q: I have received a WinAura update disk. How do I use it to update my software?
A: Place the new WinAura disk in your CD-ROM drive. And follow the instructions on the CD. You
should have a “How to Set Up WinAura” CD. Run this as a video and the CD will tell you how to
install WinAura. Or see our Quick Start manual.
Q: How do Warranty points work?
A: There are three events, which affect the warranty point count. Clicking the OK button on the setup
screen will deduct one count. Placing a hand on the hand plate will deduct one count. Printing a
report or snapshot will deduct two counts. Place the wrist strap on the subject’s wrist at the
beginning of the session, to insure the hand plate will deduct only one count per session.
Warrantee modules (dongles) are available with 4000 counts for $400.00. 2000 of these counts are
available to WinAura and 2000 are available to the Interactive series of programs. To read the
counts remaining on your dongle, go to WinAura’s Small View and at the top right it will say
“Remaining 2000.” When the count gets low, contact us for a new dongle.
43
Q: I use both WinAura and the Interactive programs. The aura colors reported by the two
programs don’t appear to agree. Why?
A: WinAura and Interactive were designed for different purposes and are supposed to act differently.
The Interactive programs were designed for active energy work sessions where the energy worker
needs instant feedback about what the aura is doing. Therefore the program is very responsive to fast
and subtle changes in the subject’s energy and the display changes rapidly. WinAura, however, was
designed for making aura photographs and for preliminary and fast evaluation of the aura. Its output
is more smoothed. If you observe someone with Interactive, note what the colors usually tend to
look like, then observe the same subject with WinAura. WinAura will agree with the basic trend that
Interactive shows.
Q: I get dongle not found errors or otherwise dongle problem messages. (error #12)
A: When this occurs it is recommended you update your Sentinel dongle driver. You can obtain this
update by visiting http://www.safenet-inc.com/support/tech/sentinel.asp from this site make sure to click
on the Sentinel Super Pro choice and then download the relevant windows driver.
44
WinAura’s U ser Guide
Section 21
Instructions For Installing Your Sealevel RS232
USB to Serial Adapter
Getting Started:
With your computer turned on and at the desktop, insert the Sea Level install disk with printed side
facing up into the tray of your computer’s CD drive. After a brief period you should see a new Sealevel
installation window appear on your screen.
From this window select the Install Software option by clicking on the words install software. You
should now see a listing of all the sea level products with their respective part numbers printed on the
right hand side. From the new list that appears scroll down until you come to part # 2105 and click on
the blue colored number 2105. A new screen will appear prompting you to select which operating
system you are installing.
Select the Windows 98/ME/XP/2000 option by clicking on it. Now from the new window select the
45
Virtual COM port driver option.
A message will appear prompting you to either Open or Save the incoming file. Choose the Open
option. After a brief loading period the installation screen will appear.
WinAura’s U ser Guide
Section 21
Instructions For Installing Your Sealevel RS232
USB to Serial Adapter
Start the installation process by clicking on Next. Agree to the license terms on the next page by
choosing Yes. Fill in the blanks with the appropriate information. (Note: this screen really serves no
important purpose. You may fill the information in with whatever you desire.)
Select 'Next' from the proceeding few screens until the installation begins and you receive the
installation-completed message and select Finish from it.
Now connect the Sealevel USB to serial adaptor into your PC and restart your computer by selecting
Start- Shut Down- Restart then OK. After restarting, the machine will auto detect the hardware, and
display the install new hardware screen
46
Select Install software automatically then click on Next. If you receive a warning that the driver is not certified, please
choose 'Continue' and the rest of the installation should auto complete.
WinAura’s U ser Guide
Section 22
Configuring Your USB to Serial Adapter To Work Correctly
From the desktop right click the mouse button on top of the My Computer icon. A menu should appear
giving you a selection of choices. From this menu select Properties. A new window should load that
appears similar to this image below.
From this window click on the Hardware tab. An option should appear for 'Device Manager.' Click it
and the device manager window will appear.
47
Select Ports COM & LPT. Go down the list of items displayed here until you see SeaLINK +232
WinAura’s U ser Guide
Section 22
Configuring Your USB to Serial Adapter To Work Correctly
(highlighted above). Double click on this choice and a new window should appear.
From this window select the 'Port Settings' tab and click the Advanced option.
Now a new window will appear that gives you advanced port settings options. Here we need to change
the COM port assigned to the RS232 adapter to make sure it’s at COM 1. To do so click the drop down
menu that displays port choices and click on COM 1. Then chose OK.
48
After doing so you may get a warning message indicating COM 1 is currently in use. If you do receive
this message, simply chose OK, close all windows and restart your computer. Congratulations you may
now load Win Aura. Your USB to serial adapter should be configured correctly. If you still have
problems contact Sealevel at 1-(864) 843-4343 or go to www.sealevel.com
WinAura’s U ser Guide
Disclaimer
This device and the software are not intended to indicate or diagnose physical problems or any illness.
Please contact your physician, health care provider or therapist for consultation before beginning any
treatment. This program is meant as a self-help and monitoring tool for experimental use only and is not
intended to replace competent medical or psychological counseling and treatment under any
circumstances.
At the same time, Aura Imaging recognizes the importance of assuming responsibility for your own
spiritual health and well-being. We suggest that you continue to take an active role in maintaining your
personal spiritual health and well-being. This program is intended for use as a tool for personal
exploration.
Using this program indicates you are in agreement with the above terms.
49
WinAura’s U ser Guide
Index
A
H
Aura
Holistic Session 7, 31
Helping Hand Colors 7
Hand Plate 38
High Sensetivity 5
Live 6, 7, 13, 29, 30
Rate 21
Softness 21
Average Color Bar 15
Accurate Colors 5
I
B
Intensity 21
Initial Aura Sizes 7
Balance Meter 15
J
C
K
7 Chakra 13
Changes Chart 15
L
M
Change Settings 15
N
D
50
O
Disclaimer 49
Dongle 41
E
Emotion Meter 15
Expanded Spectrum 5
F
G
P
Print 14
Printing 41
Printer Set Up 14
Print Screen 15
Photo 13
Photo Stable 5, 23
Photo Session 28
Prepare A CD 23
General Information 43
WinAura’s U ser Guide
Index
Q
Quick Switch 15
R
Research 13
S
Screen Size 14
Save Session 15, 23
Snapshot 11, 14, 28
T
Thermometer 15
Test 14
U
51
V
Video 39
View Text 14
View Graphs 15
W
WinAura Star 13
X
Y
Z
52