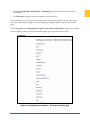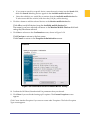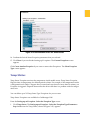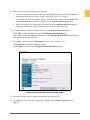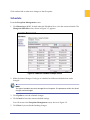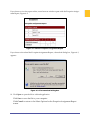
1
Admin & User Guide
Exceptions
December 2008
Exceptions Admin & User Guide
AUG-Except-12Dec08US
December 2008
www.road.com
Copyright © 2008 by Trimble Navigation Limited. @Road, Trimble and iLM are registered trademarks of Trimble Navigation Limited. The
@Road logo, the Trimble logo, GeoManager and @Road Pathway are trademarks and/or service marks of Trimble Navigation Limited. All
other trademarks and/or service marks used are the property of their respective owners.
Trimble reserves the right to make changes at any time, in order to improve the reliability, function or design of its devices, products or
services and to supply the best devices, products and services possible. Trimble devices, products and services are protected under one or
more of the following U.S. Patents: 5,477,228; 5,694,594; 5,959,577; 5,990,827; 6,459,988; 6,529,159; 6,552,682; 6,594,576;
6,664,922; 6,578,005; 5,963,911; 6,862,524; 6,795,017; 6,882,313; 6,867,733; 6,832,140; 6,922,566 and numerous other patents and
patents pending in jurisdictions worldwide. Trimble does not represent that the devices, products or services shown or described herein are
free from patent infringement or from any other third party right. Trimble assumes no obligation to correct any errors contained herein or
to advise any user of liability for the accuracy or correctness of any engineering software support or assistance provided to a user.
The Trimble devices, products and services are dependent on the coverage and calling areas of wireless networks owned and operated by
third parties. Coverage and calling areas are approximate and may not cover significant portions of the United States. Actual coverage and
operation of the devices, products and services depend on a variety of factors, including without limitation: system availability and
capacity; system and equipment upgrades, repairs, maintenance, modifications and relocation; user equipment; terrain; signal strength;
structural conditions; weather and atmospheric conditions; availability of power; governmental regulations; suspected fraudulent
activities; acts of God and other conditions beyond the reasonable control of Trimble. Trimble will not be responsible for limits in coverage
or performance degradation due to any such conditions. The user acknowledges that coverage and calling areas may be interrupted,
halted or curtailed or the quality of the transmission may be diminished at any time.
The devices, products and services are dependent upon the availability of the Internet, which is owned and operated by and accessed
through third parties. Trimble assumes no responsibility for improper storage of data or information, or delivery of messages. The user
assumes the entire risk in downloading or otherwise accessing any data, information, files or other materials obtained from the Trimble
and/or @Road web site, even if the user has paid for or otherwise been provided virus protection services from Trimble.
The Trimble devices, products and services and any modifications, alterations, additions or changes to the devices, products or services are
not fault tolerant and are not designed, manufactured or intended for use in life support, emergency, mission-critical or other ultrahazardous activities (“High Risk Activities”). Trimble specifically disclaims any express or implied warranty of fitness for such High Risk
Activities. Use of a Trimble device, product or services in any application without the written consent of Trimble is prohibited.
All customer information is governed by the Trimble Privacy Policy located on the Trimble web site at www.road.com.
Notice of Rights. All rights reserved. No part of this manual may be reproduced or transmitted in any form by any means—electronically,
mechanically, by photocopying, via recording or otherwise—without the prior written permission of Trimble Navigation Limited For
information on getting permission for reprints, contact Corporate Communications at Trimble Navigation Limited Headquarters.
Notice of Liability. The information in this manual is distributed on an “As Is” basis, without warranty, and was current at the time of
publication. While precautions have been taken in the preparation of the manual, Trimble will not have any liability to any person or entity
with respect to any loss or damage caused or alleged to be caused directly or indirectly by the instructions contained in this manual or by
the software or hardware products described in it.
Privacy and Use. This product is intended to monitor and make available information concerning the vehicle’s activities. It is the customer’s
sole responsibility to ensure that its use complies with any applicable laws and regulations. It is the customer’s responsibility to develop and
communicate policies concerning use of the application prior to implementing the product. Customers are urged to consult with their
own legal counsel in connection with the particular use to which the customer puts the product and the potential implications from that
use.
Trimble MRM Confidential
ii
Table of Contents
Preface . . . . . . . . . . . . . . . . . . . . . . . . . . . . . . . . . . . . . . . . . . . . . . . . . . . . . . . . . . . . . . . . . . . . . . . . . . . . v
System Requirements . . . . . . . . . . . . . . . . . . . . . . . . . . . . . . . . . . . . . . . . . . . . . . . . . . . . . . . . . . . . . v
Introduction . . . . . . . . . . . . . . . . . . . . . . . . . . . . . . . . . . . . . . . . . . . . . . . . . . . . . . . . . . . . . . . . . . . . . . . . 1
Formats. . . . . . . . . . . . . . . . . . . . . . . . . . . . . . . . . . . . . . . . . . . . . . . . . . . . . . . . . . . . . . . . . . . . . . . . . 2
Data Retention . . . . . . . . . . . . . . . . . . . . . . . . . . . . . . . . . . . . . . . . . . . . . . . . . . . . . . . . . . . . . . . . . . 2
Optional Features (Additional Fee) . . . . . . . . . . . . . . . . . . . . . . . . . . . . . . . . . . . . . . . . . . . . . . . . . . 2
Exception Types . . . . . . . . . . . . . . . . . . . . . . . . . . . . . . . . . . . . . . . . . . . . . . . . . . . . . . . . . . . . . . . . . . 3
Creating Exception Parameters . . . . . . . . . . . . . . . . . . . . . . . . . . . . . . . . . . . . . . . . . . . . . . . . . . . . . . . . . 5
Exception Management . . . . . . . . . . . . . . . . . . . . . . . . . . . . . . . . . . . . . . . . . . . . . . . . . . . . . . . . . . . 9
Diagnostics Fault . . . . . . . . . . . . . . . . . . . . . . . . . . . . . . . . . . . . . . . . . . . . . . . . . . . . . . . . . . . . . . . . 12
Forms . . . . . . . . . . . . . . . . . . . . . . . . . . . . . . . . . . . . . . . . . . . . . . . . . . . . . . . . . . . . . . . . . . . . . . . . . 18
Handset Usage . . . . . . . . . . . . . . . . . . . . . . . . . . . . . . . . . . . . . . . . . . . . . . . . . . . . . . . . . . . . . . . . . . 26
Idling. . . . . . . . . . . . . . . . . . . . . . . . . . . . . . . . . . . . . . . . . . . . . . . . . . . . . . . . . . . . . . . . . . . . . . . . . . 31
Landmark . . . . . . . . . . . . . . . . . . . . . . . . . . . . . . . . . . . . . . . . . . . . . . . . . . . . . . . . . . . . . . . . . . . . . . 36
Landmark Proximity. . . . . . . . . . . . . . . . . . . . . . . . . . . . . . . . . . . . . . . . . . . . . . . . . . . . . . . . . . . . . . 41
Low Battery . . . . . . . . . . . . . . . . . . . . . . . . . . . . . . . . . . . . . . . . . . . . . . . . . . . . . . . . . . . . . . . . . . . . 46
Messaging . . . . . . . . . . . . . . . . . . . . . . . . . . . . . . . . . . . . . . . . . . . . . . . . . . . . . . . . . . . . . . . . . . . . . 51
Mileage. . . . . . . . . . . . . . . . . . . . . . . . . . . . . . . . . . . . . . . . . . . . . . . . . . . . . . . . . . . . . . . . . . . . . . . . 55
Mobile Device Vicinity . . . . . . . . . . . . . . . . . . . . . . . . . . . . . . . . . . . . . . . . . . . . . . . . . . . . . . . . . . . . 60
Off Hours/Unauthorized Use. . . . . . . . . . . . . . . . . . . . . . . . . . . . . . . . . . . . . . . . . . . . . . . . . . . . . . . 64
Speed . . . . . . . . . . . . . . . . . . . . . . . . . . . . . . . . . . . . . . . . . . . . . . . . . . . . . . . . . . . . . . . . . . . . . . . . . 68
Stop. . . . . . . . . . . . . . . . . . . . . . . . . . . . . . . . . . . . . . . . . . . . . . . . . . . . . . . . . . . . . . . . . . . . . . . . . . . 72
Stop Count . . . . . . . . . . . . . . . . . . . . . . . . . . . . . . . . . . . . . . . . . . . . . . . . . . . . . . . . . . . . . . . . . . . . 77
Stop Duration. . . . . . . . . . . . . . . . . . . . . . . . . . . . . . . . . . . . . . . . . . . . . . . . . . . . . . . . . . . . . . . . . . . 82
Switch Status . . . . . . . . . . . . . . . . . . . . . . . . . . . . . . . . . . . . . . . . . . . . . . . . . . . . . . . . . . . . . . . . . . . 86
Temp Status . . . . . . . . . . . . . . . . . . . . . . . . . . . . . . . . . . . . . . . . . . . . . . . . . . . . . . . . . . . . . . . . . . . . 92
Zone . . . . . . . . . . . . . . . . . . . . . . . . . . . . . . . . . . . . . . . . . . . . . . . . . . . . . . . . . . . . . . . . . . . . . . . . . . 97
Vehicle Diagnostics . . . . . . . . . . . . . . . . . . . . . . . . . . . . . . . . . . . . . . . . . . . . . . . . . . . . . . . . . . . . . 102
Editing Exceptions . . . . . . . . . . . . . . . . . . . . . . . . . . . . . . . . . . . . . . . . . . . . . . . . . . . . . . . . . . . . . . . . . 107
Parameters . . . . . . . . . . . . . . . . . . . . . . . . . . . . . . . . . . . . . . . . . . . . . . . . . . . . . . . . . . . . . . . . . . . . 109
Schedule . . . . . . . . . . . . . . . . . . . . . . . . . . . . . . . . . . . . . . . . . . . . . . . . . . . . . . . . . . . . . . . . . . . . . . 110
Notification . . . . . . . . . . . . . . . . . . . . . . . . . . . . . . . . . . . . . . . . . . . . . . . . . . . . . . . . . . . . . . . . . . . 111
Mobile Devices . . . . . . . . . . . . . . . . . . . . . . . . . . . . . . . . . . . . . . . . . . . . . . . . . . . . . . . . . . . . . . . . . 112
Enable. . . . . . . . . . . . . . . . . . . . . . . . . . . . . . . . . . . . . . . . . . . . . . . . . . . . . . . . . . . . . . . . . . . . . . . . 114
Disable . . . . . . . . . . . . . . . . . . . . . . . . . . . . . . . . . . . . . . . . . . . . . . . . . . . . . . . . . . . . . . . . . . . . . . . 114
Delete . . . . . . . . . . . . . . . . . . . . . . . . . . . . . . . . . . . . . . . . . . . . . . . . . . . . . . . . . . . . . . . . . . . . . . . . 115
Assigning Exceptions to Mobile Devices or Groups. . . . . . . . . . . . . . . . . . . . . . . . . . . . . . . . . . . . 115
Exception Reports . . . . . . . . . . . . . . . . . . . . . . . . . . . . . . . . . . . . . . . . . . . . . . . . . . . . . . . . . . . . . . . . . 117
Exceptions Parameter Report . . . . . . . . . . . . . . . . . . . . . . . . . . . . . . . . . . . . . . . . . . . . . . . . . . . . . 117
Exception Notification Console. . . . . . . . . . . . . . . . . . . . . . . . . . . . . . . . . . . . . . . . . . . . . . . . . . . . 120
Trimble MRM Confidential
iii
Generating Exception Reports . . . . . . . . . . . . . . . . . . . . . . . . . . . . . . . . . . . . . . . . . . . . . . . . . . . . 122
Glossary. . . . . . . . . . . . . . . . . . . . . . . . . . . . . . . . . . . . . . . . . . . . . . . . . . . . . . . . . . . . . . . . . . . . . . . . . . 130
Trimble MRM Confidential
iv
Preface
System Requirements
Item
Description
Operating System
Microsoft Windows 2000, XP, Vista
Microsoft Windows 2000 Professional, XP Professional
CPU
Pentium-class processor (500 MHz or faster recommended)
Memory
64 MB minimum (128 MB or more recommended)
Display
VGA or better display (1024x768 resolution recommended)
Browser
Internet Explorer: 5.5 and above.
Note:
• All pop-up blockers should be disabled when using GeoManager to prevent conflict with the MapView Control
Panel
• The Run ActiveX control option must be enabled
Plug-In
Autodesk MapGuide Viewer 5.0 plug-in (available on the
@Road web site) for Internet Explorer
Internet Access
Minimum 56 Kbps (high speed access via DSL, cable or ISDN
recommended)
Trimble MRM Confidential
v
1
Introduction
Trimble addresses the challenges of managing mobile workers with Trimble Exceptions, a com‐
prehensive monitoring and reporting tool that helps efficiently manage daily mobile workforce operations and improve business productivity through event‐based monitoring and timely alerts. Exceptions are offered as a standard feature of the Trimble GeoManagerSM iLM, Trimble Geo‐
ManagerSM PE, Trimble PathwaySM iLM and Trimble PathwaySM PE as shown in the matrix below. GeoManager
iLM
RealTime
Speed
Idling
Landmark
Landmark Proximity
Mobile Device
Vicinity
Zone
Stop
Stop Count
Handset Usage
Low Battery
Off Hours Use*
Mileage*
Stop Duration*
Message
Form
Switch Status
Temp Status
Vehicle Diagnostics
X
X
X
Standard
X
X
X
X
Pathway
Pocket Edition
iLM
RealTime
Standard
RealTime
X
X
X
X
X
X
X
X*
X
X
X
X
X
X
X
X
X
X*
X
X
X
X
X
X
X
X
X
Pocket Edition
Standard
X
X
X
X
RealTime
Standard
X
X
X
X
X
X
X
X
X
X
X
X
X
X
X
X
X
X
X
X
X
X
X
X
X
*New to Exceptions 2.0
Exceptions give you the ability to define a normal range of parameters for events or activities, then capture any deviance from this range. The parameters and range settings vary by Exception type but most often include less than and/or greater than values, duration and time frame for monitoring.
Trimble MRM Confidential
1
Formats
Users can view exception data in several formats:
•
Exceptions Console – Online PC based console that displays Exceptions in real‐time or stan‐
dard delivery, depending on the selected options Exception is configured.
•
Notifications:
•
•
Real‐Time – receive individual notifications, as Exceptions occur, in the form of a text message to the user’s desktop (via email), console or mobile device.
•
Standard – receive a daily summary of notifications, sent automatically to the user’s desktop, console or mobile device at scheduled times. Reports:
•
Detailed reports onscreen
•
Downloadable reports in the following formats:
•
Excel •
Tab de‐limited
•
Comma de‐limited
Data Retention
Exception data is normally retained for 14 days for Pathway iLM or Pathway PE and 90 days for GeoManager iLM and GeoManager PE. You may choose to retain access to data for a longer period of time through the Extended Data Storage option. Offered at an additional fee, this option gives you access to data up to a year after the event occurred.
Note:
Please consult with your Trimble MRM Sales Manager if you are interested in extending the
time your data is available to you for retrieval.
Optional Features (Additional Fee)
Some Exception types are companions to optional product features that require an additional fee for their use. You may add more features and options to your existing agreement at any time.
Trimble MRM Confidential
2
Note:
For information about how to add more features and options, please consult with your Trimble MRM Sales Manager.
Exception Types
Many types of Exceptions are available, depending on the Trimble MRM solution you have. The standard Exceptions are:
•
Forms –triggered when a form field is sent from the mobile device and meets certain user specified parameters.
•
Handset Usage – triggered when a hand‐held mobile device has not accessed the Trimble MRM application by the time expected, or if there is mobile activity beyond expected work hours. The administrator specifies the time window during which mobile users should be logged in to the Trimble MRM application, as well as the notification parameters.
•
Idling – occurs when a mobile device idles for more than a specified duration. Idling is mea‐
sured when the ignition is “on” and the mobile device is not moving for more than 2 min‐
utes. •
Landmark – triggered when a mobile device stops at user‐defined landmarks. Trimble MRM runs a nightly process to identify Landmark Exceptions from the previous day.
•
Landmark Proximity – triggered when a Mobile User arrives at or departs from a user‐
defined landmark and has been there for 1 minute plus device sampling rate. Landmark Proximity is monitored by the device and capable of real‐time delivery notification. •
Low Battery – triggered when the vehicle battery level or hand‐held mobile device battery level (for PE applications) falls to the point at which no location data may be transmitted. The administrator sets notification parameters.
•
Messaging – triggered when a predefined message is delivered by the mobile device.
•
Mileage – triggered when a mobile device exceeds a predefined number of miles within a day. •
Mobile Device Vicinity – monitors the occurrences of multiple mobile devices stopping within a defined distance from each other for a predefined period of time common to both or all vehicles.
•
Off Hours Use – triggered when a mobile device registers vehicle movement outside desig‐
nated working hours, which are defined by the administrator. •
Speed – triggered when a mobile device exceeds a speed and duration threshold. •
Stop – triggered when the total daily stop time at a landmark is greater than a predefined threshold.
Trimble MRM Confidential
3
•
Stop Count – triggered when the total number of stops at a landmark is greater than a pre‐
defined threshold. •
Stop Duration – triggered when a mobile device at a landmark or any location exceeds a stop time longer than the predefined threshold, within a defined workday. •
Switch Status – allows customers to define when a Switch Status event should trigger a noti‐
fication, such as trailer door open or close. •
Temp Status – allows customers to set a temperature and duration value to monitor the tem‐
perature of a mobile asset’s cargo. •
Zone – allows the user to monitor the arrival at and/or departure of a mobile device from a specified zone. A “zone” can be a zip code, city, county or state. •
Vehicle Diagnostics – monitors the vehicle systems and triggers an alert when any mechan‐
ical issue occurs.
The following Exceptions are optional, for an additional fee, with GeoManager iLM and Geo‐
Manager PE. •
Forms
•
Messaging
•
Mobile Device Vicinity
The following Exceptions are optional, for an additional fee, with GeoManager iLM only.
•
Temp Status
Trimble MRM Confidential
4
2
Creating Exception Parameters
Before you can define the parameters for any Exception, you must log into GeoManager.
To log into GeoManager iLM, GeoManager PE, Pathway iLM, or Pathway PE:
To log into GeoManager:
1. Enter the address http://www.trimble.com/mobile_resource_management in the Universal Resource Locator (URL) The Trimble home page, shown in Figure 2–1, appears.
Figure 2–1 Trimble MRM Home Page
2. Select the desired Trimble MRM solution from the Customer Login drop‐down menu. The Login screen, shown in Figure 2–2, appears.
Trimble MRM Confidential
5
Figure 2–2: The Trimble Login Screen
3. At the prompt, enter the Username and Password. 4. Click the Login Here button or press Enter. The GeoManager home page, shown in Figure 2–3, appears or the home page for Pathway, shown in Figure 2–4, appears.
Figure 2–3GeoManager iLM/GeoManager PE Home Page
Trimble MRM Confidential
6
Figure 2–4 GeoManager Pathway iLM
From the Administration screen you can configure, edit, maintain, enable and create exceptions for activities and their functions. If the WLAN feature is enabled in the Administration Tool Client account, the WLAN Security Administration link in the administration home page will be enabled. Click the WLAN Security Administration link to configure access point parameters.
Note:
You will need an Administrator Password to access the Administration Control Panel. If you
do not have an Administrator Password, contact Trimble MRM Customer Satisfaction at [email protected].
To access Administration:
1. Click the Administration link on the navigation Control Panel. The main Administration screen, shown in Figure 9–4, appears.
Trimble MRM Confidential
7
Figure 2–5 Administration Options
2. Click Exception Administration. The Exceptions Administration screen, shown in Figure 2–
6, appears.
Figure 2–6 Exception Administration Options
Trimble MRM Confidential
8
The following options appear after you click Exception Administration:
•
Exception Management
•
Batch Exception Assignment
•
View Exception Parameter Reports
Exception Management
Exception Management displays all current Exceptions you track. You can create, modify, enable, disable and delete exceptions based on business need. The first time you enter Exceptions the list will be empty until exceptions have been assigned.
1. Click Exception Management from the Exceptions screen. The Exception Administration screen, shown in Figure 2–7, appears.
Figure 2–7: Exception Administration Screen
•
Click the Show drop down menu, shown in Figure 2–8, to display exceptions by type. Trimble MRM Confidential
9
Figure 2–8: Show Drop Down Menu
The following exception types are appear:
•
Diagnostics Fault
•
Forms
•
Handset Usage
•
Hard Brake
•
Idling
•
Landmark
•
Landmark Proximity
•
Low Battery
•
Messaging
•
Mileage
•
Mobile Device Vicinity
•
Off Hours/Unauthorized Use
•
Speed
•
Stop
•
Stop Count
•
Stop Duration
•
Switch Status
•
Temp Status
•
Zone
Trimble MRM Confidential
10
2. Click the Starting With, Ending With, Containing drop down menu to sort Exceptions accordingly.
3. Click Refresh to display only the exceptions you wish to view.
The screen lists 10, 15, or 20 devices at a time. If you manage more than 15 devices, the screen also shows the number of pages. Select the appropriate page number to move to the desired page. Click Create New, the Setting up an Exception ‐ Select the Exception Type screen, shown in Fig‐
ure 2–9, displays. Here you can select the Exception type you would like to set up.
Figure 2–9: Setting Up the Exception - Select the Exception Type
Trimble MRM Confidential
11
Click Exception Menu to return to the Exceptions screen, shown in Figure 2–6.
You are now ready to set the parameters for any Exceptions you would like to track. The follow‐
ing sections complete the creation procedure for each Exception type.
After clicking the desired Exception, an Exceptions wizard opens to guide you through a series of screens used to create each set of Exceptions parameters.
Diagnostics Fault
Diagnostics Fault Exceptions are triggered when a mobile device generates a fault code.
Diagnostics Fault is currently available for users with Vehicle Diagnostics enabled who are using iLM 4500 series hardware.
From the Setting up an Exception ‐ Select the Exception Type screen:
1. Click Diagnostics Fault. The Setting up an Exception ‐ Select the Exception Type/Parame‐
ters – Step 1 of 4 screen for Diagnostics Fault, shown in Figure 2–10 appears. Figure 2–10: Setting Up the Exception - Select the Exception/Parameters Screen for Diagnostics Fault Step 1 of 4
Trimble MRM Confidential
12
Field
Description
Exception Name
This is the name that appears on the Exceptions Report. You may
use up to 50 characters to create a unique name. Characters must
be alpha-numeric. No symbols or punctuation is allowed.
Exception Type
This field is pre-filled from the Select Exceptions Type screen.
Type of Monitoring Schedule
Monitoring Schedules are available in two types:
• Recurring – a specific schedule that happens on a repeated basis.
This can be one of four predefined schedules or customized to
your work day(s).
• 24 X 7 – continuous monitoring of mobile workers.
TimeZone
The time zone where the mobile workers will be performing their
tasks. You can select multiple time zones by holding down the [Ctrl]
key.
Begin Date
The month, day and year you want to begin monitoring diagnostics
faults for the selected mobile device. This can be today’s date or a
future date, but cannot be a previous date.
Begin Time
The time of day you want to begin monitoring diagnostics faults for
the selected mobile device. This must be the current time or later.
Minutes can be selected in 15 minute increments.
2. Type a name into the Exception Name field.
3. Select a time zone from the TimeZone drop down menu.
4. Click the Begin Date calendar icon to select a begin date to start monitoring the selected mobile device.
5. Click the Begin Time clock icon to select a begin time to start monitoring the selected mobile device.
6. Click OK to accept the selected begin time.
•
Click Cancel to exit without making changes.
•
Click Clear to remove an existing time from the Begin Time field.
7. Click Next. The Setting up an Exception ‐ Specify the Exception Notification Options – Step 3 of 4 screen for Diagnostics Fault, shown in Figure 2–11 appears.
•
Click Cancel to return to the Exception Administration screen, shown in Figure 2–7, without saving changes.
Trimble MRM Confidential
13
Figure 2–11: Setting Up the Exception - Specify the Exception Notification Options Screen
for Diagnostics Fault Step 3 of 4
Field
Description
Exception Console Delivery
Sends a notification of the Diagnostics Fault Exception to the online
Exceptions Console. For more information about the Exceptions
Console, see the Exceptions Notification Console section.
Real-Time Message Delivery
Notifies selected personnel that a Diagnostics Fault Exception has
occurred in real-time.
Note:Mouse over the Tip or Note icon to view addition information.
Standard Message
Delivery
Notifies selected personnel of Diagnostics Fault Exceptions that
occurred the previous day. All Exceptions are cataloged and sent in a
single message.
Note:Mouse over the Tip or Note icon to view addition information.
Note Icon - Directions
Trimble MRM Confidential
Mouse over the Note icon to view step by step instructions for filling out the Exception parameters.
14
Note:
All exception violations will be recorded and stored for reporting purposes
8. Select how you want Notification of the Speed Exceptions sent to you. You may select more than one delivery option.
•
Check the Exception Console delivery check box if you want console notification.
•
Check the Real‐Time Message delivery option if you want immediate notification of Speed Exceptions.
a. Enter up to two email or mobile device addresses into the 1. and 2. fields.
b. Select the radio button for the format of the device address: PC format or mobile device.
To send messages to mobile devices, use the format {phonenumber}@page.nextel.com (i.e. [email protected]).
•
Check the Standard Message delivery option if you want a list of all the Speed Excep‐
tions that occurred the previous day.
a. Enter up to two email or mobile device addresses, one for each of the 1. and 2. fields.
b. Select the radio button for the format of the device address: PC format or mobile device.
To send messages to mobile devices, use the format {phonenumber}@page.nextel.com (i.e. [email protected]).
9. Click Next to advance to the Specify mobile devices to Monitor screen, shown in Figure 12.
•
Click Previous to return to the last screen. •
Click Cancel to return to the Current Exceptions screen.
Trimble MRM Confidential
15
Figure 2–12: Setting Up the Exception - Specify the Mobile Devices to Monitor Screen for
Diagnostics Fault Step 4 of 4
Field
Description
Available Vehicles
Shows a list of all the vehicles or hand-held devices that are available for tracking Diagnostics Fault Exceptions.
Monitor Vehicles
Shows a list of all vehicles or hand-held devices selected for Diagnostics Fault Exception tracking.
Group
If vehicles or hand-held devices have been grouped into categories,
the categories are listed here. Defaults to All Vehicles.
Search
Allows the administrator to enter a keyword or name for faster location of a specific mobile worker’s vehicle or hand-held device.
Unavailable
Mobile Devices
Shows a list of devices that have already been assigned to a different Diagnostics Fault Exception.
Note:Mouse over the Tip icon to view addition information.
Note Icon-Directions
Trimble MRM Confidential
Mouse over the Note icon to view step by step instructions for filling out the Exception parameters.
16
10. Select vehicles or hand‐held devices to monitor:
•
Select the vehicle group, if applicable, from the Group drop‐menu. For more information about Groups, see the GeoManager User Admin Guide.
•
If you want to search for a specific device, enter the search criteria into the Search field, then click Search. Matching devices appear in the Available mobile devices list.
•
Select the vehicle(s) you would like to monitor from the Available mobile devices list. To select more than one vehicle, hold down the [Ctrl] key while selecting.
11. Click the > button to add the selected devices to the Monitor mobile devices list.
Click All>> to add all devices from the Available mobile devices list.
The name(s) you have selected will move to the box on the right indicating they have been selected.
Note:
Devices can only be part of one Speed Exception. Unavailable devices that are part of a different Speed Exception are shown in the Unavailable mobile devices field along with the
name of the Speed Exception to which they belong.
12. Click Next to advance to the Confirmation screen, shown in Figure 13. Click Previous to return to the last screen. Click Cancel to return to the Current Exceptions screen.
Figure 2–13: Setting Up the Exception - Confirmation
13. Confirm the Speed Exception parameters that you have selected.
Trimble MRM Confidential
17
14. Click Done if you are finished setting up Exceptions. The Exception Administration screen appears.
Click Create Another Exception if you want to create other Exceptions. The Setting up an Exception ‐ Select the Exception Type screen appears.
Forms
Forms Exception works in conjunction with the Messaging option. If the Forms feature of Mes‐
saging is being used, exceptions for form field data outside an expected parameter can be moni‐
tored for variance.
This would be useful, for example, for flagging unusually large quantities associated with a sales order.
Forms Exceptions are available for GeoManager iLM and GeoManager PE.
From the Setting up an Exception ‐ Select the Exception Type screen:
1. Click Forms. The Setting up an Exception ‐ Select the Exception Type/Parameters – Step 1 of 4 screen for Forms, shown in Figure 2–14 appears. Trimble MRM Confidential
18
Figure 2–14: Setting Up the Exception - Select the Exception/Parameters Screen for Forms
Step 1 of 4 (Recurring)
Field
Description
Exception Name
This is the name that appears on the Exceptions Report. You may
use up to 50 characters to create a unique name. Characters must
be alpha-numeric. No symbols or punctuation is allowed.
Exception Type
This field is pre-filled from the Select Exceptions Type screen.
Select Form
A list of your previously created forms. For more information about
creating Forms, see the GeoManager Admin User Guide.
Select Field
Combination of a drop-menu of fields from the previously created
form and alpha/numeric conditions that would be contained in the
field.
For more information about pre-defined form information, see the
GeoManager User Admin Guide.
Trimble MRM Confidential
19
Field
Description
Validation
Allows a second level of validation to ensure the correct form field
flags an exception. Combination of drop-menus and text fields for
validating data from form fields.
For more information about pre-defined form information, see the
GeoManager User Admin Guide.
Type of Monitoring Schedule
Monitoring Schedules are available in two types:
• Recurring – a specific schedule that happens on a repeated basis.
This can be one of four predefined schedules or customized to
your work day(s).
• 24 X 7 – continuous monitoring of mobile workers.
TimeZone
The time zone where the mobile workers will be performing their
tasks. You can select multiple time zones by holding down the [Ctrl]
key.
Begin Date
The month, day and year you want to begin monitoring forms for
the selected mobile device. This can be today’s date or a future
date, but cannot be a previous date.
Begin Time
The time of day you want to begin monitoring diagnostics faults for
the selected mobile device. This must be the current time or later.
Minutes can be selected in 15 minute increments.
2. Type a name into the Exception Name field. 3. Select the pre‐typed message from the Select Form drop‐menu.
4. Select the pre‐typed message from the Select Field drop‐menu.
5. If desired, enter the exact words that will be used to validate the message in the Validation field.
6. Select the schedule type you would like to establish for monitoring Forms Exceptions from the Type of Monitoring Schedule field:
•
24 X 7
•
Recurring
For predefined Recurring Schedule options, shown in Figure 2–15:
a. Click NEXT to open the Specify the Monitoring Schedule screen.
Trimble MRM Confidential
20
Figure 2–15: Setting Up the Exception - Select the Exception - Specify the Monitoring
Schedule Step 2 of 4
Field
Description
Predefined Schedules
For your convenience, Trimble MRM has predefined the four most
commonly used schedules:
•
•
•
•
Week Days (8 a.m. - 5 p.m. Mon-Fri)
Week Nights (5 p.m. - 8 a.m. Mon-Fri)
Weekends (5 p.m. Fri - 8 a.m. Mon)
Nights and Weekends (Includes week nights and weekends)
Note:Mouse over the Note icon to display step by step instructions
for filling out the Exception parameters.
Trimble MRM Confidential
21
Field
Description
Begin Monitoring
The day, hour and minute you want GeoManager to begin
recording Speed Exceptions. Days of the week cannot be repeated
or overlapped. Minutes can be selected in 15 minute increments.
If a predefined schedule is selected, these fields are auto-filled with
information.
End Monitoring
The day, hour and minute you want GeoManager to stop recording
Speed Exceptions. Days of the week cannot be repeated or overlapped. Minutes can be selected in 15 minute increments.
If a predefined schedule is selected, these fields are auto-filled with
information.
To customize Recurring Schedule options, shown in Figure 2–15:
b. Select one of the four options from the Predefined Schedules field:
• Week Days • Week Nights
• Weekends • Nights and Weekends c. Click the Day drop down menu in the Begin Monitoring column to change the day of the week, as needed.
d. Click the Clock icon in the Begin Monitoring column to change the daily time using the Hour, Min and AM/PM fields as needed. e. Click the Day drop down menu in the End Monitoring column to change the day of the week, as needed.
f.
Click the Clock icon in the End Monitoring column to change the daily time using the Hour, Min and AM/PM fields as needed. g. To clear the selected options and re‐enter information, click Clear.
h. Click Next to advance to the next screen. Click Previous to return to the last screen. Click Cancel to return to the Exception Administration screen.
For 24 X 7 Schedule options, shown in Figure 2–16:
Trimble MRM Confidential
22
Figure 2–16: Setting Up the Exception - Select the Exception - Select the Exception Type/
Parameters - Step 1 of 4 (24 X 7)
a. Select the correct time zone from the Time Zone field.
The system will default to PDT if no option is selected.
b. Click the Calendar icon to select the Begin Date. c. Click the Clock icon to select the Begin Time.
d. Click NEXT to advance to the Specify the Exception Notification Options screen, shown in Figure 2–17 Click Cancel to return to the Exception Administration screen.
Trimble MRM Confidential
23
Figure 2–17: Setting Up the Exception - Specify the Exception Notification Options Step 3
of 4
7. Select how you want Notification of the Forms Exceptions sent to you. You may select more than one delivery option.
•
Check the Exception Console Delivery check box if you want console notification.
•
Check the Real‐Time message delivery option if you want immediate notification. a. Enter up to two email or mobile devices, one for each of the 1. and 2. fields.
b. Select the radio button for the format of the device address: PC format or mobile device. To send messages to mobile devices, use the format {phonenumber}@page.nextel.com (i.e. [email protected]).
•
Check the Standard message delivery option if you want a list of all the Forms Excep‐
tions that occurred the previous day.
a. Enter up to two email or mobile devices, one for each of the 1. and 2. fields. b. Select the radio button for the format of the device address: PC format or mobile device. To send messages to mobile devices, use the format {phonenumber}@page.nextel.com (i.e. [email protected]).
Trimble MRM Confidential
24
8. Click Next to advance to the Specify the Mobile Devices to Monitor screen, shown in Figure 2–18. Click Previous to return to the last screen. Click Cancel to return to the Exception Administration screen. Figure 2–18: Setting Up the Exception - Specify the Mobile Devices to Monitor Step 4 of 4
9. Select vehicles or hand‐held devices to monitor:
•
Select the vehicle group, if applicable, from the Group drop‐menu, then click Search. For more information about Groups, see the GeoManager Admin User Manual.
•
If you want to search for a specific device, enter the search criteria into the Search field, then click Search. Matching devices appear in the Available mobile devices list.
•
Select the vehicle(s) you would like to monitor from the Available mobile devices list. To select more than one vehicle, hold down the [Ctrl] key while selecting. 10. Click the > button to add the selected devices to the Monitor mobile devices list. Click All>> to add all devices from the Available mobile devices list.
The name(s) you have selected will move to the Monitor Mobile Devices field indi‐
cating they have been selected.
11. Click Next to advance to the Confirmation screen, shown in Figure 2–19. Click Previous to return to the last screen. Click Cancel to return to the Exception Administration screen.
Trimble MRM Confidential
25
Figure 2–19: Setting Up the Exception - Confirmation
12. Confirm the Forms Exception parameters that you selected.
13. Click Done if you are finished setting up Exceptions. The Exception Administration screen appears.
Click Create Another Exception if you want to create other Exceptions. The Select Exception Type screen appears.
Handset Usage
Handset Usage Exceptions occur when a mobile device has not accessed your Trimble MRM application by an expected time or if there is activity outside of set work hours. These Exceptions can help a company determine when hand‐held devices are being used outside of company time or turned off during work hours.
Handset Usage is available for GeoManager iLM, GeoManager PE and Pathway iLM.
From the Setting up an Exception ‐ Select the Exception Type screen:
1. Click Handset Usage. The Setting up an Exception ‐ Select the Exception Type/Parameters – Step 1 of 4 screen for Handset Usage, shown in Figure 2–20 appears. Trimble MRM Confidential
26
Figure 2–20: Setting Up the Exception - Select the Exception - Select the Exception Type/
Parameters for Handset Usage - Step 1 of 4
Field
Description
Exception Name
This is the name that appears on the Exceptions Report. You may
use up to 50 characters to create a unique name. Characters must
be alpha-numeric. No symbols or punctuation is allowed.
Exception Type
This field is pre-filled from the Select Exceptions Type screen.
Enable/Disable
SMS:
Check this box if you do not want an SMS message sent to each
device selected for this Exception.
You can still set up alert notifications on the Notification page for
this Exception, but no SMS message will be sent automatically to
any of the devices selected for this Exception when a Usage Exception is triggered for a given device.
Note: A Handset Usage Exception will be sent as an email/SMS
message to all the selected devices if the Trimble phone application is detected to be off for more than the time specified below,
during defined monitoring hours.
If no phone number is entered for any of the devices selected for
the Usage Exception, then no SMS notices will be sent to the
handset.
Trimble MRM Confidential
27
Field
Description
Minutes Device
does not Register
ON:
If the Trimble application is not detected as running within this
number of minutes (added to the update frequency that your service transmits to the server), an alert will be sent.
This must be greater than 15 minutes.
Note:Mouse over the Tip icon to view addition information.
Type of Monitoring Schedule
Monitoring Schedules are available in two types:
• Recurring – a specific schedule that happens on a repeated basis.
This can be one of four predefined schedules or customized to
your work day(s).
• 24 X 7 – continuous monitoring of mobile workers.
TimeZone
The time zone where the mobile workers will be performing their
tasks. You can select multiple time zones by holding down the [Ctrl]
key.
Begin Date
The month, day and year you want to begin monitoring handset
usage for the selected mobile device. This can be today’s date or a
future date, but cannot be a previous date.
Begin Time
The time of day you want to begin monitoring diagnostics faults for
the selected mobile device. This must be the current time or later.
Minutes can be selected in 15 minute increments.
2. Type a name into the Exception Name field. 3. Select the SMS Message check box if you do not want an SMS message sent to each device selected for this Exception.
4. Enter the maximum number of minutes that the GeoManager application is not detected as running before an Exception occurs.
5. Select the schedule type you would like to establish for monitoring Handset Usage Excep‐
tions from the Type of Monitoring Schedule field:
•
Recurring
•
24 X 7
Each type of schedule has different set‐up options which appear in the next screen. 6. Click NEXT to open the Schedule Options screen.
7. Set‐up the options for your schedule.
For predefined Recurring Schedule options, shown in Figure 2–15:
a. Select one of the four options from the Predefined Schedules field:
• Week Days Trimble MRM Confidential
28
• Week Nights
• Weekends • Nights and Weekends b. Click the Day drop down menu in the Begin Monitoring column to change the day of the week, as needed.
c. Click the Clock icon in the Begin Monitoring column to change the daily time using the Hour, Min and AM/PM fields as needed. d. Click the Day drop down menu in the End Monitoring column to change the day of the week, as needed.
e. Click the Clock icon in the End Monitoring column to change the daily time using the Hour, Min and AM/PM fields as needed. f.
To clear the selected options and re‐enter information, click Clear.
g. Click Next to advance to the next screen. Click Previous to return to the last screen. Click Cancel to return to the Exception Administration screen.
For 24 X 7 Schedule options, shown in Figure 2–16:
a. Select the correct time zone from the Time Zone field.
The system will default to PDT if no option is selected.
b. Click the Calendar icon to select the Begin Date. c. Click the Clock icon to select the Begin Time.
d. Click NEXT to advance to the Specify the Exception Notification Options screen, shown in Figure 2–17
Click Cancel to return to the Exception Administration screen.
8. Select how you want Notification of the Handset Usage Exceptions sent to you. You may select more than one delivery option.
•
Check the Exception Console Delivery check box if you want console notification.
•
Check the Real‐Time message delivery option if you want immediate notification. a. Enter up to two email or mobile devices, one for each of the 1. and 2. fields.
b. Select the radio button for the format of the device address: PC format or mobile device. To send messages to mobile devices, use the format {phonenumber}@page.nextel.com (i.e. [email protected]).
Trimble MRM Confidential
29
•
Check the Standard message delivery option if you want a list of all the Handset Usage Exceptions that occurred the previous day.
a. Enter up to two email or mobile devices, one for each of the 1. and 2. fields. 9. Select the radio button for the format of the device address: PC format or mobile device. To send messages to mobile devices, use the format {phonenumber}@page.nextel.com (i.e. [email protected]).
10. Click Next to advance to the Specify the Mobile Devices to Monitor screen, shown in Figure 2–18. Click Previous to return to the last screen. Click Cancel to return to the Exception Administration screen. 11. Select vehicles or hand‐held devices to monitor:
•
Select the vehicle group, if applicable, from the Group drop‐menu, then click Search. For more information about Groups, see the GeoManager Admin User Manual.
•
If you want to search for a specific device, enter the search criteria into the Search field, then click Search. Matching devices appear in the Available mobile devices list.
•
Select the vehicle(s) you would like to monitor from the Available mobile devices list. To select more than one vehicle, hold down the [Ctrl] key while selecting. 12. Click the > button to add the selected devices to the Monitor mobile devices list. Click All>> to add all devices from the Available mobile devices list.
The name(s) you have selected will move to the Monitor Mobile Devices field indi‐
cating they have been selected.
13. Click Next to advance to the Specify the Mobile Devices to Monitor screen, shown in Figure 2–18. Click Previous to return to the last screen. Click Cancel to return to the Exception Administration screen. Trimble MRM Confidential
30
Figure 2–21 Confirmation Screen for Handset Usage
14. Confirm the Handset Usage Exception parameters that you selected.
15. Click Done if you are finished setting up Exceptions. The Current Exceptions screen appears.
Click Create Another Exception if you want to create other Exceptions. The Select Exception Type screen appears.
Idling
Idling Exceptions are triggered when the engine idles longer than a specified period of time. Idle time is defined when the ignition is “on” but the vehicle is stopped. This allows better manage‐
ment of productive time as well as for cost savings through fuel and maintenance savings. Idling is available for GeoManager iLM and Pathway iLM.
From the Setting up an Exception ‐ Select the Exception Type screen:
1. Click Idling. The Setting up an Exception ‐ Select the Exception Type/Parameters – Step 1 of 4 screen for Idling, shown in Figure 2–22, appears.
Trimble MRM Confidential
31
Figure 2–22 Select the Exception Type/Parameters for Idling - Step 1 of 4
Field
Description
Exception Name
This is the name that appears on the Exceptions Report. You may
use up to 50 characters to create a unique name. Characters must
be alpha-numeric. No symbols or punctuation is allowed.
Exception Type
This field is pre-filled from the Select Exceptions Type screen.
Select Idling Duration
The continuous amount of time before Idling is exceeded and an
Exception is triggered. This can be anywhere between 5 and 120
minutes in duration.
Type of Monitoring Schedule
Monitoring Schedules are available in two types:
• Recurring – a specific schedule that happens on a repeated basis.
This can be one of four predefined schedules or customized to
your work day(s).
• 24 X 7 – continuous monitoring of mobile workers.
TimeZone
The time zone where the mobile workers will be performing their
tasks. You can select multiple time zones by holding down the [Ctrl]
key.
Begin Date
The month, day and year you want to begin monitoring diagnostics
faults for the selected mobile device. This can be today’s date or a
future date, but cannot be a previous date.
Begin Time
The time of day you want to begin monitoring idling for the
selected mobile device. This must be the current time or later. Minutes can be selected in 15 minute increments.
2. Type a name into the Exception Name field. Trimble MRM Confidential
32
3. Select the number of minutes a vehicle must idle before an alert is created from the Select Idling Duration field.
4. Select the schedule type you would like to establish for monitoring Idling Exceptions from the Type of Monitoring Schedule field:
•
Recurring
•
24 X 7
Each type of schedule has different set‐up options which appear in the next screen. 5. Click NEXT to open the Schedule Options screen.
6. Set‐up the options for your schedule.
For predefined Recurring Schedule options, shown in Figure 2–15:
a. Select one of the four options from the Predefined Schedules field:
• Week Days • Week Nights
• Weekends • Nights and Weekends b. Click the Day drop down menu in the Begin Monitoring column to change the day of the week, as needed.
c. Click the Clock icon in the Begin Monitoring column to change the daily time using the Hour, Min and AM/PM fields as needed. d. Click the Day drop down menu in the End Monitoring column to change the day of the week, as needed.
e. Click the Clock icon in the End Monitoring column to change the daily time using the Hour, Min and AM/PM fields as needed. f.
To clear the selected options and re‐enter information, click Clear.
g. Click Next to advance to the next screen. Click Previous to return to the last screen. Click Cancel to return to the Exception Administration screen.
For 24 X 7 Schedule options, shown in Figure 2–16:
a. Select the correct time zone from the Time Zone field.
The system will default to PDT if no option is selected.
b. Click the Calendar icon to select the Begin Date. c. Click the Clock icon to select the Begin Time.
Trimble MRM Confidential
33
d. Click NEXT to advance to the Specify the Exception Notification Options screen, shown in Figure 2–17. Click Cancel to return to the Exception Administration screen.
7. Select how you want Notification of the Idling Exceptions sent to you. You may select more than one delivery option.
•
Check the Exception Console Delivery check box if you want console notification.
•
Check the Real‐Time message delivery option if you want immediate notification. a. Enter up to two email or mobile devices, one for each of the 1. and 2. fields.
b. Select the radio button for the format of the device address: PC format or mobile device. To send messages to mobile devices, use the format {phonenumber}@page.nextel.com (i.e. [email protected]).
•
Check the Standard message delivery option if you want a list of all the Idling Excep‐
tions that occurred the previous day.
a. Enter up to two email or mobile devices, one for each of the 1. and 2. fields. 8. Select the radio button for the format of the device address: PC format or mobile device. To send messages to mobile devices, use the format {phonenumber}@page.nextel.com (i.e. [email protected]).
9. Click Next to advance to the Specify the Mobile Devices to Monitor screen, shown in Figure 2–18. Click Previous to return to the last screen. Click Cancel to return to the Exception Administration screen. 10. Select vehicles or hand‐held devices to monitor:
•
Select the vehicle group, if applicable, from the Group drop‐menu, then click Search. For more information about Groups, see the GeoManager Admin User Manual.
•
If you want to search for a specific device, enter the search criteria into the Search field, then click Search. Matching devices appear in the Available mobile devices list.
•
Select the vehicle(s) you would like to monitor from the Available mobile devices list. To select more than one vehicle, hold down the [Ctrl] key while selecting.
11. Click the > button to add the selected devices to the Monitor mobile devices list. Click All>> to add all devices from the Available mobile devices list.
The name(s) you have selected will move to the Monitor Mobile Devices field indi‐
cating they have been selected.
Trimble MRM Confidential
34
Note:
Devices can only be part of one Idling Exception. Unavailable devices that are part of a different Idling Exception are shown in the Unavailable mobile devices field along with the name
of the Idling Exception to which they belong.
12. Click Next to advance to the Confirmation screen, shown in Figure 2–23. Click Previous to return to the last screen. Click Cancel to return to the Exception Administration screen. Figure 2–23 Confirmation Screen for Idling
13. Confirm the Idling Exception parameters that you selected.
14. Click Done if you are finished setting up Exceptions. The Current Exceptions screen appears.
Click Create Another Exception if you want to create other Exceptions. The Select Exception Type screen appears.
Trimble MRM Confidential
35
Landmark
Landmark Exceptions flag stops at a specific landmark type or address. This is helpful for track‐
ing pickups and deliveries, monitoring unauthorized (e.g. personal) usage of company vehicles either during or after work hours, or flagging unscheduled customer stops. You can specify up to 20 Landmark Exceptions for monitoring. The Trimble MRM servers moni‐
tor Landmark Exceptions and require the vehicle to stop at the Landmark to trigger an Excep‐
tion.
Landmark is available for GeoManager iLM, GeoManager PE, Pathway iLM and Pathway PE.
From the Setting up an Exception ‐ Select the Exception Type screen:
1. Click Landmark. The Setting up an Exception ‐ Select the Exception Type/Parameters – Step 1 of 4 screen for Landmark, shown in Figure 2–24, appears.
Figure 2–24 Select the Exception Type/Parameters for Landmark - Step 1 of 4
Trimble MRM Confidential
36
Field
Description
Exception Name
This is the name that appears on the Exceptions Report. You may
use up to 50 characters to create a unique name. Characters must
be alpha-numeric. No symbols or punctuation is allowed.
Exception Type
This field is pre-filled from the Select Exceptions Type screen.
Customer Landmark(s) to monitor
Designated Landmarks, entered by an administrator, that are available for monitoring selection.
For information about creating Landmarks, refer to the GeoManager User Admin Guide.
Type of Monitoring Schedule
Monitoring Schedules are available in two types:
• Recurring – a specific schedule that happens on a repeated basis.
This can be one of four predefined schedules or customized to
your work day(s).
• 24 X 7 – continuous monitoring of mobile workers.
TimeZone
The time zone where the mobile workers will be performing their
tasks. You can select multiple time zones by holding down the [Ctrl]
key.
Begin Date
The month, day and year you want to begin monitoring diagnostics
faults for the selected mobile device. This can be today’s date or a
future date, but cannot be a previous date.
Begin Time
The time of day you want to begin monitoring landmarks for the
selected mobile device. This must be the current time or later. Minutes can be selected in 15 minute increments.
2. Type a name into the Exception Name field. 3. Click Select. The Landmarks screen displays, shown in Figure 2–25, appears.
Trimble MRM Confidential
37
Figure 2–25 Landmarks Screen
Note:
Subsequent changes to Landmarks created for this exception will not be automatically recognized. Any Landmarks that have been changed need to be selected again in the edit/modify
exception screen.
4. Select the Landmarks you would like to monitor:
•
Select the Landmark type, if applicable, from the Landmark type drop down menu. For more information about Landmark types, see the GeoManager User Admin Guide.
•
Select the location by City, State or Zip if applicable, from the Location drop down menu.
•
Enter search criteria into Landmark Name field, then click Search to search for a specific Landmark. Matching Landmarks appear in the Available Landmarks list.
5. Select the check box(es) next to the Landmark(s) you would like to monitor. 6. Click Select to add the selected Landmarks to the Customer Landmarks to Monitor list. Click Close exit the Landmarks screen without selecting landmarks.
Trimble MRM Confidential
38
The Landmark(s) you have selected will appear in the Customer Landmarks to Monitor list indicating they have been selected.
7. Select the schedule type you would like to establish for monitoring Landmark Exceptions from the Type of Monitoring Schedule field:
•
Recurring
•
24 X 7
Each type of schedule has different set‐up options which appear in the next screen. 8. Click NEXT to open the Schedule Options screen.
9. Set‐up the options for your schedule.
For predefined Recurring Schedule options, shown in Figure 2–15:
a. Select one of the four options from the Predefined Schedules field:
• Week Days • Week Nights
• Weekends • Nights and Weekends b. Click the Day drop down menu in the Begin Monitoring column to change the day of the week, as needed.
c. Click the Clock icon in the Begin Monitoring column to change the daily time using the Hour, Min and AM/PM fields as needed. d. Click the Day drop down menu in the End Monitoring column to change the day of the week, as needed.
e. Click the Clock icon in the End Monitoring column to change the daily time using the Hour, Min and AM/PM fields as needed. f.
To clear the selected options and re‐enter information, click Clear.
g. Click Next to advance to the next screen. Click Previous to return to the last screen. Click Cancel to return to the Exception Administration screen.
For 24 X 7 Schedule options, shown in Figure 2–16:
a. Select the correct time zone from the Time Zone field.
The system will default to PDT if no option is selected.
b. Click the Calendar icon to select the Begin Date. Trimble MRM Confidential
39
c. Click the Clock icon to select the Begin Time.
d. Click NEXT to advance to the Specify the Exception Notification Options, shown in Figure 2–17. Click Cancel to return to the Exception Administration screen.
Figure 2–26 Exception Notification Screen with Standard Notification Only - Step 3 of 4
10. Select how you want Notification of the Landmark Exceptions sent to you. You may select more than one delivery option.
•
Check the Exception Console Delivery check box if you want console notification.
•
Check the Standard message delivery option if you want a list of all the Landmark Exceptions that occurred the previous day.
a. Enter up to two email or mobile devices, one for each of the 1. and 2. fields. b. Select the radio button for the format of the device address: PC format or mobile device. To send messages to mobile devices, use the format {phonenumber}@page.nextel.com (i.e. [email protected]).
11. Click Next to advance to the Specify the Mobile Devices to Monitor screen, shown in Figure 2–18. Click Previous to return to the last screen. Click Cancel to return to the Exception Administration screen. 12. Select vehicles or hand‐held devices to monitor:
•
Select the vehicle group, if applicable, from the Group drop‐menu, then click Search. For more information about Groups, see the GeoManager Admin User Manual.
Trimble MRM Confidential
40
•
If you want to search for a specific device, enter the search criteria into the Search field, then click Search. Matching devices appear in the Available mobile devices list.
•
Select the vehicle(s) you would like to monitor from the Available mobile devices list. To select more than one vehicle, hold down the [Ctrl] key while selecting.
13. Click the > button to add the selected devices to the Monitor mobile devices list. Click All>> to add all devices from the Available mobile devices list.
The name(s) you have selected will move to the Monitor Mobile Devices field indi‐
cating they have been selected.
14. Click Next to advance to the Confirmation screen, shown in Figure 2–27. Click Previous to return to the last screen. Click Cancel to return to the Exception Administration screen. Figure 2–27 Confirmation Screen for Landmarks
15. Confirm the Landmark Exception parameters that you selected.
16. Click Done if you are finished setting up Exceptions. The Current Exceptions screen appears.
Click Create Another Exception if you want to create other Exceptions. The Select Exception Type screen appears.
Landmark Proximity
Trimble MRM Confidential
41
Landmark Proximity Exceptions flag arrivals to and departures from a specific landmark type or address. This area is more tightly confined than an area for a Zone Exception, which are covered later in this manual. Landmark Proximity Exceptions are helpful for tracking merchandise pick‐
up and delivery, monitoring unauthorized (e. g. personal) usage of company vehicles either dur‐
ing or after work hours, or flagging unscheduled customer stops. You can specify up to 20 Landmark Proximity Exceptions for monitoring. Landmark Proximity Exceptions are monitored in the iLM. An Exception is triggered as soon as the vehicle breeches the Landmark for at least one minute. Stopping the vehicle is not required to trigger an Excep‐
tion.
Landmark Proximity is available for GeoManager iLM, GeoManager PE and Pathway iLM.
From the Setting up an Exception ‐ Select the Exception Type screen:
1. Click Landmark Proximity. The Setting up an Exception ‐ Select the Exception Type/Param‐
eters – Step 1 of 4 screen for Landmark Proximity, shown in Figure 2–28, appears.
Figure 2–28 Select the Exception Type/Parameters for Landmark Proximity - Step 1 of 4
Trimble MRM Confidential
42
Field
Description
Exception Name
This is the name that appears on the Exceptions Report. You may
use up to 50 characters to create a unique name. Characters must
be alpha-numeric. No symbols or punctuation is allowed.
Exception Type
This field is pre-filled from the Select Exceptions Type screen.
Customer Landmark(s) to monitor
Designated Landmarks, entered by an administrator, that are available for monitoring selection.
For information about creating Landmarks, refer to the GeoManager User Admin Guide.
Type of Monitoring Schedule
Monitoring Schedules are available in two types:
• Recurring – a specific schedule that happens on a repeated basis.
This can be one of four predefined schedules or customized to
your work day(s).
• 24 X 7 – continuous monitoring of mobile workers.
TimeZone
The time zone where the mobile workers will be performing their
tasks. You can select multiple time zones by holding down the [Ctrl]
key.
Begin Date
The month, day and year you want to begin monitoring landmark
proximity for the selected mobile device. This can be today’s date or
a future date, but cannot be a previous date.
Begin Time
The time of day you want to begin monitoring diagnostics faults for
the selected mobile device. This must be the current time or later.
Minutes can be selected in 15 minute increments.
Note:
•
Only circular landmarks can be monitored in landmark proximity exceptions.
•
Subsequent changes to Landmarks created for this exception will not be automatically
recognized. Any Landmarks that have been changed need to be selected again in the
Edit/Modify Exception screen.
2. Type a name into the Exception Name field. 3. Click Select. The Landmarks screen displays.
4. Select the Landmarks you would like to monitor:
•
Select the Landmark type, if applicable, from the Landmark type drop down menu. For more information about Landmark types, see the GeoManager User Admin Guide.
•
Select the location by City, State or Zip if applicable, from the Location drop down menu.
Trimble MRM Confidential
43
•
Enter search criteria into Landmark Name field, then click Search to search for a specific Landmark. Matching Landmarks appear in the Available Landmarks list.
5. Select the check box(es) next to the Landmark(s) you would like to monitor. 6. Click Select to add the selected Landmarks to the Customer Landmarks to Monitor list. Click Close exit the Landmarks screen without selecting landmarks.
The Landmark(s) you have selected will appear in the Customer Landmarks to Monitor list indicating they have been selected.
7. Select the schedule type you would like to establish for monitoring Landmark Exceptions from the Type of Monitoring Schedule field:
•
Recurring
•
24 X 7
Each type of schedule has different set‐up options. 8. Click NEXT to open the Schedule Options screen.
9. Set‐up the options for your schedule.
For predefined Recurring Schedule options, shown in Figure 2–15:
a. Select one of the four options from the Predefined Schedules field:
• Week Days • Week Nights
• Weekends • Nights and Weekends b. Click the Day drop down menu in the Begin Monitoring column to change the day of the week, as needed.
c. Click the Clock icon in the Begin Monitoring column to change the daily time using the Hour, Min and AM/PM fields as needed. d. Click the Day drop down menu in the End Monitoring column to change the day of the week, as needed.
e. Click the Clock icon in the End Monitoring column to change the daily time using the Hour, Min and AM/PM fields as needed. f.
To clear the selected options and re‐enter information, click Clear.
g. Click Next to advance to the next screen. Click Previous to return to the last screen. Trimble MRM Confidential
44
Click Cancel to return to the Exception Administration screen.
For 24 X 7 Schedule options, shown in Figure 2–16:
a. Select the correct time zone from the Time Zone field.
The system will default to PDT if no option is selected.
b. Click the Calendar icon to select the Begin Date. c. Click the Clock icon to select the Begin Time.
d. Click NEXT to advance to the Specify the Exception Notification Options screen, shown in Figure 2–17. Click Cancel to return to the Exception Administration screen.
10. Select how you want Notification of the Landmark Proximity Exceptions sent to you. You may select more than one delivery option.
•
Check the Exception Console Delivery check box if you want console notification.
•
Check the Real‐Time message delivery option if you want immediate notification. a. Enter up to two email or mobile devices, one for each of the 1. and 2. fields.
b. Select the radio button for the format of the device address: PC format or mobile device. To send messages to mobile devices, use the format {phonenumber}@page.nextel.com (i.e. [email protected]).
•
Check the Standard message delivery option if you want a list of all the Landmark Prox‐
imity Exceptions that occurred the previous day.
a. Enter up to two email or mobile devices, one for each of the 1. and 2. fields.
b. Select the radio button for the format of the device address: PC format or mobile device. To send messages to mobile devices, use the format {phonenumber}@page.nextel.com (i.e. [email protected]). 11. Click Next to advance to the Specify the Mobile Devices to Monitor screen, shown in Figure 2–18. Click Previous to return to the last screen. Click Cancel to return to the Exception Administration screen. 12. Select vehicles or hand‐held devices to monitor:
•
Select the vehicle group, if applicable, from the Group drop‐menu, then click Search. For more information about Groups, see the GeoManager Admin User Manual.
Trimble MRM Confidential
45
•
If you want to search for a specific device, enter the search criteria into the Search field, then click Search. Matching devices appear in the Available mobile devices list.
•
Select the vehicle(s) you would like to monitor from the Available mobile devices list. To select more than one vehicle, hold down the [Ctrl] key while selecting.
13. Click the > button to add the selected devices to the Monitor mobile devices list. Click All>> to add all devices from the Available mobile devices list.
The name(s) you have selected will move to the Monitor Mobile Devices field indi‐
cating they have been selected.
14. Click Next to advance to the Confirmation screen, shown in Figure 2–29. Click Previous to return to the last screen. Click Cancel to return to the Exception Administration screen. Figure 2–29 Confirmation Screen for Landmark Proximity
15. Confirm the Landmark Proximity Exception parameters that you selected.
16. Click Done if you are finished setting up Exceptions. The Current Exceptions screen appears.
Click Create Another Exception if you want to create other Exceptions. The Select Exception Type screen appears.
Low Battery
Trimble MRM Confidential
46
Low Battery Exceptions send warnings when handset or vehicle battery levels fall to a point at which no location data can be transmitted. This Exception helps remind mobile workers to charge their equipment.
Low Battery is available for GeoManager iLM, GeoManager PE and Pathway PE.
From the Setting up an Exception ‐ Select the Exception Type screen:
1. Click Low Battery. The Setting up an Exception ‐ Select the Exception Type/Parameters – Step 1 of 4 screen for Low Battery, shown in Figure 2–30, appears.
Figure 2–30 Select the Exception Type/Parameters for Low Battery - Step 1 of 4
Field
Description
Exception Name
This is the name that appears on the Exceptions Report. You may
use up to 50 characters to create a unique name. Characters must
be alpha-numeric. No symbols or punctuation is allowed.
Exception Type
This field is pre-filled from the Select Exceptions Type screen.
Minutes device
continues to have
Low Battery without recharge:
If the GeoManager application is not detected as running within
this number of minutes due to low battery (added to the update
frequency that your service transmits to the server), an alert will be
sent.
This must be greater than 15 minutes.
Trimble MRM Confidential
47
Field
Description
Type of Monitoring Schedule
Monitoring Schedules are available in two types:
• Recurring – a specific schedule that happens on a repeated basis.
This can be one of four predefined schedules or customized to
your work day(s).
• 24 X 7 – continuous monitoring of mobile workers.
TimeZone
The time zone where the mobile workers will be performing their
tasks. You can select multiple time zones by holding down the [Ctrl]
key.
Begin Date
The month, day and year you want to begin monitoring low battery
for the selected mobile device. This can be today’s date or a future
date, but cannot be a previous date.
Begin Time
The time of day you want to begin monitoring diagnostics faults for
the selected mobile device. This must be the current time or later.
Minutes can be selected in 15 minute increments.
2. Type a name into the Exception Name field. 3. Enter the maximum number of minutes that the GeoManager application is not detected as running due to low battery before an Exception occurs.
4. Select the schedule type you would like to establish for monitoring Idling Exceptions from the Type of Monitoring Schedule field:
•
Recurring
•
24 X 7
Each type of schedule has different set‐up options which appear in the next screen. 5. Click NEXT to open the Schedule Options screen.
6. Set‐up the options for your schedule.
For predefined Recurring Schedule options, shown in Figure 2–15:
a. Select one of the four options from the Predefined Schedules field:
• Week Days • Week Nights
• Weekends • Nights and Weekends b. Click the Day drop down menu in the Begin Monitoring column to change the day of the week, as needed.
c. Click the Clock icon in the Begin Monitoring column to change the daily time using the Hour, Min and AM/PM fields as needed. Trimble MRM Confidential
48
d. Click the Day drop down menu in the End Monitoring column to change the day of the week, as needed.
e. Click the Clock icon in the End Monitoring column to change the daily time using the Hour, Min and AM/PM fields as needed. f.
To clear the selected options and re‐enter information, click Clear.
g. Click Next to advance to the next screen. Click Previous to return to the last screen. Click Cancel to return to the Exception Administration screen.
For 24 X 7 Schedule options, shown in Figure 2–16:
a. Select the correct time zone from the Time Zone field.
The system will default to PDT if no option is selected.
b. Click the Calendar icon to select the Begin Date. c. Click the Clock icon to select the Begin Time.
d. Click NEXT to advance to the Specify the Exception Notification Options screen, shown in Figure 2–17.
Click Cancel to return to the Exception Administration screen.
7. Select how you want Notification of the Low Battery Exceptions sent to you. You may select more than one delivery option.
•
Check the Exception Console Delivery check box if you want console notification.
•
Check the Real‐Time message delivery option if you want immediate notification. a. Enter up to two email or mobile devices, one for each of the 1. and 2. fields.
b. Select the radio button for the format of the device address: PC format or mobile device. To send messages to mobile devices, use the format {phonenumber}@page.nextel.com (i.e. [email protected]).
•
Check the Standard message delivery option if you want a list of all the Speed Excep‐
tions that occurred the previous day.
a. Enter up to two email or mobile devices, one for each of the 1. and 2. fields. b. Select the radio button for the format of the device address: PC format or mobile device. To send messages to mobile devices, use the format {phonenumber}@page.nextel.com (i.e. [email protected]).
Trimble MRM Confidential
49
8. Click Next to advance to the Specify the Mobile Devices to Monitor screen, shown in Figure 2–18. Click Previous to return to the last screen. Click Cancel to return to the Exception Administration screen. 9. Select vehicles or hand‐held devices to monitor:
•
Select the vehicle group, if applicable, from the Group drop‐menu, then click Search. For more information about Groups, see the GeoManager Admin User Manual.
•
If you want to search for a specific device, enter the search criteria into the Search field, then click Search. Matching devices appear in the Available mobile devices list.
•
Select the vehicle(s) you would like to monitor from the Available mobile devices list. To select more than one vehicle, hold down the [Ctrl] key while selecting.
10. Click the > button to add the selected devices to the Monitor mobile devices list. Click All>> to add all devices from the Available mobile devices list.
The name(s) you have selected will move to the Monitor Mobile Devices field indi‐
cating they have been selected.
11. Click Next to advance to the Confirmation screen, shown in Figure 2–37. Click Previous to return to the last screen. Click Cancel to return to the Exception Administration screen. Figure 2–31 Confirmation Screen for Low Battery
12. Confirm the Low Battery Exception parameters that you selected.
Trimble MRM Confidential
50
13. Click Done if you are finished setting up Exceptions. The Current Exceptions screen appears.
Click Create Another Exception if you want to create other Exceptions. The Select Exception Type screen appears.
Messaging
Messaging Exception works in conjunction with our Messaging option. It allows exceptions to be sent as an alert notification when certain pre‐defined messages are sent by the driver. For exam‐
ple, you can tie an alert to the pre‐defined message “Driver has flat tire.” Whenever this pre‐defined message is sent, the system forwards an e‐mail or notification console alert to the dispatcher and maintenance group to ensure that immediate assistance is provided to the driver.
Messaging is available for GeoManager iLM and GeoManager PE.
From the Setting up an Exception ‐ Select the Exception Type screen:
1. Click Messaging. The Setting up an Exception ‐ Select the Exception Type/Parameters – Step 1 of 4 screen for Idling, shown in Figure 2–32, appears.
Figure 2–32 Select the Exception Type/Parameters for Messaging - Step 1 of 4
Trimble MRM Confidential
51
Field
Description
Exception Name
This is the name that appears on the Exceptions Report. You may
use up to 50 characters to create a unique name. Characters must
be alpha-numeric. No symbols or punctuation is allowed.
Exception Type
This field is pre-filled from the Select Exceptions Type screen.
Select Message
A list of your custom canned messages will appear.
Validation
This step allows a second level of validation to ensure the correct
message flags an exception. Leave the box blank if you do not wish
to use this extra validation.
Type of Monitoring Schedule
Monitoring Schedules are available in two types:
• Recurring – a specific schedule that happens on a repeated basis.
This can be one of four predefined schedules or customized to
your work day(s).
• 24 X 7 – continuous monitoring of mobile workers.
TimeZone
The time zone where the mobile workers will be performing their
tasks. You can select multiple time zones by holding down the [Ctrl]
key.
Begin Date
The month, day and year you want to begin monitoring diagnostics
faults for the selected mobile device. This can be today’s date or a
future date, but cannot be a previous date.
Begin Time
The time of day you want to begin monitoring messaging for the
selected mobile device. This must be the current time or later. Minutes can be selected in 15 minute increments.
2. Type a name into the Exception Name field. 3. Select the pre‐typed message from the Select Message drop‐menu.
4. If desired, enter the exact words that will be used to validate the message in the Validation field.
5. Select the schedule type you would like to establish for monitoring Idling Exceptions from the Type of Monitoring Schedule field:
•
Recurring
•
24 X 7
Each type of schedule has different set‐up options which appear in the next screen. 6. Click NEXT to open the Schedule Options screen.
7. Set‐up the options for your schedule.
For predefined Recurring Schedule options, shown in Figure 2–15:
Trimble MRM Confidential
52
a. Select one of the four options from the Predefined Schedules field:
• Week Days • Week Nights
• Weekends • Nights and Weekends b. Click the Day drop down menu in the Begin Monitoring column to change the day of the week, as needed.
c. Click the Clock icon in the Begin Monitoring column to change the daily time using the Hour, Min and AM/PM fields as needed. d. Click the Day drop down menu in the End Monitoring column to change the day of the week, as needed.
e. Click the Clock icon in the End Monitoring column to change the daily time using the Hour, Min and AM/PM fields as needed. f.
To clear the selected options and re‐enter information, click Clear.
g. Click Next to advance to the next screen. Click Previous to return to the last screen. Click Cancel to return to the Exception Administration screen.
For 24 X 7 Schedule options, shown in Figure 2–16:
a. Select the correct time zone from the Time Zone field.
The system will default to PDT if no option is selected.
b. Click the Calendar icon to select the Begin Date. c. Click the Clock icon to select the Begin Time.
d. Click NEXT to advance to the Specify the Exception Notification Options screen, shown in Figure 2–17. Click Cancel to return to the Exception Administration screen.
8. Select how you want Notification of the Messaging Exceptions sent to you. You may select more than one delivery option.
•
Check the Exception Console Delivery check box if you want console notification.
•
Check the Real‐Time message delivery option if you want immediate notification. a. Enter up to two email or mobile devices, one for each of the 1. and 2. fields.
b. Select the radio button for the format of the device address: PC format or mobile device. Trimble MRM Confidential
53
To send messages to mobile devices, use the format {phonenumber}@page.nextel.com (i.e. [email protected]).
•
Check the Standard message delivery option if you want a list of all the Speed Excep‐
tions that occurred the previous day.
a. Enter up to two email or mobile devices, one for each of the 1. and 2. fields. b. Select the radio button for the format of the device address: PC format or mobile device. To send messages to mobile devices, use the format {phonenumber}@page.nextel.com (i.e. [email protected]).
9. Click Next to advance to the Specify the Mobile Devices to Monitor screen, shown in Figure 2–18. Click Previous to return to the last screen. Click Cancel to return to the Exception Administration screen. 10. Select vehicles or hand‐held devices to monitor:
•
Select the vehicle group, if applicable, from the Group drop‐menu, then click Search. For more information about Groups, see the GeoManager Admin User Manual.
•
If you want to search for a specific device, enter the search criteria into the Search field, then click Search. Matching devices appear in the Available mobile devices list.
•
Select the vehicle(s) you would like to monitor from the Available mobile devices list. To select more than one vehicle, hold down the [Ctrl] key while selecting.
11. Click the > button to add the selected devices to the Monitor mobile devices list. Click All>> to add all devices from the Available mobile devices list.
The name(s) you have selected will move to the Monitor Mobile Devices field indi‐
cating they have been selected.
12. Click Next to advance to the Confirmation screen, shown in Figure 2–33. Click Previous to return to the last screen. Click Cancel to return to the Exception Administration screen. Trimble MRM Confidential
54
Figure 2–33 Confirmation Screen for Messaging
13. Confirm the Messaging Exception parameters that you selected.
14. Click Done if you are finished setting up Exceptions. The Current Exceptions screen appears.
Click Create Another Exception if you want to create other Exceptions. The Select Exception Type screen appears.
Mileage
Mileage Exceptions occur when a mobile device exceeds a predefined number of miles within a specified work day. By monitoring mobile worker mileage, companies can save money by deter‐
mining which mobile workers consistently exceed mileage parameters and determining more efficient routes.
The Mileage Exception is available for GeoManager iLM and GeoManager PE.
From the Setting up an Exception ‐ Select the Exception Type screen:
1. Click Mileage. The Setting up an Exception ‐ Select the Exception Type/Parameters – Step 1 of 4 screen for Idling, shown in Figure 2–34, appears.
Trimble MRM Confidential
55
Figure 2–34 Select the Exception Type/Parameters for Mileage - Step 1 of 4
Field
Description
Exception Name
This is the name that appears on the Exceptions Report. You may
use up to 50 characters to create a unique name. Characters must
be alpha-numeric. No symbols or punctuation is allowed.
Exception Type
This field is pre-filled from the Select Exceptions Type screen.
Mileage
The daily mileage the mobile device must exceed to trigger an
exception.
Type of Monitoring Schedule
Monitoring Schedules are available in two types:
• Recurring – a specific schedule that happens on a repeated basis.
This can be one of four predefined schedules or customized to
your work day(s).
• 24 X 7 – continuous monitoring of mobile workers.
TimeZone
The time zone where the mobile workers will be performing their
tasks. You can select multiple time zones by holding down the [Ctrl]
key.
Begin Date
The month, day and year you want to begin monitoring diagnostics
faults for the selected mobile device. This can be today’s date or a
future date, but cannot be a previous date.
Begin Time
The time of day you want to begin monitoring diagnostics faults for
the selected mobile device. This must be the current time or later.
Minutes can be selected in 15 minute increments.
Trimble MRM Confidential
56
Note:
A mobile device cannot exist in more than one mileage exception.
2. Type a name into the Exception Name field. 3. Enter the maximum number of miles the mobile device can travel per day.
4. Select the schedule type you would like to establish for monitoring Idling Exceptions from the Type of Monitoring Schedule field:
•
Recurring
•
24 X 7
Each type of schedule has different set‐up options which appear in the next screen. 5. Click NEXT to open the Schedule Options screen.
6. Set‐up the options for your schedule.
For predefined Recurring Schedule options, shown in Figure 2–15:
a. Select one of the four options from the Predefined Schedules field:
• Week Days • Week Nights
• Weekends • Nights and Weekends b. Click the Day drop down menu in the Begin Monitoring column to change the day of the week, as needed.
c. Click the Clock icon in the Begin Monitoring column to change the daily time using the Hour, Min and AM/PM fields as needed. d. Click the Day drop down menu in the End Monitoring column to change the day of the week, as needed.
e. Click the Clock icon in the End Monitoring column to change the daily time using the Hour, Min and AM/PM fields as needed. f.
To clear the selected options and re‐enter information, click Clear.
g. Click Next to advance to the next screen. Click Previous to return to the last screen. Click Cancel to return to the Exception Administration screen.
For 24 X 7 Schedule options:
a. Select the correct time zone from the Time Zone field.
Trimble MRM Confidential
57
The system will default to PDT if no option is selected.
b. Click the Calendar icon to select the Begin Date. c. Click the Clock icon to select the Begin Time.
d. Click NEXT to advance to the Specify the Exception Notification Options screen, shown in Figure 2–16. Click Cancel to return to the Exception Administration screen.
7. Select how you want Notification of the Mileage Exceptions sent to you. You may select more than one delivery option.
•
Check the Exception Console Delivery check box if you want console notification.
•
Check the Real‐Time message delivery option if you want immediate notification. a. Enter up to two email or mobile devices, one for each of the 1. and 2. fields.
b. Select the radio button for the format of the device address: PC format or mobile device. To send messages to mobile devices, use the format {phonenumber}@page.nextel.com (i.e. [email protected]).
•
Check the Standard message delivery option if you want a list of all the Speed Excep‐
tions that occurred the previous day.
a. Enter up to two email or mobile devices, one for each of the 1. and 2. fields. b. Select the radio button for the format of the device address: PC format or mobile device. To send messages to mobile devices, use the format {phonenumber}@page.nextel.com (i.e. [email protected]).
8. Click Next to advance to the Specify the Mobile Devices to Monitor screen, shown in Figure 2–18. Click Previous to return to the last screen. Click Cancel to return to the Exception Administration screen. 9. Select vehicles or hand‐held devices to monitor:
•
Select the vehicle group, if applicable, from the Group drop‐menu, then click Search. For more information about Groups, see the GeoManager Admin User Manual.
•
If you want to search for a specific device, enter the search criteria into the Search field, then click Search. Matching devices appear in the Available mobile devices list.
•
Select the vehicle(s) you would like to monitor from the Available mobile devices list. To select more than one vehicle, hold down the [Ctrl] key while selecting.
Trimble MRM Confidential
58
10. Click the > button to add the selected devices to the Monitor mobile devices list. Click All>> to add all devices from the Available mobile devices list.
The name(s) you have selected will move to the Monitor Mobile Devices field indi‐
cating they have been selected.
11. Click Next to advance to the Confirmation screen, shown in Figure 2–35. Click Previous to return to the last screen. Click Cancel to return to the Exception Administration screen. Figure 2–35 Confirmation Screen for Mileage
12. Confirm the Mileage Exception parameters that you selected.
13. Click Done if you are finished setting up Exceptions. The Current Exceptions screen appears.
Click Create Another Exception if you want to create other Exceptions. The Select Exception Type screen appears.
Trimble MRM Confidential
59
Mobile Device Vicinity
Mobile Device Vicinity monitors the occurrences of multiple mobile devices stopping within a defined distance from each other for a period of time common to both or all. This allows compa‐
nies to check for route overlap or flag unproductive time if mobile devices are grouped near each other for extended periods of time.
Mobile Device Vicinity is available for GeoManager iLM, GeoManager PE and Pathway iLM.
Note:
Landmarks designated as Type 14 exclude vehicle congregation from the Mobile Device
Vicinity Exception report.
From the Setting up an Exception ‐ Select the Exception Type screen:
1. Click Mobile Device Vicinity. The Setting up an Exception ‐ Select the Exception Type/
Parameters – Step 1 of 4 screen for Landmark, shown in Figure 2–36.
Figure 2–36 Select the Exception Type/Parameters for Mobile Device Vicinity - Step 1 of 4
Trimble MRM Confidential
60
Field
Description
Exception Name
This is the name that appears on the Exceptions Report. You may
use up to 50 characters to create a unique name. Characters must
be alpha-numeric. No symbols or punctuation is allowed.
Exception Type
This field is pre-filled from the Select Exceptions Type screen.
Number of Mobile
Devices
The number of mobile devices that must be in proximity to each
other before an Exception is triggered. This can be anywhere from 2
to 10 devices.
Common Duration
The amount of time the specified number of mobile devices must be
in proximity to each other before an Exception is triggered. This can
be anywhere from 5 to 60 minutes.
Distance
The range, in Miles, of the mobile devices before an Exception is
triggered. This can be from 0.5 to 2.0 miles in 0.5 mile increments.
Type of Monitoring Schedule
Monitoring Schedules are available in two types:
• Recurring – a specific schedule that happens on a repeated basis.
This can be one of four predefined schedules or customized to
your work day(s).
• 24 X 7 – continuous monitoring of mobile workers.
TimeZone
The time zone where the mobile workers will be performing their
tasks. You can select multiple time zones by holding down the [Ctrl]
key.
Begin Date
The month, day and year you want to begin monitoring diagnostics
faults for the selected mobile device. This can be today’s date or a
future date, but cannot be a previous date.
Begin Time
The time of day you want to begin monitoring landmarks for the
selected mobile device. This must be the current time or later. Minutes can be selected in 15 minute increments.
2. Type a name into the Exception Name field. 3. Select the number of mobile devices that must be in proximity to each other from the Num‐
ber of Vehicles drop‐menu.
4. Select the amount of time the mobile devices must be in proximity to each other from the Common Duration drop‐menu.
5. Select how close the mobile devices must be from the Distance drop‐menu.
6. Select the schedule type you would like to establish for monitoring Landmark Exceptions from the Type of Monitoring Schedule field:
•
Recurring
•
24 X 7
Trimble MRM Confidential
61
Each type of schedule has different set‐up options which appear in the next screen. 7. Click NEXT to open the Schedule Options screen.
8. Set‐up the options for your schedule.
For predefined Recurring Schedule options, shown in Figure 2–15:
a. Select one of the four options from the Predefined Schedules field:
• Week Days • Week Nights
• Weekends • Nights and Weekends b. Click the Day drop down menu in the Begin Monitoring column to change the day of the week, as needed.
c. Click the Clock icon in the Begin Monitoring column to change the daily time using the Hour, Min and AM/PM fields as needed. d. Click the Day drop down menu in the End Monitoring column to change the day of the week, as needed.
e. Click the Clock icon in the End Monitoring column to change the daily time using the Hour, Min and AM/PM fields as needed. f.
To clear the selected options and re‐enter information, click Clear.
g. Click Next to advance to the next screen. Click Previous to return to the last screen. Click Cancel to return to the Exception Administration screen.
For 24 X 7 Schedule options, shown in Figure 2–16:
a. Select the correct time zone from the Time Zone field.
The system will default to PDT if no option is selected.
b. Click the Calendar icon to select the Begin Date. c. Click the Clock icon to select the Begin Time.
d. Click NEXT to advance to the Specify the Exception Notification Options screen, shown in Figure 2–17. Click Cancel to return to the Exception Administration screen.
9. Select how you want Notification of the Mobile Device Vicinity Exceptions sent to you. You may select more than one delivery option.
Trimble MRM Confidential
62
•
Check the Exception Console Delivery check box if you want console notification.
•
Check the Standard message delivery option if you want a list of all the Landmark Exceptions that occurred the previous day.
a. Enter up to two email or mobile devices, one for each of the 1. and 2. fields. b. Select the radio button for the format of the device address: PC format or mobile device. To send messages to mobile devices, use the format {phonenumber}@page.nextel.com (i.e. [email protected]).
10. Click Next to advance to the Specify the Mobile Devices to Monitor screen, shown in Figure 2–18. Click Previous to return to the last screen. Click Cancel to return to the Exception Administration screen. 11. Select vehicles or hand‐held devices to monitor:
•
Select the vehicle group, if applicable, from the Group drop‐menu, then click Search. For more information about Groups, see the GeoManager Admin User Manual.
•
If you want to search for a specific device, enter the search criteria into the Search field, then click Search. Matching devices appear in the Available mobile devices list.
•
Select the vehicle(s) you would like to monitor from the Available mobile devices list. To select more than one vehicle, hold down the [Ctrl] key while selecting.
12. Click the > button to add the selected devices to the Monitor mobile devices list. Click All>> to add all devices from the Available mobile devices list.
The name(s) you have selected will move to the Monitor Mobile Devices field indi‐
cating they have been selected.
13. Click Next to advance to the Confirmation screen, shown in Figure 2–37. Click Previous to return to the last screen. Click Cancel to return to the Exception Administration screen. Trimble MRM Confidential
63
Figure 2–37 Confirmation Screen for Mobile Device Vicinity
14. Confirm the Mobile Device Vicinity Exception parameters that you selected.
15. Click Done if you are finished setting up Exceptions. The Current Exceptions screen appears.
Click Create Another Exception if you want to create other Exceptions. The Select Exception Type screen appears.
Off Hours/Unauthorized Use
When a mobile device is used outside of designated work hours, an Off Hours/Unauthorized Use Exception occurs. This Exception helps a company discover whether company resources are being used when mobile workers are not on shift. Off Hours/Unauthorized Use is available for GeoManager iLM and GeoManager PE.
From the Setting up an Exception ‐ Select the Exception Type screen:
1. Click Off Hours/Unauthorized Use. The Setting up an Exception ‐ Select the Exception Type/Parameters – Step 1 of 4 screen for Off Hours/Unauthorized Use, shown in Figure 2–
38, appears.
Trimble MRM Confidential
64
Figure 2–38 Select the Exception Type/Parameters for Idling - Step 1 of 4
Field
Description
Exception Name
This is the name that appears on the Exceptions Report. You may
use up to 50 characters to create a unique name. Characters must
be alpha-numeric. No symbols or punctuation is allowed.
Exception Type
This field is pre-filled from the Select Exceptions Type screen.
Description
An Exception will be triggered when the mobile device(s) reports
activity outside the specified work time.
TimeZone
The time zone where the mobile workers will be performing their
tasks. You can select multiple time zones by holding down the [Ctrl]
key.
Begin Date
The month, day and year you want to begin monitoring diagnostics
faults for the selected mobile device. This can be today’s date or a
future date, but cannot be a previous date.
Begin Time
The time of day you want to begin monitoring diagnostics faults for
the selected mobile device. This must be the current time or later.
Minutes can be selected in 15 minute increments.
2. Type a name into the Exception Name field. 3. Click NEXT to open the Setting up an exception ‐ Specify the Monitoring Schedule screen.
4. Set‐up the options for your schedule.
For predefined Recurring Schedule options, shown in Figure 2–15:
a. Select one of the four options from the Predefined Schedules field:
Trimble MRM Confidential
65
• Week Days • Week Nights
• Weekends • Nights and Weekends b. Click the Day drop down menu in the Begin Monitoring column to change the day of the week, as needed.
c. Click the Clock icon in the Begin Monitoring column to change the daily time using the Hour, Min and AM/PM fields as needed. d. Click the Day drop down menu in the End Monitoring column to change the day of the week, as needed.
e. Click the Clock icon in the End Monitoring column to change the daily time using the Hour, Min and AM/PM fields as needed. f.
To clear the selected options and re‐enter information, click Clear.
g. Click Next to advance to the next screen. Click Previous to return to the last screen. Click Cancel to return to the Exception Administration screen.
5. Select how you want Notification of the Off Hours/Unauthorized Use Exceptions sent to you. You may select more than one delivery option.
•
Check the Exception Console Delivery check box if you want console notification.
•
Check the Standard message delivery option if you want a list of all the Landmark Exceptions that occurred the previous day.
a. Enter up to two email or mobile devices, one for each of the 1. and 2. fields. b. Select the radio button for the format of the device address: PC format or mobile device. To send messages to mobile devices, use the format {phonenumber}@page.nextel.com (i.e. [email protected]).
6. Click Next to advance to the Specify the Mobile Devices to Monitor screen, shown in Figure 2–18. Click Previous to return to the last screen. Click Cancel to return to the Exception Administration screen. 7. Select vehicles or hand‐held devices to monitor:
•
Select the vehicle group, if applicable, from the Group drop‐menu, then click Search. For more information about Groups, see the GeoManager Admin User Manual.
Trimble MRM Confidential
66
•
If you want to search for a specific device, enter the search criteria into the Search field, then click Search. Matching devices appear in the Available mobile devices list.
•
Select the vehicle(s) you would like to monitor from the Available mobile devices list. To select more than one vehicle, hold down the [Ctrl] key while selecting.
8. Click the > button to add the selected devices to the Monitor mobile devices list. Click All>> to add all devices from the Available mobile devices list.
The name(s) you have selected will move to the Monitor Mobile Devices field indi‐
cating they have been selected.
9. Click Next to advance to the Confirmation screen, shown in Figure 2–39. Click Previous to return to the last screen. Click Cancel to return to the Exception Administration screen. Figure 2–39 Confirmation Screen for Mobile Device Vicinity
10. Confirm the Off Hours/Unauthorized Use parameters that you selected.
11. Click Done if you are finished setting up Exceptions. The Current Exceptions screen appears.
Click Create Another Exception if you want to create other Exceptions. The Select Exception Type screen appears.
Trimble MRM Confidential
67
Speed
Speed Exceptions flag vehicles that drive above a maximum speed for a specific block of time. This is helpful in monitoring both fleet safety and cost containment since speeding can be tied to accidents and higher insurance rates.
Speed is available for GeoManager iLM, GeoManager PE, Pathway iLM and Pathway PE.
From the Setting up an Exception ‐ Select the Exception Type screen:
1. Click Speed. The Setting up an Exception ‐ Select the Exception Type/Parameters – Step 1 of 4 screen for Speed, shown in Figure 2–40, appears.
Figure 2–40 Select the Exception Type/Parameters for Speed - Step 1 of 4
Field
Description
Exception Name
This is the name that appears on the Exceptions Report. You may
use up to 50 characters to create a unique name. Characters must
be alpha-numeric. No symbols or punctuation is allowed.
Exception Type
This field is pre-filled from the Select Exceptions Type screen.
Trimble MRM Confidential
68
Field
Description
Max Speed
The maximum speed the mobile worker can reach before an Exception is triggered.
• An Exception is triggered when the speed of the mobile device(s)
exceeds the maximum speed for X minutes. The minutes must be
consecutive minutes.
• A mobile device cannot exist in more than one speed exception.
Select Duration of
Speed
The continuous amount of time the Max Speed is exceeded before
an Exception is triggered.
Type of Monitoring Schedule
Monitoring Schedules are available in two types:
• Recurring – a specific schedule that happens on a repeated basis.
This can be one of four predefined schedules or customized to
your work day(s).
• 24 X 7 – continuous monitoring of mobile workers.
TimeZone
The time zone where the mobile workers will be performing their
tasks. You can select multiple time zones by holding down the [Ctrl]
key.
Begin Date
The month, day and year you want to begin monitoring diagnostics
faults for the selected mobile device. This can be today’s date or a
future date, but cannot be a previous date.
Begin Time
The time of day you want to begin monitoring diagnostics faults for
the selected mobile device. This must be the current time or later.
Minutes can be selected in 15 minute increments.
2. Type a name into the Exception Name field. 3. Select the maximum speed at which vehicles in your fleet are allowed to travel from the Max Speed field.
4. From the Duration field, select the number of minutes a vehicle must travel at the maximum speed before an alert is created. This can be anywhere between 2 and 10 minutes in duration.
5. Select the schedule type you would like to establish for monitoring Idling Exceptions from the Type of Monitoring Schedule field:
•
Recurring
•
24 X 7
Each type of schedule has different set‐up options which appear in the next screen. 6. Click NEXT to open the Schedule Options screen.
7. Set‐up the options for your schedule.
For predefined Recurring Schedule options, shown in Figure 2–15:
a. Select one of the four options from the Predefined Schedules field:
Trimble MRM Confidential
69
• Week Days • Week Nights
• Weekends • Nights and Weekends b. Click the Day drop down menu in the Begin Monitoring column to change the day of the week, as needed.
c. Click the Clock icon in the Begin Monitoring column to change the daily time using the Hour, Min and AM/PM fields as needed. d. Click the Day drop down menu in the End Monitoring column to change the day of the week, as needed.
e. Click the Clock icon in the End Monitoring column to change the daily time using the Hour, Min and AM/PM fields as needed. f.
To clear the selected options and re‐enter information, click Clear.
g. Click Next to advance to the next screen. Click Previous to return to the last screen. Click Cancel to return to the Exception Administration screen.
For 24 X 7 Schedule options, shown in Figure 2–16:
a. Select the correct time zone from the Time Zone field.
The system will default to PDT if no option is selected.
b. Click the Calendar icon to select the Begin Date. c. Click the Clock icon to select the Begin Time.
d. Click NEXT to advance to the Specify the Exception Notification Options screen, shown in Figure 2–17. Click Cancel to return to the Exception Administration screen.
8. Select how you want Notification of the Speed Exceptions sent to you. You may select more than one delivery option.
•
Check the Exception Console Delivery check box if you want console notification.
•
Check the Real‐Time message delivery option if you want immediate notification. a. Enter up to two email or mobile devices, one for each of the 1. and 2. fields.
b. Select the radio button for the format of the device address: PC format or mobile device. Trimble MRM Confidential
70
To send messages to mobile devices, use the format {phonenumber}@page.nextel.com (i.e. [email protected]).
•
Check the Standard message delivery option if you want a list of all the Speed Excep‐
tions that occurred the previous day.
a. Enter up to two email or mobile devices, one for each of the 1. and 2. fields. b. Select the radio button for the format of the device address: PC format or mobile device. To send messages to mobile devices, use the format {phonenumber}@page.nextel.com (i.e. [email protected]).
9. Click Next to advance to the Specify the Mobile Devices to Monitor screen, shown in Figure 2–18. Click Previous to return to the last screen. Click Cancel to return to the Exception Administration screen. 10. Select vehicles or hand‐held devices to monitor:
•
Select the vehicle group, if applicable, from the Group drop‐menu, then click Search. For more information about Groups, see the GeoManager Admin User Manual.
•
If you want to search for a specific device, enter the search criteria into the Search field, then click Search. Matching devices appear in the Available mobile devices list.
•
Select the vehicle(s) you would like to monitor from the Available mobile devices list. To select more than one vehicle, hold down the [Ctrl] key while selecting.
11. Click the > button to add the selected devices to the Monitor mobile devices list. Click All>> to add all devices from the Available mobile devices list.
The name(s) you have selected will move to the Monitor Mobile Devices field indi‐
cating they have been selected.
12. Click Next to advance to the Confirmation screen, shown in Figure 2–41. Click Previous to return to the last screen. Click Cancel to return to the Exception Administration screen. Trimble MRM Confidential
71
Figure 2–41 Confirmation Screen for Speed
13. Confirm the Speed Exception parameters that you selected.
14. Click Done if you are finished setting up Exceptions. The Current Exceptions screen appears.
Click Create Another Exception if you want to create other Exceptions. The Select Exception Type screen appears.
Stop
Stop Exceptions monitor total daily stop time accumulated at specific locations (Landmarks). This is helpful in determining if workers are spending too much time at non‐revenue generating facilities such as a home office or base location. Noting Stop Exceptions can help drive productivity by capturing less‐than‐usual numbers of expected deliveries, or potentially assist with security breaches if higher‐than‐usual numbers of expected stops are noted.
From the Setting up an Exception ‐ Select the Exception Type screen:
1. Click Stop. The Setting up an Exception ‐ Select the Exception Type/Parameters – Step 1 of 4 screen for Stop, shown in Figure 2–42, appears.
Trimble MRM Confidential
72
Figure 2–42 Select the Exception Type/Parameters for Stop - Step 1 of 4
Field
Description
Exception Name
This is the name that appears on the Exceptions Report. You may
use up to 50 characters to create a unique name. Characters must
be alpha-numeric. No symbols or punctuation is allowed.
Exception Type
This field is pre-filled from the Select Exceptions Type screen.
Total Daily Stop
Duration
This is the daily total duration of stops made at each landmark. For
example, if a mobile device stops at Joe's Gas Station twice today
for 5 minutes each, the total daily stop duration is 10 minutes.
This can be anywhere from 15 to 120 minutes in five minute increments.
Trimble MRM Confidential
73
Field
Description
Select Stops to
Monitor
These radio buttons allow you to select the types of Landmarks you
want to monitor:
•
•
•
•
•
All Stops (Customer Landmarks/Non-Customer Landmark)
All Stops at Customer Landmark
All Stops at Non Customer Landmark
Only Stops at Landmark Type (Select from drop-down menu)
Only Stops at Specified Customer Landmark
For information about creating Landmarks, refer to the GeoManager User Admin Guide.
Type of Monitoring Schedule
Monitoring Schedules are available in two types:
• Recurring – a specific schedule that happens on a repeated basis.
This can be one of four predefined schedules or customized to
your work day(s).
• 24 X 7 – continuous monitoring of mobile workers.
TimeZone
The time zone where the mobile workers will be performing their
tasks. You can select multiple time zones by holding down the [Ctrl]
key.
Begin Date
The month, day and year you want to begin monitoring diagnostics
faults for the selected mobile device. This can be today’s date or a
future date, but cannot be a previous date.
Begin Time
The time of day you want to begin monitoring Stops for the
selected mobile device. This must be the current time or later. Minutes can be selected in 15 minute increments.
2. Type a name into the Exception Name field. 3. Select the daily total duration of stops from the Total Daily Stop Duration drop‐menu.
4. Select the type of Stops you want monitored from the Select Stops to Monitor radio buttons.
•
If you select Only Stops at Landmark Type, select the Landmark type, if applicable, from the Landmark Type drop‐menu. For more information about Landmark types, see the GeoManager Administrator Manual.
•
If you select Only Stops at Specified Customer Landmark:
a. Click Select. The Landmarks screen displays.
b. Select the Landmarks you would like to monitor:
• Select the Landmark type, if applicable, from the Landmark type drop down menu. For more information about Landmark types, see the GeoManager User Admin Guide.
• Select the location by City, State or Zip if applicable, from the Location drop down menu.
Trimble MRM Confidential
74
• Enter search criteria into Landmark Name field, then click Search to search for a specific Landmark. Matching Landmarks appear in the Available Landmarks list.
c. Select the check box(es) next to the Landmark(s) you would like to monitor. d. Click Select to add the selected Landmarks to the Customer Landmarks to Monitor list. Click Close exit the Landmarks screen without selecting landmarks.
The Landmark(s) you have selected will appear in the Customer Landmarks to Monitor list indicating they have been selected.
5. Select the schedule type you would like to establish for monitoring Landmark Exceptions from the Type of Monitoring Schedule field:
•
Recurring
•
24 X 7
Each type of schedule has different set‐up options. 6. Click NEXT to open the Schedule Options screen.
7. Set‐up the options for your schedule.
For predefined Recurring Schedule options, shown in Figure 2–15:
a. Select one of the four options from the Predefined Schedules field:
• Week Days • Week Nights
• Weekends • Nights and Weekends b. Click the Day drop down menu in the Begin Monitoring column to change the day of the week, as needed.
c. Click the Clock icon in the Begin Monitoring column to change the daily time using the Hour, Min and AM/PM fields as needed. d. Click the Day drop down menu in the End Monitoring column to change the day of the week, as needed.
e. Click the Clock icon in the End Monitoring column to change the daily time using the Hour, Min and AM/PM fields as needed. f.
To clear the selected options and re‐enter information, click Clear.
g. Click Next to advance to the next screen. Click Previous to return to the last screen. Trimble MRM Confidential
75
Click Cancel to return to the Exception Administration screen.
For 24 X 7 Schedule options, shown in Figure 2–16:
a. Select the correct time zone from the Time Zone field.
The system will default to PDT if no option is selected.
b. Click the Calendar icon to select the Begin Date. c. Click the Clock icon to select the Begin Time.
d. Click NEXT to advance to the Specify the Exception Notification Options screen, shown in Figure 2–17. Click Cancel to return to the Exception Administration screen.
8. Select how you want Notification of the Stop Exceptions sent to you. You may select more than one delivery option.
•
Check the Exception Console Delivery check box if you want console notification.
•
Check the Standard message delivery option if you want a list of all the Landmark Prox‐
imity Exceptions that occurred the previous day.
a. Enter up to two email or mobile devices, one for each of the 1. and 2. fields.
b. Select the radio button for the format of the device address: PC format or mobile device. To send messages to mobile devices, use the format {phonenumber}@page.nextel.com (i.e. [email protected]). 9. Click Next to advance to the Specify the Mobile Devices to Monitor screen, shown in Figure 2–18. Click Previous to return to the last screen. Click Cancel to return to the Exception Administration screen. 10. Select vehicles or hand‐held devices to monitor:
•
Select the vehicle group, if applicable, from the Group drop‐menu, then click Search. For more information about Groups, see the GeoManager Admin User Manual.
•
If you want to search for a specific device, enter the search criteria into the Search field, then click Search. Matching devices appear in the Available mobile devices list.
•
Select the vehicle(s) you would like to monitor from the Available mobile devices list. To select more than one vehicle, hold down the [Ctrl] key while selecting.
11. Click the > button to add the selected devices to the Monitor mobile devices list. Click All>> to add all devices from the Available mobile devices list.
The name(s) you have selected will move to the Monitor Mobile Devices field indi‐
cating they have been selected.
Trimble MRM Confidential
76
12. Click Next to advance to the Confirmation screen, shown in Figure 2–43. Click Previous to return to the last screen. Click Cancel to return to the Exception Administration screen. Figure 2–43 Confirmation Screen for Stop
13. Confirm the Stop Exception parameters that you selected.
14. Click Done if you are finished setting up Exceptions. The Current Exceptions screen appears.
Click Create Another Exception if you want to create other Exceptions. The Select Exception Type screen appears.
Stop Count
Stop Count Exceptions monitor the total number of stops a vehicle makes. This can help a com‐
pany determine which mobile workers are performing too many or too few stops during a shift. From the Setting up an Exception ‐ Select the Exception Type screen:
1. Click Stop Count. The Setting up an Exception ‐ Select the Exception Type/Parameters – Step 1 of 4 screen for Stop Count, shown in Figure 2–44, appears.
Trimble MRM Confidential
77
Figure 2–44 Select the Exception Type/Parameters for Stop Count - Step 1 of 4
Field
Description
Exception Name
This is the name that appears on the Exceptions Report. You may
use up to 50 characters to create a unique name. Characters must
be alpha-numeric. No symbols or punctuation is allowed.
Exception Type
This field is pre-filled from the Select Exceptions Type screen.
Duration of Stop
This is the maximum amount of time before an Exception occurs.
This can be anywhere from 3 to 240 minutes in five minute increments.
Total Daily Number
of Stops
Trimble MRM Confidential
This is the minimum and/or maximum number of stops a mobile
device can make before an Exception occurs.
78
Field
Description
Select Stops to
Monitor
These radio buttons allow you to select the types of Landmarks you
want to monitor:
•
•
•
•
•
All Stops (Customer Landmarks/Non-Customer Landmark)
All Stops at Customer Landmark
All Stops at Non Customer Landmark
Only Stops at Landmark Type (Select from drop-down menu)
Only Stops at Specified Customer Landmark
For information about creating Landmarks, refer to the GeoManager User Admin Guide.
Type of Monitoring Schedule
Monitoring Schedules are available in two types:
• Recurring – a specific schedule that happens on a repeated basis.
This can be one of four predefined schedules or customized to
your work day(s).
• 24 X 7 – continuous monitoring of mobile workers.
TimeZone
The time zone where the mobile workers will be performing their
tasks. You can select multiple time zones by holding down the [Ctrl]
key.
Begin Date
The month, day and year you want to begin monitoring diagnostics
faults for the selected mobile device. This can be today’s date or a
future date, but cannot be a previous date.
Begin Time
The time of day you want to begin monitoring Stops for the
selected mobile device. This must be the current time or later. Minutes can be selected in 15 minute increments.
2. Type a name into the Exception Name field. 3. Select the stop duration from the Duration of Stop drop‐down menu.
4. Select the minimum and maximum total daily number of stops from the Min and Max drop‐
down menus.
5. Select the type of Stops you want monitored from the Select Stops to Monitor radio buttons.
•
If you select Only Stops at Landmark Type, select the Landmark type, if applicable, from the Landmark Type drop‐menu. For more information about Landmark types, see the GeoManager Administrator Manual.
•
If you select Only Stops at Specified Customer Landmark:
a. Click Select. The Landmarks screen displays.
b. Select the Landmarks you would like to monitor:
• Select the Landmark type, if applicable, from the Landmark type drop down menu. For more information about Landmark types, see the GeoManager User Admin Guide.
Trimble MRM Confidential
79
• Select the location by City, State or Zip if applicable, from the Location drop down menu.
• Enter search criteria into Landmark Name field, then click Search to search for a specific Landmark. Matching Landmarks appear in the Available Landmarks list.
c. Select the check box(es) next to the Landmark(s) you would like to monitor. d. Click Select to add the selected Landmarks to the Customer Landmarks to Monitor list. Click Close exit the Landmarks screen without selecting landmarks.
The Landmark(s) you have selected will appear in the Customer Landmarks to Monitor list indicating they have been selected.
6. Select the schedule type you would like to establish for monitoring Landmark Exceptions from the Type of Monitoring Schedule field:
•
Recurring
•
24 X 7
Each type of schedule has different set‐up options. 7. Click NEXT to open the Schedule Options screen.
8. Set‐up the options for your schedule.
For predefined Recurring Schedule options, shown in Figure 2–15:
a. Select one of the four options from the Predefined Schedules field:
• Week Days • Week Nights
• Weekends • Nights and Weekends b. Click the Day drop down menu in the Begin Monitoring column to change the day of the week, as needed.
c. Click the Clock icon in the Begin Monitoring column to change the daily time using the Hour, Min and AM/PM fields as needed. d. Click the Day drop down menu in the End Monitoring column to change the day of the week, as needed.
e. Click the Clock icon in the End Monitoring column to change the daily time using the Hour, Min and AM/PM fields as needed. f.
To clear the selected options and re‐enter information, click Clear.
g. Click Next to advance to the next screen. Trimble MRM Confidential
80
Click Previous to return to the last screen. Click Cancel to return to the Exception Administration screen.
For 24 X 7 Schedule options, shown in Figure 2–16:
a. Select the correct time zone from the Time Zone field.
The system will default to PDT if no option is selected.
b. Click the Calendar icon to select the Begin Date. c. Click the Clock icon to select the Begin Time.
d. Click NEXT to advance to the Specify the Exception Notification Options screen, shown in Figure 2–17. Click Cancel to return to the Exception Administration screen.
9. Select how you want Notification of the Stop Count Exceptions sent to you. You may select more than one delivery option.
•
Check the Exception Console Delivery check box if you want console notification.
•
Check the Standard message delivery option if you want a list of all the Landmark Prox‐
imity Exceptions that occurred the previous day.
a. Enter up to two email or mobile devices, one for each of the 1. and 2. fields.
b. Select the radio button for the format of the device address: PC format or mobile device. To send messages to mobile devices, use the format {phonenumber}@page.nextel.com (i.e. [email protected]). 10. Click Next to advance to the Specify the Mobile Devices to Monitor screen, shown in Figure 2–18. Click Previous to return to the last screen. Click Cancel to return to the Exception Administration screen. 11. Select vehicles or hand‐held devices to monitor:
•
Select the vehicle group, if applicable, from the Group drop‐menu, then click Search. For more information about Groups, see the GeoManager Admin User Manual.
•
If you want to search for a specific device, enter the search criteria into the Search field, then click Search. Matching devices appear in the Available mobile devices list.
•
Select the vehicle(s) you would like to monitor from the Available mobile devices list. To select more than one vehicle, hold down the [Ctrl] key while selecting.
12. Click the > button to add the selected devices to the Monitor mobile devices list. Click All>> to add all devices from the Available mobile devices list.
Trimble MRM Confidential
81
The name(s) you have selected will move to the Monitor Mobile Devices field indi‐
cating they have been selected.
13. Click Next to advance to the Confirmation screen, shown in Figure 2–45. Click Previous to return to the last screen. Click Cancel to return to the Exception Administration screen. Figure 2–45 Confirmation Screen for Stop
14. Confirm the Stop Count Exception parameters that you selected.
15. Click Done if you are finished setting up Exceptions. The Current Exceptions screen appears.
Click Create Another Exception if you want to create other Exceptions. The Select Exception Type screen appears.
Stop Duration
Stop Duration Exceptions occur when the total amount of time a mobile worker spends at a stop exceeds a set threshold during a defined workday. This helps companies identify workers who spend too much or too little time stopped at any location. Trimble MRM Confidential
82
From the Setting up an Exception ‐ Select the Exception Type screen:
1. Click Stop Duration. The Setting up an Exception ‐ Select the Exception Type/Parameters – Step 1 of 4 screen for Stop Duration, shown in Figure 2–46, appears.
Figure 2–46 Select the Exception Type/Parameters for Stop Duration - Step 1 of 4
Field
Description
Exception Name
This is the name that appears on the Exceptions Report. You may
use up to 50 characters to create a unique name. Characters must
be alpha-numeric. No symbols or punctuation is allowed.
Exception Type
This field is pre-filled from the Select Exceptions Type screen.
Stop Duration
This is the maximum amount of time a mobile device can be
stopped before an Exception occurs.
Type of Monitoring Schedule
Monitoring Schedules are available for a Recurring Schedule, which
is a specific schedule that happens on a repeated basis.
This can be one of four predefined schedules or customized to your
work day(s).
TimeZone
Trimble MRM Confidential
The time zone where the mobile workers will be performing their
tasks. You can select multiple time zones by holding down the [Ctrl]
key.
83
Field
Description
Begin Date
The month, day and year you want to begin monitoring diagnostics
faults for the selected mobile device. This can be today’s date or a
future date, but cannot be a previous date.
Begin Time
The time of day you want to begin monitoring diagnostics faults for
the selected mobile device. This must be the current time or later.
Minutes can be selected in 15 minute increments.
2. Type a name into the Exception Name field. 3. Enter the maximum number of minutes a vehicle must stopped before an alert is created in the Stop Duration field.
4. Click NEXT to open the Schedule Options screen.
5. Set‐up the options for your schedule.
a. Select one of the four options from the Predefined Schedules field:
• Week Days • Week Nights
• Weekends • Nights and Weekends b. Click the Day drop down menu in the Begin Monitoring column to change the day of the week, as needed.
c. Click the Clock icon in the Begin Monitoring column to change the daily time using the Hour, Min and AM/PM fields as needed. d. Click the Day drop down menu in the End Monitoring column to change the day of the week, as needed.
e. Click the Clock icon in the End Monitoring column to change the daily time using the Hour, Min and AM/PM fields as needed. f.
To clear the selected options and re‐enter information, click Clear.
g. Click Next to advance to the next screen. Click Previous to return to the last screen. Click Cancel to return to the Exception Administration screen.
6. Select how you want Notification of the Stop Duration Exceptions sent to you. You may select more than one delivery option.
•
Check the Exception Console Delivery check box if you want console notification.
•
Check the Real‐Time message delivery option if you want immediate notification. Trimble MRM Confidential
84
a. Enter up to two email or mobile devices, one for each of the 1. and 2. fields.
b. Select the radio button for the format of the device address: PC format or mobile device. To send messages to mobile devices, use the format {phonenumber}@page.nextel.com (i.e. [email protected]).
•
Check the Standard message delivery option if you want a list of all the Speed Excep‐
tions that occurred the previous day.
a. Enter up to two email or mobile devices, one for each of the 1. and 2. fields. b. Select the radio button for the format of the device address: PC format or mobile device. To send messages to mobile devices, use the format {phonenumber}@page.nextel.com (i.e. [email protected]).
7. Click Next to advance to the Specify the Mobile Devices to Monitor screen, shown in Figure 2–18. Click Previous to return to the last screen. Click Cancel to return to the Exception Administration screen. 8. Select vehicles or hand‐held devices to monitor:
•
Select the vehicle group, if applicable, from the Group drop‐menu, then click Search. For more information about Groups, see the GeoManager Admin User Manual.
•
If you want to search for a specific device, enter the search criteria into the Search field, then click Search. Matching devices appear in the Available mobile devices list.
•
Select the vehicle(s) you would like to monitor from the Available mobile devices list. To select more than one vehicle, hold down the [Ctrl] key while selecting.
9. Click the > button to add the selected devices to the Monitor mobile devices list. Click All>> to add all devices from the Available mobile devices list.
The name(s) you have selected will move to the Monitor Mobile Devices field indi‐
cating they have been selected.
10. Click Next to advance to the Confirmation screen, shown in Figure 2–47. Click Previous to return to the last screen. Click Cancel to return to the Exception Administration screen. Trimble MRM Confidential
85
Figure 2–47 Confirmation Screen for Stop Duration
11. Confirm the Stop Duration Exception parameters that you selected.
12. Click Done if you are finished setting up Exceptions. The Current Exceptions screen appears.
Click Create Another Exception if you want to create other Exceptions. The Select Exception Type screen appears.
Switch Status
Switch Status Exceptions keep track of on/off events such as door open/door close or trunk open/
trunk close. This is used to identify irregularities such as unauthorized deliveries (door open/
door close), unauthorized tows (crane arm up, crane arm down), or unauthorized passenger pick‐ups (passenger door open, passenger door close).
Switch Status Exceptions can also be tied to pre‐defined Landmarks to identify stops at non‐cus‐
tomer sites. Trimble MRM Confidential
86
Almost any on/off switch in the vehicle may be monitored for activity, and Exceptions to what you define as normal can be flagged. You can define up to 20 Switch Status Exceptions for your account. Only one Switch Status Exception can be configured for a vehicle at a time.
Switch Status Exceptions are available for GeoManager iLM.
From the Setting up an Exception ‐ Select the Exception Type screen:
1. Click Switch Status. The Setting up an Exception ‐ Select the Exception Type/Parameters – Step 1 of 4 screen for Switch Status, shown in Figure 2–48, appears.
Figure 2–48 Select the Exception Type/Parameters for Switch Status - Step 1 of 4
Trimble MRM Confidential
87
Field
Description
Exception Name
This is the name that appears on the Exceptions Report. You may
use up to 50 characters to create a unique name. Characters must
be alpha-numeric. No symbols or punctuation is allowed.
Exception Type
This field is pre-filled from the Select Exceptions Type screen.
Switch Status to
Monitor
A predefined list of switches on the vehicle that you want to monitor. This can be a door, trunk, roll-up door, pump-engine, etc.
You can monitor on, off or both for the switch.
Switch State
Allows you to change the state of the switch to Active, Inactive or
Both.
Select Stops to
Monitor
These radio buttons allow you to select the types of Landmarks you
want to monitor:
•
•
•
•
•
All Stops (Customer Landmarks/Non-Customer Landmark)
All Stops at Customer Landmark
All Stops at Non Customer Landmark
Only Stops at Landmark Type (Select from drop-down menu)
Only Stops at Specified Customer Landmark
For information about creating Landmarks, refer to the GeoManager User Admin Guide.
Type of Monitoring Schedule
Monitoring Schedules are available in two types:
• Recurring – a specific schedule that happens on a repeated basis.
This can be one of four predefined schedules or customized to
your work day(s).
• 24 X 7 – continuous monitoring of mobile workers.
TimeZone
The time zone where the mobile workers will be performing their
tasks. You can select multiple time zones by holding down the [Ctrl]
key.
Begin Date
The month, day and year you want to begin monitoring diagnostics
faults for the selected mobile device. This can be today’s date or a
future date, but cannot be a previous date.
Begin Time
The time of day you want to begin monitoring Stops for the
selected mobile device. This must be the current time or later. Minutes can be selected in 15 minute increments.
2. Type a name into the Exception Name field. 3. Select the type of switch to monitor from the Switch Status to Monitor drop‐down menu.
4. Select the state of the switch you want to monitor:
•
Active
•
Inactive
Trimble MRM Confidential
88
•
Both
5. Select the type of Stops you want monitored from the Select Stops to Monitor radio buttons.
•
If you select Only Stops at Landmark Type, select the Landmark type, if applicable, from the Landmark Type drop‐menu. For more information about Landmark types, see the GeoManager Administrator Manual.
•
If you select Only Stops at Specified Customer Landmark:
a. Click Select. The Landmarks screen displays.
b. Select the Landmarks you would like to monitor:
• Select the Landmark type, if applicable, from the Landmark type drop down menu. For more information about Landmark types, see the GeoManager User Admin Guide.
• Select the location by City, State or Zip if applicable, from the Location drop down menu.
• Enter search criteria into Landmark Name field, then click Search to search for a specific Landmark. Matching Landmarks appear in the Available Landmarks list.
c. Select the check box(es) next to the Landmark(s) you would like to monitor. d. Click Select to add the selected Landmarks to the Customer Landmarks to Monitor list. Click Close exit the Landmarks screen without selecting landmarks.
The Landmark(s) you have selected will appear in the Customer Landmarks to Monitor list indicating they have been selected.
6. Select the schedule type you would like to establish for monitoring Idling Exceptions from the Type of Monitoring Schedule field:
•
Recurring
•
24 X 7
Each type of schedule has different set‐up options which appear in the next screen. 7. Click NEXT to open the Schedule Options screen.
8. Set‐up the options for your schedule.
For predefined Recurring Schedule options, shown in Figure 2–15:
a. Select one of the four options from the Predefined Schedules field:
• Week Days • Week Nights
• Weekends Trimble MRM Confidential
89
• Nights and Weekends b. Click the Day drop down menu in the Begin Monitoring column to change the day of the week, as needed.
c. Click the Clock icon in the Begin Monitoring column to change the daily time using the Hour, Min and AM/PM fields as needed. d. Click the Day drop down menu in the End Monitoring column to change the day of the week, as needed.
e. Click the Clock icon in the End Monitoring column to change the daily time using the Hour, Min and AM/PM fields as needed. f.
To clear the selected options and re‐enter information, click Clear.
g. Click Next to advance to the next screen. Click Previous to return to the last screen. Click Cancel to return to the Exception Administration screen.
For 24 X 7 Schedule options, shown in Figure 2–16:
a. Select the correct time zone from the Time Zone field.
The system will default to PDT if no option is selected.
b. Click the Calendar icon to select the Begin Date. c. Click the Clock icon to select the Begin Time.
d. Click NEXT to advance to the Specify the Exception Notification Options screen, shown in Figure 2–17. Click Cancel to return to the Exception Administration screen.
9. Select how you want Notification of the Switch Status Exceptions sent to you. You may select more than one delivery option.
•
Check the Exception Console Delivery check box if you want console notification.
•
Check the Real‐Time message delivery option if you want immediate notification. a. Enter up to two email or mobile devices, one for each of the 1. and 2. fields.
b. Select the radio button for the format of the device address: PC format or mobile device. To send messages to mobile devices, use the format {phonenumber}@page.nextel.com (i.e. [email protected]).
•
Check the Standard message delivery option if you want a list of all the Speed Excep‐
tions that occurred the previous day.
Trimble MRM Confidential
90
a. Enter up to two email or mobile devices, one for each of the 1. and 2. fields. b. Select the radio button for the format of the device address: PC format or mobile device. To send messages to mobile devices, use the format {phonenumber}@page.nextel.com (i.e. [email protected]).
10. Click Next to advance to the Specify the Mobile Devices to Monitor screen, shown in Figure 2–18. Click Previous to return to the last screen. Click Cancel to return to the Exception Administration screen. 11. Select vehicles or hand‐held devices to monitor:
•
Select the vehicle group, if applicable, from the Group drop‐menu, then click Search. For more information about Groups, see the GeoManager Admin User Manual.
•
If you want to search for a specific device, enter the search criteria into the Search field, then click Search. Matching devices appear in the Available mobile devices list.
•
Select the vehicle(s) you would like to monitor from the Available mobile devices list. To select more than one vehicle, hold down the [Ctrl] key while selecting.
12. Click the > button to add the selected devices to the Monitor mobile devices list. Click All>> to add all devices from the Available mobile devices list.
The name(s) you have selected will move to the Monitor Mobile Devices field indi‐
cating they have been selected.
13. Click Next to advance to the Confirmation screen, shown in Figure 2–49. Click Previous to return to the last screen. Click Cancel to return to the Exception Administration screen. Trimble MRM Confidential
91
Figure 2–49 Confirmation Screen for Switch Status
14. Confirm the Switch Status Exception parameters that you selected.
15. Click Done if you are finished setting up Exceptions. The Current Exceptions screen appears.
Click Create Another Exception if you want to create other Exceptions. The Select Exception Type screen appears.
Temp Status
Temp Status Exception monitors the temperature inside mobile assets. Temp Status Exception flags deviance in temperature for defined periods of time. For example, if the temperature inside a refrigerated truck climbs 5 degrees above normal and stays there for more than 10 minutes, an Exception is triggered. Dispatch then notifies the driver that there is a problem with the refriger‐
ation unit. You can define up to 20 Temp Status Type Exceptions for your account.
Temp Status Exceptions are available for GeoManager iLM.
From the Setting up an Exception ‐ Select the Exception Type screen:
1. Click Temp Status. The Setting up an Exception ‐ Select the Exception Type/Parameters – Step 1 of 4 screen for Temp Status, shown in Figure 2–50, appears.
Trimble MRM Confidential
92
Figure 2–50 Select the Exception Type/Parameters for Temp Status - Step 1 of 4
Field
Description
Exception Name
This is the name that appears on the Exceptions Report. You may
use up to 50 characters to create a unique name. Characters must
be alpha-numeric. No symbols or punctuation is allowed.
Exception Type
This field is pre-filled from the Select Exceptions Type screen.
Temperature to
Monitor
The minimum and maximum acceptable temperatures for the vehicle. This must be in degrees Fahrenheit.
Select Temperature Duration
The maximum amount of time the temperature can be outside the
temperature range before triggering an Exception.
Type of Monitoring Schedule
Monitoring Schedules are available in two types:
• Recurring – a specific schedule that happens on a repeated basis.
This can be one of four predefined schedules or customized to
your work day(s).
• 24 X 7 – continuous monitoring of mobile workers.
TimeZone
Trimble MRM Confidential
The time zone where the mobile workers will be performing their
tasks. You can select multiple time zones by holding down the [Ctrl]
key.
93
Field
Description
Begin Date
The month, day and year you want to begin monitoring Temp Status for the selected mobile device. This can be today’s date or a
future date, but cannot be a previous date.
Begin Time
The time of day you want to begin monitoring diagnostics faults for
the selected mobile device. This must be the current time or later.
Minutes can be selected in 15 minute increments.
2. Type a name into the Exception Name field. 3. Enter the minimum and maximum acceptable temperatures in the Temperature to Monitor Min and Max fields.
4. Select the maximum amount of time that is acceptable for the temperature of the vehicle to be outside the selected temperature range from the Select Temperature Duration drop‐down menu.
5. Select the schedule type you would like to establish for monitoring Idling Exceptions from the Type of Monitoring Schedule field:
•
Recurring
•
24 X 7
Each type of schedule has different set‐up options which appear in the next screen. 6. Click NEXT to open the Schedule Options screen.
7. Set‐up the options for your schedule.
For predefined Recurring Schedule options, shown in Figure 2–15:
a. Select one of the four options from the Predefined Schedules field:
• Week Days • Week Nights
• Weekends • Nights and Weekends b. Click the Day drop down menu in the Begin Monitoring column to change the day of the week, as needed.
c. Click the Clock icon in the Begin Monitoring column to change the daily time using the Hour, Min and AM/PM fields as needed. d. Click the Day drop down menu in the End Monitoring column to change the day of the week, as needed.
e. Click the Clock icon in the End Monitoring column to change the daily time using the Hour, Min and AM/PM fields as needed. Trimble MRM Confidential
94
f.
To clear the selected options and re‐enter information, click Clear.
g. Click Next to advance to the next screen. Click Previous to return to the last screen. Click Cancel to return to the Exception Administration screen.
For 24 X 7 Schedule options, shown in Figure 2–16:
a. Select the correct time zone from the Time Zone field.
The system will default to PDT if no option is selected.
b. Click the Calendar icon to select the Begin Date. c. Click the Clock icon to select the Begin Time.
d. Click NEXT to advance to the Specify the Exception Notification Options screen, shown in Figure 2–17.
Click Cancel to return to the Exception Administration screen.
8. Select how you want Notification of the Temp Status Exceptions sent to you. You may select more than one delivery option.
•
Check the Exception Console Delivery check box if you want console notification.
•
Check the Real‐Time message delivery option if you want immediate notification. a. Enter up to two email or mobile devices, one for each of the 1. and 2. fields.
b. Select the radio button for the format of the device address: PC format or mobile device. To send messages to mobile devices, use the format {phonenumber}@page.nextel.com (i.e. [email protected]).
•
Check the Standard message delivery option if you want a list of all the Speed Excep‐
tions that occurred the previous day.
a. Enter up to two email or mobile devices, one for each of the 1. and 2. fields. b. Select the radio button for the format of the device address: PC format or mobile device. To send messages to mobile devices, use the format {phonenumber}@page.nextel.com (i.e. [email protected]).
9. Click Next to advance to the Specify the Mobile Devices to Monitor screen, shown in Figure 2–18. Click Previous to return to the last screen. Click Cancel to return to the Exception Administration screen. Trimble MRM Confidential
95
10. Select vehicles or hand‐held devices to monitor:
•
Select the vehicle group, if applicable, from the Group drop‐menu, then click Search. For more information about Groups, see the GeoManager Admin User Manual.
•
If you want to search for a specific device, enter the search criteria into the Search field, then click Search. Matching devices appear in the Available mobile devices list.
•
Select the vehicle(s) you would like to monitor from the Available mobile devices list. To select more than one vehicle, hold down the [Ctrl] key while selecting.
11. Click the > button to add the selected devices to the Monitor mobile devices list. Click All>> to add all devices from the Available mobile devices list.
The name(s) you have selected will move to the Monitor Mobile Devices field indi‐
cating they have been selected.
12. Click Next to advance to the Confirmation screen, shown in Figure 2–51. Click Previous to return to the last screen. Click Cancel to return to the Exception Administration screen. Figure 2–51 Confirmation Screen for Temp Status
13. Confirm the Temp Status Exception parameters that you selected.
14. Click Done if you are finished setting up Exceptions. The Current Exceptions screen appears.
Trimble MRM Confidential
96
Click Create Another Exception if you want to create other Exceptions. The Select Exception Type screen appears.
Zone
Zone Exceptions flag arrivals to and departures from multiple specified zones defined as Zip Code, City, County, State or Country. This can help monitor unauthorized (e.g. personal) use of company vehicles either during or after work hours, or flag possible security breaches when vehicles were not expected to move from a specific location.
Zone is available in real‐time notification for GeoManager iLM and GeoManager PE and in stan‐
dard notification for Pathway iLM.
From the Setting up an Exception ‐ Select the Exception Type screen:
1. Click Zone. The Setting up an Exception ‐ Select the Exception Type/Parameters – Step 1 of 4 screen for Zone, shown in Figure 2–52, appears.
Figure 2–52 Select the Exception Type/Parameters for Zone - Step 1 of 5
Trimble MRM Confidential
97
Field
Description
Exception Name
This is the name that appears on the Exceptions Report. You may
use up to 50 characters to create a unique name. Characters must
be alpha-numeric. No symbols or punctuation is allowed.
Exception Type
This field is pre-filled from the Select Exceptions Type screen.
Zone Type
A specified area that makes up the zone. This can be a City, State,
Zipcode, County, or Country.
Arrival/Departure
Drop-menu that allows you to select the mobile worker’s arrival at,
departure from or both from a Zone.
Type of Monitoring Schedule
Monitoring Schedules are available in two types:
• Recurring – a specific schedule that happens on a repeated basis.
This can be one of four predefined schedules or customized to
your work day(s).
• 24 X 7 – continuous monitoring of mobile workers.
TimeZone
The time zone where the mobile workers will be performing their
tasks. You can select multiple time zones by holding down the [Ctrl]
key.
Begin Date
The month, day and year you want to begin monitoring diagnostics
faults for the selected mobile device. This can be today’s date or a
future date, but cannot be a previous date.
Begin Time
The time of day you want to begin monitoring diagnostics faults for
the selected mobile device. This must be the current time or later.
Minutes can be selected in 15 minute increments.
Note:
•
This exception type is limited to the update interval of the mobile device.
•
Each Zone Type is limited to a maximum of 10 mobile devices.
2. Type a name into the Exception Name field. 3. Select the Zone you want monitored from the Zone Type drop‐menu.
4. Select type of monitoring you want from the Arrival/Departure field.
5. Select the schedule type you would like to establish for monitoring Idling Exceptions from the Type of Monitoring Schedule field:
•
Recurring
•
24 X 7
Each type of schedule has different set‐up options which appear in the next screen. Trimble MRM Confidential
98
6. Click NEXT to open the Schedule Options screen.
7. Set‐up the options for your schedule.
For predefined Recurring Schedule options, shown in Figure 2–15:
a. Select one of the four options from the Predefined Schedules field:
• Week Days • Week Nights
• Weekends • Nights and Weekends b. Click the Day drop down menu in the Begin Monitoring column to change the day of the week, as needed.
c. Click the Clock icon in the Begin Monitoring column to change the daily time using the Hour, Min and AM/PM fields as needed. d. Click the Day drop down menu in the End Monitoring column to change the day of the week, as needed.
e. Click the Clock icon in the End Monitoring column to change the daily time using the Hour, Min and AM/PM fields as needed. f.
To clear the selected options and re‐enter information, click Clear.
g. Click Next to advance to the next screen. Click Previous to return to the last screen. Click Cancel to return to the Exception Administration screen.
For 24 X 7 Schedule options, shown in Figure 2–16:
a. Select the correct time zone from the Time Zone field.
The system will default to PDT if no option is selected.
b. Click the Calendar icon to select the Begin Date. c. Click the Clock icon to select the Begin Time.
d. Click NEXT to advance to the Specify the Exception Notification Options screen, shown in Figure 2–17. Click Cancel to return to the Exception Administration screen.
8. Select how you want Notification of the Idling Exceptions sent to you. You may select more than one delivery option.
•
Check the Exception Console Delivery check box if you want console notification.
•
Check the Real‐Time message delivery option if you want immediate notification. Trimble MRM Confidential
99
a. Enter up to two email or mobile devices, one for each of the 1. and 2. fields.
b. Select the radio button for the format of the device address: PC format or mobile device. To send messages to mobile devices, use the format {phonenumber}@page.nextel.com (i.e. [email protected]).
•
Check the Standard message delivery option if you want a list of all the Speed Excep‐
tions that occurred the previous day.
a. Enter up to two email or mobile devices, one for each of the 1. and 2. fields. b. Select the radio button for the format of the device address: PC format or mobile device. To send messages to mobile devices, use the format {phonenumber}@page.nextel.com (i.e. [email protected]).
9. Click Next to advance to the Specify Zones to Monitor screen, shown in Figure 2–53. Click Previous to return to the last screen. Click Cancel to return to the Exception Administration screen.
Figure 2–53 Setting up an Exception - Specify the Zones to Monitor - Step 4 of 5
10. Enter the information for the Zone you specified:
Trimble MRM Confidential
100
•
City – enter the city name and state abbreviation. For example: Fremont, CA.
•
State – enter the state abbreviation. For example: CA.
•
Zip Code – enter the five digit zip code. At least one zip code is required.
•
County – enter the county name and state abbreviation. For example: Alameda, CA.
•
Country – select the country from the drop‐menu. Defaults to USA.
11. Click Next to advance to the Specify the Mobile Devices to Monitor screen, shown in Figure 2–18. Click Previous to return to the last screen. Click Cancel to return to the Exception Administration screen. 12. Select vehicles or hand‐held devices to monitor:
•
Select the vehicle group, if applicable, from the Group drop‐menu, then click Search. For more information about Groups, see the GeoManager Admin User Manual.
•
If you want to search for a specific device, enter the search criteria into the Search field, then click Search. Matching devices appear in the Available mobile devices list.
•
Select the vehicle(s) you would like to monitor from the Available mobile devices list. To select more than one vehicle, hold down the [Ctrl] key while selecting.
13. Click the > button to add the selected devices to the Monitor mobile devices list. Click All>> to add all devices from the Available mobile devices list.
The name(s) you have selected will move to the Monitor Mobile Devices field indi‐
cating they have been selected.
14. Click Next to advance to the Confirmation screen, shown in Figure 2–54. Click Previous to return to the last screen. Click Cancel to return to the Exception Administration screen. Trimble MRM Confidential
101
Figure 2–54 Confirmation Screen for Zone
15. Confirm the Zone Exception parameters that you selected.
16. Click Done if you are finished setting up Exceptions. The Current Exceptions screen appears.
Click Create Another Exception if you want to create other Exceptions. The Select Exception Type screen appears.
Vehicle Diagnostics
Exceptions generated for Vehicle Diagnostics (i.e. J1708) are triggered based on built in fault codes from the J1708 bus. This causes Vehicle Diagnostic Exceptions to be different for each type of vehicle, depending on the make, model and year. Each type of vehicle sends different pre‐
defined information, determined by the manufacturer and gathered from the vehicle’s computer system(s). GeoManager Vehicle Diagnostic Exceptions trigger when these pre‐defined thresholds are exceeded. The following common types of Vehicle Diagnostic information may appear in your Vehicle Diagnostic Exceptions notifications and reports:
•
Diagnostic Fault Description – Describes the vehicle malfunction, such as a cylinder misfire.
•
Engine Idle Time – Records the time the engine is on but the vehicle is not moving.
•
Driving time – The length of time spent driving.
Trimble MRM Confidential
102
•
Trip Duration – Driving time plus engine idle time.
•
PTO Duration – The length of time Power Take Off (PTO) occurred.
•
PTO Fuel – The amount of fuel used for PTO.
•
Idle Fuel – The amount of fuel used while the engine is idling.
•
Driving Fuel – The amount of fuel used for driving.
•
Trip Fuel – The amount of fuel used for idling, PTO, and driving.
•
Miles per gallon – Number of miles a vehicle drives per gallon of fuel.
•
Deceleration per 100 miles – Number of times the vehicle decelerates per 100 miles.
•
Acceleration per 100 miles – Number of times the vehicle accelerates per 100 miles.
•
Brakes per 100 miles – Number of times the brakes are applied per 100 miles.
•
Distance in top gear – The distance the vehicle traveled in the top gear.
•
PTO distance – The distance the vehicle traveled with the PTO switch engaged.
•
Trip distance – Total distance traveled during the trip.
•
End odometer – The odometer reading at the end of the trip.
•
Stop Count – The number of times the vehicle stopped during the trip
Since the information for the Vehicle Diagnostic Exceptions is pre‐determined when the iLM is installed in the vehicle, there is no customer configuration needed aside from assigning the noti‐
fication delivery method.
To assign the notification delivery method to a vehicle diagnostics exception:
1. From the Exception Administration screen, select Diagnostics Fault, shown in Figure 2–55.
Trimble MRM Confidential
103
Figure 2–55 Exception Administration Screen
The Exceptions Management screen for Vehicle Diagnostics, shown in Figure 2–56, appears.
Figure 2–56 Edit Diagnostics Fault Exception
2. From the Edit Menu screen, select the Notification link. The Exception Notification screen, as shown in Figure 51, appears.
Trimble MRM Confidential
104
Figure 2–57 Edit Diagnostics Fault Exception
3. Select how you want Notification of the Diagnostics Fault Exceptions sent to you. You may select more than one delivery option.
•
Check the Exception Console Delivery check box if you want console notification.
•
Check the Real‐Time message delivery option if you want immediate notification. a. Enter up to two email or mobile devices, one for each of the 1. and 2. fields.
b. Select the radio button for the format of the device address: PC format or mobile device. To send messages to mobile devices, use the format {phonenumber}@page.nextel.com (i.e. [email protected]).
•
Check the Standard message delivery option if you want a list of all the Speed Excep‐
tions that occurred the previous day.
a. Enter up to two email or mobile devices, one for each of the 1. and 2. fields. b. Select the radio button for the format of the device address: PC format or mobile device. To send messages to mobile devices, use the format {phonenumber}@page.nextel.com (i.e. [email protected]).
Trimble MRM Confidential
105
4. Click Update to advance to the Confirmation screen, shown in Figure 2–58. Click Cancel to return to the Exception Administration screen. Figure 2–58 Edit Diagnostics Fault Exception
5. Confirm the Diagnostics Fault Exception Notification parameters that you selected. 6. Click Done to return to the Exceptions Management screen.
7. Click Done again to return to the Current Exceptions screen.
Trimble MRM Confidential
106
3
Editing Exceptions
You have the ability to change any parameters in effect for each Exception type, as well as: •
Disable •
Enable •
Delete
Before you can edit the parameters for any Exception, you must log into your Trimble Solution.
Note:
You will need an Administrator Password to access the Administration Control Panel. If you
do not have an Administrator Password, contact Trimble MRM Customer Satisfaction at [email protected].
To edit an Exception:
1. Log into your Trimble MRM Solution. For more information about logging in, see the begin‐
ning of Section 2, Creating Exception Parameters.
2. Click Administration from the Control Panel on the left side of the screen.
3. Click Exception Administration. The Exception Administration Options screen, shown in Figure 3–1, displays.
Figure 3–1 Exceptions Screen
4. Click Exception Management. The Exceptions Management screen, shown in Figure 3–2, appears. Trimble MRM Confidential
107
Figure 3–2 Exceptions Management Screen
Note:
If an Exception is disabled, you can enable or delete the exception. You must enable the
exception before additional changes can be made.
5. Click the name of the Exception you would like to edit. The Exceptions Management Edit Menu, shown in Figure 54, appears.
Figure 3–3 Edit Menu Screen
From the Exceptions Management Edit Menu screen you can edit the following: •
Parameters
Trimble MRM Confidential
108
•
Notification
•
Mobile Devices
Parameters
From the Exceptions Management screen:
1. Click Parameters located under the Edit Menu list. The Change the Parameters screen, an example of which is shown in Figure 3–4, appears. Each type of Exception may have different parameters. Figure 3–4 Change the Parameters Example Screen
2. Make the desired changes. Each type of Exception will have different parameters that can be changed. Some Exceptions have no parameters that can be changed.
3. Click Update to save the parameter changes. 4. Click Cancel to leave the current parameter settings. You will return to the Exceptions Management screen, shown in Figure 3–2. 5. Click Done if you are finished making changes. Click another link to make more changes to that Exception.
Trimble MRM Confidential
109
Click another link to make more changes to that Exception.
Schedule
From the Exceptions Management screen:
1. Click Recurring or 24 X 7, located under the Edit Menu list to view the current schedule. The Change the Schedule screen, shown in Figure 3–5, appears. Figure 3–5 Edit the Schedule Example Screen
2. Make the desired changes. Each type of schedule has different schedules that can be changed. Note:
The type of schedule cannot be changed for an Exception. The parameters within the schedule type can be changed.
3. Click Update to save the schedule changes. 4. Click Cancel to leave the current schedule settings. You will return to the Exceptions Management screen, shown in Figure 3–2. 5. Click Done if you are finished making changes. Trimble MRM Confidential
110
6. Click Done again to return to the Exceptions Management screen.
Click another link to make more changes to that Exception.
Notification
From the Exceptions Management screen:
1. Click Notification, located under the Edit Menu list to view the current schedule. The Change the Notification screen, shown in Figure 3–6, appears. Figure 3–6 Edit the Notification Example Screen
2. Make the desired changes.
•
Check the Exception Console Delivery check box if you want console notification.
•
Check the Real‐Time message delivery option if you want immediate notification. a. Enter up to two email or mobile devices, one for each of the 1. and 2. fields.
b. Select the radio button for the format of the device address: PC format or mobile device. To send messages to mobile devices, use the format {phonenumber}@page.nextel.com (i.e. [email protected]).
Trimble MRM Confidential
111
•
Check the Standard message delivery option if you want a list of all the Forms Excep‐
tions that occurred the previous day.
a. Enter up to two email or mobile devices, one for each of the 1. and 2. fields. b. Select the radio button for the format of the device address: PC format or mobile device. To send messages to mobile devices, use the format {phonenumber}@page.nextel.com (i.e. [email protected]).
3. Click Update to save the parameter changes. 4. Click Cancel to leave the current parameter settings. You will return to the Exceptions Management screen, shown in Figure 3–2. 5. Click Done if you are finished making changes. Click another link to make more changes to that Exception.
Mobile Devices
From the Exceptions Management screen:
1. Click Mobile Devices, located under the Edit Menu list to view the current schedule. The Change the Mobile Devices screen, shown in Figure 3–6, appears. Trimble MRM Confidential
112
Figure 3–7 Edit the Mobile Devices Example Screen
2. Make the desired changes. 3. Select vehicles or hand‐held devices to monitor:
•
Select the vehicle group, if applicable, from the Group drop‐menu, then click Search. For more information about Groups, see the GeoManager Admin User Manual.
•
If you want to search for a specific device, enter the search criteria into the Search field, then click Search. Matching devices appear in the Available mobile devices list.
•
Select the vehicle(s) you would like to monitor from the Available mobile devices list. To select more than one vehicle, hold down the [Ctrl] key while selecting. 4. Click the > button to add the selected devices to the Monitor mobile devices list. Click All>> to add all devices from the Available mobile devices list.
The name(s) you have selected will move to the Monitor Mobile Devices field indicating they have been selected.
5. Click Update to save the mobile device changes. 6. Click Cancel to leave the current parameter settings. You will return to the Exceptions Management screen, shown in Figure 3–2. Trimble MRM Confidential
113
7. Click Done if you are finished making changes. Click another link to make more changes to that Exception.
Enable
This allows you to reactivate a disabled Exception.
•
All previous parameters are reinstated as created.
•
Users have full access to information generated with this Exception.
•
Remains active until it is disabled.
From the Exception Administration screen, click Enable for the exception you would like to enable. The Exceptions Management screen changes to show the Exception is enabled. Note:
You can only enable an Exception that was previously disabled. Otherwise the Enable option
is not available.
Disable
This allows you to temporarily remove an active Exception from use. •
All parameters are preserved.
•
Users cannot access/receive data from this Exception.
•
Remains inactive until it is enabled.
From the Exception Administration screen:
1. Click Disable from the Edit Menu list. A dialog box, shown in Figure 3–8, appears to verify disabling the Exception.
2. Click OK to disable the Exception. Figure 3–8 Dialog Box
Trimble MRM Confidential
114
The Exception Administration screen changes to show that the Exception is disabled. Delete
This allows you to completely remove an Exception from your system.
•
An Exception is permanently deleted from your system.
•
Parameters established for this Exception are lost and cannot be retrieved for later use.
From the Exceptions Management screen:
1. Click Delete from the Edit Menu list. A dialog box, appears to verify deleting the Exception.
2. Click OK to delete the Exception. Figure 3–9 Delete Dialog Box
When the Trimble MRM solution is finished deleting the Exception, the current Exceptions screen will appear. Assigning Exceptions to Mobile Devices or Groups
If you would like to change several vehicle assignments for more than one Exception, you can easily do this by accessing Assigning Exceptions to Mobile Devices in Exception Administration.
Note:
The Group option will only appear if your company has subscribed to this feature. If you
would like to add this capability to your system, please contact your Trimble MRM sales manager.
From the Exceptions screen, shown in Figure 3–1: 1. Select Batch Exception Assignment. The Assigning Exceptions to Mobile Devices or Groups screen, shown in Figure 3–10, appears. Trimble MRM Confidential
115
Figure 3–10 Assigning Exceptions to Mobile Devices or Groups Screen
2. Highlight the mobile devices from the Select mobile devices / Groups field: •
If you want to search for a specific device, enter the criteria into the Search field, then click Search. Matching devices appear in the Available mobile devices list.
•
To select more than one vehicle or group, hold the [Ctrl] key while selecting.
3. Select Exceptions to assign from the Select the Exception(s) field. •
If you want to search for a specific Exception, enter the criteria into the Search field, then click Search. Matching Exceptions appear in the Select the Exceptions list.
•
To select more than one Exception, hold the [Ctrl] key while selecting.
4. Click Assign to record the changes you made.
Click Cancel to exit without making the requested changes.
Trimble MRM Confidential
116
4
Exception Reports
Exceptions data can be viewed in several ways, through Exception Parameter Reports, the Excep‐
tion Notification Console and by creating Exception Reports for specific Exceptions or a Consoli‐
dated Exception Report.
Exceptions Parameter Report
The Exceptions Parameter Report shows current Exceptions and their corresponding vehicle assignments for your company. It may be downloaded as a tab‐delimited, comma‐delimited or Excel report, or generated for online viewing To create and view an Exceptions Parameter Report, you must first log into your GeoManager solution:
1. Log into your GeoManager Solution. For more information about logging in, see the begin‐
ning of Section 2, Creating Exception Parameters.
2. Click Administration from the Control Panel on the left side of the screen.
3. Click Exception Administration. The Exception Administration Options screen, shown in Figure 3–1, displays. 4. Select View Exceptions Parameter Report from the Main Menu drop‐menu. An Exceptions screen, shown in Figure 4–1, with selection options for generating the report appears.
Trimble MRM Confidential
117
Figure 4–1: Select Options for Generating an Exception Assignment Report
5. Select the appropriate radio button: •
If you select Groups a list of the available Groups appears. •
If you select Mobile Devices a list of the available vehicles appears.
•
To select more than one vehicle or group, hold the [Ctrl] key while selecting.
6. Highlight the mobile devices from the Select Mobile Devices / Groups field.
7. Select Exceptions to assign from the Select the Exception(s) field. •
If you want to search for a specific Exception, enter the criteria into the Search field, then click Search. Matching Exceptions appear in the Select the Exceptions list.
•
To select more than one Exception, hold the [Ctrl] key while selecting.
8. Select the way you want to view the report from the Select Reporting Option drop‐down menu.
9. Click Generate Report to generate the report. Trimble MRM Confidential
118
If you chose to view the report online, a new browser window opens with the Exception Assign‐
ment Report, Figure 4–2. Figure 4–2: Online Exception Assignment Report
If you chose to download the Exception Assignment Report, a download dialog box, Figure 4–3, appears.
Figure 4–3: File Download Dialog Box
10. Click Open to open the file in a default application.
Click Save to save the file to your computer. Click Cancel to return to the Select Options for the Exception Assignment Report screen.
Trimble MRM Confidential
119
Exception Notification Console
The Exception Notification Console is a browser‐based tool that allows you to easily view, sort and manage alerts online. This provides a timely way to learn about Exceptions created by your mobile workers if real‐time notifications are not available or enabled for an Exception.
Online Console Notifications are delivered real‐time or next day based on how the Exception was configured. Real‐time Exception Notifications are immediately sent to the console, if console delivery was selected. Standard Exception Notifications are sent to the Console the following day.
To view the Exception Notification Console:
1. Log into your Trimble MRM Solution. For more information about logging in, see the begin‐
ning of Section 2, Creating Exception Parameters.
2. From the GeoManager home page, click Exceptions under the Control Panel on the left of the home page. The Exception Notification Console, Figure 4–4, opens.
Figure 4–4: Exceptions Notification Console
Trimble MRM Confidential
120
Field
Description
Row
Delineates the order Exceptions were received, with the most recent
appearing in row 1.
Date
Date and time the Exception occurred.
Mobile Device
The name of the mobile device that incurred the Exception.
Exception Type
General Exception type.
Exception Name
Specific Exception based upon custom parameters.
Exception Value
Details that indicate why Exception was triggered.
You can sort Exceptions shown in the Exceptions Notification Console by any of the column headers. To sort data, click on the column heading you want as your sort filter.
You may rearrange the order in which Exception data columns appear online. To change the order of your columns, click on the column header you want to move and drag it to the spot on the table in which you would like it to appear.
Message Types are color coded to make identification of like Exceptions easy to find and read. If you set up real‐time alerts, you can elect to receive an audible alert each time a new notification is sent to the Notification Console. To enable or disable this option, click the alert icon. When it is disabled, the icon will appear with a red slash across it. For additional details on any of the alerts:
1. Scroll to the alert you want to select.
2. Click the alert anywhere on the row.
Details appear in the Exception Details area at the bottom of the Exception Notification Console. The Notification Console highlights your selection and additionally shows the Criteria that had to be met to generate the Exception as well as the Location of the mobile device when the Excep‐
tion occurred.
To generate a printable version of this information, press the print icon in the upper right‐hand corner of the screen. The system will display the same information in a text format that can be easily printed. Click the Printer icon. The Exception Details screen displays. From here you can print two ways:
•
Click the Print link in the Details column of the Exception Detail screen. This will print the details for that specific Exception.
Trimble MRM Confidential
121
•
Click the Print Summary button in the top right corner. This opens the Print dialog box.
Click Print to print the Exception Summary. Click Cancel to close the dialog without printing. Generating Exception Reports
Exception Reports may be generated at any time. Steps for creating reports for all of the Excep‐
tions are virtually the same. Below are steps for generating each report format:
1. Click the Reports link from the Control Panel on the left. The Reports screen, shown in Figure 1–165, opens.
Figure 4–5: Reports Screen
2. Click the Exceptions Reports tab.
3. Select the type of Exception report to generate from the Select Report to Generate drop‐
menu. •
If you select Consolidated Exception Report, the Exception Report Options screen, shown in Figure 1–166, appears:
Trimble MRM Confidential
122
Figure 4–6: Consolidated Exception Reports Screen
Field
Description
Select Report to
Generate
This is filled in from the previous screen and shows Consolidated
Exception report.
Mobile Device(s) /
Group(s)
Combination of radio buttons, drop-menu and text box for
organization of mobile devices available for reporting. One radio
button must be selected. One or more mobile devices or groups
listed must be selected.
Time Period
The length of time you want the report to contain. This is limited to:
• GeoManager – An online report can contain one month or less
of data. If you want to generate a report containing more than
one month of data, then you must use the Scheduled Reports
Tool. For more information about Scheduled Reports, see the
GeoManager Administrator Guide.
• Pathway – An online report can contain 14 days worth of data.
Pathway does not have Scheduled Reports.
Trimble MRM Confidential
123
Field
Description
Report Format
Shows you the available formats for the Exception Reports.
Currently:
•
•
•
•
Check Box
Online
Downloadable Format (Tab delimited)
Downloadable Format (Comma delimited)
Downloadable Format (Excel version)
Select if you want to include the header in Comma and Tab
delimited downloadable reports.
a. Select the radio button for mobile devices, Groups or mobile devices from Group.
b. If you select mobile devices from Group, select the Group from the drop‐menu. c. Select the mobile devices for the report from the text box. Hold down Ctrl key to select more than one mobile device or group.
d. Select the Time Period from the From and To Day, Month, Year, Hour and Min drop‐
menus. e. Select the Report Format from the drop‐menu.
f.
If you choose to download the Exception Assignment Report select the check box to Include header in Comma and Tab Delimited downloadable reports if you want headers included in the report.
g. Click Generate Report. • If you chose to view the report online, a new browser window opens with the Con‐
solidated Exception Report, as shown in Figure 1–167. Trimble MRM Confidential
124
Figure 4–7: Online Consolidated Exception Report
• If you chose to download the Consolidated Exception Report, a download dialog box, Figure 4–8, appears.
Figure 4–8: File Download Dialog Box
h. Click Open to open the file in a default application. Click Save to save the file to your computer. Click Cancel to return to the Exception Reports Options screen.
Trimble MRM Confidential
125
• If you select any other individual Exception Report, the Exception Report Options screen, shown in Figure 1–169, appears:
Figure 4–9: Individual Exception Report Options
Field
Description
Select Report to
Generate
This is filled in from the previous screen and shows Consolidated
Exception report.
Exception Name
Contains a list of all the Exceptions available for report creation.
Select Mobile
Device(s) to
Include in the
Report
Combination of radio buttons, drop-down menus and text box for
organization of mobile devices available for reporting. One radio
button must be selected. One or more mobile devices or groups
listed must be selected.
Time Period
The length of time you want the report to contain. This is limited to:
• GeoManager – An online report can contain one month or less
of data. If you want to generate a report containing more than
one month of data, then you must use the Scheduled Reports
Tool. For more information about Scheduled Reports, see the
GeoManager Administrator Guide.
• Pathway – An online report can contain 14 days worth of data.
Pathway does not have Scheduled Reports.
Trimble MRM Confidential
126
Field
Description
Report Format
Shows you the available formats for the Exception Reports.
Currently:
•
•
•
•
Check Box
Online
Downloadable Format (Tab delimited)
Downloadable Format (Comma delimited)
Downloadable Format (Excel version)
Select if you want to include the header in Comma and Tab
delimited downloadable reports.
a. Select Exception Name from the drop‐menu.
b. Select the radio button for mobile devices, Groups or mobile devices from Group.
c. If you select mobile devices from Group, select the Group from the drop‐menu. d. Select the mobile devices for the report from the text box. Hold down [Ctrl] key to select more than one mobile device or group.
e. Select the Time Period from the From and To Day, Month, Year, Hour and Min drop‐
menus. f.
Select the Report Format from the drop‐menu.
g. If you choose to download the Exception Assignment Report select the check box to Include header in Comma and Tab Delimited downloadable reports if you want headers included in the report.
h. Click Generate Report. • If you chose to view the report online, a new browser window opens with the Exception Report, as shown in Figure 1–170. Trimble MRM Confidential
127
Figure 4–10: Online Exception Report
• If you chose to download the Exception Report, a download dialog box, as shown in Figure 1–271, appears.
Figure 4–11: File Download Dialog Box
i.
Click Open to open the file in a default application. Click Save to save the file to your computer. Click Cancel to return to the Exception Reports Options screen.
Trimble MRM Confidential
128
Trimble MRM Confidential
129
Glossary
affiliate
Companies who work with larger carriers to build a nationwide network. Affiliates may use the larger carrierʹs brand name, network operations, customer service or other resources.
antenna
A device for transmitting and receiving signals. Often camouflaged on existing buildings, trees, water towers or other tall structures, the size and shape of antennas are generally determined by the frequency of the signal they manage. AP
Access point is a WLAN transceiver or ʺbase stationʺ that can connect a network to one or many wireless devices. APs can also bridge to one another. carrier
Also known as service provider or operator, a carrier is the communications company that provides customers with air time and other services for their wireless phones.
channel
A path along which a communications signal is transmitted.
FSM Field Service Management is the process of managing mobile resources to improve the performance of tasks in the field. FSM includes scheduling, dispatching and Intelligent Appointing, as reflected in the Trimble Taskforce solution. GPS
Global Positioning System is a worldwide satellite navigational system, made up of 24 satellites orbiting the earth and their receivers on the earth’s surface. The GPS satellites continuously transmit digital radio signals so that up‐to‐the‐minute information may be used in location tracking, navigation and other location or mapping technologies.
iLMTM Internet Location Manager is a patented Trimble in‐vehicle mobile resource management device using GPS and wireless network communications technologies. The Trimble iLM captures location‐based information in the field and securely transmits it over high‐speed wireless Trimble MRM Confidential
130
networks to Trimble subscribers. This data shows up in the form of on‐demand, exception or scheduled web‐based reports that reflect information such as mobile worker location, vehicle speed, starts and stops on customizable maps.
IP Internet Protocol sends data packets, called data‐grams, across multiple networks, but does not ensure that they arrive at their destination reliably (TCP ensures reliable delivery). Each IP datagram has a header containing source and destination information, allowing each datagram to travel independently to its destination directly or through gateways, with each datagram perhaps traveling a different route to reach its destination.
IP address
Also called ʺInternet address.ʺ The 32‐bit address assigned to hosts using TCP/IP. Most Internet addresses consist of a network portion and a node portion. The address for each device must be unique on the network.
LAN
Local Area Network is a small data network covering a limited area, such as a building or group of buildings. Most LANs connect workstations or personal computers, allowing many users to share devices such as laser printers, as well as data. A LAN also allows easy communication by facilitating e‐mail or supporting chat sessions.
Landmarks
The GeoManager Landmarks feature—available with all Trimble MRM Fleet Productivity & Management solutions—is an enhanced scheduling and reporting tool that enables you to define and post special destinations and locations in the Trimble customized mapping database, then view them conveniently on a map in relation to current field asset locations. Landmarks feature option is an excellent tool for administrators looking to streamline their vehicle routing process while reducing wasted time, fuel costs and other expenses.
MRM
Mobile Resource Management is a category of business solutions designed to maximize the productivity of mobile work forces. The most effective MRM solutions—such as those offered by Trimble MRM—combine Internet services with applications that leverage on‐demand GPS, wireless capabilities and transaction processes to help companies reduce operating costs and raise the quality of customer experience. Trimble MRM Confidential
131
Wi‐Fi
Wireless fidelity is the generic term for 802.11 technology. WLAN Wireless Local Area Networks use radio waves instead of a cable to connect a user device, such as a laptop computer, to a LAN. They provide Ethernet connections over the air and operate under the 802.11 family of specifications developed by the IEEE. wireless
General term for using radio‐frequency spectrum for transmitting and receiving voice, data and video communications.
wireless Internet
A general term for using wireless services to access the Internet, e‐mail and/or the web.
wireless IT
Wireless Information Technology is the monitoring, managing and troubleshooting of computer equipment throughout a wireless network.
Trimble MRM Confidential
132