1
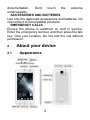
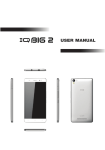
User Manual 1 Contents 1 SAFETY ........................................ 3 2 ABOUT YOUR DEVICE ............... 4 3 START TO USE ............................ 5 4 BASIC FUNCTIONS .................... 5 5 FUNCTION MENU ......................11 2 1 Safety Read these concise guidelines. Not following them may be dangerous or illegal. ROAD SAFETY Always keep your hands free to operate the vehicle while driving. Park your vehicle safely before using your device. SWITCH OFF OR USE FLIGHT MODE IN AIRCRAFT Wireless devices can cause interference in aircraft. Using them in aircraft is both dangerous and illegal. Switch off your device or switch to fight mode before on board. SWITCH OFF IN HOSPITALS Follow relevant regulations or rules. Switch your device off near medical equipment. SWITCH OFF WHEN REFUELING Switch off your device at a refueling point or near fuels or chemicals. SWITCH OFF NEAR BLASTING Don’t use your device where blasting is in progress. Observe restrictions, and follow any regulations or rules. INTERFERENCE All wireless phones may be susceptible to interference, which could affect the performance. USE PROPERLY Use in the normal position explained in the product 3 documentation. Don't touch the antenna unnecessarily. ACCESSORIES AND BATTERIES Use only the approved accessories and batteries. Do not connect to incompatible products. EMERGENCY CALLS Ensure the phone is switched on and in service. Enter the emergency number, and then press the talk key. Give your location. Do not end the call without permission. 2 2.1 About your device Appearance 4 2.2 Keys instruction Keys Power key Volume key Home key Menu key Back key 3 3.1 Descriptions Short press on the Power key shall lock the screen Long press on the Power key shall switch on/off the device. Press Volume key to change the volume. Press Home key at a non-standby screen to go back to standby screen Long press Home key to go to the recent application lists Press Menu key to add/manage applications, wall papers, searches, notices and menu settings in the standby interface. Press Back key to go back to previous menu Start to use Insert SIM card The phone is a Dual SIM mobile phone allowing 5 you to use the facility of two networks. To insert SIM card(s): 1. Switch off the mobile phone and remove the rear cover and battery. 2. Insert the SIM card correctly in the card slots. 3. Finally insert the battery and replace the rear cover of the mobile phone. 3.2 Insert Memory card 1. Power off the mobile phone and remove the rear cover and battery. 2. Insert the Micro SD card into the slot. 3. Finally insert the battery and the rear cover of the mobile phone. Note: Use only compatible memory cards for use with this device. Incompatible memory cards may damage the card or the device and corrupt the data stored in the card. 3.3 Charge the Battery or Connect to a computer You can charge your battery using the charger or connect the USB cable (supplied with this phone) to the computer. Note: Please use the specific battery, otherwise it may cause explosion. 6 4 4.1 Basic functions Basic operations Long press the blank space in Home screen to add the shortcuts, widgets, folders to Home screen and change the wallpapers. Long press the icons in Home screen and drag it to the trash at the bottom. Press the third icon at the bottom of Home screen into application lists. Long press the application icon and drag it to home screen to create the shortcuts of the application. 4.2 Make calls When the network provider icon appears on the standby screen, you can call out or answer calls. The indicator on the upper right part shall show the signal strength. Quality of connection will be greatly influenced by obstructions. So movement in a small range may effectively improve the quality of connection. 4.2.1 Make domestic calls Use virtual keyboard to enter phone numbers and then press Dial icon to call. If you need to change the phone number, please press the cancel key on the touch screen to delete (numbers entered). When the call is answered, the screen shall show the 7 connection status. 4.2.2 Call extension phone Some of the extension phones can't be directly connected to. Use the virtual keyboard, enter switchboard number, open the option menu and choose "Add 2-sec pause", and then dial the extension phone number. Type in as follows to call extension phone: Zone description › switchboard number › temporarily held for 2s › extension phone number › call 4.2.3 Make international calls If you need to make an international call, long press the 0 key on the virtual keyboard until there appears the sign "+" for international call prefix, which helps you call numbers from any country (For example, 86 for China)even if you don't know the international call prefix of that country. You can make an international call according to the following typing order: + › country code › complete phone number › dialing icon (type in the prefix code(+), and then continue to enter the country code and complete phone number). Country code usually follows conventional practice: German is 49, Britain 44, Sweden 46 and so on. When making international phone calls, the "0" in the city code should be omitted. 4.2.4 Make listed calls Every dialed and received phone number is 8 recorded in the call history list. Recently dialed, answered and missed phone numbers are in order (latest to earliest) listed in the "all" log. You can also choose and check missed, answered and dialed list as needed. Follow the instructions below to check the list: Press Dial icon at standby screen to dial or check call history. Listed phone numbers can be called out by pressing the respective log. Press the small icon on the right side to enter the log detail interface. In the call history interface, users can long press to save or delete the number. In the details interface, the phone number saving function is preset. 4.3 Emergency calls You can make emergency call as long as you are in the network coverage (check the signal strength indication bar on the upper right side of the handset screen). If your network provider doesn't provide roaming service in this area, there will be "Emergency Calls Available" on the screen. If you are in the network coverage, you can make emergency calls even without a SIM card. 4.4 Answer calls Directly slide "answer key" to answer an 9 incoming call. If your headphone is connected to the handset, you can use the headphone key on the headphone to answer calls. Cautions: A short press on the headphone key will answer the call while a long one will hang up the phone. 4.5 Call history This handset can not only list all calls in reverse order, but also list a floating menu with all, answered; dialed, missed calls for checking call history of different kinds. 4.6 Call Connection option This option can only be seen during a call. The waiting call, hold call, multi-party call functions require the support of the network. Please contact your service provider for details. In the connection option page, you can do the following operations: Hold Temporarily hold the current one-line call. End Call End the current call. Contacts Enter the Contacts menu. Dial pad Enter the dialing screen during a call. 10 Speaker The voice passes through the speaker system Mute Turn on/off Mute. When the mute is ON, the other person can't hear the sound from this handset. Audio recording. Record the current call. Conference In Conference call mode, you answer the incoming call and add it to the conference in accordance with the instructions; Hold multiparty conference; Have a private conversation with one party and hold other parties' call; Connect one party to the other and end the conference call; Put one party on hold; End current call and all hold on calls. Cautions: menu items marked by * means happening only under certain situations. Users need to apply for opening the conference call service from their service provider. 5 5.1 Function menu Browser Press the browser icon to enter the browser interface and you can search for websites. 11 5.2 Calculator The handset is provided with a calculator with basic functions. You can carry out the operation for plus, minus, multiply, and division by pressing icons on the screen. Slide the screen to the right , you can use more functions. Cautions: the accuracy is limited and round-off error may occur. 5.3 Calendar Enter the calendar menu and there shall appear a virtual calendar on the screen with the current date marked on background frame in a special color. Press the touch screen to browse date and the calendar information on the screen shall be correspondingly updated. 5.4 Call Log Select Call history to view recent calls in SIM1 and in SIM2, including All calls, Outgoing calls, Incoming calls, Missed calls and Call time. Select any entries to calls, send message and send multimedia message. 5.5 Camera In viewing interface, press the bottom icons to do 12 the following operations. Press the center icon to shoot a picture, press the right icon to film a video, Press the photo icon to show the latest captured picture or video. 5.6 Clock 5.6.1 New Alarm Enter the clock menu and press alarm icon to add a new alarm. Drag the scrollbar to set alarm time. Choose “settings” to edit the activity, alarm time, repeat, alarm tone, vibration and tag, press “done” to finish the setting. If you need to change the settings (reset), choose "edit alarm". If you want to delete the alarm, press "delete alarm". 5.7 Contacts Enter the Contacts interface, you can check all the contacts, search for contacts or add new contact. New contact means a newly added phone number that is recorded in the SIM card or the handset. When adding a new contact, you can type in the name, address, phone number, workplace, more phone number, handling/work place/ other email address and so on. You can also check call history and contact group. 13 5.8 Downloads You can check the being-downloaded contents. 5.9 downloaded or Email First you need to set the Email account. Step 1: Input email address and password. Step 2: select account type, press OK to connect. 5.10 File manager You can manage file folders, including Download, Music, Received files. Press menu key to create a new folder or select folders to copy, move and delete. 5.11 FM Radio Notice: this handset doesn't have a built-in antenna. If you want to listen to the radio, please insert the headphone first. Pressing the side keys can adjust the volume. a. Channel list: check all the channels and select. b. FM recording: choose recording after turning on the FM radio. c. Start/stop: start/stop FM. 14 d. Previous/Next: press this key to change FM channel. 5.12 Gallery In the gallery interface, there are different folders. Select a folder and press to enter. Press the picture to view it.. When viewing the picture, if you press on the screen or press the menu key, "share, delete, more" will pop out. Choose "share" to send the file via BT or a message; choose "more" for further functions such as detailed information, set as, edit, print, and rotate left or right. If you press the shooting icon at the upper right corner, you can directly shoot a picture or record a video. 5.13 Messages 5.13.1 Write a new message Press “compose new message” to get a new text message: a. Press the edit frame, type in the message after a virtual keyboard pops out. b. Press the number frame and enter number, or press add contact icon and select stored contact number from Contacts, or call history or contact group. 15 c. Input contents into the typing frame on the touch screen. After editing, press send icon to send the text. d. Press menu key to add subject, Attach, Discard, Insert quick text, Insert smiley and more operations. 5.13.2 Message setting Include storage settings, SMS settings, MMS settings, notice settings, service information settings and so on. 5.14 Music In the music interface, there are four tags: Artists, Albums, Songs and Playlists. Press different tags to enter different tag interfaces. In the play interface, you can press the menu key to change settings of the player's by selecting part shuffle play, all shuffle play or sound effects. In the sound effect menu, you can choose Bass Boost, Virtualization, Preset Reverberation and Equalizer Effect. 5.15 Dial Press Dial icon, enter the phone number, and press Call icon. 16 5.16 Sound Recorder 1. Press Record to start recording. In the middle of the screen is a timing bar. Press Stop to stop recording and select "Save" in the pop up "Save/Cancel' to save the recording. You can press Play key to listen to the recording before selecting "Save/Cancel". 2. Press menu key to select recording quality. 5.17 Search Input key words to search in the network, messages, applications, contacts, call history and music, etc. 5.18 Settings 5.18.1 SIM management The contents in this menu may differ subject to different service providers. For detailed information, please view in the phone. 5.18.2 Wireless & networks Change settings for wireless connection and network such as Airplane mode, WLAN, WLAN settings, BT, BT settings, Tethering & portable hotspot, VPN settings and mobile networks. 5.18.3 BT To activate BT, you need to make BT settings . BT settings: a. BT: Activate/Inactivate BT. 17 b. Device name: check and change device name. c. Discoverable: Enable others to find your device after you activate this function. d. Advanced settings: you can transfer files, select visit authority and remote SIM mode. e. Scan for device: Scan and search devices. 5.18.3 Call settings Change settings of voice call, video call and Internet call, and other settings. 5.18.4 Audio profiles Include General, Silent, Meeting and Outdoor. 5.18.5 Display Change settings of brightness, auto-rotate screen, –active desktop and screen timeout. 5.18.6 Security Change the settings of screen lock/unlock, SIM card lock, passwords, device management and credential storage items. Screen lock settings: a. Pattern: unlock the screen through designed pattern. Draw a private pattern to unlock the screen so as to avoid unauthorized use of the handset. 18 b. PIN: type in PIN numbers to unlock the screen. c. Password: type in password to unlock the screen. 5.18.7 Applications Include the management of applications, the condition and development of the currently used service and storage space. 5.18.8 Accounts & sync You may add user accounts here and sync data and applications as you like. 5.18.9 Privacy Restore default settings——in this menu, related settings will be restored to default if you press "reset the phone". You can also format the SD card. If you select this option, all of the data in the SD card will be erased. 5.18.10 Storage Include the SD card storage, available storage, insert SD card (If a SD card has already been inserted, then this option will show "remove SD card"), format SD card and all available storage. 5.18.11 Language & Keypad Include language settings, keypad settings and input methods and so on. 5.18.12 Voice input & output Include text to voice settings. You can use the default setting, and install linguistic data. 19 5.18.13 Accessibility Power button: press power button to end calls. Quick boot: switch on/off the handset quickly. 5.18.14 Date & Time Include automation, set date, select time zone, set time, use 24hour format and select date format. 5.18.15 Schedule power on/off You can set the time for switching on/ off the handset, which include setting time and repetition date. 5.18.16 About phone Include status information, battery information, law information, type, android version, base band version, core version and version number. 20