1
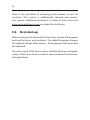
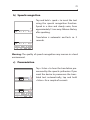
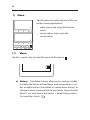
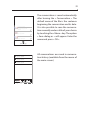
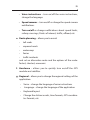
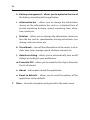
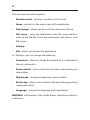
Vasco Traveler
Premium
USER MANUAL
ENGLISH
Compagnia Lingua Ltd.
www.compagnia-lingua.com
[email protected]
3
TABLE OF CONTENTS
1. Security
6
2. Technical details
9
3. Operation of the device 10
3.1. Function keys
11
3.2. Charging
11
3.3. Memory card
12
3.4. In-built SIM card
12
3.4.1. Top-up 3.4.2. SIM card costs
3.4.3. SIM card expiration
3.4.4 Telephone number
3.5. First start-up
4. Settings
14
15
4.1. Vasco Settings
15
4.2. System settings 16
4.2.1. WiFi Configuration
4.2.2. Mobile network settings
4
APPLICATIONS19
1. Vasco Translator
20
1.1. Main screen
20
1.2. Menu
26
1.3. Conversation
28
2. GPS Navigationn
32
3. Guide Books
37
4. Emergency numbers
39
5. Embassies
40
6. Unit converter
41
7. SOS 42
8. Telephone
43
8.1. Outgoing calls
43
8.2. Incoming calls 44
8.3. Call log
44
8.4. Contacts
44
9. SMS / MMS
45
10. Camera and Gallery
46
10.1. Camera
46
10.2. Gallery
47
11. Browser
47
5
12. Calculator
48
13. Clock
48
14. Calendar
49
15. ToDo
50
16. Facebook
50
17. YouTube
51
18. Gmail
52
19. Email
52
20. Account balance
52
21. WiFi, GSM, GPS
53
Warranty terms and conditions
54
6
1. Security
WARNING: Carefully read the instructions below to minimize
risks connected to the use of the device.
•
Switch off the device or change to the flight mode when on
an airplane as it can disrupt on-board devices. All the restrictions have to be adhered to.
•
Do not use the device in the vicinity of flammables, chemicals or explosives.
•
Do not use the device in the vicinity of fire, embers, cigarette butts, etc.
•
While driving, adhere to local rules concerning the use of
mobile devices. Do not install the device above air bags.
•
Do not use the device in hospitals or other places where
the use of mobile devices is forbidden. Mobile devices may
influence the functioning of electronic and medical equipment such as pacemakers or hearing aids. Before using the
device in hospital or in the vicinity of medical equipment,
consult a doctor.
•
Do not dismantle the elements of the device. Do not modify
the device and do not paint it. If the device does not work
correctly, contact the seller immediately.
•
The battery should be charged in a cool and airy environment, far from flammable materials and explosives.
7
•
Do not keep the device in the vicinity of magnetic materials such as discs, credit cards etc. The device may be
demagnetised.
•
Rain, humidity, or any kind of moisture and liquids contain
mineral substances and may cause the corrosion of electronic circuits. In case of flooding of the device, remove the
battery and immediately contact the seller.
•
Warning! In case of fire, the device may explode.
•
Do not use the device in too high or too low temperatures.
Do not expose it to the sun or high humidity.
•
Do not use household detergents or a damp cloth to clean
the device.
•
The device has to be kept in a clean and dry place.
•
Do not throw, drop, or bend the device.
•
Do not use the device where it is forbidden to use electronic
devices.
•
The headset should be worn comfortably, and should not
be pressured.
•
Warning! A broken display may be sharp and cause injury.
•
Warning! Keep away from children. The device may be dangerous to their health as it consists of small parts which may
cause choking or suffocation.
•
The producer does not take responsibility for breakdowns
caused by software or hardware modifications.
8
•
Use electronic devices according to local law.
The device may cause interference of medical implants. In order to
minimize the risk, keep the device at least 20 cm away from implants
at all times. It is advised not to keep the device in a lapel. In case of
emergency, switch off the device immediately and consult a doctor.
The producer reserves the right to change this user manual
without prior notification.
Disclaimer : Vasco Traveler is the trademark of Compagnia Lingua
Ltd. All rights are reserved.
9
2. Technical details
Display:
7'', IPS, 1024 x 600
Processor:
MT8312 Dual core, 2 x 1.3 GHz
RAM:
1 GB, DDR 3
ROM:
8 GB
Battery:
Lithium-ionium BP-6T (3.7V,
7.4Wh, 2800mAh)
Earphone input:
3.5 mm
USB:
Micro USB
Size:
190*109*9 mm
Weight:
279 g
10
3. Operation of the device
1
2
3
4
5
8
7
6
1. Loudspeaker, 2. Turn on/off, 3. Volume, 4. SIM card,
5. MicroSD, 6. Earphones, 7. USB, 8. Microphone
11
3.1 Function keys
Power
•
Device turned off: hold this key for 5 seconds to turn on the
device
•
Working device: Push this key to block the screen, push
again to unblock
•
Working device: Push and hold the key for about 1 second
to open the settings of the device. You will see a button. Tap
the button to turn off the device.
Volume
•
Working device: push up or down to increase or decrease
the volume
3.2 Charging
•
Plug the charger into an electric socket and the USB cable
into the device in order to charge the battery
•
The battery indicator moves to charging mode
•
The battery is fully charged after about 4 hours.
•
After the battery is charged, remove the charger and the
USB cable
12
WARNING: Charge the battery in a well-ventilated area between -10oC and +35oC. To charge the battery use the charger
provided by the producer. Using any other charger may damage the device.
3.3 Memory card
The device is provided with a memory card. Removing and/or damaging the card may cause the incorrect functioning of the device
3.4. In-built SIM card
The device is equipped with an in-built, international SIM card which
allows you to answer free incoming calls in over 130 countries. To
check the current list of the countries and available services visit
www.vasco-electronics.com.
3.4.1. Top-up
The in-built SIM card is a pre-paid card. It does not require any
contract.
The SIM card’s operator is OneSimCard. The card is active and is
topped-up with $20. To top-up your card visit www.vasco-electronics.com or contact the distributor.
Checking the account balance – see 11.
13
3.4.2. SIM card costs
To check rates and coverage please visit vasco-electronics.com. The
costs may vary depending on the country.
3.4.3. SIM card expiration
The SIM card expires 2 years after the last operation. In order to
prolong the expiry date, use the device (make a call, send SMS or
use data transfer).
If the device does not work properly and you see « SIM card error »,
turn off the device and make sure that the SIM card is inserted
properly.
WARNING! Do not bend or scratch the SIM card. The SIM card
cannot be exposed to water, dust, or electricity.
3.4.4. Telephone number
Your telephone number starts with +372. The complete number is
under the cover of the battery or on the inner side of the box.
Additionally, you can activate your U.S. number. In order to activate
your personal U.S. number visit www.vasco-electronics.com or contact the distributor.
14
There is the possibility of activating local numbers in over 60
countries. This service is additionally charged and sometimes requires additional documents. In order to learn more visit
www.vasco-electronics.com or contact the distributor.
3.5. First start-up
When turning on the device for the first time, choose the language
and read the terms and conditions. The default language changes
the regional settings of the device – the language of the menu and
the keyboard.
The main screen of the device shows available functions and applications. Slide up or down in order to move between the functions
and applications.
15
4. Settings
4.1. Vasco Settings
Vasco settings allows you to quickly change the main settings of the
device.
•
Translation counters – allows you to control the number of translations done via WiFi and GSM.
•
WiFi Settings – allows you to manually connect to a WiFi network
which requires a password. If a WiFi network is secured with a
password tap its name and enter the password. Tap « Connect »
in order to connect to the chosen network.
•
Automatic WiFi – allows the device to connect automatically to
open WiFi networks.
•
Change the network operator manually – allows you to search
for and connect to chosen mobile network operators manually,
•
Application language – allows you to quickly change the language of the menu.
•
Check for updates – allows you to quickly check if any new updates are available.
WARNING! All updates must be downloaded via WiFi!
•
About
n
n
16
4.2. System settings
The settings allow you to manage more advanced options:
•
Connect – manages SIM card, WiFi and mobile networks.
•
Device – manages display options, memory card, internal storage, applications.
Clean
Clean
Speak
Listen
Clean
Speak
Listen
Clean
•
Account – manages location, security, language.
•
More – manages time and date, accessibility, developer options
and information about the phone.
Speak
Listen
Clean
Speak
Listen
Clean
4.2.1. WiFi Configuration
o go to the cinema
0:16 AM
Allows you to connect to WiFi manually.
WiFi (1)
tu veux aller au cinéma
Open (Connected)
you want to go to
the cinema
Tap « WiFi
configuration » to see the list of
currently available networks. To connect
with the chosen network, tap its name
and « connect ».
WiFi (2)
WPA2
0:16 AM
morow
0:16 AM
If the network is secured with a password,
you will see a padlock icon next to it. Tap
the network name to enter the password.
ATTENTION! If the device is within range of an open WiFi
network, it will connect to it automatically.
n
Clean
Speak
Listen
Clean
Speak
Listen
Clean
n
Clean
Speak
Listen
Clean
Speak
Listen
Clean
17
4.2.2. Mobile network settings
The device is equipped with an in-built SIM card which allows it to work
independently of WiFi. If the device is within range of any network
operator it will connect to it without the need of configuration.
WARNING! Changing the mobile network settings may affect the functioning of the device.
Mobile network settings are available through the function « Change
the network operator manually ».
WARNING! Changing the settings may affect the functionality of
the device.
If the translator does not work and you see « Network error » make
sure that data connection is on. Choose « Change the network
18
operator manually », choose your country and enter the settings.
Confirm with « Yes » .
•
Check if « Data connection » says EE EMT.
•
Try changing the mobile network operator in
« Network operators ».
•
Make sure that the APN is correct (see below).
Access Point Names (Advanced)
Tap « send.ee » to see the APN settings.
The device works with the following settings:
Name
send.ee
APN
send.ee
APN type
default,supl
Proxy
Not set
Port
Not set
Username
00372 + 8-digit number located under the cover
protecting the battery or on the inner side of the
box of the device.
Password
Not set
WARNING! Entering wrong data may cause malfunction of the device.
19
APPLICATIONS
20
1. Vasco Translator
Main screen
1.1.
a) Text boxes
en
Clean
Speak
Listen
Use the text boxes to insert text. Tap the top
or bottom text box to display the touch keyboard and enter a word or a sentence for
translation. You can change the keyboard language by holding «space ».
Clean
Speak
Listen
Clean
Speak
Listen
Clean
It is also possible to use the speech recognition function to insert the text (viz. Bod 1.2 b).
English
Arabic
Bulgarian
Czech
Danish
Estonian
Finnish
French
Greek
Hebrew
Spanish
Dutch
Japanese
en
Clean
Speak
Listen
Clean
Speak
Listen
Clean
Speak
Listen
Clean
Lithuanian
German
Norwegian
It is possible to enlarge the size of the top and bottom text boxes by
tapping .
tu veux aller au cinéma
tu veux aller au cinéma
you want to go to the
To close this window, tap thecinema
« back » key.
you want to go to
cinema
not today
not today
pas aujourd’hui
pas aujourd’hui
peut-être demain
peut-être demain
maybe tomorow
Listen
Speak
Speak
Listen
Speak
Speak
Listen
maybe tomorow
Speak
Speak
Listen
Speak
Speak
Listen
21
b) Speech recognition
en
Clean
Speak
Listen
Clean
Tap and hold « speak » to insert the text
using the speech recognition function.
Speak in a clear and steady voice, from
approximately 15 cm away. Release the key
after speaking.
Speak
Listen
Clean
Speak
Listen
Clean
Speak
Listen
Cle
Speak
Listen
Cle
Translation is automatic and lasts ca. 2
seconds.
en
Clean
Speak
Listen
Clean
Speak
Listen
Clean
you want to go to the cinema
Speak
Listen
Clean
WiFi (1)
tu veux aller au cinéma
Warning: The quality of speech
recognition may worsen in a loud
not today
environment.
maybe tomorow
03/12/2013 10:16 AM
Open (Connected)
you want to
the c
WiFi (2)
WPA2
03/12/2013 10:16 AM
03/12/2013 10:16 AM
c) Pronunciation
you want to go to the
tu veux aller au cinéma
cinema
not today
pas aujourd’hui
peut-être demain
Listen
maybe tomorow
Speak
n
Clean
Speak
n
Clean
Speak
Save dialog as
Listen
Clean
Listen
Clean
urd’hui
Listen
Clean
Speak
Listen
Clean
Speak
Listen
Clean
Speak
Listen
Clean
Speak
Listen
Clean
Speak
Listen
Clean
WiFi (1)
03/12/2013 10:16 AM
Open (Connected)
not today
WiFi (2)
03/12/2013 10:16 AM
WPA2
03/12/2013 10:16 AM
au cinéma
Speak
you want to go to the cinema
maybe tomorow
t to go to the
Tap « listen » to hear the translation pronounced by the speech synthesizer. If you
want the device to pronounce the translated text automatically, tap and hold
« listen » for a couple of seconds.
Speak
Speak
Listen
Cle
Speak
Listen
Cle
tu veux aller au cinéma
Listen
you want to go to
the cinema
Clean
Speak
Listen
Clean
22
d) Clean
Tap « clean » to clean the whole text. In
order to delete single letters or words,
use the backspace on the keyboard.
an
n
Speak
Listen
Clean
Speak
Listen
Clean
Speak
Listen
Clean
Speak
Listen
Cl
Speak
Listen
Clean
Speak
Listen
Clean
Speak
Listen
Clean
Speak
Listen
Cl
e
ian
ian
e) Choosing the source language
you want to go to the cinema
WiFi (1)
03/12/2013 10:16 AM
Open (Connected)
not today
WiFi (2)
03/12/2013 10:16 AM
WPA2
maybe tomorow
03/12/2013 10:16 AM
er au cinéma
nt to go to the
Menu shows the list of available languyou want to go to the
cinema To change the source language, tap
ages.
the
flag. The list of available languages
pas aujourd’hui
will appear. To choose the appropriate
maybe tomorow
language,
drag the list up or down and
tap the chosen language.
tu veux aller au cinéma
English
Arabic
ourd’hui
Bulgarian
not today
Czech
demain
Danish
tomorow
peut-être demain
sten
Listen
Clean
Speak
Speak
Speak
Listen
Listen
Clean
Speak
Speak
Listen
Estonian
Clean
Finnish
Speak
Listen
Clean
Speak
Listen
Clean
French
Greek
Save dialog as
Hebrew
Spanish
Dutch
Japanese
sten
Clean
Speak
Listen
Clean
Speak
Listen
Clean
Lithuanian
German
Norwegian
Speak
tu veux aller au cinéma
Speak
Listen
not today
pas aujourd’hui
Cle
Clean
Speak
Listen
Cle
peut-être demain
maybe tomorow
Listen
Listen
pas aujourd’hui
peut-être demain
Speak
Speak
you want to go to the
cinema
not today
Speak
Clean
tu veux aller au cinéma
you want to go to the
cinema
Listen
Listen
maybe tomorow
Speak
Speak
Listen
Speak
Speak
Listen
Speak
Speak
Listen
23
f) Choosing the target language
The menu shows the list of available
languages. To change the target language, tap the flag. The list of available
languages will appear. To choose the
appropriate language, drag the list up or
down and tap the chosen language.
English
Arabic
Bulgarian
Czech
Danish
Estonian
en
Clean
Finnish
French
Greek
Speak
Listen
Clean
Speak
Listen
Clean
Speak
Listen
Clea
Speak
Listen
Clean
Speak
Listen
Clean
Speak
Listen
Clea
Hebrew
Spanish
Dutch
Japanese
en
Clean
Lithuanian
German
Norwegian
you want to go to th
03/12/2013 10:16 AM
not today
g) Changing the direction of translation
03/12/2013 10:16 AM
maybe tomorow
03/12/2013 10:16 AM
tu veux aller au cinéma
Tap this key to change the direction of
you want to go to the
translation. However, itcinema
is not necessary
as you can translate both
the text inserpas aujourd’hui
ted in the up and bottom text box.
you want to go to the
cinema
tu veux aller au cinéma
English
not today
Arabic
pas aujourd’hui
Bulgarian
not today
Czech
peut-être demain
Danish
maybe tomorow
peut-être demain
Estonian
ten
Listen
Clean
Speak
Speak
Listen
Clean
Speak
Listen
Speak
Finnish
Speak
Listen
Speak
Speak
Listen
maybe
tomorowClean
Speak
Listen
Clean
Speak
Listen
Clean
French
Greek
Save dialog as
Hebrew
Spanish
Dutch
Japanese
ten
Clean
Speak
Listen
Clean
Speak
Lithuanian
Listen
Clean
German
Norwegian
Speak
er au cinéma
Listen
tu veux aller au cinéma
nt to go to the
you want to go to the
cinema
tu veux aller au cinéma
Speak
ourd’hui
Listen
pas aujourd’hui
not today
demain
pas aujourd’hui
peut-être demain
tomorow
maybe tomorow
peut-être demain
Speak
Speak
Listen
Speak
Speak
Listen
Clea
you want to go to th
cinema
not today
Listen
Clea
Speak
Speak
Listen
Speak
maybe tomorow
24
h) WiFi key
Tap they key to turn on or turn off the
WiFi. If the key is green – the WiFi is
active.
ten
Clean
Speak
Listen
Clean
ten
Clean
Speak
Listen
Clean
tu veux aller au cinéma
ted)
you want to go to
the cinema
i) GSM key
Tap the key to turn on or turn off the
mobile connection. If the key is green –
the mobile connection is active
en
Clean
Speak
Listen
Clean
Speak
Listen
Clean
en
Clean
Speak
Listen
Clean
Speak
Listen
Clean
en
to go toClean
the cinema
Speak
WiFi (1) Listen
Clean
10:16 AM
Open (Connected)
y
you want to go to
the cinema
WiFi (2)
WPA2
10:16 AM
omorow
10:16 AM
en
Clean
Speak
Listen
tu veux aller au cinéma
Clean
25
Clean
Speak
Listen
Clean
Speak
Listen
Clean
Speak
Listen
Clean
j) Battery status
Clean
en
Clean
Speak
Listen
Clean
The icon shows the status of the battery.
Speak
Listen
you want to go to the cinema
WiFi (1)
03/12/2013 10:16 AM
Open (Connected)
Speak
Listen
Clean
not today
WiFi (2)
03/12/2013 10:16 AM
WPA2
Clean
Speak
Listen
Clean
tu veux aller au cinéma
you want to go to
the cinema
maybe tomorow
03/12/2013 10:16 AM
u cinéma
o go to the
en
Clean
Speak
Listen
Clean
d’hui
ain
morow
dialog as
k) Back
Tap the « back » button to return to the
previous screen.
Speak
Listen
Clean
Speak
Listen
Clean
Speak
Listen
Clean
Speak
Listen
Clean
Speak
Listen
Clean
Speak
Listen
Clean
26
1
l) Menu
Tap the menu to see the options of the currently running application.
• main screen: tap to get to the main
menu
2
• conversation: tap to save the
conversation
3
Clean
Speak
Listen
Clean
Speak
Listen
Clean
Clean
Speak
Listen
Clean
Speak
Listen
Clean
1.2.Menu
4
Tap the « menu » key to enter the menu of the device.
5
a) History – Translation history allows you to look-up, modify,
or delete the history of translations and conversations. In order to delete entries (translation or conversation history) or
change its name (conversation history) hold a chosen line for
about 1 sec. and choose the option « delete history entry ».
8
7
6
To cancel tap « back ».
27
b) Reset – Deletes whole translation and conversation history.
c) Conversation – This application enables a conversation
between two people (see 1.3).
d) Change the network operator manually – This option
allows you to change the GSM network operator manually. Tap
this option in order to see the list of the countries in which the
Vasco Translator works. Choose the country you are in. You will
see the list of preferred operators.
To change the operator manually, tap « Operator selection. Choose
a network operator » and confirm with « Yes ». You will be re-directed
to mobile network settings.
Choose « Network operators -> Select manually ». After a while you
will see the list of currently available operators. Tap the name of the
preferred operator to register in the network.
WARNING! In the event of losing range of the manually-chosen operator, the device will not register another network automatically. You will have to go to the mobile network settings
and choose your preferred network operator again or tap
« Choose automatically ».
e) About – Information about the device and terms of use.
28
1.3.Conversation
Speak
Listen
Clean
Speak
Listen
Clean
Speak
Listen
Clean
Speak
Listen
Clean
Listen
Clean
The « Conversation » application allows a conversation between
two people in two languages.
Enter « Menu » -> « Conversation ».
Speak
Listen
Clean
Speak
Listen
Clean
Speak
Listen
Clean
Speak
Choose the languages on the main screen of the device
To start the conversation, tap and hold
the flag of the country of the person who
will talk first.
tu veux aller au cinéma
Bulgarian
you want to go to the
cinema
Czech
Danish
not today
sten
Clean
Speak
Listen
Clean
Speak
Listen
Estonian
Speakpas aujourd’hui
Listen
Clean
Clean
English
Arabic
Finnish
French
peut-être demain
Greek
maybe tomorow
Hebrew
Spanish
Speak
Listen
Speak
Speak
Listen
Speak
Speak
Listen
Speak
Speak
Dutch
Listen
Japanese
sten
Clean
Speak
Listen
Clean
Speak
Listen
Clean
Speak
Listen
Clean
Lithuanian
German
Norwegian
A microphone will appear. Speak in a
clear and steady voice. Then release the
flag.
tu veux aller au cinéma
tu veux aller au cinéma
you want to go to the
cinema
you want to go to the
cinema
not today
not today
pas aujourd’hui
pas aujourd’hui
peut-être demain
peut-être demain
maybe tomorow
Listen
Speak
Speak
Listen
Speak
Speak
Listen
maybe tomorow
Speak
Speak
Listen
Speak
Speak
Listen
Greek
Hebrew
Spanish
Dutch
29
Japanese
ten
Clean
Speak
Listen
Clean
Speak
Listen
Clean
Speak
Lithuanian
Listen
Clean
German
Norwegian
The translation lasts about 2 seconds.
You will see the text and the flag corresponding to the language of the person
who talked. Beneath, the
translation will
you want to go to the
cinema
be visible in a larger font.
tu veux aller au cinéma
tu veux aller au cinéma
you want to go to the
cinema
English
Arabic
not today
pas aujourd’hui
Clean
Listen
Speak
Speak
Speak
pas aujourd’hui
Clean
Listen
peut-être demain
Estonian
maybe tomorow
Listen
not today
Czech
Danish
peut-être demain
sten
Bulgarian
tomorow Clean
SpeakmaybeListen
Finnish
Speak
French
Speak
Greek
Listen
Speak
Speak
Listen
Speak
Speak
Listen
Speak
Clean
Listen
Hebrew
Spanish
Dutch
Japanese
sten
Clean
Speak
Listen
Clean
Speak
Lithuanian
Listen
Clean
Speak
Listen
Clean
German
Norwegian
The interlocutor should repeat those
steps starting with tapping and holding
the flag corresponding to the language
he or she speaks.
er au cinéma
tu veux aller au cinéma
nt to go to the
you want to go to the
cinema
tu veux aller au cinéma
you want to go to th
cinema
not today
ourd’hui
pas aujourd’hui
not today
demain
pas aujourd’hui
peut-être demain
tomorow
maybe tomorow
peut-être demain
Listen
Speak
Speak
Listen
Speak
Speak
Listen
Speak
Speak
Listen
Speak
maybe tomorow
Save dialog as
Greek
Hebrew
Spanish
30
en
Dutch
Japanese
Clean
Speak
Lithuanian
Listen
Clean
Speak
Listen
Clean
Speak
Listen
Clea
German
Norwegian
To enlarge the chosen translation, tap
the .
you want to go to th
03/12/2013 10:16 AM
not today
03/12/2013 10:16 AM
maybe tomorow
03/12/2013 10:16 AM
tu veux aller au cinéma
you want to go to the
cinema
n
tu veux aller au cinéma
you want to go to the
cinema
not today
pas aujourd’hui
not today
pas aujourd’hui
peut-être demain
Speak
Listen
maybe
tomorowClean
Speak
Listen
Clean
Speak
Listen
Clean
Speak
Listen
Clea
Speak
Listen
Clea
peut-être demain
Listen
Speak
Speak
Listen
Speak
Speak
Listen
maybe tomorow
Speak
Save dialog as
Speak
an
Listen
Clean
Speak
Listen
Clean
Speak
Listen
Clean
an
To listen to the last translated
sentence,
you want to go to the cinema
tap « listen » or the linenotwith
the translatoday
tion. Tap and hold « listen
» to turn on the
maybe tomorow
automatic pronunciation.
03/12/2013 10:16 AM
03/12/2013 10:16 AM
WiFi (1)
Open (Connected)
Speak
Listen
Clea
Speak
Listen
Clea
WiFi (2)
WPA2
03/12/2013 10:16 AM
r au cinéma
t to go to the
tu veux aller au cinéma
you want to go to the
cinema
urd’hui
not today
pas aujourd’hui
emain
omorow
peut-être demain
Listen
Speak
Speak
Listen
Speak
maybe tomorow
Save dialog as
Speak
Listen
Clean
Speak
Listen
Clea
Speak
Listen
Clean
Speak
Listen
Clea
31
en
Clean
Speak
Listen
Clean
Speak
Listen
Clean
Speak
Listen
Clean
Speak
The
conversation is saved automatically
you want to go to the cinema
after
leaving the « Conversation ». The
not today
default
name of the file is the sentence
maybe tomorow
beginning the conversation and its date.
It is also possible to save the conversation manually under a title of your choice
by touching the « Menu » key. The option
« Save dialog as » will appear. Enter the
name and press « OK ».
WiFi (1)
03/12/2013 10:16 AM
Listen
Cle
tu veux aller au cinéma
Open (Connected)
you want to
the c
WiFi (2)
WPA2
03/12/2013 10:16 AM
03/12/2013 10:16 AM
tu veux aller au cinéma
you want to go to the
cinema
not today
pas aujourd’hui
n
Clean
Speak
Listen
Clean
peut-être demain
Listen
maybe tomorow
Speak
Speak
Listen
Clean
Speak
Listen
Clean
Speak
Listen
Clean
Speak
Listen
Clean
Save dialog as
n
Clean
Speak
Listen
Clean
you want to go to the cinema
03/12/2013 10:16 AM
All conversations are saved in conversawant tomenu
go to
tion history (available fromyouthe
of
the cinema
the main screen).
WiFi (1)
tu veux aller au cinéma
Open (Connected)
Speak
not today
WiFi (2)
Listen
Clean
Speak
Listen
Clean
Speak
Listen
Cle
Listen
Clean
Speak
Listen
Clean
Speak
Listen
Cle
WPA2
03/12/2013 10:16 AM
maybe tomorow
03/12/2013 10:16 AM
au cinéma
to go to the
Speak
urd’hui
main
omorow
e dialog as
Speak
Listen
Clean
Speak
Listen
Clean
Speak
Listen
Clean
Speak
Listen
Clean
Speak
Listen
Clean
Speak
Listen
Clean
32
2. GPS Navigation
Sygic is a GPS navigation and needs GPS to work properly. Make sure
that the GPS module is on. Tap WiFi/GSM/GPS on the main screen
and activate GPS or enter the Settings -> Location access -> GPS
satellites.
The main screen of the application is the map showing the current
position.
In order to plan a route tap
and choose «Navigate to…».
Choose «Address or POI», then choose the country, city/town/village, street and house number. Tap «DONE».
Tap «Drive to» and wait for the position. The navigation will plan a
route to the address provided.
You can also search for the address by tapping the magnifying glass
icon
and typing in the name of the place.
Navigation menu:
1. Navigate to – plans a route to the destination provided:
a. Address or POI – plan a route to the address provided or
Point of Interest (petrol station, hospital, hotel, etc.)
33
b. Home – plan a route to the predefined home address.
• Select from map: find your home on the map
• Quick search: type your home address and tap <<search>>
• Nearby POI: set your home address as a POI
• Favourites: add your favourite destinations
• History: save all the routes and destinations
• Contacts: save your contacts
• GPS coordinates: provide your home GPS coordinates
• Photo: add a photo to the address.
c. Quick search – allows you to quickly type in the name of
your destination .
d. Nearby POI – shows the list of Point of Interests in the vicinity of your current position, choose one of the POIs and
<<Drive to>> in order to plan a route to the POI.
e. Favourites – a list of all your favourite destinations. Tap a
place and <<Drive to>> in order to plan a route.
f. History – allows you to save the list of the searched for destinations. Tap the name and <<Drive to>> in order to plan a
route.
g. Contacts – allows you to save your contacts.
h. GPS coordinates – if you know the GPS coordinates of your
destination, type them in and tap <<Done>> and <<Drive
to>> in order to plan a route.
34
2. Route – shows the options of the current route
a. Add viapoint – choose a point through which the route should be plotted.
b. Load route – load the previously set route.
c. Delete route – delete the current route.
d. Add shortcut to home screen – add a shortcut to an often
used route in order to find and plan it quickly.
3. Travel book – saves all the information on all your routes, e.g.
average speed, time and date, mileage, etc.
4. SOS / Help – allows you to quickly contact emergency services
or find the nearest hospital, police station, etc.
5. My community – allows you to set a profile in Sygic community.
6. Settings – allows you to change the settings of the application:
a. Manage maps – Allows you to download or delete the maps.
b. Map – allows you to change the options of the map: day/
night mode, map details: buildings, landmarks, singpost info,
POI, 2D/3D view, font size, etc.
c. Connection – allows you to quickly connect to the Internet.
d. Notifications & Sounds
• Allows you to turn on/off the sounds and notifications.
35
• Voice instructions – turn on/off the voice instructions,
change the language.
• Speed cameras – turn on/off or change the speed camera
notifications.
• Turn on/off or change notifications about speed limits,
railway crossings, Points of interest, traffic, offroad, etc.
e. Route planning – allows you to avoid:
•
toll roads
•
unpaved roads
•
motorways
•
ferries
•
traffic incidents
and set an alternative route and the options of the route:
fastest, shortest, economic.
f. Hardware – allows you to quickly turn on/off the GPS
module and satellites.
g. Regional – allows you to change the regional settings of the
application:
•
Voice – change the language of voice instructions
•
Language – change the language of the application
•
Keyboard layout
•
Change the distance units, time formats, GPS coordinates formats, etc.
36
h. Battery management – allows you to optimize the use of
the battery according to the application.
i. Information bar – allows you to change the information
shown on the information bar such as: estimated time of
arrival, remaining distance, speed, remaining time, elevation, speed, etc.
j. Side bar – allows you to change the information shown on
the side bar such as speedometer, driving instructions, eco
driving, route overview, etc.
k. Travel book – saves all the information on the routes such as
date, time, hour, average speed, distance covered, etc.
l. Autoclose dialog – allows you to automatically turn on/off
dialogs according to your preferences.
m.Favourite POI – allows you to make the list of your favourite
Points of interest.
n. About – information about the application.
o. Reset to defaults – allows you to reset the options of the
application to the defaults.
7. Close – close the navigation and go back to the main menu.
37
3. Guide Books
The Guide Books application includes a very large data base of
guide books of most countries and cities in the world. The application does not require the Internet because all the guide books have
been saved in the device’s memory.
The main screen of the application includes general information
about the available guide books and shortcuts to popular articles.
In order to find a guide book, provide the name of the chosen place.
The data base includes information on continents, countries, states,
regions, cities and other popular touristic places.
Type the beginning of the name of the place you are looking for
in order to see the list of proposed places. Tap the name to see the
article.
If the application does not show the chosen information, use other
names for the place, or search for a region or a state in which the
required place is.
During reading the article you can find links to other articles or
external websites.
WARNING: Using the Internet may require data transfer!
38
Click the menu to see the options:
•
Random article – chooses a random article to read
•
Home – redirects to the main screen of the application
•
Find in page – allows you to search for a phrase in the text
•
Full screen – starts the application in the full screen mode; in
order to exit the full screen tap menu again and choose « exit
full screen ».
•
Settings
•
Exit – allows you to leave the application
In « Settings » you can change the following:
•
Zoom level – allows to change the zoom level, it is advisable to
choose « automatic ».
•
Zoom controls – turns on the icons of zoom control during reading articles.
•
Night mode – changes background colour to black.
•
Back to top – allows you to return to the top of the page during
reading the article.
•
Language – changes the language of the application.
WARNING: Information in the Guide Books should be treated as
a reference.
39
4. Emergency numbers
This application allows you to search
for local emergency numbers.
To find an emergency number tap
the menu and choose the country
you are in. You will see all the emergency numbers available in that
country.
To make a call, tap the line with the
chosen number.
WARNING! The list of emergency numbers may be subject to
change. Please confirm this information before your trip.
40
5. Embassies
The application allows you to find an
embassy or consulate data in the country you are in.
To find an embassy tap the menu and
choose your nationality. Then, choose
the country you are in. You will see the
data of your embassy or consulate in
that country.
Tap the line to:
•
Address
•
Telephone
•
Website
- find the embassy in the OsmAnd navigation
- make a call to the embassy
- open the website in the Internet browser
WARNING! The data may be subject to change. Please confirm
the information before your trip.
41
6. Unit converter
The application allows you to convert
the following units:
•
currencies
•
length
•
weight
•
pressure
•
speed
•
temperature
•
volume
Tap the top blue line to choose a unit to convert.
Enter a number in the left box in order to see the converted value in
the right box.
This application downloads the exchange rate automatically. However, you can provide the rate manually. To enter the rate manually
tick « manual rate entry ». Unit names will disappear and the application will convert the value from the left box using the rate entered
manually.
42
7. SOS
The SOS application allows you to send
an SOS message to the predefined number with the predefined text. You can add
your location by ticking the field « add
your location ».
When starting the application for the first
time, you must provide the telephone
number to which you want the SMS to
be sent and the text of the message.
Tap the red button « Send SOS » in order
to send the SOS.
43
8. Telephone
The Telephone application allows you to
make phone calls and store contacts.
8.1. Outgoing calls
Tap the receiver icon to make a call. Enter the number on the keyboard
and tap the green receiver icon.
,
When using the in-built SIM card you need to enter the phone number together with the dialling code (e.g. +44 223 …). Your call will be
immediately ended, and after a couple of seconds you will receive an
incoming call. Answer and wait for the outgoing call.
44
Costs of outgoing calls may vary depending on the country. Visit
www.vasco-electronics.com to check the current rates.
8.2. Incoming calls
Incoming calls are free in over 130 countries. Visit www.vasco-electronics.comto learn more.
8.3. Call log
Tap the icon
. to look up the call log. To see the details tap the
chosen line and hold.
8.4.Contacts
Tap the icon
to add, edit, or look up contacts. Slide up or down
to look up contacts.
Tap the icon
to type the name of the contact. Provide the name
or choose from the list and confirm with the magnifying glass icon in
the right bottom corner.
Tap the icon
to add a new contact.
WARNING! The contact must be saved with the dialling code if you
want to make a call.
45
9. SMS / MMS
The application allows you to send and
receive short messages.
Tap the icon
in the left bottom corner to create a new message. You will see
the screen and the touch keyboard. Enter
the recipient’s number (with the dialling
code) in order to send the message.
Tap the icon
. to add the recipient
from your contact list. Tick the chosen
contact.
Tap the icon
to send the message.
WARNING: SMS/MMS costs may vary depending on the country. Visit
www.vasco-electronics.com to check the current rates.
46
10. Camera and Gallery
The device is equipped with a front and rear camera. Photos are saved
in the Gallery.
Tap the Camera icon to see a submenu. Choose the Camera or the
Gallery.
10.1 Camera
Tap and hold the icon
to take a photo.
Tap and slide -/+ to zoom.
Tap the icon
to change between cameras.
Tap the icon
photo.
to record a video or take a panoramic
Tap the icon
to open the Gallery.
Tap the icon
to open the advanced settings.
47
10.2 Gallery
The Gallery allows you to store and view the photos taken by the
camera.
The images may be sorted by albums, locations, time, people or tags.
Tap « Album » to change the sorting.
Tap the icon
to turn on the camera.
Tap « Aack » to exit the Gallery.
11. Browser
This application allows you to browse the Internet.
Tap « Search or type URL », enter the web address using the touch
keyboard and confirm with « OK ».
Tap « Menu »
to enter the settings.
WARNING! The application requires the data transfer. Using data
transfer via a GSM network may incur additional costs. It is advisable to browse the Internet via WiFi.
48
12. Calculator
The application allows you to perform basic and complex operations
of arithmetic.
Tap « C » to clear.
Tap menu
options.
and choose « Advanced panel » to see the advanced
Tap menu
panel.
and choose « Basic panel » to exit the advanced
Tap menu
operations.
and choose « Clear history » to clear the history of
13. Clock
This application shows the current time and date. Enter the system
settings to change time and date.
Timer
back tap
- to set the time use the keyboard and tap START; to reset
.
49
Stopwatch
-tap START to start the stopwatch; tap STOP to stop
it; tap
to reset it.
Alarm
- tap
activate the alarm
and edit ALARM to set the alarm; tap
to
•
Repeat – choose the days on which the alarm should be repeated
•
Ringtone – set the ringtone of the alarm
•
Vibration – turn on/off vibration
You can set more than one alarm.
World clock
– tap the icon to add other time zones; the clock
will show the hour set in the system and the hour in a chosen
location.
Settings
- allows you to change the settings of the clock;
snooze; volume; time zone; etc.
14. Calendar
The Calendar allows you to see days and months and add events and
reminders.
To add a reminder, tap the icon of the day and tap the chosen hour
twice. Confirm the reminder with « Done ».
50
You can change the layout of the calendar. Tap the date in the top left
corner to change the layout.
Tap the menu to see the options.
15. ToDo
This application allows you to manage your tasks « to do ».
Tap the icon
to add a new position. Enter the title and details
and set the date by tapping « No expiration date ».
Tap the icon
to delete the position.
Tap the icon
to see the details.
Enter the details and tap the icon
done ».
. to move the position to « tasks
Tap the « Back » button to exit the application.
51
16. Facebook
Facebook is a social networking service. The application requires the
Internet. In order to use Facebook you need a Facebook account.
If you do not have the account you can establish one by clicking
« Register on Facebook ».
WARNING! Using the application via GSM will charge your account. It is advisable to use the application via WiFi.
17. YouTube
YouTube is a popular Internet service allowing the watching and sharing of videos. The application requires the Internet. To use YouTube
you do not need any account. To search for an interesting video, tap
the magnifying glass icon and enter the title.
WARNING! Using the application via GSM will charge your account. It is advisable to use the application via WiFi.
52
18. Gmail
Gmail is a popular e-mail application. The application requires a
Google account. If you do not have a Google account, you can add
it by tapping « New ».
19. Email
The application allows you to check your own e-mail. To configure
the application you need to enter your e-mail address and password.
You will also need to enter incoming and outgoing servers POP3 and
SMTP. If you do not know these servers, contact your e-mail provider.
20. Account balance
This function allows you to check your current account balance.
Tap « Account balance » on the main screen to check the balance.
To top up your account visit www.vasco-electronics.com.
53
21. WiFi, GSM, GPS
This application allows you to quickly turn on/off WiFi, GSM, and
GPS.
Enter the application to see:
•
WiFi – turns on/off the wireless connection to the Internet.
•
GSM – turns on/off the connection to a mobile network operator.
•
GPS – turns on/off the GPS module.
The green colour means the function is active; red – inactive.
To turn on/off the function, tap the icon
name.
next to the function
54
Warranty terms and conditions
Compagnia Lingua Ltd. guarantees that the Vasco Traveler Premium is undamaged, and does not have any design faults.
The warranty covers two (2) years from the date of purchase.
If the device does not work properly with normal use, Compagnia
Lingua Ltd. may repair the device or exchange the device, if a repair
is not possible.
During the repair or exchange of the device, a loss of personal data
saved on the device may occur. Compagnia Lingua Ltd. does not take
responsibility for the loss of personal settings, materials, information, etc. The company does not compensate the above-mentioned
losses.
Conditions
1. This very warranty is valid only if the original purchase documents are attached.
2. This very warranty is not valid in case of faults caused by
improper use, conservation inconsistent with the user manual, or wear of the device. The warranty is not valid in case of
faults caused by device or software modifications, accidents, or
mechanical damage such as flooding, undue stress and strain,
or dropping.
55
3. The battery of the device wears down and it is not the fault of
the battery. In case of substantial decrease of battery working
time, it is advisable to change it.
4. Damaged pixels, very small black or white points, may appear on
the screen of the device. It is not the fault of the device.
5. This very warranty is not valid in case of damages caused by
repair by an unauthorized person.
6. This very warranty is not valid in case of damages caused by
viruses, Trojan horses, nor any other spy software.
7. This very warranty is not valid in case of the incorrect functioning of GSM network.
8. This very warranty is not valid in the case of accessories,
especially batteries or earphone.
9. The device is equipped with a SIM card. The warranty does
not include the functionality of the SIM card.
10.The device uses applications of third parties. The very warranty does not include the correct functioning of these
applications, especially the applications of Microsoft.
The deliverer of the built-in SIM card has agreements with the majority of GSM operators in the world. The device requires an Internet
connection via WiFi or GSM. The producer does not guarantee the
functioning of the device in every location, nor free WiFi access.
56
Compagnia Lingua Ltd. does not take responsibility for the functioning of SIM cards other than the in-built SIM card, or for any additional costs charged by operators different from that of the in-built
SIM card operator.
Despite the fact that the Vasco Traveler Premium uses cutting-edge
advancements in the technology of text translation and speech recognition, these functions should be treated as helpful information,
not a precise translation. Translation may be inacurate. Compagnia
Lingua Ltd. does not take responsibility for damages caused by
imprecise or inacurate translation.
Guarantor:
Compagnia Lingua Ltd.
www.compagnia-lingua.com
[email protected]