Transcript
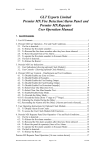
1
Pushbutton Operation
3
Residential Fire Control Panel
Residential Fire Control Panel
Some functions are accessed by a simple one-touch key operation, whilst other
more safety critical functions are accessed via the User Access Code.
The acceptance of each key sequence is confirmed with an audible double click.
When entering the User Access Code, the green Power LED will flash rapidly for 5
seconds signifying that the panel is ready to accept the Function key.
One-Touch Key
1
2
User Operating Instructions
IX-02-143 Rev 1
Please read the following instructions carefully and
retain them in a safe place for future reference.
Important
2
This equipment is to be installed, serviced and maintained by a suitably qualified
technical person with the requisite knowledge of electrical and fire safety
installations.
The Noby-220 incorporates fault monitoring of vital safety circuits as required by
the EN54 standard. It is important that fault indications are investigated at the
earliest by a qualified engineer.
Part of the internal circuitry operates at 230V and presents an electrical shock
hazard. Do not attempt to open, dismantle, repair or tamper with this equipment
without first disconnecting the mains supply voltage.
The Responsible Person
The Responsible Person is the person who would normally:
!
!
!
!
!
!
!
!
prepare the Fire Alarm Procedures for the premises
ensure that all persons are familiar with the Fire Alarm Procedures
ensure that persons likely to operate the Fire Control Panel are familiar with its
operation, and know where the User Operating Instructions are stored.
ensure that all detectors and call-points remain free from obstruction
routinely test the Fire Alarm System
contact the Installation Company in the event of a fire, false alarms or faults
ensure that the Fire Alarm System is regularly serviced
maintain a log book of all activities related to the Fire Alarm System
The Installation or Service Company
Name :
Telephone :
Panel Behaviour
Faults & Warnings
A Fault Tone is signified by a low-level double-beep every 4 seconds, which can be
muted. Make a note of the LED indication. Perform a System Reset to clear down the
indication. If the problem persists then inform the Installation or Service Company at
the earliest as the system may be compromised.
A Warning Tone is signified by a low-level double-beep every 60 seconds, which can
be muted. This is most likely to occur due to a loss of mains supply for more than 90
seconds. The green Power LED will flash once every 4 seconds whilst the mains is
absent, and blink once every 4 seconds when the mains is restored. Perform a
System Reset to clear down the indication.
Momentary Press
Press & Hold for 5 secs
Mute Sounders
Evacuate / Sounder Test
activates the sounders & relay
Courtesy Light : On / Off
timed 10 mins if mains OK
timed 60 mins if no mains
Courtesy Light On
i.e not self-timed
A System Reset resets the detector circuits and clears down the panel indications. All
the panel LEDs are lit during the 3 second reset period. Note that a standing fire or
fault condition will immediately re-trigger the alarm after a Reset.
no action
Disable Zone-1
self-timed 60 mins
Courtesy Light & Power-Cuts
no action
Disable Zone-2
self-timed 60 mins
Function
User Access Code
220
5
Action
1
1
2
System Reset
1
1
2
Evacuate or Sounder Test
activates the sounders & relay
1
1
2
1
Disable / Re-enable Zone-1
permanently i.e. not timed
1
1
2
2
Disable / Re-enable Zone-2
permanently i.e. not timed
LED Indications
4
Sounder Fault
(yellow flashing)
Power
1
Common
Fire
Sounders Disabled
(yellow steady)
2
COMMON FAULT
(yellow)
The backlight is automatically disabled in the event of mains supply loss in order to
conserve battery power.
Temporarily disabling the zones
In certain domestic environments it may be desirable to temporarily disable part of the
system where nuisance alarms are likely to occur eg. burning toast in the kitchen.
Press the Zone-1 or Zone-2 button for 5 seconds until the yellow LEDs indicate that the
zone is disabled. Note that the zone can be manually re-enabled by repeating the
operation. Otherwise it will be automatically re-introduced after a period of 60 mins.
Frequent use of this facility is not recommended and you should contact the Installer or
Service Company for further advice about suitable detector types and their siting.
6
Fire alarms
The Responsible Person for the fire alarm should devise written procedures for the
action to be taken in the event of a fire alarm, and ensure that all other users have
received sufficient training on how to operate the system properly and that they are
familiar with these procedures.
! activate the internal panel sounder and any other connected sounders
! activate the alarm relay which may trigger connected ancillary equipment
! the LED display will indicate i) Common Fire LED
ii) one or more zone LEDs
When the alarm sounds :
Zone-2:
Fire (red flashing)
Fault (yellow flashing)
Disabled (yellow steady)
COMMON FIRE
(red)
Backlight
In the event of a fire the fire control panel will :
Alarm Relay Disabled
(yellow steady)
Common
Fault
POWER
(green)
Under normal circumstances the courtesy light can be switched on for a self-timed
period of 10 minutes, or switched on permanently by means of the User Access Code.
In the event of a power-cut the courtesy light self-timer is extended to a more useful 60
minutes, and is automatically triggered on detection of mains power loss. At any time
during a power-cut the light can be manually re-triggered for a further 60 minute period.
Note that in the interest of conserving battery power it is not possible to turn the
courtesy light on permanently during a power-cut.
The Responsible Person
Zone-1:
Fire (red flashing)
Fault (yellow flashing)
Disabled (yellow steady)
System LED
System Reset
CARRY OUT THE PRESCRIBED FIRE ALARM PROCEDURE
Silencing the Panel
Status
steady on
1 flash / 4s
1 blink / 4s
rapid flashing
steady on
Interpretation
Only after the prescribed Fire Alarm Procedures have been carried out should you
silence (mute) the audible sounders.
Mains OK
Mains Absent
Mains Absent (latched memory)
awaiting a pushbutton command
To mute the sounders press
Fire on Zone-1 and/or Zone-2
Resetting the system
To re-sound the alarm
The sounders can be manually re-activated by pressing
for 5 seconds.
Only perform a System Reset once the cause of the alarm is established.
Record the indications in the Log Book.
steady on
1 flash / 4s
2 flash / 4s
3 flash / 4s
4 flash / 4s
flashing 2Hz
Common Zone or Sounder fault
PSU Low Volts (real time status)
PSU Low Volts (latched memory)
PSU Battery Capacity Test failed
PSU Battery O/C or Fuse F2
CPU Watchdog Fault.
To perform a System Reset press
1
1
2
If the original cause of the alarm still exists or has not cleared then the alarm will
immediately re-sound.