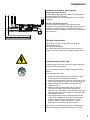
1
Project Acronym: Class 1 REF EC: 038572 REF (project coordinator org.): Work package: 3 DOCUMENT: Del. 15 REF.: Project Coordinator: Jacob Madsen Project coordination org.: Municipality of Egedal Date: December 1, 2009 Revision: 1 Product brochure and guidance notes GENVEX: Heat pump for single family houses CONCERTO INITIATIVE Class 1 Cost-effective Low-energy Advanced Sustainable So1utions Instrument: Integrated Project Thematic Priority: Energy 2005 Period covered: 1.11.07- 31.10.09 Start date of project: November 1, 2007 CONCERTO is co-funded by the European Commission Date of preparation: December 1, 2009 Duration: 5 years PREFACE The class 1 project The idea of the project CLASS 1 is to use the strengthening of the energy requirements to boost and drive the technological developments and to prove the economical and environmental benefits of ultra-low energy buildings (50% below the new requirements in the Danish building regulations) integrated with biomass- and solar heating based renewable energy supply. In this context the objectives are to: 1. Optimise the integration of low-energy building technologies with supply (renewable and conventional) and distribution (heating and electricity) technologies. 2. Advance selected technologies within the 3 areas: low-energy building, renewable energy supply and distribution 3. Improve the design, checking and verification procedures (this relates directly to the implementation of the building energy performance directive EPBD). 4. Integrate the European ecolabel in the building projects (houses and components) 5. Demonstrate large scale implementation at close to market technical and economical conditions. The Class 1 project is focused on the optimisation of sustainable energy systems in local communities, through an innovative integration of RE technologies with ultra low-energy buildings. Deliverables 9-14 and 15-20 Deliverable 9-15 and 15-20 are 12 deliverables presenting the results of work package 3 - Advancement of technologies and solutions - of the Class 1 project. The first 6 of the deliverables of work package 3 present the result of the development work - the advancement of the technologies in question and the 6 latter deliverables present the sales brochures developed by each producer and the guidance notes on how to employ the advanced technologies. 2 List of contents Preface ................................................................................................................................................................................ 2 1. INTRODUCTION..................................................................................................................................................... 4 2. BROCHURES for the 2 advanced products: ............................................................................................................ 5 3. INSTALLATIONS MANUAL ACTIVE VENTILATION HEAT PUMP ............................................................ 14 4. USER MANUAL FOR THE CONTROL PANEL ................................................................................................. 31 3 1. INTRODUCTION Deliverable 15 presents the brochure and user manual for the developed GENVEX product(s). 4 2. BROCHURES FOR THE 2 ADVANCED PRODUCTS: E Premium 1/1L GE Premium 1/1L GE Premium 2 5 GE Premium 1/1L Description Suitability GE Premium 1/1L is a ventilation unit consisting of a counter current heat exchanger, a heat pump, supply and extract air fans, F7 supply air filter, G4 extract air filter, complete Optima 300 automatics and control panel. GE Premium 1/1L has also got a cooling function. GE Premium 1/1L is suitable in ventilation systems where balanced ventilation, heat recovery and warm/cool supply air is needed. At first the heat will be recovered in the counter current heat exchanger and then further heat will be supplied to the supply air by the heat pump. During the summer the heat pump can switch to a cooling mode which means that the heat pump will supply cooling to the supply air. GE Premium 1/1L can be delivered with the following options: - Water and electrical heating element for Ø160 mm duct mounting - Water frost sensor - Fresh air and extract air damper with motor for Ø160 mm duct - Thermostat or motor valve GE Premium 1/1L is normally used in homes with an area up to 450 square metres (at an average room height at 2.4 m and an air exchange rate of 0,3 1/h). Air exchange/h Max. capacity m³/h Living area m² * 0.3 325 450 0.4 325 340 0.5 325 270 * The power consumption is not included when calculating the living area Dimensions Types GE Premium 1/1L Dimension in mm GE Premium 1/1L - H (Right) & V (Left) GE Premium 1/1L - H (Right - shown) & V (Left) 492 1373 103 186 1186 6 5 8 7 16 15 298 20 137 137 9 103 182 25 29 27 28 11 17 1: Extract air Ø160 2: Supply air Ø160 3: Fresh air Ø160 4: Exhaust air Ø160 5: Counter current heat exch. 6: Supply air fan 7: Extract air fan 8: Filter, extract air 9: Filter, supply air 10: Compressor 11: Evaporator 12: Condensator 23 18 21 30 10 19 13: High-pressure gov. 14: Process valve 15: Cable entry 16: Electrical box 17: Condensat.conn. Ø15 18: Condensation tub 18 12 22 26 13 24 14 15 19: Supply boss at the back Ø100 20: Switch 21: Magnetic valve defrosting 22: Thermovalve condenser 23: Thermovalve evaporater 24: Sensor for extract air Construction changes reserved (P V5.0 - 0308) 182 4 137 2 601 3 1 17 137 25: Sensor for fresh air 26: Sensor for supply air 27: Sensor before cooling air 28: Sensor for cooling coil 29: Sensor for exhaust air 30: Four-way valve www.genvex.dk 1 GE Premium 1/1L Automatics Technical data Electrical connections (Input power supply) Without electrical heating and preheating coil 1 x 230V + N + PE + 10 A, 50 Hz With electrical heating and preheating coil Max 1.2 + 1.0 kW 1 x 230V + N + PE + 16 A, 50 Hz GE Premium 1/1L is delivered with Optima 300 automatics with a factory settings so that the unit can be started, without setting up the menu. The factory settings are standard settings, that can be changed to the specific needs and demands of your living area. Control panel Fans: R3G 190 Motor: EC motor with integrated electronics Insulation class B Fan protection class IP 44 Fan speed (Max. per motor): 3320 Rpm Fan power input (Max. per motor): 71 W Fan current (Max. per motor): 0.50 A Fan speed regulation: Individually the fans can be set to 3 different speeds The working area of the heat pump: -15°/+35°C Compressor: NB 6165 GK / NE 6210 GK (1/1L) Min. air volume: 100 / 150 m³/h (1/1L) Effect collection (max.): 331/585W (1/1L) Power consumption (max.): 1,9/3.14A (1/1L) Average performance: 895/1363W (1/1L) Average effect consumption: 295/425W (1/1L) Refrigerant: R407c Weight 1100 g Speed (1) Use this function to set the fan speed to levels 0-12-3-4. Extended operation (2) Use this function to set the timer to forced operation from 0 to 9 hours After-heat (3) Use this function to turn on or off the supplementary after-heat. Temperature (7) Use this function to set the room temperature. Information (6) Use this function to get a good overview of the device’s current operating condition. Filter (5) Use this function to reset the filter alarm. Sound data Measuring point Airflow 1 m in front of the unit 1 2 3 1 Lp dB 2 Supply air duct 3 1 Lwu dB 2 3 Lwi dB 63 Hz ¨53 46 52 93 95 98 85 89 93 125 Hz 47 52 54 87 95 97 81 88 91 250 Hz 43 50 53 84 91 95 78 83 87 500 Hz 33 37 44 66 77 84 60 73 83 1000 Hz - - 34 60 70 76 58 68 73 2000 Hz - - 30 57 68 73 54 63 68 4000 Hz - - - 44 61 67 43 50 55 8000 Hz - - - 32 49 58 39 40 43 47 77 Average Lp dB(A) 37 2 Extract air duct 43 Lwu dB(A) 85 89 Lwi dB(A) 71 78 84 1: Measured at 40% of max. speed with compressor on 2: Measured at 70% of max. speed with compressor on 3: Measured at 100% of max. speed with compressor on Construction changes reserved (P V5.0 - 0308) www.genvex.dk GE Premium 1/1L Capacity The capacity lines are based on an average of the supply and extract air volume in a unit with filters. GE Premium 1 VPC - kapacitetstest med kassettefiltre F7 og G4 v. ventilatorhastigheder: 100%, 85%, 70%, 50% og 40% 350 Max. Capacity: At 100 Pa the max. capacity is: 325 m3/h. With an average room height of 2.4 m, the living area is calculated as follows: Living area (m2) = 300 70% 200 150 50% Max. capacity (m³/h) Room height (m) x Air exchange (h-1) 100 40% 50 Example: Living area (m2) = 85% 250 Pressure [Pa] Living area (m2) x Room height (m) x Air exchange/h = Max. capacity 100% 325 m³/h = 270 m² * 2.4 x 0.5 h-1 0 0 50 100 150 200 250 300 350 400 350 400 Flow [m3/h] * The power consumption is not included when calculating the living area Total power consumption GE Premium 1 VPC - effektforbrug med G4 og F7 kassettefilter v. 100%, 85%, 70%, 50% og 40% ventilatorhastighed 180 For both fans and control. 160 1 140 Power consumption [W] 1 = 100% 2 = 85% 3 = 75 4 = 50% 5 = 40% 120 2 100 3 80 60 40 5 4 20 0 0 50 100 150 200 250 300 Flow [m3/h] Temperaturvirkningsgrad GES E-1 Heat recovery rate Heat recovery rate, flow min = mout Icing of the heat exchanger at low outdoor temperatures has been left out of account. 1 = Temp.: -12 °C RF.: 50% 2 = Temp.: 4 °C RF.: 50% 3 Construction changes reserved (P V5.0 - 0308) www.genvex.dk GE Premium 1/1L Capacity Construction Size: (h x l x d) ex. connecting pieces and electric box 600 x 1186 x 492 mm GE Premium 1/1L’ capacity varies with air quantity and outdoor air temperature Airflow 159 m³/h. (GE Premium 1) GE Premium 1 VPC - kapacitet v. luftmængde 259 m3/h Cabinet: Fully closed hot galvanised plate with 30 mm Isolation. Plastic-coated white RAL 9010. 5000 4500 Duct connection: Ø160 mm with rubber ring seal Ø100 mm supply air connection pieces (back) 4000 3500 Front: Front with quick locks for filter service [W] 3000 Heat exchanger: See water resistant aluminium 2500 2 2000 1500 Condensation tub: Stainless steel 1000 3 1 500 Condensation connection: Stainless steel Ø15 mm 0 -15 Filters: Fresh air: F7 filter Exhaust air: G4 filter -10 -5 0 5 10 15 Outdoor temperatur [°C] Airflow. 259 m³/h. (GE Premium GE1L) Premium 1L VPC - kapacitet v. luftmængde 25 Weight: 105 kg 5000 4500 4000 Flow diagram T3 3500 T7 Extract Air Fresh Air Evaporator (cooling coil) Condenser (heating coil) [W] 3000 Counter current heat exchanger 2 2500 T4 2000 Supply Air Exhaust Air T6 Control panel T1 T5 T2 1500 1000 3 1 500 0 MA7 -15 -5 0 5 10 15 Outdoor temperatur [°C] High pressure HP switch 1) Energy consumption for heating supply air to room temperature 20°C. 2) Total capacity of the unit 3) Power input with compressor running MA4 Compressor Sensors: T1: Supply air T2: Room T3: Fresh air T4: Extract air T5: Before the cooling coil T6: Cooling coil T7: Exhaust air -10 Magnetic valve: MA4: Defrosting MA7: Heat/cooling The hatched area is GE Premium 1/1L’s contribution for roomheating Cooling capacity: With an outside temperature of 26°C, relative humidity of 45% and full speed, the cooling power output is 685/1040 W.(1/1L) 4 Construction changes reserved (P V5.0 - 0308) www.genvex.dk GE Premium 2 Suitability Description GE Premium 2 is used in ventilation systems where balanced ventilation, heat recovery and warm/cool supply air is needed. GE Premium 2 is a ventilation unit consisting of a counter current heat exchanger, at heat pump, supply and extract air fans, F7 supply air filter, G4 extract air filter, complete Optima 300 automatics and control panel. GE Premium 2 has also got a cooling function. At first the heat will be recovered in the counter current heat exchanger and then further heat will be supplied to the supply air by the heat pump. During the summer the heat pump can switch to a cooling mode which means that the heat pump will supply cooling to the supply air. GE Premium 2 can be delivered with the following options: - Water and electrical heating element for Ø200 mm duct mounting - Water frost sensor - Fresh air and extract air damper with motor for Ø200 mm duct - Thermostat or motor valve - Fan guard GE Premium 2 is normally used in homes with an area up to 555 square metres (at an average room height at 2.4 m and an air exchange rate of 0,3 1/h). Air exchange/h Max. capacity m³/h Living area m² * 0.3 400 555 0.4 400 417 0.5 400 333 * The power consumption is not included when calculating the living area Types Dimensions GE Premium 2 Dimensions in mm GE Premium 2 - H (Right - shown) GE Premium 2 - V (Left) 615 1373 138 1186 6 5 8 7 138 16 298 20 137 137 9 186 2 182 25 29 27 28 17 11 1: Fresh air 7: Extract air fan 1. Udsugning8: ø200Filter, extract air 2: Exhaust air 2. Indblæsning ø 200 3: Extract air 9: Filter, supply air 3. Friskluft ø 200 4. Afkast ø 200 4: Supply air 10: Compressor 5. Modstrømsvarmeveksler 5: Counter current heat exch. 11: Evaporator 6. EC-Ventilator 7. EC-Ventilator 6: Supply air fan 12: Condensator 8. Filter 9. Filter 10. Kompressor 23 18 11. 12. 13. 14. 15. 16. 17. 18. 19. 20. 21 30 10 19 13: High-pressure gov. 18 12 22 26 13 24 14 15 19: Condensation tub Fordamper 21. Magnetventil afrimning 14: Process valve 20: Supply boss at the back Ø100 Kondensator 22. Termoventil kondensator 15: Cable entry 21: Magnetic valve defrosting Højtrykspressostat 23. Termoventil fordamper Procesventil 24. Føler udsugning 16: Switch 22: Thermovalve condenser 25. Føler friskluft Kabelindføring 17: Electrical box 23: Thermovalve El-kasse 26. Føler indblæsning evaporater Kondensafløb ø20 27. Føler for køleflade 18: Condensat.conn. Ø15 24: Sensor for extract air Kondensvandsbakke 28. Føler køleflade 29. Føler afkast Inblæsnings studs bagud Construction changes reserved (P V5.01 - 0508) Afbryder 30. firevejsventil 182 4 157 1 601 3 17 157 25: Sensor for fresh air 26: Sensor for supply air 27: Sensor before cooling air 28: Sensor for cooling coil 29: Sensor for exhaust air 30: Four-way valve www.genvex.dk 1 GE Premium 2 Automatics Technical data GE Premium 2 is delivered with Optima 300 automatics with a factory settings so that the unit can be started, without setting up the menu. The factory settings are standard settings, that can be changed to the specific needs and demands of your living area. Electrical connections (Input power supply): Without electrical heating and preheating coil 1 x 230V + N + PE + 10 A, 50 Hz With electrical heating and preheating coil Max 1.2 + 1.0 kW 1 x 230V + N + PE + 16 A, 50 Hz Control panel Fans: R3G 190 Motor: EC motor with integrated electronics Insulation class B Speed (1) Fan protection class IP 44 Use this function to set the fan speed to levels 0-1-2-3-4. Extended operation (2) Fan speed (Max. per motor): 3320 Rpm Use this function to set the timer to forced operation from 0 to 9 hours Fan power input (Max. per motor): 71 W After-heat (3) Use this function to turn on or off the supplementary afterheat. Fan current (Max. per motor): 0.50 A Temperature (7) Fan speed regulation: Individually the fans can be set to 3 different speeds The working area of the heat pump: -15°/+35°C Compressor: NE 9213GK Effect collection (max.): 767W Power consumption (max.): 3.3A Average performance: 1800W Average effect consumption: 575W Refrigerant: R407c Weight 1000 gram Use this function to set the room temperature. Information (6) Use this function to get a good overview of the device’s current operating condition. Filter (5) Use this function to reset the filter alarm. Sound data Measuring point Airflow 1 2 3 Extract duct 1 Lp dB 2 Supply duct 3 1 Lwu dB 2 3 Lwi dB 63 Hz 49 50 58 90 92 94 89 93 94 125 Hz 51 55 55 87 94 97 87 97 98 250 Hz 47 53 55 82 90 94 84 93 94 500 Hz 34 43 45 65 78 84 74 79 83 1000 Hz - - 33 60 71 77 64 73 77 2000 Hz - - - 59 70 75 61 71 74 4000 Hz - - - 44 63 68 51 64 68 8000 Hz - - - 31 49 57 38 50 55 48 75 Average 2 1 m in front of theunit Lp dB(A) 41 46 Lwu dB(A) 84 88 Lwi dB(A) 76 86 88 1: Measured at 40% of max. speed with compressor on 2: Measured at 70% of max. speed with compressor on 3: Measured at 100% of max. speed with compressor on Construction changes reserved (P V5.01 - 0508) www.genvex.dk GE Premium 2 VPC 420 EC - kapacitetskurver og SFP 1200 kurve (kapacitetskurver v. 100%, 70%, 55% og 40%) Capacity The capacity lines are based on an average of the supply and extract air volume in a unit with filters. 350 100% 300 Max. Capacity: At 100 Pa the max. capacity is: 400 m3/h. With an average room height of 2.4 m, the living area is calculated as follows: Pressure [Pa] 250 Living area (m ) x Room height (m) x Air exchange/h = Max. capacity 2 Living area (m2) = 55% 150 100 Max. capacity (m³/h) Room height (m) x Air exchange (h-1) 70% 200 40% 50 Example: 0 Living area (m ) = 400 m³/h -1 = 333 m² * 2.4 x 0.5 h 2 Flow [m3/h] * The power consumption is not included when calculating the living area VPC 420-EC - Samlet effektforbrug (uden kompressor!) v. 100%, 70%, 55% og 40% 160 For both fans and control. 140 1 = 100 % 2 = 70 % 3 = 55 % 4 = 40 % 120 Power consumption [W] Total power consumption: 100% 100 80 70% 60 55% 40 20 40% 0 Flow [m3/h] Temperaturvirkningsgrad GES E-1 Heat recovery rate Heat recovery rate, flow min = mout Icing of the heat exchanger at low outdoor temperatures has been left out of account. 1 = Temp.: -12 °C RF.: 50% 2 = Temp.: 4 °C RF.: 50% 3 Construction changes reserved (P V5.01 - 0508) www.genvex.dk GE Premium 2 Capacity Construction GE Premium 2´ capacity varies with air quantity and outdoor air Size: (h x l x d) ex. connecting pieces and electric box 601 x 1186 x 615 mm Airflow 178 m³/h. Cabinet: Fully closed hot galvanised plate with 30 mm Insulation. Plastic-coated white RAL 9010. Duct connection: Ø200 mm with rubber ring seal Ø100 mm with rubber ring seal Front: Front with quick locks for filter service Heat exchanger: See water resistant aluminium Condensation tub: Stainless steel Airflow 285 m³/h. Condensation connection: Stainless steel Ø15 mm Filters: Fresh air F7 filter Exhaust air G4 filter Weight: 126 kg 1) Energy consuption for heating incomming fresh air to room temperature 20°C. 2) Total capacity of the unit 3) Power input with compressor running Flow diagram T3 The hatch area is GE Premium 2´s contribution for roomheating T7 Cooling capacity: With an outside temperature of 26°C, relative humidity of 45% and full speed, the cooling power output is 1580 W. Extract Air Fresh Air Counter current heat exchanger Evaporator (cooling coil) Condenser (heating coil) T4 Supply Air Exhaust Air T6 T1 T5 Control panel T2 MA7 High pressure HP switch 4 Sensors: T1: Supply air T2: Room T3: Fresh air T4: Extract air T5: Before the cooling coil T6: Cooling coil T7: Exhaust air Magnetic valve: MA4: Defrosting MA7: Heat/cooling MA4 Compressor Construction changes reserved (P V5.01 - 0508) www.genvex.dk 3. INSTALLATIONS MANUAL ACTIVE VENTILATION HEAT PUMP 14 GB Installations Manual Active Ventilation Heat pump . . . . GES Premium 1/1L GE Premium 1/1L GE Premium 2 GE Premium 3 Version V1.03 - 0209 Table of contents Installation................................................................................. 4 Duct connection....................................................................... 5 Duct system.............................................................................. 5 Condensate drain..................................................................... 6 Insulation of ducts in cold loft spaces................................... 6 Insulation of ducts in heated spaces..................................... 7 Electrical installation............................................................... 7 Commissioning of the unit...................................................... 8 Maintenance of the unit........................................................... 8 Fault finding............................................................................ 10 Electrical diagram GE Premium-serie...................................11 Flow diagram GE Premium-serie.......................................... 12 EU-Declaration of conformity................................................ 13 Subject to Technical Modifications 2 . IMPORTANT . IMPORTANT . IMPORTANT . IMPORTANT . IMPORTANT . When installing GENVEX Premium-series and Premium range, please follow these instructions: temperature drops below +2C°. 7) Air flow adjustments must be made on both the supply and exhaust side prior to normal use of the machine. It is important to have a balance between supply and exhaust air volumes 8) It is recommended to keep the ducts closed until the unit is adjusted and working. 1) Make sure that the machine is in plumb. 2) Install an airtight water trap on a non-freezing location to compensate for fan pressure. 3) The height of the water trap must be at least 100 mm. 4) Make sure that the drain flows downwards all the way from the unit. 5) Pour some water into the drip tray of the unit to verify that it functions properly. 6) If freezing of the water trap may occur, it is necessary to install a thermostat and an electrical heater to prevent freezing when the This instruction must be followed. If the drain is not made according to this instruction GENVEX A/S cannot be made responsible for any additional damages, which have nothing to do with the GENVEX unit. . IMPORTANT . IMPORTANT . IMPORTANT . IMPORTANT . IMPORTANT . Fresh air Extract air Exhaust air Supply air Air tight connection Airtight connection 100 mm Inside outlet Illustration applie to the Premium range 3 Installation Installation Dimensions in mm 1373 The GE Premium range is available with supply air on the right-hand side (as shown) or supply air on the left-hand side and as a reversible cool/heat exchanger. When it is a left-hand version the unit is build laterally reversed, which means that the power connection is placed on the left-hand side. Because it is a reversible heat pump the unit has two condensate drains. At all times the condensation from the heat pump will appear. Both outlets must be connected to a suitable drain on site. The unit must be positioned on a surface so that vibrations from the unit cannot be transferred through ceiling and walls and so that the condensate drain with the necessary water trap can be led to an inside drain without danger of freezing in cold weather. In the winter period the unit may produce up to 5-8 litres of condensate each day. To allow access for service and maintenance, there must be a space of a minimum of 600 mm in front of the unit and a current floor. If the unit is located in the loft space, there must be free access to the unit from the loft hatch. GE Premium 2 100 1 20� �� 600 ø200 2 4 181 5 18 5 20 14 10 12 27 23 8 18 30 1185 1377 31 19 192 3 ø200 13 2 26 21 28 11� 1 17 22 5 19 540 612 24 25 29 4 181 31 157 270 9 ø200 6 7 3 282 17 137 15 16 137 138 ø200 296.5 Thia illustration applies to the Premium range 4 300 186 298 1186 Installation Duct connection Friskluft Incomming Air At all duct connections there is a yellow sticker indicating which ventilation duct to be connected. Frischluft Connect the supply air duct: Duct system from the unit to the supply outlet in the living room Afkast Exhaust Air Fortluft Drain Connect the extract air duct: Duct system from wet rooms to the unit. Udsugning Extract Air Abluft Connect the fresh air duct: Duct system from fresh air roof cowls/external grills to the unit Indblæsning Supply Air Zuluft Connect the escaping air duct: Duct system from unit to the escaping roof cowls/external grills. Duct system It is recommended that the duct system is made of spiral ducting with rubber ring seal fittings in order to provide a tight and durable duct system. To achieve a satisfactory low sound level from the unit, silencers must always be fitted to the supply and extract air duct system between the unit and the first supply and extract valves. It is recommended that the air speed in the ducts are dimensioned at a sufficiently low level to prevent noise from the supply and extract valves. When positioning fresh air and extract roof cowls/grills, make sure that the two air flows do not intercept causing escaping air to be drawn in again. It is recommended that grills are placed on the north or east side of the house to ensure optimum comfort. In flats/houses where it is not possible to provide a sufficient distance between the fresh air and the escaping. 3m 3m 1m 5 Installation Condensate drain Fresh air Extract air Exhaust air Supply air Air tight connection Airtight connection 100 mm Inside outlet The units produces up to 5-8 litres of condensate per day. It is therefore important that the condensate drain is correctly made and that the unit has a slight fall towards the condensate drain. The condensate drain pipe must be mounted with the necessary gradient and be led to an internal outlet. The condensate drain must be fitted with a water trap as there is negative pressure in the air chamber in which the condensate tray is mounted. If the unit is installed in a cold loft space, the condensate drain pipe must be insulated to prevent freezing of the condensate in the pipe. No water in siphon: = Outlet is blocked = Underpressure which leeds to false air However, it is recommended that the water trap is installed in a heated space to ensure that the water does not freeze. Illustration applies to Premium range If installation problems make it impossible to secure the condensate drain pipe from freezing by insulation, it will be necessary to mount a thermostat-controlled heating coil round the condensate drain pipe. Insulation of ducts in cold loft spaces Duct insulation, alt. B In order to high recovery rate of the unit, it is necessary to insulate the ducts correctly. Supply and extract ducts: Supply and extract air duct : To minimize heat losses from the duct system in cold loft spaces, the supply and extract ducts must be insulated with minimum a 100 mm insulation mat. If insulation type A is chosen, it is recommended that it is done with two layers of 50 mm mats wropped with paper or foil on the outside and with staggered joints between the two layers. If the ducts are positioned on the rafter foot, type B may be chosen. The insulation must always be tightly wrapped round the ducts. Duct insulation, alt. A Fresh air and exhaust air ducts in cold spaces : It is recommended that fresh air and exhaust air ducts are insulated with a minimum of 50 mm insulation. The fresh air duct is insulated to prevent warm air in the loft in summer from heat up the fresh air. Make sure to seal the termination where the escaping duct is led through the roof or through the gable end in order to avoid condensation damage. Faulty duct insulation 6 Installation Insulation of ducts in warm spaces Supply and extract air ducts: In warm spaces the supply and extract channels must be insulated with 50 mm insulation. Supply and extract ducts in heated spaces do not require insulation. Fresh Air Extract Air Fresh air and xhaust air ducts: In warm loft spaces and warm rooms the fresh and exhaust air ducts must be insulated with minimum 50 mm insulation. In addition, plastic or aluminium foil must be wrapped around the insulation in order to avoid condensate in the insulation. Exhaust Air Supply Air Electrical connections The electrical connection must be carried out by an authorised electrician. See the electrical diagram. The cable between the unit and the control panel is a 4conductor 0.25 mm2 cable with a maximum length of 30 m. Commissioning of the unit To achieve optimal running of the unit it must be adjusted with air measuring equipment. If you wish to start up the unit before adjustment, do as follows. Before starting up the unit: 1: Make sure that the Genvex unit is correctly mounted and that all ducts are insulated as required. 2: Make sure that inspection doors can be opened so that service and maintenance of the unit can be carried out. 3: Make sure that filters are clean (may be dirty from installation work). 4: Make sure that the condensate drain is correctly mounted with a water trap and is protected from freezing. Pour 1 litre water into the condensate tray and make sure that it can run through the condensate drain pipe without hindrance. 5: Adjust all the supply valves so that the valve closest to the unit is opened three turns from closed position, while the furthest is open eight turns from closed position. Open the valves in between 4-7 turns depending on how far they are from the unit. The unit can now be started up and run until adjustment with air measurement equipment has been carried out. 7 Installation Optimal commissioning of the ventilation system Air measuring equipment is necessary for commissioning. Before starting adjusting the system make sure that the 5 points in the section commissioning of the unit have been carried out. Then start up the unit. The basic ventilation value adjustment is to be done on speed 2. To reduce energy consumption as much as possible, start by adjusting the main air volumes to the desired air volume by changing the voltage outlet on the transformer. Then adjust the supply and extract air valves with air measuring equipment (when adjusting the supply and extract air valves, remember to lock them and to turn the guide plate in the supply air valves so the air blows in the right direction). Then measure the main air volumes again and do the finaladjustment of the main air volumes with the fresh and extract air dampers (Remember to lock the dampers after commissioning). Maintenance of the unit G4 = Standard filter (Coarse filter class G4) F5 = Fine filter (Fine filter class F5) F7 = Pollen filter (Fine filter class F7) Filters: When the red lamp on the control panel flashes, the filters must be changed/cleaned. Stop the unit on the switch on the unit or the electrical panel. Open the front cover and take out the filter. When the filter has been changed or cleaned by shaking it and by removing the worst dirt, and mounted again switch on the unit and press the enter button on the control panel for 10-15 seconds until the Genvex logo starts flashing again and the equipment is back in normal operation. Careful handling of the plates is required. They have sharp edges and must not be damaged. Do not vacuum or clean at high air pressure. It will damage the filter! Remember: do not open the unit, before it has been disconnected from the electricity Condensate drain: When changing the filter in August/September, before outside temperatures fall to 5°C, measure that the condensate drain is not blocked by dirt and make sure that there is water in the water trap. Pour 1 litre of water into the condensate tray and make sure it runs off without hindrance. If the condensate drain does not work, this could lead to water damage in the dwelling. 8 Installation Counter current heat exchanger: Inspect the countercurrent heat exchanger every years. If it is dirty, remove it and wash in warm soap water and then rinse, if possible in the bathroom using the shower head. Fans: Every year check the two fan wheels for dirt. If they are dirty they may be cleaned with a brush, bottle washer etc. Supply and extract valves: Clean the valves by wiping them with a dry cloth. Make sure the valve does not rotate causing a change in the air volume. Service: If you are unable to maintain your unit yourself, you can sign a service agreement with the Genvex service department. If any faults arise in the unit, contact the Genvex service department. 100 mm 9 Installation Fault finding Fault finding The display shows: Unit has stopped: No light in any of the lamps on the control panel, even though both buttons are pressed. Fault: The fuse on electrical panel has blown, no power to unit One of the fuses on the circuit board has blown Loose wire, no power to unit Loose wire between unit and control panel Faulty or incorrectly set clock (units with clocks installed). Data fault: - no communication between the display and controller. - cable between display and circuit board is too long Version fault: - The program version is not the same as that of the print board Change filter: - the filters have to be changed Hold ON-OFF: - the filters have not been changed within the last 14 days. The unit has stopped Red lamp on the control panel is constantly on: Fault: Frost protection thermostat disconnected (units with water reheating surfaces). Defect sensor in unit Defect sensor in control panel If no supply sensor has been mounted, this has been replaced by a resistance which is faulty Loose sensor wire or loose jumper in terminal row on control circuit board. Condensate running out of appliance: Fault: Condensate drain blocked by dirt No water in the water trap Condensate drain blocked by ice. Drain is insufficiently insulated. No supply air to living rooms: Fault: Defect fan Blocked filter Fresh air grill is blocked by dirt and leaves in the autumn or snow and ice in the winter. Fuse on control circuit board has blown No extract air from wet rooms: Fault: Defect fan Blocked filter Fuse on control circuit board has blown Cold supply air: Fault: Countercurrent heat exchanger blocked by dirt or ice. Extract air fan is defective Extract air filter is blocked Electrical reheating surface disconnected through the fire thermostat. (Only units with an electrical reheating surface mounted). No hot water circulation to water reheating surface. (Only units with a water reheating surface mounted). Blocked circulation pump, air in heating pipe, defect thermostat/motor valve, incorrect setting of control panel. 10 Sensor Fresh air Sensor Supply air T3 T1 M2 Fan Extract air MA7 0V Yellow Blue 52 N 53 51 L 50 54 49 48 47 46 45 44 43 42 41 40 39 38 37 10µF relay 9 RM96-1011-35-1024 relay 8 T 500mA 5K 5K 5K 5K 5K 1000µF 35V 4 MHz 1000µF 35V 47µF 25V 7805 1000µF 47µF 25V 30 30 30 30 30 30 T 3.13 A T 1.6 A Relay out for extra board For electric reheater Step 2, Relay 5 Relay out for extra board For electric reheater Step 3, Relay 6 Relay out for extra board For electric reheater Step 4, Relay 7 Valve Defrost, Relay 4 Extra cooling Preheater 0.8 KW, Relay 3 Electric reheater 1.2 Kw Step 1 Relay 2 Compressor Relay 1 PE1 2L 3N 4 5 6 7 8 9 10 11 12 13 14 15 16 17 18 19 1A 2A 4B 5B N L PE Mains 1x230VAC, 50Hz MAX FUSE 16A Must be connected to ground. Optima 300 Controller 24VDC Valve Hot water 21 (Roomsensor T2) 22 23 Valve Defrost PE N L L PE 90°C manu 300EL N Electric preheating surface T1 MA4 T2 1200W Blue Brown Yell/green Yellow Blue Blue Brown Yell/green Sensor Escaping air T4 M1 24VDC Fan Supply air Optional output 230VAC, see operating manual Sensor Upstream of cooling T5 36 Pressostat Hygrostat Cooling valve (Not on VP) Sensor Cooling surface T6 35 5K 24 VDC 34 21 20 22 23 24 4 24 0V BY-PASS Sensor Extract air T7 2 RX Motor Valve T 500mA 27 26 25 P1 Remote controller 33 5K 2 TX 32 3 High pressure switch 0-10V 0-10V Sensor Freezing water T8 5K 1 1 0V +10V 31 30 29 28 Potentialfree Contact Must be used Genvex Hygrostat Hy¬Set Optima 300 VPVPC Connection GE Premium 2 C S R Compressor L 300EL 90°C manu PE N M3 PE BU BN Evt. cirk. pumpe Electric reheating surface T1 PE 1200W 0V 0-10V 63 62 61 60 100nF X2 100nF X2 Flow diagram GE Premium range T3 T7 Extract Air Fresh Air Counter current heat exchanger Evaporator (cooling coil) Condenser (heating coil) T4 Supply Air Exhaust Air T6 T1 T5 Control panel T2 MA7 High pressure HP switch MA4 Compressor Notes: 13 Notes: 14 Notes: 15 Genvex World Wide: Austria J.Pichler Lufttechnik GmbH A-9021 Klagenfurt Tel.: +43 (0) 463 / 3 27 69 Fax: +43 (0) 463 / 3 75 48 E-Mail: [email protected] Belgium Artiklima bvba B - 9220 Hamme Tel.: +32 (0) 52 41 25 41 Fax: +32 (0) 52 41 29 66 E-Mail: [email protected] Croatia Pichler & CO d.o.o. 10000 Zagreb Tel.: + 385/ (0) 1/ 65 45 407 Fax: + 385/ (0) 1/ 65 45 409 E-Mail: [email protected] Denmark Genvex A/S DK - 6100 Haderslev Tel.: +45 73 53 27 00 Fax: +45 73 53 27 07 E-Mail: [email protected] Billund Copenhagen Germany Novelan GmbH D-95359 Kasendorf Tel.: +49 (0) 92 28 / 99 60 7-0 Fax: +49 (0) 92 28 / 99 60 7-189 Hamburg E-Mail: [email protected] Great Britain Total Home Environment Ltd GB- Moreton in Marsh, GL 56 0JQ Tel.: +44 (0) 845 260 0123 Fax: +44 (0) 1608 652490 E-Mail: [email protected] Ireland / N.I. ECO Systems Ireland Ltd Co. Antrim BT54 6PH Tel.: (UK 028) (ROI 048) +44 2076 8708 Fax: (UK 028) (ROI 048) +44 2076 9781 E-Mail: [email protected] Portugal Iberterm PT-4475-493 Nogueira Maia Tel: +351 229 065 123/4 Fax: +351 229 065 125 E-Mail: [email protected] Web: www.iberterm.com Slovenia Pichler & CO d.o.o. 2000 Maribor Tel.: +386/ (0) 2/460 13 50 Fax: +386/ (0) 2/460 13 55 E-Mail: [email protected] Intelligent ventilation system from Genvex As ventilation specialists, we offer a product range that covers all aspects of modern ventilation equipment, from passive ventilation units with highly effective counter current exchangers to units with integrated heat pumps that are extremely power efficient for heating or cooling. We can also provide units for ceiling mounting for installation in existing office buildings, high-rise buildings and industrial buildings. Presented by: Published by Genvex A/S, Sverigesvej 6, DK-6100 Haderslev www.genvex.dk 4. USER MANUAL FOR THE CONTROL PANEL 31 UK User Manual Optima 300 DESIGN Version V1.03 - 0609 Optima 300 Table of contents Page 1. Control panel............................................................3 2. Installation................................................................4 2.1 Installation of the control panel.................................4 2.2 Mounting...................................................................4 3. Start-up......................................................................5 4. Operating..................................................................6 4.1 Operating and changing data in the operating menu........................................................6 4.2 Main menu................................................................8 4.3 Schedule for week program...................................16 4.4 Schedule for set-points...........................................17 5. Function..................................................................18 5.1 Controlling Optima 300...........................................18 5.2 Extra capacity.........................................................18 5.3 Reliability................................................................18 6. Maintenance............................................................19 6.1 Unit.........................................................................19 6.2 Alarms....................................................................19 6.3 Dismantling/decommissioning the device..............19 7. Troubleshooting.....................................................20 7.1 High-pressure switch..............................................20 7.2 The device is not running...................................... 20 7.3 Error on air side......................................................20 Technical changes may have occurred after publication of this document 2 Optima 300 1. Control panel The control panel must be mounted on a wall that is centrally located in the home. Since the control panel functions as a room thermostat, it is important to observe the following: • • • • Do not expose to direct sunlight, Do not place on an outer wall, Do not build it into the wall, Do not place over a heat source. A lamp close to the control panel can affect the light sensor so that it will not regulate the light intensity as intended. There are 7 buttons in the ring on the front of the control panel that are used to operate the panel. The function of the buttons changes depending on the menu selected. (More information is available under Operating) There is an infrared movement sensor located under the glass screen. You can use this to bring up the menu for daily control options simply by moving your hand past the control panel. (This function can be turned off: See under Main menu/ Display/Menu item 5) The following are located on the bottom of the control panel: 1: SD card 2: Room sensor 3: Light sensor 4: Mini USB- socket for connection to computer 1: The SD-card, which can be removed, contains all the control models and versions that make the control panel compatible with older versions. The SD-card also contains all the languages, menus, help texts, symbols and collected data logs. During the start-up procedure, the current versions are installed on the control panel so that the controls can function without the SD-card. However, the help texts will not appear on the screen and the data logs will not be saved. 4: In order for a computer to read the data logs, it must have the Genvex data logger program installed. 3 Optima 300 2. Installation At the bottom of the control panel there is access to: 2.1 Installation of the control panel A: Terminal board. Connection to main circuit board B: SD card C: Room sensor D: Light sensor E: USB port The control panel is intended for hanging on a wall. The control panel must be positioned in the home at a height of about 1.5 metres from the floor. The control panel must not be countersunk into the wall, since the panel also functions as a room thermostat. It is also equipped with a light sensor. The control panel must not be exposed to direct sunlight. It must not be mounted on an outer wall or the room sensor will not be able to measure the correct room temperature. Fit a low-voltage cable 4 x 0.25 mm² between the unit and the control panel. The maximum cable length is 50 m. The voltage drop will be too great if the cable is over 50 m long and this may produce operational disturbances. The wall fixture can be mounted in two ways: 2.2 Mounting Find the place where the control panel is to be mounted, mark the places for the holes and screw the fitting onto the wall. 1. Screw the fixture on to a smooth wall and lead the cable up from below so that it is visible. 2. Fit a masonry junction box or a countersunk box to e.g. a plaster wall. If another type of box is preferred, to must be ensured that the screw hole match. Connect the low-voltage cable to the terminal box. Check that the cable is connected to the same numbers at both ends. (Between the control panel and the main circuit board in the unit) Hold the wall frame against the wall and mark the holes for mounting the frame. Drilling of holes, the size of the holes and the corresponding screws for mounting will all depend on the wall material. Clip the control panel onto the wall fixture by moving it downwards a little bit out at the bottom and finish by pressing it in at the bottom so that it is flush with the wall. To dismantle, pull the control panel out slightly at the bottom and lift it up. Place the control panel down into the fittings and tip it in against the wall. B A C D E 4 Pos. Description 1 House for panel 2 Front for panel 3 Plate for display 4 Wall fittings 5 Glas for display Optima 300 3. Start-up The first time the device is started, the control panel display will show: “Choose language”. Click “Next” to switch between Danish, English, German and French. Press “Enter” when the desired language is shown in the display. The control panel will now read the current program version in the selected language. The display will now show: • Updating model • Wait 1.5 minutes (It takes approximately 1.5 minutes to read the current version) • Language load (91) • Language OK • Menu load (84) • Menu OK • Icon load (369) • Menu OK • Reset to default • Restarting…….. • Optima 300 Then the display will then change to: • The symbol Bookmark • Optima 300 • Version number D (Display): X.X C (Controller): X.X Finally, the display changes to daily operation and the device is now in operation with the default settings. The menu items can now be set as desired for the house in question and will thereby achieve the most optimal and most effective utilisation and operation of the device. 5 Optima 300 4. Operating Optima 300 All Genvex heat pumps of type GE VP/VPC and GE Premium for houses and are delivered with Optima 300 control systems, which have default settings so that the unit can be put into operation. The default setting is only a basic setting that should be changed to the operating wishes and requirements of the house in question and will thereby achieve optimal utilisation and operation of the device. After the device has been started, the control panel will be in stand-by and will display one of the screen savers (can be changed in the main menu under the item ‘display’). Pass your hand over the control panel to bring up the symbols on the screen that show the daily operating options. K1 K7 K6 K2 K3 K5 K4 4.1 Operating and changing data in the operating menu The display normally shows the screen with symbols for daily operations, where the following buttons can be seen in connection with daily operation. Speed (K1) Use this function to set the fan speed to levels 0-1-2-3-4. The button beside the speed symbol changes between the 4 speeds. The installation can also be stopped by holding down the button for 3-4 seconds. Extended operation (K2) Use this function to set the timer to forced operation from 0 to 9 hours Use the button next to the symbol for extended operation to change from 0 to 9 hours. If the timer is set to 0, speeds 3 and 4 will run until the speed is changed manually. If the timer is set for between 1 and 9 hours, speeds 3 and 4 will automatically be linked back to speed 2 after the number of hours the symbol was set at. 6 Cooling (K3) Use the button beside the after-heat symbol to change between + or ÷. If the symbol is set at +, the after-heat will commence as required. If, on the other hand, the symbol is set to ÷, the after-heat will not commence, even if it is required. Main menu (K4) Use this function to enter the main menu and access the sub-items date, calendar, user menu, display, information menu and service menu. Filter (K5) Use this function to un-set the filter alarm. The button beside the filter symbol un-sets the alarm for filter change. To un-set the filter alarm, change the filters hold down the button with the filter symbol until the exclamation mark in the symbol disappears. Information (K6) Use this function to get a good overview of the device’s current operating condition, e.g. temperature, fan setting, relay status/functions, alarm, timer etc. Use the button beside the info symbol to read the installation’s operating condition (more information can be found in the main menu section under the info operation item). Temperature (K7) Use this function to set the room temperature. Use the button next to the temperature symbol to set the required temperature from 10-30°C. The current temperature will be displayed at the centre of the screen. Press help to see a guide for the item that is marked. Press the exit to return to the previous display screen. The setting will not be saved when you press here. Use the arrow buttons to navigate in the menus. The two arrow buttons will change to plus and minus when you change the setting. Use the Enter button to proceed through the menus. If a menu item has been changed, finish by pressing Enter and the change will be saved. Optima 300 4.2 Main menu There is a book icon at the bottom centre of the daily control options. This gives access to the main menu. Press this button to enter the main menu, which is divided into 6 menus: • Date and time • Calendar • User menu • Display • Info operation • Service menu Date and time Use this function to configure and change the date and time. This menu is divided into 6 menu items: • 01 Hours. Enter the current hour here. Changing between “summer” and “winter” time manually sets the time one hour back or forward. • 02 Minutes. Enter the current minut post the hour here. • 03 Weekday. Enter the current weekday here. Monday 1 Tuesday 2 Wednesday 3 The control buttons change function. Pressing on “Arrow down” or “Arrow up” will change the symbol to a horizontal arrow that shows the current location. Press “Enter” to access to the current menu’s sub-items. Press “Arrow down” or “Arrow up” again to select the required menu item. When the horizontal arrow is next to a menu point, the 2 lines will change place, the font size will change and the text “Set” will be added. Pressing “Enter” next to the selected menu item will change the background of the item to grey. Use the “+” and “-” buttons to change the current value. Press “Enter” again to save the changed setting. If you do not wish to make any changes, it is possible to go back out of the menus by pressing the button “Exit”. Pressing “Help” will bring up a short help text on the screen that explains the menu item. Press one of the buttons to exit the help program. If no button is pressed within a short period of time, the control system will automatically exit the programs. Thursday 4 Friday 5 Saturday 6 Sunday 7 • 04 Date. The current can be entered here. • 05 Month. The current month can be entered here. January 1 February 2 March 3 April 4 May 5 June 6 July 7 August 8 September 9 October 10 November 11 December 12 • 06 Year. The current year can be entered here. 7 Optima 300 Calendar Use this function to configure and change each day setting for the week. Each day can be configured to run with different ventilation speeds as required. It is possible to copy the configuration from one day to another. It is possible to press ON or OFF here, i.e. if there is a time when there are no people in the building, the daily settings can be turned off and the device will run according to the manual settings, e.g. level 1. • • It is not necessary to use all change-times if the line only reads 0, it will be skipped by the control system. 03 to -08. These days can be filled in individually in the same way as under item 02. 09 Copy day. Use this menu item to copy one day to another, where the same changetimes, speeds and temperature lowering are required. For example: From Thursday to Tuesday. User menu Use this function to configure and change the following sub-items: This menu is divided into 9 menu items: • 01 Use this to choose between controlling the device manually or control the speed (air exchange) and temperature automatically according to a fixed day program. If the menu item is set to OFF, the device will be controlled manually according to the speed and temperature selected. If the menu item is set to ON, the device will controlled according to the day programs entered in the menu items 02 to 08. • 02 Monday. Up to 10 change times can be entered for one day. The times can be entered in random sequence. Enter the hours in the first column. Enter the minutes in the second column. Enter the speed in the third column S. Use the fourth column to enter the temperature difference to which the temperature should be lowered. Example: If the temperature is set to 21ºC and you then enter – 2.0º, the device will aim at 19ºC. If the speed has been changed manually on the button under daily operation, the program will revert to the day program at the next changetime point is passed. Examples of a day program: 01 07:30 H3 -0.0 02 09:15 H1 -1.0 03 17:00 H3 -0.0 04 18:00 H2 -0.0 05 23:30 H2 -2.0 8 • 1 Temperature Configure the required temperature between 10°C and 30°C in order to change the ventilation temperature. It is a precondition that a suitable after-heat surface is fitted to the device. Use bypass to configure the ventilation temperature to between 2°C and 30°C. (The room sensor is mounted in the control panel). The default setting is 20°C. • 2 Cooling To prevent the cooling of the air supply starting as soon as there is no heat requirement, configure how many degrees the room temperature must be above the configured room temperature in item 1 before the cooling may start. (Cooling costs money). The set-point can be configured to between 3°C and 10°C. The default setting is 52°C. • 3 Cooling ON / OFF For devices of type VP that are not equipped with automated cooling, the set-point must be configured to OFF. For devices with automated cooling of type VPC or Premium, the set-point can be configured to ON and the device will cool when the item performance increases to over the configured temperatures in item 2. If cooling is not required, configure the set-point to OFF. Optima 300 The default setting is OFF • 4 Timer levels 3 and 4 At speeds 3 and 4, the device will automatically reconnect to speed 2 after the number of hours that are configured in item 17 by configuring the set-point to ON: If the set-point is set to OFF, the device will run at speed 3 or 4 until it is manually changed to another speed. The timer can also be operated directly with the button with the symbol for extended operation on the display for daily operating options. The default setting is OFF • 5 Change filter There is a built-in filter timer that counts how long the device has been running since the last change of filter. The set point can be configured from 1- 6, which corresponds to 1-6 months. It is recommended that the set-point should initially be set at 3, corresponding to 3 months. If the filters are too dirty after the period configured, configure the set-point to a lower number. If is not necessary to change the filter after the configured period, the set-point can be configured to a larger number. When the timer reaches the configured value for the change of filter, “Alarm” and “Change filter” will be flash at the top of the screen saver. When the filters have been changed, return to the screen display for daily operating options and hold down the button for the filter symbol until the exclamation sign disappears and the device returns to normal operation. The default setting is OFF Display menu The menu item with the Display symbol Example: Optima 300 DK D: 1.0 C: 3.0 D represents the control panel’s version number. C represents the main print version in the unit. • 03 Screen saver. The following settings can be selected here: 0: Screen saver off 1: Screen saver off, but with light dimming. 2: Room temperature + light dimming 3: Clock + light dimming 4: Clock and Room temp. + light dimming, 5: Black screen + light dimming • 04 Pause time. Use this to set how long it should take from when none of the symbols on the display for daily operation have been used until it automatically reverts to the screen saver. From daily menu to screen saver variable = 1 to 10 minutes. The other automatic return connections cannot be adjusted. If no button has been pressed within the time intervals indicated below, it will automatically revert to the previous display: -Change in menu item back to menu item = 30 seconds. -From menu item to main menu = 2 minutes -From menu item to daily menu = 2 minutes • 05 Auto wake-up. It is possible to de-activate the auto wake-up function, where you can change from the screen saver to the display with the symbols for the daily control options by passing your hand over the control panel. If the function is set to OFF, press any button to display the daily operating options. • 06 Auto lightness. In the display there is a movement sensor. You can choose between: ”0” OFF ”1” Max sensitive ”2” Level 2 ”3” Level 3 ”4” Least sensitive This menu is divided into 12 menu items • 01 Language. Use this to choose between Danish, English, German or French text in the display. • 02 Program info. This menu shows which Optima is fitted on the device and its version number: 9 Optima 300 • 07 Lightness day. Use this to enter the maximum brightness for the control panel when the room is fully lit. • 08 Lightness night. Use this to enter the minimum brightness level for the control panel when the room is in complete darkness. • to enter the menu for Date and Time without using the selected access code in item 18. • 14 Calendar. If this item is set to ON, it will not be possible to enter the menu for Calendar without using the selected access code in item 18. 09 Lightness day screensaver. Use this to enter the maximum brightness for the screen saver when the room is fully lit. • 15 User menu. If this item is set to ON, it will not be possible to enter the menu for User without using the selected access code in item 18. • 10 Lightness night screensaver. Use this to enter the minimum brightness level for the screensaver when the room is in complete darkness. • 16 Display. If this item is set to ON, it will not be possible to enter the menu for Display without using the selected access code in item 18. • 11 Default reset. If the set points are configured so that the installation no longer functions as expected and the cause cannot be found, it is possible to choose between 2 different options to reset the menu items to the default settings. -Press 1 to change all menu items to the default settings except for the menu items for Speed (Level), Filter timer, Calendar and Defrost temperatures. -Press 2 to change all menu items to the default settings. Note: Before performing a reset, ensure that the currently entered values are noted in a table for the set items. • 17 Service menu. If this item is set to ON, it will not be possible to enter the menu for Service without using the selected access code in item 18. • 18 Password. Enter the selected password here and use this also in item 12 to enter items 13 to 18. If you forget your password, contact Genvex Service department for assistance. To change the password, enter a new password in this item and press enter. All passwords will now be changed to the new password. • 12 Safety menu. It is possible to prevent access to selected main menu items so that they cannot be changed without a password, which is a 4-digit figure. For the first time, press 0 four times and then Enter. Items 13 to 18 will open. Select the password under point 18, which will be the password to access items 13 to 18. • 13 Date and time. If this item is set to ON, it will not be possible 10 Information menu The information menu can be used to get an overview of the devices’ current operating status. If you want to see the devices’ operating status over an operating period, connect the control panel to a computer and use the Optima data program. The device monitors the operating status every minute and stores the data for up to one year on the SD card. • Press Enter next to the information menu. The first screen displayed shows the current temperatures: Optima 300 • • Supply air T2 Room T3 Fresh air T4 Exhaust T5 Pre-cool surface T6 Cooling surface T7 Air extraction T8 Water frost Control system ON stopped T9 Help sensors Fejl Error: Filter not changed after 14 days./ For water frost error/The device is equipped with an external switch between terminals 28 and 29. An Alarm will be given when these are short circuited and the device will stop. Change filter ON Error The filters should be changed Pressure switch ON Error The high-pressure switch is disconnected due to excessive pressure in the cooling system. Possible error messages for: Press Arrow down to display the current speeds of the fans and the opening of the bypass valve and the opening of the water valve: Supply air in % Com error ON Extract air in % Error Bypass valve in % Water valve in % The control panel cannot communicate with the main circuit board between display and circuit board) Press the Arrow down again to display the current status of the operation relays: For extra electrical heat level R5, R6 and R7, an extra relay circuit board is fitted with R10, R11 and R12. When R5 is ON, R10 is ON. When R6 is ON, R11 is ON. When R7 is ON, R12 is ON. R1 Compressor R2 Electrical after-heat R3 Electrical pre-heat R4 Defrosting R5 Heat level 2 (R10) R6 Heat level 3 (R11) R7 Heat level 4 (R12) R8 Cooling system R9 Help function • daily control options, where it says alarm above it. The information menu shows which alarm it is. For the alarm for change filter, Change filter will blink over the word Alarm. The alarm will read OFF when the error has been corrected or the filter is changed and reset. T1 Press Arrow down again to display the current Alarms. An Alarm it is activated if the word ON appears beside it. At ON there is an alarm, which can also be seen on the screen saver and the image for • Press the Arrow down again to display the hour counter, which counts from the day the device is put into operation. The figures shown should be multiplied by 10. This shows how many hours the device has been running, how many hours the installation has run at the various speeds and how many hours the relays have been connected (ON): Total in operation: Level 0 Level 1 Level 2 Level 3 Level 4 Relay 2 Electrical after-heat Relay 3 Electrical pre-heat Relay 8 Device in operation (Speed 1-4) Relay 9 Help function Press Exit to return to the main menu. 11 Optima 300 Service menu Use this function to configure and change the following items: • 10 Level 1 Supply air Level 1 is the lowest speed and is usually used when there is nobody home. Both fans can be configured independently of each other for all levels so that the volume of air in the air supply and exhaust is equal, which provides optimal operation. The calibration of the device must be performed with specialised air measurement equipment and can be performed without the use of the main regulating valve. Configuring the air volumes without expert advice is not recommended. Incorrect configuration can lead to major energy consumption. The default setting is 40%. • 11 Level 2 Supply air Level 2 is the recommended speed for the device to run in order to provide the optimal indoor climate and should be calibrated for the house’s ventilation requirement. The default setting is 70%. • 12 Levels 3 and 4 Supply air Level 3 is the highest speed that can be configured. It is used e.g. if there are a number of guests or there is a lot of activity in the kitchen. The default setting in level 3 is 100%. Level 4 always runs at 100% and cannot be configured. It is used mainly in summer to lower the indoor temperature. Remember that greater volumes of air exchange require greater levels of energy consumption. • 13 Level 1 Extract air The fan speed is adjusted until the same air volume is achieved as the supply in level one. The default setting is 35%. • 14 Level 2 Extract air The fan speed is adjusted until the same air volume is achieved as the supply in level 2. The default setting is 55%. 12 • 15 Levels 3 and 4 Extract air The air volume in level 3 is calibrated to the same air volume as the air supply in levels 3 and 4. The default setting in level 3 is 70%. Level 4 always runs at 100%. • 16 Fine tuning (T2) It is possible to fine tune the control panel’s room sensor so the display shows the current room temperature. The temperature can be adjusted between 0 and -5°C. The default setting is 3°C • 17 Timer levels 3 and 4 If automatic reconnection is used for speeds 3 or 4, you can enter how many hours the installation should run on level 3 or 4 before it is automatically returns to level 2. The set-point can be set to between 1 and 9 hours. The default setting is 3 hours. • 18 Filter/stop To ensure that the filters are changed when the control panel blinks “Change Filter”, the set-point can be set to ON. The device will then stop automatically after 14 days if the filters have not been changed. If you do not want this precaution, configure the set-point to OFF and the device will continue to operate. The default setting is OFF. • 19 Method of control It is possible to choose between room, air supply or air extraction control: -Room regulation (T2 sensor) -Supply regulation (T1 sensor) -Extraction regulation (T7 sensor) If the device is used for a house, it will normally be set to room control. Configure the set-point to 1. For room control, set the set-point to 0. For air extraction control, set the set-point to 2. The default setting is 0 • 20 Pre-heat ON If there is a pre-heat surface fitted to the fresh air channel, the set-point must be configured to ON. Configure the required pre-heat temperature in the Optima 300 service menu under item 21. The default setting is OFF • 21 Pre-heat If the pre-heat is set to ON in item 20 in the service menu, the set-point must be configured to the desired fresh air temperature to which the pre-heat surface should heat the fresh air. The temperature can be configured to between -15 and 0°C. The default setting is -10°C • 22 Regulation water If a water after-heat surface with a motor-operated valve is fitted to the device, it may be necessary to adjust the regulation time. The less regulation time, the faster the motor-operated valve will regulate. The set-point can be configured to between 1 and 250 seconds. The default setting is 20 seconds. • 23 Regulation electricity If an electrical after-heat surface or electrical preheat surface is fitted, it may be necessary to adjust the regulation time. The set-point can be configured to between 1 and 30 minutes. The default setting is 3 minutes. • 24 Minimum air volume In order to achieve optimal performance, the device’s air volumes correspond to at least the air volumes contained in the data sheet for the device in question. If the air supply and extraction volumes are set lower than the minimum requirement, the heat pump will stop and only preheated air from the heat exchanger will be blown into all the rooms. The default setting is 30 • 25 Water frost If a water after-heat surface with motor-operated valve is fitted to the device, a water frost sensor should be fitted to the water after-heat surface and the set-point configured to ON. If there is no water frost sensor, the set-point must be configured to OFF. The default setting is OFF • 26 Water frost temperature If water frost in item 25 is configured to ON, the required water frost temperature must be configured to the temperature where the device should stop and the motoroperated valve will open completely for the flow of hot water. The set-point can be configured to between 0 and 10°C. The default setting is 5°C. • 27 Help functions (R9) Help functions with relay 9 can be used for the following: 1. If the set-point is configured to 0, the help relay is turned off. 2. If the set-point is configured to 1, the relay is on when the device is running. This can e.g. be used to open and close the fresh air and exhaust valve. 3. If the set-point is configured to 2, the relay is on when there extra heat is required or when you want the circulation pump to run when heating with the water after-heat is required. 4. If the set-point is configured to 3, the relay will be turned on when a change of filter is required. This can be used to activate an external alarm. 5. If the set-point is set to 4, the relay will be turned on when extra cooling is required. This function is used if a pre-heat surface is also fitted to the device. 6. If the set-point is configured 5, the control system can handle an earth heat-exchanger with the aid of a valve. The relay will be turned on for one of the following two conditions: -The outdoor temperature, sensor T9, is lower than the configured value in item 26 (water frost temperature, typically set at 5°C). -The outdoor temperature, sensor T9, is more than 1°C above the configured temperature in item 1 and 1°C above the current room temperature. If the set-point is configured to 6, then the relay is turned on when the temperature in the bedroom is 1°C higher that the value configured in item 40. The default setting is 0. • 28 Device stop Here is the possibility to choose if the unit should stop by holding down the button for speed (K1) in the main menu. If the set point is OFF the unit can’t be turned off. 13 Optima 300 The default setting is OFF • 29 Stop defrosting The default setting is that the defrosting period ends when cooling service has reached a temperature of 5°C, which is the default setting. It may be necessary to change this temperature to a higher value in special operating conditions where the cooling surface is not completely defrosted. The temperature can be adjusted between 0 and 15°C. It is not recommended to change the default setting without expert advice. The default setting is 5°C. • 30 Compressor Start/stop The default temperature difference between start/stop compressor is ± 0.4°. It is recommended to change the temperature difference for special operating situations. The difference can be adjusted between 0.1 and 1.0°C. It is not recommended to change the default setting without expert advice. The default setting is 0.4°C. • 31 Constant ON If the house’s other heating system is not connected to the heating pump system, the house’s other heating system, e.g. boiler, can stop the water pump so that water pump device with heat exchanger only blows pre-heated air into all rooms. This will cause increasing problems with draughts as the temperature falls outside. Devices without heat exchangers will blow fresh air directly in. Configuring the set-point to ON will disconnect the room sensor. The heat pump will always operate and blow warm air in when the fresh air temperature is below the temperature configured in item 32. If the set-point is configured to OFF, the room sensor will regulate the heat pump regardless of the fresh air temperature. The default setting is OFF • 32 Constant If constant =ON is connected in item 31, the required fresh air temperature can be configured. The temperature can be configured to between 0°C and 10°C. The default setting is 5°C. • 33 Reduce the volume of fresh air For very low fresh air temperatures, lowering the air supply volume is recommended in order to improve the heat pump’s operating conditions and to also achieve a higher diffusion air temperature, even though the same volume of air will be taken in. By configuring the setpoint to ON, the volume of diffusion air will be lowered when the fresh air temperature falls below the configured temperature. If the set-point is configured to OFF, there will be no reduction of the diffusion air volume. This configuration is used when there is a pre-heat surface on 14 the fresh air. The default setting is OFF • 34 Fresh air temperature When the set-point is ON in item 33, it is recommended that the fresh air temperature is configured to -10°C. The set-point can be configured to between -15°C and 0°C. The default setting is -10°C.. • 35 Supply air volume When the set-point is ON in item 33, it is recommended to configure the reduced diffusion air volume to 20% lower the value configured in item 11. The default setting is 50 %. • 36 Restriction of cooling In order to prevent the device from beginning to cool in winter, regardless of how high the room temperature is, the fresh air temperature can be configured to the temperature required before the cooling function engages. It is recommended that the temperature is configured to a minimum of 15°C. The fresh air temperature can be configured to between 0°C and 20°C. The default setting is 15°C. • 37 After-heat If an after-heat surface is fitted to the device, you can decide when you want the after-heat surface to operate. If the set-point is set to OFF, the after-heat service will not work, even if it is required. If the set-point is set to OFF the after-heat surface will engage as required. It configures itself according to the temperature set in item 1. The default setting is OFF • 38 Extra electric pre-heat ON If an electric pre-heat surface is fitted with several levels over the extra relay circuit board, the set-point must be configured to ON. If there is no extra relay circuit board, the set-point must be configured to OFF. The default setting is OFF • 39 Extra electric pre-heat If the extra electric pre-heat is set to ON in item 38, the Optima 300 set-point must be configured to the desired fresh air temperature to which the electric pre-heat surface should heat the fresh air before the unit. The temperature can be configured to between -15°C and 0°C. The default setting is -10°C. • 40 Bedroom If a lower temperature is required in the bedroom or in another room than the value configured in item 1 in the user menu, there is an option to fit extra valves between the diffusion channel and the channel connection for the bedroom and control the temperature in the room in question with a room sensor (T9) by configuring the set-point to 6 in item 27. The required temperature can be configured to between 10°C and 25°C. The default setting is 10°C. 15 Optima 300 4.3 Schedule for weekly program Monday Hours Tuesday Minutes Speed Red. T2 Hours Wednesday Minutes Speed Red. T2 Hours 1) 1) 1) 2) 2) 2) 3) 3) 3) 4) 4) 4) 5) 5) 5) 6) 6) 6) 7) 7) 7) 8) 8) 8) 9) 9) 9) 10) 10) 10) Thursday Hours Friday Minutes Speed Red. T2 Hours Minutes Speed Red. T2 Hours 1) 1) 2) 2) 2) 3) 3) 3) 4) 4) 4) 5) 5) 5) 6) 6) 6) 7) 7) 7) 8) 8) 8) 9) 9) 9) 10) 10) 10) Hours Minutes Speed Red. T2 1) 2) 3) 4) 5) 6) 7) 8) 9) 10) Red. T2 = Reduced room temperature 16 Speed Red. T2 Minutes Speed Red. T2 Saturday 1) Sunday Minutes Optima 300 4.4 Schedule for set points Headline Default: Configuration area: 1 Temperature 20 10 - 30 2 Cooling 5 3 - 10 3 Cooling ON/OFF OFF ON / OFF 4 Timer levels 3 and 4 OFF ON / OFF 5 Change filter 3 1-6 10 Level 1 Supply 40% 11 Level 2 Supply 70% 12 Level 3 Supply 100% 13 Level 1 Extract 35% 14 Level 2 Extract 55% 15 Level 3 Extract 70% 16 Fine tuning (T2) 3 17 Timer levels 3 and 4 18 Filter/stop 19 Regulation form 3 1-9 OFF ON / OFF 0 0-2 20 Pre-heat OFF ON / OFF Bypass open -10 -15 - 0 22 Regulation water 20 1 - 250 23 Regulation electricity 3 1 - 30 24 Minimum air volume 30 0 - 100 25 Water frost 3 1 - 30 26 Water frost temperature 5 0 - 10 27 Help functions Device stop 29 Stop detrosting Dato: Dato: Dato: 0-5 21 28 Dato: 0 0-5 OFF ON / OFF 5 0 - 15 30 Compressor dif. 31 Constant ON 0,4 0,1 - 1,0 OFF ON /OFF 32 Constant 5 0 - 10 33 Reduce the volume of fresh air OFF ON /OFF 34 Fresh air temperature -10 -15 - 0 35 Supply air volume 50 0 - 100 36 Restriction of cooling 15 0 - 20 37 After-heat OFF ON /OFF 38 Extra electric pre-heat ON OFF ON /OFF 39 Extra electric pre-heat -10 -15 - 0 40 Bedroom 10 10 - 25 17 Optima 300 5. Function 5.1 Control system Optima 300 Room regulation: The room temperature is controlled by the room sensor T2, which is fitted in the control panel. If a temperature of e.g. 21°C has been configured, the compressor will start when the room temperature falls to 20.6°C the compressor will stop when it has increased the room temperature to 21.4°C. If the compressor cannot maintain the room temperature, the motor-operated valve (devices with water after-heat surface) will begin to regulate (PI regulation) when the room temperature has fallen to 20°C. For devices with electric after-heat surface divided into up to 4 levels, the first level will engage when the room temperature has fallen to 20°C. If the regulator time is set to e.g. 3 minutes, the room sensor will measure after 3 minutes whether the room temperature is now above or below 20°C. Level 2 will engage if the temperature is still under 20°C. When the room temperature at some point reaches 20°C, the electrical heat levels will begin to disconnect at 3-minute intervals. When the cooling (from +3°C to +10°C) starts, the diffusion and extraction fan engages at speed 3 and the cooling valve MA 7 opens so that the condenser on the diffusion side becomes a cooling surface and the cooling surface on the extraction side becomes a condenser. When the room temperature has fallen 1°C, the compressor stops and the fan returns to normal operation. The cooling valve MA 7 only closes when the bypass function is closed. If an extra cooling device is fitted to the system, this will engage when the room temperature is 2°C higher than start cooling. Devices with an electrical pre-heat surface will regulate in the same way as an electrical after-heat surface. Defrosting The device begins defrosting when the temperature difference between the temperature before the cooling surface and the cooling surface becomes too big, which occurs when ice forms on the cooling surface. The magnetic valve MA 4 opens, the diffusion fan and the electric heats surfaces stop until the ice is melted and the cooling surface has reached a temperature of about 5°C, after which the magnetic valve closes again and the diffusion fan and electric heat surfaces start again. 18 5.2 Extra capacity Electrical after-heat: If there is a greater requirement for heat that the unit can supply, the electric after-heat can be configured (additional equipment) to ON in the main menu with the shortcut key. 5.3 Operating reliability High pressure switch: In order to protect the compressor from running more than intended, a high pressure switch is built in that will disconnect when the pressure becomes too great. The red reset button on the pressure switch is activated in the cabinet when the cause of the fault has been found. Overriding of the diffusion fan: If the diffusion temperature increases to over 45°C, the diffusion fan’s speed will begin to increase. The diffusion temperature will be maintained at 45°C if possible. Overriding of the extraction fan: If the discharge temperature for cooling increases to over 45°C, and the extraction speed at level 3 is not configured to 100 %, the extraction fan speed will begin to increase. The discharge temperature will be maintained at 45°C if possible. Optima 300 6. Maintenance Follow the following instructions to achieve optimal performance: Before opening the device, turn off the power, pull out the plug and wait until the fan is completely quiet. After installing for the first time, check after a couple of days that the condensation outlet is working. Environmental requirements: When repairing or dismantling the device, statutory environmental regulations must be observed regarding recycling and destruction of various materials. 6.1 Device Filters: The filters must be changed when “change filter” flashes in the control panel display. Use the device’s circuit breaker to stop the device or use the circuit breaker on the terminal box. Open the front and remove the filters. Reset the filter timer when the filters have been changed. You can make an adjustment in the operating menu if you wish to change the filters with a different time interval . There is a danger of cuts from sharp discs. The discs must not be damaged. Vacuum cleaning or using pressurised air on the filters is not recommended. Filter performance may be impaired. wheels are not removed, as this will lead to disequilibrium and cause a higher level of noise and also cause wear to the fans. Air supply and extraction valves: Clean the valves by drying with a dry cloth. Take care that the valve does not turn around, causing a change in air volume. 6.2 Alarms Filter timer: The control system has a filter timer in order to ensure that the filters are changed and optimal performance is maintained. When the timer reaches the configured value, “change filter” will flash in the display until the filter has been changed. When the filter has been changed, the screen image for daily operations will return. Hold down the button for the filter symbol until the exclamation mark disappears and the device returns to normal running. Data error: This error message will appear if no communication is possible between the display and the control system. Check that the cable connection is correct on terminals 21 to 24. 21 Signal 22 Signal 23 10 Volt 24 0 Volt Frost alarm: This error message will be displayed if a water heat surface is fitted to the system and the temperature on the water heat surface is too low, causing a danger of frost G4 = Standard filter (Coarse filter class G4). burst. The control system will stop the device and open F5 = Fine filter (Fine filter class F5). the motor-operated valve to keep the water service warm. F7 = Fine filter (Fine filter class F7). Condensation water and condensation outlet: The condensation trays must be cleaned of dirt every autumn. Fill the condensation trays with water and check that the water drains away. If not, the outlets must be cleaned. Check that the vaporisor discs are also clean. Heat exchangers: The heat exchangers should be inspected every 3 years. If it is dirty, remove it and wash it in warm water with soap and rinse with a hand shower. Fans: Inspect the fans every three years for dirt in the fan wheels. Remove the front cover from the device. Clean the fans with a brush, a bottle cleaner or a paint brush. Make sure that the counterbalancing weights on the fan Pressure switch error: When the high-pressure switch disengages, “Pressure switch” will appear flashing in the display until the pressure switch’s red reset button is activated. 6.3 Dismantling/ decommissioning the device The following must be performed: The power supply, i.e. the electric cables, must be disconnected from the device. Disconnect the condensation outlet and power cables to any after-heat/ pre-heat. Disconnect wires for the panel and remove channels. If the device is to be decommissioned, the cables must be removed to avoid condensation water in the device and in the channels. Close all air supply and extraction valves. 19 Optima 300 7. Troubleshooting 7.3 Error on air side The water pump is fitted with the following safety equipment: No air supply to the rooms: Error: • Defective fan. • Blocked bag filter • Fresh air grill blocked with dirt and leaves in the autumn or snow and ice in the winter. • The fuse on the control system circuit board has blown. 7.1 High-pressure switch : The high-pressure switch protects the heat pump from excessive pressure in the cooling circuit. In the event of any disturbances (excessive pressure), the high-pressure switch will stop the pump. The system will restart when the high-pressure switch is reset manually. Take off the front cover by removing the screw. Press the red button for RESET. 7.2 The device is not running The device stops: Check the following: • Is the device connected to a power supply (230 Volt)? • Is there power in the socket? • Is the heat pump disconnected via the clock program? • Is the high-pressure switch disengaged? • Is the cable attached between the control system and the control panel? • Has the filter not been changed (“Filter error” on the device)? • Water frost error. Condensation water is leaking from the device: Error: • Condensation outlet blocked with dirt. • The condensation outlet is not adequately protected against freezing at low outdoor temperatures. 20 No air extraction from wet rooms: Error: • Defective fan. • Blocked plane filter. • The fuse on the control system circuit board has blown. • Discharge grill/roof cover blocked by snow and ice in winter. Cold air supply: Error: • The heat exchanger is blocked by snow and ice. • The extraction fan is defective. • The extraction filter is blocked. • The cooling surface is blocked with ice. • The cooling component in the cooling circuit (Heat pump) is defective. • The control panel or control circuit board is defective. • Defective sensor. If the error is not one of those listed above, please contact your installer or the GENVEX customer centre Genvex World Wide: Austria J.Pichler Lufttechnik GmbH A-9021 Klagenfurt Tel.: +43 (0) 463 / 3 27 69 Fax: +43 (0) 463 / 3 75 48 E-Mail: [email protected] Belgium Artiklima bvba B - 9220 Hamme Tel.: +32 (0) 52 41 25 41 Fax: +32 (0) 52 41 29 66 E-Mail: [email protected] Croatia Pichler & CO d.o.o. 10000 Zagreb Tel.: + 385/ (0) 1/ 65 45 407 Fax: + 385/ (0) 1/ 65 45 409 E-Mail: [email protected] Denmark Genvex A/S DK - 6100 Haderslev Tel.: +45 73 53 27 00 Fax: +45 73 53 27 07 E-Mail: [email protected] Billund Copenhagen Germany Novelan GmbH D-95359 Kasendorf Tel.: +49 (0) 92 28 / 99 60 7-0 Fax: +49 (0) 92 28 / 99 60 7-189 Hamburg E-Mail: [email protected] Great Britain Total Home Environment Ltd GB- Moreton in Marsh, GL 56 0JQ Tel.: +44 (0) 845 260 0123 Fax: +44 (0) 1608 652490 E-Mail: [email protected] Ireland / N.I. ECO Systems Ireland Ltd Co. Antrim BT54 6PH Tel.: (UK 028) (ROI 048) +44 2076 8708 Fax: (UK 028) (ROI 048) +44 2076 9781 E-Mail: [email protected] Portugal Iberterm PT-4475-493 Nogueira Maia Tel: +351 229 065 123/4 Fax: +351 229 065 125 E-Mail: [email protected] Web: www.iberterm.com Slovenia Pichler & CO d.o.o. 2000 Maribor Tel.: +386/ (0) 2/460 13 50 Fax: +386/ (0) 2/460 13 55 E-Mail: [email protected] Intelligent ventilation system from Genvex As ventilation specialists, we offer a product range that covers all aspects of modern ventilation equipment, from passive ventilation units with highly effective counter current exchangers to units with integrated heat pumps that are extremely power efficient for heating or cooling. We can also provide units for ceiling mounting for installation in existing office buildings, high-rise buildings and industrial buildings. Presented by: Published by Genvex A/S, Sverigesvej 6, DK-6100 Haderslev www.genvex.dk