1
Mathematica Link for Excel 3.5
User’s
Manual
&
Reference
Guide
Copyright © 1998-2011 Episoft Inc.
Table of Contents
Overview ...................................................................................................................................
Features .....................................................................................................................................
Changes ....................................................................................................................................
About .........................................................................................................................................
1
1
2
5
Working in Mathematica
Getting Started ..........................................................................................................................
General Principles .....................................................................................................................
Automating Excel ......................................................................................................................
Creating Excel Functions ..........................................................................................................
Creating Excel Macros ...............................................................................................................
6
8
12
15
22
Working in Excel
Getting Started ..........................................................................................................................
General Principles .....................................................................................................................
Working with Functions .............................................................................................................
Working with Macros .................................................................................................................
Link Management ......................................................................................................................
Sharing Workbooks ...................................................................................................................
27
34
36
43
47
48
Using The Clipboard
Loading the Add-In ....................................................................................................................
51
Copying Data from Excel ........................................................................................................... 51
Pasting Data to Excel ................................................................................................................. 51
Fixing Problematic Data ............................................................................................................. 52
Mathematica Reference
Mathematica Function Index ......................................................................................................
54
Excel Reference
Excel Worksheet Functions .......................................................................................................
97
Toolbar Commands ................................................................................................................... 99
Context Commands ................................................................................................................... 102
Keyboard Shortcuts ................................................................................................................... 106
Data Types ................................................................................................................................. 107
Number Formats ........................................................................................................................ 111
Introduction
Introduction
Overview
Mathematica Link for Excel consists of two main components:
The ExcelLink package.
The MathematicaLink add-in.
These components work together to provide full two-way connectivity between Mathematica and Excel.
To use the link from Mathematica, you load the ExcelLink package.
To use the link from Microsoft Excel, you load the MathematicaLink add-in.
Features
The ExcelLink package provides:
A set of Mathematica functions that allow you to:
@ Read and write data to Excel ranges.
@ Display graphics, typeset equations, and formatted output in Excel.
@ Create, open, modify, and close Excel files.
@ Develop Excel worksheet functions in Mathematica.
@ Develop Excel macros in Mathematica.
The MathematicaLink add-in provides:
A set of worksheet functions that allow you to use Mathematica functions in Excel formulas.
A Mathematica Function Wizard to help you learn about and enter Mathematica functions.
A Mathematica macros window that allows you to turn Mathematica code into Excel macros.
A special Clipboard window that allows you to easily copy and paste data between programs.
A searchable PDF-based manual.
1
2
Changes
Version 3.5
New in Version 3.5
Compatibility with Mathematica 8.0.
Compatibility with Excel 2010 (including Excel 2010 64-bit version).
ExcelShare function allows sharing a kernel between Excel and Mathematica.
VBA support routines: MathematicaSet, MathematicaRun, and MathematicaGet
Support for reading and writing Excel comments (including writing to a range using CellLabel["my comment"]).
Shift-click the Mathematica Evaluate button to close link and bring up the Mathematica connection window.
Shift-right-click a range to quickly display the Mathematica Context menu w/o turning on Mathematica Contexts.
Improved in Version 3.5
Updated toolbar and menu icons
Improved Mathematica connection management (self-healing link, new connection options window)
Improved handling of Mathematica connection exceptions and evaluation interrupts
Improved Mathematica messaging (messages now returned in real time)
Improved 'Display Message Box' option now only applies to Print[] output
Improved workbook initialization code evaluation and management
Improved common multi-workbook initialization now supported using a init.m file in same directory
Improved support for long-running Mathematica macros
Improved automatic workbook relinking and addin startup logic
Other minor improvements and fixes
Introduction
Introduction
Version 3.2
New in Version 3.2
Compatibility with Mathematica 7.0 including Mathematica 7.0 based icons.
ExcelOpen, ExcelSave, and ExcelDialog support for Excel 2007 .xlsx, .xlsm, .xlsb files.
ExcelWrite support for writing Grid[{{1,2,3},{4,5},{6}}, opts] f.ex. ANOVATable output
ExcelFormat["A:C","AutoFit"] to automatically adjust column width.
Support for 64-bit Windows and 64-bit Mathematica connecting to 32-bit Excel.
Improved in Version 3.2
Improved message print format in Mathematica 6 and 7.
Fixed a bug where some workbooks with macro buttons do not relink correctly
Improved ExcelInstall[Visible->True] method for launching visible instance of Excel
Improved Mathematica Macros dialog method of inserting of code boxes and buttons
No "kernel connection closed" dialog if initialization code ends with Quit[]
Other minor improvements and fixes
Version 3.1
New in Version 3.1
Compatibility with Mathematica 6.0.
Compatibility with Excel 2007.
Keyboard shortcuts for Excel toolbar commands.
Additional Excel message-related options.
Restored backwards compatibility with Excel 2000.
Improved in Version 3.1
Improved editing of existing functions using the Mathematica Function Wizard.
Improved compatibility with workbooks originally built with version 2.x of the link.
Improved printable PDF documentation.
3
4
Introduction
Version 3.0
New in Version 3
Display of typesetting and formatted output in Excel.
Creating Mathematica-based macros.
A suite of Mathematica functions to interact with and automate Excel.
Improved in Version 3
Start/End Link button is now an Evaluate button. This button can be used to interrupt current evaluations and re-evaluate
the workbook once changes have been made. To end a link, hold down the Shift key and click the Evaluate button.
You can now use the Function Wizard to edit existing formulas, select and assign options more easily, and browse for
built-in functions by category.
Standard packages are automatically declared by default and can be browsed directly within the Function Wizard. This
functionality replaces the Libraries Dialog.
Data Copy and Paste commands are now available from a Mathematica Context Menu. You can now see the data you are
copying and pasting using the Mathematica Clipboard window.
Kernel Dialog has now been incorporated into the Mathematica Clipboard window. You can type Mathematica expressions directly into the Clipboard window, evaluate them, and paste the results somewhere if you choose.
Messages are now displayed and stored to a nonmodal window. Using the window you can scroll through multiple messages, find the source of a message, and even save the messages to a log file.
Formula Activate/Deactivate/Recalculate commands are available from the Mathematica Context Menu as a Comments toggle and Recalculate command.
Increased worksheet function speed. Worksheet functions now calculate up to 8 times faster.
Increased worksheet function reliability. Worksheet functions are now robust enough for the most demanding spreadsheet
applications. Automated tests have performed billions of continuous evaluations without errors.
Improved worksheet function error handling. Dependent evaluations are now suppressed through the use of native Excel
error codes.
To share workbooks with others, you can unlink the workbooks’ formulas and macro buttons using the Unlink button in
the Mathematica Options @ Workbook tab. If colleagues have the link, they will be automatically prompted to relink
formulas when they open the workbook.
Strings and floating-point numbers can now be specified using the DATA worksheet function.
Obsolete in Version 3
The MATH worksheet functions provided in Version 2 have been superseded by a more flexible set of functions in Version 3.
The MATH worksheet functions still work in Version 3. However, there may be slight differences in how results are returned.
Introduction
5
If you would like to convert your existing formulas, here are examples of how they can be mapped.
Version 2
Version 3
=MATH("Inverse",A1:B2)
=EVAL("Inverse",A1:B2)
=MATHEXACT("Inverse",A1:B2)
=EVAL("InputForm",EXPR("Inverse",A1:B2))
=MATHVOLATILE("Random[]")
=CALC(EVAL("Random[]"))
=MATHDEFINE("m",A1:C3)
=EVAL("Set","m",A1:C3)
=MATHCODE(B1:B10)
initialization code lives is a code box, no formula required
MATHFORMULA & CELL functions
experimental functions no longer supported
MATH function mappings.
The ReadExcel function has been superseded by a new suite of Excel functions. Here is an example of how an improved
ReadExcel function could be defined using the new Excel functions.
ReadExcelfile_, sheet_, rng_ :
Modulebook, data,
IfNotExcelCheckExcelBookfile, book ExcelOpenfile;
data ExcelReadExcelRangefile, sheet, rng;
IfValueQbook, ExcelClosebook;
data
This ReadExcel function checks to see if the required file is already open in Excel. If not it opens the file, reads the
required data, and closes the book if it was not already open.
About
Mathematica Link for Excel
Version 3.5
Copyright © 1998–2011 Episoft, Inc.
http://www.episoft.com
6
Working in Mathematica
Working in Mathematica
Getting Started
Loading the Package
To start using the link from inside Mathematica, you must first load the ExcelLink package.
In[1]:=
ExcelLink`
The ExcelLink package provides a library of functions and symbols relating to Excel.
In[2]:=
? ExcelLink`*
ExcelLink`
Excel
ExcelDelete
ExcelOffset
ExcelSave
ExcelWrite
ExcelActivate
ExcelDialog
ExcelOpen
ExcelSelect
ImageFormat
ExcelAddress
ExcelDirectory ExcelOutput
ExcelShape
MaxCharacters
ExcelBook
ExcelFilter
ExcelPosition ExcelShapes
ToExcel
ExcelBooks
ExcelForm
ExcelRange
$ExcelDialogs
ExcelShare
ExcelCalculate ExcelFormat
ExcelRanges ExcelSheet
$ExcelDirectories
ExcelCall
ExcelGraphic
ExcelRead
$ExcelGraphic
ExcelCheck
ExcelInsert
ExcelRefresh ExcelSize
$ExcelLink
ExcelClear
ExcelInstall
ExcelRename ExcelStatus
$ExcelOutput
ExcelClose
ExcelName
ExcelResize
ExcelTypeset $ExcelResult
ExcelContext
ExcelNew
ExcelResult
ExcelUninstall $ExcelShare
ExcelDate
ExcelObject
ExcelRun
ExcelUnshare $ExcelTypeset
ExcelSheets
You can learn more about these functions and symbols by looking up its entry in the Mathematica Reference section of this
manual. You can also access this manual within Mathematica's help system by looking under Add-Ons.
Assigning and Retrieving Data
In[1]:=
Needs"ExcelLink`"
The top-level Excel function provides an easy way to specify a location in Excel, as if it were a variable, then assigns or
retrieves data from it.
Working in Mathematica
7
In[2]:=
Excel"A1" "hello"
In[3]:=
Excel"A1"
Out[3]= hello
You can also clear data from the Excel location.
In[4]:=
Excel"A1" .
When assigning data to Excel ranges, one-dimensional data can be assigned either to single rows or single columns of cells.
In[5]:=
In[6]:=
Excel"A1:C1" 1, 2, 3
Excel"A1:A3" 1, 2, 3
Two-dimensional data can be assigned to a rectangular range of cells.
In[7]:=
Excel"A1:C3" 1, 2, 3, 4, 5, 6, 7, 8, 9
In[8]:=
Excel"A1:C3" .
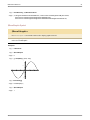
Displaying Graphics
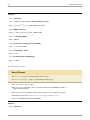
In[1]:=
Needs"ExcelLink`"
This displays a graphic in Mathematica.
In[2]:=
g PlotSin ^2, , 4, 4, PlotStyle Hue.8, Frame True
1
0.5
0
-0.5
-1
-4
-2
0
2
4
This displays the same graphic in Excel.
In[3]:=
Excel"B3" g
As specified, the graphic is displayed at cell B3. This cell will serve as an anchor point for the graphic; however, you can
move it anywhere you like. You can also resize the graphic as needed.
Subsequent assignments update and redraw the existing graphic.
8
Working in Mathematica
In[4]:=
g PlotSin ^2, , 3, 3, PlotStyle Hue.8, Frame True
1
0.5
0
-0.5
-1
-3
In[5]:=
-2
-1
0
1
2
3
Excel"B3" g
This clears the graphic associated with cell B3.
In[6]:=
Excel"B3" .
Displaying Expressions
In[1]:=
Needs"ExcelLink`"
This defines an expression to be displayed.
In[2]:=
expr Sini Pi^2 2;
Here is a typeset form of the expression.
In[5]:=
TraditionalFormexpr
Out[5]//TraditionalForm=
1
sin2 i
2
This displays the typeset form in Excel.
In[6]:=
Excel"B3" TraditionalFormexpr
This clears the displayed expression associated with cell B3.
In[7]:=
Excel"B3" .
General Principles
Function Overview
Functions in the ExcelLink package follow the general convention:
Working in Mathematica
9
ExcelMethodExcelObject ..., ...
Four kinds of Excel objects are supported. Here is a list of the objects with some methods that apply to them.
Book: New, Open, Refresh, Save, Close.
Sheet: Insert, Rename, Delete, Activate.
Range: Read, Write, Clear, Resize, Offset, Filter, Select.
Shape: Insert, Rename, Delete, Read, Write, Select.
For detailed information on all the objects and methods provided by the ExcelLink package, see the Mathematica Reference
section.
Shorthand Notation
Objects
Most objects in Excel can be referenced directly by a unique identifier. The identifier is typically the name of an object or,
in the case of ranges, the address. If an identifier is unique among all object types, you do not need to specify what kind of
object it is.
Here a range object is provided as a typed object.
ExcelReadExcelRange"A1:B10"
Here the range object is specified only by its address, the identifier implicitly identifies it as a range.
ExcelRead"A1:B10"
You can use this type of shorthand referencing in any function that requires an Excel object.
Methods
Read and write operations are so common, a shorthand has also been provided for them, and for clearing a range.
In[1]:=
Needs"ExcelLink`"
In[2]:=
Excel"A1:B10" TableRandom, 10, 2
In[3]:=
Excel"A1:B10"
Out[3]= 0.395543, 0.335494, 0.934515, 0.304868, 0.495912, 0.426754, 0.657647, 0.398919, 0.800834, 0.159929,
0.216486, 0.109539, 0.694347, 0.157112, 0.0578395, 0.273708, 0.750935, 0.710237, 0.760348, 0.420566
In[4]:=
Excel"A1:B10" .
The above three lines of shorthand code are equivalent to the following.
In[5]:=
ExcelWriteExcelRange"A1:B10", TableRandom, 10, 2
10
Working in Mathematica
In[6]:=
ExcelReadExcelRange"A1:B10"
Out[6]= 0.779186, 0.105253, 0.954368, 0.320287, 0.383643, 0.769759, 0.0198529, 0.0154194, 0.887731, 0.343005,
0.362206, 0.6165, 0.0868974, 0.183076, 0.14572, 0.506961, 0.39255, 0.025964, 0.0878807, 0.233253
In[7]:=
ExcelClearExcelRange"A1:B10"
Notes
If more than one object has the same identifier (e.g., a shape has the same name as a sheet)
the identifier most likely to be used by the calling method is returned.
Object Notation
Using full object notation can be useful when referring to an object by index, or providing context for the object.
Here are a few examples.
ExcelSheet1
ExcelSheet"Book1", "Sheet1"
ExcelSheet"Book1", 1
ExcelRange"Report.xls", 1, "A1:D100"
When no context is provided, the active context is assumed.
Excel object references are resolved when they are passed to a method, not before. Until then, they are just Mathematica
expressions representing a location in Excel.
In[1]:=
Needs"ExcelLink`"
In[2]:=
ExcelSheet"My Sheet"
Out[2]= Sheet: My Sheet
In[3]:=
ExcelReadExcelSheet"My Sheet"
ExcelRead::source : Sheet: My Sheet is not a valid range, shape, or sheet.
Out[3]= $Failed
If you want to see if an object reference is valid, you can do so by using the ExcelCheck function.
In[4]:=
ExcelCheckExcelSheet"My Sheet"
Out[4]= False
You can return collections of objects as a list by using the plural of an object name.
In[5]:=
ExcelSheets
Out[5]= Sheet: Sheet1, Sheet: Sheet2, Sheet: Sheet3
You can extract the name of a returned object.
Working in Mathematica
In[6]:=
11
ExcelNameFirstExcelSheets
Out[6]= Sheet1
You can also return the embedded context information for the objects.
In[7]:=
ExcelContextFirstExcelSheets
Out[7]= Book1
Expression Cells
If the Number Format of an Excel cell is set to Text, the contents of the cell are considered to be a Mathematica expression when transferring them to Mathematica via the clipboard or in a macro.
For more information, see Strings in the Excel Reference guide.
Notes
Cells should be formatted as Text before entering an expression. To convert existing contents
to Text, you can re-enter them manually or use the provided Expression command from the
Mathematica Context menu
Expressions such as 1/2 or -x can only be entered in cells formatted as Text. Otherwise, Excel
will attempt to interpret them as something else.
When working with expression cells, all cells in the range should be formatted as Text.
Partial expression ranges are not currently supported.
From Mathematica, you can use the ExcelFormat function to apply or unapply Text format
to a range.
Data Cells
If the Number Format of an Excel cell is anything other than Text, the cell is considered a data cell.
When transferring the contents of data cells from Excel to Mathematica:
Data is transferred as it is natively stored in Excel. This means, for example, all numbers will be returned as floating point
doubles. This includes dates which are numbers with special formatting properties.
When transferring Mathematica expression to Excel data cells:
Nonnative expressions are converted to an equivalent Excel data type whenever possible. Expressions that do not have any
possible Excel-equivalent are converted to InputForm strings.
See the Data Types Overview in the Excel Reference guide for more details.
Notes
12
Working in Mathematica
You can use the ExcelDate function and ExcelForm functions to work with date values once
you get them into Mathematica.
Cell references in Excel-based formulas such as =EVAL(A1,A2,A3) are an exception to this
rule. In this case, you must wrap formula arguments with the provided DATA function to
treat them as data cells, =EVAL("StringJoin", DATA(A2), DATA(A3)), for example.
Automating Excel
Opening Excel
By default, the ExcelLink package automatically connects, as needed, to an open instance of Excel. This provides easy,
on-demand connectivity. In this mode, you can open or close Excel on your own whenever you wish.
If you write Mathematica code that automates Excel to perform a task, you may want the Mathematica code to initiate
opening an instance of Excel. The ExcelInstall function provides a way of doing this.
In[1]:=
Needs"ExcelLink`"
This opens a visible instance of Excel, if one is not already open.
In[2]:=
ExcelInstallVisible True
Out[2]= LinkObject
C:\Documents and Settings\Anton\Application Data\Mathematica\Applications\ExcelLink\Binaries\ExcelLink.exe,
2, 2
Once an Excel automation routine has been developed, you can set Visible->False instead. This will open a hidden, private
instance of Excel to perform the requested tasks.
Importing Workbooks
In[1]:=
Needs"ExcelLink`"
This specifies a file to import data from.
In[2]:=
f ToFileNameExcelDirectory"Link", "Examples", "Stocks.xls"
Out[2]= C:\Documents and Settings\Anton\Application Data\Mathematica\Applications\ExcelLink\Examples\Stocks.xls
This opens the file.
In[3]:=
ExcelOpenf
Out[3]= Book: Stocks.xls
This returns the sheets in the file.
Working in Mathematica
13
ExcelSheets
In[4]:=
Out[4]= Sheet: IBM, Sheet: CSCO, Sheet: AAPL, Sheet: MSFT, Sheet: BLDP,
Sheet: AIG, Sheet: ADP, Sheet: JNJ, Sheet: SYY, Sheet: WMT
This reads in all the data from one of the sheets.
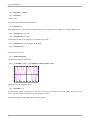
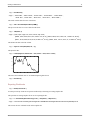
data ExcelReadExcelSheet"IBM";
In[5]:=
This previews the first five rows of data from the sheet.
Takedata, 5
In[6]:=
Out[6]= Date, Open, High, Low, Close, Volume, Adj. Close,
36886., 88.97, 89.53, 82.14, 85., 6.0523 106 , 84.47, 36878., 88.39, 94.41, 80.07, 89., 7.6938 106 , 88.45,
36871., 96.49, 98.23, 87.32, 87.81, 6.1856 106 , 87.27, 36864., 96.01, 104.74, 93.13, 97., 5.5668 106 , 96.4
This defines the data in the last column.
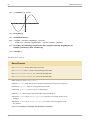
adjclose RestPartdata, All, 1;
In[7]:=
This plots the data.
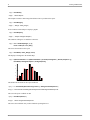
ListPlotadjclose, PlotJoined True, Frame True, Axes False
In[8]:=
120
100
80
60
0
25
50
75
100
125
150
This closes the workbook once we are finished importing data from it.
In[9]:=
ExcelClose
Exporting Workbooks
In[1]:=
Needs"ExcelLink`"
You can provide any format to an exported workbook by referencing an existing template file.
This specifies an existing template file to use for exporting the file.
In[2]:=
f ToFileNameExcelDirectory"Link", "Templates", "Report.xls"
Out[2]= C:\Documents and Settings\Anton\Application Data\Mathematica\Applications\ExcelLink\Templates\Report.xls
This creates the new workbook based on the template file.
14
Working in Mathematica
In[3]:=
ExcelNewf
Out[3]= Book: Report1
The template contains a named range that defines where to put data in the report.
In[4]:=
ExcelRanges
Out[4]= Range: Trials_Range
It also contains a named shape to display a graphic.
In[5]:=
ExcelShapes
Out[5]= Shape: Histogram Graphic
This simulates rolling two six-sided dice 500 times.
In[6]:=
roll : RandomInteger, 1, 6
trials Tableroll roll, 500;
This writes the trial data to the report.
In[8]:=
ExcelWrite"Trials_Range", trials
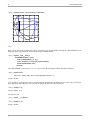
This displays a histogram to the named shape.
In[9]:=
If$VersionNumber 7, If$VersionNumber 6, Needs"Histograms`", Needs"Graphics`"
ExcelWrite"Histogram Graphic", Histogramtrials
80
60
40
20
4
6
8
10
12
This defines the file name for the report workbook.
In[11]:=
f ToFileNameExcelDirectory"Home", "Autogenerated Report.xls"
Out[11]= C:\Documents and Settings\Anton\My Documents\Autogenerated Report.xls
This saves the report workbook to disk.
In[12]:=
ExcelSaveActive, f
Out[12]= Book: Autogenerated Report.xls
This closes the workbook once you have finished exporting data to it.
Working in Mathematica
In[13]:=
15
ExcelClose
This cleans up by deleting the exported workbook file.
In[14]:=
DeleteFilef
Closing Excel
In[1]:=
Needs"ExcelLink`"
Once your automation routines are completed, you can use the ExcelUninstall function to close Excel.
In[2]:=
ExcelUninstall
By default, ExcelUninstall only closes visible instances of Excel if no workbooks remain open. This avoids accidental data
loss. You can force a visible instance of Excel to close, even if workbooks are open, by specifying Visible->True as an
option to ExcelUninstall.
Creating Excel Functions
Defining Functions
Here is how to define a Mathematica function that adds two numbers.
In[1]:=
addtwox_, y_ : x y
Arguments for the function are specified using pattern _ indicators. The delayed assignment := operator indicates that the
body of the function is evaluated only once the values for the arguments are known.
In[2]:=
addtwo2, 2
Out[2]= 4
The next example uses a function defined in a standard package, which you must load first.
In[3]:=
If$VersionNumber 6, Needs"ComputationalGeometry`",
Needs"DiscreteMath`ComputationalGeometry`"
This is an example of a function that generates a graphic.
In[4]:=
triplotn_ : PlanarGraphPlotTableRandom, n, 2
The function triangulates a set of n random coordinates.
16
Working in Mathematica
triplot10
In[5]:=
9
8
10
2
3
5
1
7
4
6
Here is a version of the same function, written in two steps.
In[6]:=
triplotn_ :
Moduledata,
data TableRandom, n, 2;
PlanarGraphPlotdata
In this definition, a local variable is defined within the body of the function. The two steps within the body of the function
are separated using a semicolon. The final line of code returns the value of the function.
In[7]:=
triplot10
4
10
1
8
7
2
3
9
5
6
Working in Mathematica
17
Special Considerations
Usage
To help others know how to use your function, you can define a usage message.
In[8]:=
triplot::"usage" "triplotn plots a random triangulation of n planar points."
Out[8]= triplotn plots a random triangulation of n planar points.
The usage message is used by the Mathematica Function Wizard to automatically generate argument templates for the
function. To be fully compatible with the Function Wizard, you should always use the following convention for your usage
messages.
In[9]:=
f::"usage" "fx does one thing. flist does another. flist, x does more."
Out[9]= fx does one thing. flist does another. flist, x does more.
Options
You can also define a set of default options for your functions, if needed.
In[10]:=
Optionstriplot Frame False, GridLines None
Out[10]= Frame False, GridLines None
This clears the previous definition for the function, then defines it with options.
In[11]:=
Cleartriplot
In[12]:=
triplotn_, opts___Rule :
Moduledata, g, rules,
data TableRandom, n, 2;
rules Sequence Joinopts, Optionstriplot;
PlanarGraphPlotdata, rules
18
Working in Mathematica
In[13]:=
triplot10, Frame True, GridLines Automatic
8
0.8
3
0.6 1
6
4
0.4
9
0.2
2
5
10
7
0
0.2
0.4
0.6
0.8
Errors
When you are developing a function that will be used in Excel, you should consider returning the symbol $Failed if something goes wrong in your function. You can do this using the Check function.
In[14]:=
triplotn_, opts___Rule :
CheckModuledata, g, rules,
data TableRandom, n, 2;
rules Sequence Joinopts, Optionstriplot;
PlanarGraphPlotdata, rules
, $Failed
The symbol $Failed is converted to a #VALUE! error in Excel that will suppress further dependent calculations.
In[15]:=
triplot"hello"
Table::iterb : Iterator hello does not have appropriate bounds. More…
Out[15]= $Failed
To be complete, you should also create a catch-all function definition that will handle the case where users provide arguments that do not match the pattern you specified. By default, the function returns unevaluated.
In[16]:=
triplot1, 2, 3
Out[16]= triplot1, 2, 3
This traps the error.
In[17]:=
triplot___ : $Failed
In[18]:=
triplot1, 2, 3
Out[18]= $Failed
Working in Mathematica
19
You can also create your own error messages to inform the user about what went wrong.
In[19]:=
triplot___ :
Module,
Messagetriplot::"args";
$Failed
In[20]:=
triplot::"args" "Arguments are incorrect"
Out[20]= Arguments are incorrect
In[21]:=
triplot1, 2, 3
triplot::args : Arguments are incorrect
Out[21]= $Failed
Code Box Deployment
Once you have developed a set of Mathematica functions you would like to use in Excel, you can collect cells that define
the functions in one place to make it easier to transfer the code to Excel.
In[1]:=
If$VersionNumber 6, Needs"ComputationalGeometry`",
Needs"DiscreteMath`ComputationalGeometry`"
In[2]:=
Cleartriplot
In[3]:=
triplot::"usage" "triplotn plots a random triangulation of n points.";
In[4]:=
Optionstriplot Frame False, GridLines None;
In[5]:=
triplotn_, opts___Rule :
CheckModuledata, g, rules,
data TableRandom, n, 2;
rules Sequence Joinopts, Optionstriplot;
PlanarGraphPlotdata, rules
, $Failed
In[6]:=
triplot___ :
Module,
Messagetriplot::"args";
$Failed
In[7]:=
triplot::"args" "Arguments are incorrect";
To deploy this code as an Excel function, you will need to copy the contents of the notebook cells that define the function to
an initialization code box in an Excel workbook.
Here is how to do this.
20
Working in Mathematica
1. Create an initialization code box in Excel:
@ Click Macros on the Mathematica Toolbar.
@ Click New... and name the macro Initialization. This is the default if no other macros exist in your workbook.
@ Select a location for the code box and click OK.
2. Copy the code from Mathematica:
@ Use Kernel @ Show In/Out Names to temporarily hide input labels.
@ Select the Input cells to copy. To select noncontiguous cells, hold down the Control key.
@ Press Crtl-C or choose Edit @ Copy.
3. Paste the Mathematica code into the Excel code box:
@ Click and drag inside the code box to select all existing contents.
@ Press Delete to delete the previous contents.
@ Press Ctrl-V or choose Edit @ Paste.
You can now use the Mathematica function you created inside Excel.
Notes
Using the code box approach, you can create workbooks that have no dependencies on other
files.
Working in Mathematica
21
Package Deployment
Mathematica notebooks can automatically generate an associated package file. This provides an easy way for you to export
a set of Mathematica function definitions you would like to use in an Excel workbook.
With this in mind, on the Excel side, the MathematicaLink add-in checks for a package file with the same name in the same
directory when initializing a workbook. If one is found, the code in the file is considered the initialization code for the
workbook.
Here is how to create a package file from a notebook, then use the contents of the package file as initialization code in a
workbook:
@ Create .nb and .xls files with the same name in the same directory.
@ Select the cells that contain code that will be used in the workbook.
@ Click Cell @ Cell Properties @ Initialization Cell to specify the selected cells as initialization cells.
@ Save the notebook. When you do this, you will be prompted to create a package file with the contents of the initialization
cells.
@ Click Create Auto Save Package.
You should now have .nb, .m, and .xls files in the same directory with the same name. In the future, every time you save
changes to the notebook, the package file is automatically updated. In turn, the next time you evaluate in Excel, the new set
of function definitions will be automatically loaded and used.
Notes
Using the package approach, you can easily develop and update function definitions for a
workbook. However, you must remember to send the package file along with the workbook to
enable others to interact with the workbook.
During development, be sure to save changes to your Mathematica notebook in order to
update the package file before using it from the Excel side.
22
Working in Mathematica
Creating Excel Macros
Developing Macros
Setting Up a New Notebook
When developing Mathematica code, it is best to separate input and output definitions from the main analysis portion of the
routine. This way your analysis code can be easily adapted to obtain inputs and send outputs anywhere.
Here is a sequence of Mathematica commands that performs some analysis.
This section defines inputs.
In[1]:=
m 1., 2., 3., 4.;
This section performs your analysis.
In[2]:=
m Inversem;
This section displays outputs.
In[3]:=
m
Out[3]= 2., 1., 1.5, 0.5
To use this code as an Excel macro, you only need to load the ExcelLink package to modify the input and output sections.
Before doing this, open Excel and type in the same inputs into the workbook locations indicated in the following.
This section loads required packages.
In[4]:=
Needs"ExcelLink`"
This section defines inputs from Excel.
In[5]:=
m Excel"B3:C4";
This section performs your analysis.
In[6]:=
m Inversem;
This section returns outputs to Excel.
In[7]:=
Excel"B3:C4" m
In this example, the input and output range is the same. This is a way of performing in-place evaluation.
Working in Mathematica
23
Modifying an Existing Notebook
To convert an existing Mathematica notebook to be used as an Excel macro:
@ Locate the cells in your notebook that define inputs to your analysis.
@ Modify those cells to use values contained in Excel.
@ Likewise, locate the cells in the notebook that display outputs of your analysis.
@ Modify those cells to return results to Excel.
For more information, see Code Box Deployment.
Special Considerations
Status
If your analysis takes a while to complete, you may want to provide some feedback to the user on how the analysis is
proceeding. You can do this by using the ExcelStatus function.
In[1]:=
Needs"ExcelLink`"
In[2]:=
ExcelStatus"Processing data...";
Pause3;
ExcelStatus"Analyzing data...";
Pause5;
ExcelStatus"Generating report...";
Pause1;
ExcelStatus;
This writes status information to the status bar at the bottom left-hand side of the Excel window. In the final line ExcelStatus
is called without arguments in order to return the status bar to its default state.
Notes
Writing status messages makes the analysis section of your notebook Excel specific. However, this may be required for longer routines.
Writing status messages can also be a good way to see which part of your analysis is taking
up the most time.
Dialogs
If you would like to ask the user to select a range or specify a file name during a macro, you can do so using the ExcelDialog
function. The symbol $ExcelDialog gives a list of available dialogs.
24
Working in Mathematica
In[9]:=
$ExcelDialogs
Out[9]= Range, Open, Save, Files, Folder
This displays the "Range" dialog.
In[10]:=
ExcelDialog"Range"
Out[10]= Range: B3:C4
Notes
When running code from Mathematica, you need to activate Excel first to interact with an
Excel dialog.
Notebook Deployment
When developing Excel macros, you do not need to transfer code to a workbook. The Mathematica code can remain stored
in a notebook file. In this case, any time you want to run a macro on a particular Excel workbook, open the notebook that
contains the macro and, with the workbook open in Excel, evaluate the code from the notebook.
Code Box Deployment
To create a stand-alone workbook interface, you can transfer the Mathematica macros you have developed in a notebook to
code boxes in the Excel workbook. Once this is done you can create buttons for the macros.
To deploy Mathematica code as an Excel macro you will need to copy the the notebook cells that define the macro to a code
box in an Excel workbook.
Here are the notebook cells that contain the code you want to use as a macro.
In[1]:=
Needs"ExcelLink`"
In[2]:=
m Excel"B3:C4";
In[3]:=
m Inversem;
In[4]:=
Excel"B3:C4" m
Here is how to transfer the code to Excel.
1. Create a code box for the macro in Excel:
@ Click Macros on the Mathematica Toolbar.
@ Click New... and name the macro whatever you like. Spaces in the macro name are permitted.
@ Select a location for the code box and click OK.
2. Copy the code from Mathematica:
Working in Mathematica
@ Use Kernel @ Show In/Out Names to temporarily hide input labels.
@ Select the cells to copy. To select noncontiguous cells, hold down the Control key.
@ Press Crtl-C or choose Edit @ Copy.
3. Paste the Mathematica code into the Excel code box:
@ Click inside the code box you just created.
@ Click and drag to select all existing contents of the code box.
@ Press Delete to delete the previous contents.
@ Press Ctrl-V or choose Edit @ Paste.
To create a button for the Mathematica macro:
@ Select the name of the macro from the Available Macros list.
@ Click Button....
@ Select a location for the button and click OK.
For more information on using macros you create in Excel, see Working with Macros.
Notes
When running macro code from inside Excel, it is not necessary to load the ExcelLink
package. However, you can still include the line in your macro.
Using the code box approach, you can create workbooks that have no dependencies on other
files.
25
26
Working in Mathematica
Package Deployment
Mathematica notebooks can automatically generate an associated package file. This provides an easy way to export a set of
Mathematica commands that can be used as a one-click workbook processing macro.
To create a package file, follow the steps outlined for creating a package file outlined in the Creating Excel Functions
Package Deployment section. The only difference is, in this case, you will save a sequence of macro commands to the
package file instead of a set of function definitions.
You should now have .nb, .m, and .xls files in the same directory with the same name. In the future, every time you save
changes to the notebook, the package file is automatically updated. In turn, the next time you click Evaluate in Excel, the
new workbook processing macro will be used.
Notes
If you would like the kernel to close after workbook processing is complete, include Quit[]
as the last line of your macro.
Working in Excel
27
Working in Excel
Getting Started
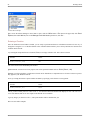
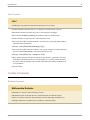
Loading the Add-In
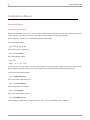
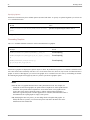
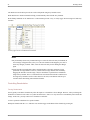
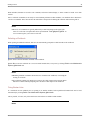
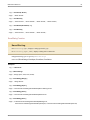
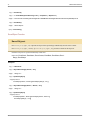
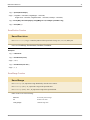
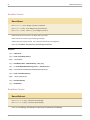
After installing the link, you will see a Mathematica Link for Excel folder in your Start @ All Programs menu. The add-in
in this folder is required if using the link from the Excel-side or when copying and pasting data between programs.
The Mathematica Link for Excel start menu folder.
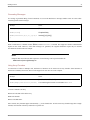
If you did not install the addin when you installed the software, click Mathematica Link Add-In to do no now. The addin
will install itself when it is loaded the first time. This may take a moment depending on your anti-virus / security settings.
If you are prompted to do so, choose to Enable Macros in the security warning dialog. If no dialog appears and nothing
works, you may need to adjust your Excel macro security settings to permit the macros in the add-in to run. Refer to the help
in your version of Excel regarding how to change your macro security settings. Once you have adjusted your security
settings, close Excel and try loading the add-in again.
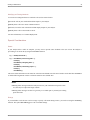
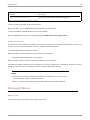
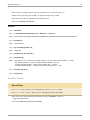
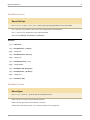
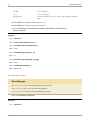
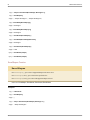
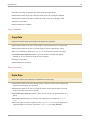
Once the add-in is loaded, the Mathematica toolbar will appear.
@ In Excel 2007 or later, the Mathematica toolbar can be found under the Add-Ins ribbon tab .
The Mathematica Toolbar.
If you would like a Mathematica menu instead, you can click the Options button on the toolbar. All commands in the
Mathematica menu are identical to those on the Mathematica toolbar. The Mathematica menu can be useful if you would
like to use the Alt key to access menu-based commands.
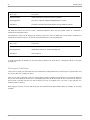
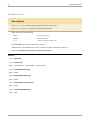
Once you have installed the add-in the first time, you no longer need to use the Start menu shortcut. Instead, you can use
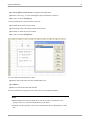
Tools @ Add-ins dialog to load or unload the Mathematica Link add-in. Excel checks the settings in this dialog each time it
starts and automatically loads any checked add-ins.
28
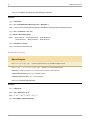
Working in Excel
The Excel Add-Ins manager.
@ To access the add-ins manager in Excel 2007 or later, click the Office button / File menu to the upper-left, click Excel
Options, then under Add-Ins, next to the Manage: Excel Add-ins drop down box, click Go....
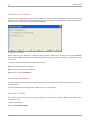
Entering a Function
Once the MathematicaLink addin is loaded, you are ready to perform Mathematica calculations inside Excel. One way of
doing this is using the EVAL worksheet function. This worksheet function allows you to call any Mathematica function from
within an Excel formula.
Try entering the simple Mathematica function, Prime, in an empty worksheet cell. This is done as shown.
Formula
Result
=EVAL("Prime",100)
541
The value returned is the hundredth prime number.
@ Intermational verisons of Excel may require semi-colon separated formulas such as =EVAL("Prime"; 100)
@ During your first calculation, a Mathematica kernel will be launched as a computation server for Excel. This new process
may appear in your Windows task bar.
Now, try creating an interactive prime number calculator by specifying a cell reference as an argument.
Formula
Result
=EVAL("Prime",A1)
#N/A
Unless you have already entered a value in cell A1, the function returns unevaluated and displays an error code. The #N/A
error code indicates that one or more inputs to the formula are not available.
Type any integer you choose in cell A1, and a prime number will be calculated for you.
Here are some other examples.
Working in Excel
29
Formula
Result
=EVAL("Factorial",10)
3628800
=EVAL("Det",A1:C3)
determinate of matrix in cells A1:C3
=EVAL("Expand","(x+1)^3")
1 + 3 * x + 3 * x ^ 2 + x ^ 3
=EVAL("Plot","x^2","{x,0,5}")
ExcelGraphic[1]
@ To display graphics, a copy of the Mathematica front end may be launched in graphics server mode.
The Mathematica kernel and Mathematica graphics server in the Windows task bar.
Mathematica contains thousands of functions. If you know precisely which Mathematica function you wish to use and the
arguments it takes, you can type it directly into your spreadsheet, as shown.
If you are unsure of the name of a Mathematica function or how to use it, or want to explore the functions Mathematica has
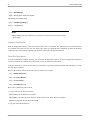
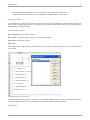
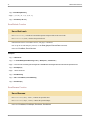
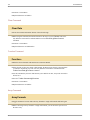
to offer, click Functions on the Mathematica Toolbar. This will launch the Mathematica Function Wizard.
The first step of the wizard is designed to help you find, and learn about, Mathematica functions.
The Mathematica Function Wizard—Step 1.
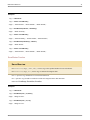
The next step is designed to help you interactively specify arguments to the function.
30
Working in Excel
The Mathematica Function Wizard—Step 2.
An optional third step is available to select and specify options for functions such as Plot that have a defined set of options.
The Mathematica Function Wizard—Step 3.
Notes
Unlike Excel, Mathematica uses case-sensitive syntax. Therefore, be sure to capitalize
Mathematica function names like Prime.
If you do not include a * character in your name search, the wizard defaults to a non case-sensitive search for *name*.
Working in Excel
31
You cannot interact with a Mathematica front end that is in server mode. If you would like to
work in the Mathematica front end, you can launch another standard instance of the front end.
Creating a Macro
To call Mathematica code as an Excel macro, the Mathematica code must be contained in a named code box inside Excel.
Once you have created the named code box, you can then create a button that will call the code in the box. The Mathematica
Macros manager can help you do this.
To create a macro code box:
@ Click Macros on the Mathematica Toolbar.
@ Click New... and specify a name. In this case, name the macro Example.
@ Select where to place the code box.
@ Click OK.
The Example macro is added to the list Available Macros and a code box for the Example macro is inserted at the location
you specified.
Running Mathematica code as an Excel macro.
The initial contents of the code box are specified by a customizable template. In this case, you can leave the default code as
is. Before running the code, however, you should type values into the cells referenced in the macro.
To run a macro:
32
Working in Excel
@ Select the macro from the available macros list.
@ Click Run.
To make it more convenient to run the macro, you can create a button for the macro.
To create a macro button:
@ Select the macro from the available macros list.
@ Click Button....
@ Select where to place the button.
@ Click OK.
Creating a button for a Mathematica macro.
Notes
The default macro name, Initialization, is reserved for code you want to run automatically
every time you connect to a kernel or click Evaluate.
To move a button or a code box, hold down the Ctrl key before selecting it.
Code boxes can be located anywhere in a workbook. They do not need to be on the same
sheet as the button calling the code.
Evaluating an Expression
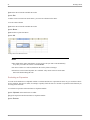
You can use the Mathematica Clipboard window to evaluate Mathematica expressions the same way you would in a Mathematica notebook. This may be useful, for example, to quickly check the state of a variable or experiment with a function you
are using for the first time.
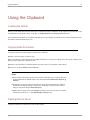
To evaluate an expression in the Mathematica Clipboard window:
@ Click Clipboard on the Mathematica Toolbar.
@ Type the expression into the Mathematica Clipboard window.
@ Click Evaluate.
Working in Excel
33
Typing an expression into the Mathematica Clipboard window.
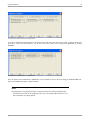
Once the Mathematica kernel has evaluated the expression, the answer replaces the contents of the Clipboard window.
Viewing evaluation results in the Mathematica Clipboard window.
@ To restore the original input expression, click Restore.
Notes
To paste evaluation results to a location in Excel, click Paste. You will be prompted to
specify where to paste the results.
To paste evaluation results to another program, click Put. This puts the evaluation results
onto the global Clipboard. You can then paste them into another program.
Unloading the Add-In
If you are finished using the link, you can uncheck Mathematica Link in the Add-Ins manager and click OK. This unloads
the add-in from Excel.
34
Working in Excel
Unloading the MathematicaLink add-in.
When you unload the link, you will be prompted to delete your personal settings.
Click No to preserve your settings until the next time you use the link. Click Yes to restore default settings the next time you
use the link.
Notes
If you do not uncheck Mathematica Link in the Add-Ins manager, the link is automatically
loaded the next time you start Excel.
General Principles
Non-modal Dialogs
All MathematicaLink dialogs are non-modal. You can leave dialogs open and still work in Excel.
There are two ways of closing a link dialog:
@ Click Close or press the Esc key. The dialog remembers its current location and state the next time it is displayed.
@ Click the X in the upper right-hand corner. The dialog returns to a default location and state the next time it is displayed.
Notes
Occasionally, changes you make in Excel may not be reflected in the contents of an open
dialog. If this happens, redisplay the dialog to refresh its contents.
The Context Menu
MathematicaLink commands that operate on the current selection are available from a Mathematica Context Menu. To
display this context menu, right-click a range when Mathematica contexts are enabled.
Working in Excel
35
The Mathematica Context Menu.
To enable or disable Mathematica contexts, click Contexts on the Mathematica Toolbar.
Notes
All commands on the Mathematica Context Menu also have a keyboard shortcut. See Keyboard Shortcuts for a listing.
Expression Cells
If the Number Format of an Excel cell is set to Text, the contents of the cell are considered to be a Mathematica expression when transferring them via the clipboard or in a macro.
For more information, see Strings in the Excel Reference guide.
Notes
The number format of a range can also be changed using Excel’s built-in Format @ Cells @
Number tab.
Cells should be formatted as Text before entering an expression. To convert existing contents
to Text, you can re-enter them manually or use the provided Expression command from the
Mathematica Context menu
Expressions such as 1/2 or -x can only be entered in cells formatted as Text. Otherwise, Excel
will attempt to interpret them as something else.
When working with expression cells, all cells in the range should be formatted as Text.
Partial expression ranges are not currently supported.
From Mathematica, you can use the ExcelFormat function to apply or unapply Text format
to a range.
36
Working in Excel
Data Cells
If the Number Format of an Excel cell is anything other than Text, the cell is considered a data cell.
When transferring the contents of data cells from Excel to Mathematica:
@ Data is transferred as it is natively stored in Excel. This means, for example, all numbers will be returned as floating point
doubles. This includes dates which are numbers with special formatting properties.
When transferring Mathematica expression to Excel data cells:
@ Non-native expressions are converted to an equivalent Excel data type whenever possible. Expressions that do not have
any possible Excel-equivalent are converted to InputForm strings.
See the Data Types Overview in the Excel Reference guide for more details.
Notes
You can use the ExcelDate function and ExcelForm functions to work with date values once
you get them into Mathematica.
Cell references in Excel-based formulas such as =EVAL(A1,A2,A3) are an exception to this
rule. In this case, you must wrap formula arguments with the provided DATA function to
treat them as data cells, =EVAL("StringJoin", DATA(A2), DATA(A3)), for example.
Working with Functions
The Link Functions
There are five worksheet functions provided by the MathematicaLink add-in.
Function
Use
EVAL
perform Mathematica evaluations
EXPR
build Mathematica expressions
DATA
specify an argument as native Excel data
RULE
build a Mathematica rule
CALC
force a function to respond to the Excel calculate command (F9)
The Link functions.
Together, these functions can be used to build up expressions and perform evaluations in Mathematica in very flexible ways.
For more detailed information on each worksheet functions, see Worksheet Functions.
Working in Excel
37
Using the EVAL worksheet function, you can call any function defined in Mathematica. This immediately extends the
number of functions available inside Excel from a few hundred to several thousand.
Excel syntax
Mathematica syntax
=EVAL("f","arg1","arg2",...)
f[arg1,arg2,...]
The EVAL function.
Example
Result
=EVAL("Simplify","x^2+2x+1")
(1 + x)^2
=EVAL("Random","Integer","{1,6}
")
an integer between 1 and 6
EVAL examples.
As shown, Mathematica syntax must be wrapped in quotes when directly typed into an Excel formula. If this is not done,
Excel’s formula parser will try to interpret these as Excel syntax. To avoid having to do this, you can create references to
arguments in Excel cells. This is discussed in more detail in Specifying Arguments.
In its single argument form, the EVAL function can also be used to evaluate Mathematica expressions such as symbols or
operator forms of expressions.
Excel syntax
Mathematica syntax
=EVAL("expression")
expression
The single argument form of EVAL.
Example
Result
=EVAL("$Version")
the version of the kernel you are running
=EVAL("7! + 5!")
5160
EVAL single argument examples.
Specifying Function Heads
When specifying a Mathematica function, the function does not necessarily have to be a named Mathematica function. The
function can also be specified as a nameless pure function. Using pure functions, you can use multiple functions to create a
new function on the fly.
The syntax of Mathematica pure functions is as follows:
38
Working in Excel
Slots for individual arguments are specified as #1, #2, ....
All arguments can collectively be inserted at one point using ##.
Here, a pure function with two arguments is created in a step-by-step way.
Method
Notes
=EVAL("Sum[1/x^3,{x,10}]")
this sums the first ten terms in the series
=EVAL("Sum[1/x^3,{x,#1}]","10")
number of terms is now specified as a pure function argument
=EVAL("Sum[1/x^#2,{x,#1}]","10"
,"3")
exponent of x is now specified as a second pure function argument
Creating a pure function.
Note that, as shown, arguments do not have to appear in sequential order inside the function. The index specifies which
argument goes where.
Once values that may be edited have been specified as arguments, a reference to the cells containing the values can be made.
This is discussed in the next section.
Notes
If you are familiar with pure functions, you will notice the pure function indicator (&) is not
used here. There is no need because, in this context, it is clear that if pound signs are present,
a pure function is being specified.
For more information on creating and using pure functions refer to The Mathematica Book.
Specifying Arguments
While arguments can be typed directly into a formula, it is generally more convenient to specify arguments as the contents of
a cell or a range of cells. Editing values contained in cells is much easier than editing values embedded in a formula. And, if
entered in a cell, Mathematica syntax does not need to be wrapped in quotes.
Method
Notes
=EVAL("Random[Integer,{1,6}]")
function and its arguments entered as a single expression
=EVAL("Random","Integer","{1,6}
")
function arguments passed individually
=EVAL("Random",C2,"{1,6}")
symbol Integer now provided by cell C2
=EVAL("Random",C2,D2:E2)
list {1,6} now provided by range D2:E2
Specifying range arguments.
Working in Excel
39
Using the last form of the example, you can easily change the upper and lower bound of the random number by changing
cells D2 and E2. Also, by typing Real in cell C2 you can change the type of random number returned.
A single column or single row of cells is interpreted as a one-dimensional Mathematica list; if a range has multiple rows and
multiple columns, it is returned as a 2D list of lists.
Specifying String Arguments
To specify a string in Mathematica, you can wrap a text argument with the DATA function. The following methods return a
list of Mathematica functions that end in Solve.
Method
Notes
=EVAL("Print",DATA("Hello"))
evaluates Print["Hello"]
=EVAL("Print",DATA(A1))
string now provided in cell A1
Specifying string arguments.
Specifying Numeric Data
Mathematica evaluations are performed at the precision of the inputs provided. If you would like the kernel to perform
evaluations numerically at floating-point precision, wrap your inputs with the DATA function.
Method
Notes
=EVAL("Eigenvalues",A1:C3)
performs evaluation using symbolic or numeric methods depending on the inputs provided in A1:C3
=EVAL("Eigenvalues",DATA(A1:C3)
)
always performs evaluation using numeric methods
Specifying numeric arguments.
Specifying Subexpressions
Using the EXPR function you can build up multi-function expressions for a single evaluation.
Method
Notes
=EVAL("f",EXPR("g",1),EXPR("g",2))
evaluates f[g[1],g[2]]
Specifying subexpressions.
40
Working in Excel
Specifying Options
Mathematica functions may have defined options associated with them. To specify an optional argument you can use the
RULE worksheet function.
Method
Notes
=EVAL("ListPlot",A1:B100,RULE("PlotJoined"
,D2))
specifies an option using the value in cell D2
Specifying an option.
Generating Graphics
The EVAL worksheet functions can also be used to return Mathematica graphics.
Example
Result
=EVAL("ListPlot","Table[Random[],{50}]")
ExcelGraphic[1]
=EVAL("Graphics","Polygon[{{0,0},{9,3},{3,5}}]
")
ExcelGraphic[2]
=EVAL("Plot3D","Sin[x+Cos[x y]
y]","{x,0,4}","{y,0,4}")
ExcelGraphic[3]
EVAL graphics examples.
Mathematica graphics are displayed as picture objects in Excel. By default these pictures are rendered as Windows metafiles. This format scales reasonably well since it is a vector format. Font sizes, however, may become a bit distorted when a
graphic is resized. If this happens, you can force the graphic to be re-rendered at its new size by recalculating its formula.
Re-rendering the graphic will reapply any font size you have specified as a graphics option.
Notes
It is the name of a graphic that associates it with a particular Excel cell. For example, if a
formula in cell E10 returns graphics, the picture named "Graphic E10" will be updated on the
same sheet. If no picture named "Graphic E10" exists on that sheet, a new graphic will be
created. This is the extent to which the picture is “linked.” When cutting and pasting a
Mathematica-generated picture to another application or worksheet, this name-based “link” is
not maintained. The copied graphic is simply a static picture.
By modifying the name of a picture, you can change which cell updates that graphic. To
modify the name of a picture, you can select the picture and click in the Name box on the
left-hand side of the formula bar.
Working in Excel
41
Generating Messages
If a message is generated during a kernel evaluation, it is sent to the Mathematica messages window. Here are some evaluations that generate kernel messages.
Example
Result
=EVAL("7+")
$Failed or #VALUE!
=EVAL("1/0")
ComplexInfinity
=EVAL("Inverse","{{1,2},{2,4}}"
)
Inverse[{{1,2},{2,4}}]
EVAL single argument examples.
When a Mathematica evaluation returns $Failed, an Excel #VALUE! is returned. This suppresses further evaluations that
depend on this result. However, often when messages are generated, the original calculation request may be returned
unevaluated as shown in the last example.
Notes
Options that control how the link responds to a kernel message can be specified under the
Mathematica Options @ Message tab.
Using Array Formulas
To return lists of values to multiple cells, Mathematica functions can be entered as an array formula. Some functions in
Mathematica naturally return lists, others can be mapped over lists. Here are some examples.
Example
Result
=EVAL("Range","10")
{1, 2, 3, 4, 5, 6, 7, 8, 9, 10}
=EVAL("Map","Factorial",A1:A10)
a list containing the factorial of each number in A1:A10
Formulas that can be entered as an array.
To enter a formula as an array:
Select all cells that will be in the array.
Enter the formula.
Press Ctrl-Shift-Enter.
Once entered, array formulas appear surrounded by { } in the formula bar. All cells in an array formula range share a single
formula, each element of the array returned to a separate cell.
42
Working in Excel
The MathematicaLink add-in provides two tools to help make using array formulas easier:
The Mathematica Function Wizard can help you automatically enter and edit array formulas.
The Array command on the Mathematica Context Menu provides a way to easily toggle between single-cell and array
formulas.
The Array toggle command on the Mathematica Context Menu.
Notes
If you manually edit an array formula but forget to select all cells in the array beforehand, an
error message will appear when you try to re-enter the formula. If this happens, press Esc to
cancel any changes you made. Then, select all cells in the array before making the changes
again.
Array formulas can significantly reduce calculation times if the same operation is being
performed on a large number of cells. If you have filled a range with the same formula by
dragging the formula across the range, it may be much faster to perform these calculations
using an array formula. There is a transaction time associated with each call to Mathematica.
If a single array formula is used to return values for 100 cells, recalculation could be up to
100 times faster than calling 100 individual formulas.
Controlling Recalculation
Forcing Recalculation
Excel typically recalculates formulas only when the inputs to a formula have been changed. However, when you change the
definition of a function or the value of a symbol in Mathematica, there is no way for Excel to automatically know about this
change. In this case, you may want to force formulas to recalculate.
To force repeated recalculation of a specific formula:
Wrap the formula with the CALC function. You can then trigger recalculation of that formula by pressing F9.
Working in Excel
43
Example
Description
=CALC(EVAL("Random[]"))
gives a new random number each time F9 is pressed
Marking a formula for repeated calcuation using the CALC function.
To force one-time recalculation of the current selection:
Press Ctrl-Shift-= or choose Recalculate from the Mathematica Context Menu.
To force recalculation of all link functions in the current workbook:
Click the Evaluate button. This is an option specified under Mathematica Options @ Workbook.
Disabling Recalculation
By temporarily storing formulas as comments, you can disable recalculation on a formula-by-formula basis. You may want
to do this to preserve currently calculated values or to suppress unwanted recalculation.
To comment link formulas in the current selection:
Press Ctrl-Shift-' or check Comment from the Mathematica Context Menu.
To uncomment link formulas in the current selection:
Press Ctrl-Shift-' again or uncheck Comment on the Mathematica Context Menu.
Commenting a formula essentially freezes the formula in its currently calculated state. Commenting formulas for an entire
workbook is discussed as a way of sharing a workbook with others in Sharing Workbooks.
Notes
To select an entire sheet, click the upper left-hand corner of the header row, between A and 1.
You can then apply selection commands to the sheet.
The CALC function can be used to generate random numbers for Excel-based simulations.
Working with Macros
Macro Types
There are three types of Mathematica macros that you can create.
44
Working in Excel
Macro Type
Description
Definitions Macro
defines Mathematica functions used in a workbook
Processing Macro
processes a workbook when the Evaluate button is clicked
Task Macro
performs a task when an associated button on a spreadsheet is clicked
Types of Mathematica macros.
The difference between the first two is that a workbook definitions macro does not perform actions on a workbook, a
workbook processing macro does.
All Mathematica macros can be deployed by creating a code box to store the Mathematica code inside a workbook. For
workbook-level macros, however, you can also store the Mathematica code in a package file.
Macro Type
Deployment
Definitions Macro
initialization code box or workbook package file
Processing Macro
initialization code box or workbook package file
Task Macro
macro code box
Deploying Mathematica macros.
A workbook package file should be in the same directory and have the same name as a workbook with the .m extension
replacing .xls.
Working with Code Boxes
Code boxes are simply text boxes that have been formatted for writing Mathematica code and given a special name. They
are, in every other way, ordinary text boxes.
There are two ways of selecting a text box, selecting the box itself or selecting text inside the box. The selection border of
the text box will be different in each case. To do anything other than edit the text inside the box you will need to make sure
the box itself is selected. Once the box itself is selected, you can, for example, move it or resize it, copy and paste it to
another location, or delete it.
When typing in a text box, be aware that Excel goes into a different mode. Most toolbar buttons, for example, are no longer
available.
Working in Excel
45
Excel while in edit mode.
As with many toolbar buttons, Mathematica macros do not work while Excel is in this mode. To get out of this edit mode,
press the Esc key or click out of the box.
Working with Buttons
By default, the caption of the button will be the same as the macro name. You can change this. You can also change the size
of the button or move it. To do this, you will need to select the button.
To select a button:
@ Hold down the Ctrl key then click the button.
Once you have a button selected, you can work with it as you would any other shape. You can, for example, move it or
resize it, change its caption, copy and paste it to another location, or delete it.
Right-clicking a button will also select it and work with it in various ways.
Right-clicking a macro button.
46
Working in Excel
Developing on the Clipboard
The Mathematica Clipboard window can evaluate multiple lines of code at a time. When multiple lines are evaluated on the
Clipboard, only the result from the last line is returned. You can use this behavior to progressively build up code that can be
used as a macro by alternatively clicking Evaluate and Restore.
Developing code on the Clipboard.
When used this way, the Mathematica Clipboard window becomes a floating macro code box. The Clipboard Evaluate
button becomes a Run button for the macro during development. When you are done developing, you can transfer the code
to a code box.
To transfer code from the Mathematica Clipboard to a code box:
@ Click Put on the Mathematica Clipboard.
@ Select where to put the code in the code box.
@ Press Ctrl-V or choose Edit @ Paste.
Developing in Mathematica
If you are familiar with the Mathematica notebook front end, you can develop code in that environment, then transfer it to a
code box in Excel.
For more information on developing macros in Mathematica, see Creating Macros.
Protecting Your Code
Once you have developed a macro, you may want to protect your code. This can be done by hiding or protecting the sheet
containing the code.
To hide a sheet in Excel:
@ Click Format @ Sheet @ Hide.
Working in Excel
47
To protect a sheet in Excel:
@ Click Tools @ Protection @ Protect Sheet.
See Excel help for more information on these commands.
Link Management
Opening a Link
The first time you request a Mathematica evaluation in Excel, a link to a Mathematica kernel will open automatically. If
you'd like to force a link to open, even if there is nothing to evaluate, you can:
@ Click the Evaluate icon on the Mathematica Toolbar.
You can manually specify a kernel to connect to using the Mathematica Options @ Kernel tab. Settings you specify will be
used automatically the next time you connect.
Notes
If you do not have a typical Mathematica installation, you may be required to specify a kernel
the first time you use the link.
Interrupting Evaluations
To interrupt a Mathematica evaluation:
@ Click Evaluate on the Mathematica Toolbar.
Although most Mathematica evaluations can be interrupted, some cannot. If the kernel does not respond to an abort request
after some time, you can choose to close the kernel to end the evaluation.
To close a kernel during an evaluation and return control to Excel:
@ Hold down Shift and click Evaluate on the Mathematica Toolbar, or
@ Right-click the Mathematica kernel in the task bar and choose Close.
Notes
Pressing the Esc key does not interrupt Mathematica evaluations. The Esc key is used by
Excel to send interrupts to local Visual Basic code.
Aborted formulas return #NULL! thereby suppressing evaluation of dependent formulas.
48
Working in Excel
Closing a Link
To close a link with a Mathematica kernel, you can:
@ Hold down the Shift key while clicking Evaluate.
@ Click Close under Mathematica Options @ Kernel.
@ Evaluate Quit[] in the Clipboard window, a function, or a macro.
Notes
The kernel is automatically closed whenever Excel is closed or the MathematicaLink add-in
is uninstalled.
Sharing Workbooks
Unlinking a Workbook
Before sharing a workbook containing Mathematica formulas or macros, you may first want to unlink the workbook.
Unlinking a workbook will allow others to take a look at the results in the workbook without launching a kernel, encountering pathnames from your hard drive, or inadvertantly replacing cell values with #NAME? errors.
To unlink a workbook:
@ Click Unlink on the Mathematica Options @ Workbook tab.
Unlinking a workbook.
Working in Excel
49
When unlinked, formulas are stored as cell comments, and macro buttons display a “macro cannot be found” error when
clicked.
Once a workbook is unlinked, it can easily be viewed without problems on other machines, even machines where MathematicaLink is not installed. Those who do have the link will have the option of relinking the workbook and interacting with it.
Notes
In Excel, cell comments are typically indicated by a small red triangle in the upper-right
corner of a cell. This is an option that can be specified under Tools @ Options @ View. To
view a comment, place your cursor over the cell.
Relinking a Workbook
When opening an unlinked workbook, link users are automatically prompted to relink formulas in the workbook.
@ Click Yes to relink all formulas contained in the workbook.
@ Click No to leave the workbook as is. You can relink formulas later, at any time, by clicking Relink on the Mathematica
Options @ Workbook tab.
Notes
Relinking formulas recalculates all Mathematica formulas in the workbook, overwriting the
existing set of results.
If a workbook contains only Mathematica macros, the relink prompt will not appear. Macro
buttons are relinked without prompting since this has no other impact on the workbook.
Fixing Broken Links
If a workbook was not unlinked prior to opening it on another machine, broken path-based formula links can be fixed
automatically by clicking Relink under Mathematica Options @ Workbook.
This is possible, of course, only if the MathematicaLink add-in is available on that machine.
Notes
50
Working in Excel
Fixing broken links recalculates all Mathematica formulas in the workbook, overwriting the
existing set of results.
Using the Clipboard
51
Using the Clipboard
Loading the Add-In
Before you can transfer data between Mathematica notebooks and Excel workbooks via the clipboard, you first need to load
the Mathematica Link add-in in Excel. To do this, see Getting Started in the Working in Excel section.
Once installed, the Mathematica Link add-in adds and special copy and paste commands to Excel. These commands convert
Excel data to and from Mathematica lists.
Copying Data from Excel
To copy the contents of an Excel range to a Mathematica notebook:
@ In Excel, select the range you want to copy.
@ Press Ctrl-Shift-C or right-click and choose Copy if Mathematica Contexts are enabled. This will copy the contents of the
range onto the Clipboard as a Mathematica list.
@ Switch to your Mathematica notebook and place the cursor where you would like to insert the list.
@ Press Ctrl-V or choose Paste from the Edit menu.
Notes
If the contents of the range were not converted into a Mathematica list, verify Mathematica
keyboard shortcuts are enabled in Excel. You can do this under Mathematica Options @
Interface.
By default, text cells are copied as Mathematica strings. Only cells formatted as Text are
considered to contain Mathematica expressions. See Strings. If needed, you can convert
strings to expressions using ToExpression[data].
Empty cells are copied as the symbol Empty. If needed, you can convert these to a desired
default value, such as 0 or "", using ReplaceAll[data,Empty->val].
Pasting Data to Excel
To paste the contents of a Mathematica list to an Excel range:
52
Using the Clipboard
@ In a Mathematica notebook, select the list you wish to copy.
@ Press Ctrl-C or choose Copy from the Edit menu.
@ Switch to Microsoft Excel and select where to insert the contents of the list. If a single cell is selected, data will be pasted
down and to the right of that cell.
@ Press Ctrl-Shift-V or right-click and choose Paste if Mathematica Contexts are enabled.
Notes
If nothing was pasted, verify Mathematica keyboard shortcuts are enabled in Excel. You can
do this under Mathematica Options @ Interface.
For best results, convert your data to Mathematica InputForm before pasting the data into
Excel. You can do this in Mathematica or using the Mathematica Clipboard window in
Excel. See Fixing Problematic Data.
Be sure the opening and closing brackets of the Mathematica list are selected. Excel will not
recognize the Clipboard contents as a Mathematica list unless these brackets are present.
A convenient way to select an entire Mathematica list is to place the cursor at the beginning
of the list and triple-click.
Fixing Problematic Data
If you run into problems pasting data into Excel, it is likely the copied data is not in the proper form. The Paste command
requires data to be in Mathematica InputForm. Depending on how you copied the data and from what kind of notebook cell
you copied it, you may end up with data in a format other than InputForm.
The Paste command can fix certain common problems with the data automatically, however in some cases you may still
need to convert to InputForm on your own.
You can do this two ways:
@ In Mathematica before copying, use Cell @ Convert @ InputForm.
@ In Excel, after copying, use the Evaluate button in the Mathematica Clipboard window.
If you do not want to modify your source notebook, the second approach is the most convenient.
Here is an example of some data to paste.
In[1]:=
data TableRandom 10^8, 10
Out[1]= 6.92556 10 , 5.23638 10 , 4.21124 10 , 4.61886 10 , 9.65829 10
9
9
9
9
10
9
9
9
9
9
5.8988 10 , 4.26737 10 , 1.64441 10 , 1.50418 10 , 7.90577 10
,
To view this data in the Mathematica Clipboard window, copy the output then, in Excel, open the Mathematica Clipboard
window and click Get.
Using the Clipboard
53
The Mathematica Clipboard window before clicking Evaluate.
You can see additional formatting characters are present in the data. In this case, the fixes are minor, so pasting directly into
Excel does, in fact, still work. However, you can also convert the contents of the Clipboard to InputForm by clicking
Evaluate.
The Mathematica Clipboard window after clicking Evaluate.
Once the data has been standardized to InputForm, you can continue to paste it into Excel using the standard Paste command or the Paste button on the Clipboard window.
Notes
An alternative to copying and pasting is to assign and retrieve Excel data programmatically
from Mathematica. This can be significantly faster if you are dealing with large data sets. For
more information, see Getting Started.
54
Mathematica Reference
Mathematica Reference
Function Index
Excel Function
Excel
Excel[id] identifies a location to read and write from in Excel.
Excel[id] reads the contents of id.
Excel[id] = expr writes expr to id.
Excel[id] =. clears the contents of id.
The location identified by id can be a range, shape, or sheet.
The id can be a name, A1-style address, All, Selection, or an Excel object reference.
Assigning graphics, typeset equations, or formatted output to a location displays a graphic.
Excel[id] is equivalent to ExcelRead[id].
Excel[id] = expr is equivalent to ExcelWrite[id, expr].
Excel[id] =. is equivalent to ExcelClear[id].
ExcelRange, ExcelShape, or ExcelSheet can be used to create an Excel object reference.
Excel object references can be used to provide a specific context for id or to specify a different type of id.
Examples: Excel["A1:C10"], Excel["Sheet1"], and Excel[ExcelSheet[1]].
See also: ExcelRead, ExcelWrite, ExcelClear.
Examples
In[1]:= <<ExcelLink`
In[2]:= Excel["A1:C3"] = IdentityMatrix[3]
In[3]:= Excel["A1:C3"]
Out[3]= 1., 0., 0., 0., 1., 0., 0., 0., 1.
Mathematica Reference
In[4]:=
Excel"A1:C3" .
In[5]:=
data TableRandom, 10000, 10;
In[6]:=
Excel"Sheet1" data
In[7]:=
data Excel"Sheet1";
In[8]:= Dimensions[data]
Out[8]= 10000, 10
In[9]:=
Excel"Sheet1" .
ExcelActivate Function
ExcelActivate
ExcelActivate[book] makes book the active book.
ExcelActivate[sheet] makes sheet the active sheet.
See also: ExcelBook, ExcelSheet, ExcelContext, ExcelSelect.
Examples
In[1]:= <<ExcelLink`
In[2]:= ExcelActivate[ExcelSheet["Book1","Sheet1"]]
In[3]:=
ExcelContext
Out[3]= Book1, Sheet1
In[4]:= ExcelActivate["Sheet3"]
In[5]:= ExcelContext[]
Out[5]= Book1, Sheet3
In[6]:= ExcelActivate["Sheet1"]
In[7]:= ExcelContext[]
Out[7]= Book1, Sheet1
55
56
Mathematica Reference
ExcelAddress Function
ExcelAddress
ExcelAddress[range] returns the A1-style address of the specified range.
See also: ExcelRange, ExcelPosition, ExcelSize.
Examples
In[1]:= <<ExcelLink`
In[2]:=
ExcelAddress1, 1, 10, 3
Out[2]= A1:C10
ExcelBook Function
ExcelBook
ExcelBook[id] represents a workbook identified by id.
The id can be one of the following:
Active
currently active workbook
"Book1" or "Report.xls"
the name of the workbook
"C:\\Reports\\Report.xls"
the full path of the workbook
1 or -1
a positive or negative position index
The first workbook opened has position 1. The last workbook opened has position -1.
Once a workbook is saved, the .xls suffix is required to identify the workbook by name or
path.
See also: ExcelBooks, ExcelDirectory, ExcelName, ExcelCheck, ExcelObject.
Examples
In[1]:= <<ExcelLink`
In[2]:=
ExcelBooks
Out[2]= Book: Book1
Mathematica Reference
In[3]:=
ExcelNameExcelBookActive
Out[3]= Book1
In[4]:=
ExcelNew
Out[4]= Book: Book2
In[5]:=
ExcelBooks
In[6]:=
ExcelNameExcelBook1
Out[5]= Book: Book1, Book: Book2
Out[6]= Book1
In[7]:= ExcelName[ExcelBook[-1]]
Out[7]= Book2
In[8]:=
ExcelClose
In[9]:=
ExcelBooks
Out[9]= Book: Book1
In[10]:=
ExcelCheckExcelBook2
Out[10]= False
ExcelBooks Function
ExcelBooks
ExcelBooks[] gives a list of workbooks currently open in Excel.
See also: ExcelBook, ExcelNew, ExcelOpen, ExcelClose.
Examples
In[1]:= <<ExcelLink`
In[2]:= ExcelBooks[]
Out[2]= Book: Book1
In[3]:=
ExcelNew
Out[3]= Book: Book2
57
58
Mathematica Reference
In[4]:=
ExcelBooks
In[5]:=
ExcelClose
Out[4]= Book: Book1, Book: Book2
ExcelCalculate Function
ExcelCalculate
ExcelCalculate[] causes all formula-based calculations in Excel to update.
This function can be useful if Excel has been set to manual calculation mode or if volatile
functions, such as random number generators, are being used.
See also: ExcelBook, ExcelRefresh.
Examples
In[1]:= <<ExcelLink`
In[2]:=
ExcelWrite"A1", "RAND"
In[3]:=
ExcelRead"A1"
Out[3]= 0.0145436
In[4]:= ExcelCalculate[]
In[5]:= ExcelRead["A1"]
Out[5]= 0.0438649
In[6]:=
ExcelClear"A1"
ExcelCall Function
ExcelCall
ExcelCall is an internal function called by all functions that need to communicate with Excel.
See also: ExcelInstall, ExcelUninstall, $ExcelLink.
Mathematica Reference
ExcelCheck Function
ExcelCheck
ExcelCheck[object] checks if object is valid.
ExcelCheck[object, "format"] checks if object has the specified format.
ExcelCheck always returns True or False.
If object is a shape, the format can be "Image", "Text", or "Other".
If object is a sheet, the format can be "Work" or "Chart".
If object is a range, the format can be "General", "Text", a number format, or "Mixed".
See also: ExcelObject.
Examples
In[1]:= <<ExcelLink`
In[2]:= object=ExcelRange["Sheet1","A1"]
Out[2]= Range: A1
In[3]:= ExcelCheck[object]
Out[3]= True
In[4]:= object=ExcelRange["Bogus","A1"]
Out[4]= Range: A1
In[5]:= ExcelCheck[object]
Out[5]= False
In[6]:= object=ExcelSheet[1]
Out[6]= Sheet: 1
In[7]:= ExcelCheck[object, "Work"]
Out[7]= True
In[8]:=
ExcelCheckobject, "Chart"
Out[8]= False
59
60
Mathematica Reference
ExcelClear Function
ExcelClear
ExcelClear[range] clears data from the specified range in Excel.
ExcelClear[sheet] clears all data contained in the specified sheet.
ExcelClear[All] and ExcelClear[Active] both clear all data on the active sheet.
See also: ExcelRange, ExcelSheet, ExcelWrite.
Examples
In[1]:= <<ExcelLink`
In[2]:= ExcelWrite["A:A", $Path]
In[3]:= ExcelClear["A:A"]
In[4]:= ExcelWrite["Sheet1", Table[Random[],{1000},{10}]]
In[5]:= ExcelClear["Sheet1"]
ExcelClose Function
ExcelClose
ExcelClose[] closes the active workbook.
ExcelClose[book] closes the specified book.
See also: ExcelBook, ExcelSave.
Examples
In[1]:= <<ExcelLink`
In[2]:=
book ExcelNew
Out[2]= Book: Book2
In[3]:=
ExcelBooks
Out[3]= Book: Book1, Book: Book2
Mathematica Reference
In[4]:=
ExcelClosebook
In[5]:=
ExcelBooks
Out[5]= Book: Book1
ExcelContext Function
ExcelContext
ExcelContext[] returns a list identifying the current active context.
ExcelContext[object] returns a list identifying the context of the specified object.
See also: ExcelObject, ExcelActivate, ExcelName, ExcelAddress.
Examples
In[1]:= <<ExcelLink`
In[2]:=
ExcelActivate"Book1"
In[3]:=
ExcelActivate"Sheet1"
In[4]:=
ExcelContext
Out[4]= Book1, Sheet1
In[5]:= object=ExcelRange["Book1","Sheet2","A1:C10"]
Out[5]= Range: A1:C10
In[6]:=
ExcelContextobject
Out[6]= Book1, Sheet2
ExcelDate Function
ExcelDate
ExcelDate[n] converts Excel date n to {y,m,d,h,n,s} list form.
ExcelDate[list] converts date list to an Excel date.
Excel dates count days from December 30, 1899.
Time of day information is provided by the fractional part of the date, where 0.5 represents
noon.
61
62
Mathematica Reference
Excel dates can be printed in various formats using the ExcelForm function.
See also: ExcelForm, ExcelFormat.
Examples
In[1]:= <<ExcelLink`
In[2]:= d = Date[]
Out[2]= 2006, 7, 11, 13, 8, 48.6900112
In[3]:= n = ExcelDate[d]
Out[3]= 38909.5
In[4]:=
n InputForm
Out[4]//InputForm=
38909.54778576389
In[5]:= ExcelForm[n,"dddd, mmm d, yyyy"]
Out[5]= Tuesday, Jul 11, 2006
In[6]:= ExcelForm[n,"h:mm AM/PM"]
Out[6]= 1:08 PM
In[7]:=
ExcelDaten
Out[7]= 2006, 7, 11, 13, 8, 48.69
ExcelDelete Function
ExcelDelete
ExcelDelete[sheet] deletes the specified sheet.
ExcelDelete[shape] deletes the specified shape.
See also: ExcelSheet, ExcelShape, ExcelInsert, ExcelRename.
Examples
In[1]:= <<ExcelLink`
In[2]:=
ExcelSheets
Out[2]= Sheet: Sheet1, Sheet: Sheet2, Sheet: Sheet3
Mathematica Reference
In[3]:=
ExcelInsert"Sheet"
Out[3]= Sheet: Sheet4
In[4]:=
ExcelSheets
In[5]:=
ExcelDeleteExcelSheet1
In[6]:=
ExcelSheets
Out[4]= Sheet: Sheet1, Sheet: Sheet2, Sheet: Sheet3, Sheet: Sheet4
Out[6]= Sheet: Sheet1, Sheet: Sheet2, Sheet: Sheet3
ExcelDialog Function
ExcelDialog
ExcelDialog["type"] displays a dialog specified by type.
ExcelDialog["type", "title"] displays a dialog with a custom title.
Supported dialog types are given by $ExcelDialogs.
See also: $ExcelDialogs, ExcelOpen, ExcelSave, ExcelSelect.
Examples
In[1]:= <<ExcelLink`
In[2]:= $ExcelDialogs
Out[2]= Range, Open, Save, Files, Folder
In[3]:= ExcelDialog["Range"]
Out[3]= Range: B2:C6
In[4]:= ExcelDialog["Open"]
Out[4]= C:\Documents and Settings\Anton\Desktop\Excel Data Types.xls
In[5]:= ExcelDialog["Save"]
Out[5]= C:\Documents and Settings\Anton\Desktop\New File.xls
In[6]:= ExcelDialog["Files"]
Out[6]= C:\Documents and Settings\Anton\Desktop\Manager.xls,
C:\Documents and Settings\Anton\Desktop\Temp.xls, C:\Documents and Settings\Anton\Desktop\Test.xls
63
64
Mathematica Reference
In[7]:= ExcelDialog["Folder"]
Out[7]= C:\Documents and Settings\Anton\My Documents
ExcelDirectory Function
ExcelDirectory
ExcelDirectory["name"] gives a directory specified by name.
ExcelDirectory[book] gives the directory of the specified book.
Supported named directories are given by $ExcelDirectories.
If book is unsaved, its directory is given as None.
See also: $ExcelDirectories, ExcelBook.
Examples
In[1]:= <<ExcelLink`
In[2]:= ExcelDirectory["Installation"]
Out[2]= C:\Program Files\Microsoft Office\Office10
In[3]:=
s ToFileNameExcelDirectory"Link", "Examples", "Stocks.xls"
Out[3]= C:\Documents and Settings\Anton\Application Data\Mathematica\Applications\ExcelLink\Examples\Stocks.xls
In[4]:=
book ExcelOpens
Out[4]= Book: Stocks.xls
In[5]:= ExcelDirectory[book]
Out[5]= C:\Documents and Settings\Anton\Application Data\Mathematica\Applications\ExcelLink\Examples
In[6]:= ExcelClose[book]
ExcelFilter Function
ExcelFilter
ExcelFilter[range, {filter1, filter2,...}] applies filters to header fields in range.
ExcelFilter[range, None] turns off all filters for the specified range.
Mathematica Reference
The first filter is applied to the first field, the second filter to the second field, and so on.
Filters can be value strings such as "Q4", or comparison strings such as ">100".
If a filter is All, no filter is applied to the field at that position.
See also: ExcelRange, ExcelRead.
Examples
In[1]:= <<ExcelLink`
In[2]:=
s ToFileNameExcelDirectory"Link", "Examples", "Cities.xls"
Out[2]= C:\Documents and Settings\Anton\Application Data\Mathematica\Applications\ExcelLink\Examples\Cities.xls
In[3]:=
ExcelOpens
Out[3]= Book: Cities.xls
In[4]:=
rng ExcelRange"USA", All
Out[4]= Range: All
In[5]:=
ExcelFilterrng, All, "Nevada"
In[6]:=
ExcelReadrng
Out[6]= City, State, Lat, Lon, Carson City, Nevada, 39.1667, 119.767, Elko, Nevada, 40.8333, 115.783,
Ely, Nevada, 39.2833, 114.85, Las Vegas, Nevada, 36.0833, 115.167,
Lovelock, Nevada, 40.0667, 118.55, Reno, Nevada, 39.5, 119.783,
Tonopah, Nevada, 38.0667, 117.083, Winnemucca, Nevada, 40.9, 117.8
In[7]:=
ExcelFilterrng, None
In[8]:=
ExcelCloses
ExcelForm Function
ExcelForm
ExcelForm[expr] prints expr as it would appear in Excel in "General" format.
ExcelForm[expr, "format"] prints expr as it would appear in the specified format.
The format can be specified using special characters such as "$ #,###.00", "0.0%", or
"yyyy-mm-dd hh:mm:ss".
See also: ExcelRead, ExcelFormat, ExcelDate.
65
66
Mathematica Reference
Examples
In[1]:= <<ExcelLink`
In[2]:=
v 3., 1.5*^-15, 1 2, 3 5I, "Hello", Empty, True, False
Out[2]= 3., 1.5 10
15
1
, , 3 5 , Hello, Empty, True, False
2
In[3]:= Map[ExcelForm, v]
Out[3]= 3, 1.5E15, 0.5, 3 5I, Hello, , TRUE, FALSE
In[4]:=
n ExcelDateDate
Out[4]= 38909.6
In[5]:= ExcelForm[n, "dd-mmm-yy hh:mm AM/PM"]
Out[5]= 11Jul06 01:36 PM
In[6]:= ExcelForm[5/7, "0.0%"]
Out[6]= 71.4%
In[7]:= ExcelForm[12345, "#,### \[Euro]"]
Out[7]= 12,345 €
ExcelFormat Function
ExcelFormat
ExcelFormat[target] returns the number format of target.
ExcelFormat[target, "format"] sets the number format of target.
The target can be a range or a sheet.
The format can be "General", "Text", or a number format such as "$ #,###.00", "0.0%", or
"yyyy-mm-dd hh:mm:ss".
The format can also be "AutoFit" to adjust column widths in target to display all contents.
If multiple formats exist in target, ExcelFormat[target] returns "Mixed".
See also: ExcelWrite, ExcelForm, ExcelDate.
Examples
In[1]:= <<ExcelLink`
Mathematica Reference
In[2]:= ExcelFormat["A1"]
Out[2]= General
In[3]:=
ExcelWrite"A1", .5
In[4]:= ExcelFormat["A1","0.0%"]
In[5]:= ExcelFormat["A1"]
Out[5]= 0.0%
In[6]:=
ExcelFormat"A1", "hh:mm"
In[7]:= ExcelFormat["A1"]
Out[7]= hh:mm
In[8]:=
ExcelFormat"A1", "General"
In[9]:= ExcelFormat["A1"]
Out[9]= General
In[10]:=
ExcelClear"A1"
ExcelGraphic Function
ExcelGraphic
ExcelGraphic[graphic, opts...] specifies options for how graphic should be displayed in Excel.
Excel[id] = ExcelGraphic[graphic, opts...] displays graphic with specified options.
Excel[id] = graphic displays graphic using default options.
Options[ExcelGraphic] gives a list of available options.
SetOptions[ExcelGraphic, opts...] sets the defaults.
See also: ExcelWrite, $ExcelGraphic.
Examples
In[1]:= <<ExcelLink`
67
68
Mathematica Reference
In[2]:=
g PlotSinx, x, Pi, Pi
1
0.5
-3
-2
-1
1
2
3
-0.5
-1
In[3]:= Excel["B3"] = g
In[4]:=
OptionsExcelGraphic
Out[4]= ImageSize Automatic, ImageMargins Automatic,
ImageFormat Automatic, ImageResolution Automatic, TextStyle Automatic
In[5]:= Excel["B3"] = ExcelGraphic[g, ImageFormat->"GIF", ImageSize->{400,300}, ImageMargins->20,
TextStyle->{FontFamily->"Arial", FontSize->9}]
In[6]:=
Excel"B3" .
ExcelInsert Function
ExcelInsert
ExcelInsert[] inserts a sheet in the active book.
ExcelInsert["name"] inserts a sheet with the specified name.
ExcelInsert[ExcelSheet[id]] inserts the specified sheet.
ExcelInsert[ExcelShape[id]] inserts the specified shape.
The id can be a "name" or Automatic.
Option Position can be used to specify the position where the new object is to be inserted.
For sheets, Position can be an existing sheet name or index.
For shapes, Position can be a {top, left} coordinate pair.
Option Format can be used to specify the format of the inserted object.
For sheets, Format can be "Work", "Chart", or a reference to an existing sheet to use as
a template.
For shapes, Format can be "Image", "Text", or a reference to an existing shape to use
as a template.
See also: ExcelSheet, ExcelShape, ExcelRename, ExcelDelete.
Mathematica Reference
Examples
In[1]:= <<ExcelLink`
In[2]:=
ExcelSheets
In[3]:=
ExcelInsert
Out[2]= Sheet: Sheet1, Sheet: Sheet2, Sheet: Sheet3
Out[3]= Sheet: Sheet4
In[4]:=
ExcelSheets
In[5]:=
ExcelDeleteExcelSheet1
In[6]:=
ExcelSheets
In[7]:=
ExcelInsert"New", Position 1
Out[4]= Sheet: Sheet1, Sheet: Sheet2, Sheet: Sheet3, Sheet: Sheet4
Out[6]= Sheet: Sheet1, Sheet: Sheet2, Sheet: Sheet3
Out[7]= Sheet: New
In[8]:=
ExcelSheets
In[9]:=
ExcelDeleteExcelSheet1
Out[8]= Sheet: New, Sheet: Sheet1, Sheet: Sheet2, Sheet: Sheet3
In[10]:=
ExcelSheets
Out[10]= Sheet: Sheet1, Sheet: Sheet2, Sheet: Sheet3
ExcelInstall Function
ExcelInstall
ExcelInstall[] starts communications with Excel.
Option Visible specifies if a visible instance of Excel is used. The default is Visible->Automatic.
If Visible is Automatic, a visible instance of Excel must already be open to start
communications.
If Visible is True, a visible instance of Excel is launched if needed.
69
70
Mathematica Reference
If Visible is False, a hidden instance of Excel is launched for private use by
Mathematica.
By default, ExcelInstall[] is called the first time communication with Excel is required.
See also: ExcelUninstall, $ExcelLink.
Examples
In[1]:= <<ExcelLink`
In[2]:=
ExcelInstallVisible True
Out[2]= LinkObject
C:\Documents and Settings\Anton\Application Data\Mathematica\Applications\ExcelLink\Binaries\ExcelLink.exe,
2, 2
In[3]:=
ExcelNew
Out[3]= Book: Book1
In[4]:=
ExcelBooks
In[5]:=
ExcelClose
Out[4]= Book: Book1
In[6]:= ExcelUninstall[]
In[7]:= ExcelInstall[Visible->False]
Out[7]= LinkObject
C:\Documents and Settings\Anton\Application Data\Mathematica\Applications\ExcelLink\Binaries\ExcelLink.exe,
3, 2
In[8]:=
ExcelNew
Out[8]= Book: Book1
In[9]:=
ExcelBooks
Out[9]= Book: Book1
In[10]:= ExcelUninstall[]
ExcelName Function
ExcelName
ExcelName[object] returns the name of the specified object.
Mathematica Reference
See also: ExcelObject, ExcelContext.
Examples
In[1]:= <<ExcelLink`
In[2]:= objects = ExcelSheets[]
Out[2]= Sheet: Sheet1, Sheet: Sheet2, Sheet: Sheet3
In[3]:= ExcelName /@ objects
Out[3]= Sheet1, Sheet2, Sheet3
ExcelNew Function
ExcelNew
ExcelNew[] creates a new workbook with the default number of sheets.
ExcelNew[i] creates a book with i sheets.
ExcelNew[{"name1", "name2", ...}] creates a book with the specified named sheets.
ExcelNew["book.xls"] creates a book using the specified existing book as a template.
Template names must be specified using a full path.
See also: ExcelBook, ExcelOpen, ExcelSave, ExcelClose.
Examples
In[1]:= <<ExcelLink`
In[2]:= ExcelBooks[]
Out[2]= Book: Book1
In[3]:= ExcelNew[]
Out[3]= Book: Book2
In[4]:=
ExcelClose
In[5]:=
v MapToString, Range2000, 2010
In[6]:=
ExcelNewv
Out[5]= 2000, 2001, 2002, 2003, 2004, 2005, 2006, 2007, 2008, 2009, 2010
Out[6]= Book: Book3
71
72
Mathematica Reference
In[7]:=
ExcelClose
In[8]:=
s ToFileNameExcelDirectory"Link", "Templates", "Report.xls"
Out[8]= C:\Documents and Settings\Anton\Application Data\Mathematica\Applications\ExcelLink\Templates\Report.xls
In[9]:=
ExcelNews
Out[9]= Book: Report1
In[10]:= ExcelClose[]
ExcelObject Function
ExcelObject
ExcelObject["type", id] represents an object of the specified type identified by id in the active context.
ExcelObject["type", context] @ ExcelObject["type", id] provides a context for the object id.
All Excel objects are represented internally in this form.
See also: ExcelCheck, ExcelName, ExcelContext, ExcelBook, ExcelSheet, ExcelRange, ExcelShape.
Examples
In[1]:= <<ExcelLink`
In[2]:= object=ExcelRange["Sheet1", "A1"]
Out[2]= Range: A1
In[3]:= InputForm[object]
Out[3]//InputForm=
ExcelObject["Sheet", "Sheet1"][ExcelObject["Range", "A1"]]
In[4]:= object=ExcelRange["Book1", "Sheet1", "A1"]
Out[4]= Range: A1
In[5]:= InputForm[object]
Out[5]//InputForm=
ExcelObject["Book", "Book1"][ExcelObject["Sheet", "Sheet1"][
ExcelObject["Range", "A1"]]]
Mathematica Reference
ExcelOffset Function
ExcelOffset
ExcelOffset[range, {rows, cols}] offsets range by the specified number of rows and columns.
All specifies range should be offset to the end of contiguous data in that dimension.
None specifies range should not be offset in that dimension.
See also: ExcelRange, ExcelResize, ExcelPosition.
Examples
In[1]:= <<ExcelLink`
In[2]:=
ExcelOffset"A1", 5, None
Out[2]= Range: A6
In[3]:=
ExcelOffset"A:A", None, 5
Out[3]= Range: F:F
In[4]:=
ExcelOffset"A1:C3", 1, 1
Out[4]= Range: B2:D4
In[5]:=
ExcelWrite"A:A", Range10
In[6]:=
ExcelOffset"A1", All, None
Out[6]= Range: A11
In[7]:=
ExcelClear"A:A"
ExcelOpen Function
ExcelOpen
ExcelOpen["book.xls"] opens the specified workbook in Excel.
File name book.xls must be specified using a full path.
If it is already open in Excel, the workbook is activated.
Newer Excel file formats such as .xlsx, .xlsm and .xlsb files are also supported.
73
74
Mathematica Reference
See also: ExcelBook, ExcelDirectory, ExcelDialog, ExcelClose.
Examples
In[1]:= <<ExcelLink`
In[2]:=
dir ToFileNameExcelDirectory"Link", "Examples"
Out[2]= C:\Documents and Settings\Anton\Application Data\Mathematica\Applications\ExcelLink\Examples\
In[3]:=
files FileNames".xls", dir;
In[4]:= books = ExcelOpen /@ files
Out[4]= Book: Cities.xls, Book: Highways.xls, Book: Metals.xls,
Book: Stocks.xls, Book: Waves.xls, Book: Wind.xls
In[5]:=
ExcelClose books
Out[5]= Null, Null, Null, Null, Null, Null
ExcelOutput Function
ExcelOutput
ExcelOutput[expr, opts...] specifies options for how expr should be output in Excel.
Excel[id] = ExcelOutput[expr, opts...] displays expr with specified options.
Excel[id] = form[expr] displays expr in the specified form using default options.
Options[ExcelOutput] gives a list of available options.
SetOptions[ExcelOutput, opts...] sets the defaults.
See also: ExcelWrite, $ExcelOutput.
Examples
In[1]:= <<ExcelLink`
In[2]:=
expr Expandx y^5
5
4
3
2
2
3
4
5
Out[2]= x 5 x y 10 x y 10 x y 5 x y y
In[3]:= Excel["B8"] = OutputForm[expr]
Mathematica Reference
In[4]:=
75
OptionsExcelOutput
Out[4]= ImageSize Automatic, ImageMargins Automatic,
ImageFormat Automatic, ImageResolution Automatic, TextStyle Automatic
In[5]:= Excel["B8"] = ExcelOutput[expr, ImageMargins->10, TextStyle->{FontSize->16}]
In[6]:=
Excel"B8" .
ExcelPosition Function
ExcelPosition
ExcelPosition[range] returns the position of the top-left cell of range as a {row, col} index pair.
See also: ExcelRange, ExcelAddress, ExcelSize, ExcelOffset.
Examples
In[1]:= <<ExcelLink`
In[2]:=
ExcelPosition"C10"
In[3]:=
ExcelPosition"A1:C10"
Out[2]= 10, 3
Out[3]= 1, 1
ExcelRange Function
ExcelRange
ExcelRange[id] represents a range identified by id in the active context.
ExcelRange[sheet, id] represents a range in the specified sheet.
ExcelRange[book, sheet, id] represents a range in the specified book.
The id can be one of the following:
Selection
the currently selected range
All
all cells in the sheet
"Data_Range"
a defined range name
76
Mathematica Reference
"A1:C10"
an A1-style address
{1, 1}
a {row, col} index pair
{{1, 1},{10, 3}}
a list of two index pairs {{top, left}, {bottom, right}} defining a rectangular
range
See ExcelSheet for a listing of valid id values for sheet.
See ExcelBook for a listing of valid id values for book.
See also: ExcelRanges, ExcelAddress, ExcelName, ExcelPosition, ExcelSize, ExcelCheck, ExcelObject.
Examples
In[1]:= <<ExcelLink`
In[2]:=
ExcelSelectExcelRange"A1:C5"
In[3]:=
ExcelAddressExcelRangeSelection
Out[3]= A1:C5
In[4]:=
ExcelAddressExcelRange1, 1
Out[4]= A1
In[5]:= ExcelAddress[ExcelRange[{{1,1},{5,3}}]]
Out[5]= A1:C5
In[6]:=
ExcelSizeExcelRangeAll
Out[6]= 65536, 256
ExcelRanges Function
ExcelRanges
ExcelRanges[] gives a list of named ranges in the active sheet.
ExcelRanges[sheet] gives a list for the specified sheet.
ExcelRanges[book] gives a list of all named ranges in book.
See also: ExcelRange, ExcelName.
Examples
In[1]:= <<ExcelLink`
Mathematica Reference
In[2]:=
s ToFileNameExcelDirectory"Link", "Examples", "Stocks.xls"
Out[2]= C:\Documents and Settings\Anton\Application Data\Mathematica\Applications\ExcelLink\Examples\Stocks.xls
In[3]:=
book ExcelOpens
Out[3]= Book: Stocks.xls
In[4]:= ExcelRanges[]
Out[4]= Range: Stock_History
In[5]:=
ranges ExcelRangesbook
Out[5]= Range: Stock_History, Range: Stock_History, Range: Stock_History,
Range: Stock_History, Range: Stock_History, Range: Stock_History, Range: Stock_History,
Range: Stock_History, Range: Stock_History, Range: Stock_History
In[6]:=
ExcelContext ranges
Out[6]= Stocks.xls, AAPL, Stocks.xls, ADP, Stocks.xls, AIG, Stocks.xls, BLDP, Stocks.xls, CSCO,
Stocks.xls, IBM, Stocks.xls, JNJ, Stocks.xls, MSFT, Stocks.xls, SYY, Stocks.xls, WMT
In[7]:=
ExcelClosebook
ExcelRead Function
ExcelRead
ExcelRead[range] reads data from the specified range in Excel.
ExcelRead[sheet] reads all data contained in the specified sheet.
ExcelRead[shape] reads the contents of the specified shape.
If range includes trailing empty cells, they are ignored.
See also: ExcelRange, ExcelSheet, ExcelShape, ExcelForm, ExcelDate.
Examples
In[1]:= <<ExcelLink`
In[2]:= ExcelWrite["A1:C3",IdentityMatrix[3]]
In[3]:= ExcelRead["A1:C3"]
Out[3]= 1., 0., 0., 0., 1., 0., 0., 0., 1.
In[4]:= ExcelRead["A:C"]
Out[4]= 1., 0., 0., 0., 1., 0., 0., 0., 1.
77
78
Mathematica Reference
In[5]:= ExcelRead["Sheet1"]
Out[5]= 1., 0., 0., 0., 1., 0., 0., 0., 1.
In[6]:=
ExcelClear"A1:C3"
ExcelRefresh Function
ExcelRefresh
ExcelRefresh[] refreshes all external data queries and pivot tables in the active book.
ExcelRefresh[book] refreshes the specified book.
External data sources can include text files, web pages, or databases.
To set up an external data query in Excel, use the Data @ Import External Data commands.
See also: ExcelBook, ExcelCalculate.
Examples
In[1]:= <<ExcelLink`
In[2]:=
s ToFileNameExcelDirectory"Link", "Examples", "Stocks.xls"
Out[2]= C:\Documents and Settings\Anton\Application Data\Mathematica\Applications\ExcelLink\Examples\Stocks.xls
In[3]:=
ExcelOpens
Out[3]= Book: Stocks.xls
In[4]:=
ExcelRefresh
In[5]:=
data ExcelRead ExcelSheets;
In[6]:=
ExcelCloses
ExcelRename Function
ExcelRename
ExcelRename[sheet, "name"] renames the specified sheet.
ExcelRename[shape, "name"] renames the specified shape.
See also: ExcelSheet, ExcelShape, ExcelInsert, ExcelDelete.
Mathematica Reference
Examples
In[1]:= <<ExcelLink`
In[2]:=
sheets ExcelSheets
In[3]:=
ExcelRename"Sheet1", "Summary"
Out[2]= Sheet: Sheet1, Sheet: Sheet2, Sheet: Sheet3
Out[3]= Sheet: Summary
In[4]:=
sheets ExcelSheets
In[5]:=
ExcelRename"Summary", "Sheet1"
Out[4]= Sheet: Summary, Sheet: Sheet2, Sheet: Sheet3
Out[5]= Sheet: Sheet1
In[6]:=
sheets ExcelSheets
Out[6]= Sheet: Sheet1, Sheet: Sheet2, Sheet: Sheet3
ExcelResize Function
ExcelResize
ExcelResize[range, {rows, cols}] resizes range to the specified number of rows and columns.
ExcelResize[range, All] resizes range to include all contiguous data.
None specifies range should not be resized in that dimension.
All specifies range should be extended to include all contiguous data in that dimension.
See also: ExcelRange, ExcelOffset, ExcelSize.
Examples
In[1]:= <<ExcelLink`
In[2]:=
ExcelResize"A1", 10, None
Out[2]= Range: A1:A10
In[3]:=
ExcelResize"A1", 10, 10
Out[3]= Range: A1:J10
79
80
Mathematica Reference
In[4]:=
data TableRandom, 10, 3;
In[5]:=
ExcelWrite"A1:C10", data
In[6]:=
ExcelResize"A1", All
Out[6]= Range: A1:C10
In[7]:=
ExcelResize"A1", All, None
Out[7]= Range: A1:A10
In[8]:=
ExcelClear"A1:C10"
ExcelResult Function
ExcelResult
ExcelResult is an internal function used to return lengthy results to Excel.
Options[ExcelResult] gives a list of options that affect how results are returned.
SetOptions[ExcelResult,opts...] can be used to specify these options.
See also: ExcelWrite, $ExcelResult.
Examples
In[1]:= <<ExcelLink`
In[2]:=
OptionsExcelResult
In[3]:=
expr Expandx .8^9
Out[2]= MaxCharacters 255, NumberMarks False
2
3
4
5
6
7
8
9
Out[3]= 0.134218 1.50995 x 7.54975 x 22.0201 x 41.2877 x 51.6096 x 43.008 x 23.04 x 7.2 x x
In[4]:=
StringLengthToStringInputFormexpr
Out[4]= 205
In[5]:= ExcelForm[expr]
Out[5]= 0.134218 1.50995x 7.54975x^2 22.0201x^
3 41.2877x^4 51.6096x^5 43.008x^6 23.04x^7 7.2x^8 x^9
In[6]:=
SetOptionsExcelResult, MaxCharacters 100
Out[6]= MaxCharacters 100, NumberMarks False
Mathematica Reference
In[7]:= ExcelForm[expr]
Out[7]= ExcelResult1
In[8]:=
SetOptionsExcelResult, MaxCharacters 255
In[9]:=
SetOptionsExcelResult, NumberMarks True
Out[8]= MaxCharacters 255, NumberMarks False
Out[9]= MaxCharacters 255, NumberMarks True
In[10]:=
ExcelFormexpr
Out[10]= 0.13421772800000006` 1.5099494400000009`x 7.549747200000004`
x^2 22.02009600000001`x^3 41.287680000000016`x^4 51.609600000000015`
x^5 43.00800000000001`x^6 23.040000000000006`x^7 7.2`x^8 x^9
In[11]:=
SetOptionsExcelResult, NumberMarks False
Out[11]= MaxCharacters 255, NumberMarks False
ExcelRun Function
ExcelRun
ExcelRun["macro"] runs the specified VBA macro in Excel.
ExcelRun["macro", arg1, arg2, ...] runs the macro with the specified arguments.
See also: ExcelStatus.
Examples
If the Mathematica Link add-in is currently loaded in Excel, this displays the Mathematica Clipboard window.
In[1]:= <<ExcelLink`
In[2]:=
ExcelRun"MathematicaClipboard"
81
82
Mathematica Reference
ExcelSave Function
ExcelSave
ExcelSave[] saves changes to the active workbook.
ExcelSave[book] saves changes to the specified book.
ExcelSave[book, "book.xls"] saves changes as book.xls.
If book has never been saved, a file name must be specified.
File name book.xls must be specified using a full path.
Newer Excel file formats such as .xlsx, .xlsm and .xlsb files are also supported.
See also: ExcelBook, ExcelDirectory, ExcelDialog, ExcelClose.
Examples
In[1]:= <<ExcelLink`
In[2]:=
book ExcelNew"Data"
Out[2]= Book: Book2
In[3]:=
ExcelWrite"Data", TableRandom, 100, 10
In[4]:=
s ToFileNameExcelDirectory"User", "Temporary.xls"
Out[4]= C:\Documents and Settings\Anton\Desktop\Temporary.xls
In[5]:=
book ExcelSavebook, s
Out[5]= Book: Temporary.xls
In[6]:=
ExcelClosebook
In[7]:=
DeleteFiles
ExcelSelect Function
ExcelSelect
ExcelSelect[range] selects the specified range.
ExcelSelect[shape] selects the specified shape.
See also: ExcelRange, ExcelShape, ExcelContext, ExcelActivate, ExcelDialog.
Mathematica Reference
83
Examples
In[1]:= <<ExcelLink`
In[2]:=
ExcelContext
In[3]:=
ExcelSelectExcelRange"Sheet3", "B2:D5"
In[4]:=
ExcelContextSelection
In[5]:=
ExcelAddressSelection
Out[2]= Book1, Sheet1
Out[4]= Book1, Sheet3
Out[5]= B2:D5
In[6]:=
ExcelSelectExcelRange"Sheet1", "A1"
ExcelShape Function
ExcelShape
ExcelShape[id] represents a shape identified by id in the active context.
ExcelShape[sheet, id] represents a shape in the specified sheet.
ExcelShape[book, sheet, id] represents a shape in the specified book.
The id can be one of the following:
Selection
the currently selected shape
"Rectangle 1"
the name of the shape
1 or -1
a positive or negative position index
The first shape inserted on a sheet has position 1. The last shape inserted on a sheet has
position -1.
See ExcelSheet for a listing of valid id values for sheet.
See ExcelBook for a listing of valid id values for book.
See also: ExcelShapes, ExcelName, ExcelCheck, ExcelObject.
Examples
In[1]:= <<ExcelLink`
In[2]:=
shape1 ExcelInsertExcelShape"Rectangle 1";
84
Mathematica Reference
In[3]:=
shape2 ExcelInsertExcelShape"Rectangle 2";
In[4]:=
ExcelShapes
Out[4]= Shape: Rectangle 1, Shape: Rectangle 2
In[5]:= ExcelName[ExcelShape[1]]
Out[5]= Rectangle 1
In[6]:= ExcelName[ExcelShape[-1]]
Out[6]= Rectangle 2
In[7]:=
ExcelSelectExcelShape1
In[8]:=
ExcelNameExcelShapeSelection
Out[8]= Rectangle 1
In[9]:=
ExcelCheckExcelShape5
Out[9]= False
In[10]:=
ExcelDeleteshape1
In[11]:=
ExcelDeleteshape2
ExcelShapes Function
ExcelShapes
ExcelShapes[] gives a list of supported shapes in the active sheet.
ExcelShapes[sheet] gives a list for the specified sheet.
ExcelShapes[book] gives a list of all supported shapes in book.
See also: ExcelShape, ExcelName, ExcelInsert, ExcelDelete.
Examples
In[1]:= <<ExcelLink`
In[2]:=
ExcelShapes
In[3]:=
shape ExcelInsertExcelShape"Rectangle 1"
Out[2]=
Out[3]= Shape: Rectangle 1
Mathematica Reference
In[4]:=
ExcelShapes
In[5]:=
ExcelDeleteshape
Out[4]= Shape: Rectangle 1
ExcelShare Function
ExcelShare
ExcelShare[] starts kernel sharing with Excel on a link named "ExcelShare".
You must have the MathematicaLink add-in loaded in Excel to share a kernel with Excel.
ExcelShare[] must be called before connecting from Excel.
In Excel, if your Mathematica Connection is set to "Automatic", the MathematicaLink addin
will first try to connect to a link named "ExcelShare" and then launch its own kernel if a link
with that name is not available.
In Excel, if your Mathematica Connection is set to "Shared", the MathematicaLink addin will
try to connect to a link "ExcelShare" and fail if a link with that name is not available.
Anytime you close a connection from the Excel-side, you need to call ExcelShare[] again in
Mathematica before starting a new shared kernel session.
ExcelShare[] only works in Mathematica 6.0 or later.
See also: ExcelUnshare, $ExcelShare.
Examples
In[1]:= <<ExcelLink`
In[2]:=
ExcelShare
Once you have connected from the Excel-side, you can share definitions of data between Excel and Mathematica.
In[3]:=
x
Out[3]= 100
The above assumes you defined x as 100 in Excel using a formula, macro, or the clipboard.
85
86
Mathematica Reference
ExcelSheet Function
ExcelSheet
ExcelSheet[id] represents a sheet identified by id in the active context.
ExcelSheet[book, id] represents a sheet in the specified book.
The id can be one of the following:
Active
the current active sheet
"Sheet1"
the name of the sheet
1 or -1
a positive or negative position index
See ExcelBook for a listing of valid id values for book.
The first sheet in the workbook has position 1. The last sheet in the workbook has position -1.
See also: ExcelSheets, ExcelName, ExcelCheck, ExcelObject.
Examples
In[1]:= <<ExcelLink`
In[2]:=
ExcelSheets
In[3]:=
ExcelNameExcelSheet1
Out[2]= Sheet: Sheet1, Sheet: Sheet2, Sheet: Sheet3
Out[3]= Sheet1
In[4]:= ExcelName[ExcelSheet[-1]]
Out[4]= Sheet3
In[5]:=
ExcelNameExcelSheetActive
Out[5]= Sheet1
In[6]:=
ExcelCheckExcelSheet5
Out[6]= False
Mathematica Reference
ExcelSheets Function
ExcelSheets
ExcelSheets[] gives a list of sheets in the active workbook.
ExcelSheets[book] gives a list for the specified book.
See also: ExcelSheet, ExcelName, ExcelInsert, ExcelDelete.
Examples
In[1]:= <<ExcelLink`
In[2]:=
ExcelSheets
In[3]:=
sheet ExcelInsert"Sheet"
Out[2]= Sheet: Sheet1, Sheet: Sheet2, Sheet: Sheet3
Out[3]= Sheet: Sheet4
In[4]:=
ExcelSheets
In[5]:=
ExcelDeletesheet
Out[4]= Sheet: Sheet1, Sheet: Sheet2, Sheet: Sheet3, Sheet: Sheet4
ExcelSize Function
ExcelSize
ExcelSize[range] returns the size of range as {rows, cols}.
See also: ExcelRange, ExcelPosition, ExcelResize.
Examples
In[1]:= <<ExcelLink`
In[2]:=
ExcelSize"A1:C10"
Out[2]= 10, 3
87
88
Mathematica Reference
ExcelStatus Function
ExcelStatus
ExcelStatus["text"] displays text in the status bar in Excel.
ExcelStatus[] restores the status bar to its default state.
See also: ExcelRun.
Examples
In[1]:= <<ExcelLink`
In[2]:= ExcelStatus["Performing analysis..."];
Pause2;
ExcelStatus["Generating report..."];
Pause1;
ExcelStatus[];
ExcelTypeset Function
ExcelTypeset
ExcelTypeset[expr, opts...] specifies options for how expr should be typeset in Excel.
Excel[id] = ExcelTypeset[expr, opts...] displays expr with specified options.
Excel[id] = form[expr] displays expr in the specified form using default options.
Options[ExcelTypeset] gives a list of available options.
SetOptions[ExcelTypeset, opts...] sets the defaults.
See also: ExcelWrite, $ExcelTypeset.
Examples
In[1]:= <<ExcelLink`
In[2]:=
expr Expand\[Alpha] \[Beta]^4
4
3
2
2
3
4
Out[2]= 4 6 4
In[3]:= Excel["B3"] = TraditionalForm[expr]
Mathematica Reference
In[4]:=
OptionsExcelTypeset
Out[4]= ImageSize Automatic, ImageMargins Automatic,
ImageFormat Automatic, ImageResolution Automatic, TextStyle Automatic
In[5]:= Excel["B3"] = ExcelTypeset[expr, ImageFormat->"WMF", ImageSize->{300,50}, TextStyle->{FontSize->20}]
In[6]:= Excel["B3"] =.
ExcelUninstall Function
ExcelUninstall
ExcelUninstall[] ends communications with Excel.
Option Visible specifies if visible instances of Excel should be closed when the link is
uninstalled. The default is Visible->Automatic.
If Visible is Automatic, visible instances of Excel are closed if no workbooks are open.
If Visible is True, visible instances are always closed and unsaved changes to open workbooks are discarded.
If Visible is False, visible instances are never closed.
See also: ExcelInstall, $ExcelLink.
Examples
In[1]:= <<ExcelLink`
In[2]:= ExcelInstall[Visible->False]
Out[2]= LinkObject
C:\Documents and Settings\Anton\Application Data\Mathematica\Applications\ExcelLink\Binaries\ExcelLink.exe,
2, 2
In[3]:=
$ExcelLink
Out[3]= LinkObject
C:\Documents and Settings\Anton\Application Data\Mathematica\Applications\ExcelLink\Binaries\ExcelLink.exe,
2, 2
In[4]:= ExcelUninstall[]
In[5]:= $ExcelLink
89
90
Mathematica Reference
ExcelUnshare Function
ExcelUnshare
ExcelUnshare[] ends kernel sharing with Excel.
Calling ExcelUnshare[] from a Mathematica session is not required. There is no harm in
leaving the shared link open once it is established.
ExcelUnshare[] is automatically called when Excel closes a shared kernel session.
See also: ExcelShare, $ExcelShare.
Examples
In[1]:= <<ExcelLink`
In[2]:= ExcelShare[]
Out[2]= LinkObjectExcelShare, 2, 2
In[3]:=
$ExcelShare
Out[3]= LinkObjectExcelShare, 2, 2
In[4]:= ExcelUninstall[]
In[5]:= $ExcelShare
ExcelWrite Function
ExcelWrite
ExcelWrite[range, data] writes data to the specified range in Excel.
ExcelWrite[sheet, data] fills sheet with data.
ExcelWrite[range, graphic] displays a graphic at the specified range location.
ExcelWrite[range, form] displays the expression form at the specified range location.
ExcelWrite[shape, graphic] displays a graphic to the specified shape.
ExcelWrite[shape, form] displays the expression form to the specified shape.
ExcelWrite[shape, "text"] writes text to the specified shape.
If data does not completely fill the range, remaining cells are cleared.
Mathematica Reference
91
See also: ExcelRange, ExcelSheet, ExcelShape, ExcelClear, ExcelFormat, ExcelDate,
ExcelGraphic, ExcelTypeset, ExcelOutput, ExcelResult.
Examples
In[1]:= <<ExcelLink`
In[2]:=
ExcelWrite"A1", 1
In[3]:=
ExcelWrite"A1:A3", 1, 2, 3
In[4]:=
In[5]:=
In[6]:=
ExcelWrite"A1:C1", 1, 2, 3
ExcelWrite"A1:C3", 1, 2, 3, 4, 5, 6, 7, 8, 9
ExcelWrite"A1:C3", 1, 2, 3, 4
In[7]:=
data TableRandom, 30, 30;
In[8]:=
ExcelWrite"Sheet1", data
In[9]:=
ExcelClear"Sheet1"
In[10]:=
ExcelWrite"A1", ListContourPlotdata, ContourLines False
30
25
20
15
10
5
5
In[11]:=
10
15
20
25
30
ExcelClear"A1"
ToExcel Function
ToExcel
ToExcel is an internal function used by the link to convert expressions into a form suitable for use in Excel.
See also: ExcelForm, ExcelWrite.
92
Mathematica Reference
$ExcelDialogs Symbol
$ExcelDialogs
$ExcelDialogs gives a list of supported named dialogs that can be used with the ExcelDialog
function.
See also: ExcelDialog, ExcelOpen, ExcelSave, ExcelSelect.
Examples
In[1]:= <<ExcelLink`
In[2]:= $ExcelDialogs
Out[2]= Range, Open, Save, Files, Folder
In[3]:= ExcelDialog["Folder","Select a folder"]
Out[3]= C:\Documents and Settings\Anton\My Documents
$ExcelDirectories Symbol
$ExcelDirectories
$ExcelDirectories gives a list of supported named directories that can be used with the
ExcelDirectory function.
"Installation" is the directory where Excel is installed.
"Home" is the default file location in Excel. This is specified in Excel under Tools @
Options... @ General.
"User" is the directory where Excel user settings are stored.
"Link" is the directory where Mathematica Link for Excel is installed.
See also: ExcelDirectory, ExcelBook.
Examples
In[1]:= <<ExcelLink`
In[2]:= $ExcelDirectories
Out[2]= Installation, Home, User, Link
Mathematica Reference
In[3]:=
93
ExcelDirectory $ExcelDirectories
Out[3]= C:\Program Files\Microsoft Office\Office10, C:\Documents and Settings\Anton\My Documents,
C:\Documents and Settings\Anton\Application Data\Microsoft,
C:\Documents and Settings\Anton\Application Data\Mathematica\Applications\ExcelLink
$ExcelGraphic Symbol
$ExcelGraphic
$ExcelGraphic is an internal counter used to display graphics in Excel.
See also: ExcelGraphic.
Examples
In[1]:= <<ExcelLink`
In[2]:=
$ExcelGraphic
Out[2]= 0
In[3]:=
g PlotSinx, x, Pi, Pi
1
0.5
-3
-2
-1
1
-0.5
-1
In[4]:= ExcelForm[g]
Out[4]= ExcelGraphic1
In[5]:=
$ExcelGraphic
Out[5]= 1
2
3
94
Mathematica Reference
$ExceLink Symbol
$ExcelLink
$ExcelLink gives the LinkObject being used to communicate with Excel.
See also: ExcelInstall, ExcelUninstall.
Examples
In[1]:= <<ExcelLink`
In[2]:= $ExcelLink
In[3]:= ExcelInstall[]
Out[3]= LinkObject
C:\Documents and Settings\Anton\Application Data\Mathematica\Applications\ExcelLink\Binaries\ExcelLink.exe,
2, 2
In[4]:=
$ExcelLink
Out[4]= LinkObject
C:\Documents and Settings\Anton\Application Data\Mathematica\Applications\ExcelLink\Binaries\ExcelLink.exe,
2, 2
In[5]:= ExcelUninstall[]
In[6]:= $ExcelLink
$ExcelOutput Symbol
$ExcelOutput
$ExcelOutput is an internal counter used to display formatted output in Excel.
See also: ExcelOutput.
Examples
In[1]:= <<ExcelLink`
In[2]:=
$ExcelOutput
Out[2]= 0
Mathematica Reference
In[3]:=
expr BaseForm10, 2
Out[3]//BaseForm=
10102
In[4]:= ExcelForm[expr]
Out[4]= ExcelOutput1
In[5]:=
$ExcelOutput
Out[5]= 1
$ExcelResult Symbol
$ExcelResult
$ExcelResult is an internal counter used to return lengthy expressions to Excel.
See also: ExcelResult.
Examples
In[1]:= <<ExcelLink`
In[2]:=
$ExcelResult
Out[2]= 0
In[3]:=
expr Expandx 2^100;
In[4]:= ExcelForm[expr]
Out[4]= ExcelResult1
In[5]:=
$ExcelResult
Out[5]= 1
$ExcelShare Symbol
$ExcelShare
$ExcelShare gives the LinkObject being used to share a kernel session with Excel.
See also: ExcelShare, ExcelUnshare.
95
96
Mathematica Reference
Examples
In[1]:= <<ExcelLink`
In[3]:= ExcelShare[]
Out[3]= LinkObjectExcelShare, 2, 2
In[4]:=
$ExcelShare
Out[4]= LinkObjectExcelShare, 2, 2
$ExcelTypeset Symbol
$ExcelTypeset
$ExcelTypeset is an internal counter used to display typeset equations in Excel.
See also: ExcelTypeset.
Examples
In[1]:= <<ExcelLink`
In[2]:=
$ExcelTypeset
Out[2]= 0
In[3]:=
expr TraditionalFormExpandx 1 2^5
Out[3]//TraditionalForm=
5 x4
5 x3
5 x2
5x
1
x5
2
2
4
16
32
In[4]:= ExcelForm[expr]
Out[4]= ExcelTypeset1
In[5]:=
$ExcelTypeset
Out[5]= 1
Excel Reference
Excel Reference
Excel Worksheet Functions
EVAL Function
EVAL
=EVAL(expr) evaluates expr in a Mathematica kernel.
=EVAL(head, arg1, arg2, ...) builds an expression from the provided head and args and evaluates it.
=EVAL(head, arg1, arg2, ...) is equivalent to =EVAL(EXPR(head, arg1, arg2, ...)).
You can use =EXPR(head, arg1, arg2, ...) to see exactly what will be evaluated in
Mathematica.
=EVAL(head, arg1, arg2, ...) evaluates only once head and all arguments have been provided. If head or any argument refers to an empty cell or an error, evaluation is suppressed
and #N/A is returned.
See notes for EXPR.
See also: DATA, RULE.
EXPR Function
EXPR
=EXPR(head, arg1, arg2, ...) builds an expression from the provided head and arg and returns it as
unevaluated text.
=EXPR(head, arg1, arg2, ...) builds the Mathematica expression head[arg1, arg2, ...].
Example: =EXPR("f","x","y") returns f[x,y].
You can build any expression using nested EXPR calls.
Example: =EXPR("Sqrt",EXPR("Plus",EXPR("Power",A1,2),EXPR("Power",A2,2))).
If head contains #, head is automatically assumed to be a pure function.
Example: =EXPR("Sqrt[#1^2+#2^2]",A1,A2).
97
98
Excel Reference
=EXPR(head, arg1, arg2, ...) returns #N/A if head or any arguments refer to an empty cell
or an error.
=EXPR(range) trims empty cells and errors from the end of range.
See also: EVAL, DATA, RULE.
DATA Function
DATA
=DATA(text) converts text to a literal string.
=DATA(num) ensures num includes a decimal point.
=DATA(range) returns Excel[range] when range is not a single cell.
The DATA function is typically used inside EVAL, EXPR, or RULE calls.
Example: =EVAL("FileNames",DATA("*"),DATA("C:\")).
You can wrap numeric data in the DATA function to ensure numeric calculation methods are
used instead of symbolic methods. The former is often much faster.
Example: =EVAL("Eigenvalues",DATA(A1:B2)).
Unlike EXPR ranges, DATA ranges can contain empty cells or errors.
=DATA(range) trims empty cells and errors from the end of range.
See also: EVAL, EXPR, RULE.
RULE Function
RULE
=RULE(lhs, rhs) builds a Mathematica rule from the provided left-hand side and right-hand side.
=RULE(lhs, rhs) builds the Mathematica expression lhs->rhs.
Example: =RULE("x",1) returns x->1.
The RULE function can be used to specify options for the Mathematica function in EVAL or
EXPR calls.
Example: =EVAL("Plot",A1,A2:A4,RULE("PlotTitle",A1),RULE("PlotStyle","Blue")).
If lhs and rhs are references to multi-cell ranges of the same size, a list of rules is returned.
Example: =EVAL("ReplaceAll",A1,RULE(A2:A4,B2:B4)).
See also: EVAL, EXPR, DATA.
Excel Reference
CALC Function
CALC
=CALC(function) defines the calculation method of function as volatile.
Volatile functions recalculate when any cell changes or when the F9 key is pressed.
Nonvolatile formulas recalculate only when a referenced input cell changes.
Excel functions RAND() and NOW() are examples of built-in volatile functions.
Volatile functions are typically used to run simulations in Excel.
You can use the CALC worksheet function to use Mathematica-generated random numbers
within Excel-based simulations.
Example: =CALC(EVAL("Random[Integer,{1,6}]")).
You can use the CALC worksheet function to "tag" specific functions to respond when F9 is
pressed or when ExcelCalculate is called from Mathematica code.
Example: =CALC(EVAL("Set", "stockprice", G10)).
Note: Volatile functions recalculate frequently and can, therefore, significantly slow down
recalculation and editing operations in your spreadsheet. To avoid any potential problems,
use volatile functions sparingly and, if needed, disable them when making modifications to
your spreadsheets.
See also: EVAL.
Toolbar Commands
Evaluate Command
Mathematica Evaluate
Establishes a connection with a Mathematica kernel.
Reinitializes and/or recalculates the active workbook (based on workbook options).
Closes or resets the connection with a Mathematica kernel (depending on modifier key).
Interrupts Mathematica evaluation (if an evaluation is currently running).
99
100
Excel Reference
Workbook options can be specified under the Mathematica Options @ Workbook tab.
Shift-Click: Closes the kernel.
Ctrl-Click: Clears the kernel’s Global context. (Soft kernel reset)
Ctrl-Shift-Click: Closes and restarts the kernel. (Hard kernel reset)
Location: Mathematica Toolbar, Mathematica Menu
Keyboard shortcut: Ctrl-Alt-E
Functions Command
Mathematica Functions
Displays the Mathematica Function Wizard.
If no link formula is selected, the Wizard starts at the Mathematica Function Browser step.
If an existing link formula is selected, the Wizard starts at the Mathematica Function Arguments step, and the Wizard is populated with the existing formula.
Using the Wizard you can search for, learn about, and interactively build and edit Mathematica function calls.
Note: The Wizard is nonmodal. You can leave it open and still work in Excel.
Location: Mathematica Toolbar, Mathematica Menu
Keyboard shortcut: Ctrl-Alt-F
Macros Command
Mathematica Macros
Displays the Mathematica Macros window.
Using this window, you can create code boxes and corresponding buttons that allow you to
run Mathematica code as if it were an Excel macro.
Using this window, you can also create initialization code boxes for workbooks that contains
code that is run automatically when you connect to a kernel or re-evaluate the workbook.
Note: The window is nonmodal. You can leave it open and still work in Excel.
Location: Mathematica Toolbar, Mathematica Menu
Keyboard shortcut: Ctrl-Alt-M
Excel Reference
Clipboard Command
Mathematica Clipboard
Displays the Mathematica Clipboard window.
Using this window, you can interactively copy and paste data to Excel ranges.
You can also type code directly into the Mathematica Clipboard widow, evaluate it, and view
the results.
Note: The window is nonmodal. You can leave it open and still work in Excel.
Location: Mathematica Toolbar, Mathematica Menu
Keyboard shortcut: Ctrl-Alt-C
Contexts Command
Mathematica Contexts
Toggle command. Enables or disables Mathematica Context Menus.
When menus are enabled, if you right-click a range, a custom Mathematica Context Menu
will appear.
When menus are disabled, if you right-click a range, the default Excel Context menu will
appear.
Location: Mathematica Toolbar, Mathematica Menu
Keyboard shortcut: Ctrl-Alt-X
Messages Command
Mathematica Messages
Displays the Mathematica Messages window.
Using this window, you can use view messages generated by the Mathematica kernel.
You can also locate the source of messages, browse through past messages, and save messages to a log file.
Note: The window is nonmodal. You can leave it open and still work in Excel.
101
102
Excel Reference
Location: Mathematica Toolbar, Mathematica Menu
Keyboard shortcut: Ctrl-Alt-G
Options Command
Mathematica Options
Displays the Mathematica Options window.
You can browse this window to explore link options available to you.
If you change an option, but want to leave the window open, click Apply to apply the changes.
Note: The window is nonmodal. You can leave it open and still work in Excel.
Location: Mathematica Toolbar, Mathematica Menu
Keyboard shortcut: Ctrl-Alt-O
Help Command
Mathematica Help
Opens the PDF-based Mathematica Link for Excel manual.
Adobe Reader is required to view this version of the manual.
Contents of this manual can also be viewed in the Mathematica Help Browser under AddOns & Links @ Mathematica Link for Excel.
Location: Mathematica Toolbar, Mathematica Menu
Keyboard shortcut: Ctrl-Alt-H
Context Commands
Expression Command
Text Expression
Toggle command. Applies or removes the Text number format from the selected range.
Excel Reference
Contents of the range are automatically reentered after the format change.
If the number format for all cells is Text, the format for all cells is changed to General.
If the number format for all cells is not Text, the format for all cells is changed to Text.
Location: Context Menu
Keyboard shortcut: Ctrl-Shift-E
Copy Command
Copy Data
Copies the contents of the selected range to the Mathematica Clipboard.
If the number format for all cells is Text, strings are copied as Mathematica text expressions.
If the number format for all cells is not Text, strings are copied as Mathematica strings.
The copy command uses Mathematica InputForm to represent the contents of the range.
If the Mathematica Clipboard window is open, the window is automatically updated,
allowing you to view what has been placed on the Clipboard.
Location: Context Menu
Keyboard shortcut: Ctrl-Shift-C
Paste Command
Paste Data
Pastes the contents of the Mathematica Clipboard into an Excel range.
If the number format for all cells in the target range is Text, the contents of the Clipboard will
be pasted as Mathematica text expressions.
If the number format for all cells is not Text, the contents of the Clipboard will be converted
to native Excel data types wherever possible.
If the Mathematica Clipboard window is open, you can view the text expression before it is
pasted.
The Paste command requires the contents of the Clipboard to be in Mathematica InputForm.
Note: If the expression on the Clipboard is not in InputForm, you can use the Mathematica
Clipboard window to convert the expression to InputForm by clicking Evaluate.
103
104
Excel Reference
Location: Context Menu
Keyboard shortcut: Ctrl-Shift-V
Clear Command
Clear Data
Clears the contents and number formats of the selected range.
When using this command, the number format for the range is reset to General. This is the
only difference between this command and the Excel standard Edit @ Clear Contents
command.
Location: Context Menu
Keyboard shortcut: Ctrl-Shift-Delete
Function Command
Function...
Edits the selected formula in the Mathematica Function Wizard.
If the selected cell does not contain a link formula, the Wizard goes directly to the Mathematica Function Arguments step. This is the only difference between this command and the
Toolbar Command @ Functions command.
Use this command if you know what function you would like to enter, and you do not need to
browse for it.
See also: Toolbar Command @ Functions
Location: Context Menu
Keyboard shortcut: Ctrl-Shift-F
Array Command
Array Formula
Toggle command. Converts multi-cell array formulas to single-cell formulas and back again.
When converting an array formula to a single-cell formula, you can select the top-left cell or
the entire array.
Excel Reference
When converting a single-cell formula to an array formula, the array formula is automatically
sized correctly, or you can preselect the cells you would like to be included in the array.
Location: Context Menu
Keyboard shortcut: Ctrl-Shift-A
Comments Command
Comments
Toggle command. Comments or uncomments formulas in the current selection.
Commenting formulas allows you to temporarily disable evaluation of the selected formulas.
To comment all Mathematica formulas on a sheet, click the top-left corner of the header rows
between A and 1 to select the entire sheet.
To comment all Mathematica formulas in a workbook, click Unlink under Mathematica
Options @ Workbook.
Location: Context Menu
Keyboard shortcut: Ctrl-Shift-'
Recalculate Command
Recalculate
Recalculates formulas in the current selection.
To force recalcutation of all Mathematica formulas on a sheet, click the top-left corner of the
header rows, between A and 1 to select the entire sheet.
To force recalculation of all Mathematica formulas in the workbook, you can click Evaluate
if your options are set to do so.
Location: Context Menu
Keyboard shortcut: Ctrl-Shift-=
105
106
Excel Reference
Keyboard Shortcuts
Toolbar Shortcuts
Keyboard shortcuts are available for all commands on the Mathematica Toolbar. These toolbar shortcuts all include the Alt
key.
Evaluate CtrlAltE
Functions CtrlAltF
Macros CtrlAltM
Clipboard CtrlAltC
Contexts CtrlAltX
Messages CtrlAltG
Options CtrlAltO
Help CtrlAltH
Keyboard shortcuts for Mathematica toolbar commands.
For descriptions of these commands, see the Toolbar Commands section in this reference guide.
Context Shortcuts
Keyboard shortcuts are available for all commands in the Mathematica Context Menu. Context shortcuts all include the Shift
key. They all operate on the current selection in Excel.
Expression CtrlShiftE
Copy CtrlShiftC
Paste CtrlShiftV
Clear CtrlShiftDelete
Function CtrlShiftF
Array CtrlShiftA
Comments CtrlShift'
Recalculate CtrlShift
Keyboard shortcuts for Mathematica context menu commands.
For descriptions of these commands, see the Context Commands section in this reference guide.
Excel Reference
107
Workbook Shortcuts
Keyboard shortcuts are available for the following workbook-level operations.
Reevaluate initialization code CtrlEnter
Recalculate link formulas Ctrl
Unlink Relink workbook Ctrl'
Keyboard shortcuts for workbook operations.
The functionality provided by some of these commands can optional automatically occur as part of the Evaluate toolbar
command. Related options and buttons can be found on the Mathematica Options @ Workbook tab.
Notes
Keyboard shortcuts can be disabled and re-enabled using the the Mathematica Options @
Interface tab.
Data Types
Overview
Excel cells can contain six different types of data.
Numbers
Dates
Strings
Booleans
Errors
machine-precision double
machine-precision double with special formatting
unicode text
TRUE , FALSE
#VALUE! , #REF! , ...
Empty empty cell
Native Excel data types.
Mathematica data types not natively supported by Excel can be stored as strings in a range formatted as Text.
108
Excel Reference
Integer 1
Rational 1/2
Complex 1 + 2 I
Symbol x
Expression x + y
Mathematica data types that can be stored in text cells.
To specify the format of a range, you can use the ExcelFormat function provided by the ExcelLink package. Or, from
within Excel, you can select a format in the Format @ Cell... @ Number pane or use the Expression toggle command
provided by the MathematicaLink add-in.
Notes
For worksheet functions, such as EVAL or EXPR, inputs are always assumed to contain text
expressions, even if Text formatting has not been applied to input ranges. This assumption
makes it easier to build Mathematica expressions. To use data as it is natively stored in Excel,
wrap the reference to the data range with the DATA worksheet function.
When a number is stored as text in Excel, an error flag may appear on the cell. If you find
these flags distracting, you can turn this type of error checking off in the Tools @ Options...
@ Error Checking pane.
Numbers
Excel stores all numbers as machine-precision doubles. A number may appear to be an integer in Excel when no decimal
point is displayed, however internally the number is stored as a floating point. Whether a decimal point is displayed is a
matter of formatting. See Excel Number Formats for more information.
Maximum and minimum numbers that can be natively stored in Excel are defined by machine-precision limits.
$MaxMachineNumber
1.7976931348623157*^308
$MinMachineNumber
2.2250738585072014*^-308
Excel number limits.
Outside of this range, numbers can be stored as Mathematica text expressions.
Dates
Excel dates are stored as numbers where the integer part represents the day and the fractional part represents the time of day.
Excel Reference
109
0.0 December 30, 1899 (beginning of day)
2.0 January 1, 1900 (beginning of day)
2.5 January 1, 1900 (midday)
36526.0 January 1, 2000 (beginning of day)
36526.5 January 1, 2000 (midday)
How Excel stores date and time information.
What makes a number appear as a date in Excel is a matter of formatting. See Excel Number Formats for more information.
Notes
Excel cells only format dates properly after March 1, 1900. Excel erroneously considers 1900
a leap year, and negative numbers cannot be formatted as dates in Excel.
The ExcelForm function does not suffer from the same restrictions as Excel cells and can
therefore be used to print out dates before March 1, 1900.
Strings
In Excel, textual data can be entered into cells specifically formatted as Text. It can also to entered into cells with other
formats, such as General. Mathematica Link for Excel uses this formatting difference to distiguish between text expressions
and strings. If a cell is formatted as Text, the content of the cell is considered to be a Mathematica expression, otherwise the
contents are considered to be a Mathematica string.
xyz (Text format)
xyz
xyz (other format)
"xyz"
Excel string mapping.
In Excel, the two versions of the string appear identical. However, there are significant behavioral difference between text
cells and other cells:
Strings assigned to nontext cells pass through an Excel interpreter. The interpreter checks to see if the string being
assigned appears to be a data type it knows about. If so, the string is converted to the identified data type, and an appropriate
cell format is automatically applied if needed.
Strings assigned to text cells do not pass through the Excel interpreter. They can therefore contain exact numbers, rationals, or anything else that can be stored as a Mathematica expression.
As an example, if 1/2 is assigned to a cell with the General format, the rational is interpeted as January 2 of the curent year,
and a date format is automatically assigned to the cell. When 1/2 is assigned to a text cell, the fraction remains as entered.
Notes
110
Excel Reference
For worksheet functions, such as EVAL or EXPR, input ranges are always assumed to
contain text expressions, even if the input range has not been formated as Text. This assumption makes it easy to build Mathematica expressions. You can wrap data ranges with the
DATA worksheet function to treat text contained in the range as Mathematica strings.
Booleans
Excel booleans are mapped to corresponding Mathematica symbols.
TRUE True
FALSE False
Excel boolean mapping.
Errors
Excel errors are converted to Mathematica strings.
#N/A "#N/A"
#REF! "#REF!"
#VALUE! "#VALUE!"
#NULL! "#NULL!"
#NAME? "#NAME?"
#NUM! "#NUM!"
#DIV/0! "#DIV/0!"
Excel error mapping.
Of these errors, four may be returned by Mathematica worksheet functions. In this case, the errors have the following
meanings.
#N/A error or empty found in inputs
#REF!
#VALUE!
#NULL!
connection error or invalid kernel path
evaluation returned $Failed
evaluation returned $Aborted or link was closed
Mathematica worksheet function errors.
Notes
For worksheet functions, such as EVAL or EXPR, the #N/A error suppresses further evaluation. To force a range containing empty cells or errors to be evaluated in Mathematica, you
can use the DATA function as an argument wrapper. DATA(range) specifies range is a data
Excel Reference
111
range that may contain empty cells or errors. You can then handle the empty values and errors
in your Mathematica code.
Empty
Mathematica Link for Excel handles empty cells differently depending on where the cells are located.
non-trailing empty Empty
trailing empty trimmed from range
Excel empty cell mapping.
For empty cells to be trimmed, an entire trailing row or column within the range must contain nothing but empty cells.
Notes
The trimming of trailing empty cells allows you to easily work with entire rows and columns
of data.
Number Formats
Excel number formats allow you to define how a number will appear in your spreadsheet.
1000 General
1.0E+03 0.0E+00
$ 1,000.00 $ #,###.00
100000% 0%
Examples of Excel number formats.
Excel number formats are also used to format dates and time information that has been stored as a number.
January 1, 2000 mmmm d, yyyy
12:00 hh:mm
01-Jan-00 12:00:00 dd-mmm-yy hh:mm:ss
Examples of Excel date formats.
For more examples of Excel number formats, browse the Custom category in the Format @ Cells... @ Number pane in
Excel.