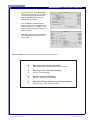
1
Multimedia Module
PREMIERE 6
INSTRUCTOR MANUAL
For information and permission to use these training modules, please contact:
Limell Lawson - [email protected] - 520.621.6576
or
Joe Brabant - [email protected] - 520.621.9490
Modules available online at http://mll.arizona.edu/workshops.shtml?tutorialpdfs
Premiere6_Instructor.pmd
Last modified: 05/20/02
2
PREMIERE 6: Instructor Manual
TABLE OF CONTENTS
Instructor Setup ............................................................................................................................. 3
Introduction and Overview .............................................................................................................. 5
Lecturette 1: Organization of Premiere Desktop ............................................................................ 6
Exercise 1: Organization of Premiere Desktop .............................................................................. 7
Exercise 2: Connecting a DV Camera via FireWire to the Computer ............................................. 8
Exercise 3: Opening Premiere ....................................................................................................... 8
Exercise 4: Set Up Scratch Disk and Device Control ..................................................................... 9
Exercise 5: Set Project Settings .................................................................................................. 10
Review Test 1 ............................................................................................................................... 12
Lecturette 2: Importing Files into Premiere .................................................................................. 12
Exercise 6: Importing Files into Premiere .................................................................................... 12
Exercise 7: Capturing Video into Premiere .................................................................................. 13
Exercise 8: Adding Clips to Timeline ........................................................................................... 13
Exercise 9: Adding Transitions Between Clips ............................................................................. 14
Exercise 10: Shortening and Splicing Clips ................................................................................. 15
Exercise 11: Changing the Opacity of a Clip ................................................................................ 15
Exercise 12: Adjusting Audio Levels and Panning ....................................................................... 16
Review Test 2 ............................................................................................................................... 16
Exercise 13: Changing the Speed of a Clip .................................................................................. 17
Exercise 14: Creating Titles in Premiere ...................................................................................... 17
Exercise 15: Creating Scrolling Titles .......................................................................................... 18
Exercise 16: Rendering the Work Area ........................................................................................ 18
Exercise 17: Printing to Video ..................................................................................................... 19
Exercise 18: Exporting to QuickTime ........................................................................................... 19
Criterion Test................................................................................................................................ 20
File name: Premiere6_Instructor.pmd
Last modified: 05/20/02
Copyright Arizona Board of Regents, 2002
University of Arizona
3
PREMIERE 6: Instructor Manual
INSTRUCTOR SETUP:
Pre-Requisites to this Course:
♦
iMovie 2
Materials:
♦
♦
♦
Premiere 6 Instructor Manual
Premiere 6 User Manual (1 copy per user)
Job Aid (1 copy per user)
Equipment::
♦
♦
♦
♦
♦
♦
♦
Electronic Classroom
PC or Macintosh workstations (1 per user) with FireWire ports and Premiere 6 installed
(note: class size is limited by available equipment
Instructor PC or Mac workstation with FireWire ports and Premiere 6
1 DV Camera, 1DV Tape, 1DV Camera battery, and 1 FireWire cable per user
1 DV Camera, 1DV Tape with prerecorded footage, 1DV Camera battery, and 1 FireWire
cable for instructor
Overhead projector connected to instructor workstation
Flip Chart and markers
Setup:
♦
♦
♦
♦
♦
♦
♦
♦
♦
♦
Session length is approximately 2 hours
Instructor should be familiar with all aspects/components of this Premiere 6 module
Instructor should be familiar with DV Cameras and FireWire setup
Check that all computers and equipment are functioning properly
Turn on and test projector
Prepare flip chart of key points/items to be covered. Make sure view is unobstructed
Have users sit at their own computer
Put a practice file (a simple image file like a pict will do) on the desktop of each user
computer. The users will need to import a file later in the lesson.
The Instructor Manual is set up so that you can see the corresponding User Manual page
next to it. To make copies of the User Manual for the participants of the workshop, print
out the PDF version from http://mll.arizona.edu/workshops.shtml?tutorialpdfs
When teaching this module, make sure you demonstrate steps and ideas for the
users FIRST. Do not allow them to follow along on their own while you are
demonstrating; they will have the opportunity to practice steps on their own after.
File name: Premiere6_Instructor.pmd
Last modified: 05/20/02
Copyright Arizona Board of Regents, 2002
University of Arizona
4
PREMIERE 6: Instructor Manual
Flip Chart Preparation:
1.
2.
3.
4.
5.
6.
7.
8.
9.
Intro to Premiere
Key words/terms for Premiere
How to attach a DVCamera
How to open Premiere
Basic set up in Premiere
Capturing video and importing files
Basic Editing
Advanced Editing
Exporting and Printing to video
File name: Premiere6_Instructor.pmd
Last modified: 05/20/02
Copyright Arizona Board of Regents, 2002
University of Arizona
5
PREMIERE 6: Instructor Manual
INTRODUCTION AND OVERVIEW
Instructor Note: At this time, pass out the User Manual to the students. Turn the flip chart so the
users may see the key points. Indicate that the students are Not to get ahead and do anything without
the instructor. Indicate that the students are Not to do anything on the computer besides the indicated
tasks at the indicated times. Remind them that they are to watch you first as you demonstrate, then
they will be able to practice on their own.
In this class you will learn the basic layout and key terms to using Premiere. You will learn how to
open the program and set up the Project Settings, capture video and import files, edit, and export the
finished video to tape and QuickTime formats. Once you have successfully completed this course,
you will be able to answer most questions dealing with the basics of Premiere.
The following are the key points we will be covering:
1.
2.
3.
4.
5.
6.
7.
8.
9.
Intro to Premiere
Key words/terms for Premiere
How to attach a DVCamera
How to open Premiere
Basic set up in Premiere
Capturing video and importing files
Basic Editing
Advanced Editing
Exporting and Printing to video
File name: Premiere6_Instructor.pmd
Last modified: 05/20/02
Copyright Arizona Board of Regents, 2002
University of Arizona
6
PREMIERE 6: Instructor Manual
LECTURETTE 1: ORGANIZATION OF PREMIERE DESKTOP
Instructor Note: Launch Premiere 6 so the overhead may display the interface. Remind the students
of the structure: they are to watch you first as you demonstrate on the overhead the steps and key
points. Be sure to point out what you are talking about on the overhead for the users to understand.
All of these are movable and the standard positions can be accessed again by selecting: Window
> Workspace > A/B Editing.
♦
The MONITOR is the big black screen. This is where you can watch your video as you’re
editing.
♦
The TIMELINE is where you place your clips in sequence and can view them chronologically.
As you drag the playhead along the Timeline ruler, the current frame of the sequence is
updated in the Monitor.
♦
The BIN is where your captured video and imported files will appear for your use. This is just
a list referencing your clips, do not delete them from their original locations.
♦
The MENU BAR is at the top of the screen and offers many options, including HELP
♦
The palettes, which includes TRANSITIONS, will allow you to edit smoothly between clips and
apply effects.
♦
The TOOLS are located on the timeline, and can be used to edit within the timeline.
So, to sum up, the Premiere interface consists of the Monitor, Timeline, Bin, Menu Bar, Palettes
including Transitions and Effects, and the Tool Bar.
Instructor Note: At this time, have the users turn to Exercise 1 in their User Manuals. Allow them to
complete it on their own. They will have to draw a line between the names and the window that corresponds to it. After they have finished, ensure everyone has completed it correctly.
File name: Premiere6_Instructor.pmd
Last modified: 05/20/02
Copyright Arizona Board of Regents, 2002
University of Arizona
7
PREMIERE 6: Instructor Manual
EXERCISE 1: ORGANIZATION OF PREMIERE DESKTOP
Bin
Timeline
File name: Premiere6_Instructor.pmd
Last modified: 05/20/02
Tools
Menu Bar
Monitor
Transitions
Copyright Arizona Board of Regents, 2002
University of Arizona
8
PREMIERE 6: Instructor Manual
EXERCISE 2: CONNECTING A DV CAM VIA FIREWIRE TO
THE COMPUTER
Instructor Note: Remember to demonstrate first, then allow the users to complete on their own,
following the steps in their User Manuals.
Steps:
1.
Connect firewire cable to breakout box
2.
Connect firewire cable to DV Cam
3.
Turn DV Cam on to VCR/VTR mode
4.
Connecting DV Cam via firewire is the only way to insure device control
EXERCISE 3: OPENING PREMIERE
Instructor Note: Remember to demonstrate first, then allow the users to complete on their own,
following the steps in their User Manuals.
Steps:
1.
Locate and Open Premiere
2.
An Initial Workspace window will open automatically
3.
Choose Select A/B Editing
4.
If this window does not open, you can arrange workspace by accessing
Window > Workspace > A/B Editing once the program is open.
File name: Premiere6_Instructor.pmd
Last modified: 05/20/02
Copyright Arizona Board of Regents, 2002
University of Arizona
9
PREMIERE 6: Instructor Manual
5.
A Load Project Settings window will open automatically
6.
Ask client about settings for their DV Cam/Consult DV Cam manual
7.
Select appropriate setting (If unknown, select Standard 48 kHz DV-NTSC)
8.
Click OK to save settings
EXERCISE 4: SET UP SCRATCH DISK AND DEVICE CONTROL
Instructor Note: Remember to demonstrate first, then allow the users to complete on their own,
following the steps in their User Manuals.
Steps:
1.
Choose Edit from menu bar
2.
Scroll down to Preferences, and
choose Scratch Disks and Device
Control
3.
Choose Select Folder from the
Captured Movies text box
4.
Navigate to your folder on the hard
drive
5.
Choose DV Device Control as your
device
6.
Click on Options (may come up automatically
File name: Premiere6_Instructor.pmd
Last modified: 05/20/02
Copyright Arizona Board of Regents, 2002
University of Arizona
10
PREMIERE 6: Instructor Manual
7.
Set device to your camera type
8.
Click OK to save settings
9.
A window asking you to deactivate AppleTalk will automatically open after you set
device control. Press Deactivate
EXERCISE 5: SET PROJECT SETTINGS
Instructor Note: Remember to demonstrate first, then allow the users to complete on their own,
following the steps in their User Manuals.
Steps:
1.
Select Project from Menu Bar, scroll
down to Project Settings and open
General category
2.
Click on “Playback Settings” in the
General Category
3.
Make sure to uncheck the box for
“Audio, play audio on the output
device only”, and click OK to close
window
4.
Click Next on General Settings window
5.
Set compressor to None on Video Settings window, and click Next to move to Audio
Settings window
File name: Premiere6_Instructor.pmd
Last modified: 05/20/02
Copyright Arizona Board of Regents, 2002
University of Arizona
11
PREMIERE 6: Instructor Manual
6.
Set compressor to “uncompressed” in
Audio Settings window, and click Next
to move to Keyframe and Rendering
window and Next again to move to
Capture Settings window
7.
Click on Video in Capture Settings
window and choose a compressor and
frames per second. Click OK to save
these changes and return to Capture
Settings window
8.
Click OK in Capture Settings window to
save all Project Settings and return to
main screen
Instructor Note: Ask the following questions to the users for review
QUESTIONS FOR REVIEW
Q:
A:
How do you access the Device Control?
Edit > Preferences > Scratch Disk and Device Control
Q:
A:
How do you access the Project Settings?
Project > Project Settings
Q:
A:
How do you access A/B Editing?
Window > Workspace > A/B Editing
Q:
A:
What tabs should be addressed in the Project Settings?
General, Video, Audio, Capture Settings
File name: Premiere6_Instructor.pmd
Last modified: 05/20/02
Copyright Arizona Board of Regents, 2002
University of Arizona
12
PREMIERE 6: Instructor Manual
REVIEW TEST 1
Instructor Note: This is a review test that will test the users on what they have learned thus far. Allow them
to complete on their own with minimal assistance.
Steps:
1.
2.
3.
4.
5.
Connect a DV Cam to your computer
Open Premiere
Set up Device Control
Turn off AppleTalk
Set the Project Settings using the steps outlined in this workshop
LECTURETTE 2: IMPORTING FILES INTO PREMIERE
Instructor Note: Pass out the Job Aid and inform them that is contains information that will be quick to find
“on the job”, including this file format information. Have users follow along with the Job Aid as you go over
the following.
The following are the file formats can be imported into Premiere:
♦
♦
♦
Video formats: MOV, Type 2 AVI
Audio formats: AVI, MOV, AIFF, WAV
Still image formats: PSD, GIF, JPEG, PICT, TGA, TIFF, PCX, FLC/FLI, BMP, PICS
animations
EXERCISE 6: IMPORTING FILES INTO PREMIERE
Instructor Note: Remember to demonstrate first, then allow the users to complete on their own, following
the steps in their User Manuals. The file that they are to import is the file that you earlier placed on the
desktops of their computers - let them know which file they are looking for.
Steps:
1.
Choose File from the Menu bar
2.
Scroll down to Import
3.
Choose Import File
4.
Select desired file from hard drive
5.
Click Open to import file
6.
Imported files will appear in the bin
File name: Premiere6_Instructor.pmd
Last modified: 05/20/02
Copyright Arizona Board of Regents, 2002
University of Arizona
13
PREMIERE 6: Instructor Manual
EXERCISE 7: CAPTURING VIDEO INTO PREMIERE
Instructor Note: Remember to demonstrate first, then allow the users to complete on their own, following
the steps in their User Manuals.
Steps:
1.
Make sure DV Cam is connected and turned
on, and cued
2.
Choose File from menu bar
3.
Scroll down to Capture
4.
Select Movie Capture to open capture
window control camera from buttons on screen
5.
Press red button (looks like VCR record
button) to begin capturing
6.
Press Escape key on keyboard to end
capturing
7.
Close capture window when finished
8.
Captured clips will appear in the bin
EXERCISE 8: ADDING CLIPS TO TIMELINE
Instructor Note: Remember to demonstrate first, then allow the users to complete on their own, following
the steps in their User Manuals.
Steps:
1.
Drag desired clip from bin to timeline
2.
Drag next clip into Timeline, placing it either next
to the first clip, or in another track
3.
To play the Timeline, position the playhead at the
beginning of the clip by clicking the mouse there
and press the space bar
File name: Premiere6_Instructor.pmd
Last modified: 05/20/02
Copyright Arizona Board of Regents, 2002
University of Arizona
14
PREMIERE 6: Instructor Manual
EXERCISE 9: ADDING TRANSITIONS BETWEEN CLIPS
Instructor Note: Remember to demonstrate first, then allow the users to complete on their own, following
the steps in their User Manuals.
Steps:
1.
Place first clip in A track of Video 1
2.
Place second clip in B track of Video 1- there must be
some overlap with clip #1
3.
Choose a transition from the transitions window
4.
Drag the transition you want into the “transition” track of
the timeline, between clip #1 and clip #2
5.
To preview a transition do one of the next two options
6.
Click Return after adding a change to build or render a preview that you can watch
in real time
7.
“Option scrub” by holding down the option key while scrubbing to see the transition at the speed you scrub through timeline
File name: Premiere6_Instructor.pmd
Last modified: 05/20/02
Copyright Arizona Board of Regents, 2002
University of Arizona
15
PREMIERE 6: Instructor Manual
EXERCISE 10: SHORTENING AND SPLICING CLIPS
Instructor Note: Remember to demonstrate first, then allow the users to complete on their own, following
the steps in their User Manuals.
Steps:
1.
Drag at the ends of clips in the timeline to shorten them
2.
Choose the razor blade tool
3.
Splice clips by clicking on them with the Razor Blade tool
(this splits them wherever you click)
EXERCISE 11: CHANGING THE OPACITY OF A CLIP
Instructor Note: Remember to demonstrate first, then allow the users to complete on their own, following
the steps in their User Manuals.
Steps:
1.
Place a clip in track 2 or higher
2.
Expand track by clicking on arrow to the left of “Video 2”
3.
Drag rubberband (Red Line) to desired opacity
File name: Premiere6_Instructor.pmd
Last modified: 05/20/02
Copyright Arizona Board of Regents, 2002
University of Arizona
16
PREMIERE 6: Instructor Manual
EXERCISE 12: ADJUSTING AUDIO LEVELS AND PANNING
Instructor Note: Remember to demonstrate first, then allow the users to complete on their own, following
the steps in their User Manuals.
Steps:
1.
Place an audio clip in any audio track on the timeline
2.
Expand track by clicking on arrow to left of “Audio 1”
3.
Drag rubberbands to desired levels for volume and panning ( red line-volume, blue
line-panning) by selecting box with desired color/ effect from the audio track.
REVIEW TEST 2
Instructor Note: This is a review test that will test the users on what they have learned thus far. Allow them
to complete on their own with minimal assistance.
Steps:
1.
Add clips to the timeline
2.
Shorten and splice clips
3.
Change the opacity of a clip
4.
Adjust the audio levels and panning in a clip using the steps outlined in this
workshop
File name: Premiere6_Instructor.pmd
Last modified: 05/20/02
Copyright Arizona Board of Regents, 2002
University of Arizona
17
PREMIERE 6: Instructor Manual
EXERCISE 13: CHANGING THE SPEED OF A CLIP
Instructor Note: Remember to demonstrate first, then allow the users to complete on their own, following
the steps in their User Manuals.
Steps:
1.
Select desired clip
2.
Choose Clip from Menu bar
3.
Select Clip Speed
4.
Change speed by entering new rate or desired duration and clicking “OK” (a “-” in
front of the new rate will cause the clip to play in reverse)
EXERCISE 14: CREATING TITLES IN PREMIERE
Instructor Note: Remember to demonstrate first, then allow the users to complete on their own, following
the steps in their User Manuals.
Steps:
1.
Select File from Menu bar
2.
Scroll down to New, and choose “New Title” to open titling window
3.
Use the tools to create title within the innermost dotted lines which marks the title
safe area
4.
Close the window
5.
The title appears as a clip in your bin
6.
Drag a video clip into title window to place text over moving video.
File name: Premiere6_Instructor.pmd
Last modified: 05/20/02
Copyright Arizona Board of Regents, 2002
University of Arizona
18
PREMIERE 6: Instructor Manual
EXERCISE 15: CREATING SCROLLING TITLES
Instructor Note: Remember to demonstrate first, then allow the users to complete on their own, following
the steps in their User Manuals.
Steps:
1.
Select desired clip
2.
Select Clip from Menu bar
3.
Scroll down to Video Options
4.
Select Motion Settings to open
Motion Settings window
5.
Manipulate motion of clip by
dragging rubberband in Motion
Settings window
6.
View changes in preview .
7.
Click OK to commit changes to
movie and close window
EXERCISE 16: RENDERING THE WORK AREA
Instructor Note: Remember to demonstrate first, then allow the users to complete on their own, following
the steps in their User Manuals.
Steps:
1.
Make sure your entire movie is encompassed by the yellow “work area” bar at the top
of the timeline. Extend work area by dragging on end of arrow on yellow bar.
2.
Choose Timeline from Menu bar
3.
Choose Render Work Area
4.
Wait for rendering to finish (length of wait determined by length of movie and complexity of edits)
File name: Premiere6_Instructor.pmd
Last modified: 05/20/02
Copyright Arizona Board of Regents, 2002
University of Arizona
19
PREMIERE 6: Instructor Manual
EXERCISE 17: PRINTING TO VIDEO
Instructor Note: Remember to demonstrate first, then allow the users to complete on their own, following
the steps in their User Manuals.
Steps:
1.
Make sure DV Cam is connected and
turned on to VCR mode
2.
Select File from Menu bar
3.
Scroll down to Export Timeline
4.
Select Print to Video
5.
Follow instructions
EXERCISE 18: EXPORTING TO QUICKTIME
Instructor Note: Remember to demonstrate first, then allow the users to complete on their own, following
the steps in their User Manuals.
Steps:
1.
Select File from Menu bar
2.
Scroll down to Export Timeline
3.
Select Movie (yellow selection line at the top of the Timeline)
4.
Save movie to hard drive as QuickTime
5.
Send through Media Cleaner 5 to optimize for your needs
Instructor Note: Ask the following questions to the users for review
QUESTIONS FOR REVIEW
Q:
How do you access the Render, Print to Video and
QuickTime functions?
A:
Render: Timeline > Render Work Area
Print to Video: File > Export Timeline > Print to Video
QuickTime: File > Export Timeline > Movie
File name: Premiere6_Instructor.pmd
Last modified: 05/20/02
Copyright Arizona Board of Regents, 2002
University of Arizona
20
PREMIERE 6: Instructor Manual
CRITERION TEST:
25 min
Instructor Note: Instruct the students to turn to the last page of their User’s Manuals. Inform the
students they have 25 minutes to complete the Criterion Test, which should be more than enough
time. At the end of the time allowed, check the students’ final products to ensure they have passed
successfully.
This is the criterion test for the Premiere 6 module. It is going to test your comprehension of the
module you just participated in or allow you to test out of the Premiere 6 module.
Create and Export a video using Premiere.
1.
2.
3.
4.
5.
6.
7.
8.
9.
Capture several video clips onto the Bin in Premiere.
Place them in the Timeline.
Trim and split clips so that there are 7 different clips of about 4-5 seconds each.
Put a scrolling title at the beginning that has 3 short lines of text such as:
♦
Directed by (your name)
♦
My Movie
♦
Starring Me
Put a Cross Dissolve Transition between the first two clips that is about 1-2 seconds long.
Make the third clip play in reverse.
Make the fourth clip play in slow motion.
Make the last clip fade to black.
Put a stationary title of your choice at the end with one line of text such as:
♦
10.
11.
12.
Year
Adjust the fifth clip so that the audio is very soft.
Export movie to Quicktime
Export movie again back onto the camera at the end of the footage.
File name: Premiere6_Instructor.pmd
Last modified: 05/20/02
Copyright Arizona Board of Regents, 2002
University of Arizona