1
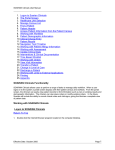
InfoClique
User Manual
Training and Education Services, IST Division
Notes
Table of Contents
Summary ................................................................................................ 3
What is InfoClique Physician? ................................................................ 4
Accessing InfoClique from within the Kaleida network ......................... 5
Accessing InfoClique from any Internet connected computer............... 6
Related Patient Section .......................................................................... 7
Viewing Patient Information .................................................................. 8
Viewing Demographic Information ........................................................ 9
Viewing a Patient’s Flow ...................................................................... 10
Viewing Dictated Reports ..................................................................... 11
Viewing Orders ..................................................................................... 12
Viewing Results .................................................................................... 13
Viewing Medications............................................................................. 16
Surgery Scheduling Section.................................................................. 18
Non-Related Patient Section ................................................................ 19
Searching Non-Related Patient Information by Physician List ............ 20
Search Non-Related Patient Information by Last Name/First Name... 21
Search Non-Related Patient Information by Number .......................... 21
Account Maintenance ........................................................................... 22
Edit My Coverage Group .......................................................................... 22
View who has accessed my (Atn Dr) patients ............................................. 22
View who has accessed my Practice Group patients.................................... 22
View my Practice Group and Support Staff................................................. 22
Change Password .................................................................................... 23
Revision date: 10/19/2004
Page 2
InfoClique Physician Manual
Notes
Summary
InfoClique is a web-based system designed to provide the medical staff of
Kaleida Health and referring physicians a secure central access point for
clinical information. This service is provided free in support of our patient
care partners.
The InfoClique manual is designed to familiarize physicians and physician
support staff to the features of the InfoClique.
InfoClique Physician Manual
Page 3
Notes
What is InfoClique Physician?
InfoClique allows the medical staff of Kaleida Health and referring
physicians to review clinical and demographic information on their
patients Kaleida-wide. InfoClique is provided free in support of our
patient care partners.
The Physician, Network Physician and Physician Support Staff View
provides the following patient information in InfoClique:
Demographic Information
Patient History (patient movement, transfers, etc.)
Dictated Reports
Results
Orders
Medications
Cumulative Lab Reports
Surgery Scheduling
This information is displayed according to the patient/physician
relationship (admitting, attending, referring or consulting).
To have access to InfoClique you must be connected to the Internet. It
requires either Internet Explorer or Netscape and you do not need to install
any additional software on your computer.
To obtain InfoClique access, complete the InfoClique registration form
and fax to Kaleida Health (Information Systems & Technology – Security
Department) at 859-8676.
Once you have an InfoClique id/password, you can access InfoClique
from the following secured Internet address https://www.InfoClique.com.
Page 4
InfoClique Physician Manual
Notes
Accessing InfoClique from within the
Kaleida network
Once you have an assigned User Name and Password, you will be able to
access InfoClique. InfoClique can be accessed directly from within the
Kaleida network or from any Internet connected computer.
1. Double-click the Internet Explorer icon on your desktop.
2. If KaleidaScope is not displayed, type KaleidaScope in the address
bar and press Enter.
To get to the InfoClique site quickly type the letters ic in the
address bar and press Enter.
3. Click the Applications link at the top of the KaleidaScope
window.
4. Enter your assigned User Name and Password, and then click the
Go button.
5. After reading the security notice, click the Accept button.
6. If this is your first time signing in, you will be asked to change
your password.
Please refer to page 23 for further information regarding changing
passwords.
7. Choose the InfoClique - Physician link from your list of
applications.
InfoClique Physician Manual
Page 5
Notes
Accessing InfoClique from any Internet
connected computer
To access InfoClique from outside the Kaleida network:
1. Double-click the Internet Explorer icon on your desktop.
2. Type https://www.infoclique.com in the address bar and press
Enter.
Please note that the “s” after http is required.
3. Enter your assigned User Name and Password, and then click the
Go button.
4. After reading the security notice, click the Accept button.
An informational window may appear. Read the contents of
the window and click the close button. The content of this
window will change periodically.
5. If this is your first time signing in, you will be asked to change
your password.
Please refer to page 23 for further information regarding
changing passwords.
6. Choose the InfoClique - Physician link from your list of
applications.
Page 6
InfoClique Physician Manual
Notes
Related Patient Section
There are several ways that a physician can access patient information.
The first is by using the Related Patient Section (circled below).
The Related Patient section allows you to generate a list of patient
information. Patients will appear on your list if you are the attending,
admitting, referring, or consulting physician for this encounter.
1. Select the physician and one of the following search parameters:
Current (non-discharged) Inpatients – view displays Inpatient
information on any patients for the physician or practice group that
have not yet been discharged.
Inpatient Discharged in the last 30 days –displays inpatients that
were discharged within a specific date range.
Outpatient in the last 7 days – displays outpatients within a
specific date range.
Patients ranging from A to Z – displays patients by name.
Example to search for Doe, type Doe to Doe or type the beginning
letter.
2. Click the Get List button.
InfoClique Physician Manual
Page 7
Notes
Viewing Patient Information
There are two lists that may display, the Patient List and Covered
Patients list.
The Patient List contains patients the selected physician is attending,
admitting, consulting or referring. The Covered Patients list contains
patients the selected physician is temporarily covering for another
physician.
1. Click a link to view specific information on a patient.
The patient’s Demographic Information, Flow, Dictated
Reports, Orders, Results, Medication and Labs will be
available.
Doe, Sue
Page 8
InfoClique Physician Manual
Notes
Viewing Demographic Information
The demographic information available includes: Name and Address Data,
Visit Data, Emergency Contact Data, Guarantor Data, Insurance Data,
Physician Data and Allergy Data.
1. Click on the Demo tab, in the links section.
The EMPI Demographic Information screen will display the
patient’s demographic information.
2. Scroll through the information using the scroll bar on the right.
3. To advance to other areas regarding this patient, click the
appropriate tab at the top of the page.
To return to see other patients click the Patients tab at the top
of the page as illustrated above.
Note: There is also a VNA Referral link at the bottom of the screen,
which opens the Kaleida Health Home Care Referral form.
InfoClique Physician Manual
Page 9
Notes
Viewing a Patient’s Flow
The Patient Flow information includes any admission, transfer and
discharge dates and times, as well as the patient’s length of stay,
current/previous room and patient type.
1. Click on the Flow tab.
The Patient Flow screen will display.
Doe, John J
Page 10
InfoClique Physician Manual
Notes
Viewing Dictated Reports
InfoClique can access the dictated reports from the main dictation servers
at Buffalo General, Children’s, Millard Fillmore Gates and Suburban
hospitals.
All Dictated Reports should be considered unverified.
There are many specialized servers that are not accessible. To get dictated
reports from those servers please follow normal procedures (phone call,
etc).
1. Click on the Dictation tab.
The Dictated Reports screen will display.
2. Click the blue link that corresponds to the dictated report.
3. Use the scroll bar to view the entire report.
4. To print the dictated report, click the print button on the toolbar.
A report can also be printed by clicking on the File menu and
selecting Print.
InfoClique Physician Manual
Page 11
Notes
Viewing Orders
The Orders view provides information regarding all orders placed on a
particular patient. You will be able to see the order number, department
category for that order, order name, status of the order, comments, and
details regarding that order.
1. Click on the Orders tab.
The Order Display screen will display.
Doe, John J
Click here to view
patient care orders.
Order Number
2. To see the results of a completed order, click on the Order
Number.
3. Click the Back button on the toolbar to return to the Orders screen.
Page 12
InfoClique Physician Manual
Notes
Viewing Results
1. Click on the Results tab, to see a list of the patient’s results. By
default, the Results screen displays patient results occurring within
the last 6 days.
The Results screen will display.
Use the Quick Links dropdown menu(s) to quickly
navigate to a specific
category of results or
desired date/time frame.
Click here to modify
the date range.
Click on the
result name to
view a graph
and the result
analysis table.
Use the Other Queries
drop-down menu to view
AP Diagnosis Summary,
Tracemaster ECG’s and
PACS.
Click on the result value
to view the Result Display
table. The Result table is
very similar to the
PowerChart Flowsheet
view.
2. If you would like to change the date range, click on the calendar
icons next to the date(s) and select a new date from the date
selector. To view results for the new date range, click the Results
for Dates button.
If the date range selected crosses encounters, all results from
each encounter will display.
3. If you would like to view all results for the selected patient
encounter, click on the Results for Encounter button.
4. Use the Quick Links drop-down menu to quickly navigate to the
result category you are seeking.
InfoClique Physician Manual
Page 13
Notes
Viewing Results (Continued)
5. Click on the actual result value to view the result display.
6. Click on the result name from either of the two windows shown
above to view a graph of the numeric discrete results.
DOE, JOHN J
Click on the result
name to view a
graph and a result
analysis table.
After clicking on the result name, a graph of the last 100
points will be produced. This graph crosses encounters.
7. After viewing (or printing) the results, click on the Results tab
again to view results for additional orders.
DOE, JOHN J
Page 14
InfoClique Physician Manual
Notes
Viewing Results (Continued)
Other available queries include, AP Diagnosis Summary, Tracemaster
ECG’s, and PACS.
1. To access any of the additional queries, click on the drop-down
menu under the Other Queries category and select the item you
wish to view.
AP Diagnosis Summary – Displays a summary of AP
Pathology reports. It does not reflect the full report. The
Results tab would display the full report.
TraceMaster ECGs - Displays TraceMaster reports for the
selected patient. The reports are currently only available for
viewing on desktops within the Kaleida Health network.
PACS - The GE Picture Archiving & Communication
System (PACS) allows radiology images to be transferred
electronically throughout Kaleida Health sites. PACS
installations at the following sites have been completed:
Buffalo General, Women’s & Children’s Hospital, DeGraff
Memorial, and Millard Fillmore Gates and Suburban.
Images from all modalities with the exception of
mammography can be viewed on PACS monitors throughout
the Imaging Department. The next phase of the implementation
is to provide access to images and reports from the nursing
units.
You must be connected to the Kaleida network to access PACS
(dial-in, VPN or direct connect).
Note: Only authorized personnel are able to view the images
found in PACS; therefore it is necessary to complete a request
access form and submit it to the Imaging Department. This form
will display when you click on the PACS link in the Other
Queries drop-down menu or in the Resources tab.
InfoClique Physician Manual
Page 15
Notes
Viewing Medications
The Medication view shows a list of all ordered medications for the
patient. You will see medications that the patient is currently receiving, as
well as discontinued medications (shaded in gray).
1. Click on the Meds tab.
•
The Medication Display screen will display.
DOE, JOHN J
2. To view details on a medication (i.e. dosage, frequency etc.), click
on the Details link.
DOE, JOHN J
3. If within the Kaleida network, click on a medication name to
perform a search against the MicroMedex database.
4. Click on the Meds tab in the Links section to return to the main
medication display screen.
Page 16
InfoClique Physician Manual
Notes
Viewing Visit List
Click on the Main tab to return to the home page (green tab in the top left
section of the screen) and scroll down until you see the Visit List Section.
The Visit List Section can be utilized to produce a rounds list by one or
multiple facilities.
1. To view a list for all physicians in practice group, select All from
the View list or select a particular physicians name.
2. Check off the facilities or leave check boxes blank to select All
Kaleida facilities.
3. Click Get List button.
4. Click on the Location link (purple text) to obtain detailed
information on the location (i.e.; phone numbers).
5. Click on the Note icon, under the Edit column, to take notes on a
patient.
Notes are not kept as part of the medical chart and are
viewable only in InfoClique.
Doe, John J
Doe, Sue
InfoClique Physician Manual
Page 17
Notes
Surgery Scheduling Section
Click on the Main tab to return to the home page (green tab in the top left
section of the screen) and scroll down until you see the Surgery
Scheduling Section.
Utilize this section to view surgery schedules for the past, present, and
future.
1. Choose the surgery list you wish to view and enter the date
parameters.
The surgery schedule can be viewed for today and up to 180
days into the future, or surgeries scheduled for the previous
180 days.
2. Click the Get List button.
The Surgery Schedule screen will display.
DOE, JOHN J
DOE, JOHN J
Page 18
InfoClique Physician Manual
Notes
Non-Related Patient Section
In the Non-related Patients Section of InfoClique, you will have three
choices when searching for a patient:
Search non-related patients of another physician
Search non-related patients by last name/first name
Search non-related patients by MRN, financial number, or
social security number
InfoClique Physician Manual
Page 19
Notes
Searching Non-Related Patient Information
by Physician List
1. Under the Non-related Patient Information section click on the
appropriate letter range of the physician list you wish to view.
2. Select the Physician whose current inpatients you wish to review.
3. Click on the View button.
4. Click the underlined option to view specific information for the
patient.
The following information can be viewed on the patient:
Demographic Information, Flow, Dictated Reports, Orders,
Results, Medication and Labs.
Note: The view of patient data is set up the same as the Related
Patient Information Section.
Page 20
InfoClique Physician Manual
Notes
Search Non-Related Patient Information by
Last Name/First Name
1. Under the Non-related Patient Information Section, type in the
Last Name or First Name of the patient you wish to locate.
2. Click on the Search button.
3. Click on the Encounters link to view patient’s Demographic
Information, Flow, Dictated Reports, Orders, Results, Medication
and Labs.
John Doe J
Search Non-Related Patient Information by
Number
1. Under the Non-related Patient Information Section, click the
radio button of the field to search on.
2. Type in the Medical Record Number, Financial/Account
Number, or Social Security Number to search for a patient.
If you view patient information by Medical Record Number
or Financial/Account Number, you will have the option of
viewing all encounters or specifying a date range.
3. Click on the Search button.
4. Click the underlined option to view specific information for the
patient. You have the ability to view a patient’s Demographic
Information, Flow, Dictated Reports, Orders, Results, Medication
and Labs.
InfoClique Physician Manual
Page 21
Notes
Account Maintenance
Edit My Coverage Group
Click the Edit My Coverage Group link under the Account
Maintenance section to temporarily assign yourself to another physician’s
patients or to remove this coverage.
View who has accessed my (Atn Dr) patients
Click here to see who is looking up information on your patients (by
attending physician).
View who has accessed my Practice Group patients
Click here to see who is looking up information on your patients (by
practice group).
View my Practice Group and Support Staff
Click here to see a list of your practice group members and support staff.
Page 22
InfoClique Physician Manual
Notes
Change Password
1. Click the Change Password link to reset your password.
2. Type your User ID in the Old Password field and press Tab.
3. Type a new password in the New Password field.
Passwords must be 6-8 characters in length and contain at least one
number.
4. Retype your new password in the New Password field again.
5. Click the Change Password button after completing the three
fields.
Step 2
Step 3
Step 4
A message will display confirming that the password change was
successful.
6. Click Continue.
For assistance with your password, contact the Kaleida
Technology Assistance Center at 859-7777.
InfoClique Physician Manual
Page 23