1
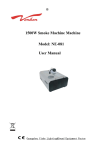
HAZE
MACHINE
Instruction Manual
For Model No:
G002EH
HAZE MACHINE INSTRUCTION MANUAL
Introduction
Thank you for choosing this FX Lab Haze Machine. You now own a rugged state-of-the art
machine. Prior to use, we suggest that you carefully read all of the instructions. By following the
suggestions found in this user manual, you can look forward to the reliable and satisfactory
performance of your FX Lab Haze Machine for years to come.
Specification
Rating voltage . . . . . . . . . . . . . . . . . . . .230V 50Hz
Power consumption . . . . . . . . . . . . . . . . . . .700W
Fuse . . . . . . . . . . . . . . . . . . . . . . .VDE 250V/3.15A
Preheating time . . . . . . . . . . . . . . . . . . . . .2-3min
Tank capacity . . . . . . . . . . . . . . . . . . . . . . .1.5 litre
Dims . . . . . . . . . . . . . . . . . . . .520 x 220 x 155mm
Weight . . . . . . . . . . . . . . . . . . . . . . . . . . . . . .7.5kg
Please follow these operation and safety instructions to ensure a long and safe life for your Haze
Machine.
Caution
•
•
•
•
•
Danger of electric shock.
Do not over fill, overfilling will cause the unit to clog.
Keep this device dry.
For inside use only. Not designed for outside use.
Use 3-pin grounded electrical outlet only. Prior to use take care to determine that the unit is
installed at the rated voltage.
• Always unplug the Haze machine before filling its tank.
• Turn off or unplug when not in use.
• This machine is not water or splash proof. If moisture or fog liquid gets inside the housing,
immediatey unplug the unit and contact a service technician or your Haze machine dealer before
using it again.
• No user serviceable parts inside. Refer to your Haze machine dealer or qualified service personel.
• For adult use only. Haze machine must be installed out of the reach of children. Never leave the
unit running unattended.
• Never aim the output at open flames.
• Danger of explosion. Never add flammable liquids of any king (oil, gas, perfume) to the Haze
machine or the fluid container.
• Pay attention to all warning labels and instructions printed on the exterior of your Haze machine.
• Use only high quality liquid or suitable dealer recommended fog fluid.
• Always make sure there is sufficient liquid in the Haze machine liquid tank. Operating this unit
without liquid may cause permanent damage to the machine.
• If your Haze machine fails to work properly, discontinue use immediately. Drain all liquid from the
tank, pack the unit securely (preferably in the original packing material), and return it to your
dealer for service.
• Never drink Haze machine liquid. If it is ingested, call a doctor immediately. If Haze machine liquid
comes in contact with skin or eyes, rinse thoroughly with water.
Unpacking and Inspection
Open the shipping carton and verify that all equipment necessary to operate the system has arrived
intact. Yor Haze machine should be accompanied by the following items:
1. User manual. 2. Power cord. 3. Multi-function remote control with attached 10 metre cord.
If any equipment is missing contact your dealer immediately.
Before beginning the initial setup make sure that there is no evident damage caused by
transportation. In the event that the unit’s housing or cable is damaged, do not plug it in and do
not attempt to use it until after contacting your dealer for assistance.
Setup
• Remove all packing materials from shipping box. Check that all foam and plastic padding is
removed.
• Place Haze machine on a flat surface and remove liquid tank cap.
• Pour high quality fog liquid into the liquid tank, being careful not to exceed the maximum fluid
level. DO NOT OVERFILL. Use only recommended fluid. When the container is full place the cap
back on the liquid tank and tighten.
• Your Haze machine can only be operated by connecting the remote control into the control
socket in the back of the machine.
Operation
• Plug the remote control cord into socket marked remote control on the back of the unit. Plug the
power cord into a grounded electrical outlet.
• Turn on the power switch locsted on the back of the machine.
• The red light on the remote control will come on once the machine is plugged into a power outlet
and the on/off switch is turned on.
• The machine must warm up. This period varies depending on conditions but should not take more
than ten minutes.
• The green light illuminates when the machine is ready The unit can now be operated using the
remote control. Refer to section titled Remote Control Operation for detailed instruction on the
various functions available.
• The unit will not function unless the green light is illuminated.
• When the machine runs out of fluid the PC board will shut off the pump so that the machine will
not be damaged. The pump will remain off until fluid is added to the machine.
• After every 40 hours of use clean nozzle with solution consisting of 80% water and 20% vinegar.
Remote Control Operation
Set the DIP switch 11 to ON and al the DMX address switches to OFF, the power indicator on the
rear of the unit will light, at the same time the red LED on the remote will come on. When the manual
LED is lit the unit is ready for use.
DMX Mode
Connect the Haze Machine with a suitable DMX cable to a DMX controller. Turn the DIP 11 to off,
then turn the power on, the blue LED indicator on the back of the controller will flash which means
the Haze Machine has accepted DMX signal. please note that this Haze Machine has only 2 DMX
channels, the first channel is to control the output haze volume, the second DMX channel is to
control the power to the fan.
Master Slave Mode
Connect two Haze Machines with a suitable DMX cable. Set one of the machines to be the master
by turning all dip switches to off and set the slave machine by setting the DIP switch 11 to ON and
all other DMX address switches to OFF, then all the slave machines will be Synchronized with the
master machine.
Important
Always monitor tank fluid level during operation. The Haze machine can suffer damage when run
without fluid. If you experience low output mechanical noise or no output at all, uplug immediately.
Check fluid level, external fuse, remote connection and power. If these appear to OK plug the unit
in again. If unit still does not function contact your dealer. Always drain tank before transporting
this unit.
Remote Control Operation
• The interval knob adjusts the time between discharges when the timer function is engaged. The
range is from 10 to 200 seconds.
• The second knob lebelled Volume controls the amount of haze produced. The range is from 0100% of maximum output.
• The yellow Timer button controls the timer function. Depress the button to activate. When
activated the yellow light will turn on. Adjusting the interval knob will determine the time between
haze output (10-20 seconds). The duration of output is set at 13 seconds, the volume can be
adjusted iusing the volume knob to control the amount of haze.
• The red Continuous button sets the machine to constant haze production. To activate this
function depress the red button. The volume knob can be used to regulate the volume of the
steady stream of haze produced.
• The green Manual button will produce a continuous blast at maximum volume while button is held
down. When released the manual function stops and the machine will return to the previous
setting; timer; continuous or stationary.
• The continuous function will override the Timer function. Therefore, if both buttons have been
depressed the Haze machine will haze continuously. The manual function overrides all functions.
When depressed and held down the Haze machine will haze at maximum volume for as long as
the button is held down, regardless of the machime’s setting at the time.
• Do not allow the haze liquid to become contaminated. Contamination includes adding fragrances,
oils, dust or any other foreign materials to the fog liquid supply. Always replace the caps on the
haze liquid container and the Haze machine’s liquid tank immediately after filling.
Distributed by:
Electrovision Ltd, Lancots Lane, Sutton Oak, St Helens, Merseyside WA9 3EX
England
www.electrovision.co.uk