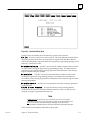
1
ÎÎ
GE Fanuc Automation
Programmable Control Products
t
Logicmaster 90 -70
Ethernet
User’s Manual
GFK–0780
April, 1993
GFL–002
Warnings, Cautions, and Notes
as Used in this Publication
Warning
Warning notices are used in this publication to emphasize that hazardous voltages,
currents, temperatures, or other conditions that could cause personal injury exist in this
equipment or may be associated with its use.
In situations where inattention could cause either personal injury or damage to
equipment, a Warning notice is used.
Caution
Caution notices are used where equipment might be damaged if care is not taken.
Note
Notes merely call attention to information that is especially significant to understanding
and operating the equipment.
This document is based on information available at the time of its publication. While
efforts have been made to be accurate, the information contained herein does not
purport to cover all details or variations in hardware or software, nor to provide for
every possible contingency in connection with installation, operation, or maintenance.
Features may be described herein which are not present in all hardware and software
systems. GE Fanuc Automation assumes no obligation of notice to holders of this
document with respect to changes subsequently made.
GE Fanuc Automation makes no representation or warranty, expressed, implied, or
statutory with respect to, and assumes no responsibility for the accuracy, completeness,
sufficiency, or usefulness of the information contained herein. No warranties of
merchantability or fitness for purpose shall apply.
The following are trademarks of GE Fanuc Automation North America, Inc.
Alarm Master
CIMPLICITY
CIMPLICITY 90–ADS
CIMPLICITY PowerTRAC
CIMSTAR
GEnet
Genius
Genius PowerTRAC
Helpmate
Logicmaster
Modelmaster
ProLoop
PROMACRO
Series One
Series Three
Series Five
Copyright 1992 GE Fanuc Automation North America, Inc.
All Rights Reserved
Series Six
Series 90
VuMaster
Workmaster
Preface
Content of this Manual
t
This manual describes the 802.3/Ethernet version of Logicmaster 90-70 software
(Logicmaster 90-70–Ethernet). The software runs on a Workmaster computer or IBM
PC compatible computer connected directly to the 802.3/Ethernet network. This
provides a central location from which to program and configure Series 90 -70 PLCs
attached to the 802.3/Ethernet network. It includes all the features of the standard
Logicmaster 90-70 software package. In addition, it includes a set of Network Utilities
which facilitate the start-up of a system and provide troubleshooting data for the
Logicmaster 90-70 station.
t
The manual is organized as follows.
Chapter 1.
Introduction: This chapter describes the product in general and types of
users of the product. A quick guide to the manual is also provided.
Chapter 2.
Installing and Starting-Up the Software: This chapter describes how to
install and start-up the software on a Workmaster or IBM PC compatible
computer.
Chapter 3.
Establishing Communications with Series 90-70 PLC Stations: This
chapter explains the task of establishing communications with a Series
90-70 PLC Station in order to perform Logicmaster functions.
Chapter 4.
Network Utilities: This chapter describes the functions of the Network
Utilities. This chapter is primarily for the personnel responsible for the
operation of the network.
Appendix A.
Network Tally Descriptions: This appendix describes the meaning of
the Tallies listed in the Tallies screen of the Network Utilities.
Appendix B.
Network Parameter Descriptions: This appendix describes the meaning
of the Parameters listed in the Parameters screen of the Network Utilities.
Appendix C.
Sample System Initialization Files: This appendix lists the
requirements of the DOS initialization files for each type of PC LAN
interface supported by Logicmaster 90-70–Ethernet. The purpose of
these initialization files is explained in Chapter 2.
Related Publications
GFK-0263
GFK-0265
GFK-0533
t 90-70 Programming Software User’s Manual
Logicmastert 90-70 Programming Software Reference Manual
GEnett Factory LAN for Series 90-70 PLCs, MMS-Ethernet and MAP 3.0
Logicmaster
Communications User’s Manual
GFK-0780
iii
Preface
We Welcome Your Comments and Suggestions
At GE Fanuc Automation, we strive to produce quality technical documentation. After
you have used this manual, please take a few moments to complete and return the
Reader ’s Comment Card located on the next page.
iv
Logicmaster 90-70–Ethernet User’s Manual – April, 1993
GFK-0780
Contents
Chapter 1
Chapter 2
Chapter 3
GFK–0780
Introduction . . . . . . . . . . . . . . . . . . . . . . . . . . . . . . . . . . . . . . . . . . . . . . .
1-1
The Logicmaster 90-70–Ethernet Network . . . . . . . . . . . . . . . . . . . . . . . . . . .
1-2
Users of the Logicmaster 90-70–Ethernet Software Package . . . . . . . . . . . .
1-2
Quick Guide to the Manual . . . . . . . . . . . . . . . . . . . . . . . . . . . . . . . . . . . . . . . .
1-3
Contents Of the Logicmaster 90-70–Ethernet Software Package . . . . . . . .
1-3
Installing and Starting-Up the Software . . . . . . . . . . . . . . . . . . . . . . .
2-1
Computer Requirements for Running the Software . . . . . . . . . . . . . . . . . . . .
2-1
Installing the 802.3 Interface in the Computer . . . . . . . . . . . . . . . . . . . . . . . .
2-2
Installing Logicmaster 90-70–Ethernet Software . . . . . . . . . . . . . . . . . . . . . .
2-3
Installing the Logicmaster 90-70–Ethernet Software . . . . . . . . . . . . . . . .
2-3
Configuring Logicmaster 90-70–Ethernet Software . . . . . . . . . . . . . . . . .
2-4
Setting-Up the PC . . . . . . . . . . . . . . . . . . . . . . . . . . . . . . . . . . . . . . . . . . . . .
2-6
Changing the 802.3/Ethernet Interface in Your PC . . . . . . . . . . . . . . . . . .
2-8
Starting-Up Logicmaster 90-70–Ethernet Software . . . . . . . . . . . . . . . . . . . .
2-9
EstablishingCommunications
with Series 90-70 PLC Stations . . . . . . . . . . . . . . . . . . . . . . . . . . . .
3-1
Building the PLC List . . . . . . . . . . . . . . . . . . . . . . . . . . . . . . . . . . . . . . . . . . . . . .
3-1
Accessing the PLC List Screen . . . . . . . . . . . . . . . . . . . . . . . . . . . . . . . . . . .
3-2
Browsing the Network . . . . . . . . . . . . . . . . . . . . . . . . . . . . . . . . . . . . . . . . .
3-6
Establishing Communications . . . . . . . . . . . . . . . . . . . . . . . . . . . . . . . . . . . . . .
3-10
Storing Programs in Run Mode (Run-Mode-Store) . . . . . . . . . . . . . . . . . . . . .
3-11
Logicmaster 90–70–Ethernet – April, 1993
v
Contents
Chapter 4
Network Utilities . . . . . . . . . . . . . . . . . . . . . . . . . . . . . . . . . . . . . . . . . .
4-1
Selecting the Network Utilities . . . . . . . . . . . . . . . . . . . . . . . . . . . . . . . . . . . . .
4-1
Network Utilities Operation . . . . . . . . . . . . . . . . . . . . . . . . . . . . . . . . . . . . . . . .
4-4
Function Keys . . . . . . . . . . . . . . . . . . . . . . . . . . . . . . . . . . . . . . . . . . . . . . . . .
4-4
Field Selection Keys . . . . . . . . . . . . . . . . . . . . . . . . . . . . . . . . . . . . . . . . . . . .
4-4
Editing Keys . . . . . . . . . . . . . . . . . . . . . . . . . . . . . . . . . . . . . . . . . . . . . . . . . .
4-4
Exiting a Screen . . . . . . . . . . . . . . . . . . . . . . . . . . . . . . . . . . . . . . . . . . . . . . .
4-4
PLC List Screen . . . . . . . . . . . . . . . . . . . . . . . . . . . . . . . . . . . . . . . . . . . . . . . . . . .
4-5
Clear Function . . . . . . . . . . . . . . . . . . . . . . . . . . . . . . . . . . . . . . . . . . . . . . . . .
4-5
Save Function . . . . . . . . . . . . . . . . . . . . . . . . . . . . . . . . . . . . . . . . . . . . . . . . .
4-5
Add Function . . . . . . . . . . . . . . . . . . . . . . . . . . . . . . . . . . . . . . . . . . . . . . . . . .
4-5
Delete Function . . . . . . . . . . . . . . . . . . . . . . . . . . . . . . . . . . . . . . . . . . . . . . . .
4-5
Browse Function . . . . . . . . . . . . . . . . . . . . . . . . . . . . . . . . . . . . . . . . . . . . . . .
4-6
Network Exception Log . . . . . . . . . . . . . . . . . . . . . . . . . . . . . . . . . . . . . . . . . . .
4-8
Clear Function . . . . . . . . . . . . . . . . . . . . . . . . . . . . . . . . . . . . . . . . . . . . . . . . .
4-8
Save Function . . . . . . . . . . . . . . . . . . . . . . . . . . . . . . . . . . . . . . . . . . . . . . . . .
4-8
Zoom Function . . . . . . . . . . . . . . . . . . . . . . . . . . . . . . . . . . . . . . . . . . . . . . . .
4-9
Error Conditions . . . . . . . . . . . . . . . . . . . . . . . . . . . . . . . . . . . . . . . . . . . . . . .
4-9
Network Tallies . . . . . . . . . . . . . . . . . . . . . . . . . . . . . . . . . . . . . . . . . . . . . . . . . . .
4-10
Clear Function . . . . . . . . . . . . . . . . . . . . . . . . . . . . . . . . . . . . . . . . . . . . . . . . .
4-10
Save Function . . . . . . . . . . . . . . . . . . . . . . . . . . . . . . . . . . . . . . . . . . . . . . . . .
4-10
Zoom Function . . . . . . . . . . . . . . . . . . . . . . . . . . . . . . . . . . . . . . . . . . . . . . . .
4-10
Network Parameters . . . . . . . . . . . . . . . . . . . . . . . . . . . . . . . . . . . . . . . . . . . . . .
4-12
Save Function . . . . . . . . . . . . . . . . . . . . . . . . . . . . . . . . . . . . . . . . . . . . . . . . .
4-12
Zoom Function . . . . . . . . . . . . . . . . . . . . . . . . . . . . . . . . . . . . . . . . . . . . . . . .
4-12
PLC Download Screen . . . . . . . . . . . . . . . . . . . . . . . . . . . . . . . . . . . . . . . . . . . .
4-14
Set Password Screen . . . . . . . . . . . . . . . . . . . . . . . . . . . . . . . . . . . . . . . . . . . . . .
4-15
Appendix A
Network Tally Descriptions . . . . . . . . . . . . . . . . . . . . . . . . . . . . . . . . .
A-1
Appendix B
Network Parameter Descriptions . . . . . . . . . . . . . . . . . . . . . . . . . . . . .
B-1
Appendix C
Sample DOS Initialization Files . . . . . . . . . . . . . . . . . . . . . . . . . . . . .
C-1
Etherlink II . . . . . . . . . . . . . . . . . . . . . . . . . . . . . . . . . . . . . . . . . . . . . . . . . . .
C-2
Etherlink 16 . . . . . . . . . . . . . . . . . . . . . . . . . . . . . . . . . . . . . . . . . . . . . . . . . . .
C-3
Etherlink/MC . . . . . . . . . . . . . . . . . . . . . . . . . . . . . . . . . . . . . . . . . . . . . . . . .
C-4
EtherCard PLUS, EtherCard PLUS Elite 16, EtherCard PLUS/A . . . . . . .
C-5
Intel 82593 . . . . . . . . . . . . . . . . . . . . . . . . . . . . . . . . . . . . . . . . . . . . . . . . . . . .
C-6
Xircom Pocket Adapter . . . . . . . . . . . . . . . . . . . . . . . . . . . . . . . . . . . . . . . . .
C-7
GFK–0780
Logicmaster 90–70–Ethernet – April, 1993
vi
Contents
Figure 1-1. The Logicmaster 90-70–Ethernet Network . . . . . . . . . . . . . . . . . . . . . . . . . . . . . . . . . . . . . .
1-1
Figure 2-1. Menu Selection of 802.3/Ethernet Interface for the PC . . . . . . . . . . . . . . . . . . . . . . . . . . . . .
2-5
Figure 2-2. Logicmaster 90-70 Software Main Menu . . . . . . . . . . . . . . . . . . . . . . . . . . . . . . . . . . . . . . . . .
2-9
Figure 2-3. Logicmaster 90-70 Setup File Editor Menu . . . . . . . . . . . . . . . . . . . . . . . . . . . . . . . . . . . . . . .
2-10
Figure 2-4. Logicmaster 90-70 PLC Communications Options Menu . . . . . . . . . . . . . . . . . . . . . . . . . . .
2-10
Figure 3-1. The Logicmaster 90-70 Main Menu . . . . . . . . . . . . . . . . . . . . . . . . . . . . . . . . . . . . . . . . . . . . .
3-2
Figure 3-2. The Logicmaster 90 Utilities Menu . . . . . . . . . . . . . . . . . . . . . . . . . . . . . . . . . . . . . . . . . . . . . .
3-2
Figure 3-3. The Password Screen . . . . . . . . . . . . . . . . . . . . . . . . . . . . . . . . . . . . . . . . . . . . . . . . . . . . . . . . .
3-3
Figure 3-4. Network Utilities Menu . . . . . . . . . . . . . . . . . . . . . . . . . . . . . . . . . . . . . . . . . . . . . . . . . . . . . . .
3-4
Figure 3-5. The PLC List Screen . . . . . . . . . . . . . . . . . . . . . . . . . . . . . . . . . . . . . . . . . . . . . . . . . . . . . . . . . .
3-5
Figure 3-6. The Browse Window . . . . . . . . . . . . . . . . . . . . . . . . . . . . . . . . . . . . . . . . . . . . . . . . . . . . . . . . .
3-6
Figure 3-7. Results of a Browse . . . . . . . . . . . . . . . . . . . . . . . . . . . . . . . . . . . . . . . . . . . . . . . . . . . . . . . . . . .
3-7
Figure 3-8. Use of “ID:” Field to Identify Connected PLC . . . . . . . . . . . . . . . . . . . . . . . . . . . . . . . . . . . . .
3-9
Figure 3-9. The Programmer Setup Menu . . . . . . . . . . . . . . . . . . . . . . . . . . . . . . . . . . . . . . . . . . . . . . . . . .
3-10
Figure 3-10. The Select PLC Connection Screen . . . . . . . . . . . . . . . . . . . . . . . . . . . . . . . . . . . . . . . . . . . . .
3-11
Figure 4-1. The Logicmaster 90 Utilities Menu . . . . . . . . . . . . . . . . . . . . . . . . . . . . . . . . . . . . . . . . . . . . . .
4-1
Figure 4-2. The Password Screen . . . . . . . . . . . . . . . . . . . . . . . . . . . . . . . . . . . . . . . . . . . . . . . . . . . . . . . . .
4-2
Figure 4-3. Network Utilities Menu . . . . . . . . . . . . . . . . . . . . . . . . . . . . . . . . . . . . . . . . . . . . . . . . . . . . . . .
4-3
Figure 4-4. The PLC List Screen . . . . . . . . . . . . . . . . . . . . . . . . . . . . . . . . . . . . . . . . . . . . . . . . . . . . . . . . . .
4-5
Figure 4-5. The Browse Window . . . . . . . . . . . . . . . . . . . . . . . . . . . . . . . . . . . . . . . . . . . . . . . . . . . . . . . . .
4-6
Figure 4-6. Network Exception Log Screen . . . . . . . . . . . . . . . . . . . . . . . . . . . . . . . . . . . . . . . . . . . . . . . .
4-8
Figure 4-7. Network Exception Log Zoom Window . . . . . . . . . . . . . . . . . . . . . . . . . . . . . . . . . . . . . . . . .
4-9
Figure 4-8. Network Tallies Screen . . . . . . . . . . . . . . . . . . . . . . . . . . . . . . . . . . . . . . . . . . . . . . . . . . . . . . . .
4-10
Figure 4-9. Network Tallies Zoom Window . . . . . . . . . . . . . . . . . . . . . . . . . . . . . . . . . . . . . . . . . . . . . . . .
4-11
Figure 4-10. Network Parameters Screen . . . . . . . . . . . . . . . . . . . . . . . . . . . . . . . . . . . . . . . . . . . . . . . . . .
4-12
Figure 4-11. Network Parameters Zoom Window . . . . . . . . . . . . . . . . . . . . . . . . . . . . . . . . . . . . . . . . . . .
4-13
Figure 4-12. PLC Download Screen . . . . . . . . . . . . . . . . . . . . . . . . . . . . . . . . . . . . . . . . . . . . . . . . . . . . . . .
4-14
Figure 4-13. The Set Password Screen . . . . . . . . . . . . . . . . . . . . . . . . . . . . . . . . . . . . . . . . . . . . . . . . . . . . .
4-15
GFK–0780
Logicmaster 90–70–Ethernet – April, 1993
vii
Contents
Table 1-1. Quick Guide to the Manual . . . . . . . . . . . . . . . . . . . . . . . . . . . . . . . . . . . . . . . . . . . . . . . . . . . . .
1-3
Table 2-1. Supported 802.3/Ethernet Interfaces . . . . . . . . . . . . . . . . . . . . . . . . . . . . . . . . . . . . . . . . . . . . .
2-2
Table 2-2. Hardware Settings for 802.3/Ethernet Interfaces . . . . . . . . . . . . . . . . . . . . . . . . . . . . . . . . . . .
2-2
Table 4-1. Use of the Function Keys in the Network Utilities . . . . . . . . . . . . . . . . . . . . . . . . . . . . . . . . . .
4-4
Table 4-2. Use of the Editing Keys in the Network Utilities . . . . . . . . . . . . . . . . . . . . . . . . . . . . . . . . . . .
4-4
Table A-1. Tally Descriptions . . . . . . . . . . . . . . . . . . . . . . . . . . . . . . . . . . . . . . . . . . . . . . . . . . . . . . . . . . . . .
A-1
Table A-1. (cont.). Tally Descriptions . . . . . . . . . . . . . . . . . . . . . . . . . . . . . . . . . . . . . . . . . . . . . . . . . . . . . .
A-2
Table B-1. Parameter Descriptions . . . . . . . . . . . . . . . . . . . . . . . . . . . . . . . . . . . . . . . . . . . . . . . . . . . . . . .
B-1
Table B-1. (cont.). Parameter Descriptions . . . . . . . . . . . . . . . . . . . . . . . . . . . . . . . . . . . . . . . . . . . . . . . . .
B-2
GFK–0780
Logicmaster 90–70–Ethernet – April, 1993
viii
restart lowapp ARestart oddapp: ARestarts for autonumbers that do not restart in
each chapter. figure bi level 1, reset table_big level 1, reset chap_big level 1, reset1
Lowapp Alwbox restart evenap:A1app_big level 1, resetA figure_ap level 1, reset
table_ap level 1, reset figure level 1, reset table level 1, reset these restarts
oddbox reset: 1evenbox reset: 1must be in the header frame of chapter 1. a:ebx, l 1
resetA a:obx:l 1, resetA a:bigbx level 1 resetA a:ftr level 1 resetA c:ebx, l 1 reset1
c:obx:l 1, reset1 c:bigbx level 1 reset1 c:ftr level 1 reset1 Reminders for
autonumbers that need to be restarted manually (first instance will always be 4)
let_in level 1: A. B. C. letter level 1:A.B.C. num level 1: 1. 2. 3. num_in level 1: 1. 2.
3. rom_in level 1: I. II. III. roman level 1: I. II. III. steps level 1: 1. 2. 3.
Chapter
1 Introduction
1
t
The802.3/Ethernet version of Logicmaster 90-70 software provides a central location
from which to program and configure Series 90 -70 PLCs attached to the 802.3/Ethernet
network. Logicmaster 90-70–Ethernet software includes all the features of the standard
Logicmaster 90-70 software package. In addition, it includes a set of Network Utilities
which facilitate the start–up of a system and provide troubleshooting data for the
Logicmaster 90-70 station.
t
The following figure shows the major components of an Ethernet network designed to
program and configure Series 90-70 PLCs using Logicmaster 90-70–Ethernet software.
ÎÎÎÎ
ÎÎÎÎ ÎÎÎÎÎÎÎ
ÎÎÎÎÎ
ÎÎ
ÎÎ
Î
ÎÎ
Î
ÎÎ
ÎÎ
ÎÎ
Î
ÎÎ
Î
ÎÎ
Î
ÎÎ
Î
ÎÎ
Î
ÎÎ
Î
Î
ÎÎ
Î
ÎÎ
ÎÎ
Î
ÎÎ
Î
Î
ÎÎ
Î
ÎÎ
ÎÎ
ÎÎ
ÎÎ
Î
ÎÎ
Î
Î
ÎÎ
ÎÎ
Î
Î
ÎÎÎÎ
ÎÎ
ÎÎ
ÎÎ
Î
ÎÎÎ
ÎÎ
Î
ÎÎÎÎÎÎÎÎ
ÎÎÎÎÎÎÎÎ Î
Transceiver
Transceiver
a45231
Transceiver
MMS–Ethernet
Interface
Ethernet Card
or Interface
C
P
U
Series 90–70 PLC
Station
Logicmaster –– Ethernet
Station
ÎÎÎÎÎ
ÎÎÎÎÎ
ÎÎ
ÎÎ
Î
ÎÎ
ÎÎ
ÎÎ
ÎÎ
ÎÎ
Î
ÎÎ
Î
ÎÎ
Î
ÎÎ
Î
ÎÎ
Î
ÎÎ
Î
Î
ÎÎ
Î
ÎÎ
Î
ÎÎ
Î
ÎÎ
Î
ÎÎ
Î
ÎÎ
ÎÎ
ÎÎ
Î
ÎÎ
ÎÎ
ÎÎ
ÎÎ
Î
Î
Î
ÎÎ
ÎÎ
ÎÎ
ÎÎ
ÎÎ
ÎÎÎ
ÎÎ
Î
802.3/Ethernet
Network
C
P
U
Series 90–70 PLC
Station
Logicmaster 90–70 –– Ethernet is installed on
a Workmaster or PC compatible to create the
Logicmaster 90–70 –– Ethernet Station.
Figure 1-1. The Logicmaster 90-70–Ethernet Network
GFK-0780
1-1
1
The Logicmaster 90-70–Ethernet Network
For the Logicmaster 90-70–Ethernet software package to operate, there must be a
network of Series 90-70 PLCs and a personal computer for running the Logicmaster
90-70–Ether net software.
This Logicmaster 90-70–Ethernet network includes the following.
H
Each station consists of a Series 90-70 PLC with
installed MMS–Ethernet Interface. The Series 90–70 PLC CPU must have revision
4.12 or later firmware.
Note
The MMS-Ethernet Interface must have revision 1.11 (or later) firmware
and 1.12 (or later) RAM-loaded software or loaded by Logicmaster
90-70–Ether net.
H
H
H
This consists of Logicmaster
90-70–Ether net software installed in a Workmaster or PC compatible with an
802.3/Ethernet card or interface.
This consists of all the cabling and physical equipment necessary to
interconnect the devices listed above to the network.
(Not shown in Figure 1-1.) This consists of a
Workmaster or personal computer attached to the network with the GSM software
installed. The GSM is used primarily to configure the MMS-Ethernet Interfaces
installed in the Series 90-70 PLCs. The GSM is optional; it is not required for
Logicmaster 90-70–Ethernet.
Users of the Logicmaster 90-70–Ethernet Software Package
This manual provides information for two groups of users of the Logicmaster
90-70–Ether net software package; these are:
H
H
PLC Logic Programming Personnel
Network Personnel
PLC Logic Programming Personnel
This group uses the Logicmaster 90-70–Ethernet software package to program and
perform CPU and I/O configuration for the Series 90-70 PLCs. These tasks involve
building a list of PLCs on the network and establishing connections with them. This
group is usually not interested in setting-up and maintaining the network.
Network Personnel
This group of users will use the Network Utilities to set-up and maintain the
Logicmaster 90-70–Ethernet station.
1-2
Logicmaster 90–70–Ethernet User’s Manual, April, 1993
GFK-0780
1
Quick Guide to the Manual
This manual is a supplement to the Logicmaster 90-70 User’s and Reference manuals
and it documents aspects of Logicmaster 90-70 software that are unique to the Ethernet
version of Logicmaster 90-70 software. The table below identifies the tasks unique to the
Logicmaster 90-70–Ethernet software and where to find them in this manual. To use
Logicmaster 90-70–Ethernet software to program logic in the PLC, consult the
Logicmaster 90-70 User’s and Reference manuals listed in the following section.
ÁÁÁÁÁÁÁÁÁÁÁÁÁ
ÁÁÁÁÁÁÁÁÁÁÁÁÁÁ
ÁÁÁÁÁÁÁÁÁÁÁÁÁ
ÁÁÁÁÁÁÁÁÁÁÁÁÁÁ
ÁÁÁÁÁÁÁÁÁÁÁÁÁ
ÁÁÁÁÁÁÁÁÁÁÁÁÁÁ
ÁÁÁÁÁÁÁÁÁÁÁÁÁ
ÁÁÁÁÁÁÁÁÁÁÁÁÁÁ
ÁÁÁÁÁÁÁÁÁÁÁÁÁ
ÁÁÁÁÁÁÁÁÁÁÁÁÁÁ
ÁÁÁÁÁÁÁÁÁÁÁÁÁ
ÁÁÁÁÁÁÁÁÁÁÁÁÁÁ
Table 1-1. Quick Guide to the Manual
Task
Where to look in the Manual
Installing and Starting-Up the Software
Establishing a Connection to a PLC for PLC Program and Configuration Download
Troubleshooting and Maintaining Logicmaster
90-70–Ethernet communications
Chapter 2. Installing and Starting-Up the Software
Chapter 3. Establishing Communications with Series 90-70 PLC Stations
Chapter 4. Network Utilities
Contents Of the Logicmaster 90-70–Ethernet Software Package
The Logicmaster 90-70–Ethernet software package includes:
H
H
H
H
H
GFK-0780
Two 5.25-inch, High-Density diskettes, two 3.5-inch, High-Density diskettes.
Logicmaster 90-70–Ethernet Software User’s Manual, GFK-0780.
Logicmaster 90-70 Programming Software User’s Manual, GFK-0263.
Logicmaster 90-70 Programming Software Reference Manual, GFK-0265.
Important Product Information for Logicmaster 90-70–Ethernet Software,
GFK-0786.
Chapter 1 Introduction
1-3
Chapter
2 Installing and Starting-Up the Software
2
section level 1 1
figure bi level 1
table_big level 1
This chapter describes how to install the Logicmaster 90-70–Ethernet software on a
Workmaster computer or IBM PC-compatible computer. The topics covered in this
chapter are:
H
H
H
Computer Requirements for Running the Software
Installing the 802.3 Interface in the Computer
Installing the Logicmaster 90-70–Ethernet Software
h
h
h
h
H
Installing Logicmaster 90-70–Ethernet Software
Configuring Logicmaster 90-70–Ethernet Software
Setting-Up the PC
Changing the 802.3/Ethernet Interface in the PC
Starting-Up Logicmaster 90-70–Ethernet Software
The Logicmaster 90-70–Ethernet software is supplied on two 5.25-inch, high-density
diskettes or two 3.5-inch, high-density diskettes.
These diskettes do not contain the MS-DOS operating system. You must boot your computer
from your hard drive or another diskette containing this system software.
Computer Requirements for Running the Software
To install and run Logicmaster 90-70–Ethernet software, the computer must meet the
following requirements.
GFK-0780
H
H
H
H
H
DOS Version 5.0 or later
H
802.3/Ethernet Interface
80386 or 80486 computer
3.6 Megabytes of available space on hard disk
2 Megabytes of RAM
600 Kilobytes of Free Conventional Memory. To determine this value for your
personal computer, execute the DOS command “MEM/C” after completely installing
Logicmaster 90-70–Ethernet software and rebooting.
2-1
2
Installing the 802.3 Interface in the Computer
An802.3/Ethernet interface must be installed in the computer running the Logicmaster
90-70–Ether net software before connecting to a Series 90-70 PLC on the network. A list
of supported interfaces is shown in the table below.
ÁÁÁÁÁÁ
ÁÁÁÁÁÁÁÁÁÁ
ÁÁÁÁ
ÁÁÁÁÁÁ
ÁÁÁÁ
ÁÁÁÁÁÁ
ÁÁÁÁÁÁÁÁÁÁ
ÁÁÁÁ
ÁÁÁÁÁÁ
ÁÁÁÁ
ÁÁÁÁÁÁ
ÁÁÁÁÁÁÁÁÁÁ
ÁÁÁÁ
ÁÁÁÁÁÁ
ÁÁÁÁ
ÁÁÁÁÁÁ
ÁÁÁÁÁÁÁÁÁÁ
ÁÁÁÁ
ÁÁÁÁÁÁ
ÁÁÁÁ
ÁÁÁÁÁÁ
ÁÁÁÁÁÁÁÁÁÁ
ÁÁÁÁ
ÁÁÁÁÁÁ
ÁÁÁÁ
ÁÁÁÁÁÁ
ÁÁÁÁÁÁÁÁÁÁ
ÁÁÁÁ
ÁÁÁÁÁÁ
ÁÁÁÁ
ÁÁÁÁÁÁ
ÁÁÁÁÁÁÁÁÁÁ
ÁÁÁÁ
ÁÁÁÁÁÁ
ÁÁÁÁ
ÁÁÁÁÁÁ
ÁÁÁÁÁÁÁÁÁÁ
ÁÁÁÁÁÁÁÁÁÁÁÁ
ÁÁÁÁ
ÁÁÁÁÁÁ
ÁÁÁÁ
ÁÁÁÁÁÁ
ÁÁÁÁÁÁÁÁÁÁ
ÁÁÁÁÁÁÁÁÁÁÁÁ
ÁÁÁÁ
ÁÁÁÁÁÁ
ÁÁÁÁ
ÁÁÁÁÁÁ
ÁÁÁÁÁÁÁÁÁÁÁÁÁÁÁÁÁÁÁÁÁÁÁÁÁ
ÁÁÁÁÁÁÁÁÁÁ
ÁÁÁÁ
ÁÁÁÁÁÁ
ÁÁÁÁ
t
ÁÁÁÁÁÁÁÁÁÁÁÁÁÁÁÁÁÁÁÁÁÁÁÁÁ
t
ÁÁÁÁÁÁÁÁÁÁÁÁÁÁÁÁÁÁÁÁÁÁÁÁÁ
Table 2-1. Supported 802.3/Ethernet Interfaces
Vendor
Model
3Com
3Com
3Com
Western Digital
Western Digital
Western Digital
Intel
Xircom
Size
Etherlink II (3C503)
Etherlink 16 (3C507)
Etherlink/MC (3C523)
EtherCard PLUS (WD8003E)
EtherCard PLUS Elite 16
(WD8013EP)
EtherCard PLUS/A
(WD8003ET/A)
Intel 82593
Xircom Pocket Adapter
PC Bus
Width
Half slot
1 slot
1 slot
Half slot
1 slot
XT, AT
XT, AT
Micro Channel
XT, AT
AT
8-bit
16-bit
16-bit
8-bit
16-bit
1 slot
Micro Channel
16-bit
Interface is built-in to Zenith Znote
External
Enhanced Printer
N/A
Port
Etherlink II and Etherlink/MC are a trademark of 3Com Corporation.
EtherCard PLUS, EtherCard PLUS Elite16, and EtherCard PLUS/A are trademarks of Western
Digital Corporation.
Note
The PC can lock-up if setup errors are encountered when installing
Ethernet interfaces and device drivers in a PC. Make sure to obtain a
system boot diskette to recover from possible setup errors.
When installing the 802.3/Ethernet interface in your PC, make sure to do the following.
1.
Install the 802.3/Ethernet interface into the computer according to the
manufacturer ’s instructions. Setup the hardware as described in Table 2-2 below;
these are the default settings of the interface. If the default settings are not used,
record them for the Logicmaster 90-70–Ethernet software installation.
ÁÁÁÁÁÁÁ
ÁÁÁÁÁÁÁÁ
ÁÁÁÁÁÁÁÁÁÁ
ÁÁÁÁÁÁÁ
ÁÁÁÁÁÁÁÁ
ÁÁÁÁÁÁÁÁÁÁ
ÁÁÁÁÁÁÁ
ÁÁÁÁÁÁÁÁ
ÁÁÁÁÁÁÁÁÁÁ
ÁÁÁÁÁÁÁ
ÁÁÁÁÁÁÁÁ
ÁÁÁÁÁÁÁÁÁÁ
ÁÁÁÁÁÁÁ
ÁÁÁÁÁÁÁÁ
ÁÁÁÁÁÁÁÁÁÁ
ÁÁÁÁÁÁÁ
ÁÁÁÁÁÁÁÁ
ÁÁÁÁÁÁÁÁÁÁ
ÁÁÁÁÁÁÁ
ÁÁÁÁÁÁÁÁ
ÁÁÁÁÁÁÁÁÁÁ
ÁÁÁÁÁÁÁ
ÁÁÁÁÁÁÁÁ
ÁÁÁÁÁÁÁÁÁÁ
ÁÁÁÁÁÁÁ
ÁÁÁÁÁÁÁÁ
ÁÁÁÁÁÁÁÁÁÁ
ÁÁÁÁÁÁÁ
ÁÁÁÁÁÁÁÁ
ÁÁÁÁÁÁÁÁÁÁ
ÁÁÁÁÁÁÁ
ÁÁÁÁÁÁÁÁ
ÁÁÁÁÁÁÁÁÁÁ
Table 2-2. Hardware Settings for 802.3/Ethernet Interfaces
Vendor
Etherlink II (3C503)
Etherlink 16 (3C507)
Etherlink/MC
EtherCard PLUS (WD8003E)
Western Digital
EtherCard PLUS Elite 16
(WD8013EP)
EtherCard PLUS/A
(WD8003ET/A)
Intel 82593
Xircom Pocket Adapter
Western Digital
Intel
Xircom
2.
2-2
Model
3Com
3Com
3Com
Western Digital
Hardware Settings
I/O base address = 0x0300 IRQ3
I/O base address = 0x0300 IRQ3
N/A
I/O base address = 0x0280 IRQ3
Memory Address = 0xD000
I/O base address = 0x0280 IRQ3
Memory Address = 0xD000
I/O base address = 0x0280 IRQ3
Memory Address = 0xD000
I/O base address = 0x0300 IRQ15
None
Run any diagnostic software provided by the manufacturer of the interface to check
that the computer communicates with the interface.
Logicmaster 90-70–Ethernet User’s Manual – April, 1993
GFK-0780
2
Installing Logicmaster 90-70–Ethernet Software
Logicmaster 90-70–Ethernet software uses an NDIS-compliant PC LAN interface for
connection to the 802.3 network. NDIS (Network Driver Interface Specification) defines
the interconnection between a PC LAN interface and the PC application software. NDIS
drivers for previously listed interfaces are included on Logicmaster 90-70 diskettes.
Perform the steps described below to install the Logicmaster 90-70–Ethernet software
onto your hard disk.
Installing the Logicmaster 90-70–Ethernet Software
Logicmaster 90-70–Ethernet is shipped on two 5.25-inch, high-density or two 3.5-inch,
high-density distribution diskettes. The instructions below explain how to load the
Logicmaster 90-70 files from the distribution diskettes onto your hard disk. The
instructions below assume the use of floppy drive A, but you may also load the software
from another drive.
1.
Insert Logicmaster 90-70 distribution diskette 1 into Drive A or another drive if
desired.
2.
From the A: prompt, type.
A:\> install
3.
A screen appears prompting you to enter the destination hard drive for the
Logicmaster 90-70–Ethernet software. Enter the drive letter (or use the default
drive that is provided) and press Enter.
4.
If this is the first installation of the software, a screen for registering the software
appears. This screen contains prompts for your name, company, address, and
software serial number. Fill in this information.
Note
The serial number for your software is located on the back of diskette
number 1.
After you have entered the information, press Enter.
GFK-0780
5.
A screen for confirming the registration information appears next. If the
information you entered is correct, press Enter. If it is not, press Esc to correct any
information. If you pressed Enter, the data is then written onto the master
distribution disk.
6.
The Copyright screen then appears. Press Enter to continue.
7.
The AUTOEXEC.BAT and CONFIG.SYS modification screen appears next. Press Y if
you want the Install program to automatically modify these files. Press N if you
want to modify the files yourself.
8.
If you pressed Y, the Install program will create an LM90 directory on the hard drive
you specified, and immediately begin to write the Logicmaster 90-70–Ethernet
software to it.
Chapter 2 Installing and Starting–Up the Software
2-3
2
If you pressed N, so you could modify the AUTOEXEC.BAT and the CONFIG.SYS
files yourself, a screen will appear prompting you to make the modifications (shown
in step 10) after installing the software. A confirm prompt also appears at the
bottom of this screen which permits you to change your mind and have the Install
program modify them for you.
Press Y for automatic update or press N if you still want to modify them yourself. In
either case, the Logicmaster 90-70–Ethernet files will begin installing on your hard
disk at this time.
9.
While the Logicmaster 90-70–Ethernet software is being installed, a screen will
appear indicating that the install is “WORKING”. When all the files from a diskette
are installed, you will be prompted to insert the next diskette and press Enter to
proceed. Do this step for diskette 2.
10. After the Install program writes all the files to the destination drive,
Logicmaster 90-70 is installed. If you elected to modify the AUTOEXEC.BAT and
CONFIG.SYS files yourself, do so now.
To the AUTOEXEC.BAT file, add the following to the path line.
(Drive ID):\LM90
The Drive ID is the letter corresponding to the hard disk drive where the
Logicmaster 90-70–Ethernet software is installed.
To the CONFIG.SYS file, make the following entries.
FILES = 20
BUFFERS = 48
11. This completes the installation of the Logicmaster 90-70 files. If you are installing
Logicmaster 90-70–Ethernet for the first time you must configure the software as
described below.
Configuring Logicmaster 90-70–Ethernet Software
The next procedure you must perform before running Logicmaster 90-70–Ethernet
is to configure the Network Support Software. The configuration program that does
this is written to the \LM90\LOE directory during the procedure described above.
During the Network Support Software configuration , three files will be created in
the GEFNDIS directory of which you must be aware. These files are,
CONFIG.LOE
AUTOEXEC.LOE
PROTOCOL.LOE
After installing the software, these files will contain the prototypes for the files,
CONFIG.SYS and AUTOEXEC.BAT, located in the root directory and the
PROTOCOL.INI file located in the LM90 subdirectory. When the installation is
complete, be sure to look in the .LOE files to note the requirements to run the
Logicmaster 90-70–Ethernet software. Then, refer to the appropriate section for
“setting-up the PC” for further directions.
Note
The contents of the .LOE files (for each type of 802.3/Ethernet interface
supported) are shown in Appendix C, Sample DOS Initialization Files.
2-4
Logicmaster 90-70–Ethernet User’s Manual – April, 1993
GFK-0780
2
1.
Go to the \LM90\LOE directory. This directory was created when you installed the
Logicmaster 90-70–Ethernet Software.
2.
Type
LOE_CFG
3.
Next, a menu will be displayed to prompt you to specify the type of 802.3/Ethernet
interface installed in your PC. Selections in the menu include the 802.3/Ethernet
interface types listed in Table 2.1. It is strongly recommended that you use one of
these supported types of interfaces. Enter the number for the desired 802.3/Ethernet
interface type.
Figure 2-1. Menu Selection of 802.3/Ethernet Interface for the PC
This step creates a default NDIS configuration file, \LM90\LOE\PROTOCOL.LOE for
the type of interface selected. The default settings in this file work only if you used
the default hardware settings on the 802.3/Ethernet interface.
4.
An instruction menu appears next with a brief description of how to set up your PC
to run Logicmaster. From this screen press any key to complete configuration of the
Network Support Software.
You must now set up the PC as explained below before the Logicmaster 90-70–Ethernet
software will run properly.
GFK-0780
Chapter 2 Installing and Starting–Up the Software
2-5
2
Setting-Up the PC
The PC must be set up properly before Logicmaster 90-70–Ethernet will run. Before
you set-up the PC, you must first determine whether another NDIS network application
has been installed on your computer. To do this, check your CONFIG.SYS file for a
PROTMAN.DOS device definition. If this definition is in CONFIG.SYS, then a network
application does already exist. In this case, skip the section below and refer to the
section, “Adding Logicmaster 90-70–Ethernet When a Network Application Already
Exists”.
When Logicmaster 90-70–Ethernet is the Only Network Application on
the PC
1.
To set up your PC, you must ensure that your CONFIG.SYS file and AUTOEXEC.BAT
file contain certain commands. The commands needed have been created for you
during the installation procedure. The commands are located in the CONFIG.LOE
and AUTOEXEC.LOE files in the \LM90\LOE directory (sample contents are shown
below). You may enter these commands individually into your existing
CONFIG.SYS and AUTOEXEC.BAT files using an editor.
CONFIG.LOE
FILES=20
BUFFERS=48
DEVICE=\DOS\HIMEM.SYS
DEVICE=\DOS\EMM386.EXE RAM 800
DOS=HIGH,UMB
DEVICE=\GEFNDIS\PROTMAN.DOS /I:\LM90
DEVICEHIGH=\GEFNDIS\ELNKII.DOS
DEVICEHIGH=\GEFNDIS\GEFNDIS.DOS
(The MAC device driver ELNKII.DOS in the next-to-last line in the sample above
will vary depending on the 802.3/Ethernet interface you select.)
AUTOEXEC.LOE
\GEFNDIS\netbind
If installing the software on a PC with a monochrome monitor, add the following
command to the AUTOEXEC.BAT file:
MODE
CO80
2.
When you selected the 802.3/Ethernet interface during the Logicmaster
90-70–Ether net configuration, the file, PROTOCOL.LOE, was created. This file
contains default information about the communications driver of the interface. If
you used default hardware settings on your interface, you will not have to edit this
file. Just copy it to \LM90\PROTOCOL.INI.
3.
Restart the PC so that the modifications to the AUTOEXEC.BAT, CONFIG.SYS, and
PROTOCOL.INI files will be used.
Adding Logicmaster 90-70–Ethernet When a Network Application Already Exists on the PC
If you are adding Logicmaster 90-70–Ethernet when an NDIS network application
exists, you need to understand more about how an NDIS application is setup. The
following files must be installed for an NDIS application.
2-6
Logicmaster 90-70–Ethernet User’s Manual – April, 1993
GFK-0780
2
PROTMAN.xxx
NDIS Manager Driver.
(NDIS Driver).xxx NDIS layer driver - varies depending on 802.3/Ethernet interface.
PROTOCOL.INI File listing each driver and operating parameters for each.
For GE Fanuc applications, the driver, GEFNDIS.DOS, is also installed. For Logicmaster
90-70–Ether net, all these files, and some others, are placed in the \LM90\LOE directory.
But, if an NDIS application has been installed previously, the files described above,
except for GEFNDIS.DOS, will already have been placed in another location.
The steps below will explain what to do with these files in addition to the CONFIG.SYS
and AUTOEXEC.BAT files to ensure proper network operation.
1.
To set up your PC so the Logicmaster 90-70–Ethernet software will run with
another NDIS network application, you must ensure that your CONFIG.SYS file and
AUTOEXEC.BAT file contain certain commands. Commands needed when
Logicmaster 90-70–Ethernet is the only application have been created for you in sample
files during the installation procedure. These commands are located in the
CONFIG.LOE and AUTOEXEC.LOE files in the \LM90\LOE directory (sample files
shown below).
CONFIG.LOE
FILES=20
BUFFERS=48
DEVICE=\DOS\HIMEM.SYS
DEVICE=\DOS\EMM386.EXE RAM 800
DOS=HIGH,UMB
DEVICE=\GEFNDIS\PROTMAN.DOS /I:\LM90
DEVICEHIGH=\GEFNDIS\ELNKII.DOS
DEVICEHIGH=\GEFNDIS\GEFNDIS.DOS
(The MAC device driver ELNKII.DOS in the next-to-last line in the sample above
will vary depending on the 802.3/Ethernet interface you select.)
AUTOEXEC.LOE
\GEFNDIS\netbind
Since you are adding Logicmaster 90-70–Ethernet when a Network application
already exists, some of these commands may already exist, so you will not need to
add all of these commands. Edit your CONFIG.SYS and AUTOEXEC.BAT as
explained below.
2.
CONFIG.SYS
command.
Include all entries from CONFIG.LOE except the following
DEVICE=\GEFNDIS\PROTMAN.DOS /I:\LM90
This file will already have a valid Protocol Manager device definition from the
existing network application, and need not be changed. This file will already have
one or more 802.3/Ethernet interface device definitions from the existing network
application.
GFK-0780
Chapter 2 Installing and Starting–Up the Software
2-7
2
If a valid definition exists for the 802.3/Ethernet interface selected for the
Logicmaster 90-70–Ethernet, that definition need not be changed.
3.
AUTOEXEC.BAT Do not include the following NETBIND command.
\GEFNDIS\netbind
This command is a call to a network driver binding utility. Since a network
application already exists, that application must have a call which does the same
thing, although it may not be obvious by looking at AUTOEXEC.BAT. Binding must
occur only once after the PC is started.
If installing the software on a PC with a monochrome monitor, add the following
command to the AUTOEXEC.BAT file:
MODE
4.
CO80
PROTOCOL.INI Do not copy PROTOCOL.LOE to PROTOCOL.INI; the existing
network application will already have a PROTOCOL.INI file, and you would
destroy its contents.
The PROTOCOL.LOE file created during Logicmaster 90-70–Ethernet installation
contains a separate section for defining the operating parameters of each NDIS
device. The Protocol Manager device [PROTMGR] is defined first, followed by all
802.3/Ethernet interface (MAC) devices, and finally the Logicmaster 90-70–Ethernet
application device driver [GEFNDIS].
You must add the device definition sections for only the [GEFNDIS] device and any
new [MAC driver] device from the PROTOCOL.LOE file into the existing
PROTOCOL.INI file.
The location of the existing PROTOCOL.INI file is specified by the “/i” parameter in
the CONFIG.SYS file. Make sure the MAC driver parameters match the settings for
your PC LAN interface. Refer to Table 2-2 for default settings.
The sample PROTOCOL.LOE file shown below is created if you selected the 3Com
EtherlinkII interface.
[protocol manager]
DRIVERNAME = PROTMAN$
[GEFNDIS]
DRIVERNAME = GEFNDIS$
BINDINGS = ETHERLINKII
MAX_RX_SIZE = 560
NUM_RX_BUFS = 8
[ETHERLINKII]
DRIVERNAME =
DMACHANNEL
INTERRUPT
IOADDRESS
MAXTRANSMITS
5.
ELNKII$
= 1
= 3
= 0x300
= 8
Restart the PC so that the modifications to the AUTOEXEC.BAT, CONFIG.SYS, and
PROTOCOL.INI files will be used.
Changing the 802.3/Ethernet Interface in Your PC
If you need to change the interface in your PC, follow the steps below.
1.
2-8
Power down the PC. Remove the existing interface. Follow the manufacturer’s
instructions to install the new interface.
Logicmaster 90-70–Ethernet User’s Manual – April, 1993
GFK-0780
2
2.
Power up the PC. Set the default to the \LM90\LOE directory.
3.
Run the Network Support Software configuration utility by typing,
LOE_CFG
4.
This utility accesses the same menu as found in step 2 of the section, “Configuring
Logicmaster 90-70–Ethernet Software”. Complete the remaining steps of that
section and then set-up the PC again.
Starting-Up Logicmaster 90-70–Ethernet Software
Perform the following steps to start-up Logicmaster 90-70–Ethernet software.
1.
Type LM90 at the DOS prompt and press the Enter key. The menu of Series 90 PLCs
and functions is displayed as shown below.
Figure 2-2. Logicmaster 90-70 Software Main Menu
You must now select the Ethernet version of the Logicmaster 90-70 software. To do this
complete the steps below.
2.
GFK-0780
From the Logicmaster 90-70 Main Menu shown above, select “F9 ... Logicmaster 90
Setup Package”. The Logicmaster 90 Setup File Editor menu will be displayed.
Chapter 2 Installing and Starting–Up the Software
2-9
2
Figure 2-3. Logicmaster 90-70 Setup File Editor Menu
3.
From the Logicmaster 90 Setup File Editor menu above, select “F4 ... PLC
Communications Options” . The following menu will be displayed.
Figure 2-4. Logicmaster 90-70 PLC Communications Options Menu
From this menu use the Tab key to select the Ethernet option to activate the Ethernet
version of Logicmaster 90-70 software.
2-10
Logicmaster 90-70–Ethernet User’s Manual – April, 1993
GFK-0780
Chapter
3 Establishing Communications
with
90-70 PLC Stations
sectionSeries
level 1 1
3
figure bi level 1
table_big level 1
This chapter explains the task of establishing communications with a Series 90-70 PLC
Station in order to perform Logicmaster functions. The topics discussed in this chapter
are:
H
H
Building the PLC List
Establishing Communications
Building the PLC List
To set-up your Logicmaster 90-70–Ethernet communication system, you must first build
the PLC list. Once the list is complete it will include all Logicmaster 90-70 PLCs on the
Ethernet network. The PLC list is built by executing the “browse” function in the PLC
List Screen which is part of the Network Utilities.
The “browse” function, when executed, searches the Ethernet network for all Series
90-70 PLCs with 802.3/Ethernet Interfaces which can support a Logicmaster connection.
This includes Interfaces containing either the complete MMS-Ethernet communications
software or the Logicmaster–only communications software.
If the Ethernet Interface for a PLC has not been downloaded with communications
software, it will not respond to a browse. But a message will appear on the screen
indicating that on or more PLCs on the Ethernet network needs a download.
GFK-0780
3-1
3
Accessing the PLC List Screen
To access the PLC List Screen follow the steps below.
1.
First access the Logicmaster 90-70 Main Menu as shown below.
Figure 3-1. The Logicmaster 90-70 Main Menu
2.
From the Logicmaster 90-70 Main Menu, press “F7... Logicmaster 90 Utilities”. The
following screen will appear.
Figure 3-2. The Logicmaster 90 Utilities Menu
3-2
Logicmaster 90-70–Ethernet User’s Manual – April, 1993
GFK-0780
3
3.
From the Logicmaster 90 Utilities Menu, press “F1 ... Network Utility”. The
password screen will then appear.
Figure 3-3. The Password Screen
Enter the password and press Enter. (The default password is netutil). Then the
Network Utilities Menu will appear.
Note
You can change the password in the “F7 ... Set Password” function in the
Network Utilites.
GFK-0780
Chapter 3 Establishing Communications with Series 90-70 PLC Stations
3-3
3
Figure 3-4. Network Utilities Menu
3-4
Logicmaster 90-70–Ethernet User’s Manual – April, 1993
GFK-0780
3
4.
From the Network Utilities Menu, select “F1... PLC List”.
Figure 3-5. The PLC List Screen
The MAC address and Nickname fields in the PLC List screen will be blank if the browse
function has never been executed. In the screen above, however, these fields contain the
MAC addresses and nicknames for a sample PLC list. How to browse the network and
assign nicknames to build a PLC list is discussed in the next section.
GFK-0780
Chapter 3 Establishing Communications with Series 90-70 PLC Stations
3-5
3
Browsing the Network
To browse the network for PLCs, your Logicmaster 90-70–Ethernet system must be
connected to an operating 802.3/Ethernet network. Select F5 browse on the PLC List
Screen. The following window will be displayed.
Figure 3-6. The Browse Window
Browse Parameters
The browse window displays 3 browse parameters.
H
H
H
Spread
Begin After
End At
For small networks of PLCs (around 10 PLCs) the default browse parameters should be
adequate.
For large networks, change the default parameters as suggested below before browsing.
3-6
H
Increase the spread. (Range 1-300; Default 3) To ensure that all PLCs do not
respond at the same time, each PLC spaces its response within the spread time (in
seconds). The spacing is calculated based on the MAC address which is unique.
H
Browse only a portion of the network at a time. For example, suppose your network
consists of 100 stations (MAC addresses 080019010101 through 080019010200). Take
two passes to browse the entire network. On the first pass set the “begin after” to
080019010100 and “end at” to 080019010150. On the second pass set the “begin
after” to 080019010150 and “end at” to 080019010200.
Logicmaster 90-70–Ethernet User’s Manual – April, 1993
GFK-0780
3
Executing the Browse
Pressing Enter will cause a browse request to be multicast on the network. The resulting
PLC List will include the MAC address of any Series 90-70 PLC with an 802.3/Ethernet
Interface that can support a Logicmaster connection. This currently includes PLCs with
Interfaces downloaded with:
1.
Logicmaster-only communications software from Logicmaster 90-70–Ethernet, or
2.
Full MMS-Ethernet communications software from the GSM.
A PLC LAN interface on the network that has not been downloaded with
communications software will not be included on the PLC List. But a message will
appear indicating that one or more PLCs on the network require a download of
communications software.
The current PLC List is updated with each response. The MAC address for any new
supported PLC on the network is added to the list. These new entries to the list are
marked with a plus sign (+).
Listed MAC address entries for which there is no response remain on the list, but they
are marked with a minus sign (-).
The screen below illustrates a browse that found 1 new supported PLC on the network.
Figure 3-7. Results of a Browse
Saving the PLC List
After executing the browse, use the F2 save function to retain the results. The PLC list
will then be available on the “Select PLC Connection” screen in the programmer
package and the configuration package.
PLC Download Message – Request for Communications Software
As explained before, a browse request results in the building of the PLC List. This list
includes all PLCs on the network that respond. There may, however, be PLCs on the
GFK-0780
Chapter 3 Establishing Communications with Series 90-70 PLC Stations
3-7
3
network that cannot respond because their 802.3/Ethernet Interfaces have not been
downloaded with communications software. In this case a message will be displayed on
the screen, after executing the browse request, indicating there are PLCs requiring a
download.
If this message is displayed, one or more PLCs are requesting a download of
communications software. If you want to attempt to load the PLC(s) with
Logicmaster–only communications software, go to the PLC Download screen. You can
get to the PLC Download screen from the PLC List screen by pressing Shift-F5
DNLOAD. For more information on downloading communications software to the
802.3/Ethernet interface in the PLC, refer to Chapter 4, Network Utilities.
Assigning Nicknames
After the first time you execute the browse function, the PLC List contains only MAC
addresses for the PLCs. You can locally assign a nickname to the MAC Address/PLCto
make it easier to use the list to establish communications with PLCs.
This nickname is local to the personal computer running the Logicmaster
90-70–Ether net software. The nickname can be 8 characters long and can include any
printable character.
To assign a nickname, move the cursor to the line containing the desired MAC address,
and type the nickname. Be sure to save the nicknames by pressing F2 save.
Recommendation for Assigning Nicknames
Since the nickname is local to the personal computer running the Logicmaster software
and is not displayed on any Logicmaster screen except for the Select PLC Connection
screen (described later in this chapter), we strongly recommend that you use the SNP ID
of the PLC, when assigning nicknames to MAC Addresses/PLCs.
By following our recommendation for assigning nicknames, you will be able to tell
which PLC you are connected to in other parts of the Logicmaster programming or
configuration packages, simply by viewing the “ID:” field that appears in the status lines.
A screen illustrating the use of this field is shown below.
Refer to GFK-0263, Logicmaster 90-70 Programming Software User’s Manual, for instructions
on how to set the SNP ID.
3-8
Logicmaster 90-70–Ethernet User’s Manual – April, 1993
GFK-0780
3
Figure 3-8. Use of “ID:” Field to Identify Connected PLC
GFK-0780
Chapter 3 Establishing Communications with Series 90-70 PLC Stations
3-9
3
Establishing Communications
The Select PLC Connection screen is used to select the PLC you wish to communicate
with. This screen displays the same list of PLCs which was created using the browse
function as explained in the previous section. Each PLC in the list is identified by its
MAC address and nickname if a nickname has been assigned.
You may choose a PLC from this list or enter its nickname in the “Selected ID:” field.
Refer to the instructions below.
To Establish Communications:
1.
Go to the Select PLC Connection screen. To do this, first enter the Programmer
Package Main Screen and then press “F7 ... Programmer Mode and Setup” to access
the Programmer Setup menu as shown below.
Figure 3-9. The Programmer Setup Menu
3-10
Logicmaster 90-70–Ethernet User’s Manual – April, 1993
GFK-0780
3
Then press “F3... Select PLC Connection”, to access the Select PLC Connection screen.
Figure 3-10. The Select PLC Connection Screen
2.
You can identify the PLC to which you want to connect in two ways.
H
H
3.
Cursor to the desired PLC in the list and press Enter to select.
Or, type the nickname in the SELECTED ID field and press Enter to select.
To connect to the selected PLC, press F6 setup.
Logicmaster software will then attempt to connect to the selected PLC. When successful, the SNP ID field and other PLC status information will be updated in the
status displayed at the bottom of the screen.
4.
If you want to connect to the selected PLC whenever Logicmaster is run, execute the
F7 save function to save the selected PLC.
Storing Programs in Run Mode (Run-Mode-Store)
Before attempting to store a logic program to a PLC in Run mode or to modify a running
program, you must first set the Logicmaster Communications Window to Limited mode.
Also, we recommend a time setting of 50 ms for the window.
Note
Logicmaster prohibits storing programs in RUN mode if the
Logicmaster Communications Window is not set to Limited mode.
The mode of the Communications Window is set in the PLC Sweep Control screen. This
screen is accessed from the Logicmaster Programming main screen by pressing , “F3 ...
PLC Control and Status”, and then “F1 ... PLC Sweep Control”.
GFK-0780
Chapter 3 Establishing Communications with Series 90-70 PLC Stations
3-11
Chapter
4 Network Utilities
4
section level 1 1
figure bi level 1
table_big level 1
This chapter describes the functions of the Network Utilities. These screens are
primarily for the personnel responsible for the operation of the network. But the PLC
List screen is very valuable as well to those using the Logicmaster 90-70–Ethernet
software for programming and configuring the PLCs on the network.
Selecting the Network Utilities
To select the Network Utility functions:
1.
From the Logicmaster Main menu select the Logicmaster 90 Utilities by pressing the
“F7 ... Logicmaster 90 Utilities”. The following screen will be displayed.
Figure 4-1. The Logicmaster 90 Utilities Menu
GFK-0780
4-1
4
2.
Select the Network Utility by pressing “F1 ... Network Utility”. The password screen
will then appear.
Figure 4-2. The Password Screen
Enter the password and press Enter. (The default password is netutil). Then the
Network Utilities Menu will appear.
Note
You can change the password in the “F7 ... Set Password” function in the
Network Utilites.
4-2
Logicmaster 90-70–Ethernet User’s Manual – April, 1993
GFK-0780
4
Figure 4-3. Network Utilities Menu
From the Network Utilities menu the following screens can be selected:
Provides a list of PLCs on the network. The list is updated automatically by
requesting all Series 90-70 PLCs on the network to respond with their MAC address.
This list is subsequently displayed within the Logicmaster programming package on the
Select PLC Connection screen.
Provides a list of network related exceptions that have been
recorded when running the Logicmaster programming package. If communications
problems are encountered when running Logicmaster an examination of this list may
help in troubleshooting the problem.
Provides a list of network tallies that have been recorded when
running the Logicmaster programming package. If communications problems are
encountered when running Logicmaster an examination of this list may help in troubleshooting the problem.
Provides a list of parameters used when running Logicmaster
on the network.
Provides the function of downloading limited
communications software to the 802.3/Ethernet interfaces of PLCs on the network;
adequate to support Logicmaster functions only.
Note
If MMS services are required by your application, the PLC LAN Interface
Download function in the Logicmaster 90-70–Ethernet Network Utility must
not be used. Instead, the GEnet System Manager must be used to
download the communications software to the 802.3/Ethernet Interface.
These screens are described in detail later in this chapter.
GFK-0780
Chapter 4 Network Utilities
4-3
4
Network Utilities Operation
The keys used in the Network Utilities sub-menus are described below.
Function Keys
The table below describes the function keys used in the Network Utilities.
ÁÁÁ
ÁÁÁÁÁ
ÁÁÁÁÁÁÁÁÁÁÁÁÁÁÁÁÁÁÁÁ
ÁÁÁ
ÁÁÁÁÁ
ÁÁÁÁÁÁÁÁÁÁÁÁÁÁÁÁÁÁÁÁ
ÁÁÁ
ÁÁÁÁÁ
ÁÁÁÁÁÁÁÁÁÁÁÁÁÁÁÁÁÁÁÁ
ÁÁÁ
ÁÁÁÁÁ
ÁÁÁÁÁÁÁÁÁÁÁÁÁÁÁÁÁÁÁÁ
ÁÁÁ
ÁÁÁÁÁ
ÁÁÁÁÁÁÁÁÁÁÁÁÁÁÁÁÁÁÁÁ
ÁÁÁ
ÁÁÁÁÁ
ÁÁÁÁÁÁÁÁÁÁÁÁÁÁÁÁÁÁÁÁ
ÁÁÁ
ÁÁÁÁÁ
ÁÁÁÁÁÁÁÁÁÁÁÁÁÁÁÁÁÁÁÁ
Table 4-1. Use of the Function Keys in the Network Utilities
Key
Name
F1
F2
F3
F4
F5
clear
save
add
delete
browse
F10
zoom
Function
Clears values of the displayed list.
Saves the values of the displayed list.
Adds a MAC address to the PLC List.
Deletes a PLC name from the PLC List.
Browses the network for PLCs. The names of responding PLCs are added to the
PLC List.
Provides an explanation of the selected field.
Field Selection Keys
The four arrow keys (up, down, right,and left) are used to select a field. The selected
field is shown in reverse video.
Editing Keys
In cases where the selected field can be edited the following keys are used.
ÁÁÁÁÁÁ
ÁÁÁÁÁÁÁÁÁÁÁÁÁÁÁÁÁÁÁÁ
ÁÁÁÁÁÁ
ÁÁÁÁÁÁÁÁÁÁÁÁÁÁÁÁÁÁÁÁ
ÁÁÁÁÁÁ
ÁÁÁÁÁÁÁÁÁÁÁÁÁÁÁÁÁÁÁÁ
ÁÁÁÁÁÁ
ÁÁÁÁÁÁÁÁÁÁÁÁÁÁÁÁÁÁÁÁ
ÁÁÁÁÁÁ
ÁÁÁÁÁÁÁÁÁÁÁÁÁÁÁÁÁÁÁÁ
ÁÁÁÁÁÁ
ÁÁÁÁÁÁÁÁÁÁÁÁÁÁÁÁÁÁÁÁ
ÁÁÁÁÁÁ
ÁÁÁÁÁÁÁÁÁÁÁÁÁÁÁÁÁÁÁÁ
ÁÁÁÁÁÁ
ÁÁÁÁÁÁÁÁÁÁÁÁÁÁÁÁÁÁÁÁ
ÁÁÁÁÁÁ
ÁÁÁÁÁÁÁÁÁÁÁÁÁÁÁÁÁÁÁÁ
ÁÁÁÁÁÁ
ÁÁÁÁÁÁÁÁÁÁÁÁÁÁÁÁÁÁÁÁ
ÁÁÁÁÁÁ
ÁÁÁÁÁÁÁÁÁÁÁÁÁÁÁÁÁÁÁÁ
ÁÁÁÁÁÁ
ÁÁÁÁÁÁÁÁÁÁÁÁÁÁÁÁÁÁÁÁ
Table 4-2. Use of the Editing Keys in the Network Utilities
Key
Ctrl-right arrow
Ctrl-left arrow
Delete
Insert
‘0’ - ‘9’
‘0’ - ‘9’
‘a’ - ‘f’
‘A’ - ‘F’
‘0’ - ‘9’
‘A’ - ‘Z’
Function
Moves the cursor to the right. The cursor can not be moved beyond the maximum length. The cursor can not be moved to a position in the field such that a
space would result. There is no wrap around.
Moves the cursor to the left. There is no wrap around.
Deletes the character above the cursor.
Switches keyboard between Insert and Replace modes.
Keys allowed for decimal input.
Keys allowed for hexadecimal input. The ‘a’ - ‘f’ keys are converted to upper
case (‘A’ - ‘F’).
Keys allowed for alphanumeric strings.
Exiting a Screen
The Esc key is used to exit the current screen and return to the previous screen or menu.
4-4
Logicmaster 90-70–Ethernet User’s Manual – April, 1993
GFK-0780
4
PLC List Screen
When the PLC List screen is displayed the list of PLCs is read from a file. This file is used
by the Logicmaster programming package to display the list of PLCs for connection. You
may clear or modify this list of PLCs on the screen but these changes are not
automatically written to the file. Press F2 save to write any changes to the file.
The PLC List screen is shown below.
Figure 4-4. The PLC List Screen
Clear Function
To clear the list of PLCs on the screen, press F1 clear.
Save Function
To write the currently displayed list to the file, press F2 save.
Add Function
To add a MAC address to the list, press F3 add, and enter a full 12-digit MAC address.
Press ENTER to add to the list.
Delete Function
To delete a name from the list, position the cursor on the name and press F4 delete.
GFK-0780
Chapter 4 Network Utilities
4-5
4
Browse Function
To build and update the PLC List, press F5 browse. As shown in the figure below, a
window with the browse parameters is displayed. You may edit these parameters. To
execute the browse function, press the Enter key. To close the window without
executing the browse, press the Esc key.
Figure 4-5. The Browse Window
Press Enter to cause a browse request to be multicast on the network. A PLC receiving
the browse request will respond with its MAC address. To ensure that all PLCs do not
respond at the same time, each PLC spaces its response within the spread time (in
seconds). The spacing is calculated based upon the MAC address of each PLC, which is
unique.
After the browse function is executed, the PLC List reflects the result of the browse.
New entries to the existing list are marked with a plus sign (+). If a response was not
received from a PLC in the existing list, that PLC entry will be marked with a minus sign
(-). If an entry is not marked with a plus sign or a minus sign, it means that the entry
was in the list and that a response from that PLC was received.
The PLC List will include the MAC address of any Series 90-70 PLC with an
802.3/Ethernet Interface that can support a Logicmaster connection. This currently
includes PLCs with Interfaces downloaded with:
1.
Logicmaster communications software from Logicmaster 90-70–Ethernet, or
2.
Full MMS-Ethernet communications software with Logicmaster support from the
GSM.
A PLC on the network that has not been downloaded with communications software
will not be included on the PLC List. But a message will appear indicating that one or
more PLCs on the network require a download of communications software.
4-6
Logicmaster 90-70–Ethernet User’s Manual – April, 1993
GFK-0780
4
Browse Function Parameters
The spread parameter is the time allocated to the browse. This
parameter is in seconds and must be in the range of 1 to 300. For large networks (more
than 20 PLCs), the spread parameter should be increased from the default (3 seconds).
The “begin after” and “end at” parameters
are used to limit the number of PLCs that respond. These parameters establish a range
and if the MAC address for a PLC falls within that range it will respond. To respond, the
string (MAC address) must be greater than the “begin after” parameter and less than or
equal to the “end at” parameter.
For example, suppose your network consists of 100 stations (MAC addresses
080019010101 through 080019010200), but you want to browse only 080019010130 080019010139. Set the “begin after” to 080019010129 and “end at” to 080019010139.
Assigning Nicknames
After the first time you execute the browse function, the PLC List contains only MAC
addresses. You can locally assign a nickname to the MAC address to make it easier to use
the list to establish communications with PLCs.
This nickname is local to the personal computer running the Logicmaster
90-70–Ether net software. The nickname can be 8 characters long and can include any
printable character.
To assign a nickname, move the cursor to the line containing the desired MAC Address,
and type the nickname. Be sure to save the nicknames by pressing F2 save.
Recommendation for Assigning Nicknames
Since the nickname is local to the personal computer running the Logicmaster software
and is not displayed on any Logicmaster screen except for the Select PLC Connection
screen (described later in this chapter), we strongly recommend that you use the SNP ID
of the PLC, when assigning nicknames to MAC Addresses/PLCs.
By following our recommendation for assigning nicknames, you will be able to tell
which PLC you are connected to in other parts of the Logicmaster programming or
configuration packages, simply by viewing the “ID:” field that appears in the status lines.
Refer to GFK-0263, Logicmaster 90-70 Programming Software User’s Manual, for instructions
on how to set the SNP ID.
GFK-0780
Chapter 4 Network Utilities
4-7
4
Network Exception Log
The Logicmaster package uses a DOS software driver to communicate on the network.
This driver maintains a log of exceptions. This log is displayed on the Exception Log
screen. The log is displayed in a format similar to the log displayed by the Station
Manager of the Series 90-70 MMS-Ethernet Interface. It is important to remember that
the exception log displayed by the Network Utilities is local to the PC running
Logicmaster and is not the log in the PLC Ethernet Interface. An English-language
explanation of each exception is available, on-line, using the Zoom function.
The exception log is used in two ways:
1.
The Logicmaster package has been unable to connect to the PLC or communication
to the PLC is intermittent. In this case, the operator should use the exception log to
diagnose the problem.
2.
The operator refers to the exception log to get a general picture of the health of the
network. In general the exception log should be empty.
The following figure shows an example of the Exception Log screen:
Figure 4-6. Network Exception Log Screen
Log entries of concern are marked with an “* ” and should be investigated.
Clear Function
To clear the Exception Log, press F1 clear.
Save Function
To save the cleared Exception Log to the file, press F2 save. Otherwise, the faults will
reappear the next time the Exception Log is displayed.
4-8
Logicmaster 90-70–Ethernet User’s Manual – April, 1993
GFK-0780
4
Zoom Function
For an explanation of a particular log entry, select the entry using the up and down
arrow keys and press F10 zoom. A window will be displayed, as shown below,
describing the log entry.
Figure 4-7. Network Exception Log Zoom Window
Error Conditions
There are over fifty error conditions that are checked by the software. The majority of
these conditions are not expected to occur. If they are reported on the Log screen it is a
result of a hardware or software failure and an analysis of the problem should be
referred to GE Fanuc Field Service.
The three errors that should be investigated by the user are described below.
(Event = 11H, Entry 2 = 2C) This
entry is caused when Logicmater attempts to connect to a PLC and the PLC does not
respond.
(Event = 11H, Entry 2 =
2F) This entry is caused when the connection between the transport layer on the PC
and the transport layer on the PLC has been broken.
(Event = 11H, Entry 2 = 30H)
The PLC has requested a disconnect.
GFK-0780
Chapter 4 Network Utilities
4-9
4
Network Tallies
The Logicmaster package uses a DOS software driver to communicate on the network.
This driver maintains a list of tallies which are displayed on the Tallies screen. They are
needed to diagnose communications problems. Refer to Appendix A for details.
Figure 4-8. Network Tallies Screen
Clear Function
To clear the tallies, press F1 clear.
Save Function
To save the Network Tallies to the file, press F2 save. Otherwise, the tallies will reappear
the next time the Exception Log is displayed.
Zoom Function
For an explanation of a particular tally, select the entry using the arrow keys and press
F10 zoom. A window will be displayed, as shown below, describing the tally.
4-10
Logicmaster 90-70–Ethernet User’s Manual – April, 1993
GFK-0780
4
Figure 4-9. Network Tallies Zoom Window
GFK-0780
Chapter 4 Network Utilities
4-11
4
Network Parameters
The software driver that supports the Logicmaster package uses a set of system
parameters to define its operation. These parameters are displayed and changed on the
Network Parameters screen. When you enter this screen, a short list of parameters is
displayed as shown below.
Figure 4-10. Network Parameters Screen
You can also obtain a long list of parameters by pressing Alt-N. When the long list is
displayed you can use the Page Down and Page Up keys to view more parameters.
Press Alt-N again to return to the short list.
Initially the software driver uses a set of default values for the network parameters. The
default values for the Network and Transport layers correspond to the Series 90-70 PLC
LAN Interface default values. If changes have been made to the Series 90-70 PLC LAN
Interface system parameters then corresponding changes should be made to
Logicmaster’s driver.
Refer to Appendix B for a description of the parameters.
Save Function
To save the currently displayed system parameters, press F2 save.
Zoom Function
For an explanation of a particular network parameter, select the parameter using the
arrow keys and press F10 zoom. A window will be displayed describing the network
parameter.
4-12
Logicmaster 90-70–Ethernet User’s Manual – April, 1993
GFK-0780
4
Figure 4-11. Network Parameters Zoom Window
GFK-0780
Chapter 4 Network Utilities
4-13
4
PLC Download Screen
Logicmaster 90-70–Ethernet software provides the capability of downloading
communications software to the 802.3/Ethernet interfaces installed in Series 90-70 PLCs.
This communications software is a subset of the communications software provided
with the GEnet System Manager (GSM). Communications software downloaded by
Logicmaster 90-70–Ethernet allows the PLC to communicate only with Logicmaster
90-70–Ether net and not with other 802.3/Ethernet devices, in particular, MMS devices.
When you enter this screen, Logicmaster software will automatically attempt to
download to any PLC requesting it.
The screen below shows the messages displayed after a download.
Figure 4-12. PLC Download Screen
Note
If the message “Station <MAC Address> requested a load for an MMS
Stack” appears in the message line, then the PLC to which it refers has
been configured to accept a download of the full MMS communications
software only. Download to this PLC must be done by the GEnet
System Manager software. Logicmaster 90-70–Ethernet software will
not download to such a device.
4-14
Logicmaster 90-70–Ethernet User’s Manual – April, 1993
GFK-0780
4
Set Password Screen
The Set Password screen allows you to change the password that allows you to enter the
Network Utilities. The screen displays the password prompt as shown below.
Figure 4-13. The Set Password Screen
To change the password:
1.
Type in the current password at the Enter current password prompt and press Enter.
The New password prompt will be displayed.
Enter new password :
2.
Type in a new password and press Enter. The Verify password prompt will be
displayed.
Verify new password :
3.
Type in the new password and press Enter. The following messages will then be
displayed.
Password set
Press any key to continue ...
GFK-0780
Chapter 4 Network Utilities
4-15
Appendix A Network Tally Descriptions
A
The following table describes the meaning of the Tallies listed in the Tallies screen
discussed in Chapter 4.
ÁÁÁÁÁ
ÁÁÁÁÁÁÁÁÁÁÁÁÁÁÁÁÁÁÁÁÁÁÁ
ÁÁÁÁÁ
ÁÁÁÁÁÁÁÁÁÁÁÁÁÁÁÁÁÁÁÁÁÁÁ
ÁÁÁÁÁ
ÁÁÁÁÁÁÁÁÁÁÁÁÁÁÁÁÁÁÁÁÁÁÁ
ÁÁÁÁÁ
ÁÁÁÁÁÁÁÁÁÁÁÁÁÁÁÁÁÁÁÁÁÁÁ
ÁÁÁÁÁ
ÁÁÁÁÁÁÁÁÁÁÁÁÁÁÁÁÁÁÁÁÁÁÁ
ÁÁÁÁÁ
ÁÁÁÁÁÁÁÁÁÁÁÁÁÁÁÁÁÁÁÁÁÁÁ
ÁÁÁÁÁ
ÁÁÁÁÁÁÁÁÁÁÁÁÁÁÁÁÁÁÁÁÁÁÁ
ÁÁÁÁÁ
ÁÁÁÁÁÁÁÁÁÁÁÁÁÁÁÁÁÁÁÁÁÁÁ
ÁÁÁÁÁ
ÁÁÁÁÁÁÁÁÁÁÁÁÁÁÁÁÁÁÁÁÁÁÁ
ÁÁÁÁÁ
ÁÁÁÁÁÁÁÁÁÁÁÁÁÁÁÁÁÁÁÁÁÁÁ
ÁÁÁÁÁ
ÁÁÁÁÁÁÁÁÁÁÁÁÁÁÁÁÁÁÁÁÁÁÁ
ÁÁÁÁÁ
ÁÁÁÁÁÁÁÁÁÁÁÁÁÁÁÁÁÁÁÁÁÁÁ
ÁÁÁÁÁ
ÁÁÁÁÁÁÁÁÁÁÁÁÁÁÁÁÁÁÁÁÁÁÁ
ÁÁÁÁÁ
ÁÁÁÁÁÁÁÁÁÁÁÁÁÁÁÁÁÁÁÁÁÁÁ
ÁÁÁÁÁ
ÁÁÁÁÁÁÁÁÁÁÁÁÁÁÁÁÁÁÁÁÁÁÁ
ÁÁÁÁÁ
ÁÁÁÁÁÁÁÁÁÁÁÁÁÁÁÁÁÁÁÁÁÁÁ
ÁÁÁÁÁ
ÁÁÁÁÁÁÁÁÁÁÁÁÁÁÁÁÁÁÁÁÁÁÁ
ÁÁÁÁÁ
ÁÁÁÁÁÁÁÁÁÁÁÁÁÁÁÁÁÁÁÁÁÁÁ
ÁÁÁÁÁ
ÁÁÁÁÁÁÁÁÁÁÁÁÁÁÁÁÁÁÁÁÁÁÁ
ÁÁÁÁÁ
ÁÁÁÁÁÁÁÁÁÁÁÁÁÁÁÁÁÁÁÁÁÁÁ
ÁÁÁÁÁ
ÁÁÁÁÁÁÁÁÁÁÁÁÁÁÁÁÁÁÁÁÁÁÁ
ÁÁÁÁÁ
ÁÁÁÁÁÁÁÁÁÁÁÁÁÁÁÁÁÁÁÁÁÁÁ
ÁÁÁÁÁ
ÁÁÁÁÁÁÁÁÁÁÁÁÁÁÁÁÁÁÁÁÁÁÁ
ÁÁÁÁÁ
ÁÁÁÁÁÁÁÁÁÁÁÁÁÁÁÁÁÁÁÁÁÁÁ
ÁÁÁÁÁ
ÁÁÁÁÁÁÁÁÁÁÁÁÁÁÁÁÁÁÁÁÁÁÁ
ÁÁÁÁÁ
ÁÁÁÁÁÁÁÁÁÁÁÁÁÁÁÁÁÁÁÁÁÁÁ
Table A-1. Tally Descriptions
Tally
TimReset
Restart
CrCong
CrConfg
CrRefCfg
CrProErr
CrUnsuc
PduProEr
PduRefP
ChkFail
Timeout
TPduSent
TPduRcvd
ReTrans
CrdtZero
OpenCon
DscGen
DscCong
DscAddr
DscLife
DscUnsp
DscReasm
NPduRcvd
NPudSent
OctSent
GFK-0780
Meaning
Count of the number of times the internal time and date have been changed.
Count of the number of times that the LAN driver has been restarted.
Incoming connections refused due to congestion.
Incoming connections refused due to negotiation failure, reference number problems, or
addressing problems.
Incoming connections refused due to negotiation failure, reference number problems, or
addressing problems.
Incoming connections refused due to protocol error.
Timeouts waiting for connection confirm, or outgoing connections refused due to protocol
error.
Invalid Transport Protocol Data Units (TPDUs) (other than Connect Request) received.
Disconnect Request or Error TPDUs received in response to a TPDU (other than Connect
Request) sent from local node.
Incoming TPDUs with bad checksum fields.
Timeouts waiting for a response to a TPDU which was sent.
Count of the number of TPDUs sent.
Count of the number of TPDUs received.
Count of the number of TPDUs re–sent.
Number of Acknowledgement TPDUs sent that reduced the foreign credit to zero.
Count of the number of open connections.
Network Protocol Data Units (NPDUs) discarded due to protocol error, syntax error, checksum error, duplicate option, incomplete NPDU, or reason unspecified.
Count of the number of packets discarded for inability to provide service.
Received NPDUs discarded due to destination NSAP unknown.
Count of the number of received packets discarded for transmit time exceeded.
Received NPDUs discarded due to unsupported option(s).
Received NPDUs discarded due to segmented NPDU reassembly error.
Count of the number of NPDUs received.
Count of the number of NPDUs sent.
Number of octets sent by this node.
A-1
A
ÁÁÁÁÁ
ÁÁÁÁÁÁÁÁÁÁÁÁÁÁÁÁÁÁÁÁÁÁÁ
ÁÁÁÁÁ
ÁÁÁÁÁÁÁÁÁÁÁÁÁÁÁÁÁÁÁÁÁÁÁ
ÁÁÁÁÁ
ÁÁÁÁÁÁÁÁÁÁÁÁÁÁÁÁÁÁÁÁÁÁÁ
ÁÁÁÁÁ
ÁÁÁÁÁÁÁÁÁÁÁÁÁÁÁÁÁÁÁÁÁÁÁ
ÁÁÁÁÁ
ÁÁÁÁÁÁÁÁÁÁÁÁÁÁÁÁÁÁÁÁÁÁÁ
ÁÁÁÁÁ
ÁÁÁÁÁÁÁÁÁÁÁÁÁÁÁÁÁÁÁÁÁÁÁ
ÁÁÁÁÁ
ÁÁÁÁÁÁÁÁÁÁÁÁÁÁÁÁÁÁÁÁÁÁÁ
Table A-1. (cont.). Tally Descriptions
Tally
OctRcvd
EsEsSent
EsIsSent
EsEsRcvd
EsIsRcvd
EsEsErr
A-2
Description
Number of octets received by this node.
Number of ES–ES protocol NPDUs sent by this node.
Number of ES–IS protocol NPUDs sent by this node.
Number of ES–ES protocol NPDUs received by this node.
Number of ES–IS protocol NPDUs received by this node.
Number of (Es–Es protocol) ER NPDUs received by this node.
Logicmaster 90-70–Ethernet User’s Manual – April, 1993
GFK-0780
Appendix B Network Parameter Descriptions
section level 1 1
figure_ap level 1
table_ap level 1
B
The following table describes the meaning of the Parameters listed in the Parameters
screen (long list) discussed in Chapter 4.
ÁÁÁÁÁ
ÁÁÁÁ
ÁÁÁÁÁÁ
ÁÁÁÁÁÁÁÁÁÁÁÁÁÁÁÁ
ÁÁÁÁÁ
ÁÁÁÁ
ÁÁÁÁÁÁ
ÁÁÁÁÁÁÁÁÁÁÁÁÁÁÁÁ
ÁÁÁÁÁ
ÁÁÁÁ
ÁÁÁÁÁÁ
ÁÁÁÁÁÁÁÁÁÁÁÁÁÁÁÁ
ÁÁÁÁÁ
ÁÁÁÁ
ÁÁÁÁÁÁ
ÁÁÁÁÁÁÁÁÁÁÁÁÁÁÁÁ
ÁÁÁÁÁ
ÁÁÁÁÁÁ
ÁÁÁÁÁÁÁÁÁÁÁÁÁÁÁÁ
ÁÁÁÁ
ÁÁÁÁÁ
ÁÁÁÁ
ÁÁÁÁÁÁ
ÁÁÁÁÁÁÁÁÁÁÁÁÁÁÁÁ
ÁÁÁÁÁ
ÁÁÁÁ
ÁÁÁÁÁÁ
ÁÁÁÁÁÁÁÁÁÁÁÁÁÁÁÁ
ÁÁÁÁÁ
ÁÁÁÁ
ÁÁÁÁÁÁÁÁÁÁÁÁÁÁÁÁÁÁÁÁÁÁ
ÁÁÁÁÁ
ÁÁÁÁ
ÁÁÁÁÁÁ
ÁÁÁÁÁÁÁÁÁÁÁÁÁÁÁÁ
ÁÁÁÁÁ
ÁÁÁÁ
ÁÁÁÁÁÁ
ÁÁÁÁÁÁÁÁÁÁÁÁÁÁÁÁ
ÁÁÁÁÁ
ÁÁÁÁ
ÁÁÁÁÁÁ
ÁÁÁÁÁÁÁÁÁÁÁÁÁÁÁÁ
ÁÁÁÁÁ
ÁÁÁÁ
ÁÁÁÁÁÁ
ÁÁÁÁÁÁÁÁÁÁÁÁÁÁÁÁ
ÁÁÁÁÁ
ÁÁÁÁ
ÁÁÁÁÁÁ
ÁÁÁÁÁÁÁÁÁÁÁÁÁÁÁÁ
ÁÁÁÁÁ
ÁÁÁÁ
ÁÁÁÁÁÁ
ÁÁÁÁÁÁÁÁÁÁÁÁÁÁÁÁ
ÁÁÁÁÁ
ÁÁÁÁ
ÁÁÁÁÁÁ
ÁÁÁÁÁÁÁÁÁÁÁÁÁÁÁÁ
ÁÁÁÁÁ
ÁÁÁÁ
ÁÁÁÁÁÁ
ÁÁÁÁÁÁÁÁÁÁÁÁÁÁÁÁ
ÁÁÁÁÁ
ÁÁÁÁ
ÁÁÁÁÁÁ
ÁÁÁÁÁÁÁÁÁÁÁÁÁÁÁÁ
ÁÁÁÁÁ
ÁÁÁÁÁÁ
ÁÁÁÁÁÁÁÁÁÁÁÁÁÁÁÁ
ÁÁÁÁ
ÁÁÁÁÁ
ÁÁÁÁ
ÁÁÁÁÁÁ
ÁÁÁÁÁÁÁÁÁÁÁÁÁÁÁÁ
ÁÁÁÁÁ
ÁÁÁÁ
ÁÁÁÁÁÁ
ÁÁÁÁÁÁÁÁÁÁÁÁÁÁÁÁ
ÁÁÁÁÁ
ÁÁÁÁ
ÁÁÁÁÁÁÁÁÁÁÁÁÁÁÁÁÁÁÁÁÁÁ
Table B-1.
Parameter
GFK-0780
Parameter Descriptions
Type
Default
nsap
hex
MAC specific
reslvtime
dec
200
dnldaddr
dec
090060000000
trtrantime
dec
1000
tgiveup
dec
1000
tinactive
dec
6000
twindow
dec
2500
Description
Network Service Access Point. This parameter specifies the
NSAP to be used for the communications services.
Time allowed for a PLC to respond to a resolve–name request.
This parameter is in units of 10 milliseconds.
Multicast address used for software download to Ethernet
Interface in PLC.
Retransmit Timeout for the Transport Layer. When this timer
expires, it causes re–transmission of unacknowledged Connect Request (CR), Connect Confirm (CC), Data Transfer
(DT) TPDUs. This parameter is in units of 10 milliseconds.
The default value for this parameter is 10 seconds. Range 1 –
9999.
Give up timeout for the Transport Layer. This timer is started
when a TPDU has been re–transmitted the maximum number
of times. If it times out before an acknowledgement is received for the TPDU, the Transport connection is broken.
This parameter is in units of 10 milliseconds. The default
value for this parameter is 10 seconds. Range 1 – 9999.
Inactivity Timeout for the Transport Layer. This timer establishes the maximum time that the Transport connection will
be maintained without receiving a TPDU. This parameter is
in units of 10 milliseconds. Range 1 – 9999.
Window Timeout for the Transport Layer. When this timer
times out, an acknowledge (AK) TPDU is transmitted. Its
value should be less than that for the Transport Layer inactivity timer. This parameter is in units of 10 milliseconds.
Range 1 – 9999.
B-1
B
ÁÁÁÁÁ
ÁÁÁÁ
ÁÁÁÁÁÁ
ÁÁÁÁÁÁÁÁÁÁÁÁÁÁÁÁ
ÁÁÁÁÁ
ÁÁÁÁ
ÁÁÁÁÁÁ
ÁÁÁÁÁÁÁÁÁÁÁÁÁÁÁÁ
ÁÁÁÁÁ
ÁÁÁÁ
ÁÁÁÁÁÁ
ÁÁÁÁÁÁÁÁÁÁÁÁÁÁÁÁ
ÁÁÁÁÁ
ÁÁÁÁ
ÁÁÁÁÁÁ
ÁÁÁÁÁÁÁÁÁÁÁÁÁÁÁÁ
ÁÁÁÁÁ
ÁÁÁÁ
ÁÁÁÁÁÁ
ÁÁÁÁÁÁÁÁÁÁÁÁÁÁÁÁ
ÁÁÁÁÁ
ÁÁÁÁ
ÁÁÁÁÁÁ
ÁÁÁÁÁÁÁÁÁÁÁÁÁÁÁÁ
ÁÁÁÁÁ
ÁÁÁÁ
ÁÁÁÁÁÁ
ÁÁÁÁÁÁÁÁÁÁÁÁÁÁÁÁ
ÁÁÁÁÁ
ÁÁÁÁ
ÁÁÁÁÁÁ
ÁÁÁÁÁÁÁÁÁÁÁÁÁÁÁÁ
ÁÁÁÁÁ
ÁÁÁÁÁÁ
ÁÁÁÁÁÁÁÁÁÁÁÁÁÁÁÁ
ÁÁÁÁ
ÁÁÁÁÁ
ÁÁÁÁ
ÁÁÁÁÁÁ
ÁÁÁÁÁÁÁÁÁÁÁÁÁÁÁÁ
ÁÁÁÁÁ
ÁÁÁÁ
ÁÁÁÁÁÁ
ÁÁÁÁÁÁÁÁÁÁÁÁÁÁÁÁ
ÁÁÁÁÁ
ÁÁÁÁ
ÁÁÁÁÁÁ
ÁÁÁÁÁÁÁÁÁÁÁÁÁÁÁÁ
ÁÁÁÁÁ
ÁÁÁÁ
ÁÁÁÁÁÁ
ÁÁÁÁÁÁÁÁÁÁÁÁÁÁÁÁ
ÁÁÁÁÁ
ÁÁÁÁ
ÁÁÁÁÁÁ
ÁÁÁÁÁÁÁÁÁÁÁÁÁÁÁÁ
ÁÁÁÁÁ
ÁÁÁÁ
ÁÁÁÁÁÁ
ÁÁÁÁÁÁÁÁÁÁÁÁÁÁÁÁ
ÁÁÁÁÁ
ÁÁÁÁ
ÁÁÁÁÁÁ
ÁÁÁÁÁÁÁÁÁÁÁÁÁÁÁÁ
ÁÁÁÁÁ
ÁÁÁÁ
ÁÁÁÁÁÁ
ÁÁÁÁÁÁÁÁÁÁÁÁÁÁÁÁ
ÁÁÁÁÁ
ÁÁÁÁÁÁÁÁÁÁÁÁÁÁÁÁ
ÁÁÁÁ
ÁÁÁÁÁÁ
ÁÁÁÁÁ
ÁÁÁÁ
ÁÁÁÁÁÁ
ÁÁÁÁÁÁÁÁÁÁÁÁÁÁÁÁ
ÁÁÁÁÁ
ÁÁÁÁ
ÁÁÁÁÁÁ
ÁÁÁÁÁÁÁÁÁÁÁÁÁÁÁÁ
ÁÁÁÁÁ
ÁÁÁÁ
ÁÁÁÁÁÁ
ÁÁÁÁÁÁÁÁÁÁÁÁÁÁÁÁ
ÁÁÁÁÁ
ÁÁÁÁ
ÁÁÁÁÁÁ
ÁÁÁÁÁÁÁÁÁÁÁÁÁÁÁÁ
ÁÁÁÁÁ
ÁÁÁÁÁÁ
ÁÁÁÁÁÁÁÁÁÁÁÁÁÁÁÁ
ÁÁÁÁ
ÁÁÁÁÁ
ÁÁÁÁ
ÁÁÁÁÁÁ
ÁÁÁÁÁÁÁÁÁÁÁÁÁÁÁÁ
ÁÁÁÁÁ
ÁÁÁÁ
ÁÁÁÁÁÁ
ÁÁÁÁÁÁÁÁÁÁÁÁÁÁÁÁ
ÁÁÁÁÁ
ÁÁÁÁ
ÁÁÁÁÁÁ
ÁÁÁÁÁÁÁÁÁÁÁÁÁÁÁÁ
ÁÁÁÁÁ
ÁÁÁÁÁÁÁÁÁÁÁÁÁÁÁÁ
ÁÁÁÁ
ÁÁÁÁÁÁ
ÁÁÁÁÁ
ÁÁÁÁ
ÁÁÁÁÁÁ
ÁÁÁÁÁÁÁÁÁÁÁÁÁÁÁÁ
ÁÁÁÁÁ
ÁÁÁÁ
ÁÁÁÁÁÁ
ÁÁÁÁÁÁÁÁÁÁÁÁÁÁÁÁ
ÁÁÁÁÁ
ÁÁÁÁ
ÁÁÁÁÁÁ
ÁÁÁÁÁÁÁÁÁÁÁÁÁÁÁÁ
ÁÁÁÁÁ
ÁÁÁÁ
ÁÁÁÁÁÁ
ÁÁÁÁÁÁÁÁÁÁÁÁÁÁÁÁ
ÁÁÁÁÁ
ÁÁÁÁ
ÁÁÁÁÁÁ
ÁÁÁÁÁÁÁÁÁÁÁÁÁÁÁÁ
ÁÁÁÁÁ
ÁÁÁÁ
ÁÁÁÁÁÁ
ÁÁÁÁÁÁÁÁÁÁÁÁÁÁÁÁ
ÁÁÁÁÁ
ÁÁÁÁ
ÁÁÁÁÁÁ
ÁÁÁÁÁÁÁÁÁÁÁÁÁÁÁÁ
ÁÁÁÁÁ
ÁÁÁÁ
ÁÁÁÁÁÁ
ÁÁÁÁÁÁÁÁÁÁÁÁÁÁÁÁ
ÁÁÁÁÁ
ÁÁÁÁ
ÁÁÁÁÁÁ
ÁÁÁÁÁÁÁÁÁÁÁÁÁÁÁÁ
Table B-1. (cont.). Parameter Descriptions
Parameter
B-2
Type
Default
treftime
dec
0
trtrancnt
dec
2
twindsize
dec
2
tmaxpdu
dec
8
tchksum
dec
0
tlcack
dec
0
npdulife
ncfgtime
nhldtime
dec
dec
dec
10
10
25
nqwtime
dec
15
ntick
nchksum
dec
dec
10
0
noptmiz
dec
0
nmaxpdu
dec
552
bbuff1
bbuff2
bbuff3
bbuff4
balloc1
balloc2
balloc3
balloc4
dec
dec
dec
dec
dec
dec
dec
dec
20
40
60
588
10
20
10
60
Description
Reference Timeout for the Transport Layer. This parameter
establishes the period during which a source reference cannot
be reassigned to another Transport connection. This parameter is in units of 10 milliseconds. Range 1 – 9999.
Retransmit Counter for the Transport Layer. This counter
establishes the maximum number of re–transmissions for
Connect Request (CR), Connect Confirm (CC), Data Tranfer
(DT), Expedited Data (ED), and Disconnect Request (DR)
TPDUs. Range 1 – 10.
Window Size for the Transport Layer. This parameter is the
maximum window size allowed for the receipt of (Data Transfer) DT TPDUs. Range 1 – 5.
Maximum PDU size for the Transport Layer. This establishes
the maximum TPDU size negotiated for data transfers. This
parameter is used as a power of 2 to get actual size. (A value
of 8 implies a size of 256 octets.) Range 7 – 12.
Checksum Negotiation for the Transport Layer. This parameter determines whether or not the Transport checksums are
negotiated during Transport connection establishment. “0”
for this parameter specifies that checksums are not negotiated.
“1” for this parameter specifies that checksums are negotiated.
Range 0 – 1.
Local Acknowledge Timeout for the Transport Layer. This
timer is reserved for future use.
Lifetime of outgoing ES–ES NPDUs in half–seconds.
Configuration timer interval in seconds. Range 1 – 9999.
Holding timer for outgoing ES–IS NPDUs in seconds. Range
1 – 9999.
Query configuration wait timeout in seconds. Range 1 –
9999.
Seconds between check clock. Range 1 – 9999.
Use checksums on outgoing NPDUs. “0” means do not use
checksums, “1” means use checksums. Range 0 – 1.
Use ISO 9542 optimization. “0” means do not use optimization, “1” means use optimization. Range 0 – 1.
Maximum network PDU size for the MAP Network Layer.
Range 100 – 963.
Buffer pool 1 buffer size. Range 1 – 999.
Buffer pool 2 buffer size. Range 1 – 999.
Buffer pool 3 buffer size. Range 1 – 999.
Buffer pool 4 buffer size. Range 1 – 999.
Buffer pool 1 memory percent. Range 0 – 99.
Buffer pool 2 memory percent. Range 0 – 99.
Buffer pool 3 memory percent. Range 0 – 99.
Buffer pool 4 memory percent. Range 0 – 99.
Logicmaster 90-70–Ethernet User’s Manual – April, 1993
GFK-0780
Appendix C Sample DOS Initialization Files
C
section level 1 1
figure_ap level 1
table_ap level 1
This appendix shows prototypes for the DOS initilization files, CONFIG.SYS,
AUTOEXEC.BAT, and PROTOCOL.INI, for each type of 802.3/Ethernet Interface
supported by Logicmaster 90-70–Ethernet. The configuration program, LOE_CFG,
allows you to select the type of 802.3/Ethernet Interface you are using and then creates
the files, CONFIG.LOE, AUTOEXEC.LOE, and PROTOCOL.LOE, which are prototypes
specific to that interface type.
You may, of course, have additional DOS initialization functions, which may need to be
merged with these prototypes to form the final CONFIG.SYS, AUTOEXEC.BAT, and
PROTOCOL.INI files.
GFK-0780
C-1
C
Etherlink II
\CONFIG.SYS
FILES=20
BUFFERS=48
DEVICE=\DOS\HIMEM.SYS
DEVICE=\DOS\EMM386.EXE RAM 800
DOS=HIGH,UMB
DEVICE=\GEFNDIS\PROTMAN.DOS /I:\LM90
DEVICEHIGH=\GEFNDIS\ELNKII.DOS
DEVICEHIGH=\GEFNDIS\GEFNDIS.DOS
\AUTOEXEC.BAT
\GEFNDIS\netbind
\LM90\PROTOCOL.INI
[protocol manager]
DRIVERNAME = PROTMAN$
[GEFNDIS]
DRIVERNAME = GEFNDIS$
BINDINGS = ETHERLINKII
MAX_RX_SIZE = 560
NUM_RX_BUFS = 8
;
;
;
;
;
;
;
;
Warning:
Interrupt conflicts may arise when using default hardware
configurations for many Ethernet Adapters. For example,
interrupt IRQ3 is commonly used for the COM2 serial port
and most Ethernet adapters.
The following informnation must match the hardware configuration
of the Ethernet Adapter as installed on your computer. Please
modify this information as necessary.
[ETHERLINKII]
DRIVERNAME =
DMACHANNEL
INTERRUPT
IOADDRESS
MAXTRANSMITS
C-2
ELNKII$
= 1
= 3
= 0x300
= 8
Logicmaster 90-70–Ethernet User’s Manual – April, 1993
GFK-0780
C
Etherlink 16
\CONFIG.SYS
FILES=20
BUFFERS=48
DEVICE=\DOS\HIMEM.SYS
DEVICE=\DOS\EMM386.EXE RAM 800
DOS=HIGH,UMB
DEVICE=\GEFNDIS\PROTMAN.DOS /I:\LM90
rem
rem The Ethernet Adapter and its device driver must first
rem into your computer. Replace the string ”<DIRECTORY>”
rem following DEVICEHIGH command with the directory which
rem the specified device driver for your Ethernet Adapter
rem
DEVICEHIGH=<DIRECTORY>\ELNK16.DOS
DEVICEHIGH=\GEFNDIS\GEFNDIS.DOS
be installed
in the
contains
module.
\AUTOEXEC.BAT
\GEFNDIS\netbind
\LM90\PROTOCOL.INI
[protocol manager]
DRIVERNAME = PROTMAN$
[GEFNDIS]
DRIVERNAME = GEFNDIS$
BINDINGS = ELNK16.DOS
MAX_RX_SIZE = 560
NUM_RX_BUFS = 8
;
;
;
;
;
;
;
;
Warning:
Interrupt conflicts may arise when using default hardware
configurations for many Ethernet Adapters. For example,
interrupt IRQ3 is commonly used for the COM2 serial port
and most Ethernet adapters.
The following informnation must match the hardware configuration
of the Ethernet Adapter as installed on your computer. Please
modify this information as necessary.
[ELNK16.DOS]
DRIVERNAME = ELNK16$
GFK-0780
Appendix C Sample DOS Initialization Files
C-3
C
Etherlink /MC
\CONFIG.SYS
FILES=20
BUFFERS=48
DEVICE=\DOS\HIMEM.SYS
DEVICE=\DOS\EMM386.EXE RAM 800
DOS=HIGH,UMB
DEVICE=\GEFNDIS\PROTMAN.DOS /I:\LM90
rem
rem The Ethernet Adapter and its device driver must first
rem into your computer. Replace the string ”<DIRECTORY>”
rem following DEVICEHIGH command with the directory which
rem the specified device driver for your Ethernet Adapter
rem
DEVICEHIGH=<DIRECTORY>\ELNKMC.SYS
DEVICEHIGH=\GEFNDIS\GEFNDIS.DOS
be installed
in the
contains
module.
\AUTOEXEC.BAT
\GEFNDIS\netbind
\LM90\PROTOCOL.INI
[protocol manager]
DRIVERNAME = PROTMAN$
[GEFNDIS]
DRIVERNAME = GEFNDIS$
BINDINGS = ETHERLINKMC
MAX_RX_SIZE = 560
NUM_RX_BUFS = 8
;
;
;
;
;
;
;
;
Warning:
Interrupt conflicts may arise when using default hardware
configurations for many Ethernet Adapters. For example,
interrupt IRQ3 is commonly used for the COM2 serial port
and most Ethernet adapters.
The following informnation must match the hardware configuration
of the Ethernet Adapter as installed on your computer. Please
modify this information as necessary.
[ETHERLINKMC]
DRIVERNAME = ELNKMC$
C-4
Logicmaster 90-70–Ethernet User’s Manual – April, 1993
GFK-0780
C
EtherCard PLUS, EtherCard PLUS Elite 16, EtherCard PLUS/A
\CONFIG.SYS
FILES=20
BUFFERS=48
DEVICE=\DOS\HIMEM.SYS
DEVICE=\DOS\EMM386.EXE RAM 800
DOS=HIGH,UMB
DEVICE=\GEFNDIS\PROTMAN.DOS /I:\LM90
DEVICEHIGH=\GEFNDIS\MACWD.DOS
DEVICEHIGH=\GEFNDIS\GEFNDIS.DOS
\AUTOEXEC.BAT
\GEFNDIS\netbind
\LM90\PROTOCOL.INI
[protocol manager]
DRIVERNAME = PROTMAN$
[GEFNDIS]
DRIVERNAME = GEFNDIS$
BINDINGS = MACWD_NIF
MAX_RX_SIZE = 560
NUM_RX_BUFS = 8
;
;
;
;
;
;
;
;
Warning:
Interrupt conflicts may arise when using default hardware
configurations for many Ethernet Adapters. For example,
interrupt IRQ3 is commonly used for the COM2 serial port
and most Ethernet adapters.
The following informnation must match the hardware configuration
of the Ethernet Adapter as installed on your computer. Please
modify this information as necessary.
[MACWD_NIF]
DRIVERNAME = MACWD$
irq = 3
ramaddress = 0xd000
iobase = 0x280
receivebufsize = 1024
GFK-0780
Appendix C Sample DOS Initialization Files
C-5
C
Intel 82593
\CONFIG.SYS
FILES=20
BUFFERS=48
DEVICE=\DOS\HIMEM.SYS
DEVICE=\DOS\EMM386.EXE RAM 800
DOS=HIGH,UMB
DEVICE=\GEFNDIS\PROTMAN.DOS /I:\LM90
rem
rem The Ethernet Adapter and its device driver must first
rem into your computer. Replace the string ”<DIRECTORY>”
rem following DEVICEHIGH command with the directory which
rem the specified device driver for your Ethernet Adapter
rem
DEVICEHIGH=<DIRECTORY>\I82593.DOS
DEVICEHIGH=\GEFNDIS\GEFNDIS.DOS
be installed
in the
contains
module.
\AUTOEXEC.BAT
\GEFNDIS\netbind
\LM90\PROTOCOL.INI
[protocol manager]
DRIVERNAME = PROTMAN$
[GEFNDIS]
DRIVERNAME = GEFNDIS$
BINDINGS = MLM_NIF
MAX_RX_SIZE = 560
NUM_RX_BUFS = 8
;
;
;
;
;
;
;
;
Warning:
Interrupt conflicts may arise when using default hardware
configurations for many Ethernet Adapters. For example,
interrupt IRQ3 is commonly used for the COM2 serial port
and most Ethernet adapters.
The following informnation must match the hardware configuration
of the Ethernet Adapter as installed on your computer. Please
modify this information as necessary.
[MLM_NIF]
DRIVERNAME = I82593$$
IOADDRESS
= 0x300
INTERRUPT
= 15
DMACHAN0
= 6
DMACHAN1
= 7
INBUFFER(K)
= 8
OUTBUFFERS(K) = 3
C-6
Logicmaster 90-70–Ethernet User’s Manual – April, 1993
GFK-0780
C
Xircom Pocket Adapter
\CONFIG.SYS
FILES=20
BUFFERS=48
DEVICE=\DOS\HIMEM.SYS
DEVICE=\DOS\EMM386.EXE RAM 800
DOS=HIGH,UMB
DEVICE=\GEFNDIS\PROTMAN.DOS /I:\LM90
rem
rem The Ethernet Adapter and its device driver must first
rem into your computer. Replace the string ”<DIRECTORY>”
rem following DEVICEHIGH command with the directory which
rem the specified device driver for your Ethernet Adapter
rem
DEVICEHIGH=<DIRECTORY>\PE2_NDIS.EXE
DEVICEHIGH=\GEFNDIS\GEFNDIS.DOS
be installed
in the
contains
module.
\AUTOEXEC.BAT
\GEFNDIS\netbind
\LM90\PROTOCOL.INI
[protocol manager]
DRIVERNAME = PROTMAN$
[GEFNDIS]
DRIVERNAME = GEFNDIS$
BINDINGS = XIRCOMNET
MAX_RX_SIZE = 560
NUM_RX_BUFS = 8
;
;
;
;
;
;
;
;
Warning:
Interrupt conflicts may arise when using default hardware
configurations for many Ethernet Adapters. For example,
interrupt IRQ3 is commonly used for the COM2 serial port
and most Ethernet adapters.
The following informnation must match the hardware configuration
of the Ethernet Adapter as installed on your computer. Please
modify this information as necessary.
[XIRCOMNET]
DRIVERNAME = XIRCOM$
GFK-0780
Appendix C Sample DOS Initialization Files
C-7
Index
A
Accessing the PLC List Screen, 3-2
Adding Logicmaster 90–70Ethernet
When a Network Application Already
Exists on the PC, 2-6
Etherlink /MC, C-4
Etherlink 16, C-3
Etherlink II, C-2
Exception Log, 4-8
Exception Log Screen, 4-8
Assigning Nicknames, 3-8 , 4-7
Exception Log Zoom Window, 4-9
AUTOEXEC.BAT, 2-4 , 2-8
Executing the Browse, 3-7
AUTOEXEC.LOE, 2-4 , 2-6 , 2-7
Exiting a Screen, 4-4
B
F
Begin After and End At Parameters, 4-7
Field Selection Keys, 4-4
Browse Function, 4-6
Function Keys, 4-4
Browse Function Parameters, 4-7
Browse Parameters, 3-6
Browse Window, 3-6 , 4-6
Browsing the Network, 3-6
Building the PLC List, 3-1
C
I
Installing and Starting–Up the Software,
2-1
Installing Logicmaster 90–70Ethernet
Software, 2-3
Installing the 802.3 Interface in the Computer, 2-2
Changing the 802.3/Ethernet Interface in
Your PC, 2-8
Installing the Logicmaster 90–70Ethernet
Software, 2-3
CONFIG.LOE, 2-4 , 2-6 , 2-7
Intel 82593, C-6
CONFIG.SYS, 2-4 , 2-7
Configuring Logicmaster 90–70Ethernet
Software, 2-4
Contents Of the Logicmaster 90–70Ethernet Software Package, 1-3
D
Download Request Message, 3-7
E
Editing Keys, 4-4
Establishing Communications, 3-10
Establishing Communications with Series
90–70 PLC Stations, 3-1
EtherCard PLUS, EtherCard PLUS Elite
16, EtherCard PLUS/A,C-5
GFK-0780
L
Logicmaster 90 Utilities Menu, 3-2 , 4-1
Logicmaster 90–70 Main Menu, 3-2
Logicmaster 90–70 PLC Communications
Options Menu, 2-10
Logicmaster 90–70 Setup File Editor
Menu, 2-10
Logicmaster 90–70 Software Main Menu,
2-9
N
NDIS description, 2-3
NDIS Driver.xxx, 2-7
Network Parameters, 4-12
Network Parameters Screen, 4-12
Index-1
Index
Network Parameters Zoom Window, 4-13
Saving the PLC List, 3-7
Network Utilities, 4-1
Select PLC Connection Screen, 3-11
Network Utilities Menu, 3-4 , 4-3
Selecting the Network Utilities, 4-1
Network Utilities Operation, 4-4
Setting–Up the PC, 2-6
Nicknames, 4-7
Spread Parameter, 4-7
O
Overview of the Logicmaster
90–70Ether net Network, 1-2
P
Starting–Up Logicmaster 90–70Ethernet
Software, 2-9
Storing Programs in Run Mode, 3-11
Supported802.3/Ethernet Interfaces, 2-2
T
Parameter Descriptions, B-1
Tallies, 4-10
PLC Download Screen, 4-14
Tallies Screen, 4-10
PLC List, 3-1
Tallies Zoom Window, 4-11
PLC List Screen, 3-5 , 4-5
Tally Descriptions, A-1
Programmer Setup Menu, 3-10
The Passward Screen, 3-3
PROTMAN.xxx, 2-7
PROTOCOL.INI, 2-4 , 2-7 , 2-8
PROTOCOL.LOE, 2-4 , 2-8
Q
Quick Guide to the Manual, 1-3
U
Use of ID: Field to Identify Connected
PLC, 3-9
Users of the Logicmaster 90–70Ethernet
Software Package, 1-2
Network Personnel, 1-2
PLC Logic Programming Personnel, 1-2
R
Requirements for Running the Software,
2-1
Results of a Browse, 3-7
Run-Mode-Store, 3-11
S
Sample System Initialization Files, C-1
Index-2
W
When Logicmaster 90–70Ethernet is the
Only Network Application on the PC,
2-6
X
Xircom Pocket Adapter, C-7
GFK-0780