Download Datasheet 3.39 MB
Transcript
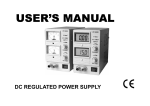
DC SWITCHING POWER SUPPLY
USER
MANUAL
DC POWER SUPPLY
BRIEF INTRODUCTION:
The HY1803L and HY2402U HY2403Lseries variable DC power supplies are very stable, regulated DC
power supplies allowing continuous adjustment of both the output voltage and output current levels.
MODELS:
MODEL
HY1803L
REGULATED
0-1 8V
OUTPUT VOLTAGE
REGULATED
0-3A
OUTPUT CURRENT
1. TECHNICAL PARAMETERS
230V/115VAC + 10%
1.1 Input voltage :
1.2 Line regulation:
1.3 Load regulation:
CVs50.01%+5mV(l>3A)
1.4 Ripple and noise:
CV^O.SmVr.m.s
CVs£1.0mVr.m.s(l>3A)
TOWER SUPfLT
2. OPERATION
2.1 Controls and indicators:
(1) Power 1-0 switch.
(2) AC Input Socket with Fuse.
(3) Concealed Fuse box.
HY2403L
0-24V
0-24V
0-2A
0-3A
50HZ/60Hz±2Hz
CCsS0.2%+1mA
CCsS0.2%+3mA(|5=3A)
CCsS0.2%+5mA(l>3A)
CCsSSmAr.m.s (I=S3A)
CCsSGmAr.m.s (I>3A)
1.5 Protection: constant current and short-circuit protection
1.6 Voltage indication accuracy: LCD+1%+2digits,
1.7 Current indication accuracy: LCD+2%+2digits,
1.8 Environment: 0 ~ +40 °C relative humidity:<90%
LINEAR MODE
HY2402L
(4) Output Voltage Tuning knob.
(5) Output Current Tuning knob.
(6) Output On/Off push button.
(7) Output Termina1Positive(+)Red color.
(8) GND Terminal ( T )Green color.
(9) Output Terminal Negative(-)Black color.
(10) LCD Display panel showing:
Sdigit voltage.current meter,(CV)constant voltage mode,(CC)constant current mode,
Output Terminal on/off state output 0*0
2.2 OPERATING PROCEDURE
2.2.1Constant Voltage (CV),Automatic crossover&Contant Current (CC)
The power supply functions as a constant voltage source (CV) as long as the load current is less than the
preset current limiting value.When the load current is equal to or greater than the preset current limiting
value.the power supply will automatically cross over to the constant mode.voltage will drop,(CC) will
show on the LED display panel and it will operate as a constant current source.
When the load current drops below the preset current limiting value.the power supply returns to constant
voltage(CV) mode.
2.2.2Presetting Current Limiting Value(CC)
Switch on the power supply.adjust the output voltage to about SV.turn off the output terminal with push
botton(6),icon becomes Output*""*.
Short the black and red output terminals and turn on the output terminal by (6),icon becomes *-* .adjust
the current limiting value to your desired value say x Amp by turning knob(5).Turn off the output terminal
and take out the shorting connection.
The current limiting of the power supply has been preset to x Amp for the whole range of output voltage.
2.2.3Connection and Operation Procedure
2.2.3.1 .After checking with the rating lable plug in to AC mains.
2.2.3.2.Switch on the power supply and the LED display should be on at the same time.
2.2.3.3.The (CV)icon should be shown on the display.
2.2.3.4.Turn to current volume knob(5)to maximum clockwise if you do not require lower Current limiting
value.otherwise do the preset the(CC)limiting procedure.
2.2.3.5.Set your desired output voltage and then turn off the output terminal by push button(6).
2.2.3.6.Connect to your load positive to positive and negative to negative.
2.2.3.7.Tum on the output terminal again and check if display shows(CV).
2.2.3.8.If display shows(CC),either your preset current limiting value is too low or your load requires more
voltage and current.You need to re-access the voltage and current requirement of your load and increase
the voltage or current accordingly until (CV)appears.
2.2.4Tracking Output Over Voltage Protection(OVP)
This is to protect the connected load in the event that the output voltage control circuit mal-functions,the
maximum output voltage will not exceed 30% of the adjusted voltage value at the time of the opeartion.
3. ATTENTION:
3.1 In the event of a short circuit at the output the current will limit at the value set by the current controls,
however the unit should be turned off and the short circuit removed before continuing use.
3.2 The mains power must be switched off before servicing and servicing should be referred to a qualified
person.
3.3 The unit should be stored in a dry and well ventilated place and the power cord removed if storing for
long periods.
4. ACCESSORIES
4.1 Power cord
one piece
4.2 Instruction manual
one piece


