1
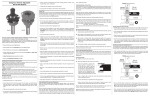
Electric Drill
Safety Rules
The Electric Drill is a handy tool in almost any
shop. It’s handheld and portable. There are cordless
models that give the user more freedom of
movement and can be taken to places where
electrical outlets aren’t available. There are models
with adjustable clutches that target the market for
users who need them as high-performance
screwdrivers, and there are models that have an
impact feature that provides enhanced ability to drill
in difficult materials and some which are really
oriented to use as impact wrenches often used by
mechanics. Our primary focus will be on those used
for drilling wood and possibly driving screws. It is
worth knowing that the versions with the impact
feature can do a much more effective job at these
tasks in certain situations.
The Electric Drill can be used to drill holes in a
wide range of diameters, and with appropriate driver
bits can be used to install or remove screws and
bolts. As noted above some models have an
adjustable torque setting so that screws can be set
properly without being overdriven and damaging
the material being secured.
Electric Drills are rotating tools. They have the
potential to grab and wrap hair, jewelry, fabric or
similar material around a bit or even around the
chuck. The danger from the chuck is increased on
models using the common chuck key, which uses
gear teeth to open and close the chuck.
To avoid accidents, the following safety rules must
be followed by everyone working with Electric
Drills in the CWA / JPM shop. Failure to follow
these safety rules can result in personal injury or
injury to others and can result in a loss of shop
privileges.
Start with a Risk Assessment to ensure a safe
work area, and that the machine is ready to use:
1. Follow all procedures in CHARLOTTE
WOODWORKERS’ ASSOCIATION Shop
Rules and Guidelines, Electrical Safety Rules
2.
3.
4.
5.
6.
7.
8.
9.
10.
11.
12.
and Guidelines, and Shop Safety Best
Practices.
Keep your work area clean and well lit.
Cluttered benches and dark areas invite
accidents.
Check the tool for proper operation of
moving parts.
Check for binding of moving parts, and for
misalignment of moving parts, breakage of
parts, and any other condition that may
affect the tool’s operation. If damaged, have
the tool serviced before using it. Many
accidents are caused by poorly maintained
tools. Develop a periodic maintenance
schedule for your Electric Drill and follow it.
Inspect tools for any damage prior to each
use.
Check the handle and body casing of the tool
for cracks or other damage.
If the tool has auxiliary or double handles,
check them all to see that they are installed
securely.
Inspect cords for defects: check the power
cord for cracking, fraying, wear, cuts or other
faults in the cord insulation.
Check for damaged switches and switches
with faulty trigger locks. Do not use the tool
if the switch does not turn it “ON” or “OFF”
reliably. Any tool that cannot be controlled
with the switch is dangerous; have it repaired.
While checking that the switch turns the
Electric Drill “On” and “Off” reliably, check
the drill for excessive vibration. Do not use a
drill that vibrates excessively or appears
unsafe in any way.
Inspect the plug for damage; including
cracks and missing, loose, or faulty prongs.
A damaged or malfunctioning part must be
properly repaired or replaced prior to use to
avoid risk of personal injury.
The Charlotte Woodworkers Association | Electric Drill Safety Rules
Effective
4/8/14 DP/WJ
13. Do not operate power tools in explosive
atmospheres, such as in the presence of
flammable liquids, gases or dust. Power tools
create sparks which may ignite the dust or
fumes.
14. Don’t operate corded drills in damp or wet
locations. If operating the drill in a damp
location is unavoidable, use a ground fault
circuit interrupter (GFCI) protected supply
to power the tool. Use of a GFCI protected
supply reduces the risk of serious electric shock.
Even with GFCI protection, AVOID
RUNNING A CORDED ELECTRIC DRILL
WHILE STANDING IN WATER!!!
15. Keep the area around where you’ll be working
clear of people and debris that could impair
your traction or footing to avoid potential slips
and falls.
16. Drill bits and other drill accessories can be
dangerous. You can injure yourself or a
bystander if you aren’t careful where you’re
holding them, even when the drill isn’t running.
17. Dress properly. Don’t wear loose clothing or
jewelry. If a drill can catch anything while
it’s running it will wrap it up until the bit
stop turning. If you’re wearing jewelry such as
necklaces, bracelets, or rings that could become
caught or entangled in moving parts, remove
them and store them safely. Roll up long
sleeves, tuck in or remove ties, etc.
18. Don’t wear gloves. If you’re working in our
shop environment it should never be too cold to
work without gloves. If it is, ask a Shop
Foreman to have someone turn on a heater.
19. Tie back, or otherwise secure, long hair.
20. Keep your hair and clothing away from
moving parts. Loose clothes, jewelry, or long
hair can be caught in any rotating part of the
Electric Drill.
21. Keep handles dry, clean, and free from oil
and grease.
22. Never carry the Electric Drill with your
finger on the power switch (trigger). Carrying
tools with your finger on the switch or plugging
in tools that have the switch “ON” invites
accidents.
23. Remove the chuck key, if your drill has one,
and any adjusting keys and/or wrenches
before turning the tool “ON”. A wrench,
24.
25.
26.
27.
28.
chuck key, or an adjusting key that is left
attached to a moving part of the tool can cause
personal injury to the operator or a bystander.
There’s also the possibility that it may damage
the tool, the chuck key, adjusting key, or
wrench. It could also damage the material being
worked on.
Use safety equipment. Always wear eye
protection. Non-skid safety shoes, hard hat, and
hearing protection must be used when situations
call for them.
Safety glasses (ANSI Z87.1) and (CAN/CSA
Z94.3) with side shields or a face shield must
be worn. The impact resistance of everyday
eyeglasses is not as great as the impact
resistance that is necessary for eyeglasses to be
classified as safety glasses. Both lenses and
frames must pass specific tests to be classified
as safety glasses. For more information on the
requirements that eyewear must meet to be
classified as safety glasses, see:
http://www.allaboutvision.com/safety/safetyglasses.htm. If you’re not wearing actual safety
glasses, wearing safety goggles over your
regular glasses can provide the protection you
need.
Hearing protection should always be worn.
Use the appropriate dust mask or respirator
in dusty work conditions. Electric Drills can
create dust and if your operation does,
protection from that dust is important.
Give the work your undivided attention.
Operational Safety Rules:
1. Approach your work in the Shop & while
using the Electric Drill with a safe attitude!
2. Read the manual of operating/safety
instructions (User’s Manual) that came with
the Electric Drill. If you can’t find it and if the
Shop Foreman can’t help you find it, someone
can download a copy of the manual from the
internet. This manual should tell you where the
various switches and controls for the Drill are
and how they’re supposed to work.
3. If you don’t know how to use the Electric
Drill properly for the work you plan to do,
get instruction on how to use it correctly for
what you want to do BEFORE beginning.
4. Keep bystanders, children, and visitors away
from the work area while operating a power
The Charlotte Woodworkers Association | Electric Drill Safety Rules
Effective
4/8/14 DP/WJ
5.
6.
7.
8.
9.
10.
tool. Having anybody not involved in the
drilling operation in the immediate area can
create distractions that can cause you to lose
control of the tool.
Stay alert, watch what you are doing and use
common sense when operating a power tool.
Do not use tools while tired or under the
influence of drugs, alcohol, or medication. A
moment of inattention while operating power
tools may result in serious personal injury.
Keep the Electric Drill’s air vents clear to
maintain adequate airflow through the tool.
Proper ventilation helps keep the drill from
overheating while in use.
Use the proper chuck key that fits the chuck
correctly to tighten and loosen bits. Using
chuck keys that don’t fit exactly right can
damage the chuck and have the potential to slip
while you’re tightening them which could result
in injury.
Always remove the drill bit when
transporting or storing the Electric Drill.
Removing the bit ensures that you won’t stab
yourself, another woodworker, or a bystander
with the bit. Even a dull bit can cause serious
injury.
Keep power cords away from the chuck,
installed bits or accessories, heat, water and
oil. When drilling or driving screws, or using
the drill for any other operation, make sure you
place the cord in such a way that you won’t
damage it by accident.
Be aware of the proper operation of the
drill’s power switch. Generally these are
trigger switches; on many models the trigger
is a variable speed control, the further the
trigger switch is depressed the higher the
speed (within the limits of the drill’s
maximum speed). It’s common for electric
drills to have triggers that Lock. If your drill
has a locking feature, become completely
familiar and comfortable with the operation
of the lock. If the switch is locked "ON" during
use, be prepared for emergency situations by
being ready to switch it "OFF". On some
models this is done by first pulling the trigger
then immediately releasing it, but other models
may differ. Make sure you learn how yours
works before you start using the drill. Make
sure you try the procedure for unlocking the
11.
12.
13.
14.
15.
16.
17.
power switch often enough to become totally
comfortable with it. Leave it UNLOCKED
BEFORE plugging the drill in.
Always make sure that the switch is “OFF”
before plugging the Electric Drill in or
installing its battery pack. On drills with
locking trigger switches, make sure the switch
is “UNLOCKED” before plugging the tool in.
Accidental start-ups can cause injury.
Never unplug tools by pulling on the power
cord. When unplugging equipment pull on the
plug, not on the cord.
Hold Electric Drills only by the handles when
drilling into areas that may contain “live”
wires. On most handheld power tools, Electric
Drills included, contact with a "live" wire may
make exposed metal parts of the tool "live",
which can shock the operator. If possible, do
not drill or cut into existing walls or other blind
areas where electrical wiring may exist. If this
situation is unavoidable, disconnect all fuses or
circuit breakers feeding that part of the worksite
before proceeding.
Keep your hands and all other parts of your
body, as well as those of any helper or
assistant, at least 3 inches from any point
where the drill bit, or drill chuck, may
travel while you’re drilling. The same applies
to the area where a screw or other fastener
may emerge while you’re driving it through
or into the workpiece.
Do not reach under the material being drilled
or where screws are being installed. The
proximity of the bit (or screw) to a hand that’s
under the material being drilled or joined is
hidden from your sight. Caution all assistants to
avoid putting any body part in the areas where
drill bit or fastener may be traveling and warn
them not to reach under the material being
drilled or joined.
Do not overreach. Keep proper footing and
balance at all times. Proper footing and
balance enables better control of the tool in
unexpected situations.
Unplug the Electric Drill or remove its
battery pack before installing or changing
bits or accessories. This reduces the chances of
injuring yourself should you accidentally
depress the power switch while performing
these operations.
The Charlotte Woodworkers Association | Electric Drill Safety Rules
Effective
4/8/14 DP/WJ
18. Make sure the bit you’re installing is
acceptable for use in the Electric Drill you’re
planning to use. Acceptable Drill types and
sizes for a given drill model and application
should be available from the manufacturer,
often in the user’s manual for your model of
Electric Drill. An example of such a table can
be found, for some Bosch Electric Drills on the
internet at:
http://mdm.boschwebservices.com/files/r18721
v2.pdf.
19. Do not use dull, bent or damaged bits. Bits
that are in poor condition are basically just
waiting to cause you further problems. Dull bits
can be dangerous if the amount of pressure you
apply while attempting to get them to cut causes
the bit to break. If that happens the portion that
breaks off can become a projectile. Bent or
damaged bits won’t drill straight and this can
cause a number of undesirable results, least of
which is that the hole you’re attempting to drill
will not be straight, true, and of the desired
diameter. Sharpen, repair, or replace damaged
bits rather than use them as they are.
20. Insert the drill bits into the drill chuck until
they hit the “bottom” of the chuck, then back
them out a little (1/8 inch should be enough)
so they aren’t touching the “bottom” of the
chuck and tighten them. Make sure that the
jaws of the chuck close evenly around the bit,
with the bit in the center of the jaws. This
ensures that the bit will be centered and will be
held firmly by the chuck jaws when they’re
tightened.
21. Drill bits usually have one of two styles of
shank. Either the shanks are round or they
have a hex profile. Nut drivers, screw driver
bits, and drivers for standard sockets intended
for use with Electric Drills typically have a hex
profile. Either type of shank will work in the
standard 3-jaw chucks, but they must all be
centered properly and the chuck must be
properly tightened.
22. If you’re using the impact feature available
on some Electric Drills, the bits you use must
be rated for use in an impact drill/driver.
Using standard bits in an impact driver can lead
to damage to the bit and potential injury
depending on what happens if the bit fails.
23. If your drill has an impact feature, it’s
important to know if it’s on full time or if it
can be selected. If the drill has impact
capability, you need to know how it’s selected
and how it’s turned on and off to properly
configure the drill for the task you want to
perform. It’s also important to be able to turn
the impact function OFF if you’ll be using
bits that aren’t impact rated.
24. There are two types of chuck tightening
mechanisms on drills commonly seen in
modern shops. The older method, still
common, uses a chuck key. These are called
“keyed chucks”. The newer method uses a
keyless chuck, which can be tightened by
hand. There are different variations of
keyless chucks, but the concept is similar.
Make sure that you know how your specific
chuck tightens and loosens the installed bit. .
Consulting the user’s manual for the model of
drill you’re working with is the proper first step
in learning how to work with your chuck for the
first time. If you still have questions, you should
ask the Shop Foreman to direct you to someone
with the experience to help you use your style
of chuck.
25. Most Electric Drills are variable speed tools;
use the proper speed for the size and type of
drill bit you’re using and for the material
you’re working with. This is a situation where
referring to the user’s manual that came with
the drill you’re using would be wise. It’s also
important to have information on the proper
speed range to use with the bit you have
installed.
26. The most common way that speed is
controlled on Electric Drills is by how far the
user depresses the trigger. In general, when
adjusting the speed of the Electric Drill choose
slower speeds for larger diameter holes and
when cutting material that can be damaged by
buildup of heat, such as plastics. Choose faster
speeds for small diameter holes with bits that
feed easily like standard twist drills. Familiarize
yourself with the characteristics of different
drill bit styles (twist bits, brad point bits, selffeeding bits, spade bits, hole saws, etc.) and the
factors that influence the rate that each style of
bit can cut.
The Charlotte Woodworkers Association | Electric Drill Safety Rules
Effective
4/8/14 DP/WJ
27. Understand how the Electric Drill you’re
using controls speed. On most electric drills,
this is done using the trigger switch as outlined
above. Some models, however, have several
speed ranges. They are usually variable speed
drills but with different maximum speeds.
Choosing the correct speed range is an
important part of setting up the drill for safe use
in your application. If you’ve never used this
model of drill before, you can learn about speed
controls and speed range selection from the
user’s manual or from someone who’s familiar
with the model of drill you’ll be using. If you
can’t locate the user’s manual, and you don’t
know someone with experience who can help
you, contact the Shop Foreman and they’ll help
you find someone who can help you find the
manual or who can answer your questions on
how to use this feature of the drill you plan to
use.
You need to understand the speed range of
the drill you’ll be using and how to control
those speeds in order to operate the drill
efficiently and safely.
28. Most new Electric Drills have can reverse
their direction of rotation. This allows tasks
like removing screws to be accomplished easily.
You should learn how the reversing feature
works on your model of Electric Drill (with
most it’s just a switch lever under the trigger). If
you can’t determine how the drill’s direction of
rotation is changed from the user’s manual, ask
the Shop Foreman to help you find the
assistance you need.
29. Dust collection for handheld Electric Drills is
not common, but is available as an accessory
for some brands, particularly for impact drivers.
If your drilling application needs dust
collection, please contact a Shop Foreman for
assistance.
30. Use only accessories that are recommended
by the manufacturer for your model of drill
or that are approved for use with your
specific Electric Drill model. Accessories that
may be suitable for one model of a tool may
become hazardous when used on another model.
31. Secure material before drilling. Secure and
support the stock being drilled. If drilling
through holes, the best results can be achieved
by clamping the stock with a sacrificial backer
32.
33.
34.
35.
36.
37.
board underneath so that the drill bit will exit
the workpiece cleaning as it starts to cut into the
backer board. NEVER support stock to be
drilled by hand or with any part of your
body (or an assistant’s body). Instead clamp
it properly to an appropriate supporting
surface and take steps so that you don’t drill
into the support unless you plan to replace
the support after use. Holding the work by
hand or against your body is dangerous and
unstable; taking that approach may lead to loss
of control if the drill bit seizes in the hole while
you’re drilling and could lead to serious injury.
Make sure all supports, clamps and holding
devices are clear of the drill bit’s path before
continuing.
Keep the stock clamped to the support until the
drill bit has been withdrawn from the workpiece
and the drill has stopped turning.
Make certain that all locking adjustments
are properly locked and the bit is secured
properly before plugging the handheld
Electric Drill in. Loose adjustments or drill bits
can slip and cause loss of control. A general
best practice is to lock each adjustment properly
before moving on to the next task as you make
the Electric Drill ready for drilling. NOTE:
properly tightened means just that, follow the
instructions in the user’s manual or other
reliable reference. These parts can be over
tightened too, so be sure you know how tight is
“properly” tightened.
Before starting to drill a hole, carefully locate
the hole’s center, mark it for easy reference
and, if necessary to properly locate the
starting point for the drill bit, mark the
center with an awl or sharp punch so that the
bit will have an easy time remaining on
center as you start drilling. This is more of an
issue with standard twist bits than it is with bits
with sharp center points like those found on
Forstner and brad point bits.
Most drill bits are sharp enough to cut you.
Handle drill bits with care to avoid injury.
The sharp edges of most drill bits can be
damaged if they are mishandled, dropped, or
stored improperly. Handle drill bits with care
and respect. Store them in the proper holders so
that their edges are protected and don’t drop
The Charlotte Woodworkers Association | Electric Drill Safety Rules
Effective
4/8/14 DP/WJ
38.
39.
40.
41.
42.
43.
them, especially on hard floors like the concrete
floor in the shop.
Keep a firm grip on the Electric Drill to
maintain control and get the cleanest possible
result. Firm means comfortably firm, not a
knuckle whitening clenched grip.
Do not force the Electric Drill. Let the bit cut
at a rate where it is able to clear the chips
well and where you don’t feel like you’re
asking it to bore the hole faster than it’s able
to cut without bogging down. If you’re using
the right bit at the proper speed it should
drill smoothly. The correct tool, properly
configured, will do the job better and more
safely at the rate it was designed for. If you’re
having problems, contact the Shop Foreman
who can help you determine what’s going
wrong.
Forcing a bit to cut faster than it’s able to will
result in poor cut quality and can result in
broken bits when using smaller diameter (less
than 1/4 inch) bits and can be a serious safety
issue with larger bits if the bit catches and twists
the drill from your hands.
Before making any adjustments, performing
maintenance, changing accessories, or
changing bits, turn the Electric Drill “OFF”,
let it come to a complete stop, then unplug it
or remove the battery pack. Such preventive
safety measures reduce the risk of starting the
tool accidentally.
When removing drill bits after the drill has
been running, do so with CARE!
Woodworking and metalworking bits are
SHARP, and after you’ve been using the drill
for a while, they can be HOT! When removing
the bit from the Electric Drill do so with care to
avoid cutting, and possibly burning, yourself.
Some dust created by power sanding, sawing,
and grinding, drilling, and other construction
activities contains chemicals known to cause
cancer, birth defects or other reproductive
harm. Some examples of these chemicals are:
• Lead from lead-based paints
• Crystalline silica from bricks, cement and
other masonry materials
• Arsenic and chromium from chemically
treated lumber
44.
45.
46.
47.
48.
49.
50.
Your risk from these exposures varies,
depending on how often you do this type of
work. To reduce your exposure to these
chemicals: work in a well ventilated area, and
work with approved safety equipment, such as
those dust masks that are specially designed to
filter out microscopic particles.
Never abuse the power cord on corded tools.
Never use the cord to carry the Electric Drill.
Maintain tools with care. Keep the tools
clean and in good repair and keep drill bits
clean and sharp. Properly maintained tools,
with sharp bits, are less likely to bind and are
easier to control. Any alteration or modification
of the Electric Drill is considered misuse and
may result in a dangerous condition.
Inspect your stock carefully before drilling.
Stock should be clean, free of dirt and other
debris, and not have metal fasteners of any kind
in the area that will be drilled unless you’re
deliberately drill those areas with a metal
cutting drill bit.
Never place any part of your body directly in
line with the drill bit’s path. If you do,
eventually you’ll end up drilling a hole in
yourself!!! That is painful at a minimum and
could be fatal at worst.
STOP the drill and wait until the bit has come to
a complete stop before moving the workpiece or
clearing sawdust and chips by hand or with a
brush. This is much safer than working around a
moving drill bit.
Do not drill a workpiece that is too small to be
safely supported and held securely. If you have
small parts that need to have holes drilled in
them and you don’t know how to hold them
safely while drilling ask the Shop Foreman to
help you find someone who can assist you.
There are so many ways to safely hold material
for drilling that someone will almost always be
able to provide a good recommendation that
will allow you to hold the work safely for
drilling.
When taking a break or when finished using
the drill for the day, unplug the Electric Drill
or remove the battery pack, remove the bit
and store the drill and all its accessories
properly, out of the reach of children and
The Charlotte Woodworkers Association | Electric Drill Safety Rules
Effective
4/8/14 DP/WJ
other untrained persons. Tools are dangerous
in the hands of untrained users.
51. Before storing the Electric Drill for the day,
clean it to remove sawdust so that it will be free
of debris when the next person wants to use it.
Coil the cord neatly (if it has one), and then
store it properly.
Maintenance and Service
1. Tool service must be performed only by
qualified repair personnel. Service or
maintenance performed by unqualified
personnel could result in a risk of injury. For
example, internal wires may be misplaced or
pinched. If a tool belonging to CWA or our host
organization needs maintenance, contact the
Shop Foreman. If the tool is still under
warranty, they will make arrangements for the
service to be done under the warranty. If the
manufacturer’s warranty has expired, they will
ensure that the tool is repaired by properly
qualified repair personnel.
2. When servicing a tool, use only identical
replacement parts. Follow instructions in the
Maintenance section of the manual
applicable to that make and model of tool.
Use of unauthorized parts or failure to follow
the correct maintenance instructions may create
a risk of electric shock or injury. Certain
cleaning agents such as gasoline, carbon
tetrachloride, ammonia, etc. may damage plastic
parts. Before using chemical cleaning agents on
a tool check the manual for that make and
model of tool for approved cleansers and
cleaning procedures.
The Charlotte Woodworkers Association | Electric Drill Safety Rules
Effective
4/8/14 DP/WJ