1
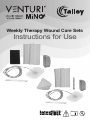
Weekly Therapy Wound Care Sets
Instructions for Use
2
EN
Foam Weekly Therapy Wound Care Sets - Contents: 150ml Drainage Canister, 2 x
Gauze Weekly Therapy Wound Care Sets - Contents: 150ml Drainage Canister, 2 x
Portal Drain, 2 x Gauze, 2 x Saline, 3 x Transparent Wound Dressing Film, 2 x Measuring Tape
Please check each Wound Care Set component before use. Do not use sterile items if packaging
is damaged or unsealed. Do not use components past their expiry date.
INDICATIONS FOR USE
Use of the VENTURI® NPWT systems is indicated for use for patients with acute or chronic wounds.
Wounds that may benefit from the application of negative pressure therapy include:- Partial/
Full thickness Pressure Ulcers; Dehisced surgical wounds; Diabetic/Neuropathic ulcers; Venous
leg ulcers; Post surgical wounds; Sinus drainage and management; Traumatic wounds; Pre-op
flap/graft; Post op surgical flap/grafts; Necrotising fasciitis; Burns
CONTRAINDICATIONS FOR USE
Do not place NPWT dressings directly in contact with exposed blood vessels, anastomotic
sites, organs or nerves. NPWT is contraindicated for patients with:- Malignancy in the wound;
Untreated osteomyelitis; Non-enteric and unexplored fistulas; Wounds with difficult haemostasis;
Necrotic tissue with eschar present
NOTE: After debridement of necrotic tissue and complete removal of eschar, NPWT can be
used.
Please refer to the VENTURI® MiNO NPWT System User Manual for detailed power unit operation
instructions and to the VENTURI® Clinical Guidelines Manual for further information on application
of Wound Care Sets and other clinical advice and safety information.
Application Instructions
CAUTION! The medical professional is responsible for using his/her best medical judgement
when using this kit. Prior to use, the medical professional(s) treating the wound must assess how
to best use the kit for an individual wound.
1.
If required, irrigate the wound bed thoroughly with approximately 20ml of normal saline.
Ensure surrounding wound edges are dry.
2. Prepare the periwound area if required by applying a liquid barrier film. For patients with
fragile or excoriated periwound tissue, a protective thin layered dressing, thin hydrocolloid,
or a vapour permeable adhesive film, may be applied to the periwound area.
3. If required, apply non-adherent wound contact layer as per local protocol to the wound
surface, ensuring that the edges of this non-adherent are within the wound margins.
4.
TR
PL
CZ
RO
If using foam:
Measure the wound dimensions, length,
breadth and depth, and cut the foam to these
dimensions to allow it to be placed gently into
the wound. Once cut gently rub the foam
edges to remove any loose pieces of foam.
Do not cut or rub the foam over the wound.
Gently place the foam in the wound cavity
covering the entire wound base, sides and
undermined areas. If the wound is large – more
than one piece of foam may be required, if
more than one piece is used please ensure
that all adjoining edges of the foam are in
direct contact with each other to ensure an
even distribution of negative pressure. Count
the pieces of foam used and record the total
in the patient’s notes.
EL
PT
NO
SV
DA
FI
NL
IT
ES
DE
FR
Portal Drain, 2 x Foam Pad, 3 x Transparent Wound Dressing Film, 2 x Measuring Tape
5.
6.
If using gauze:
Moisten the gauze with saline and
place this into the wound to fill the
cavity, making sure the gauze is
in contact with any undermined
or tunnelled areas. CAUTION! It is
critical that the gauze is moistened
rather than saturated with normal
saline prior to filling the wound. If
the wound is large and more than
one piece of gauze is used, check
that all pieces are in direct contact
with each other to ensure an even
distribution of negative pressure.
Count the pieces of gauze used
and record the total in the patient’s
notes.
Place the transparent dressing over the filled wound, ensuring contact with at least 2.5cm
of intact skin beyond the wound edges.
Lift the transparent dressing slightly with the thumb and forefinger and cut a oval shaped
hole approx. 1cm diameter over the foam/gauze (do not cut into the foam/gauze).
DE
ES
IT
NL
FI
DA
SV
NO
PT
EL
TR
PL
CZ
RO
Ensure that the patient/wound is suitable for negative pressure wound therapy.
Read and follow all user instructions and safety information that accompany Talley products.
Ensure accuracy of diagnosis and address all underlying and associated co-morbidities.
Ensure appropriate dressing methods are used.
Ensure appropriate debridement prior to treatment.
Do not tightly pack dressings into the wound; place dressings gently into the wound.
Ensure a good dressing seal has been achieved.
Accurately record the number of dressing pieces used in the patient’s chart.
Keep the VENTURI® power unit switched on at all times during NPWT. At the end of NPWT
treatment apply an alternative dressing at the direction of the treating clinician, if required.
l Monitor continuously and check and respond to operation status/fault indicators.
l If any signs of irritation or sensitivity to the dressing or tubing assembly appear, discontinue use
and consult a physician.
l When dressing is removed, count the number of dressing pieces removed, correlate the
count with the number of pieces previously placed in the wound and verify the complete
removal of all dressing pieces.
l If no response or improvement in the wound is observed within two weeks, reassess the
treatment plan.
l Seek advice/support from local Talley personnel as needed.
lVENTURI® canisters and the components of the wound care set are for single use only.
l
l
l
l
l
l
l
l
l
FR
SAFETY POINTS TO REMEMBER WHEN THE USING THE VENTURI® NEGATIVE PRESSURE WOUND
THERAPY SYSTEMS:
EN
7. Apply the portal drain over this area ensuring that the hole in the portal drain aligns with
the hole cut into the transparent dressing. Attention should be paid to the site of the portal
drain and tubing to avoid placing over bony prominences or within creases in the tissues.
8. Apply gentle pressure around the portal drain to ensure complete adhesion.
9. Attach the drainage canister to the VENTURI® MiNO power unit by lining up the two parts,
pushing together and twisting to lock.
10. Attach the portal drain to the power unit canister by pushing the tubing firmly and fully onto
the tubing connector located on the top of the canister. Push the tubing down into the
channel to assist with the routing of the tubing.
11. Turn on the power unit to initiate suction (see main User Manual for information). Once the
power unit is running, observe the wound site. The dressing should contract noticeably,
becoming firm to the touch. If the dressing fails to contract, the dressing has not been
completely sealed. Reinforce the dressing seal and/or adjust the drain and initiate suction
again.
12. Check for dressing integrity every 2-3 hours and at every shift change.
13. Depending on patient status and clinical judgement, the initial dressing change should
take place after 48 hours and then 48-72 hours thereafter. For infected wounds the dressing
may need to be changed initially every 24 hours.
14. To change or remove dressing, press the RUN/STOP button to switch off the power unit.
Clamp the Wound Care Set tubing and remove by lifting the tubing up from the routing
channel and pulling from the tubing connector on the canister. Dispose of used Wound
Care Set according to local clinical waste policy. If required, apply new Wound Care Set
and continue NPWT.
NB. NPWT dressings are not bio-absorbable. Always count the total number of pieces
removed from the wound and ensure the same number of pieces were removed as
placed. Dressings left in the wound for longer than the recommended time period may be
difficult to remove from the wound, or lead to infection or other adverse events. If significant
bleeding develops, immediately discontinue the use of the NPWT system, take measures to
stop the bleeding, and do not remove the dressing until the treating physician or surgeon is
consulted. Do not resume the use of the NPWT system until adequate haemostasis has been
achieved, and the patient is not at risk for continued bleeding.
15. Canisters should be replaced as required or weekly. To change canister, clamp and remove
Wound Care Set tubing as above (this can be reconnected to new canister and unclamped
if wound dressing is not being changed). Rotate canister to unlock and remove from
power unit. Dispose of used canister according to local clinical waste policy. If continuing
NPWT, attach new canister and connect Wound Care Set tubing as previously described.
USER LEAFLET PART NUMBER 50-05-05-105 (UK)
Talley Group Limited
Premier Way, Abbey Park Industrial Estate
Romsey, Hampshire, SO51 9DQ England
TEL: +44(0)1794 503500
FAX: +44(0)1794 503555
EMAIL: [email protected]
10/2014
www.talleygroup.com