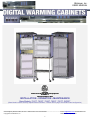
1
Blickman, Inc. USER MANUAL 3171283 Conforms to Medical Electrical Equipment UL 60601-1 CSA C22.2 #601.1-M90 INSTALLATION • OPERATION • MAINTENANCE Base Models: 7921T, 7922T, 7924T, 7925T, 7927T, SW30T (Base Model numbers suffix by alphanumerical numbers – Please refer to page 19 for detail model configuration) _____________________________________________________________________________________________________________________________ 500 US Highway 46 East● Clifton, NJ 07011 ● 800-247-5070 ● Fax: 973-330-0594 e-mail: [email protected] ●www.blickman.com Copyright © 2011 Blickman, Inc. TDWTSTGBHI ● April 12, 2012 1 Blickman, Inc. USER MANUAL Table Of Contents 1. Warnings and Cautions (Mises en garde et precautions)…………. 3 – 4 2. Installation…………………………………………………………….... 5 3. Quick Start……………………………………………………………… 6 – 8 4. Operation……………………………………………………………….. 9 – 13 5. Routine Preventative Maintenance…………………………………... 14 6. Troubleshooting – Error Codes………………………………………. 15 7. Replacement Part list……..…………………………………………… 16 8. Wiring – Block Diagram……………………………………………….. 17 – 18 9. Technical Data…………………………………………………………. 19 – 20 10. Warranty Provision………………………………………………….. 21 _____________________________________________________________________________________________________________________________ 500 US Highway 46 East● Clifton, NJ 07011 ● 800-247-5070 ● Fax: 973-330-0594 e-mail: [email protected] ●www.blickman.com Copyright © 2011 Blickman, Inc. TDWTSTGBHI ● April 12, 2012 2 Blickman, Inc. USER MANUAL 1.0 WARNINGS AND CAUTIONS 1.1 These Cabinets Have Been Designed to Heat: Liquids in vented containers. Liquids in non-vented containers to a temperature of 150°F maximum. Metal objects. Muslin or cotton sheets and wool blankets. 1.2 Following is a list of the safety precautions that must be observed when operating this equipment. WARNINGS indicate the potential for injury to personnel. CAUTIONS indicate the potential for damage to equipment. It is important to review these precautions before using the equipment. Warning – Injury Hazard: Warning – Electrical Shock Hazard: REPAIRS AND ADJUSTMENTS, other than those described in these instructions, should be performed only by experienced Blickman service representatives fully acquainted with this equipment. Use of inexperienced, unqualified persons to work on the equipment or installation of unauthorized parts could cause personal injury or result in costly damage. To provide continued protection against risk of electric shock, connect to properly grounded outlets only. DO NOT remove control tray. Contact qualified service personnel. Caution – Electromagnetic Interference: This equipment may cause electromagnetic or other interference between other devices. If this occurs, move the equipment away from the affected devices. Warning – Burn Hazard: DO NOT exceed 150°F for non-vented closures; (screw caps, crimp seals, plastic pouches, etc.) Do not exceed pre-sterile solution manufacturer’s temperature requirements. DO NOT raise set temperature to increase rate of heating. Allow approximately 4-6 hours for solutions to reach desired temperatures. DO NOT use liquids on - or inject in – living tissue… unless actual liquid temperature has been measured and is acceptable. Temperature of warming cabinet contents may be hotter than the displayed air temperature. For patient safety, in accordance with good medical practice, always check liquid temperature prior to using. Caution – Possible Equipment Damage: Some items are not acceptable in these warming cabinets. If in doubt as to whether an item can be safely processed, have facility supervisor contact the manufacturer of the item. Process only plastics rated as “thermal” (withstanding temperatures in excess of 300°F). Annealed borosilicate glass (Pyrex® type) containers are the only glass containers recommended for the unit. To process aqueous solutions, however, use appropriate containers and observe temperature limitations. Contact Blickman Customer Service at 1-800-247-5070 for any problems beyond the scope of this guide. Warning – Explosion Hazard: DO NOT use in the presence of flammable anesthetics. DO NOT heat liquids in the presence of flammable solvents. _____________________________________________________________________________________________________________________________ 500 US Highway 46 East● Clifton, NJ 07011 ● 800-247-5070 ● Fax: 973-330-0594 e-mail: [email protected] ●www.blickman.com Copyright © 2011 Blickman, Inc. TDWTSTGBHI ● April 12, 2012 3 Blickman, Inc. USER MANUAL 1.0 MISES EN GARDE ET PRÉCAUTIONS 1.1 Ces cabinets sont conçus pour chauffer: Les liquides contenus dans des conteneurs ventilés.. liquides dans des récipients non ventilée à une température maximale de 150 ° F. Des objets métalliques. mousseline ou des draps en coton et des couvertures de laine. 1.2 Après une liste des précautions de sécurité qui doivent être respectées lors de l'utilisation de cet équipement. AVERTISSEMENTS indiquer les risques de blessures pour le personnel. PRÉCAUTIONS indiquent le potentiel d'endommager l'équipement. It Il est important d'examiner ces précautions avant d'utiliser l'équipement. Mise en garde - Risques de blessures: Avertissement - Risque de chocs électriques: Réparations et ajustements, autres que ceux décrits dans ces directives, devrait être effectuée que par des représentants d'expérience au service Blickman pleinement familiarisé avec cet équipement. L'utilisation de inexpérimentés, des personnes non qualifiées pour travailler sur l'équipement ou installation de pièces non autorisées pourraient causer des blessures ou entraîner des dommages coûteux. Pour assurer une protection permanente contre le risque de choc électrique, connectez-vous à des points de la terre seulement. NE PAS retirer la gouttière de contrôle. Contactez le personnel qualifié de service. Attention - Interférences électromagnétiques: Avertissement - risques de brûlures: Cet équipement mai provoquer des interférences électromagnétiques ou d'autres avec d'autres appareils. Si cela se produit, déplacer le matériel loin des appareils concernés. NE PAS dépasser 150 ° F pour des fermetures sans évent; (capsules à vis, à sertir les phoques, les sachets en plastique, etc) Ne pas dépasser pré-constructeur de solution stérile's exigences de température. NE PAS soulever la température de consigne d'augmenter le taux de chauffage. Prévoir environ 4-6 heures pour les solutions d'atteindre des températures désiré. NE PAS utiliser de liquides à bord - ou injecter dans - les tissus vivants ... à moins que la température de liquide luimême a été mesurée et est acceptable. Température du réchauffement contenu de l'armoire mai être plus chaud que la température affichée air. Pour la sécurité des patients, conformément aux bonnes pratiques médicales, il faut toujours vérifier la température du liquide avant d'utiliser. Mise en garde - Possibilité d'endommager l'équipement: Certains articles ne sont pas acceptables dans ces armoires réchauffement. En cas de doute quant à savoir si un article peut être traitée en toute sécurité, avoir des contacts superviseur de l'usine du fabricant de la question.. Processus plastiques jugés à "thermique" (résister à des températures supérieures à 300 ° F). Recuit verre borosilicaté (Pyrex ®) conteneurs sont les contenants de verre seulement recommandé pour l'unité. Pour traiter des solutions aqueuses, cependant, utiliser un emballage adéquat et respecter les restrictions de la température. Contactez le Service à la clientèle Blickman 1-800-247-5070 pour toute des problèmes qui dépassent la portée du présent guide. Avertissement - Risque d'explosion: NE PAS utiliser en présence d'anesthésiques inflammables. NE PAS chauffer des liquides en présence de solvants inflammables. _____________________________________________________________________________________________________________________________ 500 US Highway 46 East● Clifton, NJ 07011 ● 800-247-5070 ● Fax: 973-330-0594 e-mail: [email protected] ●www.blickman.com Copyright © 2011 Blickman, Inc. TDWTSTGBHI ● April 12, 2012 4 Blickman, Inc. USER MANUAL 2.0 INSTALLATION 2.1 Receiving and Opening Cartons and Crates. Your order has been shipped according to the terms and conditions agreed upon between the ordering party and Blickman. The following steps should be taken by your receiving personnel to ensure that your order is damage-free and in proper order and condition: Upon receipt of packing list, verify the number of cartons, crates, and packages to make sure that you have received all materials listed. Check cartons, crates, and packages for signs of mishandling and other damage. Before signing transport truck delivery receipt, call driver’s attention to damages and note your comments on delivery and packing list. If possible, take photos of damage. Before opening, be sure that the carton or crate is in the upright position. When cartons, crates, and packages are opened, inspect items for concealed damages or missing parts. If items will be stored, do not place cartons or crates on top of one another. This will prevent damage and eventual breakage. 2.2 Location for Use. This unit is intended for use in a stable ambient environment, with an ideal temperature of 68 ° F or 20° C. The unit should never be used directly next to any appliance that may produce heat, such as Autoclave. 2.3 Unit furnished with Power Cord. 2.3.1 Carefully un-wrap packaged parts. 2.3.2 Place cabinet in front of its permanent 2.4.2 Carefully pull the drawer half way out. location. 2.4.3 Feed electrical supply into cabinet through 2.3.3 Plug the unit into the correct (properly rear of the cabinet. grounded outlet only) electrical supply… 100 -120VAC, 15 AMP, 60 Hz or 220 - 240VAC, 15 AMP, 60 Hz 2.3.4 Carefully roll the unit to its permanent location. 2.4 Unit to be Hard-Wired at the facility. 2.4.1 Open door and remove the drawer screws (2 screws) from underneath top drawer. 2.4.4 Connect electrical supply. 2.4.5 Replace drawer and screws. _____________________________________________________________________________________________________________________________ 500 US Highway 46 East● Clifton, NJ 07011 ● 800-247-5070 ● Fax: 973-330-0594 e-mail: [email protected] ●www.blickman.com Copyright © 2011 Blickman, Inc. TDWTSTGBHI ● April 12, 2012 5 Blickman, Inc. USER MANUAL 3.0 Quick Start 3.1 These Cabinets Have Been Designed to Heat: Liquids in vented containers. Liquids in non-vented containers to a temperature of 150°F / 65°C Maximum. Metal objects. Muslin or cotton sheets and wool blankets. Note: Glass containers must be annealed borosilicate glass (Pyrex® type). Plastic containers must be rated “thermal” capable of withstanding temperatures in excess of 300° F / 149° C. Load contents must be placed in compartment to allow for adequate air circulation. Control panel equipped with latest reliable Tactile Membrane Switches, apply firm pressure to activate. 3.2 Recommended Settings Blickman does not recommend any operating temperature set point. For appropriate heating temperatures, please contact the manufacturer of the goods being heated. Controller will perform self-test, read the temperature sensor, and control the relay output(s) to maintain actual temperature equal to the set point temperature (Factory set @ 90° F). 3.5 Set Processing Temperature 3.3 Load 3.3.1 Open heating compartment door(s) and place article to be heated in the chamber, and close the door. It is necessary to maintain at least one-inch space from each side and from the bottom of the fan unit, to permit adequate air circulation and to prevent from overheating. 3.5.1 Press key Once to select Upper Chamber or Twice to select Lower Chamber. (Pressing “Set Temp” key will toggle between Upper and Lower chambers.) key to clear existing 3.5.2 Press temperature. 3.5.3 Key in desired temperature* using numeric key pad. Example: Press * Minimum Temperature Set point is 90°F / 32°C and Maximum Temperature Set point is 160°F / 71°C. 3.4 Start 3.4.1 Apply power to the system by pressing the . 3.5.4 Press power switch to the “ON” position. 3.5.5 Press mode / screen. key to set temperature. key to return to the operating _____________________________________________________________________________________________________________________________ 500 US Highway 46 East● Clifton, NJ 07011 ● 800-247-5070 ● Fax: 973-330-0594 e-mail: [email protected] ●www.blickman.com Copyright © 2011 Blickman, Inc. TDWTSTGBHI ● April 12, 2012 6 Blickman, Inc. USER MANUAL 3.0 Quick Start (cont.) 3.9.3 If the alarm activated under normal 3.6 Lock Set Temperature - Using “Key” 3.6.1 To “lock” the processing temperature, simply insert “Key”, turn to “Lock” position, and remove “Key”. (Be sure to store “Key” in a secure location.) When the set point key lock is locked, all membrane switches will be ignored. LED next to “Locked” will light. 3.6.2 To unlock, re-insert key, return to Set point “Unlock” position — either remove or leave it in place. 3.7 Lock Set Temperature - Using Password 3.7.1 To “lock” or “Unlock” the processing temperature, simply press operating conditions, turn power OFF and call Blickman Customer Service at 1-800-2475070. 3.10 Operation Mode 3.7.1 This mode is entered at power on, or accessed from the Main Menu. Single Input Unit key. Dual Input Unit 3.7.2 Press key to clear existing value. 3.7.3 Key in factory set pin code (see # 3.12 to define custom code) key. Upper Chamber and press Lower Chamber 3.7.4 Press key to return operation screen. LED next to “Locked” will light. 3.11 Trend View 3.11.1 Trend view is a graphical representation of recent temperature conditions. 3.8 Change Temperature Unit, °F ↔ °C 3.8.1 Press key to toggle the displayed temperature readings between Celsius and Fahrenheit. It will also toggle the °C and °F LED’s accordingly. key to view Trend Screen 3.11.2 Press while on operation mode. Trend Upper Scale Value Actual Temperature Trend 3.9 Over Temperature Alarm Actual Temp. at Cursor line 3.9.1 The temperature setting may be changed whenever desired; however, reducing the set temperature to a lower temperature could activate the over-temp alarm buzzer. 3.9.2 The alarm may activate when lowering Set-Point Tend Cursor Line Trend Lower Scale Value Time Marker Sample Interval 3.11.3 Press through timeline. the chamber temperature. Press to silence the alarm and open the door(s) to release heated air. or key to navigate _____________________________________________________________________________________________________________________________ 500 US Highway 46 East● Clifton, NJ 07011 ● 800-247-5070 ● Fax: 973-330-0594 e-mail: [email protected] ●www.blickman.com Copyright © 2011 Blickman, Inc. TDWTSTGBHI ● April 12, 2012 7 Blickman, Inc. USER MANUAL 3.0 Quick Start (cont.) 3.14 Door Hinge Reversal 3.12 Define Custom Lock-code / Password 3.12.1 Press + Main menu screen. keys together to view 3.12.2 Press + keys together to view password configuration menu screen. 3.12.3 Follow the direction at the bottom of the screen to change factory set lock code (10) to any desired 4 digits “custom lock code” to prevent unauthorized access to critical functional menus. 3.13 Self-Closing Door Adjustment 3.13.1 Remove snap-on cover of the hinge. 3.13.2 Insert a 3/32” (0.090”) diameter dowel pin (not supplied) into one of the adjusting holes on the adjusting shaft. Remove locking pin. Rotate counter-clockwise to increase and clockwise to reduce the self-closing tension. Replace the locking pin in the hole nearest to the hinge adjusting plate and remove the dowel pin. Assemble snap-on cover. 5. Slide the drawer, remove screws to dismount drawer front 3.13.3 Repeat above steps for all hinges. 3.13.4 Simply remove locking pin from all hinges to prevent door from self-closing. 6. Change door lock position with the dummy plug and vice versa _____________________________________________________________________________________________________________________________ 500 US Highway 46 East● Clifton, NJ 07011 ● 800-247-5070 ● Fax: 973-330-0594 e-mail: [email protected] ●www.blickman.com Copyright © 2011 Blickman, Inc. TDWTSTGBHI ● April 12, 2012 8 Blickman, Inc. USER MANUAL 4.0 OPERATION 4.1 Operator Interference 4.1.1 There are 16 keys used by the operator. The 0 – 9 key pad is used for entering numbers and navigating the controllers menus, the CLEAR MUTE key is used to confirm the alarm, The ENTER key is used to confirm the entry of a number, the SET TEMP key is used to jump to the setpoint editing screens and the PASSWORD key is used for entry of the setpoint locking password. 4.1.2 The main operator display will show the current process variable and setpoint. When the system is a dual chamber controller then the display will show the process variable and setpoint for both chambers. 4.2 Screen Navigation 4.2.1 The controller has the following HMI (Human – Machine Interface) structure: Operator Mode + Main Menu Configuration Mode Tuning Mode USB Mode Energy Saver Mode Recorder Mode Product Information _____________________________________________________________________________________________________________________________ 500 US Highway 46 East● Clifton, NJ 07011 ● 800-247-5070 ● Fax: 973-330-0594 e-mail: [email protected] ●www.blickman.com Copyright © 2011 Blickman, Inc. TDWTSTGBHI ● April 12, 2012 9 Blickman, Inc. USER MANUAL 4.0 OPERATION (cont.) 4.2.2 The keys are used for the following functions: Navigate up through menu/parameter lists Navigate down through menu/parameter lists Navigate to the previous screen Navigate to the next item on a screen or the next screen + Navigate back through the modes Clears the current value ready for entry of the new value Confirm the value that has just been edited When in the operator mode the °C/°F key is used to switch between °C and °F. When entering a value this button is used to enter a negative number. 4.3 Setpoint Editing 4.3.1 On pressing the SET TEMP key the screen will change to allow editing of the upper chamber setpoint and when the system is a dual chamber controller pressing the SET TEMP again will jump to the lower chamber setpoint editing screen. 4.3.2 When the key lock is in the lock position the setpoint can not be changed. When the key lock is in the unlock position the setpoint can be locked by entering a valid setpoint lock code or unlocked by repeating the process. (Lock toggled by entering a valid lock code) 4.3.3 The lock code can be entered by pressing the PASSWORD key. On entering a valid lock code the setpoint lock led is toggled indicating that the setpoint can be edited or not. Operator Screen Setpoint Password Not available if key locked Chamber 1 Setpoint Editing Screen Not available if setpoint locked Chamber 2 Setpoint Editing Screen _____________________________________________________________________________________________________________________________ 500 US Highway 46 East● Clifton, NJ 07011 ● 800-247-5070 ● Fax: 973-330-0594 e-mail: [email protected] ●www.blickman.com Copyright © 2011 Blickman, Inc. TDWTSTGBHI ● April 12, 2012 10 Blickman, Inc. USER MANUAL 4.4 Main Menu 4.4.1 This menu is used to access the various features and configuration menus available in the instrument. 4.4.2 To prevent unauthorized entry, most modes require a pass-code or unlock code (1 to 9999) to gain entry. These modes are indicated by the symbol against their names. The default unlocks code for all modes are 10 and the current codes can be viewed and changed from the Lock Code View in Configuration Mode. Main Menu: Operation Mode Display of the process and setpoint values and selection/adjustment of the Setpoint’s Configuration Menu Accesses the sub-menus for Input; Control; Alarms; Communications; Recorder; Clock; Display; Lock Codes and Reset To Defaults menus and functions. Automatic Tuning Selection of Pre-Tune, Self-Tune and Auto Pre-Tune. USB Menu Downloading instrument data recordings. ESM Menu Energy Saving Mode Configuration. Recorder Menu Manually starting, stopping and deleting recordings. Product Information Instrument information. Service Information Contact information for service/support etc. 4.5 Data Recorder and USB Interface 4.2.1 The warming cabinet is equipped with built-in temperature data recorder. The recorder will record date and time, actual temperature (PV), setpoint temperature (SP), and the status of the upper and lower chambers at desired intervals (factory set interval = 1 hr) set by the user using “Recorder Menu” function. 4.2.2 The format of the saved data is as follow: Format Date Month/Day/Year Time Hours:Minutes:Seconds PVUpper Actual Temperature Upper Chamber (###.#) SPUpper SetPoint Temperature Upper Chamber (###) PVLower Actual Temperature Upper Chamber (###.#) SPLower SetPoint Temperature Upper Chamber (###) OPUpper Upper Heater Status, 1 = ON; 2 = OFF OPLower Lower Heater Status, 1 = ON; 2 = OFF 4.2.3 Upon inserting a USB stick into the USB port the controller will initialize USB stick, switch the display to the USB menu. The user will then be able to enter a folder name the logged files will be saved to on the USB stick. 4.2.4 The recorder log files are stored in .csv format; the first recorder log file written is named 000001-1.csv and placed in the new Recorder sub-folder. Stopping/starting a recording does not create a new file. If any of these files would exceed the maximum spreadsheet size of 65500 data lines, a new file is created with the last digit incremented by 1 (e.g. 000001-2.csv then 000001-3.csv). _____________________________________________________________________________________________________________________________ 500 US Highway 46 East● Clifton, NJ 07011 ● 800-247-5070 ● Fax: 973-330-0594 e-mail: [email protected] ●www.blickman.com Copyright © 2011 Blickman, Inc. TDWTSTGBHI ● April 12, 2012 11 Blickman, Inc. USER MANUAL 4.0 OPERATION (cont.) 4.6 Screen Navigation / Sequences The parameters displayed depend on how the instrument has been configured. After 2 minutes without key activity, most screens revert to the next higher menu level, until reaching the base Operation Mode display. Screens marked persist unless changed by the user. Menus marked = Require a password for access. 4 = Accept Value & Move Back 8 = Next Item/Increment 2 = Prior Item/Decrement 6 = Accept Value & Move Forward 2 + 6 = Move Up One Menu Level The symbols are showed to the right of the lists when more menu options are available above or below . Operation Mode: Base operating screen. This screen shows the current temperature and the setpoint. Chamber Setpoint Editing of chamber setpoint (only available on single variant) – can not be accessed if the setpoint is locked Upper chamber setpoint Editing of the upper chamber setpoint (only available on dual variant) – can not be accessed if the setpoint is locked Lower chamber setpoint Editing of the lower chamber setpoint (only available on dual variant) – can not be accessed if the setpoint is locked Configuration Menu: Configuration Mode Unlocking Enter correct code number to access Configuration Mode. Default Value = 10 Configuration Options Select required Configuration Menu Option from list. Press 6 to continue. MAIN MENU OPTIONS Select Main MenuS Option from list. Press to continue. - Press + to move from Operation Mode to Main Menu Refer to the next page for Configuration Sub-Menus screen sequences. Automatic Tuning Menu: Automatic Tuning Mode Unlocking Enter correct code number to access Automatic Tuning Menu. (Upper) Pre-Tune Turn Pre-Tune on/off. Pre-Tune is disabled in On-Off Mode; if PV <5% of span from SP; during Profiles or if a Ramping Setpoint is set. (Upper) Pre-Tune Status Shows current Pre-Tune status. Active or Inactive. (Upper) Self-Tune Turn Self-Tune on/off. Self-Tune is disabled in On-Off Mode and is suspended during setpoint ramping or profile ramp segments. (Upper) Self-Tune Status Shows current Self-Tune status. Active or Inactive. Lower Pre-Tune Turn Pre-Tune on/off. Pre-Tune is disabled in On-Off Mode; if PV <5% of span from SP; during Profiles or if a Ramping Setpoint is set. (only available on dual variant) Lower Pre-Tune Status Shows current Pre-Tune status. Active or Inactive. (only available on dual variant) Lower Self-Tune Turn Self-Tune on/off. Self-Tune is disabled in On-Off Mode and is suspended during setpoint ramping or profile ramp segments. (only available on dual variant) Lower Self-Tune Status Shows current Self-Tune status. Active or Inactive. (only available on dual variant) USB Menu: USB Access Unlocking Enter correct code number to access USB Menu. Default Value = 10 Read/Write To USB Device? From: Read/Write Configuration File; Read/Write Profile File or Write Recorder Log File. Enter A File or Folder Name Enter an 8-character folder name for logs. Caution: Existing files/folders with the same name will be over-written. Writing File(s) The file is being written. Caution: Do not disconnect USB device until completed! Data loss or corruption may result. Transfer Successful Confirmation of successful data transfer. Press 6 to continue Energy Saver Mode Setup: ESM Mode Unlocking Enter correct code number to access Data Recorder Menu. Default Value = 10 ESM Status Turn ESM on/off. Enabled or Disabled. This must be set to Disabled to edit settings. Mon – Fri : Day Enter the Time for the start of this event and temperature(s) - Press Clear to edit values, Enter to confirm, and 6 to advance to next setting Mon – Fri : Night Enter the Time for the start of this event and temperature(s) - Press Clear to edit values, Enter to confirm, and 6 to advance to next setting Sat – Sun: Day Enter the Time for the start of this event and temperature(s) - Press Clear to edit values, Enter to confirm, and 6 to advance to next setting Sat – Sun: Night Enter the Time for the start of this event and temperature(s) - Press Clear to edit values, Enter to confirm, and 6 to advance to next setting Recorder Menu: Recorder Mode Unlocking Enter correct code number to access Data Recorder Menu. Default Value = 10 Recording In Progress Warning If recording in progress when Recorder Menu entered. - Access to the Start/Stop or Abort screens only until the recording is stopped. Start/Stop Data Recording Manually Stop, or Start a new recording. Recorder Status Information Shows if a recording is in progress; the recording mode; memory usage per sample; memory remaining and approximate recording time remaining. Delete Recording Clears the recorder memory. Caution: Permanently removes All recorded data. Product Information Mode: Input Calibration Status Calibration status of mVDC and Thermocouple CJC inputs. Both should be “Calibrated”. Firmware Information Type and version of firmware. Serial Number Information Instrument serial number. Date of Manufacture Date of Manufacture Service Information Mode: For Service Contact Contact information for Service, Sales, or Technical Support. _____________________________________________________________________________________________________________________________ 500 US Highway 46 East● Clifton, NJ 07011 ● 800-247-5070 ● Fax: 973-330-0594 e-mail: [email protected] ●www.blickman.com Copyright © 2011 Blickman, Inc. TDWTSTGBHI ● April 12, 2012 12 Blickman, Inc. USER MANUAL CONFIGURATION MENU OPTIONS Select required Main Menu Option from list. Press 6 to continue. - Press 2 + 6 to move back to Main Menu 4.0 OPERATION (cont.) Input Configuration: Process Variable Input Type Thermocouple inputs. - see specifications section for details. Engineering Units Select display units from: °C or °F. Decimal Point Position Display resolution with 0 or 1 decimal place. (Upper) Input Range Minimum Sets the usable span within the overall range selected for the input type (min = 100 units, max = range limits - see specs) (Upper) Input Range Maximum (Upper) Process Variable Offset Trims the PV. +Ve values add to, –Ve values subtract from measured input. Caution: Use with care! (Upper) Input Filter Time Filter unwanted noise from input signal. Adjustable from 0.1 to 100.0 seconds or OFF (default = 2s). Caution: Use with care! Lower Input Range Minimum Sets the usable span within the overall range selected for the input type (min = 100 units, max = range limits - see specs) (Only available on Dual variant) Lower Input Range Maximum Lower Process Variable Offset Trims the PV. +Ve values add to, –Ve values subtract from measured input. Caution: Use with care! (Only available on Dual variant) Lower Input Filter Time Filter unwanted noise from input signal. Adjustable from 0.1 to 100.0 seconds or OFF (default = 2s). Caution: Use with care! (Only available on Dual variant) (Upper) Control Configuration: Proportional Band From: On-Off control or 0.1% to 999.9% proportional band. Read Only during automatic tuning. Integral Time Constant Integral Time value (Automatic Reset) from 1s to 99min 59s or OFF. Read Only during automatic tuning Derivative Time Constant Derivative Time value (Rate) from 1s to 99 min 59s or OFF. Read Only during automatic tuning Manual Reset (Bias) Manual Reset value (Bias) from 0-100% (-100 to +100% for Primary & Secondary control type). On-Off Differential Primary On-Off control hysteresis (deadband) from 0.1 to 10.0% of Span (centred about setpoint). Cycle Time Output Cycle Time from 0.5s to 512s. Power Minimum Minimum Output Power limit, from 0 to 90%. Must be 10 or more % less than the upper limit. Caution: Use with care Power Maximum Maximum Output Power limit, from 10 to 100%. Must be 10 or more % higher than the lower limit. Caution: Use with care Setpoint Maximum Maximum allowable setpoint values. Adjustable within Input Span limits. Caution: Use with care! Setpoint Minimum Minimum allowable setpoint values. Adjustable within Input Span limits. Caution: Use with care! Lower Control Configuration: (Only available on Dual variant) Proportional Band From: On-Off control or 0.1% to 999.9% proportional band. Read Only during automatic tuning. Integral Time Constant Integral Time value (Automatic Reset) from 1s to 99min 59s or OFF. Read Only during automatic tuning Derivative Time Constant Derivative Time value (Rate) from 1s to 99 min 59s or OFF. Read Only during automatic tuning Manual Reset (Bias) Manual Reset value (Bias) from 0-100% (-100 to +100% for Primary & Secondary control type). On-Off Differential Primary On-Off control hysteresis (deadband) from 0.1 to 10.0% of Span (centred about setpoint). Cycle Time Output Cycle Time from 0.5s to 512s. Power Minimum Minimum Output Power limit, from 0 to 90%. Must be 10 or more % less than the upper limit. Caution: Use with care Power Maximum Maximum Output Power limit, from 10 to 100%. Must be 10 or more % higher than the lower limit. Caution: Use with care Setpoint Maximum Maximum allowable setpoint values. Adjustable within Input Span limits. Caution: Use with care! Setpoint Minimum Minimum allowable setpoint values. Adjustable within Input Span limits. Caution: Use with care! Alarm Configuration: Alarm 1 Type From: Unused; High; Low; Deviation; Band; Control Loop; PV Signal Break; Alarm 1 Value Alarm activation point. – applicable if type is High; Low; Deviation (+ve above, -ve below SP) or Band (above or below SP). Alarm 1 Hysteresis Deadband on “safe” side of alarm, through which the signal must pass before alarm deactivates. Alarm 1 Inhibit Prevents alarm activation if the alarm condition is true at power up. Activation occurs only after the condition has passed and then reoccurred. Alarm 2 Type From: Unused; High; Low; Deviation; Band; Control Loop; PV Signal Break; (only available on dual variant) Alarm 2 Value Alarm activation point. – applicable if type is High; Low; Deviation (+ve above, -ve below SP) or Band (above or below SP). (only available on dual variant) Alarm 2 Hysteresis Deadband on “safe” side of alarm, through which the signal must pass before alarm deactivates. (only available on dual variant) Alarm 2 Inhibit Prevents alarm activation if the alarm condition is true at power up. Activation occurs only after the condition has passed and then reoccurred. (only available on dual variant) Loop Alarm Type From: Automatic (2x Integral Time Constant) or Manual (from Loop Alarm Time screen). Manual Loop Alarm Time Time allowed (after PID power output reaches min or max), for process to begin responding. Alarm activates if no response. Recorder Configuration: Recording In Progress Warning Recording Mode Recording Sample Interval Recorder Status Information Recorder Clock Configuration: Date Format Set Date Set Day Of Week Set Time Display Configuration: Display Colour Invert Display Display Contrast If recording in progress when Recorder Configuration entered. - Access to the Start/Stop or Abort screens only until the recording is stopped. Record Until Memory Used (Stop recording when full) or Continuous FIFO (First In - First Out - overwrites oldest data when full). From: Every 1; 2; 5; 10; 15; 30 Seconds, or Every 1; 2; 5; 10; 15; 30; 60 Minutes Shows if a recording is in progress; the recording mode; memory usage per sample; memory remaining and approximate recording time remaining. The format used for displayed dates: dd/mm/yyyy (Day / Month / Year) or mm/dd/yyyy (Month / Day / Year). Sets the internal clock Date. – Entered in the format defined by Date Format screen. Sets the day of week used by the internal clock. Sets the internal clock Time. - In hh:mm:ss (Hours : Minutes : Seconds) format. Changes the backlight colour from red to green on alarm, green to red on alarm, always red and always green Standard or Negative display image. Screen contrast (0 and 100) to improve clarity. 100 = maximum contrast. Password Configuration: Configuration Mode Password Automatic Tuning Password USB Menu Password Recorder Menu Password Setpoint Editing Password View and edit the Configuration Mode Password (1-9999 or OFF). Default Values = 10 View and edit the Automatic Tuning Mode Password (1-9999 or OFF). Default Values = 10 View and edit the USB Menu Password (1-9999 or OFF). Default Values = 10 View and edit the Recorder Menu Password (1-9999 or OFF). Default Values = 10 View and edit the Setpoint Editing Password (1-9999 or OFF). Default Values = 10 Reset To Defaults: Reset To Defaults Set all parameters to default values. Caution: User must reconfigure all required settings before using the instrument following a reset. _____________________________________________________________________________________________________________________________ 500 US Highway 46 East● Clifton, NJ 07011 ● 800-247-5070 ● Fax: 973-330-0594 e-mail: [email protected] ●www.blickman.com Copyright © 2011 Blickman, Inc. TDWTSTGBHI ● April 12, 2012 13 Blickman, Inc. USER MANUAL 5.0 ROUTINE PREVENTATIVE MAINTENANCE 5.1 Temperature Accuracy 5.1.1 Check display temperature accuracy on a periodic basis with a calibrated thermometer placed near fan inlet. 5.1.2 Air temperature near fan should be within 2°F / 1. 2°C of display temperature for upper chamber and counter top models and 3°F / 1.8°C for lower compartment. 5.1.3 If cabinet is not within these guidelines, contact your Blickman sales representative or call Blickman Customer Service at 1-800-247-5070 with Model and Serial Number (see section 6.5). 5.2 Product Cleaning 5.2.1 Regular cleaning is important to maintain the appearance of stainless steel equipment. Clean your product with a soft cloth and hot water or commercial stainless steel cleaner according to the cleaner’s directions. 5.2.2 Shelves, Sloping Top etc. can be cleaned with a solution of liquid dishwashing detergent and water or a solution of baking soda and water. Rinse and polish dry with a paper towel or soft cloth. Drying is very important to eliminate any film buildup that may develop from hard water deposits. 5.2.3 Avoid bleach, acids, strong alkali, and chlorine cleaners. They can cause discoloration, staining and eventual pitting. If any of these solutions are exposed to the surface, rinse off immediately. 5.2.4 Avoid coarse grit cleaners or steel wool pads. They can contaminate and scratch the surface leading to staining and rusting. 5.3 Tough Stains and Rust 5.3.1 Most stains are a result of water-borne minerals. Rust stains are a result of iron particles from an outside source (i.e. water, cookware, etc.) Persistent stains, (including rust) can be removed with a variety of mild, non-abrasive, stainless steel cleaners. Always rinse thoroughly when using any cleaner. See the Blickman website for further details at www.blickman.com. _____________________________________________________________________________________________________________________________ 500 US Highway 46 East● Clifton, NJ 07011 ● 800-247-5070 ● Fax: 973-330-0594 e-mail: [email protected] ●www.blickman.com Copyright © 2011 Blickman, Inc. TDWTSTGBHI ● April 12, 2012 14 Blickman, Inc. USER MANUAL 6.0 TROUBLESHOOTING GUIDE 6.1 The unit will not heat. Check that the door(s) is (are) closed. Check that the Power Switch is turned ON. Check that the building power is activated. 6.2 The unit heats, but does not reach the selected temperature. Allow enough operating time for temperature to reach set point. Open door(s) and hold down the door switch. Listen for fan operation. If no operation is audible, contact your Blickman sales representative or call Blickman Customer Service at 1-800-2475070. 6.3 Alarm LED is lit and audible alarm is activated. Refer to Operating Instructions para 3.9 on page 7 in this manual . 6.4 Technical or Customer Service Assistance. The warming cabinet Model Number and Serial Number is required in order to assist with any inquiry related to replacement parts, warranty claim or technical service. 3171283 Medical Equipment UL 60601-1 CSA C22.2 #601.1-M90 _____________________________________________________________________________________________________________________________ 500 US Highway 46 East● Clifton, NJ 07011 ● 800-247-5070 ● Fax: 973-330-0594 e-mail: [email protected] ●www.blickman.com Copyright © 2011 Blickman, Inc. TDWTSTGBHI ● April 12, 2012 15 Blickman, Inc. USER MANUAL 7.0 REPLACEMENT PARTLIST Part Number Description Model Used On 91B6221000 Over Temperature Switch All models XXXXT S / G / PTXX 91B5238000 Fan Motor All models XXXXT S / G / PTXX 9105407900 Door Switch for Glass Door For Glass Door only 9105407940 Door Switch for Solid Door For Solid Door only 91B7264010 Heating Element 120V, 750W 7921T; 7922T; 7924T; 7925T 91B7927010 Heating Element 120V, 350W 7927T 91BSW30010 Heating Element 120V, 750W SW30T 810R422844 Edgemount Door Hinge&Cover All models XXXX S / G / PTXX 810R422800 Self-Closing Spring Kit All models XXXX S / G / PTXX 810R42X0004 Edgemount Door Hinge-Cover All models XXXX S / G / PTXX _____________________________________________________________________________________________________________________________ 500 US Highway 46 East● Clifton, NJ 07011 ● 800-247-5070 ● Fax: 973-330-0594 e-mail: [email protected] ●www.blickman.com Copyright © 2011 Blickman, Inc. TDWTSTGBHI ● April 12, 2012 16 Blickman, Inc. USER MANUAL 8.0 WIRING – BLOCK DIAGRAM Upper Door Switch Lower Door Switch USB Upper J Thermocouple Controller Upper SSR Lower SSR Lower J Thermocouple Buzzer Key Switch _____________________________________________________________________________________________________________________________ 500 US Highway 46 East● Clifton, NJ 07011 ● 800-247-5070 ● Fax: 973-330-0594 e-mail: [email protected] ●www.blickman.com Copyright © 2011 Blickman, Inc. TDWTSTGBHI ● April 12, 2012 17 Blickman, Inc. USER MANUAL 8.0 WIRING – BLOCK DIAGRAM (cont.) UPPER CHAMBER HEAT ALARM LOCKED LCD Screen HEAT ALARM LOWER CHAMBER _____________________________________________________________________________________________________________________________ 500 US Highway 46 East● Clifton, NJ 07011 ● 800-247-5070 ● Fax: 973-330-0594 e-mail: [email protected] ●www.blickman.com Copyright © 2011 Blickman, Inc. TDWTSTGBHI ● April 12, 2012 18 Blickman, Inc. USER MANUAL 9.0 TECHNICAL DATA 9.1 Warming Cabinet Models and Specification Base Model XXXXT 7921T Single Chamber 7922T Single Chamber 7924T Dual Chamber 7925T Single Chamber 7927T Single Chamber SW30T Single Chamber 30W x 26.625D x 74.5H 30W x 26.625D x 35.5H 30W x 26.625D x 74.5H 30W x 26.625D x 24.5H 24W x 20.125D x 24.5H 30W x 20.625D x 60.0H Door Configuration XXXX G Enclosed - Glass Door S Enclosed - Solid Door (Stainless Steel) PTGG Pass Thru – Front & Rear Glass Doors PTGS Pass Thru – Front Glass & Rear Solid Doors PTSG Pass Thru – Front Solid & Rear Glass Doors PTSS Pass Thru – Front & Rear Solid Doors Rated Voltage # _ 100 ~120 VAC* 2 220 ~240 VAC * No suffix (blank) indicates standard 100 ~ 120 VAC 9.2 Temperature Controller PROCESS INPUT Sampling Rate: Impedance: Supply Variation: Humidity Influence: Process Display: Process Variable Input Offset: Sensor Break Detection: Supported Thermocouple Types & Ranges: Thermocouple Calibration: 2 per second. >10M resistive, except DC mA (5) and V (47k ). Supply voltage influence negligible within supply limits. Negligible if non-condensing. Displays up to 5% over and 5% under span limits. Reading adjustable ± Controller Span. +ve values added to Process Variable, -ve values subtracted from Process Variable Control goes to off. High & Sensor Break alarms activate. Type Range °C Range °F J (default) -200 to 999°C -328 to 999°F K -240 to 999°C -400 to 999°F Optional decimal place can be displayed up to 999.9°C/F 0.1% of full range, 1LSD (1°C for internal CJC). Linearization better than better 0.2°C (0.05 typical) BS4937, NBS125 & IEC584 DIGITAL INPUTS Volt-free contacts (or TTL): Digital Input Sensitivity: Digital Input 1 Function: Digital Input 2 Function: Digital Input 3 Function: Open contacts (>5000or 2 to 24VDC signal = Logic High Closed contacts (<50 or -0.6 to +0.8VDC signal = Logic Low. Edge Sensitive. Requires High-Low or Low-High transition to change function. Response within <0.25 second. Key lock input, locks access to editing the setpoint value Upper chamber door switch input, disables upper chamber control output Lower chamber door switch input, disables lower chamber control output OUTPUTS : SSR DRIVE Drive Capability: Isolation: SSR driver voltage >10V into 500 minimum. Not isolated from the universal input or Ethernet communications. _____________________________________________________________________________________________________________________________ 500 US Highway 46 East● Clifton, NJ 07011 ● 800-247-5070 ● Fax: 973-330-0594 e-mail: [email protected] ●www.blickman.com Copyright © 2011 Blickman, Inc. TDWTSTGBHI ● April 12, 2012 19 Blickman, Inc. USER MANUAL 9.0 TECHNICAL DATA (cont.) COMMUNICATIONS PC Configuration Connection: Isolation: Ethernet Connection: Protocol: Supported Speed: USB Connection: Protocol: Supply Current: Targeted Peripheral: LOOP CONTROL Tuning Types: Proportional Band: Automatic Reset: Rate: Manual Reset: Differential: Cycle Times: ALARMS Alarm Types: RS232 via PC Configurator Cable to RJ11 socket under case. Not isolated from input or SSR Driver outputs. For bench configuration only. CAUTION: Do not use in live applications. Connection via RJ45 connector. Modbus TCP. Slave only. 10BaseT or 100BaseT Connection via rear mounted 6 pin header. USB 1.1 or 2.0 compatible. Mass Storage Class. Up to 250mA. USB Memory Stick. Pre-Tune, Self-Tune or Manual Tuning. 0.5% to 999.9% of input span in 0.1% increments, or On/Off control. Integral Time Constant, 1s to 99min 59s and OFF Derivative Time Constant, 1s to 99 min 59s and OFF Bias 0 to 100%. ON/OFF switching differential 0.1% to 10.0% of input span Selectable from 0.5s to 512s. Up to 5 alarms selectable as Process High, Process Low, Band, Deviation, Sensor/input Break, Loop Alarm. Band and Deviation (high or low) alarm values are relative to the current setpoint value. Alarm Hysteresis: A deadband from 1 LSD to full span (in display units) for Process, Band or Deviation Alarms. OPERATING CONDITIONS (FOR INDOOR USE) Temperature: 0°C to 55°C (Operating), –20°C to 80°C (Storage). Relative Humidity: 20% to 95% non-condensing. Supply Voltage and Power: 100 to 240VAC 10%, 50/60Hz, 20VA. CONFORMANCE NORMS EMI: Safety Considerations: DISPLAY Display Type: Display Area: Display Characters: DATA RECORDER Recording Memory: Recording Interval: Recording Capacity: RTC Battery Type: RTC accuracy DIMENSIONS Weight: Size: Mounting Panel: Ventilation CE: Complies with EN61326. CE: Complies with EN61010-1. UL, cUL to UL61010C-1. Pollution Degree 2, Installation Category II. 160 x 80 pixel, monochrome graphic LCD with a dual colour (red/green) backlight. 66.54mm (W) x 37.42mm (H). 0 to 9, a to z, A to Z, plus ( ) - and _ 1Mb non-volatile flash memory. Data retained when power is turned off. 1; 2; 5; 10; 15; 30 seconds or 1; 2; 5; 10; 15; 30; 60 minutes. Dependant on sample rate and number of values recorded. Two values can be recorded for up to 7 days at 10s intervals. More values or faster sample rates reduce the maximum duration. VARTA CR 1616 3V Lithium. Clock runs for >1 year without power. Real Time Clock error <1second per day. 0.65kg maximum. 96 x 96mm (Front Bezel). 117mm (Depth Behind Panel). Panel must be rigid. Maximum thickness 6.0mm (0.25inch). 20mm gap required above, below and behind. _____________________________________________________________________________________________________________________________ 500 US Highway 46 East● Clifton, NJ 07011 ● 800-247-5070 ● Fax: 973-330-0594 e-mail: [email protected] ●www.blickman.com Copyright © 2011 Blickman, Inc. TDWTSTGBHI ● April 12, 2012 20 Blickman, Inc. USER MANUAL 10.0 WARRANTY BLICKMAN, INC. “Engineered for a Lifetime” Blickman Inc Warming Cabinet Warranty All warming cabinets manufactured by Blickman, Inc. will carry a lifetime guarantee against product craftsmanship, 1‐year labor and 2‐year part guarantee. The factory will service all units without cost to the buyer 1‐ year from shipment. After the 1‐year period, replacement of a defective part (labor) will be at buyer’s expense. Blickman, Inc. will exchange all defective parts at no cost to the buyer for a period of 2‐years from shipment. All defective parts must be returned within 30 days to ensure proper credit. “Our Reputation is Stainless” _____________________________________________________________________________________________________________________________ 500 US Highway 46 East● Clifton, NJ 07011 ● 800-247-5070 ● Fax: 973-330-0594 e-mail: [email protected] ●www.blickman.com Copyright © 2011 Blickman, Inc. TDWTSTGBHI ● April 12, 2012 21