1
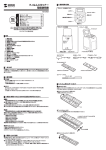
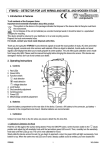
FCC_E.fm Page 1 Friday, August 9, 2002 5:28 PM
FCC Warning
The equipment has been tested and found to comply with the limits for a Class A digital
device, pursuant to Part 15 of the FCC rules. These limits are designed to provide reasonable protection against harmful interference when the equipment is operated in a commercial environment. This equipment generate, uses, and can radiate radio frequency energy
and, if not installed and used in accordance with this user's guide, may cause harmful interference to radio communications. Operation of this equipment in a residential area is likely
to cause harmful interference in which case the user will be required to correct the interference at his own expense.
CE Mark Warning
This is a Class A product. In a domestic environment, this product may cause radio interference, in which case the user may be required to take adequate measures.
Trademarks
Copyright ©2002 BenQ Corporation.
Contents subject to change without prior notice. BenQ is a registered trademark of BenQ
Corporation. All other trademarks belong to their respective proprietors.
Copyright Statement
No part of this publication may be reproduced in any form or by any means or used to make
any derivative such as translation, transformation, or adaptation without permission from
BenQ Corporation.
SE&SS0116.book Page i Friday, August 9, 2002 5:28 PM
Table of Contents
1. Introduction ............................................................................................1
1.1. Product Overview ................................................................................................1
1.2. Features & Specifications .....................................................................................1
1.2.1. Features ....................................................................................................................... 1
1.2.2. Technical Specifications ............................................................................................ 1
1.2.3. Physical Specifications .............................................................................................. 2
1.3. Product outlook and LED Display ....................................................................2
1.3.1. Product outlook ........................................................................................................ 2
1.3.2. LED Display ................................................................................................................ 3
1.4. Package contents ...................................................................................................3
2. Installation ................................................................................................3
2.1. Operating Environment .......................................................................................3
2.2. Connecting to network devices ........................................................................3
2.3. Connecting the power .........................................................................................4
3. Trouble Shooting ..................................................................................4
Appendix: .....................................................................................................4
Ordering Information ..................................................................................................4
i
SE&SS0116.book Page 1 Friday, August 9, 2002 5:28 PM
English
1. Introduction
1.1. Product Overview
This user’s manual describes and illustrates the installation method and usage of the 16/24
port Fast Ethernet Switch. The rack-mount switch (SE0016/SE0024) introduced here provides 16/24 10/100Mbps Fast Ethernet ports to segment traffic, extend Fast Ethernet connection distance, and convert data packets between different transmission speeds. This
Fast Ethernet Switch provides shielded RJ-45 ports both with 10Base-T and 100Base-TX
Auto-negotiation capability and MDI/MDIX auto crossover. All ports in this switch support
Full-Duplex and Half-Duplex operation modes.
Furthermore, this powerful Fast Ethernet Switch utilizes stored-and-forward switching
architecture that filters and forwards data after the complete data packet is received and
examined to be free of errors. With one set of status LEDs for each individual port, the
switch operation status can be easily monitored. The switch is rack-mount design that can
be mounted on the industrial standard 19 inches rack in the enterprise wiring center.
1.2. Features & Specifications
1.2.1. Features
• 16/24 port 10/100Base-TX, RJ-45 connector.
• Innovative Display panel design.
• Auto-negotiation for speed and half/full duplex.
• Complies with IEEE802.3 and IEEE802.3u Standards.
• Auto-MDI/MDIX detection.
• Support "True non-blocking architecture."
• Full wire speed forwarding.
• Operating at maximum packet filtering and forwarding rate.
• Support for Store-and-forward of packet switching.
• Flow Control.
• Broadcast storm control.
• Standard 19" Rack-mount size.
1.2.2. Technical Specifications
• Ethernet Standards
• Protocol
• 10/100Mbps Ports
• MAC address
• Buffer Memory
• LED report
• Transmission Method
• Forwarding Rate
IEEE 802.3 10Base-T, 802.3u 100Base-TX.
CSMA/CD
RJ-45 x 16 (SE0016), RJ-45 x 24 (SE0024)
8k (SE0016), 4K (SE0024)
512K Bytes (SE0016), 768K Bytes (SE0024)
per unit: Power Status.
per port: 10/100M;
LNK/ACT (port number);
FDX/COL.
Store-and-forward
14,880pps for 10Mbps;
148,800pps for 100Mbps
1. Introduction - 1
SE&SS0116.book Page 2 Friday, August 9, 2002 5:28 PM
English
1.2.3. Physical Specifications
• Power
• Operating Temperature
• Storage Temperature
• Operating Humidity
• Storage Humidity
• Emission Compliance
90VAC~240VAC 50Hz~60Hz
0°C ~ 50°C
-20°C ~ 70°C
10% ~ 90% RH
5% ~ 90% RH
FCC part 15 Class A, CE Mark, VCCI,
C-Tick
UL/CSA
W 435 mm x D 221 mm x H 44mm
(17.1”x 8.7”x1.8”). Standard 19” rack-mountable
size, one-unit-height.
2.9kg (6.41b)
• Safety
• Dimension
• Net Weight
1.3. Product outlook and LED Display
1.3.1. Product outlook
Front View
SE0016 Front Panel:
SE0024 Front Panel:
Rear View
SE0016/SE0024 Rear Panel:
1. Introduction - 2
SE&SS0116.book Page 3 Friday, August 9, 2002 5:28 PM
LEDs
Status
Steady
Off
On
Off
Power
100M
(Green)
Indication
Power on
Power off
100M mode
10M mode
A valid network connection established.
LNK stands for LINK.
Activity, Transmitting, or receiving data.
Neither valid network connection nor transmitting
established.
Connection in full duplex mode.
FDX stands for FULL-DUPLEX.
Collision occurred.
Connection in half-duplex mode.
Steady
Port Number
(Green)
Flashing
Off
FDX/COL
(Yellow)
Steady
Flashing
Off
1.4. Package contents
Packing List
SE0016/SE0024 x 1
AC power cord x 1
This User’s Guide
Rack-mount ears with screws
Warranty Card
If any item is found missing or damaged, please contact your local BenQ reseller for
replacement.
2. Installation
2.1. Operating Environment
This switch must be installed and operated within the limits of specified operating temperature and humidity (see previous section under Specifications).
• Do not place objects on top of the unit.
• Do not obstruct any vents at the sides of the unit.
• Do not position the unit near any heating source such as heater, radiator, or direct exposure to sun.
• Prevent entering of water and moisture into the unit.
• If necessary, use dehumidifier to reduce humidity.
• Always avoid dust and dirt.
• Allow some space between the product and the surroundings to facilitate dissipation of
heat generated inside the switch.
2.2. Connecting to network devices
The RJ-45 ports on the switch are designed as MDI/MDIX auto crossover ports which
allow using straight-through cables to connect any port on this switch to network device.
Connect one end of the network cable to the RJ-45 port on the front panel, and connect
the other end of the network cable to the RJ-45 port on the network device. Follow the
2. Installation - 3
English
1.3.2. LED Display
English
SE&SS0116.book Page 4 Friday, August 9, 2002 5:28 PM
same procedure to connect all the RJ-45 ports of the switch. The UTP network cables
must comply with EIA/TIA 568 specifications and Category 5 standard for 100Mbps data
transmission and Category 3, 4, 5 for 10Mbps connection. Maximum length, using UTP
cable, between the switch and connected device is 100 meters (328ft). Once the network
cable is connected to both ends and the attached network device is powered on, the LEDs
should be lit.
2.3. Connecting the power
Connect the output end of the power cord to the power connector on the rear panel of
the unit. Then connect the power cord to the power outlet. The green Power LED on the
front panel should be lit.
3. Trouble Shooting
The SE0016/SE0024 can be easily monitored by its LED indicators. Please follow the troubleshooting steps below to solve any problem you may encounter during installation or
implementation of the SE0016/SE0024.
1. Power LED is not lit
Check if the power cord is properly connected to the power outlet and is firmly
plugged into the power socket of the switch.
2. Port Number(Green) is not lit when connected to a valid LAN device
• Check the power switch of the network device attached to the switch; make sure it is
turned ON.
• Check the network cable; make sure it is properly connected to the switch and the network device.
• Check the network cable; make sure the UTP cables comply with EIA/TIA 568 and Category 5 specification.
Please perform the following tests:
• Please check whether the RJ-45 cable is functional. Replace with another working cable
and see whether the condition can be improved.
• Use another port on the SE0016/SE0024. If a link can be established this way, the first
port is faulty. Please contact your local BenQ dealer for assistant.
• Make sure that all devices are connected to the network.
• Please ensure that the network adapter cards installed in the workstation or other
devices to the switch are in well working condition.
[!] Contact your dealer if problem persists.
Appendix:
Ordering Information
Part Number
Model
99.332N2.101
SE0016
16-Port Fast Ethernet Switch
Description
99.334N2.101
SE0024
24-Port Fast Ethernet Switch
3. Trouble Shooting - 4
SE&SS0116.book Page i Friday, August 9, 2002 5:47 PM
Inhalt
1. Einführung ................................................................................................1
1.1. Produktübersicht ..................................................................................................1
1.2. Features & technische Daten .............................................................................1
1.2.1. Features ....................................................................................................................... 1
1.2.2. Technische Daten ...................................................................................................... 1
1.2.3. Physische Daten ......................................................................................................... 2
1.3. Produktübersicht und LED-Anzeige .................................................................2
1.3.1. Produktübersicht ....................................................................................................... 2
1.3.2. LED-Anzeige ............................................................................................................... 3
1.4. Packungsinhalt ........................................................................................................3
2. Installation ................................................................................................3
2.1. Betriebsumgebung ................................................................................................3
2.2. Anschluss an Netzwerkgeräte ...........................................................................3
2.3. Stromanschluss ......................................................................................................4
3. Problembehebung .................................................................................4
Anhang: .........................................................................................................4
Bestellinformation .........................................................................................................4
i
SE&SS0116.book Page 1 Friday, August 9, 2002 5:47 PM
1. Einführung
1.1. Produktübersicht
Darüber hinaus benutzt dieser leistungsfähige Fast Ethernet Switch einen "Stored-and-Forward"-Umschaltmechanismus, der Daten filtert und weiter sendet, nachdem das komplette
Datenpaket empfangen und auf Fehler überprüft wurde. Jede individuelle Schnittstelle
besitzt einen eigenen Satz von Status-LEDs, so dass der Status der Umschaltoperation
leicht erkannt werden kann. Der Switch ist für die Montage in einem standarmäßigen 19Zoll Einbaugehäuse für Verdrahtung in Firmen konzipiert worden.
1.2. Features & technische Daten
1.2.1. Features
• 16/24-Schnittstellen 10/100Base-TX, RJ-45-Anschluss.
• Innovatives Anzeigedesign.
• Auto-Negotiation für Geschwindigkeit und Half-/Full-Duplex.
• Entspricht den Standards IEEE802.3 und IEEE802.3u.
• Auto-MDI/MDIX-Erkennung.
• Unterstützung von "True-Non-Blocking"-Mechanismus.
• Forwarding mit voller Drahtgeschwindigkeit.
• Betrieb bei maximaler Paketfilter- und Forwarding-Rate.
• Unterstützt "Store-and-Forward"-Paketumschaltung.
• Flusskontrolle.
• Broadcast-Storm-Kontrolle.
• Standardmäßige 19"-Einbaugehäusegröße.
1.2.2. Technische Daten
• Ethernet-Standards
• Protokoll
• 10/100Mbps-Schnittstellen
• MAC-Adresse
• Puffer-Speicher
• LED-Report
• Übertragungsmethode
IEEE 802.3 10Base-T, 802.3u 100Base-TX.
CSMA/CD
RJ-45 x 16 (SE0016), RJ-45 x 24 (SE0024)
8k (SE0016), 4K (SE0024)
512K Bytes (SE0016), 768K Bytes (SE0024)
pro Einheit: Strom-Status.
pro Schnittstelle: 10/100M;
LNK/ACT (Schnittstellennummer);
FDX/COL.
Store-and-Forward
1. Einführung - 1
Deutsch
Dieses Benutzerhandbuch beschreibt und zeigt die Installation und das Benutzen des 16/24Schnittstellen Fast Ethernet Switches. Der hier vorgestellte in einem Einbaugehäuse installierte Switch (SE0016/SE0024) bietet 16/24 10/100Mbps Fast Ethernet-Schnittstellen zum
Segmentieren von Verkehr, zum Erweitern von Fast Ethernet-Verbindungsentfernungen und
zum Umwandeln von Datenpaketen in unterschiedlichen Übertragungsgeschwindigkeiten.
Dieser Fast Ethernet Switch bietet abgeschirmte RJ-45-Schnittstellen mit sowohl 10Base-T
als auch 100Base-TX Auto-Negotiation-Kapazitäten und MDI/MDIX-Auto-Crossover. Alle
Schnittstellen des Switches unterstützen die Betriebsmodi Full-Duplex und Half-Duplex.
SE&SS0116.book Page 2 Friday, August 9, 2002 5:47 PM
• Forwarding-Rate
14,880pps für 10Mbps;
148,800pps for 100Mbps
Deutsch
1.2.3. Physische Daten
• Strom
• Betriebstemperatur
• Lagertemperatur
• Luftfeuchtigkeit während Betrieb
• Luftfeuchtigkeit während Lagerung
• Emissionsrichtlinien
• Sicherheit
• Abmessungen
• Nettogewicht
90VAC~240VAC 50Hz~60Hz
0°C ~ 50°C
-20°C ~ 70°C
10% ~ 90% RH
5% ~ 90% RH
FCC Teil 15 Klasse A, CE Mark, VCCI,
C-Tick
UL/CSA
W 435mm x T 221mm x H 44mm
(17.1”x 8.7”x1.8”). Standardmäßige
19"-Einbaugehäusegröße, Eine-Einheit-Höhe.
2.9kg (6.41b)
1.3. Produktübersicht und LED-Anzeige
1.3.1. Produktübersicht
Vorderseite
Vorderseite von SE0016:
Vorderseite von SE0024:
Rückseite
Rückseite von SE0016/SE0024:
1. Einführung - 2
SE&SS0116.book Page 3 Friday, August 9, 2002 5:47 PM
1.3.2. LED-Anzeige
LEDs
Strom
100M
(Grün)
Status
Ständig
Aus
Ein
Aus
FDX/COL
(Gelb)
Ständig
Aufblinkend
Aus
1.4. Packungsinhalt
Packungsliste
SE0016/SE0024 x 1
1 Netzkabel
Dieses Benutzerhandbuch
Einbauschienen mit Schrauben
Garantiekarte
Wenn ein Teil fehlen oder beschädigt sein sollte, kontaktieren Sie bitte Ihren örtlichen
BenQ-Händler, um Ersatz zu erhalten.
2. Installation
2.1. Betriebsumgebung
Der Switch muss in einer Umgebung installiert und betrieben werden, in der die Grenzwerte für Betriebstemperatur und Feuchtigkeit eingehalten werden (siehe Technische
Daten).
• Stellen Sie keine Gegenstände auf die Einheit.
• Verdecken Sie nicht die Lüftungsschlitze auf den Seiten der Einheit.
• Stellen Sie die Einheit nicht in die Nähe einer Hitzequelle, z. B. einen Heizkörper, oder in
direktes Sonnenlicht.
• Vermeiden Sie, dass Wasser oder Feuchtigkeit in die Einheit eindringt.
• Benutzen Sie, falls nötig, einen Entfeuchter, um die Luftfeuchtigkeit zu reduzieren.
• Vermeiden Sie Staub und Schmutz.
• Sorgen Sie für Abstand zwischen dem Gerät und seiner Umgebung, um die Wärmeableitung vom Inneren des Switches zu erleichtern.
2.2. Anschluss an Netzwerkgeräte
Die RJ-45-Schnittstellen des Switches wurden als MDI/MDIX-Auto-Crossover-Schnittstellen entworfen, die das Benutzen von Straight-Through-Kabeln ermöglichen, um eine
beliebige Schnittstelle des Switches mit einem Netzwerkgerät zu verbinden.
Schließen Sie das eine Ende des Netzwerkkabels an die RJ-45-Schnittstelle auf der Vorderseite an. Schließen Sie das andere Ende des Netzwerkkabels an die RJ-45-Schnittstelle des
Netzwerkgeräts an. Gehen Sie auf die gleiche Weise vor, um alle RJ-45-Schnittstellen des
2. Installation - 3
Deutsch
Ständig
Schnittstellen
nummer
Aufblinkend
(Grün)
Aus
Anzeige
Strom ein
Strom aus
100M-Modus
10M-Modus
Eine gültige Netzwerkverbindung wurde erstellt.
LNK steht für LINK.
Aktivität, Daten werden übertragen oder empfangen
Weder gültige Netzwerkverbindung noch Übertragung wurde
erstellt.
Verbindung in Full-Duplex-Modus.
FDX steht für FULL-DUPLEX.
Kollision aufgetreten.
Verbindung in Half-Duplex-Modus.
SE&SS0116.book Page 4 Friday, August 9, 2002 5:47 PM
Deutsch
Switches anzuschließen. Die UTP-Netzwerkkabel müssen mit den EIA/TIA 568-Werten
und dem Kategorie-5-Standard für 100Mbps-Datenübertragung sowie Kategorie 3, 4, 5 für
10Mbps-Verbindung übereinstimmen. Die maximale Länge beim Benutzen eines UTPKabels zwischen dem Switch und angeschlossenem Gerät ist 100 Meter (328ft). Sobald das
Netzwerkkabel an beide Enden angeschlossen und das angeschlossene Netzwerkerät
eingeschaltet wurde, sollten die LEDs aufleuchten.
2.3. Stromanschluss
Schließen Sie das Ausgabeende des Netzkabels an den Stromanschluss auf der Rückseite
der Einheit an. Schließen Sie dann das Netzkabel an eine Netzquelle an. Die grüne StromLED auf der Vorderseite sollte aufleuchten.
3. Problembehebung
SE0016/SE0024 kann mit Hilfe der LED-Anzeigen einfach überwacht werden. Gehen Sie
bitte wie unten angegeben vor, um Probleme zu beheben, auf die Sie während der Installation oder des Benutzens von SE0016/SE0024 stoßen.
1. Strom-LED leuchtet nicht auf
Überprüfen Sie, ob das Netzkabel korrekt an die Netzquelle angeschlossen und fest in
die Strombuchse des Switches eingesteckt ist.
2. Schnittstellennummer (Grün) leuchtet nicht auf, wenn gültiges LANGerät angeschlossen ist
• Überprüfen Sie, ob der Stromschalter des an den Switch angeschlossen Netzwerkgeräts
eingeschaltet ist.
• Überprüfen Sie das Netzwerkkabel; gehen Sie sicher, dass es ordnungsgemäß an den
Switch und das Netzwerkgerät angeschlossen ist.
• Überprüfen Sie das Netzwerkkabel; gehen Sie sicher, dass die UTP-Kabel mit den Werten
für EIA/TIA 568 und Kategorie 5 übereinstimmen.
• Führen Sie bitte die folgenden Tests durch:
• Überprüfen Sie, ob das RJ-45-Kabel funktionsfähig ist. Ersetzen Sie es durch an anderes
funktionierendes Kabel und sehen, ob sich der Zustand verbessert.
• Benutzen Sie eine andere Schnittstelle von SE0016/SE0024. Wenn eine Verbindung auf
diese Weise hergestellt werden kann, ist die erste Schnittstelle fehlerhaft. Kontaktieren
Sie bitte Ihren örtlichen BenQ-Händler für Hilfe.
• Gehen Sie sicher, das alle Geräte an das Netzwerk angeschlossen sind.
• Gehen Sie sicher, dass die Netzwerk-Adapterkarten, die in die Workstation installiert
sind, oder andere Geräte, die an den Switch angeschlossen sind, einwandfrei funktionieren.
[!] Kontaktieren Sie Ihren Händler, wenn das Problem weiterhin besteht.
Anhang:
Bestellinformation
Teilenummer
Modell
99.332N2.101
SE0016
16-Schnittstellen Fast Ethernet Switch
Beschreibung
99.334N2.101
SE0024
24-Schnittstellen Fast Ethernet Switch
3. Problembehebung - 4
SE&SS0116.book Page i Friday, August 9, 2002 5:51 PM
Sommarie
1. Introduction ............................................................................................1
1.1. Présentation ...........................................................................................................1
1.2. Fonctionnalités & Caractéristiques ...................................................................1
1.2.1. Fontionnalités ............................................................................................................. 1
1.2.2. Caractéristiques techniques .................................................................................... 1
1.2.3. Caractéristiques physiques ...................................................................................... 2
1.3. Présentation du produit et Affichage LED ......................................................2
1.3.1. Vues du produit ......................................................................................................... 2
1.3.2. Affichage LED ............................................................................................................. 3
1.4. Contenu de l’emballage .......................................................................................3
2. Installation ................................................................................................3
2.1. Envrionnement d’exploitation ............................................................................3
2.2. Connexion aux périphériques de réseau ........................................................3
2.3. Connexion de l’alimentation ..............................................................................4
3. Dépannage ..............................................................................................4
Appendice: ...................................................................................................5
Renseignements pour la commande .........................................................................5
i
SE&SS0116.book Page 1 Friday, August 9, 2002 5:51 PM
1. Introduction
1.1. Présentation
Ce manuel d’utilisation décrit et illustre la méthode d’installation et d’utilisation du
commutateur Fast Ethernet 16/24 ports. Le commutateur monté sur châssis (SE0016/
SE0024) présenté ici fournit 16/24 ports de 10/100Mbps Fast Ethernet pour segmenter le
trafic, étendre la connexion Fast Ethernet, et convertir des paquets de données entre des
vitesses de transmission différente. Ce commutateur Fast Ethernet vous fournit des ports
pour connecteur RJ-45 avec la capacité d'auto-négociation 10Base-T et 100Base-TX et
traverse automatique MDI/MDI-X. Tous les ports de ce commutateur prennent en charge
les modes d'opération bidirectionnel simultané et semi-duplex.
1.2. Fonctionnalités & Caractéristiques
1.2.1. Fontionnalités
• 16/24 ports 10/100Base-TX, connecteur RJ-45.
• Panneau d’affichage de conception innovante.
• Auto-négociation pour la vitesse et le semi-duplex/bidirectionnel simultané.
• Conforme aux normes IEEE802.3 et IEEE802.3u.
• Détection automatique-MDI/MDIX.
• Prise en charge de l’ "architecture sans blocage."
• Acheminement en vitesse plein câble.
• Opération au taux maximum de filtrage des paquets et d’acheminement.
• Prise en charge de la méthode de commutation de stockage et acheminement des
paquets.
• Contrôle du flux.
• Contrôle de l’orage de transmission.
• Taille standard de 19" pour un montage sur châssis.
1.2.2. Caractéristiques techniques
• Normes Ethernet
• Protocole
• Ports 10/100Mbps
• Adresse MAC
• Mémoire tampon
• Rapport LED
• Méthode de transmission
IEEE 802.3 10Base-T, 802.3u 100Base-TX.
CSMA/CD
16xRJ-45 (SE0016), 24x RJ-45 (SE0024)
8k (SE0016), 4K (SE0024)
512K Octets (SE0016), 768K Octets (SE0024)
par unité: Etat de l’alimentation
par port: 10/100M;
LIEN/ACT (numéro du port);
FDX/COL.
Stockage et acheminement
1. Introduction - 1
Français
De plus, ce puissant commutateur Fast Ethernet utilise la méthode de commutation de
stockage et d'acheminement (store-and-forward) qui filtre et achemine les données après
que les paquets aient été reçus et examinés pour être sans erreur. Avec un ensemble de
LED d'état pour chaque port, les opérations du commutateur peuvent être facilement
surveillées. Ce commutateur a été conçu pour être monté sur un châssis industriel de 19
pouces dans le centre de câblage de l’entreprise.
SE&SS0116.book Page 2 Friday, August 9, 2002 5:51 PM
• Taux d’acheminement
14,880pps pour 10Mbps;
148,800pps pour 100Mbps
1.2.3. Caractéristiques physiques
Français
• Alimentation
• Température d’opération
• Température de stockage
• OHumidité d’opération
• Humidité de stockage
• Conformité d’émission
90VAC~240VAC 50Hz~60Hz
0°C ~ 50°C
-20°C ~ 70°C
10% ~ 90% RH
5% ~ 90% RH
Classe A partie 15 FCC, Marque CE, VCCI,
C-Tick
UL/CSA
L 435 mm x P 221 mm x H 44mm
(17.1”x 8.7”x1.8”). Taille standard 19”pour
montée sur châssis, une unité de hauteur.
2.9kg (6.41b)
• Sûreté
• Dimensions
• Poids net
1.3. Présentation du produit et Affichage LED
1.3.1. Vues du produit
Vue de devant
Panneau avant du SE0016:
Panneau avant du SE0024:
Vue de derrière
Panneau arrière du SE0016/SE0024:
1. Introduction - 2
SE&SS0116.book Page 3 Friday, August 9, 2002 5:51 PM
1.3.2. Affichage LED
les LED
Alimentation
100M
(Vert)
Statut
Continu
Eteint
Activé
Eteint
Continu
Numéro du
port (Vert)
Clignotant
Eteint
FDX/COL
(Jaune)
Continu
Clignotant
Eteint
1.4. Contenu de l’emballage
Liste des éléments
1xSE0016/SE0024
1x cordon d’alimentation secteur
Ce guide d’utilisation
Montants pour le châssis et vis
Carte de garantie
Si l'un des éléments était manquant ou endommagé, veuillez contacter votre revendeur
BenQ local pour le faire remplacer.
2. Installation
2.1. Envrionnement d’exploitation
Ce commutateur doit être installé et opéré dans les limites de température et d'humidité
spécifiées (Veuillez vous reporter à la section précédente et au paragraphe
Caractéristiques).
• Ne placez aucun objet sur l'unité.
• Ne bouchez pas les ouvertures latérales de l'unité.
• Ne postionnez pas l'unité près d'une source de chaleur, comme un radiateur, ou à
l'exposition directe du soleil.
• Evitez l'entrée d'eau ou de poussière à l'intérieur de l'unité.
• Si nécessaire, utilisez un déshumidificateur pour réduire l'humidité.
• Eviter toujours la poussière ou les salissures.
• Laissez de l'espace aux alentours du produit pour faciliter la dissipation de la chaleur
générée par le commutateur.
2.2. Connexion aux périphériques de réseau
Les ports RJ-45 du commutateur sont conçus comme des ports de traverse automatique
MDI/MDI-X qui vous permettent de connecter directement des câbles d'un périphérique
de réseau au port de ce commutateur.
2. Installation - 3
Français
Indication
Mise sous tension
Mise hors tension
mode 100M
mode 10M
Une connexion valide au réseau est établie.
LIEN signifie LIEN.
Activité, transmission ou réception de données.
Aucune connextion valide au réseau n’est établie et
aucune transmission de données n’est effectuée.
Connexion en mode bidirectionnel simultané.
FDX signifie bidirectionnel simultané.
Une collision a eu lieu.
Connexion en mode semi-duplex.
SE&SS0116.book Page 4 Friday, August 9, 2002 5:51 PM
Connectez l'une des extrémités du câble du réseau au port RJ-45 du panneau avant, puis
connectez l'autre extrémité du câble du réseau au port RJ-45 du périphérique de réseau.
Suivez la même procédure pour connecter les autres périphériques aux ports RJ-45 du
commutateur. Le câble de réseau UTP doit être conforme aux spécifications EIA/TIA 568
et à la norme Catégorie 5 pour une transmission des données à 100Mbps et à la Catégorie
3, 4, 5 pour une connexion à 10Mbps. La longueur maximum, avec un câble UTP, entre le
commutateur et le périphérique connecté est de 100 mètres (328ft). Une fois le câble du
réseau connecté à ses deux extrémités et que le périphérique de réseau est mis sous
tension, le LED s’allume.
Français
2.3. Connexion de l’alimentation
Connectez l'extrémité de sortie du cordon d’alimentation au connecteur d'alimentation
qui se trouve sur le panneau arrière de l'unité. Connectez le cordon d’alimentation à la
prise. Le LED vert d'alimentation du panneau avant doit s'allumer.
3. Dépannage
Le SE0016/SE0024 peut être facilement surveillé avec ses indicateurs LED. Veuillez suivre
les étapes de dépannage décrites ci-dessous pour résoudre un problème rencontré lors de
l'installation ou de l'utilisation du SE0016/SE0024.
1. Le LED d'alimentation ne s'allume pas
Vérifiez que le cordon d’alimentation est correctement connecté à la prise et qu’il est
fermement enfoncé dans le connecteur d’alimentation du commutateur.
2. Numéro du port(Vert) ne s’allume pas lorsqu’il est connecté à un
périphérique de réseau valide
• Vérifiez le commutateur d'alimentation du périphérique de réseau qui est connecté au
commutateur, et assurez-vous qu'il est bien sur la position Allumé.
• Vérifiez le câble du réseau; assurez-vous qu'il est correctement connecté au commutateur
et au périphérique de réseau.
• Vérifiez le câble du réseau; assurez-vous que les câbles UTP sont conformes au normes
EIA/TIA 568 et Catégorie 5.
Veuillez effectuer les tests suivants:
• Veuillez vérifier que le câble RJ-45 fonctionne. Remplacez-le par un câble qui fonctionne
déjà pour voir si les conditions peuvent être améliorées.
• Utilisez un autre port du SE0016/SE0024. Si un lien peut être établi de cette manière, le
port utilisé précédemment est fautif. Veuillez contacter votre revendeur BenQ pour une
assistance.
• Assurez-vous que tous les périphériques sont connectés au réseau.
• Assurez-vous que les cartes de réseau installées dans les postes de travail ou que les
autres périphériques connectés au commutateur fonctionnent.
[!]Contactez votre revendeur si le problème persiste.
3. Dépannage - 4
SE&SS0116.book Page 5 Friday, August 9, 2002 5:51 PM
Appendice:
Renseignements pour la commande
Numéro de la
pièce
Modèle
99.332N2.101
SE0016
Commutateur Fast Ethernet de 16-ports
99.334N2.101
SE0024
Commutateur Fast Ethernet de 24-ports
Description
Français
Appendice: - 5
SE&SS0116.book Page i Friday, August 9, 2002 6:01 PM
Sommario
1. Introduzione ............................................................................................1
1.1. Descrizione generale ............................................................................................1
1.2. Caratteristiche e specifiche tecniche ...............................................................1
1.2.1. Caratteristiche .......................................................................................................... 1
1.2.2. Specifiche tecniche ................................................................................................... 1
1.2.3. Specifiche di tipo ........................................................................................................ 2
1.3. Uno sguardo al prodotto e ai LED di segnalazione ......................................2
1.3.1. Uno sguardo al prodotto ....................................................................................... 2
Pannello frontale SE0024: ................................................................................................... 2
1.3.2. LED ............................................................................................................................... 2
1.4. Contenuto della scatola ......................................................................................3
2. Installazione .............................................................................................3
2.1. Ambiente di funzionamento ..............................................................................3
2.2. Connessione ai dispositivi della rete ................................................................3
2.3 Collegamento dell’alimentazione ........................................................................4
3. Ricerca guasti .........................................................................................4
Appendice: ...................................................................................................4
Informazioni per l’ordine: ...........................................................................................4
i
SE&SS0116.book Page 1 Friday, August 9, 2002 6:01 PM
1. Introduzione
1.1. Descrizione generale
Questo manuale dell’utente descrive ed illustra il metodo di installazione e di utilizzo dello
switch Fast Ethernet a 16/24 porte. Lo switch (SE0016/SE0024) è in esecuzione per montaggio a rack, possiede 16/24 porte Fast Ethernet a 10/100Mbps e serve a segmentare il
traffico, aumentare la distanza di connessione e convertire i pacchetti tra dispositivi con
velocità di trasmissione diversa. Questo Fast Ethernet Switch ha porte RJ-45 schermate
con capacità di autonegoziazione 10Base-T e 100Base-TX ed autocrossover MDI/MDIX.
Tutte le porte dispongono di modo Full-Duplex e Half-Duplex.
Inoltre questo potente Fast Ethernet Switch utilizza l’architettura “accumula e inoltra”
(stored-and-forward) che filtra e inoltra i dati dopo avere ricevuto il pacchetto completo
ed avere verificato che sia senza errori. Ogni porta possiede un insieme di LED di stato,
per cui si può capire facilmente lo stato della porta. Lo switch è in esecuzione per montaggio su rack industriale da 19 pollici, adatto a centrali di smistamento cavi.
1.2.1. Caratteristiche
• 16/24 porte 10/100Base-TX, connettore RJ-45.
• Profilo innovativo del pannello del display.
• Auto-negoziazione per la velocità di trasmissione e half/full duplex.
• Conforme alle norme IEEE802.3 e IEEE802.3u.
• Auto- rivelazione MDI/MDIX.
• Supporto " Architettura “True non-blocking.”".
• Trasmissione alla massima velocità “non blocking”.
• Funzionante alla massima capacità di filtro e di trasmissione.
• Supporto per commutazione del pacchetto accumula e inoltra (Store-and-forward).
• Controllo del Flusso.
• Controllo delle collisioni.
• Esecuzione standard Rack 19".
1.2.2. Specifiche tecniche
• Standard Ethernet
• Protocollo
• Porte10/100Mbps
• IndirizzamentoMAC
• Buffer di Memoria
• LED di segnalazione
• Metodo di Transmissione
• Velocità di trasmissione
IEEE 802.3 10Base-T, 802.3u 100Base-TX.
CSMA/CD
RJ-45 x 16 (SE0016), RJ-45 x 24 (SE0024)
8k (SE0016), 4K (SE0024)
512K Byte (SE0016), 768K Byte (SE0024)
per tutta l’unità: Stato dell’alimentazione
per port: 10/100M;
LNK/ACT (Numero della porta);
FDX/COL.
Accumula e inoltra
14,880pps per 10Mbps;
148,800pps per 100Mbps
1. Introduzione - 1
Italiano
1.2. Caratteristiche e specifiche tecniche
SE&SS0116.book Page 2 Friday, August 9, 2002 6:01 PM
1.2.3. Specifiche di tipo
• Alimentazione
• Temperatura di funzionamento
• Temperatura di magazzinaggio
• Umidità di funzionamento
• Umidità di magazzinaggio
• Norme di Emissione
90VAC~240VAC 50Hz~60Hz
0°C ~ 50°C
-20°C ~ 70°C
10% ~ 90% RH
5% ~ 90% RH
FCC parte 15 Classe A, Marchio CE, VCCI,
C-Tick
UL/CSA
L 435 mm x P221 mm x H 44mm
(17.1”x 8.7”x1.8”). RackStandard 19” ,
una unità di altezza
2.9kg
• Sicurezza
• Dimensioni
• Peso netto
1.3. Uno sguardo al prodotto e ai LED di segnalazione
Italiano
1.3.1. Uno sguardo al prodotto
Vista frontale
Pannello frontale SE0016:
Pannello frontale SE0024:
Vista posteriore
Pannello posteriore SE0016/SE0024l:
1.3.2. LED
LED
Stato
Stabile
Alimentazione
Spento
Acceso
100M
(Verde)
Spento
Indicazione
Acceso
Spento
modo 100M
modo 10M
1. Introduzione - 2
SE&SS0116.book Page 3 Friday, August 9, 2002 6:01 PM
Pronto
Numero della
porta (Verde)
Lampeggiante
Spento
FDX/COL
(giallo)
Stabile
Lampeggiante
Spento
È stabilita una valida connessione di rete.
LNK significa LINK (collegato).
In attività, trasmette o riceve dati.
Non c’è una connessione di rete valida o una trasmissione.
CConnessione in modo full duplex.
FDX significa FULL-DUPLEX.
Collisione.
Connessione in modo half-duplex.
1.4. Contenuto della scatola
Distinta dell’imballo
SE0016/SE0024 x 1
Cavo AC x 1
Questo manuale dell’utente
Supporti per il montaggio a rack e viti
Scheda di garanzia
2. Installazione
2.1. Ambiente di funzionamento
Questo switch deve essere installato e azionato nei limiti di temperatura ed umidità specificati. (Consultare la sezione precedente, sotto la voce Specifiche)
• Non collocare oggetti sopra di esso.
• Non ostruire le feritoie laterali.
• Non collocare lo switch vicino a sorgenti di calore come riscaldatori e radiatori, non
esporre al sole.
• Evitare l’ingresso di acqua o umidità nell’apparecchio.
• Se necessario, usare un deumidificatore per ridurre l’umidità.
• Evitare sempre la polvere e la sporcizia.
• Lasciare sempre dello spazio tra il dispositivo e gli oggetti attorno per facilitare la dissipazione del calore generato dallo stesso.
2.2. Connessione ai dispositivi della rete
Le porte RJ-45sullo switch sono progettate come porte auto-crossover MDI/MDIX, rendendo possibile l’uso di cavi diretti tra ogni porta di questo switch e ogni dispositivo della
rete.
Collegare un capo del cavo di rete alla porta RJ-45 sul pannello frontale, e l’altro capo del
cavo di rete alla porta RJ-45 sul dispositivo di rete. Seguire la stessa procedura per collegare tutte le porte RJ-45 dello switch. Il cavo UTP della rete deve essere conforme alle
norme EIA/TIA 568 e agli standard della categoria 5, per la trasmissione dati a 100 Mbps, e
delle categorie 3, 4, 5 per la trasmissione a 10Mbps. La massima lunghezza del cavo UTP tra
lo switch e i dispositivi connessi è di 100 metri (328ft). Appena il cavo di rete è collegato
sui due estremi e il dispositivo di rete connesso è acceso, si devono accendere i LED.
2. Installazione - 3
Italiano
Se una qualsiasi delle voci è mancante o danneggiata, rivolgersi al rivenditore locale dei prodotti BenQ per la sostituzione
SE&SS0116.book Page 4 Friday, August 9, 2002 6:01 PM
2.3 Collegamento dell’alimentazione
Collegare l’uscita dell’alimentatore al connettore sul pannello posteriore. Quindi inserire la
spina nella presa di rete. Il LED verde sul pannello frontale deve essere acceso.
3. Ricerca guasti
Lo switch SE0016/SE0024 può essere facilmente controllato mediante i suoi LED. Per la
ricerca guasti, operare come segue, al fine di risolvere qualsiasi problema che si possa
incontrare durante l’installazione o l’implementazione di SE0016/SE0024.
1. Il LED di alimentazione non è acceso.
Controllare che il cavo d’alimentazione sia opportunamente collegato alla rete. Assicurarsi
che la spina d’alimentazione sia ben inserita nella presa.
Italiano
2. Il numero della porta (Verde) non è acceso quando si collega la porta a
un dispositivo LAN valido.
• Controllare che il cavo d’alimentazione sia opportunamente collegato alla rete. Assicurarsi che la spina d’alimentazione sia ben inserita nella presa.
• Controllare il cavo di rete, assicurarsi che sia opportunamente collegato allo switch e alla
rete.
• Verificare il cavo di rete, assicurarsi che il cavo UTP sia conforme alle norme EIA/TIA 568
e categoria 5.
Eseguire i seguenti test:
• Controllare se il cavo RJ-45 funziona. Sostituirlo con un altro cavo e vedere se la situazione migliora.
• Usare un’altra porta su SE0016/SE0024. Se in questo modo il link funziona, la porta è
guasta. Rivolgersi al rivenditore locale dei prodotti BenQ per assistenza.
• Assicurarsi che tutti i dispositivi siano collegati alla rete
• Assicurarsi che le schede di rete, installate nella workstation o in altri dispositivi verso lo
switch, siano in buone condizioni.
[!] Rivolgersi al rivenditore se il problema persiste.
Appendice:
Informazioni per l’ordine:
Codice pezzo
Modello
99.332N2.101
SE0016
Fast Ethernet Switch a 16 porte
Descrizione
99.334N2.101
SE0024
Fast Ethernet Switch a 24 porte
3. Ricerca guasti - 4
SE&SS0116.book Page i Friday, August 9, 2002 5:31 PM
Contenido
1. Introducción ............................................................................................1
1.1. Generalidades ........................................................................................................1
1.2. Características y Especificaciones .....................................................................1
1.2.1. Características ............................................................................................................ 1
1.2.2. Technical Specifications ............................................................................................ 1
1.2.3. Physical Specifications .............................................................................................. 2
1.3. Vista del Producto y Display LED .....................................................................2
1.3.1. Vista del producto ..................................................................................................... 2
1.3.2. Display de LED ........................................................................................................... 3
1.4. Contenido del Paquete ........................................................................................3
2. Instalación ................................................................................................3
2.1. Entorno Operativo ...............................................................................................3
2.2. Conexión a dispositivos de red .........................................................................3
2.3. Conexión a la red eléctrica ................................................................................4
3. Resolución de problemas ....................................................................4
Apéndice: ......................................................................................................4
Información para ordenar ...........................................................................................4
i
SE&SS0116.book Page 1 Friday, August 9, 2002 5:31 PM
1. Introducción
1.1. Generalidades
Esta guía del usuario describe e ilustra acerca del método de uso e instalación del switch
Fast Ethernet de 16/24 puertos. El switch rackeable (SE0016/SE0024) introducido aquí
provee 16/24 puertos 10/100Mbps Fast Ethernet para segmentar el tráfico, extender la distancia de conexión Fast Ethernet, y convertir paquetes de datos entre diferentes
velocidades de transmisión Este Switch Fast Ethernet provee puertos RJ-45 blindados
tanto en 10Base-T como en 100Base-TX, capacidades de Auto-negociación y auto crossover MDI/MDI-X. Todos los puertos en este switch soportan modos de operación FullDúplex y Half-Dúplex.
Mas aún, este Switch Fast Ethernet utiliza una arquitectura de conmutación stored-and-forward que filtra y envía los datos una vez que el paquete completo de datos es recibido y
comprobado que está libre de errores. Con un conjunto de LEDs para el estado de cada
puerto individual, el estado de operación del switch puede ser fácilmente monitoreado.
Este switch posee un diseño rackeable de forma tal que puede ser montado en un rack
industrial estándar de 19" en el centro de cableado de la compañía.
1.2. Características y Especificaciones
1.2.1. Características
1.2.2. Technical Specifications
• Estándares Ethernet
• Protocolo
• Puertos 10/100Mbps
• Dirección MAC
• Memoria de Buffer
• Reporte del LED
• Método de Transmisión
IEEE 802.3 10Base-T, 802.3u 100Base-TX.
CSMA/CD
RJ-45 x 16 (SE0016), RJ-45 x 24 (SE0024)
8k (SE0016), 4K (SE0024)
512K Bytes (SE0016), 768K Bytes (SE0024)
por unidad: Estado de Alimentación.
por puerto: 10/100M;
LNK/ACT (número de puerto);
FDX/COL.
Store-and-forward
1. Introducción - 1
Español
• 16/24 puertos 10/100Base-TX, con conector RJ-45.
• Diseño innovador del panel de display.
• Auto-negociación tanto para velocidad como para modo half/full dúplex.
• Cumple con los estándares IEEE802.3 y IEEE802.3u.
• Auto-MDI/MDIX detection.
• Soporta arquitectura "True non-blocking".
• Envío a la velocidad del cable.
• Operación a la tasa máxima de filtrado de paquetes y reenvío..
• Soporta conmutación de paquetes Store-and-forward.
• Control de Flujo.
• Control de tormenta de Broadcast.
• Tamaño de rack estándar de 19".
SE&SS0116.book Page 2 Friday, August 9, 2002 5:31 PM
• Tasa de Reenvío
14,880pps a 10Mbps;
148,800pps a 100Mbps
1.2.3. Physical Specifications
• Alimentación
• Temperatura Operativa
• Temperatura de Almacenaje
• Humedad de Operación
• Humedad de Almacenaje
• Normas de Emisión
• Seguridad
• Dimensiones
• Peso Neto
90VAC~240VAC 50Hz~60Hz
0°C ~ 50°C
-20°C ~ 70°C
10% ~ 90% RA
5% ~ 90% RA
FCC part 15 Class A, CE Mark, VCCI,
C-Tick
UL/CSA
W 435 mm x D 221 mm x H 44mm
(17.1”x 8.7”x1.8”). Rack Estándar 19" una
unidad.
2.9kg (6.41b)
1.3. Vista del Producto y Display LED
1.3.1. Vista del producto
Español
Vista Frontal
Panel Frontal SE0016:
Panel Frontal SE0024:
Vista Trasera
Panel Trasero SE0016/SE0024:
1. Introducción - 2
SE&SS0116.book Page 3 Friday, August 9, 2002 5:31 PM
1.3.2. Display de LED
LEDs
Poder
100 M
(Verde)
Número de
Puerto (Verde)
FDX/COL
(Amarillo)
Estado
Prendida
Apagada
Prendida
Apagada
Prendida
Intermitente
Indica
Alimentado
Sin alimentación
Modo 100Mb
Modo 10Mb
Una conexión válida a la red ha sido establecida
Transmitiendo o recibiendo datos
Ni hay una conexión válida a la red ni se están transmitiendo o recibiendo datos
Conexión en modo Full Dúplex (FDX)
Una colisión ha ocurrido (COL)
Conexión en modo Half Dúplex
Apagada
Prendida
Intermitente
Apagada
1.4. Contenido del Paquete
Lista de Empaque
SE0016/SE0024 x 1
Cable de alimentación x 1
Este manual del Usuario
Orejas de montaje al rack con tornillos
Tarjeta de Garantía
2. Instalación
2.1. Entorno Operativo
Este switch debe ser instalado y operado dentro de los límites especificados de humedad y
temperatura (vea la sección previa bajo Especificaciones).
• No pose objetos sobre la unidad.
• No obstruya ninguna ventilación en los costados de la unidad.
• No instale la unidad cerca de Fuentes de calor tales como calefactores, radiadores, etc, ni
expuesta directamente a los rayos solares.
• Evite que el agua o la humedad penetren en la unidad.
• De ser necesario, use deshumectantes para reducir la humedad.
• Evite siempre el polvo y la suciedad.
• Prevea cierto espacio entre el producto y objetos circundantes para facilitar que se disipe
el calor generado por el switch.
2.2. Conexión a dispositivos de red
Los puertos RJ-45 del switch están diseñados como puertos MDI/MDI-X auto crossover lo
que permite usar cables estándar para conectar cualquier puerto en este switch a un dispositivo de red.
Conecte un terminal del cable de red al puerto RJ-45 en el panel posterior y luego conecte
el otro extremo del cable al puerto RJ-45 del dispositivo de red. Siga el mismo procedimiento para conectar todos los puertos del switch. Los cables UTP deben cumplir con las
2. Instalación - 3
Español
Si algún ítem falta o está dañado, favor contactarse con su revendedor BenQ local para
reemplazo.
SE&SS0116.book Page 4 Friday, August 9, 2002 5:31 PM
especificaciones EIA/TIA 568 y los estándares de Categoría 5 para transmisiones de datos a
100Mbps y de las Categorías 3, 4, 5 para conexiones a 10Mbps. La distancia máxima utilizando cable UTP, entre el switch y el dispositivo conectado es de 100 metros (328ft). Una
vez que el cable de red está conectado en ambos extremos y el dispositivo de red
conectado recibe poder, los LEDs deben prenderse.
2.3. Conexión a la red eléctrica
Conecte el terminal de la fuente externa al conector de poder en el panel trasero de la
unidad. Conecte el adaptador a la salida de corriente. El LED verde de poder en el panel
frontal debe estar encendido.
3. Resolución de problemas
El SE0016/SE0024 puede ser fácilmente monitoreado utilizando sus indicadores LED. Por
favor siga estos pasos para resolver cualquier problema que pueda encontrar durante la
instalación o implementación del SE0016/SE0024.
1. El LED de poder no enciende
Español
Verifique que el cable de corriente está correctamente conectado a la red externa.
Asegúrese que el conector de DC está firmemente enchufado en la ficha respectiva del
switch.
2. El número de puerto (Verde) no enciende cuando se conecta a un dispositivo de red
• Revise el interruptor del dispositivo conectado, verifique que esté encendido (ON).
• Revise el cable de red; asegúrese que esté conectado correctamente tanto al switch
como al dispositivo de red.
• Revise el cable de red; asegúrese que los cables UTP cumplen con las especificaciones
EIA/TIA 568 y la Categoría 5.
Por favor conduzca las siguientes pruebas:
• Por favor revise que el cable RJ-45 funciona. Reemplácelo con otro cable que sí funciona y
vea si la condición mejora.
• Use otro Puerto en el SE0016/SE0024. Si se puede establecer un link de esta forma,
entonces el puerto anterior falla. Por favor contáctese con su distribuidor BenQ para
asistencia.
• Asegúrese que todos los dispositivos están conectados a la red.
• Por favor asegúrese que todas las tarjetas de red instaladas en la estación de trabajo u
otros dispositivos de la red están en buenas condiciones operativas.
[!] Contacte a su distribuidor si el problema continúa.
Apéndice:
Información para ordenar
Número de Parte
Modelo
99.332N2.101
SE0016
Fast Ethernet Switch 16 Puertos
Descripción
99.334N2.101
SE0024
Fast Ethernet Switch 24 Puertos
3. Resolución de problemas - 4
SE&SS0116.book Page i Friday, August 9, 2002 5:31 PM
Índice
1. Introdução ...............................................................................................1
1.1. Produto ...................................................................................................................1
1.2. Funções & Especificações ....................................................................................1
1.2.1. Características ............................................................................................................ 1
1.2.2. Technical Specifications ............................................................................................ 1
1.2.3. Especificações Físicas ............................................................................................... 2
1.3. Vista do Produto e Painel de LEDs ...................................................................2
1.3.1. Vista do Produto ....................................................................................................... 2
1.3.2. LEDs ............................................................................................................................. 3
1.4. Conteúdo do Pacote ............................................................................................3
2. Instalação .................................................................................................3
2.1. Ambiente de Operação .......................................................................................3
2.2. Conectando em Dispositivos de Rede ............................................................3
2.3. Conectando a Alimentação ................................................................................4
3. Resolvendo Problemas ........................................................................4
Apêndice: ......................................................................................................4
Informação de Numeração .........................................................................................4
i
SE&SS0116.book Page 1 Friday, August 9, 2002 5:31 PM
1. Introdução
1.1. Produto
Este manual de usuário descreve e ilustra o método de instalação e utilização do Switch
Fast Ethernet de 16/24 portas. O switch para montagem em rack (SE0016/SE0024), apresentado aqui, possui 16 portas Fast Ethernet 10/100MBps para segmentar o tráfego,
estender a distância de conexão Fast Ethernet e converter pacotes de dados entre diferentes velocidades de transmissão. Este Switch Fast Ethernet possui portas RJ45 blindadas,
ambas com 10Base-T e 100Base-TX com capacidade de auto-negociação, e com "crossover" automático MDI/MDIX. Todas as portas do switch suportam modos de operação
"Full-Duplex" e "Half-Duplex".
Além disto, este potente Switch Fast Ethernet utiliza arquitetura de comutação "store-andforward" que filtra e envia os dados após recepção completa do pacote e verificação de
erro. Com um conjunto de LEDs de estado individual para cada porta, o estado de operação do switch pode ser facilmente monitorado. O projeto do switch montado em rack
permite que ele seja montado em um rack padrão de 19 polegadas no centro de cabeamento da empresa.
1.2. Funções & Especificações
1.2.1. Características
1.2.2. Technical Specifications
• Padrões Ethernet
• Protocolo
• Portas 10/100Mbps
• Endereço MAC
• "Buffer" de memória
• LEDs
• Método de Transmissão
IEEE 802.3 10Base-T, 802.3u 100Base-TX.
CSMA/CD
RJ-45 x 16 (SE0016), RJ-45 x 24 (SE0024)
8k (SE0016), 4K (SE0024)
512K Bytes (SE0016), 768K Bytes (SE0024)
Por unidade: Alimentação (1 LED)
Por porta: 10/100M;
LNK/ACT (número da porta);
FDX/COL.
Store-and-forward
1. Introdução - 1
Português
• 16/24 portas 10/100Base-TX, conector RJ45.
• Desenho inovador do painel.
• Auto-negociação para velocidade e modo "half/full" duplex.
• Compatível com os padrões IEEE802.3 e IEEE803.3u.
• Detecção automática MDI/MDIX.
• Suporte e arquitetura "True non-bloking".
• Transmissão total a "wire speed".
• Opera a taxa máxima de filtro de pacotes e transmissão.
• Suporte a comutação de pacotes para "store-and-forward".
• Controle de fluxo.
• Controle de "broadcast storm".
• Montagem em rack padrão de 19 polegadas.
SE&SS0116.book Page 2 Friday, August 9, 2002 5:31 PM
• Taxa de envio
14.880pps para 10Mbps
148.800pps para 100Mbps
1.2.3. Especificações Físicas
• Alimentação
• Temperatura de operação
• Temperatura de armazenamento
• Umidade em operação
• Umidade de armazenamento
• Compatibilidade para emissões
eletromagnéticas
• Segurança
• Dimensões
• Peso líquido
90VAC~240VAC 50Hz~60Hz
0°C ~ 50°C
-20°C ~ 70°C
10% ~ 90% RH
5% ~ 90% RH
FCC parte 15 Class A, CE Mark, VCCI,
C-Tick
UL/CSA
Largura 435mm x profundidade 221mm
x Altura 44mm. Para montagem em rack
padrão de 19 polegadas, altura de 1U.
2,9 Kilogramas (6.41b)
1.3. Vista do Produto e Painel de LEDs
1.3.1. Vista do Produto
Vista Frontal
Português
Painel Frontal SE0016:
Painel Frontal SE0024:
Vista Traseira
Painel Traseiro SE0016/SE0024:
1. Introdução - 2
SE&SS0116.book Page 3 Friday, August 9, 2002 5:31 PM
1.3.2. LEDs
LEDs
Alimentação
100M
(Verde)
Número da
porta
(Verde)
FDX/COL
(Amarelo)
Estado
Aceso
Apagado
Aceso
Apagado
Indicação
Ligado
Desligado
Modo 100M
Modo 10M
Conexão válida de rede estabelecida, LNK significa
conexão.
Atividade, enviando ou recebendo dados.
Sem conexão de rede ou transmissão estabelecida.
Conexão está em modo "Full-duplex".
FDX significa "Full-Duplex".
Ocorreu colisão.
Conexão em modo "Half-Duplex".
Aceso
Piscando
Apagado
Aceso
Piscando
Apagado
1.4. Conteúdo do Pacote
Conteúdo da Embalagem
SE0016/SE0024 x 1
Cabo de Alimentação CA x 1
Este Guia do Usuário
Suportes para montagem em rack e parafusos
Se algum destes itens estiver faltando ou danificado, favor entrar em contato com o revendedor BenQ local para substituição.
2. Instalação
Este switch deve ser instalado e operado dentro dos limites especificados de temperatura e
umidade (ver seção anterior - especificações).
• Não colocar objetos sobre a unidade.
• Não obstruir as entradas de ar laterais da unidade.
• Não posicionar a unidade próxima a fontes de calor, como aquecedores, radiadores, ou
exposição direta ao sol.
• Prevenir contra a entrada de água e poeira na unidade.
• Se necessário, instalar um de-umidificador para reduzir a umidade.
• Sempre evitar poeira e sujeira.
• Deixar um espaço entre o produto e as imediações para facilitar dissipação do calor
gerada dentro do switch.
2.2. Conectando em Dispositivos de Rede
As portas RJ45 do switch foram projetadas para auto cruzamento MDI/MDX que permite
utilizar cabos diretos para conectar qualquer porta deste switch em dispositivos de rede.
Conectar uma extremidade do cabo de rede no conector RJ45 do painel frontal, e conectar a outra extremidade do cabo de rede na porta RJ45 do dispositivo de rede. Seguir o
mesmo procedimento para conectar todas as portas RJ45 do switch. O cabo UTP de rede
precisa ser compatível com as especificações EIA/TIA 568 Categoria 5 para transmissão a
2. Instalação - 3
Português
2.1. Ambiente de Operação
SE&SS0116.book Page 4 Friday, August 9, 2002 5:31 PM
100Mbps e Categoria 3, 4, 5 para conexões a 10Mbps. O comprimento máximo de cabo
UTP entre o switch e o dispositivo conectado é de 100 metros. Quando o cabo estiver
conectado nas duas extremidades e o dispositivo de rede estiver ligado, os LEDs devem
estar acesos.
2.3. Conectando a Alimentação
Conectar o cabo de alimentação na traseira do switch. Conectar em seguida o cabo de alimentação na tomada da parede. O LED verde de Alimentação no painel frontal deve
acender.
3. Resolvendo Problemas
O SE0016/SE0024 pode ser facilmente monitorado pelos LED indicadores. Seguir os passos seguintes para resolver qualquer problema que aparecer durante a instalação e implementação do SE0016/SE0024.
1. LED de Alimentação não acende
Verificar se o cabo de alimentação está conectado corretamente na tomada da parede e
na traseira do switch.
2. Número da Porta (verde) não acende quando conectada em um dispositivo de rede válido.
Português
• Verificar a alimentação do dispositivo de rede ligado no switch, certificar-se de que esteja
ligado.
• Verificar o cabo de rede; certificar-se de que esteja conectado corretamente no switch e
no dispositivo de rede.
• Verificar o cabo de rede; certificar-se de que o cabo UTP seja compatível com a norma
EIA/TIA 568 especificação categoria 5.
Favor realizar os seguintes testes:
• Verificar se o cabo RJ45 está bom. Substituir por outro cabo que esteja funcionando e
ver se a condição pode ser melhorada.
• Utilizar outra porta do SE0016/SE0024. Se a conexão puder ser estabelecida desta
forma, a porta anterior está com problema. Contatar o revendedor local da BenQ para
assistência.
• Certificar-se que todos os dispositivos estejam conectados na rede.
• Favor certificar-se que a interface de rede instalada na estação de trabalho ou outro dispositivo esteja em boas condições de operação.
[!] Contatar o revendedor se os problemas persistirem.
Apêndice:
Informação de Numeração
Número do
Produto
Modelo
99.332N2.101
SE0016
Switch Fast Ethernet de 16 Portas
99.334N2.101
SE0024
Switch Fast Ethernet de 24 Portas
Descrição
3. Resolvendo Problemas - 4
SE&SS0116.book Page i Friday, August 9, 2002 6:26 PM
Inhoudsopgave
1. Inleiding ....................................................................................................1
1.1. Overzicht van het product .................................................................................1
1.2. Eigenschappen & Specificaties ............................................................................1
1.2.1. Eigenschappen ............................................................................................................ 1
1.2.2. Technische specificaties ........................................................................................... 1
1.2.3. Fysieke specificaties ................................................................................................... 2
1.3. Uiterlijk van product en LED-weergave ..........................................................2
1.3.1. Uiterlijk van product ................................................................................................. 2
1.3.2. LED-weergave ........................................................................................................... 3
1.4. Inhoud van verpakking .........................................................................................3
2. Installatie ..................................................................................................3
2.1. Bedrijfsomgeving ...................................................................................................3
2.2. Aansluiting op netwerkapparaten .....................................................................3
2.3. De voeding aansluiten ..........................................................................................4
3. Foutzoeken ............................................................................................4
Aanhangsel: ..................................................................................................4
Bestelgegevens ...............................................................................................................4
i
SE&SS0116.book Page 1 Friday, August 9, 2002 6:26 PM
1. Inleiding
1.1. Overzicht van het product
Deze handleiding beschrijft en illustreert de installatiemethode en het gebruik van de 16/
24 port snelle ethernetswitch. De switch (SE0016/SE0024) met rekmontage die hier geïntroduceerd wordt heeft 16 of 24 snelle ethernetaansluitingen van 10/100MB/s om netwerkverkeer te verdelen, de verbindingsafstand van een snel ethernet uit te breiden en
datapakketten tussen verschillende snelheden te converteren. Deze snelle ethernetswitch
heeft afgeschermde RJ-45-aansluitingen die automatisch werken met 10Base-T en 100BaseTX en met automatische MDI/MDIX crossover. Alle aansluitingen van de switch ondersteunen volduplex en halfduplex.
Verder gebruikt deze snelle ethernetswitch een schakelarchitectuur met opslag en doorsturen, waarmee na ontvangst van een heel gegevenspakket het pakket gefilterd wordt, gecontroleerd op fouten en doorgestuurd. Met een stel toestand-leds voor iedere aansluiting kan
de werking van de switch gemakkelijk gecontroleerd worden. De switch past in een rek dat
voldoet aan de industriestandaard van 19 inch en dat zich bevindt op de plaats waar alle
bekabeling van het bedrijf zich verzamelt.
1.2. Eigenschappen & Specificaties
1.2.1. Eigenschappen
1.2.2. Technische specificaties
• Ethernetstandaarden
• Protocol
• 10/100MB/s Aansluitingen
• MAC-adres
• Buffer-geheugen
• LED-melding
• Transmissiemethode
IEEE 802.3 10Base-T, 802.3u 100Base-TX.
CSMA/CD
RJ-45 x 16 (SE0016), RJ-45 x 24 (SE0024)
8k (SE0016), 4K (SE0024)
512K bytes (SE0016), 768K bytes (SE0024)
per eenheid: Voedingstoestand
per aansluiting: 10/100M;
LNK/ACT (aansluitingsnummer);
FDX/COL.
Opslaan en doorsturen
1. Inleiding - 1
Nederlands
• 16/24 aansluitingen 10/100Base-TX, RJ-45-connector.
• Vernieuwend weergavepaneel.
• Automatische onderhandeling voor snelheid en half-/volduplex.
• Voldoet aan de standaarden IEEE802.3 en IEEE802.3u.
• Automatische detectie MDI/MDIX.
• Ondersteunt de " ware niet-blokkerende architectuur."
• Volledige bedrading snelheid doorsturen.
• Functioneert bij de maximumsnelheid van pakketfilteren en doorsturen.
• Ondersteuning voor opslaan en doorsturen bij pakketswitching.
• Besturing van verloop.
• Uitzending van stormbesturing.
• Past in standaard rek van 19".
SE&SS0116.book Page 2 Friday, August 9, 2002 6:26 PM
• Doorstuursnelheid
14 880p/s voor 10MB/s;
148 800p/s voor 100MB/s
1.2.3. Fysieke specificaties
• Voeding
• Bedrijfstemperatuur
• Opslagtemperatuur
• Bedrijfvochtigheid
• Opslagvochtigheid
• Emissiecompliantie
90V~240V 50Hz~60Hz
0°C ~ 50°C
-20°C ~ 70°C
10% ~ 90% RH
5 % ~ 90% RH
FCC deel 15 klasse A, CE mark, VCCI,
C-Tick
UL/CSA
W 435 mm x D 221 mm x H 44mm
(17.1”x 8.7”x1.8”). Past in standaard 19” rek
een eenheid hoog.
2.9kg (6.41b)
• Veiligheid
• Afmeting
• Gewicht
1.3. Uiterlijk van product en LED-weergave
1.3.1. Uiterlijk van product
Voorzijde
SE0016 Voorpaneel:
Nederlands
SE0024 Voorpaneel:
Achterzijde
SE0016/SE0024 Achterpaneel:
1. Inleiding - 2
SE&SS0116.book Page 3 Friday, August 9, 2002 6:26 PM
1.3.2. LED-weergave
LEDs
Toestand
Constant
Uit
Aan
Uit
Voeding
100M
(Groen)
Constant
Nummer van
aansluiting
(Groen)
Knipperend
Uit
FDX/COL
(Geel)
Constant
Knipperend
Uit
Indicatie
Voeding ingeschakeld
Voeding uitgeschakeld
100M modus
10M modus
Een goede netwerkverbinding is tot stand gekomen.
LNK betekent LINK.
Activiteit, gegevens worden verzonden of ontvangen.
Er is geen geldige netwerkverbinding en er worden
geen gegevens uitgewisseld.
Verbinding in volduplexmodus.
FDX betekent VOLDUPLEX.
Botsing opgetreden.
Verbiding in halfduplexmodus.
1.4. Inhoud van verpakking
Verpakkingslijst
SE0016/SE0024 x 1
Voedingskabel x 1
Deze handleiding
Beugels en schroeven voor rekmontage
Garantiekaart
Ontbreekt er een voorwerp of is het beschadigd, neem dan contact op met uw BenQ-leverancier voor vervanging.
2. Installatie
2.1. Bedrijfsomgeving
• Zet geen voorwerpen op het apparaat.
• Blokkeer geen ventilatiegaten aan de zijkant van het apparaat.
• Plaats het apparaat niet bij een warmtebron zoals een kachel of radiator, en stel het niet
bloot aan direct zonlicht.
• Pas op dat er geen water of vocht in het apparaat komt.
• Gebruik zonodig een middel om de vochtigheid te verminderen.
• Vermijd altijd stof en vuil.
• Zorg voor ruimte tussen het product en de omgeving, zodat de warmte in de switch
gemakkelijk kan dissiperen.
2.2. Aansluiting op netwerkapparaten
De RJ-45-aansluitingen op de switch zijn ontworpen als MDI/MDIX autocrossover-aansluitingen
waardoor standaardkabels kunnen worden gebruikt om de aansluitingen van de switch met netwerkapparaten te verbinden.
2. Installatie - 3
Nederlands
Deze switch moet geïnstalleerd en gebruikt worden binnen de grenzen van de opgegeven
bedrijfstemperatuur en -vochtigheid (zie hiervoor onder Specificaties).
SE&SS0116.book Page 4 Friday, August 9, 2002 6:26 PM
Sluit het ene uiteinde van de netwerkkabel aan op de RJ-45-aansluiting op het voorpaneel
en het andere op de RJ-45-aansluiting op het netwerkapparaat. Volg dezelfde procedure
voor alle RJ-45-aanslutingen op de switch. De UTP-kabels moeten voldoen aan de specificaties van EIA/TIA 568 en de standaard Categorie 5 voor gegevensuitwisseling met 100MB/
s en aan de Categorie 3, 4, 5 voor 10MB/s. Maximale lengte, bij gebruik van UTP-kabel, tussen de switch en aangesloten apparaten is 100 meter (328 voet). Is de netwerkkabel aan
weerszijden aangesloten en het aangesloten apparaat ingeschakeld, dan moet de LED
oplichten.
2.3. De voeding aansluiten
Sluit de uitgang van de voedingskabel aan op de voedingsaansluiting op het achterpaneel.
Steek daarna de voedingskabel in het stopcontact. Het groene lampje op het voorpaneel
moet nu branden.
3. Foutzoeken
De SE0016/SE0024 is eenvoudig te controleren door de LEDs. Volg de instructies hieronder om een probleem op te lossen dat mocht optreden tijdens de installatie of implementatie van de SE0016/SE0024.
1. Voedings LED brandt niet
Controleer of de voedingskabel goed is aangesloten op het stopcontact en op de voedingsaansluiting van de switch.
2. Aansluitingnummer (Green) licht niet op bij verbinding met een geldig
LAN-apparaat
• Controleer de netschakelaar van het netwerkapparaat dat op de switch is aangesloten.
Deze moet AAN-staan.
• Controleer of de netwerkkabel goed is aangesloten op de switch en het netwerkapparaat.
• Controleer de netwerkkabel, hij moet voldoen aan de specificaties van EIA/TIA 568 en
Categorie 5.
Nederlands
Voer de volgende tests uit:
• Controleer of de RJ-45-kabel goed functioneert. Vervang hem door een andere kabel en
kijk of dat de situatie verbetert.
• Gebruik een andere aansluiting van de SE0016/SE0024. Werkt het dan wel, dan was de
eerste aansluiting defect. Neem contact op met uw BenQ-leverancier voor hulp.
• Controleer of alle apparaten op het netwerk aangesloten zijn.
• Controleer dat de netwerkkaart in het werkstation of ander apparaat goed geïnstalleerd
en goed functioneert.
[!] Neem contact op met uw leverancier als het probleem nog niet is opgelost.
Aanhangsel:
Bestelgegevens
Bestelnummer
Model
99.332N2.101
SE0016
16-Port snelle ethernetswitch
Omschrijving
99.334N2.101
SE0024
24-Port snelle ethernetswitch
3. Foutzoeken - 4
Warranty.fm Page 1 Friday, August 9, 2002 5:56 PM
BenQ Network Products Limited Warranty
A. LIMITED WARRANTY
BenQ Corporation (“BenQ”) warrants the BenQ network product you have purchased
from BenQ or from an BenQ Authorized Reseller to be free from defects in materials
and workmanship under normal use during the warranty period of one year from the
date of purchase. Your original purchase invoice (sales receipt), showing the date of
purchase of the network product, is your proof of the date of purchase. This warranty
extends only to you, the original Purchaser. It is not transferable to anyone who subsequently purchases, leases or otherwise obtains the network product from you.
During the warranty period, BenQ will, at no additional charge, repair or replace defective
parts with serviceable used parts that are equivalent to new parts in performance. All
exchanged parts and network product replaced under this warranty will become the
property of BenQ. There will be no charge for labor or parts during the one-year warranty
period from the date of purchase.
To ensure timely response to a service request, please complete and detach the
BenQ Warranty Registration Card, then return it together with a copy of your
sales receipt to BenQ within ten (10) calendar days after date of purchase by
end user.
In the event the network product exhibits a defect in material or workmanship within the
warranty period, BenQ will provide the warranty services applicable to the network product as defined below.
B. WARRANTY LIMITATION; EXCLUSIONS; EXCLUSIVE REMEDIES
The Limited Warranty does not extend to any network product not purchased from BenQ
or from an BenQ Authorized Reseller. This limited warranty also does not extend to any
network product that has been damaged or rendered defective (a) as a result of use of the
network product other than for its normal intended use, failure to use the network product in accordance with the User's Manual which accompanies the network product or
other misuse, abuse or negligence to the network product; (b) by the use of parts not manufactured or sold by BenQ; (c) by modification of the network product; (d) as a result of
service by anyone other than BenQ or an BenQ Authorized Service Provider; (e) improper
transportation or packing when returning the network product to BenQ or an authorized
Service Provider; or (f) unusual physical or electrical stress or interference, failure or fluctuation of electrical power, lightening, static electricity, fire or acts of God.
EXCEPT FOR THE WARRANTIES AND CONDITIONS SET FORTH HEREIN, BENQ
DISCLAIMS ALL OTHER WARRANTIES, EXPRESS, IMPLIED, OR STATUTORY, INCLUDING BUT NOT LIMITED TO THE IMPLIED WARRANTIES OF MERCHANT ABILITY OR
FITNESS FOR A PARTICULAR PURPOSE. ANY IMPLIED WARRANTIES THAT MAY BE
IMPOSED BY APPLICABLE LAW ARE LIMITED TO THE TERMS OF THIS LIMITED
WARRANTY. IN NO EVENT SHALL BENQ BE LIABLE FOR ANY INCIDENTAL, SPECIAL OR CONSEQUENTIAL DAMAGES, INCLUDING BUT NOT LIMITED TO LOSS
OF BUSINESS, PROFITS, DATA OR USE, WHETHER IN AN ACTION IN CONTRACT
OR TORT OR BASED ON A WARRANTY, ARISING OUT OF THE NETWORK PRODUCT OR ANY SOFTWARE SUPPLIED BY BENQ THAT ACCOMPANIES THE NETBenQ Network Products Limited Warranty - 1
Warranty.fm Page 2 Friday, August 9, 2002 5:56 PM
WORK PRODUCT, EVEN IF BENQ HAS BEEN ADVISED OF THE POSSIBILITY OF
SUCH DAMAGES. YOU AGREE THAT REPAIR, REPLACEMENT OR REFUND, AS APPLICABLE, UNDER THE WARRANTY SERVICES DESCRIBED HEREIN ARE YOUR SOLE
AND EXCLUSIVE REMEDIES WITH RESPECT TO ANY BREACH OF THE BENQ LIMITED WARRANTY SET FORTH HEREIN.
Some states do no allow the exclusion or limitation of incidental or consequential damages
for consumer products, and some states do not allow limitations on how long an implied
warranty lasts. In such cases, the exclusions or limitations of this Limited Warranty may
not apply to you.
This Limited Warranty gives you specific legal rights. You may also have other rights that
vary from state to state. You are advised to consult applicable state laws for a full determination of your rights.
C. TECHNICAL SUPPORT
Please visit our support website http://www.BenQ.com.tw, the most frequently asked questions are answered here.
All prices, products, terms & conditions are subject to change without notice.
BenQ Network Products Limited Warranty - 2