1
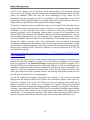
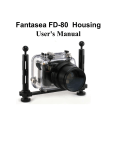
Nikon D5200 Experience
PREVIEW of
Nikon D5200 Experience
The Still Photography Guide to Operation and
Image Creation with the Nikon D5200
by
Douglas J. Klostermann
Full Stop. good writing for better photography
1
Nikon D5200 Experience
All rights reserved. This e-book is licensed for your personal enjoyment only and may not be resold, file-shared, or given away. No part of this book may be reproduced or transmitted in any
form or by any means, electronically or in print, without expressed permission from the author.
Every effort has been made to make this e-book as accurate as possible, but no warranty of
fitness is implied. The information is provided on an as-is basis. The author shall have no
liability or responsibility with respect to any loss or damages arising from the information
provided in this e-book including but not limited to the use of any of the materials or methods
described, the products, retailers, Internet web sites, or links provided. Please read and follow
all instructions and use, safety and handling precautions expressed in the manuals provided
with your equipment and software, and which take precedence over any content in this work.
All contents of this work including cover design, text, and photographs, with the exception of
products, brands, software, contents of menus and screenshots, and logos, are copyright by the
author. All products, brands, software, contents of menus and screenshots, and logos are
property of the respective companies and websites. Terms which are trademarks or service
marks in this e-book are used in an editorial and/ or educational manner, and should not be
regarded as affecting the validity of any trademark or service mark. “Nikon” is a trademark of
Nikon Inc. “Adobe,” “Photoshop,” and “Lightroom” are trademarks of Adobe Systems Inc. The
author and the contents of this book are not affiliated with or endorsed by Nikon Inc.
Douglas Klostermann is a participant in the Amazon Services LLC Associates Program, an
affiliate advertising program designed to provide a means for sites to earn advertising fees by
advertising and linking to amazon.com. (Links are provided to products and accessories
mentioned in this guide.)
Special thanks to Newtonville Camera of Newton, Mass.
http://www.nvcamera.com
Nikon D5200 Experience
The Still Photography Guide to Operation and Image Creation with the Nikon D5200
by: Douglas J. Klostermann
Version 1.0 - PREVIEW
March 2013
Copyright 2013 Douglas J. Klostermann - all rights reserved
Cover design and photograph by the author.
Author’s website: www.dojoklo.com
Author’s blog: http://blog.dojoklo.com/
Published by Full Stop Media. good writing for better photography
Cambridge, Mass. USA
http://www.dojoklo.com/Full_Stop/
2
Nikon D5200 Experience
CONTENTS
1. INTRODUCTION........................................................................................................... 5
1.1 Take Control of Your Camera ................................................................................. 6
1.2 Using This Guide ..................................................................................................... 7
1.3 Getting Started ...................................................................................................... 11
2. CAMERA CONTROLS ............................................................................................... 14
3. MENUS and CUSTOM SETTINGS ............................................................................ 24
3.1 Setting Up the D5200 ............................................................................................ 24
3.2 Playback Menu ...................................................................................................... 25
3.3 Shooting Menu ...................................................................................................... 29
3.4 Custom Settings .................................................................................................... 43
3.5 Setup Menu ........................................................................................................... 57
3.6 Retouch Menu ....................................................................................................... 65
3.7 Recent Settings / My Menu ................................................................................... 69
4. PLAYBACK, OPERATION, and IMAGE FILE FORMATS ....................................... 72
4.1 Image Playback ..................................................................................................... 72
4.2 Information Display................................................................................................ 75
4.3 JPEG vs. NEF (RAW)............................................................................................ 79
4.4 File Sizes and Maximum Burst Rate ..................................................................... 81
5. AUTOFOCUSING ....................................................................................................... 82
5.1 Using Autofocus .................................................................................................... 82
5.2 Focus Modes ......................................................................................................... 84
5.3 Autofocus AF-Area Modes .................................................................................... 91
5.4 Locking Focus ....................................................................................................... 97
5.5 Focus Points and Image Composition .................................................................. 98
5.6 Live View and Movie Focusing............................................................................ 101
6. RELEASE MODES ................................................................................................... 104
7. EXPOSURE Part 1 ................................................................................................... 106
7.1 Aperture, Shutter Speed and ISO ....................................................................... 106
7.2 Aperture-Priority Auto Mode and Shutter-Priority Auto Mode ............................. 112
7.3 Full Stops............................................................................................................. 117
7.4 Manual Exposure Mode (M) ................................................................................ 119
8. METERING MODES ................................................................................................. 123
8.1 Matrix Metering .................................................................................................... 123
8.2 Center-Weighted Metering .................................................................................. 124
8.3 Spot Metering ...................................................................................................... 127
8.4 Manual Metering.................................................................................................. 129
8.5 Metering Modes and Exposure ........................................................................... 130
9. EXPOSURE Part 2 ................................................................................................... 133
9.1 Exposure Lock..................................................................................................... 133
9.2 Histograms........................................................................................................... 136
9.3 Exposure Compensation ..................................................................................... 138
9.4 Bracketing............................................................................................................ 140
9.5 HDR (High Dynamic Range) ............................................................................... 145
3
Nikon D5200 Experience
9.6 Active D-Lighting ................................................................................................. 148
9.7 Multiple Exposure ................................................................................................ 150
10. ADDITIONAL CAMERA FUNCTIONS ................................................................... 153
10.1 White Balance ................................................................................................... 153
10.2 Picture Control................................................................................................... 158
10.3 Flash .................................................................................................................. 163
10.4 Interval Timer and Time-Lapse Photography Shooting .................................... 165
10.5 Sensor Cleaning ................................................................................................ 167
10.6 Putting It All Into Practice .................................................................................. 168
11. THE IMAGE TAKING PROCESS........................................................................... 169
11.1 Still Subjects ...................................................................................................... 169
11.2 Moving Subjects ................................................................................................ 171
12. VIDEO - AN INTRODUCTION ................................................................................ 173
13. COMPOSITION....................................................................................................... 179
14. PHOTOGRAPHY ACCESSORIES......................................................................... 189
14.1 Nikon D5200 Accessories ................................................................................. 189
14.2 Digital SLR Photography Accessories .............................................................. 190
14.3 Digital Photography Books ................................................................................ 193
15. CONCLUSION ........................................................................................................ 195
Future Updates to the Text........................................................................................ 195
About the Author........................................................................................................ 196
4
Nikon D5200 Experience
1. INTRODUCTION
The introduction of the Nikon D5200 marks an important leap in Nikon’s mid-level digital
SLR evolution. Its new 24.1 megapixel sensor, improved over the 16.2 megapixel
sensor of the D5100, is capable of capturing high quality, low noise images even in
challenging low-light situations. Perhaps more importantly, the D5200 also incorporates
the sophisticated 39 point autofocus system of the pro-sumer D7000 and D600
cameras. By offering so many additional Focus Points, this powerful autofocus system
will enable photographers to have more control over their compositions and more easily
and accurately track and capture moving subjects. In addition, the D5200 boasts an
improved 2016 pixel exposure metering sensor for better subject tracking and
determination of exposure settings, faster 5 frames per second (fps) maximum
continuous shooting speed, upgraded Expeed 3 processor, and an improved user
interface (Information Display) for changing the camera settings using the rear Monitor.
When shooting video, the D5200 continues to offer full-time autofocus, plus a built-in
stereo microphone for capturing audio, and additional frame rates for HD video. The
camera even offers wireless capabilities for image sharing and camera control through
a smart phone or tablet with the use of the optional WU-1a Wireless Mobile Adapter.
Figure 1 - Detail of the Nikon D5200 digital SLR
The D5200 offers the capabilities and features required for dedicated enthusiast
photographers who wish to continue to grow, and is clearly an advanced dSLR that
provides the potential to capture sharp, clean, and well-exposed images in most any
situation you wish to use it.
5
Nikon D5200 Experience
But the D5200 is merely a tool. It is up to you to make use of its features and
capabilities to create the images you envision. While the camera’s manual can tell you
about all the settings and controls, how to change them, and their intended function, this
guide will build upon that and tell you when and why you want to use them. Every
button, menu item, and Custom Setting of the D5200 is there for a reason: to help you
capture the images you want. Some of them are more useful to different types of
photographers and shooting situations and you don’t necessarily need to learn and use
them all immediately, but this guide should help to give you the knowledge to
confidently use the ones that turn your Nikon D5200 into an image capturing tool that
works best for you.
Figure 2 - Flower, Cambridge, MA - Autofocus modes, exposure metering mode,
aperture, shutter speed, ISO, and white balance all considered even in creating this
simple image. Shutter speed 1/320, aperture f/4.5, ISO 100.
1.1 Take Control of Your Camera
Since the D5200 is a tool to take the images you want to take, you obviously can’t
always allow the camera to make decisions for you. You have to take control of the
camera to ensure that you capture exactly the images you envision - by autofocusing
precisely where you intend, setting the aperture or shutter speed that you want, and
obtaining the exposure you desire. While the D5200 is an intelligent camera, it cannot
read your mind and your intentions and does not know that you wish to focus on and
properly expose the yellow flower in the foreground, while making the background
appear out of focus, and the flower petals to be caught still and not be blurred from the
6
Nikon D5200 Experience
motion of the wind, on this bright, sunny day (see Figure 2). You have to tell the camera
to do all of this, through the various controls and settings, such as the Autofocus Mode
and AF-Area Mode (lock focus on the center of the flower), the exposure metering mode
(properly expose the petals), the aperture setting (the out-of-focus background), the
shutter speed (freezing the motion of the flower from the wind), the ISO (bright day) and
the white balance (sunny day). Taking control of all of these functions and settings will
enable you to consistently create the dramatic and compelling images you envision.
Learning to use and get the most out of a dSLR camera like the D5200 takes time,
practice, patience, mistakes, and experimentation. If you have upgraded from an older
dSLR to the D5200, its improved features and capabilities should more easily help you
to capture high quality images that you may have been limited in consistently attaining
before, especially in action situations. If you are new to dSLR photography, you will
soon find that using a more versatile camera such as the D5200 can be initially
challenging but ultimately more rewarding by offering you more responsiveness and
greater control over your shooting and your results. If you are not yet familiar with all the
controls of a dSLR and the exposure concepts of digital photography, don’t expect to
just pick it all up at once, in one or two readings of a single book. (In fact, you wouldn’t
want to, as the never ending journey of learning and mastering photography is a big part
of what it’s all about!) Taking control of the complex 39 point autofocus system and its
Autofocus Modes and AF-Area Modes may be especially challenging at first. Try not to
become frustrated when you don’t quite understand something or aren’t yet getting the
results you desire. Instead learn the controls, functions, settings, and concepts little by
little, try them out in real life shooting situations, and return to this guide, the manual,
and other photography books to address questions and problems you encounter.
Continue to learn and to photograph often and it should all begin to come together,
sometimes slowly and sometimes in rapid spurts of discovery and understanding. With
practice and experience you will soon be shooting with confidence and can then begin
to take advantage of the camera’s more advanced functions.
1.2 Using This Guide
There are many different ways to use a dSLR camera and its controls to capture
images, and many diverse situations in which photographers work. I’m going to
concentrate on the techniques that I believe are the most practical, useful, and effective
for the majority of enthusiast photographers using the D5200. The settings and
techniques I discuss can apply to various types of photography including general
photography, action, portrait, and travel photography. Once you have a firm grasp of the
controls, settings, and basic techniques you will have the tools and knowledge to
address different issues, specialized situations, and challenging scenes. I encourage
you to then experiment and continue to learn, and to find the techniques that work best
and are most comfortable or intuitive for you.
Since this guide is intended to help you get the most out of your D5200, I will not go into
detail about all of the automatic features or Auto and Scene Modes. The D5200 is a
sophisticated tool that deserves to be used to its full potential, and that involves taking
7
Nikon D5200 Experience
control of the camera and its functions, which means taking it off automatic settings
such as Auto and Program shooting modes and automatically selected autofocus points
(when not needed). While this may be more challenging at first, these are the
techniques that are necessary to take full advantage of the capabilities of any dSLR
including the D5200, and will lead you to having more control and consistency over your
image making. Hopefully this will inevitably lead to better images!
This guide is intended to be used with the camera in your hands. That is the best way to
directly follow and understand the controls, functions, and settings as they are being
explained. It is also intended to be used in conjunction with and in addition to the
camera’s manuals, not to completely replace them, so every bit of information in the
Nikon D5200 User’s Manual and Reference Manual will not be repeated here. (As you
have probably discovered by now, the camera’s User’s Manual is brief and basic. There
is a more detailed Reference Manual on the Reference CD included with your camera.)
Among the official manuals’ often brief descriptions and sometimes frustratingly
incomplete and disjointed explanations, there is some very valuable information, as well
as the basics for buttons, controls, and how to access and change all the settings. Note
that the more detailed D5200 Reference Manual can also be obtained as a PDF file
from the Nikon website:
http://support.nikonusa.com/app/answers/detail/a_id/18112/kw/nikon%20D5200%20use
r%27s%20manual
As you can see, there is a lot to make sense of regarding terminology and controls, so I
recommend that you familiarize yourself with the controls and displays of the camera
body, as explained in the Camera Controls chapter below and shown on pages 1-6 of
both the D5200 User’s Manual and the Reference Manual, as well as read through the
manuals at some point and attempt to understand or absorb as much as possible. Yes,
much of it may be complicated and confusing at first, but this guide will explain and
clarify the numerous buttons, controls, menus, and settings and explain when and why
you will want to use them in your photography.
As will be explained throughout this guide, the majority of the camera’s shooting
settings can be changed using the [i] Button and Information Display (see Figure 3).
Press the [i] Button once (or the Info Button) to view your settings, then press the [i]
Button a second time to enable you to navigate to a specific setting with the Multi
Selector thumb-pad. Access the selected setting’s options by pressing the OK Button.
However, some settings of the Nikon D5200 can be controlled in multiple ways including
using the buttons and controls on the camera body while reading the settings on the
rear Monitor, or accessing the settings in the Menus after pressing the Menu Button.
Explore the options and find the ways that work most quickly and intuitively for you.
8
Nikon D5200 Experience
2. CAMERA CONTROLS
Before setting up the Menu options and Custom Settings and then starting to use the
camera, it is helpful to become familiar with the names and functions of the controls of
the D5200. Have a look at your camera and/ or pages 1-4 of the Nikon D5200 User’s
Manual or Reference Manual and I’ll go over the controls on your camera that you will
be learning about and using throughout this guide. Customizing the various buttons and
controls will be further discussed in the Menus and Custom Settings chapter. The
controls will also be discussed in more detail throughout the text in conjunction with the
functions they perform and control.
Figure 6 - View of the top controls of the Nikon D5200.
On the top of the camera (see Figure 6) you will find, starting on the upper right:
Power Switch - Located surrounding the Shutter Button, this is obviously used to turn
the camera on and off.
Shutter-Release Button - This is what you press to take a photo or series of photos.
Tapping it half-way will do a few things like wake up the camera from Standby if it hasn’t
been used in a few minutes or start the exposure metering. Pressing and holding it halfway will also perform functions like locking focus or starting focus tracking (depending
on your Autofocus Mode and Custom Settings). I will often refer to this simply as the
Shutter Button in the text.
14
Nikon D5200 Experience
Movie-Record Button - This small button with the red dot will start and end movie
recording when working in Live View, which is enabled by using the Live View Switch.
Exposure Compensation Button - Pressing this button indicated by (+/-) and turning
the Command Dial will adjust Exposure Compensation, which will be discussed in the
Exposure Part 2 chapter. When working in Manual (M) shooting mode, this button is
pressed as the Control Dial is turned to adjust the aperture setting (as indicated by the
aperture icon next to the button). When using the flash, press and hold this button plus
the Flash Button on the front of the camera while turning the Control Dial to adjust Flash
Compensation.
Info Button - This button is pressed to turn on the Information Display on the rear
Monitor, so that you can view the various camera settings. Press the rear [i] Button to
then enable changing many of these settings with the use of the Multi Selector and OK
Button (see Figure 9). Or press this Info Button again to turn off the Monitor.
Release-Mode Button - This button is pressed to select the desired shutter Release
Mode (sometimes also called drive mode), such as Single Frame (S), Continuous High
Speed, or Self-Timer. These will be discussed in the Release Modes chapter. Press the
button then use the Multi Selector to choose the setting as viewed on the rear Monitor.
Figure 7 - Detail of the Mode Dial (set on Aperture-Priority Auto - A in this image) and
other controls of the D5200.
15
Nikon D5200 Experience
3.2 Playback Menu
Figure 14 - Playback Menu
Delete
Use this to delete a selected single image or group of images (Selected), all images
taken on a specific date (Select date), or all images in the current playback folder on the
selected memory card (All). Set the Playback Folder item next to determine which
images are included in the current playback folder.
However, if you are deleting a single image or just a few, you can more easily do this
using the Delete Button on the rear of the camera. If you are deleting all the images on
a card, it is better to use Format Memory Card (see Setup Menu below). Use large
enough memory cards so that you don’t need to worry about deleting images in camera
while working, and instead it may be best to manage them on your computer after
downloading all the images.
Playback Folder
This sets which images will be visible during Playback (see Figure 15). If set for All, all
the images in all of the folders on the memory card (taken with this camera and other
compatible cameras) will be visible. If you just wish to view only the images in the
current folder, select Current. (You will select which folder is the current folder, and
create individual folders for organizing your photos, in the Storage Folder item in the
Shooting Menu.) Most users will likely wish to set this for All so that you don’t lose track
of any images on the card and accidentally erase them.
25
Nikon D5200 Experience
Figure 15 - Playback Folder options, to determine which images on the memory card
are visible during image playback.
Playback Display Options
During image playback on the rear Monitor you can cycle through various information
displays in order to view your images either full screen or with various shooting data or
histograms (see Figure 16). This menu item is used to select which of these views will
be available during playback. I recommend that you select all of the options, at least
initially. Then after some use you can determine which information views you prefer and
deselect the ones you don’t need.
Figure 16 - Playback Display Options, allowing you to select which information and
displays are available to view during image playback.
26
Nikon D5200 Experience
None will display a full screen image with no information, which helps you to inspect the
image. Highlights will display blinking areas to alert you of where the image has been
overexposed, which can help you determine the proper exposure for the subsequent
shots. RGB histogram will display histogram graphs of the various color channels to
also assist you in determining proper exposure. This one may actually be optional if you
do not yet make use of individual color channel histograms. Shooting data displays
additional information including the lens and focal length used, flash information, and
Picture Controls settings. This screen is not necessarily very informative immediately
after taking the shot since you already know most of these settings, but can be handy
when later reviewing an image in-camera. Overview displays a thumbnail of the image
along with the RGB histogram and shooting information (see Figure 17). This is perhaps
the most important and useful information screen to use while shooting to help
determine that you obtained the proper or desired exposure of an image. The various
views will be illustrated and discussed in the Image Playback section of this guide, and
all the information items displayed on these information screens will be discussed and
explained throughout the guide, particularly in the Exposure chapters and in the
Histogram section.
Figure 17 - The Overview information display screen during image playback, showing a
thumbnail of the image along with the RGB Histogram and shooting and file information.
Image Review
Use this to set whether or not your images are immediately displayed on the rear
Monitor after capturing them. If you typically review each image after taking it, turn this
On. However, if you don’t review every image, turn it Off to save the battery, then hit the
Playback Button when you wish to review an image on the Monitor. You can adjust how
long the images are displayed during review in Custom Setting c2: Auto off Timers.
27
Nikon D5200 Experience
3.4 Custom Settings
a - Autofocus
Figure 35 - Autofocus Custom Settings menu.
Note: The autofocus system of the D5200 will be explained in detail in Chapter 5 on
Autofocusing. Remember to return to these Autofocus Custom Settings once you have
become familiar with the autofocus system, including the Autofocus Modes and
Autofocus Area Modes.
a1: AF-C priority selection
When you are working in Continuous-servo AF Mode (AF-C) - used to track and
maintain focus on moving subjects - this setting determines if attaining focus is top
priority or if you just want the shots to be taken even if exact focus is not attained for
each shot (see Figure 36). Specifically, when you press the Shutter Button, this setting
determines if the image is taken immediately (Release) or if the camera waits for focus
to be attained before taking the photo (Focus). For example, if you are tracking a
moving subject such as a runner or an animal, you may wish to just capture a rapid
series of shots at all costs in order to ensure getting specific moments, and exact focus
of each shot may not be the priority. Or you may wish to make sure the camera has
properly focused each shot before the shutter is released. This however may cause a
slight (perhaps millisecond or more) delay for each shot and the exact moments may be
missed. If capturing the images at all costs and maintaining the maximum continuous
frame rate are the priorities, set for Release. If exact focus is your priority, set on Focus.
43
Nikon D5200 Experience
Figure 36 - AF-C Priority Selection options, to determine if shutter release and
maintaining the maximum continuous frame rate are the priorities, or if exact focus of
each shot is the priority.
a2: Number of focus points
This setting determines the number of autofocus points that are available for selection in
your Viewfinder (see Figure 37). If you are manually selecting your Focus Point (as you
typically should, and will learn about in this guide) you may find that it is quicker and
easier, at least at first, to limit the number of AF points to 11 points. If you prefer to have
all the AF points available for your selection, set this at 39 points. If you set to 11 points
your selection will be limited to those 11 AF points, but all 39 points will still be used by
the camera in subject tracking, so the camera is still taking advantage of all the Focus
Points of the autofocus system.
Figure 37 - 39 AF points vs. 11 AF points - A simulated view of the D5200 Viewfinder
showing the configuration of all 39 Focus Points (left), and the 11 Focus Points
available when the 11 Points setting is chosen in Custom Setting a2 - Number of Focus
Points (right). Background image is shown at 50% opacity to better view the AF points.
Note that only the single, selected Focus Point will be visible in the Viewfinder during
actual shooting.
44
Nikon D5200 Experience
a3: Built-in AF-assist illuminator
This is used to enable or disable the AF-Assist Illuminator light, the small white lamp
found on the front of the camera. Turn this On to assist you with autofocusing in low
light, but be sure to turn it Off if you are working in situations where it will be distracting,
unwanted, or unnecessary. Note that if this light is enabled, it will only function in Singleservo (AF-S) Autofocus Mode (or in AF-A Autofocus Mode when the camera chooses
Single-servo AF), and when either Auto-area AF is the active Autofocus Area Mode or
the center Focus Point is being used in another Autofocus Area Mode. In other words,
the AF-Assist Illuminator lamp is mainly designed to be used when taking shots of still
subjects using AF-S Autofocus Mode while focusing with the center Focus Point.
a4: Rangefinder
This setting is used to help obtain focus when you have turned off autofocus and are
using Manual Focus mode (MF) and manually focusing. (Be sure to also set the
autofocus switch on your lens to M) The Exposure Indicator in the Viewfinder is instead
used to indicate if the subject located at the active Focus Point is correctly in focus. If
the dots and arrow are to the left of 0, the camera is focused in front of the subject; to
the right means the camera is focused behind the subject. Note that this indicator does
not work for determining focus in Manual (M) shooting mode (when your Mode Dial is
set to M) because it is used instead to indicate exposure. Turn this setting On if you
need its assistance when manually focusing. It is generally advisable to use the
camera’s autofocus system and not manually focus, though some users may wish to
manually focus in certain situations such as close-up and macro photography.
b - Metering/Exposure
Figure 38 - Custom Setting b1 - EV Steps for Exposure Control menu options, either 1/3
step or 1/2 step.
45
Nikon D5200 Experience
5. AUTOFOCUSING
5.1 Using Autofocus
One of the essential steps in taking a successful and sharp photo is controlling where
the camera autofocuses. If you allow the camera to autofocus by automatically choosing
its own Focus Point(s), such as in Auto shooting mode or when using Auto-Area AF
autofocus area mode, it typically focuses on the closest object or person. This may or
may not be what you want to focus on, so you should select or at least narrow down
where the camera focuses using the autofocus Focus Points or Dynamic-Area groups of
points. By doing so you are telling the camera exactly where to autofocus or where to
look to find a moving subject to track. For example, you often want to focus on a
subject’s eyes, but if you allow the camera to choose the autofocus point by itself, it may
select another part of the face, or somewhere else on the body, or even a raised hand
that is nearer to the camera than the face to focus most sharply on. If you are capturing
an image of a bird in a tree the camera has no idea you want the autofocus system to
zero in on the bird so that it is in sharp focus, and not on the branches or leaves near it
or perhaps even the leaves closer to you.
Figure 82 - Autofocus controls and other controls of the Nikon D5200.
The versatile and customizable autofocus system of the D5200 is a major part of what
makes it such a powerful camera. In any shooting mode other than Auto and Scene
modes you can, and should, take control of the autofocus system. The autofocus
system is comprised of the autofocus related controls (see Figure 82), the Autofocus
82
Nikon D5200 Experience
Modes (such as Single-servo AF, called AF-S), the autofocus Focus Points and AFArea Modes (such as 9-Point Dynamic-Area AF), and the autofocus related menu and
Custom Settings items described at the beginning of this text, which customize how the
AF system works. You will select an Autofocus Mode generally based on whether the
subject is still or moving, and select an AF-Area Mode based on how large of an area
you want the camera to look at to find and track your intended subject - ranging from a
single point, to a wider Dynamic-Area, to all the available 39 AF points. You can set the
Autofocus Modes and AF-Area Modes in a variety of combinations based on what and
how you are shooting. Be sure to read the Menus and Custom Settings section first to
make sure your camera is properly set up to make use of all the autofocus points and
various other recommended autofocus settings.
Autofocus works by looking for contrast so try to focus (locate your Focus Point as you
view it in the Viewfinder) on a texture or a detail with a pronounced line or some amount
of contrast between light and dark. It may not be able to focus on a large area of
consistent color - such as a white wall or clear blue sky, or even a uniformly colored and
illuminated shirt - or on a subject or scene that is too dark. It can be disrupted by regular
patterns and fine detail, or confused when looking through close objects to objects
farther away, such as looking through a fence. And it sometimes fails to work well in
highly contrasting or dim light, though the Built-in AF-Assist Illuminator of Custom
Setting a3 can assist in this situation. Note that the nine central AF points are more
accurate cross-type points which look for contrast in both the horizontal and vertical
direction, and thus you may wish to make use of these points in low light or other
challenging autofocus situations. When photographing people, generally try to focus
somewhere on the face, ideally on the eyes or eyebrows (or the nearest eye of an
angled face), then recompose the framing of your image if necessary.
I will use the term “recompose” a few times throughout the text. By this I mean moving
the camera after you have set the focus and/ or exposure such as with a half-press of
the Shutter Button or use of the AE-L/AF-L Button, but before you fully press the Shutter
Button and take the picture (as will be explained). This means that what you see in the
Viewfinder changes from when you do those first actions to when you take the picture;
you have re-composed the view you see in the Viewfinder (shown in Figure 96 and
Figure 97 later in this text).
Before diving into the autofocus system, I’ll briefly explain how autofocus point selection
works. You will manually select your desired autofocus point (also called Focus Point or
AF point) using the Multi Selector as you look through the Viewfinder. You can use the
center OK Button to select the center AF point. Make sure the focus mode switch on
your lens is set for autofocus (A or M/A). If it ever seems that your camera or lens is not
autofocusing, be sure to check this switch on the lens. Use the [i] Button and
Information Display screen to access and change the Focus Mode and AF-Area Mode
(see Figure 83).
83
Nikon D5200 Experience
1. Set the Mode Dial to P (Program).
2. Tap the Shutter Button with a half-press to wake up the camera and start the
exposure metering.
3. Looking through the Viewfinder, use the Multi Selector to select the Focus
Point that is nearest to where you want to focus.
4. Place that point over your intended subject.
5. Press and hold the Shutter Button halfway down and see that point blink red.
The Focus Indicator dot should light up in your Viewfinder. You have locked the
focus.
6. Keeping the Shutter Button pressed halfway, recompose if necessary, and
take the shot by fully pressing the Shutter Button.
If the In-Focus Indicator does not light up and the camera does not take the photo, the
camera may not be finding something to focus on, may not be finding enough contrast
to lock in on, or you may be too close to your subject for the lens to focus.
There are reasons to make use of all the Focus Points and not just the center one all
the time, which will be discussed. It may sound difficult to manually select the Focus
Point each time, but it is actually very quickly done and will become instinctive. You may
even start to choose your AF point as you approach a scene before even bringing your
camera to your eye, using your thumb on the Multi Selector. But if you wish, you can
start by always using the center point and recomposing before taking the shot. And
remember that Custom Setting a2: Number of Focus Points allows you to limit the
number of selectable points to 11 Points to perhaps make this process more
manageable.
5.2 Focus Modes
The D5200 has three different Focus Modes to choose from, typically depending on if
your subject is still, or if it is moving and you wish to track its movement and remain
continuously focused on it. It also has six different autofocus AF-Area Modes (discussed
in the next section) to specify how many of the Focus Points are active and how they
follow or track a moving object. You can set these two functions in various
combinations. We will first go over the Focus Modes. Select the Focus Mode using the
[i] Button to access the Information Display screen, navigate to the desired setting (see
Figure 83), and press the OK button to view and select the desired option (see Figure
84). (Note that the following Focus Modes and AF-Area Modes apply to Viewfinder
shooting and will differ for Live View and Movie shooting. Live View and Movie
Focusing will be explained later in this chapter.)
84
Nikon D5200 Experience
Figure 83 - Selecting the Focus Mode and AF-Area Mode on the Information Display
Screen. These two settings are shown circled in yellow here.
Single-Servo AF (AF-S)
Use this mode when your subject is stationary, or is still and not going to move, or if
your subject is not going to move very much, or if the distance between you and the
subject is not going to change between the time you lock focus, recompose, and take
the shot. Lock focus on the subject by half-pressing the Shutter Button and then
recompose if necessary. This mode can even be used for moving people or subjects if
you quickly take the shot after establishing or locking focus. When using AF-S, you can
select from two AF-Area Modes (to be described in the next section), either Single-Point
AF where you select the Focus Point, or Auto-Area AF, where the camera selects the
AF point(s) for you. I suggest you nearly always select your own desired Focus Point so
that the camera autofocuses exactly where you want it to.
85
Nikon D5200 Experience
Figure 84 - Single-Servo AF Focus Mode, AF-S, as accessed on the Information
Display screen.
As noted above, focus on your subject by pressing the Shutter Button halfway. The
active AF point will illuminate (blink), and the Focus Indicator light at the lower left in the
Viewfinder will illuminate as well. Continue to press the Shutter Button all the way to
take the shot. If you half-press the Shutter Button to lock focus on your subject, the
camera will remain focused at that distance as long as you keep half-pressing the
Shutter Button. You can recompose the shot as you wish and then fully press the
Shutter Button to take the photo. Again, if the Focus Indicator light does not light up and
the camera does not take the photo, the camera may not be finding enough contrast to
focus on, you may be too close to your subject for the lens to focus, or the lighting may
be too dim for the AF system to work well, though the AF-Assist Illuminator can help in
low-light situations.
However, if you are photographing a subject that is approaching or receding from view
at a relatively constant rate, or photographing fast or erratic or unpredictably moving
subjects, or photographing sports, action, or wildlife you will usually want to use
Continuous-Servo AF (AF-C) Autofocus Mode.
Continuous-Servo AF (AF-C)
Continuous-Servo AF mode is used for tracking and maintaining focus on moving
subjects, and is ideal for capturing sharp images of sports and wildlife including birds.
To take full advantage of this mode you will need to also understand the AF-Area
Modes, as described in the Autofocus AF-Area Modes section just below. If the
subject is moving towards you or away from you, the camera will keep evaluating the
focus distance. And if the subject is moving from side to side or throughout the frame,
the camera can track it as it passes from one AF point to other ones (depending on the
selected AF-Area Mode).
86
Nikon D5200 Experience
What Readers are Saying about Doug's previous Nikon guides,
Nikon D5100 Experience and Nikon D7000 Experience:
A well written, professional helpful guide - Brilliant, just what I was looking for! A manual that
was exciting, clear to follow, had examples and was used by a professional who gave just the
right amount of technical info with explanations of why you use those settings, when to use those
settings and so on, all properly explained. Well thought through and well written.
-R.D.C.
For beginners and the more experienced - This book, with its fun to read and easy to
understand instructions, helps both the novice and experienced. My photos have improved after
reading this book, and I refer to it again as I learn more. I highly recommend this purchase.
-Laura A.
It’s the first guide I've read which has taken me through all the settings in an understandable
way. I now feel that I have control over the camera.
-Peter S.
Really practical and tremendously helpful. Readers of this e-book can expect to benefit from a
more rewarding photographic experience using this superb camera, and be better able to exploit
its potential to match their personal objectives and photographic style. Highly recommended.
-M.M.
Really focuses on the "why" - I found the Nikon manual good for understanding how to set
things up but not much on the why - this book really focuses on the WHY. The guide helped me
understand why to use specific settings for specific needs.
-Benoit A.
It's clear, concise and gets to the heart of the camera's multiple and often confusing options.
Very highly recommended - for experienced user and beginner alike..
-G.S.A.
This book, together with the manual that came with your camera, is all you need to start
discovering the full potential of the D7000.
-Max M.
This manual is a clearly written, concise and useful explanation of the rationale for the
seemingly infinite and often confusing settings options for the D7000. Used in conjunction with
the Nikon manual I feel more confident in understanding how to at last proceed in getting better
photographs.
-W.L.S.
Purchase Nikon D5200 Experience at:
http://www.dojoklo.com/Full_Stop/Nikon_D5200_Experience.htm
197