1
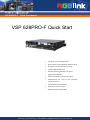
VSP 628PRO-F Quick Start Manual VSP 628PRO-F Quick Start Any signal input any signal output LOGO capture and standard test pattern built in 3D signals input and output processing Support EDID management Seamless switching between any signals Support dual 2K output Preview and program outputs separately Independently one input to two separately output conversion User-defined output resolution Genlock and reference input Module based and expendable vision tools | 22041 Hamburg | T 040-209864-0 | [email protected] | www.visiontools.de VSP 628PRO-F Quick Start Manual CONTENT Product Introduction ...............................................................................................................................2 Hardware Orientation ..............................................................................................................................3 Front Panel .........................................................................................................................................3 Back Panel .........................................................................................................................................4 Operating Instruction ..............................................................................................................................5 Content ...............................................................................................................................................5 How to Realize the System Mode Setting ..................................................................................6 How to Do Customized Output Resolution ...............................................................................11 How to Realize the Test Pattern Setting ...................................................................................12 How to Realize LAN Remote Control Setting ...........................................................................12 How to Realize WEB SERVER Cross-platform Setting ...........................................................15 How to Save the Parameter ......................................................................................................16 How to Load the Saved Parameter...........................................................................................17 WEB SERVER Cross-platform Control Operation Interface .............................................................18 VSP 628PRO Connect APP Control Operation ...................................................................................27 Contact Information...............................................................................................................................32 vision tools | 22041 Hamburg | T 040-209864-0 | [email protected] | www.visiontools.de VSP 628PRO-F Quick Start Manual Seite 2 Product Introduction VSP 628PRO is an advanced high performance EDID all-in-one video scaler, scan converter, switcher interface, seamless switching between the and transcoder converting any input signal inputs, VSP 628PRO is one of the most format to any output signal format. advanced and flexible signal processor in the VSP 628PRO supports composite, component, industry. VGA, HDMI, VSP 628PRO is based on module based DisplayPort, USB, CVBS and SD/HD/3G-SDI structure, its standard version comes with all signal are the features you need and expect to find in provided for the DVI and SDI input and Genlock old versions. In addition to the standard signals. With features like LOGO capture and features, with different modules, you can standard test pattern built in, 3D processing, reach more possibility and application range. DVI signal formats. and dual Loop-through link, outputs management, Web page control System Connection RGBlink offers solutions to demanding technical problems. Any application questions, or required further information, please contact with our customer Support Engineers. VSP 628PRO System Connection Diagram vision tools | 22041 Hamburg | T 040-209864-0 | [email protected] | www.visiontools.de VSP 628PRO-F Quick Start Manual Seite 3 Hardware Orientation Front Panel Button Instruction MENU Menu button, push the button for 3 seconds to lock panel 7 SDI3/VGA2/DVI2/HDMI2/USB1/CVBS1/ DP1.2 signal source button SCALE Scale button, push MENU and SCALE button for 3 seconds to switch language 8 SDI4/VGA3/DVI3/HDMI3/USB2/CVBS2/ HDMI1.4 signal source button FREEZE Freeze button LOGO LOGO and test pattern setting button PIP Single and double images switch button DIMMER Dimmer and effects setting button SDI1, SDI2 SDI signal source button TAKE Seamless effect switch button, and LOAD reuse button (except in switcher mode) DVI DVI signal source button 0~9 Number button, for parameters setting HDMI HDMI signal source button Knob Confirm and adjust OLED menus DP Displayport signal source button OLED Panel Show operation menu items VGA VGA or YPbPr signal source button vision tools | 22041 Hamburg | T 040-209864-0 | [email protected] | www.visiontools.de VSP 628PRO-F Quick Start Manual Seite 4 Back Panel Input Interface Output Interface 3 Genlock Input BNC port 4 Genlock Loop Out BNC port 5. 7 3G-SDI input BNC port 6. 8 3G-SDI Loop Out BNC port 11 DVI Input DVI-D port 12 DVI Loop Out DVI-D port 13 HDMI Input HDMI-A port 14 HDMI Loop Out HDMI-A port 15 Displayport Input port 17 DVI Output DVI-D port 16 VGA Input DB15 port 18 HDMI Output HDMI-A 19 VGA Output DB15 port 20 CVBS Output BNC port (OC optional module) Other Interface 1 10/100M Interface RJ45 2 USB Interface 9 S. V. D. H. U. C. HDMI_DP_4K2K_IN Optional Module 10 F. S Optional Module/Sending card interface 21 Switch 22 Power IEC-3 port vision tools | 22041 Hamburg | T 040-209864-0 | [email protected] | www.visiontools.de VSP 628PRO-F Quick Start Manual Operating Instruction Content How to Realize the System Mode Setting How to Do Customized Output Resolution How to Realize the Test Pattern Setting How to Realize LAN Remote Control Setting How to Realize WEB SERVER Cross-platform Setting How to Save the Parameter How to Load the Saved Parameter vision tools | 22041 Hamburg | T 040-209864-0 | [email protected] | www.visiontools.de Seite 5 VSP 628PRO-F Quick Start Manual How to Realize the System Mode Setting VSP 628PRO supports 5 kinds of system modes: Standard, Dual 2K, Switcher, Split and MinDelay. Push the [MENU] button to enter to the menu items, choose <System>, push the knob to confirm. Turn the knob, choose <System Mode>, user can choose the mode according to actual need. 1. Standard In this mode, all the outputs are the same image, the same resolution, and support fade in fade out switch. Each input signal supports scale, effects setting independently. Single Image Switching VSP 628PRO can realize seamless effects switching between two channels. Push the signal button, and the signal will be switched to the output. For example, the [SDI1] button light is on, it means the signal of output is SDI1, if user need to switch to VGA signal, push the [VGA] button, and the signal will be seamless cut or fade in fade out to the output. User can adjust the switch speed in <Trans Time> option in <Transition>by pushing the [MENU] button. PIP Setting Enable the PIP function: VSP 628PRO supports seamless switch in single image and double images. Push the [PIP] button, the button light is on, and enable the PIP function. Choose the signal in PIP: VSP 628PRO can output two same or different signals to the output, the settings are as follows: 1. Push the [PIP] button, and enable the PIP function. 2. Push the [SCALE] or [DIMMER] button, choose <Layer Select>, and push the knob to confirm. (User can also choose <Layer Select> in <Input> or <Output> option by pushing the [MENU] button.) 3. Turn the knob, and choose main or sub image. 4. Choose the signal, and the selected image will be switched to this signal. vision tools | 22041 Hamburg | T 040-209864-0 | [email protected] | www.visiontools.de Seite 6 VSP 628PRO-F Quick Start Manual Scale Setting Push the [SCALE] button, and enter to the scale function menus, user can adjust the H size, V size, H/V size, H pos, V pos and scaling mode by knob or number buttons. If image quality distorts by improper operation, it can be recover by reset. Note: In PIP mode, user need to choose the image that to set in <Layer Select> option before setting. Image Size Adjust Push the [MENU] button, and enter to the menu items. Turn the knob, and choose <Input>, push the knob to confirm. Turn the knob, choose <Sizing Adjust>, push the knob to confirm. User can adjust the H size, V size, H pos V pos, and mask top, bottom, left and right of the image by knob or number buttons. If image quality distorts by improper operation, it can be recover by reset. Note: In PIP mode, user need to choose the image that to set in <Layer Select> option before setting. Dimmer and Effects Setting Push the [DIMMER] button, and enter to the menu items, user can set the dimmer and effects. The adjustment value range of dimmer is 0~100. The setting for effects include brightness, contrast, chroma, hue, color temperature, color correction, gamma, brightness, H sharpness, V sharpness, noise reduction, Invert, Flip V, Flip H and Flip 90 degree. Note: User can also choose <Effects> in <Output> option by pushing the [MENU] button for setting. 2. Dual 2K In this mode, the two channels output independently, CHA outputs to DVI and VGA, CHB outputs to HDMI, CHA and CHB can input any signal and set different resolutions, but can not support fade in fade out switch. Each input signal supports scale, effects setting independently. vision tools | 22041 Hamburg | T 040-209864-0 | [email protected] | www.visiontools.de Seite 7 VSP 628PRO-F Quick Start Manual Same operation with standard mode, in this mode, user can switch the signal, set the size and position, mask the image and adjust the dimmer and effects. User need to choose the channel in <Channel Select> before setting. For example, choose the signal of CHB, first, push the [MENU] button to enter to menu items, choose <Output>, push the knob to confirm, turn the knob, choose <Channel select>, turn the knob to choose CHB. Then choose the signal, CHB will switch to the selected signal. 3. Switcher In this mode, the HDMI output is preview image, and the DVI and VGA output is program image, preview signal can not support fade in fade out switch, and program signal supports. Same operation with stand mode, in this mode, user can switch the signal, set the size and position, and mask the image. All the settings above are for preview, push [TAKE] button after setting, and the preview image will be cut or fade in fade out to the program. 4. Split In this mode, user can set split simply, and can set the split parameters of single or multiple devices quickly. The split operations are as follows: Project: There is one LED display, the size is 3684x1152, divide into right and left halves, the left width is 1824 and the right width is 1860, we will cascade the two LED displays with one VSP 628PRO, and display a complete picture in the whole screen. (1) Connect the interface Connect the DVI signal to the DVI input interface, connect the DVI output to the left LED sending card, and connect the HDMI output to the right LED sending card. (2) Choose the system mode Push the [MENU] button to enter to the menu items, turn the knob to choose <System>: vision tools | 22041 Hamburg | T 040-209864-0 | [email protected] | www.visiontools.de Seite 8 VSP 628PRO-F Quick Start Manual Transition ->System Logo Display Setup Seite 9 >> >> >> >> Push the knob to confirm, turn the knob to choose <System Mode>: ->System Mode Ethernet Input EDID VFD Bright >> >> >> >> Push the knob to confirm, turn the knob to choose <Split>: System Mode * Split (3) Choose the split mode Turn the knob in split menus, and choose the split mode as <One Machine> or <Multi Machine>. ->One Or Multi One Machine Choose <One Machine>, push the knob to confirm, turn the knob, choose the split mode, for example, choose <H One-To-Two>: One Machine * H One-To-Two (4) Set the output format Push the [MENU] button to enter to the menu items, turn the knob and choose <Output>. vision tools | 22041 Hamburg | T 040-209864-0 | [email protected] | www.visiontools.de VSP 628PRO-F Quick Start Manual Input ->Output Custom Formats Views Seite 10 >> >> >> >> Push the knob to confirm.Turn the knob to choose <Output Format>, and set the output formats as 2048x1152@60hz. Channel Select ->Output Format CVBS Format Out Auto Config (N/A) CHA >> >> >> The resolutions of the two outputs will change at the same time. (5) Set the split parameters After choose the split mode, the OLED screen will show the split parameters, set the H total as 3864, set the V total as 1152, set the first width as 1824, then turn the knob, and choose <Set Parameter>, push the knob to confirm. ->H Total V Total First Width Set Parameter 3864 1152 1824 >> (6) Save Push the [MENU] button to enter to the menu items, turn the knob and choose <Views>. Input Output Custom Formats ->Views >> >> >> >> Push the knob to confirm. Turn the knob again and choose <Save>. Recall ->Save Delete Delay Recall >> >> >> >> vision tools | 22041 Hamburg | T 040-209864-0 | [email protected] | www.visiontools.de VSP 628PRO-F Quick Start Manual Push the knob to confirm. Turn the knob to choose the save mode, for example, choose File 4, push the knob to confirm. Save ->File 4 File 1 will be auto recalled after device powering on. 5. MinDelay In this mode, user can achieve the same input and output resolutions, and achieve the least processor delay time. Except effects function, it can not support scale, De interlacing, etc. How to Do Customized Output Resolution Push [MENU] button to enter to the menu items, turn the knob and choose <Custom Formats>, push the knob and confirm. 1. Enter digits of desired resolution by pressing the red number buttons. 2. After the digital, push the knob will add ×, means before × is the horizontal size. Same operation for vertical size. 3. After the digital, push the knob will add ×, means before the × is the vertical size, and after the × is the refresh rate. Only digital 50 or digital 60 supports for the refresh rate. Use the digital buttons to finish the settings. 4. After input all the values, push the knob to enable VSP 628PRO to output this resolution. VSP 628PRO will take 5~10 seconds to enable this output resolution. vision tools | 22041 Hamburg | T 040-209864-0 | [email protected] | www.visiontools.de Seite 11 VSP 628PRO-F Quick Start Manual How to Realize the Test Pattern Setting Push the [LOGO] button, user can set the test pattern, the settings are as follows: Type: Choose the test pattern type, including LOGO, H RAMP, V RAMP, 100% COL BAR, 75% COL BAR, 16*16 GRID, 32*32 GRID, BURST, 50% GRAY, GRAY STEP1, GRAY STEP2, WHITE、BLACK and SMPTE COL BAR. Raster Box: User can choose enable or disable the raster box function. Diag Motion: User can choose enable or disable the diag motion function. AOI Raster Box: User can choose enable or disable the AOI raster box function. If choose “ON”, user can choose the types including Box X, Box Y, Box Width and Box Height. If image quality distorts by improper operation, it can be recover by reset. How to Realize LAN Remote Control Setting Firstly, To realize LAN remote control need to build up a LAN platform including: ①One computer (Laptop or computer, used to do remote control which installed windows control software in the computer).②One router (Better to have wireless function which may realize WEB control cross different platform; without wireless function is available but only realize cable remote control. No limitation for router’s model and brand, such as VPN router model: Netcore 255 or 266. Volans VE 760W or 982W). ③One VSP 628PRO processor (as long as the router’s network ports can connect to, user can place multi pieces of VSP 628PRO). Step one: LAN physical connection. Connect VSP 628PRO and router with network cable, then connect computer and router with network cable also, use the LAN port of router, WAN port is used for connecting to outer net. Sketch map as below: vision tools | 22041 Hamburg | T 040-209864-0 | [email protected] | www.visiontools.de Seite 12 VSP 628PRO-F Quick Start Manual Step two: IP address setting (processor’s default IP address is 192.168.0.100) Firstly change computer’s local connection to “automatically getting the IP”, showed as below: Secondly refer to router’s instruction (user manual, specification), and find out router’s default network segment. If router’s default network segment is 192.168.0.1, then it is same to processor IP address segment, open up windows control software and user can directly control on VSP 628PRO. If router’s default network segment is 192.168.1.1, then user need to change router’s default gateway or change processor’s IP, both methods are available, but we suggest to change processor’s IP. Method one: Change processor’s IP. Push the [MENU] button on front panel and go into items as below picture shows. Change processor’s IP to be 192.168.1.100, confirm and restart the processor, then user can directly control on VSP 628PRO via windows control software. vision tools | 22041 Hamburg | T 040-209864-0 | [email protected] | www.visiontools.de Seite 13 VSP 628PRO-F Quick Start Manual Method two: Change router’s gateway. Type in 192.168.1.1 on the browser and go into router setting. Type in default account and code (please refer to the router user manual for the information). Go to router setting part and find out “LAN port setting”, change the default value “192.168.1.1” to be “192.168.0.1”. Save the setting and restart the router, then user can directly control on VSP 628PRO via windows control software. vision tools | 22041 Hamburg | T 040-209864-0 | [email protected] | www.visiontools.de Seite 14 VSP 628PRO-F Quick Start Manual How to Realize WEB SERVER Cross-platform Setting First, the formation of LAN Remote Control Platform: one Ipad or one Iphone, one router (with wireless functions, for example with a wireless-enabled VPN router models: Netcore 255 and 266. Volans VE760W, 982W.), one VSP 628PRO processor (can be more processors, as long as the network interface can be connected to the router) The first step: LAN Physical Connection: connect VSP 628PRO and routers by CAT5, and connect routers by CAT5, please use the LAN Ethernet port, WAN port is only used to connect to external networks, it’s not allowed to use in this step. Connection diagram is as below: The second step: IP address setup. Please refer to IP Setup steps which in the “How to Realize LAN Remote Control Setting” section. (Make sure that processors IP address and router IP address are in the same band.) When users use Ipad or Iphone, you can directly use the Safari browser, enter the URL 192.168.0.100 (default) and run. If user using other types of devices will need to install the kernel webkit browser such as: Apple Safari, Google Chrome or Maxthon browser. The Installing package will provide Google Chrome browser (windows version). Note: The Internet Explorer, Edge and Firefox are not supported. The third step: Make connections. Click ico, run Google Chrome browser, open the page enter 192.168.0.100 (default) and run. vision tools | 22041 Hamburg | T 040-209864-0 | [email protected] | www.visiontools.de Seite 15 VSP 628PRO-F Quick Start Manual After connection successfully, Web page appears as VSP 628PRO system control interface. Click on the toolbar below the control interface, then accesses setup menu, now WEB control on VSP 628PRO is available. How to Save the Parameter VSP 628PRO provides 22 kinds of save modes, the settings are as follows: 1. Push the [MENU] button to enter to the menu items, turn the knob, choose <View>, push the knob to confirm. 2. Turn the knob, and choose <Save>, push the knob to confirm. 3. Turn the knob, and choose the location that need to save, push the knob to confirm. vision tools | 22041 Hamburg | T 040-209864-0 | [email protected] | www.visiontools.de Seite 16 VSP 628PRO-F Quick Start Manual How to Load the Saved Parameter VSP 628PRO provides 22 kinds of save modes, the settings are as follows: 1. Push the [MENU] button to enter to the menu items, turn the knob, choose <View>, push the knob to confirm. 2. Turn the knob, and choose <Recall>, push the knob to confirm. 3. The button on is ready for recall, and button flashes means just recall. Push the button on or turn the knob to choose the location that need to recall, push the knob to confirm. Note: User can only recall File 1 to File 10 by pushing the button. Beyond File 10, user need to choose the file by the knob. vision tools | 22041 Hamburg | T 040-209864-0 | [email protected] | www.visiontools.de Seite 17 VSP 628PRO-F Quick Start Manual WEB SERVER Cross-platform Control Operation Interface If users use Ipad or Iphone, they can input the website 192.168.0.100 (default) or 192.168.0.231 in Safari browsers to operate. If users need to modify VSP 628PRO IP address, they can input corresponding modified IP address. If users use other device, they need to install webkit kernel browser, such as: apple Safari, Google Chrome or Maxthon. Installation package provides Google Chrome browser (Windows version). Now take Google Chrome browser for example, specific steps are as follows: Step 1: click to run Google Chrome browser, open the webpage and input 192.168.0.100 to operate: Step 2: Enter the default home page, the system provides 13 kinds of output resolutions for choose, blue stripe means current selected output resolution. Selected, then VSP 628PRO will automatically update the output resolution. vision tools | 22041 Hamburg | T 040-209864-0 | [email protected] | www.visiontools.de Seite 18 VSP 628PRO-F Quick Start Manual Seite 19 Note Users can freely switch the icons in title bar to set relevant functions, following will introduce the relevant settings. Step 3: Select "Input" icon in title bar, user can click the signal source that need, VSP 628PRO will automatically update input signal source. Step 4: Select "Image" icon in title bar to scale the image, user can modify digital setting parameters and image size and position easily through "-+" icon. Click "Set" after modify the digital, VSP 628PRO image will display the latest Settings. vision tools | 22041 Hamburg | T 040-209864-0 | [email protected] | www.visiontools.de VSP 628PRO-F Quick Start Manual Seite 20 Step 5: Select "PIP" icon in title bar. When the PIP sliding block icon is grey, then it is single channel picture mode, and if image selection is gray, then image 1 is default for single image output image, and can't be chosen. Note User can preset the image mode that switch the current single picture mode to double-picture mode and the position of the two images in the mode. Drag the slider rolling ball, when the slide block is green, PIP starts. vision tools | 22041 Hamburg | T 040-209864-0 | [email protected] | www.visiontools.de VSP 628PRO-F Quick Start Manual Then user can set PIP location, in addition to system default PIP upper left picture, also can choose picture above picture and picture edge picture. In PIP mode, the default image1 is the main image, image 2 for PIP sprite, click the corresponding image when need to edit image 1 or image 2, the selected image with blue stripes, tick, as shown below: image 2 is selected, all settings will for image 2. For example, you can switch "Input" icon in title bar to choose image 2 input source. vision tools | 22041 Hamburg | T 040-209864-0 | [email protected] | www.visiontools.de Seite 21 VSP 628PRO-F Quick Start Manual Seite 22 Note If image 1 and image 2 with the same input source, then it will display the same picture in PIP. Step 6: Image brightness setting, it is mainly for output image setting. If "Sync" is grey, you can adjust one color alone, when "Sync" is green, it means it starts, drag one color, and the other two color values will change accordingly to the same value. Note User can adjust setting according to actual condition, the function mainly suitable for the personage that is very processional in image quality. Nonprofessional isn’t recommend to the vision tools | 22041 Hamburg | T 040-209864-0 | [email protected] | www.visiontools.de VSP 628PRO-F Quick Start Manual Seite 23 above operations, if distortion of image quality as of improper operation errors, you can reset to the factory initialization. Step 7: Image contrast setting, it is mainly for output image contrast. If "Sync" is grey, you can adjust one color alone, when "Sync" is green, it means it starts, drag one color, and the other two color values will change accordingly to the same value. Note User can adjust setting according to actual condition, the function mainly suitable for the personage that is very processional in image quality. Nonprofessional isn’t recommend to the above operations, if distortion of image quality as of improper operation errors, you can reset to the factory initialization. Step 8: Save and Call function. User can save the parameters to UserMode1 and UserMode2, and can also load UserMode1 and UserMode2 that saved before. vision tools | 22041 Hamburg | T 040-209864-0 | [email protected] | www.visiontools.de VSP 628PRO-F Quick Start Manual Step 9: Page setting. First, choose the language according to user’s need. And the default is automatic identification. vision tools | 22041 Hamburg | T 040-209864-0 | [email protected] | www.visiontools.de Seite 24 VSP 628PRO-F Quick Start Manual Click "Set" after select the language (such as select Chinese), pay attention to system prompt "Language will effect after the next time and after reboot IP will affect" (at green box); Now you need to refresh the page to complete the setting. If need to modify IP address, user can press MENU->SYSTEM ->Ethernet->IP, it will take effect after restart the device. Reset: If appear wrong operation, click "Reset" to factory default. Key Lock: If slide block is gray, it is unlock, and VSP 628PRO keys can normally operate. And if slide block is green, the VSP 628PRO keys locked, and user can't operate any button. Dimmer: ALPHA transparency regulation. Drag ball to change the transparency value, transparency value is between 0 ~ 100 levels. vision tools | 22041 Hamburg | T 040-209864-0 | [email protected] | www.visiontools.de Seite 25 VSP 628PRO-F Quick Start Manual Seite 26 Note Operation is invalid in PIP mode. Step 10: Log function is mainly for research and development personnel as debugging use. vision tools | 22041 Hamburg | T 040-209864-0 | [email protected] | www.visiontools.de VSP 628PRO-F Quick Start Manual Seite 27 VSP 628PRO Connect APP Control Operation 1. Download the APP User can log in the Apple or Android system to search and download the video processor client APP, click the link https://itunes.apple.com/au/app/vsp-628pro-software-control/id990925513?mt=8, and then install the VSP 628PRO client APP on Iphone or IPAD, shown as completed, the Iphone or IPAD will show the icon . After the installation is . 2. APP Control Interface Introduction WIFI Network cable 1. Prepare a router that with wireless internet and DHCP function, connect and set the router by computer before connect to VSP 628PRO, and enable the IP and DHCP function. (For more details about setting, please refer to router’s instruction). 2. Connect the LAN port of router to the LAN port of VSP 628PRO with the network cable. 3. Connect to the router by IOS or Android device, system default IP automatic access, use the web browser to access “192.168.0.100”, the default IP address of VSP 628PRO, if the IP address is changed, please enter the changed IP address. (Set path: MENU->System->Ethernet->IP), user can wirelessly control VSP 628PRO after loading. ⑴ Make sure the device is connected to the router, power on, after the device is stable, turn on the mobile phone or IPAD APP to search and connect the device, as follows: vision tools | 22041 Hamburg | T 040-209864-0 | [email protected] | www.visiontools.de VSP 628PRO-F Quick Start Manual ⑵ There are 2 device options after connect the device, DEMO is the presentation template that comes with software, choose any one of them, as follows: ⑶ After connection, it enters to the processor manager interface, as follows: ⑷ Click <Signal Select>, it supports 4 different modes, as follows: vision tools | 22041 Hamburg | T 040-209864-0 | [email protected] | www.visiontools.de Seite 28 VSP 628PRO-F Quick Start Manual ⑸ Click <Save And Load>, it supports 22 kinds of save modes, as follows: ⑹ Click <Image Setting>, user can adjust the parameters in preview mode, as follows: ⑺ Click <Mask And Scale>, user can mask and scale the image, as follows: vision tools | 22041 Hamburg | T 040-209864-0 | [email protected] | www.visiontools.de Seite 29 VSP 628PRO-F Quick Start Manual ⑻ Click <Test Pattern>, there are 13 kinds of test patterns, as follows: ⑼ Click <Parameter Setting>, user can adjust the output resolution, as follows: ⑽ Click <Information>, user can view the device mode, serial number, IP address and module versions. User can also click “Factory Reset” to reset to its factory settings. vision tools | 22041 Hamburg | T 040-209864-0 | [email protected] | www.visiontools.de Seite 30 VSP 628PRO-F Quick Start Manual vision tools | 22041 Hamburg | T 040-209864-0 | [email protected] | www.visiontools.de Seite 31 VSP 628PRO-F Quick Start Manual Seite 32 Contact Information Warranty: All video products are designed and tested to the highest quality standard and backed by full 3 years parts and labor warranty. Warranties are effective upon delivery date to customer and are non-transferable. RGBlink warranties are only valid to the original purchase/owner. Warranty related repairs include parts and labor, but do not include faults lighting resulting from user negligence, special modification, strikes, abuse(drop/crush), and/or other unusual damages. The customer shall pay shipping charges when unit is returned for repair. vision tools distributions gmbh | 22041 Hamburg | Königsreihe 12-14 Tel.: +49 (0)40-209 864-0 | www.visiontools.de | [email protected] vision tools | 22041 Hamburg | T 040-209864-0 | [email protected] | www.visiontools.de