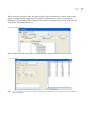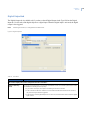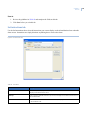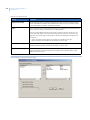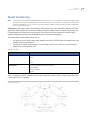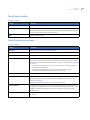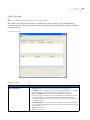
1
GE
Security
Facility Commander Wnx 7.5
User Manual
P/N 460641002C • ISS 30MAR09
Copyright
Copyright © 2009, GE Security Inc. All rights reserved.
This document may not be copied or otherwise reproduced, in whole or in part, except as
specifically permitted under US and international copyright law, without the prior written
consent from GE Security.
Document number/revision: 460641002C (March 2009).
Disclaimer
THE INFORMATION IN THIS DOCUMENT IS SUBJECT TO CHANGE WITHOUT NOTICE. GE ASSUMES
NO RESPONSIBILITY FOR INACCURACIES OR OMISSIONS AND SPECIFICALLY DISCLAIMS ANY
LIABILITIES, LOSSES, OR RISKS, PERSONAL OR OTHERWISE, INCURRED AS A CONSEQUENCE,
DIRECTLY OR INDIRECTLY, OF THE USE OR APPLICATION OF ANY OF THE CONTENTS OF THIS
DOCUMENT. FOR THE LATEST DOCUMENTATION, CONTACT YOUR LOCAL SUPPLIER OR VISIT US
ONLINE AT WWW.GESECURITY.COM.
This publication may contain examples of screen captures and reports used in daily operations.
Examples may include fictitious names of individuals and companies. Any similarity to names
and addresses of actual businesses or persons is entirely coincidental.
Trademarks and patents
GE and the GE monogram are registered trademarks of General Electric.
Facility Commander Wnx and logo are registered trademarks of GE Security.
Other trade names used in this document may be trademarks or registered trademarks of the
manufacturers or vendors of the respective products.
Intended use
Use this product only for the purpose it was designed for; refer to the data sheet and user
documentation. For the latest product information, contact your local supplier or visit us online
at:
www.gesecurity.com.
i
Contents
Preface . . . . . . . . . . . . . . . . . . . . . . . . . . . . . . . . . . . . . . . . . . . . . . . . . . . . . . . . . . . . . . . . . . . . . . . . . . . . . . . . . . . . . . . . xi
Conventions used in this manual. . . . . . . . . . . . . . . . . . . . . . . . . . . . . . . . . . . . . . . . . . . . . . . . . . . . . . . . . . . . . . . . . xi
Safety terms and symbols . . . . . . . . . . . . . . . . . . . . . . . . . . . . . . . . . . . . . . . . . . . . . . . . . . . . . . . . . . . . . . . . . . . . . . . xi
Navigating a PDF file. . . . . . . . . . . . . . . . . . . . . . . . . . . . . . . . . . . . . . . . . . . . . . . . . . . . . . . . . . . . . . . . . . . . . . . . . . . . xi
Related documentation . . . . . . . . . . . . . . . . . . . . . . . . . . . . . . . . . . . . . . . . . . . . . . . . . . . . . . . . . . . . . . . . . . . . . . . . . xii
. . . . . . . . . . . . . . . . . . . . . . . . . . . . . . . . . . . . . . . . . . . . . . . . . . . . . . . . . . . . . . . . . . . . . . . . . . . . . . . . . . . . . . . . . . . . . . . xii
Quick Setup guide . . . . . . . . . . . . . . . . . . . . . . . . . . . . . . . . . . . . . . . . . . . . . . . . . . . . . . . . . . . . . . . . . . . 1
How to accomplish frequently performed tasks: . . . . . . . . . . . . . . . . . . . . . . . . . . . . . . . . . . . . . . . . . . . . . . . . . . . . 1
How to configure a system in recommended sequential order . . . . . . . . . . . . . . . . . . . . . . . . . . . . . . . . . . . . . . . 2
How to accomplish administrator tasks. . . . . . . . . . . . . . . . . . . . . . . . . . . . . . . . . . . . . . . . . . . . . . . . . . . . . . . . . . . 22
How to accomplish operator tasks . . . . . . . . . . . . . . . . . . . . . . . . . . . . . . . . . . . . . . . . . . . . . . . . . . . . . . . . . . . . . . . 26
Chapter 1.
Introduction . . . . . . . . . . . . . . . . . . . . . . . . . . . . . . . . . . . . . . . . . . . . . . . . . . . . . . . . . . . . 1
Overview . . . . . . . . . . . . . . . . . . . . . . . . . . . . . . . . . . . . . . . . . . . . . . . . . . . . . . . . . . . . . . . . . . . . . . . . . . . . . . . . . . . . . . . 2
Professional Edition . . . . . . . . . . . . . . . . . . . . . . . . . . . . . . . . . . . . . . . . . . . . . . . . . . . . . . . . . . . . . . . . . . . . . . . . . . . . . . . . . .2
Enterprise Edition . . . . . . . . . . . . . . . . . . . . . . . . . . . . . . . . . . . . . . . . . . . . . . . . . . . . . . . . . . . . . . . . . . . . . . . . . . . . . . . . . . . .2
Global Edition . . . . . . . . . . . . . . . . . . . . . . . . . . . . . . . . . . . . . . . . . . . . . . . . . . . . . . . . . . . . . . . . . . . . . . . . . . . . . . . . . . . . . . . .2
Product contents . . . . . . . . . . . . . . . . . . . . . . . . . . . . . . . . . . . . . . . . . . . . . . . . . . . . . . . . . . . . . . . . . . . . . . . . . . . . . . . . 3
Before you begin configuration . . . . . . . . . . . . . . . . . . . . . . . . . . . . . . . . . . . . . . . . . . . . . . . . . . . . . . . . . . . . . . . . . . . 3
Licensing . . . . . . . . . . . . . . . . . . . . . . . . . . . . . . . . . . . . . . . . . . . . . . . . . . . . . . . . . . . . . . . . . . . . . . . . . . . . . . . . . . . . . . . 3
Client/server architecture . . . . . . . . . . . . . . . . . . . . . . . . . . . . . . . . . . . . . . . . . . . . . . . . . . . . . . . . . . . . . . . . . . . . . . . . 4
Facility Commander Wnx services. . . . . . . . . . . . . . . . . . . . . . . . . . . . . . . . . . . . . . . . . . . . . . . . . . . . . . . . . . . . . . . . . 4
Simple File Sharing on WinXP . . . . . . . . . . . . . . . . . . . . . . . . . . . . . . . . . . . . . . . . . . . . . . . . . . . . . . . . . . . . . . . . . . . . . 5
Configuring firewall and DCOM settings with SecurityCnfg . . . . . . . . . . . . . . . . . . . . . . . . . . . . . . . . . . . . . . . . . . 5
Navigation. . . . . . . . . . . . . . . . . . . . . . . . . . . . . . . . . . . . . . . . . . . . . . . . . . . . . . . . . . . . . . . . . . . . . . . . . . . . . . . . . . . . . . 7
Log on/log off or Shut down the computer . . . . . . . . . . . . . . . . . . . . . . . . . . . . . . . . . . . . . . . . . . . . . . . . . . . . . . . . . . . .8
Logoff . . . . . . . . . . . . . . . . . . . . . . . . . . . . . . . . . . . . . . . . . . . . . . . . . . . . . . . . . . . . . . . . . . . . . . . . . . . . . . . . . . . . . . . . . . . . . . .8
Shutting down . . . . . . . . . . . . . . . . . . . . . . . . . . . . . . . . . . . . . . . . . . . . . . . . . . . . . . . . . . . . . . . . . . . . . . . . . . . . . . . . . . . . . . .8
Menus . . . . . . . . . . . . . . . . . . . . . . . . . . . . . . . . . . . . . . . . . . . . . . . . . . . . . . . . . . . . . . . . . . . . . . . . . . . . . . . . . . . . . . . . . . 8
Status Bar . . . . . . . . . . . . . . . . . . . . . . . . . . . . . . . . . . . . . . . . . . . . . . . . . . . . . . . . . . . . . . . . . . . . . . . . . . . . . . . . . . . . . . . . . 19
Creating, editing, and deleting records . . . . . . . . . . . . . . . . . . . . . . . . . . . . . . . . . . . . . . . . . . . . . . . . . . . . . . . . . . . 20
Creating records . . . . . . . . . . . . . . . . . . . . . . . . . . . . . . . . . . . . . . . . . . . . . . . . . . . . . . . . . . . . . . . . . . . . . . . . . . . . . . . . . . . 20
Editing records. . . . . . . . . . . . . . . . . . . . . . . . . . . . . . . . . . . . . . . . . . . . . . . . . . . . . . . . . . . . . . . . . . . . . . . . . . . . . . . . . . . . . 20
Chapter 2.
System preferences . . . . . . . . . . . . . . . . . . . . . . . . . . . . . . . . . . . . . . . . . . . . . . . . . . . . 23
Overview . . . . . . . . . . . . . . . . . . . . . . . . . . . . . . . . . . . . . . . . . . . . . . . . . . . . . . . . . . . . . . . . . . . . . . . . . . . . . . . . . . . . . . 24
Configure preferences . . . . . . . . . . . . . . . . . . . . . . . . . . . . . . . . . . . . . . . . . . . . . . . . . . . . . . . . . . . . . . . . . . . . . . . . . . 24
System Settings tab . . . . . . . . . . . . . . . . . . . . . . . . . . . . . . . . . . . . . . . . . . . . . . . . . . . . . . . . . . . . . . . . . . . . . . . . . . . . . . . . 24
User Fields tab . . . . . . . . . . . . . . . . . . . . . . . . . . . . . . . . . . . . . . . . . . . . . . . . . . . . . . . . . . . . . . . . . . . . . . . . . . . . . . . . . . . . . 28
Mode/Threat Labels tab . . . . . . . . . . . . . . . . . . . . . . . . . . . . . . . . . . . . . . . . . . . . . . . . . . . . . . . . . . . . . . . . . . . . . . . . . . . . 29
Address Fields tab . . . . . . . . . . . . . . . . . . . . . . . . . . . . . . . . . . . . . . . . . . . . . . . . . . . . . . . . . . . . . . . . . . . . . . . . . . . . . . . . . 30
ii
Facility Commander Wnx 7.5
User Manual
Communications tab . . . . . . . . . . . . . . . . . . . . . . . . . . . . . . . . . . . . . . . . . . . . . . . . . . . . . . . . . . . . . . . . . . . . . . . . . . . . . . . 31
Clear Archive tab . . . . . . . . . . . . . . . . . . . . . . . . . . . . . . . . . . . . . . . . . . . . . . . . . . . . . . . . . . . . . . . . . . . . . . . . . . . . . . . . . . . 33
Backing up data. . . . . . . . . . . . . . . . . . . . . . . . . . . . . . . . . . . . . . . . . . . . . . . . . . . . . . . . . . . . . . . . . . . . . . . . . . . . . . . . . . . . 34
Archiving . . . . . . . . . . . . . . . . . . . . . . . . . . . . . . . . . . . . . . . . . . . . . . . . . . . . . . . . . . . . . . . . . . . . . . . . . . . . . . . . . . . . . . . . . . 34
Appending Archive databases . . . . . . . . . . . . . . . . . . . . . . . . . . . . . . . . . . . . . . . . . . . . . . . . . . . . . . . . . . . . . . . . . . . . . . 35
Restoring databases . . . . . . . . . . . . . . . . . . . . . . . . . . . . . . . . . . . . . . . . . . . . . . . . . . . . . . . . . . . . . . . . . . . . . . . . . . . . . . . 36
Security tab . . . . . . . . . . . . . . . . . . . . . . . . . . . . . . . . . . . . . . . . . . . . . . . . . . . . . . . . . . . . . . . . . . . . . . . . . . . . . . . . . . . . . . . . 37
ACU Settings tab (ACU only) . . . . . . . . . . . . . . . . . . . . . . . . . . . . . . . . . . . . . . . . . . . . . . . . . . . . . . . . . . . . . . . . . . . . . . . . . 39
Configure regions . . . . . . . . . . . . . . . . . . . . . . . . . . . . . . . . . . . . . . . . . . . . . . . . . . . . . . . . . . . . . . . . . . . . . . . . . . . . . . 40
Region tab . . . . . . . . . . . . . . . . . . . . . . . . . . . . . . . . . . . . . . . . . . . . . . . . . . . . . . . . . . . . . . . . . . . . . . . . . . . . . . . . . . . . . . . . . 41
Backup Regions tab . . . . . . . . . . . . . . . . . . . . . . . . . . . . . . . . . . . . . . . . . . . . . . . . . . . . . . . . . . . . . . . . . . . . . . . . . . . . . . . . 42
APB Region Configuration tab. . . . . . . . . . . . . . . . . . . . . . . . . . . . . . . . . . . . . . . . . . . . . . . . . . . . . . . . . . . . . . . . . . . . . . . 44
Global configuration regional rules . . . . . . . . . . . . . . . . . . . . . . . . . . . . . . . . . . . . . . . . . . . . . . . . . . . . . . . . . . . . . . 46
Replication and synchronization conflicts. . . . . . . . . . . . . . . . . . . . . . . . . . . . . . . . . . . . . . . . . . . . . . . . . . . . . . . . . 47
Define facilities . . . . . . . . . . . . . . . . . . . . . . . . . . . . . . . . . . . . . . . . . . . . . . . . . . . . . . . . . . . . . . . . . . . . . . . . . . . . . . . . 48
Facility tab . . . . . . . . . . . . . . . . . . . . . . . . . . . . . . . . . . . . . . . . . . . . . . . . . . . . . . . . . . . . . . . . . . . . . . . . . . . . . . . . . . . . . . . . . 48
Identify and configure clients. . . . . . . . . . . . . . . . . . . . . . . . . . . . . . . . . . . . . . . . . . . . . . . . . . . . . . . . . . . . . . . . . . . . 49
Networking . . . . . . . . . . . . . . . . . . . . . . . . . . . . . . . . . . . . . . . . . . . . . . . . . . . . . . . . . . . . . . . . . . . . . . . . . . . . . . . . . . . . . . . . 50
Client tab . . . . . . . . . . . . . . . . . . . . . . . . . . . . . . . . . . . . . . . . . . . . . . . . . . . . . . . . . . . . . . . . . . . . . . . . . . . . . . . . . . . . . . . . . . 51
Backup Clients tab . . . . . . . . . . . . . . . . . . . . . . . . . . . . . . . . . . . . . . . . . . . . . . . . . . . . . . . . . . . . . . . . . . . . . . . . . . . . . . . . . 54
Takeover and recovery timing . . . . . . . . . . . . . . . . . . . . . . . . . . . . . . . . . . . . . . . . . . . . . . . . . . . . . . . . . . . . . . . . . . . . . . 57
Client redundancy overview . . . . . . . . . . . . . . . . . . . . . . . . . . . . . . . . . . . . . . . . . . . . . . . . . . . . . . . . . . . . . . . . . . . . . . . . 58
Define clients groups . . . . . . . . . . . . . . . . . . . . . . . . . . . . . . . . . . . . . . . . . . . . . . . . . . . . . . . . . . . . . . . . . . . . . . . . . . . 59
Client Group tab. . . . . . . . . . . . . . . . . . . . . . . . . . . . . . . . . . . . . . . . . . . . . . . . . . . . . . . . . . . . . . . . . . . . . . . . . . . . . . . . . . . . 59
Create permissions . . . . . . . . . . . . . . . . . . . . . . . . . . . . . . . . . . . . . . . . . . . . . . . . . . . . . . . . . . . . . . . . . . . . . . . . . . . . . 60
Permission tab . . . . . . . . . . . . . . . . . . . . . . . . . . . . . . . . . . . . . . . . . . . . . . . . . . . . . . . . . . . . . . . . . . . . . . . . . . . . . . . . . . . . . 61
Determine and create operators . . . . . . . . . . . . . . . . . . . . . . . . . . . . . . . . . . . . . . . . . . . . . . . . . . . . . . . . . . . . . . . . . 63
Operator tab . . . . . . . . . . . . . . . . . . . . . . . . . . . . . . . . . . . . . . . . . . . . . . . . . . . . . . . . . . . . . . . . . . . . . . . . . . . . . . . . . . . . . . . 63
Multiple language support . . . . . . . . . . . . . . . . . . . . . . . . . . . . . . . . . . . . . . . . . . . . . . . . . . . . . . . . . . . . . . . . . . . . . . . . . . 65
Facilities tab . . . . . . . . . . . . . . . . . . . . . . . . . . . . . . . . . . . . . . . . . . . . . . . . . . . . . . . . . . . . . . . . . . . . . . . . . . . . . . . . . . . . . . . 66
What’s next?. . . . . . . . . . . . . . . . . . . . . . . . . . . . . . . . . . . . . . . . . . . . . . . . . . . . . . . . . . . . . . . . . . . . . . . . . . . . . . . . . . . 67
Chapter 3.
Schedules . . . . . . . . . . . . . . . . . . . . . . . . . . . . . . . . . . . . . . . . . . . . . . . . . . . . . . . . . . . . . 69
Overview . . . . . . . . . . . . . . . . . . . . . . . . . . . . . . . . . . . . . . . . . . . . . . . . . . . . . . . . . . . . . . . . . . . . . . . . . . . . . . . . . . . . . . 70
Define time schedules . . . . . . . . . . . . . . . . . . . . . . . . . . . . . . . . . . . . . . . . . . . . . . . . . . . . . . . . . . . . . . . . . . . . . . . . . . 70
Time Schedules tab. . . . . . . . . . . . . . . . . . . . . . . . . . . . . . . . . . . . . . . . . . . . . . . . . . . . . . . . . . . . . . . . . . . . . . . . . . . . . . . . . 71
Define event schedules (Micro only) . . . . . . . . . . . . . . . . . . . . . . . . . . . . . . . . . . . . . . . . . . . . . . . . . . . . . . . . . . . . . . 73
Event Schedules tab . . . . . . . . . . . . . . . . . . . . . . . . . . . . . . . . . . . . . . . . . . . . . . . . . . . . . . . . . . . . . . . . . . . . . . . . . . . . . . . . 73
Configure event notifier. . . . . . . . . . . . . . . . . . . . . . . . . . . . . . . . . . . . . . . . . . . . . . . . . . . . . . . . . . . . . . . . . . . . . . . . . 75
Alarm Selection tab. . . . . . . . . . . . . . . . . . . . . . . . . . . . . . . . . . . . . . . . . . . . . . . . . . . . . . . . . . . . . . . . . . . . . . . . . . . . . . . . . 76
Person Selection tab. . . . . . . . . . . . . . . . . . . . . . . . . . . . . . . . . . . . . . . . . . . . . . . . . . . . . . . . . . . . . . . . . . . . . . . . . . . . . . . . 77
Message Format tab . . . . . . . . . . . . . . . . . . . . . . . . . . . . . . . . . . . . . . . . . . . . . . . . . . . . . . . . . . . . . . . . . . . . . . . . . . . . . . . 78
Define mode schedules . . . . . . . . . . . . . . . . . . . . . . . . . . . . . . . . . . . . . . . . . . . . . . . . . . . . . . . . . . . . . . . . . . . . . . . . . 80
Modes tab . . . . . . . . . . . . . . . . . . . . . . . . . . . . . . . . . . . . . . . . . . . . . . . . . . . . . . . . . . . . . . . . . . . . . . . . . . . . . . . . . . . . . . . . . 81
Mode Event Trigger form. . . . . . . . . . . . . . . . . . . . . . . . . . . . . . . . . . . . . . . . . . . . . . . . . . . . . . . . . . . . . . . . . . . . . . . . 86
iii
Controllers tab . . . . . . . . . . . . . . . . . . . . . . . . . . . . . . . . . . . . . . . . . . . . . . . . . . . . . . . . . . . . . . . . . . . . . . . . . . . . . . . . . . . . . 86
What’s next? . . . . . . . . . . . . . . . . . . . . . . . . . . . . . . . . . . . . . . . . . . . . . . . . . . . . . . . . . . . . . . . . . . . . . . . . . . . . . . . . . . . 87
Alarms tab. . . . . . . . . . . . . . . . . . . . . . . . . . . . . . . . . . . . . . . . . . . . . . . . . . . . . . . . . . . . . . . . . . . . . . . . . . . . . . . . . . . . . . . . . 87
Chapter 4.
Devices . . . . . . . . . . . . . . . . . . . . . . . . . . . . . . . . . . . . . . . . . . . . . . . . . . . . . . . . . . . . . . . 89
Overview . . . . . . . . . . . . . . . . . . . . . . . . . . . . . . . . . . . . . . . . . . . . . . . . . . . . . . . . . . . . . . . . . . . . . . . . . . . . . . . . . . . . . . 90
Device configuration. . . . . . . . . . . . . . . . . . . . . . . . . . . . . . . . . . . . . . . . . . . . . . . . . . . . . . . . . . . . . . . . . . . . . . . . . . . . 90
Controllers overview. . . . . . . . . . . . . . . . . . . . . . . . . . . . . . . . . . . . . . . . . . . . . . . . . . . . . . . . . . . . . . . . . . . . . . . . . . . . 90
Define controllers . . . . . . . . . . . . . . . . . . . . . . . . . . . . . . . . . . . . . . . . . . . . . . . . . . . . . . . . . . . . . . . . . . . . . . . . . . . . . . 92
Records generation . . . . . . . . . . . . . . . . . . . . . . . . . . . . . . . . . . . . . . . . . . . . . . . . . . . . . . . . . . . . . . . . . . . . . . . . . . . . . . . . 92
Controller Definition tab . . . . . . . . . . . . . . . . . . . . . . . . . . . . . . . . . . . . . . . . . . . . . . . . . . . . . . . . . . . . . . . . . . . . . . . . . . . . 99
Security tab. . . . . . . . . . . . . . . . . . . . . . . . . . . . . . . . . . . . . . . . . . . . . . . . . . . . . . . . . . . . . . . . . . . . . . . . . . . . . . . . . . . . . . . 106
Time Zone tab . . . . . . . . . . . . . . . . . . . . . . . . . . . . . . . . . . . . . . . . . . . . . . . . . . . . . . . . . . . . . . . . . . . . . . . . . . . . . . . . . . . . 108
Comments tab . . . . . . . . . . . . . . . . . . . . . . . . . . . . . . . . . . . . . . . . . . . . . . . . . . . . . . . . . . . . . . . . . . . . . . . . . . . . . . . . . . . . 109
Events tab . . . . . . . . . . . . . . . . . . . . . . . . . . . . . . . . . . . . . . . . . . . . . . . . . . . . . . . . . . . . . . . . . . . . . . . . . . . . . . . . . . . . . . . . 110
Status tab . . . . . . . . . . . . . . . . . . . . . . . . . . . . . . . . . . . . . . . . . . . . . . . . . . . . . . . . . . . . . . . . . . . . . . . . . . . . . . . . . . . . . . . . 111
Controller Configuration tab . . . . . . . . . . . . . . . . . . . . . . . . . . . . . . . . . . . . . . . . . . . . . . . . . . . . . . . . . . . . . . . . . . . . . . . 113
Global Area Control tab . . . . . . . . . . . . . . . . . . . . . . . . . . . . . . . . . . . . . . . . . . . . . . . . . . . . . . . . . . . . . . . . . . . . . . . . . . . 115
Port Settings tab . . . . . . . . . . . . . . . . . . . . . . . . . . . . . . . . . . . . . . . . . . . . . . . . . . . . . . . . . . . . . . . . . . . . . . . . . . . . . . . . . . 116
Settings to Reach Host tab . . . . . . . . . . . . . . . . . . . . . . . . . . . . . . . . . . . . . . . . . . . . . . . . . . . . . . . . . . . . . . . . . . . . . . . . 118
Settings to Reach Controller tab . . . . . . . . . . . . . . . . . . . . . . . . . . . . . . . . . . . . . . . . . . . . . . . . . . . . . . . . . . . . . . . . . . . 119
Controller flash and controller preference configuration . . . . . . . . . . . . . . . . . . . . . . . . . . . . . . . . . . . . . . . . . .121
1. View/edit preference info (Micro only) . . . . . . . . . . . . . . . . . . . . . . . . . . . . . . . . . . . . . . . . . . . . . . . . . . . . . . . . . . . . 121
2. Start flashing controllers . . . . . . . . . . . . . . . . . . . . . . . . . . . . . . . . . . . . . . . . . . . . . . . . . . . . . . . . . . . . . . . . . . . . . . . . 121
3. View/edit flash files . . . . . . . . . . . . . . . . . . . . . . . . . . . . . . . . . . . . . . . . . . . . . . . . . . . . . . . . . . . . . . . . . . . . . . . . . . . . . 122
Define readers . . . . . . . . . . . . . . . . . . . . . . . . . . . . . . . . . . . . . . . . . . . . . . . . . . . . . . . . . . . . . . . . . . . . . . . . . . . . . . . .123
Reader tab . . . . . . . . . . . . . . . . . . . . . . . . . . . . . . . . . . . . . . . . . . . . . . . . . . . . . . . . . . . . . . . . . . . . . . . . . . . . . . . . . . . . . . . 124
Keypad alarm shunting . . . . . . . . . . . . . . . . . . . . . . . . . . . . . . . . . . . . . . . . . . . . . . . . . . . . . . . . . . . . . . . . . . . . . . . . . . . 128
Door Functions tab. . . . . . . . . . . . . . . . . . . . . . . . . . . . . . . . . . . . . . . . . . . . . . . . . . . . . . . . . . . . . . . . . . . . . . . . . . . . . . . . 129
Routing tab . . . . . . . . . . . . . . . . . . . . . . . . . . . . . . . . . . . . . . . . . . . . . . . . . . . . . . . . . . . . . . . . . . . . . . . . . . . . . . . . . . . . . . . 134
Functions Schedule tab . . . . . . . . . . . . . . . . . . . . . . . . . . . . . . . . . . . . . . . . . . . . . . . . . . . . . . . . . . . . . . . . . . . . . . . . . . . 135
Routing Schedule tab . . . . . . . . . . . . . . . . . . . . . . . . . . . . . . . . . . . . . . . . . . . . . . . . . . . . . . . . . . . . . . . . . . . . . . . . . . . . . 136
Reader Type Schedules tab. . . . . . . . . . . . . . . . . . . . . . . . . . . . . . . . . . . . . . . . . . . . . . . . . . . . . . . . . . . . . . . . . . . . . . . . 138
Status tab . . . . . . . . . . . . . . . . . . . . . . . . . . . . . . . . . . . . . . . . . . . . . . . . . . . . . . . . . . . . . . . . . . . . . . . . . . . . . . . . . . . . . . . . 139
Extended Control tab. . . . . . . . . . . . . . . . . . . . . . . . . . . . . . . . . . . . . . . . . . . . . . . . . . . . . . . . . . . . . . . . . . . . . . . . . . . . . . 141
Define digital inputs . . . . . . . . . . . . . . . . . . . . . . . . . . . . . . . . . . . . . . . . . . . . . . . . . . . . . . . . . . . . . . . . . . . . . . . . . . .144
Digital Input tab. . . . . . . . . . . . . . . . . . . . . . . . . . . . . . . . . . . . . . . . . . . . . . . . . . . . . . . . . . . . . . . . . . . . . . . . . . . . . . . . . . . 145
Digital Output tab . . . . . . . . . . . . . . . . . . . . . . . . . . . . . . . . . . . . . . . . . . . . . . . . . . . . . . . . . . . . . . . . . . . . . . . . . . . . . . . . . 147
DO Groups tab . . . . . . . . . . . . . . . . . . . . . . . . . . . . . . . . . . . . . . . . . . . . . . . . . . . . . . . . . . . . . . . . . . . . . . . . . . . . . . . . . . . . 148
Schedule tab . . . . . . . . . . . . . . . . . . . . . . . . . . . . . . . . . . . . . . . . . . . . . . . . . . . . . . . . . . . . . . . . . . . . . . . . . . . . . . . . . . . . . 150
Events tab . . . . . . . . . . . . . . . . . . . . . . . . . . . . . . . . . . . . . . . . . . . . . . . . . . . . . . . . . . . . . . . . . . . . . . . . . . . . . . . . . . . . . . . . 151
Status tab . . . . . . . . . . . . . . . . . . . . . . . . . . . . . . . . . . . . . . . . . . . . . . . . . . . . . . . . . . . . . . . . . . . . . . . . . . . . . . . . . . . . . . . . 153
Define digital outputs . . . . . . . . . . . . . . . . . . . . . . . . . . . . . . . . . . . . . . . . . . . . . . . . . . . . . . . . . . . . . . . . . . . . . . . . . .154
Digital Output tab . . . . . . . . . . . . . . . . . . . . . . . . . . . . . . . . . . . . . . . . . . . . . . . . . . . . . . . . . . . . . . . . . . . . . . . . . . . . . . . . . 155
Schedule tab . . . . . . . . . . . . . . . . . . . . . . . . . . . . . . . . . . . . . . . . . . . . . . . . . . . . . . . . . . . . . . . . . . . . . . . . . . . . . . . . . . . . . 157
iv
Facility Commander Wnx 7.5
User Manual
Manual Control & Status tab . . . . . . . . . . . . . . . . . . . . . . . . . . . . . . . . . . . . . . . . . . . . . . . . . . . . . . . . . . . . . . . . . . . . . . .158
Alarm Control tab . . . . . . . . . . . . . . . . . . . . . . . . . . . . . . . . . . . . . . . . . . . . . . . . . . . . . . . . . . . . . . . . . . . . . . . . . . . . . . . . .159
Define digital output groups. . . . . . . . . . . . . . . . . . . . . . . . . . . . . . . . . . . . . . . . . . . . . . . . . . . . . . . . . . . . . . . . . . . . 160
Group tab. . . . . . . . . . . . . . . . . . . . . . . . . . . . . . . . . . . . . . . . . . . . . . . . . . . . . . . . . . . . . . . . . . . . . . . . . . . . . . . . . . . . . . . . .161
Schedule tab . . . . . . . . . . . . . . . . . . . . . . . . . . . . . . . . . . . . . . . . . . . . . . . . . . . . . . . . . . . . . . . . . . . . . . . . . . . . . . . . . . . . . .162
Define instructions . . . . . . . . . . . . . . . . . . . . . . . . . . . . . . . . . . . . . . . . . . . . . . . . . . . . . . . . . . . . . . . . . . . . . . . . . . . . 163
Instruction tab . . . . . . . . . . . . . . . . . . . . . . . . . . . . . . . . . . . . . . . . . . . . . . . . . . . . . . . . . . . . . . . . . . . . . . . . . . . . . . . . . . . .163
Define alarm responses . . . . . . . . . . . . . . . . . . . . . . . . . . . . . . . . . . . . . . . . . . . . . . . . . . . . . . . . . . . . . . . . . . . . . . . . 164
Alarm Response tab . . . . . . . . . . . . . . . . . . . . . . . . . . . . . . . . . . . . . . . . . . . . . . . . . . . . . . . . . . . . . . . . . . . . . . . . . . . . . . .164
Define alarms. . . . . . . . . . . . . . . . . . . . . . . . . . . . . . . . . . . . . . . . . . . . . . . . . . . . . . . . . . . . . . . . . . . . . . . . . . . . . . . . . 165
Alarm tab . . . . . . . . . . . . . . . . . . . . . . . . . . . . . . . . . . . . . . . . . . . . . . . . . . . . . . . . . . . . . . . . . . . . . . . . . . . . . . . . . . . . . . . . .166
Set Instructions tab. . . . . . . . . . . . . . . . . . . . . . . . . . . . . . . . . . . . . . . . . . . . . . . . . . . . . . . . . . . . . . . . . . . . . . . . . . . . . . . .169
Digital Outputs tab . . . . . . . . . . . . . . . . . . . . . . . . . . . . . . . . . . . . . . . . . . . . . . . . . . . . . . . . . . . . . . . . . . . . . . . . . . . . . . . .170
DO Groups tab . . . . . . . . . . . . . . . . . . . . . . . . . . . . . . . . . . . . . . . . . . . . . . . . . . . . . . . . . . . . . . . . . . . . . . . . . . . . . . . . . . . .172
Schedule tab . . . . . . . . . . . . . . . . . . . . . . . . . . . . . . . . . . . . . . . . . . . . . . . . . . . . . . . . . . . . . . . . . . . . . . . . . . . . . . . . . . . . . .174
Events tab . . . . . . . . . . . . . . . . . . . . . . . . . . . . . . . . . . . . . . . . . . . . . . . . . . . . . . . . . . . . . . . . . . . . . . . . . . . . . . . . . . . . . . . .176
Status tab. . . . . . . . . . . . . . . . . . . . . . . . . . . . . . . . . . . . . . . . . . . . . . . . . . . . . . . . . . . . . . . . . . . . . . . . . . . . . . . . . . . . . . . . .177
CCTV tab. . . . . . . . . . . . . . . . . . . . . . . . . . . . . . . . . . . . . . . . . . . . . . . . . . . . . . . . . . . . . . . . . . . . . . . . . . . . . . . . . . . . . . . . . .178
Adding sound to an alarm. . . . . . . . . . . . . . . . . . . . . . . . . . . . . . . . . . . . . . . . . . . . . . . . . . . . . . . . . . . . . . . . . . . . . . 179
Define alarm groups. . . . . . . . . . . . . . . . . . . . . . . . . . . . . . . . . . . . . . . . . . . . . . . . . . . . . . . . . . . . . . . . . . . . . . . . . . . 179
Group tab. . . . . . . . . . . . . . . . . . . . . . . . . . . . . . . . . . . . . . . . . . . . . . . . . . . . . . . . . . . . . . . . . . . . . . . . . . . . . . . . . . . . . . . . .180
Events tab . . . . . . . . . . . . . . . . . . . . . . . . . . . . . . . . . . . . . . . . . . . . . . . . . . . . . . . . . . . . . . . . . . . . . . . . . . . . . . . . . . . . . . . .182
Alarm Priority . . . . . . . . . . . . . . . . . . . . . . . . . . . . . . . . . . . . . . . . . . . . . . . . . . . . . . . . . . . . . . . . . . . . . . . . . . . . . . . . . 184
Define alarm priority. . . . . . . . . . . . . . . . . . . . . . . . . . . . . . . . . . . . . . . . . . . . . . . . . . . . . . . . . . . . . . . . . . . . . . . . . . . . . . .184
Define alarm category. . . . . . . . . . . . . . . . . . . . . . . . . . . . . . . . . . . . . . . . . . . . . . . . . . . . . . . . . . . . . . . . . . . . . . . . . . . . .186
Configure routing and bumping . . . . . . . . . . . . . . . . . . . . . . . . . . . . . . . . . . . . . . . . . . . . . . . . . . . . . . . . . . . . . . . . 187
Definition tab . . . . . . . . . . . . . . . . . . . . . . . . . . . . . . . . . . . . . . . . . . . . . . . . . . . . . . . . . . . . . . . . . . . . . . . . . . . . . . . . . . . . .188
Alarms tab . . . . . . . . . . . . . . . . . . . . . . . . . . . . . . . . . . . . . . . . . . . . . . . . . . . . . . . . . . . . . . . . . . . . . . . . . . . . . . . . . . . . . . . .190
API Connection form. . . . . . . . . . . . . . . . . . . . . . . . . . . . . . . . . . . . . . . . . . . . . . . . . . . . . . . . . . . . . . . . . . . . . . . . . . . 191
Definition tab . . . . . . . . . . . . . . . . . . . . . . . . . . . . . . . . . . . . . . . . . . . . . . . . . . . . . . . . . . . . . . . . . . . . . . . . . . . . . . . . . . . . .191
Define floors . . . . . . . . . . . . . . . . . . . . . . . . . . . . . . . . . . . . . . . . . . . . . . . . . . . . . . . . . . . . . . . . . . . . . . . . . . . . . . . . . . 192
Floor tab . . . . . . . . . . . . . . . . . . . . . . . . . . . . . . . . . . . . . . . . . . . . . . . . . . . . . . . . . . . . . . . . . . . . . . . . . . . . . . . . . . . . . . . . . .193
Define elevators . . . . . . . . . . . . . . . . . . . . . . . . . . . . . . . . . . . . . . . . . . . . . . . . . . . . . . . . . . . . . . . . . . . . . . . . . . . . . . 193
Methods of elevator control. . . . . . . . . . . . . . . . . . . . . . . . . . . . . . . . . . . . . . . . . . . . . . . . . . . . . . . . . . . . . . . . . . . . . . . .193
Floor tab (on the Access Right form) . . . . . . . . . . . . . . . . . . . . . . . . . . . . . . . . . . . . . . . . . . . . . . . . . . . . . . . . . . . . . . . .194
Configuring elevator control using a Micro controller: . . . . . . . . . . . . . . . . . . . . . . . . . . . . . . . . . . . . . . . . . . . . . . .195
Configuring elevator control using an ACU controller: . . . . . . . . . . . . . . . . . . . . . . . . . . . . . . . . . . . . . . . . . . . . . . .195
Elevator tab . . . . . . . . . . . . . . . . . . . . . . . . . . . . . . . . . . . . . . . . . . . . . . . . . . . . . . . . . . . . . . . . . . . . . . . . . . . . . . . . . . . . . . .196
Public Access tab. . . . . . . . . . . . . . . . . . . . . . . . . . . . . . . . . . . . . . . . . . . . . . . . . . . . . . . . . . . . . . . . . . . . . . . . . . . . . . . . . .197
Floor/Digital Output tab . . . . . . . . . . . . . . . . . . . . . . . . . . . . . . . . . . . . . . . . . . . . . . . . . . . . . . . . . . . . . . . . . . . . . . . . . . .199
Floor/Digital Output/Digital Input tab . . . . . . . . . . . . . . . . . . . . . . . . . . . . . . . . . . . . . . . . . . . . . . . . . . . . . . . . . . . . . . .200
Elevator control sample scenarios . . . . . . . . . . . . . . . . . . . . . . . . . . . . . . . . . . . . . . . . . . . . . . . . . . . . . . . . . . . . . . . . .201
What’s next?. . . . . . . . . . . . . . . . . . . . . . . . . . . . . . . . . . . . . . . . . . . . . . . . . . . . . . . . . . . . . . . . . . . . . . . . . . . . . . . . . . 202
v
Chapter 5.
Video . . . . . . . . . . . . . . . . . . . . . . . . . . . . . . . . . . . . . . . . . . . . . . . . . . . . . . . . . . . . . . . . 203
Overview . . . . . . . . . . . . . . . . . . . . . . . . . . . . . . . . . . . . . . . . . . . . . . . . . . . . . . . . . . . . . . . . . . . . . . . . . . . . . . . . . . . . .204
Video driver installation . . . . . . . . . . . . . . . . . . . . . . . . . . . . . . . . . . . . . . . . . . . . . . . . . . . . . . . . . . . . . . . . . . . . . . . . . . . 204
Define digital video recorders. . . . . . . . . . . . . . . . . . . . . . . . . . . . . . . . . . . . . . . . . . . . . . . . . . . . . . . . . . . . . . . . . . .204
DVR . . . . . . . . . . . . . . . . . . . . . . . . . . . . . . . . . . . . . . . . . . . . . . . . . . . . . . . . . . . . . . . . . . . . . . . . . . . . . . . . . . . . . . . . . . . . . . 205
Digital Video Recorder form . . . . . . . . . . . . . . . . . . . . . . . . . . . . . . . . . . . . . . . . . . . . . . . . . . . . . . . . . . . . . . . . . . . . . . . 206
Definition tab . . . . . . . . . . . . . . . . . . . . . . . . . . . . . . . . . . . . . . . . . . . . . . . . . . . . . . . . . . . . . . . . . . . . . . . . . . . . . . . . . . . . . 206
Communications Settings tab . . . . . . . . . . . . . . . . . . . . . . . . . . . . . . . . . . . . . . . . . . . . . . . . . . . . . . . . . . . . . . . . . . . . . 209
Video Display tab . . . . . . . . . . . . . . . . . . . . . . . . . . . . . . . . . . . . . . . . . . . . . . . . . . . . . . . . . . . . . . . . . . . . . . . . . . . . . . . . . 211
Status tab . . . . . . . . . . . . . . . . . . . . . . . . . . . . . . . . . . . . . . . . . . . . . . . . . . . . . . . . . . . . . . . . . . . . . . . . . . . . . . . . . . . . . . . . 212
Video windows. . . . . . . . . . . . . . . . . . . . . . . . . . . . . . . . . . . . . . . . . . . . . . . . . . . . . . . . . . . . . . . . . . . . . . . . . . . . . . . . . . . . 213
Define camera presets . . . . . . . . . . . . . . . . . . . . . . . . . . . . . . . . . . . . . . . . . . . . . . . . . . . . . . . . . . . . . . . . . . . . . . . . .214
Definition tab . . . . . . . . . . . . . . . . . . . . . . . . . . . . . . . . . . . . . . . . . . . . . . . . . . . . . . . . . . . . . . . . . . . . . . . . . . . . . . . . . . . . . 214
Define cameras . . . . . . . . . . . . . . . . . . . . . . . . . . . . . . . . . . . . . . . . . . . . . . . . . . . . . . . . . . . . . . . . . . . . . . . . . . . . . . .215
Definition tab . . . . . . . . . . . . . . . . . . . . . . . . . . . . . . . . . . . . . . . . . . . . . . . . . . . . . . . . . . . . . . . . . . . . . . . . . . . . . . . . . . . . . 215
Presets tab . . . . . . . . . . . . . . . . . . . . . . . . . . . . . . . . . . . . . . . . . . . . . . . . . . . . . . . . . . . . . . . . . . . . . . . . . . . . . . . . . . . . . . . 217
Define event triggers . . . . . . . . . . . . . . . . . . . . . . . . . . . . . . . . . . . . . . . . . . . . . . . . . . . . . . . . . . . . . . . . . . . . . . . . . .218
Event tagging overview . . . . . . . . . . . . . . . . . . . . . . . . . . . . . . . . . . . . . . . . . . . . . . . . . . . . . . . . . . . . . . . . . . . . . . . . . . . 218
Video Event Trigger form . . . . . . . . . . . . . . . . . . . . . . . . . . . . . . . . . . . . . . . . . . . . . . . . . . . . . . . . . . . . . . . . . . . . . . . . . . 218
Preset/Camera tab. . . . . . . . . . . . . . . . . . . . . . . . . . . . . . . . . . . . . . . . . . . . . . . . . . . . . . . . . . . . . . . . . . . . . . . . . . . . . . . . 219
Readers tab . . . . . . . . . . . . . . . . . . . . . . . . . . . . . . . . . . . . . . . . . . . . . . . . . . . . . . . . . . . . . . . . . . . . . . . . . . . . . . . . . . . . . . 220
Alarms tab. . . . . . . . . . . . . . . . . . . . . . . . . . . . . . . . . . . . . . . . . . . . . . . . . . . . . . . . . . . . . . . . . . . . . . . . . . . . . . . . . . . . . . . . 221
Enable alarm video popup. . . . . . . . . . . . . . . . . . . . . . . . . . . . . . . . . . . . . . . . . . . . . . . . . . . . . . . . . . . . . . . . . . . . . . . . . 222
Intrusion Zone tab . . . . . . . . . . . . . . . . . . . . . . . . . . . . . . . . . . . . . . . . . . . . . . . . . . . . . . . . . . . . . . . . . . . . . . . . . . . . . . . . 223
Areas tab . . . . . . . . . . . . . . . . . . . . . . . . . . . . . . . . . . . . . . . . . . . . . . . . . . . . . . . . . . . . . . . . . . . . . . . . . . . . . . . . . . . . . . . . . 224
Video CD Burner. . . . . . . . . . . . . . . . . . . . . . . . . . . . . . . . . . . . . . . . . . . . . . . . . . . . . . . . . . . . . . . . . . . . . . . . . . . . . . .226
DVR disk is full . . . . . . . . . . . . . . . . . . . . . . . . . . . . . . . . . . . . . . . . . . . . . . . . . . . . . . . . . . . . . . . . . . . . . . . . . . . . . . . . . . . . 227
Navigating Video Console . . . . . . . . . . . . . . . . . . . . . . . . . . . . . . . . . . . . . . . . . . . . . . . . . . . . . . . . . . . . . . . . . . . . . .228
Video Console window . . . . . . . . . . . . . . . . . . . . . . . . . . . . . . . . . . . . . . . . . . . . . . . . . . . . . . . . . . . . . . . . . . . . . . . . . . . . 228
Navigation pane . . . . . . . . . . . . . . . . . . . . . . . . . . . . . . . . . . . . . . . . . . . . . . . . . . . . . . . . . . . . . . . . . . . . . . . . . . . . . . . . . . 229
Play controls. . . . . . . . . . . . . . . . . . . . . . . . . . . . . . . . . . . . . . . . . . . . . . . . . . . . . . . . . . . . . . . . . . . . . . . . . . . . . . . . . . . . . . 230
File menu . . . . . . . . . . . . . . . . . . . . . . . . . . . . . . . . . . . . . . . . . . . . . . . . . . . . . . . . . . . . . . . . . . . . . . . . . . . . . . . . . . . . . . . . . 230
View menu . . . . . . . . . . . . . . . . . . . . . . . . . . . . . . . . . . . . . . . . . . . . . . . . . . . . . . . . . . . . . . . . . . . . . . . . . . . . . . . . . . . . . . . 231
Window menu . . . . . . . . . . . . . . . . . . . . . . . . . . . . . . . . . . . . . . . . . . . . . . . . . . . . . . . . . . . . . . . . . . . . . . . . . . . . . . . . . . . . 232
Search for video . . . . . . . . . . . . . . . . . . . . . . . . . . . . . . . . . . . . . . . . . . . . . . . . . . . . . . . . . . . . . . . . . . . . . . . . . . . . . . .232
How to search by system event. . . . . . . . . . . . . . . . . . . . . . . . . . . . . . . . . . . . . . . . . . . . . . . . . . . . . . . . . . . . . . . . . . . . 232
How to search by video event . . . . . . . . . . . . . . . . . . . . . . . . . . . . . . . . . . . . . . . . . . . . . . . . . . . . . . . . . . . . . . . . . . . . . 233
How to search by time and date . . . . . . . . . . . . . . . . . . . . . . . . . . . . . . . . . . . . . . . . . . . . . . . . . . . . . . . . . . . . . . . . . . . 233
How to search by motion. . . . . . . . . . . . . . . . . . . . . . . . . . . . . . . . . . . . . . . . . . . . . . . . . . . . . . . . . . . . . . . . . . . . . . . . . . 234
Define CCTV interfaces . . . . . . . . . . . . . . . . . . . . . . . . . . . . . . . . . . . . . . . . . . . . . . . . . . . . . . . . . . . . . . . . . . . . . . . . .234
CCTV tab . . . . . . . . . . . . . . . . . . . . . . . . . . . . . . . . . . . . . . . . . . . . . . . . . . . . . . . . . . . . . . . . . . . . . . . . . . . . . . . . . . . . . . . . . 235
What’s next? . . . . . . . . . . . . . . . . . . . . . . . . . . . . . . . . . . . . . . . . . . . . . . . . . . . . . . . . . . . . . . . . . . . . . . . . . . . . . . . . . .236
vi
Facility Commander Wnx 7.5
User Manual
Chapter 6.
Areas and intrusion zones . . . . . . . . . . . . . . . . . . . . . . . . . . . . . . . . . . . . . . . . . . . . . 237
Overview - areas . . . . . . . . . . . . . . . . . . . . . . . . . . . . . . . . . . . . . . . . . . . . . . . . . . . . . . . . . . . . . . . . . . . . . . . . . . . . . . 238
Define areas . . . . . . . . . . . . . . . . . . . . . . . . . . . . . . . . . . . . . . . . . . . . . . . . . . . . . . . . . . . . . . . . . . . . . . . . . . . . . . . . . . 238
Area tab . . . . . . . . . . . . . . . . . . . . . . . . . . . . . . . . . . . . . . . . . . . . . . . . . . . . . . . . . . . . . . . . . . . . . . . . . . . . . . . . . . . . . . . . . .240
Reader tab . . . . . . . . . . . . . . . . . . . . . . . . . . . . . . . . . . . . . . . . . . . . . . . . . . . . . . . . . . . . . . . . . . . . . . . . . . . . . . . . . . . . . . . .242
Alarm tab . . . . . . . . . . . . . . . . . . . . . . . . . . . . . . . . . . . . . . . . . . . . . . . . . . . . . . . . . . . . . . . . . . . . . . . . . . . . . . . . . . . . . . . . .244
. . . . . . . . . . . . . . . . . . . . . . . . . . . . . . . . . . . . . . . . . . . . . . . . . . . . . . . . . . . . . . . . . . . . . . . . . . . . . . . . . . . . . . . . . . . . . . . . . . .247
Digital Output tab . . . . . . . . . . . . . . . . . . . . . . . . . . . . . . . . . . . . . . . . . . . . . . . . . . . . . . . . . . . . . . . . . . . . . . . . . . . . . . . . .247
Arm/Disarm an Area . . . . . . . . . . . . . . . . . . . . . . . . . . . . . . . . . . . . . . . . . . . . . . . . . . . . . . . . . . . . . . . . . . . . . . . . . . . . . .248
Arm/disarm by manual control. . . . . . . . . . . . . . . . . . . . . . . . . . . . . . . . . . . . . . . . . . . . . . . . . . . . . . . . . . . . . . . . . . . . .249
Overview - intrusion zones . . . . . . . . . . . . . . . . . . . . . . . . . . . . . . . . . . . . . . . . . . . . . . . . . . . . . . . . . . . . . . . . . . . . . 249
Define intrusion zones . . . . . . . . . . . . . . . . . . . . . . . . . . . . . . . . . . . . . . . . . . . . . . . . . . . . . . . . . . . . . . . . . . . . . . . . . 251
Intrusion Zone tab. . . . . . . . . . . . . . . . . . . . . . . . . . . . . . . . . . . . . . . . . . . . . . . . . . . . . . . . . . . . . . . . . . . . . . . . . . . . . . . . .252
Status tab. . . . . . . . . . . . . . . . . . . . . . . . . . . . . . . . . . . . . . . . . . . . . . . . . . . . . . . . . . . . . . . . . . . . . . . . . . . . . . . . . . . . . . . . .254
Arm/disarm an intrusion zone. . . . . . . . . . . . . . . . . . . . . . . . . . . . . . . . . . . . . . . . . . . . . . . . . . . . . . . . . . . . . . . . . . . . . .255
What’s next?. . . . . . . . . . . . . . . . . . . . . . . . . . . . . . . . . . . . . . . . . . . . . . . . . . . . . . . . . . . . . . . . . . . . . . . . . . . . . . . . . . 255
Chapter 7.
Access rights, departments, persons, and credentials . . . . . . . . . . . . . . . . . . . . 257
Overview . . . . . . . . . . . . . . . . . . . . . . . . . . . . . . . . . . . . . . . . . . . . . . . . . . . . . . . . . . . . . . . . . . . . . . . . . . . . . . . . . . . . . 258
Define access rights . . . . . . . . . . . . . . . . . . . . . . . . . . . . . . . . . . . . . . . . . . . . . . . . . . . . . . . . . . . . . . . . . . . . . . . . . . . 258
Access Rights tab . . . . . . . . . . . . . . . . . . . . . . . . . . . . . . . . . . . . . . . . . . . . . . . . . . . . . . . . . . . . . . . . . . . . . . . . . . . . . . . . .259
Floor tab . . . . . . . . . . . . . . . . . . . . . . . . . . . . . . . . . . . . . . . . . . . . . . . . . . . . . . . . . . . . . . . . . . . . . . . . . . . . . . . . . . . . . . . . . .260
Digital Output Groups tab. . . . . . . . . . . . . . . . . . . . . . . . . . . . . . . . . . . . . . . . . . . . . . . . . . . . . . . . . . . . . . . . . . . . . . . . . .261
Intrusion Zones tab. . . . . . . . . . . . . . . . . . . . . . . . . . . . . . . . . . . . . . . . . . . . . . . . . . . . . . . . . . . . . . . . . . . . . . . . . . . . . . . .263
Areas tab . . . . . . . . . . . . . . . . . . . . . . . . . . . . . . . . . . . . . . . . . . . . . . . . . . . . . . . . . . . . . . . . . . . . . . . . . . . . . . . . . . . . . . . . .264
Define personnel type . . . . . . . . . . . . . . . . . . . . . . . . . . . . . . . . . . . . . . . . . . . . . . . . . . . . . . . . . . . . . . . . . . . . . . . . . 267
Personnel Type tab . . . . . . . . . . . . . . . . . . . . . . . . . . . . . . . . . . . . . . . . . . . . . . . . . . . . . . . . . . . . . . . . . . . . . . . . . . . . . . . .267
Define departments . . . . . . . . . . . . . . . . . . . . . . . . . . . . . . . . . . . . . . . . . . . . . . . . . . . . . . . . . . . . . . . . . . . . . . . . . . . 268
Department tab . . . . . . . . . . . . . . . . . . . . . . . . . . . . . . . . . . . . . . . . . . . . . . . . . . . . . . . . . . . . . . . . . . . . . . . . . . . . . . . . . . .268
Define persons . . . . . . . . . . . . . . . . . . . . . . . . . . . . . . . . . . . . . . . . . . . . . . . . . . . . . . . . . . . . . . . . . . . . . . . . . . . . . . . . 269
Personnel tab . . . . . . . . . . . . . . . . . . . . . . . . . . . . . . . . . . . . . . . . . . . . . . . . . . . . . . . . . . . . . . . . . . . . . . . . . . . . . . . . . . . . .269
Location tab . . . . . . . . . . . . . . . . . . . . . . . . . . . . . . . . . . . . . . . . . . . . . . . . . . . . . . . . . . . . . . . . . . . . . . . . . . . . . . . . . . . . . .272
User Fields tab . . . . . . . . . . . . . . . . . . . . . . . . . . . . . . . . . . . . . . . . . . . . . . . . . . . . . . . . . . . . . . . . . . . . . . . . . . . . . . . . . . . .274
Access Rights tab . . . . . . . . . . . . . . . . . . . . . . . . . . . . . . . . . . . . . . . . . . . . . . . . . . . . . . . . . . . . . . . . . . . . . . . . . . . . . . . . .275
Photo tab . . . . . . . . . . . . . . . . . . . . . . . . . . . . . . . . . . . . . . . . . . . . . . . . . . . . . . . . . . . . . . . . . . . . . . . . . . . . . . . . . . . . . . . . .278
Area Control tab. . . . . . . . . . . . . . . . . . . . . . . . . . . . . . . . . . . . . . . . . . . . . . . . . . . . . . . . . . . . . . . . . . . . . . . . . . . . . . . . . . .279
Image capture . . . . . . . . . . . . . . . . . . . . . . . . . . . . . . . . . . . . . . . . . . . . . . . . . . . . . . . . . . . . . . . . . . . . . . . . . . . . . . . . 280
Selecting an input device . . . . . . . . . . . . . . . . . . . . . . . . . . . . . . . . . . . . . . . . . . . . . . . . . . . . . . . . . . . . . . . . . . . . . . . . . .280
Displaying existing images. . . . . . . . . . . . . . . . . . . . . . . . . . . . . . . . . . . . . . . . . . . . . . . . . . . . . . . . . . . . . . . . . . . . . . . . .282
Design credentials . . . . . . . . . . . . . . . . . . . . . . . . . . . . . . . . . . . . . . . . . . . . . . . . . . . . . . . . . . . . . . . . . . . . . . . . . . . . 283
Credential Designer form . . . . . . . . . . . . . . . . . . . . . . . . . . . . . . . . . . . . . . . . . . . . . . . . . . . . . . . . . . . . . . . . . . . . . . 284
Design tab . . . . . . . . . . . . . . . . . . . . . . . . . . . . . . . . . . . . . . . . . . . . . . . . . . . . . . . . . . . . . . . . . . . . . . . . . . . . . . . . . . . . . . . .285
Installing print driver . . . . . . . . . . . . . . . . . . . . . . . . . . . . . . . . . . . . . . . . . . . . . . . . . . . . . . . . . . . . . . . . . . . . . . . . . . . . . .286
Define credentials . . . . . . . . . . . . . . . . . . . . . . . . . . . . . . . . . . . . . . . . . . . . . . . . . . . . . . . . . . . . . . . . . . . . . . . . . . . . . 286
Credential Definition tab . . . . . . . . . . . . . . . . . . . . . . . . . . . . . . . . . . . . . . . . . . . . . . . . . . . . . . . . . . . . . . . . . . . . . . . . . . .287
vii
Credential Status tab. . . . . . . . . . . . . . . . . . . . . . . . . . . . . . . . . . . . . . . . . . . . . . . . . . . . . . . . . . . . . . . . . . . . . . . . . . . . . . 290
User Fields tab . . . . . . . . . . . . . . . . . . . . . . . . . . . . . . . . . . . . . . . . . . . . . . . . . . . . . . . . . . . . . . . . . . . . . . . . . . . . . . . . . . . . 292
Mass update . . . . . . . . . . . . . . . . . . . . . . . . . . . . . . . . . . . . . . . . . . . . . . . . . . . . . . . . . . . . . . . . . . . . . . . . . . . . . . . . . .293
Criteria for using Mass Update mode . . . . . . . . . . . . . . . . . . . . . . . . . . . . . . . . . . . . . . . . . . . . . . . . . . . . . . . . . . . . . . 294
Define credential alias . . . . . . . . . . . . . . . . . . . . . . . . . . . . . . . . . . . . . . . . . . . . . . . . . . . . . . . . . . . . . . . . . . . . . . . . .295
Credential Alias tab . . . . . . . . . . . . . . . . . . . . . . . . . . . . . . . . . . . . . . . . . . . . . . . . . . . . . . . . . . . . . . . . . . . . . . . . . . . . . . . 295
Create custom credential status . . . . . . . . . . . . . . . . . . . . . . . . . . . . . . . . . . . . . . . . . . . . . . . . . . . . . . . . . . . . . . . .297
Create credential formats . . . . . . . . . . . . . . . . . . . . . . . . . . . . . . . . . . . . . . . . . . . . . . . . . . . . . . . . . . . . . . . . . . . . . .298
Credential Format tab. . . . . . . . . . . . . . . . . . . . . . . . . . . . . . . . . . . . . . . . . . . . . . . . . . . . . . . . . . . . . . . . . . . . . . . . . . . . . 299
Credential formats in 40-bit and 55-bit Wiegand protocol. . . . . . . . . . . . . . . . . . . . . . . . . . . . . . . . . . . . . . . . . . . 301
What’s next? . . . . . . . . . . . . . . . . . . . . . . . . . . . . . . . . . . . . . . . . . . . . . . . . . . . . . . . . . . . . . . . . . . . . . . . . . . . . . . . . . .302
Chapter 8.
Guard tours . . . . . . . . . . . . . . . . . . . . . . . . . . . . . . . . . . . . . . . . . . . . . . . . . . . . . . . . . . 303
Overview . . . . . . . . . . . . . . . . . . . . . . . . . . . . . . . . . . . . . . . . . . . . . . . . . . . . . . . . . . . . . . . . . . . . . . . . . . . . . . . . . . . . .304
Define guard tours . . . . . . . . . . . . . . . . . . . . . . . . . . . . . . . . . . . . . . . . . . . . . . . . . . . . . . . . . . . . . . . . . . . . . . . . . . . .304
Guard Tour tab . . . . . . . . . . . . . . . . . . . . . . . . . . . . . . . . . . . . . . . . . . . . . . . . . . . . . . . . . . . . . . . . . . . . . . . . . . . . . . . . . . . 305
Define tour points . . . . . . . . . . . . . . . . . . . . . . . . . . . . . . . . . . . . . . . . . . . . . . . . . . . . . . . . . . . . . . . . . . . . . . . . . . . . .307
Tour Point tab. . . . . . . . . . . . . . . . . . . . . . . . . . . . . . . . . . . . . . . . . . . . . . . . . . . . . . . . . . . . . . . . . . . . . . . . . . . . . . . . . . . . . 309
What’s next? . . . . . . . . . . . . . . . . . . . . . . . . . . . . . . . . . . . . . . . . . . . . . . . . . . . . . . . . . . . . . . . . . . . . . . . . . . . . . . . . . .309
Chapter 9.
Monitor and control . . . . . . . . . . . . . . . . . . . . . . . . . . . . . . . . . . . . . . . . . . . . . . . . . . . 311
Overview . . . . . . . . . . . . . . . . . . . . . . . . . . . . . . . . . . . . . . . . . . . . . . . . . . . . . . . . . . . . . . . . . . . . . . . . . . . . . . . . . . . . .312
Activity monitoring . . . . . . . . . . . . . . . . . . . . . . . . . . . . . . . . . . . . . . . . . . . . . . . . . . . . . . . . . . . . . . . . . . . . . . . . . . . .312
Activity Monitor shortcut menu . . . . . . . . . . . . . . . . . . . . . . . . . . . . . . . . . . . . . . . . . . . . . . . . . . . . . . . . . . . . . . . . . . . . 316
Swipe and show option . . . . . . . . . . . . . . . . . . . . . . . . . . . . . . . . . . . . . . . . . . . . . . . . . . . . . . . . . . . . . . . . . . . . . . . . . . . 317
Alarm monitoring . . . . . . . . . . . . . . . . . . . . . . . . . . . . . . . . . . . . . . . . . . . . . . . . . . . . . . . . . . . . . . . . . . . . . . . . . . . . .319
Using the Alarm Monitor form . . . . . . . . . . . . . . . . . . . . . . . . . . . . . . . . . . . . . . . . . . . . . . . . . . . . . . . . . . . . . . . . . . . . . 321
Alarm Monitor toolbar. . . . . . . . . . . . . . . . . . . . . . . . . . . . . . . . . . . . . . . . . . . . . . . . . . . . . . . . . . . . . . . . . . . . . . . . . . . . . 323
Alarm Monitor shortcut menu . . . . . . . . . . . . . . . . . . . . . . . . . . . . . . . . . . . . . . . . . . . . . . . . . . . . . . . . . . . . . . . . . . . . . 323
Client monitoring. . . . . . . . . . . . . . . . . . . . . . . . . . . . . . . . . . . . . . . . . . . . . . . . . . . . . . . . . . . . . . . . . . . . . . . . . . . . . .325
Client Monitor toolbar . . . . . . . . . . . . . . . . . . . . . . . . . . . . . . . . . . . . . . . . . . . . . . . . . . . . . . . . . . . . . . . . . . . . . . . . . . . . . 327
Client Monitor shortcut menu. . . . . . . . . . . . . . . . . . . . . . . . . . . . . . . . . . . . . . . . . . . . . . . . . . . . . . . . . . . . . . . . . . . . . . 327
Controller monitoring . . . . . . . . . . . . . . . . . . . . . . . . . . . . . . . . . . . . . . . . . . . . . . . . . . . . . . . . . . . . . . . . . . . . . . . . . .328
Column headings . . . . . . . . . . . . . . . . . . . . . . . . . . . . . . . . . . . . . . . . . . . . . . . . . . . . . . . . . . . . . . . . . . . . . . . . . . . . . . . . . 328
Controller Monitor toolbar . . . . . . . . . . . . . . . . . . . . . . . . . . . . . . . . . . . . . . . . . . . . . . . . . . . . . . . . . . . . . . . . . . . . . . . . . 330
Search criteria and controller selection . . . . . . . . . . . . . . . . . . . . . . . . . . . . . . . . . . . . . . . . . . . . . . . . . . . . . . . . . . . . 331
Controller Monitor shortcut menu. . . . . . . . . . . . . . . . . . . . . . . . . . . . . . . . . . . . . . . . . . . . . . . . . . . . . . . . . . . . . . . . . . 331
Controller flash and controller preference configuration . . . . . . . . . . . . . . . . . . . . . . . . . . . . . . . . . . . . . . . . . . . . 332
Digital input status . . . . . . . . . . . . . . . . . . . . . . . . . . . . . . . . . . . . . . . . . . . . . . . . . . . . . . . . . . . . . . . . . . . . . . . . . . . .335
Status tab . . . . . . . . . . . . . . . . . . . . . . . . . . . . . . . . . . . . . . . . . . . . . . . . . . . . . . . . . . . . . . . . . . . . . . . . . . . . . . . . . . . . . . . . 335
Digital output status. . . . . . . . . . . . . . . . . . . . . . . . . . . . . . . . . . . . . . . . . . . . . . . . . . . . . . . . . . . . . . . . . . . . . . . . . . .336
Status tab . . . . . . . . . . . . . . . . . . . . . . . . . . . . . . . . . . . . . . . . . . . . . . . . . . . . . . . . . . . . . . . . . . . . . . . . . . . . . . . . . . . . . . . . 336
Graphics Console . . . . . . . . . . . . . . . . . . . . . . . . . . . . . . . . . . . . . . . . . . . . . . . . . . . . . . . . . . . . . . . . . . . . . . . . . . . . . .338
Graphics Preferences . . . . . . . . . . . . . . . . . . . . . . . . . . . . . . . . . . . . . . . . . . . . . . . . . . . . . . . . . . . . . . . . . . . . . . . . . . . . . 338
Symbol Editor . . . . . . . . . . . . . . . . . . . . . . . . . . . . . . . . . . . . . . . . . . . . . . . . . . . . . . . . . . . . . . . . . . . . . . . . . . . . . . . . . . . . . 338
Graphics Editor . . . . . . . . . . . . . . . . . . . . . . . . . . . . . . . . . . . . . . . . . . . . . . . . . . . . . . . . . . . . . . . . . . . . . . . . . . . . . . . . . . . 338
viii
Facility Commander Wnx 7.5
User Manual
Graphics Console. . . . . . . . . . . . . . . . . . . . . . . . . . . . . . . . . . . . . . . . . . . . . . . . . . . . . . . . . . . . . . . . . . . . . . . . . . . . . . . . . .339
Manual control form. . . . . . . . . . . . . . . . . . . . . . . . . . . . . . . . . . . . . . . . . . . . . . . . . . . . . . . . . . . . . . . . . . . . . . . . . . . 339
Reader/Digital Output tab . . . . . . . . . . . . . . . . . . . . . . . . . . . . . . . . . . . . . . . . . . . . . . . . . . . . . . . . . . . . . . . . . . . . . . . . .339
Alarm/Digital Input tab . . . . . . . . . . . . . . . . . . . . . . . . . . . . . . . . . . . . . . . . . . . . . . . . . . . . . . . . . . . . . . . . . . . . . . . . . . . .342
Areas and Zones tab . . . . . . . . . . . . . . . . . . . . . . . . . . . . . . . . . . . . . . . . . . . . . . . . . . . . . . . . . . . . . . . . . . . . . . . . . . . . . .345
Mode/Threat tab . . . . . . . . . . . . . . . . . . . . . . . . . . . . . . . . . . . . . . . . . . . . . . . . . . . . . . . . . . . . . . . . . . . . . . . . . . . . . . . . . .346
Guard tour tab . . . . . . . . . . . . . . . . . . . . . . . . . . . . . . . . . . . . . . . . . . . . . . . . . . . . . . . . . . . . . . . . . . . . . . . . . . . . . . . . . . . .349
Transaction override . . . . . . . . . . . . . . . . . . . . . . . . . . . . . . . . . . . . . . . . . . . . . . . . . . . . . . . . . . . . . . . . . . . . . . . . . . 350
Override tab . . . . . . . . . . . . . . . . . . . . . . . . . . . . . . . . . . . . . . . . . . . . . . . . . . . . . . . . . . . . . . . . . . . . . . . . . . . . . . . . . . . . . .351
What’s next?. . . . . . . . . . . . . . . . . . . . . . . . . . . . . . . . . . . . . . . . . . . . . . . . . . . . . . . . . . . . . . . . . . . . . . . . . . . . . . . . . . 352
Chapter 10. Reports . . . . . . . . . . . . . . . . . . . . . . . . . . . . . . . . . . . . . . . . . . . . . . . . . . . . . . . . . . . . . . 353
Overview . . . . . . . . . . . . . . . . . . . . . . . . . . . . . . . . . . . . . . . . . . . . . . . . . . . . . . . . . . . . . . . . . . . . . . . . . . . . . . . . . . . . . 354
Designing reports . . . . . . . . . . . . . . . . . . . . . . . . . . . . . . . . . . . . . . . . . . . . . . . . . . . . . . . . . . . . . . . . . . . . . . . . . . . . . 355
Template - defined . . . . . . . . . . . . . . . . . . . . . . . . . . . . . . . . . . . . . . . . . . . . . . . . . . . . . . . . . . . . . . . . . . . . . . . . . . . . . . . .355
Report Templates window . . . . . . . . . . . . . . . . . . . . . . . . . . . . . . . . . . . . . . . . . . . . . . . . . . . . . . . . . . . . . . . . . . . . . . . . .355
New Template dialog . . . . . . . . . . . . . . . . . . . . . . . . . . . . . . . . . . . . . . . . . . . . . . . . . . . . . . . . . . . . . . . . . . . . . . . . . . . . . .355
Preview . . . . . . . . . . . . . . . . . . . . . . . . . . . . . . . . . . . . . . . . . . . . . . . . . . . . . . . . . . . . . . . . . . . . . . . . . . . . . . . . . . . . . . . . . . .355
Print Report . . . . . . . . . . . . . . . . . . . . . . . . . . . . . . . . . . . . . . . . . . . . . . . . . . . . . . . . . . . . . . . . . . . . . . . . . . . . . . . . . . . . . . .356
Create default template . . . . . . . . . . . . . . . . . . . . . . . . . . . . . . . . . . . . . . . . . . . . . . . . . . . . . . . . . . . . . . . . . . . . . . . . . . .356
Set as default template . . . . . . . . . . . . . . . . . . . . . . . . . . . . . . . . . . . . . . . . . . . . . . . . . . . . . . . . . . . . . . . . . . . . . . . . . . . .356
Export . . . . . . . . . . . . . . . . . . . . . . . . . . . . . . . . . . . . . . . . . . . . . . . . . . . . . . . . . . . . . . . . . . . . . . . . . . . . . . . . . . . . . . . . . . . .356
Delete template . . . . . . . . . . . . . . . . . . . . . . . . . . . . . . . . . . . . . . . . . . . . . . . . . . . . . . . . . . . . . . . . . . . . . . . . . . . . . . . . . . .356
Tabs on report forms . . . . . . . . . . . . . . . . . . . . . . . . . . . . . . . . . . . . . . . . . . . . . . . . . . . . . . . . . . . . . . . . . . . . . . . . . . 356
General tab . . . . . . . . . . . . . . . . . . . . . . . . . . . . . . . . . . . . . . . . . . . . . . . . . . . . . . . . . . . . . . . . . . . . . . . . . . . . . . . . . . . . . . .356
Fonts tab . . . . . . . . . . . . . . . . . . . . . . . . . . . . . . . . . . . . . . . . . . . . . . . . . . . . . . . . . . . . . . . . . . . . . . . . . . . . . . . . . . . . . . . . .359
Filters tab . . . . . . . . . . . . . . . . . . . . . . . . . . . . . . . . . . . . . . . . . . . . . . . . . . . . . . . . . . . . . . . . . . . . . . . . . . . . . . . . . . . . . . . . .359
Date Range tab . . . . . . . . . . . . . . . . . . . . . . . . . . . . . . . . . . . . . . . . . . . . . . . . . . . . . . . . . . . . . . . . . . . . . . . . . . . . . . . . . . .362
Database tab . . . . . . . . . . . . . . . . . . . . . . . . . . . . . . . . . . . . . . . . . . . . . . . . . . . . . . . . . . . . . . . . . . . . . . . . . . . . . . . . . . . . .363
Additional Filters tab. . . . . . . . . . . . . . . . . . . . . . . . . . . . . . . . . . . . . . . . . . . . . . . . . . . . . . . . . . . . . . . . . . . . . . . . . . . . . . .363
Expiration Date Filter tab . . . . . . . . . . . . . . . . . . . . . . . . . . . . . . . . . . . . . . . . . . . . . . . . . . . . . . . . . . . . . . . . . . . . . . . . . .364
Return Date Filter tab. . . . . . . . . . . . . . . . . . . . . . . . . . . . . . . . . . . . . . . . . . . . . . . . . . . . . . . . . . . . . . . . . . . . . . . . . . . . . .365
Guard Tour tab . . . . . . . . . . . . . . . . . . . . . . . . . . . . . . . . . . . . . . . . . . . . . . . . . . . . . . . . . . . . . . . . . . . . . . . . . . . . . . . . . . . .366
Readers tab . . . . . . . . . . . . . . . . . . . . . . . . . . . . . . . . . . . . . . . . . . . . . . . . . . . . . . . . . . . . . . . . . . . . . . . . . . . . . . . . . . . . . . .366
Areas tab . . . . . . . . . . . . . . . . . . . . . . . . . . . . . . . . . . . . . . . . . . . . . . . . . . . . . . . . . . . . . . . . . . . . . . . . . . . . . . . . . . . . . . . . .366
External Reports . . . . . . . . . . . . . . . . . . . . . . . . . . . . . . . . . . . . . . . . . . . . . . . . . . . . . . . . . . . . . . . . . . . . . . . . . . . . . . 367
Reader Where When Report . . . . . . . . . . . . . . . . . . . . . . . . . . . . . . . . . . . . . . . . . . . . . . . . . . . . . . . . . . . . . . . . . . . . . . .367
Who Has Access Report . . . . . . . . . . . . . . . . . . . . . . . . . . . . . . . . . . . . . . . . . . . . . . . . . . . . . . . . . . . . . . . . . . . . . . . . . . .367
Saving/Exporting Reports . . . . . . . . . . . . . . . . . . . . . . . . . . . . . . . . . . . . . . . . . . . . . . . . . . . . . . . . . . . . . . . . . . . . . . 369
Appendix A. Diagnostics and troubleshooting . . . . . . . . . . . . . . . . . . . . . . . . . . . . . . . . . . . . . . . 371
Overview . . . . . . . . . . . . . . . . . . . . . . . . . . . . . . . . . . . . . . . . . . . . . . . . . . . . . . . . . . . . . . . . . . . . . . . . . . . . . . . . . . . . . 372
Auto Update . . . . . . . . . . . . . . . . . . . . . . . . . . . . . . . . . . . . . . . . . . . . . . . . . . . . . . . . . . . . . . . . . . . . . . . . . . . . . . . . . . 372
Items needed . . . . . . . . . . . . . . . . . . . . . . . . . . . . . . . . . . . . . . . . . . . . . . . . . . . . . . . . . . . . . . . . . . . . . . . . . . . . . . . . . . . . .372
Creating the FCWnx.ini file . . . . . . . . . . . . . . . . . . . . . . . . . . . . . . . . . . . . . . . . . . . . . . . . . . . . . . . . . . . . . . . . . . . . . . . . .372
Placing the files . . . . . . . . . . . . . . . . . . . . . . . . . . . . . . . . . . . . . . . . . . . . . . . . . . . . . . . . . . . . . . . . . . . . . . . . . . . . . . . . . . .372
ix
Setting up Auto Update in FCWnx. . . . . . . . . . . . . . . . . . . . . . . . . . . . . . . . . . . . . . . . . . . . . . . . . . . . . . . . . . . . . . . . . . 372
Check for update . . . . . . . . . . . . . . . . . . . . . . . . . . . . . . . . . . . . . . . . . . . . . . . . . . . . . . . . . . . . . . . . . . . . . . . . . . . . . . . . . 374
Diagnostics overview . . . . . . . . . . . . . . . . . . . . . . . . . . . . . . . . . . . . . . . . . . . . . . . . . . . . . . . . . . . . . . . . . . . . . . . . . .374
Logfiles . . . . . . . . . . . . . . . . . . . . . . . . . . . . . . . . . . . . . . . . . . . . . . . . . . . . . . . . . . . . . . . . . . . . . . . . . . . . . . . . . . . . . . .375
LogFile tab. . . . . . . . . . . . . . . . . . . . . . . . . . . . . . . . . . . . . . . . . . . . . . . . . . . . . . . . . . . . . . . . . . . . . . . . . . . . . . . . . . . . . . . . 375
Diagnostic settings . . . . . . . . . . . . . . . . . . . . . . . . . . . . . . . . . . . . . . . . . . . . . . . . . . . . . . . . . . . . . . . . . . . . . . . . . . . .376
Settings tab. . . . . . . . . . . . . . . . . . . . . . . . . . . . . . . . . . . . . . . . . . . . . . . . . . . . . . . . . . . . . . . . . . . . . . . . . . . . . . . . . . . . . . . 376
When to enable debug messages for a diagnostic object . . . . . . . . . . . . . . . . . . . . . . . . . . . . . . . . . . . . . . . . . .378
Diagnostic Viewer program. . . . . . . . . . . . . . . . . . . . . . . . . . . . . . . . . . . . . . . . . . . . . . . . . . . . . . . . . . . . . . . . . . . . .380
Menus. . . . . . . . . . . . . . . . . . . . . . . . . . . . . . . . . . . . . . . . . . . . . . . . . . . . . . . . . . . . . . . . . . . . . . . . . . . . . . . . . . . . . . . . . . . . 381
Preferences. . . . . . . . . . . . . . . . . . . . . . . . . . . . . . . . . . . . . . . . . . . . . . . . . . . . . . . . . . . . . . . . . . . . . . . . . . . . . . . . . . . . . . . 383
Help system. . . . . . . . . . . . . . . . . . . . . . . . . . . . . . . . . . . . . . . . . . . . . . . . . . . . . . . . . . . . . . . . . . . . . . . . . . . . . . . . . . .384
Help . . . . . . . . . . . . . . . . . . . . . . . . . . . . . . . . . . . . . . . . . . . . . . . . . . . . . . . . . . . . . . . . . . . . . . . . . . . . . . . . . . . . . . . . . . . . . . 384
User Manual . . . . . . . . . . . . . . . . . . . . . . . . . . . . . . . . . . . . . . . . . . . . . . . . . . . . . . . . . . . . . . . . . . . . . . . . . . . . . . . . . . . . . . 385
About the application . . . . . . . . . . . . . . . . . . . . . . . . . . . . . . . . . . . . . . . . . . . . . . . . . . . . . . . . . . . . . . . . . . . . . . . . . . . . . 385
Questions and answers . . . . . . . . . . . . . . . . . . . . . . . . . . . . . . . . . . . . . . . . . . . . . . . . . . . . . . . . . . . . . . . . . . . . . . . .385
Database . . . . . . . . . . . . . . . . . . . . . . . . . . . . . . . . . . . . . . . . . . . . . . . . . . . . . . . . . . . . . . . . . . . . . . . . . . . . . . . . . . . . . . . . . 385
Documentation . . . . . . . . . . . . . . . . . . . . . . . . . . . . . . . . . . . . . . . . . . . . . . . . . . . . . . . . . . . . . . . . . . . . . . . . . . . . . . . . . . . 386
Global configuration . . . . . . . . . . . . . . . . . . . . . . . . . . . . . . . . . . . . . . . . . . . . . . . . . . . . . . . . . . . . . . . . . . . . . . . . . . . . . . 386
Networking . . . . . . . . . . . . . . . . . . . . . . . . . . . . . . . . . . . . . . . . . . . . . . . . . . . . . . . . . . . . . . . . . . . . . . . . . . . . . . . . . . . . . . . 388
Printers. . . . . . . . . . . . . . . . . . . . . . . . . . . . . . . . . . . . . . . . . . . . . . . . . . . . . . . . . . . . . . . . . . . . . . . . . . . . . . . . . . . . . . . . . . . 390
Readers . . . . . . . . . . . . . . . . . . . . . . . . . . . . . . . . . . . . . . . . . . . . . . . . . . . . . . . . . . . . . . . . . . . . . . . . . . . . . . . . . . . . . . . . . . 391
Setup. . . . . . . . . . . . . . . . . . . . . . . . . . . . . . . . . . . . . . . . . . . . . . . . . . . . . . . . . . . . . . . . . . . . . . . . . . . . . . . . . . . . . . . . . . . . . 391
Setup: RAID Server . . . . . . . . . . . . . . . . . . . . . . . . . . . . . . . . . . . . . . . . . . . . . . . . . . . . . . . . . . . . . . . . . . . . . . . . . . . . . . . . 393
Software . . . . . . . . . . . . . . . . . . . . . . . . . . . . . . . . . . . . . . . . . . . . . . . . . . . . . . . . . . . . . . . . . . . . . . . . . . . . . . . . . . . . . . . . . 396
Terminal services . . . . . . . . . . . . . . . . . . . . . . . . . . . . . . . . . . . . . . . . . . . . . . . . . . . . . . . . . . . . . . . . . . . . . . . . . . . . . . . . . 398
User questions. . . . . . . . . . . . . . . . . . . . . . . . . . . . . . . . . . . . . . . . . . . . . . . . . . . . . . . . . . . . . . . . . . . . . . . . . . . . . . . . . . . . 398
Video . . . . . . . . . . . . . . . . . . . . . . . . . . . . . . . . . . . . . . . . . . . . . . . . . . . . . . . . . . . . . . . . . . . . . . . . . . . . . . . . . . . . . . . . . . . . . 400
Customer Support . . . . . . . . . . . . . . . . . . . . . . . . . . . . . . . . . . . . . . . . . . . . . . . . . . . . . . . . . . . . . . . . . . . . . . . . . . . . .400
Appendix B. Certifications . . . . . . . . . . . . . . . . . . . . . . . . . . . . . . . . . . . . . . . . . . . . . . . . . . . . . . . . . 401
Overview . . . . . . . . . . . . . . . . . . . . . . . . . . . . . . . . . . . . . . . . . . . . . . . . . . . . . . . . . . . . . . . . . . . . . . . . . . . . . . . . . . . . .402
UL certification . . . . . . . . . . . . . . . . . . . . . . . . . . . . . . . . . . . . . . . . . . . . . . . . . . . . . . . . . . . . . . . . . . . . . . . . . . . . . . . .402
Glossary . . . . . . . . . . . . . . . . . . . . . . . . . . . . . . . . . . . . . . . . . . . . . . . . . . . . . . . . . . . . . . . . . . . . . . . . . . 405
x
Facility Commander Wnx 7.5
User Manual
xi
Preface
Welcome to Facility CommanderTM Wnx . This document provides an overview of the Facility Commander
Wnx product and detailed instructions for configuration and administration functions. Throughout this manual,
reference to Facility Commander Wnx is represented as “FCWnx” in text content to avoid repetition.
Conventions used in this manual
The following conventions are used in this document:
Bold
Menu items and buttons.
Italic
Emphasis of an instruction or point; special terms.
Titles of books and various documents.
Blue italic
(Electronic version.) Hyperlinks to cross-references, related topics, and URL addresses.
Monospace
Text that displays on the computer screen.
Programming or coding sequences.
Safety terms and symbols
These terms may appear in this manual:
CACAUTION: Cautions identify conditions or practices that may result in damage to the equipment or other property.
WARNING: Warnings identify conditions or practices that could result in equipment damage or serious personal injury.
Navigating a PDF file
When Adobe Acrobat Reader opens your PDF file, use the tools to navigate through the document.
Element
Description
Use the hand tool to navigate through the document. Position the hand over a linked area
until the pointer changes to a pointing finger. Click the link to jump to the linked topic or
page. Click
to go back to the previous view. Click
to go to the next view.
Click to display a window that lets you enter a word or phrase for which to search. Click
Search and wait as Acrobat generates the results.
Use this toolbar to navigate back and forth through the pages of the currently displayed
document. Click
to go back to the previous view. Click
to go to the next view.
Use this toolbar to resize the page view. You can use the zoom tool, use the page fit icons,
zoom out incrementally, set a % of zoom, or zoom in incrementally.
xii
Facility Commander Wnx 7.5
User Manual
Related documentation
For more information about Editions of this software and associated
hardware, refer to the following documentation:
•
•
•
•
•
•
•
•
•
•
•
•
•
•
•
Facility Commander Wnx Installation Manual (Professional, Enterprise,
or Global Edition)
Facility Commander Wnx Database Triggers
Credential Designer User Manual
Graphics Monitoring and Control User Manual
Installing Facility Commander Wnx in a Clustered Environment
Facility Commander Wnx with VisioWave Setup Guide
ACU Networked Intelligent Controllers User Guide
M5 Installation Manual
M5 Quick Installation
Micro/PX-2000 and Micro/PXN-2000 Installation Guide
Micro/PX-2000 and Micro/PXN/2000 Microcontroller Quick Installation
Instructions
M3000 Installation Manual
M3000 Quick Installation
DirecDoor Installation Manual
Diamond II Installation Manual
These documents and others can be found on the documentation disc included
with this product, in portable document format (PDF). The CD is included in
the media kit, shipped with your system. You must have Adobe Acrobat
Reader installed on your computer to view PDF documents. For your
convenience, a copy of the Adobe Acrobat Reader software is included on the
CD.
Quick Setup guide
Quick Setup guide
This section walks you through the basic steps needed to configure your system. It should be used in conjunction with the other
chapters of this document or the Help, if additional and specific information is required. Not all forms are described here.
How to prepare for your configuration
Before you proceed, make sure that your peripheral system hardware is installed and running. This includes controllers, readers, modems,
printers, and network lines. Refer to your installation manual, documentation provided with your equipment from GE, or follow specific
installation instructions for your brand of hardware.
How to configure a system in recommended sequential order, on page qs 2
Define preferences; on page qs 2
Define facilities; on page qs 2
Define clients; on page qs 3
Define permissions; on page qs 3
Define operators; on page qs 3
Define schedules:; on page qs 4
Configure devices:; on page qs 7
Create:; on page qs 15 (areas, intrusion zones, access rights, person records, credential records)
Back up your system; on page qs 19 (Professional and Enterprise systems, and database backups)
How to accomplish frequently performed tasks:
These tasks can be accessed by the icons on the Application toolbar:
Create Persons, on page qs 18
Monitor Activities, on page qs 27
View/Remove Alarms from the Alarm Monitor form, on page qs 28
View Graphics Console, on page qs 28 (If your system is licensed for this feature, the following icon is available.)
View video console, on page qs 26 (If your system is licensed for this feature, the following icon is available.)
Manually control DIs, DOs, areas, intrusion zones, on page qs 27
Access Help
How to accomplish administrator tasks, on page qs 22 How to accomplish operator tasks, on page qs 26
Configure devices, on page qs 22
Arm/Disarm:, on page qs 26 (areas and intrusion zones)
Configure guard tours, on page qs 22
View video console, on page qs 26
Configure/Monitor redundancy, on page qs 22
Manually control DIs, DOs, areas, intrusion zones, on page qs 27
Create controller records:, on page qs 22
Monitor Activities, on page qs 27
Create Credential Designs, on page qs 23
View Graphics Console, on page qs 28
Create Access Rights, on page qs 23
View/Remove Alarms from the Alarm Monitor form, on page qs 28
Create Person Records, on page qs 23
Create Reports, on page qs 28
Mass Updates, on page qs 24
Alarm Routing and Bumping, on page qs 24
Set Automatic Logoff Time, on page qs 24
Diagnostics, on page qs 25
Contact Customer Support, on page qs 25
qs 1
qs 2
Facility Commander Wnx 7.5
User Manual
How to configure a system in recommended sequential order
Table 1.
Quick setup sequence
Element
Description
Task
Application Group
1. Define preferences
Administration/Preferences (Refer to Chapter 2, System preferences on
page 24.)
Select a time interval for archiving your database.
2. Define facilities
1.
Configure the number of seconds that elapse before your FCWnx system
detects and advises you that your database is not accessible.
2.
If you are using image badging, set the aspect ratio.
3.
Set console alarm sounds.
4.
Configure for line coloring for suspended credentials.
5.
Enable Time and Attendance (T&A) and Anti-Passback (APB) if applicable
for your system.
6.
If this is a conversion or upgrade, consider selecting Enable unique and
required Employee Number.
7.
Set Grant Access On Duress as required.
8.
Set Alarm E-mail Notification.
9.
If your windows login and FCWnx login differ, enter a user name and
password for Access to File Share Directories.
Places & Policies/Facility (Refer to Chapter 2, System preferences on page 48.)
1.
Enter a unique description in the Description field. This may be a building
name or location.
Quick Setup guide
Table 1.
Quick setup sequence (continued)
Element
Description
Task
Application Group
3. Define clients
Administration/Client (Refer to Chapter 2, System preferences on page 49.)
1.
Click the add icon
2.
Enter or edit a unique description for the client you are adding. If you do
not enter a description, this field automatically populates with the PC
Name selected on the Client tab.
to begin a new record.
Note: Global Client Descriptions: We recommend that your client
description include a meaningful name of the Global or Regional
database server computer. When the description displays on the
Client Monitor form, the Global and Regional server are easily
identifiable.
4. Define permissions
5. Define operators
3.
A facility option can be designated.
4.
To select a PC name, click Browse to display a Select Client window.
5.
Proceed to complete the remainder of the options according to your
system, this client, and the guidelines in this manual.
6.
Repeat these steps for each client that you are defining.
Administration/Permission (Refer to Chapter 2, System preferences on page 60.)
1.
Click the add icon
2.
Enter a unique description in the Description field. This is a required field
and accepts 64 characters.
to begin a new record.
3.
Expand the form’s navigation tree to display the FCWnx forms.
4.
Select a form and select one of the Actions to associate with the form and
the permission you are creating.
5.
Click Save. Notice that the icon has changed to the associated action
granted to this permission.
Administration/Operator (Refer to Chapter 2, System preferences on page 63.)
1.
Click the add icon
to begin a new record.
2.
A facility option can be designated.
3.
Enter the Login ID associated with this operator record.
4.
Enter the name of the operator.
5.
Select a permission from the drop-down list associated with this operator.
6.
Select a language from the drop-down list associated with this operator.
7.
Using the guidelines in Table 35, complete the field for FCWnx Password
Authentication or the field for Active Directory Password Authentication.
qs 3
qs 4
Facility Commander Wnx 7.5
User Manual
Table 1.
Quick setup sequence (continued)
Element
Description
Task
Application Group
6. Define schedules:
•
Time schedules
Schedules/Time Schedule (Refer to Chapter 3, Schedules on page 70.)
1.
Click the add icon
2.
Enter a unique description in the Description field. This is a required field
and accepts 64 characters.
to begin a new record.
3.
A facility option can be designated.
4.
Review the guidelines in Table 38 and complete this tab similar to the
following steps.
5.
Create 5 intervals for the five days of the week, Monday through Friday
from 8:00am (08:00) to 5:00pm (17:00).
6.
Click Save before you exit this tab.
Note: You need to assign this time schedule to a device such as a reader.
Example
BocaHQ Normal Workweek would indicate a facility-specific
time schedule, where BocaHQ refers to a geographic location. For
example, you can create a time schedule that is active Monday
through Friday 8:00 a.m. to 5:00 p.m. This particular time schedule
(perhaps called Normal Workweek) can be applied to the Access
Right for Permanent Employees and you may want to turn off
alarm monitoring during those hours.
Door Unlock schedule:
1.
On the Reader form, select Building 1 Lobby Door reader record.
2.
On the Functions Schedule tab of the Reader form, select a Door schedule
entitled BocaHQ Normal Workweek from the drop-down list of Time
schedules.
3.
Select Unlock.
4.
The result is that the selected reader unlocks the door based on the time
schedule as configured for BocaHQ Normal Workweek.
Quick Setup guide
Table 1.
Quick setup sequence (continued)
Element
Description
Task
Application Group
•
Event schedules
(Micro only.)
Schedules/Event Schedule (Refer to Chapter 3, Schedules on page 73.)
1.
Click the add icon
2.
Enter a unique description in the Description field for this record. This is a
required field and accepts 64 characters.
to begin a new record.
3.
A facility option can be designated.
4.
Review Table 40 and create an event using the guidelines listed.
5.
Click Save before you exit this tab.
Note: An event schedule can be assigned to a device such as a controller
(see Controller form, Events tab) or a reader (see the Reader form,
Reader Type Events tab).
Example
BocaHQ Weekend Begins indicates a facility-specific event
schedule, where BocaHQ refers to a geographic location. For
example, you could create an event beginning each Friday at 6:00
p.m. that resets the APB status and the T&A status, and sets a
reader to Credential and Keypad. Employees coming into the
building after 6 p.m. on Friday are required to present their
credential and then key in a PIN number to enter the building.
Remember that an event stays in effect until another event occurs
to change it. Therefore, in our example, a second event needs to be
scheduled to change that reader back to Normal on Monday
morning.
•
Event notifier
Alarms & Events/Event Notifier (Refer to Chapter 3, Schedules on page 75.)
1.
Enter a unique description in the Description field for this record. This is a
required field and accepts 64 characters.
2.
A facility option can be designated.
3.
Review Table 42 and assign alarms that are to trigger e-mail notifications.
4.
Select one or both Transaction Type options.
5.
Review Table 43 and assign people to receive notification.
6.
Review Table 44 and format the e-mail message.
qs 5
qs 6
Facility Commander Wnx 7.5
User Manual
Table 1.
Quick setup sequence (continued)
Element
Description
Task
Application Group
•
Mode schedules
Schedules/Mode Schedule (Refer to Chapter 3, Schedules on page 80.)
1.
Click the add icon
2.
Enter a unique description in the Description field for this record. This is a
required field and accepts 64 characters.
to begin a new record.
3.
A facility option can be designated.
4.
Review the guidelines in Table 46 and complete this tab.
5.
Select the date 03/16/2006 from the calendar 'Date' control.
6.
Click Edit in the Assigned Controllers group box.
7.
Select the controller ACU19588' from the controller list.
8.
Select the check box for Mode 7 from the Available Modes group box.
9.
Click Save before you exit this tab.
Example modes
Normal: This mode is day-of-the-week dependent and it is the default
mode for the FCWnx system. The remaining modes are not day-of-theweek dependent. Both schedules and events can be defined in terms of
modes. Sunday through Saturday configurations are only in effect in
Normal mode. Next, you could define other modes such as:
Mode 1 as Half-Day Holiday
Mode 2 as Full-Day Holiday
Mode 3 might be Return to Normal (Modes do not end. Rather, one mode
replaces another as the active mode.)
For systems using ACU controllers, these additional modes display:
Mode 4
Mode 5
Mode 6
Mode 7
Mode 8
Note: Mode schedules created on the Mode Schedule form display as
schedule options on the Event Schedule form and Time Schedule form.
You can change the label of your modes on the Preferences form, Mode/
Threat Labels tab. (You must restart the FCWnx program for any changes
to the Preferences form to take effect.)
Quick Setup guide
Table 1.
Quick setup sequence (continued)
Element
Description
Task
Application Group
7. Configure devices:
•
•
Controllers
Readers
Security Devices/Controller (Refer to Chapter 4, Devices on page 92.)
1.
Controller records can be created within FCWnx without having the
controllers attached and configured. Additional device records can be
configured after creating controller records.
2.
Click the add icon
3.
The description of the controller should be unique and include where the
controller is located and/or how it is used. For example, 1 - Building
A2 North Telco Closet could represent Controller 1 located in
Building A2 North in the Telco Closet. This is a required field and accepts
64 characters.
4.
A facility option can be assigned for your new controller record from the
Facility drop-down list. All devices, such as readers, alarms, DOs, and DIs
added with the controller belong to the same facility as the controller. If
you edit the Facility option on an existing controller record, a messages
displays, Do other devices change to the same facility as the controller? If
you select Yes, all associated devices and alarms change to the newly
assigned facility. If you select No, the facility change takes place only on
the controller record. The default of Ignore Facilities is assigned if no other
selection is made.
5.
This form contains the basic information about the controller. When
configuring a controller, complete the definition tab first. Other tabs
display, depending on the selections you make on this tab.
6.
Review the guidelines and complete the fields on this form according to
the controller type that you are configuring.
to begin a new record.
Security Devices/Reader (Refer to Chapter 4, Devices on page 123.)
1.
When a controller record is created, reader records are also created. The
number of records depends on the controller that you configure and the
reader modules that the controller contains.
2.
When reader records are created, the default description is in the format:
Micro controller: mmmmm-bb-pp
ACU controller: mmmmm-na-pp
where mmmmm represents the controller number to which this reader is
associated, b represents the module number (n represents the port
number and a represents port address), and pp represents the reader
number. It is recommended that you keep the mmmmm-bb-pp prefix in
each reader displayed to aid in locating the reader points on the physical
hardware. This field accepts a maximum of 64 characters.
3.
The reader is automatically enabled as Online and Active, and configured
to accept credential transactions when a reader record is created.
4.
A facility option can be designated.
5.
Review the guidelines and complete the tabs and fields on this form
according to the reader type that you are configuring.
qs 7
qs 8
Facility Commander Wnx 7.5
User Manual
Table 1.
Quick setup sequence (continued)
Element
Description
Task
Application Group
•
Digital inputs
Security Devices/Digital Input (Refer to Chapter 4, Devices on page 144.)
1.
When the records are created, the default description is in the format:
Micro controller: mmmmm-bb-pp
ACU controller: mmmmm-na-pp
where mmmmm represents the controller number to which this digital input
is associated, b represents the module number (n represents the port
number and a represents port address), and pp represents the point or
device number. It is recommended that you keep the mmmmm-bb-pp
prefix in each digital input displayed to aid in locating the alarm points on
the physical hardware. This field accepts a maximum of 64 characters.
2.
A facility option can be designated. The same facility is assigned for all
devices associated with the controller when a controller is created.
Note: Be very careful when assigning the facility of a DI to a different
facility than the controller. You can create an undesired result if you
do not fully understand facility assignment.
•
Digital outputs
3.
Review the guidelines and complete the tabs and fields on this form.
4.
You cannot delete digital input records. The number of digital inputs is
based on the controller you set up and modules that the controller
contains.
Security Devices/Digital Output (Refer to Chapter 4, Devices on page 154.)
1.
When DO records are created, the default description is in the format:
Micro controller: mmmmm-bb-pp
ACU controller: mmmmm-na-pp
where mmmmm represents the controller number to which this digital
output is associated, b represents the module number (n represents the
port number and a represents port address), and pp represents the point
or device number. It is recommended that you keep the mmm-b-pp prefix
in each digital output description displayed to aid in locating the alarm
points on the physical hardware. This is a required field and accepts 64
characters.
Note:
2.
•
Digital output
groups
Be very careful when assigning the facility of a digital output to a
different facility than the controller. You can create an undesired
result if you do not fully understand facility assignment.
Review the guidelines and complete the tabs and fields on this form.
Security Devices/Digital Output Group (Refer to Chapter 4, Devices on
page 160.)
1.
Enter a unique description for this record. This is a required field and
accepts 64 characters.
2.
A facility option can be designated.
Note:
3.
If you assign DOs that belong to a different facility, you may be
creating an undesired result; not all DOs are visible under certain
facilities.
Review the guidelines and complete the tabs and fields on this form.
Quick Setup guide
Table 1.
Quick setup sequence (continued)
Element
Description
Task
Application Group
•
•
Alarm
instructions
Alarm responses
Alarms & Events/ Instruction (Refer to Chapter 4, Devices on page 163.)
1.
The instructions should belong to the same facility as the transaction with
which they are associated.
2.
Assign a number to the instruction records.
3.
Enter the text you want to display when the associated transaction
occurs. The instruction can be 1 to 500 alphanumeric characters in length.
Alarms & Events/Response (Refer to Chapter 4, Devices on page 164.)
1.
A facility option can be designated.
2.
This form lets you create a list of frequently used, predefined responses to
an alarm, and reduces the need to type an entry. The response entries
that you create display as selections on the Alarm Monitor form.
Complete the field on this tab.
Examples
Police are on their way.
Maintenance is cleaning up.
3.
•
Alarms
Click Save between each entry and before you exit.
Alarms & Events/Alarm (Refer to Chapter 4, Devices on page 165.)
1.
When you set up your controller, some alarms are automatically set up for
you. The Alarm form is used to modify an alarm record. However, alarms
for digital inputs must be set up manually using the Digital Input form.
2.
When the records are created, the default description is in the format:
Micro controller: mmmmm-bb-pp
ACU controller: mmmmm-na-pp
where mmmmm represents the controller number to which this alarm is
associated, b represents the module number (n represents the port
number and a represents port address), and pp represents the point or
device number. It is recommended that you keep the mmmmm-bb-pp
prefix in each alarm displayed to aid in locating the alarm points on the
physical hardware.
3.
A facility option can be designated.
4.
Review the guidelines and complete the tabs and fields on this form.
5.
With the exception of external alarms, you cannot delete alarm records.
Alarms are managed by the owner of the alarm record. The alarm owner
can be an API, module, CCTV Interface, digital input, camera, DVR,
controller, or reader. For an alarm to display on the Alarm Monitor form,
you can either select the Monitor field on the Alarm form or schedule the
alarm to be monitored. When set to be monitored, the alarm displays and
changes to an alarm condition.
qs 9
qs 10
Facility Commander Wnx 7.5
User Manual
Table 1.
Quick setup sequence (continued)
Element
Description
Task
Application Group
•
Alarm groups
(Micro only.)
Alarms & Events/Alarm Group (Refer to Chapter 4, Devices on page 179.)
1.
Alarm groups provide two things. First, they provide a convenient way of
scheduling many alarms at once. Second, they provide a means of
disabling monitoring in many alarms from a keypad reader. When a
controller record is created, 16 alarm groups are also created.
2.
The description of the alarm group should be unique. When the records
are created, the default description includes the controller to which this
alarm group is associated and the number of the alarm group. For
example, 0001 Group 1, which represents alarm group one on
controller one. All alarms are automatically assigned alarm group 0. To
change this description, enter over the existing text and save the record. It
is recommended that you keep the alarm group number and controller
number prefix to aid in locating the alarm points on the physical
hardware. This is a required field and accepts 64 characters.
Note:
•
Elevators
Be very careful when assigning the facility of an alarm group to a
different facility than the controller. You can create an undesired
result if you do not fully understand facility assignment. The default
of Ignore Facilities is assigned if no other selection is made.
3.
You cannot delete an alarm group record. Alarm groups are owned by the
associated controller record. Use the Alarm Group form to assign events or
schedules to alarm groups.
4.
Review the guidelines and complete the tabs and fields on this form.
Elevators/Elevator (Refer to Chapter 4, Devices on page 193.)
1.
Decide which method of elevator control you want to use. The methods of
implementing elevator control:
- No floor tracking method
- Floor tracking by input
- Floor tracking by keypad
2.
Depending on the type of controller used in your system for this elevator,
your configuration steps vary.
3.
Review the guidelines and complete the tabs and fields on this form.
Quick Setup guide
Table 1.
Quick setup sequence (continued)
Element
Description
Task
Application Group
Configuring elevator control using a Micro controller:
1.
Create floor records and floor numbers to be used with the elevators.
2.
Configure the elevator records. You use the Elevator form to configure
elevator records. Here, you select:
- Method of elevator control
- Readers (Verify that readers are active on the Reader form.)
- Floors
You can set a reader for elevator control using this form only. When you
return to the Reader form and display a corresponding reader record, you
notice that all other options in the Logical Type section are not available.
3.
The type of modules you want to use in your dedicated controller (DO only
or a combination of DO and DI modules) determines the number of floors
available. After installing the CPU module, the power/communication
module, and at least one reader module, there are four slots available that
can be used for digital input modules or a combination of digital input
modules and digital output modules.
Configuring elevator control using an ACU controller:
1.
Create a controller record and set the controller type to Elevator
Controller. This controller can only manage elevators and nothing else.
2.
Create floor records and floor numbers to be used with the elevators.
3.
Create area records on the Area form. Assign readers to the area. See Area
form, Reader tab.
Note: The area must also be assigned to an access right for a person to
gain access to that reader.
4.
Now, you can configure the elevator records. Use the Elevator form to
configure elevator records. Here, you select:
•
Method of elevator control
•
Readers (You can set a reader for elevator control using this form
only.) When you return to the Reader form and display a
corresponding reader record, you notice that all other options in the
Logical Type section are not available.)
•
Floors to area association
Note: Elevator control does not span controllers. This means the
reader, digital outputs, and digital inputs (if applicable) must be on the
same controller.
qs 11
qs 12
Facility Commander Wnx 7.5
User Manual
Table 1.
Quick setup sequence (continued)
Element
Description
Task
Application Group
•
DVRs
Security Devices/Digital Video Recorder (DVR) (Refer to Chapter 5, Video on
page 203.)
The following order is recommended for configuration of a DVR system for this
application:
1.
Set up operators and permissions.
2.
Configure the DVR. Refer to the manuals you received with your DVR for
hardware setup and installation specifics.
3.
Configure DVR devices. DVR devices can be hosted on the server
computer for this application and/or client workstations. The actual
number of DVR devices hosted on each server computer may vary.
Distributing DVR hosting across multiple computers may be required for
optimizing system performance in your specific application.
Note: When you change a facility designation, it changes the facility for
the DVR only. You receive a message displaying, “Do other devices
change to the same facility as the digital video recorder?” Select
Yes or No. If you select Yes, the alarm record and camera records
change as well. You need to verify the accuracy of the revised
records.
4.
•
Camera presets
Create preset records.
5.
Configure cameras.
6.
Set up event triggers.
7.
Optional: Set up alarm graphics.
Security Devices/Camera Preset (Refer to Chapter 5, Video on page 214.)
1.
After setup and programming of your DVR devices to meet your
monitoring requirements, you need to parallel the settings and positions in
the configurations in this application. This form lets you edit or enter a
description and number for a camera preset. Presets must be defined
before you can assign them to a camera on the Presets tab of the Camera
form.
2.
A facility option can be designated.
3.
In the text field, enter a number within the range of 1 to 64. This number
only references the preset number programmed and stored in a camera
with PTZ capability.
4.
Click Save. This preset is now available for assignment to a specific
camera.
Quick Setup guide
Table 1.
Quick setup sequence (continued)
Element
Description
Task
Application Group
•
Cameras
Security Devices/Camera (Refer to Chapter 5, Video on page 214.)
1.
Use this form to edit camera preferences. Camera records are
automatically created when a DVR is defined on the Digital Video
Recorder form. The camera records display in the format 00X-0X Camera
where 00X is the DVR address and 0X is the camera number. It is
recommended that you keep the number prefix to aid in locating the
cameras.
Note: Device description updates are communicated to corresponding
alarms, DIs, and DOs. In order for changes to migrate to additional
form windows that may be open at the time of a change, the open
windows should be closed and then re-opened before the new
device description is able to be seen.
•
Event triggers
2.
A facility option can be designated.
3.
Review the guidelines and complete the tabs and fields on this form
according to the camera type that you are configuring.
Alarms & Events/Event Triggers (Refer to Chapter 5, Video on page 218.)
1.
An event consists of a camera and either readers, alarms, or zone/area
activity. A trigger causes an event or program routine to be executed,
depending on what options you set on the tabs of this form.
Example: A camera begins recording in response to an invalid credential
transaction. An alarm is recorded in response to the credential
transaction.
•
Flash/download
firmware to the
controller
2.
Enter a description that conveys specific information relating to a physical
location, camera, reader, or state, such as:
Front Door Inv Credential Camera 1 Reader 1
You can assign a reader alarm or camera alarm or both and this can be
reflected in the description of the trigger.
3.
Review the guidelines and complete the tabs and fields on this form that
become the source for this event trigger.
4.
When tagged events are identified by a search, retrieved, and viewed, the
video playback begins at the start of the event and continues playing until
you elect to discontinue the playback.
Monitors & Controls/Controller Monitor (Refer to Chapter 9, Monitor and control
on page 332.)
1.
Right-click on the Controller Monitor to display a shortcut menu. Select
Flash Controller(s) to download the latest firmware to the selected
controller. When the Controller Flash & Controller Preference Configuration
dialog box displays, click Start Flashing Controller(s). This option starts
flashing each controller with the latest firmware. A dialog box displays,
asking you to verify your request.
2.
The flashing process varies with the amount of data that needs to be
transmitted to the controller.
qs 13
qs 14
Facility Commander Wnx 7.5
User Manual
Table 1.
Quick setup sequence (continued)
Element
Description
Task
Application Group
•
Put controller
online and
monitor
communications
Monitors & Controls/Controller Monitor (Refer to Chapter 9, Monitor and control
on page 328.)
1.
Right-click on the Controller Monitor to display a shortcut menu.
•
Select Change State (for multiple controllers) or Set Online (single
controller) to put the controller online.
•
Click Download Database each time a controller is set to online, in
order to download the database to the controller.
•
Any time a new controller database is required, click Download
Database.
•
Click Download Credentials to download credential records for the
selected controller.
Quick Setup guide
Table 1.
Quick setup sequence (continued)
Element
Description
Task
Application Group
8. Create:
•
Areas
Places & Policies/Area (Refer to Chapter 6, Areas and intrusion zones on
page 238.)
Note:
The Area form is enabled for systems licensed and configured with
ACU controllers.
Use this form to configure secure areas. Your system supports up to 8,192
areas. Complete the steps in the order presented.
1.
You must first configure ACU controllers. (Reader records are
automatically created when you configure an ACU controller.) The
controllers must be connected and online to arm/disarm if the area spans
controllers. An area can contain alarm points, entry and exit points
(readers), and digital outputs (relays). Areas can be local (does not span
controllers) or global (spans controllers).
2.
Create areas. The intended application is suited for arming and disarming
secure areas from outside or inside of the monitored and secured areas.
3.
Assign devices to an area in order to use the device functionality. The
defined secure areas have the ability to be armed and disarmed through
access control by using a credential and keypad reader, or manual
control.
4.
The Area form provides the ability to define areas for each controller that
consists of the following:
•
Keypad disarm and arm
•
Time schedules
•
SCIF (sensitive compartmentalized information facility) Workstations
(ACU only.)
•
Readers
•
Alarms
•
APB (anti-passback)
•
Digital inputs (assigned only for utilizing the arm/disarm function and
SCIF control)
•
Digital outputs (assigned only for SCIF control)
•
Arm/Disarm digital input
5.
Review the guidelines and complete the tabs and fields on this form.
6.
When an area record is updated and saved, all controllers are notified of
the new configuration.
Click the add icon
to begin a new record.
Before you can delete an area record:
1.
Access rights must be removed.
2.
Devices associated with this area must be removed.
This area must be removed from the Area Control tab of the Person form as
assigned for arm/disarm.
qs 15
qs 16
Facility Commander Wnx 7.5
User Manual
Table 1.
Quick setup sequence (continued)
Element
Description
Task
Application Group
•
Intrusion zones
Places & Policies/Intrusion Zone (Refer to Chapter 6, Areas and intrusion zones
on page 249.)
The Intrusion Zone form is required for creating a relation between readers,
alarm inputs, the arm/disarm intrusion point, and the arm/disarm DO. Perform
the following:
1.
Define an intrusion zone with a description and facility assignment.
2.
Select a controller selection to establish the zone source and its intrusion
points.
3.
Filtered on the operator’s active facilities, assign the following intrusion
zone components: arm/disarm DO, arm/disarm Intrusion DI, readers, and
alarms.
•
Arm/Disarm Intrusion DI: This is a single record selection from a dropdown list filtered by active facility that consists of all available arm/
disarm intrusion points for the controller. Only the DIs that have not
been assigned are available.
•
Alarm Points: This is a multiple-record selection from an assignment
dialog filtered by active facility that consists of available controller
alarm points not already assigned to a zone. (24/7 4-State
Supervision rules apply regardless of the armed/disarmed state of
the zone.)
•
Readers: This is a multiple-record selection from an assignment
dialog filtered by active facility that consists of available readers not
already assigned to a zone. (Readers must be active and nonelevator
type.)
•
A zone can be configured to contain the following:
-An Arm/Disarm Intrusion Point with Alarm Points only and no
Readers.
-An Arm/Disarm Intrusion Point with Readers only and no Alarm
Points.
-Alarm Points and Readers only with no Arm/Disarm Intrusion Point.
-Readers only. Note: An arm/disarm DO can be assigned for any of
these.
4.
A Status tab provides the ability to request status of the zone and each of
its associated points, as follows.
•
Zone: Armed or Disarmed
•
Arm/Disarm Intrusion DI: Active/Inactive/Trouble
•
Readers: Online or offline
•
Alarm Points: Monitored Off/Monitored On
Quick Setup guide
Table 1.
Quick setup sequence (continued)
Element
Description
Task
Application Group
To complete the intrusion zone functionality, you also need to complete the
Access Right form - Intrusion Zones tab.
1.
•
Access rights,
departments
The Intrusion Zones tab of the Access Right form lets you assign multiple
intrusion zones using an assignment dialog.
•
Only credential holders with an intrusion zone assigned on the Access
Right form are able to arm and disarm zones using any of the
credential/keypad readers within a zone.
•
When a zone is armed, all readers within the zone go offline, and
normal access rights do not gain access into the area.
•
When a zone is disarmed, all readers within the zone go online and
normal access rights gain access into the area. If schedules were
assigned, the reader follows the schedule. If you expect to arm/
disarm by using any one of the readers within a zone:
• That reader must be assigned on the Access Right tab of the
Access Right form and be an assigned reader in the intrusion
zone listed on the Intrusion Zones tab.
— or —
• Individually created access rights must be assigned to the
person that arms/disarms the intrusion zone. (One right allows
access to the readers and another right allows access to the
intrusion zone.)
Places & Policies/Access Right (Refer to Chapter 7, Access rights, departments,
persons, and credentials on page 258.)
Use this form to create access rights to define where (with readers) and when
(with time schedules) an individual can gain entry.
For systems using Micro controllers:
•
Assign readers to the access right using the Access Right tab.
•
Define which floors a person can access and what digital output
groups a person can trigger with a valid credential:
Note: Floors and elevators are assigned to an access right.
•
Intrusion zones can be assigned to an access right, allowing the
ability to arm/disarm the zone and access to a particular zone.
For systems using ACU controllers:
•
For ACU controller readers, assign the readers to an area first. Then,
assign the area to the access right using the Area tab.
•
Assign areas to an access right and then, assign a time schedule and
dates to the area access right.
1.
Review the guidelines and complete the tabs and fields on this form
according to the type of controllers in your system.
2.
Following the creation of access rights, create departments.
3.
Now, you are able to create person records and assign access rights and
departments to the person records.
4.
If your company is using credentials, you may want to capture an image
and design a credential that incorporates that image.
qs 17
qs 18
Facility Commander Wnx 7.5
User Manual
Table 1.
Quick setup sequence (continued)
Element
Description
Task
Application Group
•
Persons
Personnel/Person (Refer to Chapter 7, Access rights, departments, persons, and
credentials on page 258.)
1.
2.
Click the add icon
to begin a new record. Create a record of an
employee’s personal information. Only Last Name, Personnel Type, and
Employee Number are required fields.
Review the guidelines and complete the tabs and fields on this form.
If your company is using credentials, you may want to capture an image
and design a credential that incorporates that image.
1.
Select the Photo tab on the Person form.
2.
Select one of the records in the Record list.
3.
Click Capture Image/Signature to capture a new image. Based on the
input device you previously selected, the proper interface window
displays for adjusting, capturing, and loading a new image.
4.
Adjust, and then click Save to save the adjusted settings.
5.
Click Capture Photo to capture the new image. Once the photo is taken,
the Image Enhancement dialog box displays.
Note: Refer to the Image Capture Application Help system for additional
specific details of this application.
•
Credential
Credentials/Credential (Refer to Chapter 7, Access rights, departments, persons,
and credentials on page 258.)
To create your own simple credential design:
1.
Click the add icon
to begin a new record, and enter a unique
Description, and then click Save. The Edit Credential Design button is now
enabled.
2.
Assign a facility. Review the guidelines and complete the tab on this form.
3.
Click Edit Credential Design to run the Credential Design application.
4.
Select New from Imaging File menu.
5.
Draw a shape in your design window the size of your credential.
6.
For a background color, select Edit, Background, and then select a color
from the Color dialog that displays.
7.
Add one or several bitmaps inside the credential design preferences.
8.
Add one or several text boxes.
9.
Move or resize the photo and text as desired.
10. Click Save.
Quick Setup guide
Table 1.
Quick setup sequence (continued)
Element
Description
Task
Application Group
9. Back up your system
Refer to the application installation manual for detailed instructions for all
types of backups.
This list assists in backing up a Professional Edition system.
1.
Back up the entire Facility Commander Wnx folder. If you purchased your
system from GE, your system contains a CD drive acceptable for backup
purposes. Copy the Facility Commander Wnx folder to your backup
media.
2.
To back up your Facility Commander Wnx databases, custom stored
procedures or triggers added to the Facility Commander Wnx databases
need to be removed. You can re-create custom procedures or triggers
after restoring the database files.
•
Create a folder on your system where the backup files are to be
stored.
•
Click Start, Programs, FCWnx, and then Database Maintenance
Utility.
•
If this utility is not found in the Start menu, and then go to the Facility
Commander Wnx directory and double-click the file:
Maintenance.exe.
•
Click Backup. Accept the default Login of “sa” and enter the Password
for sa. The default password assigned for the “sa” user is
SecurityMaster08.
•
Navigate to the drive and directory folder on your system where the
backup files are to be stored. Double-click to open the Destination
folder.
•
Holding down the left mouse button, drag and drop the destination
folder onto each of the database fields. The .BAK files in each field
are automatically named, to include the directory path, file name,
date, and time. If you choose not to back up any of the three
databases, clear the check box at the end of that field. If the check
box is selected but no destination is entered in the database field,
backup of that database file does not occur.
•
Click Backup. The backup process begins. When then backup is
complete, a dialog box displays a message verifying the successful
backup of the chosen databases.
•
Click OK. Exit the Maintenance window.
3.
Back up Designs, Graphics, Images, Signatures, and Videos folder. You can
use any backup program you want and any media such as tape, zip disks,
CD, or a network folder. The size of the files in the folder you want to back
up are a determining factor of which media to use.
qs 19
qs 20
Facility Commander Wnx 7.5
User Manual
Table 1.
Quick setup sequence (continued)
Element
Description
Task
Application Group
Backing up an Enterprise Edition System
Note:
Using SQL Server Management Studio, backups can be scheduled so
that you do not have to remember to back up your databases.
Since this application does not contain a backup option, you can use any
method you like to back up the data.
You should keep two backups of the server computer, as follows:
1.
Data backup
•
Three databases (Refer to the instructions for backing up databases
in Microsoft SQL Server, given below.)
•
Externals
•
Images
•
Signatures
•
Graphics
•
Designs
•
Video
You should back up this data often since it changes so frequently. We
recommend that you create a backup at least every week.
2.
Back up entire Facility Commander Wnx installation.
•
Always maintain a current backup. Should you have any problems
with your system, you can always restore your backup. This includes
your database as well as your files.
•
If you purchased your system from GE, and then your system
contains a CD drive acceptable for backup purposes.
•
In Microsoft Windows Explorer, navigate to the Facility Commander
Wnx program folder. Copy the Facility Commander Wnx folder to
your backup media.
Quick Setup guide
Table 1.
Quick setup sequence (continued)
Element
Description
Task
Application Group
This list assists in backing up databases in Microsoft SQL Server 2005.
Note:
1.
Although there are other methods, we have included the following
steps as a guide to assist you in performing one type of backup.
From your Start menu, navigate to Microsoft SQL Server 2005/2008
Server, SQL Server Management Studio. At the Connect to Server
window, verify that the Login and Password are correct, and then click
Connect.
2.
Open the Databases folder.
3.
Right-click one of the databases and select Tasks, and then Back up from
the shortcut menu.
4.
When the Backup Database dialog box displays, select Full. In the Name
field, you can keep the default or choose a different name.
5.
Under Destination, choose Disk or Tape.
6.
Edit the file path name as appropriate for the folder that you have created
to receive the database. Do not change the database name. Click OK.
7.
In the Select a page pane, click Options. On the Options page, select either
Overwrite all existing backup sets or Append to the existing backup set.
We recommend that you append to the file.
8.
We recommend that you select Verify backup when finished. Click OK to
start the backup.
9.
Click OK when the “Backup operation has been completed successfully”
message displays.
10. Repeat these steps for each of the three FCWnx databases.
qs 21
qs 22
Facility Commander Wnx 7.5
User Manual
How to accomplish administrator tasks
Table 2.
Administrator tasks
Task
Description
Create controller records:
Refer to Chapter 4, Devices on page 92. Additional device records can be configured after
creating controller records.
•
•
Direct-Connect Controller
Record
1.
Click the Security Devices group.
2.
Click the Controller icon.
3.
Select connection type as Direct on the Definition tab.
4.
Complete all applicable fields and enabled tabs according to the type of controller
that you are configuring.
1.
Click the Security Devices group.
Dial-up Controller Record
Configure devices
Configure guard tours
Configure/Monitor redundancy
2.
Click the Controller icon.
3.
Select connection type as Dialup on the Definition tab.
4.
Complete the Settings to Reach Host tab.
5.
Complete the Settings to Reach Controller tab.
Refer to Chapter 4, Devices on page 90. Follow the recommended order for completion of
device configuration:
1.
Click the Security Devices group.
2.
Click the icon and complete the form that corresponds to the device that you are
configuring.
Refer to Chapter 8, Guard tours on page 303.
1.
Click the Guard Tours group.
2.
Click the Guard Tour icon.
3.
Configure the specifics of this tour by completing the elements displayed on the
form.
Refer to Chapter 2, System preferences on page 58.
Although devices like the controller are designed to run without the host software
running for days, eventually memory is going to be filled up at the controller end. The
redundancy feature in FCWnx is designed to address this condition. Clients can be
configured to be backed up by other clients so that, in case of the default hosting client
(called the primary client) being disabled, one of the backup clients takes over all its
devices. This is designed to work automatically without any operator intervention so the
system continues to work efficiently.
1.
Review Table 29 on page 58.
2.
Click the Administration group.
3.
Click the Client icon.
4.
Click the Backup Clients tab and assign backup clients.
5.
Click the Monitors & Controls group.
6.
Click the Client Monitor icon.
7.
Monitor clients on the Client Monitor form.
Quick Setup guide
Table 2.
Administrator tasks (continued)
Task
Description
Create Credential Designs
Refer to Chapter 7, Access rights, departments, persons, and credentials on page 283.
Create Access Rights
Create Person Records
1.
Click the Credentials group.
2.
Click the Credential Design icon.
3.
Click the add icon
to begin a new record, and enter a unique Description, and
then click Save. The Edit Credential Design button is now enabled.
4.
Click Edit Credential Design to run the Credential Design application.
5.
Select New from Imaging File menu.
6.
Proceed to design your credential. Click Save.
Refer to Chapter 7, Access rights, departments, persons, and credentials on page 258.
1.
Click the Places & Policies group.
2.
Click the Access Right icon.
3.
Review the guidelines and complete the tabs and fields on this form according to
the type of controllers in your system.
4.
Following the creation of access rights, create departments.
5.
Now, you are able to create person records and assign access rights and
departments to the person records.
Refer to Chapter 7, Access rights, departments, persons, and credentials on page 269.
1.
Click the Personnel group.
2.
Click the Person icon.
3.
Create a record of an employee’s personal information. Only Last Name, Personnel
Type, and Employee Number are required fields.
If your company is using credentials, you may want to capture an image and
design a credential that incorporates that image.
1.
Select the Photo tab on the Person form.
2.
Select one of the records in the Record list.
3.
Click Capture Image/Signature to capture a new image. Based on the input device
you previously selected, the proper interface window displays for adjusting,
capturing, and loading a new image.
4.
Adjust, and then click Save to save the adjusted settings.
5.
Click Capture Photo to capture the new image. Once the photo is taken, the Image
Enhancement dialog box displays.
6.
Refer to the Image Capture Application Help system for additional specific details of
this application.
qs 23
qs 24
Facility Commander Wnx 7.5
User Manual
Table 2.
Administrator tasks (continued)
Task
Mass Updates
Description
Refer to Chapter 7, Access rights, departments, persons, and credentials on page 293.
1.
Open a blank form. Click Search to display a list of existing records. We recommend
entering search criteria to narrow your search results to only records that are to be
updated.
Note: If there are no records, Mass Update is not available.
2.
Right-click to display a shortcut menu to related forms. To enable the Mass Update
mode, select Mass Update from the shortcut menu.
3.
Note the change in the appearance of the form. only those fields or dialog boxes
that are available for mass update changes are now enabled and blank. Refer to
Chapter 7, Access rights, departments, persons, and credentials on page 257.
4.
Select the records you want to adjust from the list box on the right.
5.
Make the required adjustment to the form.
6.
Click Save. The update of records begins immediately. A window displays with a
progress bar, indicating the update progress.
7.
Click Abort if you want to stop the update in progress.
Note: You cannot close a form during the Mass Update process.
Right-click shortcut menu navigation is unavailable when you are in Mass Update
mode.
If you have changed any preference but did not Save, a message reminds you to
discard or save your changes.
Smaller batch updates are recommended to prevent performance issues during a
mass update.
8.
A Mass Update Complete dialog box displays, indicating completion or failure.
9.
When mass updates are processed to an access right, a log file is generated and a
View Results key displays in the dialog box. Click to view the completion log. We
recommend that you rename and save this file to another location for reference
purposes. Renaming the log prevents an overwrite.
10. When the process is complete, a Mass Update Complete dialog message displays.
11. Right-click and select Mass Update from the shortcut menu to disable and exit
Mass Update mode. The records refresh at this point.
Note: Updates display in the list box to the right.
Alarm Routing and Bumping
Refer to Chapter 4, Devices on page 187.
1.
Set Automatic Logoff Time
Click the Alarms & Events group.
2.
Click the Alarm Routing and Bumping icon.
3.
Assign Client groups for Routing and a frequency option.
4.
Assign Client groups for Bumping and a frequency option.
5.
Follow guidelines to complete the form.
Refer to Table 27 on page 51.
1.
Click the Administration group.
2.
Click the Client icon.
3.
Set Auto logoff Minutes.
Quick Setup guide
Table 2.
Administrator tasks (continued)
Task
Description
Diagnostics
Refer to Appendix A, Diagnostics and troubleshooting.
1.
Click the Diagnostics group.
2.
Click the Diagnostic Setting icon.
3.
Select items from the list box on the right windowpane that you want to monitor
using the Diagnostic Viewer program.
4.
Select Enable debug messages.
Note: Use this form with care. The more items you turn on for monitoring, the more
your system performance is affected. This is even more important when
monitoring port, communications, or controller items.
Contact Customer Support
5.
Click the Diagnostics group.
6.
Click the Diagnostic Viewer icon to open the Diagnostic Viewer program. The
activities of your selected component are displayed.
Refer to Appendix A, Diagnostics and troubleshooting.
1.
If you require assistance, first contact your local Business Partner.
2.
To contact GE Security, use the following numbers and addresses:
Telephone:
United States: 1-888-GE SECURITY (1-888-437-3287)
Asia: 852-2907-8108
Australia: 61-3-9259-4700
Europe: 48-58-326-22-40
Latin America: 305-593-4301
Be ready at the equipment before calling.
FAX: 561 998 6224
Web site: www.gesecurity.com
Support: [email protected]
Check the Web site periodically for timely information on all GE Security products.
qs 25
qs 26
Facility Commander Wnx 7.5
User Manual
How to accomplish operator tasks
Table 3.
Operator tasks
Task
Description
Arm/Disarm:
•
Area
Refer to Chapter 6, Areas and intrusion zones on page 237.
1.
Click the Policies & Places group.
2.
Click the Access Right icon.
3.
Assign the Area to this access right.
4.
Swipe the credential at any of the credential/keypad readers within an area.
— or —
•
Intrusion zone
1.
Click the Manual Control icon.
2.
Click the Areas and Zones tab and click Arm or Disarm.
Refer to Chapter 6, Areas and intrusion zones on page 255.
1.
Click the Policies & Places group.
2.
Click the Access Right icon.
3.
Assign the intrusion zone to this access right.
4.
To Arm: = * 1 # followed by a valid credential read.
To Disarm: * 0 # followed by a valid credential read.
— or —
View video console
1.
Click the Manual Control icon.
2.
Click the Area and Zones tab and click Arm or Disarm.
Refer to Chapter 5, Video on page 213.
1.
Click the Monitors & Controls group.
2.
Click the Video Console icon.
Note: If an alarm is generated with associated video, the Video Console icon
displays in the Alarm Monitor and you can access Video Console by clicking
on it.
3.
Capabilities include:
•
Live video can be sent to multiple video consoles.
•
Video Console can be automatically launched, with live and recorded video,
when an alarm event occurs.
•
Multiple video streams from multiple DVRs can be sent to the Video Console.
•
Multiple camera views allow an operator to select two-up, four-up, nine-up, or
sixteen-up views.
•
Recorded video is available to multiple Video Consoles.
•
A single frame of recorded video can be viewed.
•
Video can be searched by date and time, play position, or token.
•
If the camera has PTZ (pan/tilt/zoom) capabilities, you can use the mouse to
control the camera movement. (This feature is not available if another operator
has control of the camera.)
Quick Setup guide
Table 3.
Operator tasks (continued)
Task
Description
Manually control DIs, DOs, areas,
intrusion zones
Refer to Chapter 9, Monitor and control on page 339.
Monitor Activities
1.
Click the Monitors & Controls group.
2.
Click the Manual Control icon.
The Manual Control form allows the operator to perform the following, depending
on the operator's facilities and permissions:
•
Manually lock/unlock doors.
•
Turn on/off DO (digital output).
•
Monitor on/off alarms and alarm groups.
•
Enable/disable DI inputs.
•
Arm/disarm areas and intrusion zones.
•
Change the mode of a controller.
•
Start/stop a guard tour.
3.
Refer to the individual tab controls for additional information regarding the
available functions.
Refer to Chapter 9, Monitor and control on page 311.
1.
Click the Monitors & Controls group.
2.
Click the icon of the appropriate monitor:
•
Activity Monitor displays credential transactions.
•
Alarm Monitor displays alarm activities.
•
Client Monitor displays client information.
•
Controller Monitor displays controller information.
3.
The options on the monitor toolbar vary with the monitor that is displaying.
All monitors: These forms are outside of the main application window. Right-click on the
form window to display a shortcut menu of options. The window can be independently
moved anywhere on the desktop. This feature has been incorporated to facilitate
multiple window management for both single and multiple monitor workstation
configurations.
qs 27
qs 28
Facility Commander Wnx 7.5
User Manual
Table 3.
Operator tasks (continued)
Task
Description
View Graphics Console
Refer to Chapter 9, Monitor and control on page 338.
Note:
This option is available only if you are licensed for graphics console.
This option and related features are covered in detail in the Graphics
Management Console (GMC) User Manual.
1.
View/Remove Alarms from the
Alarm Monitor form
Click the Monitors & Controls group.
2.
Click the Graphics Console icon.
3.
The Graphics Console option opens the application that lets you view the maps of
your facility that were created in the Graphics Map Editor. These maps point out the
location and type of incoming alarms as they occur, such as a door held open
alarm. Operators can issue commands and launch applications, such as locking and
unlocking doors.
4.
Graphics maps are organized according to their facility. The items that display in
the navigation pane are determined by an operator’s permission levels and context.
Initially the facilities are collapsed. Expand a facility. Even if the facility containing
that map is collapsed, the icon is red, which indicates that a map in that facility is in
alarm. Click on a map to open it. You can also open a map from the Menu bar, by
selecting File, Open. The corresponding facility in the Navigation pane expands
accordingly.
5.
The Graphics Monitor is divided by a split bar with split pointers, which can be used
to change the size of the window.
Refer to Chapter 9, Monitor and control on page 319.
1.
Click the Monitors & Controls group.
2.
Click the Alarm Monitor icon to display the monitor. Alarm messages display.
3.
Select one or more alarm messages that you want to remove.
4.
Click the Alarm Monitor toolbar icon to Purge All and remove all messages or Purge
Individual to remove one alarm message.
All Monitors: These forms are outside of the main application window. Right-click on the
form window to display a shortcut menu of options. The window can be independently
moved anywhere on the desktop. This feature has been incorporated to facilitate
multiple window management for both single and multiple monitor workstation
configurations.
Create Reports
Refer to Chapter 10, Reports on page 355.
1.
Click Reports on the menu bar.
2.
From the drop-down menu, select the type of report that you want to create.
3.
Select a template or create a new template.
4.
The options on a tab and drop-down options in a field vary depending on the type
of report you are creating.
Chapter 1 Introduction
This chapter provides an overview of FCWnx.
In this chapter:
Overview . . . . . . . . . . . . . . . . . . . . . . . . . . . . . . . . . . . . . . . . . . . . . . . . . . 2
Product contents . . . . . . . . . . . . . . . . . . . . . . . . . . . . . . . . . . . . . . . . . . . . 3
Before you begin configuration . . . . . . . . . . . . . . . . . . . . . . . . . . . . . . . . 3
Licensing. . . . . . . . . . . . . . . . . . . . . . . . . . . . . . . . . . . . . . . . . . . . . . . . . . 3
Client/server architecture . . . . . . . . . . . . . . . . . . . . . . . . . . . . . . . . . . . . . 4
Facility Commander Wnx services . . . . . . . . . . . . . . . . . . . . . . . . . . . . . . 4
Simple File Sharing on WinXP . . . . . . . . . . . . . . . . . . . . . . . . . . . . . . . . . 5
Configuring firewall and DCOM settings with SecurityCnfg. . . . . . . . . . 5
Navigation. . . . . . . . . . . . . . . . . . . . . . . . . . . . . . . . . . . . . . . . . . . . . . . . . 7
Menus . . . . . . . . . . . . . . . . . . . . . . . . . . . . . . . . . . . . . . . . . . . . . . . . . . . . 8
Creating, editing, and deleting records . . . . . . . . . . . . . . . . . . . . . . . . . 20
2
Facility Commander Wnx 7.5
User Manual
Overview
Facility Commander Wnx 7.5 offers powerful, easy-to-use, IT friendly, integrated security management within
the familiar Microsoft Windows operating system environment. It is a complete end-to-end solution for today's
most commonly deployed physical security applications; providing real-time monitoring, command and
control, automation, database administration, and report management in a single, unified system.
Facility Commander Wnx is available in the following three configurations:
Professional Edition
•
•
•
Deployment support: Windows XP and Vista platforms with SQL Server 2008 Express database.
Scalability support: Single server with up to 5 remote concurrent clients, 256 readers, and 256
cameras
Personnel/Credentials: 25,000
Enterprise Edition
•
•
•
Deployment support: Windows Server 2003 with SQL Server 2005 database or Windows Server
2008 with SQL Server 2008 database.
Scalability support: Single server with up to 50 remote concurrent clients, 4096 readers, and 4096
cameras
Personnel/Credentials: 500,000
Global Edition
•
•
•
•
Note:
Deployment support: Windows Server 2003 with SQL Server 2005 database or Windows Server
2008 with SQL Server 2008 database.
Scalability Support: Single Global server with up to 64 Regional servers
Scalability Support per/Server: Up to 50 remote concurrent clients, 4096 readers, and 4096 cameras
Personnel/Credentials: 500,000 system-wide
Cluster technology selections in the Enterprise-level installation provide new configuration options. See the document,
Installing Facility Commander Wnx 7.5 in a Clustered Environment for additional information and instructions.
This user manual provides information for system administrators to configure and operate the application
software.
Chapter 1
Introduction
Product contents
Inspect the package and contents for visible damage. If any components are damaged or missing, do not use;
contact your supplier immediately. If you need to return the package, you must ship it in the original box.
Before you begin configuration
Before you proceed, make sure that your peripheral system hardware is installed and running. This includes
controllers, readers, modems, printers, and network lines. Refer to the FCWnx installation documentation
provided with your equipment from GE, or follow specific installation instructions for your brand of hardware.
Licensing
Note:
Your software is licensed during the installation process. The license sequence is also an item on the Start, Programs,
menu. Refer to the License Help system for additional details of the licensing procedure and operating in demo mode.
Clicking Help, About this application options opens a screen displaying the software version, service pack
number, copyright information, licensing information, and contact information.
Your license included Imaging software for this application that controls the number of clients that can launch
Imaging. Imaging is included in each installation; however, you cannot enable Imaging on more computers
than you have Imaging licenses for. (Only clients that have an Imaging license enabled can capture images and
signatures, create credential designs, and print credentials. If not all computers require the license at the same
time, you can enable and disable the license for the appropriate computers.)
Licensing controls the number of computers that can host remote sessions. You cannot enable thin client on
more computers than you have licenses for. (If not all computers require the license at the same time, you can
enable and disable the option for the appropriate computers.)
Note:
To run the License program, click in this sequence: Start, Programs, Facility Commander Wnx, and then FCWnx
License. The License Setup window opens. Follow instructions as displayed. License has a separate Help system.
The license that you purchase determines what items display in the Application Group pane. (For example, if
you are not licensed for guard tours, the Guard Tours group does not display.)
3
4
Facility Commander Wnx 7.5
User Manual
Client/server architecture
FCWnx servers, client workstations, and network-enabled controllers communicate over 10/100Mb Ethernet
LAN/WAN topologies. Refer to Controller Definition tab on page 99 for a list of supported controller types.
Refer to the Facility Commander Wnx 7.5 Installation Manual (Professional, Enterprise or Global Edition).
Facility Commander Wnx services
Windows uses special programs called services. A service is a process that can start automatically when the
system boots and remains running as a background process independently of anyone being logged in. It runs
regardless of whether anyone is logged into Windows or FCWnx. In other words, the computer must be turned
on but no one needs to be logged in. SQL Server 2005/2008 must be running for network clients to connect and
share the SQL database.
FCWnx has six services that run on all computers. The default Startup Type for services is set to Manual. You
are instructed to set the FCWnx services for an Automatic startup during the FCWnx installation process,
which means that they start as soon as the computer is started. Once set to Automatic, we recommend that you
do not change these settings.
1. FCWnx Diagnostics handles all diagnostics on all computers.
2. FCWnx System Manager manages communication between computers and licensing. This service
also starts the WebService.
3. FCWnx Manager is the main service and handles controller communications and alarms.
4. FCWnx Webservice handles the video media service. This service is dependent on the System
Manager and automatically starts when the Manager service starts.
5. FCWnx Media Server is handled entirely by FCWnx Webservice. This service requires no user
intervention, and starts and stops automatically.
6. FCWnx API Service is used when using an API interface. This service is used when an external
system is sending or receiving transactions by way of the Application Program Interface to this
application. This service can be started manually at the time you install an API interface.
Note:
Changing the state of a service without a good working knowledge of its purpose can cause the computer to act
erratically!
Services automatically shut down when a client closes the FCWnx application and meets all of the following
criteria:
1. Does not host any controllers or DVRs.
2. Does not have any API connections.
3. Is not a Thin Client.
4. Is not a backup client or have any backup clients of its own.
5. Is not a CCTV client.
6. Is not hosting a guard tour.
7. Client form Enable Auto Shutdown is selected.
Chapter 1
Introduction
Licensing controls the number of computers that can host FCWnx sessions. If a particular client is shut down,
that license is now available for another client computer to be designated an FCWnx client and run the FCWnx
application. If not all clients require a license at the same time, you can enable and disable the license for the
appropriate computers.
Simple File Sharing on WinXP
Simple File Sharing is a feature in Windows XP that removes file sharing security options available in other
versions of Windows. This setting must be disabled for FCWnx to operate successfully between servers and
clients. Once the user sets the permission, the user and clients have access to shared files and the ability to
assign passwords to shares.
To disable folder shares:
1. Double-click My Computer on the Windows XP Desktop.
2. From the Tools menu, select Folder Options to open a Folder Options window.
3. Click the View tab and locate the Use simple file sharing (Recommended) check box in the list of
Advanced Settings.
4. To disable Simple File Sharing, ensure this check box is not selected. Select the check box to disable
the option. (The Simple File Sharing check box should be at or near the bottom of the Advanced
Settings list.)
5. Click OK to close the Folder Options window. The settings for Simple File Sharing are now updated;
no computer reboot is required.
Note:
1.
Enabling Simple File Sharing prohibits the ability to assign user-level passwords to shares. When Simple File Sharing is
enabled on a computer, remote users are not prompted for a password when accessing that computer's shares.
2.
If the Windows XP Professional computer is part of a Windows domain rather than a Windows workgroup, this process
for enabling or disabling Simple File Sharing has no effect. Simple File Sharing always remains disabled for computers
joined to domains.
Configuring firewall and DCOM settings with SecurityCnfg
The SecurityCnfg utility assists you in configuring firewall and DCOM settings on your computer. We
recommend that you configure your FCWnx system with the Windows firewall ON. In order for your system
to perform successfully, the following firewall and DCOM ports must be configured for server and client
communication across your network.
For machines running Windows XP or Windows 2003, you must be logged in with local administrator rights to
run the SecurityCnfg Utility. If not, log off and log back on as a user with these permissions.
For machines running Windows Vista or Windows 2008, you must be logged in as the local administrator to
run the SecurityCnfg Utility. If not, log off and log back on as the local administrator.
5
6
Facility Commander Wnx 7.5
User Manual
This utility is launched one of three ways:
•
•
•
Auto launches immediately following the licensing sequence.
Select Configure Ports on the main File menu of FCWnx.
Click Start, select Programs, Facility Commander Wnx, and then Security Configuration.
The three windows of this application are as follows:
1. Communications Ports for Clients
These are the ports used for TCP and UDP filtering.
Low Range: Enter 6700
High Range: Enter 6709
Click Next to continue. The settings are automatically saved to your computer.
2. DCOM User and Password
Anonymous: By default, this check box is selected and this application uses anonymous
authentication. That is, DCOM authentication is not verified. DCOM communications are configured
for you by running the SecurityCnfg application.
Supported authentications:
Domain
Workgroup
Anonymous
Yes
Yes
Local User Account
N/A
Not supported
Domain Account
Yes
N/A
Clear this check box to enable the fields on this tab.
Username: Enter a domain or local user name for this user. This field accepts 34 characters.
Password: Enter a domain or local password for the user listed in the User Name field. This field
accepts 34 characters.
Password (Confirm): Enter the domain or local password a second time identical to what was entered
in the Password field.
Domain: Enter the name of the FCWnx domain or workgroup.
Click Next to continue. The settings are automatically saved to your computer and DCOM is
configured for FCWnx.
•
•
•
At login, the user is prompted for a domain user name and password. This login is used to
authenticate remote DCOM objects. At a later time, if you choose to change this selection,
return to this window.
To keep interruptions to the FCWnx application to a minimum, your IT Department may
choose to set passwords as never expiring.
If any computer in your FCWnx system uses DCOM authentication, then all other client
computers must use DCOM authentication.
Chapter 1
Introduction
3. Firewall Configurations
The following port numbers display by default:
Controller Communications Port
6699
Client Workstation/Server Communications Port
(RPC):
135
The following port numbers are read from the dvmrtable of your FCWnx system.
Server Workstation Video Streaming Port:
8088
Used by the video server to send streaming
video.
Start Video Communications Port Range (3)
8085
Used by video clients to communicate with
video servers.
These numbers signify a range of ports. Your
application log identifies the specific ports
that are opened. Additionally, your firewall
application identifies which ports are on or
off.
Start Digital Video Viewer Port Range (20)
8089
Additional ports used by video clients to
communicate with video servers.
These numbers signify a range of ports. Your
application log identifies the specific ports
that are opened. Additionally, your firewall
application identifies which ports are on or
off.
Note:
If you change any setting, you are opening firewall ports and changing how video communicates. It is
required that each computer in your FCWnx system be changed to the identical setting. Then, restart services.
Click Finish to save and close this application. The settings are automatically saved to your computer.
Navigation
Typical Microsoft Windows navigation is used in this application. Selecting menu bar, drop-down menu,
workspace items, and task bar options are typical Microsoft navigational procedures. Color or format in text, or
changes in the cursor identify hotspot links to related topics.
1. To make the navigation or topic panes larger:
•
•
Point to the divider between panes. When the pointer displays, hold down the left mouse button
and drag the divider left or right.
Point to any corner of the window. When the pointer changes to a double-sided arrow, hold down
the left mouse button and drag the corner.
2. Move up or down the topic window by clicking the scroll bar on the right side of the topic pane.
3. To save the position of any main application or external application window, select Save Position from
the Window menu. Close the window. When re-opened, the window displays in the saved position.
7
8
Facility Commander Wnx 7.5
User Manual
Log on/log off or Shut down the computer
Enter your log in ID and password:
•
•
Note:
To log in to the program from the File menu.
To quit the program using the Close button in the top right corner of the FCWnx application window.
The default Login/logout ID is secure and the default password is SecurityMaster08 (case sensitive). If you
purchased your system from GE Security, the default ID and Password are set for you.
UPGRADES: Versions of Secure Perfect 4.0 and earlier did not require case-sensitive default login passwords.
When upgrading from a version of Secure Perfect or earlier, you may experience a problem logging in. If you
have never changed it, your system default password may be set to initial caps, as in 'Master' and not 'master.'
Logoff
The Logoff option on the File menu lets you log off of the FCWnx session without closing the program. A
message box displays. Click OK to log off of this application (logging off allows an operator to log off and
another operator to log in without ending the program) or Cancel to cancel the logoff process. While logged
off, no one can enter data into the application; however, the application continues to communicate with the
controllers, store alarm and credential transactions in the history database, and notify you of alarms based on
your facility assignment. Refer to the Client form for information on turning alarm notifications on and off.
Note:
The FCWnx services are still running but you do not receive any alarm notifications. Do not shut down services unless
you are instructed or the system requires maintenance.
Shutting down
CAUTION:
It is essential that you shut down FCWnx and your computer properly.
If you are logged in to the FCWnx application, you must first log off before shutting down the computer. We
recommend that you stop all FCWnx Services before shutting down the computer.
Note:
You must have Administrative rights to stop FCWnx services.
To shut down the services:
1. Click Start, Settings, Control Panel, Administrative Tools, and then Services. Scroll to FCWnx
Diagnostics. Right-click on FCWnx Diagnostics, and then click Stop (If you select to shut down this
service first, a message displays informing you that the other services must be shut down first. If you
select to do that now, all other services shut down, and then Diagnostics will shut down.).
2. Exit Control Panel.
3. From the taskbar, click Start, and then Shut Down.
4. From the Shut Down Windows form, verify that “Shut down” is selected and click OK.
Menus
Following a successful login, your application window displays.
Chapter 1
Introduction
Figure 1. Application window
Menu Bar
Application Toolbar
Record Toolbar
Application Group Pane
Table 4.
Form fields
Element
Description
Menu Bar:
Select a menu bar item to display a drop-down group of related options. Enabled
options on the drop-down menus are preceded with a check
icon.
File
Click to display File menu selections. See Table 6 on page 13.
Search
Click to display Search menu selections. See Table 7 on page 15.
View
Click to display View menu selections. See Table 8 on page 16.
Reports
Click to display Reports menu selections. See Table 9 on page 17.
Window
Click to display Window menu selections. See Table 10 on page 18.
Help
Click to display Help menu selections. See Table 11 on page 19.
Application Toolbar:
Click to access frequently used forms.
Person
Opens the Person form.
Activity Monitor
Opens the Activity Monitor.
Alarm Monitor
Opens the Alarm Monitor.
9
10
Facility Commander Wnx 7.5
User Manual
Table 4.
Form fields (continued)
Element
Description
Graphics Console
Opens the Graphics Console application. (If your system is licensed for this feature, the
icon displays.)
Video Console
Opens the Video Console application. (If your system is licensed for this feature, the icon
displays.)
Manual Control
Opens Manual Control.
Help
With an application form displaying, you can click the ? icon, and then drag the ? over
any area and click again. A window opens with information pertaining to the selected
section of your form.
Record Toolbar:
Click any button on this standard toolbar for associated result.
Add Record
Click to add a record. The Add Record menu option creates a new record preloaded with
default data. This is the best way to start or add a new record because the default data
often saves you from entering the data. The Add Record option is available only when a
form is open, contains records, and you have been given permission to update records.
Save
Click to save the current record. The Save Record menu option saves changes made to
the current record into the database. Unsaved entries are discarded. The Save Record
option is available only when a form is open, and you have been given permission to
update records.
Print Preview
Click to preview before printing. The Print Preview option lets you preview before printing
and is available only when a Report form is displaying. A printer must be added to your
FCWnx system in order for this feature to be available. Following completion of all tabs
and options on the Report form, click to preview a copy of your report.
On the Preview Report screen, the Total: field represents the number of records in the
database and not the number of records that matched your search criteria. The zoom %
value always reads 100% regardless of the zoom used.
Delete Record
Click to delete a record. The Delete Record option deletes the current record from the
database.
Note:
Be careful when selecting this option, as deleted records cannot be recovered!
The Delete Record option is available only when a form is open, contains
records, and you have been given all permissions.
Some forms such as the Reader form do not have a delete option.
Search
Click to search. The Search option conducts a search in the database for all records that
match the search criteria data you enter in the form. The records found by the search
are displayed in the search results window. Data can be in any number of fields in the
form or any number of tables.
Only records that match all fields in which data is entered are displayed. An asterisk (*)
can be entered in text boxes to indicate wildcard characters. The Search option is
available only when a form is open that contains records.
Examples:
• Enter S* in an appropriate text box to display any records beginning with S.
• A search for credentialholders with the last name starting with Sm* would yield
such names as Smith and Smythers.
If no search data is entered, all records display. Any column displaying in the list box can
be sorted by clicking on the column heading.
Chapter 1
Introduction
Table 4.
Form fields (continued)
Element
Description
Recall Search
Click to recall a search. The Recall Search option refills the current form with the last
search criteria data. Use this option when you want to recall the last search criteria. The
option does not conduct a search or affect any data in the database. The Recall Search
option is available only when a form that contains records is open.
Clear Search
Click to clear a search. The Clear Search option clears all data in the current form. Use
this option when the form has data and you want to begin a new search. The option
does not conduct a search nor does it affect any data in the database. It only clears data
from the form in preparation for a search or cancels a change to a record. The Clear
Search option is available only when a form that contains records is open.
Table 5.
Application Group pane
Element
Application Group Pane:
Description
• Select any Application Group title in the Application Group pane to display the items
in that group.
• Click on the “X” icon or right-click and select “hide” in the Application Group title bar
to hide the Application Group Pane. To display it again, select the View menu, and
then Application Group.
• Right-click within a group to display a shortcut menu and select Large Icons or
Small Icons (default).
• The license that you purchase determines what items display. (For example, if you
are not licensed for guard tours, the Guard Tours group does not display.)
• The docked pane can be dragged to an alternative position on your application
window.
Personnel
Click to display items in the Personnel group. The following selections display in the
Personnel group pane:
• Person
• Personnel Type
• Department
Credentials
Click to display items in the Credentials group. The following selections display in the
Credentials group pane:
• Credential
• Credential Designer
• Credential Alias (This option is only available if it was installed as part of a Custom
installation)
• Credential Format
• Custom Credential Status
Places & Policies
Click to display items in the Places & Policies group. The following selections display in
the Places & Policies group pane:
• Facility
• Area (If your system is licensed for ACU controllers, this item displays.)
• Intrusion Zone (If your system is licensed for Micro controllers, this item displays.)
• Access Right
11
12
Facility Commander Wnx 7.5
User Manual
Table 5.
Application Group pane (continued)
Element
Description
Monitors & Controls
Click to display items in the Monitors & Controls group. The following items display in the
Monitors & Controls group pane:
• Activity Monitor
• Alarm Monitor
• Client Monitor
• Controller Monitor
• Graphics Console
• Video Console
• Manual Control
• Digital Input Status
• Digital Output Status
Alarms & Events
Click to display items in the Alarms & Events group. The following items display in the
Alarms & Events group pane:
• Alarm
• Alarm Group (If your system is licensed for Micro controllers, this item displays.)
• Alarm Priority
• Routing & Bumping
• Response
• Instruction
• Event Notifier
• Video Event Trigger
• Mode Event Trigger
Security Devices
Click to display items in the Security Devices group. The following items display in the
Security Devices group pane:
• Controller
• Reader
• Digital Input
• Digital Output
• Digital Output Group
• DVR
• Camera
• Camera Preset
Elevators
Click to display items in the Elevators group. The following items display in the Elevators
group pane:
• Elevator
• Floor
Guard Tours
Click to display items in the Guard Tours group. The following items display in the Guard
Tours group pane:
• Guard Tour
• Guard Tour Point (If your system is licensed for Micro controllers, this item displays.)
Chapter 1
Introduction
Table 5.
Application Group pane (continued)
Element
Description
Graphics
Click to display items in the Graphic Maps group. The following items display in the
Graphic Maps group pane:
• Graphics Map Editor
• Graphics Symbol Editor
• Graphics Preference
Schedules
Click to display items in the Schedules group. The following items display in the
Schedules group pane:
• Time Schedule
• Event Schedule (If your system is licensed for Micro controllers, this item displays.)
• Mode Schedule
Gateways & Interfaces
Click to display items in the Gateways & Interfaces group. The following items display in
the Gateways & Interfaces group pane:
• CCTV Interface
• API Connection
Administration
Click to display items in the Administration group. The following selections display in the
Administration group pane:
• Preferences
• Client
• Client Group
• Operator
• Permission
• Transaction Override
• Region
• Auto update (see auto update)
• Video CD Burner
Diagnostics
Click to display items in the Diagnostics group. The following items display in the
Diagnostics group pane:
• Diagnostic Setting
• Diagnostic Viewer
• Logfile
The following tables list the options displayed in the drop-down menu of each Menu bar selection.
Table 6.
File menu
Element
Description
Save Record
Click to save the current record. The Save Record menu option saves changes made to
the current record into the database. Unsaved entries are discarded. The Save Record
option is available only when a form is open, and you have been given permission to
update records.
New Record
The New Record menu option creates a new record preloaded with default data. This is
the best way to start or add a new record because the default data often saves you from
entering the data. The New Record option is available only when a form is open, contains
records, and you have been given permission to update records. The Add Record icon on
the Record toolbar has the same features as the New Record menu option.
13
14
Facility Commander Wnx 7.5
User Manual
Table 6.
File menu (continued)
Element
Description
Delete Record
Click to delete record. The Delete Record option deletes the current record from the
database.
Note:
BE CAREFUL when selecting this option, as deleted records cannot be
recovered! The Delete Record option is available only when a form is open,
contains records, and you have been given all permissions.
Some forms such as the Reader form do not have a delete option.
Notes
The Notes menu option opens a text file, notes.txt, into which you can enter sitespecific information. The program used to edit this file is the program that has been
associated with .txt files in Windows (usually Notepad). The notes.txt file is saved
to your desktop by default.
Logoff
Click to display a dialog box. Enter your logoff ID and Password to quit the FCWnx client
program.
Print Setup
Select Print Setup to open the Print Setup Window, allowing you to select your printer,
printer properties, paper source, and orientation.
If your printer is networked, you may be required to adjust the security properties. At the
computer that owns the printer, navigate to the Properties window for the selected
printer. Click Start, Settings, Printers. Select the printer and then right-click. From the
shortcut menu, select Properties. On the Security tab of the Properties window, proceed
to add Anonymous Login to the Group or user names.
Print Preview Report
The Print Preview Report option lets you preview before printing and is available only
when a Report form is displaying. A printer must be added to your system in order for
this feature to be available. Following completion of all tabs and options on the Report
form, click to preview a copy of your report.
Note:
On the Preview Report screen, the Total: field represents the number of records
in the database and not the number of records that matched your search
criteria. The zoom % value always reads 100% regardless of the zoom used.
Print Report
The Print Report option lets you send the current report to a defined printer. This option is
available only when a Report form or report is displaying.
Export
This option is available only when a Report form is displaying. The Export option lets you
select an export format for your report. There are a variety of formats available including
text, Word for Windows, Lotus, HTML, and Excel. Select an export destination for the
report to a disk file, exchange folder, Lotus Domino, Lotus Domino Mail, or Microsoft Mail
(MAPI).
Save Template As
Select this option to create a new template and save under a new file name. This option
is available only when a Report form is displaying.
Set As Default Template
Use this option to select a template to use as the default template. This option is
available only when a Report form is displaying with a loaded template. While the
selected Report form is displaying, select Set As Default Template. A message displays
stating the current template is now the default template for this form. This template is
automatically loaded whenever you open this report form. You cannot undo this
election; however, you can later display and assign another report as the default.
Chapter 1
Introduction
Table 6.
File menu (continued)
Element
Description
Create Default Template
Select this option to create a default report template. This option is available only when a
Report form is displaying.
Note:
If a specific date is part of this template, it uses that date whenever this report
is run; therefore, it is important to update the calendar criteria as needed.
Delete Template
Select this option to delete the current report template. This option is available only when
a Report form is displaying with a loaded template.
Check for Update
This item is enabled when the Enable Auto Update option is selected on the Auto Update
Configuration form of the Diagnostics group.
Each time you log in, your system for this application checks for updates. Also, at any
time, you may select this item to begin a search of the configured Web site for updates
to the system for this application. This process searches for new upgrades, compares the
version, and if the patch or update needs to be applied, a dialog box displays a message.
• Click OK to close the dialog box and begin the update process.
• Click Cancel to close the dialog box and process the upgrade at another time.
• If the Web site cannot be reached, a message informs you that communication
failed. Recheck your update configuration settings and try again.
• If no new updates are available for your system, a message displays informing you
that your system is up-to-date.
Configure Ports
Select this option to configure firewall and DCOM settings on your computer.
Change Password
The Change Password option opens the Change Password Dialog Box that lets you
change the password of the operator currently logged in.
Note:
Exit
Table 7.
This dialog box is available only if this operator has permission to change the
operator password, as assigned on the Operator tab of the Operator form.
Click to display a dialog box. Enter your logoff ID and Password to quit the FCWnx client
program.
Search menu
Element
Description
Clear Search
The Clear Search option clears all data in the current form. Use this option when the form
has data and you want to begin a new search. The option does not conduct a search nor
does it affect any data in the database. It only clears data from the form in preparation
for a search or cancels a change to a record. The Clear Search option is available only
when a form that contains records is open.
Recall Search
The Recall Search option refills the current form with the last search criteria data. Use
this option when you want to recall the last search criteria. This option does not conduct
a search or affect any data in the database. The Recall Search option is available only
when a form that contains records is open.
15
16
Facility Commander Wnx 7.5
User Manual
Table 7.
Search menu (continued)
Element
Description
Search
The Search option conducts a search in the database for all records that match the
search criteria data you enter in the form. The records found by the search are displayed
in the search results window. Data can be in any number of fields in the form or any
number of tables.
Only records that match all fields in which data is entered are displayed. An asterisk (*)
can be entered in text boxes to indicate wildcard characters. The Search option is
available only when a form is open that contains records.
Examples:
• Enter S* in an appropriate text box to display any records beginning with S.
• A search for credentialholders with the last name starting with Sm* would yield
such names as Smith and Smythers.
If no search data is entered, all records display. Any column displaying in the list box can
be sorted by clicking on the column heading.
Table 8.
View menu
Element
Description
Status Bar
Status Bar is a toggle option and determines whether or not you view the status bar at
the bottom of your screen. Clear the check box to hide the status bar from view. The
status bar displays the status of this application, indicating the current operator,
communication port status, and whether there are unacknowledged alarms. Also see
Status Bar on page 19.
Menu Buttons
The Menu Buttons option determines whether or not the graphics display beside options
in the drop-down menus.
Note:
Clear the check box to hide the graphics from view.
Split
The Split option lets you increase or decrease the horizontal size of the tabs and
windowpanes on a form.
Next Pane
The Next Pane option moves the cursor between the main form, the tabs, and the search
results window, if there is one.
Application Group
This is a toggle option and determines whether or not the Application Group pane
displays along the left side of the application window.
Additionally, you can drag the docked Application Group pane to an alternative position
on your application window.
Application Toolbar
This is a toggle option and determines whether or not the Application toolbar displays at
the top of the application window.
Record Toolbar
This is a toggle option and determines whether or not the Record toolbar displays at the
top of the application window.
Select Facility
The Select Facility option opens the Set Active Facilities form that lets you change the
facilities currently in use.
Chapter 1
Introduction
Table 8.
View menu (continued)
Element
Description
Enable Alarm Video Popup
Select this item to enable/disable an automatic live video pop-up window when an alarm
occurs with an associated alarm trigger. By default, this is a toggle option and is not
selected. This option must also be activated by selection of Video Window Auto Pop-up
on the Video Event Trigger form, if the operator has been assigned permission for Digital
Video Viewer.
If operator permission for Digital Video Viewer is not made available, this option does not
activate even though selected here. Once selected, the operator login retains this feature
until disabled, no matter which computer in the system was used for logging in.
Table 9.
Reports menu
Element
Description
Person
The Person option displays the Person Report form that lets you create a report on the
people in the database.
Credential
The Credential option opens the Credential Report form that lets you create a report on
the credentials in your system.
Administration
The Administration option opens the Administration Report form that lets you create a
report on the administrative aspects of your system, such as alarm instructions, events,
host preferences, operators, permissions, responses, schedules, archives, clients, and
floors.
Device Configuration
The Device option opens the Device Report form that lets you create a report on devices
such as controllers, readers, alarms, alarm groups, digital outputs, digital output groups,
digital inputs, DVRs, cameras, and elevators.
Schedule
The Schedules/Events option opens the Schedule Report form that lets you create a
report on the schedules and events defined in this application.
Access
The Access option opens the Access Report form that lets you create a report based on
persons in this application that have access rights and to any of the specific areas.
Floor Access
The Floor Access option opens the Floor Access Report form that lets you create a report
based on the floors defined in the system and the access granted to each floor.
Area (ACU only.)
The Area report option opens the Area Report form that lets you create a report based on
the secure area transactions in the system.
Alarm History
The Alarm History option opens the Alarm History Report form that lets you create a
report based on the history of alarm activity.
Credential History
The Credential History option opens the Credential History Report form that lets you
create a report based on the history of credential transactions in the system.
Operator History
The Operator History option opens the Operator History Report form that lets you create
a report based on the history of operator activity.
Zone History (Micro only.)
The Zone History option opens the Zone History Report form that lets you create a report
based on the history of intrusion zone transactions in the system.
DI History
The DI History option opens the DI History Report form that lets you create a report
based on the history of digital input transactions in the system.
17
18
Facility Commander Wnx 7.5
User Manual
Table 9.
Reports menu (continued)
Element
Description
Guard Tour History (Micro only.)
The Guard Tour History option opens the Guard Tour History Report form that lets you
generate a report of completed tours displaying tour activities such as start points, hits,
invalid points, pauses, resumes, tour end points, tour time exceeded, manual start and
manual stop.
Time and Attendance History
(Micro only.)
The Time and Attendance History option opens the Time and Attendance History Report
form that lets you create a report based on the history of time and attendance activity
and the preferences you select.
Area History (ACU only.)
The Area History option opens the Area History Report form that lets you create a report
based on the history of secure area transactions in the system.
Roll Call
The Roll Call option opens the Roll Call Report form that lets you create a report based on
preferences selected for people who last entered a facility by way of a specified reader.
External
The External Reports option opens a Launch External Reports dialog that lets you select
an executable program or report that was not created within this application. For
example, you can access reports you created using a third party report generator such
as Crystal Reports or Microsoft Access 2002.
Table 10. Window menu
Element
Description
Cascade
The Cascade option lets you control multiple windows or forms. If you have several
forms open but not visible, select this option for a cascading view of your forms with the
active form taking precedence on the display screen.
Tile
This option lets you control multiple window or forms. If you have several forms open but
not visible, select this option to view all forms at one time tiled side-by-side or one over
the other on your display monitor.
Arrange icons
This option lets you control multiple windows or forms. If you have several forms in
progress, you can temporarily minimize a form from view. Select this option to arrange
the minimized form icons across the bottom of your display screen.
Save Position
This option resets all main application and external application windows to the top left of
your monitor.
Reset Positions
This option saves the position of any open external monitor. The next time a saved
window is opened, it opens in the saved position.
Chapter 1
Introduction
Table 11. Help menu
Help Topics
Selection of this option starts the Help system.
• The left Help navigation pane displays books and their contents, index entries, and a
search tab.
• Click and drag the ? of the Application Toolbar over any menu bar or toolbar item
and a window opens with information pertaining to the selection.
• With an application form displaying, you can click the icon, and then drag the over
any area of the open form and click again. A window opens with information
pertaining to the selected section of your form.
User Manual
Selection of this option launches the User Manual for this application.
About This Application
Help Menu
Select About . . . to display a license summary window that lists the following:
• Application Version of software installed on your computer
• Service Pack (if any)
• Copyright information
• Detailed list of licensing features
• Deployment preferences of this application on your system
• List of supported DVRs (enabled only if applicable to your system)
• Address and phone number of GE Security
Status Bar
The Status Bar is a toggle election on the View menu, and determines whether or not this toolbar is visible
across the bottom of the FCWnx screen. The Status Bar indicates the current operator, communication port
status, and whether there are unacknowledged alarms. It may look similar to the following:
.
Element
Description
secure
Displays the currently logged user ID that, by default, is secure.
Communication Port Status
Displays the current state by the following phrases and colors:
• Controller Coms On (Green): All controllers for the operator's facility are online
• Controller Coms Off (Blue): All controllers for the operator's facility are offline.
• Controller Coms Error (Yellow): Some controllers for the operator's facility are in
error state.
Unacknowledged Alarms
Displays the current state by color:
• (Red): There are unacknowledged alarms displaying on the Alarm Monitor form.
• (Green): There are no unacknolwedged alarms.
19
20
Facility Commander Wnx 7.5
User Manual
Creating, editing, and deleting records
FCWnx forms use a standard method to add, edit, or delete records.
Creating records
To create a record:
1. From the Application Group pane, such as Personnel, select a secondary item, and then click the
appropriate tab. For example, the Personnel, Person, or Personnel tab.When a form is opened, the
record list window is empty.
2. From the tool bar, click Search
to verify that a record does not already exist.
A record list window displays with all of the existing records or displays the results of search
operations and lets you quickly navigate through the records found by a search.
3. Click New
.
The New Record menu option creates a new record preloaded with default data. This is the best
way to start or add a new record because the default data often saves you from entering the data.
The New Record option is available only when a form is open, contains records, and you have
been given permission to update records. The Add Record icon on the Record toolbar has the same
features as the New Record menu option.
4. Complete the form.
A detailed explanation of each field on the form can be found on the form fields table for each
form in this guide. Not all fields may display on your form, or they may display as read only and
disabled. When all required information is complete, you are able to save the record.
5. Click Save
.
If you are unable to save or additional information is required, a message displays, informing you of
the additional requirements in order to save this record. Complete the additions or necessary changes
and click Save again.
Editing records
To edit a record:
1. From the Application Group pane, such as Personnel, select a secondary item, and then click the
appropriate tab. For example, the Personnel, Person, or Personnel tab.When a form is opened, the
record list window is empty.
2. From the tool bar, click Search
.
A record list window displays with all of the existing records or displays the results of search
operations and lets you quickly navigate through the records found by a search.
Chapter 1
Introduction
3. Select a record from the list.
•
•
Click a single record in the record list to select that record for editing. The keyboard up and down
arrows can also be used to move from one record to the next. The field values display in the
various tabs of the form.
More than one row can be selected in order to change a value for multiple records at one time, for
example, updating a Department value for all selected records. Multiple rows can be selected by
left-clicking the first desired record, dragging the mouse, and then releasing it on the last desired
record. Nonsequential rows may be added to the selection by holding down the Ctrl key on the
keyboard while selecting the row with the mouse. All selected rows are highlighted. Changing a
field value changes it for all selected records.
4. Make the necessary changes to the form.
5.
Complete the form.
A detailed explanation of each field on the form can be found on the Form Fields table for each
form in this guide. Not all fields may display on your form, or they may display as read only and
disabled. When all required information is complete, you are able to save the record.
6. Click Save
.
If you are unable to save or additional information is required, a message displays, informing you of
the additional requirements in order to save this record. Complete the additions or necessary changes
and click Save again.
Deleting records
To delete a record:
1. From the Application Group pane, such as Personnel, select a secondary item, and then click the
appropriate tab. For example, the Personnel, Person, or Personnel tab.When a form is opened, the
record list window is empty.
2. From the tool bar, click Search
.
A record list window displays with all of the existing records or displays the results of search
operations and lets you quickly navigate through the records found by a search.
3. Select a record from the list.
•
•
Click a single record in the record list to select that record for deletion. The keyboard up and down
arrows can also be used to move from one record to the next.
Multiple rows can be selected by left-clicking the first desired record, dragging the mouse, and
then releasing it on the last desired record. Nonsequential rows may be added to the selection by
holding down the Ctrl key on the keyboard while selecting the row with the mouse. All selected
rows are highlighted.
4. Click Delete
.
21
22
Facility Commander Wnx 7.5
User Manual
5. Click Save
. If any record dependencies exist for the record you are deleting, you are not able to
delete. You must remove the dependencies before you return to delete this record from the database.
Chapter 2 System preferences
This chapter provides instructions for initial setup of system preferences,
facilities, clients, permissions and operators in your Facility Commander Wnx
system.
In this chapter:
Overview . . . . . . . . . . . . . . . . . . . . . . . . . . . . . . . . . . . . . . . . . . . . . . . . . 24
Configure preferences . . . . . . . . . . . . . . . . . . . . . . . . . . . . . . . . . . . . . . . 24
Configure regions . . . . . . . . . . . . . . . . . . . . . . . . . . . . . . . . . . . . . . . . . . 40
Global configuration regional rules . . . . . . . . . . . . . . . . . . . . . . . . . . . . 46
Replication and synchronization conflicts . . . . . . . . . . . . . . . . . . . . . . . 47
Define facilities . . . . . . . . . . . . . . . . . . . . . . . . . . . . . . . . . . . . . . . . . . . . 48
Identify and configure clients . . . . . . . . . . . . . . . . . . . . . . . . . . . . . . . . . 49
Define clients groups . . . . . . . . . . . . . . . . . . . . . . . . . . . . . . . . . . . . . . . 59
Create permissions . . . . . . . . . . . . . . . . . . . . . . . . . . . . . . . . . . . . . . . . . 60
Determine and create operators . . . . . . . . . . . . . . . . . . . . . . . . . . . . . . . 63
What’s next? . . . . . . . . . . . . . . . . . . . . . . . . . . . . . . . . . . . . . . . . . . . . . . 67
24
Facility Commander Wnx 7.5
User Manual
Overview
Complete initial setup of system preferences, facilities, client computers, permissions, and operators in your
Facility Commander Wnx system before defining other records. Complete the steps in the order presented.
Configure preferences
Complete the tabs on the Preferences form, Administration group, to assign global settings used throughout the
FCWnx system. You should configure the global system preferences before you begin loading your database
by creating records and assigning permissions.
System Settings tab
Use the System Settings tab to set the general system settings.
Figure 2. System Settings tab
Chapter 2
System preferences
Table 12. Form fields
Element
Description
Archive Database
Select an option to schedule archiving history. Archiving creates a copy of the latest
history transactions, leaving your history database empty. The default value for this
option is Monthly. If you select:
Daily: The archive is appended every day beginning at 11:59:58 p.m.
Weekly: The archive is appended every week on the day that you select, beginning at
11:59:58 p.m. (You must select a day of the week.) Any change in the scheduling occurs
immediately. For example, if archiving is taking place on Tuesdays and the schedule is
revised to archive on Wednesday, the archiving occurs one day later, on Wednesday.
Monthly: The archive is appended on the last day of the month beginning at 11:59:58
p.m.
The FCWnx services do not have to be running. Archiving occurs as long as SQL Server
Agent services are running. When FCWnx is installed with SQL 2008 Express, the SQL
Agent does not run. The windows scheduler runs instead and is responsible for executing
the archiving application tasks.
Database Connection
This feature lets you configure the amount of time that elapse before your FCWnx
system detects and advises you that your database is not accessible.
Timeout (sec): The default is 30 seconds. The minimum is 3 seconds; the maximum is 120
seconds. 1) In an FCWnx Global configuration, this is the amount of time until a Regional
failover begins. 2) In a typical FCWnx configuration, this is the amount of time before
FCWnx transactions are saved, FCWnx services shut down, and a message advises you
to repair your database.
Retry: The default is 3 retries. The minimum is '0'; the maximum is 5 retries.
Photo Aspect Ratio
Select or enter a number for the height and the width. The aspect ratio controls the
relationship between the height and width of the photos. This setting controls the photos
displayed in the Capture program, on the Person form, and in the Credential Designer
program.
Console alarm sound
Continuous/Short: Select Continuous to sound a continuous tone when alarms are
detected. Select Short to sound a short tone when alarms are detected.
Enable global T&A
Select this check box if you want the entry status (either IN or OUT) for all credentials
using T&A readers to be sent to and enforced by all controllers. Disabling the check box
requires each controller to enforce T&A independently.
Enable global APB
Select this check box if you want the entry status (either IN or OUT) for all credentials
using anti-passback readers to be sent to and enforced by all controllers. Disabling the
check box requires each controller to enforce anti-passback on readers within each
controller.
Enable unique & required
Employee Number
(Selected and unavailable by default.) This check box is only available after converting
and upgrading a previous database. This feature enforces assignment of unique and
required employee numbers for each person record.
25
26
Facility Commander Wnx 7.5
User Manual
Table 12. Form fields
Element
Description
Grant Access on Duress
Select this check box to allow a door to open, and to signal a threatening situation. With
a valid access right and valid credential, a PIN code is entered at the reader and one of
the following:
(a) Micro controllers: the final digit is incremented by + 1. (That is, 1232 becomes 1233;
1239 becomes 1230. Note that only the final digit changes.)
(b) ACU controllers: the entire number is incremented by +5. (That is, 1239 becomes 1244.)
This sequence generates a duress alarm that displays on the Alarm Monitor similar to the
following: 0001-1-01 Duress. The Activity Monitor displays activity type as Duress Activity.
The default setting for your system includes this feature already selected. Clear this
check box if you do not want this feature.
Credentials
Enable line coloring for suspended credentials: Select this check box to enable the
FCWnx system to display suspended person and credential records in red.
Event Notifier E-mail Support
Enable: Select this check box to activate the e-mail notification option. The following email dialog boxes become available:
To E-mail Address Field: Select a field name from the drop-down list that is assigned as
an e-mail address. 1) Labels for these field names are assigned on the User Fields and
Address Fields tab of this form. 2) The content of each field is entered in the User Fields or
Address fields on the Person form.
Note:
Global Edition systems: To ensure successful e-mail alarm notification across
regions in a Global configuration, the Global database server and all Regional
database servers must have identical configuration settings. That is: 1) For all
servers in your Global system, the user field selected for the 'To E-mail Address
Field' must be identical. While configuring each server, select the field that
represents the e-mail address from the drop-down list. 2) All other alarm
notification information is specific to the Regional database server.
SMTP E-mail Server: Enter the name of the server that handles the transfer of e-mail to
and from the e-mail addresses. This dialog box cannot be left blank and accepts up to
256 alphanumeric characters.
From E-mail Address: Enter an e-mail address of the account or person that is
generating this alarm notification such as [email protected]. This dialog box cannot be
left blank and accepts up to 64 alphanumeric characters.
Allow Anonymous Access: This check box is selected by default, permitting the
transmission of an e-mail alarm notification without further authentication. The E-mail
User Name and E-mail Password dialog boxes are not available for entry and not
required with default settings.
If the security requirements of the e-mail server require further authentication, clear the
check box to make available the dialog boxes for entry of an e-mail username and
password:
• E-mail User Name: Enter the user name that the e-mail server uses to validate this
user. This dialog box accepts up to 64 alphanumeric characters.
• E-mail Password: Enter the user password that the e-mail server uses to validate
this user. This dialog box accepts up to 64 alphanumeric characters.
Chapter 2
System preferences
Table 12. Form fields
Element
Description
Access to File Share Directories
Complete these fields to allow FCWnx services to access file share directories, such as
the firmware directory.
By default, these fields are populated with the user name and password of the FCWnx
“secure” user. If the windows user name and password are different than the FCWnx
“secure” user name and password, unselect the Use FCWnx Operator Password for
Above User Name check box, and then enter the user name and password for a user
who has access to the file share directories (a member of the SPAdmin group).
Windows User Name: This field is automatically populated with the windows user name.
Domain Name: Click the Browse button to open the servers dialog box. From here, you
can select from a list of servers to connect to.
Use FCWnx Operator Password for above User Name: This check box is selected by
default. Click on the checkmark to remove it, enabling the Password field.
Password: Enter the windows password.
Company and site code (ACU only.) This field contains the 8 digit Company and Site Code. This numeric data must
correspond to the number that is encoded on the access cards. Enter up to 4 digits for
the Company Code and 4 digits for the Site Code. Format: CCCCSSSS where “C” is the
Company Code and “S” is the Site Code.
Max number of PIN digits (ACU
only.)
The PIN is a user modified field that contains the Personal Identification Number of a
cardholder. This setting tells the card readers how many PIN digits to expect. The number
can be a minimum of 4 digits and as many as 6 digits. Enter the number of digits to be
used for a PIN number.
Enable controller for new protocol
only (ACU only.)
When selected, the ACU controller will only communicate with the FCWnx protocol. This
is the software version of physically changing the switch settings on the controller
(Dipswitch 5 on SW3).
How to
1. Select a time interval for archiving your database.
2. Configure the number of seconds that elapse before your FCWnx system detects and advises you that
your database is not accessible.
3. If you are using image badging, set the aspect ratio.
4. Set console alarm sounds.
5. Configure for line coloring for suspended credentials.
6. Enable T&A and APB if applicable to your system.
7. If this is a conversion or upgrade, you can select Enable unique and required Employee Number.
8. Select if you want to enable Grant Access On Duress.
9. Configure if you want Alarm E-mail Notification.
10. Click Save before you exit this tab.
27
28
Facility Commander Wnx 7.5
User Manual
User Fields tab
Complete the User Fields tab to modify the labels for user fields. These labels are used on the Person form and
Credential form.
Figure 3. User fields tab
Table 13. Form fields
Element
Description
Person User Fields
Person User Field Labels: Displays a list of 90 currently assigned labels for the Person
form user fields.
New label: To assign or edit the label of a Person form user field, select a label and enter
the new or edited text in this dialog box. The user field label can be up to 32
alphanumeric characters long.
Credential User Fields
Credential User Field Labels: Displays a list of 20 currently assigned labels for the
Credential form user fields.
New label: To assign or edit the label of a Credential form user field, select a label and
enter the new or edited text in this dialog box. The user field label can be up to 32
alphanumeric characters long.
How to
1. Select a label in the Person User Fields windowpane.
2. Edit the label by entering over the text in the New Label field below this windowpane.
3. Select a label in the Credential User Fields windowpane.
4. Edit the label by entering over the text in the New label field below this windowpane.
5. Repeat for each label field that you want to edit.
6. Click Save before you exit this tab.
Chapter 2
System preferences
Mode/Threat Labels tab
Use the Mode/Threat Labels tab to change the labels of modes and threat levels. These labels are used in
scheduling. Refer to the Event, Time, and Mode Schedule forms for configuration of the modes or threat levels
you have created and labeled here.
Figure 4. Mode/Threat Labels tab
Table 14. Form fields
Element
Description
Mode 1
The default label displays. To change the label, select and enter over the existing text, up
to 30 alphanumeric characters.
Mode 2
The default label displays. To change the label, select and enter over the existing text, up
to 30 alphanumeric characters.
Mode 3
The default label displays. To change the label, select and enter over the existing text, up
to 30 alphanumeric characters.
Mode 4 . . .
For systems using ACU controllers, these additional modes display:
Mode 4
Mode 5
Mode 6
Mode 7
Mode 8
Threat Level 0
Normal conditions (no threat level)
Threat Level 1
Low threat level
Threat Level 2
Medium threat level
Threat Level 3
High threat level
29
30
Facility Commander Wnx 7.5
User Manual
How to
1. Select any one of the mode label fields.
2. Enter over the existing text, up to 30 alphanumeric characters.
3. Repeat for each label field that you want to edit.
4. Click Save before you exit this tab.
Address Fields tab
Use the Address Fields tab to modify the labels of the address fields. These labels are used on the Person form.
Figure 5. Address Fields tab
Table 15. Form fields
Element
Description
Address 1
The default label displays. To edit or create a new label, select and enter text over the
existing text. The address field label can be up to 32 alphanumeric characters in length.
Address 2
Address 3
Address 4
Address 5
How to
1. Select any one of the address fields.
2. Enter over the existing text, up to 32 alphanumeric characters.
3. Repeat for each label field that you want to edit.
4. Click Save before you exit this tab.
Chapter 2
System preferences
Communications tab
Use the Communications tab to select the modems that are to be used for dial-up controllers.
Figure 6. Communications tab
Table 16. Form fields
Element
Description
Installed Modems
Displays all modems currently installed on the PC. To designate a modem for use with a
dial-up controller, enable it by clicking in the box to the left of the modem name so that a
check displays.
Note:
If you have a modem installed for support use, do not select that modem.
For systems using ACU controllers: The modem must be a US Robotic Sportster modem
at the host.
For systems using Micro controllers: The modem must be a Star Comm modem or Hidex
modem at the host.
Modems used with FCWnx must have a Windows modem driver. If there is no modem
matching what is currently on your system, you must add the appropriate modem.
Note:
If the modem is already installed, begin with Step 3.
1.
Click Start, Settings, Control Panel, and then Phone and Modem Options.
2.
When the Options window opens, click the Modems tab. Click Add to open the
Wizard. You can allow Windows to detect your modem or select from a list of
manufacturers. Complete the windows to add your modem. Exit the Wizard
when finished.
3.
When you are returned to the Modem list of the Modem tab, select the
appropriate modem and click Properties.
•
In the Properties window, click the Modem tab. Set the maximum port
speed to 9600. Click OK.
31
32
Facility Commander Wnx 7.5
User Manual
Table 16. Form fields (continued)
Element
Description
•
•
•
For systems using ACU controllers: In the Properties window, click the
Advanced tab. In the Extra initialization commands field, enter the
following: &M0&K0&N6&U6
For systems using Micro controllers: In the Properties window, click the
Advanced tab. In the Extra initialization commands field, verify that the
field is blank.
Click Change Default Preferences to open a properties window with the
General tab displayed. Set Data Connection Preferences as follows:
Port Speed to 9600
Data Protocol to Disabled
Compression to Disabled
Flow Control to Hardware
Click OK.
Disconnect after idle
4.
Click OK.
5.
Exit the Control Panel or continue to set additional modems.
Select the number of minutes you want the system to wait before disconnecting from the
controller when the connection is idle (there is no history or database information being
exchanged). If you select 0, the connection remains active indefinitely and the host never
drops communication with the controllers.
How to
1. To designate a modem for use with a dial-up controller, enable it by clicking in the box to the left of the
modem name so that a check displays. If you have a modem installed for support use, do not select that
modem.
2. Select the number of minutes you want the system to wait before disconnecting from the controller
when the connection is idle.
3. If you cross a firewall to communicate with a controller, review Table 16 above.
4. Click Save before you exit this tab.
Chapter 2
System preferences
Clear Archive tab
Use the Clear Archive tab to configure your system database archive clean-up.
Figure 7. Clear Archive tab
Table 17. Form fields
Element
Description
Earliest Date in Current Archive DB If you have an Archive database, this date displays when you click Show Date.
Latest Date in Current Archive DB
If you have an Archive database, this date displays when you click Show Date.
Show Date
If you have an Archive database, click Show Date.
• The Earliest Date in Current Archive DB and Latest Date in Current Archive DB
displays.
• If you do not have an Archive database, the two date fields state No Record.
Archive Clean Period
Delete
• Start Date: Select the Start Date of the data that you want to remove from your
database by selecting the month, and then the day to begin your archive.
• End Date: Select the End Date of the data that you want to remove from your
database by selecting the month, and then the day to end your archive.
Click after selecting the Start Date and End Date to remove from your database.
Note:
Archive database deletion takes place in the background. Progress is indicated
on the status bar. This may take hours to complete and is dependent on the size
of the Archive database and the hardware components of your computer.
How to
1. Click Show Date to display the Earliest Date in Current Archive DB and Latest Date in Current
Archive DB.
2. Set the Start Date and End Date, for the dates that you want removed from your database archive.
3. Click Delete to clean that portion of your database archive. The removal takes place in the
background.
33
34
Facility Commander Wnx 7.5
User Manual
Backing up data
A backup is a copy of selected data. Since this application does not contain a backup option, you can use any
method you like to back up the data. Because the server computer contains the database, there is no need to
back up your application folder on your client computers.
You should keep two sets of backups of the following server computer files:
•
•
•
•
•
•
•
Database: Contains configuration data such as credentials and controllers.
History: Contains current history including credential transactions and operator history.
Archive: Contains the latest copy of this application history data.
Images: Contains the picture files of credential holders.
Signatures: Contains the signature files of credential holders.
Graphics: Backup of this data is needed if you are using Graphics Console. Contains the alarm
graphics maps.
Video: Backup needed if you are using video surveillance options. Contains the video files.
Note:
The server program must not be running when you attempt a backup of images, signatures, graphics or video!
You should back up this data more often since it changes so frequently. While your internal policies may
dictate your backup requirements, we recommend that you create a backup at least every week.
Entire Installation of this application
•
•
Note:
The entire application folder should be backed up when you first set up the system and have confirmed
that it is working, and any time you upgrade. It is very important that you also back up the registry
settings. In most backup programs, you are prompted to back up these settings.
Always maintain a current backup. Should you have any problems with your system, you can always
restore from your backup.
Enterprise Edition systems use SQL Server utilities to back up the database, History, and Archive.
Professional Edition systems use the FCWnx Database Maintenance Utility to back up the Database, History, and
Archive information (tables and queries).
Archiving
An archive is a history of transactions. The archive is created automatically by this application, based on the
time interval that you selected on the Preferences form (Daily, Weekly, or Monthly). When you select Weekly,
you must also select a day of the week.)
If you select:
•
•
•
Daily: The archive is appended every day beginning at 11:59:58 p.m.
Weekly: The archive is appended every week on the day that you select, beginning at 11:59:58 p.m.
(You must select a day of the week.) Any change in the scheduling occurs immediately. For example, if
archiving is taking place on Tuesdays and the schedule is revised to archive on Wednesday, the
archiving occurs one day later, on Wednesday.
Monthly: The archive is appended on the last day of the month beginning at 11:59:58 p.m.
The services for FCWnx do not have to be running. The archiving process takes place independently of this
application. As long as the SQL Server Agent services are running, the archive process occurs.
Chapter 2
System preferences
Determine the status of the SQL Server Agent services by navigating to Settings, Control Panel, and then
Component Services through Windows Explorer. Check the Status of SQLAgent$SPSQL for FCWnx.
Note:
Archiving is performed on the database server computer only.
Archiving creates a copy of the latest history transactions and then removes all the data from the history
database. The data is appended to the Archive database until you decide the Archive database has grown too
large.
The factors in determining whether the Archive database is too large can be:
•
•
•
The performance you receive when running history reports.
The length of time you need to keep data.
Other factors specifically related to your installation.
To remove data from the Archive database:
1. Back up your Archive database for this application. You have to back up the Archive database using
utilities provided by SQL Server 2005/2008 or by using the Database Maintenance Utility in this
application. After you perform the backup, label and store the media in a safe place.
WARNING: If you do not back up the SecurePerfectArchive, you lose all the data stored in it.
2. Select the Administration group, and then Preferences. The Preferences form opens with the System
Settings tab displayed.
3. Select the Clear Archive tab. The Earliest Date in Archive DB and Latest Date in Archive DB fields
indicate dates once you have clicked the Show Date button. If you do not have any records in your
Archive database, the two date fields state No Record.
4. Choose the Start Date of the data that you want to remove from your Archive database by selecting the
month, and then the day to begin your archive.
5. Choose the End Date of the data that you want to remove from your Archive database by selecting the
month, and then the day to end your archive.
6. Click Delete.
7. Click OK.
Note:
The deletion of an Archive database is taking place in the background. Progress is indicated on the status bar
in the lower right side of the screen. The process may take hours to complete. The length of time is dependent
on the size of the Archive database and the hardware components of your computer.
8. Upon completion, a message displays: The records from the Archive database has been
successfully deleted! Click OK.
Appending Archive databases
If you have a backup of a SecurePerfectArchive 3.x or later database, the data can be restored using the
Database Maintenance Utility for this application. Backup and restore functions are detailed in the installation
manual.
The Database Maintenance Utility for this application also appends credential history, alarm history, operator
history, and where appropriate, digital input history, zone history, and DVR history data to the current Archive
database. Current archive data is not affected.
35
36
Facility Commander Wnx 7.5
User Manual
In order to use the Append utility, you must meet the following criteria:
•
•
•
•
Backup Archive files must be restored to a local or mapped network directory folder.
Free disk space that equals at least three times the size of your database backup file.
The 'sa' password available.
Sufficient time and patience to complete the procedure.
To append data:
1. Open the Database Maintenance Utility and select Append from the menu bar.
2. Navigate to the drive on the local computer where the backup file is located.
3. Select the folder in which the backup file is located.
4. Select Archive from the Backup Source File list.
5. Drag and drop the backup Archive file to the Archive databases Only: dialog box.
6. Enter the 'sa' password.
7. Click Append.
8. The Append process can take a considerable amount of time, depending on the size of the backup.
During the Append process, the application looks like it is not responding. This is normal.
9. When you have finished using the data, we recommend that you delete the appended data using the
Preferences form, Clear Archive tab. This keeps the current Archive file from becoming too large in
size.
Restoring databases
Complete instructions for Restore functions are detailed in the installation manual that came with this software.
Restoring your databases depends on your system and how you performed your backups.
Note:
For Professional Edition systems, you can restore the backup application databases using the Database Maintenance
Utility.
Chapter 2
System preferences
Security tab
The Security tab lets you select the preferences for passwords and credentials used in the FCWnx system.
Figure 8. Security tab
Table 18. Form fields
Element
Description
Password
Minimum Length (characters): This field accepts 1 to 20 characters. Enter a number,
and then select those features that you want to enforce for this password:
Cannot begin with a numeric character: Select if a password cannot begin with a
numeric character.
Cannot end with a numeric character: Select if a password cannot end with a numeric
character.
Must be mixed case (contain both upper and lower case characters): Select if a
password must be mixed case (contain both upper and lower case characters).
Must contain both alpha and numeric characters: Select if a password must contain
both alpha and numeric characters. If selected, this option enables the Minimum
numeric characters control field.
Minimum numeric characters: Enter a number that represents the number of numeric
characters for this password. The range for this selection is 1 to 18 characters with at
least 1 alpha character.
Credential
Hide PIN Number: This determines whether or not the actual PIN numbers display on the
Credential form and in a Credential History Report. If selected, the numbers are hidden
and replaced by asterisks in the PIN Number field.
37
38
Facility Commander Wnx 7.5
User Manual
Table 18. Form fields
Element
Description
Automatic Credential Suspension
Enable daily scheduler: Select this check box to automatically suspend credentials that
have not been used for a specified number of days. A daily routine automatically runs at
12:01AM to check all credentials in the database that are set to “Active” against the
number of days selected in the field Days of Inactivity.
Include issued but unused credentials: Select this check box to suspend credentials
that were issued but never used.
Days of Inactivity: Click the drop-down list to select the number of days the credential is
inactive before automatically suspending it.
Credential User Field Logging: Click the drop-down list to select the Credential User
Field to be used to log the inactivity suspension message which is in the format: Inactivity
Suspension MM/DD/YYYY
where:
MM is the two-digit month
DD is the two-digit year
YYYY is the four-digit year
How to
1. Assign the minimum number of characters allowed for a password in the FCWnx system.
2. Assign the minimum number of numeric characters allowed for a password in the FCWnx system.
Note:
If the current operator has permission to change their password, the preferences selected here display in the
Change Password window as reminders.
3. Click Save before you exit this tab.
Chapter 2
System preferences
ACU Settings tab (ACU only)
Note:
The ACU Settings tab is enabled for input for systems using ACU controllers only.
Use the ACU Settings tab to assign an 8-digit numeric code associated with the sites of your company business
units.
Figure 9. ACU Settings tab
Table 19. Form fields
Element
Description
Company/Site Code
Enter the 8-digit number.
• This number is a combination of a 4-digit company code number with preceding
zeros if appropriate, and a 4-digit site code number with preceding zeros, if
appropriate.
• This number can be all zeros.
• This field accepts only numeric digits and must be 8 digits.
• This number corresponds to the number that is encoded in your access cards.
Example: 00670010 = The first four digits indicate your company number (67) with
preceding zeros (0067). The second set of four digits indicate your company site number
(10) with preceding zeros (0010).
Arrows: Click to move your new code number from the input field into the list box of
existing code numbers.
Listbox: This is a display of existing company codes.
Delete: A numeric code can be deleted only if it is not being used in your FCWnx system.
Default Company/Site Code: Select a company/site code to be used as the default
entry.
39
40
Facility Commander Wnx 7.5
User Manual
Table 19. Form fields (continued)
Element
Description
Credentials
Max number of PIN digits: Enter or select a number between 4 and 6 as the number of
allowable digits used as a credential PIN. The maximum number of PIN digits is 6. This
number is assigned on the Credential form.
ACU Protocol
Enable Controller for New Protocol Only: If selected, the ACU controller auto detects
which protocol to use, communicates with this application only, and cannot
communicate with any other application. (The ACU controller must be connected and
online in this application.)
Example: If this option is not selected, it is possible to continue both access control
systems during a transition period to your new software. You may need to run reports
from your previous software, using the identical ACU controllers.
How to
1. Using the guidelines in Table 19, enter an 8-digit number.
Example: 00670010 = The first four digits indicate your company number (67) with preceding zeros
(0067). The second set of four digits indicate your company facility number (10) with preceding zeros
(0010).
2. Move your number into the listbox.
3. Click Save before exiting this tab.
Configure regions
The Region form, in the Administration group, displays if you are licensed for Global or Enterprise/Standalone
configurations. Refer to the Facility Commander Wnx Installation Manual - Global Edition or Enterprise
Edition for complete details of the Global or Enterprise edition features. When a server computer is added to an
FCWnx Global or Enterprise configuration, Region form records are also created. You cannot delete a Region
form record.
•
•
•
•
Note:
The Region form lets you assign or edit the frequency of synchronization intervals for your Global
configuration database replication.
Global Edition systems can also be configured for database redundancy, at the Regional level.
A Regional database server can be configured to have backup servers in the event of a failure at the
default Regional server.
APB options are available for configuration in the selected Region.
A subscription is a request for a copy of data or database objects to be replicated. It defines what publications are
received, where, and when. The time that it takes to complete this process of replication and synchronization is
dependent on the amount of data needed to be synchronized.
Chapter 2
System preferences
Table 20. Form fields
Element
Description
Description
Click Search to display a list of database servers in your FCWnx system. Select one of the
database servers from the list box in the right windowpane. The selected server name
now displays in the Description field. This is a required field and accepts 64 characters.
Facility
A facility option can be assigned for the area from the drop-down list of available
facilities for assignment by this operator. The default of Ignore Facilities is assigned if no
other selection is made.
Region tab
Use the Region tab to identify a Global database server or Regional database server, and configure
synchronization intervals. This tab also contains the licensing information about the Region.
Figure 10. Region tab
41
42
Facility Commander Wnx 7.5
User Manual
Table 21. Form fields
Element
Description
Global Server
If the selected server name:
• Is a Global database server, a Yes displays in the Global Server field. Synchronization
interval fields are unavailable for input. You can assign synchronization intervals on
Regional database servers only.
• Is a Regional database server, a No displays in the Global Server field.
Synchronization interval fields are available for input.
Note:
The synchronization processing time is dependent on how much data needs to
be synchronized and the performance of your system. Using Windows, we
recommend that you synchronize time settings on the computers within your
FCWnx Global configuration.
Database Synchronization
Interval (min):
This database contains configuration data relating to credentials and controllers. The
default and minimum number of minutes for synchronization of this database is every
five minutes. The maximum number of minutes is 1440 (once per day).
History Database Synchronization
Interval (min):
This database contains current history including credential transactions and operator
history. The default and minimum number of minutes for synchronization of this
database is every five minutes. The maximum number of minutes is 1440 (once per day).
Note:
License Info:
A subscription is a request for a copy of data or database objects to be
replicated. It defines what publications are received, where, and when. The
time that it takes to complete this process of replication and synchronization is
dependent on the amount of data needed to be synchronized.
This list informs the operator of the current licensing capabilities of the selected Region.
Example: This information is helpful to an operator when attempting to add an
additional feature to a Region. A message may display, informing the operator that
addition of the feature is in excess of the license limit for that Region. The operator
consults this form to review the license capabilities. If limits for that feature have been
reached, additional devices cannot be added at this time.
How to
1. Select the number of minutes you want the system to wait between database synchronization.
2. Select the number of minutes you want the system to wait between history database synchronization.
3. Verify the license information.
4. Click Save before you exit this tab.
Backup Regions tab
Global Edition systems can be configured for database redundancy, at the Regional level. A Regional database
server can assign another for backup in the event of a failure at the default Regional database server.
Regional database redundancy and file server redundancy operate independently. One or the other, or both can
fail at the same time, whether they reside on the same server computer or are configured to reside on separate
computers. FCWnx initiates three tries to fail over to another file server. This process is taking place in the
Chapter 2
System preferences
background. After three tries with no success, an FCWnx FileServer interface attempts to locate an available
file server. If all attempts fail, the interface generates an alarm.
Note:
If you select a failover Regional server and want your clients to failover to the backup server, you must also select the
Client Region Failover check box on the Client form, Client tab.
Figure 11. Backup Regions tab
Table 22. Form fields
Element
Description
Backup Regions
This list box displays those Regional database server computers that you have assigned
to take over control in the event of a failure at the default Regional database server. The
order in which the computer names display, determines which server is next in line to
take over.
Move Up
Select and click to move this Regional server up the list
Move Down
Select and click to move this Regional server down the list.
Assign
Click to display a Backup Region Assignment dialog box, listing available Regional
database servers found on your FCWnx Global system. Those computers selected and
assigned when you close the dialog box, display in the Backup Regions list.
Backup Region Assignment
A list displays, of available backup Regional database server computers.
• Select one or more computer names from the available list and then click the right
arrow to assign.
• Select one or more computer names from the assigned list and then click the left
arrow to unassign.
Click OK to accept the selections and close this window.
How to
1. Review the list of assigned Backup Regions.
2. If applicable, select to move a Region up or down in backup priority.
3. Click Assign to display the Backup Region Assignment dialog box.
43
44
Facility Commander Wnx 7.5
User Manual
4. Assign one or more database servers as Regional database backup servers.
5. Click OK to close the dialog box and display the computer names as assigned.
6. Click Save before you exit this tab.
APB Region Configuration tab
Note:
The APB Region Configuration tab is enabled for Micro systems that are licensed for Global regions.
Use the APB Region Configuration tab to identify APB IN and APB OUT readers, and configure the APB
behavior across regions.
Figure 12. APB Region Configuration tab
Table 23. Form fields
Element
Description
APB Entering Region
This list box displays those readers that have been selected as APB IN readers for the
selected Region.
Assign
Click to assign APB IN readers to this region. Only readers previously configured as APB
IN readers are displayed for selection.
APB Exiting Region
This list box displays those readers that have been selected as APB OUT readers for the
selected Region.
Assign
Click to assign APB OUT readers for this region. Only readers previously configured as
APB OUT readers are displayed for selection.
Chapter 2
System preferences
Table 23. Form fields
Element
Description
It may not be required or significant for the controllers in a Region to report status to another Region. Select from one of the
following notification options:
Retain APB Status Across Region:
This is the default of three status options. If selected, the APB status is recognized across
all Regions in the FCWnx Global system. A credential can be presented at an APB IN
reader in one Region and at an APB OUT reader in a second Region. (Enable Global APB
must be selected on the Preferences form.)
Invalidate Credential Across
Regions:
If selected, this option disables the credential in all other regions when a person enters
the selected Region by presenting the credential at an APB IN reader. The Activity Monitor
displays 'Invalid APB IN' or 'Invalid APB OUT' if you attempt to enter in or out of any other
Region. When a person exits the selected Region and the credential is presented at an
APB OUT reader, the credential becomes enabled in all other Regions. (Enable Global APB
must be selected on the Preferences form.)
Example: Employees badging IN at a Miami office are tracked and not allowed to
credential IN to another location until they have presented their credential at an APB OUT
reader in Miami.
Ignore APB Status Across Regions:
If selected, the APB status is local to the selected Region and status is retained within the
Region. Regions are independent of each other and the status is not recognized by
another Region.
How to
1. Assign APB IN readers.
2. Assign APB OUT readers.
3. If necessary, select Retain APB Status Across Regions.
4. Select Invalidate Credential Across Regions if that is appropriate for your FCWnx system.
5. Select Ignore APB Status Across Regions to retain the APB status within the local Region.
6. Click Save before you exit this tab.
45
46
Facility Commander Wnx 7.5
User Manual
Global configuration regional rules
This topic addresses administration and behavior of a successful Global configuration. Particular functions in
the Global configuration must be handled locally, at the Regional level. The following table is an overview of
administrative functions and links to forms where configuration and behavior must be considered.
Table 24. Global configuration Regional rules
Form
Access Right form - Readers
Only
Updates allowed in
remote Regions?
Deletions allowed
in remote Regions?
Yes
Yes
Comments
Adding or deleting readers from an access
right for a local Region or remote Region: The
controllers get updated with the correct reader
information in both cases.
Digital Output Groups, Elevators, and Zone
assignment for access right must wait until
replication interval to update the remote
database and then perform a database
download to controllers in the remote Region.
Alarm form
No (See Comments.)
N/A
Updating in a Remote Region: Updates to
noncontroller alarms (such as CCTV, Camera,
and DVR alarms) are allowed. Updates to
devices directly controlled by I/O modules in
the controller (such as digital inputs and
readers) are not allowed. They must be updated
at a local Regional level.
Alarm Group form
No
N/A
Credential Alias form
Yes
Yes
No action required.
CCTV Alarm form
Yes
Yes
No action required.
Client form
Yes
Yes
Backup Clients tab, Assign dial-up controller
phone numbers
Digital Input form
No
N/A
Digital Output form
No
N/A
Digital Output Group form
No
No
Digital Video Recorder
Yes
Yes
Editing a DVR in a remote Region: Wait for
replication to occur before changes take effect.
If user changes the host name to a remote
client, wait for replication to occur and then
restart the hosting client's services.
Adding a DVR in a remote Region: Wait for
replication to occur and then restart services
on the remote client.
Chapter 2
System preferences
Table 24. Global configuration Regional rules (continued)
Form
Updates allowed in
remote Regions?
Deletions allowed
in remote Regions?
Elevator form
Yes
Yes
Editing an elevator in a remote Region: Edits
are not applied until replication occurs on the
remote database. After replication, the
operator must manually initiate a database
download from the Controller Monitor form in
order for changes to take effect.
Event Schedule form (Micro
only.)
Yes
Yes
Updating remote Regions: Wait for replication
interval and then perform a database
download. Applies to adds and deletes.
Floor
Yes
Yes
No action required.
Intrusion Zone form
No
No
Manual Control form
Yes
Yes
No action required.
Controller form
Yes
Yes
Editing a controller in a remote Region: Wait
for replication to occur and then perform a
database download to that controller. If the
user changes the host name to a remote client,
wait for replication to occur and then restart
the hosting client's services.
Comments
Adding a controller in a remote Region: Wait
for replication to occur and then restart
services on the remote client.
Mode Schedule form
Yes
Yes
Updating remote Regions: Wait for replication
interval and then perform a database
download. Applies to adds and deletes.
Override form
Yes
Yes
No action required.
Reader form
No
N/A
Time Schedule form
Yes
Yes
Updating remote Regions: Wait for replication
interval and then perform a database
download. Applies to adds and deletes.
Tour Point form
No
N/A
All tour points must be associated with
controllers within the same Region.
Replication and synchronization conflicts
Conflicts with this application replication are rare but can occur. A conflict occurs whenever two users in
different Regions simultaneously update a field on an individual record; or update a record at a Global database
server computer and a Regional database server computer during synchronization.
Example
Region 1 revises an address from 4444 SW 8th St. to 5544 SW 8th St.
Region 2 revises an address from 4444 SW 8th St. to 6544 SW 8th St.
47
48
Facility Commander Wnx 7.5
User Manual
There are now two different values in the same field of the same records in two different regions. Each region’s
scheduled SQL Server Merge Agent activates the merge process and the changes are sent to the Global server.
•
•
•
If both updates arrive at the Global server during the same synchronization process, the SQL Server
detects which update arrived first and that update is successful.
If the update at Region Two arrived before the update at Region One during the same synchronization
process, then Region Two's update is successful. The address is updated to 6544 SW 8th Street on both
Region One and Region Two. Keep in mind that conflicts can only occur during the same
synchronization process.
When the Global server and Regional server are connected and synchronization occurs, the SQL
Server Merge Agent detects conflicts and then determines which data is accepted and propagated to
other sites based on the first record to successfully reach the Global server.
Note:
1. The synchronization processing time depends on how much data needs to be synchronized and the performance of your
system.
2. Using Windows, we recommend that you synchronize time settings on the computers within your Global configuration.
3. When re-assigning devices such as controllers or DVRs across regions, you must stop and restart services, first on the original
owner of the devices and then on the computer to which the devices are newly assigned. You must allow sufficient time for data
replication to complete across all affected regions before restarting services on the newly assigned computer. Verify that devices
are online and operable following the re-assignment.
Define facilities
Use the Facility form, Places & Policies group, to define facilities. Your database can be partitioned and related
records can be grouped. These groupings are called facilities. If facilities are used, you must create Facility
definitions in the FCWnx system.
•
•
•
Note:
Usually, the system administrator is assigned to all facilities.
Operators can be assigned to one or more facilities and can choose which facilities to be active at any
given time.
All records have the default Ignore Facilities, which means the records are not under facility
protection; therefore, those records are visible to all operators.
A facility option can be designated on most forms throughout the system and any number of facilities can be defined.
Also, refer to an expanded facility definition in the Glossary on page 405.
Facility tab
Use the Description field on the Facility tab to create facility records.
Chapter 2
System preferences
Figure 13. Facility tab
Table 25. Form fields
Element
Description
Description
This field is required and accepts up to 64 characters. Enter a description that uniquely
identifies location or function of the facility.
How to
1. Click the Add icon to begin a new facility record.
2. Enter a unique description in the Description field. This may be a building name or location such as
FAU Campus Office Building 3.
3. Click Save before you exit this tab.
Identify and configure clients
Use the Client form, in the Administration group, to add a client to the FCWnx network or assign backup
clients.
Note:
Only systems licensed for Client Redundancy have the ability to select backup clients.
Table 26. Form fields
Element
Description
Description
This field is required and accepts up to 64 characters. Enter or edit a unique description
for the client you are adding. If you do not enter a description, this field automatically
populates with the PC Name selected on the Client tab.
Note:
Global Client Descriptions: We recommend that your client description include
a meaningful name of the Global or Regional database server computer. When
the description displays on the Client Monitor form, the Global and Regional
server are easily identifiable.
Example description: bcttestpc(client to bcteeserver) where bcttestpc
is the name of the client computer and bcteeserver is the name of the Regional
database server for this client.
49
50
Facility Commander Wnx 7.5
User Manual
Table 26. Form fields
Element
Description
Facility
A facility option can be designated for your new client record from the Facility dropdown list.
Note:
You must restart the FCWnx client program for changes to the Auto logoff selection to take effect.
Networking
FCWnx requires that you set up a network protocol to allow the server and clients to communicate. FCWnx
uses the TCP/IP network protocol.
You need to validate visibility and connectivity to the client and servers by name resolution. (FCWnx uses PC
Names only.) The following describes two ways to validate operations:
•
•
Note:
Invoking Ping: Select Start, and then Run. At the Open field, enter command. A DOS-like window
opens. At the prompt, enter ping pcname where pcname is the name of the PC to which you are
validating visibility and connectivity. If you receive a response of an unknown host, you need to reexamine you TCP/IP configuration. If you receive a reply, the client/server is online and available for
connection.
Start, Run, PC Name: Select Start, and then Run. At the Open field, enter //pcname where pcname is
the name of the PC to which you are validating connection. If the connection is valid, you see the
shared folders on the remote PC.
If you are using Token Ring and/or TCP/IP, you are encouraged to contact your system administrator for local
requirements and restrictions.
Chapter 2
System preferences
Client tab
Use the Client tab to configure a client record.
Figure 14. Client tab
Table 27. Form fields
Element
PC Name
Description
• When creating a new client record, click Browse to display a Select Client window,
listing all computers found on your network by PC name. (FCWnx uses PC names
only.) To add a client, select the computer name from the list and click OK. You can
add as many clients as you want but you are limited to the number of licensed
clients connected to the network at one time. The number of client licenses
presently active and connected to the FCWnx system can be found on the Client
Monitor form.
• By default, when an existing client record displays, PC Name is read-only and not
available for edit.
• Client computers to which devices are associated, cannot be deleted. The devices
must be removed or assigned to another client before this client can be deleted.
• Client computers assigned as backup clients cannot be deleted. You must first unassign this client from the Backup Clients list on the Backup Clients tab, and then
delete.
51
52
Facility Commander Wnx 7.5
User Manual
Table 27. Form fields (continued)
Element
Description
OS Type
This field is available only when you first open the Client form, and before you initiate a
Search. To locate a particular client type, you are able to select either WINDOWS or CCTV
from the OS Type drop-down list. (If you click Search immediately after you open the
Client form, this field displays WINDOWS and is unavailable for selection.)
Region
This field is available only when you first open the Client form, and before you initiate a
Search. To locate a particular server or client, you are able to select a server name from
the Region drop-down list. The field default displays the database server computer
name. The clients associated with the selected Region display in the right windowpane.
(If you click Search immediately after you open the Client form, this field displays the
default server name and is unavailable for selection.)
Workstation Type
Select from the drop-down list of available workstation types:
• Administration: This is the default for new installations and new client workstation
records. This configuration allows full functionality except monitoring/unmonitoring
alarms, opening/closing doors, and activating/deactivating DOs that belong to a
SCIF (ACU only.) configuration.
• Operator: This configuration allows this client workstation to monitor alarms,
activity functions, Graphics Console, and Video Console.
• SCIF (ACU only.): If this is a SCIF workstation, enable SCIF on the Area form. This
configuration allows this client workstation to do everything that an Administration
workstation can perform as well as monitoring/unmonitoring alarms, opening/
closing doors, and activating/deactivating DOs that belong to a SCIF configuration.
• Not Applicable: This option is used for CCTV workstations only. During a database
conversion from an earlier version of FCWnx, workstation types default to
Administration.
Imaging Status
• Disabled: Select if you want to disable Imaging in order to enable another client
computer.
• Enabled: Select to enable Imaging here but you are limited to the number of
licensed Imaging stations enabled at one time. The number of Imaging licenses
presently active can be found on the Client Monitor form.
Thin Client Status
An FCWnx client computer can also be a thin client. A thin client has Terminal Services
and/or Citrix server software installed. If the FCWnx client has Thin Client Status of
Enabled, other computers can connect to the Terminal or Citrix server on the FCWnx
client and run FCWnx.
• Disabled: Select if you want to disable the thin client option.
• Enabled: Select to enable the thin client option at this FCWnx client. The number of
thin clients you can enable is controlled by the number of thin client licenses you
have. Refer to the Client Monitor form, which displays the number of thin client
licenses presently available and in use.
Auto Logoff
Select the number of minutes the system waits since the last action was taken before
logging off the current operator. To turn off the auto logoff feature and remain
permanently logged in, enter 0 (zero). The default setting is 20 minutes.
Note:
Display Alarm Notification
You must restart the FCWnx client program for changes to the Auto Logoff
selection to take effect.
Enable this field if you want an alarm dialog box to display whenever an alarm occurs,
based on facilities available to the current operator.
Chapter 2
System preferences
Table 27. Form fields (continued)
Element
Description
Client Region Failover
Note:
This check box displays only on a Global configuration.
This check box is applicable to FCWnx Global configurations. When displayed, the default
state of this check box is selected and grayed out. If a database failure occurs at the
default Regional database server, this client would automatically fail over to a configured
backup Regional database server. Backups are configured on the Region form, Backup
Regions tab.
Click the check box to clear and disable the automatic failover option. You might choose
to clear this check box to prevent nonessential client failover.
Enable Auto Shutdown
FCWnx services automatically shut down when a client closes the FCWnx application
and meets all the Auto Shutdown criteria.
Services automatically shut down when a client closes the FCWnx application and meets
ALL of the following criteria:
1. Does not host any controllers or DVRs.
2. Does not have any API connections.
3. Is not a Thin Client.
4. Is not a backup client or have any backup clients of its own.
5. Is not a CCTV client.
6. Is not hosting a guard tour.
7. Client form Enable Auto Shutdown is selected.
Licensing controls the number of computers that can host FCWnx sessions. If a
particular client is shut down, that license is now available for another client computer to
be designated an FCWnx client and run the FCWnx application. If not all clients require a
license at the same time, you can enable and disable the license for the appropriate
computers.
Form Search Limits
Enable this field if you want to limit the number of search results that display on all forms
for that client. This field does not accept an entry more than nine digits long.
Note:
Ping Time (msec)
The default value is 500 results and the limit is enabled.
• Interval: This is the interval of time a broadcast message is sent, indicating a client
is online. (Default is 20,000. This field does not accept an entry less than 5,000 msec.)
• Timeout: The amount of time that elapses between broadcast message and
response before the system considers a client offline. The client status display on
the Client Monitor form. (Default is 60,000. This field does not accept an entry less
than three times the Interval amount specified.)
ACTIVITY PRINTING
CAUTION:
Note:
WinXP Professional Operating Systems: If the printer you have selected is hosted by a computer running a WinXP
Professional operating system, you must add permissions to share this printer to the FCWnx network. At the host
computer, navigate to your printer property settings. On the Security tab, add ANONYMOUS LOGON or NETWORK
to the Security permissions.
Printers can be connected to the server or any client computers. The defaults of the activity printer selections are
cleared on any newly configured system. Any system with a newly converted database requires reconfiguration of
these activity printer selections at each client workstation.
53
54
Facility Commander Wnx 7.5
User Manual
Table 27. Form fields (continued)
Element
Description
Alarm and Guard Tour DI Activity
Printing
You must enable, select a printer, and route alarms to a printer in order for alarm activity
to print.
• Enable: Select this check box to print alarm activity. If you select to enable alarm
activity printing, you must select a printer in order to save this record.
• Printer: Displays the currently selected printer to which alarm activity prints. This
may be the same or a different printer than that used for credential transactions.
• Select Printer: Click this button to select a printer to which alarm activity prints.
Note:
Credential and Area or Zone
Activity Printing
Print Alarms At Host must be selected on the Alarm form in order for alarm
activity to print.
You must enable, select a printer, and route credential activity to a printer in order to
print credential transactions.
• Enable: Select this check box to print credential activity. If you select to enable
credential and zone activity printing, you must select a printer in order to save this
record.
• Printer: Displays the currently selected printer to which credential transactions
prints. This may be the same or a different printer than that used for alarm activity.
• Select Printer: Click to select a printer to which credential transactions prints.
Note:
1) Printer options must be selected on the Reader form in order for credential
transactions to print.
2) All zone activity transactions print and do not follow routing or schedules
assigned to a reader.
How to
1. Review Table 27 on page 51 before you begin completion of this form.
2. Click Browse to display a Select Client window.
3. Proceed to complete the remainder of the options according to your system, this client, and the
guidelines in Table 27 on page 51.
4. Repeat these steps for each client that you are defining.
Backup Clients tab
Note:
The Backup Clients tab displays only at client computers that are licensed for Client Redundancy.
Use the Backup Clients tab to configure your backup clients that would take over the devices in case of a
failure at the default client computer.
Chapter 2
System preferences
Figure 15. Backup Clients tab
Table 28. Form fields
Element
Description
Backup Clients
This list box displays those clients you have assigned to take over control of any
nondirect controllers and DVRs in the event of a failure at the default client computer.
The order in which the client names display, determines which client is next in line to take
over. The timing of the takeover is a variable (see Takeover and recovery timing on
page 57). Backup clients must be online (FCWnx services are running). In the event of a
failover, the client entry includes the client computer name, and then the total combined
number of DVRs and controllers of the default client and backup client.
• Move Up: Select and click to move this client up the list.
• Move Down: Select and click to move this client down the list.
• Assign: Click to display a Backup Clients Assignment dialog box, listing client
computers found on your FCWnx system. Those computers selected and assigned
when you close the dialog box, display in the Backup Clients list box.
Backup clients must be configured correctly; otherwise, backup will fail.
Correct configuration of backup clients:
• Client B is the backup for Client A
• Client C is the backup for both Client A and Client B
Incorrect configuration of backup clients:
• Client B is the backup for Client A
• Client C is the backup for Client B
55
56
Facility Commander Wnx 7.5
User Manual
Table 28. Form fields (continued)
Element
Description
Database Connection Heartbeat
The FCWnx system validates communication with backup clients by pinging (sending
continuous broadcast messages). If there is a communication failure between the default
client and the backup client, the backup client looks for a Heartbeat (time stamp in the
database) as an indication that the default client is online and connected.
a) If a Heartbeat exists, the default client is “alive” and the backup client does not initiate
takeover of the devices from the default client.
b) If a Heartbeat does not exist, the backup client initiates takeover of devices from the
default client. The backup client uses the following values:
• Heartbeat (seconds): Select a computer from the Backup Clients list box and assign
an interval of seconds (the range is 10 to 180) between Heartbeat checks. The
default number is 60 seconds. This number can be reset at any time.
• Heartbeat Retries: Select the number of times (the range is 1 to 3) this backup client
checks for a Heartbeat stamp in the database, before initiating takeover of devices
from the default client. The default number of retries is 2.
Assign Controller Phone #s
This button is only available after completing the following:
• Backup clients have been assigned.
• The currently displayed client is host to Dial-up and/or Network + Dial-up
controllers.
In the event of a system failure, the controllers associated with the failed client must
have available telephone numbers to reach the backup client. Click to display an Assign
Controller Phone Numbers dialog box.
Assign Controller Phone Numbers Dialog Box
This dialog box lets you select a controller from the Dial-Up Controller drop-down list and
assign telephone numbers used by this controller to reach the selected backup client.
• Click to display a list of only Dial-Up and Network + Dial-Up controllers for the client
record displayed.
• When you select a controller from the drop-down list, the Phone numbers to reach
backup client xxxxxx fields become available for entry (where xxxxxx = name of
selected client in the Backup Clients list box).
• When you enter a number in the first field, the Save button becomes available.
• All Number fields must contain a telephone number of up to 20 digits. If there is only
one telephone number for this controller to reach the backup client, repeat this
number in all four fields. (If you click Save after completing the first Number field,
the system automatically completes all Number fields with a duplicate number.)
• Click Save to save the list of telephone numbers. The controller dials the number in
Number 1: and then tries the others in numerical order until connection it made.
• Click Close to exit the dialog box.
• Repeat the process for each controller in the Dial-up Controller drop-down list.
• Click Save to save this client record.
Chapter 2
System preferences
Table 28. Form fields (continued)
Element
Description
Redundancy
Display Redundancy Notification: By default, this check box is checked. If licensed for
Client Redundancy, this check box must be selected to generate a notification message
that displays at all clients (based on facilities available to the current operator), when:
• A client failure occurs.
• A device takeover succeeded.
• A device takeover did not succeed. [Select Details button for explanation.] (If the
first-in-line backup client is not available, a second backup client takes over control
of devices and a notification message displays, updating you.)
• Recovery of the default client and transfer of devices failed. [Select Details button
for explanation.]
• Recovery succeeded.
If you clear this check box, you do not receive a notification message; however, indication
of a takeover displays on the Client Monitor form.
Perform Backup on Normal Shutdown: This check box is clear by default. Select this
check box to trigger the takeover, by a specified backup client, of devices associated
with a client during a normal shut down.
If your system is not licensed and you are operating in demo mode, this option is not
available for selection.
How to
1. Verify that you are licensed for Client Redundancy.
2. Review Table 28 before you begin configuration of this form.
3. Proceed to configure your backup clients according to your system and the guidelines in Table 28.
4. Click Save before you exit this tab.
Takeover and recovery timing
Client device takeover occurs following communication breakdown between the default client and the backup
client, under the following circumstances:
1. If network problems should occur.
2. If a default client computer crashes.
3. Immediate takeover following normal shutdown, ignoring any other settings. This occurs if FCWnx
services are stopped and Perform Backup on Normal Shutdown is enabled on the Backup Clients tab
of the Client form.
When a backup client detects that the default client is offline, an approximate takeover timing can be predicted
using the following formula:
Ping Interval x Retry Count of Default Computer + Heartbeat Interval x Heartbeat Retry Count of Default Computer + Network Delays
All these values are configured on the Client form.
The values in this formula can be adjusted to achieve a shorter or longer takeover scenario.
57
58
Facility Commander Wnx 7.5
User Manual
Client redundancy overview
The FCWnx software system is responsible for processing alarm and credential transactions from devices like
controllers and DVRs. The software is responsible for writing these transactions to the database. A device such
as a controller or DVR is hosted by a single FCWnx client. The client could potentially be responsible for
hundreds of devices and can be a single point of failure. Although devices like the controller are designed to
run without the host software running for days, eventually memory is going to be filled up at the controller end.
The redundancy feature in FCWnx is designed to address this condition. Clients can be configured to be
backed up by other clients so that, in case of the default hosting client (called the primary client) being
disabled, one of the backup clients takes over all its devices. This is designed to work automatically without
any operator intervention so the system continues to work efficiently. One of the backup clients performs the
role of the default client until the default client is back up and running. The devices that can be taken over at
present are all DVRs, network controllers, dial-up controllers, and network + dial-up controllers. Direct
controllers cannot be hosted by any other than the default client computer.
The table below assists you to find the areas in this manual that relate to the redundancy feature.
Table 29. Configuring client redundancy
Element
Description
Reference Topics:
Configuring Client Redundancy:
Am I Licensed for Client Redundancy?
Licensing on page 3
How do I configure backup clients for redundancy?
Backup Clients tab on page 54
What controllers are supported?
Backup Clients tab on page 54, Assign Controller Phone #s
What are the limits on controllers and DVRs?
Backup Clients tab on page 54
What is not permitted?
Backup Clients tab on page 54
When a Failover Occurs:
Messages Displayed
Backup Clients tab on page 54, Display Redundancy Notification
Client Monitoring
Client monitoring on page 325, Active Client
How long should I wait when a failover occurs?
Backup Clients tab on page 54, Database Connection Heartbeat
What alarms display on the Alarm Monitor?
Alarm tab on page 166
What is the behavior on the Digital Video Viewer and
Network List?
Video Console window on page 228 Help
Recovery:
Recovery Notification
• Messages: Backup Clients tab on page 54, Display
Redundancy Notification
• Client monitoring on page 325
How do I recover?
Client Monitor shortcut menu on page 327
What happens when a default client is back up?
Backup Clients tab on page 54, Display Redundancy Notification
What is the timing on the recovery?
Takeover and recovery timing on page 57
Chapter 2
System preferences
Define clients groups
The Client Groups form, in the Administration group, lets you assign FCWnx client computers into logical
groups. Members of a client group cannot have conflicting mode schedules. A comment box is available to
enter any special consideration or reminder for this configuration. This field accepts 500 characters. It is not
necessary to complete an entry in this field.
Note:
Client groups can be assigned to specific alarm routing and bumping configurations. You may want to review the
Sample Scenario in Figure 80, Routing and bumping scenario on page 187.
Table 30. Form fields
Element
Description
Descriptions
This field is required and accepts up to 64 characters. Enter a unique description that
identifies this client group.
Facility
Assign a facility option from the drop-down list of available facilities. If you do not select
a facility, Ignore Facilities is assigned for you.
Save
You cannot save this record until at least one client is assigned to this group on the Client
Group tab.
Client Group tab
On the Client Group tab, you must assign at least one FCWnx client computer in order to save this client group
record.
Figure 16. Client Group tab
59
60
Facility Commander Wnx 7.5
User Manual
Table 31. Form fields
Element
Description
Clients
This windowpane displays the names of client computers that are assigned to this client
group.
Assign Clients
Click to display a Client Assignment dialog box that lets you assign FCWnx clients to this
client group.
Client Assignment Dialog: This dialog box lets you select and assign FCWnx client
computers to a client group. Only clients in the operator's facilities are available for
assignment by this operator.
• Select, and then click the right arrow to assign an available client.
• Select, and then click the left arrow to unassign a client.
Click OK to close this dialog box and display the results in the Clients windowpane.
Comments
Use this field to enter any special consideration or reminder for this configuration. This
field accepts 500 characters. It is not necessary to complete an entry in this field.
How to
1. Review Table 31 and click the add record icon to create a new client group record.
2. Enter a unique description for this group of clients.
3. Assign FCWnx clients to this group.
4. Enter a comment describing the reason for creating this group.
5. Click Save before you exit this tab.
Create permissions
Use the Permission form, Administration group, to create permission records. The forms in FCWnx display an
icon in the left corner indicating the permissions assigned to this operator. The form icons correspond to the
icons and permissions assigned here.
•
•
Note:
Permissions and facilities must be created before they are assigned to operators.
Permissions are assigned to operators and define what operators can do within FCWnx.
FCWnx comes with a System Administrator permission that allows full action on all forms. You can create more
restrictive permissions and apply the System Administrator permission only to those operators fully trained in FCWnx.
Table 32. Form fields
Element
Description
Description
This field is required and accepts up to 64 characters. Enter a unique title for this
permission record.
Chapter 2
System preferences
Permission tab
The forms in FCWnx display an icon in the left corner indicating the permissions assigned to this operator. The
form icons correspond to the icons and permissions assigned here. During a database conversion from an
earlier version of FCWnx, workstation types default to Administration.
Figure 17. Permission form
Table 33. Form fields
Element
Description
Forms
The information in the Forms windowpane can be viewed one of two ways.
1) If a + displays to the left of the form name, then additional items are available. Click +
to display additional forms. You can also double-click the Forms: menu item to view the
additional forms.
2) Right-click the windowpane to display the shortcut menu with these options.
• Show by Action lists the actions (None, Read, Update, All) followed by the forms
assigned to them.
• Operator displays the Operator form, which shows permissions assigned to existing
operators.
Actions
Four types of actions can be assigned:
• None means that no access is given to that form.
• Read means that read only access is given. The form and the associated records
can be viewed but not modified.
• Update means that the records on that form can be viewed and modified.
• All means that the records on that form can be viewed, modified and deleted.
• Mixed is not an action to be assigned. It is used only on this form to signal that any
forms beneath a general title have different actions assigned.
61
62
Facility Commander Wnx 7.5
User Manual
Table 33. Form fields (continued)
Element
Description
Note: SCIF (ACU only.) Workstations: SCIF permissions override what is assigned on this
form. SCIF permissions, depending on the type of client workstation assignment on the
Client form, are as follows:
• Administration: This is the default for new installations and new client workstation
records. This configuration allows full functionality except monitoring/unmonitoring
alarms, opening/closing doors, and activating/deactivating DOs that belong to a
SCIF configuration.
• Operator: This configuration allows this client workstation to view all monitors, and
monitor alarms, activity functions, Graphics Console, and Video Console.
• SCIF (ACU only.): If this is a SCIF workstation, enable SCIF on the Area form. This
configuration allows this client workstation to do everything that an Administration
workstation can perform as well as monitoring/unmonitoring alarms, opening/
closing doors, and activating/deactivating DOs that belong to a SCIF configuration.
Note:
When using the API form: Alarms, events, and functions associated with a
SCIF workstation do not display and cannot be controlled through an API
connection unless you are at the SCIF workstation.
• Not Applicable: Select this workstation type for CCTV interfaces. During a database
conversion from an earlier version of FCWnx, workstation types default to
Administration.
Save
Click to save this record.
How to
1. Review Table 33 and click Search to display all existing permission records in the list box on the right.
2. Select one of the permissions.
3. Expand the Forms navigation tree to display the FCWnx forms.
4. Select a form and select one of the Actions to associate with the form and the permission you are
creating.
5. Click Save. Notice that the icon has changed to the associated action granted to this permission.
Example: If you want an operator to monitor alarm and credential activity, select the Operation forms,
and then set the following:
•
•
•
•
Select Activity Monitor, and then select Read.
Select Alarm Monitor, and then select the action Read.
Select Manual Control, and then select Update. (Selecting Update for Manual Control allows the
operator to manually change the DO state.)
Select Digital Output Status, and then select Read.
On the Personnel form, assign actions to allow the new permission to add persons and credentials into the
database.
1. Select Person, and then select Update.
2. Select Credential, and then select Update.
Chapter 2
System preferences
Determine and create operators
An operator is an individual who can access and control the FCWnx software. Once a facility is assigned to an
operator, it becomes available in the Facility drop-down the next time the Operator logs in. Operators are
associated with permissions that define the actions operators can perform within FCWnx.
Table 34. Form field
Element
Description
Facility
A facility can be assigned from the drop-down list of available facilities for assignment by
this operator.
For a shortcut menu to related forms, move the mouse pointer below any tab and click the right mouse button.
Operator tab
Use the Operator form, in the Administration group, to create operator records that allow individuals to access
the FCWnx program.
Figure 18. Operator tab
63
64
Facility Commander Wnx 7.5
User Manual
Table 35. Form fields
Element
Description
Login ID
Assign and enter a login ID for this operator.
Name
Enter the name of the operator.
Permission
From the drop-down list of previously created permissions, assign a permission to this
operator.
Language
Click the drop-down list to display a list of available languages installed on your system.
Select the language with which this operator accesses and operates the FCWnx system.
Also, see Multiple language support on page 65.
Facility Commander Password
Authentication
Note:
This grouping is selected by default. If this option is selected, Active Directory
Password Authentication is not available.
Password: Enter the password this operator uses to log in to FCWnx. This field accepts a
minimum of 1 and maximum of 20 characters. Additional password preferences were set
on the Password tab of the Preferences form.
Confirm Password: Enter the password a second time exactly as entered in the
Password field.
Note:
The assigned password cannot match any previous five passwords. Operator
login passwords are case sensitive. Because it is difficult to retrieve, it is
important for operators to remember their assigned password or write it down
and store in a safe place.
Permission to Change Password: If this check box is selected, the operator indicated in
this record has the option to change the login password. If this check box is clear, the
option to change the login password is unavailable to this operator.
Expiration
Password never expires: If selected, the password assigned to the current operator
never expires. If this check box is not selected, the two remaining fields are available.
Expires in (days): This field is not available if Password never expires is selected. From the
drop-down list of available time periods, select number of days that pass before the
password assigned to the current operator expires. The selections are 30, 60, 90, 120, or
180 days.
Warn prior to expiration (days): This field is not available if Password never expires is
selected. Enter or select the number of days before the expiration of the operator’s
password that a warning message displays, indicating that the assigned operator
password is about to expire. The number of days in this field must be less than the
number of days selected in the Expires in (days) field.
When this option is selected, a message displays when logging in to FCWnx, informing
the operator of the number of days until the password expiration occurs.
• Select Yes to change the password immediately.
• Select No to continue using FCWnx and change the password at a later time.
If the password has expired, the operator can no longer log on.
If the operator does not have permission to change the password, the operator is
instructed to contact the FCWnx Administrator to change the password. These warnings
are logged as operator history transactions and can be retrieved by running a report on
operator actions, using the System Operator filter for Login Name.
Chapter 2
System preferences
Table 35. Form fields (continued)
Element
Description
Active Directory Password
Authentication
Note:
If this option is selected, FCWnx password authentication options are not
available.
The Active Directory domain controller authenticates this operator name and password.
(The operator added to FCWnx must be a valid operator in the domain computer.) The
next time this operator logs in to FCWnx, for this feature, the user must log in to the
domain when logging into the computer, for access to the FCWnx system. (The user
cannot log in to the local computer; the user logs in to the Domain.) FCWnx validates the
user login ID and password against the specified Active Directory, and not the FCWnx
database. This authentication overrides any password preferences entered through
FCWnx.
Browse: Click to display a list of Active Directory domain controller servers. Select the
domain controller server computer that authenticates the FCWnx operator, and controls
the users, passwords, and the FCWnx system to which you are assigning this operator.
The selected server computer authenticates this operator name and password. The
selected server name now displays in this field.
How to
1. Review the guidelines in Table 35 and complete this tab.
2. Enter the Login ID associated with this operator record.
3. Enter the name of the operator.
4. Select a permission from the drop-down list associated with this operator.
5. Select a language from the drop-down list associated with this operator.
6. Using the guidelines in Table 35, complete the Facility Commander Wnx Password Authentication
grouping or remove the selection and complete the Active Directory Password Authentication.
7. Click Save before you exit this tab.
Multiple language support
Some items you should note about national language support:
•
•
•
•
English is the default language and is always installed.
The Windows operating system should be installed for the specific language chosen for this
application. For example, if you are running this application in Spanish, Windows Spanish should be
installed.
This application starts in the language of the operating system. For example, if Windows Spanish is
installed, this application starts in Spanish.
Initially, there is only one operator provided with the system: an English language operator with the
login ID of secure and a password of SecurityMaster08 (case sensitive). The very first login to this
application must be done under this operator. If the operating system is in a language other than
65
66
Facility Commander Wnx 7.5
User Manual
•
•
•
•
•
English, there is a slight delay in bringing up this application main menu since the English Help files
must be copied into the main directory.
To set up a different language operator, you must go to the Operator form, and add an operator with the
desired language. A combo box on the operator form lists the available languages for the system. A
language must be selected prior to saving the operator’s record.
Multiple language logins are supported without having to restart the application. Log out and log back
in as the new operator. (There is a slight delay in bringing up this application main menu since the new
language Help files must be copied to the main directory.) This application along with the Help files
display in that operator's language.
Any data entry done after the operator’s login is in the operator's language. For example, when adding
a controller, all the attached device descriptions are in the operator’s language.
There are several areas that are not translated, such as certain Windows messages and certain parts of
the reporting functions.
If a particular language is not provided by GE Security, the installation takes place in English and the
application runs in English.
Facilities tab
Use the Facilities tab to assign facilities to an operator.
Figure 19. Facilities tab
Table 36. Form fields
Element
Description
Assigned Facilities
This list displays the facilities assigned to the current operator.
Assign Facilities
Click to display the Facility Assignment dialog box that lets you assign facilities to this
operator.
Facility Assignment
This dialog box lists the facilities available for assignment to this particular operator.
• Facilities can be moved to the Assigned list by selecting and clicking the appropriate
arrow.
• Facilities can be removed from the Assigned list by selecting and clicking the
appropriate arrow.
Chapter 2
System preferences
How to
1. Review the guidelines in Table 36 and complete this tab.
2. Click Facility Assignment to display a list of facilities.
3. Assign those facilities that you want associated with this operator.
4. If you remove a facility from this operator record, that facility now displays in the Available list.
5. Click OK to accept and close the Facility Assignment dialog box.
6. Click Save before you exit this tab.
What’s next?
Proceed to Chapter 3, Schedules on page 69.
67
68
Facility Commander Wnx 7.5
User Manual
Chapter 3 Schedules
This chapter provides an overview of Facility Commander Wnx time, event, and
mode schedule configuration.
In this chapter:
Overview . . . . . . . . . . . . . . . . . . . . . . . . . . . . . . . . . . . . . . . . . . . . . . . . . 70
Define time schedules . . . . . . . . . . . . . . . . . . . . . . . . . . . . . . . . . . . . . . . 70
Define event schedules (Micro only). . . . . . . . . . . . . . . . . . . . . . . . . . . . 73
Configure event notifier . . . . . . . . . . . . . . . . . . . . . . . . . . . . . . . . . . . . . 75
Define mode schedules . . . . . . . . . . . . . . . . . . . . . . . . . . . . . . . . . . . . . . 80
Mode Event Trigger form . . . . . . . . . . . . . . . . . . . . . . . . . . . . . . . . . . . . 86
What’s next? . . . . . . . . . . . . . . . . . . . . . . . . . . . . . . . . . . . . . . . . . . . . . . 87
70
Facility Commander Wnx 7.5
User Manual
Overview
This chapter provides an overview of Facility Commander Wnx schedule configurations.
•
•
•
•
The maximum number of combined schedules (time, event, and mode) for any one Micro controller is
1,023.
The maximum number of combined schedules (time, event, and mode) for any one ACU controller is
253.
One time schedule can have up to 16 intervals.
FCWnx supports up to 2,048 time intervals per ACU.
Define time schedules
The Time Schedule form, Schedules group, is used to create time schedules.
•
•
•
•
•
•
A time schedule determines time intervals for actions to occur, such as turning on alarm monitoring.
Time schedules are comprised of one or more time intervals (start and stop times) on one or more days
of the week and modes.
For Micro controller systems, time schedules differ from events in that time schedules define an
interval of time over which an action occurs while events schedule when an action occurs.
A time schedule can define an action multiple times within the same day.
Once a time schedule is defined, it can be applied anywhere time schedules are used.
The maximum number of all supported schedules combined for any one Micro controller is 1,023.
The maximum number of all supported schedules combined for any one ACU controller is 253.
Note:
Time schedules define the days of the week and times an action starts and ends.
Note:
If you delete a schedule while it is currently active, this schedule never ends. For example, if you have a schedule that
unlocks a door, and the schedule is deleted while the door is unlocked, that door will remain unlocked.
Note:
For ACU controller systems: Time schedules assigned to a Public Access area on the Elevator form cannot be deleted.
Table 37. Form fields
Element
Description
Description
This field accepts 64 characters. Enter a meaningful and unique description for this
schedule.
Facility
A facility option can be designated for your new record from the Facility drop-down list.
Chapter 3
Schedules
Time Schedules tab
Note:
Deleting a schedule does not affect the current state of any devices to which this schedule is associated. Any devices
currently in a state associated with the deleted time schedule remains in that state until changed manually or by
another schedule.
For ACU controller systems: The digital outputs are reset when the time schedules are deleted.
Figure 20. Time Schedules tab
Table 38. Form fields
Element
Description
TimeChart
In line with the appropriate day of the week, click the desired start time, continue to hold
the mouse button, and drag the bar to the right until you reach the preferred stop time.
This creates a bar that indicates one interval of time during this time schedule. Continue
to create intervals on the time chart for appropriate days of the week associated with
this time schedule.
Note:
The time 00:00 is the same as 24:00 of the same day. For example, Saturday at
00:00 on the left side of the chart is the same as 00:00 on the right side of the
chart.
71
72
Facility Commander Wnx 7.5
User Manual
Table 38. Form fields (continued)
Element
Description
Intervals
Each bar on the time chart indicates an interval of time. The system assigns a number to
each interval as it is created on the time chart. This is the number displayed in the
Interval field. If you select an interval on the time chart, the details of the selected
interval display in the Interval details.
Note:
ACU controllers support up to 16 intervals per time schedule. Each interval is
counted as one when it contains ranges having the same Start and End time
range. For example, The Business Hours time schedule shown in Figure 20
contains two different time intervals within the same time ranges between 7:00
to 12:00 and 13:00 to 18:00.
New
Click to create a new interval on the time chart. You may have to adjust the times.
Delete
Click this button to delete an interval from the time chart.
• Select an interval on the time chart and click Delete.
• Using the arrows beside the Interval field, scroll to the appropriate interval number
and click Delete.
• Select and enter an interval number by typing over the existing number in the
Interval field and click Delete.
Interval Details
Use interval details to modify/display your selections.
Start time: Displays the time on which the selected time interval begins.
Stop time: Displays the time on which the time interval ends.
Mode/day: Displays the mode or day on which the interval schedule occurs.
How to
1. Review the guidelines in Table 38 and complete this tab similar to the following steps.
2. Enter the description “Time Schedule - 8-5” in the Description field.
3. Create 5 intervals Monday - Friday from 8:00am (08:00) to 5:00pm (17:00).
4. Create 1 interval for Mode 7 from 8:00am (08:00) to 5:00pm (17:00).
5. Click Save before you exit this tab.
Note:
You need to assign this time schedule to a device such as a reader. Note the example below.
Example
would indicate a facility-specific time schedule, where BocaHQ refers to a
geographic location. For example, you can create a time schedule that is active Monday through Friday 8:00
a.m. to 5:00 p.m. This particular time schedule (perhaps called Normal Workweek) can be applied to the
Access Right for Permanent Employees and you may want to turn off alarm monitoring during those hours.
BocaHQ Normal Workweek
1. On the Reader form, select Building 1 Lobby Door reader record.
2. On the Functions Schedule tab of the Reader form, select a Door schedule entitled BocaHQ Normal
Workweek from the drop-down list of Time schedules.
3. Select Unlock.
Chapter 3
Schedules
4. The result is that the selected reader unlocks the door based on the time schedule as configured for
BocaHQ Normal Workweek.
Define event schedules (Micro only)
Note:
Event schedules can be created for Micro controllers only.
Use the Event Schedule form, in the Schedules group, to create event schedules. Events define the days of the
week or modes and times an action starts.
•
•
•
•
•
•
Note:
An event schedules when an action occurs, such as resetting an anti-passback status, dialing a
controller, or changing a physical reader type.
There is no end time associated with an event.
Events are comprised of one or more times on one or more days of the week and modes.
Events differ from time schedules in that events define when an action occurs and time schedules
define an interval of time over which an action occurs.
An event can schedule an action multiple times, even within the same day.
Once an event is defined, it may be applied anywhere events are used.
Deleting an event schedule does not affect the current state of any devices currently under the effect of the deleted
event schedule. An event remains active until another event occurs to change it.
Table 39. Form fields
Element
Description
Description
This field accepts 64 characters. Enter a meaningful description for this event.
Facility
A facility option can be designated for your new record from the Facility drop-down list.
Event Schedules tab
Note:
Event Schedules can be created for Micro controllers only.
Use the Event Schedules tab to create an event schedule. If you need to use facilities in your system, create an
event for each facility. Use the facility description as a prefix on the Event Schedule form, Description to
indicate to which facility this event applies. The time 24:00 is the same as 00:00 of the next day. For example,
Friday at 24:00 is the same as Saturday at 00:00.
•
•
•
•
•
•
•
An event schedule defines an action, such as resetting an anti-passback status or changing a physical
reader type.
There is no end time associated with an event.
Events are comprised of one or more times on one or more days of the week and modes.
Events differ from time schedules in that events define when an action occurs and time schedules
define an interval of time over which an action occurs.
An event can schedule an action multiple times, even within the same day.
Once an event is defined, it may be applied anywhere events are used.
The maximum number of all supported schedules combined for any one Micro controller is 1,023.
73
74
Facility Commander Wnx 7.5
User Manual
Note:
Deleting an event schedule does not affect the current state of any devices currently under the effect of the deleted
event schedule. An event remains active until another event occurs to change it.
Figure 21. Event Schedules tab
Table 40. Form fields
Element
Description
Time chart
Click on the time chart to create and day of the week/mode. This creates a diamond that
indicates that the event occurs at that time and that day of the week/mode. Note that
the current event’s diamond is selected. Time is displayed in half-hour increments by
default. To change the display increment, click and hold the left mouse button on the
right end of the bottom time bar then move the cursor to the left until you are at the
desired time increment. Then, click the desired time. If the point is incorrectly located,
you can drag and drop the point to the exact location you want.
Event
Displays the number assigned to each event in the order the event is created. The
number assigned increments consecutively.
New: Click to create a new event. Each new event is created at 08:00 a.m. Sunday.
Delete: Click to delete an event. You can delete a schedule that is currently in effect. The
Delete button removes the most recent point you have created. If you continue to click
Delete, additional calendar points disappear in the order they were created. Deleting a
schedule does not affect the current state of any devices to which this schedule is
associated. Any devices currently under the effect of the deleted schedule remain in that
state until changed manually or by another event schedule.
Chapter 3
Schedules
Table 40. Form fields
Element
Description
Event Details
Use event details to verify and modify selections made in the calendar display.
• Event time: Display and modify the time at which the event occurs.
• Mode/day: Display and modify the mode or day on which the event occurs.
How to
1. Review Table 40 and create an event using the guidelines listed.
2. Click Save before you exit this tab.
Example
indicates a facility-specific event schedule, where BocaHQ refers to a
geographic location. For example, you could create an event beginning each Friday at 6:00 p.m. that
resets the APB status and the T&A status, and sets a reader to Credential and Keypad. Employees
coming into the building after 6 p.m. on Friday are required to present their credential and then key in
a PIN number to enter the building.
BocaHQ Weekend Begins
Remember that an event stays in effect until another event occurs to change it. Therefore, in our
example, a second event needs to be scheduled to change that reader back to Normal on Monday
morning.
Configure event notifier
Note:
Keep in mind that you can use an SMTP server such as Lotus Notes or SendMail, or even online mail services such as
Yahoo, to send e-mail. Contact your local network administrator to get the SMTP server name to be used. E-mail sent by
FCWnx are sent through this SMTP server. If you receive an error message or have a problem with your configuration,
contact your local network administrator.
The Event Notifier form, Alarms & Events group, lets you:
•
•
•
Assign those alarms and reset conditions that trigger an e-mail message.
Assign people who are to receive that e-mail notification of the alarm/reset condition.
Format the style and content of the e-mail message.
Table 41. Form fields
Element
Description
Description
Assign a unique title to this record. This is a required field and accepts 64 characters.
Facility
A facility option can be assigned from the drop-down list of available facilities. The
default of Ignore Facilities is assigned if no other selection is made.
For a shortcut menu to related forms, move the mouse pointer below any tab and click the right mouse button.
75
76
Facility Commander Wnx 7.5
User Manual
Alarm Selection tab
The Alarm Selection tab lets you assign alarms in this operator’s facility that trigger an e-mail message.
Figure 22. Alarm Selection tab
Table 42. Form fields
Element
Description
Assigned Alarms
This windowpane displays any previously assigned alarms.
Assign Alarms
Click to display the Alarm Assignment dialog box that lets you select specific alarms that
trigger e-mail notifications. Click OK and the selected alarms display in the Assigned
Alarms windowpane.
Alarm Assignment dialog box
This window displays a list of alarms in the FCWnx system for the facilities available for
assignment by this operator. All alarms display. If this is a Global system, alarms are not
filtered by Region.
• Select, and then click the right arrow to assign an available alarm.
• Select, and then click the left arrow to unassign an alarm.
Click OK to display results in the Assigned Alarms windowpane.
Transaction Type
Select one or both transaction types that trigger an e-mail alarm notification.
• Alarm: E-mail notification is sent at onset of the alarm.
• Reset: E-mail notification is sent when an alarm is reset.
By default, no type is selected when you create a new Event Notifier record. A
transaction type must be selected in order to save this record.
How to
1. Review Table 42 and assign alarms that are to trigger e-mail notifications.
2. Select one or both Transaction Type options.
3. Click Save before you exit this tab.
Chapter 3
Schedules
Person Selection tab
The Person Selection tab lets you assign people available in this operator’s facility that receive an e-mail
notification of the alarm/reset condition.
Figure 23. Person Selection tab
Table 43. Form fields
Element
Description
Assigned People
This windowpane displays people assigned to receive an e-mail alarm notification.
Assign People
Click to display the People Assignment window, allowing you to select specific people
that receive an e-mail alarm notification.
People Assignment
This window displays a list of Person Records with an e-mail address in the FCWnx
system. Only person records in the operator’s facilities are available for assignment by
this operator.
• Select, and then click the right arrow to assign an available person.
• Select, and then click the left arrow to unassign a person.
Note:
Only those with an e-mail address in their Person Record display in the People
Assignment list for assignment to an alarm notification.
Click OK and the selected people names display in the Assigned People windowpane of
the Person Selection window.
How to
1. Review Table 43 and following the guidelines, assign people.
2. Click Save before you exit this tab.
77
78
Facility Commander Wnx 7.5
User Manual
Message Format tab
The Message Format tab lets you format the appearance of the e-mail alarm notification, based on your
Windows regional font settings.
Figure 24. Message Format tab
Table 44. Form fields
Element
Description
Date/Time Format
Select a date/time format from the drop-down list.
Header
Select this check box to display a header greeting. In the Header field, enter text up to
256 alphanumeric characters. This could be additional details explaining the alarm
condition.
• If you do not enter a header greeting, an equivalent white space displays at the
beginning of the e-mail notification.
• If you do not select the check box, any header message you create is not included
in your e-mail.
Footer
Select this check box to display a footer closing. In the Footer field, enter text up to 256
alphanumeric characters. This space could provide a name and number to contact if the
receiver has a question.
• If you do not enter a foot or closing, an equivalent white space displays at the end
of the e-mail notification.
• If you do not select the check box, any footer message you create is not included in
your e-mail.
Chapter 3
Schedules
Table 44. Form fields (continued)
Element
Description
Alarm Information
Add Alarm Instruction
Select this check box to include the alarm instruction associated with this alarm, in this
e-mail notification.
• If this check box is not selected, any associated alarm instruction is not included in
the message.
• If this check box is selected and there are no alarm instructions, no instructions are
included in the message.
Alarm/Reset Text
This text is how you want the alarm State to display to the receiver. You can do one of the
following:
• Accept the default alarm state entry, as displayed in the language of the current
operator.
• Select and replace the existing text with alarm state text in another language, such
as the language of the receiver. You can also add to the text with additional text (no
more than 32 alphanumeric characters total) describing the state.
Alarm Text: Default alarm state text is Alarm, displayed in the language of the current
operator.
Reset Text: Default alarm reset state text is Reset, displayed in the language of the
current operator.
How to
1. Review the guidelines in Table 44 and complete the fields on this tab.
2. Click Save before you exit this tab.
Example Alarm Information: The information displayed on the e-mail message may look similar to:
0151-1-01 DI|Alarm|10/16/02 15:20:59
where:
0151-1-01 DI
= The controller, module and reader.
Alarm
= The alarm state.
10/16/01 15:20:59 =
The controller date and time.
79
80
Facility Commander Wnx 7.5
User Manual
Define mode schedules
Use the Mode Schedules form, Schedules group, to define the date and time a mode goes into effect. The
purpose of a mode is to allow the controllers or clients to operate differently than defined for Normal mode
(Monday through Sunday, which is the default mode for this application). Operating modes are an
administrative decision, as each facility has unique requirements. For each mode, FCWnx controllers manage
their devices such as readers and doors in a predefined way.
•
•
•
Note:
Like events, there is no end time associated with a mode. The mode remains active until changed by
another mode schedule.
The Host PC and controllers may be in different modes at the same time.
The maximum number of all supported schedules combined for any one Micro controller is 1,023.
The maximum number of all supported schedules combined for any one ACU controller is 253.
You may have a schedule configured, but never see a schedule change if you do not have the schedule associated with
an Alarm Routing and Bumping configuration.
Table 45. Form fields
Element
Description
Description
Enter a meaningful and unique 64-digit or less alphanumeric description.
Facility
A facility option can be designated for your new record from the Facility drop-down list.
Chapter 3
Schedules
Modes tab
Use the Modes tab to create a mode schedule.
Note:
Like events, there is no end time associated with a mode. The mode remains active until changed by another mode
schedule.
Figure 25. Mode Schedule tab
Table 46. Form fields
Element
Description
Date
Click the arrows to navigate through the months and years until the appropriate month
displays. Click the day on the calendar that this mode begins.
Time
The time displays in the format 00:00 (hours:minutes). Select and enter text over existing
time. Enter AM or PM.
Assigned Controllers
Displays the currently assigned controllers for this record.
81
82
Facility Commander Wnx 7.5
User Manual
Table 46. Form fields (continued)
Element
Description
Edit
Click to display the Controller Assignment dialog that lets you add or change the
controllers currently assigned. You must select all controllers that this mode change
effects.
Controller Assignment dialog
This window displays when you click Edit, allowing you to select and assign client group
association for this form. Only client groups in the operator's facilities are available for
assignment by this operator.
Select, and then click the right arrow to assign an available client group.
Select, and then click the left arrow to unassign a client group.
Assigned Client Groups
Click to display the currently assigned client groups for this record.
Edit
Click to display the Client Group Assignment dialog box that lets you add or change the
client group.
Controller and Client Group Modes
(Micro only.)
Client Group Modes (ACU only.)
• From
Select the mode the system must be in for this schedule to occur.
• To
Select the mode the system changes to when this schedule occurs.
Note:
This field is not enabled until you select a client group.
• From
Select the mode the system must be in for this schedule to occur.
• To
Select the mode the system changes to when this schedule occurs.
Available Controller Modes (ACU
only.)
A list of available modes displays here. Eight modes are available and enabled for
selection. ACU controllers can be active in up to eight modes at one time.
How to
1. Review the guidelines in Table 46 and complete this tab.
Example modes
Normal: This mode is day-of-the-week dependent and is the default mode for the FCWnx system. The
remaining modes are not day-of-the-week dependent. Both schedules and events can be defined in
terms of modes. Sunday through Saturday configurations are only in effect in Normal mode. Next, you
could define other modes such as:
Mode 1 as Half-Day Holiday
Mode 2 as Full-Day Holiday
Mode 3 as Three-day Weekend
For ACU controller systems, these additional Modes display:
Mode 4
Mode 5
Mode 6
Chapter 3
Schedules
Mode 7
Mode 8
Note:
•
•
Mode schedules created on the Mode Schedule form display as schedule options on the Event Schedule form
and Time Schedule form.
You can change the label of your modes on the Preferences form, Mode/Threat Labels tab. (You must restart
the FCWnx program for any changes to the Preferences form to take effect.)
ACU controller systems
Mode schedules in ACU controller systems are mainly used to overrule the regular time schedule behavior
when the current day is a holiday. The Mode Schedule supports up to 8 controller modes.
If the current day is set to a particular mode, all the time intervals set for the same day in a certain time
schedule will be disabled. However, if in the Time Schedule Time Chart, the line corresponding to the mode
itself contains one or more ranges, the time schedule will be enabled in that range or ranges independently on
the content of the other time intervals. It is also possible to specify multiple modes working in parallel.
For example, in the Bank Holiday mode schedule shown in Figure 26, the assigned controllers are selected for
December 10 and assigned to Controller Modes 7 and 8.
On December 10, the Business Hours time schedule shown in Figure 27 will be active only between 7:00 and
12:00 because the Mode 6 line cannot match with a Mode Schedule of type 7 and 8. Therefore, only the Time
Range specified on the Mode 8 line will be used to enable the Business Hours time schedule.
83
84
Facility Commander Wnx 7.5
User Manual
Figure 26. Bank Holiday mode schedule
Chapter 3
Schedules
Figure 27. Business Hours time schedule
85
86
Facility Commander Wnx 7.5
User Manual
Mode Event Trigger form
The Mode Event Trigger form opens with the Controllers tab displayed. The selections on the Mode Event
Trigger form work in conjunction with the Threat Level Access selection on the Access Right tab of the Person
form. The Threat Level Access feature prevents access to buildings or rooms upon certain alarms or by manual
control on the Manual Control form. There are four Threat Levels (0 - 3), the first is 0 (Normal or no threat),
then 1 (Low), then 2 (Medium) and then 3 (High).
Segment the employees into Threat Levels. For example, general employees are assigned Normal, Supervisors/
Managers are assigned Low, Executives are assigned Medium and President/HR/Fire and Safety Personnel are
assigned High. If a person has a Threat Level of Medium assigned to them and the building is put into Threat
Level - Medium, only persons with a Threat Level of Medium or High can get in.
Controllers tab
Figure 28. Controllers tab
Table 47.
Controllers tab
Element
Description
Assigned Modes or Threat
Levels
Displays a status of the controller and its associated modes or threat
levels.
Add
Click to assign a controller, mode and threat level access.
Remove
Select a controller and then click to remove a mode event trigger
record.
Edit
Opens the Controller/Mode/Threat Level Selection dialog, allowing you
to change the threat level or mode.
Chapter 3
Schedules
Alarms tab
Figure 29. Alarms tab
Table 48. Alarms tab
Element
Description
Assigned Alarms
Displays a list of assigned alarms.
Assign Alarms
Opens the Alarm Assignment dialog. Click on an Available alarm to
select it, and then click on the right arrow to move it to the Assigned
window. Click the left arrow to remove an assigned alarm from the list.
How to
1. Review the guidelines in Table 47 and Table 48 to complete these tabs.
2. Click Save before you exit these tabs.
To configure a Mode Event Trigger
1. On the Controllers tab, click Add to select a controller, a particular schedule Mode (Optional and
Micro only), and a Threat Level.
2. On the Alarms tab, click Assign Alarms to assign a particular alarm or alarms that will cause these
controllers to go to that threat level.
What’s next?
Proceed to Devices on page 89.
87
88
Facility Commander Wnx 7.5
User Manual
Chapter 4 Devices
This chapter provides an overview when defining, configuring, and assigning
devices.
In this chapter:
Overview . . . . . . . . . . . . . . . . . . . . . . . . . . . . . . . . . . . . . . . . . . . . . . . . . 90
Device configuration. . . . . . . . . . . . . . . . . . . . . . . . . . . . . . . . . . . . . . . . 90
Controllers overview. . . . . . . . . . . . . . . . . . . . . . . . . . . . . . . . . . . . . . . . 90
Define controllers . . . . . . . . . . . . . . . . . . . . . . . . . . . . . . . . . . . . . . . . . . 92
Controller flash and controller preference configuration . . . . . . . . . . 121
Define readers. . . . . . . . . . . . . . . . . . . . . . . . . . . . . . . . . . . . . . . . . . . . 123
Define digital inputs . . . . . . . . . . . . . . . . . . . . . . . . . . . . . . . . . . . . . . . 144
Define digital outputs . . . . . . . . . . . . . . . . . . . . . . . . . . . . . . . . . . . . . . 154
Define digital output groups . . . . . . . . . . . . . . . . . . . . . . . . . . . . . . . . . 160
Define instructions . . . . . . . . . . . . . . . . . . . . . . . . . . . . . . . . . . . . . . . . 163
Define alarm responses. . . . . . . . . . . . . . . . . . . . . . . . . . . . . . . . . . . . . 164
Define alarms . . . . . . . . . . . . . . . . . . . . . . . . . . . . . . . . . . . . . . . . . . . . 165
Adding sound to an alarm. . . . . . . . . . . . . . . . . . . . . . . . . . . . . . . . . . . 179
Define alarm groups . . . . . . . . . . . . . . . . . . . . . . . . . . . . . . . . . . . . . . . 179
Alarm Priority. . . . . . . . . . . . . . . . . . . . . . . . . . . . . . . . . . . . . . . . . . . . 184
Configure routing and bumping . . . . . . . . . . . . . . . . . . . . . . . . . . . . . . 187
API Connection form . . . . . . . . . . . . . . . . . . . . . . . . . . . . . . . . . . . . . . 191
Define floors . . . . . . . . . . . . . . . . . . . . . . . . . . . . . . . . . . . . . . . . . . . . . 192
Define elevators . . . . . . . . . . . . . . . . . . . . . . . . . . . . . . . . . . . . . . . . . . 193
What’s next? . . . . . . . . . . . . . . . . . . . . . . . . . . . . . . . . . . . . . . . . . . . . . 202
90
Facility Commander Wnx 7.5
User Manual
Overview
Before you proceed, make sure that your peripheral system hardware is installed and running. Refer to the
installation instructions for your brand of hardware.
Device configuration
The following order is recommended for completion of device configuration:
1. Create controller records. (Additional device records can be configured following the creation of
controller records.) Refer to Controllers overview on page 90.
2. Configure reader records. Refer to Define readers on page 123.
3. Configure digital inputs. Refer to Define digital inputs on page 144.
4. Set up alarm instructions. Refer to Define instructions on page 163.
5. Configure alarm records. Refer to Define alarms on page 165.
6. Configure alarm groups. Refer to Define alarm groups on page 179.
7. Configure digital outputs. Refer to Define digital outputs on page 154.
8. Configure digital output groups. Refer to Define instructions on page 163.
9. Configure elevators. Refer to Define elevators on page 193.
10. Configure DVRs. Refer to Define digital video recorders on page 204.
11. Configure cameras. Refer to Define cameras on page 215.
12. Start controller communications.Refer to Client monitoring on page 325.
13. Verify client configurations. Refer to Identify and configure clients on page 49.
14. After creating schedules, return to the applicable device records and assign schedules.
15. If your system is using ACU controllers, you must assign devices to an area. Refer to Define areas on
page 238.
Note:
In case of a default host computer that has failed, devices that have been added to the default host computer during
the failover cannot come on line until the default host has recovered and a system recovery notification is received.
Controllers overview
Note:
Controller records can be created within FCWnx without having the controllers attached and configured. Additional
device records can be configured after creating controller records.
Controllers manage access through the use of devices such as credential readers, alarm points, and output
points physically wired to the controller, which are then connected to the host by one of the following methods:
•
•
•
Directly
Using RS-232 cabling through a modem
Through a network
Chapter 4
Devices
When you create a controller record, only those records for the associated devices (readers, alarms, alarm
groups, and digital outputs) supported by the controller’s configuration are created. For example, the
MPX2000 is a single-module Micro controller. Other modules do not display for selection, as shown in the
image below. This module address is 0.
Figure 30. MPX2000 configuration
In this example, notice the DI records created automatically when the MPX2000 record was saved.
Figure 31. DI records
Note:
The Controller form contains a combination of tabs. The settings selected on the Controller Definition tab determine
which tabs display.
91
92
Facility Commander Wnx 7.5
User Manual
Define controllers
Use the Controller form, Security Devices group, to configure controllers. Complete the steps in the order
presented.
For a shortcut menu to related forms, move the mouse pointer below any tab and click the right mouse button. If you
are using this shortcut menu to get to the Schedules form or Events form, all schedule or event records display.
Table 49. Form fields
Element
Description
Description
The description of the controller should be unique and include where the controller is
located and/or how it is used.
Example: 1 - Building A2 North Telco Closet could represent Controller 1
located in Building A2 North in the Telco Closet. This is a required field and accepts 64
characters.
Facility
A facility option can be assigned for your new controller record from the Facility dropdown list. All devices, such as readers, alarms, and DIs added with the controller belong
to the same facility as the controller. If you edit the Facility option on an existing
controller record, a message displays, Do other devices change to the same facility as
the controller? If you select Yes, all associated devices and alarms change to the newly
assigned facility. If you select No, the facility change takes place only on the controller
record. The default of Ignore Facilities is assigned if no other selection is made.
Records generation
You can configure your controller record to match the controller’s physical module configuration. Only those
records that are needed are configured.
Controller record generation
For Micro controller systems
When you select a controller type on the Controller Definition tab of the Controller form, a Power/Comm
module is automatically added to the Configuration column on the Controller Configuration tab of the
Controller form. The following records are created:
Alarm Records:
•
•
•
•
Tamper
Power
Host Comm
If this is a network Micro, a controller comm encryption alarm is created.
Note: Micro/PX-2000 modules shipped after November 1, 2003, support the 11th DI as a low-battery alarm for the
controller.
Digital Input Records:
•
•
Tamper
Power
Chapter 4
Devices
Digital Output Records
Sixteen (16) Alarm Group Records
As mentioned above, all alarms are automatically assigned to Alarm Group 0. You can change this on the
Alarm Group form.
Note:
By default, none of these alarms are monitored. If you want them to display on the Alarm Monitor when the alarm is
triggered, you need to go to the Alarm form, Alarm tab and enable Monitor in the Settings section.
In addition, all alarms are automatically assigned to Alarm Group 0. You can change the Alarm Group on the Alarm
Group form.
For ACU controller systems
Common alarm records:
•
•
•
•
•
Tamper
Power
Low battery
Host Comm
Controller COMM encryption
ACURS controllers:
•
•
•
•
Reader records
Alarm records
Input records
Output records
ACU2XL, ACU2XLPlus controllers:
•
•
12 Aux DI records
12 Aux DO records
Reader module record generation
The reader modules listed in the Modules column on the Controller Configuration tab depend on the Controller
Type you selected on the Controller Definition tab of the Controller form. When you add a reader module,
certain records are automatically created:
For Micro controller systems
•
•
Reader records: If adding a 2RP or 2SRP module, two reader records are generated. By default, these
readers are active and able to accept credential transactions. Readers marked as Active count against
your reader limit.
Alarm records
An alarm record is generated for each reader record. If you selected Supervised when you added the
module, an additional alarm record is generated for each reader called Supervised Reader. If you are
adding a 2SRP module, you receive an additional alarm record for each reader called Supervised Exit.
93
94
Facility Commander Wnx 7.5
User Manual
None of these alarms are monitored. If you want them to display on the Alarm Monitor when the alarm
is triggered, you need to go to the Alarm form, Alarm tab and enable Monitor in the Settings section.
In addition, all alarms are automatically assigned to Alarm Group 0. To change this, go to the Alarm
Group form.
•
•
Digital input records: A digital input record is generated for each reader record.
Digital output records: If you added a 2RP or 2SRP module, a digital output record called Aux DO is
generated for each reader record. (There are 2 DO relays available on a 2RP module.)
For ACU controller systems
When RRE1/RRE2/RRE4/RREIKE modules are added, the following records are created:
•
•
Reader records
Alarm records
None of these alarms are monitored. If you want them to display on the Alarm Monitor when the alarm
is triggered, you need to go to the Alarm form, Alarm tab and enable Monitor in the Settings section.
•
•
Digital input records
Digital output records
DI module record creation
For Micro controller systems
When you add a 20 DI module, twenty (20) digital input records are created.
Example: 00001-01-01 DI
This digital input is on controller 1, module 1, point 1. To change this description, enter text over the existing
text and save the record. It is recommended that you keep the mmmmm-bb-pp prefix in each digital input
displayed to aid in locating the alarm points on the physical hardware. This field accepts a maximum of 64
characters.
Note:
Micro/PX-2000 only: When you create and save a Micro/PX-2000 record, FCWnx creates and supports 11 DI points;
however, the 11th DI is a low-battery alarm from the controller. If power is off and the backup battery is running low, the
controller sends an alarm transaction to the Alarm Monitor form. The alarm displays until the battery is reset by
recharging or the controller is powered back on.
To configure the 11th DI on an MPX2000 to function as a low-battery alarm:
1. Open the Digital Input form from the Devices menu and click Search to display a list of digital inputs.
2. Select the DI labeled XXXX-X-11 where 11 is the 11th DI point of the Micro/PX-2000 controller
module.
3. Select Alarm, from the drop-down list of available DI types.
4. Click Save.
5. Open the Alarm form from the Devices menu and click Search to display a list of alarms belonging to
the controllers.
6. Select the DI labeled XXXX-X-11 where 11 is the 11th DI point of the Micro/PX-2000 controller
module.
Chapter 4
Devices
7. Extend the Description entry by entering text indicating low battery.
The entry may look similar to: 00002-02-11 Low Battery
8. On the Alarm tab of the Alarm form, select Monitor from the Settings options.
9. Click Save.
For ACU controller systems
When RIM modules are added, the following records are created:
•
•
•
16 supervised inputs
3 unsupervised inputs
2 Aux DOs
Example: 16337-00-00 ACU Reader
To change this description, enter text over the existing text and save the record. It is recommended that you
keep the number prefix in each digital input displayed to aid in locating the alarm points on the physical
hardware. This field accepts a maximum of 64 characters.
DO module record creation
For Micro controller systems
When you add a 16 DO module, sixteen (16) digital output records are created.
Example: 00001-01-01 DO
This digital output is on controller 1, module 1, point 1. To change this description, enter over the existing text
and save the record. It is recommended that you keep the number prefix in each digital output description
displayed to aid in locating the alarm points on the physical hardware. This field accepts a maximum of 64
characters.
For ACU controller systems
When you add an RRM module, the following records are created:
•
•
16 digital output
2 Aux DI
Example: 16337-00-01 ACU Reader
To change this description, enter over the existing text and save the record. It is recommended that you keep
the number prefix in each digital output description displayed to aid in locating the alarm points on the physical
hardware. This field accepts a maximum of 64 characters.
Creating direct-connect controller records
1. When you click Add to add a controller record, the Controller Definition tab of the Controller form
displays default values filled in for Head of line and Credential Loading. Complete the following:
•
•
•
Enter the address of the controller.
Enter the type of controller.
If this controller is the first controller on a string of controllers, select Yes in Head of line.
Otherwise, select No and select the head of line controller. If this is a downstream controller that
95
96
Facility Commander Wnx 7.5
User Manual
you are adding, the controller directly upstream (towards the host) from it may need to be reset in
order for it to recognize the controller you are adding.
Example: If your line of controllers looks like this:
Host - Controller 1 - Controller 2
And you want to add Controller 3 to the end of the line so that it now looked like this:
Host - Controller 1 - Controller 2 - Controller 3
Then you would need to reset Controller 2 in order for Controller 3 to be recognized.
•
•
•
•
For connection type, select Direct.
Set Host keep alive time interval.
Enter the PC name of the host computer or navigate and select.
Select a method.
2. For Micro controller systems only: On the Security tab, if you do not enter passwords, the default
passwords (one-1, two-2, three-3, and four-4) are used. If you want to change the passwords, you can
do so at any time.
3. On the Time Zone tab, a default time zone is filled in. Verify and adjust time zone settings as
necessary.
4. On the Comments tab, enter any special consideration or reminder for this configuration. This field
accepts 500 characters. It is not necessary to complete an entry in this field.
5. On the Port Settings tab, under Direct Configuration, select the COM Port that the controller is
connected to on the hosting PC.
6. On the Controller Configuration tab, select the modules that are in the controller you are setting up.
Click the module you want and drag to the Configuration column.
7. To delete, select a module from the Configuration column, right-click and select Delete.
8. Click Save. If there is any required information missing, a window displays, listing those items that are
incorrect or missing. Don’t forget to save the record again once you fix those items.
9. When the controller record is created, the records for the associated readers, alarms, alarm groups, and
digital outputs are also created with default data based on the modules you added on the Controller
Configuration tab.
10. Use the Controller Monitor form to set the controller online.
Creating dial-up controller records
Set up your modem(s) through the server or client computer’s operating system. Refer to the documentation
you received with your modem.
1. Select the Administration group, and then select Preferences.
2. Select the Communications tab, and enable the modem(s) that are used for controllers. You need to
stop the Client(s) that host the enabled modem(s) and then restart them.
3. Once you restart this application and log in, select the Controller form from the Security Device
Application Group.
4. When you click Add to add a controller record, the Controller Definition tab displays default values
for the Head of line and Credential Loading.
Chapter 4
Devices
•
•
•
Select the type of controller.
Enter the address of the controller.
If this controller is the first controller on a string of controllers, select Yes under Head of line.
Otherwise, select No and select the head of line controller. If this is a downstream controller that
you are adding, the controller directly upstream (towards the host) from it may need to be reset in
order for it to recognize the controller you are adding.
Example: If your line of controllers looks like this:
Host – Controller 1 – Controller 2
And you want to add Controller 3 to the end of the line so that it now looked like
this:
Host – Controller 1 – Controller 2 – Controller 3
Then you would need to reset Controller 2 in order for Controller 3 to be recognized.
•
•
For Connection type, select Dial-up.
Select a Credential Loading method.
5. (Micro only.) On the Security tab, if you do not enter passwords, the default passwords (one-1, two-2,
three-3, and four-4) are used. If you want to change the passwords, you may do so at any time.
6. On the Time Zone tab, verify and adjust time zone settings as necessary.
7. On the Comments tab, enter any special consideration or reminder for this configuration. This field
accepts 500 characters. It is not necessary to complete an entry in this field.
8. On the Settings to Reach Host tab:
•
•
•
•
•
•
Enter the telephone number(s) that the controller dials to reach the host.
(Micro only.) Enter the interval at which the controller automatically dials the host.
(Micro only.) Enter the number of times the controller tries the same number.
Enter the number of intervals that the controller waits before trying a telephone number again.
(ACU only.) Enter the Maximum disconnect time in minutes
(ACU only.) Select a time schedule on when to dial the controller (optional).
9. On the Settings to Reach Controller tab:
•
•
•
•
•
•
Enter the telephone number(s) that the host dials to reach the controller.
(Micro only.) Enter the interval at which the host automatically dials the controller.
(Micro only.) Enter the number of times the host tries the same number.
Enter the number of intervals that the host waits before trying a telephone number again.
(ACU only.) Enter the Maximum disconnect time in minutes
(ACU only.) Select a time schedule on when to dial the controller (optional).
10. On the Controller Configuration tab, select the modules that are in the controller you are setting up.
Click the desired module in the Modules and drag to the Configuration column. To delete a module
from the Configuration column, select then right-click and select Delete.
11. Click Save to save the record. If there is any required information missing, a message displays listing
those items that are incorrect or missing. Do not forget to save the record again once you fix those
items.
97
98
Facility Commander Wnx 7.5
User Manual
12. (Micro only.) When the controller record is created, the records for the associated readers, alarms,
alarm groups, and digital outputs are also created with default data based on the modules you added on
the Controller Configuration tab.
13. Use the Controller Monitor form to set the controller online.
Creating network controller records
1. When you click Add to add a controller record, the Controller Definition tab of the Controller form
displays default values filled in for Head of line and Credential Loading. Complete the following:
•
•
•
Enter Select the type of controller.
Enter the address of the controller.
If this controller is the first controller on a string of controllers, select Yes in Head of line.
Otherwise, select No and select the head of line controller. If this is a downstream controller that
you are adding, the controller directly upstream (towards the host) from it may need to be reset in
order for it to recognize the controller you are adding.
Example: If your line of controllers looks like this:
Host - Controller 1 - Controller 2
And you want to add Controller 3 to the end of the line so that it now looked like this:
Host - Controller 1 - Controller 2 - Controller 3
Then you would need to reset Controller 2 in order for Controller 3 to be recognized.
•
•
•
For connection type, select Network.
Enter the PC name of the host computer or navigate and select.
Select a method.
2. (Micro only.) On the Security tab, if you do not enter passwords, the default passwords (one-1, two-2,
three-3, and four-4) are used. If you want to change the passwords, you can do so at any time.
3. On the Time Zone tab, a default time zone is filled in. Verify and adjust time zone settings as
necessary.
4. On the Comments tab, enter any special consideration or reminder for this configuration. This field
accepts 500 characters. It is not necessary to complete an entry in this field.
5. On the Port Settings tab, Network Configuration, enter the IP address of the controller.
6. On the Controller Configuration tab, select the modules that are in the controller you are setting up.
Click the module you want and drag to the Configuration column.
7. To delete, select a module from the Configuration column, right-click and select Delete.
8. Click Save. If there is any required information missing, a window displays, listing those items that are
incorrect or missing. Don’t forget to save the record again once you fix those items.
9. When the controller record is created, the records for the associated readers, alarms, alarm groups
(Micro only.), digital outputs, and digital output groups are also created with default data based on the
modules you added on the Controller Configuration tab.
10. Use the Controller Monitor form to set the controller online.
Chapter 4
Devices
Controller Definition tab
Configuring your FCWnx system depends on the system that you purchased and licensed. For example, if you
purchased a system that includes Micro controllers, you are licensed for Micro controllers and cannot
configure ACU controllers.
Note:
System configuration must be planned in advance. You must designate a physical address for your controller before
you create a definition.
The Controller Definition tab contains the basic information on the controller, such as its address and
connection type. When configuring a controller, complete this tab first. Other tabs display, depending on the
selections you make on this tab.
Upon creation, the controller is offline. Before the host communicates with the controller, you must change it
to online using the Controller Monitor form. You do not see any credential or alarm transactions until this is
done.
Multi-drop configuration (ACU Controllers)
When the ACU controller is configured as head of line controller, multiple controllers can be connected to the
head of line controller. The multi-drop feature allows the connection of multiple ACU devices in only one host
link. The connection between ACUs uses four-wire RS-485 communications protocol. Multi-drop is supported
on single-path communication such as Dial-up, Direct, and Network and is not supported on dual path
communication such as Network+Network, Network+Dial-up, and Network+Direct.
FCWnx supports the following three kinds of multi-drop links. The multi-drop loop can support up to 6 ACUs.
•
•
•
LAN Multi-drop (Network)
Dial-up Multi-drop
Serial Multi-drop (Direct)
LAN Multi-drop configuration:
You can multi-drop any ACU from an ACUXL connected to the LAN using RS-485, up to a maximum of
4,000 feet to the last ACU from the ACUXL.
Note:
SW3 DIP switch 1 must be ON to enable the LAN connection. When the LAN connection is enabled, only host Port 2 may
be used to multi-drop additional ACUs. ACURS2 or ACURS4 may also be connected to the RS-485 port.
With the multi-drop LAN settings, additional panels must be configured in the controller settings with the same
IP address as the Head of Line panel.
Dial-up Multi-drop configuration:
The dial up ACUXL/ACURS panel may support up to five additional ACUXL/ACURS panels multi-dropped
to its RS485 port. Rotary switch SW4 is used to set each controller's dialing address. The additional panels
must be configured in the controller settings as dial up panels with the same phone numbers as the panel with
the dial-up modem card configured. All panels must be configured as head-of-line on the Controller Definition
tab.
If the panel with dial-up modem is installed as multi-drop, it must be set as address 1. Each additional multidrop panel on the RS485 port must be addressed starting with 2, and then 3 and so on.
99
100
Facility Commander Wnx 7.5
User Manual
Serial Multi-drop configuration:
When a hosting client is communicating to multiple ACU controllers that are further than 50 Ft (15 m), then
RS-485 must be used. The installer must connect a RS-232C-to-RS-485 converter. The maximum overall
length of this cable is 4,000 feet from the converter to the last ACU in the string, not the head of line.
With the Multi-drop serial settings, additional panels must be configured in the controller settings with the
same COM Port as the Head of Line panel.
Figure 32. Controller Definition tab
Chapter 4
Devices
Table 50. Form fields
Element
Description
Controller Type
Select the controller you are configuring from the drop-down list. FCWnx operates with
the following controller types:
Micro Controllers:
• Micro/5PX: (supports 16 readers) for direct serial and remote dial-up modem
communications links.
• Micro/5PXN: (supports 16 readers) for 10/100Mb Ethernet communications links.
May also be used for direct serial and remote dialup modem communication links.
• MPX2000: (supports 4 readers) for direct serial and remote dial-up modem
communications links.
• MPXN2000: (supports 4 readers) for 10/100Mb Ethernet communications links. May
also be used for direct serial and remote dialup modem communication links.
• MicroPXNPlus: (supports 16 readers) for 10/100Mb Ethernet communications links.
May also be used for direct serial and remote dialup modem communication links.
• MicroPXNPlus2000: (supports 4 readers) for 10/100Mb Ethernet communications
links. May also be used for direct serial and remote dialup modem communication
links.
• DirecDoor: (supports 2 readers) for 10/100Mb Ethernet communications links. Also
provides optional dial-fallback feature.
Note:
If your system is using M3000 controllers, select controller type as
MicroPXNPlus - see description above
ACU controllers:
Note:
ACU controllers support multiple combinations of port addresses for readers,
inputs, and output modules. Refer to your ACU hardware manual for
configuration instructions.
• ACU2XL: (supports 8 or 16 readers) built-in LAN connection. To configure ACU2XL8
or ACU2XL16.
• ACURS: (supports 2 or 4 onboard readers plus up to 8 additional readers) built-in
LAN connection. To configure ACURS2 or ACURS4.
• ACU2XLPlus: (supports 8 or 16 readers) built-in LAN connection.
When you make a selection, the appropriate fields become available for the selected
controller type.
Hardware Address
Micro controllers: Enter a number from 1 to 61439 maximum.
ACU controllers: This number is the five-digit serial number printed on the ACU panel.
Enter a number from 1 to 61439 maximum.
Description Address
(ACU only.) This field contributes the controller number portion of device descriptions. If
you replace a controller board, be sure to enter the new hardware address (serial
number) here if you want the hardware address portion of the device description to be
accurate in the records of associated devices such as this reader description example:
12345-1-01 Reader
This reader is on controller 12345, module 1, reader 1. If the board is changed, 12345 is
no longer accurate.
101
102
Facility Commander Wnx 7.5
User Manual
Table 50. Form fields (continued)
Element
Description
Elevator Controller
(ACU only.) Select this check box if this controller is to be assigned for elevator control.
• If the controller is an elevator controller, it can only manage elevators and nothing
else.
• If you are changing this ACU from an Elevator type to a Normal type, the Elevator
records assigned to any area must be reassigned or deleted.
Head of Line
Once you have connected the first controller to the host, this controller is the Head-ofLine in a string of controllers.
• Select Yes if you are configuring the first controller connected to the host.
• If you select No, you must also select a head-of-line controller from the drop-down
list.
A MicroPXNPlus or MicroPXNPlus2000 must be a head-of-line Micro to take advantage of
the Integrated Configuration Tool for flashing the firmware. If this is a new controller, the
network settings are set as the default. Open a browser window such as IE, enter the
controller IP address (such as http:\\192.168.6.6) and click Go. Firmware download
begins. If a MicroPXNPlus or MicroPXNPlus2000 is downstream, you have two options:
• You can use eFlash to download firmware.
• Consider obtaining a network connection and using the Integrated Configuration
Tool to individually download firmware to a Micro controller.
(ACU Controllers) Refer to, Multi-drop configuration (ACU Controllers) on page 99 for
additional configuration details.
Connection Type
You must select a controller type before this field becomes available. An error message
displays if the selected connection type is not valid with the controller type. Select:
• Dial-up if this controller is connected by a modem.
• Direct if a cable connects this controller.
• Network if this is a network controller connected by a network.
• Network + Dial-up if this is a network controller and has a backup dial-up option.
When the network connection is not available, the host attempts to reach the
controller via a dial-up modem.
• Network + Direct if this is a network controller. When the network connection is not
available, communication fails over to the secondary direct connection and
communication continues.
• Network + Network if this is a network controller. When the network connection is
not available, communication fails over to a secondary network communication
through another IP address, assigned on the Port Settings tab.
For ACU controllers only: Using a device that converts IP protocol to serial
communication, your network communication is converted to serial protocol
communication. (This product supports the Lantronix MSSLite device.)
Note:
Dial-Up and Network + Dial-Up Controllers: If the host computer of this
controller is licensed for Client Redundancy and has assigned a backup client,
a dialog box displays, reminding you to complete the Client form by configuring
telephone numbers for backup clients to reach this controller.
(ACU Controllers) Refer to, Multi-drop configuration (ACU Controllers) on page 99 for
additional configuration details.
Chapter 4
Devices
Table 50. Form fields (continued)
Element
Description
Host Keep Alive
Enter (or use the up and down arrows) the number of seconds that the host waits before
sending the next message to a controller. Enter a number between 10 and 3600. In
general, you want a large number when you have many controllers on the same line or
have a slow baud rate. The default is 30 seconds and in most cases, it does not need to
be changed.
Host Computer
Select the PC Name from the Default Hostname drop-down list. This is the host machine
that communicates with the newly defined controller in the future and acts as the
controller communication server.
If the Default Hostname computer is in a failover condition, you cannot re-assign this
controller to any other Host computer except the Active Client that is presently hosting
this device.
Credential Loading
Note that any time a credential that is not in a controller is presented to a reader, it is
reported as unknown and the host sends the credential to the controller. This happens
regardless of the Credential Loading option. The controllers can store only a limited
number of credentials. Refer to the licensing chapter of the FCWnx Installation Guide for
capacities. When a previously unknown credential is sent to a controller whose
credential capacity is exceeded, the controller randomly chooses a credential to delete
to make room for the new credential. The credential is deleted from the controller but not
from the FCWnx system.
Select Force to force a download of all credentials that can possibly gain access to a
reader on the controller.
Select Learn to allow the controller to “learn” the credentials as they are presented. For
example, when a credential is presented to a reader and the controller does not
recognize the credential as valid, the controller communicates with the host to confirm
credential validity. If the credential is valid, the information for that credential is
downloaded to the controller; therefore, the controller acknowledges this credential as
valid the next time the credential is presented to the reader.
Polling
(ACU only.) Additional Poll Delay (ms): Determines the amount of time for the head-of-line
controller to poll each downstream controller.
Report Real Time Digital Output
Status
This check box is enabled by default. Any digital output change-of-state will be reflected
on the alarm Graphics Console, in real-time status.
Note:
Every transaction that changes the state of a digital output on this controller is
now written to history.
• If you intend to place digital output symbols on your graphics maps that indicate
the state of a digital output, this option must be selected for this controller. Refer to
your Graphics Console User Manual, Graphics Symbol Editor: Properties and
Conditions for information about setting controls and assigning properties for your
graphics monitoring.
• If this option is not selected, you cannot see digital output status for this controller
on your graphics maps, and digital output transactions are not written to digital
output history.
Exit Request Debounce
(Micro only.) Enable this field to increase the sense time on all the Exit DIs (exit requests).
This field is useful if using noisy or chattering contact interference in which you receive
false exit requests.
DI/Alarm Termination Type
(ACU only.) Select the Termination Type from the drop-down list. This wiring termination
describes the type of end-of-line resistor used on this ACU controller hardware. The
default selection is 'Dipswitch.' For additional information, refer to the ACU Networked
Intelligent Controllers User Guide.
103
104
Facility Commander Wnx 7.5
User Manual
Table 50. Form fields (continued)
Element
Description
Keypad PIN
(ACU only.)
Note:
For Micro controllers, this feature can be configured on the Reader form.
Max Invalid PIN Count :
1) Select this check box if you want your FCWnx system to suspend credentials after an
invalid PIN is entered and a credential is presented at a reader a configured number of
times.
2) Then, enter a number between 1 and 9 as the number of times an invalid PIN code is
entered at a system reader before the credential is suspended. The default of this field is
'3.'
3) If suspended, the credential must be changed to active by a system administrator.
Keypad Extended Unlock
Pre-alarm
(Micro (PXN Plus and DirecDoor) only.) Select the check box and choose a keypad
command code (10 to 99).
To use this feature:
1) Enter the keypad command code *(two-digit number from 10 to 99)#.
2) Enter the extended unlock time *(two-digit number from 02 to 99)#. This is the amount
of time in minutes that the door will be unlocked. At 60 seconds prior to the extended
unlock time expiring, the reader will announce locally (beeping and flashing LED
sequence) indicating a DOOR HELD open alarm will be generated if the door is not closed
or another extended unlock command and credential transaction is executed.
Note:
If the keypad extended unlock time is set to 60 seconds, the reader will set prealarm by beeping and flashing immediately.
4) Configure “on time” for any one DO as 0 and assign this DO as output A (Primary/local)
DO for the door held alarm of a particular reader.
5) Present a valid credential and enter a valid PIN. The door will unlock.
How to
1. Review the guidelines in Table 50 and complete the fields on this tab according to the controller type
that you are configuring.
2. Click Save before you exit this tab.
Chapter 4
Devices
Elevator digital output interface
Elevator companies often choose not to allow installers to handle the elevator wiring directly. They may
provide contacts from the elevator circuit that can be used to interface between FCWnx and the elevator
control. Sample wiring scenarios are shown in Figure 33, Sample elevator digital output wiring on page 105:
Figure 33. Sample elevator digital output wiring
When an ACU controller is used for elevator control, all DOs are in active/set state when not selected. If the
ACU fails, all floors are enabled.
105
106
Facility Commander Wnx 7.5
User Manual
Security tab
Figure 34. Security tab
Table 51. Form fields
Element
Description
Controller password
(Micro only.) The Controller Passwords list box has the following default password entries,
enabling four possible levels of security. Select a password; it now displays in the
Password dialog box.
Select:
one-1 to re-assign a password by typing over the default displayed in the dialog box.
two-2 to re-assign a password by typing over the default displayed in the dialog box.
three-3 to re-assign a password by typing over the default displayed in the dialog box.
four-4 to re-assign a password by typing over the default displayed in the dialog box.
Click Change to save and re-assign the new password.
Note:
If you change your controller passwords, you must enter the changed
passwords in FlashTool by typing over the existing entries. As you enter the
password in FlashTool, the characters are replaced by asterisks (*) to ensure
the security of the host access system. This only applies to PX and PXN Micro
controllers and does not apply to PXNPlus or DirecDoor Micro controllers.
Chapter 4
Devices
Table 51. Form fields (continued)
Element
Description
Communication Encryption
This feature lets you configure additional security encryption that scrambles data into an
unbreakable code for public transmission. Encryption protects the Host-to-controller
exchange of information. The Host uses the Exchange Key to send the Data Key to the
controller. Once the Data Key is received, the Host-to-controller communication is
encrypted using that key.
Enable Encryption: This check box is available only for head-of-line network,
network + dialup, network + direct, and network + network controllers.
Note:
This check box, and all selections in the Communication Encryption grouping,
are not available on downstream controllers.
Weak encryption implies that the key could be unscrambled with a realistic amount of
processing capacity and within a reasonable amount of time.
In FCWnx, a message displays informing you that an assigned key is too weak and
therefore, invalid. Corrections must be made before the record can be saved. We
recommend entering 48 unique hex characters, in three 16-character strings. Do not
repeat any character. Do not create a pattern.
Exchange Key
There are two options for encrypting an Exchange Key:
System: When you choose this selection, no additional selections are available or
required. This key is set at the factory.
Custom:
When you select this option, the three dialog boxes become available. At the controller,
enter the 48-character exchange key. This exchange key must be identical to the key
that was entered into the controller preference block at the controller.
Micro controllers: Enter the 48-character exchange key using FlashTool or Integrated
Configuration Tool (ICT).
ACU controllers: Enter the 48-character exchange key using the ACUXUtil.exe utility.
Note:
To use AES encryption, you must select the AES data key option and then select
the Edit button. AES encryption uses four 16 character strings for a total of 64
characters.
Note:
If the Custom exchange key entries do not match, an alarm condition
indication displays in the Reference column of the Alarm Monitor form.
Edit: Click to re-assign or revise an existing encrypted Custom exchange key for a
selected controller. It is possible to assign a duplicate exchange key on separate
controllers in this application system. When you click this button one time, this button
label changes to Auto Generate.
Auto Generate: Click this button to system-generate a Custom exchange key. We
recommend that you record this number. You can now enter this key into the controller
preference block at the controller.
107
108
Facility Commander Wnx 7.5
User Manual
Table 51. Form fields (continued)
Element
Description
Data Key
This application supports three methods of data encryption standards: DES, DESIII,
and AES.
DES: When you select this method, only one dialog box is available for input. Enter 16
unique hex characters in this binary field. We recommend that you do not repeat any
character. The additional two dialog boxes are unavailable for entry.
DES III: Enter 48 unique hex characters in the binary dialog boxes, in three 16-character
stings. If you do not enter unique hex characters, this controller record is not saved. An
invalid field message displays, informing you that the keys that were chosen are too
weak.
AES: AES encryption is enabled for ACU controller systems only. Enter 64 unique hex
characters in the binary dialog boxes, in four 16-character strings.
Edit:
Click to re-assign or revise an existing encrypted data key for a selected controller. When
you click this button one time, this button label changes to Auto Generate.
Note:
To use AES encryption, you must select the AES data key option and then select
the Edit button. AES encryption uses four 16 character strings for a total of 64
characters.
Auto Generate: Click this button to system-generate a data key. We recommend that
you record this number.
How to
1. Review the guidelines in Table 51 and complete the fields on this tab.
2. Click Save before you exit this tab.
Time Zone tab
Use the Time Zone tab to select the time zone of this controller.
Figure 35. Time Zone tab
Chapter 4
Devices
Table 52. Form fields
Element
Description
Zone Drop-down List
Select the time zone of this controller from the drop-down list of available time zones.
Automatically adjust clock for
daylight saving changes
The host and controller can operate independently, in different time zones. If you want
the controller to recognize and implement daylight savings time, select this check box.
• The default of this check box is checked, and the controller recognizes daylight
savings time changes.
• If the check box is not checked, the controller does not adjust for daylight savings
time change.
How to
1. Review the guidelines in Table 52 and complete the fields on this tab.
2. Click Save before you exit this tab.
Comments tab
The Comments tab and windowpane are provided to enter a location description, reason for creating this group,
or special considerations for this configuration. This field accepts 500 characters. It is not necessary to
complete an entry in this field.
Figure 36. Comments tab
How to
1. Complete the comments field on this tab by placing your mouse cursor in the window and entering text
from your keyboard.
2. Click Save before you exit this tab.
109
110
Facility Commander Wnx 7.5
User Manual
Events tab
Note:
The Events tab is enabled for systems with Micro controllers only.
Use the Events tab to assign events to this controller.
Figure 37. Events tab
Table 53. Form fields
Element
Description
Reset APB Event
Select an event from the drop-down list of available event records that resets the antipassback status for all credentials in the controller.
Reset T & A Event
Select an event from the drop-down list of available event records that resets the T&A
status for all credentials in the controller.
How to
1. Review the guidelines in Table 53 and complete the fields on this tab.
2. Click Save before you exit this tab.
Chapter 4
Devices
Status tab
Select the Status tab to view information about an individual controller as currently stored in the controller’s
database. The columns of the Controller Monitor form also reflect the status of the selected controller and
explain what is happening between the host and the controller. The Status Windowpane is read-only and
appears in two-column format.
Figure 38. Status tab
111
112
Facility Commander Wnx 7.5
User Manual
Table 54. Form fields
Element
Description
Status windowpane
Note:
The following items apply to Micro controllers only:
Mode: (Micro only.) Displays the mode of the controller
Firmware Revision (Date): (Micro only.) Displays the date of the last firmware revision.
Boot Version: (Micro only.) Displays the number of the boot version.
Note:
The following items apply to both Micro AND ACU controllers:
Threat Level Access: (Both Micro and ACU.) Displays the threat level of the controller.
Firmware Version: (Both Micro and ACU.) Displays the version number.
Firmware Patch Level: (Both Micro and ACU.) Displays the patch level number.
Memory Size (meg): (Both Micro and ACU.) Displays the amount of memory in
megabytes.
Encryption: (Both Micro and ACU.) Indicates if encryption is in use on this controller.
Note:
Encryption status for a head-of-line network + direct controller: If the controller
loses network connection and fails over to a direct connect, a configured
Encryption status changes to None, since Encryption is available for network
controllers only.
Note:
The following items apply to ACU controllers only
Supports 16 Readers: (ACU only.) Indicates Yes or No, whether this controller supports 16
readers.
Number of Cards in Database: (ACU only.) Displays the number of credentials in the
controller database.
Supports 8K Areas: (ACU only.) Indicates Yes or No, whether this controller supports 8K
areas.
Device Type: (ACU only.) Displays the device type.
Preference Updates Allowable: (ACU only.) Indicates Yes or No, whether this controller
allows preference updates.
Battery Backup Memory: (ACU only.) Indicates Yes or No, whether this controller has
backup memory.
Last status date
Displays the date when the status was last requested.
Last status time
Displays the time when the status was last requested.
Refresh
Click to receive the current status information from the controller. It may take a moment
to complete the refresh of the data. A refresh for a dial-up controller causes the host to
dial the controller unless they are already connected. The refresh process may take a few
minutes.
Note:
A status refresh requested for a controller that is offline or in error is never
returned.
Chapter 4
Devices
How to
1. Review the fields on this tab.This is a read-only windowpane, in two-column format.
2. Request the latest information by clicking Refresh. It may take a moment to process refreshing the
data.
Controller Configuration tab
Use the Controller Configuration tab to assign the appropriate modules to this controller.
Note:
Before continuing, verify that the controller type is correct. The modules that display in the Modules column depend on
the type of controller you have selected.
Figure 39. Controller Configuration tab
Table 55. Form fields
Element
Description
Modules
Lists all modules supported by this application and the controller type you have selected.
• To add a module to the current controller record, click and drag to the Configuration
column.
• If the addition of the module violates a controller configuration rule, you get an error
and the module is not added.
113
114
Facility Commander Wnx 7.5
User Manual
Table 55. Form fields (continued)
Element
Description
Configuration
Lists the current configuration of the controller.
Micro controller systems:
• A Power/Comm module is automatically added when you create the controller
record.
• The reader, digital input, and digital output modules need to be added to match the
physical setup of the controller.
Note:
Following the addition or deletion of a module, you must click Save for the
appropriate records to be generated or deleted.
Once you add a module, you can mix and match with other types of modules. For
example, if you add one 2RP module, additional modules can be 2RP or 2SRP. For the
M5PX, you can add up to four 2RP modules, four 2SRP modules, two 4CRP modules, two
8RP modules, or two CK8RP modules. DI and DO modules can be added with all of the
above.
ACU controller systems:
• ACU modules (RRE - reader, RIM, RIM - input, RRM - output, IKERRE - keypad reader).
• The reader (RRE1, RRE2, RRE4, RREIKE), digital input (RIM), and digital output (RRM)
modules need to be added to match the physical setup of the controller.
Note:
Following the addition or deletion of a module, you must click Save for the
appropriate records to be generated or deleted.
Once you add a module, you can mix and match with other types of modules. For
example, if you add an RRE1 module, additional modules can be RRE1, RRE2, RRE4, and
RREIKE.
Note:
Following the addition or deletion of a module, you must click Save for the appropriate records to be generated or
deleted.
How to
1. Review the guidelines in Table 55 and complete the fields on this tab.
2. Select, and then drag the Modules to the Configuration window.
3. If you receive an error message for a violation, evaluate your selections and add the appropriate
modules for your configuration.
4. Click Save before you exit this tab.
Chapter 4
Devices
Global Area Control tab
Note:
The Global Area Control tab is enabled for systems with ACU controllers only. This tab is only used for the PIN mode of
area control.
The Global Area Control tab lets you assign previously defined areas to an ACU controller.
Figure 40. Global Area Control tab
Table 56. Form fields
Element
Description
Global Areas for Keypad Arm/
Disarm
This windowpane displays a list of previously assigned areas.
Assign Area
Click this button to display the Global Area Control Assignment dialog box. A list of
available areas displays, enabling you to select and assign or unassign one or more
areas for the selected ACU. Up to 120 areas can be assigned.
How to
1. Review the guidelines in Table 55 to complete this tab.
2. Click Save before you exit this tab.
115
116
Facility Commander Wnx 7.5
User Manual
Port Settings tab
The Port Settings tab displays only when you are configuring a controller type as direct-connect, network,
network + direct, network + dialup or network + network controller type. Refer to the sample Connection type
figure displayed below:
Figure 41. Port Settings tab
Table 57. Form fields
Element
Description
Direct Configuration
COM port: You are able to change this setting only if the controller connection type is
direct-connect or network + direct. Otherwise, this field is unavailable. From the dropdown list, select the COM port to which this controller is connected. The system operates
with the default setting of None if no port is designated.
Chapter 4
Devices
Table 57. Form fields (continued)
Element
Description
Network Configuration
Primary Network
Note:
You must complete one of the following two selections. These fields are
available only if the controller is other than a direct-connect or dial-up
controller.
IP Address: Select this option and then enter the IP address for network configuration.
Network Name: Select this option and then enter the network name for the controller
that hosts this controller.
Secondary Network
Note:
You must complete one of the following two selections. This option is only
available if the connection type is Network+Network.
IP Address: Select this option and then enter the secondary IP address assigned for
network + network communications.
Network Name: Select this option and then enter the secondary network name for the
controller that hosts this controller.
How to
1. Review the guidelines in Table 57 and complete the fields on this tab.
•
•
If this is a direct-connect controller, select the COM port from the drop-down list. The Network
Configuration section is not available.
If this controller is other than a direct-connect, the Network Configuration sections are available
for completion.
2. Click Save before you exit this tab.
117
118
Facility Commander Wnx 7.5
User Manual
Settings to Reach Host tab
Note:
The Settings to Reach Host tab displays only when you are setting up a dial-up, head-of-line controller.
Use the Settings to Reach Host tab to configure how the controller dials the host.
Figure 42. Settings to Reach Host tab
Table 58. Form fields
Element
Description
Phone numbers to reach host
Enter telephone numbers of up to 20 digits, that the controller dials to reach the host. If
an outside line must be accessed in order to dial out, enter a comma after the number
that accesses the outside line, (typically 9). In this situation, if the telephone number to be
dialed is 1-555-666-7777, you would enter the number in this field as follows:
9,15556667777
The controller dials the number in Number 1: and then tries the others in numerical order
until a connection is made.
Note:
Same number retries
All Number fields must contain a telephone number of up to 20 digits. If there is
only one telephone number for this controller to reach the host, repeat this
number in all fields. (If you click Save after completing the first Number field,
the system automatically completes all Number fields with a duplicate
number.)
(Micro only.) Enter the number of times (from 0 to 9) the controller should redial the same
telephone number before moving on to the next available telephone number.
Chapter 4
Devices
Table 58. Form fields (continued)
Element
Description
Retry interval
Enter the number (from 1 to 9) of 30-second intervals that the controller waits in between
each dial to the host. For example, if you specify 2, then the controller waits: 2 x 30 = 60
seconds between each dial to the host.
Dial Interval: Select the interval (none, 1 hour, 8 hours, 12 hours and 24 hours) at which
the controller automatically dials the host. The controller dials at the bottom of the hour.
For example, if you select the 1-hour interval, the controller would dial at 4:30, 5:30 and
continue every hour after.
The following options are available for ACU controller systems only:
Enter the number (from 1 to 9) of minute intervals that the controller waits in between
each dial to the host. For example, if you specify 2, then the controller waits: 2 x 1 = 2
minutes between each dial to the host.
Maximum disconnect time (min): Select a range from 1 to 180 minutes as the maximum
number of minutes that the host is allowed to be disconnected from the controller before
dialing in again. The default number of minutes is 180.
Dial Out Time Schedule: Select a time schedule from the drop-down list during which
the controller automatically dials the host to upload transactions. When the maximum
disconnect time expires, the controller dials the host only if this time schedule is active.
Note:
This setting operates independently from alarm reporting and dialing the host,
if selected on the Alarm form.
How to
1. Review the guidelines in Table 58 and complete the fields on this tab according to the controller type
that you are configuring.
2. Click Save before you exit this tab.
Settings to Reach Controller tab
Note:
The Settings to Reach Controller tab displays only when you are configuring a dial-up, head-of-line controller.
Use the Settings to Reach Controller tab to configure how the host dials the controller.
119
120
Facility Commander Wnx 7.5
User Manual
Figure 43. Settings to Reach Controller tab
Table 59. Form fields
Element
Description
Phone Numbers to Reach
Controller
Enter the telephone number of up to 20 digits, that the host dials to call the controller. If
an outside line must be accessed in order to dial out, enter a comma after the number
that accesses the outside line, (typically 9). In this situation, if the telephone number to be
dialed is 1-555-666-7777, enter the number in this field as follows: 9,15556667777
The controller first dials the number in Number 1: and then tries the number in Number 2.
Note:
All telephone number fields must contain a telephone number. If there is only
one telephone number for the controller, enter this number in all fields.
Dial Interval
Select the interval (None, 1 hour, 8 hours, 12 hours, 24 hours) at which the host
automatically dials the controller. The host dials one hour from the time the controller
went into an idle (no activity) state. If this is a new record, the count begins once the
record is saved. If this application is shut down, the count begins once this application is
started.
Same Number Retries
Enter the number of times (from 0 to 9) the host should redial the same telephone
number before moving on to the next available telephone number.
Retry Interval (30 sec)
Enter the number (from 1 to 9) of 30-second intervals that the host waits in between
each dial to the controller. For example, if you specify 2, then the host waits: 2 x 30 = 60
seconds between each dial to the host.
Host Call Back
Select this check box if you want the host computer to return a call back to the controller,
providing additional validation that the correct host-to-controller communication has
taken place.
Chapter 4
Devices
How to
1. Review the guidelines in Table 59 and complete the fields on this tab.
2. Click Save before you exit this tab.
Controller flash and controller preference configuration
This dialog box displays only if the controller is online. There are three options:
1. View/edit preference info (Micro only)
Controller Preference - Direct/Dialup
This option is available for selection of a single controller. When selected, the Controller Preference
Configuration screen displays and the configuration for the controller is retrieved, allowing you to edit or
change an existing setup such as controller address, IP address change, or phone number changes. Once saved,
the controller resets and the new changes take effect.
Note:
If you change preference block data through this application, any Universal Credential Format (UBF) data is erased.
Example: If an M5-PXN was originally configured as a direct serial controller during installation but is now a
network controller, select the updated controller type and complete the network information. Click OK. The
controller accepts the changes, resets, and then changes the host information for this controller.
The Controller Preference - Direct/Dialup tab lets you change the connection type of the controller and its
Address, Idle Time, and DI res tolerance.
The Controller Preference - Networking tab displays only if the system identified your controller as a network
controller and lets you change the network preferences for the controller.
Controller Preference - Credential Format
The Credential Format tab opens to display the custom credential formats that are currently in the controller. If
there are no custom formats, the fields are empty. If a format in the database does not match what is available
in the controller, the window list displays a message “Unrecognized Format.” To change the credential format:
•
•
•
Magnetic stripe: Select the type of magnetic stripe format from the drop-down list.
Wiegand: Click Assign formats to display a list of available Wiegand credential formats from which
to choose and assign to this controller.
Clear formats in controller: Click to clear all custom credential formats from the controller.
Credentials associated with those formats no longer work.
If you change the credential format, any format that existed in the controller previously is replaced.
2. Start flashing controllers
This option starts flashing the selected controllers with the latest firmware. A dialog box displays, asking you
to verify your request. The flashing process time varies, depending on the amount of data that needs to be
transmitted to the controller and the controller connection type.
121
122
Facility Commander Wnx 7.5
User Manual
3. View/edit flash files
Use this option only when it is necessary to selectively flash an older version of firmware on a controller. This
application automatically selects the latest version by default. Click OK to begin the flash. When flashing is
complete, the controller resets and requests a database.
•
•
•
•
•
•
•
•
M5 - PX and Micro/PX - 2000: The form opens with the latest .efl firmware file displayed. Click the
drop-down list to display and select an older firmware file.
Micro/5 - PXN and Micro/PXN - 2000: The form opens with the latest .efl network firmware file
displayed. Click the drop-down list to display and select an older network firmware file.
MicroPXNPlus and MicroPXNPlus2000: The form opens with the latest .efl network firmware file
displayed. Click the drop-down list to display and select an older network firmware file.
DirecDoor: The form opens with the latest .efl network firmware file displayed. Click the drop-down
list to display and select an older network firmware file.
ACUXL and ACURS: The form opens with the latest .s19 network firmware file displayed. Click the
drop-down list to display and select an older network firmware file.
ACUXLPlus: The form opens with the latest .efl network firmware file displayed. Click the dropdown list to display and select an older network firmware file.
Browse: Click to navigate to another media source or directory where firmware files reside.
Override Block Checking: Ignore this check box. This selection is for Customer Support use only.
Note:
Secure Perfect Version 4.XX and later Micro firmware is able to communicate with this application host and
continue to send alarm and credential transactions. Upgrading your system can be a seamless operation
without loss of data, time constraints during the controller migration process, or lockdowns during the
database upgrade process. However, in order to take advantage of the new features that are dependant on
the firmware, the ultimate goal is to bring all controllers to current level as soon as possible following the
database upgrade.
Chapter 4
Devices
Define readers
Use the Reader form, under the Security Devices group, to define readers. Readers are the devices that interpret
the encoded numbers on credentials. Readers are usually located near doors or gates that the system controls.
Credentials are presented to the readers in order to gain access through a door.
•
•
•
When a controller record is created, reader records are also created. The number of records depends on
the controller that you configure and the reader modules that the controller contains.
The reader is automatically enabled as Online and Active, and configured to accept credential
transactions when a reader record is created.
The number of active readers counts against your reader limit. For example, if your license key allows
the use of 128 readers, you may have only 128 readers marked as active.
Note:
•
•
When the total of all reader records equals the maximum number of active readers allowed by your license,
you receive a warning message.
The reader record controls both the physical reader and how the door locks and unlocks. See your
controller and reader installation manual for information on how to connect readers to a controller. Use
the Reader form to modify the reader configuration.
(ACU only.) If this reader is associated with SCIF (ACU only.), you cannot control this reader record
unless you are at the SCIF workstation that is hosting this reader.
For a shortcut menu to related forms, move the mouse pointer below any tab and click the right mouse button. If you
are using this shortcut menu to get to the Schedules form or Events form, all schedule or event records display.
Table 60. Form fields
Element
Description
Description
When reader records are created, the default description is in the format:
Micro controller: mmmmm-bb-pp
ACU controller: mmmmm-na-pp
where mmmmm represents the controller number to which this reader is associated, b
represents the module number (n represents the port number and a represents port
address), and pp represents the reader number.
Example: Micro record: 00001-01-01 Reader
This reader is on controller 1, module 1, reader 1. To change or add to this description,
select and enter text over the existing text and save the record. It is recommended that
you keep the mmmmm-bb-pp prefix in each reader displayed to aid in locating the reader
points on the physical hardware. This field accepts a maximum of 64 characters.
Facility
A facility option can be assigned for the area from the drop-down list of available
facilities for assignment by this operator. The default of Ignore Facilities is assigned if no
other selection is made.
123
124
Facility Commander Wnx 7.5
User Manual
Reader tab
The Reader tab contains the basic information about the reader.
Figure 44. Reader tab
Table 61. Form fields
Element
Description
Controller
This is a read-only field. The description of the controller that manages this reader.
Module
This is a read-only field. The default description is in the format: mmmmm-bb Module Type where
mmmmm represents the controller number to which this reader is associated, bb represents the module
number (n represents the port number and a represents port address), and Module Type
represents the reader module.
Micro controllers: mmmmm-bb-Module Type
ACU controllers: mmmmm-na-Module Type
For example, 00001-01 8RP would be the reader on controller one, 8RP module one.
Chapter 4
Devices
Table 61. Form fields (continued)
Element
Description
Number
This is a read-only field. The number of the reader. (Example: For a Micro/5-PX: 1 to 16; for a Micro/PX2000: 1 to 4.) The number corresponds to where the reader is connected on the controller.
See the Micro/5 Installation Guide, Micro/PX-2000 and Micro/PXN-2000 Installation Guide, or ACU
Networked Intelligent Controllers User Guide for more information.
Reference
(ACU only.) The reference number corresponds to the reader number.
Model
Select from the drop-down list of card data formats. The list of formats that display is associated with
the type of controllers used in your system.
Micro controllers:
• CASI-RUSCO Supervised if using a CASI-RUSCO supervised reader such as the 94x or 97x series
proximity readers set for supervised F/2F.
• CASI-RUSCO 440/445 if using a CASI-RUSCO Model 440, Model 445, or Model 910.
• Other if using a reader that does not fit into the above categories.
ACU controllers:
• Magstripe if using magnetic stripe card readers.
• Wiegand if using Wiegand card readers.
• Custom enables a field for selection of a Credential Format.
Credential Format
(ACU only.)
• This field is available when custom has been selected as the Model type. Select from a dropdown list of available credential formats in the database.
• First, select the Model as Custom, and then select a Credential Format.
Status
Online: This field is automatically enabled when this reader record is created. An online reader
accepts a valid credential read and unlocks a door, provided it is one of the licensed active readers.
You also have the option to schedule a reader offline. When the reader is offline, the reader does not
accept valid credential reads, does not unlock a door, and Activity monitor will not display any
transactions for that reader.
Active: This field is automatically selected and allows the accepting of credential transactions when
this reader record is created. The number of active readers counts against your reader limit, as
defined by your software license. For example, if your license key allows the use of 64 readers, you
may have only 64 readers marked as Active.
Note:
Physical Type
If this reader is associated with a SCIF (ACU only.), you cannot control this reader status
unless you are at the SCIF workstation that is hosting this reader.
Normal (Credential Only): This reader requires only a valid credential to gain access.
Credential and PIN Required: This reader requires a valid credential and a valid number (PIN) entered
on the keypad to gain access.
Credential or Keypad Entry: This reader requires you to enter either a valid credential number on the
keypad or a valid credential to gain access.
125
126
Facility Commander Wnx 7.5
User Manual
Table 61. Form fields (continued)
Element
Description
Logical Type
The following options are available for selection if this reader is associated with an ACU controller
or Micro controller:
Normal: Allows as many successive accesses as needed, as long as the credential is valid.
Elevator: This type of reader is used for elevator control. For Micro controllers, this type of reader is
configured when the reader is assigned to an elevator record. This is set up using the Elevator tab of
the Elevator form. For ACU controllers, this type of reader is configured when the controller is changed
to an Elevator controller.
Note:
For Micro controller systems: The Elevator radio button is enabled when you assign this
reader to an elevator on the Elevator form. When you delete the elevator or unassign the
elevator reader, the reader logical type returns to Normal.
The following option is available for selection if this reader is associated with an ACU controller
only:
APB: Anti-passback. This reader does not release a door a second time until that credential is used in
an exiting area reader. All controllers are updated. For ACU controller systems, when configuring an
area for APB, the entering and exiting area reader assigned to the area must have a logical type of
APB selected.
Note:
For ACU controller systems, when configuring an area for APB, the entering and exiting area
reader assigned to the area must have logical type APB selected.
The following options are available for selection if this reader is associated with a Micro controller
only:
APB In: Anti-passback in. This type of reader (which gives an IN status) is used to enter an area. This
reader does not release a door a second time until that credential is presented to an APB out reader
connected to the same controller or, if you selected Enable global APB on the System Settings tab of
the Preferences form, a different controller. All controllers are updated.
APB Out: Anti-passback out. This type of reader (which gives an OUT status) is used to leave an area.
This reader does not release a door a second time until that credential is presented to an APB in
reader connected to the same controller or, if you selected Enable global APB on the System Settings
tab of the Preferences form, a different controller. All controllers are updated.
Note:
Global configuration: You must configure this reader as APB if you plan to include this
reader in a Region APB configuration. Only designated APB reader types display for selection
on the Region form.
T&A In: Time & Attendance in. This type of reader (which gives an IN status) is used to enter an area.
This reader does not release a door a second time until that credential is presented to a T&A out
reader connected to the same controller or, if you selected Enable global T&A on the System Settings
tab of the Preferences form, a different controller.
T&A Out: Time & Attendance out. This type of reader (which gives an OUT status) is used to leave an
area. This reader does not release a door a second time until that credential is presented to a T&A in
reader connected to the same controller or, if you selected Enable global T&A on the System Settings
tab of the Preferences form, a different controller.
In required: This type of reader opens the door only if the credential presented currently has an IN
status. For example, if you had a credential with a status of OUT and attempted to gain access
through a reader that was marked as In required, the door would not open.
T&A In/Out: Time & Attendance In/Out. This type of reader is used only for Wiegand swipe readers,
such as the Model 100.
To get an IN status, hold the credential so that the front of the credential is facing you. (The logo is
usually printed on the front of the credential.) Then swipe the credential through the reader.
To get an OUT status, turn the credential around so that the back of the credential is now facing you.
Swipe the credential through the reader.
Chapter 4
Devices
Table 61. Form fields (continued)
Element
APB and T&A Options
Description
• Passive APB and T&A: (Micro only.) If you are using an anti-passback (APB) reader or time and
attendance (T&A) reader, enable this field for the reader to function as a Normal type reader
thereby allowing any valid credential to unlock the door regardless of the credential's IN/OUT
status. However, the credential's status is still logged as IN or OUT according to the reader used
and is recorded as such in the credential history. Use this if you want to record APB or T&A
without preventing unauthorized persons from accessing doors.
Example: Timing begins when a credential is presented to an IN reader. Until that time expires,
the user cannot enter again regardless whether they went through an OUT reader. If a user tries
to go through the IN reader a second time, the controller sends an invalid Timed APB message to
the host.
• Timed APB (min): (ACU only.) This field is enabled when you select a Logical type as 'APB in.' The
default of this field is '0.'
• Multiple Exiting Areas: (ACU only.) This option is an enhancement to anti-passback processing.
When a user swipes their credential, the system verifies two things: 1) that the user has access
privileges to the entering area and, 2) that they are registered as being “IN” the exiting area. If
either of these conditions is not true, the credential holder will be denied access and an antipassback tailgate violation will be sent to the Activity Monitor. Some locations have several
separate areas attached into a common area without readers between. With multiple exiting
areas, the readers exiting the common area could list all of the additional areas. Thus a credential
holder who was exiting the common area could be registered as “IN” any of the other areas and
still be granted exit.
Note: When configuring readers for multiple exiting areas, careful planning is needed to
maintain security and avoid unnecessary APB violations.
• Assign: (ACU only.) Click to display a list of areas that are available to be assigned as an
alternative or additional exit when leaving the area that you entered. Only areas in the operators'
facilities are available for assignment by this operator.
Keypad Options
Max Invalid PIN Count: (Micro only.)
Note:
For ACU controllers, this feature can be configured on the Controller form.
1) Select this check box if you want your system to suspend credentials after an invalid PIN is entered
and a credential is presented at a reader a configured number of times.
2) Then, enter a number between 1 and 6 as the number of times an invalid PIN code is entered at a
system reader before the credential is suspended. The default of this field is '3.'
3) If suspended, the credential must be changed to active by a system administrator.
Note:
Keypad Entry Card
number Length
If the Preferences form is set to grant access on duress, access is granted and the credential
transaction displays as Valid Duress. If the Preferences form is not set to grant access on
duress, the door does not open and the transaction is Invalid Duress. If set to monitor, an
alarm is generated in both instances.
(ACU only.) The number of digits that you need to enter into the keypad to represent a Card Number.
From the drop-down list, select None or a minimum of 4 and a maximum of 9.
Note:
If the “Keypad Entry Card Number Length” is greater than the number of digits on the card
being entered (check number of digits on card number on the Credential form), then 0s
(zeros) must be added before the entered card number. An asterisk (*) can be used to pad the
card number entry.
127
128
Facility Commander Wnx 7.5
User Manual
Table 61. Form fields (continued)
Element
Description
Enable 'Valid No
Passage'
(This option is selected by default.) Select this check box if you want your system to notify you when a
valid credential read occurs but the door did not open within the configured unlock time. This may be
an indication of someone deciding not to pass through the door, or an accidental read as someone
passes a reader.
• This feature must be associated with an alarm type of Door Forced or Door Held in order to be
notified of a change in state of the door.
• In order to notify of a duress situation, Grant Access on Duress must be configured on the
Preferences form.
How to
1. Review the guidelines in Table 61 and complete the fields on this tab according to the reader type that
you are configuring.
Also see:
•
•
•
•
Credential and PIN type reader on page 128
Credential or Keypad reader on page 129
Normal type reader on page 129
Door Functions tab on page 129
2. Click Save before you exit this tab.
Keypad alarm shunting
Note:
This feature applies to Micro controllers only.
The keypad alarm shunting feature lets you turn the monitoring of a group of alarms off or on using the keypad.
This can also be accomplished by setting up a schedule for an alarm group using a time schedule.
Note:
•
•
Only reader module door inputs and 20DI module input points can be shunted from a keypad.
To identify a reader module door input, look for a default description that follows this format: 0001-101 Reader.
To identify a 20DI module input point, look for a default description that follows this format: 0001-101 DI.
Credential and PIN type reader
Note:
Only reader module door inputs and 20DI module input points can be shunted from a keypad. (To identify a reader
module door input, look for a default description that follows this format: 0001-1-01 Reader. To identify a 20DI
module input point, look for a default description that follows this format: 0001-1-01 DI.)
Follow the steps below to shunt alarm groups within a controller connected to a credential and PIN reader.
1. Press the start key on the keypad. The start key is labeled with either an asterisk <*> or a plus <+>
depending on the reader model.
2. Enter one of the following:
0 - to turn monitoring off
Chapter 4
Devices
1 - to turn monitoring on
3. Enter the alarm group number (00 to 15) you want shunted.
4. Press the end key that is labeled with either a pound sign (#) or an <x>.
5. Present a valid credential to the reader.
6. Enter your Personal Identification Number (PIN) on the keypad.
7. Press the end key (<#> or <x>).
Credential or Keypad reader
Note:
Only reader module door inputs and 20DI module input points can be shunted from a keypad. (To identify a reader
module door input, look for a default description that follows this format: 01-1-01 Reader. To identify a 20DI
module input point, look for a default description that follows this format: 01-1-01 DI.)
Follow the steps below to shunt alarm groups within a controller connected to a keypad reader.
1. Press the start key on the keypad. The start key is labeled with either an asterisk <*> or a plus <+>
depending on the reader model.
2. Enter one of the following:
0 - to turn monitoring off
1 - to turn monitoring on
3. Enter the alarm group number (00 to 15) you want shunted.
4. Press the end key that is labeled with either a pound sign (#) or an <x>.
5. Enter your credential number on the keypad or present your badge to the reader.
6. Press the end key (<#> or <x>).
Normal type reader
Follow the steps below to shunt alarm groups within a controller connected to a normal reader.
1. Press the start key on the keypad. The start key is labeled with either an asterisk <*> or a plus <+>
depending on the reader model.
2. Enter one of the following:
0 - to turn monitoring off
1 - to turn monitoring on
3. Enter the alarm group number (00 to 15) you want shunted.
4. Press the end key which is labeled with either a pound sign (#) or an <x>.
5. Present a valid credential to the reader.
Door Functions tab
Use the Door Functions tab to define the door settings associated with the selected reader.
129
130
Facility Commander Wnx 7.5
User Manual
Figure 45. Door Functions tab
Chapter 4
Devices
Table 62. Form fields
Element
Description
Time
Maximum unlock: The time interval in minutes and seconds that a door remains
unlocked after the reader reads a valid credential. This is the amount of time that a user
has to open a door based on a valid input. If the time interval selected is zero, the reader
will toggle between lock/unlock state.
1) Enter a number between 0 (minimum) and 60 (maximum) minutes.
2) Enter a number between 0 (minimum) and 59 (maximum) seconds.
Example: If a 0 is entered in this field, the current state of the reader is changed (or
toggled) to its opposite state. The standard situation is the first credential read causes
the door to unlock and the next credential read toggles the door locked.
Alarm sense: The time interval in minutes and seconds that a door can remain open
(with a valid credential read or an exit request). This time must always be greater than
the maximum unlock time.
1) Enter a number between 0 (minimum) and 62 minutes.
2) Enter a number between 0 (minimum) and 59 (maximum) seconds.
The Alarm sense time for the reader and the DI Sense Time on the DI form are added
together to determine the total time that a door can remain open before the system
triggers a Door Held Open alarm.
Extended unlock: The extended time interval in minutes and seconds that a door
remains unlocked after the reader reads a valid credential.
1) Enter a number between 0 (minimum) and 60 (maximum) minutes.
2) Enter a number between 0 (minimum) and 59 (maximum) seconds.
Example: A facilities employee may be required to move equipment or furniture in and
out of rooms. The assignment requires a block of time beyond the normal unlock time as
configured and sufficient time to empty or fill rooms through which access is gained by a
reader and valid facility credential.
Extended Alarm sense:
This time interval is calculated automatically by subtracting the Maximum Unlock time
from the Alarm Sense time and is a read-only entry.
131
132
Facility Commander Wnx 7.5
User Manual
Table 62. Form fields (continued)
Element
Description
Door lock on
Once the door is unlocked, this field lets you specify when the door should relock.
Close (Micro): With this option, when the door is closed, the door locks immediately
regardless of the Maximum Unlock Time (Maximum unlock field above) and the Alarm
Sense Time (Alarm sense field above) is reset to zero.
Close (ACU): If this flag is set, the door strike relay is activated only when the door sensor
signals that the door is closed. This mode is used above all for pin locked doors. If pins are
down while the door is open, it would keep the door from being closed. This feature keeps
the pins up until the door is closed.
Open: With this option, when the door is opened, the Maximum Unlock Time (Maximum
unlock field above) is set to zero and the door locks. When the door is closed at any time
during this process, the Alarm Sense Time (Alarm sense field above) is reset to zero.
Duration: With this option, after the Maximum Unlock Time (Maximum unlock field
above) expires, the door locks and the Alarm Sense Time is reset to zero. During the
Maximum Unlock Time, the state of the door does not affect the Maximum Unlock Time
or the Alarm Sense Time.
Note:
Request to exit (REX)
For Micro Controllers, Door Lock On (Close or Open) only functions when the
reader's Forced Alarm is set to Monitored On.
Contact: (Micro only.)
• Open: Enable this option if the Exit Request button is wired as open for an exit
request.
• Closed: Enable this option if the Exit Request button is wired as closed for an exit
request.
Unlocks door: (Both Micro and ACU.) Select this check box if you want the door to unlock
when an exit request button is pushed.
Follows extended unlock: (Micro only.) Select this check box if you want this REX to follow
the time limits as configured for “Extended unlock.”
Report Real Time REX Status: (ACU only.) Select this check box if you want REX
transactions to display in real time. When the REX changes state, it is reported on the
Activity Monitor and in Credential History.
Extended auxiliary digital output
Select an output from the drop-down list of available digital output points. This output
follows the Extended unlock time configurations and must be on the same controller as
this reader.
Link to this reader
(Micro only.)
Note:
When configuring paired readers, door contacts and the REX input points are
the same. Paired readers are used to control a door from both directions.
Use this field to link this reader to another reader on the same controller. Select a reader
from the drop-down list.
Chapter 4
Devices
Table 62. Form fields (continued)
Element
Description
Door Configuration
(ACU only.)
Complete applicable selections in this grouping.
Relay (Digital Output): Select from the drop-down list of available DO points. This output
operates the door strike for this reader. The door strike DO is built into the unit. The
default is 0.
• Default: The DO number for the RRE based on the reader number selected.
• Other DOs available on the associated ACU controller. The installer has selected a
DO other than 0 for the door strike DO. If you are not certain which DO is being used
for the door strike, contact the installer.
Note:
When configuring paired readers, both readers use the same door access DO.
Contact (Digital Input): Select from the drop-down list of available DIs. If the controlled
door has a contact, it can be used to monitor the door status.
• Default: The door contact is automatically set as the first alarm point on the reader
or reader interface.
• Other alarms available on the associated ACU controller. The installer has selected
an alarm other than 1 for the door contact. If you are not certain which alarm point
is being used, contact the installer.
Note:
When configuring paired readers, both readers use the same door contact.
REX (Digital Input): Select the DI from the drop-down list that is connected to the REX
device for this reader.
• Default: The REX DI is automatically set as the second DI on the reader or reader
interface.
• Other DIs available on the associated ACU controller. The installer has selected a DI
other than 2 for the door contact. If you are not certain which DI is being used,
contact the installer.
How to
1. Review the guidelines in Table 62 and complete the fields on this tab according to the reader and
controller type that you are configuring.
2. Click Save before you exit this tab.
133
134
Facility Commander Wnx 7.5
User Manual
Routing tab
Use the Routing tab to define where transactions on the reader are sent. You have three options: credential
history, Activity Monitor, and a credential transaction printer. Credential transactions print only if the
transaction is routed to the printer, the credential transaction printer is enabled, and a credential transaction
printer is selected.
Figure 46. Routing tab
Table 63. Form fields
Element
Description
History
Valid: Enable this field if you want valid credential transactions recorded in credential
history.
Invalid: Invalid credential transactions are always recorded in credential history. This
default is a read-only field and cannot be changed.
Lost: Lost credential transactions are always recorded in credential history. This default
is a read-only field and cannot be changed.
Monitor
Valid: Enable this field if you want valid credential transactions to display on the Activity
Monitor form.
Invalid: Enable this field if you want invalid credential transactions to display on the
Activity Monitor form.
Lost: Enable this field if you want lost credential transactions to display on the Activity
Monitor form.
Printer
Note:
The enabling and selection of the credential transaction printer is done on the
Client form.
Valid: Enable this field if you want valid credential transactions to be sent to the
credential transaction printer.
Invalid: Enable this field if you want invalid credential transactions to be sent to the
credential transaction printer.
Lost: Enable this field if you want lost credential transactions to be sent to the credential
transaction printer.
Chapter 4
Devices
How to
1. Review the guidelines in Table 63 and complete the fields on this tab.
2. Click Save before you exit this tab.
Functions Schedule tab
Use the Functions Schedule tab to select the schedules that are used to set a reader offline/online or lock/unlock
a door. Time schedules define intervals which include a start AND an end time for different days of the week
and modes. At the start of the schedule, the state of the reader changes to the scheduled value. At the end of the
schedule, the state of the reader returns to the nonscheduled value. For example, if a reader is scheduled online,
it returns to offline at the end of the schedule.
Figure 47. Functions Schedule tab
Table 64. Form fields
Element
Description
Reader schedule
Time schedule: Select a time schedule from the drop-down list.
Online/Offline: Select whether the schedule chosen above sets the reader online or
offline.
135
136
Facility Commander Wnx 7.5
User Manual
Table 64. Form fields (continued)
Element
Description
Door schedule
Time schedule: Select a time schedule from the drop-down list.
Unlock: The door will unlock at the start of the selected time schedule and switch to Lock
at the end of the selected time schedule.
Lock: (Micro only.) The door will lock at the start of the selected time schedule and switch
to unlock at the end of the selected time schedule.
Lock - No Access: (ACU only.) The door will lock and not allow access at the start of the
selected time schedule, and then switch to unlock at the end of the selected time
schedule.
Disable Auto Unlock: Select this check box to temporarily disable the schedule that
would automatically unlock a door at the start of a new time schedule. When a valid
credential is presented to the reader for the first time and during the current time
schedule in effect, the door unlocks for the first time and the schedule is now in place, as
configured. If no valid access has been detected from start of schedule to current time,
the controller continues to wait for a valid credential access before implementing the
schedule. If a Lock schedule is selected, this feature is grayed out and not available for
selection.
Example: This is particularly helpful if a snowday or hurricane prevents employees from
entering the building at the normal time. Although the current schedule would normally
unlock the door, the door remains locked until the first employee arrives at the reader
and presents a valid credential.
Note:
For systems with ACU controllers: The person record and credential record
must be enabled for Conditional Unlock.
How to
1. Review the guidelines in Table 64 and complete the fields on this tab.
2. Click Save before you exit this tab.
Routing Schedule tab
Note:
The features on the Routing Schedule tab are available for Micro controller systems only.
Use the Routing Schedule tab to select the schedules that are used to determine when valid transactions are sent
to the history file, monitor, and/or printer. Time schedules define intervals which include a start AND an end
time for different days of the week and modes. At the start of the schedule, the routing of the transactions
changes to the scheduled value. At the end of the schedule, the routing of the transactions returns to the
nonscheduled value. For example, if valid transactions are scheduled to route to history, the transactions stop
being routed to history at the end of the schedule.
Chapter 4
Devices
Figure 48. Routing Schedule tab
Table 65. Form fields
Element
Valid transactions to history
Description
Time schedule: Select a time schedule from the drop-down list.
Yes/No: Select Yes if the above schedule is when you want valid transactions to be saved
to the history file or No if the above schedule is when you do not want valid transactions
to be saved to the history file.
Valid transactions to monitor
Time schedule: Select a time schedule from the drop-down list.
Yes/No: Select Yes if the above schedule is when you want valid transactions to be
displayed on the Activity Monitor form or No if the above schedule is when you do not
want valid transactions to be displayed on the Activity Monitor form.
Valid transactions to printer
Time schedule: Select a time schedule from the drop-down list.
Yes/No: Select Yes if the above schedule is when you want valid transactions to be sent
to the printer or No if the above schedule is when you do not want valid transactions to
be sent to the printer.
How to
1. Review the guidelines in Table 65 and complete the fields on this tab.
2. Click Save before you exit this tab.
137
138
Facility Commander Wnx 7.5
User Manual
Reader Type Schedules tab
Micro controller systems:
Use the Reader Type Schedules tab to select the events that are used to determine when a reader is used as a
Normal, Credential/Keypad, or Credential and PIN reader.
Events define start time(s) and day(s) only. There is no end associated with an event. Therefore, that event
stays in effect until another event changes it or you change it manually.
ACU controller systems:
Use the Reader Type Schedules tab to select the time schedules that are used to determine when a reader is
used as a Normal, Credential/Keypad, Credential and PIN reader, Access with Site Code, and Access with
Company Code. After the time schedule is expired, it will go back to the default physical type.
Note:
To change the reader to a Credential or Keypad physical type, you must configure the Keypad Entry Card Number
Length on the Reader tab of the Reader form.
Figure 49. Reader Type Schedules tab
Table 66. Form fields
Element
Description
The following fields are available for Micro or ACU controller systems:
Normal (Credential Only)
Select an event schedule from the drop-down list. (If this is an ACU controller system,
time schedules display.) This reader is then used as a Normal reader beginning at the
time and day given. Present your credential.
Credential and PIN Required
Select an event schedule from the drop-down list. (If this is an ACU controller system,
time schedules display.) This reader is then used as a credential and PIN reader
beginning at the time and day selected. Present your credential and enter a PIN.
Chapter 4
Devices
Table 66. Form fields
Element
Description
Credential or Keypad Entry
Select an event schedule from the drop-down list. (If this is an ACU controller system,
time schedules display.) This reader can be used to present a credential or enter a
credential number beginning at the time and day selected. Present your credential or
enter a credential number.
The following fields are available for ACU controller systems only:
Access with Site Code (ACU only.)
Access with Site Code: Select a time schedule during which access is granted if the Site
Code on the credential and person record is correct for access to this reader.
Access with Company Code (ACU
only.)
Access with Company Code: Select a time schedule during which access is granted if
the Company Code on the credential and person record is correct for access to this
reader.
1. Review the guidelines in Table 66 and complete the fields on this tab.
2. Click Save before you exit this tab.
Status tab
Select the Status tab to view information about the reader as currently stored in the controller’s database. This
is a read-only windowpane, in two-column format, as follows:
Figure 50. Status tab
139
140
Facility Commander Wnx 7.5
User Manual
Table 67. Form fields
Element
Description
Display windowpane
Micro Controllers
Physical Type: Displays the actual reader type: Normal (Credential only), Credential and
PIN Required, and Credential or Keypad Entry.
Logical Type: Displays the reader type this reader is being used as: Normal, APB In (antipassback In), APB Out (antipassback Out), T&A In (time & attendance in), T&A Out (time &
attendance out), T&A In/Out, In Required, and Elevator.
Online Status: Displays Online if the reader is currently online and Offline if the reader is
currently offline.
Routing for Valid Transactions:
• History: Whether valid transactions are being routed to history.
• Monitor: Whether valid transactions are being routed to the Activity Monitor form.
• Printer: Whether valid transactions are being routed to the printer.
Active Access Rights: Displays a list of access rights that are currently active.
ACU controllers
Reader Status: Displays Online if the reader is currently online and Offline if the reader is
currently offline.
Reader State: Display Idle (Ready) if the reader is online and active.
Door Status: Displays Open or Closed.
Door Mode: Displays Normal, Overlapped Door Open, or Overlapped Door Closed.
Keypad Enabled: Displays Disabled or Enabled.
Reader Firmware Version: Displays a version number, if applicable.
Last status date
Displays the date when the status was last requested.
Last status time
Displays the time when the status was last requested.
Refresh
Click to receive the current status information for this reader from the controller. It may
take a moment to complete the refresh of the data. A refresh for a dial-up controller
causes the host to dial the controller unless they are already connected. The refresh
process may take a few minutes.
CAUTION:
A status refresh requested for a controller that is offline or in error is never
returned.
How to
1. Review the guidelines in Table 67. This is a read-only form.
2. Request the latest information by clicking Refresh. It may take a moment to process refreshing the
data.
Chapter 4
Devices
Extended Control tab
Note:
The features on the Extended Control tab are available for ACU controller systems only.
Use the Extended Control tab to configure options for readers associated with ACU controllers. These fields
are not enabled or selectable if there are no readers associated with this controller.
Figure 51. Extended Control tab
Table 68. Form fields
Element
Description
The following fields are for ACU controller systems only:
Blink LED for Secure Status
Select from a drop-down list of available reader LED characteristics. The behavior indicates
whether an area is armed or disarmed.
Always On: This is the default setting. The red LED on the reader is constantly on.
Blink On Secure: This setting causes the LED to blink when the secure area about to be
entered is armed.
Blink On Unsecure: This setting causes the LED to blink when the secure area being entered
is disarmed.
141
142
Facility Commander Wnx 7.5
User Manual
Table 68. Form fields (continued)
Element
Description
Reader Trace Instruction
Message
Select from a drop-down list of available instructions in the system for this application, that
is an appropriate response to be associated with a trace on this reader. If you need to create
a new and appropriate instruction, refer to the Alarms & Events group, Instruction form.
Access Mode
Host Online: Select a validation option available at this reader when the associated host is
online with the controller:
• Normal: Access is granted when a valid credential is presented.
• Company Code: Access is granted when a credential is validated for only a matching
company code.
• Site Code: Access is granted when a credential is validated for only a matching site
code.
Host Offline: Select a validation option available at this reader when the associated host is
offline from the controller:
• Normal: Access is granted when a valid credential is presented.
• Company Code: Access is granted when a credential is validated for only a matching
company code.
• Site Code: Access is granted when a credential is validated for only a matching site
code.
• Secure: This is a lock-down mode and no entry is allowed at this reader.
Example: This feature may be useful during construction of a new section to an existing
building. An entrance is being used by construction workers for accessing the construction
site. Credential validation is minimal.
Degraded Mode Access: Select this option if you want this reader to function even when
communication has been interrupted between the controller and the reader. (RREs must be
powered separately from the ACU controller. The door contact and relay must be owned by
the external module. The reader recognizes the first five company/site codes only.)
Door Mode Access
Normal (No Overlap): Access is allowed as usual when a valid credential is presented.
Overlap Door Open: Any number of credentials can be presented at this reader while the
door is open and before the door closes.
Overlap Door Closed: A second credential can be presented even if the first
credentialholder has not yet opened the door.
Door Held Open Options
Select one of the following options:
Extend Held Open - 1 Minute: When this option is selected, the timer is extended an
additional minute after the normal Held Open timer. At the end of the normal Held Open
time, the reader's LED signals an alarm. If the door closes before the additional minute
expires, the alarm cancels and is not sent to the host.
Extend Held Open - REX Active: When the held-open timer expires, an active REX restarts
the held-open timer. If this option is not selected, the Held Open timer starts counting as
soon as the door opens, and the timer expires even if the REX stays activated with the door
open. At the end of the time period, a Held Open alarm is generated.
Extend Held Open - REX Toggle: If the REX is pressed or released (toggled) before the Held
Open timer completes its countdown, the timer restarts until the REX is released long
enough for the timer to expire. If this option is not selected, the Held Open timer starts
counting down as soon as the door opens and expires even if the REX is released and
reactivated.
Chapter 4
Devices
Table 68. Form fields (continued)
Element
Description
Door Lock Options
Select one or both of these options:
Enable Lock Monitor: This selection indicates if this reader uses door strikes equipped with
Lock Monitor switches. If this option is not selected, the reader does not monitor the lock.
Enable Magnetic Lock Bond Sensor: This feature makes special provisions for compatibility
with Bond Sensor outputs of Locknetics mag locks. If this option is not selected, this door
does not use the lock sensor.
Note:
Keypad Readers
This feature is only supported on readers controlled by ACU2 controllers using the
RRE Reader module. It should only be used with the Locknetics Model
101ATSDSMMBS Magnetic Lock or approved equivalents.
IKE Readers
• Basic Keypad Display Functions: When this option is selected, the reader displays a
32-character LCD display that can use various text messages. These messages are
prompts such as ARMED, DENIED, or TRY AGAIN. If this option is not selected, messages
do not display.
• Enhanced Keypad Display Function: This option is available only on IKE readers with
screen display capability. Selecting this option enables enhanced security by displaying
additional messages on the reader display screen.
• Enable Local Alarm/Zone Bypass: This option is available only when Basic Keypad
Display Functions is selected. When this option is selected, the user is allowed to swipe
a credential through the reader or enter a PIN to disarm an alarm.
Area Arm/Disarm
When this option is selected, this reader can be used to arm/disarm multiple areas
regardless of the access permissions to the reader. Select from a drop-down list of
available arm/disarm types, local to this ACU controller.
Local Area Only: arms/disarms the local area and allows access.
Multiple Area/Access: arms/disarms multiple areas assigned to this reader and allows
access.
Multiple Area/No Access: arms/disarms multiple areas assigned to this reader but
does not allow access.
Delay Arm/Disarm
This feature provides a mechanism similar to central station home burglar alarm
processing. Monitor points can be assigned a delay time during which the alarms can
be monitored on/off (armed/disarmed) without generating an alarm report. Select from
a drop-down list of available delay arm/disarm types, local to this ACU controller.
Arm/Disarm Delay: provides a delay for using this reader to arm/disarm an area.
Entry with Delay: provides a delay for using this reader to gain access into the area.
The timer is activated when access is granted by the reader.
Exit with Delay: Provides a delay for using this reader to leave the area. The area is
armed when the door closes rather than waiting for the timer to expire.
Comments:
Use this field to enter a location description or special considerations for this configuration.
This field accepts 500 characters. It is not necessary to complete an entry in this field.
How to
1. Review the guidelines in Table 68 and complete the fields on this tab.
2. Click Save before you exit this tab.
143
144
Facility Commander Wnx 7.5
User Manual
Define digital inputs
Use the Digital Input form, Security Devices group, to modify a digital input record. Digital inputs are physical
sensing devices, such as door sensors or motion sensors, used to monitor an electronic contact connected to a
controller. When a controller record is created, digital input records are also created. (Refer to DI module
record creation on page 94.) You cannot delete digital input records from the Digital Input form. The digital
inputs are managed by the associated controller record. The number of digital inputs is based on the controller
you set up and modules that the controller contains.
The alarms for digital inputs are not created automatically when you set up a controller. Set the Type field to
Alarm and then save the record. The associated alarm record is created. Refer to your Controller Installation
Guide for information on how to connect a digital input device to the controller.
For a shortcut menu to related forms, move the mouse pointer below any tab and click the right mouse button. If you
are using this shortcut menu to get to the Schedules form or Events form, all schedule or event records display.
When reader records are created, the default description is in the format:
Table 69. Form fields
Element
Description
Description
When the records are created, the default description is in the format: mmmmm-bb-pp
where mmmmm represents the controller number to which this digital input is associated,
bb represents the module number (n represents the port number and a represents port
address), and pp represents the point or device number.
Micro controllers: mmmmm-bb-pp
ACU controllers: mmmmm-na-pp
Example: 00001-01-01 DI
This digital input is on controller 1, module 1, point 1. To change or add to this description,
enter text over the existing text and save the record. It is recommended that you keep
the mmmmm-bb-pp prefix in each digital input displayed to aid in locating the alarm
points on the physical hardware. This field accepts a maximum of 64 characters.
Facility
A facility can be assigned for the new Digital Input record from the Facility drop-down
list.
Note:
The same facility is assigned for all devices associated with the controller when
a controller is created.
Be very careful when assigning the facility of a DI to a different facility than the
controller. You can create an undesired result if you do not fully understand
facility assignment.
Chapter 4
Devices
Digital Input tab
Use the Digital Input tab to configure the selected digital input.
Figure 52. Digital Input tab
Table 70. Form fields
Element
Description
Controller
Displays the controller description to which this digital input is associated. This is a readonly field and unavailable for modification.
Module
Displays the controller module number where this digital input is located. This is a readonly field and unavailable for modification.
Number
Displays the number of the digital input. This is a read-only field and unavailable for
modification.
145
146
Facility Commander Wnx 7.5
User Manual
Table 70. Form fields (continued)
Element
Description
Type
Select the type of DI that you are configuring. If you select another Type, click Search to
update the list box display of associated triggers.
• Alarm means that this digital input is being used to trigger an alarm.
• Elevator means this digital input is being used for elevator control.
• Inactive means this digital input is not being used at this time.
• Digital Output means this digital input is being used to trigger a digital output and
no alarm is generated.
Note:
Arm/Disarm type applies to ACU controller systems only.
• Arm/Disarm means this digital input arms/disarms an intrusion zone (for Micro
controllers) or an area.
Note:
Intrusion and Guard Tour types apply to Micro controller systems only.
• Intrusion means this digital input arms/disarms an intrusion zone.
• Guard Tour means this digital input is a point along a pre-determined inspection
tour of your premises by a security officer.
Note:
REX Alarm type applies to ACU controller systems only.
• REX Alarm means this digital input is associated with the REX Alarm for an ACU.
Note:
Active State
Digital Input type of intrusion can only be made if the previous type was
Inactive, meaning no other access control digital input was active. (For
example, you cannot assign Intrusion type to a DI that was previously set as an
Alarm; the DI type must first be Inactive.) Be aware that selection of this type
overrides any access control. You cannot assign any access control digital
outputs, digital output groups, schedules, or events for this record.
(Micro only.) The active state of a selected digital input can be either Closed or Open.
Note:
A third option, Both, displays as grayed out and unavailable for selection unless
the DI type is Guard Tour. During a guard tour, a single-state trigger (one-time
“hit”) triggers a DO in both states (Closed or Open).
Enabled
If you selected Digital Output as the type (defined above), enable this field to trigger DOs.
For all other type digital inputs, this is a read-only field, enabled, and unavailable for
modification.
Sense Time
(Micro only.)
Minutes: Enter or select a number between 0 and 60.
Seconds: Enter or select a number between 0 and 59 seconds. If 60 minutes is already
entered, you cannot enter a number of seconds.
Note:
Comments
When configuring Floor Tracking by Input for elevator control applications, you
should set the Sense Time to 7 seconds or less.
Use this field to enter any special consideration or reminder for this configuration. This
field accepts 500 characters. It is not necessary to complete an entry in this field.
How to
1. Review the guidelines in Table 70 and complete the fields on this tab.
2. Click Save before you exit this tab.
Chapter 4
Devices
Digital Output tab
The Digital Output tab is available only if you have selected Digital Output in the Type field on the Digital
Input tab. Use this tab to link digital outputs to a digital input. When this digital input is activated, the digital
output is also triggered.
Note:
If the DI type is Alarm, it is configured on the Alarm form.
Figure 53. Digital Output tab
Table 71. Form fields
Element
Description
This section displays for systems configured with Micro controllers:
Output A (Primary/
Local)
A primary input assignment is not required. The default is None. Click the drop-down list to select
an available DO to assign as the primary.
• If you select an output, this output must belong to the local controller.
• If the controller is offline or unable to communicate with the host at the time of an alarm,
only the Primary/Local DO is triggered.
• If the ON time on the Digital Output form is set to 00, this DO remains active until the digital
input is reset.
147
148
Facility Commander Wnx 7.5
User Manual
Table 71. Form fields (continued)
Element
Description
Output B
Click the drop-down list to select an available DO.
• The digital outputs in this list can be on a local controller or other controllers.
• If Output B is local, it will trigger. However, if Output B is on another controller it is activated
only if the host is online and able to communicate with that controller.
• The outputs that display in this list are those that were previously configured and not
currently assigned.
• This output does not communicate if offline.
This section displays for systems configured with ACU controllers:
Output Control
Note:
This digital output will activate only on an Alarm/Active state. It will not activate on
Trouble (Tamper) state (Cut or Short).
Available Output Windowpane: Select from the Available list those outputs that you want to
assign to this record. The outputs that display in this list are those that were previously
configured and not currently assigned. Only outputs in the operator ’s facilities are available for
assignment by this operator.
Selected Output Windowpane: The outputs that display are those that are currently assigned to
this record. Select, and then click the left arrow to unassign an available output.
Time Schedule
Select a time schedule from the drop-down list. If no time schedule is assigned, None will be
selected by default.
Link Only If Offline
The default of this check box is not selected and this link functions during the time schedule
regardless of the status of the digital input. If selected, the link between the digital input and
output (relay) functions only when the controller is offline. This output (relay) does not function
during the selected time schedule. Use this when multiple relays are to be linked to a single input.
Ignore Disabled State
If selected, the output (relay) triggers even when the digital input that has the digital output is
disabled .
How to
1. Review the guidelines in Table 71 and complete the fields on this tab.
2. Click Save before you exit this tab.
DO Groups tab
Use the DO Groups tab to link digital output groups to a digital input. When this digital input is triggered, the
linked digital output groups are also triggered. The digital outputs follow the settings selected under either
Reader DO Actions or Auxiliary DO Actions. If you selected a primary/local group (not applicable for ACU
controller systems) and the Micro controller is offline, the output follows the state of the alarm. For example, if
the alarm is active, the output goes to an active state; and if the alarm is reset, the output goes to an inactive
state.
Note:
Be aware that Invalid Credential alarms and Lost Credential alarms do not reset. If you assign a DO Group to either of
these alarms, the alarm goes inactive or turns off when acknowledging or purging.
Note:
This tab is only available for Digital Output types.
Chapter 4
Devices
Figure 54. DO Groups tab
Table 72. Form fields
Element
Description
Output Groups
This windowpane displays assigned digital output groups. The digital output groups can
be on a local or other controller.
Assign DO Groups
Click to display a Digital Output Group Assignment dialog box, allowing you to select and
assign DO groups you want associated with the selected record. Only DO groups in the
operator’s facilities are available for assignment by this operator.
• Select, and then click the right arrow to assign an available DO group.
• Select, and then click the left arrow to unassign a DO group.
Click OK to display results in the Output Groups windowpane.
Primary/Local Output Group
(Micro only.) You can select an output group as primary from the output groups displayed
in the windowpane. If the selection is not on a local controller, the assignment arrow
button is dimmed and unavailable for assignment as a primary output group. If the
controller is offline or unable to communicate with the host at the time of an alarm, only
the Primary/Local DO group is triggered.
When an input is active or inactive, select the action to be performed on all DOs within all selected DO groups.
149
150
Facility Commander Wnx 7.5
User Manual
Table 72. Form fields (continued)
Element
Description
Reader DO Actions
Active/Inactive:
• Duration: The door locks and valid credentials unlock the door. Schedules can
override this state.
• Lock (no access): The door locks and does not allow access. Schedules can override
the state and put the controller back online.
• Indefinite Unlock: The door is put into an unlock state. Schedules cannot override
the current state.
• Lock: The door locks and valid credentials can unlock the door.
Auxiliary DO Actions
Active/Inactive:
• On Indefinite: The DO is put into active state indefinitely. Schedules cannot override
this state on a controller.
• Off: The DO is put into the inactive state indefinitely. Schedules can override this
state on a controller.
• On for Duration: The DO is put into the active state for the duration defined.
Schedules can override this state on a controller.
How to
1. Review the guidelines in Table 72 and complete the fields on this tab.
Note:
Be aware that Invalid Credential alarms and Lost Credential alarms do not reset. If you assign a DO Group to
either of these alarms, the alarm goes inactive or turns off when acknowledging or purging.
2. Click Save before you exit this tab.
Schedule tab
Note:
If the DI type is Alarm, it is configured on the Alarm form.
The Schedule tab is available only if you have selected Digital Output in the Type field on the Digital Input tab.
Use this tab to assign a schedule. Time schedules define intervals which include a start and an end time for
different days of the week and modes.
Figure 55. Schedule tab
Chapter 4
Devices
Table 73. Form fields
Element
Description
Time Schedule
Click the drop-down list to select a previously created time schedule.
Enable/Disable
Select Enable if you want to enable this digital input when this time schedule starts.
Enabling the digital input allows it to then trigger the associated digital output when a
state change occurs.
Select Disable if you want to disable this digital input when this time schedule starts.
Disabling the digital input prevents the state change from being reported and the
associated digital output from triggering.
How to
1. Review the guidelines in Table 73 and complete the fields on this tab.
2. Click Save before you exit this tab.
Events tab
Note:
The Events tab is available for Micro controller systems only.
The Events tab is available for input if the type of digital input is Digital Output or Alarm.
Use the Events tab to assign events and an associated sense time to this digital input. Events define start time(s)
and day(s) only. There is no end associated with an event. Therefore, that event stays in effect until another
event changes it or you change it manually. Click Search to display a list of existing event records associated
with this digital input.
Figure 56. Events tab
151
152
Facility Commander Wnx 7.5
User Manual
Table 74. Form fields
Element
Description
Sense Time
This windowpane displays which events change the sense time. You can also assign
events and sense times to this digital input.
Edit: This button is available only if there are currently assigned sense time events. Click
this button to display the Edit Sense Time dialog box. From here, you can assign an event
and sense time or modify the existing sense time assignment.
• Event: Select an event from the drop-down list. If there are no events listed, you
need to configure events using the Event Schedule form.
Note: Event schedules can be created for Micro controllers only.
• New time: Select or enter a sense time. The value is in seconds and indicates the
delay before triggering an associated digital output or sending in an alarm if the DI
type is Alarm. This number tells the system how many seconds to wait after sensing
the input has changed to Active State. Enter 00 to immediately send the transaction
to the host, notifying the host of a state change. Increase the Sense Time entry if
using noisy or chattering contacts.
Example: This value could indicate the delay time, in seconds, that elapses between
the time a door contact is broken and the time the output and alarm are triggered. If
door contact is closed before the sense time elapses, the alarm would not come in
to this application and the output would not activate.
Add: To add events to the list, select an event and click. The Edit Sense Time dialog box
displays. Assign an event and sense time.
Remove: To remove events from the list, select an event and click.
How to
1. Review the guidelines in Table 74 and complete this tab.
2. Click Save before you exit this tab.
Chapter 4
Devices
Status tab
Select the Status tab to display information about the digital input as stored in the controller’s database, such as
its sense time.
Figure 57. Status tab
Table 75. Form fields
Element
Description
Sense Time
(Micro only.) The sense time as of the last status date and time.
Enabled
(Micro only.) Yes/No - Whether the digital input is enabled or disabled as of the last status
date and time.
Status
(ACU only.)
Reset - Enable
Active - Enable
Last status date
The date on which the status was last requested.
Last status time
The time that status was last requested.
Refresh
Click to receive the current status information for this digital input.
153
154
Facility Commander Wnx 7.5
User Manual
How to
1. Review the guidelines in Table 75.
2.
Request the latest information by clicking Refresh. It may take a moment to refresh the data.
Note:
A status refresh on a controller that is offline is never returned.
Define digital outputs
Use the Digital Output form, Security Devices group, to search and view or modify an existing digital output
record. A digital output represents an external device, such as lights, sirens and door strikes that may be
connected to the controller. Refer to your controller installation manual for information on how to connect a
digital output device to the controller. The digital outputs available depend on the controller setup and readers
used.
For a shortcut menu to related forms, move the mouse pointer below any tab and click the right mouse button. If you
are using this shortcut menu to get to the Schedules form or Events form, all schedule or event records display.
Table 76. Form fields
Element
Description
Description
This field is required and accepts up to 64 characters. When the records are created, the
default description is in the format: mmmmm-bb-pp where mmmmm represents the
controller number to which this digital output is associated, bb represents the module
number, and pp represents the point or device number.
Micro Example: 00001-01-01 DO
ACU Example: 00001-01-01 DO
This digital output is on controller 1, module 1, point 1. To change this description, enter
over the existing text and save the record. It is recommended that you keep the mmmmmbb-pp prefix in each digital output description displayed to aid in locating the alarm
points on the physical hardware.
Facility
A facility option can be assigned for your new digital output record from the Facility
drop-down list. The default of Ignore Facilities is assigned if no other selection is made.
WARNING:
Be careful when assigning the facility of a digital output to a different
facility than the controller. You can create an undesired result if you do
not fully understand facility assignment.
Chapter 4
Devices
Digital Output tab
Use the Digital Output tab to schedule when the digital outputs in the group are in the active state and for the
specified length of time.
Figure 58. Digital Output tab
Table 77. Form fields
Element
Description
Controller
This is a read-only field. Displays the description of the controller on which this digital
output is located.
Module
This is a read-only field. When the records are created, the default value is in the format:
mmmmm-bb Module Type where mmmmm represents the controller number to which
this reader is associated, bb represents the module number, and Module Type is the
type of reader module, such as 16DO.
Micro Example: 00001-01 16DO would be the digital output on controller one, 16DO
module one.
ACU Example: 00001-01 16DO would be the digital output on controller one, 16DO
module one.
Number
This is a read-only field and displays the physical address of the digital output.
Active State
On/Off: Defines whether the digital output is turned On or Off when the digital output is
activated. Contact your installer on how the digital output was wired. This determines the
active state of the digital output.
155
156
Facility Commander Wnx 7.5
User Manual
Table 77. Form fields (continued)
Element
Description
On time
(This feature is read-only for ACU controllers with a DO assigned to a reader.) Specify the
length of time, in minutes and seconds, the digital output remains in the active state
before going inactive. The time may be overridden by the manual control buttons. The
default setting is 10 seconds.
Micro controller systems:
• You can enter a total of 64 seconds (1 minute, 4 seconds).
If you enter 0 and this is:
• Output A, then the digital output resets when the alarm resets.
• Output B, then the digital output remains on until it is manually turned off or
scheduled off.
ACU controller systems:
With a DO assigned to a reader, this field is disabled and the read-only time fields display
what was configured on the Reader form. This field is enabled if no Digital Output (Relay)
door option is assigned on the Reader form, Door Functions tab.
• You can enter a total of 4 minutes, 15 seconds.
When the output (relay) is linked to one or more alarms, the momentary contact time
does not begin until the alarm returns to the inactive position, thus extending the active
time.
Example: If the momentary contact time is set to 10 seconds, and the alarm is in the
alarm state for 12 seconds, the output (relay) is active for a total of 22 seconds beginning
when the alarm entered the alarm state.
Comments
Use this field to enter a location description, reason for creating this record, or special
considerations for this configuration. This field accepts 500 characters. It is not
necessary to complete an entry in this field.
How to
1. Review the guidelines in Table 77 and complete the fields on this tab.
When a controller is reset or the database is reloaded, all schedules from midnight to present time run
except for schedules that have a DO “On time” not equal to zero and were set to occur prior to the
current time.
Example: You have created a schedule to occur at 8:00 am to activate a digital output 1 minute. At
10:00 am, the database for the controller is downloaded. During the download process, all schedules
from Midnight to the current time (10:00 am) are rerun. Your schedule for the 8:00 am DO does not
run since it started and ended before the current time of 10:00 am.
2. Click Save before you exit this tab.
Chapter 4
Devices
Schedule tab
Use the Schedule tab to define schedules for turning digital outputs (DO) on or off. Time schedules define
intervals that include a start and an end time for different days of the week and modes. At the start of the
schedule, the state of the DO changes to the scheduled value. At the end of the schedule, the state of the DO
returns to the nonscheduled value.
Example: If the DO is scheduled ON, the DO returns to OFF at the end of the schedule.
Figure 59. Schedule tab
Table 78. Form fields
Element
Description
Turn DO On/Off
Time Schedule: Select a time schedule from the drop-down list. This determines when
the DO automatically turns on and off. The default is None.
On/Off: Select On if the above schedule is when you want the digital output to be in the
Active state. Select Off if the above schedule is when you want the digital output to be in
the Inactive state.
Note:
OFF is not available for systems configured with ACU controllers.
How to
1. Review the guidelines in Table 78 and complete this tab.
2. Click Save before you exit this tab.
157
158
Facility Commander Wnx 7.5
User Manual
Manual Control & Status tab
Use the Manual Control & Status tab to manually set the state of a specified digital output.
Figure 60. Manual Control tab
Table 79. Form fields
Element
Description
DO Status
Displays the digital output status. Click the Refresh button for updated status.
Manual Control
Set state to
• On for Duration: Click to set the selected digital output to its Active state for the On
time specified on the Digital Output tab.
• On Indefinite: Click to set the selected digital output to its Active state until it is
manually set to its inactive state. The only way to turn it off is by selecting Off on this
tab or Off on the Manual Door/DO Control form.
• Off: Click to set the selected digital output to its inactive state.
• Sched. Can Override: Use this option to change the state of the DO if you want the
schedule to override its setting. For example, use Sched. Override to unlock a door if
you want a schedule at a later time to lock this door. If you don't want the scheduler
to lock your door, use the On Indefinite selection.
Purpose
Enter the reason for manually changing the state of the specified digital output. The text
entered here is recorded in Operator History.
How to
1. Review the guidelines in Table 79 and complete this tab.
2. Click Save before you exit this tab.
Chapter 4
Devices
Alarm Control tab
Note:
The options on the Alarm Control tab are available and enabled for ACU controller systems only.
Use the Alarm Control tab to link digital outputs to an alarm. When this alarm is activated, the digital output is
also triggered.
Example: The digital output is a siren. An alarm is generated when a door forced alarm is generated. Because
the digital output (siren) is linked to the door forced alarm, the siren sounds when the alarm is generated.
Table 80. Form fields
Element
Description
Alarms
Displays the current status of the alarms associated with this digital output.
Assign
Click this button to display the Digital Output Alarm Assignment dialog.
Select the Assign button to open the Digital Output Alarm Assignment dialog. From here, you can select
alarms to link to a particular digital output.
Figure 61. Digital Output Alarm Assignment
159
160
Facility Commander Wnx 7.5
User Manual
Table 81. Form fields
Element
Description
Alarms
Available Alarms Windowpane: Select from the Available list those alarms that you
want to assign to this record. The alarms that display in this list are those that were
previously configured and not currently assigned. Only alarms in the operator's facilities
are available for assignment by this operator.
Select the alarm, and then click the right arrow to move it to the Selected windowpane.
Selected Alarm Windowpane: The alarms that display are those that are currently
assigned to this record. Select, and then click the left arrow to unassign an available
alarm.
Time Schedule
Select a time schedule from the drop-down list.
• None is selected by default.
• If there are none listed, create a time schedule on the Time Schedule form under the
Schedules group.
Link Only If Offline
The default of this check box is not selected and this link functions during the time
schedule regardless of the status of the alarm. If selected, the link between the digital
output and alarm functions only when the controller is offline. This alarm does not
function during the selected time schedule. Use this when multiple alarms are to be
linked to a single output.
Ignore Alarm Monitor State
If selected, the output (relay) triggers even when the alarm that has the digital output is
not monitored.
How to
1. Review the guidelines in Table 81 and complete the fields on this tab.
2. Click Save before you exit this tab.
Define digital output groups
Use the Digital Output Group form, Security Devices group, to assign digital outputs to a group and schedules
to digital output groups. Digital output groups provide an easy, convenient way of scheduling many digital
outputs at once. To create digital output groups, manually create the groups and then assign the digital outputs
to them.
For a shortcut menu to related forms, move the mouse pointer below any tab and click the right mouse button. If you
are using this shortcut menu to get to the Schedules form, all schedule records display
Table 82. Form fields
Element
Description
Description
This field is required and accepts up to 64 characters. Assign a unique title to this record.
Chapter 4
Devices
Element
Description
Facility
A facility option can be assigned from the drop-down list of available facilities. The
default of Ignore Facilities is assigned if no other selection is made.
Note:
If you assign DOs that belong to a different facility, you may be creating an
undesired result; not all DOs are visible under certain facilities.
Group tab
Use the Groups tab to assign digital outputs to a selected digital output group on a specified controller.
Figure 62. Group tab
Table 83. Form fields
Element
Description
Number
Displays the number assigned to the digital output group. This field becomes read-only
after the record is saved. This is a required field.
The number can be 1-64 for systems using Micro controllers and 1-255 for systems using
ACU controllers.
Controller
Displays the description of the controller on which this digital output group is located.
This field becomes read-only after the record is saved. This is a required field.
Digital Outputs
This windowpane displays the digital outputs assigned to this group.
161
162
Facility Commander Wnx 7.5
User Manual
Table 83. Form fields
Element
Description
Assign Digital Outputs
Click this button to display the Digital Output Assignment dialog box. This dialog box lets
you select and assign digital outputs you want associated with the selected record. Only
digital outputs in the operator’s facilities are available for assignment by this operator.
• Select, and then click the right arrow to assign an available digital output.
• Select, and then click the left arrow to unassign a digital output.
Click OK to display results in the Digital Outputs windowpane.
How to
1. Review the guidelines in Table 83 and complete the fields on this tab.
2. Click Save before you exit this tab.
Schedule tab
Note:
The Schedule tab is available for Micro controller systems only.
Use the Schedule tab to define schedules for turning all digital outputs in a selected digital output group ON or
OFF.
Figure 63. Schedule tab
Table 84. Form fields
Element
Description
DO control
Time Schedule: Select a time schedule from the drop-down list.
On/Off: Select On if the above schedule is when you want the digital outputs in the
selected digital output group to be in the Active state. Select Off if the above schedule is
when you do not want the digital outputs in the selected digital output group to be in the
Active state.
Chapter 4
Devices
How to
1. Review the guidelines in Table 84 and complete this tab.
2. Click Save before you exit this tab.
Define instructions
Use the Instruction form, Alarms & Events group, to create messages that display on the Alarm Monitor form
whenever the associated alarm occurs. Instructions are directions on how to react to specific transactions.
Table 85. Form fields
Element
Description
Facility
A facility option can be assigned from the drop-down list of available facilities. The
default of Ignore Facilities is assigned if no other selection is made.
For a shortcut menu to related forms, move the mouse pointer below any tab and click the right mouse button.
Instruction tab
Use the Instruction tab to create instructions on how to react to specific transactions. The instructions should
belong to the same facility as the transaction with which they are associated.
Figure 64. Instruction tab
Table 86. Form fields
Element
Description
Number
Assign a number to the instruction records.
Instruction
Enter the text you want to display when the associated transaction occurs. The
instruction can be 1 to 500 alphanumeric characters in length.
163
164
Facility Commander Wnx 7.5
User Manual
How to
1. Review the guidelines in Table 86 and complete the fields on this tab.
2. Click Save before you exit this tab.
Define alarm responses
The Response form, Alarms & Events group, lets you create a list of frequently used, predefined responses to
an alarm, and reduces the need to type an entry. A response describes a reaction to an alarm. The response
entries that you create display as selections on the Alarm Monitor form.
Table 87. Form fields
Element
Description
Facility
A facility option can be assigned from the drop-down list of available facilities. The
default of Ignore Facilities is assigned if no other selection is made.
Alarm Response tab
Use the Alarm Response tab to enter a predefined alarm response. This multiple line dialog box accepts 64
alphanumeric characters. The responses you create and save display as selections on the Alarm Monitor form.
Figure 65. Alarm Response tab
How to
1. Complete the field on this tab.
Examples:
Police are on their way.
Maintenance is cleaning up.
2. Click Save between each entry and before you exit this tab.
Chapter 4
Devices
Define alarms
The Alarm form, Alarms & Events group, is used to modify an alarm record. An alarm is a notification that
something has happened within this application. An alarm occurs when a defined device, such as a digital input
changes to a state defined as the alarm state. For example, if a digital input alarm state is defined as Open in the
Active State, then an alarm occurs when the state changes to Open. Alarms can also be used for noncontroller
related events such as CCTV alarms. Most alarms are tied to digital output points associated with devices such
as switches and motion detectors.
Note:
Not all alarms are present at the same time, and are determined by the modules installed in the controller.
When you set up your controller, some alarms are automatically set up for you. However, alarms for digital
inputs must be set up manually using the Digital Input form.
Use the Alarm form to modify an alarm record. With the exception of external alarms, you cannot delete alarm
records. Alarms are managed by the owner of the alarm record. The alarm owner can be an API, module,
CCTV Interface, digital input, camera, DVMR, controller, or reader. For an alarm to display on the Alarm
Monitor form, you can either select the Monitor field on the Alarm form or schedule the alarm to be monitored.
When set to be monitored, the alarm displays and changes to an alarm condition.
For a shortcut menu to related forms, move the mouse pointer below any tab and click the right mouse button. If you
are using this shortcut menu to get to the Time Schedules form or Events form, all schedule or event records display.
Note:
Alarms, events, and functions associated with a SCIF (ACU only.) workstation cannot be controlled unless you are at the
SCIF workstation (ACU only.)
Table 88. Form fields
Element
Description
Description
This field is required and accepts up to 64 characters. When the records are created, the
default description is in the format: mmmmm-bb-pp where mmmmm represents the
controller number to which this alarm is associated, bb represents the module number,
and pp represents the point or device number.
Example: 00001-01-01 Tamper This tamper alarm is on controller 1, module 1, alarm
1. To change this description, select and enter text over the existing text and save the
record. It is recommended that you keep the mmmmm-bb-pp prefix in each alarm
displayed to aid in locating the alarm points on the physical hardware.
Example Failover Alarm: BCTTOKYO Failover Alarm A failover alarm is created
when backup clients are assigned to the default client computer. The alarm record
displays the default client computer name as part of the description. This failover alarm
indicates the default client as BCTTOKYO. If the description indicates Region Failover
Alarm, the name of the Regional database server is included in the description.
Alarm descriptions coming into this application from an API can be ambiguous, and the
source of the alarm point may be unclear. It is recommended that you rename API alarm
points to correspond to the actual physical point, to assist in processing and
acknowledging when an alarm displays on the Alarm Monitor.
165
166
Facility Commander Wnx 7.5
User Manual
Table 88. Form fields
Element
Description
Facility
A facility option can be assigned for the area from the drop-down list of available
facilities for assignment by this operator. The default of Ignore Facilities is assigned if no
other selection is made.
Note:
It is possible to change the behavior of more than one alarm using the Mass
Update feature, see Mass update on page 293.
Alarm tab
The Alarm tab configures the behavior of the alarm.
Figure 66. Alarm tab
Table 89. Form fields
Element
Description
Group
(Micro only.) Displays the alarm group to which this alarm was assigned. The default is
alarm group 0. You can change to any other alarm group available on that controller,
displayed on the drop-down list.
Chapter 4
Devices
Table 89. Form fields (continued)
Element
Description
Owner Type
This is a read-only field and displays the object to which the alarm belongs or refers.
• Area: Alarms owned by an area.
• API: Alarm is bidirectional and owned by the external interface.
• CCTV Interface: Alarm is owned by an interface.
• Client: Alarm is owned by a Regional database client.
• Controller: Alarm is owned by a controller.
• Digital Input: Alarm is owned by the digital input, such as a motion sensor. (The 11th
DI on a Micro/PX-2000 or M/PXN-2000 is owned by the controller; it is a low-battery
alarm from the controller.)
• Failover: Alarm is owned by the host client.
• Guard Tour: Alarm is owned by a reader or digital input.
• Camera: Alarm is owned by a camera.
• DVR: Alarm is owned by a DVR.
• Reader: Alarm is owned by a reader.
• Region Failover: Alarm is owned by the host Regional database server.
• Module: Alarm is owned by an individual module.
Category
Assign a category to this alarm. Categories are defined on the Alarm Category tab of the
Alarm Priority form.
167
168
Facility Commander Wnx 7.5
User Manual
Table 89. Form fields (continued)
Element
Description
Settings
Note:
If this alarm is associated with a SCIF (ACU only.) workstation, this control is not
available for selection unless you are at the workstation that is hosting the ACU
controller associated with this alarm.
Monitor (Alarm, Short, Cut, Reset): If selected, this alarm, when triggered, displays all
alarm conditions available to this alarm on the Alarm Monitor form. You have the option
to schedule alarm monitoring on the Schedule tab of this form. If this option is not
selected but a schedule is in place, the schedule monitors alarms only for the time that
monitoring is on. (Although the option to monitor is displayed for the 11th DI on a Micro/
PX-2000 (low-battery alarm), an alarm is not generated for Cut and Short.)
• An operator can see alarms on the Alarm Monitor form only for facilities that are
currently active and assigned to the current operator.
• The option to monitor an alarm must be selected on the Alarm form in order for a
specific alarm to display on the Alarm Monitor form.
• Alarms do not display on the Alarm Monitor form if the selection to monitor an alarm
is removed, even though Alarm Routing and Bumping may be configured.
Always monitor (Short, Cut, Reset):
Note:
For ACU controllers this is only enabled for Supervised Exit.
If selected, this alarm always displays Cut, Short, and Reset conditions of alarms on the
Alarm Monitor form. Select this option if a schedule prevents monitoring an alarm/reset
condition during certain periods of the day but you still want Short, Cut, and Reset to be
monitored and displayed. (Although the option to monitor is displayed for the 11th DI on
a Micro/PX-2000 (low-battery alarm), an alarm is not generated for Cut and Short.)
Controller dial host: If selected, an alarm occurring on a dial-up controller, or controllers
downstream from a dial-up controller, causes the controller to dial the host in order to
report the alarm.
Operator acknowledge: If selected, the operator must acknowledge the alarm on the
Alarm Monitor form before the alarm can be cleared.
Priority: This number indicates the priority of this alarm and how it displays on the Alarm
Monitor form. This priority tells the system (host) in which order it should alert the
operator if multiple alarms occur at the same time. The lower the number, the higher the
priority. The priority range is 0 through 19.
Example: A Duress alarm is assigned priority 2. An Intrusion alarm is assigned priority 3.
Multiple Intrusion alarms were being reported when a Duress alarm occurs. The Duress
alarm displays above the Intrusion alarms on the Alarm Monitor form.
Route alarms to history
If selected, alarm activity is written to the alarm history.
Print alarms at host
If selected, the alarm history transaction is printed on a selected system printer when the
alarm changes state between alarm and reset. Alarm transactions print only if the
transaction is routed to the printer and the alarm transaction printer is selected. The
selection of the alarm transaction printer is done on the Client tab of the Client form.
Delay Time
(ACU only.) From the drop-down list, select the number of seconds during which an alarm
can be delayed without generating an alarm. This is a Delayed Entry requirement.
Comment
Use this field to enter any special consideration or reminder for this configuration. This
field accepts 500 characters. It is not necessary to complete an entry in this field.
Chapter 4
Devices
How to
1. Review the guidelines in Table 89 and complete the fields on this tab.
2. Click Save before you exit this tab.
Set Instructions tab
Use the Set Instructions tab to select the instructions you want to display on the Alarm Monitor form when this
alarm occurs. Instructions are simply directions explaining how to react to the alarm.
Figure 67. Set Instructions tab
Table 90. Form fields
Element
Description
Instruction
This windowpane displays the currently selected instructions in the order in which they
display on the Alarm Monitor form.
Move Up
Click to move a selected instruction up one line; it displays on the Alarm Monitor form in
the modified order.
Move Down
Click to move a selected instruction down one line; it displays on the Alarm Monitor form
in the modified order.
169
170
Facility Commander Wnx 7.5
User Manual
Table 90. Form fields
Element
Description
Assign
Click to display the alarm Instruction Assignment dialog box that lets you assign
predefined alarm instructions to this alarm.
The Instructions Assignment window lets you modify the list of instructions assigned to
this transaction. Only instructions in the operator’s facilities are available for assignment
by this operator.
• Select, and then click the right arrow to assign an available instruction.
• Select, and then click the left arrow to unassign an instruction.
Click OK to display results in the Instruction windowpane.
How to
1. Review the guidelines in Table 90 and complete this tab.
2. Click Save before you exit this tab.
Digital Outputs tab
Use the fields on the Digital Outputs tab to link digital outputs to an alarm. When this alarm is triggered, the
linked digital output is also triggered.
Figure 68. Digital Outputs tab (ACU display shown)
Chapter 4
Devices
Table 91. Form fields
Element
Description
Output A (Primary/Local)
Available Outputs Windowpane:
A primary input assignment is not required. The default is None. Click the drop-down list
to select an available DO to assign as the primary.
If you select an output, this output must belong to the local controller.
If the controller is offline or unable to communicate with the host at the time of an alarm,
only the Primary/Local DO is triggered.
If the ON time on the Digital Output form is set to 00, this DO remains active until
the digital input is reset.
Output B
Selected Outputs Windowpane:
Click the drop-down list to select an available DO.
The digital outputs in this list can be on a local controller or other controllers.
If Output B is local, it will trigger. However, if Output B is on another controller, it is
activated only if the host is online and able to communicate with that controller.
This output does not communicate if offline.
Output Control
(ACU only.)
Note:
This digital output will activate only on an Alarm/Active state. It will not activate
on Trouble (Tamper) state (Cut or Short).
Displays a status of assigned digital outputs.
Assign button
(ACU only.) Click the Assign button to display the Alarm Digital Output Assignment dialog
(see Figure 69). Here, you can select digital outputs to assign to a Time Schedule for this
alarm.
Available Digital Outputs
Windowpane
Select from the Available list those digital outputs that you want to assign to this alarm
record. The outputs that display in this list are those that were previously configured and
not currently assigned. Only outputs in the operator's facilities are available for
assignment by this operator.
Selected Digital Outputs
Windowpane
The outputs that display are those that are currently assigned to this alarm record.
Select, and then click the left arrow to unassign an available output.
Time Schedule
Select a time schedule from the drop-down list.
• None is selected by default.
• If there are none listed, create a time schedule on the Time Schedule form.
Link Only If Offline
If selected, the link between the alarm and output (relay) functions only when the
controller is offline.
Ignore Alarm Monitor State
If selected, the output (relay) triggers even when the alarm that has the digital output is
not monitored.
171
172
Facility Commander Wnx 7.5
User Manual
Figure 69. Alarm Digital Output Assignment dialog (ACU display shown)
How to
1. Review the guidelines in Table 91 and complete the fields on this tab.
2. Click Save before you exit this tab.
DO Groups tab
Use the DO Groups tab to link digital output groups to an alarm. When this alarm is triggered, the linked digital
output groups are also triggered. The digital outputs follow the settings selected under either Reader DO
Actions or Auxiliary DO Actions. If you selected a primary/local group (not applicable for ACU controller
systems) and the Micro controller is offline, then the output follows the state of the alarm. For example, if the
alarm is active, then the output goes to an active state; and if the alarm is reset, then the output goes to an
inactive state.
Chapter 4
Devices
Figure 70. DO Groups tab
Table 92. Form fields
Element
Description
Output Groups
This windowpane displays assigned digital output groups. The digital output groups can
be on a local or other controller.
Assign DO Groups
Click to display a Digital Output Group Assignment dialog box, allowing you to select and
assign alarm DO groups that you want associated with this alarm record. Only DO
groups in the operator’s facilities are available for assignment by this operator.
• Select, and then click the right arrow to assign an available DO group.
• Select, and then click the left arrow to unassign a DO group.
Click OK to display results in the Output Groups windowpane.
Primary/Local Output Group
(Micro only.) You can select an output group as primary from the output groups displayed
in the windowpane. If the selection is not on a local controller, the assignment arrow
button is dimmed and unavailable for assignment as a primary output group. If the
controller is offline or unable to communicate with the host at the time of an alarm, only
the Primary/Local DO group is triggered.
173
174
Facility Commander Wnx 7.5
User Manual
Table 92. Form fields
Element
Description
When an alarm is active or inactive, select the action to be performed on all DOs within all selected DO groups.
Reader DO Actions
On Alarm/On Reset:
• Duration: A valid credential unlocks the door for the configured duration.
• Lock (no access): The door locks and does not allow access. Schedules can override
the state.
• Indefinite Unlock: The door is put into an unlock state. Schedules cannot override
the current state.
• Lock: The door locks and valid credentials can unlock the door.
Auxiliary DO Actions
On Alarm/On Reset:
• On Indefinite: The DO is put into active state indefinitely. Schedules cannot override
this state on a controller.
• Off: The DO is put into the inactive state indefinitely. Schedules can override this
state on a controller.
• On for Duration: The DO is put into the active state for the duration defined.
Schedules can override this state on a controller.
How to
1. Review the guidelines in Table 92 and complete the fields on this tab.
Note:
Be aware that Invalid Credential alarms and Lost Credential alarms do not reset. If you assign a DO Group to
either of these alarms, the alarm goes inactive or turns off when acknowledging or purging.
2. Click Save before you exit this tab.
Schedule tab
Use the Schedule tab to assign schedules for monitoring and printing alarms. Time schedules define intervals
that include a start AND an end time for different days of the week and modes. At the start of the schedule, the
alarm monitoring or printing changes to the scheduled value. At the end of the schedule, the alarm monitoring
or printing returns to the nonscheduled value.
Note:
For Micro controller systems, this tab is not available for host alarms such as Host Comm and Encryption alarm.
Chapter 4
Devices
Figure 71. Schedule tab
Table 93. Form fields
Element
Description
Monitoring
Note:
This field is available for nonlogical alarms associated with ACU controllers.
For Micro, this field is disabled for Host alarms such as Host Comm and
Encryption alarm.
Time schedule: Click the drop-down list to select a time schedule.
On/Off: Select On if the above schedule is when you want to monitor alarms or Off if the
above schedule is when you do not want to monitor alarms.
Print Alarm
Note:
This field is disabled for all alarms associated with ACU controllers.
Time schedule: Click the drop-down list to select a time schedule.
Yes/No: Select Yes if the above schedule is when you want to print alarms or No if the
above schedule is when you do not want to print alarms.
How to
1. Review the guidelines in Table 93 and complete the fields on this tab.
Example: If alarm monitoring is scheduled On, it returns to Off (no monitoring) at the end of the
assigned schedule.
2. Click Save before you exit this tab.
175
176
Facility Commander Wnx 7.5
User Manual
Events tab
Note:
The Events tab is enabled for systems with Micro controllers only.
Use the Events tab to assign events for alarm groups and alarm sense times. Events define start time(s) and
day(s) only. There is no end associated with an event. Therefore, that event stays in effect until another event
changes it or you change it manually.
Figure 72. Events tab
Table 94. Form fields
Element
Description
Alarm group
(Micro only.) This windowpane displays assigned events and their associated alarm
groups.
Edit
This button is available only if you currently have a list of assigned events and alarm
groups. An Edit Alarm Group dialog box displays and lets you modify the selection of
events and associated alarm groups.
Add
Click Add to assign events to the specified alarm group. An Edit Alarm Group dialog box
displays enabling you to build a list of events and associated alarm groups.
Remove
Select an entry in the list of displayed events, and then click Remove to remove from the
list.
How to
1. Review the guidelines in Table 94 and complete this tab.
2. Click Save before you exit this tab.
Chapter 4
Devices
Status tab
Select the Status tab to view information about the selected alarm as currently stored in the controller’s
database. This status reflects any changes made by schedules on this alarm. This is a read-only windowpane, in
two-column format, as follows:
Figure 73. Status tab
Table 95. Form fields
Element
Description
Status Windowpane
Micro controller status:
Alarm Group: Displays the alarm group to which the alarm is assigned.
Alarm Monitor: Displays whether this alarm is routed to the Alarm Monitor form.
ACU controller status:
Status: Displays the status of the alarm.
Monitor: Displays whether this alarm is routed to the Alarm Monitor form.
Last status date
Displays the date when the status was last requested.
Last status time
Displays the time when the status was last requested.
177
178
Facility Commander Wnx 7.5
User Manual
Table 95. Form fields (continued)
Element
Description
Refresh
Click to receive the current status information for this alarm from the controller. It may
take a moment to complete the refresh of the data. A refresh for a dial-up controller
causes the host to dial the controller unless they are already connected. The refresh
process may take a few minutes.
Note:
A status refresh requested for a controller that is offline or in error is never
returned.
How to
1. Review the guidelines in Table 95.
2. Request the latest information by clicking Refresh. It may take a moment to process refreshing the
data.
CCTV tab
Select the CCTV tab to assign CCTV alarms to alarms for this application. The windowpane displays the
CCTV alarms already assigned to this alarm.
Figure 74. CCTV tab
Chapter 4
Devices
Table 96. Form fields
Element
Description
Add/Remove
Click to display the CCTV Alarm Assignment dialog box that lets you add or remove items
from the list.
This dialog box lets you select and assign CCTV alarms to alarms for this application.
Only CCTV alarms in the operator's facilities are available for assignment by this
operator.
• Select, and then click the right arrow to assign an available alarm.
• Select, and then click the left arrow to unassign an alarm.
How to
1. Review the guidelines in Table 96 and complete the assignment on this tab.
2. Refer to the Facility Commander Wnx Installation Manual, CCTV Interfaces appendix for additional
information about CCTV interfaces.
3. Click Save before you exit this tab.
Adding sound to an alarm
If you would like to hear a sound from this application computer when an alarm occurs, follow the steps below:
Note:
You must have a sound card in your computer.
1. Click Start, Settings, and then Control Panel.
2. From the Control Panel window, double-click the Sounds and Multimedia icon.
3. In Sound Events, scroll to this application.
4. Select the alarm to which you want to assign sound; then select the sound you want for that alarm.
5. Click OK to save the change and exit the window or Apply to save that change and add more sounds.
6. Start this application; select Administration, and then Preferences.
7. On the System Settings tab of the Preferences form, verify that the Console alarm sound field is set
for the results you anticipate (either Continuous or Short).
Define alarm groups
Note:
For Micro controller systems only.
Use the Alarm Group form, Alarms & Events menu, to assign events or schedules to alarm groups. Alarm
groups provide two things. First, they provide a convenient way of scheduling many alarms at once. Second,
they provide a means of disabling monitoring in many alarms from a keypad reader. Refer to Door Functions
tab on page 129 for additional information. When a controller record is created, 16 alarm groups are also
created. You cannot delete an alarm group record. Alarm groups are owned by the associated controller record.
179
180
Facility Commander Wnx 7.5
User Manual
For a shortcut menu to related forms, move the mouse pointer below any tab and click the right mouse button. If you
are using this shortcut menu to get to the Schedules form or Events form, all schedule or event records display.
Table 97. Form fields
Element
Description
Description
This field is required and accepts up to 64 characters. The description of the alarm group
should be unique. When the records are created, the default description includes the
controller to which this alarm group is associated and the number of the alarm group, for
example 0001 Group 1, which represents alarm group one on controller one. All
alarms are automatically assigned alarm group 0. To change this description, enter over
the existing text and save the record. It is recommended that you keep the alarm group
number and controller number prefix to aid in locating the alarm points on the physical
hardware.
Facility
A facility option can be assigned for the alarm group from the drop-down list of available
facilities.
Note:
Be very careful when assigning the facility of an alarm group to a different
facility than the controller. You can create an undesired result if you do not fully
understand facility assignment. The default of Ignore Facilities is assigned if no
other selection is made.
Group tab
Use the Group tab to schedule when the alarms in the group are monitored or when to print alarm transactions
by assigning previously defined time schedules to alarm groups.
Figure 75. Group tab
Chapter 4
Devices
Table 98. Form fields
Element
Description
Number
This is a read-only field. Displays the number of the alarm group.
Controller
This is a read-only field. Displays the description of the controller on which this alarm
group is located.
Monitoring
Time schedule: Select a time schedule from the drop-down list.
On/Off: Select On if the above schedule is when you want to monitor the alarm group or
Off if the above schedule is when you do not want to monitor alarms belonging to this
alarm group.
Print Alarm
Time schedule: Select a time schedule from the drop-down list.
Yes/No: Select Yes if the above schedule is when you want to print alarms belonging to
this alarm group or No if the above schedule is when you do not want to print alarms
belonging to this alarm group.
How to
1. Review the guidelines in Table 98 and complete the fields on this tab.
2. Click Save before you exit this tab.
181
182
Facility Commander Wnx 7.5
User Manual
Events tab
Use the Events tab to schedule changes to the sense time on all alarms in the group by assigning previously
defined events to alarm groups.
Figure 76. Events tab
Table 99. Form fields
Element
Description
Alarm sense time events
This windowpane displays the currently assigned events and their associated sense time.
Edit: Available only if there are currently assigned alarm sense time events. This button is
used to modify existing alarm sense time events. The Alarm Sense Time form on
page 183 form displays.
Add: Click Add to assign events to the specified sense time. The Alarm Sense Time form
on page 183 form displays.
Remove: Select an alarm sense time event to remove and click Remove.
How to
1. Review the guidelines in Table 99 and complete the assignment on this tab.
2. Click Save before you exit this tab.
Chapter 4
Devices
Alarm Sense Time form
The Alarm Sense Time form lets you add or edit the link between an event and an alarm sense time. The event
determines when and to what value the sense times for all alarms in the group are changed.
Figure 77. Alarm Sense Time
Table 100. Form fields
Element
Description
Event
Note:
Select an event from the drop-down list. If there are no events listed, you need
to configure events using the Event Schedule form.
Note:
Event schedules can be created for Micro controllers only.
New time
Select or enter a sense time. The value is in seconds and indicates the delay before
triggering an associated digital output or sending in as alarm for this application if the DI
type is Alarm. This number tells the system how many seconds to wait after sensing the
input has changed to Active State. Enter 00 to immediately send the transaction to the
host, notifying the host of a state change. Increase the Sense Time entry if using noisy or
chattering contacts.
How to
1. Review the guidelines in Table 100 and complete this tab.
Example: This value could indicate the delay time, in seconds, that elapses between the time a door
contact is broken and the time the output and alarms are triggered. If door contact is re-established
before the sense time elapses, the alarm would not come in to this application and the output would not
activate.
2. Click Save before you exit this tab.
183
184
Facility Commander Wnx 7.5
User Manual
Alarm Priority
The Alarm Priority form, in the Alarms & Events group, includes the Alarm Priority tab and Alarm Category
tab.
Define alarm priority
The Alarm Priority tab, in the Alarms & Events group, lets you assign color priority attributes to an alarm state
and bumped alarm. The colors you assign display on the Alarm Monitor form when an alarm is generated. The
default color for alarms to display on the Alarm Monitor form is a white background with black font.
Figure 78. Alarm Priority tab
Table 101. Form fields
Element
Description
Alarm Priority
Select the alarm priority from the drop-down list for which you are assigning a color
palette. The priority range is 0 to 19.
Each alarm priority lets you assign a Background color and Font color. Click the drop-down list to display a palette of available
colors. Select a color and click OK. For your convenience, a Preview box displays a sample of the assigned colors so you can
preview your selections.
Chapter 4
Devices
Table 101. Form fields (continued)
Element
Description
Alarm State
Alarm: This alarm point is in an active state. Select a background and font color from the
drop-down lists to represent the state of an alarm for the selected priority. A preview of
your color choices displays in the Preview block. The following alarm states display in the
selected color:
Alarm
Cut
Short
Reset: This alarm point has reset and is no longer in the active alarm state. Select a
background and font color from the drop-down lists to represent the Reset state of an
alarm for the selected priority. A preview of your color choices displays in the Preview
block. Any alarm in Reset state displays in this color.
Alarm Bumped
Alarm: The notification for this alarm point has been bumped to an additional location.
Select a background and font color from the drop-down lists to represent the Bumped
state of an alarm for the selected priority. A preview of your color choices displays in the
Preview block. The following bumped alarm states display in the selected color:
Alarm
Cut
Short
Reset: The notification for this alarm point has been bumped to an additional location,
has reset, and is no longer in the active alarm state. Select a background and font color
from the drop-down lists to represent the Bumped - Reset state of an alarm for the
selected priority. A preview of your color choices displays in the Preview block.
Help
Click to open the Help system.
Revert to Original
If you changed a setting during this session and have not yet saved, click to retain the
colors previously assigned. No changes are applied.
Reset System Defaults
If you presently have colors assigned to alarms displaying on the Alarm Monitor form,
click to reset the colors to the system defaults of a white background with black font.
That is, all alarms default to a white background with black font and not just the alarm
that is currently displaying in the Alarm Priority form.
Save
Click to update an adjusted priority configuration.
OK
Click to save any changes made and close this form. The newly assigned colors display
on the Alarm Monitor form in real time if there are existing alarms.
Cancel
Click to close this form without making any changes.
How to
1. Review the guidelines in Table 101 and complete the fields on this tab.
2. Click Save before you exit this tab.
185
186
Facility Commander Wnx 7.5
User Manual
Define alarm category
The Alarm Category tab, in the Alarms & Events group, lets you define new alarm categories for alarms. When
the alarm is generated, a description of the category associated with each alarm will be displayed in the Alarm
Monitor in the Category column.
Figure 79. Alarm Category tab
Table 102. Form fields
Element
Description
Category Description
Enter a description for the new category. Then, click the Add button. This description will
appear in the drop-down list for the Category selection on the Alarm tab of the Alarm
form.
Category List
Displays a list of existing categories in alphabetical order.
Help
Click to open the Help system.
Add
Click the Add button to add a new category description to the Category List.
Update
Select an existing category to change its description. Then, click Update to update the
description in the Category List display.
Save
Click to update an adjusted priority configuration.
OK
Click to save any changes made and close this form. The newly created Categories can
be assigned to Alarms by using the Alarm Form. Category Descriptions will be displayed
in the Alarm Monitor when Alarms having assigned Categories occur.
Cancel
Click to close this form without making any changes.
Chapter 4
Devices
How to
1. Review the guidelines in Table 101 and complete the fields on this tab.
Click Save before you exit this tab.
Configure routing and bumping
The Routing and Bumping form, in the Alarms & Events group, lets you configure the routing of alarms to one
or more client groups by time schedule or at all times. Bumping is a term used to describe forwarding the
alarms to an additional location.
•
•
•
Note:
You must have client groups configured beforehand.
You can bump an alarm to one or more client groups following a time lapse of an unacknowledged and
unpurged alarm to the client groups selected for routing.
Alarm bumping information is displayed on the Alarm Monitor form in the alarm state column.
You may want to review this Sample Scenario before you begin. This is a routing and bumping schedule for a business in
two buildings (administration building and a factory, working three shifts).
Figure 80. Routing and bumping scenario
Table 103. Form fields
Element
Description
Description
Click to assign a unique title to this record.
This is a required field and accepts 64 characters.
Facility
A facility option can be assigned for the area from the drop-down list of available
facilities for assignment by this operator. The default of Ignore Facilities is assigned if no
other selection is made.
187
188
Facility Commander Wnx 7.5
User Manual
Definition tab
The Definition tab lets you configure the routing of alarms to selected client groups according to a schedule or
at all times. Additionally, you can select client groups and set a time to bump the alarm to an additional
location.
•
•
You can configure both Routing and Bumping, only a Routing record, or only a Bumping record.
client groups can be part of any Region in a Global configuration.
Figure 81. Definition tab
Table 104. Form fields
Element
Description
ROUTING
Client Groups
This windowpane displays the names of client groups assigned to this routing record.
Chapter 4
Devices
Table 104. Form fields (continued)
Element
Description
Assign Client Groups
Click to display an Alarm Routing Client Group Assignment dialog box that lets you assign
client groups to this routing record.
Only client groups in the operator's facilities are available for assignment by this
operator.
• Select, and then click the right arrow to assign an available client group.
• Select, and then click the left arrow to unassign a client group.
Click OK to close this dialog box and display the results in the Routing, Client Groups
windowpane.
Select one of the following options:
Always
Select this option if you always want this client group to receive alarms.
Time Schedule
Select this option to enable the Time Schedule drop-down list and then select a Time
Schedule from the list.
BUMPING
Client Groups
This windowpane displays the names of client groups assigned to this bumping record.
Typically, the client groups displayed here are different than those assigned to routing.
Assign Client Groups
Click to display an Alarm Bumping Client Group Assignment dialog box that lets you
assign client groups to the bumping record.
Only client groups in the operator's facilities are available for assignment by this
operator.
• Select, and then click the right arrow to assign an available client group.
• Select, and then click the left arrow to unassign a client group.
Click OK to close this dialog box and display the results in the Routing, Client Groups
windowpane.
Time To Bump
Select the number of minutes to wait before bumping this alarm notification to an
additional location, if the alarm is not acknowledged or purged at the Routing work
station. The Alarm Monitor form indicates that this alarm is bumped. The minimum
setting is one minute. The default and maximum is 30 minutes.
Select the number of seconds to wait before bumping this alarm notification to an
additional location. The default is zero.
Comment
Use this field to enter any special consideration or reminder for this configuration. This
field accepts 500 characters. It is not necessary to complete an entry in this field.
How to
1. Review Figure 80 on page 187 and the guidelines in Table 104 to complete the fields on this tab.
2. Click Save before you exit this tab.
189
190
Facility Commander Wnx 7.5
User Manual
Alarms tab
Figure 82. Alarms tab
Table 105. Form fields
Element
Description
Alarms
This windowpane displays the names of alarms assigned to this Routing and Bumping
record.
Assign Alarms
Click to display an Alarm Assignment dialog box that lets you assign alarms for this
application to this Routing and Bumping record.
How to
1. Review Table 105 to complete this tab.
2. Click Save before you exit this tab.
Chapter 4
Devices
API Connection form
The API Connection form, in the Gateways & Interfaces group, lets you define an interface license for external
application integration, by assigning a description of the API (Application Program Interface) service that has
been configured to communicate with FCWnx. This option is purchased individually and licensed with your
FCWnx system. For complete details, contact your GE Security Sales Representative.
The number of API records that you can configure is limited to the number of API connections for which you
are licensed.
Once configured, real-time event processing and remote command and control functionality extended by way
of the API includes the following:
•
•
•
•
•
•
•
•
Bidirectional alarm event processing for monitoring and acknowledgement
Receiving FCWnx access control credential events
Receiving digital input events
Receiving intrusion zone events
Control of alarm point monitoring On/Off
Control of digital input points Enable/Disable
Control of digital output points Open/Close
Control of intrusion zones Arm/Disarm
Alarms, events, and functions associated with a SCIF (ACU only.) workstation do not display and cannot be
controlled through an API connection unless you are at the SCIF workstation.
An API can be installed on any computer in your FCWnx system; however, do not attempt to install on a
domain controller. The installation does not complete properly. Review the system configuration with your IT
Department for alternative reconfiguration options.
Description: This field is required and accepts up to 64 characters. Enter the title of the external API. This
should be a unique identifier to the product.
Definition tab
Use the Definition tab to enter information that defines an interface license for external application integration
to this application.
191
192
Facility Commander Wnx 7.5
User Manual
Figure 83. API Connections
Table 106. Form fields
Element
Description
Application Login
Enter the login used by the external application to connect and access the API. Each
login must be unique.
Password
We recommend a noncryptic password. The password must be greater than four
alphanumeric or wildcard characters, with no spaces. The password is not case sensitive.
Confirm Password
Enter the password a second time.
PC Name
From the drop-down list, select the computer for this application that hosts the external
application.
How to
1. Review the guidelines in Table 106 and complete the fields on this tab.
2. Click Save before you exit this tab.
Define floors
Use the Floor form, in the Elevators group, to associate a description to a floor number.
Facility: A facility can be designated for the new floor record from the Facility drop-down list.
For a shortcut menu to related forms, move the mouse pointer below any tab and click the right mouse button.
Chapter 4
Devices
Floor tab
Use the Floor tab to create a description for a floor.
Figure 84. Floor tab
Table 107. Form fields
Element
Description
Description
This field is required and accepts up to 64 characters. Enter a description for the floor.
Floor Selection
Click the drop-down list of numbers to select a floor number or enter the floor number
using your keyboard. Duplicate numbers are acceptable.
Micro controller: The drop-down list for assigning a floor to a description accepts twocharacter floor numbers and a maximum of 64 floors.
ACU Controller: If your system is licensed and configured with an ACU controller, the
drop-down list for assigning a floor to a description accepts three-character floor
numbers and a maximum of 128 floors.
How to
1. Review the guidelines in Table 107 and complete the fields on this tab.
2. Click Save before you exit this tab.
Define elevators
Use the Elevator form, in the Elevators group, to define elevators. Decide which method of elevator control
you want to use.
Methods of elevator control
Note:
Do not switch between floor tracking and no floor tracking in the same elevator record. If you want to change an
existing record, delete that record and create a new one with the desired floor tracking method.
193
194
Facility Commander Wnx 7.5
User Manual
No floor tracking method
With this method, you define the floors available and define a digital output (relay) for each floor. Only digital
outputs provided by the DO module can be used. In addition, each DO can by used in only one elevator and
mapped to only one floor. The number of floors is limited by the number of DO modules that can be placed in
the controller. The maximum number of modules in a controller is four.
Micro controllers: The maximum number of floors available is 64 (maximum of 4 modules x 16 DOs = 64
DOs).
ACU controllers: The maximum number of floors available is 128 (12 on the ACU2 controller, 7 RRMs x 16
relays, and 1 RRM x 4 relays).
Floor tracking by input
Define the floors available, and then define a digital input and digital output (relay) for each floor. The digital
inputs are used for floor selection. Only digital inputs provided by the DI module can be used for floor
selection and each digital input can be used for only one elevator and mapped to only one floor. The digital
outputs are used to control where the elevator moves. Only digital outputs provided by the DO module can be
used, and each digital output can only be used in one elevator and mapped to one floor.
Micro controllers: The maximum number of floors is 32 (2 modules x 16 DOs = 32 DOs).
ACU controllers: The maximum number of floors is 64.
When configuring Floor Tracking by Input for elevator control applications, be sure the sense time for the
digital input is less than 7 seconds. The controller expects the digital input to occur within the first 8 seconds.
Otherwise, the controller will not detect a floor selection. It is typical for the sense time for a digital input in
this situation to be set to 0 seconds.
Floor tracking by keypad
Define the floors available and define a digital output (relays) for each floor. The reader’s keypad is used to
select the desired floor. Only digital outputs provided by the DO module can be used. In addition, each DO can
be used in only one floor. The number of floors is limited by the number of DO modules that can be placed in
the controller. The maximum number of modules in a controller is four.
Micro controllers: The maximum number of floors available is 64 (4 modules x 16 DOs = 64 DOs).
ACU controllers: The maximum number of floors available is 128 (12 on the ACU2 controller, 7 RRMs x 16
relays, and 1 RRM x 4 relays).
Floor tab (on the Access Right form)
This procedure applies to systems using Micro controllers. On the Personnel menu, select Access Right to open
the Access Right form, Floor tab to assign access rights to elevators and floors. Select from the Available list
those elevators you want to use with the form. The elevators that display in this list are those that are set up on
the Elevator form. Floors and DOs can be assigned an access right to define which floors a person can access
and what DOs a person can trigger with a valid credential.
Chapter 4
Devices
Configuring elevator control using a Micro controller:
1. Create Floor records and floor numbers to be used with the elevators. (See Floor tab on page 193.)
2. Configure the elevator records. You use the Elevator form to configure elevator records. Here, you
select:
•
•
•
Method of elevator control (See Methods of elevator control on page 193.)
Readers (Verify that readers are active on the Reader form. See Reader tab on page 124.)
Floors
You can set a reader for elevator control using this form only. When you return to the Reader form and
display a corresponding reader record, you notice that all other options in the Logical Type section are
not available.
3. The type of modules you want to use in your dedicated controller (DO only or a combination of DO
and DI modules) determines the number of floors available. After installing the CPU module, the
Power/Communication module, and at least one reader module, there are four slots available that can
be used for digital input modules or a combination of digital input modules and digital output modules.
4. The type of modules you want to use in your dedicated controller (DO only or a combination of DO
and DI modules) determines the number of floors available. After installing the CPU module, the
Power/Communication module, and at least one reader module, there are four slots available that can
be used for digital input modules or a combination of digital input modules and digital output modules.
Note:
Elevator control does not span controllers. This means the reader, digital outputs, and digital inputs (if applicable) must
be on the same controller.
Configuring elevator control using an ACU controller:
1. Create a Controller record and assign the Controller type as an Elevator Controller. This controller
cannot manage anything else. It can only manage elevators.
2. Create Floor records and floor numbers to be used with the elevators.
3. Create area records on the Area form.
•
Assign readers to the area. See Area form, Reader tab.
Note:
The area must also be assigned to an access right for a person to gain access to that reader.
4. Now, you can configure the elevator records. You use the Elevator form to configure elevator records.
Here, you select:
•
•
•
Method of elevator control
Readers
Floors to area association
You can set a reader for elevator control using this form only. When you return to the Reader form and
display a corresponding reader record, you notice that all other options in the Logical Type section are
not available.
Note:
Elevator control does not span controllers. This means the reader, digital outputs, and digital inputs (if
applicable) must be on the same controller.
195
196
Facility Commander Wnx 7.5
User Manual
Elevator tab
Select the Elevator tab to create or edit elevator information.
Figure 85. Elevator tab
Table 108. Form fields
Element
Description
Reader
To tag a reader as an elevator reader, select a reader from the drop-down list of available
readers. If no readers are listed, check that the readers have been marked active on the
Reader tab of the Reader form.
Micro controllers: The list displays all available readers.
ACU controllers: The list displays available readers associated with a controller that is set
as an elevator controller. These readers are also associated with an area.
Chapter 4
Devices
Table 108. Form fields (continued)
Element
Description
Floor Tracking
Select one of three options:
No Floor Tracking: Floor(s) selected are not sent to Credential History (not tracked).
Micro controllers: Only Trigger All DOs prior to floor selection is enabled.
ACU controllers: Only Trigger All DOs prior to floor selection is enabled.
Floor Tracking by Input: The floor(s) selected are sent to Credential History.
Micro controllers: Both Trigger All DOs prior to floor selection and Trigger One DO upon
floor selection are enabled.
ACU controllers: Only Trigger All DOs prior to floor selection is enabled.
Floor Tracking by Keypad: Floor selection is made by using the keypad of the reader and
the floor(s) selected are sent to Credential History.
Micro controllers: Both Trigger All DOs prior to floor selection and Trigger One DO upon
floor selection are enabled.
ACU controllers: Only Trigger One DO upon floor selection is enabled.
Note:
Interface
Do not switch between floor tracking and no floor tracking in the same elevator
record. If you want to change an existing record, delete that record and create
a new one with the desired floor tracking method.
Select one of two options:
Option 1: Trigger All DOs prior to floor selection: All the appropriate floor selection
buttons activate.
Option 2: Trigger One DO upon floor selection: All the appropriate floor selection
buttons activate. The user can select only one floor.
How to
1. Review the guidelines in Table 108 and complete the fields on this tab.
2. Click Save before you exit this tab.
Public Access tab
Note:
The Public Access tab is available for ACU controller systems.
Use the Public Access tab to assign an area and time schedule associated with this elevator record during which
public access is allowed.
197
198
Facility Commander Wnx 7.5
User Manual
Figure 86. Public Access tab
Table 109. Form fields
Element
Description
Area/Time Schedule
This windowpane displays the area description and associated time schedule for public
access to the area using this elevator.
Edit
Select an area or time schedule and then click Edit to open the Area/Time Schedule
Selection dialog box, allowing you to change the associated area or time schedule.
The Area/Time Schedule dialog box lets you select and assign an area and time schedule
for public access associated with this elevator record. Only areas in the operator's
facilities are available for assignment by this operator.
• Select an area from the drop-down list.
• Select a time schedule from the drop-down list to associate with the selected area.
Click OK to close this dialog box and display the results in the Area/Time Schedule
windowpane.
Click Cancel to terminate and close this window. The entries are not saved.
Add
Click Add to open the Area/Time Schedule Selection dialog box, allowing you to assign
an area and time schedule to associate with this elevator record.
Note:
Remove
The Add button will not be enabled until this record is saved. The record must
first be saved in order for the areas for selection to display.
Select an area or time schedule and then click to delete from this elevator record.
How to
1. Review the guidelines in Table 109 and complete this tab.
2. Click Save before you exit this tab.
Chapter 4
Devices
Floor/Digital Output tab
Note:
The Floor/Digital Output tab displays only if you select No Floor Tracking or Floor Tracking By Keypad from the Floor
Tracking field on the Elevator tab.
Select the Floor/Digital Output tab to link a digital output to a floor.
Note:
Elevator control does not span controllers. This means the reader, digital outputs, and digital inputs (if applicable) must
be on the same controller.
Figure 87. Floor/Digital Output tab
Table 110. Form fields
Element
Description
Assigned Floor/Digital Output
This list box displays the currently assigned floors, digital outputs, and area (for ACU
controller systems).
Edit: To edit a floor/digital output link, select and entry from the list and then click this
button. The Floor/Digital Output Selection dialog displays.
Add: To add a floor/digital output link, click this button.
The Floor/Digital Output Selection dialog displays. Use the dialog box to create or edit a
floor-to-digital-output link.
• Floor: Select a floor from the drop-down list of available floors.
• Digital Output: Select a digital output from the drop-down list of available DOs.
• Area: This control is available only if the selected reader is owned by an ACU
controller. Select an area from the drop-down list of available areas.
Click OK to accept your selections and close this form.
Remove: To remove a floor/digital output, select an entry from the list and then click this
button.
199
200
Facility Commander Wnx 7.5
User Manual
How to
1. Review the guidelines in Table 110 and complete this tab.
2. Click Save before you exit this tab.
Floor/Digital Output/Digital Input tab
Note:
The Floor/Digital Output/Digital Input tab displays only if you select Floor Tracking By Input from the Floor Tracking field
on the Elevator tab.
Select Floor/Digital Output/Digital Input tab to link a digital output and a digital input to a floor.
Note:
Elevator control does not span controllers. This means the reader, digital outputs, and digital inputs (if applicable) must
be on the same controller.
Figure 88. Floor/Digital Output/Digital Input tab
Chapter 4
Devices
Table 111. Form fields
Element
Description
Assigned Floor/Digital
Output/Digital Input
This windowpane lists the currently assigned floors, digital outputs, digital inputs, and area (for ACU
controller systems).
Edit: To edit a floor/digital output/digital input link, select an entry from the list and click this button.
The Floor/Digital Output/Digital Input Selection dialog displays.
Add: To add a floor/digital output/digital input link, click this button.
The Floor/Digital Output/Digital Input Selection dialog displays. Use this dialog box to create or edit a
floor-to-digital-output-to-digital-input link.
• Floor: Select a floor from the drop-down list of available floors.
• Digital Output: Select a digital output from the drop-down list of available DOs.
• Digital Input: Select a digital input from the drop-down list of available DIs.
• Area: This control is available only if the selected reader is owned by an ACU controller. Select an
area from the drop-down list of available areas.
Click OK to accept your selections and close this form.
Remove: To remove a floor/digital output/digital input, select an entry from the list and click this
button.
How to
1. Review the guidelines in Table 111 and complete this tab.
2. Click Save before you exit this tab.
Elevator control sample scenarios
Two Options with Floor Tracking by keypad
Option 1: Install a keypad reader in the elevator cab. A user presents their badge at the reader. The floor
number is entered on the keypad to go to that floor.
Option 2: Assign input buttons associated with each floor to a 20-DI board in the Micro to do floor tracking by
input.
Note:
Neither of these options requires any additional readers outside the elevator cab. When you push the elevator call
button, the elevator is called and the door opens but does not go to any floor until a valid badge is presented to the
reader in the cab and a valid floor is selected.
Without Floor Tracking
Install a keypad reader in the elevator cab. A user presents their badge at the reader. Presenting a valid badge
inside the elevator cab activates the buttons for all floors to which the person has access. The user selects a
floor from the elevator buttons.
Note:
A keypad reader is not required. No readers are required on each floor. A DI board in the Micro is not required.
201
202
Facility Commander Wnx 7.5
User Manual
What’s next?
Continue with Chapter 5, Video on page 203, if appropriate for your system.
Chapter 5 Video
This chapter provides instructions for configuration of video options associated
with video surveillance.
In this chapter:
Overview . . . . . . . . . . . . . . . . . . . . . . . . . . . . . . . . . . . . . . . . . . . . . . . . 204
Define digital video recorders . . . . . . . . . . . . . . . . . . . . . . . . . . . . . . . 204
Define camera presets. . . . . . . . . . . . . . . . . . . . . . . . . . . . . . . . . . . . . . 214
Define cameras . . . . . . . . . . . . . . . . . . . . . . . . . . . . . . . . . . . . . . . . . . . 215
Define event triggers. . . . . . . . . . . . . . . . . . . . . . . . . . . . . . . . . . . . . . . 218
Video CD Burner . . . . . . . . . . . . . . . . . . . . . . . . . . . . . . . . . . . . . . . . . 226
Navigating Video Console . . . . . . . . . . . . . . . . . . . . . . . . . . . . . . . . . . 228
Search for video . . . . . . . . . . . . . . . . . . . . . . . . . . . . . . . . . . . . . . . . . . 232
Define CCTV interfaces . . . . . . . . . . . . . . . . . . . . . . . . . . . . . . . . . . . . 234
What’s next? . . . . . . . . . . . . . . . . . . . . . . . . . . . . . . . . . . . . . . . . . . . . . 236
204
Facility Commander Wnx 7.5
User Manual
Overview
Video driver installation
After installation of the video adapter card, Windows automatically detects the new video card on power up.
Follow the installation instructions received with your video driver software; then, reboot your computer.
For VisioWave-specific installation and configuration requirements, refer to the FCWnx with VisioWave Setup
Guide provided on the Documentation CD.
Define digital video recorders
Digital video surveillance is integrated into the system for this application and requires its own hardware and
software. The system supports the following digital video multiplexer/recorders:
Table 112. Form fields
Element
Model Description
Version
GE
GE DVMRe - 4 CD
Requires duplex PPC firmware Version 3.18 or
later and MUX firmware Version 3.24 or later.
GE DVMRe - 10 CD
GE DVMRe - 16 CD
GE DVMRe CT / StoreSafe Pro - 4
GE DVMRe CT / StoreSafe Pro - 10
GE DVMRe CT / StoreSafe Pro - 16
GE DVMRe CT II / StoreSafe Pro II - 4
GE DVMRe CT II / StoreSafe Pro II - 10
GE DVMRe CT II / StoreSafe Pro II - 16
GE Discovery 300
GE Discovery 2400
GE Discovery 1205
GE Discovery 2405
GE Discovery 2415
Requires triplex firmware Version 5.x or later.
CT, StoreSafe, and StoreSafe Pro series
recorders are part of the family of wavejet
compression-based technology products.
CT II and StoreSafe Pro II series recorders
are part of the family of wavejet
compression-based technology products.
VOS Version 3.x
These recorders are part of the family of
VisioWave video products.
VOS Version 4.x
These recorders are part of the family of
VisioWave video products.
GE Evolution 2800
GE Evolution 2809
GE Evolution 3005
SymDec 16
1.47k
SymSafe
1.28i
SymSafe Pro
1.28i
SymNet 1
2.00i
Legend IP
3.6
These recorders are part of the family of
SymSuite video products.
Chapter 5
Video
Table 112. Form fields (continued)
Element
Model Description
Version
Integral Technologies
DVXi
3.1
DVXe
4.0, 4.1
DS Xpress
2.1
American Dynamics
Intellex DVMS8000
3.1
Nice
Pro
Harmony
8.0
Digital Watchdog
DWPro 9016
2.3
Pelco
DX8000
1.0
Panasonic
HD500A
2.5
Note:
Increasing the processor speed and memory on the server and/or client workstations may be required for optimizing
performance in your specific application.
The DVR form, Security Devices group, lets you configure integrated digital video surveillance within this
application. This option provides event-driven video recording, allowing you to access and control live and
recorded video and initiate camera control at any workstation within this application system.
•
•
Enterprise Edition supports up to 256 licensed DVR connections.
Professional Edition supports up to 16 licensed DVR connections.
The following order is recommended for configuration of a DVR system for this application:
1. Set up operators and permissions.
2. Configure the DVR. Refer to the manuals received with your DVR for hardware setup and installation
specifics.
3. Configure DVR devices. DVR devices can be hosted on the server computer for this application and/or
client workstations. The actual number of DVR devices hosted on each server computer may vary.
Distributing DVR hosting across multiple computers may be required for optimizing system
performance in your specific application.
4. Create preset records.
5. Configure cameras.
6. Set up event triggers.
7. Optional: Set up alarm graphics.
DVR
Digital Video Recorder (DVR): Equipment that can provide digital video multiplexing and/or recording.
The Video Console system program, accessible from the Monitors and Controls group, lets you monitor and
control video multiple DVRs and their associated cameras. The Video Console can also be accessed from the
Application toolbar by clicking this icon:
205
206
Facility Commander Wnx 7.5
User Manual
Note:
On the Video Console window, click Help for information about the program. For additional information, refer to the User
Manual that came with your DVR for specific installation, configuration, and operation instructions.
Digital Video Recorder form
Use the Digital Video Recorder form, in the Security Devices group, to configure DVRs.
For a shortcut menu to related forms, move the mouse pointer below any tab and click the right mouse button.
Table 113. Form fields
Element
Description
Description
This field is required and accepts up to 64 characters. Enter a unique descriptive name
for your DVR in the Description field.
Facility
A facility option can be assigned for your new DVR from the Facility drop-down list.
When you change a facility designation, it changes the facility for the DVR only. You
receive a message displaying, Do other devices change to the same facility as the digital
video recorder? Select Yes or No. If you select Yes, the alarm record and camera records
change as well. You need to verify the accuracy of the revised records.
Definition tab
Use the Definition tab to assign or edit a bus address, type, host computer, or poll time.
Chapter 5
Video
Figure 89. Definition tab
Table 114. Form fields
Element
Description
DVR Type
Select a DVR type from the drop-down list. This field is not available for edit on existing
records. When you click Save, the number of camera records are created equivalent to
the type of DVR you selected.
DVR Hostname
Select a DVR hostname from the drop-down list. This field is only used when configuring
IP Cameras.
DVR Address
Enter a DVR Address, a unique logical address associated with this DVR. This field is not
available to edit existing records. This number is used in this software to uniquely identify
the DVR and its related records.
Bus Address
The bus address is a 2-digit field in the range of 1 to 32. The bus address refers to the
physical DVR device address on the RS-485 bus and must be entered when multiple
DVRs exist on a single bus and/or for controlling cameras with PTZ capability.
When configuring a SymSuite device, the bus address must be entered as a 1 for the PTZ
cameras to function properly.
Host Computer
Select a Default Hostname from the drop-down list that hosts the defined DVR and act
as its communications server. If the Default Hostname computer is in a failover condition,
you cannot re-assign this DVR to any other Host computer except the Active Client that
is presently hosting this device.
207
208
Facility Commander Wnx 7.5
User Manual
Table 114. Form fields (continued)
Element
Description
Poll Time (seconds)
Poll Interval: Enter the length of time in seconds that elapse prior to a status request
being sent to the DVR for verification of communications and processing of error and/or
alarm messages since the last poll.
Timeout: Enter a length of time to wait for a response after a request prior to retrying (if
no response has been returned).
Retry Interval: Enter the length of time to wait between retries.
Retry Count: Enter the number of retries to attempt before qualifying a communications
failure.
How to
1. Review the guidelines in Table 114 and complete the fields on this tab.
2. Click Save before you exit this tab.
3. Configure a SymNet or a Legend IP camera:
a. Configure both the SymNet and Legend IP using the DVR Type “GE SymNet 1.”
b. In the Digital Video Recorder form, select the DVR Type GE SymNet 1. The DVR Hostname field
will then be enabled, and the Default Hostname field will be disabled.
c. In the DVR Hostname field, select the name of the DVR that will be hosting this device. The
Default Hostname field will automatically populate with the default hostname of the selected
DVR.
After creating the record in the Digital Video Recorder form, one camera is created for this
record.
d. In the Camera form Definitions tab, edit the Address number to match the IP input number
configured on the hosting DVR for this camera.
In the Facility View panel of the Video Console, this device will display as a DVR with one
camera.
Chapter 5
Video
Communications Settings tab
Use the Communications Settings tab to assign or edit a TCP/IP address, PTZ control, event tagging, and clock
time synchronization.
Figure 90. Communications Settings tab
Table 115. Form fields
Element
Description
TCP/IP Address
Assign or edit the TCP/IP network address for the DVR.
Username
Enter the same user name configured locally in the DVR for authenticating connectivity.
This is not a required field. The default is no user name; however, be aware that the DVR
form and DVR device must be identical. If you do not assign a user name in the
application but the DVR has a configured user name, there is no connectivity
authentication.
Password
Enter the same password associated with the assigned user name, if any, that has been
configured locally in the DVR for authenticating connectivity. This is not a required field.
The default is no password; however, be aware that the DVR form and DVR device must
be identical. If you do not assign a password in the application but the DVR has a
configured password, there is no connectivity authentication.
PTZ Control
This field is not available for edit . TCP/IP is enabled if cameras with PTZ capability are
configured on this DVR and require control from this application.
209
210
Facility Commander Wnx 7.5
User Manual
Table 115. Form fields
Element
Description
Event Tagging
Select TCP/IP or None. The default is TCP/IP. Select TCP/IP if event triggers are required to
tag recorded video upon activity from defined readers and alarms. Select None if no
tagging of recorded video is required for event triggers and only access to live video is
desired upon activity from defined readers and alarms.
Time Sync Interval
The DVR date and time clock can be synchronized by its host computer to ensure that
access control, alarm, and video events across the entire system are time stamped in
sync. When DVRs on a centralized system reside in different time zones, the DVRs should
be hosted by computers in their same time zone. The hosting computers synchronize
their DVR clocks at the interval selected as well as immediately manage any system
date and time changes including daylight savings time. Select one:
• None (default)
• 1 Hour
• 4 Hours
• 8 Hours
• 12 Hours
• 24 Hours
If DVRs are required to be synchronized with the system for this application date and
time clock, 12 Hours is a recommended setting for most systems.
How to
1. Review the guidelines in Table 115 and complete the fields on this tab.
2. Click Save before you exit this tab.
Chapter 5
Video
Video Display tab
Select the Video Display tab to set up your DVR video window display options. These options are configurable
per DVR and are intended for optimizing system performance based on your network bandwidth and
computing hardware. This application can be configured to request and process video from DVRs in reduced
resolution and color for display purposes, while the video remains locally stored on the DVR in its original
recorded resolution and color settings. All video is transmitted over the network in a compressed Wavelet
format.
Figure 91. Video Display tab
Table 116. Form fields
Element
Description
Resolution
From the drop-down list, select your video display resolution as Low (~12K per image), Medium
(~20K per image), or High (~28K per image).
Black and White
Select if you choose to further reduce the size of images transmitted over the network for display
purposes. Video displays in black and white; however, the video remains locally stored on the DVR
in its original recorded resolution and color settings.
Note:
This option is disabled for Sym and Visiowave recorders.
Max Search Time for
Recorded Events (secs)
Select or enter the number of seconds. This selection is the length of time a search request for
recorded video waits before timing out. Search times may vary depending on network traffic, DVR
processing load, and number of recorded events.
Video Standard
Select PAL or NTSC.
• PAL (Phase Alternating Line) is a European TV standard.
• NTSC (National TV Standards committee) is the U.S. TV standard administered by the FCC.
Note:
If your DVR is a GE Kalatel brand, the video standard is auto-detected.
How to
1. Review the guidelines in Table 116 and complete the fields on this tab.
211
212
Facility Commander Wnx 7.5
User Manual
2. Click Save before you exit this tab.
Status tab
Perform a search, select a DVR from the right list box, and click Status.
Note:
The DVR must be online in order to display a Status pane.
Figure 92. Status tab
Table 117. Form fields
Element
Description
General Status
Displays current time, time powered on, MUX firmware, PPC firmware, and disk capacity.
Camera Status
Displays current status of camera alarms and video loss alarms.
Record Status
Displays status, disk status, time recording, and time until disk is full.
Archiving Status
Displays archive status, device status, time archiving, and time until archive is full.
Ethernet Status
Displays normal connect IP address and connect priority, and live connect IP address and connect
priority.
• A duplex recorder priority status displays on a line separate from the IP address.
• A Triplex and/or Matrix recorder priority status displays as the last entry of the IP address such as:
003.018.146.159,3
Status
Click Status to refresh or update changes that occurred since the last Status request. This button is
disabled when a status request is in progress.
How to
1. Review the guidelines in Table 117 to assist you in review of the window on this tab.
2. The status pane clears when you select another DVR from the list box on the right.
Chapter 5
Video
Video windows
This is a brief overview of window behavior based on the selections assigned on the Digital Video Recorder
form.
Note:
Learn more about video windows in Navigating Video Console on page 228.
There are several ways to open a video window:
•
•
•
•
•
•
On the main toolbar of this application, click the Video icon.
On the View drop-down menu, select Enable Alarm Video Pop-up.
In the Monitor & Control application group, click the Video Console icon.
On the Alarm Monitor, when an alarm is generated with associated video, the Video Console icon
displays. Right-click the alarm transaction message to access the Video Console application.
On the Activity Monitor, when an event is triggered with associated video, the Video Console icon
displays. Right-click the event transaction to access the Video Console application.
In the Graphics Console application, click Quick Launch when associating devices with graphic
maps.
Each window displays a title bar identifying the application name and instance number. The minimize, restore,
maximize, and exit options display in the upper right corner of each window.
Resize Window
•
•
•
To resize a window, point to any corner border and drag a sizing handle to the size window you want to
display.
Increasing the window size is limited to the size of your monitor screen.
Decreasing the window size is limited to the system default, corresponding to the Small option
available on the Video Display tab.
Window Menu
•
•
•
Save Position: Each window can be independently moved anywhere on the desktop. Select this option
to save the position. If you close the window and reopen, the window opens at the saved position. This
feature has been incorporated to facilitate multiple window management for both single and multiple
monitor workstation configurations.
Reset Position: Deletes the saved position information for all application windows from the product
database. This causes all application windows to open to their default position the next time they are
opened.
Always On Top: Selection of this option keeps the window in the forefront of all windows displaying
on your workstation for this application.
213
214
Facility Commander Wnx 7.5
User Manual
Define camera presets
The Camera Preset form, in the Security Devices group, lets you edit or enter a description and number for a
camera preset. After setup and programming of your DVR devices to meet your monitoring requirements, you
need to parallel the settings and positions in the configurations in this application. Presets must be defined
before you can assign them to a camera on the Presets tab of the Camera form.
Note:
This option is available for PTZ cameras only.
Table 118. Form fields
Element
Description
Description
This field is required and accepts up to 64 characters. In this field, enter or edit the
description for the selected preset. This should be a unique name describing or
numbering a preset camera position.
Facility
A facility option can be assigned from the drop-down list of available facilities. The
default of Ignore Facilities is assigned if no other selection is made.
Definition tab
Use the Definition tab to assign a number to this camera preset.
Figure 93. Definition tab
Table 119. Form fields
Element
Description
Preset
In this text field, enter a number within the range of 1 to 64, or use the arrow controls to
select a number. This number only references the preset number programmed and
stored in a camera with PTZ capability. Click Save. This preset is now available for
assignment, to a specific camera.
Chapter 5
Video
How to
1. Review the guidelines in Table 119 and complete the field in this tab.
2. Click Save after each Preset number that you assign.
3. Click Add before beginning each new description or Preset record.
4. Click Save before you exit this tab.
Define cameras
Use the Camera form, in the Security Devices group, to edit existing camera preferences. Camera records are
automatically created when a DVR is defined on the Digital Video Recorder form. The camera records display
in the format 00X-0X Camera where 00X is the DVR address and 0X is the camera number.
Table 120. Form fields
Element
Description
Description
It is recommended that you keep the number prefix to aid in locating the cameras.
Note:
Facility
Device description updates are communicated to corresponding alarms, DIs,
and DOs. In order for changes to migrate to additional form windows that may
be open at the time of a change, the open windows should be closed and then
re-opened before the device description is able to be seen.
A facility option can be assigned for the camera from the drop-down list of available
facilities for assignment by this operator. The default of Ignore Facilities is assigned if no
other selection is made.
Definition tab
The Definition tab displays the camera channel address, with which DVR this camera is associated, and
camera type configurable for Fixed or PTZ. The camera can be enabled or disabled for viewing and managing
from within this application. Use the Camera form to edit the preferences of the selected camera record.
215
216
Facility Commander Wnx 7.5
User Manual
Figure 94. Definition tab
Table 121. Form fields
Element
Description
Address
This is a read-only field for all cameras except IP Cameras. The address of the camera is
automatically assigned. The address is a 2-digit number that corresponds to the camera
channel on the back of the DVR.
When configuring IP Cameras, edit the Address number to match the IP input number
configured on the hosting DVR for this camera.
DVMR
This is a read-only field. This field displays the corresponding DVR with which this
camera is associated.
Camera Type
Select a type of camera behavior as Fixed or PTZ from the drop-down list.
Enable Camera
By default, this check box is selected. The camera can be enabled or disabled for viewing
and managing from within this application and setting accessibility from the Digital
Video Viewer. Disabled cameras do not display on the Digital Video Viewer.
How to
1. Review the guidelines in Table 121 and complete the fields on this tab.
2. Click Save before you exit this tab.
Chapter 5
Video
Presets tab
The Presets tab lets you assign previously defined presets to a camera. (Presets must first be defined on the
Camera Preset form.) Presets are assignable to PTZ cameras only. Assign predefined presets for the selected
camera.
Note:
The Presets tab is unavailable for fixed cameras.
Figure 95. Presets tab
Table 122. Form fields
Element
Description
Assigned Presets
This windowpane displays a list of previously assigned presets.
Assign Camera Presets
Click this button to display the Camera Preset Assignment dialog box. A list of available
camera presets displays. These presets were previously defined on the Camera Preset
form.
• Select one or more presets from the available list and then click the right arrow to
assign.
• Select one or more presets from the assigned list and then click the left arrow to
unassign.
Click OK to accept the selections and close this window.
When the Camera Preset Assignment form closes, the selected presets display in the
Assigned Presets windowpane. Click Save to save the selections.
How to
1. Review to the guidelines in Table 122 and complete this tab by assigning the camera presets for this
camera.
2. Click Save before you exit this tab.
217
218
Facility Commander Wnx 7.5
User Manual
Define event triggers
Event tagging overview
When a digital video camera is activated and associated with a reader event or alarm event, the recording for
that activity is tagged. During this tagging process, the camera remains actively recording and then archives the
recording to disk.
Once recorded, the recording can be retrieved by a search option based on the event tag. If the event trigger that
activated the tagging was defined as Tag as event instead of Tag only, the DVR would have changed recording
rate to a special event-recording rate for a period of time, as predefined during the DVR setup and
configuration.
When tagged events are identified by a search, retrieved, and viewed, the video playback begins at the start of
the event and continues playing until you elect to discontinue the playback.
Event triggers must be created on the Video Event Trigger form, to define the logical rules that initiate eventdriven video response.
Video Event Trigger form
The Video Event Trigger form, Alarms & Events group, opens with the Preset/Camera tab displayed. An event
consists of a camera and either readers, alarms, or zone/area activity. A trigger causes an event or program
routine to be executed, depending on what options you set on the tabs of this form.
Example
A camera begins recording in response to an invalid credential transaction. An alarm is recorded in response to
the credential transaction.
Table 123. Form fields
Element
Description
Description
Enter text up to 64 alphanumeric characters in length.
The description should convey specific information relating to a physical location,
camera, reader, or state, such as:
Front Door Inv Credential Camera 1 Reader 1
You can assign a reader alarm or camera alarm or both and this can be reflected in the
description of the trigger.
Chapter 5
Video
Preset/Camera tab
This window enables you to assign cameras and their associated presets with an event. Up to four cameras can
be assigned per event trigger.
Figure 96. Preset/Camera tab
Table 124. Form fields
Element
Description
Assigned Preset/Camera
Windowpane
This pane displays assigned preset/cameras for this event.
Edit
Click Edit to display the Preset/Camera Selection window. You are able to edit an existing
Preset and Camera combination associated with this event. This option is disabled if
there are no existing records.
Add
Click Add to select a camera and corresponding preset. The available presets for a
camera display after you select the camera. Click OK. The addition now displays in the
Assigned Preset/Camera box.
Remove
Select then click Remove to remove a Preset and Camera combination from the list of
available combinations in the Assigned Preset/Camera box. This option is disabled if
there are no existing records.
How to
1. Review the guidelines in Table 124 and complete this tab.
2. Click Save before you exit this tab.
219
220
Facility Commander Wnx 7.5
User Manual
Readers tab
Select readers and transaction types that become the source for initiating the event trigger.
Figure 97. Readers tab
Table 125. Form fields
Element
Description
Assigned Readers
This pane displays readers assigned to this event trigger record.
Assign Readers
Click to display a Reader Assignment window, enabling you to select and assign a reader
to this event trigger.
Only readers in the operator’s facilities are available for assignment by this operator.
• Select, and then click the right arrow to assign an available reader.
• Select, and then click the left arrow to unassign a reader.
Click OK to accept the assignments and close the form.
Transactions
Select any or all of the options as types of reader transactions to trigger an event.
• Valid
• Invalid
• Unknown
• Lost
For additional information regarding reader transactions, refer to Activity monitoring on
page 312.
Chapter 5
Video
Table 125. Form fields (continued)
Element
Description
Tag Selection
Select one of the Tag options.
None: No tag is sent to the DVR for marking recorded video or manipulating record rate.
Tag only: A tag is sent to the DVR for marking recorded video at the cameras current
record rate.
Tag as event: A tag is sent to the DVR for marking recorded video and for changing the
cameras record rate to its event record rate settings.
How to
1. Review the guidelines in Table 125 and complete this tab.
2. Click Save before you exit this tab.
Alarms tab
The Alarms tab lets you select alarms and alarm transaction types that become the source for this event trigger.
Figure 98. Alarms tab
221
222
Facility Commander Wnx 7.5
User Manual
Table 126. Form fields
Element
Description
Transactions
Select one or both options as types of alarm transactions to trigger an event. The alarm
must be set for monitoring.
Alarm: An event is triggered as a result of an alarm.
Reset: An event is triggered as a result of an alarm reset.
Tag Selection
Select one of the Tag Selection options:
None: No tag is sent to the DVR for marking recorded video or manipulating record rate.
Tag only: A tag is sent to the DVR for marking recorded video at the cameras current
record rate.
Tag as event: A tag is sent to the DVR for marking recorded video and for changing the
cameras record rate to its event record rate settings.
Assign Alarms
Click to display an Alarm Assignment window, enabling you to select and assign/
unassign an alarm record for this event trigger record.
The Alarm Assignment window displays a list of alarms in the system for this application,
for the facilities available for assignment by this operator. All alarms display. If this is a
Global system, alarms are not filtered by Region.
• Select, and then click the right arrow to assign an available alarm.
• Select, and then click the left arrow to unassign an alarm.
Click OK to display results in the Assigned Alarms windowpane.
Auto Pop-up
Select this check box to enable an automatic live video pop-up window when an alarm
occurs associated with this alarm trigger. Additionally, the Enable Alarm Video Popup
must be enabled on the View menu. If this operator’s Permission for Digital Video Viewer
is not made available, this option does not activate even though selected here. Also, refer
to Enable alarm video popup.
How to
1. Review the guidelines in Table 126 and complete this tab.
2. Click Save before you exit this tab.
Enable alarm video popup
View menu
Select this item to enable/disable an automatic live video pop-up window when an alarm occurs with an
associated alarm trigger. By default, this is a toggle option and is not selected. This option must also be
activated by selection of Video Window Auto Pop-up on the Video Event Trigger form, if the operator has
been assigned permission for Digital Video Viewer.
If operator permission for Digital Video Viewer is not made available, this option does not activate even
though selected on the Video Event Trigger form, Alarms tab. Once selected, the operator login retains this
feature until disabled.
Chapter 5
Video
Intrusion Zone tab
Note:
The Intrusion Zone tab displays for systems licensed for Micro controllers.
The Intrusion Zone tab lets you assign intrusion zones and intrusion zone transaction types that become the
source for this event trigger.
Figure 99. Intrusion Zone tab
Table 127. Form fields
Element
Description
Transactions
Select any one or all of the types of intrusion zone transactions that trigger an event.
Arm: Intrusion zone arm transaction in progress.
Disarm: Intrusion zone disarm transaction in progress.
Invalid: Intrusion zone arm/disarm transaction failed for one of the following reasons:
• Device or badging failed. The zones are not secure.
• The time period allowed for completion of the arm/disarm process at keypad and
reader, has expired.
• The presented credential does not have access rights for transactions in the
selected intrusion zones.
Tag Selection
Select one of the options.
None: No tag is sent for marking a recorded video or manipulating the record rate.
Tag only: A tag is sent for marking recorded video at the camera’s current record rate.
Tag as event: A tag is sent to the DVR for marking recorded video and for changing the
camera’s record rate to its event record rate settings.
Assigned Intrusion Zones
This list box displays those intrusion zones that you have assigned to this event trigger.
223
224
Facility Commander Wnx 7.5
User Manual
Table 127. Form fields (continued)
Element
Description
Assign Intrusion Zone
Click to display an Intrusion Zone Assignment dialog box, listing available intrusion zones
in your system. Those zones selected and assigned when you close the dialog box,
display in this list box.
The Intrusion Zone Assignment displays when Assign Intrusion Zone is clicked on the
Intrusion Zones tab of the Access Right form or Event Trigger form. The window displays
a list of all intrusion zones for the controllers in the facilities available for assignment by
this operator. You can assign an unlimited number of intrusion zones to an access right.
• Select, and then click the right arrow to assign an available intrusion zone.
• Select, and then click the left arrow to unassign an intrusion zone.
Click OK to accept the selections and display the intrusion zones in the Assigned
Intrusion Zones list box.
Areas tab
Note:
The Areas tab is enabled for systems licensed and configured with ACU controllers.
The Areas tab lets you assign areas and area transaction types that become the source for this event trigger.
Figure 100.Areas tab
Chapter 5
Video
Table 128. Areas tab
Element
Description
Transactions
Select any one or all of the types of Area transactions that trigger an event.
Arm: Area arm transaction in progress.
Disarm: Area disarm transaction in progress.
Invalid: Area arm/disarm transaction failed for one of the following reasons:
• Device or badging failed. The areas are not secure.
• The arm/disarm device is not a part of the selected area.
• The 10-second time period allowed for completion of the arm/disarm process at
keypad and reader, has expired.
• The presented credential does not have access rights for transactions in the
selected area.
Tag Selection
Select one of the options.
None: No tag is sent for marking a recorded video or manipulating the record rate.
Tag only: A tag is sent for marking recorded video at the camera’s current record rate.
Tag as event: A tag is sent to the DVR for marking recorded video and for changing the
camera’s record rate to its event record rate settings.
Assigned Areas
This list box displays those Areas that you have assigned to this event trigger.
Assign Areas
Click to display an Area Assignment dialog box, listing available areas in your system.
Those areas selected and assigned when you close the dialog box, display in this list box.
The Area Assignment displays when Assign Areas is clicked on the Areas tab of the
Access Right form or Event Trigger form. The window displays a list of all areas for the
controllers in the facilities available for assignment by this operator. You can assign an
unlimited number of areas to an access right.
• Select, and then click the right arrow to assign an available area.
• Select, and then click the left arrow to unassign an area.
Click OK to accept the selections and display the areas in the Assigned Areas list box.
How to
1. Review the guidelines in Table 127 and complete this tab.
2. Click Save before you exit this tab.
225
226
Facility Commander Wnx 7.5
User Manual
Video CD Burner
The Video CD Burner option, in the Administration group, lets you record video to a CD.
Figure 101.Video CD Burner
Table 129. Form fields
Element
Description
Select files from the list below
Navigate the directory tree to display a list of previously recorded files, recorded from a
DVR. By default, the Video folder of your application displays. If video clips are stored in
another folder, navigate to that folder to display the video file names.
A list box displays file details such as file names and file sizes.
Space Used
This indicates the amount of existing data on the CD to which you are about to record.
Space Available
This indicates the amount of remaining space on the CD to which you are about to
record.
Select Recording Device
From the drop-down list, navigate to the drive or device to which you are about to
record.
Record Button
Click to begin recording the selected video file to a CD.
Help
Click to access the Help system.
Chapter 5
Video
1. Review the guidelines in Table 129 and complete this tab.
Note:
If you choose to record a video clip to a CD, performance is compromised. If you have other surveillance
windows open, close them. You may want to continue surveillance at another computer while the video is
recording to CD.
2. GE Security uses only Roxio Direct CD software. If you have a recordable drive and Roxio Direct CD
software:
Note:
If you purchased your system from GE Security, Roxio software was provided for you.
a. Double-click the file name of the video you are going to record.
b. Verify the path.
c. Verify the naming convention of the video.
d. Verify the recording drive and device.
e. Click
to begin recording. The button displays red while recording. If you want to stop the
recording in progress, click the red button.
f.
Follow the directions and prompts as they display in the popup windows.
DVR disk is full
This warning notification may display when the DVR internal disk for storing video is reaching its full
capacity. Refer to the DVR User Manual for specific information on configuring disk management options.
227
228
Facility Commander Wnx 7.5
User Manual
Navigating Video Console
Video Console, in the Monitors & Controls group, allows operators to view live and recorded video, select
different cameras, and direct cameras to a preset location. Video Console can be accessed in the following
ways:
•
•
•
From the FCWnx Application Group Panel, under Monitors & Controls, Video Console
From the main toolbar, by clicking the Video Console icon
If an alarm is generated with associated video, the Video Console icon displays in the Alarm Monitor
and you can access Video Console by clicking on it.
Other capabilities include:
•
•
•
•
•
•
•
•
Live video can be sent to multiple video consoles.
Video Console can be automatically launched, with live and recorded video, when an alarm event
occurs.
Multiple video streams from multiple DVRs can be sent to the Video Console.
Multiple camera views allow an operator to select two-up, four-up, nine-up, or sixteen-up views.
Recorded video is available to multiple Video Consoles.
A single frame of recorded video can be viewed.
Video can be searched by date and time, play position, or token.
If the camera has PTZ (pan/tilt/zoom) capabilities, you can use the mouse to control the camera
movement. (This feature is not available if another operator has control of the camera.)
Video Console window
The Video Console window is shown below. The window features are described in Table 130 on page 229.
Figure 102.Video Console window
Chapter 5
Video
Table 130. Form fields
Element
Description
Title bar
Displays the Video Console and the window instance number. Each time you open
another Video Console window, another window instance number displays indicating the
window sequence, such as 1, 2, or 3.
Menu bar
The menu bar contains the following menus: File, View, Window, and Help.
Navigation pane
The navigation pane is made up of two tabs: Facility View and Custom View.
The Facility View tab displays configured DVRs and cameras in a hierarchal structure.
Each DVR is identified with the associated cameras and preset conditions. The DVRs are
listed in alphabetical order.
Note:
All devices are displayed according to the facility to which they are assigned.
Therefore, even if a camera is associated to a DVR, if they are assigned to
different facilities, the camera does not display under the associated DVR.
The Custom View tab displays any custom views that you have saved.
Play controls
The play controls allow you to capture a snapshot and to control and adjust live and
recorded video.
Video display
This portion of the screen displays the live or recorded video from the selected DVR/
camera. Multiple cameras can be selected and displayed in two-up, four-up, nine-up, or
sixteen-up views.
Status bar
The status bar displays error messages and an icon that indicates if Video Console is
connected to the FCWnx server. Green indicates the system is connected and
communicating. Red indicates that the system is no longer communicating with the
server.
Navigation pane
The navigation pane is made up of two tabs, as listed in the table below:
Table 131. Form fields
Element
Description
Facility View
The Facility View tab displays configured DVRs and cameras in a hierarchal structure
according to facility. An operator only sees cameras and DVRs that are in the operator's
assigned facilities.
Each DVR is identified with the associated cameras and preset conditions. The DVRs are
listed in alphabetical order.
Note:
Custom View
All devices are displayed according to the facility to which they are assigned.
Therefore, even if a camera is associated to a DVR, if they are assigned to
different facilities, the camera does not display under the associated DVR.
The Custom View tab displays any custom views that you have saved.
229
230
Facility Commander Wnx 7.5
User Manual
Play controls
Table 132. Form fields
Element
Description
Snapshot: Click to capture the current image (a single frame of video) in a JPG format.
You can attach this image to an e-mail message later for distribution. To set the default
Snapshots directory in which to store images, select File\Preferences. The Video Viewer
Preferences dialog displays, where you can browse to the directory of your choice.
Fast Rewind: Click to quickly return to the beginning of the video.
Reverse Pause: Click to view the previous video frame. Continue clicking to move the
video backward one frame at a time.
Reverse: Click to go from the current position to the beginning of the recording.
Pause: Click to pause the video. The pause state will automatically return to play after 30
seconds in both live and recorded video modes.
Play: Click to start playing video.
Forward Pause: Navigate to the video clip you want to view. Click Forward Pause to view
the next frame of recorded video. Continue clicking to move the video forward one frame
at a time.
Fast Forward: Click to quickly advance to the end of the video recording.
Play Speed: Click the bar and slide to adjust the playback speed of recorded video. The
DVR playback speed can be adjusted by this method from minimum to maximum speed.
Stop: Click to stop playing the video.
File menu
The File menu contains the following commands:
Table 133. Form fields
Element
Description
Video Search
Click to open the Video Search window, where you can search for recorded video events
based on the criteria specified.
Save Video Clip …
Click to display Save Video To File dialog where you can select the file format, file name,
and the location in which to save the recorded video. When these selections have been
made click the Start Recording icon to begin recording.
Play Video Clip …
Click to display the list of recorded video stored in the VideoClips directory. Navigate to
the file and select it to begin playing the video.
Chapter 5
Video
Table 133. Form fields (continued)
Element
Description
Preferences …
Click to display the Video Viewer Preferences dialog, which displays the default Snapshot
and Video Clip directories.
• Click … to browse for an alternate location in which to store these files.
• Select Display Auto Popup in New Window to have a new window open when live
video is automatically launched due to an event. By default, this is not selected, and
each time an alarm or activity event occurs, any associated live video replaces the
previous video in the auto pop-up window.
Exit
Click to exit the Video Console.
View menu
The View menu contains the following commands:
Table 134. Form fields
Element
Description
1 Up
Click to display video in a single video pane.
2-Up Horizontal
Click to divide the video viewing area into two panes, side-by-side.
2-Up Vertical
Click to divide the video viewing area into two panes, one on top of the other.
4 Up
Click to divide the video viewing area into four panes.
9 Up
Click to divide the video viewing area into 9 panes.
16 Up
Click to divide the video viewing area into 16 panes.
Custom-7
Click to divide the video viewing area into 4 panes; the lower right pane is divided into 4
smaller panes making a total of 7 viewing panes.
Custom-11
Click to divide the video viewing area into 2 large panes, 3 medium panes, and 6 small
panes, making a total of 11 viewing panes.
Center and Perimeter
Click to divide the video display area into 1 large pane with 12 small panes surrounding
it, making a total of 13 display panes
Save Custom View…
Click to display the Save User View dialog where you can enter a view name and save
the selected camera view configuration for future use. All saved views are displayed
in the Custom Views tab of the Navigation pane.
Remove Custom View…
Click to delete the currently selected view from the Custom Views tab. You will
be asked to confirm. Click Ok to continue or Cancel to exit the dialog.
Upload Views…
Click to upload all views to the database for centralized storage
and backup.
Download Views…
Click to download all views from the database to the local computer.
Close Video Streams
Click to close all currently selected live or recorded video.
231
232
Facility Commander Wnx 7.5
User Manual
Window menu
The Window menu contains the following commands:
Table 135. Form fields
Element
Description
Save Position
Select this option to have the Video Console window display in the same position of your
desktop every time it is launched.
Always On Top
Select this option to have the Video Console window remain on top even when it is not
the active window on your desktop.
Search for video
When investigating alarm events, investigators or other operators may need to retrieve previously recorded
video clips or they may want to view previously recorded video for a specific date and time, which is not
necessarily when the event occurs.
Video can be searched by:
•
•
•
•
System Event: Searches for events that occurred on readers or alarm/intrusion digital inputs.
DVR Event: Searches video on specific DVRs or cameras.
DVR General Playback: Searches by specific dates and times.
DVR Motion: Searches a region of interest in a motion area.
How to search by system event
1. From the File menu, select Video Search. The Video Search window displays.
2. Select the System Event Search tab. The search criteria includes: start and end dates, start and end
times, readers, alarm/intrusion digital inputs, and event tags. Enter multiple values to narrow the
search criteria to locate video clips.
3. Use the Start Date and End Date fields to narrow the dates to search. The current date is the default
setting.
To change the date, click the date field and a calendar displays. From the drop-down lists, select the
month and year. Then click on the calendar to select the day. Click OK.
4. Use the Start Time and End Time fields to further narrow the search. To change the start and end times,
enter the hour and minutes in the field. Use the military format, such as 17:00:00 to represent 5:00 pm.
5. Click Reader to select the appropriate reader where the system event occurred.
6. Click Alarms to select the appropriate digital input.
7. Enter the Event tag.
8. Click Search. The Results display with number of matches found, start date and time, end date and
time, and type.
9. Double-click an item in the Results to view the video in the Video Console.
Chapter 5
Video
How to search by video event
When investigating alarm events, investigators or other operators may need to retrieve previously recorded
video clips. Use the DVR Event Search tab to locate video clips stored on the DVR device.
To search for previously recorded video:
1. From the File menu, select Video Search. The Video Search window displays.
2. Select the DVR Event Search tab. The search criteria includes: recorder, camera, start and end dates
and times, and search type. Enter multiple values to narrow the search criteria to locate video clips.
3. Use the Recorder drop-down list to select the appropriate DVR.
4. Use the Cameras drop-down list to select the appropriate camera.
5. Use the Start Date and End Date fields to enter the dates to search. The current date is the default
setting.
To change the date, click the date field and a calendar displays. From the drop-down lists, select the
month and year. Then click on the calendar to select the day. Click OK.
6. Use the Start Time and End Time fields to narrow the search. To change the start and end times, enter
the hour and minutes in the field. Use the military format, such as 17:00:00 to represent 5:00 pm.
7. Select the search type. The options are: Alarm, Event, or Text.
If you select a Text search, enter the text, such as camera name, in the Text field.
8. Click Search. The Results display with number of matches found, camera name, start date and time,
end date and time, and type.
9. Double-click an item in the Results to view the video in the Video Console. Click Clear to return to the
default settings and remove any matches in the Results pane.
How to search by time and date
Investigators and other operators may want to view previously recorded video for a specific date and time,
which is not necessarily when the event occurs. The Video Console lets you retrieve recorded video from the
DVR, which differs from only retrieving a marked video clip from an alarm event.
To search for video clips:
1. Use the navigation pane to locate the DVR storing the video event.
2. From the File menu, select Video Search. The Video Search window displays.
3. Select the DVR General Playback tab. The search criteria includes: recorder, camera, date, and time.
Enter multiple values to narrow the search criteria to locate video clips.
4. Use the Recorder drop-down list to select the appropriate DVR.
5. Use the Camera drop-down list to select the appropriate camera.
6. The current date displays in the Video Search window. To change the date, click the date field and a
calendar displays. From the drop-down lists, select the month and year. Then click on the calendar to
select the day. Click OK.
233
234
Facility Commander Wnx 7.5
User Manual
7. In the Time field, enter the time using the military format, such as 17:00:00 to represent 5:00 pm. Click
Go.
8. Move the slider to increase or decrease the play position for recorded video. Zero percent represents
the beginning of the recorded video and 100 percent represents the end of the recorded video. Click
Go.
How to search by motion
1. From the File menu, select Video Search. The Search Video window displays.
2. Select the DVR Motion Search tab. The search criteria includes: recorder, camera, start and end dates,
and start and end times. Enter multiple values to narrow the search criteria to locate video clips.
3. Use the Recorder drop-down list to select the appropriate DVR.
4. Use the Camera drop-down list to select the appropriate camera. The Motion Area displays live video
from the selected camera.
5. Use the Start Date and End Date fields to narrow the dates to search. The current date is the default
setting.
To change the date, click the date field and a calendar displays. From the drop-down lists, select the
month and year. Then click on the calendar to select the day. Click OK.
6. Use the Start Time and End Time fields to further narrow the search. To change the start and end times,
enter the hour and minutes in the field. Use the military format, such as 17:00:00 to represent 5:00 pm.
7. Use the mouse to select a region of interest in the Motion Area. One area or multiple areas can be
selected.
•
•
•
Click Undo to remove the selected area from the grid.
Click Clear All to remove all selected areas
Click Select All to select the entire area.
8. Click Search. The Results display with number of matches found, camera name, start date and time,
end date and time, and type.
9. Double-click an item in the Results to view the video in the Video Console.
Define CCTV interfaces
The CCTV Interface form, Gateways & Interfaces group, is used for serial interfaces that are interfaced to this
application. Following installation of hardware and the CCTV interface software, you must create CCTV
alarm records. This form is used to set up CCTV alarms.
Table 136. Form fields
Element
Description
Description
This is a required field and accepts 64 characters.
Facility
A facility option can be assigned from the drop-down list of available facilities for
assignment by this operator. The default of Ignore Facilities is assigned if no other
selection is made.
Chapter 5
Video
CCTV tab
Use the CCTV tab to set up a CCTV alarm.
Figure 103.CCTV tab
Table 137. Form fields
Element
Description
CCTV Interface
CCTV Interface: Select the Interface from the drop-down list. If there is no interface listed,
then it has not been installed.
CCTV Alarm
Select the alarm number from the drop-down list. When you assign a number, an enable
and disable message is automatically generated.
Enable Message
An enable message is automatically generated when you select a number in the CCTV
Alarm field. You can edit these messages, but any changes to the CCTV alarm number
overwrite the changes to this message.
Disable Message
A disable message is automatically generated when you select a number in the CCTV
Alarm field. You can edit these messages, but any changes to the CCTV alarm number
overwrites the changes to this message.
Reset CCTV Alarm
When the alarm for this application is cleared from the Alarm Monitor: Select this
option if you want the CCTV alarm to reset when the alarm is cleared from the Alarm
Monitor.
When the alarm Resets: Select this option if you want the CCTV alarm to reset when the
alarm is reset in the application.
How to
1. Review the guidelines in Table 137 and complete the fields on this tab.
2. Click Save before you exit this tab.
235
236
Facility Commander Wnx 7.5
User Manual
What’s next?
Continue with Chapter 6, Areas and intrusion zones on page 237, if appropriate for your system.
Chapter 6 Areas and intrusion zones
This chapter provides instructions for configuration of secure areas and intrusion
zones.
In this chapter:
Overview - areas . . . . . . . . . . . . . . . . . . . . . . . . . . . . . . . . . . . . . . . . . . 238
Define areas . . . . . . . . . . . . . . . . . . . . . . . . . . . . . . . . . . . . . . . . . . . . . 238
Overview - intrusion zones . . . . . . . . . . . . . . . . . . . . . . . . . . . . . . . . . . 249
Define intrusion zones . . . . . . . . . . . . . . . . . . . . . . . . . . . . . . . . . . . . . 251
What’s next? . . . . . . . . . . . . . . . . . . . . . . . . . . . . . . . . . . . . . . . . . . . . . 255
238
Facility Commander Wnx 7.5
User Manual
Overview - areas
The Area form, Places & Policies group, is enabled for systems licensed and configured with ACU controllers.
The Intrusion Zone form, Places & Policies group, is enabled for systems licensed and configured with Micro
controllers.
Define areas
Note:
The Area form is enabled for systems licensed and configured with ACU controllers.
Use the Area form, Places & Polices group, to configure secure areas. Your system supports up to 8,192 areas.
Complete the steps in the order presented.
1. You must first configure ACU controllers. (Reader records are automatically created when you
configure an ACU controller.) The controllers must be connected and online to arm/disarm if the area
spans controllers. An area can contain alarm points, entry and exit points (readers, neutral readers), and
digital outputs (relays). Areas can be local (does not span controllers) or global (spans controllers).
2. Create areas. The intended application is for arming and disarming areas from outside or inside the
monitored areas.
Area is defined as a physical area with security controls. Readers control access to the areas based on
whether the cardholder has been given privilege to enter that area at that time. Alarm points are
associated with a particular area. Operations such as masking alarms can be performed by area thereby
masking or unmasking all alarm points in an area in a single step.
Areas are also assigned to person records as an exception to its own access privileges. For example, if
some employees require access to one or more areas that are not included in an access group, and they
are the only employees with this unique requirement, these specific areas can be added to enhance the
access privileges of a given employee.
3. Assign readers to an area in order to use the device functionality. The defined areas have the ability to
be armed and disarmed through access control by using a credential and keypad reader, or manual
control.
The Area form provides the ability to define areas for each controller that consists of the following:
•
•
•
•
•
•
•
•
•
Keypad disarm and arm
Time schedules
SCIF (ACU only.)(sensitive compartmentalized information facility) workstations
Readers
Alarms
APB (anti-passback)
Digital inputs (Assigned only for utilizing the Arm/Disarm function and SCIF control)
Digital outputs (Assigned only for SCIF control)
Arm/Disarm
Area Arming/Disarming:
Areas are also used for arming and disarming, and they can be triggered in different ways such as:
Chapter 6
Areas and intrusion zones
•
•
•
•
•
•
User generated using manual control.
Through a keypad reader, if the area is local to the panel (local arming/disarming).
Through a keypad reader, if the area includes more panels (global arming/disarming).
Through a time schedule
Through digital inputs
Multiple Area Alarm Masking (MAAM) local and global
Multiple area alarm masking/unmasking (MAAM):
The MAAM feature allows a user to arm and disarm alarms in multiple areas from a single reader or
keypad.
There are two ways the alarms in the areas can be masked:
•
•
Selection of the area by entering the area number on the keypad (PIN mode), and,
Selection of the area from a scrollable list on the IKE reader display (scroll mode).
In PIN mode, the areas may span panels so the panel will request a global area arm or disarm operation
from the Host.
In scroll mode, the panel will perform a local area arm or disarm. Local area arm or disarm will
function locally.
Global area arm or disarm function requires a connection with the Host, and the user may configure up
to 120 MAAM areas at a single panel. For global MAAM to work properly the area needs to have
numeric descriptions.
Anti-passback:
Anti-passback (APB) is a feature that prevents a cardholder from entering a secure area and leaving
their access card outside for an unauthorized user.
The system can perform three types of anti-passback:
•
•
•
Global anti-passback allows the server to assign any number of readers to the anti-passback
function. The host must be on-line and communicating for this feature to work. All access grant/
deny processes for points in global APB are performed at the host, not ACU level.
Local anti-passback brings the function down to the ACU level. The advantage is that antipassback will continue to work even the server goes offline.
Timed anti-passback will not allow the cardholder to re-enter the same access point or reader for a
user-defined period.
4. When an area record is modified and saved, all related controllers are updated with the new
configuration.
Note:
Before you can delete an area record:
1) Access rights must be removed.
2) Devices associated with this area must be removed.
3) This area must be removed from the Area Control tab of the Person form as assigned for Arm/Disarm.
Table 138. Form fields
Element
Description
Description
This field accepts 64 characters.
239
240
Facility Commander Wnx 7.5
User Manual
Element
Description
Facility
A facility option can be assigned for the area from the drop-down list of available
facilities. The default of Ignore Facilities is assigned if no other selection is made.
For a shortcut menu to related forms, move the mouse pointer below any tab and click the right mouse button.
Area tab
Use the Area tab to configure the area record.
Figure 104. Area tab
Chapter 6
Areas and intrusion zones
Table 139. Form fields
Element
Description
Enable APB
Select to enable APB tracking for this area. Readers associated with this area must also
be assigned a Logical type of APB on the Reader form.
To configure an area for APB:
1) Under the Places and Polices Group, select Area.
2) Click the Search button to locate an existing area, or create a new area record by
clicking the plus sign in the menu bar.
3) On the Area tab, select the Enable APB check box.
4) On the Reader tab, assign an Entering Area Reader and an Exiting Area Reader.
5) Under the Security Devices Group, select Reader.
6) On the Reader tab in the Reader form, click the Search button and select the Entering
Area Reader you assigned to the area, as well as the Exiting Reader.
7) Under Logical Type, select APB.
8) Save before exiting this form.
Local Re-Entry Timer (min)
Enter a number between 0 and 255 as the number of minutes the user cannot enter this
area again regardless of whether they went through an Out reader. If a user tries to go
through an IN reader a second time, the controller sends an invalid Timed APB message
to the host. The default setting is '0.' Reader settings assigned on the Reader form
override any configuration on this form.
Sensitive Compartmentalized
Information Facility
Enable SCIF: (ACU only.) Select this option to indicate that this area is a SCIF (ACU only.)
(sensitive compartmentalized information facility). Proceed to select a SCIF area
workstation.
SCIF Area Workstation: (ACU only.) Select from the drop-down list of those available to
be assigned as a SCIF workstation for this area. When a workstation is selected and the
area record is saved, this workstation controls functionality within the SCIF area.
Modifications to the SCIF configuration can be made at this workstation only. This SCIF
workstation allows complete access and configuration of any associated device, reader,
alarm, Output (relay), credentialholder, or reporting functions pertaining to this specific
SCIF area. This SCIF workstations has authorization to perform the following functions for
the associated SCIF area devices:
• Readers: lock, unlock, system control
• Alarms: monitor
• Outputs (relays): activate, de-activate
• Area: arm/disarm
Arm/Disarm by Time Schedule
Time schedule: Select a time schedule from the drop-down list.
Arm/Disarm: Select whether the schedule chosen above arms or disarms the area.
241
242
Facility Commander Wnx 7.5
User Manual
Table 139. Form fields (continued)
Element
Description
Arm/Disarm by Digital Input
Digital Input: Select a digital input from the drop-down list. A digital input displays in this
list only if it has been assigned a Type of Arm/Disarm on the Digital Input tab/Digital
Input form.
Active/Inactive:
• No Action: no action is taken.
• Arm: the area is armed.
• Disarm: the area is disarmed.
• Force Arm: the area is unconditionally armed. This means that even if there is an
active alarm in the area, bypass that alarm and arm the area.
How to
1. Review the guidelines in Table 139 and complete the fields on this tab.
2. Click Save before you exit this tab.
Reader tab
Use the Reader tab to assign readers associated with this area record.
•
•
Only available reader types of Normal, anti-passback (APB), and Elevator type readers are displayed
and available for assignment.
A reader can be assigned to only two areas (one entering area and one exiting area or one area for
neutral).
If the area is to be configured as APB, the exiting area reader associated with this area must also be configured
for APB. Select APB as the logical type on the Reader form - Reader tab for this reader.
Chapter 6
Areas and intrusion zones
Figure 105. Reader tab
Table 140. Form fields
Element
Description
Entering Area Readers
Click Assign to display a Reader Assignment window, enabling you to select and assign a
reader to this area. Assigned readers display in the Entering Area Readers windowpane.
This type of reader (which gives an IN status) is used to enter an area.
Note:
Exiting Area Readers
If the area is to be configured as APB, the entering area reader associated with
this area must also be configured for APB. Select APB as the logical type on the
Reader form - Reader tab for this reader.
Click Assign to display a Reader Assignment window, enabling you to select and assign a
reader to this Area. Assigned readers display in the Exiting Area Readers windowpane.
This type of reader (which gives an OUT status) is used to leave an Area.
Note:
If the area is to be configured as APB, the entering area reader associated with
this area must also be configured for APB. Select APB as the logical type on the
Reader form - Reader tab for this reader.
243
244
Facility Commander Wnx 7.5
User Manual
Table 140. Form fields (continued)
Element
Description
Neutral Area Readers
Click Assign to display a Reader Assignment window, enabling you to select and assign a
reader to this Area. Assigned readers display in the Neutral Area Readers windowpane.
This reader indicates a valid credential read but does not indicate an IN or OUT state.
Note:
Neutral areas are not associated with APB.
Reader Assignment dialog window This window displays when you click Assign or Assign Readers, enabling you to select
and assign a reader association. Only readers in the operator’s facilities are available for
assignment by this operator.
• Select, and then click the right arrow to assign an available reader.
• Select, and then click the left arrow to unassign a reader.
Click OK to accept the assignments and close the form.
How to
1. Review the guidelines in Table 140 and complete the reader fields on this tab.
2. Click Save before you exit this tab.
Alarm tab
Use the Alarm tab to assign alarms associated with this area record. This is a multiple-record selection from an
assignment dialog filtered by active facility that consists of available alarm points not already assigned to
another area. The list box on the right displays alarms assigned to this area.
(Four-State Supervision rules apply regardless of the armed/disarmed state of the area.)
Chapter 6
Areas and intrusion zones
Figure 106. Alarm tab
Table 141. Form fields
Element
Description
Alarms for Arm/Disarm and SCIF
Control
(ACU only.) This windowpane lists all alarms currently assigned to this area.
Assign
Click Assign to display an Alarm Assignment window, enabling you to select and assign
available alarm records.
The Alarm Assignment window displays a list of system alarms for this application, for
the operator’s facilities. All alarms display. If this is a Global system, alarms are not
filtered by Region.
• Select, and then click the right arrow to assign an available alarm.
• Select, and then click the left arrow to unassign an alarm.
Click OK to display results in the Assigned Alarms windowpane.
245
246
Facility Commander Wnx 7.5
User Manual
Table 141. Form fields (continued)
Element
Description
Armed Area Monitoring Time
Schedule
When Area Monitoring is enabled for an area, an alarm event is reported to the Alarm
Monitor once every hour while the area is disarmed. This can be selected to be active
always or during an active time schedule. When the area is armed, the alarm events will
no longer be reported to the Alarm Monitor. The Time Schedule option is used to notify
that the area is disarmed in the activity monitor for every hour.
Note:
Area monitoring occurs only when the area is disarmed.
Never Monitor: The area is not monitored.
Always Monitor: The area is always monitored.
Monitor by Time Schedule: Select a time schedule from the drop-down list that you
want to assign to this area record. If a schedule is not selected, this configuration is
active at all times. This area is monitored and the user will get the notification during the
specified time schedule.
Note:
ACU controllers support 16 intervals per Time Schedule. Even if you save a
Time Schedule record with more the 16 intervals, only Time Schedules with 16
intervals or less display in this drop-down list.
• When the secure area is armed, monitoring is on for all alarm points. Readers
continue granting or denying access except when areas are set to Keypad Arm/
Disarm. In this case, a credential and PIn are required to disarm the area before the
reader can be used to grant/deny access.
• When the secure area is disarmed, monitoring is off for all alarm points.
Auto Arm Inactivity Timer (min)
Enter the amount of time in minutes of inactivity that elapse before the area
automatically arms. The default is 0, which means that the timer is disabled. This field
has a range from 0 to 255 minutes.
Example
Use this feature in areas monitored by motion detectors. You can define the number of
minutes of inactivity that can pass before an unarmed area automatically arms.
Prerequisites
• The area must be local to the controller, with at least one alarm assigned.
• Auto Arm Inactivity Timer must have an entry greater than 0.
• The area must be disarmed without an alarm being activated for the number of
minutes specified above.
• An optional reader in the area that beeps indicating one minute until arming.
Note:
Note: Readers with the matching exiting area will beep, such as the
reader on the inside of the door.
After the prerequisites are met:
• The area arms.
• If the user is monitoring the “Auto Arm on Inactivity” alarm, the alarm displays on
the Alarm Monitor form.
• A Zone Armed message displays on the Activity Monitor.
Arm Delay Timer (sec)
Set the amount of time in seconds that is allowed for the credential holder to exit the
area before the alarms are monitored. When configuring the alarm points to be used in
the secure area, make sure that you set the Held Open Options. The default is 0, which
means that the timer is disabled. This field has a range from 0 to 255 minutes. This field is
selectable only for areas using either Local or Global in the Keypad Arm/Disarm field.
Chapter 6
Areas and intrusion zones
Table 141. Form fields (continued)
Element
Description
Disarm Digital Output (device
number)
Enter or select a number that represents the digital output (relay) associated with this
area alarm. This entry can be a number between 0 and 175. The default is 0, that is, no
digital output is activated for this alarm. Refer to the ACU Networked Intelligent
Controllers Installation Guide for additional information regarding index numbers
assigned to digital outputs as presented to the ACU controller.
Note:
Keypad Arm/Disarm
If the secure area spans ACU controllers, this DO is activated across controllers.
Select to allow arm/disarm of this area using the reader keypad or manual control. This
feature is associated with IKE Readers designed for keypad arming/disarming. This
feature also works with regular keypad readers by adding +10 +20.
None: Arm/Disarm by keypad is not enabled in this area.
Local: Arm/disarm is local to one ACU controller, one area
Global: Arm/disarm spans multiple ACU controllers and areas.
Complete the association by configuring the reader for Arm/Disarm Type on the Reader
form and assigning credential holders to this area.
How to
1. Review the guidelines in Table 141 and complete the fields on this tab.
2. Click Save before you exit this tab.
Digital Output tab
Note:
This tab is enabled for SCIF areas only.
Use the Digital Output tab to assign or unassign digital outputs associated with this area record. This is a
multiple-record selection from an assignment dialog filtered by active facility that consists of available digital
output points not already assigned to another area.
247
248
Facility Commander Wnx 7.5
User Manual
Figure 107. Digital Output tab
Table 142. Form fields
Element
Description
Digital Outputs windowpane
The list box on the right displays digital outputs assigned to this area.
Assign
Click to display a Digital Output Assignment window, enabling you to select and assign
available digital output records.
How to
1. Review the guidelines in Table 142 and complete this tab.
2. Click Save before you exit this tab.
Arm/Disarm an Area
This application supports global (spans multiple ACU controllers) and local (one ACU controller) arming and
disarming of an area using the reader keypad or manual control. Global operation requires host-to-controllers
communication. Local operation allows arming/disarming without host communication.
How arming works
1. The operator enters a credential identification number and swipes a credential.
2. The display requests the operator to enter a PIN.
3. The operator enters a PIN number plus 10 (for example, 1234 + 10 = 1244; the operator enters 1244).
Chapter 6
Areas and intrusion zones
4. A message displays the state of the area arming as successful.
How disarming works
1. The operator enters a credential identification number and swipes a credential.
2. The display requests the operator to enter a PIN.
3. The operator enters a PIN number plus 20 (for example, PIN is 1234 + 20 = 1254; the operator enters
1254).
4. A message displays the state of the area disarming as successful.
When using the 'Areas for Arm/Disarm' feature
Note:
The keypad arm/disarm feature must be configured as 'Local' on the Area form, Alarm tab.
Arm
1. The operator enters an asterisk (*), swipes a credential, and enters a PIN (if required).
2. Using the arrows to scroll up and down through the areas displayed, select the area to arm.
3. Select ON.
4. Reader display indicates Area Secured.
Disarm
1. The operator enters an asterisk (*), swipes a credential, and enters a PIN (if required).
2. Using the arrows to scroll up and down through the areas displayed, select the area to arm.
3. Select OFF.
4. Reader display indicates Area Unsecure.
Arm/disarm by manual control
Manual area control for arming and disarming is accomplished using the Areas and Zones tab on the Manual
Control form. This follows the standard Manual Control form conventions including a Purpose entry by the
operator.
Note:
Because you have access to an area, this does not necessarily mean that you can arm/disarm. You must also be
configured for Arm/Disarm on the Person form.
Overview - intrusion zones
About Intrusion Options
This feature is enabled for systems licensed and configured with Micro controllers.
249
250
Facility Commander Wnx 7.5
User Manual
Intrusion functionality provides the ability to define local intrusion zones per controller that consist of:
•
•
•
•
Readers
Alarms
Arm/disarm input point Intrusion DI
Arm/disarm output point DO
The defined intrusion zones have the ability to be armed and disarmed through access control by using a
credential and keypad reader, DI, or manual control.
The intended application is suited for arming and disarming intrusion zones from outside of the monitored
areas.
Arm/Disarm
•
•
When the Arm/Disarm is set/active (armed), the associated secure area is armed by placing all readers
offline, all alarm points monitored on, and the arm/disarm DO goes active.
When the Arm/Disarm Intrusion DI is reset/not active (disarmed), the associated zone is disarmed by
placing all readers online, all alarm points monitored off (unless on a schedule), and the arm/disarm
DO goes inactive.
A. Complete the Intrusion Zone form
The Intrusion Zone form is required for creating a relation between readers, alarm inputs, the Arm/Disarm
Intrusion point, and the arm/disarm DO. Perform the following:
1. Define an intrusion zone with a description and facility assignment.
2. Select a controller selection to establish the zone source and its intrusion points.
3. Assign the following intrusion zone components: arm/disarm DO, arm/disarm Intrusion DI, readers,
and alarms.
•
•
•
•
Arm/Disarm Intrusion DI: This is a single record selection from a drop-down list filtered by active
facility that consists of all available Arm/Disarm Intrusion points for the controller. Only the DIs
that have not been assigned are available.
Alarm Points: This is a multiple-record selection from an assignment dialog filtered by active
facility that consists of available controller alarm points not already assigned to a zone. (24/7 4State Supervision rules apply regardless of the armed/disarmed state of the zone.)
Readers: This is a multiple-record selection from an assignment dialog filtered by active facility
that consists of available readers not already assigned to a zone. (Readers must be active and nonelevator type.)
A zone can be configured to contain the following:
An Arm/Disarm Intrusion Point with Alarm Points only and no Readers.
An Arm/Disarm Intrusion Point with Readers only and no Alarm Points.
Alarm Points and Readers only with no Arm/Disarm Intrusion Point.
Readers only.
Note: An arm/disarm DO can be assigned for any of these.
4. A Status tab provides the ability to request status of the zone and each of its associated points, as
follows.
Chapter 6
Areas and intrusion zones
•
•
•
•
Zone: armed or disarmed
Arm/Disarm intrusion DI: active/inactive/trouble
Readers: online or offline
Alarm points: monitored off/monitored on
B. Complete the Access Right form - Intrusion Zone tab
The Intrusion Zone tab of the Access Right form lets you assign multiple intrusion zones using an assignment
dialog.
•
•
•
Only credential holders with an intrusion zone assigned on the Access Right form are able to arm and
disarm zones using any of the credential/keypad readers within a zone.
When a zone is armed, all readers within the zone go offline, and normal access rights do not gain
access into the area.
When a zone is disarmed, all readers within the zone go online and normal access rights gain access
into the area. If schedules were assigned, then the reader follows the schedule.
Note:
•
If you expect to arm/disarm by using any one of the readers within a zone:
That reader must be assigned on the Access Right tab of the Access Right form and be an assigned
reader in the intrusion zone listed on the Intrusion Zone tab.
— or —
•
Individually created access rights must be assigned to the person that arms/disarms the intrusion zone.
(One right allows access to the readers and another right allows access to the intrusion zone.)
Arm/Disarm by Manual Control
Manual zone control for arming and disarming is accomplished using the Intrusion Zone tab on the Manual
Control form. This follows the standard Manual Control form conventions including a Purpose entry by the
operator.
Define intrusion zones
Note:
The Intrusion Zone form is enabled for systems licensed and configured with Micro controllers.
This option opens the Intrusion Zone form, Places & Policies group, that lets you create or edit an intrusion
zone record, and then assign related devices, based on the current operator’s facilities and permissions. If you
are modifying an existing zone configuration, it is recommended that you verify the state of the zone by
obtaining a current status.
Table 143. Form fields
Element
Description
Description
This field is required and accepts up to 64 characters. Enter a unique description for the
intrusion zone in this field. In the process of saving a modified configuration, a dialog box
displays: “Please note, if zone is currently armed, this update disarms and rearms with
your new configuration. Do you want to continue?”
If you select Yes, the new configuration saves to the database. If you select No, your
changes are not saved.
251
252
Facility Commander Wnx 7.5
User Manual
Table 143. Form fields
Element
Description
Facility
A facility option can be assigned for the area from the drop-down list of available
facilities. The default of Ignore Facilities is assigned if no other selection is made.
For a shortcut menu to related forms, move the mouse pointer below any tab and click the right mouse button.
Intrusion Zone tab
The Intrusion Zone tab lets you edit or create an intrusion zone record and associate DI, DO, and devices such
as readers and alarms in the operator’s selected facilities.
Figure 108. Intrusion Zone tab
Table 144. Form fields
Element
Description
Number
Assign and enter a number for the intrusion zone, between 1 and 96. Duplicate numbers
are allowed but not on the same controller.
Controller
Select a controller from the drop-down list of available controllers that control this
intrusion zone. This is a one-to-one relationship and establishes the zone source and
intrusion/access points. The controller must be connected and online.
Note:
A Reader or Digital Input and Alarm must be selected in order to save this
record.
Chapter 6
Areas and intrusion zones
Table 144. Form fields (continued)
Element
Description
Arm/Disarm DO
Select one DO from the drop-down list of DOs that trigger when an intrusion zone is
armed/disarmed. This is an optional assignment. This DO can be assigned to another
intrusion zone.
Arm/Disarm DI
Select one DI from the drop-down list of available DIs of the Type Arm/Disarm, as
assigned on the Digital Input form. This DI can arm/disarm an intrusion zone and is an
optional assignment. This DI cannot be assigned to another intrusion zone.
Note:
Last Status
When you unassign a DI, save this record. It is now available to re-assign to
another intrusion zone.
Date: Date of last zone history transaction on record.
Time: Time of last zone history transaction on record.
Status: Status as of last zone history transaction on record.
Note:
Devices
In order to refresh this status section, click off of this record then back or close
then reopen the form.
Assigned Readers: This list box displays a list of available, active readers in the same
zone, belonging to the selected controller. You must assign at least one reader or a digital
input and alarm to an intrusion zone. The reader cannot be assigned to an elevator. Click
Assign Readers to display a dialog box that enables you to assign active readers.
The Reader Assignment window displays when you click Assign or Assign Readers,
enabling you to select and assign a reader association. Only readers in the operator’s
facilities are available for assignment by this operator.
• Select, and then click the right arrow to assign an available reader.
• Select, and then click the left arrow to unassign a reader.
Click OK to accept the assignments and close the form.
Assigned Alarms: This list box displays a list of intrusion alarms in the same zone, not
already assigned, on the selected controller. This cannot be an external, DVMR, or a
logical such as Host Comm or Lost Credential alarm. Click Assign Alarms to display a
dialog box that enables you to assign alarms. This is an optional assignment.
The Alarm Assignment window displays a list of alarms in the system for this application,
for the facilities available for assignment by this operator. All alarms display. If this is a
Global system, alarms are not filtered by Region.
• Select, and then click the right arrow to assign an available alarm.
• Select, and then click the left arrow to unassign an alarm.
Click OK to display results in the Assigned Alarms windowpane.
Arm Delay (sec)
Arm Delay: Enter the number of seconds to delay the arming of this intrusion zone. This
field accepts up to 255 seconds. This time limit should allow a person to pass into or out
of a monitored area before the zone is armed.
Note:
If your system is UL Listed, the delay cannot exceed 60 seconds. Refer to the
UL Certification Requirements in your installation manual.
How to
1. Review the guidelines in Table 144 and complete this tab.
2. Click Save before you exit this tab.
253
254
Facility Commander Wnx 7.5
User Manual
Status tab
The Status tab displays the status of all devices associated with this zone and status of the Zone.
Figure 109. Status tab
Table 145. Form fields
Element
Description
Status
This list box displays the status of all devices associated with this Zone and status of the
Zone.
Reader Status
Zone Status: Armed/Disarmed
Digital Input: On/off/trouble
Digital Output Status: Active/inactive
Reader Status: Online/offline
Alarm Status: Monitored on/monitored off
Refresh: Click to refresh or update changes that occurred since the last status Refresh
request.
How to
1. Perform a search.
2. Select an intrusion zone record.
3. Click Refresh.
Chapter 6
Areas and intrusion zones
Arm/disarm an intrusion zone
Arm/disarm an intrusion zone using access rights
Any credential and keypad reader or keypad within a defined zone can be used to arm and disarm the zone with
a valid access right for the reader and an intrusion zone assigned.
Arm = * 1 # followed by a valid credential read.
•
•
If all alarm points are reset (not in an active state of alarm) and all doors closed, then all readers are
placed offline (doors locked) and alarm points are monitored on. The corresponding digital output is
triggered as selected on the Intrusion Zone form.
When the zone is successfully armed, all readers in the zone provide visual indication that the zone is
armed.
Note:
•
•
We recommend using GE brand readers, configured to display the PIN light ON or flashing, depending on the
selected reader model. A Zone armed transaction is generated and displays on the Activity Monitor form.
When a zone is not successfully armed due to an invalid zone configuration on the Access Right form,
an Arm/Disarm Failed, Invalid Access Right transaction is generated.
If any alarm points are set (in an active state of alarm) or a door is open, the zone does not become
armed. An Arm/disarm Failed Zone not secure transaction is generated and displayed on the Activity
Monitor form.
Disarm = * 0 # followed by a valid credential read.
•
All alarm points in the zone are monitored off and readers in the zone are placed online for normal
operation.
Note:
•
•
We recommend using GE brand readers, configured to display the PIN light switching from ON or flashing to
OFF, depending on the selected reader model. A Zone disarmed transaction is generated and displays on the
Activity Monitor form.
When a zone is not successfully disarmed due to an invalid credential, an Arm/Disarm Failed, Invalid
Access Right transaction is generated.
When a zone is disarmed, all normal access control rules apply for gaining access.
Arm/Disarm an Intrusion Zone Using Arm/Disarm Intrusion DI
All of the same rules apply as if arming or disarming using an access right.
•
•
•
When the zone is successfully armed, all readers in the zone should provide visual indication that the
zone is armed and a Zone Armed transaction is generated on the Activity Monitor form.
When a zone is not successfully armed, an Arm/disarm Failed transaction is generated.
When a zone is disarmed, all normal access control rules apply for gaining access and a Zone
Disarmed transaction is generated.
What’s next?
Continue with Chapter 7, Access rights, departments, persons, and credentials on page 257.
255
256
Facility Commander Wnx 7.5
User Manual
Chapter 7 Access rights, departments,
persons, and credentials
This chapter provides an overview of the forms used to create and assign access
rights, and create department, person, and credential records.
In this chapter:
Overview . . . . . . . . . . . . . . . . . . . . . . . . . . . . . . . . . . . . . . . . . . . . . . . . 258
Define access rights . . . . . . . . . . . . . . . . . . . . . . . . . . . . . . . . . . . . . . . 258
Define personnel type . . . . . . . . . . . . . . . . . . . . . . . . . . . . . . . . . . . . . . 267
Define departments . . . . . . . . . . . . . . . . . . . . . . . . . . . . . . . . . . . . . . . . 268
Define persons . . . . . . . . . . . . . . . . . . . . . . . . . . . . . . . . . . . . . . . . . . . 269
Image capture . . . . . . . . . . . . . . . . . . . . . . . . . . . . . . . . . . . . . . . . . . . . 280
Design credentials . . . . . . . . . . . . . . . . . . . . . . . . . . . . . . . . . . . . . . . . 283
Credential Designer form . . . . . . . . . . . . . . . . . . . . . . . . . . . . . . . . . . . 284
Define credentials . . . . . . . . . . . . . . . . . . . . . . . . . . . . . . . . . . . . . . . . . 286
Mass update . . . . . . . . . . . . . . . . . . . . . . . . . . . . . . . . . . . . . . . . . . . . . 293
Define credential alias . . . . . . . . . . . . . . . . . . . . . . . . . . . . . . . . . . . . . 295
Create custom credential status . . . . . . . . . . . . . . . . . . . . . . . . . . . . . . 297
Create credential formats . . . . . . . . . . . . . . . . . . . . . . . . . . . . . . . . . . . 298
What’s next? . . . . . . . . . . . . . . . . . . . . . . . . . . . . . . . . . . . . . . . . . . . . . 302
258
Facility Commander Wnx 7.5
User Manual
Overview
We recommend that you complete the forms described in this chapter in the order presented.
The forms described in this chapter create access rights to define where (with readers) and when (with time
schedules) an individual can gain entry. Following the creation of access rights and departments, you are able
to create person records and assign access rights and departments to the person records. If your company is
using credentials, you may want to capture an image and design a credential that incorporates that image.
Define access rights
Use the Access Right form, Places & Policies group, to define where (with readers) and when (with time
schedules) an individual can gain entry.
For Micro controller systems:
To define which floors a person can access and what digital output groups a person can trigger with a valid
credential:
Note:
Floors and elevators are assigned to an access right.
Allow the ability to arm/disarm an intrusion zone and access a particular Zone. Intrusion zones can be assigned
to an access right.
For ACU controller systems:
You can assign areas to an access right, assign activation and deactivation dates and then, assign a time
schedule and dates to the Area access right.
Table 146. Form fields
Element
Description
Description
This is a required field and accepts 64 characters.
Facility
A facility option can be assigned for the Access Right from the drop-down list of available
facilities for assignment by this operator. The default of Ignore Facilities is assigned if no
other selection is made.
For a shortcut menu to related forms, move the mouse pointer below any tab and click the right mouse button.
Note:
For Micro controller readers, assign readers to the access right using the Access Right tab.
For ACU controller readers, assign the readers to an Area first. Then, assign the Area to the access right using the Area
tab.
Chapter 7
Access rights, departments, persons, and credentials
Access Rights tab
Note:
The Access Rights tab is enabled for systems licensed and configured with Micro controllers.
Use the Access Rights tab to assign readers owned by Micro controllers to this access right record. This form
works in conjunction with the Mode Event Trigger form. You can add additional control to the access right by
assigning a time schedule.
Figure 110.Access rights tab
Table 147. Form fields
Element
Description
Assigned readers
This windowpane lists all readers currently assigned to this access right.
Assign Readers
Click to display the Reader Assignment dialog box and select from a list of readers
available for assignment by this operator. If no readers are listed, check that the readers
have been marked Active on the Readers tab of the Reader form.
The Reader Assignment window displays when you click Assign or Assign Readers,
enabling you to select and assign a reader association. Only readers in the operators'
facilities are available for assignment by this operator.
• Select, and then click the right arrow to assign an available reader.
• Select, and then click the left arrow to unassign a reader.
Click OK to accept the assignments and close the form.
259
260
Facility Commander Wnx 7.5
User Manual
Table 147. Form fields (continued)
Element
Description
Access control
Allow access at all times: Select this option to allow access all the time, in all modes.
Allow access by schedule: Select this option to assign a time schedule to this access
right. The time schedule governs when the access right grants access to the assigned
readers.
Time schedule: If you selected Allow access by schedule, this field is now available to
select a time schedule from the drop-down list of previously created time schedules.
Note:
If you do not have valid access to a reader that belongs to an intrusion zone
due to a schedule in that access right, you are not able to arm/disarm a zone.
How to
1. Review the guidelines in Table 147 and complete the fields on this tab.
2. Click Save before you exit this tab.
Floor tab
Note:
This tab is enabled for systems licensed and configured with Micro controllers.
The Floor tab lets you configure controls for elevators and floors by assigning them to access rights.
Figure 111.Floor tab
Chapter 7
Access rights, departments, persons, and credentials
Table 148. Form fields
Element
Description
Assigned Elevators
This windowpane displays a list of the elevators assigned to the current access right.
Assign Elevators
Click this button to display the Elevator Assignment dialog box and select from a list of
elevators available for assignment by this operator. If no elevators are listed, check that
the elevators have been configured on the Elevator form.
The Elevator Assignment window displays when you click Assign Elevators, enabling
you to select and assign an elevator association for this form. Only elevators in the
operators' facilities are available for assignment by this operator.
• Select, and then click the right arrow to assign an available elevator.
• Select, and then click the left arrow to unassign an elevator.
The elevators that display in this list are those that are configured on the Elevator form.
Assigned Floors
This windowpane displays the floors assigned to the current access right.
Assign Floors
Click this button to display the Floor Assignment dialog box and select from a list of
floors available for assignment by this operator. Only floors assigned to the selected
elevators are available for assignment. If no floors are listed, verify that the floors have
been configured on the Floor form.
The Floor Assignment window displays when you click Assign Floors, enabling you to
select and assign a floor association for this form. Only floors assigned to the selected
elevators are available for assignment. Only floors in the operators' facilities are
available for assignment by this operator.
• Select, and then click the right arrow to assign an available floor.
• Select, and then click the left arrow to unassign a floor.
The floors that display in this list are those that are configured on the Floor form.
How to
1. Review the guidelines in Table 148 and complete the fields on this tab.
2. Click Save before you exit this tab.
Digital Output Groups tab
Note:
This tab is enabled for systems licensed and configured with Micro controllers.
The Digital Output Groups tab lets you assign groups of digital outputs to access rights.
261
262
Facility Commander Wnx 7.5
User Manual
Figure 112.Digital Output Groups tab
Table 149. Form fields
Element
Description
Assigned Digital Output Groups
This windowpane displays a list of assigned output groups for the current access right.
Assign Digital Output Groups
Click this button to display and assign digital output groups to the selected access right.
Only DO Groups that are related to the same controller as the readers selected in the
Access Right tab are available for assignment. If no digital output groups display, verify
that digital output groups were set up on the Digital Output Group form.
The Digital Output Group Assignment dialog box displays when you click Assign DO
Groups, allowing you to select and assign DO groups you want to associate with the
selected record. Only DO groups in the operator’s facilities are available for assignment
by this operator.
• Select, and then click the right arrow to assign an available DO group.
• Select, and then click the left arrow to unassign a DO group.
Click OK to display results in the Outputs Groups windowpane.
How to
1. Review the guidelines in Table 149 and complete the assignment on this tab.
2. Click Save before you exit this tab.
Chapter 7
Access rights, departments, persons, and credentials
Intrusion Zones tab
Note:
This tab is enabled for systems licensed and configured with Micro controllers.
The Intrusion Zones tab lets you assign intrusion zone control to previously created access rights. Access to a
reader and access to an intrusion zone are two separate access rights. Only credential holders with an Arm/
Disarm intrusion zone access right are able to arm and disarm zones by accessing a credential/keypad reader
within a zone. When a zone is armed, all readers within that zone go offline; therefore, normal access rights do
not gain access into the area.
Figure 113.Intrusion Zones tab
Table 150. Form fields
Element
Description
Assigned Intrusion Zones
This windowpane displays a list of previously assigned intrusion zones for the currently
selected access right record.
263
264
Facility Commander Wnx 7.5
User Manual
Table 150. Form fields (continued)
Element
Description
Assign Intrusion Zone
Click this button to display the Intrusion Zone Assignment dialog box, allowing you to
assign and unassign intrusion zones to the selected access right. If no intrusion zones
display, verify that intrusion zones were configured on the Intrusion Zone form.
The Intrusion Zone Assignment window displays when Assign Intrusion Zone is clicked
on the Intrusion Zones tab of the Access Right form or the Event Trigger form. The
window displays a list of all intrusion zones for the controllers in the facilities available for
assignment by this operator. You can assign an unlimited number of intrusion zones to
an access right.
• Select, and then click the right arrow to assign an available intrusion zone.
• Select, and then click the left arrow to unassign an intrusion zone.
Click OK to accept the selections and display the intrusion zones in the Assigned
Intrusion Zones list box.
Note:
If you do not have valid access to a reader that belongs to an intrusion zone
due to a schedule in that access right, you are not able to arm/disarm a zone.
How to
1. Review the guidelines in Table 150 and complete the assignment on this tab.
2. Click Save before you exit this tab.
Areas tab
Note:
This tab is enabled for systems licensed and configured with ACU controllers.
Use the Areas tab to assign areas to an access right, and assign a time schedule. Areas are owned by ACU
controllers.
Chapter 7
Access rights, departments, persons, and credentials
Figure 114.Areas tab
Table 151. Form fields
Element
Description
Assigned Areas
This windowpane displays a list of areas currently assigned to this access right.
Assign
Click this button to display the Access Rights Area Assignment dialog box and select
from a list of areas available for assignment by this operator. Only areas in the
operators' facilities are available for assignment by this operator.
• Select, and then click the right arrow to assign an available Area.
• Select, and then click the left arrow to unassign an Area.
Click OK to accept the assignments and close the form.
Dates
Activation: Click to display a calendar dialog to select the day, month, and year to begin
this access right. The default is today's date.
Expiration: Click to display a calendar dialog to select the day, month, and year to end
this access right. The default is 20 years from today's date.
Note:
The expiration date that occurs first (either the access right expiration date or
credential expiration date) will be applied to the cardholder.
265
266
Facility Commander Wnx 7.5
User Manual
Figure 115.Access Rights Area Assignment dialog
Table 152. Form fields
Element
Description
Available Areas
This list box displays a list of areas available to be assigned to this access right. Click the
right arrow button to add to the Selected Areas windowpane.
Selected Areas
This list box displays a list of areas selected to be assigned to this access right. Click the
left arrow button to remove from the Selected Areas windowpane.
Area Access
Allow access at all times: Select if you want the access right to allow access at all times.
Allow access by schedule:
Time Schedule: The time schedule governs when the access right grants access to the
Area. The default for all areas is Always. If you want to change the schedule for this Area,
select a schedule from the drop-down list. If you need to create a schedule, open the
Time Schedule form.
Note:
ACU controllers support eight time schedule intervals per time schedule. Even if
you previously saved a time schedule record with more than eight intervals,
only eight intervals are saved to the controller.
How to
1. Review the guidelines in Table 151 and complete the fields on this tab.
2. Click Save before you exit this tab.
Chapter 7
Access rights, departments, persons, and credentials
Define personnel type
The Personnel Type form, Personnel group, is used to create category types for employees and assign default
credential designs for each category.
Personnel Type tab
Use the Personnel Type tab to create personnel types and assign a default credential design to each personnel
type.
Figure 116.Personnel Type tab
Table 153. Form fields
Element
Description
Search
Click to display a list of existing types. Three personnel types come standard with this
application:
• Permanent
• Contractor
• Temporary
Description
This field is required and accepts 64 alphanumeric characters. Enter a basic description
of the personnel type.
Credential Design
Select a default credential design from the drop-down list of available designs.
Your selected design prints whenever credentials are sent to the printer for people
assigned the current personnel type. Credential designs are created on the Credential
Design form. If you do not want the credential to imprint the default design, the design
can be changed when the credential is printed.
How to
1. Review the guidelines in Table 153 and complete the fields on this tab.
Example: You may want all Permanent Personnel to have a Portrait credential.
•
•
Assign the Description as Permanent.
Assign the Credential design as Portrait.
2. Click Save before you exit this tab.
267
268
Facility Commander Wnx 7.5
User Manual
Define departments
The Department form, Personnel group, lets you create a department that you can then assign to a person
record using the Person form. Department selection can also be used to group records when running a Person
report.
Table 154. Form fields
Element
Description
Facility
A facility option can be assigned for the Department from the drop-down list of available
facilities for assignment by this operator.
Department tab
Use the Department tab to define Department names within your company.
Figure 117.Department tab
Table 155. Form fields
Element
Description
Description
This field accepts 64 alphanumeric characters. Enter a Department name or edit an
existing Department name in your company.
How to
1. Review the guidelines in Table 155 and complete the field on this tab.
2. Click Save before you exit this tab.
Chapter 7
Access rights, departments, persons, and credentials
Define persons
Use the Person form, Personnel group, to create a record for a person, someone who can access the readers
controlled by the system.
Note:
A Person record assigned to a suspended credential that has 'Enable Line Coloring for Suspended Credentials' enabled
on the Preferences form displays in red font in the list box on the right.
For a shortcut menu to related forms, move the mouse pointer below any tab and click the right mouse button.
Table 156. Form fields
Element
Description
Last Name
Enter the last name of the individual record you are creating. This is a required field.
Facility
A facility option can be assigned to this record from the drop-down list of available
facilities for assignment by this operator.
Personnel tab
Use the Personnel tab to create a record of an employee’s personal information.
Note:
Only Last Name, Personnel Type, and Employee Number are required fields.
Figure 118.Personnel tab
269
270
Facility Commander Wnx 7.5
User Manual
Table 157. Form fields
Element
Description
First name
Enter the first name of the person.
Middle name 1
Enter the middle name of the person
Middle name 2
Enter an additional name, such as another middle name, of the person.
Note:
Initials, as displayed in the list box on the right, are the result of the first letter of
the first name and the first letter of each middle name entered.
Chapter 7
Access rights, departments, persons, and credentials
Table 157. Form fields (continued)
Element
Description
Employee number
Enter a number assigned to and identifying this employee such as the employee's social
security number. This is a required field and the record does not save if the Employee
number is left blank or if the number is not unique to this application. The field accepts
up to 12 alphanumeric characters.
Conversions only: The following information addresses conversions.
During the process of converting a database, the system checks for possible blank or
duplicate employee numbers in the database. Results of this check display on the
Administration group, Preferences form. Open the form to display the Settings tab:
• If the Enable unique & required Employee Number check box is selected and
unavailable, all converted person records have unique employee numbers. All future
person records must have a unique employee number before the record can be
saved.
• If the Enable unique & required Employee Number check box is not selected, this is
an indication that duplicate or blank employee number records exist in the
database.
At this time, you have the option to choose one of two preferences:
• Do nothing and continue to allow blank or duplicate employee numbers in person
records (the Enable unique & required Employee Number check box remains clear).
— or —
• Set a control that requires all person records to have an entry in the Employee
number field.
If you choose to require all person records to have a unique employee number,
select Enable unique & required Employee Number.
1. A message displays informing you: “The Employee number field on the Person
form is required and unique. Once this is enabled, it cannot be changed back. Do
you want to continue with this change?” Click Yes.
2. A second message displays: “Could not enable unique and required Employee
number. Duplicates already exist or field is empty in the database. Refer to the
Diagnostic Logfile.”
3. Navigate to the logfile. A message informs you that the system generated a text
file and placed the file in the Logs folder of the application server. Navigate to the
Logs folder in the FCWnx installation folder. Locate the
DuplicateEmployeeNumbers.txt file, consult the list of duplicate or blank
employee numbers, locate those person records, and assign a unique employee
number to each.
4. When all records on the .txt file list have a unique employee number, return to the
Preferences form, select Enable unique & required Employee Number, and click
Save. If you cannot save and again receive additional messages, you must repeat
the steps above.
5. The selection to require all person records to have a unique employee number
cannot be reversed and all newly added person records must have a unique
employee number.
Personnel type
Select the appropriate personnel type from the drop-down list. This is a required field.
Department
Select the appropriate department from the drop-down list.
271
272
Facility Commander Wnx 7.5
User Manual
Table 157. Form fields (continued)
Element
Description
Trace activity
Select to enable this field if you want a record of all activity on this credential. Each time
this credential is used, a message displays on the Activity Monitor and a record is written
to the history database. If the system has a printer association, the message is printed.
This field overrides the routing of activity as defined on the Reader form.
Note:
Extended Unlock/Alarm Sense
Time
We do not recommend activating the trace function at a site that uses dial-up
controllers. A controller dials the host whenever a traced credential is read. This
may incur additional telephone costs.
Select to enable this field if you want to allow a person extra time to gain access to an
entry or exit point in the system. A popup message asks you if you want to change all
associated Credential records to follow Extended Unlock Time. If you select Yes, all
credentials for that person are changed to Follow Extended Unlock Time, as configured
on the Door Functions tab of the Reader form. Refer to Door Functions tab on page 129.
Example: An extended time limit can be configured for an employee who enters a
motorized door by wheelchair.
Privileged APB
(ACU only.) Select this feature if you want to record APB without preventing this person
from accessing doors. That is, enabling this field allows any valid credential to unlock a
door regardless of the credential's status. However, the credential's status is still logged
according to the reader used and is recorded as such in the credential history.
Example: This 'privilege' may be appropriate for high-level company executives.
Conditional Unlock
(ACU only.) Select to enable this feature if you want this person to have access to the
facility although the facility may be locked due to a mode change or event that caused a
normal schedule override, such as a plant closing for inclement weather.
When this selection is enabled and saved, a message displays asking the user if this
selection is to be applied to all credentials currently issued to this person.
Find and Assign Credential
Click to find the next credential presented to a selected reader. Select any active reader.
If the credential is not in this application, you can add it. This is a convenient way to
assign credentials.
Note:
The last reader selected will be stored with this client for easy recall.
How to
1. Review the guidelines in Table 157 and complete the fields on this tab.
2. Click Save before you exit this tab.
Location tab
Use the Location tab to enter location information for this person. The fields accept 64 alphanumeric
characters, making possible exceptionally lengthy street addresses or e-mail addresses.
Chapter 7
Access rights, departments, persons, and credentials
Figure 119.Location tab
Table 158. Form fields
Element
Description
Address1
Address2
Address3
Address4
Address5
The labels of these five fields are defined on the Preferences form.
Telephone
Enter the telephone number of this person. You may use up to 14 alphanumeric
characters. There are no restrictions in format (whether you use hyphens, parentheses,
or spaces). Enter in a format meaningful and understandable to your organization or
application.
How to
1. Review the guidelines in Table 158 and complete the fields on this tab.
Note:
Any field can be used as an e-mail address, but must first be designated as the e-mail address on the
Preferences form, as a User field or Address field entry.
2. Click Save before you exit this tab.
273
274
Facility Commander Wnx 7.5
User Manual
User Fields tab
Use the Fields tab to enter user-defined information.
Figure 120.User Fields tab
Table 159. Form fields
Element
Description
Modify Field
Enter the value for the currently selected User Field. This text box field accepts 32 alphanumeric characters.
User Fields are not appropriate for exceptionally lengthy street addresses or e-mail addresses.
User Fields
The current user field Label and Value is listed in this windowpane. To give values to these fields, select a Label.
How to
1. Review the guidelines in Table 159 and complete the fields on this tab.
Example: The label for User Field 1 was previously defined on the Preferences form as Social
Security Number. The first label listed in this windowpane displays as Social Security Number. Enter
the corresponding Social Security for this person record in the Modify Field text box.
2. Click Save before you exit this tab.
Chapter 7
Access rights, departments, persons, and credentials
Access Rights tab
Use the Access Rights tab to configure threat level clearance privileges for a person.
Figure 121.Access Rights tab
Table 160. Form fields
Element
Description
Threat Level Access
Choose from a drop-down list of threat levels to assign to this person.
Threat Level 0 - A person assigned at this level can only access items that are at level 0.
Threat Level 1 - A person assigned at this level can access items at both level 0 and level 1.
Threat Level 2 - A person assigned at this level can access items at levels 0, 1 and 2.
Threat Level 3 - A person assigned at this level can access items at all levels.
275
276
Facility Commander Wnx 7.5
User Manual
Table 160. Form fields (continued)
Element
Description
Assigned access rights
This windowpane lists any currently assigned access rights. For Micro controller systems,
access rights define the readers that a credential may access. For ACU controller systems,
access rights define the areas a credential may access.
Assign
Click to display the Access Rights Assignment dialog box, enabling you to select the access
rights you want to assign or unassign for this credentialholder.
Select from the Available list those access rights you want to assign to this person. The
access rights that display in this list are those that were previously set up on the Access
Right form. Only access rights in the operator’s' facilities are available for assignment by
this operator.
• Select, and then click the right arrow to assign an available access right.
• Select, and then click the left arrow to unassign an access right.
Area Exception Assignments
This windowpane lists any currently assigned area exceptions. This defines the access
capabilities (allowed, denied, allowed by schedule) for a specific area.
Assign
Click to display the Person Area Exception Assignment dialog box, enabling you to select
areas to override the currently assigned access rights for this credential holder or add
additional areas for access.
Figure 122.Person Area Exception Assignment dialog
Chapter 7
Access rights, departments, persons, and credentials
Table 161. Form fields
Element
Description
Available Areas
Select from the Available Areas windowpane those areas you want to override the currently
assigned access rights. Select the area, and then click the right arrow to move it to the
Selected Areas windowpane.
Selected Area Windowpane: The areas that display are those that are currently assigned to
override this record. Select, and then click the left arrow to unassign an available area.
Allow access at all times
The default of this check box is selected. An override area that is selected with this check
box will allow access to this area at all times.
Deny access at all times
An override area that is selected with this check box will deny access to this area at all
times.
Allow access by schedule
An override area that's selected with this check box will allow access to this area for the
selected time schedule.
Time schedule: If you selected Allow access by schedule, this field is now available to select
a time schedule from the drop-down list of previously created time schedules.
How to
1. Review the guidelines in Table 160 and complete the assignment on this tab.
2. Click Save before you exit this tab.
277
278
Facility Commander Wnx 7.5
User Manual
Photo tab
The Photo tab lets you capture images, assign credential design layouts, and print credentials.
Figure 123.Photo tab
Table 162. Form fields
Element
Description
Photo
If there is a photo associated with this person record, it displays here.
Taken
Date this photo was captured.
Capture Image/Signature
Click to run the Capture program, allowing you to capture an image or signature of this
person. Refer to Image capture on page 280.
Credential
Displays the Descriptions of credentials assigned to this person, as assigned on the
Credential form. If a printer is configured for your system, you can select a credential to
print.
Credential Design
Displays the name of the current credential design. Click the drop-down list to select a
different credential design.
Print
If there is a printer configured for your system, click to print a credential for this person.
Signature
If there is a signature capture associated with this person record, it displays here.
How to
1. Review the guidelines in Table 162 and complete the fields on this tab.
2. Click Save before you exit this tab.
Chapter 7
Access rights, departments, persons, and credentials
Area Control tab
Note:
This tab applies to person records associated with ACU controllers.
The Area Control tab applies to person records associated with ACU controllers. Areas assigned to this person
record must be configured for keypad arm/disarm. This person is allowed to arm/disarm areas using an IKE or
keypad reader, designed for keypad arm/disarm.
Figure 124.Area Control tab
Table 163. Form fields
Element
Description
Areas for Arm/Disarm
This window displays a list of areas that are available to this person to arm/disarm.
Assign Area
Click to display a Secure Area Assignment dialog box, allowing you to select and assign
areas that this person can arm/disarm. The Secure Area Assignment window displays
when you click Assign Area, enabling you to select and assign an Area association. Only
areas in the operator’s facilities are available for assignment by this operator.
• Select, and then click the right arrow to assign an available Area.
• Select, and then click the left arrow to unassign an Area.
Click OK to accept the assignments and close the form.
279
280
Facility Commander Wnx 7.5
User Manual
Table 163. Form fields (continued)
Element
Description
Areas for Auxiliary Relay Control
This window displays a list of areas that are available as Auxiliary Relay Control Areas
(CARC).
Assign Area
Click to display a Secure Area Assignment dialog box, allowing you to select and assign
areas that are available as Auxiliary Control Areas (CARC).
How to
1. Review the guidelines in Table 163 and complete the assignment on this tab.
2. Click Save before you exit this tab.
Image capture
Note:
Your photographs and signatures can be created by digital cameras, video cameras, and signature pads. Support for
certain Imaging features and functions may be product specific and not necessarily supported by all compatible
peripherals.
Selecting an input device
Follow the instructions provided by the device manufacturer for installing an input device. Imaging can use
any device that has a TWAIN, WINTAB, or Video for Windows (VFW) driver installed.
To select an input device:
1. Go to the Personnel group and select Person. The Person form displays.
2. Select the Photo tab, and then click Search to display a current list of records.
3. Select one of the records in the records list, and then click Capture Image/Signature. The Image
Capture Application screen displays.
4. Using the mouse, point to the photo area and right-click. A context menu displays.
5. Select Input Device from the context menu. A Select Profile window displays, listing the available
input devices on your computer. By default, the input device loads from a file.
6. Select the input device you are using and click OK. The next time you capture a photo, the program
uses the input device you selected.
7. Repeat these steps to set up an input device for signature pads. The program recognizes a separate
input device for photos and signatures.
To select a record and capture a new image for the selected record:
1. Select Person from the Personnel group.
2. Select the Photo tab on the Person form.
3. Select one of the records in the Record list.
Chapter 7
Access rights, departments, persons, and credentials
4. Click Capture Image/Signature to capture a new image. Based on the input device you previously
selected, the proper interface window displays for adjusting, capturing, and loading a new image.
5. Adjust the settings, and then click Save to save the adjusted settings.
6. Click Capture Photo to capture the new image. Once the photo is taken, the Image Enhancement
dialog box displays.
7. The dialog box that displays lets you crop and enhance the newly captured image. You notice that a
highlighting box with eight sizing handles is placed directly over the center of the Original Image.
8. Place your mouse pointer over the image. The pointer changes from a single arrow to a four-headed
arrow. This lets you move the cropping area across the newly acquired image.
9. At this point, you can either capture a different portion of the image “as is,” or adjust the highlighting
box to capture some or all of the image.
Note:
Refer to the Image Capture Application Help system for additional specific details of this application.
To crop an image:
1. Place your mouse pointer within the highlighting box’s cropping area.
2. Press and hold down your left mouse button, and drag (move) the cropping area to the desired location
on the image. Release the left mouse button when you are satisfied with the new location of the
highlighting box.
3. Click OK. The photo can be placed on either the front or the back of your credential design. To print
the photo, your credential design must include photo image keylines. When you print the credential
from the application, the keylines are replaced by the image.
To resize the crop box:
1. Place your mouse pointer directly over one of the highlighting box handles. The pointer changes from
a four-headed arrow to a two-headed arrow. This lets you resize the cropping area.
2. Press and hold down your left mouse button, and drag (move) the handle toward the center of the
cropping area. The size of this highlighting box is fixed to the aspect ratio of the image type: 4 x 5 for
photos; 5 x 1 for signatures.
3. When the cropping area is sized to your satisfaction, move the highlighting box so that it covers the
portion of the image that you want to capture.
4. Click OK. The Image Capture Application screen displays with the selected image in place. To print
the photo, your credential design must include photo image keylines. When you print the credential
from the application, the keylines are replaced by the image. The photo can be placed on either the
front or the back of your credential design.
5. Click OK. The selected image is moved to the Photo tab of the Person form.
6. Click Save. The image capture is saved to the database.
281
282
Facility Commander Wnx 7.5
User Manual
Displaying existing images
During normal operations, images are not downloaded from the server. In order to view an existing image for a
credential record, the image(s) must be loaded to the computer.
1. On the Person form, select the Photo tab, and then click Search, and highlight a record from the record
list.
2. Click Capture Image/Signature button to enable the Image Capture Application screen.
3. Move the mouse pointer to the existing image and right-click. A shortcut menu for the image appears.
The available image options on that menu are discussed in the paragraphs that follow.
Capture
Based on the input device you previously selected, the appropriate interface window displays for adjusting,
capturing and loading a new image.
Enhance and Crop
These options allow you to individually crop or enhance the current image. You can adjust the existing image
without having to recapture the image.
Compare (and Restore)
When a stored image is downloaded and a new image is captured, the Compare option is enabled on the
shortcut menu to compare the newly captured or edited image to the original image. Choosing Restore undoes
any changes made to the original image.
Clear
When you select the Clear option from the shortcut menu, the image is cleared and the image file is deleted.
(The image cannot be recovered.)
Enhancement Shortcut Menu
There are four submenus for the Enhancement shortcut menu option.
Adjust by Example
When you select this option, a dialog box displays. You can adjust the brightness, contrast, focus,
exposure, and red, green, and blue colors.
Special Effect by Example
This dialog box lets you add special effects to any image. The applicable effects are Mosaic, Impressionist,
Watercolor, Emboss, and Posterize.
Remove Red Eye
This dialog box lets you remove the red eye effect of any person in an image.
Vignette
The Vignette dialog box lets you configure a vignette effect to any image.
Manipulation Shortcut Menu
Mirroring
Flip Vertically: Flip an image from top to bottom.
Chapter 7
Access rights, departments, persons, and credentials
Flip Horizontally: Flip an image from left to right.
Invert (negative)
Select this option to invert an image (create a color negative).
Convert to 8-bit grayscale
Select this option to convert an image to an 8-bit 256-grayscale image. Once this option is selected, there is
no undo. You have to reload your image.
Save Image
Changes to an existing image or newly captured image are saved to the host when you click Save.
Export To File
When you select this option, a Save As window displays. Navigate to the Images folder that contains
previously captured photo images. You may select a filename, image format, bit depth, and JPEG compression
factor. When you click Save, the contents of the image control are saved using the selected settings. If you
want, you can replace an existing image.
Select Input Device
This option lets you select an input device on the Select Profile dialog box, from a list of Capture Profiles. You
may also set and apply automatic properties for the image you are about to capture.
Select Image Type
This dialog box enables you to configure image types in the EPISUITE SDK configuration database. You can
use this dialog box to edit, create, or remove image types. To modify an image type, highlight the image type
name in the list and click Edit to open the Image Type Manager dialog box. Click Add to create a new image
type, or click Remove to delete the highlighted image type.
Revert Changes
When you make any change to the image, the Revert Changes option is enabled. Otherwise, the option is
dimmed and you are not able to select it. Selecting this option reloads the original image.
Design credentials
Complete the Credential Designer form, Credentials group, to create credential designs. Credential designs are
the graphics printed on credentials. You may want to use different graphics for different types of personnel,
such as a specific graphic for regular employees and a different graphic for contract employees within your
organization.
Note:
The Credential Design application has an extensive Help system to assist in designing your credential layout, import
graphics, link designs to credentialholder information, and add barcodes or encode magnetic stripes.
This section is an abridged summary of the credential design process.
To create your own credential design:
1. Select Credential Designer from the Credentials group. The Credential Designer form, Design tab
displays.
2. Click Add and enter a unique Description, and then click Save. The Edit Credential Design button is
now enabled.
283
284
Facility Commander Wnx 7.5
User Manual
3. Click Edit Credential Design to run the Credential Design application.
4. Select New from the Imaging File menu.
5. Draw a shape in your design window the size of your credential.
6. For a background color, select Edit, Background, and then select a color from the Color dialog that
displays.
7. Add one or several bitmaps inside the credential design preferences.
8. Add one or several text boxes.
9. Move or resize the photo and text as desired.
10. Click Save.
Credential Designer form
Complete the Credential Designer form, Credentials group, to create credential designs. Credential designs are
the graphics printed on credentials. You may want to use different graphics for different types of personnel,
such as a specific graphic for regular employees and a different graphic for contract employees within your
organization.
Table 164. Form fields
Element
Description
Description
This field is required and accepts up to 64 characters. Enter a unique description for this
credential design. During installation of Credential Designer, four standard credential
designs are included, in the Designs folder of this application:
• Landscape
• Portrait
• No Design
• Wanted Poster
Do one of the following:
• Select from the list of existing standard design records.
• Select and edit a standard design by renaming and saving.
• Create a new design.
Note:
Facility
When you add a design, enter a description and click Save to enable the Edit
Credential Design button on this form.
Assign a facility option from the drop-down list of available facilities for assignment by
this operator. If you do not select a facility, Ignore Facilities is assigned for you.
Chapter 7
Access rights, departments, persons, and credentials
Design tab
Use the Design tab to create a new credential design record. If you are editing an existing design, these options
are not available.
Figure 125.Design tab
Table 165. Form fields
Element
Description
Select one of the following:
Select Default Layout
Select a credential default layout as Portrait or Landscape.
Select Import Layout
Select to make available the option to Browse to the designs folder and import an existing
design. If you have already chosen a default layout, this option is unavailable.
Save
Click to enable the Edit Credential Design button.
Edit Credential Design
Click to open the credential designer program that lets you draw the graphics that comprise the
credential design. If you had a previous version of credential designer that created files with a
.gdr extension, you are prompted to save the file as a .dgn when you edit a credential
design for the first time. Access the extensive Help system from the Credential Designer toolbar.
Additionally, refer to the Credential Designer User Manual, and review the “What's New”
section. A PDF file of the manual is provided on your documentation CD.
How to
1. Review the guidelines in Table 165 and complete the fields on this tab.
•
•
Each workstation where credential design or credential printing is to be performed must have its
own license. Refer to your installation manual for additional details.
If Imaging Status is not enabled for this client workstation, this feature is unavailable.
2. Click Save before you exit this tab.
285
286
Facility Commander Wnx 7.5
User Manual
Installing print driver
To install the print driver for your credential printer:
1. Follow the instructions shipped with your printer.
2. Select the appropriate printer port.
3. Select a name for the printer and indicate if it is the default printer.
4. Do not print a test page; click Finish.
5. After the installation is complete, move the mouse pointer over the printer icon, click the right mouse
button, and select and set Properties.
6. Complete the printer setup and then click Exit.
Note:
The printer may not support transparent bitmaps.
If the printer runs out of credentials or the ribbon needs to be replaced while in the process of producing credentials, an
error message displays. Correct the condition at the printer and then put the printer back online before continuing with
your print job.
Define credentials
The Credential form, Credentials group, is used to define a credential by entering specific information, such as
the credential number and the person to whom this credential is assigned. A credential identifies a person to
this application. This is usually a credential with an embedded number that uniquely identifies the credential.
However, the credential does not have to be a card; it could be a unique number that is entered into a keypad
reader.
Table 166. Form fields
Element
Description
Search
Click Search to display a list of previously created credential records to review or modify.
It is possible to change the status of all credentials for the same person using the mass
update feature. All records for a selected person can be assigned the identical status.
Note:
Description
Enter a unique description of the credential, person name, or credential type. This is a
required field and this record does not save without an entry in this dialog box. If you
attempt to save a record without a description, a dialog box displays, asking if you want
to use the credential identification number as the Description. Click Yes to use the
credential identification number or return to the form and enter a Description of your
choice. (If you are entering credential records before person assignment, consider
entering a credential identification number as the Description.) This dialog box accepts
up to 64 alphanumeric characters.
Note:
Facility
A suspended credential that has 'Enable Line Coloring for Suspended
Credentials' enabled on the Preferences form displays in red font in the list box
on the right.
If this is a converted database from an earlier version of this software that
allowed blank Description fields, the credential identification number now
displays in the Description field of those records.
The facility assignment is a read-only field.
Chapter 7
Access rights, departments, persons, and credentials
For a shortcut menu to related forms, move the mouse pointer below any tab and click the right mouse button.
Credential Definition tab
Use the Credential Definition tab to define a credential.
Figure 126.Credential Definition tab
Table 167. Form fields
Element
Description
Assigned to
Select the name of the person to whom this credential is assigned. If this credential is not
yet assigned, select <UNASSIGNED>.
Refresh: Click to update the person list with the most up-to-date information.
It is possible to select all credentials for this person, assign a status, right-click to display
the shortcut menu, and select mass update. All records for the selected person are now
assigned the identical status.
Company and Site Code (ACU
only.)
Select None or select from the drop-down list of available company codes as previously
assigned on the ACU Settings tab (ACU only) of the Preferences form.
Note:
When you select a company code number, the Card Number and Issue
Number fields become available.
287
288
Facility Commander Wnx 7.5
User Manual
Table 167. Form fields (continued)
Element
Description
Card Number (ACU only.)
This field is available for input when a company code number has been selected.
This number must be unique to this application. It may be already encoded into the card
(if you are using a card) or you can assign a number in this dialog box. This number is
entered into a keypad reader when there is no card.
Issue Number (ACU only.)
This field is available for input when a company code number has been selected.
This feature refers to magnetic stripe cards. Enter or select a number that indicates the
number of times that this card number has been issued to the credential holder. A card
may be re-issued if the card is damaged, reported lost, or stolen. The original issue of this
card begins with 00. A card can be issued up to 99 times.
Number
This number must be unique to this application. It may be already encoded into the card
(if you are using a card) or you can assign a number in this dialog box. This number is
entered into a keypad reader when there is no card.
If you are using credential aliasing: The alias displays here as a read-only number and
cannot be changed. An alias number is assigned on the Credential Alias form. Refer to
Define credential alias on page 295. The encoded number is entered into a keypad reader.
Example: If you use a company code, the number may look like this:
00670010xxxxxxxxxx01
where
• The first four digits indicate your company number (67) with preceding zeros (0067).
• The second set of four digits indicates your company site number (10) with
preceding zeros (0010).
• The third set of digits is the unique card number (xxxxxxxxxx).
• The fourth set of digits is the number of times that this card has been issued to the
credential holder (01).
Status
Note:
Active credentials are granted access through readers. You can create a
custom status description to display on the Activity Monitor using the Custom
Credential Status form. Refer to Create custom credential status on page 297.
Active: The credential has been assigned to a person who may gain access. An Active
credential can be re-assigned as a Guard Tour credential.
Guard Tour: The credential has been assigned to a person and is used as a guard tour
credential. A Guard Tour credential can be re-assigned as an Active credential.
Issuable: The credential has not yet been assigned to a person (or deactivated).
Lost: The credential has been reported as lost (or stolen).
Remake: This credential has been damaged or returned.
Suspended: This credential was assigned to a person who no longer works at the facility
(terminated) or is currently not working at the facility.
Note:
A suspended credential that has 'Enable Line Coloring for Suspended
Credentials' enabled on the Preferences form displays in red font in the list box
on the right.
Chapter 7
Access rights, departments, persons, and credentials
Table 167. Form fields (continued)
Element
Description
PIN Number
If this credential is used with a credential-and-keypad reader, assign a personal
identification number here. This number must be entered at the keypad in order to gain
access with this credential.
If Hide PIN Number is selected on the Security tab, Preferences form, asterisks display in
place of numbers in this field.
Note:
Follow extended unlock/Alarm
Sense Time
For Micro controller systems, this number must be four digits. For systems
using ACU controllers, this number can be 4 to 6 digits, depending on the
preferences set on the ACU Settings tab of the Preferences form. Use preceding
zeros if necessary to create the appropriate number of digits.
• Select this option to enforce 'Extend/Alarm Sense Time' for this credential record. If
you assigned this credential to a person from the 'Assigned to' drop-down list, this
person is now allowed extra time to gain access to an entry or exit point in the
system. Time limitations are configured on the Door Functions tab of the Reader
form.
• If this credential is being assigned to a person whose existing record indicates that
Extend/Alarm Sense Time is enforced, this check box displays as already selected.
Example: An extended time limit beyond normal can be configured for an employee who
enters a motorized door by wheelchair or any individual that requires additional time to
pass through a doorway.
Follow Conditional Unlock
This option configures this credential to follow the conditional unlock configuration of
the Person form. If this is a new credential, you must manually select this option. Select
to enable this feature if you are allowing this credential to access the facility although
the facility may be locked due to a mode change or event that caused a normal
schedule override, such as a plant closing for inclement weather.
Dates
Click calendar to select a date:
Issue: The date the credential was assigned and issued to a person.
Expiration: The first date on which the credential no longer grants access. A blank value
means the credential never expires.
Return: The date the credential was returned.
Last Access
Date: Date the last valid access was granted to the credential, as stored in the database.
Time: Time the last valid access was granted to the credential, as stored in the database.
Reader: Reader at which the last valid access was granted to the credential, as stored in
the database.
Manual Control: Reset APB and
T&A Status
(Micro only.) Resets the APB or T&A status of the current credential to neutral.
Find Credential
Click to display a Find Credential dialog box, select a reader, and present a credential at
that reader. The record displays that is associated with the credential presented.
Select a reader from the drop-down list of the Find Credential dialog box, present a
credential at that reader, and this form displays the record that is associated with the
credential presented. If a record is not currently in this application, you can add it. This is
a convenient way of finding the credential record for a card without searching all
records.
289
290
Facility Commander Wnx 7.5
User Manual
How to
1. Review the guidelines in Table 167 and complete the fields on this tab.
2. Also see Mass update on page 293 for simultaneously updating properties on a group of records within
this application.
3. Click Save before you exit this tab.
Credential Status tab
Note:
The Credential Status tab is for Micro controller systems only.
A credential record must be selected in order to enable the Credential Status tab. This windowpane provides an
immediate status of the selected credential according to the information in the controller database.
Note:
This is a diagnostic tool. The status displayed here is verification that a credential modification has actually taken place
in the database, according to a change in the Status as modified on the Credential Definition tab.
Figure 127.Credential status tab
Table 168. Form fields
Element
Description
Controller
Select a controller from the drop-down list of available controllers in facilities assigned to
this operator, and then click Status. The selected controller must be online in order to
display a Status windowpane conveying information about the selected credential.
Chapter 7
Access rights, departments, persons, and credentials
Table 168. Form fields (continued)
Element
Description
Credential Status
(Micro only.) Displays the current status according to the controller database.
Note:
A suspended credential that has 'Enable Line Coloring for Suspended
Credentials' enabled on the Preferences form displays in red font in the list box
on the right.
APB Status
Displays the current Anti-Passback status.
TA Status
Displays the current Time and Attendance status.
Status
Click to refresh or update changes that occurred since the last Status request.
How to
1. Review the guidelines in Table 168 and complete the fields on this tab.
2. Click Save before you exit this tab.
291
292
Facility Commander Wnx 7.5
User Manual
User Fields tab
Use the User Fields tab to enter user-defined information for the Credential form record selected in the right
windowpane.
Figure 128.User Fields tab
Table 169. Form fields
Element
Description
Modify Field
To give value to one of the fields, select a Label in the User Fields windowpane. Enter the
value that you want to display, corresponding to this label. This text box field accepts 32
alphanumeric characters.
User Field
The existing list of labels and their values is listed in the User Fields windowpane. The
selected label in the User Field windowpane is the label to which you are assigning a
value.
How to
1. Review the guidelines in Table 169 and complete the fields on this tab.
Example: The Credential User Field 1 was previously defined and labeled on the Preferences form as
Condition of Credential. The first label listed here, in the User Fields windowpane, displays as
Condition of Credential. Select Condition of Credential. In the Modify Field dialog box, enter the
corresponding condition of this credential as Reported Lost by Credentialholder.
2. Click Save before you exit this tab.
Chapter 7
Access rights, departments, persons, and credentials
Mass update
Note:
Forms where Mass Update can be used include the Person form, Alarm form, and the Credential form.
This option is not available until at least one record exists in the list box to the right of the form. The Mass
Update mode lets you simultaneously update properties on a group of records within the application. This is
very helpful when a number of records for a single form require the identical property or value change.
Mass Update mode of processing is enabled as follows:
1. Open a blank form.
2. Click Search to display a list of existing records. We recommend entering search criteria to narrow
your search results to only records that are to be updated. Records that match your search criteria
display in the list box to the right of the form.
Note:
If there are no records, Mass Update is not available.
3. Move the mouse pointer below any of the tabs and right-click to display a shortcut menu to related
forms. To enable the Mass Update mode, select Mass Update from the shortcut menu.
4. Note the change in the appearance of the form. only those fields or dialog boxes that are available for
mass update changes are now enabled and blank. Refer to Criteria for using Mass Update mode on
page 294.
5. Select the records you want to adjust from the list box on the right. Typical Microsoft Windows
selection/deselection process is used in this application
6. Make the required adjustment to the form.
7. Click Save. The update of records begins immediately. A window displays with a progress bar,
indicating the update progress.
8. Click Abort if you want to stop the update in progress.
•
You cannot close a form during the Mass Update process.
Note:
•
•
•
Right-click shortcut menu navigation is unavailable when you are in Mass Update mode.
If you modified a preference but did not click Save, a message reminds you to discard or save your
changes.
Smaller batch updates are recommended to prevent performance issues during a mass update.
A Mass Update Complete dialog box displays, indicating completion or failure.
Note:
When mass updates are processed to an access right, a log file is generated and a View Results key displays
in the dialog box. Click to view the completion log. We recommend that you rename and save this file to
another location for reference purposes. Renaming the log prevents an overwrite. The questionable log is
available for Customer Support to review and locate discrepancies. Be aware that this log file is automatically
overwritten every 7 days, in order to prevent unnecessary data that would accumulate on your hard drive.
9. When the process is complete, a Mass Update Complete dialog message displays.
10. Right-click and select Mass Update from the shortcut menu to disable and exit Mass Update mode.
The records refresh at this point.
11. Updates display in the list box to the right.
293
294
Facility Commander Wnx 7.5
User Manual
Criteria for using Mass Update mode
Note:
•
•
•
The time to process a mass update depends on your system performance, number, and type of updates. Specifically,
the credential learn and alarm processing functions may be influenced. We recommend that you schedule mass
update processing during off-peak hours for your company.
200 is the default maximum number of records that can process updates at one time. To reconfigure
this default, call GE Security Customer Support for assistance.
Only those fields or dialog boxes that are available for mass update changes are enabled in Mass
Update mode.
Navigating from any form to another form in Mass Update mode takes that form out of Mass Update
mode.
Alarm form
•
The following fields are available for mass update: Facility, Category, Settings (Monitor and Operator
acknowledge), Priority, Instruction, and Monitoring Time Schedule. (See Define alarms on page 165.)
Person form
•
The following fields are available for mass update: Facility, Personnel Type, Department, Threat Level
Access, Assigned Access Rights, Area for Auxiliary Relay Control, Areas for arm/disarm, Trace
activity, Privileged APB, Conditional unlock, Extended unlock/alarm sense. (See Define persons on
page 269.)
Credential form
•
•
•
•
•
•
The following fields are available for mass update: Assigned To, Status, Follow extended unlock/alarm
sense time, Follow conditional unlock, Dates – Issue, Dates – Expiration, and Dates – Return. (See
Define credentials on page 286.)
When changing an assigned credential to unassigned, the status automatically changes to Issuable.
When changing status to Issuable, a message displays a Yes or No option. If Yes, the status
automatically changes to Issuable and selected credentials are unassigned.
When changing an unassigned credential (status is Issuable) to an assigned person, the status becomes
Active.
Records selected for mass update with a status changing to anything other than Issuable causes a check
for credential assignment.
If any credential in the mass update selection is not currently assigned, these credential records become
unavailable and a message displays indicating they are unavailable.
Chapter 7
Access rights, departments, persons, and credentials
Define credential alias
Note:
The Credential Alias form is available only if aliasing option was selected during initial server installation.
Use the Credential Alias form, Credentials group, to control the alias numbers that display in place of the
encoded credential number. An alias is a number that represents the encoded credential number. You decided
whether to use credential alias and which method during installation of this application. If you chose None, this
form is unavailable in the application.
Credential alias provides added security in that the encoded number is displayed only to authorized users. The
encoded credential number is hidden on the Credential form, reports, and Activity Monitor form.
Table 170. Form fields
Element
Description
There are two methods of using credential alias:
Manual
Enter the credential alias number on this form.
Automatic
The credential alias number is chosen for you.
For a shortcut menu to related forms, move the mouse pointer below any tab and click the right mouse button.
Credential Alias tab
Use the Credential Alias tab to assign alias numbers to credential encoded numbers.
Figure 129.Credential alias tab
295
296
Facility Commander Wnx 7.5
User Manual
Table 171. Form fields
Element
Description
The following three fields are for systems licensed and configured with ACU controllers:
Company Code
Select None or select from the drop-down list of available company codes as previously
assigned on the ACU Settings tab of the Preferences form.
Note:
When you select a company code number, the Card Number and Issue
Number fields become available.
Card Number
This field is available for input when a company code number has been selected.This
number must be unique to this application. It may be already encoded into the card (if
you are using a card) or you can assign a number in this dialog box. This number is
entered into a keypad reader when there is no card.
Issue Number
This field is available for input when a company code number has been selected. This
feature refers to magnetic stripe cards. Enter or select a number that indicates the
number of times that this card number has been issued to the credential holder. A card
may be re-issued if the card is damaged, reported lost, or stolen. The original issue of this
card begins with 00. A card can be issued up to 99 times.
The following fields are for systems licensed and configured with ACU controllers or Micro controllers:
Encoded number
Credential Alias
Displays the credential's encoded number.
• If you selected Manual aliasing during installation, enter the new number for the
credential.
• If you selected Automatic aliasing during installation, the number is entered for you.
Find Credential
Click to display a Find Credential dialog box, select a reader, and present a credential at
that reader. The record is displayed that is associated with the credential presented.
Save
Click to save this record.
How to
1. Review the guidelines in Table 171 and complete the fields on this tab.
•
•
Alias credential numbers saved to the system are automatically preceded with a “1-” if this is the
first Region; “2-” if this is the second Region; and so on.
If this is a Global configuration, the credential alias number is preceded by the Region ID number
that uniquely identifies the Region. Therefore, the same alias number can be assigned across
regions, because the number is uniquely identified by the Region ID.
2. Click Save before you exit this tab.
Chapter 7
Access rights, departments, persons, and credentials
Create custom credential status
The Custom Credential Status form, Credentials group, lets you create custom credential status definitions that
more closely describe active (valid) or suspended (invalid) credential transactions. When assigning a
credential, this status displays in the drop-down list of the Credential Definition tab, Credential form. When the
credential is swiped, this custom status displays on the Activity Monitor and the credential status displays in
reports.
Example 1: An employee is suspended for a week pending investigation following a disagreement with a
Manager. The credential is assigned a status of Suspended. A custom credential definition “One Week
Suspension” was created and assigned to this credential. During the week, the employee attempts to enter the
building. The credential holder presents the credential at a reader. The transaction displays on the Activity
Monitor as “One Week Suspension.” Access is denied.
Example 2: An employee is working in your facility as a temporary contract worker, performing maintenance.
The credential is assigned a status of Active. A custom credential definition “Maintenance Contractor” was
created and assigned. The transaction displays on the Activity Monitor as “Maintenance Contractor.” Access is
granted only for the duration of the contract.
Figure 130.Custom Credential Status form
Table 172. Form fields
Element
Description
Custom Credential Status
windowpane
A display of previously created custom credential status definitions. When you select a
definition in the windowpane, the selected definition displays in the Edit box. The
selected definition can be updated or deleted.
297
298
Facility Commander Wnx 7.5
User Manual
Table 172. Form fields (continued)
Element
Description
Custom Credential Status
Create or revise an existing custom credential status definition by entering text in this
text box. Following a revision, click Update to complete the process.
Select Credential Status
Active (Valid, Valid Open): Select to assign an active status to this credential definition. A
Valid only status does not allow the door to open.
Suspended (Invalid): Select to assign a suspended status to this credential. This
credential does not grant access. The Activity Monitor displays the user-defined custom
credential format in the Activity Type column.
Example:
1 On the Custom Credential Status form, a status of Pregnancy leave is created and
assigned a Status of Suspended.
2 Jane Doe goes on leave and her credential is assigned a Status of Pregnancy leave,
as selected from the Credential form, Status drop-down list.
3 While on leave, Jane swipes her badge at a valid reader. Access is denied.
4 The Activity Monitor, Activity Type column displays “Pregnancy leave.”
Add
Click to add to the list box following creation of a new definition.
Update
Click to update a definition.
Delete
Click to delete a selected credential status definition from the list. You are not able to
delete a credential status that is currently assigned to a credential.
Help (?)
Click to access the Help system.
Cancel
Click to close this form without making any changes.
How to
1. Review the guidelines in Table 172 and complete the fields on this tab.
2. Click Save before you exit this tab.
Create credential formats
Note:
If you experience difficulty with the Credential Format form, contact GE Customer Support for assistance.
The Credential Format form, Credentials group, allows an operator to do the following:
•
•
•
•
Import or export custom credential records in a Wiegand or magnetic stripe format, into the controllers
on your system.
Identify the pattern of data bits (mask) of the credential numbers that you are importing or exporting to
your system.
Store standard custom credential format in the database for this application.
Interpret data from credentials presented at a Wiegand or magnetic stripe reader.
Chapter 7
Access rights, departments, persons, and credentials
Table 173. Form fields
Element
Description
Search
Display or change an existing record.
Add
Configure a new Credential Format record. Default values display for you.
Delete
Delete a selected Credential Format record from the list in the windowpane on the right,
that is no longer required or applicable.
Description
Enter a unique description for this credential format. The field accepts 1 to 64
characters.
Example: 33 Bit Indala.
Facility
Assign a facility option from the drop-down list of available facilities for assignment by
this operator. If you do not select a facility, Ignore Facilities is assigned for you.
Credential Format tab
Configure the specific mask of this custom credential format. You cannot save this
record until you have completed the entries on this tab.
Credential Format tab
The Credential Format tab lets you identify the pattern of the data bits (mask) combination, in the credential
numbers that you import or export to your controller and store in the database for this application.
Figure 131.Credential format tab
299
300
Facility Commander Wnx 7.5
User Manual
Table 174. Form fields
Element
Description
Controller
Select the controller type from the drop-down menu as a Micro controller or ACU
controller.
Format Type
Select from two data masks.
Magnetic Stripe: The number is a mask embedded into a magnetic tape strip and
usually adhered to credentials or credit cards.
Wiegand: A pulse-generating mask sensed by a pickup coil (the reader). This is a
complex system to manufacture and virtually impossible to duplicate making it one of
the most secure access control technologies. The number is a mask of a digital 0 or 1.
Position
Indicates the location or position of the bit where your mouse pointer is presently
positioned, in the mask combination.
Credential data layout (B, C, I)
The following characters are acceptable. Also refer to the Legend group box:
Micro Magnetic Stripe:
N = credential or facility/site bit
B = Start character (With few exceptions, the start character is 'B' the majority of the
time.
0 to 9, A, C, D, E = Constant characters
<blank> = Space
Micro Wiegand:
B = Credential identification (BID) bit
F = Facility/Site Code
P = Parity
0 or 1 = Constant Characters
E = Parity Layout - Even
O = Parity Layout - Odd
X = Space
ACU Magnetic Strip:
N = Credential identification (BID) bit
C = Company Code
S = Site Code
I = Issue Code
X = Space
ACU Wiegand:
B = Credential identification (BID) bit
C = Company Code
S = Site Code
I = Issue Code
P = Parity Layout
X = Space
The following settings apply to Micro Wiegand Format only. These fields are not available for ACU Wiegand controllers.
Parity checking is an error detection technique that tests the integrity of digital data within the computer system or over a
network. Parity checking uses an extra bit that holds a '0' or '1' depending on the data content of the byte. Each time a byte is
transferred or transmitted, the parity bit is tested. Even parity systems make the parity bit 1 when there is an even number of 1
bits in the byte. Odd parity systems make it 1 when there is an odd number of 1 bits.
Parity layout 1 (E, O)
Indicates the first parity bit in the data mask. The entry must be an Even (0) or Odd 1)
parity bit.
Chapter 7
Access rights, departments, persons, and credentials
Table 174. Form fields (continued)
Element
Description
Parity layout 2 (E, O)
Indicates the second parity bit in the data mask. The entry must be an Even (0) or Odd (1)
parity bit.
Parity layout 3 (E, O)
Indicates the third parity bit in the data mask. The entry must be an Even (0) or Odd (1)
parity bit.
Parity layout 4 (E, O)
Indicates the fourth parity bit in the data mask. The entry must be an Even (0) or Odd (1)
parity bit.
Number of facility characters
The number of facility code bits in the data mask.
Numbers of credential characters
The number of credential number (BID) bits in the data mask.
The following fields are for systems licensed and configured with ACU controllers or Micro controllers:
Import format from file
This selection is enabled when you click New to add a new record. Click to navigate to a
network drive, CD, diskette, or a local drive of your computer and import a Wiegand or
magnetic stripe file. (An example Wiegand file name might be *.wgd)
Export format to file
Click to navigate to a network drive, CD, diskette, or local drive of your computer and
export a Wiegand or magnetic stripe file.
Comments
Use this field to enter any special consideration or reminder for this configuration. This
field accepts 500 characters. It is not necessary to complete an entry in this field.
How to
1. Review the guidelines in Table 174 and complete the fields on this tab.
Also, refer to:
•
•
Controller flash and controller preference configuration on page 121
Credential formats in 40-bit and 55-bit Wiegand protocol in the following section.
2. Click Save before you exit this tab.
Credential formats in 40-bit and 55-bit Wiegand protocol
4002 - 40-bit Wiegand format
The 40 bits of transmission consist of two parity bits and 38 code bits. The first bit transmitted is the first parity
bit, P1; it is even parity calculated over the first 20 bits. The last bit transmitted is the second parity bit, P2; it is
odd parity calculated over the total 40 bits.
Code format:
F = Facility - 0 Digits
B = Credential Number (99.999.999.999 possible) 12 digits
Note:
This format was created to enable identical credential identification numbers to be produced in either S-F/2F or
Wiegand mode. These numbers are derived from the 40-bit binary code in the proximity chip. The credential number is
comprised of the 38 least significant bits. The most significant bit is set at 0.
301
302
Facility Commander Wnx 7.5
User Manual
5502 - 55-bit wiegand format
The 55 bits of transmission consist of two parity bits and 53 code bits. The first bit transmitted is the first parity
bit, P1; it is even parity calculated over the first 27 bits. The last bit transmitted is the second parity bit, P2; it is
odd parity calculated over the total 55 bits.
Code format:
F = Facility - 0 digits
B = Credential Number - 16 digits
P = Parity Bit
What’s next?
If applicable to your system, continue with Chapter 8, Guard tours on page 303.
Chapter 8 Guard tours
This chapter provides an overview when configuring your facility for guard tours.
Complete the steps as presented.
In this chapter:
Overview . . . . . . . . . . . . . . . . . . . . . . . . . . . . . . . . . . . . . . . . . . . . . . . . 304
Define guard tours . . . . . . . . . . . . . . . . . . . . . . . . . . . . . . . . . . . . . . . . 304
Define tour points . . . . . . . . . . . . . . . . . . . . . . . . . . . . . . . . . . . . . . . . . 307
What’s next? . . . . . . . . . . . . . . . . . . . . . . . . . . . . . . . . . . . . . . . . . . . . . 309
304
Facility Commander Wnx 7.5
User Manual
Overview
Note:
The guard tour feature is enabled for systems licensed and configured with Micro controllers only.
A guard tour is an inspection of your facility premises, made by a security officer at random intervals. The
officer stops at pre-determined tour points along the way, where a credential must be presented to a reader or
hit a DI point, so that the system can track the tour progress. Each time the officer presents a credential to a
reader, a tour point is “hit.”
Define guard tours
Note:
The Guard Tour form, Guard Tours group, is enabled if you are licensed for guard tour. Also, see the Manual Control form,
Guard tour tab on page 349.
Conditions of the guard tour feature:
•
•
•
•
•
•
•
•
•
•
•
•
•
Tour Point form must be configured before a guard tour record is configured. Refer to Define tour
points on page 307.
A guard tour must be configured before a physical tour can begin.
All tour points must be associated with controllers within the same Region. Refer to Global
configuration regional rules on page 46.
Tour points can be both readers and DIs.
The same credential must complete the entire tour. A credential can only be assigned to one tour at a
time.
The credential read does not grant access or cause an invalid alarm.
Double-hit points by the tour credential along the tour result in invalid tour transactions.
A tour begins when the Start Point is “hit” or manually started by the operator at a computer running
this application.
A tour ends when all points assigned to the tour are “hit,” or at the expiration of the time assigned for
the duration of the tour. Also, a tour can be ended manually, by the operator at a computer running this
application.
An alarm is generated if a tour is not completed within the assigned maximum tour time.
Credential transactions are stored in credential history and available to generate reports.
DI tour points are assigned to only one tour.
Credentials must be assigned to a tour in order to be a tour credential.
Table 175. Form fields
Element
Description
Delete
Delete a selected guard tour record from the list in the windowpane on the right, that is
no longer required or applicable. The associated alarm record for this guard tour is
simultaneously deleted. If a tour is in progress, this record cannot be deleted or edited.
Refer to the Activity Monitor or the Guard Tour tab of the Manual Control form for tour
status.
Description
Enter a unique description for this tour. The field accepts 1 to 64 characters.
Chapter 8
Guard tours
Table 175. Form fields (continued)
Element
Description
Facility
Assign a facility option from the drop-down list of available facilities for assignment by
this operator. If you do not select a facility, Ignore Facilities is assigned for you.
Guard Tour tab
Configure the specifics of this tour. You cannot save this record until you have completed
the Tour tab.
For a shortcut menu to related forms, move the mouse pointer below any tab and click the right mouse button.
Guard Tour tab
Configure the specifics of this tour by completing the elements displayed on the Guard Tour tab.
Figure 132.Guard tour tab
Table 176. Form fields
Element
Description
Tour Host Computer
From the drop-down list, select the computer that hosts this tour. Guard tours must be
owned by a specific client host.
305
306
Facility Commander Wnx 7.5
User Manual
Table 176. Form fields (continued)
Element
Description
Start Tour Point
From the drop-down list, select a tour point as the start point of this tour.
• Only direct and network controller devices display in this drop-down list.
• When you select a start point, Assign Tour Points becomes available.
Max tour time (min)
Route Activity to Printer
• Enter the maximum number of minutes that this tour is allowed to last. When the
maximum time is reached, a tour is ended automatically.
• The default and maximum number of minutes in this field is 480.
Select this check box to route credential activities to a selected and enabled system
printer at the client computer that is hosting the guard tour. You must have two separate
printers configured if you are using a printer for tour activities and a printer for
credentials.
Tour Points
• Displays a list of assigned tour points. All tours are random. A random tour is a tour
where all of its points do not need to be hit in a particular order, except the assigned
start point.
• Every time this tour is executed, the order of “hit” points can vary. A random tour
ends automatically when all of its tour points have been hit.
Assign Tour Points
• Click to display a Point Assignment dialog box, allowing you to assign Tour Points to
this tour.
• Selection results display in the Tour Points windowpane.
The Point Assignment window displays when you click Assign Tour Points, enabling you
to select and assign tour points to a tour.
• Select, and then click the right arrow to assign an available point.
• Select, and then click the left arrow to unassign a point.
• A DI start point can exist in only one tour; therefore, any DIs previously assigned as
Start Tour Point in any tour, do not display in the list. The DI point cannot be re-used.
• All tour points must be associated with controllers within the same Region.
• Tour points can be readers or DIs that are not on a dial-up controller:
1) If a reader is selected as the start point, DIs not assigned to a tour,
display in this list.
2) DI points can only be assigned to one tour.
3) Reader tour points can be assigned to any tour and any number of tours.
A reader as a tour point can be re-used.
• The number of points assigned to a tour is limited to 64.
• If any reader is assigned as a tour point, at least one credential must be assigned to
the tour.
• If all tour points are DIs, you do not need to assign a credential to the tour.
Click OK to display the results in the Tour Points windowpane.
Move Up
Select and click to move this Tour Point up the list. This tour point order displays on the
Manual Control form, Guard Tour tab.
Move Down
Select and click to move this Tour Point down the list. This tour point order displays on
the Manual Control form, Guard Tour tab.
Tour Credentials
Displays a list of assigned tour credentials. At least one credential must be assigned to a
tour.
Chapter 8
Guard tours
Table 176. Form fields (continued)
Element
Description
Assign Tour Credentials
• Click to display a Credential Assignment dialog box, allowing you to assign
credentials to this tour.
• If a reader is assigned as a tour point, a credential must be assigned before this
guard tour record can be saved.
The Credential Assignment window displays when you click Assign Tour Credentials,
enabling you to select and assign tour credentials to a tour.
• Multiple credentials can be assigned to a guard tour, but if a credential is assigned
to a tour, the same credential cannot be assigned to any other tours.
• The same credential must be used to complete the entire tour.
• When a credential is assigned to a guard tour, the credential is downloaded to all
controllers that have reader type tour points for that guard tour.
• If any reader is assigned as a tour point, at least one credential must be assigned to
the tour.
• If all tour points are DIs, you do not need to assign a credential to the tour.
Click OK to display the results in the Tour Credentials windowpane.
Save
• Click to save this tour record and simultaneously create a new alarm, Guard Tour
Max Time Exceeded.
• If you have not completed the required elements, you cannot save.
How to
1. Review the guidelines in Table 176 and complete the fields on this tab.
2. Click Save before you exit this tab.
Define tour points
Note:
This feature is enabled for systems licensed and configured with Micro controllers.
Note:
The Tour Points form, Guard Tours group, is enabled if you are licensed for guard tour.
A guard tour is an inspection of your facility premises, made by a security officer at random intervals. The
officer stops at pre-determined tour points along the way, where a credential must be presented to a reader or
307
308
Facility Commander Wnx 7.5
User Manual
DI point so that the system can track the credential progress. Each time the officer presents a credential to a
reader, a tour point is “hit.”
•
•
•
•
•
•
•
•
•
•
Tour points and a guard tours record must be created before a tour can begin.
Tour points can be any readers or DIs that are not on a dial-up controller.
DIs must be configured as a DI type of guard tour.
DI points can only be assigned to one guard tour.
Reader tour points can be assigned to any tours and any number of tours.
All tour points must be associated with controllers within the same Region.
The credential read does not grant access or cause an invalid alarm.
Double-hit points along the tour result in invalid tour transactions.
Credential transactions are stored in credential history and available to generate reports.
A credential must be assigned to the tour.
Additional statements relating to guard tours are listed in Define guard tours on page 304.
Table 177. Form fields
Element
Description
Search
Click to display or change an existing guard tour point record. If this is a Global
configuration, points that display are limited to the active Region. You cannot edit a
guard tour point if it is assigned to a guard tour.
Add
Click to configure a new Tour Point record.
Delete
Click to delete a selected Tour Point record from the list in the windowpane on the right,
that is no longer required and is not assigned to an existing guard tour. If this is a Global
configuration, points that display are limited to the active Region.
Description
This field is required and accepts up to 64 characters. Enter a unique description for this
tour point.
Facility
Assign a facility option from the drop-down list of available facilities for assignment by
this operator. If you do not select a facility, Ignore Facilities is assigned for you.
Tour Point tab
Configure a reader or digital input. You cannot save this record until you have completed
the Tour Point tab.
For a shortcut menu to related forms, move the mouse pointer below any tab and click the right mouse button.
Chapter 8
Guard tours
Tour Point tab
A tour point can be a reader or digital input. You must select one option before you can save this point record.
Figure 133.Tour Point tab
Table 178. Form fields
Element
Description
Reader
If you selected Reader, this field is available. Select a reader from the drop-down list of
available readers.
Note:
Digital Input
When reader records are created, we recommend that you keep the
mmmmm-bb-pp prefix and add text to the description field. A complete and
accurate reader description aids in assigning the reader points from this dropdown list.
If you selected digital input, this field is available. Select a digital input from the dropdown list of available digital inputs.
Note:
When the digital input records are created, we recommend that you keep the
mmmmm-bb-pp prefix and add text in the description field. A complete and
accurate digital input description aids in assigning alarm points from this dropdown list.
How to
1. Review the guidelines in Table 178 and complete the fields on this tab.
2. Click Save before you exit this tab.
What’s next?
Continue with Chapter 9, Monitor and control on page 311.
309
310
Facility Commander Wnx 7.5
User Manual
Chapter 9 Monitor and control
This chapter provides an overview of the monitoring options, status capabilities,
graphics console, and manual controls within this application.
In this chapter:
Overview . . . . . . . . . . . . . . . . . . . . . . . . . . . . . . . . . . . . . . . . . . . . . . . . 312
Activity monitoring . . . . . . . . . . . . . . . . . . . . . . . . . . . . . . . . . . . . . . . . 312
Alarm monitoring . . . . . . . . . . . . . . . . . . . . . . . . . . . . . . . . . . . . . . . . . 319
Client monitoring . . . . . . . . . . . . . . . . . . . . . . . . . . . . . . . . . . . . . . . . . 325
Controller monitoring . . . . . . . . . . . . . . . . . . . . . . . . . . . . . . . . . . . . . . 328
Digital input status . . . . . . . . . . . . . . . . . . . . . . . . . . . . . . . . . . . . . . . . 335
Digital output status . . . . . . . . . . . . . . . . . . . . . . . . . . . . . . . . . . . . . . . 336
Graphics Console . . . . . . . . . . . . . . . . . . . . . . . . . . . . . . . . . . . . . . . . . 338
Manual control form . . . . . . . . . . . . . . . . . . . . . . . . . . . . . . . . . . . . . . . 339
Transaction override. . . . . . . . . . . . . . . . . . . . . . . . . . . . . . . . . . . . . . . 350
What’s next? . . . . . . . . . . . . . . . . . . . . . . . . . . . . . . . . . . . . . . . . . . . . . 352
312
Facility Commander Wnx 7.5
User Manual
Overview
All monitors: The monitor forms, in the Monitors and Controls group, open and display outside of the main
application window. Right-click on the form window to display a shortcut menu of options. The window can
be independently moved anywhere on the desktop. This feature has been incorporated to facilitate multiwindow management for both single and multi-monitor workstation configurations.
Activity monitoring
Note:
For a shortcut to the functions available within the Activity Monitor form or to a related form, right-click anywhere in the
area where the credential transactions display. Not all options are available to you. You must click on a credential
transaction with a camera association in order to enable video options on the shortcut menu. Camera and reader
association (linking) is accomplished on the Alarms & Events Group, Event Trigger form.
Figure 134.Activity monitor
Table 179. Form fields
Element
Description
Date
Displays the date in the controller on which the credential transaction occurred.
Time
Displays the time of the credential transaction occurrence in the controller.
Activity Type
Displays the type of activity that occurred, along with a graphic:
• Valid
Person was granted access.
• Invalid
Person was not granted access.
ACU controller systems:
An APB violation for ACU controller systems appears as Invalid.
Chapter 9
Monitor and control
Table 179. Form fields (continued)
Element
• User-defined custom
credential status
Description
This credential is mapped to a Suspended on the Custom Credential Status form and
does not grant access. The user-defined custom credential status displays in the Activity
Type column, as assigned on the Credential form.
Example
1. On the Custom Credential Status form, a status of Pregnancy leave is created and
assigned a Status of Suspended.
2. Jane Doe goes on leave and her credential is assigned a Status of Pregnancy leave,
as selected from the Credential form, Status drop-down list.
3. While on leave, Jane swipes her badge at a valid reader. Access is denied.
4. The Activity Monitor, Activity Type column displays a message of Pregnancy leave.
• Lost
Credential status is lost.
• Unknown
Credential is not in this application database.
• APB In Invalid
(Micro only.) Current credential APB status of IN, and attempted to gain access to an APB
IN reader.
• APB Out Invalid
(Micro only.) Current credential APB status of OUT, and attempted to gain access to an
APB OUT reader.
• TImed APB Invalid
Your credential has already been presented at a timed APB reader and you are
attempting to go back through that same reader within the timed APB timeframe (this
timeframe is determined on the Reader tab of the Reader form).
• TA In Invalid
(Micro only.) Current credential T&A status of IN, and attempted to gain access to T&A IN
reader.
• TA Out Invalid
(Micro only.) Current credential T&A status of OUT, and attempted to gain access to a T&A
OUT reader.
• Valid Floor
Elevator control with floor tracking is being used and the person was granted access to
the selected floor.
• Invalid Floor
Elevator control with floor tracking is being used and the person was not granted access
to the selected floor.
• Duress Valid
(Micro only.) 'Grant Access on Duress' is active on this system (selected on the
Preferences form) and door access was granted with a valid credential. This selection
allows a duress alarm to be generated when a PIN code is entered and one of the
following:
With the final digit incremented by + 1. (That is, 1239 becomes 1230.)
• Duress Invalid
'Grant Access on Duress' is not active on this system (not selected on the Preferences
form) and an attempted door access with a PIN code and one of the following
(a) Micro controllers: with the final digit incremented by + 1. (That is, 1239 becomes
1230.)
(b) ACU controllers: with the entire number incremented by +5. (That is, 1239 becomes
1244.)
313
314
Facility Commander Wnx 7.5
User Manual
Table 179. Form fields (continued)
Element
Description
• Duress Valid Open
'Enable Valid No Passage' is active on this reader. 'Grant Access on Duress' is active on
this system (selected on the Preferences form) and door access was granted with a valid
credential. This selection allows a duress alarm to be generated when a PIN code is
entered and one of the following:
(a) Micro controllers: with the final digit incremented by + 1. (That is, 1239 becomes
1230.) The door opens.
(b) ACU controllers: with the entire number incremented by +5. (That is, 1239 becomes
1244.) The door opens.
• Duress Valid No Passage
'Enable Valid No Passage' is active on this reader. 'Grant Access on Duress' is active on
this system (selected on the Preferences form) and door access was granted with a valid
credential. This selection allows a duress alarm to be generated when a PIN code is
entered and one of the following:
(a) Micro controllers: with the final digit incremented by + 1. (That is, 1239 becomes
1230.)
(b) ACU controllers: with the entire number incremented by +5. (That is, 1239 becomes
1244.) The unlock time expired and the door did not open.
• Valid Open
'Enable Valid No Passage' is active on this reader. A valid credential read occurs and the
door opens.
• Valid No Passage
'Enable Valid No Passage' is active on this reader. A valid credential read occurs but the
door did not open within the configured unlock time. This may be an indication of
someone deciding not to pass through the door, or an accidental read as someone
passes a reader.
• Invalid PIN
A credential was presented at a reader and an invalid PIN was entered. This message
displays for as many times as you enter an invalid PIN, unless 'Max Invalid Pin' is
configured on the Reader form, Reader tab. The credential does not grant access.
• Max Invalid PIN
'Max Invalid PIN Count' is active on this reader and the number of invalid credential
counts has reached the maximum, as configured on the Reader form, Reader tab. The
credential did not grant access and the credential is suspended.
The following are Intrusion Zone and Area activities:
• Armed
By reader, DI, manual control, or ACU by inactivity.
• Disarmed
By reader, DI, manual control, or ACU by inactivity.
• Arm/Disarm Failed, Not
Secure
An alarm is in alarm state. Device or credential transaction failed.
• Arm/Disarm Failed, Time
Expired
No credential transaction. The 10-second time period allowed for completion of the arm/
disarm process at keypad and reader has expired. (For ACU controller systems, this is a
30-second time period but can be modified.)
• Arm/Disarm Failed, Invalid
Access Right
Intrusion Zone/Area not assigned to access right or is invalid.
• Arm/Disarm Failed Not in
Zone/Area
Reader is not assigned to the zone/area.
The following are guard tour activities (Micro only.):
• Tour Started
Security officer has started a guard tour.
Chapter 9
Monitor and control
Table 179. Form fields (continued)
Element
Description
• Tour Ended
Security officer has completed a guard tour. All tour points have been 'hit.'
• Tour Started Manually
A guard tour was started manually, at the control station and not by presenting a
credential at a reader or DI point.
• Tour Ended Manually
A guard tour was ended manually, at the control station and not by presenting a
credential at a reader or DI point.
• Tour Activity
A tour point was hit along a guard tour.
• Invalid Tour Activity
• Double 'hit' of any assigned tour point.
• A tour point is 'hit' during a paused tour.
• If a tour has not started and its points are hit, an invalid tour activity transaction is
not generated.
• Tour Paused
This previously started tour has been paused. The clock time to complete this tour is
temporarily stopped.
• Tour Resumed
This previously paused tour has resumed. The clock time to complete this tour is
resumed.
Area/Zone
When an area or zone is armed/disarmed, this column displays the description of the
area or zone.
Location
• Displays the DI or reader description.
• If an event trigger has been defined for associating video with transactions from
specified readers, a camera icon displays as part of the reader description. When
selecting a credential transaction identified with a camera icon, right-click to
display the shortcut menu, and then select a video option.
• If this credential is a guard tour credential, this field displays the description of the
tour point.
• If activity is manual control, Client name displays.
Name
•
•
•
•
Number
• If the credential is unknown or not assigned to a person, the credential number or, if
aliasing is used, the credential alias number is displayed.
• Otherwise, this field is blank.
Reference
• If this is an elevator reader (Valid Floor or Invalid Floor displayed in the field), this
field displays the floor selected.
• If this is a guard tour, the guard tour description displays.
• If 'Max Invalid PIN Count' displays in the activity type, then 'Credential Suspended'
displays here.
• For any other activity type, this field is blank.
• (ACU only.) Access logging information codes display.
If this credential is assigned to a person, the name of the person displays.
If this activity is manual control, the operator name displays.
If this credential is a guard tour credential, the name of the person displays.
If this hit is a DI point, this field is blank.
Activity Monitor toolbar
The Activity Monitor form toolbar consists of the following options:
315
316
Facility Commander Wnx 7.5
User Manual
Table 180. Form fields
Element
Description
Resume
Resume or restart the scrolling of credential transactions.
This icon is active only if you clicked Pause. All credential transactions display that
occurred while the Pause option was on, once you select resume.
Pause
This option pauses or suspends the scrolling of credential transactions on the Activity
Monitor form.
Clear
Clear all credential transactions.
Reader List
Display an Edit Readers List dialog.
This selection is empty by default. When the selection is empty, all readers will be
reported. The Edit Readers List displays Available and Assigned readers that are enabled
for monitoring. Only readers in the operator’s facilities are available for assignment by
this operator.
• Select, and then click the right arrow to assign an available reader.
• Select, and then click the left arrow to unassign a reader.
Click OK to accept the assignments and close the dialog box.
Swipe and Show
Start the Swipe and Show program.
Help
Displays the Help system.
Activity Monitor shortcut menu
The Activity Monitor shortcut menu consists of the following options:
Table 181. Form fields
Element
Description
Resume
Starts the scrolling of credential transactions. This option is active only if you previously
selected Pause. All credential transactions display that occurred while the Pause option
was on, once you select Resume.
Pause
Suspends scrolling of credential transactions on the Activity Monitor.
Clear
Clears all credential transactions from the Activity Monitor.
Swipe and Show Readers
Select to display an Edit Readers List assignment form. Select those readers you want
monitored in the Swipe and Show window. If readers have been selected, right-click an
activity record, and launch the Swipe and Show program.
Launch Swipe and Show
Starts the Swipe and Show program. Only one instance of Swipe and Show is available
for display on a computer at one time.
Credential
Displays the Credential form, making available the selected credential record.
Chapter 9
Monitor and control
Table 181. Form fields (continued)
Element
Description
View Live Video
Accesses live video from the cameras associated with the reader's credential transaction
as defined by its event trigger. In order to view live video, the DVR must be online (if it is a
duplex recorder, the recorder must also be in record mode). The following windows open:
• The Digital Video Viewer. (Refer to Navigating Video Console on page 228 for
information about the Digital Video Viewer.)
• Video windows displaying the current live view of the cameras associated with the
credential transaction. Each window displays a dialog box containing the current
date and time.
View Recorded Video
Accesses previously recorded video from the cameras associated with the reader's
credential transaction as defined by its event trigger. In order to view recorded video, the
DVR must be online and available. The DVR cannot be serving another request for
playback of any recorded video event. The following windows open:
• The Digital Video Viewer. (Refer to Navigating Video Console on page 228 for
information about the Digital Video Viewer.)
• Video windows displaying the recorded video associated with the credential
transaction. Each window displays a dialog box containing the current date and
time.
View Single Recorded Frame
Select to display the first frame of the event recording as a still photo.
Quick Launch
Accesses Graphics Console, and live and recorded video from cameras associated with
the reader's credential transaction as defined by its event trigger.
Note:
Note:
In order to view live and recorded video, the DVR must be online and available,
and not serving another request for playback of recorded video based on this
event.
A message dialog displays if video is not available because associated cameras are not assigned to the currently active
facility.
Swipe and show option
Note:
Only one instance of Swipe and Show is available for display on a computer at one time. If readers have not been
selected, the program does not start.
The Swipe and Show program is a monitoring and validation option, available on the Activity Monitor form.
When properly configured and following a credential transaction, the operator is able to observe a credential
photo and text description of the transaction in the Swipe and Show window. An operator is able to monitor
transactions and compare the photo ID to a live image.
317
318
Facility Commander Wnx 7.5
User Manual
Figure 135.Swipe and Show window
The Swipe and Show window is resizable and displays the following:
Table 182. Form fields
Element
Description
Photo
A photo displays in this windowpane for the credential presented to the reader. If no
photo is available or an unknown credential is presented to the reader, a silhouette
displays.
Name
First name, middle initial, and last name of credential holder.
Employee Number
Number assigned to this employee.
Department
Department where person is assigned.
Transaction Type
Valid (displays green), invalid (displays red), or unknown (displays gray) messages
display. Guard tour activity types also display. See Activity monitoring on page 312 for a
listing of activity types.
Date/Time
Reader transaction date and time.
Reader Description
Description of reader where credential was presented.
Always on Top
Right-click the Swipe and Show title bar to display a shortcut option that keeps the
window in the forefront of all windows displaying on the workstation.
If you select another transaction, the window content changes to the available information for that transaction.
Close this window by selecting the window exit button, closing the Activity Monitor form, or closing this
application client program.
Chapter 9
Monitor and control
Alarm monitoring
Note:
For a shortcut to the functions available within the Alarm Monitor form or to a related form, right-click anywhere in the
area where the alarm transactions display. You can access the Alarm form and Graphic Console from this menu. Not all
options are available to you. You must click on an alarm transaction with a camera association in order to enable video
options on the shortcut menu.
All Monitors: The monitor forms, in the Monitors and Controls group, open and display outside of the main
application window. Right-click on the form window to display a shortcut menu of options. The window can
be independently moved anywhere on the desktop. This feature has been incorporated to facilitate multiwindow management for both single and multi-monitor workstation configurations.
The Alarm Monitor form displays alarm activity.
•
•
An operator can see alarms on the Alarm Monitor form only for facilities that are currently active and
assigned to the current operator.
The option to monitor an alarm must be selected on the Alarm form in order for a specific alarm to
display on the Alarm Monitor form.
Table 183. Form fields
Element
Description
Alarm Conditions
Alarm
Reset
Cut
Short
Process States
This is an internal state for alarm conditions:
Acknowledged
Unacknowledged
Inactive
Figure 136(applies to Micro controller systems only) explains the action of alarms, and how alarm states and
process states relate to each other.
Figure 136.Alarm states
319
320
Facility Commander Wnx 7.5
User Manual
•
•
•
•
•
•
•
Note:
When an alarm (configured for Operator acknowledge) is in alarm condition (either Alarm, Cut, or
Short), its internal process state is Active.
When an alarm (configured for Operator acknowledge) is in alarm condition (either Alarm, Cut, or
Short) and is acknowledged (see #1 above), its internal process state becomes Pending. This displays
on the Alarm Monitor form as Alarm with a process state of Acknowledged, preceded by a check.
When an alarm (not configured for Operator acknowledge) is in alarm condition (either Alarm, Cut, or
Short) and is acknowledged, its internal process state becomes Inactive and the alarm is removed from
the Alarm Monitor form.
When an alarm is in alarm condition (either Alarm, Cut, or Short) and its internal process state is
Pending (displayed as Acknowledged, preceded by a check on the Alarm Monitor form) and the alarm
is Purged individually or Reset (see #2 above), its internal process state becomes Inactive and it is
removed from the Alarm Monitor form.
When an alarm is in alarm condition (either Alarm, Cut, or Short) and the alarm is reset (see #3), its
internal process state is Completed. This displays on the Alarm Monitor as Alarm in reset.
When an alarm is in reset and the alarm is either acknowledged or purged (see #4 above), its internal
process state becomes Inactive and it is removed from the Alarm Monitor form.
When an alarm is in alarm condition (either Alarm, Cut, or Short) and the “Purge All” feature is
employed (see #5 above), its internal process state becomes Inactive and it is removed from the Alarm
Monitor form.
When an operator acknowledges a few specific alarms, their process state becomes Inactive and they are removed
from the Alarm Monitor form. This happens when the following two conditions are met:
1. If the alarm is not configured for Operator acknowledge on the Alarm form.
2. Logical alarms are system-generated and configurable. They cannot be a cut or shorted. (This differs from a physical
alarm that is generated by an actual input device.)
Examples:
Invalid credential alarm
Lost credential alarm
Duress credential alarm
Host Comm alarm
Encryption alarms
Failover alarms
Chapter 9
Monitor and control
Figure 137.Alarm Monitor
Using the Alarm Monitor form
Note:
For a shortcut menu to the functions available within the Alarm Monitor form or to a related form, click the right mouse
button within the first windowpane where the alarms display or the second pane where the messages display. Not all
options are available. You must select an alarm activity with a camera association in order to enable video options on
the shortcut menu.
There are three sections to the Alarm Monitor form:
1. The top section or pane lists the alarms.
2. The second pane lists any instructions assigned to the current (highlighted) alarm.
3. The third pane lets you respond to an alarm by either selecting a predefined response or entering text.
Table 184. Form fields
Element
Description
Alarm State
Displays a colored icon associated with an alarm process state. The four possible states
are as follows:
Alarm: Red - The point is in the active alarm state (either closed or opened). The Active
alarm state for an alarm is defined on the Alarm form.
Reset: Green -The point is no longer in the active alarm state.
Cut: Yellow - The wiring to the alarm point has been cut.
Short: Blue - The wiring to the alarm point has been short circuited.
Priority
Displays the priority of the alarm. The priority tells the system in which order it should
alert the operator when multiple alarms occur simultaneously. The priority range is 0 to
19. The lower the number, the higher the priority of the alarm. Also, refer to Alarm Priority
on page 184.
321
322
Facility Commander Wnx 7.5
User Manual
Table 184. Form fields (continued)
Element
Description
Category
Displays the category assigned to this alarm.
Description
Displays the alarm description. Refer to the following examples:
• Tamper Alarm:
Micro controller: mmmmm-bb-pp Tamper
ACU controller: mmmmm-na-pp Tamper
where mmmmm represents the controller number to which this reader is associated,
b represents the module number (n represents the port number and a represents
port address), and pp represents the point or device number, and Tamper is the
alarm description.
• Regional Failover on a Global configuration: bcttestpc-Region Failover
Alarm where bcttestpc is the PC Name of the client that has failed over to its
configured backup Region, and Region Failover Alarm is the alarm
description.
Reference
Displays additional information relating to the type of credential alarm. Only reader
alarms have a reference, such as a person name or credential number. This column may
be blank.
Process State
The process state is Acknowledged, Unacknowledged or Inactive. This is an internal state
for alarm conditions. To acknowledge an alarm, select the desired alarm and click
Acknowledged. The alarm icon changes to reflect the acknowledgement and clears from
the window after reset.
Count
The number of times the alarm has entered an alarm state since the alarm was last
cleared from the Alarm Monitor.
Host Date/Time
The date and time the alarm occurred according to the system date and time.
Device Date/Time
The date and time the alarm occurred according to the controller's date and time.
Area
(ACU only.) Displays the area associated with this alarm
Instruction
Displays the instructions linked to the current alarm. When an alarm is displayed on the
Alarm Monitor form, select the alarm. The alarm instructions set up for this alarm display
in the Instruction windowpane, providing guidelines for the operator to resolve the alarm
condition. Predefined Instructions were created on the Instruction form of the Alarms &
Events group. Refer to Define instructions on page 163.
Response
This is a multi-line dialog box, allowing you to manually enter a response of up to 256
alphanumeric characters, for the current alarm.
Acknowledge
Click to acknowledge an alarm. Forced acknowledgement to an alarm is required only if
the Operator Acknowledge check box has been checked to enable this function on the
Alarm form.
An alarm process state is either Unacknowledged or Acknowledged. To acknowledge an
alarm, select the desired alarm and click Acknowledge. The alarm button changes to
reflect the acknowledgement and clears from the window after reset.
Chapter 9
Monitor and control
Alarm Monitor toolbar
Table 185. Form fields
Element
Description
Remove All
Click this button on the toolbar to remove all alarms on the Alarm Monitor regardless of
whether the alarms are acknowledged or unacknowledged. An operator must have an
ALL permission for the Alarm Monitor in order to have access to this icon.
Remove Individual
Click this button on the toolbar to remove one or more alarms without waiting for them
to reset. The alarms can be unacknowledged and cleared as long as it was not defined
on the Alarm form as requiring an acknowledgment. Select a series of alarms in
sequence or individual alarms not in sequence.
Help
Displays the Help system.
Response
Click to display a list of predefined responses. Predefined responses are created on the
Alarm Response form. Refer to Define alarm responses on page 164. If the entire list does
not fit, scroll bars become available on the right of the window. Select a response and
click OK for the selected response to display in the Response windowpane of the Alarm
Monitor form.
• You can manually extend the response by placing your cursor at the end of the
entry and appending to a maximum of 256 alphanumeric characters.
• You can append an additional predefined response without overwriting the existing
entry.
• When you append an additional predefined response to the existing entry, a
warning message displays if the response exceeds 256 characters. The additional
response is not appended. The selected response is recorded in alarm history when
the alarm is acknowledged.
Acknowledge
Click to acknowledge an alarm. Forced acknowledgement to an alarm is required only if
the Operator Acknowledge check box has been checked to enable this function on the
Alarm form.
An alarm process state is either Unacknowledged or Acknowledged. To acknowledge an
alarm, select the desired alarm and click Acknowledge. The alarm button changes to
reflect the acknowledgement and clears from the window after reset.
Alarm Monitor shortcut menu
Table 186. Form fields
Element
Description
Show Inactive Alarms
Display alarms in an inactive state and removed from view. These alarms were
previously acknowledged or purged from the Alarm Monitor. This is a toggle election and
is a way to display previous alarm activity without running a report.
Alarm
Opens the Alarm form, allowing you to modify or view that particular alarm record.
Graphic Console
Opens the Graphic Console form, allowing you to view the alarm graphics map to which
the alarm belongs.
323
324
Facility Commander Wnx 7.5
User Manual
Table 186. Form fields (continued)
Element
Description
View Live Video
(If a camera icon is not displayed to the left of the alarm description, this option is not
available.) If an alarm transaction is displayed with a camera icon to the left of the alarm
description, right-click to view live video from the cameras associated with the alarm's
transaction as defined by its event trigger. Refer to Video windows on page 213 for
window management information.
Note:
In order to view live video, the DVR must be online (if it is a duplex recorder, the
recorder must also be in record mode).
The following windows open: 1) Digital Video Viewer. Refer to Video Console Help for
information about the Digital Video Viewer. 2) Video windows displaying the current live
view of the cameras associated with the alarm transaction. Each window displays a
dialog box containing the current date and time.
View Recorded Video
(If a camera icon is not displayed to the left of the alarm description, this option is not
available.) If an alarm transaction is displayed with a camera icon to the left of the alarm
description, select to view live video from the cameras associated with the alarm's
transaction as defined by its event trigger. Refer to Video windows on page 213 for
window management information.
Note:
In order to view recorded video, the DVR must be online and available, and not
serving another request for playback of recorded video based on this event.
The following windows open:
1) Digital Video Viewer window. Refer to Video Console Help for information about the
Digital Video Viewer.
2) Video windows displaying the current live view of the cameras associated with the
alarm transaction. Each window displays a dialog box containing the current date and
time.
View Single Recorded Frame
Select to display the first frame of the event recording as a still photo (The photo is
displayed for 30 seconds, and then the recorded video is shown).
Quick Launch
Select to automatically access live and recorded video from the cameras associated
with the alarm's transaction as defined by its event trigger. Refer to Video windows on
page 213 for window management information.
Note:
In order to view live and recorded video, the DVR must be online and available,
and not serving another request for playback of recorded video based on this
event.
The following windows open:
1) Digital Video Viewer
2) Video windows displaying the current live view of the cameras associated with the
alarm transaction. Each window displays a dialog box containing the current date and
time. For additional information, click Help on the Digital Video Viewer window.
Chapter 9
Monitor and control
Client monitoring
All Monitors: The monitor forms, in the Monitors and Controls group, open and display outside of the main
application window. Right-click on the form window to display a shortcut menu of options. The window can
be independently moved anywhere on the desktop. This feature has been incorporated to facilitate multiwindow management for both single and multi-monitor workstation configurations.
Use the Client Monitor form to obtain client information, such as client type, Imaging status, and connection
status. A client is a computer that has all the functionality of the database server computer but does not store
the database and it does not validate license information.
For a shortcut menu to related forms, move the mouse pointer below any tab and click the right mouse button.
Figure 138.Client monitor
Table 187. Form fields
Element
Description
Client
Name of the networked computer. To delete, client must have a connection status of Not
Connected.
Note:
When adding clients on the Client form, the PCName must exactly match the
network name of the computer, in order for connection to be made.
Active Client
This column displays an entry when a client failed and a backup client is now hosting its
devices.
• The column displays the currently active hostname.
• If a backup attempt to a backup client failed, the column displays [Hostname]
Backup Failed where Hostname = the backup client that was unable to host devices
for the failed default host.
• During the process of recovery to the default client, the column displays
[Hostname] <recovering>. This only displays at the default client computer.
Following a recovery to the default host, this column is blank.
Client Type
Type of client: ClientApp or CCTV.
This client can be one of the workstation types as assigned on the Client form. See
Workstation Type on page 52.
325
326
Facility Commander Wnx 7.5
User Manual
Table 187. Form fields (continued)
Element
Description
Imaging Status
Shows whether the client currently has Imaging capabilities.
• Enabled: This client has Imaging capabilities, that is, you can capture, design, and
print using this computer.
• Disabled: This client does not have Imaging capabilities.
Connection Status
Current status of the connection between the client and the server:
• Connected: The client and server are communicating.
• Not Connected: The client and server are not communicating.
Description
Displays the description of the client.
Region
This is a Global configuration and this is the name of the Region for this client.
Active Region
This column displays an entry when a Regional database server has failed and a backup
server is now hosting the database.
• The column displays the currently active Region.
• Following a recovery to the default host, this column is blank.
File Server Hosting
Display name of the file server that is hosting the database for this client.
Mode
Displays the status of the Mode for this client.
Primary Com Port
Displays the primary communications port used for CCTV serial interface.
Secondary Com Port
Displays the secondary communications port used for CCTV serial interface.
Connection Information
Licenses Used: The number of clients currently connected to the server. (CCTV interface
clients do not count against client licenses.)
Client Licenses: The total number of licenses authorized.
Imaging Information
Licenses Used: The number of clients currently given Imaging permissions.
Imaging Licenses: The total number of Imaging licenses authorized.
Chapter 9
Monitor and control
Client Monitor toolbar
Table 188. Form fields
Element
Description
Disconnect Client
Disconnect the selected client.
Launch Client
Select this icon to launch a CCTV interface (other than integrated CCTV). This option also
displays on the shortcut menu for this form. The shortcut menu displays when you click
the right mouse button on the Client Monitor form.
Help
Displays the Help system.
Client Monitor shortcut menu
Table 189. Form fields
Element
Description
Disconnect
Select this icon to disconnect the selected client.
Launch
Select this icon to enable a CCTV interface (other than integrated CCTV).
Client
To display the Client form, to add a client to this application network.
Recover
To initiate recovery of a host that failed, was taken over by a backup client, and is now
able to host its original devices. When the default client is running, a manual recovery
procedure is required to bring all its devices back to itself. Also, refer to Backup Clients tab
on page 54.
• A notification message informs you of a successful recovery. Control of devices is
returned to the default host.
• A notification message informs you of an unsuccessful recovery. Verify
communication with the default host and retry the recovery.
Region
To display the Region form, to add a Region record to this Global system.
Recover Region
To initiate recovery of a Regional database server host that failed, was taken over by a
backup Regional server, and is now able to host its database. Also, refer to Backup
Regions tab on page 42.
A notification message informs you of an unsuccessful recovery.
Recover FileServer
To initiate recovery of a file server host that has failed and is now recovered and online.
This selection is enabled and used in a custom Global configuration where one or more
database components are installed on a second or separate computer from the
database server.
Manual Control
To display the Manual Control form, for this operator to manually perform operations on
the system.
327
328
Facility Commander Wnx 7.5
User Manual
Controller monitoring
All Monitors: The monitor forms, in the Monitors and Controls group, open and display outside of the main
application window. Right-click on the form window to display a shortcut menu of options. The window can
be independently moved anywhere on the desktop. This feature has been incorporated to facilitate multiwindow management for both single and multi-monitor workstation configurations.
The Controller Monitor form lets you view all types of controllers, the activities of those controllers, monitor
communications, and control each controller in the system. Using the Controller Monitor form, you have the
capability to select, sort, and display only the controllers that you want to view, and then save that view.
Column headings
Default columns display. Drag-and-drop capability lets you re-arrange the columns. You can also choose to
display only a few columns.
For a shortcut menu to functions available within the Controller Monitor form, select a controller from the list and
right-click.
Figure 139.Controller Monitor
Table 190. Form fields
Element
Description
Description
The Description is assigned to the controller when defined on the Controller form.
Active Hostname
The name of the computer that controls communications to the controller. (For those
computers licensed for Client Redundancy, the current Active Hostname may be a
backup client and have a different name than the Default Hostname computer.)
Default Hostname
(This column does not display if this computer is not licensed for Client Redundancy.) The
hostname displayed is the computer that normally hosts this controller. The icon image
displays in green when the controllers are controlled by the originating host. The icon
image displays in yellow to signify a failed system. The backup client computer listed in
the Active Hostname column is controlling the dial-up and network+dialup controllers for
this computer.
Chapter 9
Monitor and control
Table 190. Form fields (continued)
Element
Description
Address
Physical address assigned to the controller when defined.
State
Current state of the communications with the controller.
• Online means that the host attempts to communicate with the controller.
• Offline means that the host does not attempt to communicate with the controller.
• Error means that there is a communications problem.
Connection
Connection messages include the following:
• Connected - controller is online and working.
• Shut down - No connection.
• Create port - trying to open a physical medium.
• Set up connection - physical medium is open.
• Tear down connection - connection is in the process of being closed.
• Waiting for call.
• Dialing.
• Retrying call.
• Destroy port - physical medium is being closed.
Status
Status shows what is happening between the host and the controller. Messages include
the following:
• Alarm download.
• Alarm message download.
• Credential download.
• DO download.
• DO group download.
• Download start.
• Elevator download.
• Error.
• Flash Error. (See Diagnostic Log.)
• Flashing Controller. (The entry includes the percent of flash download complete.)
• Flashing Completed.
• Idle.
• Incorrect controller type.
• Inquiry.
• Normal.
• Password download.
• Reader download.
• Reset.
• Schedule download.
• Telephone download.
• There are fewer than 4 passwords defined.
Firmware version
Firmware version: The version of firmware operating the controller.
329
330
Facility Commander Wnx 7.5
User Manual
Table 190. Form fields (continued)
Element
Description
Comm device
Comm device messages include the following:
• If this is a direct-connect controller, lists the COM port to which this controller is
connected.
• If this is a dial-up controller, the text Dial-Up is displayed.
• If this is a network controller, the IP address of the controller is displayed.
• If this is a network + direct controller, the IP address displays. If the controller loses
network connection and fails over to a direct connect, in approximately two
minutes, the display changes from the IP address to COM port. When a failover
occurs, a yellow LED displays in the COM address column.
• If this is a network + network controller, the Primary IP address displays. If the
controller loses network connection, fails over to a secondary network IP address,
the display changes to the secondary IP address. When a failover occurs, a yellow
LED displays in the COM address column.
• If this is a network + dial-up controller, the text Dial-Up is displayed.
Note:
Head Of Line
Mode/Threat Level Access
If a host computer is licensed for Client Redundancy, has assigned a backup
client, and a failover occurs, a failover COM port displays.
• If the controller is defined as head-of-line, this field is blank.
• If the selected controller is not head-of-line, this field contains a description of the
controller that is the head of this line.
This displays the current mode or threat level of the controller. The mode is assigned on
the Mode Schedule form or by a manual control command.
The mode and threat level default labels are Normal, Mode 1, Mode 2, or Mode 3 and
Threat Level 0 - Normal, Threat Level 1 - Low, Threat Level 2 - Medium, Threat Level 3 High or as re-labeled on the Preferences form.
Message Count
This field displays the number of messages waiting to be sent to a selected controller. By
default, this column is not displayed.
Controller Monitor toolbar
Note:
For a shortcut menu to functions available within the Controller Monitor form, select a controller from the list and rightclick.
For icon functionality on the Controller Monitor toolbar, refer to Table 191.
Table 191. Form fields
Element
Description
Select Columns
Display the Select Columns dialog box.
This option lets you select columns that you want to display on the Controller Monitor
form by putting a check next to the column name. When you click OK, the selected
columns are saved so you do not have to select again the next time the form is opened.
Note:
If you are licensed for Client Redundancy, the column Default Hostname is
available for selection. If not licensed for Client Redundancy, this selection is
unavailable.
Chapter 9
Monitor and control
Table 191. Form fields (continued)
Element
Description
Search
Display the Search Criteria and Controller Selection dialog box, allowing you to search
and select controllers that you want to display on the Controller Monitor form. Refer to
Search criteria and controller selection below.
The Recall Search check box, when selected, recalls the last search criteria from the
Search Controller form.
Help
Display the Help system.
Search criteria and controller selection
This dialog box lets you enter search criteria for available controllers, from facilities to which you have access,
that you want to add to your view or remove from the list of displayed controllers, based on the results of the
search criteria. Complete one or more of the search criterion.
Table 192. Form fields
Element
Description
Controller Description
Enter a controller description for which to search. You may use wildcard characters as
part of the search criteria.
Controller Address
Enter a controller address.
Online, Offline, Error
Select controllers that meet the search criteria and are online, offline, or in an error state.
Active Hostname
Select a host name.
Comm Device
Select a communication port.
Available Controllers
The controllers are displayed that meet the search criteria and are not already selected
to be displayed in the Controller Monitor form.
Selected Controllers
This box displays the results of the search. The list of controllers are those that meet the
search criteria and are selected to be displayed.
Search
Click to display the controllers as requested by the preferences you selected.
Clear Search
Clears the controller search criteria and selection preferences from the form
windowpanes, allowing you to select new criteria.
Recall Search
Select to recall and display the results of the last search performed. Every time the
monitor is opened, the system displays the monitor columns based on the criteria of the
last previous search.
Controller Monitor shortcut menu
Note:
These options also display on the Controller Monitor form toolbar. Refer to individual icons for additional details of each
function.
Table 193. Form fields
Element
Description
Edit
Open the Controller form and edit the settings for the selected controller.
331
332
Facility Commander Wnx 7.5
User Manual
Table 193. Form fields (continued)
Element
Description
Change State/Set Offline/Set
Online
Change the current state of the selected controller.
Download Credentials
Reload the credential database records for the selected controller.
Download Database
Download the controller's database.
Reset Controller
Physically reset the controller.
Reset T&A
(Micro only.) Set the time and attendance status to neutral for all credentials in this
controller.
Reset APB
Set the anti-passback status to neutral for all credentials in this controller.
Dial/Hang-up Controller
Dial that controller immediately.
Flash Controller
Click to open the Controller Flash & Controller Preference Configuration window that
lets you download the latest firmware to the selected controller. Refer to Controller flash
and controller preference configuration below.
Remove Controller(s)
Remove the controller from the Controller Monitor form window.
Refresh
Refreshes the view.
Controller flash and controller preference configuration
The Flash Controller option is available as an icon on the Controller Monitor form toolbar and shortcut menu.
This dialog box displays only if the controller is online. There are three options:
1. View/edit preference information (Micro only.)
2. Start flashing controllers
3. View/edit flash files
View/edit preference information (Micro only)
Controller Preference - Direct/Dialup: This option is available for selection of a single controller. When
selected, the Controller Preference Configuration screen displays and the configuration for the controller is
retrieved, allowing you to edit or change an existing setup such as controller address, IP address change, or
phone number changes. Once saved, the controller resets and the new changes take effect.
Note:
If you change preference block data through this application, any Universal Credential Format (UBF) data is erased.
For example, if a M/5-PXN was originally configured as a direct serial controller during installation but is
now a network controller, select the updated controller type and complete the network information. Click
OK. The controller accepts the changes, resets, and then changes the host information for this controller.
The Controller Preference - Direct/Dialup tab lets you change the connection type of the controller and its
Address, Idle Time, and DI res tolerance.
The Controller Preference - Networking tab displays only if the system identified your controller as a
network controller and lets you change the network preferences for the controller.
Chapter 9
Monitor and control
Controller Preference - Credential Format: The Credential Format tab opens to display the custom
credential formats that are currently in the controller. If there are no custom formats, the fields are empty. If a
format in the database does not match what is available in the controller, the window list displays a message
“Unrecognized Format.” To change the credential format:
•
•
•
Magnetic stripe: Select the type of magnetic stripe format from the drop-down list.
Wiegand: Click Assign formats to display a list of available Wiegand credential formats from which
to choose and assign to this controller.
Clear formats in controller: Click to clear all custom credential formats from the controller.
Credentials associated with those formats no longer work.
If you change the credential format, any format that existed in the controller previously is replaced.
Start flashing controllers
This option starts flashing the selected controllers with the latest firmware. A dialog box displays, asking you
to verify your request. The flashing process takes approximately two to three minutes; it varies with the amount
of data that needs to be transmitted to the controller.
Upgrades:
Micro controllers: This application software communicates with controllers flashed with Secure Perfect 4.X
and later firmware. All offline credential and alarm transactions are uploaded to the server computer after the
conversion process and stored in the appropriate history table. Allow all the offline transactions to be processed
before flashing controllers to the FCWnx firmware to minimize data loss. The duration of time to upload is
dependent on the number of transactions stored and the length of time that the server computer does not
communicate with the controllers. This might be a few minutes or several hours.
ACU controllers: There are two ways of getting the FCWnx firmware into the ACU panels following a
conversion from a Diamond II system: 1) Copy the firmware file from the FCWnx CD to the folder where the
DII firmware resides; 2) Use the AcuxUtil.exe utility. The functionality of this utility is described in the ACU
Networked Intelligent Controllers Hardware Installation Manual.
View/edit flash files
Use this option only when it is necessary to selectively flash an older version of firmware on a controller. This
application automatically selects the latest version by default. The flashing process takes approximately two to
333
334
Facility Commander Wnx 7.5
User Manual
three minutes; it varies with the amount of data that needs to be transmitted to the controller. Click OK to begin
the flash. When flashing is complete, the controller resets and requests a database.
•
•
•
•
•
•
•
•
Note:
Micro/5 - PX and Micro/PX - 2000: The form opens with the latest .efl firmware file displayed. Click
the drop-down list to display and select an older firmware file.
Micro/5 - PXN and Micro/PXN - 2000: The form opens with the latest .efl network firmware file
displayed. Click the drop-down list to display and select an older network firmware file.
MicroPXNPlus and MicroPXNPlus2000: The form opens with the latest .efl network firmware file
displayed. Click the drop-down list to display and select an older network firmware file.
DirecDoor: The form opens with the latest .efl network firmware file displayed. Click the drop-down
list to display and select an older network firmware file.
ACUXL and ACURS: The form opens with the latest .s19 network firmware file displayed. Click the
drop-down list to display and select an older network firmware file.
ACUXLPlus: The form opens with the latest .efl network firmware file displayed. Click the dropdown list to display and select an older network firmware file.
Browse: Click to navigate to another media source or directory where firmware files reside.
Override Block Checking: Ignore this check box. This selection is for Customer Support use only.
Secure Perfect Version 4.XX and later Micro firmware is able to communicate with this application host and continue to
send alarm and credential transactions. Upgrading your system can be a seamless operation without loss of data, time
constraints during the controller migration process, or lockdowns during the database upgrade process. However, in
order to take advantage of the new features that are dependant on the firmware, the ultimate goal is to bring all
controllers to current level as soon as possible following the database upgrade.
Chapter 9
Monitor and control
Digital input status
The Digital Input Status form, Monitors and Controls group, provides a snapshot of the current status in the
controllers (active or inactive) and physical state (open or closed) of a digital input (contact). Digital inputs are
physical sensing devices, such as door sensors or motion sensors, used to monitor an electronic contact
connected to a controller. Refer to your controller installation for information on how to connect a digital input
device to the controller.
Once you have set up your digital inputs and alarms, you need to verify the accuracy of your configuration.
Status tab
The Status tab provides the status of the selected digital input according to the information in the controller
database. You can list the digital inputs for all controllers or list the digital inputs per controller.
Figure 140.Status tab
Table 194. Form fields
Element
Select controller
Refresh
Description
• Select All to display the status for all digital inputs on all controllers.
• Select By controller to display the status for all digital inputs on a selected controller. Click the
drop-down arrow to display a list of active controllers.
Click to get an updated status on the digital inputs. A refresh for a dial-up controller causes the host to
dial the controller unless they are already connected. The refresh process may take a few minutes. A
reader and associated DIs are grouped together, by reader number.
Note:
A refresh selected for a controller that is offline or in error is never returned and message is
displayed.
335
336
Facility Commander Wnx 7.5
User Manual
Table 194. Form fields (continued)
Element
Column Headings
Description
Number: Displays the number of the digital input assigned by the system.
Description: Displays the description of the digital input. (A reader and associated DIs are grouped
together, in reader number order.)
Controller: Displays the number of the controller to which this digital input belongs.
State: Displays the state of the digital input as On, Off or Trouble.
• On means that the digital input point is in the Active state as defined on the Digital Input Status
form.
• Off means that the digital input point is Inactive as defined on the Digital Input Status form
• Trouble means that the digital input point has been cut or shorted.
Physical State: Displays the physical state of the digital input point.
• Open means that the contact is open.
• Closed means that the contact is closed.
• Cut means that the line has been cut.
• Short means that the line is shorted.
Date: Displays the date that the status was requested.
Time: Displays the time that the status was requested.
How to
1. Review the guidelines in Table 194 and select the options you require.
Digital output status
The Digital Output Status form, Monitors and Controls group, provides a snapshot of the current digital output
status in the controllers. A digital output represents an external device, such as lights, sirens, and door strikes
that may be connected to the controller.
Status tab
The Status tab displays the status of the selected digital outputs according to the information in the controller’s
database, by reader DO or other DOs, by controller or for all controllers.
Chapter 9
Monitor and control
Figure 141.Status tab
Table 195. Form fields
Element
Description
Select DO Type
• Select Reader to display the DO points available for the readers.
• Select Other to display Aux DOs (the two DO relays available on a 2RP module) and
other DO points. Example DO points include lights, sirens, and door strikes that may
be connected to the controller.
Select Controller
• Select All to display the status for the digital outputs of the type selected in the field
Select DO type found on all controllers.
• Select By Controller to display the status for digital outputs of the type selected in
the field Select DO type found on a selected controller. Click the drop-down list to
display active controllers.
Refresh
Click to get an updated status on the digital outputs. A refresh for a dial-up controller
causes the host to dial the controller unless they are already connected. The refresh
process may take a few minutes.
Note:
Column Descriptions
•
•
•
•
•
•
A refresh selected for a controller that is offline or in error is never returned and
message is displayed.
DO Number: Number of the digital output.
Description: Description of the door/DO in the database.
Controller: Description of the controller on which this digital output is found.
Current State: Displays the state of the digital output.
Date: Displays the date that the status was requested.
Time: Displays the time that the status was requested.
If this is a reader DO, the states are:
• Lock: The door is locked.
• Unlock: The door is unlocked.
• Lock No Access: The door locks and does not allow access.
If this is any other DO, the states are:
• Active: The digital output is in the Active state defined on the Digital Output form.
• Inactive: The digital output is not in the Active state.
337
338
Facility Commander Wnx 7.5
User Manual
How to
1. Review the guidelines in Table 195 and select the options you require.
Graphics Console
Note:
This feature is available if you are licensed for graphics console.
Note:
The Graphics Console features are covered in detail in the Graphics Management Console (GMC) User Manual.
The Graphics Console option, Monitors and Controls group, opens the Graphics Console application that lets
you view the maps of your facility that were created in the Graphics Editor. These maps point out the location
and type of incoming alarms as they occur, such as a door held open alarm. Operators can issue commands and
launch applications, such as locking and unlocking doors.
Graphics Console consists of four applications that allow you to edit, link, and monitor graphic maps. These
applications are:
•
•
•
•
Graphics Preferences
Symbol Editor
Graphics Editor
Graphics Console
Graphics Preferences
The Graphics Preferences option lets you set preferences for a graphics map. You can define the number of
layers that can be used to separate object types and the rate at which links blink to identify a graphics map in
alarm.
Symbol Editor
Note:
This option is available if you are licensed for Graphics Console.
Note:
This option and related features are covered in detail in the Graphics Management Console (GMC) User Manual.
The Symbol Editor option lets you associate object types, such as doors, readers, digital inputs, or controllers
with icons representing properties and conditions. Use the Symbol Editor to create, delete, save, upload, and
download symbol schemes.
Graphics Editor
Note:
This option is available if you are licensed for Graphics Console.
Note:
This option and related features are covered in detail in the Graphics Management Console (GMC) User Manual.
The Graphics Editor option lets you place symbols representing devices such as doors, readers, digital inputs,
or controllers on graphics maps. For example, start with a floor plan and place symbols on the map to indicate
their location, and then link these symbols to a physical device. In addition, you can add text to create labels
and print the graphics maps. The Graphics Editor also lets you import .gif, .jpg, .jpeg, or AutoCAD .dxf files to
be used in creating your graphics maps.
Chapter 9
Monitor and control
Graphics Console
Note:
This option is available if you are licensed for Graphics Console.
This option and related features are covered in detail in the Graphics Console User Manual.
Graphics Console provides a graphical view of the premises and allows an operator to locate alarms or events
as they occur, such as a door held open alarm. Operators can issue commands, such as locking and unlocking
doors.
Manual control form
Note:
Functions associated with a SCIF (ACU only.) workstation cannot be controlled with the Manual Control form.
Exception: (ACU only.) If you are at the SCIF workstation that is hosting the controller, door, DO, alarm, and DI functions
can be controlled.
The Manual Control form, Monitors and Controls group, allows the operator to perform the following,
depending on the operator’s facilities and permissions:
•
•
•
•
•
•
•
•
Manually lock/unlock doors
Turn on/off DO (digital output)
Monitor on/off alarms and alarm groups
Enable/disable DI inputs
Arm/disarm areas and intrusion zones
Change the mode or threat level of a controller
Start/stop a guard tour
Change the mode of a client.
Refer to the individual tab controls for additional information regarding the available functions.
Reader/Digital Output tab
Note:
Functions associated with a SCIF (ACU only.) workstation cannot be controlled with the Manual Control form.
Exception: (ACU only.) If you are at the SCIF workstation that is hosting the controller, functions can be controlled.
Manually lock or unlock doors and turn on or off DO (digital output) points, depending on the current
operator’s facilities and permissions.
Note:
Schedules override manual changes unless Indefinite Unlock has been selected. Controllers always run schedules
defined previously in its database. Therefore, if there was a schedule set to be in effect at the current time, the manual
change would be overridden and the schedule would be enforced.
339
340
Facility Commander Wnx 7.5
User Manual
Figure 142.Reader/Digital Output tab
Table 196. Form fields
Element
Description
Select controller
Note:
A controller must be selected before the system searches and displays results
in the list box.
• All displays all the digital outputs of the type selected in the field Select DO type,
found on all controllers.
• By Controller displays all the digital outputs of the type selected in the field Select
DO type, found on a selected controller. Click the drop-down list to display a list of
controllers.
Select DO type
• If you select Reader, the windowpane displays the DO points available for the
readers.
• If you select Other, the windowpane displays Aux DOs (the two 2 DO relays
available on a 2RP module) and other DO points.
Example: DO points include lights and sirens that may be connected to the
controller.
• If you select Floor, the windowpane displays the DO points available for the floors.
Chapter 9
Monitor and control
Table 196. Form fields (continued)
Element
Description
Columns in Windowpane
Description: Description of the reader/DO in the database.
Controller: Controller on which the reader/DO is located.
On Time: Displays the On Time in the database. The On Time is the number of seconds
this DO remains in the active state when activated.
Door Status: Displays as Open, Closed, Cut, or Short.
Reader/DO Status: Displays Locked or Unlocked if its a reader, and ON or OFF if it is a
DO.
Area: (ACU only.) The secure area associated with the controller.
SCIF Workstation: (ACU only.) If a SCIF area is assigned, the name of the SCIF workstation
displays here.
Controller Type: Displays the type as a Micro or ACU controller.
Set state to:
Note:
The names of the buttons change depending on the DO type (Reader or Other)
selected.
If Reader is selected, click . . .
• Duration Unlock: To unlock the selected door for the time specified in the On Time
column.
• Lock: To immediately lock the selected door.
• Indefinite Unlock: To unlock the selected door. It remains unlocked until you
manually lock it by clicking lock.
• Sched. Can Override: To change the state of a door or DO, if you want a schedule to
override its setting.
Example
Use Sched. Can Override to unlock a door if you want a schedule at a later time to
lock this door. If you don't want the scheduler to lock your door, use the Indefinite
Unlock selection.
• Lock - No Access: To lock down all readers. No transactions are allowed until those
readers are put back to lock or unlock mode. The host tracks Lock - No Access. This
allows the readers to be taken out of the Lock - No Access mode when the next
action is performed, if it is a state other than Lock - No Access.
- For Micro controllers, when a door is unlocked, a valid credential displays as
invalid.
- If a database download is performed after putting the readers into Lock - No
Access state, it reverts to the normal reader state defined by the reader record.
Note:
Lock-No access will be disabled when Other is selected.
If Floor is selected, click . . .
• Secure Floor: Denies access to the selected floor.
• Unsecure Floor: Allows access to the selected floor.
If Other is selected, click . . .
• On For Duration: Activates the selected DO for the time specified in the On Time
column.
• Off: Changes the selected DO to Inactive state.
• On Indefinite: Activates the selected DO, which remains active until you manually
turn it off by clicking Off.
• Sched. Can Override: Use this option to change the state of a DO if you want a
schedule to override its setting.
341
342
Facility Commander Wnx 7.5
User Manual
Table 196. Form fields (continued)
Element
Description
Refresh Status
Click this button to get the most recent Reader/DO status information.
Purpose
This field accepts 255 characters. Enter an explanation for locking/unlocking doors or
activating/deactivating DO points. These comments are written to the operator history
file and display on the Operator History report, Purpose Field.
How to
1. Review the guidelines in Table 196 and complete the fields on this tab.
Alarm/Digital Input tab
Note:
Functions associated with a SCIF (ACU only.) workstation cannot be controlled with the Manual Control form.
EXCEPTION: (ACU only.) If you are at the SCIF workstation that is hosting the controller, functions can be controlled.
Use the Alarm/Digital Input tab to manually monitor alarms and DIs (digital input points) depending on the
current operator’s facilities and permissions.
Note:
There may be schedules in effect that override manually controlled changes if schedule override is selected; otherwise,
the manual control selection is truly indefinite.
Chapter 9
Monitor and control
Figure 143.Alarm/Digital Input tab
Table 197. Form fields
Element
Description
Select type
Select one of the alarm/DI types from the drop-down list:
• Alarms
• (Micro only.) Alarm Groups
• Digital Input - Only digital output types of Digital Input will be displayed.
Note:
Nothing displays in the list box until you choose a controller option.
Select controller
Select a controller option.
• All displays all the selected type of devices in the current operator's facilities for all
controllers.
• By Controller displays all the selected type of devices in the current operator's
facilities for a specific controller.
Columns in Windowpane
Description: Description of the Alarm/DI in the database.
Controller: Controller on which the Alarm/DI is located.
Monitored: Displays ON or OFF.
Status: Displays status of the alarm as Open, Closed, Cut, or Short.
SCIF Workstation: (ACU only.) If a SCIF area is assigned, the name of the SCIF
workstation displays here.
Controller Type: Displays the type as a Micro controller or ACU controller.
Area: (ACU only.) Secure area associated with the controller.
343
344
Facility Commander Wnx 7.5
User Manual
Table 197. Form fields (continued)
Element
Description
Set state to
Note:
The names of the buttons change depending on the DI type (Alarm or Other)
selected.
If an Alarm or Alarm Group is selected, click . . .
• Monitor On: To monitor the selected alarms or alarm groups. Setting Monitor On
displays the alarms on the Alarm Monitor form.
• Monitor Off: To immediately discontinue monitoring the selected alarms or alarm
groups. Setting Monitor Off does not display alarms on the Alarm Monitor form.
• Indefinite: To make the change permanent. This selection does not allow it to be
overridden by a schedule (can be monitor ON or OFF).
• Sched. Can Override: (for Micro controller systems only) To change the state of the
monitoring by a schedule override. For example, use Sched. Can Override to monitor
an alarm until a schedule overrides it. If you don't want the schedule to stop the
monitoring, click Indefinite.
If a DI is selected, click . . .
• Enable: To enable the selected DI on the controller so a state change is reported.
• Disable: To immediately disable the selected DI on the controller so its state
changes are not reported to the host or trip a digital output.
• Indefinite: To Enable or Disable permanently.
• Sched. Can Override: (for Micro controller systems only) Use this option to change
operation state of a DI if you want a schedule to override its setting. For example,
use Sched. Can Override to control operation of the DI until a schedule takes over. If
you don't want a schedule to control activation of a DI, use the On Indefinite
selection.
Refresh
Click this button to get the most recent Reader/DO status information.
Purpose
This field accepts 255 characters. Enter an explanation for monitoring an alarm or
enabling/disabling DI points. These comments are written to the operator history field
and display on the Operator History report, Purpose Field.
How to
1. Review the guidelines in Table 197 and complete the fields on this tab.
Chapter 9
Monitor and control
Areas and Zones tab
The Areas/Zones tab lets you manually control an Area or Intrusion Zone, and take an Area or Zone from one
condition (armed) to another condition (disarmed). Items that display in the navigation pane are determined by
facilities assigned to the current operator
Note:
All SCIF related operations can only be performed on SCIF workstations. SCIF features will be disabled on all other
workstations.
Example
•
•
When armed, readers do not allow access to anyone, alarm points are monitored, and readers ignore
schedules.
When disarmed, readers allow access and alarms are not monitored.
Figure 144.Areas and Zones tab
Table 198. Form fields
Element
Description
Navigation Windowpane
Micro controllers: Displays configured Intrusion Zones, controllers, and their associated
alarms, in a hierarchal structure. Immediately following selection of a Micro controller,
the system searches and displays associated intrusion zone records in the list box.
ACU controllers: Displays configured Areas, controllers, and their associated alarms in a
hierarchical structure. Immediately following selection of a controller, the system
searches and displays associated Area records in the list box.
345
346
Facility Commander Wnx 7.5
User Manual
Table 198. Form fields (continued)
Element
Description
Columns in Windowpane
Description: Description of the elements in this application database.
• Armed: Area/Zone description displays current condition in red font.
• Disarmed: Area/Zone description displays current condition in green font.
State: The current state of the displayed elements.
Refresh
Click to refresh the status of the elements displayed in the windowpane.
Expand
Click to expand a single selected element.
Expand All
Click to expand all levels of the navigation tree.
Collapse All
Click to collapse all levels of the expanded elements in the navigation tree.
Set state to
These buttons are enabled when an Area or Zone description is selected:
Arm: Immediately arms the selected Area or Intrusion Zone.
Disarm: Immediately disarms the Area or Intrusion Zone.
Force Arm: Arms the selected Area even if an alarm is already in an alarm condition.
Purpose
This field accepts 255 characters. When you select an Area or Intrusion record, this box is
enabled. Enter an explanation for arming/disarming. These comments are written to the
operator history file and display in the Purpose Field, on the Operator History report.
How to
1. Review the guidelines in Table 198 and complete the selections on this tab.
Mode/Threat tab
Select all or individual controllers or clients for immediate change of mode, or of threat level access.
Example
The change of mode for controllers is helpful for an immediate “lockdown” or to open all doors immediately.
The change of mode for clients applies to alarm routing and bumping.
When you select this tab, a windowpane displays a list of available online controllers or client groups in your
system, based on facility permissions for the current operator.
Chapter 9
Monitor and control
Figure 145.Mode/Threat tab
Table 199. Form fields
Element
Description
Select Display Type
Controllers: Select to display real time description, current mode, and address of online
controllers.
Clients: Select to display real time current mode for configured Clients.
Set Mode to
From the drop-down list, select one of the available modes to which you want to change.
• The Current Mode status, as displayed in the list, refreshes automatically following a
change of mode (by schedule or manual control).
• Updates for controllers display in the Mode column of the Controller Monitor form.
• Updates for clients display on the Client Monitor form.
Apply Mode
Click Apply Mode to send the command to the controller or client. Available modes
include Normal, Mode 1, Mode 2, and Mode 3. (Modes are created and labeled on the
Mode/Threat Labels tab of the Preferences form.)
347
348
Facility Commander Wnx 7.5
User Manual
Table 199. Form fields (continued)
Element
Description
Set Threat Level Access to
From the drop-down list, select one of the available threat levels.
• The Current Threat Level Access status, as displayed in the list, refreshes
automatically following a change of threat level (by schedule or manual control).
• Updates for controllers display in the Current Threat Level Access column of the
Controller Monitor form.
• Updates for clients display on the Client Monitor form.
Apply Threat Level Access
Click Apply Threat Level Access to send the command to the controller or client.
Available Threat Levels include 0 - Normal, Mode 1, Mode 2, and Mode 3. (Threat Level
Access labels are created and labeled on the Mode/Threat Labels tab of the Preferences
form.)
Purpose
This field accepts 255 characters. Enter the reason for this change of mode. This
comment is written to the operator history file and displays on the Operator History
report.
How to
1. Review the guidelines in Table 199 and complete the selections on this tab.
Chapter 9
Monitor and control
Guard tour tab
Note:
The Guard Tour tab is enabled if you are licensed for guard tour.
The purpose of using the Guard Tour tab is to manually start, pause, resume, or stop a guard tour that is
currently in progress. The upper windowpane displays all guard tours configured in your system to which this
operator has access.
Figure 146.Guard tour tab
Table 200. Form fields
Element
Upper windowpane
Description
• Guard Tour: A list of configured tours descriptions in this application.
• Tour State: This column displays the current state of all guard tours in your system.
Typical states are: 1) Tour Started; 2) Tour Not Started; 3) Tour Paused.
• Time to Complete: This column displays the estimated time assigned for
completion of a tour, based on the clock time that this tour started and maximum
tour time allowed. If a tour is paused and later resumed before expiration of
estimated completion time, the remaining unused tour time is reflected in the Time
to Complete column.
• Client Description: This column displays the client that is hosting the selected tour.
A color indicator displays the current connection status of the client that is hosting
the selected tour.
Green indicates online.
Red indicates offline.
349
350
Facility Commander Wnx 7.5
User Manual
Table 200. Form fields (continued)
Element
Description
Lower Windowpane
• Tour Point: This column displays a list of points associated with the selected guard
tour.
• Point Status: This column displays a 'hit' or 'not hit' real-time status. You do not have
to refresh your window to see the current state of the tour points for the selected
tour.
• Last Hit Time: This column has an entry following a valid 'hit' to this point.
Set tour to
• Start: Verify that the appropriate tour is selected in the upper windowpane. Click to
manually begin a guard tour. The Tour State column indicates 'Tour Started.'
• Stop: Verify that the appropriate tour is selected in the upper windowpane. Click to
prematurely stop a tour in progress. The Tour State column indicates 'Tour Not
Started.' This button is not available if a tour is not in progress.
• Resume: Verify that the appropriate tour is selected in the upper windowpane. Click
to resume a tour that was previously paused. The Tour State column indicates 'Tour
Started.' This button is unavailable if a tour is not in progress. This button is not
available if the time assigned for the selected tour has expired.
• Pause: Verify that the appropriate tour is selected in the upper windowpane. Click to
pause a tour that is currently in progress. The Tour State column indicates 'Tour
Paused.' This button is unavailable if a tour is not in progress.
• Purpose: Specify a reason for stopping or starting this tour. Enter a brief statement
about the operator's actions.
How to
1. Review the guidelines in Table 200 and complete the fields on this tab.
Transaction override
The Transaction Override form, Administration group, opens with a default record already displaying.
Use the Transaction Override form to manually enter an In or Out status for credential transactions that you
want to enter into the selected database. This information can be used by those who create reports to track,
view, and verify employee transactions, pair In and Out transactions, or review total transactions.
Example
This form may be appropriate for tailgaters. Polite employees card in to unlock and exit a door, and then hold
the door for another person exiting the building. The second person may not present their card. If the reader is
an APB or T/A reader, you may want to track pair transactions for selected credentials as a record of those that
do not card when exiting.
Chapter 9
Monitor and control
Override tab
Use the Override tab to set up the credential transaction that you want to enter into history.
Figure 147. Override tab
Table 201. Form fields
Element
Description
Person
Select a person from the drop-down list.
Credential
Select a credential from the drop-down list of credentials currently in the database.
Time
Accept the default or select and enter over the default time.
Note:
The current time and date are displayed by default.
Date
Accept the default date, select and enter over the default date, or click calendar to enter
a date.
Calendar
Click to display the calendar.
Reader Type
Select a reader type.
Reader
Select a reader from the drop-down list of available readers for assignment by the
current operator.
Update Controller
Enable this field if you want to send this transaction to the controller.
Database Selection
Select either the History database or Archive database.
Generate
Click this button to enter the transaction into the database.
351
352
Facility Commander Wnx 7.5
User Manual
How to
1. Review the guidelines in Table 201 and complete the fields on this tab.
What’s next?
Continue with Chapter 10, Reports on page 353.
Chapter 10 Reports
This chapter provides an overview of the reporting capabilities within this
application.
In this chapter:
Overview . . . . . . . . . . . . . . . . . . . . . . . . . . . . . . . . . . . . . . . . . . . . . . . . 354
Designing reports . . . . . . . . . . . . . . . . . . . . . . . . . . . . . . . . . . . . . . . . . 355
Tabs on report forms . . . . . . . . . . . . . . . . . . . . . . . . . . . . . . . . . . . . . . . 356
External Reports . . . . . . . . . . . . . . . . . . . . . . . . . . . . . . . . . . . . . . . . . . 367
Saving/Exporting Reports . . . . . . . . . . . . . . . . . . . . . . . . . . . . . . . . . . . 369
354
Facility Commander Wnx 7.5
User Manual
Overview
FCWnx provides extensive reporting capabilities based on your system configuration.
Note:
All reports are selections on the Reports drop-down menu of the main application toolbar. Reports are filtered so that
supplied information pertains only to the selected facilities of the current operator.
A list of standard reports is provided below. Seven are history reports. In addition, FCWnx has the ability to
access reports created by using a third-party report generator. The following is a brief description of each
report:
1. Person: Provides person information, such as address and department, on all or a subset of persons in
the system.
2. Credential: Provides information in areas you select on all or a subset of credentials in the system.
3. Administration: Generates reports about the administrative areas of the system. Reports cover alarm
instructions, events, event triggers, preferences, operators, permissions, responses, schedules, clients,
e-mail notification, and intrusion zones.
4. Device Configuration: Generates reports about the devices in the system, such as readers, alarms,
cameras, and digital video recorders.
5. Schedules: Lists the schedules and events assigned for each controller.
6. Access: Provides a list of access rights and persons who have access to specific areas; that is, who has
access where.
7. Floor Access: Provides a list of floors defined in the system and the access granted to each one.
8. Area: (ACU only.) Lists the details of secure areas configured in this application.
9. Alarm History: Generates reports on alarm transactions.
10. Credential History: Generates reports on credential transactions.
11. Operator History: Generates reports on operator actions relating to operations on FCWnx forms.
12. Zone History: (Micro only.) Generates reports on intrusion zone transactions.
13. DI History: Generates reports on digital input transactions.
14. Guard Tour History: (Micro only.) Generates sets of guard tour activities containing start points, hits,
invalid points, pauses, resumes, tour end points, and tour time exceeded.
15. Time & Attendance History: (Micro only.) Generates reports on the number of hours employees
were at a facility.
16. Area History: (ACU only.) Generates reports on secure Area transactions and activity.
17. Roll Call: Provides a list of the last access granted to any or all persons in the system; that is, who last
went where based on individual credential activity.
18. External Reports: The External Reports option opens the FCWnx Crystal Reports folder from which
either Reader Where When Report or Who has Access Report can be selected.
Chapter 10
Reports
Designing reports
Template - defined
The Template drop-down list on the report forms displays the name of the currently loaded template, if there is
one. To load, select from the drop-down list of the available templates and load the details to the form. Report
templates are useful when you run a certain report frequently. After you select a report, it can be saved as a
template and revised by loading it from the template combo box.
Report Templates window
With any report form displayed, click Templates. A list box displays a list of available templates. To use, select
the desired template and do one of the following:
Element
Description
Save As
Select an existing template, and then click to save with a new name. A dialog box
displays, enabling you to enter a name for the new template. This option is available only
when a Report form is displaying.
Save
Select a template, and click to save any changes made to the template preferences. An
update message displays.
Remove
Select a template, and then click to delete it from the list. A Delete Template dialog box
displays to confirm your choice and the template is deleted.
Make Default
Select a template, and then click to automatically load this template whenever this form
is opened. A Default Template confirmation message displays.
Close
Click to close this window without taking any action.
New Template dialog
Use the New Template dialog box to create a new template. You are prompted to enter the name of the template
you want to create. Keep in mind that any information currently on the report form is saved under this name.
Preview
The Print Preview Report option on the File menu lets you preview before printing and is available only when
a Report form is displaying. A printer must be added to your FCWnx system in order for this feature to be
available. Following completion of all tabs and options on the Report form, click to preview a copy of your
report.
On the Preview Report screen, the Total: field represents the number of records in the database and not the
number of records that matched your search criteria. The zoom percent value reads the percent of the zoom
currently being viewed.
355
356
Facility Commander Wnx 7.5
User Manual
Print Report
The Print Report option on the File Menu lets you send the current report to a defined printer. This option is
available only when a Report form or report is displaying.
Create default template
Select this option on the File menu to create a default report template. This option is available only when a
report form is displaying.
Note:
If a specific date is part of this template, whenever this report is run, it uses that date; therefore, it is important to update
the calendar criteria as needed.
Set as default template
Use this option on the File menu to select a template to use as the default template. This option is available
only when a Report form is displaying with a loaded template. While the selected Report form is displaying,
select Set As Default Template. A message displays stating the current template is now the default template for
this form. This template is automatically loaded whenever you open this report form. You cannot undo this
election; however, you can later display and assign another report as the default.
Export
This option on the File menu is available only when a Report form is displaying. The Export option lets you
select an export format for your report. There are a variety of formats available including text, Word for
Windows, Lotus, HTML, and Excel. Select an export destination for the report to a disk file, exchange folder,
Lotus Domino, Lotus Domino Mail, or Microsoft Mail (MAPI).
Delete template
Select this option on the File menu to delete the current report template. This option is available only when a
Report form is displaying with a loaded template.
Tabs on report forms
General tab
The General tab displays on several Report forms, but the options vary as noted.
Person, Administration, Device Configuration, and Time and Attendance History reports
This form sets the preferences of the report.
Report Title: Enter a title for this report, of up to 64 characters.
Report Type: Select the type of report you want to run.
Chapter 10
Reports
If this is a Person report, the following options are available:
•
•
•
•
•
•
Access Rights Data provides a description of the access this person has, and if access is granted all
times in all modes.
Area Control Data provides a description of all areas for which this person has arm/disarm or auxiliary
relay control permissions.
Credential Data provides the credential number, PIN, status, issue, and expiration dates for each
credential the person has been assigned.
Location Data provides the address and telephone number for each person.
Standard Data provides the last name, first name, initials, personnel description, department, employee
number, and extended unlock time. This information is also provided on the other report types for
person reports.
User Data provides up to 90 user fields on each person. You can select which ones to include in the
report.
If this is an Administration report, the following options are available:
•
•
•
•
•
•
•
•
•
•
•
•
•
•
•
•
•
•
Alarm Routing and Bumping provides a listing of schedule descriptions, routing clients, time to bump,
bumping clients, routing clients, assigned alarms, and comments.
Archive provides a listing of all the archive files currently in the Database directory.
Client provides a listing of the clients defined on the system, their region, auto shutdown selection, and
whether they have an imaging license.
Credential Format (UBF) provides a listing of custom credential format types, data and parity layouts,
number of facility and credential characters, and comments.
Events provides a listing of events defined in the system.
Event Notifier provides a listing of e-mail alarm notification information defined in the system.
Event Trigger provides a listing of defined event triggers defined in the system, including intrusion
zone events.
Facility provides a listing of all facilities defined on the system.
Floor provides a listing of floor descriptions and their associated floor selection numbers.
Guard Tour provides information on guard tours defined in the system (Micro only.).
Host Preference provides a listing of information from the Preferences form, including database
connection timeout, database retry count, e-mail addresses, e-mails sent, and duress.
Instruction provides a listing of alarm messages defined in the system.
Intrusion Zone provides a listing of intrusion zones defined in the system (Micro only.).
Mode Event Trigger provides a listing of mode event triggers defined in the system.
Operators provides a listing of operators and their permissions defined in the system.
Permission provides a listing of permissions defined in the system.
Response provides a listing of responses defined in the system.
Schedules provides a listing of time and mode schedules defined on the system.
If this is a Device Configuration report, the following options are available:
•
•
Alarm provides a listing of alarms defined on the system and alarm specific information.
Alarm - API Connections provides a list of alarm details defined in the system, received through an
external interface.
357
358
Facility Commander Wnx 7.5
User Manual
•
•
•
•
•
•
•
•
•
•
•
Alarm - Camera provides a list of camera alarm details defined in the system as well as the DVMRs
that own them.
Alarm - DVMR provides a list of DVMR alarms defined in the system.
Alarm Group provides a listing of alarm groups defined on the system and the controller that owns the
groups (Micro only.).
Camera provides a list of cameras and camera details such as camera presets on the system and the
DVRs that own them.
Controller provides a listing of controllers defined on the system and controller-specific information.
Digital Input provides a listing of digital inputs (DI) defined on the system and DI-specific
information.
Digital Output provides a listing of digital outputs (DO) defined on the system and DO-specific
information.
Digital Output Group provides a listing of digital output groups defined on the system and the
controller that owns them.
Digital Video Recorder provides a list of DVRs defined on the system and DVR-specific details.
Elevator provides a listing of elevators defined on the system and elevator-specific information.
Reader provides a listing of readers defined on the system and reader-specific information.
Group Records: Select the field by which you want to group the records. This provides the organization of the
report. The choices in the drop-down list correspond with the selection of Report Type. This option may not be
available on all report types.
Sort Groups: Displays the fields in order of precedence by which the groups are sorted. If this box is empty,
click Add to display a list of available fields. This option may not be available on all report types.
•
•
•
•
Add: Click to select the fields by which you want to sort the groups. This displays the Sort Fields
dialog.
Delete: Select a field and click to remove a field from the Sort Groups list.
Up: Select a field and click to increase the priority of this field, which determines how the groups are
sorted.
Down: Select a field and click to lower the priority of this field, which determines how the groups are
sorted.
Chapter 10
Reports
Fonts tab
The Fonts tab displays in all reports and is used to change the fonts on selected text in a report.
Note:
•
•
•
•
•
Note:
Be careful when selecting font styles and sizes. Some styles may not display as desired when printed and some sizes
may be too large for the page. Use the Print Preview option to check how the font style and size prints on a page.
Title: To change the current font of the report title, click Change to display a list of available fonts,
font styles, and font sizes.
Header Fields: To change the current font of the report headings and/or field descriptions within the
report, click Change to display a list of available fonts, font styles, and font sizes.
Group Fields: To change the current font of the group headings, click Change to display a list of
available fonts, font styles, and font sizes.
Data Fields: To change the current font of the report information, click Change to display a list of
available fonts, font styles, and font sizes.
Page Footer: To change the current font of the report footer, click Change to display a list of available
fonts, font styles, and font sizes. The report footer contains the report title, current system date, and the
page number.
The Header Fields and Group Fields buttons are disabled on some of the reports.
Filters tab
Alarm History report form
Use the Filters tab to select the criteria by which this report is generated.
•
•
•
•
Controller: Select the controller you want to use to generate report information. If you want to use all
controllers, select <ALL>.
Alarm: Select the alarm you want to use to generate report information. If you want to use all alarms,
select <ALL>.
Priority: Select the alarm priority you want to use to generate report information. If you want to use all
alarm priorities, select <ALL>.
Alarm State: Select the alarm state you want to use to generate report information. If you want to use
all alarm states, select <ALL>.
Area History report form
Use the Filters tab to limit the person or credentialholder records printed on this report.
•
•
•
Credential Number: Enter the range of credential numbers you want listed on this report. Leave blank
for all credentials.
Employee Name: Enter the range of employee last names on which you want to generate a report.
Leave blank for all names.
Employee Number: Enter the range of employee numbers on which you want to report. Leave blank
for all numbers.
359
360
Facility Commander Wnx 7.5
User Manual
Area report form
Use the Filters tab to generate an Area report. Use this tab to select criteria by which this report is generated,
allowing you to narrow the selection of information displayed on your report.
•
•
•
Secure Area Description: Enter the range of area descriptions on which you wish to report or leave
both fields blank to generate a report for all areas.
From: Select an area description from the drop-down list as the start of the range of areas on which to
base this report.
To: Select an Area description from the drop-down list as the end of the range of areas on which to
base this report.
Credential report form
Use the Filters tab to generate a Credential report. Use this tab to select the criteria by which this report is
generated.
•
•
Credential Number: Select the range of credential numbers you want to display on the report. If you
want to list all credentials, leave these fields blank.
Credential: To provide additional filtering, you can also select to list only those credentials assigned a
specific status.
Credential History report form
Use the Filters tab to select the criteria by which this report is generated.
•
•
•
Credential Number: Select the range of credential numbers you want to display on the report. If you
want to list all credentials, leave these fields blank.
Employee Name: Select the range of person last names you want to display on the report. If you want
to list all persons, leave these fields blank.
Employee Number: Select the range of employee numbers you want to display on the report. If you
want to list all numbers, leave these fields blank.
Device Configuration report form
Use the Filters tab to generate a Device Configuration report. Filter or select specific information you want to
display on the report.
•
Note:
Device: From the drop-down list, select a device that you want to use to generate report information. If
you want to use all, select <ALL>.
The following exception applies:
•
If a Camera or Digital Video Recorder was selected as Report type on the General tab, the Device drop-down list fills
with DVRs only.
Chapter 10
Reports
DI History report form
Use the Filters tab to select or limit the criteria by which this report is generated.
•
•
•
•
•
DI State: Select the state of this DI as Set, Reset, Open, or Short. If you want to use all DI states, select
<ALL>.
Controller: Select the controller you want to use to generate report information. If you want to use all
controllers, select <ALL>.
DI Type: Select the DI type as Alarm, Elevator, Guard Tour, Intrusion, Output or Inactive. If you want
to use all DI types, select <ALL>.
DI Description: Enter the range of device descriptions on which you want to report. Leave blank for
all descriptions.
Controller Description: Enter the range of controller descriptions on which you want to report. Leave
blank for all descriptions.
Operator History report form
Use the Filters tab to select the criteria by which this report is generated.
•
•
•
Activity Type: Enable the activity types on which you want to run the report.
Login Name: Select the operator you want to use to generate report information. If you want to use all
operators, select <ALL>.
Form Name: Select the forms you want to use to generate report information. If you want to use all
forms, select <ALL>.
Person report form
Use the Filters tab to generate a Person report. Use this tab to select the criteria by which this report is
generated, allowing you to narrow the selection of information displayed on your report.
•
•
•
Employee Last Name: Select the range of person last names you want to display on the report. If you
want to list all persons, leave these fields blank.
Department: To provide additional filtering, you can select to run a report on only those persons in a
selected department.
Personnel Type: To provide additional filtering, you can also select to list only those persons assigned
a selected personnel type.
Schedule report form
Use the Filters tab to generate a Schedule report. Filter or select specific information you want to display on the
report.
•
Controller: From the drop-down list, select the controller you want to use to generate report
information. If you want to use all controllers, select <ALL>.
361
362
Facility Commander Wnx 7.5
User Manual
Time and Attendance History report form
Use the Filters tab to select the criteria by which this report is generated.
•
•
•
•
Employee Last Name: Select the range of person last names you want to display on the report. If you
want to list all persons, leave these fields blank.
Department: To provide additional filtering, you can select to run a report on only those persons in a
selected department.
Personnel Type: To provide additional filtering, you can also select to list only those persons assigned
a selected personnel type.
Round By: Select the criteria by which you want the time of the Time and Attendance transaction
rounded by: Hour, Half Hour (30-minute increments), Quarter Hour (15-minute increments) or
Minute.
An error message displays if:
•
•
•
There is not a matching number of In transactions and Out transactions within a specified time period.
There are two In transactions without an Out between them.
There are two Out transactions without an In between them.
Date Range tab
Roll Call, Alarm History, Credential History, Zone History, DI History, or Operator History
reports
Use the Date Range tab to select a date and time range on which to base this report.
•
•
•
•
•
•
Daily time range: Reports transactions that occurred between the start and stop time each day in the
date range. For example, you select a start time of 8:00 a.m., a stop time of 5:00 p.m., a start day of
April 1 and a stop day of April 5. You receive a report of credential transactions occurring between
8:00 a.m. through 5:00 p.m. each day of the day range.
Continuous time span: Continuously reports on transactions that occurred between the start time on
the start day to the stop time on the stop day. For example, you select a start time of 8:00 a.m., a stop
time of 5:00 p.m., a start day of April 1 and a stop day of April 5. You receive a report of alarm
transactions occurring between 8:00 a.m. on April 1 through 5:00 p.m. on April 5.
Start Date: Select the start date range by clicking the desired day on the calendar. To move ahead or
back by a month, click the arrows on either side of the name of the month. To move ahead or back by a
year, click the arrows on either side of the year.
Start Time: Accept the default start time as displayed or enter a start time.
Stop Date: Enter an end date range by clicking the desired day on the calendar. To move ahead or back
by a month, click the arrows on either side of the name of the month. To move ahead or back by a year,
click the arrows on either side of the year.
Stop Time: Accept the default stop time as displayed or enter a stop time.
Chapter 10
Reports
Database tab
Alarm History, Credential History, Zone History, DI History, or Operator History reports
Use the Database tab to select the history database to use for this report. The file name displayed on the tab is
the currently selected Archive database.
•
•
Select Archive Database: Click to select the archive history database.
Use default: Click to use the current history database.
Additional Filters tab
Person report
The Additional Filters tab displays only if you have selected User Data in the field Report Type on the General
tab of the Person report. Use this tab to add user fields as an additional filter for the report.
•
•
•
•
•
User Fields: This window lists all the user fields, the user field value you want to use as a filter, and
whether the user field should print. (You can print the user field on the report by selecting the field
Print selected user field or clear this field so the user field does not print.)
Modify Value: To change the value of a user field, select the user field you want and enter a new value
in this field.
User fields printed on report: If this field is enabled, then the currently selected user field prints on
the report.
Clear All/Set All: Click Clear All so that none of the User Fields are set to print. Click Set All to set
all of the User Fields to print.
Print selected user field: Enable this field to set the selected User Field to print or disable this field so
that the selected User Field does not print.
Credential History report form
Use the Additional Filters tab to select additional, specific criteria by which this report is generated.
•
•
•
•
Controller: Select the controller you want to use to generate report information. If you want to use all
controllers, select <ALL>.
Reader: Select the reader you want to use to generate report information. If you want to use all
readers, select <ALL>.
Department: Select the department you want to use to generate report information. If you want to use
all departments, select <ALL>.
Activity: Select the credential activity you want to use to filter report information, such as Duress
Invalid, Duress Valid, Duress Valid No Passage, Duress Valid Open, Guard Tour Activity, Invalid,
Invalid APB In, Invalid APB Out, Invalid Floor, Invalid PIN, Invalid T&A In, Invalid T&A Out,
363
364
Facility Commander Wnx 7.5
User Manual
•
•
Invalid Timed APB, Lost, Max Invalid PIN, Overdue, Override, Unknown, Valid, Valid No Passage,
and Valid Open. If you want to use all activities, select <ALL>.
Logical Reader Type: Select the logical reader type that you want to use to limit the report, such as
APB In, APB In or Out, APB Out, Elevator, In Required, Normal, T&A In, T&A In and Out, T&A In
or Out, or T&A Out. If you want to use all the logical reader types, select <ALL>.
Floor Description: Select the range of floor descriptions you want to display on the report. If you want
to list all floor descriptions, leave these fields blank.
Area and Zone History report
Use the Additional Filters tab to select additional, specific source criteria by which this report is generated.
•
•
•
•
Activity Type: Select the type of activity to use in generating this report. If you want to use all
intrusions zone activity type messages, select <ALL>.
Location: Select the source of the zone activity as a Credential, Digital Input, Manual, Controller, or
<ALL>.
Device Description: Enter the range of device descriptions on which you want to report. Leave blank
for all descriptions.
Controller Description: Enter the range of controller descriptions you want to use to generate report
information. If you want to use all controllers, select <ALL>.
Expiration Date Filter tab
Credential report
Use the Expiration Date Filter tab to generate a report based on the expiration date of the credentials.
•
•
•
•
Do not filter credentials by expiration date: Select this field if you do not want to use the expiration
date as a method of filtering the report information. This is equivalent to running a report on
credentials for all expiration dates.
Filter credentials using this expiration date range: Select this field if you do want to use the
expiration date as a method of filtering the report information. If this is selected, you must select a
starting and ending date.
Starting date: Click the start date you want for the starting range of expiration dates.
Ending date: Click the ending date you want for the ending range of expiration dates.
Chapter 10
Reports
Return Date Filter tab
Credential report
Use the Return Date Filter tab to generate a report based on the return date of the credentials.
•
•
•
•
Do not filter credentials by return date: Select this field if you do not want to use the return date as a
method of filtering the report information. This is equivalent to running a report on credentials for all
return dates.
Filter credentials using this return date range: Select this field if you do want to use the return date
as a method of filtering the report information. If this is selected, you must select a starting and ending
date.
Starting date: Click the start date you want for the starting range of credential return dates.
Ending date: Click the ending date you want for the ending range of credential return dates.
365
366
Facility Commander Wnx 7.5
User Manual
Guard Tour tab
Guard Tour History report
Click Edit to display the Guard Tour Assignment Dialog Box, enabling you to assign guard tours for which
this report generates. The assigned guard tours display in the open window pane of this tab.
Readers tab
Roll Call report
Use the Readers tab to select specific readers that form the basis of information for this report.
This windowpane displays the list of readers that currently apply to this report. If there are no readers listed,
click Edit to display a Reader Assignment dialog box, allowing you to select and add readers.
Access report
Note:
The Readers tab is enabled for Micro controller systems only.
Use the Readers tab to select specific readers that form the basis of information for this report.
This windowpane displays the list of readers that currently apply to this report. If there are no readers listed,
click Edit to display a Reader Assignment dialog box, allowing you to select and add readers.
Areas tab
Access report
Note:
The Areas tab is available for ACU controller systems only.
Use the Areas tab to select specific areas that form the basis of information for this report.
This windowpane displays the list of areas that currently apply to this report. If there are no areas listed, click
Edit to display an Area Assignment dialog box, allowing you to select and add areas.
Chapter 10
Reports
External Reports
The External Reports option opens the FCWNX Crystal Reports folder, from which either the Reader Where
When Report or the Who Has Access Report can be selected.
Reader Where When Report
The Reader Where When report contains information on selected readers and their associated access rights and
time schedules.
To generate the Reader Where When report:
1. From the Reports menu, select External.
2. From the Open dialog box, double click on the FCWnx Crystal Reports folder to open it.
3. Select the Reader Where When report file, and then click Open. The Enter Values window opens.
Note:
If the Cancel button is clicked in the Enter Values window of either the Reader Where When Report or Who Has
Access Report, then a message titled "print error" will display stating: "Error in file
\\<ServerName>\Externals\FCWnx Crystal Reports\<Selected Report name>: Request cancelled by user."
Click the "OK" button to close this message.
4. Select the readers you would like to include in the report, and then click OK.
5. The Preview Report window opens showing each selected reader and its associated time schedule and
access rights.
Who Has Access Report
The Who Has Access Report contains information for the following:
•
•
•
Selected Readers, Exception Areas, Person type, Department when grouped by Access right.
Selected Access rights, Exception Areas, Person type and Department when grouped by Reader.
(ACU only.) Selected Access rights, Readers, Person Type and Department when grouped by Area
Exception.
Note:
The Group by Area Exception selection is only for ACU controller systems. The area exception count is listed in
the statistics for ACU. For micro it is listed as '0.'
To generate the Who Has Access report:
1. From the Reports menu, select External.
2. From the Open dialog box, double click on the FCWnx Crystal Reports folder to open it.
3. Select the Who Has Access Report file, and then click Open. The Enter Values window opens.
4. Select the number 1 from the Group By drop-down list, and then click OK. The Enter Values window
opens.
5. In the Group By drop-down list, select either Access Right, Reader, or Area Exception (ACU only.).
6. Select the values you would like to include in the report, and then click OK.
367
368
Facility Commander Wnx 7.5
User Manual
The Preview Report window opens showing each selected reader and its associated time schedule and access
rights.
Chapter 10
Reports
Saving/Exporting Reports
Reports can be saved/exported in a variety of formats including Crystal Reports (RPT) and Adobe Acrobat
(PDF).
To save/export a report:
1. From the Preview Report window, select the envelope icon with a downward pointing arrow from the
menu bar at the top of the screen. The Export dialog box opens.
2. Select a format and destination for this report, and then click OK. The Save As dialog box opens.
3. Select a location to save the report, and then click Save.
369
370
Facility Commander Wnx 7.5
User Manual
Appendix A Diagnostics and troubleshooting
This appendix provides information for troubleshooting your system and
contacting Customer Support.
In this appendix:
Overview . . . . . . . . . . . . . . . . . . . . . . . . . . . . . . . . . . . . . . . . . . . . . . . . 372
Auto Update . . . . . . . . . . . . . . . . . . . . . . . . . . . . . . . . . . . . . . . . . . . . . 372
Diagnostics overview . . . . . . . . . . . . . . . . . . . . . . . . . . . . . . . . . . . . . . 374
Logfiles . . . . . . . . . . . . . . . . . . . . . . . . . . . . . . . . . . . . . . . . . . . . . . . . . 375
Diagnostic settings . . . . . . . . . . . . . . . . . . . . . . . . . . . . . . . . . . . . . . . . 376
When to enable debug messages for a diagnostic object . . . . . . . . . . . 378
Diagnostic Viewer program . . . . . . . . . . . . . . . . . . . . . . . . . . . . . . . . . 380
Help system . . . . . . . . . . . . . . . . . . . . . . . . . . . . . . . . . . . . . . . . . . . . . . 384
Questions and answers . . . . . . . . . . . . . . . . . . . . . . . . . . . . . . . . . . . . . 385
Customer Support . . . . . . . . . . . . . . . . . . . . . . . . . . . . . . . . . . . . . . . . . 400
372
Facility Commander Wnx 7.5
User Manual
Overview
While this application was created to be as user-friendly as possible, this section is created to assist you with
answers to frequently asked questions, troubleshooting, and settings to assist you in diagnosing problems.
Auto Update
The Auto Update feature provides a method of automatically notifying and installing the latest FCWnx Quick
Fixes and service packs on your FCWnx computers. This feature must be coordinated with your IT Department
as there may be certain company procedures, restrictions, or security policies that must be followed.
Items needed
To publish an update, three things are needed:
1. FCWnx patch/update install file.
2. FCWnx readMe file that goes with the installation (optional).
3. The FCWnx.ini file that is the update file for WiseUpdate. The update file is a text file that needs to be
manually created with the name FCWnx.ini. See the next section for instructions on creating the file.
Creating the FCWnx.ini file
Use the following format:
[WiseUpdate]
Version=7.5.1
Size=1095391
Install=http://www.myserver.com/updates/FCWnx751.exe
ReadMe=http://www.myserver.com/updates/ReadMe.txt
Where Version is the version of installation that is available on the server, Size is the size of the installation in
bytes, Install is the URL to the installation of the patch/upgrade, and ReadMe is the URL to the installation’s
ReadMe file. If you don’t have a ReadMe file, the ReadMe line is omitted from this file.
Placing the files
1. With the help of your IT department, determine which network computer on which you will place the
installation file, ReadMe file, and FCWnx.ini file. While we recommend that you place all three files
in the same place on the same server, you can place the installation file and ReadMe at any location on
the internet or intranet, as long as their URLs are currently recorded in the FCWnx.ini update file.
2. Copy the installation file, ReadMe file, and FCWnx.ini file to the computers identified in the previous
step.
Setting up Auto Update in FCWnx
Use the Auto Update form in the Administration group to configure your FCWnx network computer for
automatic notification and installation of the latest FCWnx Quick Fixes and service packs.
Appendix A
Diagnostics and troubleshooting
Figure 148.Auto update
Table 202. Form fields
Element
Description
Enable Auto Update
Select this check box to enable the Check for Update item of the File menu.
Settings
HTTP Server Path: This is the server to which you need to connect in order to search for
available updates. This field may look something like the following:
http://gesecurity.com
HTTP Server User Name: Enter the User Name used to reach the HTTP server, if required.
HTTP Server Password: Enter the password used to reach the HTTP server, if required.
Repeat HTTP Server Password: Enter the password used to reach the HTTP server, a
second time as a security check.
Note:
Product Update Available
This application supports Basic Authentication only and not Integrated
Windows Authentication.
Notify Clients Immediately that Product Update is Available: Select this check box to
automatically notify client computers that a product update is available.
Update Message Text: In this box, enter a message that displays as a popup, notifying
client computers that a product update is available.
OK
Click this button when configuration is complete. The entries on this window are saved.
Help
Click to access the Help system.
373
374
Facility Commander Wnx 7.5
User Manual
Table 202. Form fields (continued)
Element
Description
Cancel
Click this button to terminate and close this window. The entries are not saved.
How to
1. Review the guidelines in Table 202 and complete the fields on this tab.
Check for update
Check for update is enabled on the File drop-down menu of the main application toolbar when the Enable
Auto Update option is selected and completed on the Auto Update Configuration form, Administration group.
Each time you log in, the FCWnx system checks for updates. Also, at any time, you may select this item to
begin a search of the configured Web site for updates to the FCWnx application. This process searches for new
upgrades, compares the version, and if the patch or update needs to be applied, a dialog box displays a
message.
•
•
•
•
Click OK to close the dialog box and begin the update process (or click Cancel to close the dialog box
and process the upgrade at another time).
If you click OK to begin the update, a Wise Update Wizard begins the update process. A series of
windows displays. Follow the prompts. When the update is completed, the Wise Update Wizard
prompts you to reboot.
If the Web site cannot be reached, a message informs you that communication failed. Recheck your
update configuration settings and try again.
If no new updates are available for your system, a message displays informing you that your system is
up to date.
Diagnostics overview
This application, accessed in the Diagnostics group, provides an extensive and convenient diagnostic utility to
turn the monitoring of the FCWnx system components on and off. To display debug messages in the
Diagnostics Log within this application, the diagnostics for that component you want to monitor must be
turned on. Each client computer has a set of diagnostic objects that represent what can be monitored on that
computer. Specific objects are particularly helpful to Engineering when diagnosing an issue.
For each client, this application creates a default logfile (others can be created) for each day of the week such
as FCWnxFriday.spl. This file is overwritten each week, thus creating a new log for that day. During normal
operation of this application, informational as well as debug messages are written to the daily log file.
Note:
Under abnormal conditions, the log file may also contain warning and/or fatal messages indicating failure conditions.
Verify with Customer Support. In order to diagnose a problem, you may be requested to save a log file outside of the log
folder, so that the file is not overwritten. That file can be renamed specific to a date or issue.
Additionally, for each client, there is a log located in the WINNT\system32 folder. Under normal system
operation, this log is empty. It is used to log messages if the server and the database cannot be reached.
Diagnostic Viewer is a separate program within this application. To access Diagnostic Viewer, select
Diagnostic Viewer from the Diagnostics group. It operates in “real time.” That is, every time this application
Appendix A
Diagnostics and troubleshooting
writes an entry to the log file, Diagnostic Viewer automatically displays the latest message. By default,
Diagnostic Viewer displays only the latest 1000 messages. The number of displayed messages can be changed
on the Diagnostic Viewer, Preferences form.
All log files should be saved in the Logs folder of this application; it is easier to locate for backups and
upgrades. It is a shared folder, which means other clients can gain access to the log files.
Logfiles
The LogFile form in the Diagnostics group, lets you select a computer in your network for this application, set
up a new logfile (establish an identity for the file), and designate a path and directory in which to place your
logfile. All log files should be saved in the Logs folder; it is easier to locate for backups and upgrades. It is a
shared folder, which means other clients can gain access to the log files.
Each client computer has a set of diagnostic objects that represent what can be monitored on that machine.
Diagnostic objects can be controlled remotely (turned on or off). All diagnostic objects can write messages to a
common default logfile or any diagnostic object can write to a separate log file created and defined by the user.
Before any logfile can be deleted from this application, you must re-assign diagnostic objects to another
logfile.
LogFile tab
On the LogFile tab, click Add to create a new logfile record or Search to display a list box of previously
created LogFiles.
Figure 149.Logfile tab
375
376
Facility Commander Wnx 7.5
User Manual
Table 203. Form fields
Element
Description
Computer
This field is unavailable when creating a new record. The name of your computer displays in this field.
LogFile
Name or identify your file.
• For FCWnx logfile names, enter an .spl extension.
Example
COM1log.spl
• For GMC/VMC logfile names, enter .log extension.
Example
GMC.log
Path
Designate the path and directory in which to place your LogFile.
Browse
Click to display a Browse for Folder window, allowing you to navigate to the directory in which to place
your LogFile.
How to
1. Review Table 203 and complete the fields on this tab.
2. Click Save.
3. Open the Diagnostic Setting form from the Diagnostics group. You want to select this LogFile name
from the list of files displayed, and assign components for monitoring.
4. Click Save before you exit this tab.
Diagnostic settings
Use the Diagnostic Setting form, Diagnostics group, to select items to monitor using the Diagnostic Viewer
program.
Note:
Use the Diagnostic Setting form with care. The more items you turn on for monitoring, the more your system
performance is affected. This is even more important when monitoring port, communications, or controller items.
Description: Select a diagnostic object name from the list box in the right windowpane. The selected
component displays in the Description field as a read-only entry.
Settings tab
Use the Settings tab to enable the diagnostic settings.
Appendix A
Diagnostics and troubleshooting
Figure 150.Settings tab
Table 204. Form fields
Element
Description
Enable debug messages
Select this box to enable monitoring for the selected diagnostic object.
Logfiles
Default and newly created logfile names display in the Logfiles windowpane.
Select a file name from the list of files displayed, to which you are assigning this
component for monitoring. By assigning a component object to write to a particular
logfile, you are removing that object from the list of components that write to the default
logfile.
How to
1. Review the guidelines in Table 204 and complete the fields on this tab.
2. Click Save to save your new settings before you exit this tab.
3. When you open the Diagnostic Viewer, the activities of your selected component display in the logfile
to which it is assigned. (Those items with the COM # and Line # as part of the component name have
the highest effect on system performance and hard drive usage. Although you may want to monitor
several objects at the same time, this results in a large number of messages and compromises system
performance.)
Note:
After viewing, return to the Diagnostic Setting form and disable the debug messages.
377
378
Facility Commander Wnx 7.5
User Manual
When to enable debug messages for a diagnostic object
Table 205. Diagnostic objects and when to monitor
Diagnostic object name
Reasons to monitor debug messages
FCWnx objects
Diagnostic Manager
If the FCWnx Diagnostic Service does not start.
Client
If communication problems exist between the FCWnx server and it's clients.
Video Management
If the FCWnx server has a video problem on the server side (database, application, or device
errors).
Video GUI
If an FCWnx application problem exists on the user interface (client side).
SQL
If data returned in an FCWnx application form does not seem accurate. This object monitors
and captures SQL statements being generated from the server and client.
General
To monitor general, nonspecific form activity.
CCTV
If problems exist during CCTV serial communication. For example, alarms can be configured
to trigger predetermined cameras on the CCTV Matrix Switcher. If an alarm does not fire at
a particular camera, select this object to monitor debug messages in order to determine
where the failure resides.
Alarms
If problems exist during alarm activity.
Port Queue
To monitor all network, serial, or dialup data port communication. This object captures data
from the server to the controllers. This is a high-level diagnostic object and an Engineer
normally translates messages. This data is extremely useful for troubleshooting general
data problems between the server and controllers.
Manager Service
To monitor FCWnx Manager Service on starting, stopping, connecting to other servers, and
regular processing.
Flash
If problems exist when using eFlash to flash Micro controllers using the Controller Monitor
form.
System Service
To monitor FCWnx System Service on starting, stopping, connecting to other servers, and
regular processing.
TAPI Loader
To monitor TAPI dial-up connections between the server and the modem being used for
communication with controllers.
TAPI Device
To monitor TAPI dial-up connections between the server and the modem being used for
communication with controllers.
Modem Port Queue
To monitor dial-up modem connections. This object captures data being sent by a server to
a controller using dial-up communication.
Machine
To monitor computer-to-computer communication.
API
If problems exists during API activity.
DI
If problems exists during DI activity.
DBTrigger
If problems exist with database triggers. The triggers are responsible for downloading
badge, access rights, and related access data to the controller.
Appendix A
Diagnostics and troubleshooting
Table 205. Diagnostic objects and when to monitor (continued)
Diagnostic object name
Reasons to monitor debug messages
Guard Tour
If problems exist during guard tour activities.
DO
If problems exist during DO activity.
Graphics Management
To monitor FCWnx Graphics Management on starting, stopping, connecting to other
servers, and regular processing.
Web Service
To monitor FCWnx WebService on starting, stopping, connecting to other servers, and
regular processing.
GMC objects
GMC Login Transactions
If GMC fails to launch correctly. Monitor to provide tracing of the attempt by the GMC
software to connect to the FCWnx application.
GMC Alarm Events
If alarm status is not updating on graphics maps. Monitor to display what alarm data is
being received by GMC.
GMC Digital Input Events
If digital input device status is not updating on graphics maps. Monitor to display what
digital input event data is being received by GMC.
GMC Digital Output Events
If digital output device status is not updating on graphics maps. Monitor to display what
digital output event data is being received by GMC.
GMC Intrusion Zone Events
If intrusion zone status is not updating on graphics maps. Monitor to display what zone
event data is being received by GMC.
GMC Area Events
If secure area status is not updating on graphics maps. Monitor to display what area event
data is being received by GMC.
GMC General Events
If GMC application windows are not launching when requested (for example, attempting to
open graphics monitor, graphics symbol editor, graphics map editor, or graphics
preferences fails). Monitor to display what application requests GMC is receiving from the
FCWnx application.
GMC Action Commands
If commands issued from graphics maps are not being executed. Monitor to display what
commands GMC is trying to activate through the SPAPI.
GMC Database Checking
If GMC is notifying the operator of errors when attempting to access the database but
FCWnx does not inform the operator that there are problems with the database. Monitor to
display any attempts by GMC to inform the FCWnx application of difficulties accessing the
database.
VMC objects
VMC Platform
This is for internal use only.
VMC Viewer
If the Video Viewer does not display, displays improperly, or items are missing.
VMC Client Media
If there is a problem playing live or recorded video from a camera and the problem exists on
the user interface (client side).
VMC Server Media
If there is a problem playing live or recorded video from a camera and the problem exists on
the server side (database, application, or device errors).
VMC Clip Recording
If there is a problem with recording or playing back video clips.
379
380
Facility Commander Wnx 7.5
User Manual
Table 205. Diagnostic objects and when to monitor (continued)
Diagnostic object name
Reasons to monitor debug messages
VMC Drivers Client
If there is a user interface (client side) problem that seems to be related to a particular
driver. For example, everything for a GE video recorder works well but there is no video for a
camera on a Pelco recorder.
VMC Drivers Server
If there is a problem on the server that seems to be related to a particular driver. For
example, everything for a GE video recorder works well but there is no video for a camera
on a Pelco recorder.
Diagnostic Viewer program
When you select Diagnostic Viewer in the Diagnostics group, the Diagnostic Viewer program opens. The
activities of your selected component are displayed. (Those items with the COM # and Line # as part of the
component name have the highest effect on system performance and hard drive usage.)
The Diagnostic Viewer application is a diagnostic tool used in conjunction with this application. Diagnostic
Viewer lets you view the contents of the application diagnostic log files, apply filters to limit the information
displayed, and search for a specific log entry. Each day, this application writes messages to a diagnostic log
file.
There is a default log file created for each day of the week, such as FCWnxFriday.spl. This file is overwritten
each week, thus creating a new log for that day.
During normal operation, informational as well as debug messages are written to the daily log file. Under
abnormal conditions, the log file may also contain warning and/or fatal messages indicating failure conditions.
Diagnostic Viewer operates in “real-time.” That is, every time this application writes an entry to the log file,
Diagnostic Viewer automatically displays the latest message. By default, Diagnostic Viewer displays only the
latest 1000 messages. The number displayed can be changed on the Preferences form. Select this option to set
options for the program, such as automatically opening the current day’s default log file.
Appendix A
Diagnostics and troubleshooting
Figure 151.Diagnostic Viewer
Menus
Options described in the following menu tables also display in the Diagnostic Viewer toolbar.
Table 206. File menu
Open Logs
Note:
Select this option to open an FCWnx application log file.
(.spl extension).
This opens a LogFile Dialog window and allows the user to select the
file to open. Select the Filename and click OK. The logfile displays in
the Diagnostic Viewer window. This option is also found on the
Diagnostic Viewer toolbar.
Open Other
Note:
This selection is for GMC/VMC logfiles (.log extension).
Select this option to open an application log file associated with GMC
or VMC diagnostics. This opens a Launch External Logfiles window.
Select a file with a .log extension and click Open. The file opens in
Notepad for your review.
Close
Select to close the current log file.
Delete Contents
Select this option to delete the contents of the current log file.
WARNING:
Deleting the contents of a log file causes all
messages in the log to be discarded. Once discarded,
these messages no longer exist.
381
382
Facility Commander Wnx 7.5
User Manual
Table 206. File menu (continued)
Reload
Select this option to reload the current log file into the viewer. This
command is most useful after changing the filter settings.
Properties
Select this option to view the current log file's properties, such as the
full path name of the log file, the number of entries that it contains
and the number of those entries displayed.
Preferences
Refer to Preferences on page 383.
Exit
Select to close the Diagnostic Viewer application.
Table 207. Edit menu
Copy
Select this option to copy the contents of the selected rows into the
Windows Clipboard.
Table 208. View menu
Toolbar
Select to display the toolbar menu. This is a toggle selection.
Status Bar
Select to display the status bar. This is a toggle selection.
Auto Scroll
Select this option to automatically scroll to the last of the incoming
messages at the bottom of the viewer. As new messages come in
while you have Diagnostic Viewer open, the viewer scrolls so that the
most recent message always displays in the viewer. If the scroll
option is disabled, new entries do not scroll the currently-displayed
entries off the screen.
Pause
Select this option to stop the scrolling of incoming messages in the
viewer. When paused, select this option again to resume scrolling.
Find
Select this option to search for specific text in the log file.
Table 209. Filter menu
Info
Select this option to enable/disable the display of informational
messages. Informational messages indicate normal system
operation. They are always written to the log.
On the main Filter drop-down menu, this item is preceded with an
icon and if it has been enabled, the messages are displayed.
This application writes four types of log messages: INFORMATIONAL,
DEBUG, WARNING AND FATAL.
Appendix A
Diagnostics and troubleshooting
Table 209. Filter menu
Debug
Select this option to enable/disable the display of DEBUG messages.
Debug messages are optional messages, which should be turned on
only when diagnosing system operation. Use the Diagnostics Settings
form in FCWnx to turn them on or off.
WARNING:
Be careful when enabling this option as this
adversely affects system performance and use
additional hard drive space.
On the main Filter drop-down menu, the Debug option is preceded
with an icon, and if it has been enabled, these messages are
displayed.
This application writes four types of log messages: INFORMATIONAL,
DEBUG, WARNING AND FATAL.
Warning
Select this option to enable/disable the display of WARNING
messages. Warning messages indicate abnormal system operation.
Though the system is behaving abnormally, the behavior is not fatal
to system operation.
On the Filter menu, the Warning option is preceded with an icon, and
if it has been enabled, these messages are displayed.
This application writes four types of log messages: INFORMATIONAL,
DEBUG, WARNING AND FATAL.
Fatal
Select this option to enable/disable the display of FATAL messages.
Fatal messages indicate serious, abnormal system behavior. These
messages are always written to the log.
On the main Filter drop-down menu, the Fatal option is preceded with
an icon, and if it has been enabled, these messages are displayed.
This option is also found on the Diagnostic Viewer toolbar:
This application writes four types of log messages: INFORMATIONAL,
DEBUG, WARNING AND FATAL.
Table 210. Help menu
Help Topics
Select to display Help topics.
About Diagnostic Viewer
Select to display a dialog box describing version information.
Preferences
Use the Preferences form accessed on the File menu of the Diagnostic Viewer application toolbar to set options
for the Diagnostic Viewer program.
383
384
Facility Commander Wnx 7.5
User Manual
Figure 152.Diagnostic Viewer Preferences
Table 211. Form fields
Element
Description
Open today's log file when program starts
Enable this option if you would like the current day's log file to
automatically load when the Diagnostic Viewer program is started.
Prompt before deleting contents
Enable this option if you would like a prompt to appear before
deleting the contents of the current log file.
Use small toolbar
Enable this option to decrease the size of the toolbar.
Max entry limit
Enter the number of entries you would like to view. You may display
up to 50,000 entries from the beginning of the file or the last 50,000
entries from the end of the file, based on your selection of one of the
radio buttons below your entry.
This option is useful if a log file is extremely large.
Read from beginning of file
Enable this option to open the file with the FIRST or oldest entry in the
viewer.
Read form end of file
Enable this option to open the file with the LAST or most recent entry
in the viewer.
The current line number, number of entries displayed, and total number of entries in the log are displayed in the
status line of the Diagnostic Viewer screen.
Help system
Help
Selection of this option starts the FCWnx Help system. Additionally, with an application form displaying, you
can click the ? icon, and then drag the ? over any area and click again. A window opens with information
pertaining to the selected section of your form.
Appendix A
Diagnostics and troubleshooting
User Manual
Selection of this option launches Adobe Acrobat and displays this manual, the Facility Commander Wnx 7.5
User Manual.
About the application
Selection of this option opens a screen displaying the software version, service pack number, copyright
information, licensing information, and contact information.
Questions and answers
Database
Question: How can I test the integrity of my database?
The Integrity utility runs automatically, following a database creation or conversion and upgrade from a
previous version of this application. No user interaction is required.
The utility can be run manually if you want to check your database integrity. The system compares and
validates the integrity of your database schema. If selected, the system automatically corrects missing or
incorrect schema properties such as columns, keys, constraints, indexes, triggers, and tables. The
executable file is installed with this application and resides in the program folder.
1. Locate and double-click the DatabaseIntegrity.exe file to manually run the utility.
2. Enter the server name or click Browse and navigate to the appropriate server name.
3. Enter the SQL system administrator “sa” Database Password or accept the encrypted database
password of the default server.
4. Click Connect to locate and connect to this application databases. The remaining selections are now
enabled. Accept the default options or review and disable selections.
5. Select one of two options:
Verify that Check Database Integrity is selected.
Optional: Select the Autocorrect check box. This feature runs only once and corrects obvious schema
in the database. Results display in a report.
Note:
Autocorrect is not available on a Global configuration.
Select which databases to check.
Select Start to begin. Wait as the Database Integrity tool compares and validates the integrity of your
database. Messages generate to an IntegrityCheck.html file in your application Logs folder.
— or —
Select Unlock Database Mutex to unlock the shared resource. Select Unlock to unlock the database
mutex for this application's SQL instance.
6. Click OK when the Application Success window displays.
385
386
Facility Commander Wnx 7.5
User Manual
7. Click View Integrity Report to review the messages generated to an IntegrityCheck.html file in your
application Logs folder. Review the file to determine if database errors were detected.
— or —
Click Close to close the window and exit.
Note:
The Replication tab applies to systems that have Global configuration installed. We recommend that you call
GE Security Customer Support for assistance in setting the preferences for the Global configuration database
replication.
Question: Why did my services shut down unexpectedly? The log reports with a message, “Database is
down.”
This indicates a problem with connectivity to the database. In order not to lose any transactions, FCWnx
saves all credential and alarm messages by writing them to a file and read the file back in, when the
services start up again. Correct the connectivity problem with the database and restart services.
Question: Why is performance sluggish and why does it seem to hang? The Windows Task Manager
indicates an excessive level of memory usage. The diagnostic log indicates “Server is too busy to complete
operations” or “Too many resources are allocated.”
SQL Server can be configured to use a fixed amount of memory or to dynamically adjust the amount of
memory based on demand. We recommend that you set the SQL Server memory as follows:
SQL Server Management Studio
1. On the selected server computer, click Connect and wait as the Server Management Studio opens.
2. Select and then right-click the FCWnx database instance on the navigation tree to the right.
3. Select Properties.
4. Select Memory page.
5. Set the minimum server memory (in MB) to no less than a quarter of the allowable limit. Set the
Maximum server memory (MB) at approximately half of the allowable MB.
6. Exit Server Management Studio.
Documentation
Question: When the documentation CD is inserted into the CD drive, and Web Site is clicked on the menu,
why does the GE Security Web Site link open a blank page?
Reset your Internet Explorer, Options security setting to enable Allow META REFRESH.
Global configuration
Question: Converting an existing database to a regional server returns error messages and the database
creation fails. What do I do?
Conversion to a Regional Database server is not allowed. An existing FCWnx database can only be
converted to a Global database server.
Appendix A
Diagnostics and troubleshooting
Question: Subscription to Publication database-name is invalid. What can I do?
Run SELECT @@SERVERNAME in Query Analyzer on both the Global database server and the Regional
database server. If either name does not match its related server computer name, run the following on the
affected server:
sp_addserver <real-server-name>, LOCAL
If this gives an error message stating that the name already exists, use the following sequence:
sp_dropserver <real-server-name>
go
sp_addserver <real-server-name>, LOCAL
go
If the error message states, There is already a local server, use the following sequence:
sp_dropserver <old-server-name>
go
sp_addserver <real-server-name>, LOCAL
go
Stop and restart SQL Server.
Question: Event Log contains the following error message. What can I do?
The File Replication Service is having trouble enabling replication from
<remoteservername> for <directory> using the DNS name <remoteservername>. FRS will keep
retrying. Following are some of the reasons you would see this warning.
[1] FRS cannot correctly resolve the DNS name <remoteservername> from this computer.
[2] FRS is not running on <remoteservername>.
[3] The topology information in the Active Directory for this replica has not yet
replicated to all the Domain Controllers.
This event log message will appear once per connection. After the problem is fixed, you
will see another Event Log message indicating that the connection has been established.
Solution 1:
System times may not by synchronized. To resolve, synchronize with the domain controller clock time.
a. Run the following command on all computers to synchronize the clock time with the domain controller:
Net time \\(domain controller name) /set /y
b. Stop and then restart the File Replication Service on all servers that are experiencing the problem.
c. Open Event Viewer to make sure that the errors are not longer occurring.
Solution 2:
The domain name for the server may not be represented in the DNS Snap-in. Click Start, Programs,
Administration Tools, DNS. The DNS displays. Expand the node for the domain. Make sure that the
server computer name displays under the domain root. If the server computer name is not here, but it is in
the Active Directory Users and Computers Snap-in, the FRS does not recognize the server computer as
part of the domain.
Question: I’m experiencing space issues. What can I do?
Consider cleaning out your FCWnx/Replication folder.
387
388
Facility Commander Wnx 7.5
User Manual
Question: An error message displays when attempting to add a device to another Region within the Global
system. The message informs the operator that addition of the device is in excess of the license limit for that
Region. What can I do?
From the Administration menu, select Region. When the Region form opens, click Search and select the
Regional server computer in question from the list box on the right. The License Info at the bottom of this
form displays the current licensing capabilities of the selected region. Review the license capabilities. If
limits for a device have been reached, additional devices cannot be added at this time.
Question: What is domain controller down time?
There may be an occasion when the domain controller is inaccessible. In a Global Edition configuration,
replication continues; however, be aware that Microsoft SQL Server services (MSSQL and SQLAgent)
have limitations. Review the following scenarios:
Scenario One: A database server, using a domain login, successfully starts. Later, the domain controller
becomes inaccessible.
Result: SQL services and replication continue normally, without interruption.
Scenario Two: A database server, using a domain login, successfully starts. Later the domain controller
becomes inaccessible. The database server computer is rebooted.
Result: SQL services and replication continue normally because the assigned security token has not
expired for the SQL services domain account. There are limitations of which you should be aware.
Domain login must have been obtained before the domain controller became inaccessible. Consult your IT
Administrator for additional discussion about the security token.
Networking
Question: If I lost my network connection, how do I test and reconnect?
If you lost, cannot see, or cannot change your network connection, you can re-register the Netshell.dll
file by following these steps:
1. Click Start and then Run.
2. In the Open field, enter: regsvr32 %systemroot%\system32\netshell.dll
3. Click OK to display the following:
Figure 153.netshell.dll dialog box
4. Click OK.
5. Verify that you can open the properties of your network connection in the Network Connections
folder of your computer.
Appendix A
Diagnostics and troubleshooting
•
•
If the issue is resolved and connection to resources is restored, you do not have to perform the
following steps.
If the issue persists and you receive an error message, follow these steps:
6. Click Start and then Run.
7. In the Open field, enter: regsvr32 %systemroot%\system32\ole32.dll
8. Click OK to display the following:
Figure 154.ole32.dll dialog box
9. Click OK.
10. Restart your computer.
Question: My COM port is not working as expected. What should I do now?
Use the Controller Monitor to troubleshoot communications between the host and the controller.
•
•
•
•
•
Make sure the State field shows the controller as Online. If it is Offline, right-click, and then select Set
Online. If it is Error, then the host is not able to communicate correctly with the controller.
If this is a direct-connect controller, make sure the Connection field shows Connected.
Make sure the baud rate setting on the controller matches the baud rate setting for the computer’s
COM port.
Make sure the Comm. device field shows the proper communications port for this controller, that is,
COM1 for COM port 1.
Use the Status and Connection fields to check the condition of the communications. Refer to the Help
system for information on status messages.
Next, check the hardware settings:
1. Click Start, Settings, and then Control Panel.
2. From the Control Panel window, double-click System, select Device Manager, and then Ports.
3. Check that the baud rate on the host matches the baud rate set for the controller.
Question: My network controller is not working as expected. What should I do now?
Follow the same steps as in COM Port Not Working (as discussed above). Verify the controller’s IP
address from the Comm Device field. If no problems are identified in the Controller Monitor, try pinging
the controller using the IP address presented in the Controller Monitor form.
Example
C:\ping 192.9.201.107
389
390
Facility Commander Wnx 7.5
User Manual
If the ping command fails with a Request timed out message, verify that the controller IP address is
correct, that the controller is operational, and that all the gateways (routers) between this computer and the
controller are operational. You receive a reply screen display.
Question: My domain controller is inaccessible. What is happening to the system?
There may be an occasion when the domain controller is inaccessible. In a Global Edition configuration,
replication continues; however, be aware that Microsoft SQL Server services (MSSQL and SQLAgent)
have limitations. Review the following scenarios:
Scenario One: A database server, using a domain login, successfully starts. Later, the domain controller
becomes inaccessible. SQL services and replication continue normally, without interruption.
Scenario Two: A database server, using a domain login, successfully starts. Later the domain controller
becomes inaccessible. The database server computer is rebooted. SQL services and replication continue
normally because the assigned security token has not expired for the SQL services domain account. There
are limitations of which you should be aware.
Note:
Domain login must have been obtained before the domain controller became inaccessible. You may want to
review Microsoft and Windows publications relating to security tokens. Additionally, consult your IT
Administrator for discussion about the security token as applied in your company.
Printers
Question: My credential printer is not functioning as expected. What can I do?
You may use either a printer directly connected to your computer or a printer on the network. For example,
you may have two Imaging stations but only one printer.
•
•
•
•
•
•
If you plan on printing either credential or alarm transactions, at least one of those printers must be a
line printer, such as a dot matrix that supports a width of 133 characters either by using a wide carriage
or printing in compressed mode.
You can now print credential transactions or alarms transactions from any client workstation printer.
If you plan on printing credentials, you must use a GE-approved Imaging printer. Contact your GE
security business sales representative for a list of supported printer models. For directions on installing
the drivers for this printer, refer to the appropriate GE documents or the instructions that came with
your printer.
If you purchased this system with this printer from GE, the DataCard drivers are installed for you.
To print credentials, the default printer must be the Imaging printer. However, this means that the Print
Preview Report (File menu) does not display accurately. You need to select your report printer before
you preview a report.
To select a different printer, from the File menu, select Print Setup and then your report printer.
If your printer is networked, you may be required to adjust the security properties. At the computer that
owns the printer, navigate to the Properties window for the selected printer. Click Start, Settings,
Printers. Select the printer and then right-click. From the shortcut menu, select Properties. On the
Security tab of the Properties window, proceed to add Anonymous Login to the Group or user
names.
Appendix A
Diagnostics and troubleshooting
Readers
Question: What is the maximum number of readers per controller?
That depends on the controller. Refer to the Licensing Capacities table of your installation manual.
Setup
Question: How do I identify the ports used for FCWnx communication?
We recommend that you configure your FCWnx system with the Windows firewall ON. In order for your
system to perform successfully, FCWnx opens communication ports for you. These are the default port
setting values used by FCWnx for communication between servers and clients:
Element
Description
6699
Controller Communications Port
135
Client Workstation/server Communications Port (RPC):
1024
GE Security DVMRe/StoreSafe Communication Port:
8088
Server Workstation Video Streaming Port:
8085
Start Video Communications Port Range (24)
SQL
MS SQL 2005/2008 user: This port number can be obtained from your server computer. At the
database server computer for this client, click Start, select Programs, Microsoft SQL Server
2005/2008, Configuration Tools, and then SQL Server Configuration Manager. When the SQL
Server Configuration Manager opens, expand the navigation tree for SQL Server 2005/2008
Network Configuration to display Protocols for SPSQL. Right-click TCP/IP, select Properties, and
then the IP Addresses tab. The SQL port number displays in the IPAll, TCP Dynamic Ports field.
Question: I get a connection error when I try to start the client software. What should I do now?
1. Make sure that your network client is defined in the Client form.
2. Check the bottom of the Client Monitor form and verify that there is at least one license available.
3. Verify that you are using TCP/IP as your network protocol and that it is configured properly.
4. Verify that the network protocol you are using is installed on both the client and server computers.
5. On the server computer, go to the Services form and check services. If the Status column is blank for
that service, then it is not running. Select the service line, and click the Start button:
•
•
If the status changes to Started, then the service is now running. Try to start the program now. If
the program still won’t start, the network may be down. Check the current day’s log on the
network client.
If the status does not change to Started, check the current day’s log of the server log. It should
display an error message providing a reason for shutting down.'
391
392
Facility Commander Wnx 7.5
User Manual
Question: System Service does not start. What is the reason?
•
•
•
•
•
•
The service cannot access the database.
The client machine name is not in the client table.
The services on the database server are not running.
System service on the local machine does not start.
The local machine did not receive a ping from the license domain machine within the ping timeout
interval (check that the license domain services are running).
Client license count may have been exceeded. Refer to the Licensing Capacities table of your
installation manual, for supported capacities.
Question: What does this message mean? “Maximum Number of Clients Limit Reached?”
The maximum number of clients are already connected to the server. Refer to the Licensing Capacities
table of your installation manual, for supported capacities.
Question: Why aren’t the supervised DI points on my 2SRP module working?
Check the module addresses on the reader modules in your controller. They must be consecutively
numbered. This means that the first reader module must be set to Address 1, the second reader module
must be set to Address 2 and so on.
Question: What do I need to know about dial-up connections?
Dial-Up Troubleshooting Tips: While some information is automatically saved to the logfile, you can
decide whether certain items (ports, lines, controller, or forms) are sent to the logfile. Select Diagnostic
Setting from the Diagnostics group. For more persistent problems, this application provides an extensive
diagnostic utility, Diagnostic Viewer. The Diagnostic Viewer application lets you view the diagnostic log
file, apply filters to view information, and search for a specific log entry. Diagnostic Viewer has its own
Help system for additional information.
Your Diagnostic Viewer program Logfile indicates modem status by displaying one of two possible
messages:
Message 1: The following modem is not functioning properly: <modem name>.
Message 2: The following modem is functioning properly: <modem name>.
Where <modem name> is the name of the modem, such as Hayes Accura 33.6.
Message 1 displays on the Logfile every 90 seconds following a period when the modem is not operating,
until the modem is available and operational again. Verify the following:
•
•
•
•
•
Selected modem on Preferences form is identical to the modem you want to use. (If the modem
you want to use is not on the list of available modems, you may have to reinstall the driver for the
modem or select another modem.)
Modem is turned on.
Comm port connection is complete.
Connection is plugged in properly.
Modem settings are correct. (Maximum speed value of 9600 applies to most modems. If you are
having problems using this setting, refer to your modem manual for more information.)
Message 2 displays one time only, and that is when your modem returns to operational after a period when
the modem was not operational.
Appendix A
Diagnostics and troubleshooting
The Controller Monitor form indicates that the controller dedicated to a modem is in an error state.
Question: Why does the host dial a controller?
Whenever a change is made to a form that requires an update to the controller database, such as changes to
the Person form, the host dials the controller with the changes.
If you make many changes, the controller may go to idle between your changes causing a disconnection
with the host. Then, the host needs to dial the controller back to download the next change. You have two
options available to work around this situation:
1. Increase the idle time (found on the Preferences form, Communications tab) on the controller that
gives you more time to make the changes. Server services must be restarted for the changes to take
effect.
2. Put the controller offline, make the changes and then put the controller online. The host automatically
dials the controller and downloads the changes.
Setup: RAID Server
Question: The RAID Server, Event Viewer Systems and Applications Log indicates a drive failure.
(Periodically checking the Event Viewer helps detect drive failures.) What can I do now?
The specifics of your error and warning messages can be determined by consulting the manufacturer’s
documentation or Customer Support for your brand of hardware.The steps that follow are intended to be a
guide in the recovery of a Dell PowerEdge system with a PERC 3/SI RAID 1 controller, in the event of a
system failure. For specific details, refer to the documentation shipped with your Dell PowerEdge system.
Continue with the following:
"RAID disclaimer" on page 393
"RAID recovery: what you need" on page 394
"Replacing a RAID failed hard drive" on page 394
"Installing OpenManage Server Assistant" on page 394
"Installing the operating system" on page 395
"Installing Dell OpenManage RAID Array Manager" on page 395
"Installing MS SQL Server 2005/2008 on the RAID server" on page 396
RAID disclaimer
GE recommends that installations that implement RAID server configurations use RAID 1 configurations.
RAID 5 configurations are not recommended for the database due to possible transaction load issues.
RAID 1 configurations provide 100% data redundancy by disk mirroring.
Some customers may implement a combination of RAID 1 and RAID 5 configurations supported on one
server. This can be a valid configuration if the operating system and miscellaneous files are isolated on a
RAID 5 configuration, while the database resides on a RAID 1 mirrored disk drive configuration.
Note:
You should only use RAID 5 for your operating system boot partition if your RAID 5 solution is hardware-based.
Hardware-based RAID solutions are provided by Dell’s line of PowerEdge servers available to order directly
from GE Security.
For those systems that have already been configured, and the location of the databases needs to be
corrected, GE have created step-by-step procedures when moving the database files. The procedures are
393
394
Facility Commander Wnx 7.5
User Manual
located in the Technical Bulletin section of the GE security business Web site. Go to
www.gesecurity.com for additional information.
RAID recovery: what you need
In order to perform a recovery, you need the following items:
•
•
•
•
•
•
Dell OpenManage Server Assistant CD Version 7.2 or later (provided with your Dell server)
Dell OpenManage Applications CD Version 3.2 or later (provided with your Dell server)
Dell Online Documentation CD (provided with your Dell server)
Dell PowerEdge Systems Installation and Troubleshooting Guide (provided with your Dell server)
Microsoft Windows 2003 or Windows 2008 Server CD and applicable service pack
Microsoft SQL Server 2005 or 2008 CD and latest applicable service pack
Replacing a RAID failed hard drive
Note:
For optimum results, GE recommends that the drive be powered off before it is removed or replaced. A loss of
data or data corruption may occur if disks are replaced without powering off.
Replace the damaged hard drive with another hard drive with the same capacity, and then restart the
system. The RAID controller automatically rebuilds the mirror hard drive.
For instructions on replacing a failed hard drive, refer to the documentation shipped with your Dell
PowerEdge System.
Installing OpenManage Server Assistant
The OpenManage Server Assistant software provides tools to set up and configure the PowerEdge system
components and software. Installation includes drivers, diagnostics, and utilities. Refer to the
documentation and instructions shipped with your Dell PowerEdge System.
If you have a complete system failure (where both hard drives are damaged) or your system has no
operating system installed, follow the steps below:
1. Set up the speakers, monitor, mouse, and keyboard as directed by the documentation provided by Dell.
2. Attach the AC adapter and plug the power cable into a grounded power outlet.
3. Insert the Dell OpenManage Server Assistant CD into the CD drive.
4. If prompted, select the appropriate language.
5. Accept the terms of the Software License.
6. When the Welcome to Dell OpenManage Server Assistant window opens, verify that the language is
correct, and then click Server Setup.
7. The Server Setup window displays.
8. Set the Time Zone and Day, Date, and Time, and then click Start Server Setup.
Appendix A
Diagnostics and troubleshooting
9. When the Configure RAID Controller window opens, select RAID-1 and set the RAID Virtual Disk
Size to Maximum. Click Configure RAID.
Note:
If a window opens asking if you want to delete the existing virtual disk, click Yes. You are then prompted to
reboot. Click OK.
Installing the operating system
Refer to appropriate section of the installation manual for details and instruction to configure the operating
system.
Installing Dell OpenManage RAID Array Manager
Follow the instructions below to install and configure the Dell OpenManage RAID Array Manager.
1. Insert the Dell OpenManage Applications CD in the CD drive. The CD autoruns unless this function
has been disabled. If disabled, click Start, Run, Browse to navigate to the drive containing the CD,
and then select setup.exe to display the Dell OpenManage Installation window.
2. Click Next.
3. At the Software License Agreement, click Accept to continue the installation. The OpenManage
Installation Wizard displays.
4. At the Select setup type screen, click Express Setup.
5. At the Select system type screen, click Both to indicate that you are installing both Managed Node
and Management Station. A summary window displays the installation options you have selected and
gives you an opportunity to verify the installation criteria, make corrections, or abort the installation.
When you are satisfied with the summary, click Next.
6. You are prompted to verify all options by asking, Are you sure? Click Yes to begin the installation. A
progress monitor displays, listing the components being installed and the installation of applications
proceeds. When installation of all components is complete, you are asked to reboot the computer.
7. Reboot your computer at this time. An icon displays on the desktop, labeled IT Assistant. You can
access the Disk Array software from the icon or the group created in the Start menu.
8. After the computer restarts and you log on, a message displays, stating that the Windows Server
application, Disk Administrator, has been replaced by the Dell OpenManage Array Manager. If, for
some reason, you later uninstall the Array Manager software, the Windows Server Disk Administrator
is restored to the pre-installation configuration.
9. Double-click the IT Assistant icon on the desktop to display Logon Information. By default, you are
given the choice of Read only access to monitor the status of the Disk Array. You may also select
Read/Write access allowing you to make changes and configure the various preferences of the RAID
Array and the files contained on the disk. For this configuration process, we need Read/Write
permissions.
395
396
Facility Commander Wnx 7.5
User Manual
10. Select Read/Write access and click OK. You do not need to provide login information unless
someone has already configured and secured the system and you are making changes to the previous
configuration.
Note:
When the program opens for the first time, a message displays stating, IT Network Monitoring Service is not
configured for discovery; would you like to configure now? Click No to close the window and return to the
main screen for IT Assistant.
Installing MS SQL Server 2005/2008 on the RAID server
Refer to the appropriate chapter in the installation manual for details and instruction to configure SQL
Server.
Software
Question: What software and firmware versions are supported in FCWnx components?
The following are minimum requirements for FCWnx system components.
Element
Description
NET Framework
3.5 (automatically installs with FCWnx if not already there)
Acrobat Reader
5.x or later to view manuals online. Acrobat Reader is provided on the FCWnx
Documentation disk for your convenience.
DVR
Refer to Define digital video recorders on page 204 for a list of devices and supported
firmware versions.
Internet Explorer
6.1 or later with applicable service pack
MDAC
2.8 or later with applicable service pack
MS SQL
SQL Server 2005/2008 Standard or Enterprise Edition, Service Pack 2 or later
Question: Can I customize the toolbars and add more buttons?
No. The toolbars cannot be customized.
Question: How do I perform a search on a specific item?
The Search button can be found on any form that provides search capabilities. If you click this button when
the current form is blank, all records are returned. To specify criteria, fill in the information.
Example
If you want to find all credentialholders with the last name Smith, enter Smith in the Last name field and
click Search.
You can also use the * character that lets you search for patterns.
Example
A search for credentialholders with the last name starting with Sm* would yield such names as Smith and
Smythers.
Question: How do I display underlined letters for keyboard navigation?
This is an Effects option in the Display settings of your computer. To change this setting:
Appendix A
Diagnostics and troubleshooting
1. Click Start, Settings, Control Panel, and then Display.
2. Double-click Display to open the Display Properties window of your computer.
3. Navigate to the Effects options of your computer. This may vary, depending on your operating system.
4. Clear the selected option that reads, “Hide underlined letters for keyboard navigation until I press the
Alt key.”
5. Click OK.
6. Close the Control Panel.
Question: Why can't I delete a record?
Some forms, such as the Digital Output Status form and the Manual Control form, do not contain a Delete
button because they display only status information. Other forms, such as the Reader form, Alarm form,
Alarm Group form, Digital Output form, and the Digital Output Group form, also do not contain a Delete
button.
To keep the system stable, no one is given permission to delete these records, not even a System
Administrator. These records are deleted when the associated controller is deleted. However, on other
forms, you may be assigned delete permission. If you can’t delete on those forms, you do not have
permission to delete.
Question: No readers display in the reader list box. Why?
Only readers assigned Active are displayed in the list box. Go to the Reader form and click the Reader tab.
Verify that the readers you are using are assigned Active.
Question: Why are there no alarms displayed on the Alarm Monitor form?
Go to the Alarm form and click the Alarm tab. Make sure that the Monitor option is On. Also, check the
schedules. There may be one in effect that does not route certain alarms to the Alarm Monitor form.
Question: Our site uses this application in two languages. Sometimes, when we log in, the Help files are not
in the correct language. Why?
This occurs when you are using either a non-English operating system or this application in non-English
and you did not correctly shut down this application. To eliminate this problem, you must select the File
menu and then Exit to correctly shut down this application.
Question: How do I remove an alarm from the Alarm Monitor form?
When an alarm displays on the Alarm Monitor form, appropriate action should be taken. For example, you
may want to send a guard out to check that a door is secure. Once the alarm has been investigated and
reset, if necessary, it should be removed from the Alarm Monitor form.
1. Some alarms may require an acknowledgment before they can be removed. This feature is set on the
Alarm form. To acknowledge the alarm:
Without a response, click Acknowledge and the Process state for that alarm changes to
Acknowledged.
With a response, click Responses to select a predefined response or enter your own in the Response
field. Then, click Acknowledge and the Process state for that alarm changes to Acknowledged.
2. To remove an individual alarm without waiting for it to reset, highlight the alarm and click Remove
Individual.
397
398
Facility Commander Wnx 7.5
User Manual
3. If you have permission, you can remove all alarms in one action by clicking the Remove All icon.
Question: How do I troubleshoot my Global system?
Review the following:
•
•
•
•
Global configuration regional rules on page 46
Replication and synchronization conflicts on page 47
Review the installation manual chapter covering “Installing a Global Configuration.” Confirm and
review your configuration options, and then review the Troubleshooting section.
Refer to Microsoft Replication software documentation in printed and electronic format.
Terminal services
Question: I cannot capture and print with terminal services.
Capturing images requires the camera to be attached to a computer where the person is located, which is
not the case with terminal services. However, images can be captured elsewhere, saved to file, and loaded
to FCWnx.
Printing credentials with terminal services is similar to printing a report or Microsoft Word® document. If
the operator has permission to access the Credential Design application and photo (which is taken care of
based on the terminal service login), printing a credential is permitted.
User questions
Question: My Diagnostics component services have started. Why doesn’t System Manager and Manager
services start?
If you have just restored a database or re-created a database, you need to relicense and restart your system
in order to start the application.
Question: How do I put a reader online?
From the Application Group pane, select Access, and then select Reader. From the right side of the screen,
select the reader you want to set online and check the Online and Active options.
Question: How do I get into the Credential Design program?
1. The client you are using must have a license for Imaging. Select Monitors & Controls, and then Client
Monitor. The bottom section of the Client Monitor form contains the section Imaging Information.
(You may need to make the window larger to display the number of Imaging licenses presently in use
and number of Imaging licenses you are allowed, as purchased with your system.) Locate the name of
your computer in the Client list. Then, look in the column Imaging status and verify that it reads
Enabled.
2. If Imaging status reads Disabled and the numbers indicate a license is available for use, go to the
Administration menu and select Client. On the Client form, Client tab, select Enabled in Imaging
Status to enable Imaging. Return to the Client Monitor form to validate the Enabled status. You may
need to log off and log on again in order for the selection to take effect.
3. If you are licensed and Imaging is enabled, the Edit Credential Design button becomes enabled
allowing you to enter the Credential Design program. Sample credential designs are provided to get
you started.
Appendix A
Diagnostics and troubleshooting
Question: What is wrong when I run Diagnostic Viewer, try to open a file, and only one logfile shows in the
Logfile Dialog?
This indicates the database cannot be accessed. Test the database connection by following the steps in "I
get a connection error when I try to start the client software. What should I do now?" on page 391.
Question: Why do Services shut down while Diagnostic Viewer is running? A dialog box pops up and
displays the message “Diagnostic Manager Service has Shutdown”. After I restart services, no new
messages are displayed.
Communication has been lost with the services and the file needs to be reopened again when the services
are up and running.
Question: What is the order in which the services should be shut down and started?
Shutting down the Diagnostics Service shuts down the other Services. Refer to your Installation Guide for
a detailed description of Services.
Note the service dependencies as described in Table 212:
Table 212. Service Dependencies
Service
Dependency
Diagnostics
Microsoft SQL Server 2005 or 2008 must be running on the database
server PC before diagnostics can run on client computers.
System
Diagnostics
Manager
Diagnostics, System
Webservice
System Manager and automatically starts when the Manager service
starts.
API
Diagnostics, System, System Manager
This service can be started manually at the time you install an API
interface
Question: I shut down my license domain server (cold boot). My clients are reporting database errors (that
is, they have lost their network connection). Why?
This can occur when the network goes down for any purpose (common examples: hub loses power
temporarily; network cable cut or broken).
It is best to either have clients use the Client Monitor form to force users off, or notify all clients to restart
after a cold boot of the server is complete and after services have restarted on the license domain.
Question: My services do not shut down. What can I do?
Run the program spstop.exe found in the FCWnx folder. Click Start, and then Run. At the Run window,
click Browse and navigate to spstop.exe. Click Open to display the file name in the command line of
the Run window and enter all. The Run window now displays as follows:
“Program Files\GE\FCWnx\ SPstop.exe” all
Click OK to stop the services.
399
400
Facility Commander Wnx 7.5
User Manual
Question: What should a normal startup of services look like in the logfile?
It should look similar to the following with the exception of machine name and machine-encoded seed and
controllers that may show up in the log. The following sample startup script displays a sequence of key
events in the startup process. Note in bold: SYSTEM SERVICE STARTED, STARTING MANAGER
SERVICE, etc.
Video
Question: What can I do when a video session does not launch?
If you select Video Console from the Application toolbar or in the Monitors & Controls Group of the
Application Group pane, and a video session does not open:
1. Review your diagnostic log file entries for errors or warnings. Refer to Diagnostic settings on
page 376.
2. You may have to restart your computer to restart your FCWnx services.
Customer Support
Note:
If you require assistance, first contact your local Business Partner.
To contact GE Security, use the following numbers and addresses:
•
Telephone:
United States: 1-888-GE SECURITY (1-888-437-3287)
Asia: 852-2907-8108
Australia: 61-3-9259-4700
Europe: 48-58-326-22-40
Latin America: 305-593-4301
Be ready at the equipment before calling.
•
•
Note:
Web Site: www.gesecurity.com
Support: [email protected]
Check the Web site periodically for timely information on all GE Security products.
Appendix B Certifications
This appendix provides information about certifications for a UL Listed system.
In this appendix:
Overview . . . . . . . . . . . . . . . . . . . . . . . . . . . . . . . . . . . . . . . . . . . . . . . . 402
UL certification. . . . . . . . . . . . . . . . . . . . . . . . . . . . . . . . . . . . . . . . . . . 402
402
Facility Commander Wnx 7.5
User Manual
Overview
Your installation must adhere to the requirements listed in the Certification section of the installation manual,
in order to qualify as a UL Listed system.
UL certification
Facility Commander Wnx is a UL Listed system (UL 1076 Grade A Proprietary Burglary Requirements/UL
294 Access Control Requirements). You must adhere to the following requirements in a UL Listed installation.
1. The computer and monitor shall be completely duplicated. Provision for switchover within 6 minutes
is required (30 seconds for manual transfer of cables and 5 minutes 30 seconds for the system boot
sequence).
2. Compatibility has been verified with the following protected premises-control units:
•
•
•
ACU2X, ACU2XL8, ACU2XL16, ACURS02, ACURS04, ACUX16
M5, M3000, and Micro/2000 using a PXN or PXNplus CPU board
DirecDoor
3. The system shall be connected to a listed surge suppressor with a maximum marked rating of 330
volts.
4. The installation instructions shall specify signal line transient protection complying with the Standard
for Protectors for Data Communications and Fire Alarm Circuits, UL 479B, with a maximum marked
rating of 50 volts.
5. The equipment shall be installed in a temperature-controlled environment. Twenty-four hours of
backup power shall be provided to the HVAC system. The HVAC system shall be capable of
maintaining a temperature between 55° and 95° F.
6. The installation instructions shall specify that, in addition to the main power supply and secondary
power supply that are required to be provided at the central supervisory station, the system shall be
provided with an uninterruptable power supply (UPS) with sufficient capacity to operate the computer
equipment for a minimum of 15 minutes. If more than 15 minutes is required for the secondary power
supply to supply the UPS input power, the UPS shall be capable of providing input power for at least
that amount of time. The UPS shall comply with the Standard for Uninterruptable Power Supply
Equipment, UL 1778, or the Standard for Fire Protective Signaling Devices, UL 1481.
7. A UL Listed printer shall be provided.
8. Signal prioritization shall be set up as follows (from highest to lowest: Alarm, Trouble, Supplementary
(such as access control).
9. Polling of a receiving unit must not exceed 200 seconds.
10. Exit and Entry delay must not exceed 60 seconds.
11. Communication between Host and Protected Premise Units must consist of an independent, dedicated,
and direct Ethernet line. Communication over LAN and WAN has not been investigated by UL.
12. Elevator Control, DVR, CCTV, Camera functions, and Keypad Alarm Response have not been
evaluated by UL.
Appendix B
Certifications
13. Any communication failure shall be treated as a compromise of the Encrypted Line Security of the
proprietary burglar alarm system when installed with NIST validated, Triple DES C module, Version
1.1.
14. The minimum system configuration for the Facility Commander Wnx monitoring equipment consists
of a Listed Pentium computer with a minimum CPU speed of 2 GHz, 2 GB RAM, 10 GB HDD, and
10/100 NIC. A color monitor shall also be provided (1024 x 768 resolution, 16-bit color display).
403
404
Facility Commander Wnx 7.5
User Manual
405
Glossary
This section explains some terms as they apply to FCWnx.
Table 213. FCWnx terms explained
Element
Description
anti-passback
Anti-passback (APB) is an access control feature designed and configured to reduce the chance of
users “passing back” their credential to another person attempting to gain access.
Micro controllers:
When readers are designated as entry (IN) or exit (OUT), the system is able to record whether a user is
inside or outside at any time by noting the last place a credential was used. If the last valid transaction
was reported at an IN reader, then the system knows that they are inside. If the last valid transaction
was at an OUT reader, then the system knows that they are outside.
• Active APB does not let a person re-enter unless they first exit. The user is unable to “pass back”
their credential to allow a friend to gain entry.
• Passive APB records the status but does not enforce the status. The system knows where a person
is but does not stop them from entering twice.
• Timed APB refers to a system where users are “forgiven” after a certain length of time, configured
in minutes. After the configured time is expired, the user status is set to “neutral” and the system
allows them to re-enter. This eliminates the need for an OUT reader and prevents a credential
holder from re-entering for that time period.
• Global APB tracks the user throughout the entire FCWnx network and across all controllers. No
matter where a user is, their APB status is recorded.
• Regional APB (FCWnx Global configuration) tracks the user within a region. The user is active in
that region only and inactive in all other regions.
APB transactions using Valid No Passage, as selected on the Reader form:
• Transactions are not tracked if the door is not opened.
406
Facility Commander Wnx 7.5
User Manual
Table 213. FCWnx terms explained (continued)
Element
Description
ACU controllers:
When designated as Entering Area or Exiting Area readers, the system is able to record whether a user
is inside or outside of an area at any time by noting the last place a credential was presented.
• The area must be defined as an APB area on the Area form.
• To track and grant/deny access using APB, areas must be defined as APB on the Area form and
Readers must be defined as APB in the Reader form. Only Readers assigned to the areas as
entering area readers or exiting area readers will be part of the APB operation.
• When exiting an APB area to another APB or non-APB area, the credentialholder must exit the
other area before being allowed back into an APB area, otherwise, a Tailgating error occurs. This
error can be prevented in some cases, see Reader tab, on page 124.
• Timed APB on the reader takes precedence over the timed ABP setting on the Area form.
APB with door contact:
• The user must open the door to be placed in the area.
• If Valid No Passage is enabled and the door is opened, Valid Open is displayed on the Activity
monitor. The User is recorded as IN the area.
• If Valid No Passage is not enabled and the door not opened, Valid No Passage is displayed on the
Activity monitor. The User is not recorded as in the area.
• If Valid No Passage is not enabled and the door is opened, Valid is displayed on the Activity
Monitor. The User is recorded as IN the area.
• If Valid No Passage is not enabled and the door is not opened, Valid is displayed on the Activity
Monitor. The User is not recorded as in the area.
APB without a door contact:
• If Valid No Passage is enabled and the door is opened, Valid Open is displayed on the Activity
Monitor. The User is recorded as IN the area.
• If Valid No Passage is enabled and the door is not opened, Valid Open is displayed on the Activity
Monitor. The User is recorded as IN the area.
• If Valid No Passage is not enabled and the door is opened, Valid is displayed on the Activity
monitor. The user is recorded as IN the area.
• If Valid No Passage is not enabled and the door is not opened, Valid is displayed on the Activity
Monitor The user is recorded as IN the area.
Note: By default, all readers are created with a door contact DI defined.
archive
An archive is a history of transactions. The archive is created automatically by this application, based
on the time interval that you selected on the Preferences form (Daily, Weekly, or Monthly). Refer to
Archiving, on page 34.
407
Table 213. FCWnx terms explained (continued)
Element
Description
arm/disarm an area
This application supports global (spans multiple ACU controllers) and local (one ACU controller) arming
and disarming of an area using the reader keypad or manual control. Global operation requires hostto-controllers communication. Local operation allows arming/disarming without host communication.
How arming works
1. The operator enters a credential identification number and swipes a credential.
2. The display requests the operator to enter a PIN.
3. The operator enters a PIN number plus 10 (for example, 1234 + 10 = 1244; the operator enters 1244)
4. A message displays the state of the area arming as successful.
How disarming works
1. The operator enters a credential identification number and swipes a credential.
2. The display requests the operator to enter a PIN.
3. The operator enters a PIN number plus 20 (for example, PIN is 1234 + 20 = 1254; the operator enters
1254).
4. A message displays the state of the area disarming as successful.
When using the 'Areas for Arm/Disarm' feature:
Note:
The keypad arm/disarm feature must be configured as 'Local' on the Area form, Alarm tab.
Arm
1. The operator enters an asterisk (*), swipes a credential, and enters a PIN (if required).
2. Using the arrows to scroll up and down through the areas displayed, select the area to arm.
3. Select ON.
4. Reader display indicates Area Secured.
Disarm
1. The operator enters an asterisk (*), swipes a credential, and enters a PIN (if required).
2. Using the arrows to scroll up and down through the areas displayed, select the area to arm.
3. Select OFF.
4. Reader display indicates Area Unsecure.
auto update
Use this form to configure your network computer for this application, for automatic notification and
installation of the latest quick fixes and service packs. This feature must be coordinated with your IT
Department. They may have certain procedures, restrictions, or security policies in place.
backup
A backup is a copy of selected data. Since this application does not contain a backup option, you can
use any method you like to back up the data. Refer to Backing up data, on page 34.
calendar
Select the day, month, and year, such as the controls of credential issue, return, or expiration. Click OK
to accept the selected date displayed and close the form. Click Cancel to close the Calendar form
without making any changes. Click None to clear the date currently in the field.
CARC
The cardholder auxiliary relay control (CARC) feature allows relays to be fired after a successful card
read based on the cardholder's “Area for Auxiliary Relay Control” selections on the Area Control tab of
the Person form.
demo mode
When the License Setup window displays during the installation sequence, the option to Cancel can be
selected. Installation of this application completes and operation of your system continues in demo
mode until you successfully license your system. After each hour of login time, the system shuts down
and you are required to restart this application to continue operations. This sequence continues
indefinitely if you have not properly licensed your system. Refer to the Help system in the Licensing
Setup for additional information.
408
Facility Commander Wnx 7.5
User Manual
Table 213. FCWnx terms explained (continued)
Element
Description
DES/DESIII/AES
Data Encryption is additional security assigned to protect the Host-to-controller exchange of
information. The data messages are encrypted.
Methods of Encryption
DES: This option uses a single pass of authentication and 16 unique hex characters are required.
DES III: This method of encryption uses a three-pass authentication process. Starting at the left, the
first pass authenticates 16 hex characters. The second pass authenticates 16 hex characters. The third
pass authenticates all 48 hex characters.
AES: This method of encryption uses four pass authentication and 64 unique hex characters are
required. When you select this method, four dialog boxes are available for input. Enter 64 unique hex
characters in the binary dialog boxes, in four 16-character strings.
Diagnostic Viewer
The Diagnostic Viewer application is a diagnostic tool used in conjunction with this application.
Diagnostic Viewer lets you view the contents of the application diagnostic log files, apply filters to limit
the information displayed, and search for a specific log entry. Each day, this application writes
messages to a diagnostic log file. Refer to Diagnostic Viewer program, on page 380.
Diamond II
Diamond II (DII) is a Browser-based Facility Security System for access control, alarm monitoring,
DIAMOND II Color Graphics, photo badging, and CCTV control.
FCWnx combines the features of Secure Perfect and Diamond II software with a whole new look!
Features are enabled on the application forms according to the controller hardware and system that
you purchased and licensed.
encryption
See DES/DESIII/AES, on page 408.
409
Table 213. FCWnx terms explained (continued)
Element
Description
facility
The FCWnx database can be partitioned and grouped. These groupings are identified as Facilities. If
Facilities are not defined, all operators are able to access all the FCWnx records, based on the
permissions associated with the form.
Reminders:
• Facility partitioning does not involve access rights or who goes where.
• The same facility is assigned for all devices associated with the controller when a controller is
created.
• Reports can be generated based on the currently active facility or all facilities assigned to the
current operator.
• GLOBAL SYSTEMS: To view transactions outside of your region, you must have in your active
facility, the client’s facility where the transactions are occurring.
Sequence Guide:
1.
If facilities are going to be used, the facilities must first be defined in FCWnx, on the Facility
form. When creating a facility record, enter a description that uniquely identifies the location
or function of the facility.
2.
Permissions are created and defined to determine what form and what fields are available
within FCWnx.
Note:
3.
The forms in FCWnx display an icon in the left corner indicating the permissions assigned to
the current operator. The form icons correspond to the icons and permissions assigned on the
Permission form.
Once defined, facilities and permissions are available for assignment to an operator on the
Operator form.
a) At any given time, the current operator has the ability to select the active facility for that
session, from the list of all facilities that the current operator is allowed to see.
b) When a facility is assigned to an operator, it displays in the Facility drop-down list of FCWnx
forms after a successful login by that operator. Depending on assigned permissions, that
operator can now create records and assign facilities from the list that displays in the Facility
drop-down list.
hex character
Valid and allowable hex characters include the base 16 numbering system (0 through 9 and A through
F).
image capture
Your photographs and signatures can be created by digital cameras, video cameras, and signature
pads. Support for certain Imaging features and functions may be product specific and not necessarily
supported by all compatible peripherals. Refer to Image capture, on page 280.
integrity utility
The utility can be run manually if you want to check your database integrity. The system compares and
validates the integrity of your database schema. If selected, the system automatically corrects missing
or incorrect schema properties such as columns, keys, constraints, indexes, triggers, and tables. The
executable file is installed with this application and resides in the program folder. Refer to How can I test
the integrity of my database?, on page 385.
language
On the Operator form, click the drop-down list to display a list of available languages installed on your
system. Select the language with which this operator accesses and operates the FCWnx system. Refer
to Multiple language support, on page 65.
mass update
This option is not available until at least one record exists in the list box to the right of the form. The
Mass Update mode lets you simultaneously update properties on a group of records within the
application. This is very helpful when a number of records for a single form require the identical
property or value change. Forms where Mass Update is applicable include the Person form and
Credential form. Refer to Mass update, on page 293.
410
Facility Commander Wnx 7.5
User Manual
Table 213. FCWnx terms explained (continued)
Element
Description
PDF
Portable Document Files (PDFs) are read-only electronic versions of printed documents. The documents
are in PDF format and included on a separate document CD.
Adobe Acrobat Reader is required to view these documents. It is also included on the CD. If you do not
already have Adobe Acrobat Reader installed, follow the steps below:
1. Copy the Acrobat executable file from CD onto your hard drive.
2. Navigate to Windows Explorer and double-click the file.
3. Follow the on-screen installation instructions.
To view the PDF file, double-click the file name or start Adobe Acrobat Reader and open the document
you want to view. For additional information, refer to Adobe Acrobat Reader Help.
Save Position
To save the position of any main application or external application window, right-click to display a
shortcut menu. Select Save Position. Close the window. When re-opened, the window displays in the
saved position.
Secure Perfect
Secure Perfect is a multi-edition software offering of Integrated Secure Management Software
designed on Microsoft Windows technology. Secure Perfect Editions provide full security management
functions including access control, intrusion zone control, alarm monitoring, reporting, photo ID
badging, and CCTV interfaces as standard features. Secure Perfect Editions also offer integrated
system options that include digital video surveillance and Web-based reporting.
FCWnx combines the features of Secure Perfect and Diamond II software, and has a whole new look!
Features are enabled on the application forms according to the controller hardware and system that
you purchased and licensed.
Simple File Sharing
Simple File Sharing is a feature in Windows XP that removes file sharing security options available in
other versions of Windows. This setting must be disabled for FCWnx to operate successfully between
Servers and clients. Once the user sets the permission, the user and clients have access to shared files
and the ability to assign passwords to shares.
To disable folder shares:
1. Double-click My Computer on the Windows XP Desktop.
2. From the Tools menu, select Folder Options to open a Folder Options window.
3. Click the View tab and locate the Use Simple File Sharing (Recommended) check box in the list of
Advanced Settings.
4. To disable Simple File Sharing, ensure this check box is not selected. Click inside the check box to
disable the option. (The Simple File Sharing check box should be at or near the bottom of the Advanced
Settings list.)
5. Click OK to close the Folder Options window. The settings for Simple File Sharing are now updated; no
computer reboot is required.
Note:
1. Enabling Simple File Sharing prevents the ability to assign user-level passwords to shares.
When Simple File Sharing is enabled on a computer, remote users are not prompted for a
password when accessing that computer's shares.
Note:
2. If the Windows XP Professional computer is part of a Windows domain rather than a
Windows workgroup, this process for enabling or disabling Simple File Sharing has no effort.
Simple File Sharing always remains disabled for computers joined to domains.
411
Table 213. FCWnx terms explained (continued)
Element
Description
SCIF (ACU only.)
A group of rooms or buildings may be used for handling or processing classified information. These
areas are called Sensitive Compartmentalized Information Facilities (SCIF). Control is limited to the
SCIF client workstation assigned to the area. Workstations within these areas must be configured with
specific security clearance and permissions.
Recommended order for creating a SCIF area:
1. You must define a facility on the Facility form specifically for dedicating the device configurations
belonging to this SCIF area.
2. On the Client form, Client tab, select Workstation Type as SCIF.
3. On the Controller form, configure the controller (add to the SCIF facility if it is to be dedicated to SCIF
functionality)
4. If the controller is not SCIF-dedicated, configure the reader, DI, alarm, and DO devices, assigning each
device to the SCIF facility.
5. On the Area form:
• Assign the SCIF facility.
• Select Enable SCIF.
• Assign a workstation to this SCIF area.
Note: Devices assigned here must be assigned to the facility created for the SCIF area.
• Assign readers.
• Assign alarms.
• Assign DOs.
When an area is designated as a SCIF area and assigned to a SCIF workstation, this workstation is
able to control functionality for the SCIF area. Monitoring and control can be made at that SCIF
workstation only. Modifications to the SCIF area configuration (such as unassigning the area as SCIF,
or unassigning the area to the SCIF workstation) can be made on a non-SCIF client only if the
operator has SCIF facility permissions.
6. Assign Access Rights, Persons, and Credentials.
Note:
services
Alarms, events, and functions associated with a SCIF workstation cannot be configured,
monitored or controlled through an API connection unless you are at the SCIF workstation.
Windows uses special programs called services. A service is a process that can start automatically
when the system boots and remains running as a background process independently of anyone being
logged in. It runs regardless of whether anyone is logged into Windows or FCWnx. In other words, the
computer must be turned on but no one needs to be logged in. SQL Server 2005/2008 must be running
for network clients to connect and share the SQL database.
FCWnx Diagnostics handles all diagnostics on all computers.
FCWnx System Manager manages communication between computers and licensing. This service
also starts the FCWnx WebService.
FCWnx Manager is the main service and handles controller communications and alarms.
FCWnx Webservice handles the video media service. This service is dependent on the System Manager
and automatically starts when the Manager service starts.
FCWnx Media Server is handled entirely by FCWnx Webservice. This service requires no user
intervention, and starts and stops automatically.
FCWnx API Service is used when using an API interface. This service is used when an external system is
sending or receiving transactions by way of Application Program Interface to this application. This
service can be started manually at the time you install an API interface.
Note:
Changing the state of services without a good working knowledge of the purpose can cause
the computer to act erratically! Refer to Facility Commander Wnx services, on page 4.
412
Facility Commander Wnx 7.5
User Manual
Table 213. FCWnx terms explained (continued)
Element
Description
Swipe and Show
Note:
Only one instance of Swipe and Show is available for display on a computer at one time. If
readers have not been selected, the program does not start. If Imaging is not licensed for the
system, this option is not available.
The Swipe and Show program is a monitoring and validation option, available on the Activity Monitor
form. When properly configured and following a credential transaction, the operator is able to observe
a credential photo and text description of the transaction in the Swipe and Show window. An operator
is able to monitor transactions and compare the photo ID to a live image. The Swipe and Show window
is set to a default size and cannot be resized.
Tailgating
Tailgating refers to a user following another user through a door without presenting a credential. They
follow closely enough so they can get through the door or gate before it closes. Only the first user is
recorded as IN or OUT.
weak encryption key
Weak encryption implies that the key could be unscrambled with a realistic amount of processing
capacity and within a reasonable amount of time.
In FCWnx, a message displays informing you that an assigned key is too weak and therefore, invalid.
Corrections must be made before the record can be saved. We recommend entering 48 unique hex
characters, in three 16-character strings. Do not repeat any character. Do not create a pattern.