1
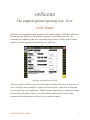
onScene Crew Guide v2.10 December 2014 onScene The simplest patient reporting tool. Ever. Crew Guide onScene was designed from the ground up for simple intuitive field data collection. Returning your attention to the patient experience is our main objective. By replacing the technology that was complicated and prone to failure with a simple, intuitive tool that anyone in the field can use with ease. onScene used on the new iPad This crew guide will focus on several key functions that will be key to your ease of use as well as a brief example of reports for each section. onScene was designed as a touch and go web application. While Internet connectivity is required to logon and transfer and submit reports, you will find that onScene also works while unconnected to the internet to allow you to complete reports. ONSCENE CREW GUIDE 2 Key Training Points User Log on/off process Creating a new report Multi-tasking / moving from one report to another Report transfer process Retrieving a transferred report Managing completed reports Creating photo and video attachments onScene Design Highlights and User-friendly data entry tools ONSCENE CREW GUIDE 3 EMS Log In Page Login is simple and easy. Each device is assigned and logged on to a pre-defined EMS agency and unit. You cannot change either of these settings; doing so requires you to contact your Agency Administrator. Your onScene device knows who is assigned to each division so you can simply touch the “Crew Division” button and select the appropriate schedule to log your whole crew on at once. To change one or more user(s), touch that user name and change the user by selecting someone else from the user list that pops up. See examples on how to do this in the following pages. ONSCENE CREW GUIDE 4 All crew are added by touching A, B, C, or the appropriate weekly schedule. ONSCENE CREW GUIDE 5 To change one or more users, touch that user’s name and the crew list will appear; touch the user you want to select. ONSCENE CREW GUIDE 6 To finish your log in, touch the crew member field on the bottom log in row and select your name from the crew member list. Next, touch the password field and enter your password. Then, touch the green log in button. If your administrator has configured a login message, read the message and acknowledge it by touching OK. Now you’re in and ready to go! ONSCENE CREW GUIDE 7 Creating a New onScene Report Logging in to onScene will create a new patient report for you as pictured above. By design, when logged into onScene you will always be in a report. The report page has all the functionality of a home page so there is no need to exit from the report page for any reason other than logging out of onScene. Whenever you finish a report, whether you transfer it, send it to the server for QA/billing, or delete an unneeded report, a new blank report will be loaded for your next incident. ONSCENE CREW GUIDE 8 If you are working on an unfinished report and would like to keep it on your device for later completion and want to start a new report, simply touch the Blue + button in the top left corner and select “New Run” or “New Run From CAD.” If you select “New Run From CAD” you can select from incident numbers assigned to your unit over the last 6 hours. This will ensure your report is connected to the correct CAD data. You can also enter the incident number manually if you prefer. ONSCENE CREW GUIDE 9 Entering Info on Multiple Reports On-The-Go Use the incident number tab at the top of the report to jump from one report to any other open report on your onScene device. ONSCENE CREW GUIDE 10 Transferring a Report to Another Unit To transfer a report to another unit, touch the Red X and you can select the option of transferring the report to other units in your operating area. You will pick from a list of units and send the report only to the intended recipient for completion. ONSCENE CREW GUIDE 11 Retrieving a Transferred Report Whether you want to retrieve a report sent to you by another unit or one you sent that has not been retrieved by another unit, do the following: Touch the blue + symbol in the top left corner and select “Retrieve Transferred Run.” If a report is available you will see a pop up box that will allow you to select the report. Once selected the report will be loaded to the onScene report page you are viewing. ONSCENE CREW GUIDE 12 Managing Finished Reports Managing completed reports is easy in onScene. By touching the red X button in the top-right corner, you can do the following: “Validate Run Complete”: Validates whether rules defined by your agency for proper documentation are satisfied. Errors indicate issues that must be resolved prior to submitting the run, while warnings indicate issues that may be overridden by the user during submission if appropriate. “Submit and Close Run”: Sends your finished report to the server and remove it from the onScene device. If there are any validation errors, you will not be able to submit your run. Cancel and Delete Run: Delete an unneeded run. Be careful when using this option, because once the run is deleted, it is gone for good. ONSCENE CREW GUIDE 13 Confirm From CAD When submitting your completed run, you can validate that the incident number used is valid for the current unit. Click “Confirm From CAD”. If it is not correct, a warning will appear, indicating that the incident number you have specified was not assigned to your unit. You will be given the option to change the incident number, Should you elect to do so, a pick list of incident numbers assigned to your unit will be displayed. Select the correct incident number from the list, and submit the run again. ONSCENE CREW GUIDE 14 onScene Design Highlights and User-Friendly Data Entry Tools The following pages will highlight a number of the custom tools designed to make onScene a simple and intuitive tool for field data collection. First, what you see is what you get; there are no hidden pages to find for all your most common reports. Every page has the same look and feel. The section buttons that line the sides take you directly to that section and never change so you can always find your way back to any section you need in ONE touch of its button. You know where you are because the currently viewed section button changes from the look of the rest. In this case look at the INC button above displaying the Incident information page. ONSCENE CREW GUIDE 15 Local Records If you log onto a device, and the device still has records on it that have not been submitted, the number of records remaining will be indicated in the top left corner of the home page, to the right of the blue “+” button. ONSCENE CREW GUIDE 16 Data Field Pick Lists When you want to enter data in your onScene report, touch the labeled data element button that you wish to enter. In most cases, onScene has custom, easy-touse data pick lists. You select the entry you wish to use by touching the corresponding button on the pick list. All large pick lists are dynamically sorted by the common use of data elements, the most commonly used elements for your system will be sorted to the top of the list and may change from time to time based on use. Large pick lists use the “More…” button to access a scroll list of more data elements that are not sorted to the short list because they are less commonly used. See the picture on the following page displaying the scrollable pick list. ONSCENE CREW GUIDE 17 Scrollable Pick Lists Scrolling pick lists allow users access to the complete list of potential data elements available for a certain data field. In this case, you see the list for the Chief Complaint or C/Comp button pictured above. Move your finger up or down on the list to make the list scroll and tap on your selection to enter it into the field you are working with. Some lists have a multiselect ability. The search box at the top of the tool allows the user to type in the item they are searching for. This will cause the scrolling list to display only items matching the search. If the user cannot find the desired item on the list, he or she can finish typing out his or her complete entry and then tap on the pencil button to add a freetext entry. ONSCENE CREW GUIDE 18 Multi-Select Lists Above you see a multi select pick list tool being used on the patient history page. All selections change color with a blue highlight and can be deselected by touching one or more items a second time. Multi select lists always require you to touch the OK button to close the list or by touching another data field on the page, such as the Patient Medication list on this page. ONSCENE CREW GUIDE 19 Search and Other Free-Text Keyboard Use Using the search tool displayed above uses the pop-up device keyboard. In this case, it is used for the Patient Medications documentation data field. Because this list contains over 6000 medications, onScene only displays items on the list after at least one letter is entered into the search tool. The user MUST type in a partial or complete medication name to be able to select it from the list. If the user cannot find the desired medication, they can type out the complete medication name and then tap on the pencil button to add a free-text entry. Users can close the keyboard at any time by touching the keyboard symbol on the bottom right corner of the screen. ONSCENE CREW GUIDE 20 Combined Data-Entry Tools Above you see an example of combining two or more data elements in one easy to use tool. The Pulse tool above combines the pulse rate with the answer for quality in the same tool. Using this onScene intelligent design allows onScene to simplify your report creation by eliminating 100s of data entry points throughout each report. ONSCENE CREW GUIDE 21 Automatic Procedures On the EKG page, if you create an EKG entry, an appropriate procedure will also be created. The procedure created will depend on what is selected in the EKG field. If the EKG entry is later changed or deleted, the corresponding procedure will be deleted as well. Similarly, on the vitals page, if you record a glucose value on a vitals entry, a “Blood/Glucose Analysis” Procedure will automatically be created. If the glucose value entry is later removed from the report, the corresponding procedure will also be removed. ONSCENE CREW GUIDE 22 Another Example of Multiple Data Elements Collected on One Tool In this example you have the three elements for Skins, Selecting all normal will enter normal for all three and close the tool. ONSCENE CREW GUIDE 23 Changes to Crew Members on EKG, Rx, and Procedure Pages If you are working on an incident that was started by a first responder unit and subsequently transferred to a transport unit, the names of all members of both crews will be available on the pick list for indicating who performed the procedures. ONSCENE CREW GUIDE 24 Vital Sign Copy Tool If you have a new set of Vitals to enter and only one thing that changed from the last set, just touch the Blue COPY button and all vitals from the previous set will be carried over the new set. Make any needed change entries and enter the time. Even entering times is simple, as you can see from the top of the time tool pictured above. ONSCENE CREW GUIDE 25 Editing User Entries Touch this area to edit this sections All entries for both treatments and findings are shown on the right side of the onScene page you are working on. Each entry displayed on this page is interactive. You can allow edit and/or delete any unwanted entries. Simply touch the documented element you wish to edit, and make any changes to the entry, or press the “Clear” button to delete the entry. ONSCENE CREW GUIDE 26 AMA Section In the AMA section pictured here: Document the condition buttons on the right side. Each question is answered by touching the Green “Yes” side or the Red “No” side. You will see a “Y” or “N” highlight in the corresponding box. Questions that require a response prior to saving a signature are indicated with a [R]. Select the type…AMA, Release, etc. If the patient’s name was not already entered on the Info page, tap on the text area above the signature box to enter the patient’s name. Then tap on the signature box to open the signature capture screen. ONSCENE CREW GUIDE 27 Signature Capture Signature text may be available in multiple languages, depending on how your administrator configured onScene. To select a language other than English, tap on “English” and select a different language from the list. Have the patient read the signature text, sign in the signature box, and tap Save to store the signature. The patient may tap Clear to erase their signature and start over. Tapping Cancel will return to the previous page without storing the signature. ONSCENE CREW GUIDE 28 Here is a Completed AMA Page You will notice that the patient’s signature now appears on the AMA page. This confirms that the signature has been saved successfully. ONSCENE CREW GUIDE 29 Attachment Page Photo and video attachments can be added to the patient record, if enabled by your administrator. Begin by selecting the blue “Choose Attachment” button. Next, choose your attachment source. “Take Photo or Video” will turn on the iOS device camera for capturing a photo. “Choose Existing” will allow the crew to choose photos or video that may be stored in the iOS Photo app. Video will only be available if enabled by your administrator. ONSCENE CREW GUIDE 30 Capturing Photos or Video When capturing a camera image or video from within onScene, the iPad functions strictly as a pass through device and the image is not stored on the iPad. The captured and attached onScene photos and video pass directly through the iPad and are stored on the onScene Server. ONSCENE CREW GUIDE 31 Specifying Attachment Type Tap “Attachment Type” and select the type that best fits your attached photo or video. This label will assist both the receiving hospital and your administrator in identifying your attached images. If “EKG” is selected as the attachment type, and the image is sent to a hospital, the hospital copy will also include the most recent set of vitals. ONSCENE CREW GUIDE 32 Sending Attachments If you select a hospital, your electronic image will be sent to a hospital as well attach itself to the ePCR. If you select “Attach to record only”, the image will become part of the ePCR, but will not be sent to a hospital. The “Size” field displays the attachment file size. Tapping “Upload” completes the process. ONSCENE CREW GUIDE 33 Narrative Made Easy onScene allows for voice dictation when your device is connected to the Internet. Dictate text: From the onscreen keyboard, tap the microphone, and then speak. When you finish, tap the microphone again. The dictated text will begin to appear when you stop talking and tap the microphone. Start using this tool by speaking in shorter blurbs so edits are easier. Also avoid nosy areas when using voice dictation. ONSCENE CREW GUIDE 34 How to Find Specialty Pages Touching the yellow “…” button in the bottom-right corner of onScene gives you the More Pages list. Select from that list to access one of the less-commonly-used pages. ONSCENE CREW GUIDE 35 CAD Incident Page onScene provides a times documentation section, “CAD Incident”, for agencies that do not have a fully integrated CAD interface. The times section is also available as a backup in the event CAD information is not available for an onScene report. Please note that if there is a conflict between data obtained from a direct CAD interface and user-inputted data, the data provided from the direct CAD interface will override the user-inputted data in order to ensure an accurate documentation of times. ONSCENE CREW GUIDE 36 Timeline The Timeline page provides users with an at-a-glance visual representation of the major events that were documented for a run. At-patient-side time, vitals taken, PQRST entries, EKGs performed, procedures performed, medications administered, and hospital signature time appear on a timeline in chronological order. The timeline may be scrolled by dragging it left or right, and may be zoomed by pinching two fingers inward or outward. ONSCENE CREW GUIDE 37 Support The Support page can be used to submit a support request to your administrator or their designees if you have questions about using onScene or are experiencing problems using the application. The device must be online in order to submit a support request. The Issue Date/Time, User, Incident, and Error Location fields are populated by default with the current time the user logged in to the application, and the last incident number and page used. Confirm the information in these fields and change if necessary. Next, in the Description field, enter your question or a detailed description of the problem you are experiencing, then click Send. An email containing all of the information entered on this page, as well as diagnostic information regarding the state of your device, will be sent to your ONSCENE CREW GUIDE 38 administrator or their designees. You will receive a copy of this email in your own inbox. Support The Support page can be used to submit a support request to your administrator if you have questions about using onScene or are experiencing problems using the application. The device must be online in order to submit a support request. The Issue Date/Time, User, Incident, and Error Location fields are populated by default with the current time the user logged in to the application, and the last incident number and page used. Confirm the information in these fields and change if necessary. Next, in the Description field, enter your question or a detailed description of the problem you are experiencing, then click Send. ONSCENE CREW GUIDE 39 An email containing all of the information entered on this page, as well as diagnostic information regarding the state of your device, will be sent to your administrator. You will receive a copy of this email in your own inbox. What has Changed in Version 2.10? The following changes have taken place in the onScene application since the last version (2.8): Changes to “Crew” fields: In the "Crew" fields on the EKG, Rx, or Procedures pages, onScene now allows any crew member from the same agency who participated in the run to be selected. AMA Signatures: On the mobile app, for AMA signatures where the patient name would be included, add a checkbox to indicate that a Parent/Legal Guardian will be signing instead, and allow the name of the parent/legal guardian to be entered Incident Number Drop-Down Label: On the mobile application incident number drop-down field, the name of the "blank" selection has been changed to "# Local Record(s)", with # being the number of records on the device that the current crew is able to select. Viewing of pages with multiple entries: On the mobile app, on all pages that allow multiple entries (SS, Attachments, Vitals, PQRST, EKG, Rx, Procedures), entries will now sort by the time on the entry descending, instead of the time that the entry was created. Also, onScene now shows all of the entries, not just 5 of them. CAD incident number confirmation: On the mobile app, when a crew member decides to submit a run, onScene willverify that the incident number used is valid for the current unit. If not, it give the user a warning: "The incident number you specified (FS14123456) was not assigned to your unit (E12). Would you like to change the incident number? [Change] [Don't ONSCENE CREW GUIDE 40 Change]". If the user decides to change the incident number, onScene will display a pick list of incident numbers assigned to the unit. EKG Page automatically creates procedure: creating an EKG entry will automatically create an appropriate Procedure entry. The procedure that is created will depend on what is selected on the "EKG" field. If the EKG entry is changed or deleted, the Procedure entry that was automatically created will be changed or deleted automatically. Blood glucose value will automatically create a blood glucose procedure: If a Glucose value is recorded on a Vitals entry, a "Blood/Glucose Analysis" Procedure entry is automatically created. If the Glucose value or the Vitals entry is removed, the automatically-created Procedure will be removed as well. ONSCENE CREW GUIDE 41