1
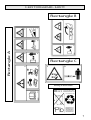
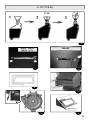
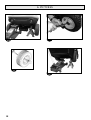
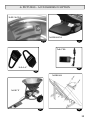
GB
User Manual
Please read carefully before using your machine
(Translation of the originals
instructions manual)
MBHE2-MKHP3-MHHE2MKHE3-MKM
OPERATING AND MAINTENANCE MANUAL FOR THE RIDE-ON MOWER
ETESIA
CONTENTS
2
1.
Your safety and that of others ....................................................................................................................................................... 3
2.
Key to diagrams ............................................................................................................................................................................ 5
3.
Description .................................................................................................................................................................................... 9
4.
Pictures ....................................................................................................................................................................................... 11
5.
Pictures - Accessories in option .................................................................................................................................................. 19
6.
Specifications .............................................................................................................................................................................. 21
7.
Operating instructions ................................................................................................................................................................. 23
8.
Assembly - Disassembly - Access to components ...................................................................................................................... 26
9.
Maintenance ................................................................................................................................................................................ 27
10.
Maintenance schedule ................................................................................................................................................................. 31
11.
Prolonged storage - Winter storage............................................................................................................................................. 32
12.
Troubleshooting .......................................................................................................................................................................... 32
13.
Accessories ................................................................................................................................................................................. 33
14.
Warranty...................................................................................................................................................................................... 34
C
ONGRATULATIONS !
You are now the proud owner of an Etesia ride-on mower. This
extremely reliable and tough machine has been specially designed to
give many years of service.
• In order to prolong the life of your mower and keep it in excellent
working order, read this manual carefully and always follow the
safety recommendations and maintenance instructions.
• As part of our commitment to excellence, we are constantly
seeking new ways of improving our products.
• For this reason, your model may differ slightly from the description
in this manual.
• Up-to-date technical information can be obtained from your dealer.
• He will be happy to resolve any queries you may have.
MOWER IDENTIFICATION
• EVERY MODELS EXCEPT MKM: The identification number of
your mower is located on the right-hand side of the machine next to
the grass box (see picture 1a).
• MKM: The identification number of your mower is located under
the seat (see picture 1b).
• Always quote this number when seeking advice from your dealer.
1• YOUR SAFETY AND THAT OF OTHERS
• Always follow these instructions when using your ride-on mower.
• Prior to use, check that safety labels are present on the mower as
indicated in the manual. Read these labels carefully. If any safety
labels are missing, inform your dealer immediately, as the mower is
required by law to carry them.
• Never remove warning labels or safety instructions.
• Before using your mower, make sure that you are completely
familiar with the controls
• Study the operating instructions so that you are able to stop the
machine quickly.
• Always keep the mower and accessories in good working order.
• Never operate the mower using faulty guards or without the use of
safety devices.
• Do not attempt to adjust the engine speed controls.
• Never race the motor as this will increase the risks of injury to the
operator and the likelihood of damaging the components of your
lawn mower.
• Never allow your mower to be used by anyone who is not familiar
with the operating manual.
• Never use your mower on slopes with a gradient of more than 10°
(17,6%).
• Always observe the special instructions concerning use of the
mower on sloping ground.
• Never drive your mower too close to embankments or ditches, on
soft ground, or where there is a risk of overturning.
• The user is responsible for ensuring the safety of others within the
area where the mower is being used.
• Keep a safe distance from people and animals when the engine is
running.
• Never allow passengers to ride on the mower.
• Never allow children under the age of 16 to drive the mower.
• Always remove the ignition key when leaving the mower
unattended, even momentarily.
• Before using the mower, always check the condition and adjustment
of the blade.
• Never attempt to carry out work on or underneath the mower if it
has been raised on temporary supports or without taking proper
safety precautions.
• Before mowing, always clear the lawn of stones, pieces of wood or
metal, wire, bones, plastic, branches and other debris liable to be
thrown out by the mower.
• Make sure that your lawn has no natural barriers of the type
molehills, cracks, ruts...
• Low branches liable to cause injury to the user should also be
removed.
• Avoid obstacles such as mole hills, concrete pedestals, tree stumps
and edging, which cannot be cut by the blade and which could
damage the cutting mechanism specially the blade.
• Change absolutely the blade after any shock.
• Exercise particular care when reversing.
• The advance control is a maintained-action safety device: never
lock it. Never put your foot astride the two pedals.
• Never place hands or feet under the cutter housing.
• Whilst mowing, take care to avoid injury to others caused by flying
stones and other objects.
• Operate the mower only in broad daylight or with good artificial
lighting.
• Loose clothing and short trousers should not be worn when using
the mower.
• Always wear stout and closed shoes.
• When adjusting the engine or moving parts, always switch off the
engine and remove the ignition key. As a precaution, disconnect the
spark plug caps.
• Never operate the machine when feeling tired or unwell.
• Never operate the machine after consuming alcohol or taking
medicine.
• When the mower is driven on surfaces other than grass, disengage
the cutter and switch it to the fully raised position.
• Do not fill the tank whilst the engine is running. Allow the engine to
cool for few minutes before filling.
• Always use recently purchased petrol. Old petrol will leave gum
deposits in the carburattor, lead or leacks or make the engine
difficult to start. Only buy as much unleaded petrol as is required
for less than one month. Store the petrol in a clean container which
is not used for other purpose.
• WARNING: fuel is highly flammable.
- Always fill the fuel tank in the open and do not smoke during this
operation.
- Add fuel before starting the engine.
Never remove the fuel cap whilst the engine is running or hot.
- Avoid fuel overflow while filing the fuel tank. If in spite of these
precautions it should happen, check following :
a) Clean scrupulously all the contaminated parts.
b) Don’t start the machine as long as you’re not sure that all spilled
fuel has been eliminated.
• Ensure that the fuel tank and fuel can caps are replaced correctly.
• Never store, pour or use petrol near a naked flame or near devices
such as stoves, water-heaters with pilot lights or any other device
liable to produce sparks.
• WARNING: NEVER ALLOW THE ENGINE TO RUN IN
CONFINED AREAS.
Exhaust gases contain carbon monoxide, which is odourless and can
kill.
• Do not start the engine if you can smell petrol, or in the presence of
other risks of explosion.
• Do not run the motor without a silencer.
• Examine the silencer regularly and replace as required.
• Clean the silencer and surrounding area regularly to prevent the
accumulation of grass and other flammable materials. Please cool
the engine a few minutes before you clean the exhaust.
• These precautions are vital to your safety. However, the
recommendations given are not exhaustive and due care should
always be exercised when using your mower.
3
1• YOUR SAFETY AND THAT OF OTHERS
• You should also comply with any legal requirements relating to
ride-on mowers (e.g. insurance, useful life, etc).
• The mower is not designed for towing.
• If the machine has to be lifted or transported, turn off the motor and
close the petrol tap.
• It is better to use a loading ramp to load or unload the machine.
INSURING YOUR RIDING MOWER:
Under the terms of articles L 211-1 and the following, R 211-1 and
the following, and A 211-1 and the following of the Insurance Code,
it is mandatory to ensure all motor-driven land vehicles.
Your riding mower is not homologated for the use of the public
highway which is therefore prohibited to it.
You should not use this mower until you have read the safety
instructions with care. Read this instructions manual carefully for the
use and maintenance of your mower.
SERVICING
• Always keep the machine and its accessories in perfect operating
condition.
• Replace worn or damaged parts for greater safety.
• Replace immediately the exhaust silencer if it is defective.
• Servicing and cleaning work on the mower must only be carried out
with the engine turned off. As a precaution, disconnect the spark
plug caps.
• It is highly unadvisable to use a high pressure cleaner at the risk of
damaging certain parts.
• Spare blades must only be fitted to mowers for which they are
designed, in conformity with the indications given.
• After an impact on a blade, it must be replaced.
4
RESPONSIBILITY
• In the event of failure to use the mower in conformity with the
instructions manual and the applicable regulations, ETESIA cannot
accept any responsibility.
• You must not make any modifications to your mower without the
prior agreement of ETESIA. Any modification not authorised by
ETESIA can make the machine dangerous and lead to severe injury
in use. In the event of failure to comply with these instructions
ETESIA cannot accept any responsibility.
2• KEY TO DIAGRAMS - SAFETY
• LABELS
• Various labels have been affixed to your mower.
• Check that they are all present (see list below and pictures 1, 2
and 3).
• Labels with a yellow background warn against risks.
• The other labels contain instructions for operating the mower.
This symbol appears in the instruction manual alongside
those sections which deal with user safety.
This symbol appears in the instruction manual alongside
important information on how to prolong the life of your
mower.
• ENGINE DIAGRAMS
Fuel is highly explosive and inflammable.
Stop the engine before fill the fuel tank. DO NOT SMOKE.
Always fill the fuel tank in the open and never pour or
use petrol near a naked flame or near devices such as
stoves, water-heaters with pilots lights or any other
deviceiable to produce sparks.
Exhaust fumes are very toxic and contain carbone monoxide
who is a deadly and odourless poison. Do not run the engine
in confined areas.
To avoid any burn, do not touch the exhaust pipe when it is
hot.
• SAFETY LABELS
DIAGRAMS RECTANGLE A (PICTURE 3)
DIAGRAMS RECTANGLE C (PICTURE 2)
• a = CAUTION !
• DANGER!
• b = Before using, please read and follow the safety and maintenance
instructions of the instruction booklet.
• a = Risk of cutted feet and hands.
• c = Stop the engine, disconnect the spark plug and remove key from
ignition before proceeding to any maintenance operation.
• d = Risk of projections.
• b = Hold the third persons far from the machine.
MARKING OF ACCUMULATORS
• e = Avoid the presence of third persons in the danger zone.
• a = Indicates these are hazardous products which should preferably
be returned to the distributor.
• f = Fall down risk. Never transport passengers.
• b = (Pb) indicates the presence of lead.
• g = Hold the third persons far from the machine.
• h = Risk of toppling over the machine.
• i = Never use your ride on mower on slopes with a gradient of more
than 17,6 % (10°).
DIAGRAMS RECTANGLE B (PICTURE 3)
• a = Risk of cutted feet and hands.
• b = Hold the third persons far from the machine.
• c = Risk of objects projection and cutted feet.
• d = Never use the mower without the flap.
Never open the flap of the cutting box by running engine.
Before each use, check that the flap is locked or the rear charge
deflector is put in place.
5
2• KEY TO DIAGRAMS - SAFETY
1a
a
Rectangle C
2
1b
3
Rectangle A
Rectangle B
6
2• KEY TO DIAGRAMS - SAFETY
Rectangle A
Rectangle B
Rectangle C
a
b
Marking of accumulators
a
b
7
2• KEY TO DIAGRAMS - USE
• With the option MVE80, the grass box emptying is done by
electrical ram controlled by a switch.
• ENGINE SPEED
• Indications for controlling engine speed:
START : position for starting the engine
MAXI : engine at full speed
MINI : engine idling
CLOSING THE BOX
OPENING THE BOX
• STARTING THE ENGINE
• OPERATING THE CUTTER
0 : engine off, power switched off
I : power switched on
I : cutter switched on
: engine started
0 : cutter switched off
• PARKING BRAKE
• BY-PASS
• The arrow indicates the direction of movement
of the brake lever in order to engage the parking
brake.
1 : Lever on I position : closed by pass = advance transmission
engaged
0 : Lever on O position : open by pass = advance transmission
disengaged
• CUTTING HEIGHT
• LIGHTING (MKHP)
• Indicates the cutting height.
• HORN (MKHP)
• EMPTYING THE GRASS BOX
• On every models except MKM :
The arrow indicates the direction of movement
of the release lever in order to empty the grass
box.
8
3• DESCRIPTION
1
2
4
3
5
12
7 8
14
6
13
15
11
9
• 1. Fuel cap
• 2. Parking brake lever
• 3. Cutting height lever
• 4. Emptying grass box lever (except on MKM)
• 5. Engine speed adjusting lever
• 6. Seat lever
• 7. Forward pedal
• 8. Reverse pedal
10
• 9. Inspection flap
• 10. Ornamental hub cap front wheels
• 11. Ornamental hub cap rear wheels
• 12. Front light (MKHP)
• 14. Strap hook
• 15. Grass box bonnet
• 16. Central bonnet
9
3• DESCRIPTION DASHBOARD
1
2
5
4
7
3
• 1. Cutting deck switch
• 2. Grass box opening and closing switch (option MVE80)
• 3. Hour meter - Tachometer (MKHP)
• 4. Audible warning device control switch (MKHP)
10
6
• 5. Lights control switch (MKHP)
• 6. Key switch
• 7. 12V charger connector (option MCB)
4• PICTURES
STOP
4
MBHE - MKHE
MHHE - MKM
MKHP
5
5a
6
7a
10° (17,6 %)
7b
8
11
4• PICTURES
13
9
a
10
13a
a
11
12
12
13b
14a
4• PICTURES
14b
18
2
1
15
19
20
16
17
2
1
21
13
4• PICTURES
HONDA
23
22
BRIGGS & STRATTON
24a
c
HONDA GXV 390
24b
BRIGGS & STRATTON
25
14
KAWASAKI FS481V
24c
BRIGGS & STRATTON
4• PICTURES
HONDA GXV 390
25a
28a
a
b
c
KAWASAKI FS481V
25b
HONDA GXV 390
28b
KAWASAKI
b
26
a
c
b
d
KAWASAKI
FS481V
a
27
28c
15
4• PICTURES
29a
29b
BRIGGS & STRATTON
HONDA
30a
31
16
KAWASAKI
30b
32
4• PICTURES
MAXI
MINI
33
36b
MC85MN
36c
34
a
37a
35
36a
37b
17
4• PICTURES
38b
38a
39
40
18
4• PICTURES - ACCESSORIES IN OPTION
MU80N
MD80N
41
42
MCB
MAC
44
43
MR80
MET
45
46
19
4• PICTURES - ACCESSORIES IN OPTION
MRM
47
MVE80
MV80N
49
MN80
48
50
20
21
240 liters
Grass box capacity
Not cutted radius
Dynamic breake
Hydraulic with advance transmission
0,7 m
Front : 10x6.5-6
Rear : 16x6.5-8
0 - 9 km/h
Foward speed
Tyre sizes
Hydrostatic
Transmission
MOWER
6-8h
Autonomy
2850 ± 100
1,1 l
12 liters
1,4 l
Paper element + polyuretahne foam filter
Fuel tank capacity
Rate
Oil sump capacity
Motor air filter
Fuel filter (ref: 25266)
Paper filter
Super grade unleaded fuel
Front : 13x5.0-6
Rear : 16x6.5-8
1,5 l - 1,7 l with filter
Ref : 18363
Front :10x6.5-6
Rear : 16x6.5-8
Ø
3000 ± 100
Ref : 03861
12V - 15A with rectifier
Under pressure by pump
Standard Ø 14 mm x 19 mm
Fuel type
Motor oil filter
MKM
16 HP (11,9 kW) at 3600 rpm
603 cm3
Twin cylinder air-cooled
73 x 72 mm
KAWASAKI FS481V
MKHP
Ref : ZY751 or 3861
MKHE
Standard Ø 14 mm x 19 mm
0,75 mm
Standard Ø 14 mm x 19 mm
Spark gap
Spark plug
Electric 12V
Starter
12V - 10A with rectifier
By oil pump
13 HP (9,6kW) at 3600 rpm
389 cm
3
88 x 64 mm
12V - 20 Ah
12V - 9A with rectifier
By oil turbine
Without
Single cylinder air-cooled
15,5 HP (11,4 kW) at 3600 rpm
502 cm
3
91 x 78 mm
4 stroke OHV
MHHE
HONDA GXV390
MBHE
BRIGGS & STRATON INTEK 31E607
Battery
Alternator
Lubrification
Power
Cubic capacity
Cylinder / Cooling
Bore / Stroke
Type
Engine
MODEL
6• TECHNICAL SPECIFICATIONS
22
MODEL
Steel
No
Central steering 5 positions
80 cm
Electromagnetic with built-in blade brake
80 cm
Hanging cutting deck
230 Kg
1,47 m/s² maxi
0,66 m/s² maxi
1,17 m/s² maxi
1,12 m/s² maxi
1,17 m/s² maxi
1.4 awx
1.4 awy
awz
A (8)
Directive 2002/44/CE
Reference standards : ISO2631-1, ISO5349-1+2
A (8)
ahw
86 dB (A)
Switches on grassbox / seat / neutral position / parking brake
ahw
Daily exposure value
MHHE
Mechanical, mounted on hydrostatic box
1975 x 825 x 1210 mm
Seat vibration level
(full body)
MBHE
Directive 2006/42/EC
Reference standards : EN836, EN1032, EN1033
VIBRATIONS
Sound pressure at driver’s seat
SAFETY SYSTEM
Anti scalp protection
Cutting height
Cutting width
Blade clutch
Blade
Type of mounting
Cutting deck
CUTTING SYSTEM
Dimensions L x w x H
Weight
Parking breake
6• TECHNICAL SPECIFICATIONS
Yes
1995 x 825 x
1300 mm
240 Kg
MKHP
2,1 m/s² maxi
2,1 m/s² maxi
Handlebar vibration level
(other appendages)
1975 x 825 x
1210 mm
MKHE
Switches on seat
/ neutral position /
parking brake
Yes
85 cm
85 cm
Mastershock
1730 x 900 x
1220 mm
220 Kg
MKM
7• OPERATING INSTRUCTIONS
7•1 PRE-DELIVERY INSPECTION
• The pre-delivery inspection of your mower is a highly technical
operation and will therefore be carried out by your approved dealer/
repairer.
7•2 SAFETY SYSTEMS
• The mower is fitted with 4 safety switches which are activated by :
- 1. the control pedals
- 2. the seat
- 3. the grass box (except on MKM)
- 4. the parking brake
• The motor can only be started if the following conditions are
satisfied :
- the driver is seated or the parking brake is engaged
- the control pedals are in the neutral position
- the cutter is not switched on.
• The motor is stopped automatically if the driver leaves the seat and:
- either the cutting system remains engaged
- or the parking brake is not applied.
• The engine will also stop if the control pedals are operated whilst
the parking brake is on.
• The cutter can only be activated if :
- the grass box is correctly closed
- and the driver is seated.
WARNING!
The grass box opening provoke the stop of the cutting unit.
The cutter unit will automatically start when the grass box
comes back in working position.
• In the event of a fault, do not attempt to use your mower. Contact
your approved dealer/repairer.
7•3 FUEL
CAUTION DANGER !
Petrol is highly inflammable.
• For your engine we recommend that you use 95 unleaded fuel that
you have acquired recently. Only buy the amount of petrol that you
can use in 1 month and store it in a jerrican specially reserved for
this purpose.
• Do not add oil to the petrol !
WARNING !
Do not use additives or petrol/alcohol mixtures.
• Always fill up outdoors and do not smoke when filling the tank.
Avoid any flames or the projection of sparks. Avoid spilling petrol
and be sure not to overfill the tank to prevent it overflowing : leave
a space of approximately 5 cm under the filler spout to allow the
fuel to expand.
• When filling the tank, we advise the use of a funnel with a float. By
means of its floating stem, this funnel indicates when the tank is full
(see picture 4).
When the tank’s full, take the funnel away by holding the
top of the float rod (see 3 picture 4).
• Put the tank and petrol feed caps back in place correctly.
• If petrol has been spilled, when you smell it, or if there are any
other explosive conditions, do not try to start the engine but clean
all the parties concerned carefully and avoid causing ignition until
the petrol vapours have dissipated.
When draining the petrol tank, work outdoors (in the
open air).
7•4 SEAT ADJUSTMENT
• For safe driving, the position of the seat should be adjusted so that
the pedals are within reach.
• To unlock the seat, push the seat lever
- towards exterior on MKHP.
- towards interior on MBHE, MKHE, MHHE and MKM.
• Move the seat to the required position.
• Release the lever and check that the seat is locked in place.
7•5 TURNING THE ENGINE ON AND
OFF
7•5•1 TURNING ON
Before use, always carry out a visual check to
make sure that the cutting blade and its attaching
screw are not worn or damaged.
• Before starting the engine, always check the engine oil level.
Top up the oil if the level does not reach the mark [FULL] (see
paragraph 9•3•1 and picture 24).
The oil gauge must be screwed down home when the engine
is running.
• Also check the level of the hydraulic fluid in the expansion cylinder.
The oil level must always be visible in the expansion cylinder (see
paragraph 9•4•2).
• Check the cleanliness of the air cooling inlet grille under the seat,
the engine compartment and the hydrostatic axle cooling fins. Also
regularly check the condition of the fan (see picture 29).
• Top up with fuel in order not to have to add petrol during work
when the engine is hot.
• Open the petrol tap.
• Take place on your mower seat.
• Make sure that the cutting system selector is not engaged and that
the advance pedals are not operated.
• Turn the petrol control to the [START] position for cold starts.
• Insert the ignition key and turn it to the right to the starting position
].
[
• When the engine has started, release the key and put the accelerator
control between the [MINI] and [MAXI] positions.
• Let the engine run for between 3 and 5 minutes before setting the
accelerator control to the [MAXI] position and starting the cutting
system.
To restart a hot engine, set the accelerated control directly to the
[MAXI] position and start the engine.
The engine can only be started if the parking brake is applied and the
cutting system selector is not engaged.
CAUTION ! Never leave the engine running in closed
areas where carbon monoxide, a dangerous substance, could
build up.
CAUTION ! Never remove the petrol cap or add petrol
while the engine is running or when it is hot. Leave the
engine to cool for 2 minutes before topping up with petrol.
Do not change the original settings of the engine
and do not let the engine race. In the event of
maladjustment, contact your ETESIA dealership.
23
7• OPERATING INSTRUCTIONS
7•5•2 TURNING OFF THE ENGINE
• Set the accelerator control to the [MINI] position then turn the
ignition key to the left, bringing it to the off position [O].
• Close the petrol tap for extended periods of stoppage.
CAUTION ! Never use the accelerator control [START]
position to stop the engine.
CAUTION ! Never leave the ignition key in the on
position [I] when the engine is at a stop; the battery would
discharge slowly and the hour meter would continue to run.
Never leave your foot astride the two pedals.
The position of the pedals governs the speed of movement of the
mower from stationary (pedal not operated) to top speed (pedal
pressed down all the way), as well as dynamic braking.
• Release the pedal to reduce the speed of movement.
• Lift your foot entirely off the forward pedals to come to a stop : the
mower will brake gradually until it reaches a full stop.
• To stop quickly, lift your feet off the pedals and apply the parking
brake.
CAUTION ! When you leave the mower unattended,
remove the ignition key.
7•6 STARTING AND STOPPING THE
CUTTER
7•6•1 STARTING THE CUTTER
• Move the throttle hand-lever to the [MAXI] position.
• Swing in [1] position the comutator located on the dashboard (see 1
description page 10).
• The cutter can only be activated with the driver seated and the grass
box in normal working position.
7•6•2 STOPPING THE CUTTER
• To stop the cutter, move the switch to position [0].
The cutter will stop when the box opens and will only restart when the box returns to the normal closed position.
• Stoppage of the engine caused by the driver leaving his seat will in
turn stop the cutter.
Always turn the cutting system off before leaving your seat.
7•7 DRIVING THE MOWER
7•7•1 PARKING BRAKE
The parking brake locking lever is to the left of the seat.
• To apply the parking brake, push the brake lever forwards then
towards the inside of the machine; because of the spring loading,
the lever will assume that the parking brake applied position.
• To release the parking brake, push the brake lever forwards then
engage it in its notches.
Always apply the parking brake before getting out of your
seat.
To slow down your speed : control the forward speed with
dynamic braking provided by the hydrostatic transmission by
reducing the action on the forward travel pedal.
7•7•2 FORWARD CONTROL PEDALS
7•8 CUTTING HEIGHT ADJUSTMENT
• To adjust the cutting height, use the lever situated on the left of the
seat.
• Push the lever down to lower the cutter and up to raise it.
• Select a higher setting for long or wet grass (position 4 and 5).
• Select lower settings (position 1, 2 and 3) for flat, regularly
maintained lawns.
7•9 MOWING
Before mowing, check the condition of the blade
and its tightness. To obtain regular cutting, it is
important to check whether the tire pressure is the
recommended pressure (see paragraph 9•6).
• The picture 6 illustrates the optimum method of using the mower on
most lawns.
• These instructions will enable you to avoid making sharp turns and
unnecessary journeys.
• When mowing with the cutter set low, it is important to select a low
speed, to keep the engine at a high speed.
7•9•1 MOWING WITH GRASS COLLECTION
(EXCEPT MKM)
• When the grass box is full, an alarm will sound, switch off
immediately the cutter.
• By switching off the cutter the alarm is deactivated.
• Empty the box.
• The box is emptied from the driver’s seat.
- With lever : to empty, lift this lever and drive slowly the machine
before closing the grass box.
- Option MVE80 : empty with the electric ram by swinging
the opening and closing box comutator towards down, move
slowly the machine before closing the box by swinging the same
comutator towards the top.
• To make collection of the grass easier after mowing, create two or
three larger piles of grass rather than several smaller ones.
• Because emptying the box is so quick and easy, there is no need to
fill it completely. Empty the box, even if it is not completely full,
whenever you come to an existing pile of grass.
• This will save unnecessary journeys.
The forward movement of your mower is controlled by the two
pedals placed at the front of the right running board.
7•9•2 MOWING WITHOUT COLLECTING :
MODEL MKM
• Before making any movements, release the parking brake.
• Operate the right hand pedal gradually to adjust the forward speed.
• Gradually operate the left hand pedal to adjust the reverse speed.
• Look at the mown area : there should be no cut grass left on the
surface. If cut grass can be seen, the cutting height should be raised
until the desired result is obtained.
24
7• OPERATING INSTRUCTIONS
Advice for mulching
7•10 DRIVING ON SLOPING GROUND
• It is better to mulch the grass when it is dry. Mowing wet or damp
grass increases the amount of debris accumulated in the housing,
results in clodding and requires more power.
• Keep the blade housing clean. Accumulated debris under the
housing reduces the shredding efficiency.
• Only mow one third of the height of the grass at a time. Mow more
than once if the grass is tall or wet.
• Do not mow the same area more than once :
- allow a greater overlap of cutting.
- adjust the speed according to the condition of the grass.
- the blades must be in perfect condition. Check them and sharpen
them frequently.
• The machine is suitable for use only on ground with a gradient of
less than 17,6 % (10°) (see picture 8).
• To ensure maximum safety when driving on slopes, follow the
instructions below :
- Avoid sudden stops.
- Always drive at low speed so as not to lose control of the mower.
- When moving off on a slope [uphill or downhill start], release the
parking brake and move forward immediately using the control
pedals.
- Particular care should be taken when performing U-turns on
sloping ground. Prepare for the change of direction and reduce
speed so as not to lose control of the mower.
- Apply the parking brake as soon as the mower stops.
7•9•3 HIGH GRASS MOWING
Always stop the engine and take the key out of the ignition
before modifying the open or closed deflector mowing
mode. Choose the mowing mode before beginning to mow.
OPTIONAL MD80 DEVICE (except MKM)
• For mowing exceptionally high grass, a cutting deck lateral ejection
device improves the efficiency of your mower.
7•11 SPECIAL EQUIPMENTS FOR
DIFFERENT MODELS
7•11•1 LIGHTING (MKHP)
In order to see and to be seen, your mower is fitted with front lights.
Please switch the lighting control commutator on.
• Use of grass box as deflector :
- For mowing without picking up the grass, the bottom of the grass
box can be removed. To unclip the bottom of the grass box, bring it
to the dumping position (see picture 7a).
7•11•2 BUZZER (MKHP)
MODEL MKM
CAUTION ! In spite of these equipments, you are not allowed to
drive on public roads with your machine.
• When mowing tall grass, use the lateral ejection device built into
the cutting deck. This improves the efficiency of your mower
Opening/closing the deflector :
• Undo the lateral deflector clasp on the right of the cutting deck. The
deflector is deployed automatically outwards by a spring, and the
protective flap is positioned in front of the lateral ejection outlet
(see picture 7b).
• Check that the protective flap is in position and in good condition.
Do not use your mower in the lateral ejection configuration if the
protective flap is faulty.
• To return to the mulching configuration, push the lateral deflector
towards the cutting deck, hook the clasp in its bracket and close it
again.
In order to signal a danger : you can use a buzzer. Please switch the
buzzer control on.
7•11•3 HOUR METRE (MKHP)
To make the maintenance of your machine easier, the hour metre will
remind you through messages when your oil needs to be emptied
(after 10 first hours and then every 50 hours).
• The message will appear one hour before due time and will stay
during on the screen two working hours. After two hours it will
automatically disappear.
• In normal time when the engine is on the screen will show you the
engine running and when the engine is off the total number of hours
done.
25
8•ASSEMBLY - DISASSEMBLY - ACCESS TO COMPONENTS
8•1 ACCESS TO THE ENGINE
Switch off the engine and remove the ignition key. protect
your hands by wearing gloves.
• Loosen the two screws by 1/4 turn (see picture 9) using your key
ring.
• Remove the bonnet.
• Compress the spring by squeezing together the 2 locking plates
located in front of the battery (see picture 10).
• Pivot the seat frame forward, and release the locking plates to
secure the support in the upright position. To release the support,
squeeze the locking plates together again.
• To put the bonnet back into place, do reverse procedure.
8•2 ACCESS TO THE FUSE BOX
• The fuse box (see picture 11) is located in front of the battery, under
the front cover.
• It is equiped with 2 fuses. Each fuse is protected by a black cap.
- Fuse c : Battery charge fuse.
- Fuse b : General protection fuse.
8•3 ACCESS TO THE HYDROSTATIC
GEARBOX
• To gain access to the hydrostatic gearbox, remove the right and the
left cover (see picture 12 and paragraph 9•4).
• Adjust the cutter setting to the lowest position.
• Take out the belt guide (see picture 15) and the blade transmission
belt by acting on the tensioner (left side of the machine).
• Remove the six pins from the bolts and handles of the cutter plate
on the cutting height adjustment arms. First remove the 2 front
handles, followed by the 2 rear bolts (see pictures 16 and 17).
The right-hand rear bolt is integral with the cutting height
adjustment arm (see picture 18).
• Move the cutting mechanism forward to release the ejection channel
from the gasket sheet (see picture 19).
• Apply full left lock to the steering wheel.
• Remove the cutting mechanism.
• To replace the cutting mechanism, repeat these steps in reverse
order.
For your safety reasons, please always make sure that the
bonnet and protections assembly are fitted on the machine
before starting it.
8•5 REMOVAL OF THE GRASS BOX
(EXCEPT MKM)
• Tilt grass box bonnet towards the seat and hold it open.
• Remove the discharge rod from the connecting rod situated in the
grass box (see picture 20).
• Remove the Beta pins, followed by the bolts (see picture 21).
• Remove the box and replace the bolts and pins so as not to lose
them.
WARNING !
8•4 REMOVAL OF THE CUTTER
Switch off the engine and remove the ignition key. Before
removing the cutter, put on protective gloves.
• Apply the parking brake.
• Unscrew and rotate the screw 1/4 from the left and right lateral
bonnets with your key ring, and take them out (see picture 12).
MODEL MKM
• Take out the left and right protections (mobile elements) by
unscrewing and rotating screw ¼ with your key ring (see a pictures
13a and 13b).
• Adjust the cutter setting to the highest position.
• Detach the equalizer spring of the cutting height adjustment
mechanism at the rear of the machine using a small twine (see
picture 13).
• Unhook the spring from the belt tightener and release the belt from
the pulley.
• Adjust the cutter setting to the lowest position.
• Remove the six pins from the bolts and handles of the cutter plate
on the cutting height adjustment arms. First remove the 2 front
handles, followed by the 2 rear bolts (see pictures 16, 17 and 18).
• Adjust the cutting height lever to the highest position.
• Apply full left or right lock to the steering wheel.
• Remove the cutting mechanism.
• To replace the cutting mechanism, repeat these steps in reverse
order.
FOR ALL OTHER MODELS
• Detach the equalizer spring of the cutting height adjustment
mechanism at the rear of the machine using a small twine (see
picture 13).
• Take out the left and right protections (mobile elements) by
unscrewing and rotating screw ¼ with your key ring (see pictures
14a and 14b).
26
Never operate the mower without the grass box.
The grass box should be removed only for cleaning.
8•6 ACCESS TO THE FUEL TAP
MODEL MKM
• The petrol cap can be reached by the left side.
• Undo the quarter-turn screws on the left-hand side cover and
remove it (see picture 12).
- Fuel tap open : b picture 24c.
- Fuel tap closed : a picture 24c.
FOR ALL OTHER MODELS
• Open the grass box.
• The petrol cap can be reached alongside the grass box.
- Fuel tap open : b picture 22.
- Fuel tap closed : a picture 22.
• The HONDA engine has an extra tap situated close to the
carburettor. Make sure that you keep it open (see picture 23).
9• MAINTENANCE
• CONDITION OF THE CUTTER (BLADE)
Before carrying out any maintenance, turn off the engine
and remove the ignition key.
9•1 CLEANING
The best maintenance is above all the regular cleaning of your mower
each time you use it.
• It is highly unadvisable to use a high pressure cleaner.
In any case, be sure not to spray water on to the parts of the engine
such as : carburateur, air filter, ignition, silencer and the electrical
parts. Do not direct water onto the bearings (blade or wheel
bearings) or the hydraulic components.
• It is recommended that the engine and all the transmission
components be operated after cleaning to ensure the evacuation of
any water that might have leaked into the moving parts.
9•2 CUTTER HOUSING
9•2•1 CLEANING THE CUTTER HOUSING
• After using the mower, always clean the cutter housing, particularly
the inside face.
• Cleaning the cutter housing using the pipe coupling.
• On the left-hand side of the cutter housing is a coupling allowing
connection of a garden hose (see a picture 2).
- Connect the hose to the cutter housing.
- Remove the bottom of the grass box (see picture 7a).
- Switch on the water tap.
- Sit on the mower, and start up the engine and cutter.
- After approximately 3 minutes the blade is clean.
- Switch off the cutter and then the engine.
- Switch off the water and disconnect the hose.
- Switch the cutter on again for a few minutes in order to expel the
water.
9•2•2 CLEANING THE CUTTER
FOLLOWING REMOVAL (SEE § 8.4)
If the mower has been used under particularly tough conditions (very
wet grass, mowing in a very low position), it may be necessary to
remove the cutting plate and clean it with a scraper. Take advantage
of the opportunity to check the condition of the blade and the
coupling, and of replacing them if necessary. A properly maintained
cutting system will improve cutting quality.
9•2•3 CLEANING THE GRASS BOX
(EXCEPT MKM)
• Like the cutter housing, the grass box should always be cleaned
after use to ensure optimum air flow. Cleaning should be carried out
using a garden hose.
WARNING !
Proper maintenance of the cutter housing and grass box will
improve grass cutting and collection and prolong the life of
the mower.
9•2•4 MAINTENANCE OF THE
CUTTER
WARNING !
Before carrying out any work on the cutting mechanism,
always switch off the engine and remove the ignition key.
Protective gloves should also always be worn.
• Before using the mower, always check the blade for signs of
damage or wear :
- 1 : Normal - 2 : Twisted - 3 : Worn - 4 : Split (see picture 34).
• If the blade is blunt or twisted, the mower will not cut or collect
correctly.
- Damaged blades can be highly dangerous if a section of the blade
becomes detached and is ejected from the cutter housing.
• Change absolutely the blade after any shock.
• Some microcracks provoked by a shock can lead to the rupture of
the blade if it’s not replaced.
• Change worn or damaged blades immediately (see section below).
- Blades which are blunt but do not present other signs of damage
may be re-sharpened.
- Do not resharpen the blade beyond the limit marked on the blade
edge.
- After sharpening, the blade should be re-balanced to prevent
vibration.
- The blade coupling should also be checked to ensure that it is in
good working order.
• In the case of serious damage to the cutter housing, the entire
cutting mechanism should be examined by your approved dealer/
repairer.
9•2•5 REPLACEMENT OF THE CUTTER
(BLADE)
Before carrying out any work on the cutting mechanism,
always switch off the engine and remove the ignition key.
Also protect your hands by wearing gloves.
- MODEL MKM (PICTURE 36C)
• The blade may be inspected and removed via the lateral ejection
device.
• The best way to replace the blade is by removing the entire cutting
mechanism (see section on removal of the cutting mechanism 8•4).
• Lock the blade with a wooden block between the blade and the
cutting deck, then remove the central bolt with a 17 mm spanner
(see picture 36a).
• Grease the end of the shaft before replacing the blade flange. Check
the condition of lock washer (ref. 37665), flange (ref. 50334) and
the key (ref. 20602).
• Tighten the blade bolts, to 50 Nm.
• The cutting blades and their fastening screws are available under
reference MC85MN.
- FOR ALL OTHER MODELS (PICTURE 36B)
• The blade may be inspected and removed via the inspection flap in
the ejection channel (see picture 35).
• The best way to replace the blade is by removing the entire cutting
mechanism (see section on removal of the cutting mechanism 8•4).
• Lock the blade with a wooden block between the blade and the
cutting deck, then remove the central bolt with a 17 mm spanner
(see picture 36a).
• Grease the end of the shaft before replacing the blade flange. Check
the condition of lock washer (ref. 37665 - Pos. 6), flange (ref.
28420 - Pos. 11), key (ref. 20602 - Pos. 10), shearbolt (Pos. 9), nuts
(Pos. 8) and the support washer (ref. 28238 - Pos. 7).
• Tighten the blade bolts, to 50 Nm.
• Replace the blades so that the cutting edge is facing the discharge
duct.
9•2•6 REPLACING SHEARBOLTS
• The shearbolts connect the blade and the blade flange.
27
9• MAINTENANCE
If a sudden shock occurs, these bolts shear instantaneously and
protect the entire transmission system.
• You can purchase a set of 8 screws and shearbolts (ref. 26157).
• Tighten the safety bolts to a torque of 5 Nm (MKM).
Tighten the safety bolts to a torque of 8 Nm (other models).
• Contact your dealer if you do not have the necessary tools or
knowledge.
9•3 ENGINE MAINTENANCE
WARNING !
For work on any parts related to the engine, switch off the
engine, remove the ignition key and allow the engine to
cool. Also protect your hands with working gloves.
Never touch the exhaust pipe, the cooling cylinder or fins,
to avoid the risk of burns.
9•3•1 CHECKING THE OIL LEVEL
(see picture 24a for B&S / 24b for HONDA GXV 390 / 24c
for KAWASAKI FS481V).
• To be checked before each machine use.
• Position the mower on a flat surface.
• MKM : Undo the quarter-turn screws on the left-hand side cover
then remove it (see picture 12).
• MBHE - MKHP - MHHE - MKHE : Swing the seat towards
the front (see paragraph 8•1).
• Clean the area around the filler neck to prevent dirt from entering
the sump.
• Remove the dipstick.
• Wipe the gauge with a clean cloth and place it back in the filler
tube.
• MBHE : screw the plug back on and then unscrew it again (see
picture 24a).
• MKHP - MHHE - MKHE - MKM (see c picture 24c) : rest
the plug on the tube without screwing it down.
• Take out the gauge to check the level : the oil left on the gauge
should reach between the marks [ADD] and [FULL] or [MINI] and
[MAXI] (see pictures 24b and 24c). For the capacity of oil sump :
see technical characteristics.
9•3•2 DRAINING THE ENGINE OIL
• After initial 10 h service to be done by your dealer, the engine oil
has to be replaced with the first of the following expiry :
- Every 50 h or once each year.
• Do the emptying while the engine is still warm, oil will be easier to
take out.
• Position the machine on a flat surface.
• Stop the engine and remove the ignition key.
• MKM, MKHE AND MHKP MODELS (PICTURE 25B)
- The cutting system does not require dismantling.
- Undo the quarter-turn screws on the left-hand side cover then
remove it (see picture 12).
- Place an appropriate container (c) at the oil drainage pipe outlet, at
the back of the mower.
- Using an open-ended spanner (a), open the drainage valve (b), and
allow the used oil to drain into the collecting container (c) placed
at the back of the machine.
- Close the valve.
28
• MHHE AND MBHE MODELS
- Remove the cutter (see paragraph 8•4).
- Unscrew the drain plug (see picture 25afor B&S engine / 25a
for HONDA engine) and drain the used oil into a appropriate
container.
- Clean and replace the drain plug.
- Clean the area around the filler neck to prevent dirt from entering
the engine.
• MKM, MKHE, MKHP, MHHE AND MBHE MODELS
- Remove the dipstick and slowly add a 10W40 multigrade engine oil
to specification API-SL or ACEA-A3 ref. ETESIA 38383 (2 liters)
or an SAE 30 monograde oil, through the filler pipe.
- Check the oil level using the dipstick (see paragraph 9•3•1).
- The level should reach but not exceed the [FULL] or [MAXI]
marker.
WARNING !
Special care should be taken when draining hot oil.
Dispose of used oil at an approved collection point.
9•3•3 REPLACEMENT OF THE OIL FILTER
(MKHE - MKHP - MKM)
Change the oil filter every 100 working hours.
WARNING !
A hot engine can cause very severe burns. Before changing
oil filter, wait engine cooling.
• Put a receptacle under filter connection.
• Turn filter (see A picture 26) (clock sense opposed) and take it off.
• Put a clean oil film on the new oil filter joint.
• Set up the new oil filter (clock sense) until the joint reaches the
fitting surface (see B picture 26) then screw the oil filter (3/4 hand
turn).
• Check oil level and start the engine about 3 minutes : then stop the
engine and make sure there is no oil leak at oil filter connection.
• Adjust oil engine oil to compensate the oil level decrease due to oil
filter content.
9•3•4 SPARK PLUG (PICTURE 27)
• Spark plug reference : Ref. 03861 for HONDA and Kawasaki
engines.
WARNING !
Do not attempt to change the spark plug until the engine is
completely cold.
• Clean or replace the spark plug after every 100 hours of service.
- Disconnect the spark plug lead and remove the spark plug.
- Clean the electrodes (a) using a metal brush to remove carbon deposits.
- Check that the porcelain is not cracked and that the electrode is
not excessively worn. Replace the spark plug if necessary.
- Check the spark gap (b) using a feeler gauge.
The gap should be set on 0.75 mm. Adjust the gap as necessary
using only the outer tab.
- Replace the spark plug and tighten with a torque of 22 Nm.
- Reconnect the spark plug lead.
9•3•5 AIR FILTER
A dirty air filter restricts airflow to the carburetor, reducing engine
performance. If engine is used on dirty or dusty surfaces, clean more
often than mentioned in the maintenance manual.
9• MAINTENANCE
If engine is used without air filter or with a damaged air
filter, dirts will penetrate into the engine which will wear
out more quickly. This type of damage isn’t covered by the
limited warranty.
• Once a year or after every 100 hours of service, as appropriate,
remove the fan cowl and clean the areas indicated in order to
prevent the engine from overheating, racing or being otherwise
damaged.
• Clean more frequently, if necessary.
CONTROL
Remove the filter cover and check the air filter elements.
Clean or replace the dirty filter elements. Always replace the
damaged filter elements.
• MHHE (PICTURE 28B) : Unscrew the finger nut(s) (a) and
remove the cover.
• MBHE (PICTURE 28A) : Remove the cover and carefully
remove the filter elements.
• Clean the filter base thoroughly, taking care not to allow dirt and
dust to enter the carburettor (use a clean, lightly oiled cloth).
• Clean the filter elements :
- Foam element (pre-filter).
- Remove the foam pre-filter (c) from the element (d).
- Wash in warm soapy water.
- Wrap in a clean, dry cloth to remove excess moisture and dry.
- Soak in engine oil and squeeze to remove excess oil.
- Paper element (d) : tap the element on a flat surface to remove
dust. If the element is very dirty, replace it. Replace the element
every 100 hours or at least once a year. Replace the cover.
• MKHE / MKHP / MKM (PICTURE 28C) :
- Remove the cover (a) by turning the two quarter-turn screws (b).
- Remove carefully the filtering elements. Clean carefully the
filter seating by avoid any penetration of dust and scraps in the
carburettor (use a clean cleaning rag lightly oiled).
- Clean the filtering elements.
- Foam element (prefilter c) : clean with tepid and detergent. Wrap
it inside a clean dry cleaning rag to dry it.
- Paper cartridge (d) : tap it gently on a flat area to make the dust
fall. Replace it every 100 hours or once the year.
- Refit carefully all the filtering elements.
- Replace the cover and check that the quarter-turn screws (b) are
sitting correctly in position.
WARNING !
Do not use solvents or petrol to clean the paper element. Do
not soak in oil. Do not use compressed air to clean or dry
the element, as this could damage it.
WARNING !
In dusty environments, the intervals between cleaning or
replacement should be reduced.
9•3•6 PETROL FILTER
(Picture 30a for B&S and Honda engines / picture 30b for
KAWASAKI).
• If your engine lacks power or misfires this may be due to blockage
of the petrol filter, in which case the filter must be changed.
• However, we recommend that the filter be changed every 100 hours or
at least once a year, even if it appears to be in good working order.
MKM MODEL : To access, remove the right-hand side cover.
9•3•7 COOLING SYSTEM (PICTURE 29A)
• Before using the mower, always check that the rotating engine grille
is not blocked by grass or other debris.
• Clean, if necessary.
• Clean the foam suction collar around the grille regularly.
WARNING!
Clean the area around the silencer regularly to remove
grass, dust and inflammable debris.
Do not attempt to carry out major repairs unless you are
equipped with the appropriate tools and are suitably skilled
in the repair of internal combustion engines.
9•4 MAINTENANCE OF THE
TRANSMISSION
9•4•1 HYDROSTATIC GEARBOX
(PICTURE 29B)
• Clean the hydrostatic gearbox cooling fins regularly and also check
that the fan is in good condition.
The oil should be changed and the oil filter replaced by your
ETESIA dealership after 50 hours of operation, then every
200 hours.
9•4•2 HYDRAULIC OIL LEVEL
Before unscrewing the hydraulic oil cylinder, clean it carefully and
make sure that no impurities get into it.
Check the hydraulic oil level before using the mower every
time. Do not fill the expansion cylinder but make sure
that the oil level in it is always visible (see picture 31), in
particular when cold (normal level approximately 1 cm
above the bottom of the cylinder, between minimum and
maximum). We recommend 10W40 oil cans ref. 38383 (2
liters).
9•5 BATTERY MAINTENANCE
9•5•1 MAINTENANCE
Your mower has a lead storage battery in the engine compartment
(see picture 33) requiring a little maintenance. Check the level of
the electrolyte every 50 hours. It should be between the lower level
(marked [MINI]) and the higher level (marked [MAXI]) in each of
the cells.
If the level of the charged battery electrolyte (see picture 33) is near
the [MINI] mark, add distilled water until it reaches the [MAXI]
mark.
The battery contains sulphuric acid which is highly
dangerous and can cause serious injury if it comes into
contact with the skin or the eyes. Take great care. Wear
protective clothing (gloves, safety glasses, etc) when
topping up the electrolyte level. In the event of the
electrolyte coming into contact with the skin or eyes,
rinse copiously in water and if necessary see a doctor
immediately.
The battery and the acid must be kept away from children.
Never allow the battery to overflow. In the event of spillage,
rinse immediately and copiously all parts concerned with
clear water to prevent their corrosion.
29
9• MAINTENANCE
Regularly check that the battery terminals are free of oxidisation.
Otherwise, clean them and apply grease to them.
If the battery has to be removed, always disconnect the negative
terminal first, followed by the positive terminal.
9•5•2 BATTERY CHARGING
(see 7 description page 10 and picture 44)
Your machine can be fitted with the MCB option (battery charger).
CAUTION !
Use this connector solely for recharging the battery with the
charger supplied with the option MCB.
WARNING !
Batteries kept in a discharged state cannot subsequently be
recharged.
9•5•3 ELIMINATION OF BATTERIES
Batteries contain hazardous materials and must under no
circumstances be disposed of into the environment. They are the
subject of specific rules governing (directive 2006/66/EC). You can
hand in your spent ETESIA batteries to your ETESIA dealer who
will eliminate them or take them to selective sorting or refuse centres
capable of dealing with the task.
Please contact your retailer (option MCB).
9•6 MAINTENANCE OF THE TYRES
The battery can also be recharged with a traditional charger. To do
this, remove the battery from the mower, first connecting the negative
terminal then the positive terminal.
• Always ensure that the tyres are inflated to the recommended
pressure.The use of pressures other than those recommended may
adversely affect driving performance and may even result in loss of
control of the mower.
• Check the electrolyte level. If necessary, top up with distilled water
(see paragraph 9•5•1).
• Connect the battery to the charger.
- Charge voltage : 12 V
- Charging current : max. 3 amps
- Charge time: up to 7 hours, according to need (under 3 Ah).
Lead-acid batteries emit explosive gas mixtures during
charging. Avoid naked flames and sparks and do not smoke.
The battery should always be charged in a well-ventilated
area.When charging is complete, check the level of the
electrolyte. If necessary, top up to the higher level using
distilled water.
30
Front pressure: 1.2 bar
for models other than MKHP.
Rear pressure: 0.8 bar
Front pressure: 1.5 bar
for the MKHP model.
Rear pressure: 0.8 bar
10• MAINTENANCE SCHEDULE
Page
Component
28
Engine oil
28
29
29
Oil filter Kawasaki
Air filter
Cooling system
28
Spark plug
29
Battery
Controls
29
Petrol filter and hose
27
Blade
27
Blade coupling
Always before mowing
After the first
10 hours
Check level and top up
if necessary.
Remove grass
from engine grille.
Brake
Check level and
top up if necessary.
Check for good
working order.
Electric circuit
Grass box
Wheels
Lubricate pivot pins on
cutting height adjustment
and box discharge levers.
Replace filter.
Check hoses.
RECOMMENDED
Check condition and tightness.
Sharpen or replace if necessary.
Check and lubricate
the blade shaft.
SERVICE
Ensure pedals in good
working order. Check
oil level in hydrostatic
transmission box and
ensure cooling not impeded
by grass or dust deposits.
Check efficiency of
parking brake.
Check brake pads
for wear.
Check tension and for
wear.
Drain the oil after the 50
Check and adjust
first hours. Check the shaft
system. Lubricate
screw clamping of the trans- pedal pins. Drain the
mission box input pulley.
gear box oil every
Replace the pulley every 300 200 hours.
hours in professionnal use.
BY YOUR
Steering
26
26
32
Replace filter.
Replace.
Check and clean.
Clean and adjust or
replace.
Belts
Transmission
Every 100 hours
or yearly
Drain.
Clean.
Electromagnetic clutch
29
Every 50 hours
or yearly
Check steering joints.
Lubricate pinion, ring gear
and pivot pin of axle. Play
adjusting. Control play
between column and steering
ring and adjust it when
necessary.
Check safety switches.
Clean.
Check tyre pressure.
DEALER
Check seams.
Lubricate front and
rear wheel axles.
31
11• PROLONGED STORAGE - WINTER STORAGE
11•1 PREPARATION FOR THE WINTER
STORAGE
• Clean the machine thoroughly, and the cutter plate in particular.
Lubricate moving parts and change the engine oil.
• Drain the fuel tank completely and run the engine until all the fuel
is used up.
Always empty the fuel tank in open air.
• Disconnect the spark plug.
• Remove the spark plug and inject a small quantity of oil (1 cl/10
cm3) into the cylinder(s) via the plug opening.
• Activate the engine by turning the ignition key.
• Replace the spark plug by hand without replacing the suppressor.
• Remove the battery by first disconnecting the negative terminal.
• Charge the battery: see section 9.5.2.
• Store the battery in a dry, well-ventilated and frost-free place.
• Recharge the battery every two months.
• Always keep the battery and acid out of the reach of children.
• Contact your dealer for the following adjustments or maintenance
operations :
- Adjustment of the parking brake
- Adjustment of the electromagnetic blade clutch
- Adjustment of the cutter plate alignment
- Adjustment of the steering
- Adjustment of the engine
- Replacement of belts, where necessary
- Replacement of any parts, or repairs involving the removal of
parts which are not covered by this manual.
11•2 RETURN TO SERVICE
• Unscrew the spark plugs and clean them with petrol. Allow to dry
but do not put them back for the time being.
• Reinstall and reconnect the battery.
• Operate the starter very briefly using the ignition key to eliminate
any excess oil from the cylinders.
• Then fit the dry spark plugs and connect the caps.
• Check the oil level and top up with fuel.
You are now ready to restart the engine.
12• TROUBLESHOOTING
12•1 MOVING THE MOWER WITH
THE ENGINE SWITCHED OFF
• The by-pass enables the mower to be moved without switching on
the engine.
• Put the lever on [O] position : unclutched position to move the
mower with engine on stop.
• To gain access to the by-pass lever, open the grassbox in emptying
position (see pictures 5 and 5a).
Do never use the mower with a disengaged by-pass
(position 0).
12•2 TOWING THE MACHINE IN THE
EVENT OF BREAKDOWN
• Disengage the box (see paragraph 12•1) .
• Close the fuel tap (see paragraph 7•5•2 and 8•6).
• Set up the towing hock :
- Unscrew the front bumper fixation screws and take it out (see
picture 37a).The towing ring is located behind the bumper. It is
fixed on the back side on the frame tube (see a picture 37a).
- Unscrew the towing ring screws, return it so that the ring looks
towards the front and fix it with the same fixation screws.
- Drill 2 holes diameter 12 mm at the back of the bumper and cut in
order to obtain a circle hole (see picture 37b).
- Put the bumper back into place. The towing ring is going through
the circle hole.
Use only a towing bar.
Do not use other towing points.
WARNING!
The disengaged position should be used only for travel over
short distances at low speed (up to 5 km/h). After moving
the mower, remember to place the lever in the engaged
position.
32
• Where a broken-down mower is to be moved over long distances, an
appropriate form of transport (trailer, goods vehicle) should be used.
12•3 TRANSPORT
For any delivery on a trailer or in a van :
- Attach your mower with straps that you will pass around straps hocks
(rep. 13 description page 9) and towing hook.
- Put parking brake in action.
- Block wheels.
12•4 CHANGING TYRES
• Where it is necessary to remove a wheel, this should be done on
firm, even ground.
• Do not attempt to carry out work on or under the mower if it has
been raised on temporary supports or without taking proper safety
precautions.
• If you do not possess appropriate tools or the knowledge needed to
carry out the work, contact your dealer.
• Remove the wheels in the following manner :
• FRONT WHEELS
- Switch off the engine and remove the ignition key.
- Apply the parking brake.
- Secure the vehicle using chocks.
- Place a jack under the front axle on the side where the wheel
needs to be replaced and lift until this wheel does not touch the
ground anymore (see picture 38a).
- Secure the machine by lying it on stable props.
- Remove the wheel hub.
- Remove the circlips with the help of a screwdriver (see picture 38b).
• You can now remove the wheel from the shaft.
• For remonting, follow the same instructions in the opposite way. Do
grease the wheel shaft.
• REAR WHEELS
- Stop the engine and remove the contactor key.
- Apply the parking brake.
- Secure the vehicle using chocks.
12• TROUBLESHOOTING
- Remove the wheel hub.
- Unscrew the 3 screws with a key 6 (thread 5).
Remove sidewards the two securing rings (see picture 39).
- Place a jack under the rear part of the chassis on the side where the
wheel needs to be replaced and lift until this wheel does not touch
the ground anymore (see picture 40).
- Secure the machine by lying it on stable props.
• You can now remove the wheel from the shaft.
• For remonting, follow the same instructions in the opposite way. Do
grease the wheel shaft.
DISPOSAL OF USED PNEUMATICS
It is forbidden to leave standing, to lay down or to burn pneumatics in
nature. Our dealer network has been informed about its obligation to
take back, free of charge, all used pneumatics from ETESIA ride on
mowers.
WARNING !
Do not lose the O shape key which fits in the wheel shaft.
• Check the screw tightness.
• Check the tyre pressure.
* front : 1,2 bar
(except MKHP)
* rear : 0,8 bar
* front : 1,2 bar
(MKHP)
* rear : 0,8 bar
13• ACCESSORIES
Stop the engine, disconnect the spark plug before proceeding and
remove key from ignition.
• MU 80 N : MULCHING KIT (see picture 41)
A special blade and a ejection-closing insert allow a fine cut of
frequently cut grass, helping its decomposition without needing any
collection.
• MD 80 N : SIDE DEFLECTOR (see picture 42)
Allows ejection of the grass to the side. It is recommended in very
high grass or when collection is not necessary. A first cut at maximum
cutting height and low drive speed followed by a second cut at final
height insure a good finish.
• ANTI-PUNCHURE TYRE LIQUID (part number 28461).
Introduced as prevention in the tyres inner tubes, this liquid repairs
instantaneously potential perforation.
• SEAT ARMRESTS MAC FOR MKHP (see picture 43)
Armrest greatly improve driving comfort, in particulary when your
mower is being used on a slope. They are easy to attach to the seat
back rests by 4 screws.
• KIT BATTERY CHARGER MCB (see picture 44)
This kit is composed with a electronic charger and a load plug to be
installed on the dashboard.
• MR 80 : TOWING HOOK FOR MKHE, MBHE, MHHE
AND MKHP (see picture 46)
Allows to tow light loads according to following limits :
- 140 kg on the trailer axle (trailer + load).
- 20 kg upward or downward on the drawbar.
- drive on slopes of 5° (8.7%) maximum.
• MULTIPURPOSE TRAILER-WHEELBARROW MRM
(see picture 47)
This trailer is light and robust, very practical for transporting
gardening equipment. The hollow structure of the skip forms an 85 L
tank for carrying water of phytosanitary products. As an option, it can
be equipped with a spray monitr (ref : MRL).
• SNOW BALDE MV80N (see picture 48)
Designed for cleaning snow from aisles and outside areas.
Adjustable to the right or to the left.
• KIT DRAINS ELECTRIC GRASSBOX MVE80
(see picture 49)
For a greater comfort of use, you can make replace the lever of
manual draining of the grassbox, by a device with electric jack
operated by a switch on the instrument panel.
• MN80 : SYNTHETIC CHAINS (see picture 50)
• SPREADER MET (see picture 45)
Having a hopper capacity of 60 L, this wheel-driven distributing
disc spreader is ideal for spreading snow clearing salt or sand.
All these accessories are accompanied with an instruction manual of
installation and use.
33
14• WARRANTY
DEFINITIONS
• Dealer, importer = Distributor linked to ETESIA by an agreement
(dealership or importer contract). The dealer and the importer are in
charge of selling and servicing ETESIA machines.
• User, buyer = physical or moral person, company, collectivity or
association having bought legally a machine new or second hand
from a dealer.
• Domestic use = use of a machine on a private ground. Machine is
owned by the user and just use to clear its private piece of ground
(main or secondary residence).
• Professional use = use of an ETESIA machine, in exchange of
money or not, on public areas to maintain companies or institutions
like : hospitals, associations,….or on private fields being owned by
a third person.
• The user completes the warranty card indicating the type of use
for every machine. This declaration engages its responsibility and
defines the legal warranty period.
• Should ETESIA discover that the machine is not used in the use
initially declared, ETESIA allows itself to cancel the warranty.
• Wear parts/consumable parts : parts needing to be changed
inevitably to enable an optimal normal use of the machine.
• Normal use = use of the machine according to all instructions
mentioned in the instruction book (including safety and
maintenance).
GENERAL WARRANTY CONDITIONS
• In addition to the legal warranty, ETESIA offers a contractual
warranty. The ETESIA warranty concerns the exchange of parts
free of charge in case of material, production or conception
fault. This warranty applies on the product as he leave ETESIA
production line.
• The delivery company is the only responsible in case of transport
damage. It is however the addresse responsibility when damages
occurs during transport to mention reserves on the delivery note
when receiving the goods and to inform ETESIA within 48H by
registered letter.
• The instruction book delivered with every machine contents all
information regarding machines use. Any different use from the
one described in the instruction book can be dangerous for the user
and reduce machine life. In such cases, ETESIA can not be held
responsible.
CONTRACTUAL WARRANTY
• The ETESIA contractual warranty is allowed for one year in
professional use and for 3 years on domestic use (warranty period
starting the first day when the machine is purchased by the user).
This warranty is just valid if :
1) Instructions from the instructions book have been respected.
2) The warranty card has been returned to ETESIA immediately after
the machine purchase or completed on the extranet site.
3) A revision is recommended after periods indicated in the
instruction book.
4) To require a repair under warranty claim, the buyer will contact
first the ETESIA dealer. Should it not be possible, he could contact
ETESIA who would propose an alternative solution.
5) Just repairs done in ETESIA dealers workshops can be taken under
warranty.
6) Any material, production or conception fault recognized by
ETESIA as such will be eligible to warranty (parts and labour). It
will therefore be paid back to the dealer according to charge scale
mentioned in the agreement. It is dealer responsibility to make
sure that the end user does receive the complete warranty allowed
by ETESIA. Should ETESIA not recognize any fault, the dealer
will be held responsible. ETESIA reserves the right to cancel the
decision with no compensation or warning.
Transportation cost for machines and parts are at user cost.
34
7) Any intervention done within warranty time, in particular in case
of parts exchange, will not give right to any new warranty period.
8) In case of parts exchange under warranty, ETESIA reserves the
right to use either new or second hand parts. Parts given free of
charge by ETESIA can required at any time by ETESIA.
They need to be sent back on simple request. Should ETESIA
not receive these parts, warranty claim would automatically be
cancelled.
9) This warranty however does not cover : parts damaged during a
repair action ; machines not having been serviced according to
the repair schedule mentioned in the instruction book ; parts with
normal wear.
Please find a list (not complete) of wearing parts: spark plugs,
filters, exhaust, seals, membranes, blades, blade coupling parts,
belts, clutchs, batteries, battery electrolytes, control cables, sheath,
fuel pipes, durits, cooling liquid, hydraulic and lubrication liquids,
fuel, seat, bonnets, grassbox, material grassbox frame, mudguards,
pedal covers, running board cover, anti scalp kit, roll axle...
10) Warranty right is cancelled in the following cases:
- Damages due to non respect of safety, maintenance use and
storage instructions. ETESIA will not be held responsible,
legally in particular, for damages resulting from other uses than
the ones described in the instruction book.
- Damages due to accident or collision.
- Damages due to a modification of the original machine or use of
non original spare parts.
- Damages on machines not having been maintained by the
ETESIA dealer network.
11) In case of owner change, the outstanding warranty period can be
transferred to the new owner. However to enable this transfer a
written request need to be sent to ETESIA after sales department.
This request needs to attest as well that the new end user has
received the instruction book for the machine as well as the
warranty terms.
12) ETESIA keeps the right to check that preliminary conditions for
warranty have been respected by the buyer.
13) When warranty application is requested, ETESIA does deliver the
parts as soon as possible. However an immediate delivery can not
be requested. A delay in delivery would in no case give right to
compensation or to warranty extension.
14) Any additional claims to ETESIA is excluded.
15) Any breakdown suspected as being a fault subject to warranty
has to be brought to attention to an ETESIA dealer. The ETESIA
dealer is in fact the only contact able to submit a warranty claim
to ETESIA.
Should a dispute occur the competent tribunal is the one
mentioned in the ETESIA dealership.
IMPORTANT NOTE :
As soon as a machine purchase takes place, the warranty cards needs
to be :
- completed, signed and sent back to
ETESIA – WARRANTY SERVICE
67165 WISSEMBOURG CEDEX
FRANCE
- or completed on line on the extranet
EC DECLARATION OF CONFORMITY
As per Directive 2006/42/EC
We,
13, Rue de l’Industrie, 67165 WISSEMBOURG CEDEX
declare under our responsibility, that the ride-on lawnmowers, type Bahia and Hydro 80, reference MBHE2, MHHE2, MKHE3, MKHP3 and
MKM to which this declaration refers, fulfil all the relevant terms of directive 2006/42/EC applicable to them as well as to the provisions of
all other directives European applicable to them :
Electromagnetic compatibility
Concerning batteries and accumulators containing certain dangerous substances
Noise emission in the environment by equipment for use outdoor
- 2004/108/EC
- 2006/66/EC
- 2000/14/EC
and guarantee that the ride-on lawnmowers, type Bahia and Hydro 80, reference MBHE2, MHHE2, MKHE3, MKHP3 and MKM meet
the requirements of Directive 2000/14/EC regarding noise emissions in the environment, and are subject to the internal production control
procedure, with evaluation of the technical documents and periodic inspection by a notified body, the CETIM, F-60304 SENLIS CEDEX.
- Average acoustic power level measured : 100 dB(A)
- Guaranteed acoustic power level : 100 dB(A)
Mr Schmitt Freddy
13, rue de l'industrie 67165 Wissembourg CEDEX
is the person authorized to constitute the technical file :
Assessment of conformity ti in-house inspection of machine manufacture according to Annex VIII of directive 2006/42/EC.
Model :
Serial number:
Mr Patrick VIVES
The President
i3 - Due to their permanent improvement policy, ETESIA reserves
the right to modify specifications, text and pictures without prior
notice.
ETESIA SAS - F - 67165 WISSEMBOURG CEDEX Strasbourg Trade & Commerce Register B343 510 996
50909_01_032013
Done in Wissembourg, the 03.21.2013
Stamp
here
please
ETESIA
SERVICE GARANTIE
13 rue de l'Industrie
67165 WISSEMBOURG CEDEX
France
This card has to be returned completed to ETESIA upon the first setting up.
WARRANTY CERTIFICATE
USER
Serial number
NAME ___________________________ Forename _________________________
Street ___________________________ Zip code __________________________
Day
Tel. number ______________________
Month
Year
@ Email : ________________________________________________________________________
Contact : __________________________Cell phone number for SMS information : ______________
- Dealer : _________________________________- Installer : _______________________________
- End user ________________________________ - Importer : _______________________________
Installation provided by : _____________________________________________________________
I already own an ETESIA q yes - q no
Area to be mown
q Less than 1000 m2
q 1000 to 2000 m2
q 2000 to 5000 m2
q 5000 to 10 000 m2
q 10 000 to 20 000 m2
q More than 20 000 m2
q More than once the week
q Once the week
q Twice the month
q Once the month
q Less than once the month
I am, I represent :
q A privat
q an association, a company _______________________
q A council, a collectivity
q A landscaper (green areas professionnal)
q Other, specify __________________________________________________________________
Signature and confirmation of the user :
- that he has taken possession of a machine in perfect working order ;
- that the user has been handed over and that he thoroughly read the use instructions, safety and maintenance suggestions figuring in it ;
- that he has been informed of the warranty terms and that he accepts said terms without reserve or restriction ;
- that he has been informed by the ‘’Contract of breakdown service per alarm « GPS »’’ (automatic lawnmower ETMowers)
Dealer's stamp and signature
Automatic lawnmower ETMower - Track and Trace : User code query
Date : _____________________________________________
Town ____________________________ Date of purchas _____ _____ 20 ___
Date ________________________
Signature ___________________