1
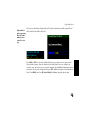
Using Address Book
10. Using Address Book
The Address Book is a personal information management program that you can use to store
names, street addresses, phone numbers, and 1e-mail addresses.
As described in this chapter, you can:
• Enter data into the Address Book using the standard keypad or remote controller keypad.
• Transfer contact information from a Windows® CE based, handheld computer to the
Joyride™ system, using the built-in Infrared (IR) port.
• Record and associate custom speech commands (voice tags) with individual contacts.
• Use a Custom speech command to quickly access and display information about that
contact.
• Calculate a route to an address stored in the Address Book (with the optional Navigation
program).
• Input new contact phone numbers copied from the Phone Book option of the Cell Phone
program. (Cell Phone must be installed. Check availability with your Joyride™ system
dealer.)
1 E-mail requires installation of the optional Cell Phone program and subscription to
a network operator, answering service.
133
User’s Manual
Getting Started
To start the Address Book program—
Using speech commands—
• Say “Auto PC.” Wait for the green “Listening” bar to appear, and then speak
the next command.
• Say “Address Book.”
Using the faceplate—
1. Press the Start key to select Address Book. OR press
(large screen) to select Address Book.
(small screen) /
2. Press ENT to display the main Address Book List screen.
Using the remote controller—
1. Unsnap the lower half of the remote controller to display the inner keypad.
Align the transmitter sensor (top end of the remote) with the Joyride™
system IR port.
2. Press the Addr button to launch Address Book and display the main screen.
134
Using Address Book
Entering a New Contact
Address Book stores and lists contact information in alphabetical order.
To enter new contact information—
1. From the Address Book List main screen, press
to select the letter tab
representing the first letter of the last name of your contact (new entry).
2. (Option 1) The system prompts you to enter a new contact name: <No
entry. Add New?> displays. Press ENT to enter the new contact name. A
keypad graphic displays for data entry. Using the graphic may require a
little practice.
135
User’s Manual
Shortcuts: Press
“#” to create a
blank space and
advance the
cursor. Press “*”
to backspace and
delete an
unwanted
character
(Keypad Tips)
Press
and keys to move between letters. Move to Shift and press ENT to
deactivate capitalization. Select a bracket key (< or >) and press ENT to move
the cursor left or right in the data entry bar. Press the “#” key to create a blank
space or move to the blank block next to “Done.” Press ENT to create a blank
space. Press Done when finished. Press HELP at any time.
(Option2 ) Alternately, you can press MENU, then to select the New Entry
option. The system prompts you to enter a new contact name. Press ENT to
display the keypad graphic on large screen (small screen is a data entry form)
and enter your contact information.
136
Using Address Book
If the letter selection you make already has a contact stored, press
to select
the letter again, then use the menu method of entry: press MENU, and then
press to select New Entry.
3. Once you have entered the entire name in the Text Input area, press and
hold ENT to advance to Done. The system will next prompt you to enter a
Work number.
(LARGE SCREEN) On Large screen, the prompt is for a Home number.
4. Enter a Work number using the Number (graphic) keypad.
5. When you are finished, press ENT. (To skip this step, press ENT.) The
system will next prompt you to enter a Home number.
(LARGE SCREEN) On Large screen, the prompt is for a Home address.
6. Enter a Home number using the Number keypad.
137
User’s Manual
7. When you are finished, press ENT. (To skip this step, press ENT.) You will
be prompted with a question “Do you want to record the contact name?”
8. Press
to select “Yes,” if you want to record the contact name, and then
press ENT. The recording you assign to this name is known as a “voice tag.”
Important: If you prefer, choose “No” to accept the current entry without
recording a contact name, and then skip the remaining steps in this
procedure. Alternately, select Cancel to return to the previous screen.
9. The name to record appears at the top of the screen. Read the instruction
“Say Command Word three times...” Press ENT to start recording.
10. Wait for the prompting tone after each repetition. Record the custom
name 3 times as prompted by the tone.
138
Using Address Book
When you are finished, the display will read “Custom Command successfully recorded” and
Open-and-close
will be added to the Address Book List.
quotes appearing
above the name
indicate you’ve
created a “voice
tag”
Press BACK or ENT to return to the Address Book List screen and to view the contact name.
Open-and-close quotes, above the contact on the Address Book List screen, indicate you
created a “voice tag” for later use as a speech command. To add additional information to your
contact, like the city, state and postal code, press ENT. Additional categories of information are
listed. Press MENU and select All Contact Details if additional categories do not show.
139
User’s Manual
To add a contact category—
1. Press
and
to choose the contact category you want to add.
2. For Small screen, press
to highlight the Address icon (a destination flag),
phone or “i” icon located in the upper, right corner of the display.
For Large screen, press
to select the Address List tab, Phone List tab or
Personal tab, then scroll down to select the category to add and edit.
Entering Data Using the Keypad
You can enter data into the Address Book edit boxes using the hardware keypad or keypad
graphic. Note that this method of entry requires some practice because:
(1) the letters and numbers will scroll rapidly when you press and hold a key.
(2) the cursor will move to the next edit box as soon as you release a key
140
Using Address Book
To enter or change a letter, place the cursor on the character box you want to edit, and then
press the desired keys on the keypad. Press
to select a character within the edit box. Press
“*” to delete a character. To insert a space, press “#”. Upon completion press ENT (small
screen) or select “Done” (large screen) when your entry is complete.
Entering Contacts from a Personal Device Assistant (PDA)
If you have another mobile device powered by Windows® CE, such as a Handheld PC or
Palm-sized PC, you can quickly transfer your contacts to the Joyride™ system through the
infrared port. Limit the number of contacts to 25 at one time.
To transfer contacts from a mobile device—
1. Press the Start key to select Address Book. OR press
(small screen) /
(large screen) to select Address Book. Press ENT to display the Address
Book main screen.
2. Press MENU to display additional Address Book options.
3. Press
to select Receive, and then press ENT.
4. Select all contacts you want to be sent from your mobile device and select
Send under the file menu.
5. Align your mobile device’s infrared port with the Joyride™ system’s infrared
port to send the contact information from your hand held device. Hold
until the Joyride™ system confirms the contact has been transferred.
141
User’s Manual
If you are having trouble transferring data, be sure that your infrared ports are
aligned. If the problem persists, change your infrared transfer speed in the
Setup program.
Recording a Custom Name for an Existing Contact
If you did not record a Custom Command when you entered a contact, follow the steps below
to record a custom name for an existing contact entry. You can then use the custom name as a
voice command for quickly locating and selecting the contact.
To record a custom name for an existing contact—
1. Press the Start key to select Address Book. OR press
(small screen) /
(large screen) to select Address Book. Press ENT to display the Address
Book main screen.
2. Press
to find the desired contact entry.
3. Press MENU, then press
and then press ENT.
to select Record a Contact Name (verify option),
4. At the display “Say Command Word three times at the tone prompt” press
ENT.
142
Using Address Book
5. Record the custom name (e.g., “Patrick Chevalier”) three times when
prompted on the tone ( ). Wait for the prompting tone ( ) after each
repetition.
When you are finished, the display will read “Custom Command successfully recorded.” After
5 seconds, the display will return to the Address Book List. Quote marks to the side of a
contact on the Address Book List screen indicate a Custom Command Word now exists for this
entry. This custom command is now known as a “voice tag.”
Navigating the List of Contacts
The following steps describe how to use speech commands to navigate the list of contacts.
To go to the next tab and select a contact—
• Say “Auto PC.” Wait for the green “Listening” bar to appear.
• Say “Next”—OR—“Previous.”
Manually: You can also use
or
to scroll through contacts.
To select a contact and retrieve information—
• Say “Auto PC.” Wait for the green “Listening” bar to appear.
• Say “Select.”
143
User’s Manual
To read the current name—
• Say “Auto PC.” Wait for the green “Listening” bar to appear.
• Say “Read.”
To find a contact with previously recorded custom command word—
• Say “Auto PC.” Wait for the green “Listening” bar to appear.
• Say “Locate + <pre-recorded name>.”
To hear all names starting with a specific letter—
• Say “Auto PC.” Wait for the green “Listening” bar to appear.
• Say “Letter” followed by a letter (e.g., “P…”).
• Say “List.”
To stop the list operation, press ENT.
144
Using Address Book
Browsing Contacts
You can browse contacts using speech commands or the navigation keys; however, using your
voice is much faster and easier. The following steps describe how to use speech commands to
browse and locate a contact.
To have the Joyride™ system read names—
• Say “Auto PC.” Wait for the green “Listening” bar to appear.
• Say “Address Book.”
• Say “List” (to hear all contact names alphabetically).
— OR —
• Say “Read” (to hear the currently selected contact).
The Joyride™ system starts reading names beginning from the tab (A, B, C,) that
you select. Press ENT to stop reading names.
To locate a pre-recorded contact—
• Say “Auto PC.” Wait for the green “Listening” bar to appear.
• Say “Address Book.”
145
User’s Manual
• Say “Locate.”
• Say “<prerecorded name>.”
To be able to have
the Joyride™
system read all
contacts by name,
you must have
recorded all names
when you input
them to Address
Book
To browse one contact at a time—
Using speech commands—
• Say “Auto PC.” Wait for the green “Listening” bar to appear.
• Say “Address Book.”
• Say “Next” or “Previous.”
• Say “Select.”
Using the faceplate—
1. Press the Start key to select Address Book. OR press
(small screen) /
(large screen) to select Address Book. Press ENT to display the Address
Book main screen.
2. Press
and
to browse contacts.
3. Press ENT to select a contact.
146
Using Address Book
To browse alphabetically by letter—
Using speech commands—
• Say “Auto PC.” Wait for the green “Listening” bar to appear.
• Say “Address Book.”
• Say “Letter <P>”, for example “P” to go to the letter P.
• Alternately, say “Next” or “Previous” to advance from letter to letter.
Important: You can also use
or
to scroll through contacts.
Dialing a Phone Number (Optional)
The following examples illustrate commands to initiate dialing a number from an existing
Address Book entry. This function requires an (optional) phone interface. (See your Joyride™
system dealer for details.)
147
User’s Manual
Using the Address Book List
To dial a number from the Address Book List—
Using speech commands—
• Say “Auto PC.” Wait for the green “Listening” bar to appear.
• Say “Address Book.”
• Say “Letter <P> (e.g., to go to the letter P, if you have a contact stored
there.)
• Say “Next” or “Previous” until the desired contact is shown.
148
Using Address Book
• Say “Select.”
• Say “Dial.” The system will launch the Cell Phone program and dial the
“preferred” telephone number. (For more information, see Specifying
Preferred Phone Numbers and Addresses later in this chapter.)
Using the faceplate—
1. Press the Start key to select Address Book. OR press
(small screen) /
(large screen) to select Address Book. Press ENT to display the Address
Book main screen.
2. Press
to step through the alphabet.
3. Press to find the next entry under the letter if you have several contacts
under a specific letter.
4. Press ENT to select a contact.
5. Press
to select the Phone icon located in the upper right corner of the
display (small screen) or the Phone List tab (large screen).
149
User’s Manual
6. Press
7. Press
to select the phone number to be dialed, and then press ENT.
to highlight Dial, and then press ENT.
Once you select an entry and highlight the Phone icon (small screen) or the
Phone List (large screen), the display shows the phone number for the selected
contact. You can use the “Read” speech command to have the Joyride™
system read the number to you before dialing. If this is not the number you
wish to dial for this person, say “Next…” to review another number. Make
sure the Phone icon is selected to review all stored phone numbers.
To return to the Address Book List, press BACK.
150
Using Address Book
Using a Custom Name
To dial a number using the custom name—
• Say “Auto PC.” Wait for the green “Listening” bar to appear.
• Say “Address Book.”
• Say “Locate <custom command word>” (e.g., “Bob James”). The display
shows the selected contact, as shown below. The unit then “reads” the
name to you.
• Say “Select.”
• Say “Dial.” The Joyride™ system screen changes to the Cell Phone program
and the “preferred” telephone number is dialed.
Calculating a Route to a Contact (Optional)
Calculating a route from the Address Book requires the optional small screen / large screen
Navigation package. See your Joyride™ system dealer for details.
151
User’s Manual
Using the Address Book List
To calculate a route from the Address Book List—
Using speech commands—
• Say “Auto PC.” Wait for the green “Listening” bar to appear.
• Say “Address Book.”
• Say “Letter <P> (e.g., to go to the letter”P“.)
• Say “Next” or “Previous” until the desired contact is shown.
• Say “Select.”
• Say “Go There.” The system will launch the Navigation program and
calculate a route to the preferred address. (For more information, see
Specifying Preferred Phone Numbers and Addresses later in this chapter.)
Using the faceplate—
1. Press the Start key to select Address Book. OR press
(small screen) /
(large screen) to select Address Book. Press ENT to display the Address
Book main screen.
152
Using Address Book
2. Press
to step through the alphabet.
3. Press to find the next entry under the letter if you have many contacts
under a specific letter.
4. Press ENT to select a contact.
5. Press
to select the Address icon located in the upper right corner of the
display.
6. Press to select the address to which a route should be calculated, and
then press ENT.
7. Press
to highlight the Calculate tab, and then press ENT. (Alternatively,
to view additional information about the entry, highlight Detail, and then
press ENT. To modify the entry, highlight Edit, and then press ENT.)
Once you select an entry and select the Address icon (small screen) or the Address List tab
(large screen), the display shows the address for the selected contact.
You can use the “Read” voice command to have the Joyride™ system read the addresses to
you before you calculate a route. If this is not the appropriate address for this person, say
“Next ” to review another address. Make sure the Address icon is selected to review all stored
addresses.
8. When you are finished, press BACK to return to the Address Book List.
153
User’s Manual
Editing Contact Information
When you are in the Address List, the display shows the contact with three icons representing
the three categories of information stored in the Address Book: Address, Phone, and
Information.
Showing All Available Fields
To show all available fields (categories) for a contact—
1. Press the Start key to select Address Book. OR press
(small screen) /
(large screen) to select Address Book. Press ENT to display the Address
Book main screen.
2. Press
and
to select a contact, and then press ENT.
3. Press MENU and press
154
to choose All Contact Details.
Using Address Book
4. Press
to select “Yes.”
5. Press Back to exit.
Editing Contacts
To edit contact telephone numbers—
1. Press the Start key to select Address Book. OR press
(small screen) /
(large screen) to select Address Book. Press ENT to display the Address
Book List main screen.
2. Press
and
to select the contact you want to edit, and then press ENT.
3. Press
to highlight the Phone icon in small screen or Phone List in large
screen.
4. Press
to highlight the phone number to be edited, and then press ENT.
5. If the field does not already have a phone number entered, press ENT to
display the keyboard for editing.
6. When you are finished, press ENT to accept. To cancel changes press
BACK.
155
User’s Manual
7. If the field already has a phone number entered, press
Edit tab.
to highlight the
8. Press ENT to start editing.
9. When you are finished, press ENT to accept. To cancel changes, press
BACK.
The following procedure only details how to edit or add the address - not the city, state, postal
code, or country. To edit the latter, see To edit Information other than Phone numbers or
Addresses.
To edit contact addresses—
1. Press the Start key to select Address Book. OR press
(small screen) /
(large screen) to select Address Book. Press ENT to display the Address
Book main screen.
2. Press
ENT.
, then press
to choose the contact you want to edit, and press
3. Press
to highlight the Address icon located in the upper, right corner of
the small screen display or the Address List tab of the Large screen display,
and press ENT.
4. Press
156
to highlight the address to be edited, and then press ENT.
Using Address Book
5. If the field does not already have an address entered, input the address
information into the Edit Record boxes using the keypad.
6. When you are finished, press ENT (small screen) or Done (large screen) to
save. To cancel changes, press BACK.
7. If the field already has an address entered, press
icon in small screen or Edit tab in large screen.
to highlight the Edit
8. Press ENT to edit the address information using keys on the faceplate.
9. When you are finished, press ENT to accept. To cancel changes press
BACK.
To edit information other than phone numbers or addresses—
1. Press the Start key to select Address Book. OR press
(small screen) /
(large screen) to select Address Book. Press ENT to display the Address
Book List main screen.
2. Press
and
to choose the contact you want to edit.
3. Press
to select the “i” (Information) icon located in the upper, right
corner of the display (small screen) or the Personal tab (large screen).
157
User’s Manual
4. Press
to select the field to be edited and press ENT.
5. Press ENT to start entering information.
6. When you are finished, press ENT to save (small screen) or Done (large
screen). To cancel changes press BACK.
Showing a Complete Address
To view the address for an entry—
1. Press the Start key to select Address Book. OR press
(small screen) /
(large screen) to select Address Book. Press ENT to display the Address
Book List main screen.
158
Using Address Book
2. Press
and
to select a contact.
3. Press
to select the Address icon in small screen or the Address List in
large screen .
4. Press
5. Press
to select the address, and then press ENT.
to select the Detail tab.
6. Press ENT to view the complete address for the entry.
7. Press BACK to return to the previous screen.
Specifying Preferred Phone Numbers and Addresses
If the (optional) Navigation program is installed, the Preferred Address option can also be used
to calculate a destination route. The preferred phone numbers are used to dial a contact.
Specifying the Preferred Phone
If the optional Cell Phone program is installed, use Preferred Phone as the default phone type.
159
User’s Manual
To select the preferred phone number—
1. After you have entered contacts, press ENT to display other contact details.
2. Press MENU, then press to select Preferred Phone and choose between
the options, Work, Home, Mobile, and Pager. Press BACK to save this
setting and exit this option.
Specifying the Preferred Address
The Preferred Address is also a default address used to calculate a route, if Navigation is
installed.
To select the preferred address—
1. After you have entered contacts, press ENT to display other contact details.
2. Press MENU then press to select Preferred Address and choose between
the options: Work or Home. Press BACK to save this setting and exit this
option.
Deleting Contacts
Contacts can be deleted from the Address Book. The Address Book allows you to either delete
all the contacts, or individually delete specific contacts.
160
Using Address Book
To delete a contact—
1. Press the Start key to select Address Book. OR press
(small screen) /
(large screen) to select Address Book. Press ENT to display the Address
Book main screen.
2. Press
and
to select a contact, and then press ENT.
3. Press MENU and press
to choose Delete or Delete All depending if you
wish to delete the current contact or all contacts.
4. Press ENT. A delete confirmation screen appears next.
5. To confirm the deletion, press
“No” to cancel the deletion.
to highlight “Yes.” Otherwise, choose
6. Press ENT.
WARNING: To avoid accidentally deleting all of your contact information pay attention to
the Delete option you choose.
Transferring (Sending) Data to a Personal Device Assistant (PDA)
If you have another mobile device powered by Windows® CE, such as a Handheld or Palmsized PC, you can quickly transfer your contacts to your Joyride™ system through the infrared
port.
161
User’s Manual
To transfer contacts to a PDA—
1. Press the Start key to select Address Book. OR press
(small screen) /
(large screen) to select Address Book. Press ENT to display the Address
Book main screen.
2. Press to select the contact name to send, and then press MENU. Press
to select Send or Send All, depending on whether you send a current
contact or all contacts.
3. Select “Receive” in your hand-held device.
4. Align the hand-held device transmitter with the Joyride™ system infrared
port to transfer data.
162
Using Address Book
5. Press ENT. Hold until the Joyride™ system confirms the contact has been
transferred.
Receiving Data from a Personal Device Assistant (PDA)
To receive contacts from a mobile device—
1. Press the Start key to select Address Book. OR press
(small screen) /
(large screen) to select Address Book. Press ENT to display the Address
Book List main screen.
2. Press
to select Receive, and press ENT.
163
User’s Manual
3. Select “Send” in the menu of your hand held device and align your mobile
device transmitter with the Joyride™ system infrared port. Hold until the
Joyride™ system confirms the contact has been transferred.
If you are having trouble transferring data, be sure that your infrared ports are aligned. If the
problem persists, change your infrared transfer speed in the Setup program.
Protecting Address Book Information
If you have phone numbers and addresses in the Joyride™ system that you don’t have backed
up on another mobile device, you may want to back up the information in case it is lost or
corrupted. You also may want to password protect your data to prevent unauthorized access.
For more information, see Setting a Password in Chapter 8, Using the Setup Program.
164