1
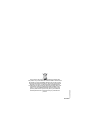
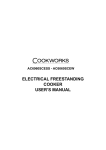
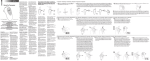
SC5O6OSCEW
SC5O6OSCESS
SC5O6OSCECW
SC5O6OSCECSS
SC6O6OSCEW
SC6O6OSCESS
SC6O6OSCECW
SC6O6OSCECSS
ELECTRICAL FREESTANDING
COOKER
USER’S MANUAL
T h a n k y o u fo r c h o o s in g th is S o v e re ig n a p p lia n c e . It h a s b e e n d e s ig n e d to
give years of trouble-free u s e , provided it is installed and m aintained correctly.
Please read these instructions carefully before installing or using your appliance.
It is a d v is a b le t o k e e p y o u r p u rc h a s e a n d in s t a lla t io n re c e ip t s w it h t h e s e
in s tru c tio n s in a s a fe p la c e fo r fu tu re re fe re n c e . In c lu d e d is s o m e im p o r ta n t
s a f e ty in f o r m a tio n in a d d it io n to g u id e lin e s a n d re c o m m e n d a tio n s th a t w ill
e n a b le yo u to ta k e fu ll a d va n ta g e o f a ll th e fu n c tio n s a va ila b le .
T h is q u a lity a p p lia n c e h a s b e e n te s te d a n d c e rtifie d to m e e t a ll a p p lic a b le U K
e le c tric a l a n d s a fe ty s ta n d a rd s .
T h is a p p lia n c e m u s t b e in s ta lle d a n d c o n n e c te d in a c c o rd a n c e w ith c u rre n t
reg ulation s b y a qu alified ele ctricia n.A fter u n pac kin g th e ap p lian ce e ns ure tha t
th e re is n o v is ib le d a m a g e . If th e a p p lia n c e h a s b e e n d a m a g e d d u rin g tra n s it,
d o n o t u s e it.
B efore using the cooker
Rem ove any packing and protective film and keep this away from children. W ash
the cooker thoroughly w ith clean w a rm soapy water.
T he first tim e you use the cooker
S w itch on th e oven for approxim ately 15 m in utes at a h ig h tem pe ratu re to burn off
any residues from the m anufacturing process. After you have carried out this operation
to the oven, do the sam e to the hotplates and then the grill. Again, 15 m inutes should
be adeq uate.
G uarantee
This appliance is guaranteed for one year from date of purchase. Keep your purchase
re ceipt w ith these instructions.
To fu lfil th e co n d itio n s o f th e g u a ra n te e th is a p p lia n ce m u st h a ve b e e n co rre ctly
Installed by a qualifie d person and opera ted in accord ance w ith these instruction s.
The app liance is inten ded fo r dom estic uses only.
If th e a p plia nce fa ils to wo rk p rop e rly d u rin g the firs t yea r pe rio d con tact th e
Helpline .
T he ap plia n ce w ill be re p aire d (at th e m an ufacture r ’s d iscretion ) at n o co st to
you. If the guarantee has ela psed , you w ill b e given a quotation for any repairs
or p arts required.
T h e o ve n ’s d ata p la te is acce ssib le eve n w h e n th e a p p lia n ce is in stalle d. T he
data plateis visible by opening the d oor.
T his d ata a nd m o de l n um b er to gethe r w ith d eta ils of you r sa les receip t m ust
be
quoted whe n contacting the H elpline.
For Assistance or Service please contact the
Sovereign Service Helpline on 0870-607-7270
1
IMPORTANT SAFETY NOTICES
PLEASE R E AD T HIS M AN U AL C O M PLETELY BE FO RE U SING THE AP PLIA N C E
This applianc e ha s bee n de signe d fo r non -p ro fessional, dom e stic u se only.
Th e p rod uce r is no t respo nsible fo r an y d am a ge tha t m ig ht be ca use d by
in co r re ct in sta lla tio n .
Ensure that the electrical supply complies with the type stated on the rating plate.
Do not attem pt to m odify the appliance in any way.
During use the appliance gets ve ry hot. Take special when using the appliance
and do not touch the heating elements.
Before changing the oven’s lamp, please turn off the electric supply.
Do not ke ep fla m m a ble m a terials n e a r th e a p p lia n ce w hilst it is op era ting .
Do not allow electric cable of other appliances to touch the hot surfaces of this
cooker.
Keep children away from the oven.
If you notice any dam age to the oven you should switch off the unit and contact an
approved repair agent.
If the electric cable becom es dam aged, contact a qualified electrician and get it
replaced.
Do not use steam cleaners for cleaning the cooking hob or oven cavity.
FO R E FFIC IE NC Y AN D SA FE TY, W E RE CO MME ND THAT YO U A LWAY S U S E O RIG IN AL
S PA RE PAR TS AND ONLY AU THO RIZE D SE RV IC E AGENTS.
2
C O NT EN TS :
Section 1. COOKER COMPONENTS
Section 2. INSTALLATION
Section 3. USING THE HOTPLATE
Section 4. USING THE GRILL
Section 5. USING THE OVEN
Section 6. CLEANING AND MAINTENANCE
Section 7. SERVICE
3
SECTION 1: CO O K ER CO M PO N E NTS
Part of List :
1- Hob
2- Control Panel
3- Oven Door Handle
4- Drawer Cover
5- Feet
6-Oven Door
7- Oven Tray
8-Wire Grid
1
2
8
7
7
6
3
4
5
SECTION 2 : INSTALLATION
This appliance must be installed and connected in accordance with current regulations
by a qualified electrician.
2.1. INSTALLATION OF OVEN
This appliance can be placed next to or in between built-in kitchen furniture. However,
the height of the built-in furniture must not exceed the height of the cooker hotplate.
Ensure that there is a minimum of 2cm clear space behind the cooker to allow for air
circulation.
You must allow a minimum height of 650mm between the cooker hotplate and any object
fitted above, i.e. wall cupboards or a cooker hood.
2.2. ADJUSTMENT OF FEET
Your cooker is fitted with 4 adjustable feet. Please ensure that the appliance is level and
secure before first use
4
2.3. E LE CTR ICAL C ONN EC TIO N
This appliance has been adjusted as appropriate for 220-240 Volts.
This appliance m ust be connected to a 45amp fused cooker circuit.
Do not connect via a 13am p socket.
Do not use with an extension lead.
N
3
2
1
L
4
3
L3
5
2
L2
PE
1
3 x 2.5 m m 220 V
3 x 2.5 m m 230 V
3 x 2.5 m m 240 V
L
N
4
5
PE
5x1.5 m m 380 V ,3N
5x1.5 m m 400 V ,3N
5x1.5 m m 415 V ,3N
SECTIO N 3: USING THE HO TPLATE
Four individual control knobs situated on the control/fascia pane l control the four
sealed hotplates. Clear graphics indicate the hotplate that each control knob operates.
Tu rn th e re le va n t co n tro l kn o b to th e re q u ire d he a t se ttin g , se ttin g 1 = L o w,
setting 6 = High.
W hilst the hotplate is on the red indicator will glow. W hen you have finished using the
hotplate turn the control knob back off which is the ‘0’ setting.
Before using your cooker for the first time, we recomm end that you turn each hotplate
on to setting 3. for approximately 15 m inutes, this will burn off any residues from the
manufacturing process.
Oven Thermostat
Switch
Oven Function
Switch
Left Front Heater
1
50
Max
100
200
6
5 2
3
150
1
6
2
4
1
3
4
1
6
5 2
Left Back Heater
5
Right Back Heater
6
5 2
3
4
5
3
4
Right Front Heater
S EC TIO N 4: U SIN G TH E G R ILL
The grill is controlled by turning the oven function control knob (far left control) to the
grill function setting and then turning the oven therm ostat control knob to the desired
tem pe ra ture se ttin g. W h en you ha ve finish ed grilling , turn both con tro l knob s ba ck
to the off setting (‘0’).
B efo re using the g rill for the first tim e w e recom m en d tha t you tu rn th e grill on for
app roxim a tely 1 5 m inu tes, this w ill bu rn o ff an y residue s fro m th e m anu factu ring
process.
Please note:
W e r e c o m m e n d t h a t y o u c a r r y o u t g r illin g w it h th e o v e n d o o r c lo s e d .
S et the therm ostat control to:
190 OC
S EC TIO N 5: U SIN G TH E O V EN
The oven is controlled by first turning the oven control knob clockwise to the desired
se ttin g: th e first positio n provide s he at fro m the top an d bo tto m oven ele m en ts,
the secon d position provides heat from the botto m heating elem en t only, the th ird
position provides heat from the top heating element only. You m ust then turn the oven
therm ostat control knob to the required heat setting. W hilst the oven is on th e red
indicator will glow.
W hen you have finished using the oven turn both control knobs off to the ‘0’ setting.
Before using your cooker for the first time, we recomm end that you turn the oven on
(top & bottom elem ents) for approximately 15 m inutes, this will burn off any residues
from the m anufacturing process.
6
S EC TIO N 6: CLEA N IN G A N D M A IN TEN A N C E
Always ensure that your cooker is com pletely cool and sw itched off at the electricity
supply before carrying out cleaning.
Always clean away food and liquid spills from the hotplate as soon as possible – do
not allow spills to harden off.
Exterior and interior areas of the cooker should be w ashed with w arm soapy w ater
and/or m ild cream detergents.
U s e g l a s s c le a n e r t o c l e a n t h e in t e r io r / e x t e r io r o f t h e g la s s d o o r.
N EVE R U S E ABR A SIV E D E TERG ENTS O R W IR E W O O L TO C LEA N A R EA O F
YO UR C O O KER.
Please note that it is quite normal to get a slight burning smell from the cooker during
th e first fe w ope ra tions. This is sim ply th e p ro tective oil film th at is use d du rin g
production
to protect the cooker parts.
SEC TION 7: SERVIC E
If the hotplate, grill or oven does not operate, check that the electricity supply switch
to the appliance has not been turned off, or that the circuit fuse has blown or circuit
breaker has been tripped.
If the grill or oven does not operate, check that the oven tem perature control knob
has
been set to the desired tem perature setting.
If you require further advice or assistance, please phone
our Service Helpline on 0870-607-7270
7
The symbol on the product or on its packaging indicates that
this product may not be treated as household waste. Instead it shall
be handed over to the applicable collection point for the recycling
of electrical and electronic equipment. By ensuring this product is
disposed of correctly, you will help prevent potential negative
consequences for the environment and human health, which could
otherwise be caused by inappropriate waste handling of this
product. For more detailed information about recycling of this
product, please contact your local city office, your household
waste disposal service or the shop where you purchased the
product.
52009662