1
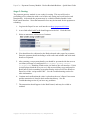
PaperCut Payment Gateway Module
Realex Realauth Redirect
Quick Start Guide
This guide is designed to supplement the Payment Gateway Module documentation
and provides a guide to installing, setting up, and testing the Payment Gateway
Module for use with Realex‟s hosted credit card payment service, Realex Realauth
Redirect. The main Payment Gateway Module documentation may be downloaded
from:
http://www.papercut.com/anonftp/pub/pcng/ext/payment-gateway/PaymentGatewayModule.pdf
IMPORTANT: You should have a registered and active Realex merchant account
with Realauth Redirect functionality activated before installing the payment gateway.
Realex can assist with these tasks. The login information will be required during
setup.
Setup and testing time should take around 30 minutes for basic setup, plus time for
customizing the order pages if required. No system level restart is required; however
the PaperCut application server will be restarted during the install process. If other
administrators are using the PaperCut administration interface at this time, it may be
advisable to warn them of the pending restart.
This document is written assuming the reader has good server administration skills
and is experienced with general PaperCut administration.
PaperCut - Payment Gateway Module - Realex Realauth Redirect - Quick Start Guide
Stage 1: Realex Information
Several pieces of information are required from Realex before PaperCut can send
users to the order page:
1. Your Realex merchant id. This is a unique id assigned by Realex to identify
your merchant account, and is used to log into RealControl. E.g. “papercut”.
2. The shared secret / password associated with your merchant id. This is not
necessarily the password used to log into RealControl. If you do not already
have a shared secret please contact Realex to request one.
3. Confirm the payment currency you will be using (e.g. “GBP”, “EUR”) is
enabled for use with your Realex merchant account. If you are unsure, contact
Realex for confirmation.
4. Realex can track transactions using sub-accounts. If you will be using a subaccounts to track PaperCut payment transactions you will need the name of the
subaccount. For more information about Realex sub-accounts or to create a
new sub-account please contact Realex.
Stage 2: Realex Configuration
Log into the Realex RealControl interface and navigate to Administration ->
Configuration. There are two text fields on this page that are useful to configure:
1. The “Success Text” is displayed to users when their card was successfully
charged but Realex could not contact PaperCut with the transaction details.
This means that the payment amount was not added to the user’s account. It
may be helpful to write a message here telling the user to contact the relevant
person (e.g. a system administrator) and notify them of the situation. This
person can then check in RealControl that the user‟s card was indeed charged,
and make a manual balance adjustment in PaperCut if required.
2. The “Failure Text” is displayed to users when their card was not charged, and
Realex could not contact PaperCut with the transaction details. It may be
helpful to write a message here telling the user that the payment failed, and
who to contact if the problem keeps occurring.
Copyright © 2010 PaperCut Software International Pty. Ltd., All Rights Reserved.
2 of 7
PaperCut - Payment Gateway Module - Realex Realauth Redirect - Quick Start Guide
Stage 3: Installing the Payment Gateway Module
1. The Payment Gateway Module will function during the PaperCut NG 40 day
trial period. After this, the module must be licensed. If you have been
supplied with a new license take the time to install this now. The license
install procedure is documented in the PaperCut user manual chapter
„Licensing and Support‟.
2. Download the Payment Gateway Module from the PaperCut website at
http://www.papercut.com/anonftp/pub/pcng/ext/payment-gateway/pcng-payment-gatewaymodule.exe
3. Install the module into the same directory as PaperCut. This is normally:
C:\Program Files\PaperCut NG\
4. Open the file:
[app-path]\server\lib-ext\ext-payment-gateway-realexrr.properties
in a text editor such as Notepad.
5. Locate the line realex-rr.enabled=N and change the N to Y. This will
enable the Realex module.
6. Locate the line realex-rr.merchant-id and enter your Realex merchant id.
7. Locate the line realex-rr.shared-secret and enter your Realex shared
secret / password.
8. Configure other options in this file as discussed in General Configuration
Options in the Payment Gateway Module documentation, or by referring to the
comments in the file itself. Options include limits on the amount to transfer,
access groups, custom error messages, and the messages displayed to users
after a successful or failed transaction.
You may like to enable a group restriction to limit access to administrators
until configuration is complete.
9. Save the file and exit the text editor.
10. Restart the PaperCut Application Server service via Control Panel ->
Administrative Tools -> Services and wait 30 seconds.
11. Check the end of the log file at [app-path]\server\logs\server.log for
any obvious error messages.
Copyright © 2010 PaperCut Software International Pty. Ltd., All Rights Reserved.
3 of 7
PaperCut - Payment Gateway Module - Realex Realauth Redirect - Quick Start Guide
Stage 4: Firewall and POST URL Configuration
The Realex server communicates with the PaperCut server via HTTP (only) on port
80 (only). You will need to ensure that Realex is able to contact the PaperCut server
via an internet-accessible hostname on port 80. This will usually involve the
following network changes:
1. Set up a public DNS entry to ensure the PaperCut server is publicly accessible
via a friendly name (e.g. papercut.myorg.edu).
2. Either:
a. Allow internet access directly to the PaperCut server over port 80, or
b. Set up external firewall rules to port forward from the public address
on port 80 to the PaperCut server port 9191.
It is important that the firewall policy only applies to external hosts.
Internal hosts will require direct access to the PaperCut server.
During testing it may be appropriate to open access from any host, then
lock down access to the Realex IP address range once it has been
determined. Once a test transaction has been made via HTTP the
Realex server IP address(es) may be gained from the payment gateway
event log file (located at [app-path]/server/logs/paymentgateway/event.log).
At the time of writing this address range was: 62.17.19.0/255
3. Accessing the following URL with a web browser will display a simple
confirmation page containing the current time, and can be used to test external
access:
http://papercut.myorg.edu/rpc/gateway/realex-rr
4. Once the URL is working and accessible from the internet, contact Realex and
notify them that you would like to set the “script return URL” for your
Realauth Redirect service to the above URL. Realex will then configure this
URL, being the URL that Realex will POST transaction details to.
Copyright © 2010 PaperCut Software International Pty. Ltd., All Rights Reserved.
4 of 7
PaperCut - Payment Gateway Module - Realex Realauth Redirect - Quick Start Guide
Stage 5: Testing
The payment gateway module is now ready for testing. This test will involve
performing a live transaction with a real credit card, testing real-world end-to-end
functionality. Afterwards the payment may be voided/credited/refunded via the
RealControl interface. Note that transaction fees may be incurred for the payment or
refunding.
1. Log into the PaperCut user web interface at http://papercut:9191/user
2. A new link called Add Credit should appear on the left. Click this link.
3. Select an amount to add and press Continue.
4. You should now be redirected to the Realex hosted order pages for payment.
Enter the payment details including a valid credit card number and associated
details as requested.
5. After entering your payment details you should be presented with the success
(or failure) message as configured in ext-payment-gateway-realexrr.properties, including a link to take you back to the web interface. If this
is not displayed (and the text you see is the success/failure text configured in
RealControl), then something went when Realex tried to POST the details to
PaperCut via the “script return URL”. See the Troubleshooting section for
more information.
6. Continue and confirm that the value is placed on the user‟s PaperCut account
and the transaction is listed in their transaction history. See the
Troubleshooting section if you have any problems.
7. The transaction should appear in the RealControl, and may be voided or
credited.
Copyright © 2010 PaperCut Software International Pty. Ltd., All Rights Reserved.
5 of 7
PaperCut - Payment Gateway Module - Realex Realauth Redirect - Quick Start Guide
Stage 6: Go-Live
If a group restriction was enabled in Stage 2 it can now be removed or altered to allow
access to end-users. Your system is now live and will accept and charge credit cards.
Copyright © 2010 PaperCut Software International Pty. Ltd., All Rights Reserved.
6 of 7
PaperCut - Payment Gateway Module - Realex Realauth Redirect - Quick Start Guide
Troubleshooting
Administrators may find information in the following log files useful when trying to
troubleshoot setup/configuration problems or issues reported by end-users.
Payment Gateway Event Log:
[app-path]\server\logs\payment-gateway\event.log
This log contains gateway specific error messages and events.
Application Log:
[app-path]\server\logs\server.log
This log contains general application specific error messages and events.
Transaction Log:
[app-path]\server\logs\payment-gateway\transaction.log
This log contains a list of successful transactions in a tab-delimited form.
Please feel free to contact the PaperCut Software Development Team at
[email protected] if you require assistance.
Copyright © 2010 PaperCut Software International Pty. Ltd., All Rights Reserved.
7 of 7