1
Programming EyeLink Experiments
in Windows
Version 2.1
Copyright 1994-2002, SR Research Ltd.
EyeLink is a registered trademark of SR Research Ltd., Toronto, Canada
Windows EyeLink Programming (8/16/2002) 1997 SR Research Ltd.
1
Table of Contents
1.
INTRODUCTION .................................................................................................................................1
1.1
ORGANIZATION OF THIS DOCUMENT ....................................................................................................1
1.2
GETTING STARTED ...............................................................................................................................2
1.3
REVISION HISTORY...............................................................................................................................2
1.3.1
Version 1.0 to 1.2: .......................................................................................................................2
1.3.2
Version 2.0-2.0 ............................................................................................................................3
1.3.3
Version 2.1...................................................................................................................................3
2.
OVERVIEW OF EXPERIMENTS......................................................................................................5
2.1
OUTLINE OF A TYPICAL WINDOWS EXPERIMENT..................................................................................5
2.2
EYELINK OPERATION IN EXPERIMENTS ................................................................................................6
2.3
FEATURES OF THE EYELINK_EXPTKIT LIBRARY ....................................................................................7
2.4
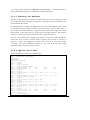
DISPLAYS AND EXPERIMENTS ..............................................................................................................8
2.4.1
Drawing Directly to the Display .................................................................................................9
2.4.2
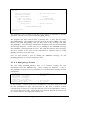
Synchronizing to the Display.......................................................................................................9
2.4.3
Using Bitmaps for Display ........................................................................................................11
3.
PROGRAMMING EXPERIMENTS ................................................................................................12
3.1
IMPORTANT PROGRAMMING NOTES ...................................................................................................12
3.2
PROGRAMMING TOOLS AND ENVIRONMENT .......................................................................................12
3.3
PORTING CODE FOR VERSION 1 OF EYELINK_EXPTKIT ........................................................................13
3.4
STARTING A NEW PROJECT.................................................................................................................13
3.5
PLANNING THE EXPERIMENT ..............................................................................................................14
3.6
DEVELOPING AND DEBUGGING NEW EXPERIMENTS ...........................................................................15
3.6.1
Simulated Link Mode.................................................................................................................15
3.6.2
Mouse Simulation Mode ............................................................................................................16
3.7
CONVERTING EXISTING EXPERIMENTS ...............................................................................................16
4.
DEVELOPER’S TOOLKIT FILES ..................................................................................................18
4.1
FILES AND LIBRARIES .........................................................................................................................18
4.1.1
Libraries ....................................................................................................................................18
4.1.2
Required Source Files ...............................................................................................................18
4.1.3
Organization of Projects and Files ...........................................................................................20
5.
EYELINK PROGRAMMING CONVENTIONS.............................................................................22
5.1
STANDARD MESSAGES .......................................................................................................................22
5.1.1
Trial Return Codes ....................................................................................................................23
6.
EYELINK DATA TYPES ..................................................................................................................25
6.1
BASIC PORTABLE DATA TYPES ..........................................................................................................25
6.2
LINK DATA TYPES ..............................................................................................................................25
6.2.1
Samples......................................................................................................................................26
6.2.2
Event Data .................................................................................................................................27
7.
ISSUES FOR PROGRAMMING EXPERIMENTS UNDER WINDOWS ...................................32
7.1
ISSUES FOR DOS PROGRAMMERS .......................................................................................................32
7.2
ISSUES FOR WINDOWS PROGRAMMERS ..............................................................................................33
7.3
WINDOWS TIMING ISSUES ..................................................................................................................33
7.3.1
Using the SYSTESTS Application ..............................................................................................34
7.3.2
Minimizing Windows Delays .....................................................................................................36
7.3.3
Windows 2000/XP Realtime Mode ............................................................................................36
7.4
7.5
7.6
7.7
8.
HARDWARE I/O UNDER WINDOWS .....................................................................................................37
MESSAGE PUMPS AND LOOPS .............................................................................................................38
WINDOWS KEY SUPPORT ...................................................................................................................39
TERMINATING THE PROGRAM.............................................................................................................39
WINDOWS GRAPHICS PROGRAMMING ...................................................................................41
8.1
GRAPHICS MODES ..............................................................................................................................41
8.1.1
Resolutions and Colors..............................................................................................................41
8.1.2
Drawing Speed ..........................................................................................................................42
8.1.3
Display Mode Information ........................................................................................................43
8.1.4
Adapting to Display Resolutions ...............................................................................................44
8.1.5
Synchronization to Display Refresh ..........................................................................................45
8.2
FULL-SCREEN WINDOW .....................................................................................................................45
8.2.1
Creating the Window.................................................................................................................45
8.2.2
Clearing the Display..................................................................................................................46
8.2.3
Processing Windows Messages .................................................................................................46
8.2.4
Changing the Window Template................................................................................................46
8.2.5
Registering the Window.............................................................................................................47
8.3
WINDOWS GRAPHICS FUNDAMENTALS ..............................................................................................47
8.3.1
Display Contexts........................................................................................................................47
8.3.2
Specifying Colors.......................................................................................................................48
8.3.3
Pens and Brushes ......................................................................................................................48
8.3.4
Fonts and Text ...........................................................................................................................48
8.4
DRAWING WITH BITMAPS ..................................................................................................................49
8.4.1
Drawing to Bitmaps...................................................................................................................49
8.4.2
Loading Pictures .......................................................................................................................50
8.4.3
Copying to the Display ..............................................................................................................51
9.
CONTROLLING CALIBRATION ...................................................................................................52
9.1
9.2
9.3
9.4
9.5
CALIBRATION COLORS .......................................................................................................................52
CALIBRATION TARGET APPEARANCE .................................................................................................52
CALIBRATION SOUNDS .......................................................................................................................53
RECORDING ABORT BLANKING ..........................................................................................................53
CUSTOMIZING WITH HOOK FUNCTIONS ..............................................................................................54
10.
CONNECTIONS AND MULTIPLE COMPUTER CONFIGURATIONS ...............................55
10.1 CONNECTION TYPES ...........................................................................................................................56
10.1.1 Broadcast Connections..............................................................................................................56
10.1.2 Unconnected Operation.............................................................................................................56
10.1.3 Connection Functions................................................................................................................57
10.2 FINDING TRACKERS AND REMOTES ....................................................................................................58
10.3 INTER-REMOTE COMMUNICATION......................................................................................................58
10.3.1 EyeLink Messaging System........................................................................................................58
10.3.2 Communication by Tracker Messages.......................................................................................59
11.
EXPERIMENT TEMPLATES OVERVIEW...............................................................................61
11.1
TEMPLATE TYPES ...............................................................................................................................61
12.
“SIMPLE” TEMPLATE ................................................................................................................63
12.1 SOURCE FILES FOR “SIMPLE” .............................................................................................................63
12.2 ANALYSIS OF “W32_DEMO_MAIN.C”..................................................................................................64
12.2.1 WinMain()..................................................................................................................................64
12.2.2 Initialization ..............................................................................................................................65
12.2.3 Opening an EDF file .................................................................................................................66
12.2.4 EyeLink Tracker Configuration.................................................................................................67
Windows EyeLink Programming (8/16/2002) 1997 SR Research Ltd.
iii
12.2.5 Running the Experiment ............................................................................................................68
12.2.6 Transferring the EDF file ..........................................................................................................68
12.2.7 Cleaning Up ..............................................................................................................................68
12.2.8 Extending the Experiment Setup................................................................................................69
12.3 ANALYSIS OF “W32_SIMPLE_TRIALS.C” .............................................................................................69
12.3.1 Initial Setup and Calibration.....................................................................................................69
12.3.2 Trial Loop and Result Code Processing....................................................................................69
12.3.3 Trial Setup Function..................................................................................................................71
12.3.4 “TRIALID” Message.................................................................................................................71
12.3.5 Tracker Feedback Graphics ......................................................................................................71
12.3.6 Executing the Trial ....................................................................................................................72
12.4 CONTROL BY SCRIPTS ........................................................................................................................73
12.5 ANALYSIS OF “W32_SIMPLE_TRIAL.C”...............................................................................................73
12.5.1 Overview of Recording ..............................................................................................................73
12.6 DRIFT CORRECTION............................................................................................................................74
12.6.1 Starting Recording.....................................................................................................................75
12.6.2 Starting Realtime Mode .............................................................................................................76
12.6.3 Drawing the Subject Display.....................................................................................................77
12.6.4 Recording Loop .........................................................................................................................79
12.6.5 Cleaning Up and Reporting Trial Results .................................................................................80
12.6.6 Extending “w32_simple_trial.c”...............................................................................................81
13.
"TEXT” TEMPLATE.....................................................................................................................83
13.1
13.2
13.3
13.4
SOURCE FILES FOR “TEXT” ................................................................................................................83
DIFFERENCES FROM "SIMPLE”............................................................................................................84
ANALYSIS OF “W32_TEXT_TRIALS.C” ................................................................................................84
ANALYSIS OF “W32_BITMAP_TRIAL.C” ..............................................................................................85
14.
"PICTURE” TEMPLATE .............................................................................................................87
14.1 SOURCE FILES FOR “PICTURE” ...........................................................................................................87
14.2 DIFFERENCES FROM "TEXT”...............................................................................................................88
14.3 ANALYSIS OF “W32_PICTURE_TRIALS.C” ...........................................................................................88
14.3.1 Loading pictures and creating composite images .....................................................................89
15.
"EYEDATA” TEMPLATE ............................................................................................................92
15.1 SOURCE FILES FOR “EYEDATA”..........................................................................................................92
15.2 DIFFERENCES FROM "TEXT” AND “PICTURE” .....................................................................................93
15.3 ANALYSIS OF “W32_DATA_TRIALS.C”................................................................................................93
15.4 ANALYSIS OF “W32_DATA_TRIAL.C” .................................................................................................94
15.4.1 Newest Sample Data..................................................................................................................94
15.4.2 Starting Recording.....................................................................................................................95
15.4.3 Confirming Data Availability ....................................................................................................95
15.4.4 Reading Samples .......................................................................................................................96
15.5 ANALYSIS OF “W32_PLAYBACK_TRIAL.C” .........................................................................................97
15.5.1 Starting Playback ......................................................................................................................97
15.5.2 Processing Link Data ................................................................................................................98
15.5.3 Processing Events......................................................................................................................99
15.5.4 Detecting Lost Data...................................................................................................................99
15.5.5 Processing Samples .................................................................................................................100
16.
“GCWINDOW” TEMPLATE .....................................................................................................101
16.1 GAZE-CONTINGENT WINDOW ISSUES...............................................................................................101
16.1.1 Fast Updates............................................................................................................................101
16.1.2 Windowing and Masking .........................................................................................................102
16.1.3 Eye Tracker Data Delays ........................................................................................................102
Windows EyeLink Programming (8/16/2002) 1997 SR Research Ltd.
iv
16.1.4 Display Delays.........................................................................................................................103
16.2 GAZE-CONTINGENT WINDOW IMPLEMENTATION .............................................................................104
16.2.1 Initializing Gaze-Contingent Window .....................................................................................104
16.2.2 Drawing the Gaze-Contingent Window...................................................................................105
16.3 SOURCE FILES FOR “GCWINDOW”...................................................................................................106
16.4 ANALYSIS OF “W32_GCWINDOW_TRIALS.C” ....................................................................................107
16.4.1 Setup and Block Loop..............................................................................................................107
16.4.2 Setting Up Trials......................................................................................................................108
16.5 ANALYSIS OF “W32_GCWINDOW_TRIAL.C”......................................................................................110
16.5.1 Initializing the Window............................................................................................................110
16.5.2 Drawing the Window...............................................................................................................110
16.6 OTHER GAZE-CONTINGENT PARADIGMS ..........................................................................................111
16.6.1 Saccade Contingent Displays ..................................................................................................111
16.6.2 Boundary Paradigms...............................................................................................................112
17.
"CONTROL” TEMPLATE .........................................................................................................113
17.1 SOURCE FILES FOR “CONTROL”........................................................................................................113
17.2 ANALYSIS OF “W32_GCONTROL_TRIAL.C”.......................................................................................114
17.2.1 Fixation Update Events ...........................................................................................................114
17.2.2 Enabling Fixation Updates......................................................................................................115
17.2.3 Processing Fixation Updates...................................................................................................115
17.2.4 Multiple Selection Region Support ..........................................................................................116
18.
“DYNAMIC” TEMPLATE..........................................................................................................119
18.1 SOURCE FILES FOR “DYNAMIC” .......................................................................................................120
18.2 ANALYSIS OF “W32_TARGETS.C” .....................................................................................................120
18.2.1 Modifying Target Shapes.........................................................................................................121
18.3 ANALYSIS OF “W32_DYNAMIC_TRIAL.C” .........................................................................................122
18.4 ANALYSIS OF “W32_DYNAMIC_TRIALS.C” .......................................................................................125
18.4.1 Saccadic Trial Setup................................................................................................................125
18.4.2 Saccadic Trial Drawing Function ...........................................................................................126
18.4.3 Pursuit Trial Setup ..................................................................................................................128
18.4.4 Pursuit Trial Drawing Function..............................................................................................130
18.5 ADAPTING THE “DYNAMIC” TEMPLATE ............................................................................................131
19.
“COMM_SIMPLE” AND “COMM_LISTENER” TEMPLATES ..........................................133
19.1 SOURCE FILES FOR “COMM_SIMPLE” ...............................................................................................134
19.2 ANALYSIS OF “COMM_SIMPLE_MAIN.C”...........................................................................................134
19.2.1 Synchronizing with comm_listener..........................................................................................135
19.2.2 Enabling Messages in Link Data.............................................................................................136
19.3 ANALYSIS OF “COMM_SIMPLE_TRIAL.C”..........................................................................................137
19.4 SOURCE FILES FOR “COMM_LISTENER”............................................................................................138
19.5 ANALYSIS OF “COMM_LISTENER_MAIN.C” .......................................................................................138
19.6 ANALYSIS OF “COMM_LISTENER_LOOP.C” .......................................................................................140
19.7 ANALYSIS OF “COMM_LISTENER_RECORD.C”...................................................................................142
19.8 EXTENDING THE “COMM_SIMPLE” AND “COMM_LISTENER” TEMPLATES .........................................144
20.
“BROADCAST” TEMPLATE.....................................................................................................146
20.1 SOURCE FILES FOR “BROADCAST”....................................................................................................147
20.2 ANALYSIS OF “BROADCAST_MAIN.C”...............................................................................................147
20.2.1
Checking Tracker Connection Status ........................................................................149
20.2.2
Reading and Mapping Display Resolution...............................................................150
20.2.3 Tracker Mode Loop .................................................................................................................152
20.3 ANALYSIS OF “BROADCAST_RECORD.C” ..........................................................................................154
20.4 EXTENDING “BROADCAST”...............................................................................................................155
Windows EyeLink Programming (8/16/2002) 1997 SR Research Ltd.
v
21.
ASC FILE ANALYSIS..................................................................................................................157
21.1 CREATING ASC FILES WITH EDF2ASC............................................................................................157
21.2 ANALYZING ASC FILES ...................................................................................................................157
21.3 FUNCTIONS DEFINED BY “READ_ASC.C” ...........................................................................................158
21.3.1 File Reading Functions ...........................................................................................................158
21.3.2 Word Read and Compare ........................................................................................................159
21.3.3 Reading Recording Configuration...........................................................................................160
21.3.4 Reading Samples .....................................................................................................................161
21.3.5 Reading Events ........................................................................................................................162
21.3.6 Rewinding and Bookmarks ......................................................................................................164
21.4 A SAMPLE ASC ANALYSIS APPLICATION.........................................................................................164
21.4.1 Planning the Analysis ..............................................................................................................165
21.4.2 Typical Trial Data ...................................................................................................................165
21.4.3 Analyzing a File.......................................................................................................................166
21.4.4 Analyzing Trials.......................................................................................................................167
22.
MOST USEFUL TOOLKIT FUNCTIONS ................................................................................171
22.1 CONNECTION TO EYELINK TRACKER ...............................................................................................171
22.1.1 open_eyelink_connection()......................................................................................................171
22.1.2 close_eyelink_connection() .....................................................................................................171
22.1.3 set_eyelink_address() ..............................................................................................................172
22.1.4 eyelink_get_tracker_version() .................................................................................................172
22.2 TRACKER STATUS ............................................................................................................................173
22.2.1 eyelink_is_connected() ............................................................................................................173
22.2.2 eyelink_current_mode()...........................................................................................................173
22.3 EYELINK SETUP MENU ....................................................................................................................174
22.3.1 do_tracker_setup() ..................................................................................................................174
22.3.2 exit_calibration() .....................................................................................................................174
22.4 PERFORM DRIFT CORRECTION..........................................................................................................175
22.4.1 do_drift_correct() ....................................................................................................................175
22.5 CONFIGURE CALIBRATION AND DRIFT CORRECTION ........................................................................176
22.5.1 set_calibration_colors() ..........................................................................................................176
22.5.2 set_target_size().......................................................................................................................176
22.5.3 set_cal_sounds() ......................................................................................................................177
22.5.4 set_dcorr_sounds() ..................................................................................................................177
22.6 EXECUTE EYELINK COMMAND ........................................................................................................177
22.6.1 eyecmd_printf()........................................................................................................................177
22.7 SEND DATA MESSAGE ......................................................................................................................178
22.7.1 eyemsg_printf()........................................................................................................................178
22.8 DATA FILE OPEN, CLOSE AND TRANSFER.........................................................................................178
22.8.1 receive_data_file()...................................................................................................................178
22.8.2 open_data_file() ......................................................................................................................179
22.8.3 close_data_file() ......................................................................................................................179
22.9 IMAGE FILE SAVING AND TRANSFERRING ........................................................................................179
22.9.1 bitmap_save() ..........................................................................................................................179
22.9.2 bitmap_to_backdrop() .............................................................................................................180
22.9.3 bitmap_save_and_backdrop() .................................................................................................181
22.10
RECORDING ..................................................................................................................................182
22.10.1
start_recording() .................................................................................................................182
22.10.2
stop_recording() ..................................................................................................................182
22.10.3
check_recording()................................................................................................................183
22.10.4
check_record_exit() .............................................................................................................183
22.10.5
set_offline_mode() ...............................................................................................................183
22.11
PLAYBACK OF LAST TRIAL ...........................................................................................................184
Windows EyeLink Programming (8/16/2002) 1997 SR Research Ltd.
vi
22.11.1
eyelink_playback_start() .....................................................................................................184
22.11.2
eyelink_playback_stop() ......................................................................................................184
22.12
MILLISECOND AND MICROSECOND CLOCKS .................................................................................184
22.12.1
current_time(), current_msec()............................................................................................184
22.12.2
msec_delay()........................................................................................................................185
22.12.3
pump_delay().......................................................................................................................185
22.12.4
current_usec()......................................................................................................................185
22.13
EYELINK TRACKER KEYS.............................................................................................................186
22.13.1
eyelink_flush_keybuttons() ..................................................................................................186
22.13.2
eyelink_read_keybutton() ....................................................................................................186
22.13.3
eyelink_send_keybutton() ....................................................................................................187
22.14
EYELINK TRACKER BUTTONS ......................................................................................................187
22.14.1
eyelink_last_button_press().................................................................................................187
22.14.2
eyelink_button_states()........................................................................................................187
22.14.3
eyelink_flush_keybuttons() ..................................................................................................188
22.15
REAL-TIME EYE DATA FROM LINK ..............................................................................................189
22.15.1
eyelink_wait_for_block_start()............................................................................................189
22.15.2
eyelink_eye_available() .......................................................................................................189
22.15.3
eyelink2_mode_data() (EyeLink II only) .............................................................................190
22.15.4
eyelink_get_next_data().......................................................................................................190
22.15.5
eyelink_get_float_data()......................................................................................................191
22.15.6
eyelink_newest_float_sample()............................................................................................191
22.16
WINDOWS KEYBOARD SUPPORT ..................................................................................................192
22.16.1
getkey() ................................................................................................................................192
22.16.2
echo_key()............................................................................................................................193
22.16.3
escape_pressed() .................................................................................................................193
22.16.4
break_pressed() ...................................................................................................................193
22.17
REALTIME MODE AND APPLICATION PRIORITY ............................................................................194
22.17.1
begin_realtime_mode()........................................................................................................194
22.17.2
end_realtime_mode()...........................................................................................................194
22.17.3
set_high_priority()...............................................................................................................195
22.17.4
set_normal_priority() ..........................................................................................................195
22.18
WINDOWS GRAPHICS SUPPORT ....................................................................................................195
22.18.1
wait_for_video_refresh() .....................................................................................................195
22.18.2
in_vertical_retrace()............................................................................................................196
22.18.3
get_display_information() ...................................................................................................196
22.18.4
init_expt_graphics().............................................................................................................197
22.18.5
close_expt_graphics()..........................................................................................................197
22.19
WINDOWS DIALOG BOXES ...........................................................................................................197
22.19.1
edit_dialog() ........................................................................................................................197
22.19.2
alert_printf() ........................................................................................................................198
22.20
WINDOWS SYSTEM SUPPORT........................................................................................................198
22.20.1
terminal_break()..................................................................................................................198
22.20.2
exit_calibration() .................................................................................................................199
22.20.3
message_pump() ..................................................................................................................199
22.20.4
process_key_messages()......................................................................................................199
22.21
WINDOWS BUILDING BLOCKS ......................................................................................................200
22.21.1
translate_key_message() .....................................................................................................200
22.21.2
flush_getkey_queue() ...........................................................................................................200
22.21.3
read_getkey_queue() ...........................................................................................................201
23.
OTHER EYELINK FUNCTIONS...............................................................................................202
23.1 RECORDING SUPPORT .......................................................................................................................202
23.1.1 eyelink_wait_for_data()...........................................................................................................202
23.1.2 eyelink_event_type_flags() ......................................................................................................202
Windows EyeLink Programming (8/16/2002) 1997 SR Research Ltd.
vii
23.2 LOCAL AND TRACKER TIME .............................................................................................................203
23.2.1 current_micro() .......................................................................................................................203
23.2.2 eyelink_request_time().............................................................................................................203
23.2.3 eyelink_read_time() .................................................................................................................203
23.3 EYELINK COMMANDS AND MESSAGES.............................................................................................204
23.3.1 eyelink_send_command() ........................................................................................................204
23.3.2 eyelink_timed_command().......................................................................................................204
23.3.3 eyelink_command_result().......................................................................................................204
23.3.4 eyelink_last_message()............................................................................................................205
23.3.5 eyelink_send_message() ..........................................................................................................205
23.4 READ EYELINK VARIABLES .............................................................................................................205
23.4.1 eyelink_read_request() ............................................................................................................205
23.4.2 eyelink_read_reply()................................................................................................................206
23.5 EYELINK TRACKER MODES..............................................................................................................206
23.5.1 eyelink_abort() ........................................................................................................................206
23.5.2 eyelink_wait_for_mode_ready()..............................................................................................206
23.5.3 eyelink_start_setup() ...............................................................................................................207
23.5.4 eyelink_in_setup()....................................................................................................................207
23.5.5 eyelink_tracker_mode() ...........................................................................................................207
23.6 CALIBRATION AND DRIFT CORRECTION SUPPORT ............................................................................207
23.6.1 eyelink_target_check().............................................................................................................207
23.6.2 eyelink_accept_trigger()..........................................................................................................208
23.6.3 eyelink_driftcorr_start() ..........................................................................................................208
23.6.4 eyelink_cal_result() .................................................................................................................208
23.6.5 eyelink_apply_driftcorr().........................................................................................................209
23.6.6 eyelink_cal_message().............................................................................................................209
23.7 USER MENU SUPPORT ......................................................................................................................209
23.7.1 eyelink_user_menu_selection()................................................................................................209
23.8 LINK DATA RECEIVE CONTROL ........................................................................................................210
23.8.1 eyelink_reset_data() ................................................................................................................210
23.8.2 eyelink_data_status()...............................................................................................................210
23.8.3 eyelink_wait_for_block_start()................................................................................................210
23.8.4 eyelink_in_data_block() ..........................................................................................................211
23.8.5 eyelink_wait_for_data()...........................................................................................................211
23.8.6 eyelink_get_next_data()...........................................................................................................211
23.8.7 eyelink_get_last_data() ...........................................................................................................212
23.8.8 eyelink_get_sample() ...............................................................................................................212
23.8.9 eyelink_newest_sample() .........................................................................................................212
23.8.10
eyelink_data_count() ...........................................................................................................212
23.8.11
eyelink_data_switch()..........................................................................................................213
23.8.12
eyelink_data_start().............................................................................................................213
23.8.13
eyelink_data_stop() .............................................................................................................214
23.8.14
eyelink_event_data_flags()..................................................................................................214
23.8.15
eyelink_position_prescaler() ...............................................................................................215
23.9 SPECIAL LINK CONNECTIONS ...........................................................................................................215
23.9.1 open_eyelink_system().............................................................................................................215
23.9.2 close_eyelink_system() ............................................................................................................216
23.9.3 eyelink_open() .........................................................................................................................216
23.9.4 eyelink_dummy_open()............................................................................................................216
23.9.5 eyelink_close() .........................................................................................................................217
23.9.6 eyelink_broadcast_open() .......................................................................................................217
23.9.7 eyelink_open_node()................................................................................................................218
23.9.8 eyelink_broadcast_open() .......................................................................................................219
23.9.9 eyelink_quiet_mode()...............................................................................................................219
23.10
TRACKER AND APPLICATION SEARCH ..........................................................................................220
Windows EyeLink Programming (8/16/2002) 1997 SR Research Ltd.
viii
23.10.1
eyelink_set_name() ..............................................................................................................220
23.10.2
text_to_elinkaddr() ..............................................................................................................220
23.10.3
eyelink_poll_trackers()........................................................................................................221
23.10.4
eyelink_poll_remotes() ........................................................................................................221
23.10.5
eyelink_poll_responses() .....................................................................................................221
23.10.6
eyelink_get_node()...............................................................................................................222
23.11
INTER-APPLICATION COMMUNICATION ........................................................................................222
23.11.1
eyelink_node_send() ............................................................................................................222
23.11.2
eyelink_node_receive()........................................................................................................222
23.11.3
eyelink_node_send_command()...........................................................................................223
23.11.4
eyelink_node_send_message().............................................................................................223
23.11.5
eyelink_node_request_time()...............................................................................................223
23.12
CALIBRATION AND IMAGE SUPPORT HOOKS ................................................................................223
24.
USEFUL EYELINK COMMANDS.............................................................................................226
24.1 CALIBRATION SETUP ........................................................................................................................226
24.1.1 calibration_type.......................................................................................................................226
24.1.2 gaze_constraint........................................................................................................................226
24.1.3 horizontal_target_y .................................................................................................................227
24.1.4 enable_automatic_calibration.................................................................................................227
24.1.5 automatic_calibration_pacing ................................................................................................227
24.2 CONFIGURING KEY AND BUTTONS ...................................................................................................227
24.2.1 key_function.............................................................................................................................227
24.2.2 create_button...........................................................................................................................228
24.2.3 button_function........................................................................................................................228
24.2.4 button_debounce_time.............................................................................................................228
24.2.5 write_ioport .............................................................................................................................228
24.2.6 read_ioport..............................................................................................................................228
24.3 DISPLAY SETUP ................................................................................................................................229
24.3.1 screen_pixel_coords ................................................................................................................229
24.3.2 screen_write_prescale .............................................................................................................229
24.4 FILE OPEN AND CLOSE .....................................................................................................................229
24.4.1 open_data_file .........................................................................................................................229
24.4.2 add_file_preamble_text ...........................................................................................................230
24.4.3 close_data_file.........................................................................................................................230
24.4.4 data_file_path..........................................................................................................................230
24.5 TRACKER CONFIGURATION ..............................................................................................................230
24.5.1 Configuration: Eyes Tracked...................................................................................................230
24.5.2 Anti-Reflection Control............................................................................................................231
24.5.3 heuristic_filter (EyeLink I) ......................................................................................................231
24.5.4 heuristic_filter (EyeLink II) .....................................................................................................231
24.5.5 pupil_size_diameter.................................................................................................................231
24.5.6 simulate_head_camera............................................................................................................232
24.5.7 simulation_screen_distance.....................................................................................................232
24.6 DRAWING COMMANDS .....................................................................................................................232
24.6.1 echo .........................................................................................................................................232
24.6.2 print_position ..........................................................................................................................232
24.6.3 clear_screen ............................................................................................................................233
24.6.4 draw_line.................................................................................................................................233
24.6.5 draw_box .................................................................................................................................233
24.6.6 draw_filled_box.......................................................................................................................233
24.6.7 draw_line.................................................................................................................................233
24.6.8 draw_text .................................................................................................................................234
24.6.9 draw_cross ..............................................................................................................................234
24.7 FILE DATA CONTROL .......................................................................................................................234
Windows EyeLink Programming (8/16/2002) 1997 SR Research Ltd.
ix
24.7.1 file_sample_data......................................................................................................................234
24.7.2 file_event_data ........................................................................................................................234
24.7.3 file_event_filter........................................................................................................................235
24.7.4 mark_playback_start ...............................................................................................................235
24.8 LINK DATA CONTROL ......................................................................................................................236
24.8.1 link_sample_data.....................................................................................................................236
24.8.2 link_event_data........................................................................................................................236
24.8.3 link_event_filter .......................................................................................................................237
24.8.4 recording_parse_type..............................................................................................................237
24.8.5 link_nonrecord_events ............................................................................................................237
24.9 PARSER CONFIGURATION .................................................................................................................237
24.9.1 select_parser_configuration....................................................................................................238
24.9.2 saccade_velocity_threshold.....................................................................................................238
24.9.3 saccade_acceleration_threshold .............................................................................................238
24.9.4 saccade_motion_threshold ......................................................................................................238
24.9.5 saccade_pursuit_fixup.............................................................................................................239
24.9.6 fixation_update_interval..........................................................................................................239
24.9.7 fixation_update_accumulate....................................................................................................239
24.9.8 Typical Parser Configurations ................................................................................................239
Windows EyeLink Programming (8/16/2002) 1997 SR Research Ltd.
x
1. Introduction
Performing research with eye-tracking equipment typically requires a long-term
investment in software tools to collect, process, and analyze data. Much of this
involves real-time data collection, saccadic analysis, calibration routines, and so
on.
The EyeLink eye-tracking system is designed to implement most of the required
software base for data collection and conversion. It is most powerful when used
with the Ethernet link interface, which allows remote control of data collection
and real-time data transfer. The eyelink_exptkit toolkit includes libraries that
implement the link interface, and includes support code that makes
programming simpler. It includes powerful general-purpose functions for data
and file transfer, eye-image transfer, calibration, and control.
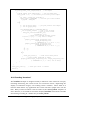
The Windows (WIN32) experiment programming toolkit is implemented as a DLL
library, eyelink_exptkit20.dll. This contain a standard set of functions for
implementation of experiments using the EyeLink tracker. The toolkit can be
used to produce experiments that use a standardized interface for setup,
calibration, and data recording. The full set of EyeLink functions are also
available for programming non-standard experiments. Additional resources in
the DLL include support for full-screen graphics and display synchronization.
1.1 Organization of This Document
We first introduce the standard form of an EyeLink experiment. This will help in
understanding the sample code, and is also valuable to programmers in
understanding how to write experiment software, and how to port existing
experiments to the EyeLink platform.
Next, the organization of source files, libraries and functions in the EyeLink
toolkit is described. This will help you to understand where files are located,
which libraries are required, and the organization of the programs. The EyeLink
programming conventions, messages and data types are defined.
The next section introduces the principles of Windows graphics programming
using the support library for experiments.
A detailed analysis of the sample programs and code follows. This sample
contains code that can be used for almost any experiment type, and can be used
as a starting point for your own experiments.
Windows EyeLink Programming (8/16/2002) 2002 SR Research Ltd.
1
Analysis of data files using ASC files and the EDF2ASC utility is covered next. A
sample program is given to analyze a data file and produce data for a statistics
program.
A description of the most useful eyelink_exptkit and EyeLink routines is next,
which describes the most useful functions. You will rarely need other functions
than those listed here.
Finally, a list of commands that can be sent to the EyeLink tracker is given.
These commands can be used for on-line configuration and control.
1.2 Getting Started
Please refer to the EyeLink II Installation manual for instructions on how to set
up the Subject PC for use with the Windows API. This will include copying in the
source code, DLLs, and utility programs, and installation of the DriverLinx PortIO
driver.
The eyelink_exptkit DLL and associated sample experiment templates have been
updated and optimized to work under Windows 2000 and XP, but can also work
(without sub-millisecond realtime performance) under Windows 95, 98 and Me.
The code has been compiled under Visual C 6.0, but should be compatible with
other Windows C compilers. The functions in the DLL may be called by other
languages that support external DLL calls, but SR Research does not offer any
support for these.
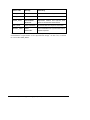
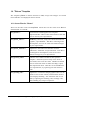
1.3 Revision History
This is a list of the revision history of the EyeLink Windows developer’s kit, to the
current release. This list also includes the version of eye trackers and operating
systems required or supported, and a list of files that have changed or require
updating.
Each version of the DLL has been carefully tested to support EyeLink tracker
versions back to version 2.01 of EyeLink I, and all versions of EyeLink II.
However, some new features may not work properly unless the newer versions of
the tracker software are used.
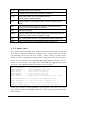
1.3.1 Version 1.0 to 1.2:
New features: Improved networking reliability, support for experiments using
two or more applications (broadcast and polling), playback, and extended
connection modes.
Windows EyeLink Programming (8/16/2002) 2002 SR Research Ltd.
2
Tracker versions required to use new features: EyeLink I 2.1 and above,
EyeLink II 1.09 and above.
DLL version: eyelink_exptkit20.dll, version 2.1 and above. Programs must be
relinked with the new library eyelink_exptkit20.lib to access new functions.
Header files updated: eyelink.h, eyetypes.h, eye_data.h, w32_exptsppt2.h
New code templates: broadcast, comm_simple, comm_listener
Modified templates: Messages marking time (“DISPLAY ON” and a number of
messages in the dynamic template) were modified to place the message delay
first, to allow automatic time correction by the EyeLink viewer and data analyzer.
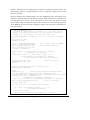
1.3.2 Version 2.0-2.0
New features: Windows 2000 and Windows XP support, real-time mode and
refresh-locked graphics, support for multiple image file types, support for
detection of tracker version, support for enhanced EyeLink camera images, larger
image display, all DLL export functions standardized to STDCALL model for use
by languages other than C.
Tracker versions required to use new features: EyeLink II 1.00 and above.
DLL version: eyelink_exptkit20.dll, version 2.0 and above. Programs must be
recompiled with w32_exptsppt2.h and relinked with the new library
eyelink_exptkit20.lib. Requires installation of an IO port driver.
Header files updated: eyelink.h, eyetypes.h, eye_data.h, w32_exptsppt2.h
(replaces w32_exptsppt.h).
New code templates: dynamic
Modified templates: All templates modified to include real-time mode where
required, many small changes made to illustrate use of “helper” functions in DLL.
New dynamic temple illustrates real-time pursuit and saccadic paradigms.
Playback template fixed to work properly with EyeLink II.
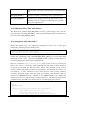
1.3.3 Version 2.1
New features: Improved networking reliability, support for experiments using
two or more applications (broadcast and polling), playback, and extended
connection modes.
Tracker versions required to use new features: EyeLink I 2.1 and above,
EyeLink II 1.09 and above.
Windows EyeLink Programming (8/16/2002) 2002 SR Research Ltd.
3
DLL version: eyelink_exptkit20.dll, version 2.1 and above. Programs must be
relinked with the new library eyelink_exptkit20.lib to access new functions.
Header files updated: eyelink.h, eyetypes.h, eye_data.h, w32_exptsppt2.h
New code templates: broadcast, comm_simple, comm_listener
Modified templates: Messages marking time (“DISPLAY ON” and a number of
messages in the dynamic template) were modified to place the message delay
first, to allow automatic time correction by the EyeLink viewer and data analyzer.
Tracker versions required to use new features: EyeLink I 2.1 and above,
EyeLink II 1.09 and above.
Windows EyeLink Programming (8/16/2002) 2002 SR Research Ltd.
4
2. Overview of Experiments
The EyeLink system and this developer’s kit based on experience gained by
actual research in diverse areas, including saccadic tasks, smooth pursuit,
reading, and gaze contingent displays. This experience has made it possible for
SR Research to write this manual, which will provide the knowledge required for
programmers to write experiments that produce valid data. This toolkit contains
samples of many types of experiments, and the eyelink_exptkit library is designed
to simplify implementation of almost any experimental task.
As well, SR Research has studied each platform that the EyeLink developer’s kit
has been ported to, and has determined the best way to present graphics, control
program flow, and to achieve reproducible timing. This manual and the example
source code included will help you to write Windows-specific experiments without
spending hundreds of hours in reading books and testing different methods.
Some knowledge of Windows programming and of the C language is required, but
reading the first few chapters of a Windows programming book should give
enough background to understand the terminology used in Windows
programming.
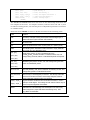
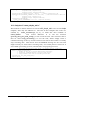
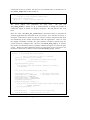
2.1 Outline of a Typical Windows Experiment
A typical experiment using the EyeLink eye tracker system will use some
variation of this sequence of operations:
• Initialize the EyeLink system, and open a link connection to the EyeLink
tracker.
• Check the display mode, create a full-screen window, and initialize the
calibration system in the eyelink_exptkit library.
• Send any configuration commands to the EyeLink tracker to prepare it for the
experiment
• Get an EDF file name, and open an EDF data file (stored on the eye tracker)
• Record one or more blocks of trials. Each block typically begins with tracker
setup (camera setup and calibration), then several trials are run.
• Close the EDF data file. If desired, copy it via the link to the local computer.
• Close the window, and the link connection to the eye tracker.
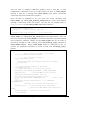
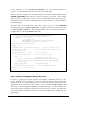
For each trial, the experiment will do these steps:
• Create a data message (“TRIALID”) and title to identify the trial
• Create background graphics on the eye tracker display
Windows EyeLink Programming (8/16/2002) 2002 SR Research Ltd.
5
• Perform a drift correction, or display a fixation target
• Start the EyeLink recording to the EDF file
• Display graphics for the trial. (These may have been prepared as a bitmap
before the trial).
• Loop until the trial time is up, a button is pressed on the tracker, or the
recording is interrupted from the tracker. The display may be changed as
required for the trial (i.e. moving a target to elicit saccades) in this loop. Realtime eye-position and saccade/fixation data are also available for gazecontingent displays and control.
• Stop recording, and handle any special exit conditions. Report trial success or
errors by adding messages to the EDF file.
• Optionally, play back the data from the trial for on-line analysis.
This sequence of operations is the core of almost all most experiments. A real
experiment would probably add practice trials, instruction screens,
randomization, and so on.
During recording, all eye-tracking data and events are usually written into the
EDF file, which is saved on the eye tracker’s hard disk, and may be copied to the
Subject PC at the end of the experiment. Your experiment will also add messages
to the EDF file which to identify trial conditions and to timestamp important
events (such as subject responses and display changes) for use in analysis. The
EDF file may be processed directly using the EDFVIEW application, or converted
to an ASC file and processed by your own software.
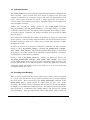
2.2 EyeLink Operation in Experiments
Several simple experiments are included in the EyeLink experiment kit, including
all source code. These experiments will be discussed in detail throughout this
manual. Each is an example of the basic operations needed to implement the
most useful eye-tracking research: simple and complex static and dynamic
displays, on-line data playback, real-time data transfer, gaze-contingent displays,
and gaze-controlled computer interfaces.
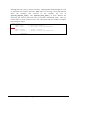
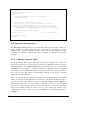
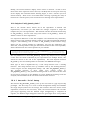
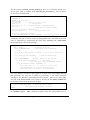
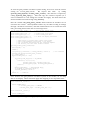
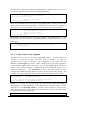
For now, we will run the simplest of the experiments, called simple. This includes
four trials, each of which prints a single word at the center of the display. Start
the EyeLink tracker, then go to the EyeLinkII_Win_API\Sample_Experiments folder
and execute simple on the Subject PC. The experiment first asks for a file name
for the EDF file that will be created on the EyeLink computer’s hard disk. Enter
a 1 to 8 character name, or press “Esc” or click “Cancel” and no file will be
created (all recorded data will be discarded).
Windows EyeLink Programming (8/16/2002) 2002 SR Research Ltd.
6
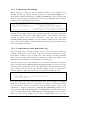
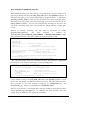
The Windows display then blanks, and the tracker displays the Setup menu
screen.
From this menu, the experimenter can perform camera setup,
calibration, and validation. These may be practiced with the track application
included with the eyelink_exptkit kit. Instructions for using this utility are
included in the EyeLink User’s Manual. All operations, including calibration,
validation, and display of the eye image on the Subject PC, are implemented by
the EyeLink and eyelink_exptkit DLL.
When the eyetracker has been set up and the subject calibrated, press the ‘Esc’
key on either the EyeLink PC or the Subject PC to exit the Setup menu. The
experiment will immediately proceed to the first trial, and display a drift
correction fixation target. Press the space bar on the Subject PC or EyeLink
tracker while fixating the target to perform the drift correction. Pressing the ‘Esc’
key during drift correction will switch the tracker to the Setup menu to
recalibrate or correct setup problems. Drift correction will resume after the
Setup menu is exited with the ‘Esc’ key.
The screen now shows the stimulus for the first trial, a small text message. The
tracker displays the subject’s gaze position, overlaid on graphics indicating the
stimulus position. Press a button on the EyeLink button box, or press the ‘Esc’
key on the Subject PC keyboard to end the trial. The experiment will immediately
proceed to the next trial. You may also hold down the ‘Ctrl-C’ key combination or
press ‘ALT-F4’ on the Subject PC to terminate trials and the experiment.
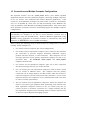
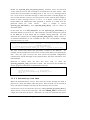
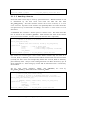
During recording, the EyeLink’s Abort menu may be displayed by clicking on the
“Abort” button (for EyeLink II) or pressing the ‘Ctrl’-’Alt’-’A’ keys on the tracker
keyboard. You can now choose to enter the Camera Setup screen (the Setup
menu on EyeLink I) for calibration or to restart or skip the current trial. The
experiment may also be aborted.
Special code in the eyelink_exptkit DLL
interprets your selections in this menu to control the sequencing of the
experiment.
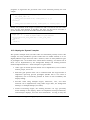
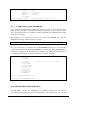
After the final trial, you will be prompted for a local name for the EDF file
recorded during the experiment. Unless you press the ‘Esc’ key or select
“Cancel”, the file will be transferred from the EyeLink computer to the Subject
PC.
Files may also be copied using the eyelink_getfile application.
The
experiment then disconnects from the tracker and exits.
2.3 Features of the eyelink_exptkit Library
The interaction of the EyeLink tracker and your experiment is fairly
sophisticated: for example, in the Setup menu it is possible to perform calibration
or validation, display a camera image on the Subject PC to aid in subject setup,
and record data with the experiment following along by displaying proper
Windows EyeLink Programming (8/16/2002) 2002 SR Research Ltd.
7
graphics. Large files can be transferred over the link, and should the EyeLink
tracker software terminate, the experiment application is automatically
terminated as well. Keys pressed on the Subject PC keyboard are transferred to
the EyeLink PC and operate the tracker during setup, and buttons pressed on
the tracker button box may be used to control the execution of the experiment on
the Subject PC.
All of these operations are implemented through the eyelink_exptkit DLL library.
Each of the above operations required just one line of code in your program.
Almost all of the source code you’ll write is for the experiment itself: control of
trials, presentation and generation of stimuli, and error handling.
Some of the features in the eyelink_exptkit DLL library are:
• Simple connection to EyeLink system
• Execution of eye tracker commands with error detection, for tracker
configuration, opening files, etc.
• Timestamped messages placed in tracker EDF file (1 millisecond time
accuracy)
• Internal clocks with millisecond and microsecond resolution.
• Monitoring of tracker button box and keyboard
• One line of C code to perform all aspects of drift correction and Setup menu
• One line of C code to transfer data files
• Transfer of camera images and display on Subject PC
• Real-time access to tracker data and eye movement events (such as fixations
and saccades)
• Playback of eye-movement data between trials, which reduces the need for
processing data during recording when data analysis within experiments is
desired.
• Ability to find and communicate with other EyeLink applications running on
other computers (NEW).
• Ability to share a simple eye tracker between multiple computers, for example
to perform real-time data analysis or control, or to enable the use of special
display devices. (NEW).
A complete list of eyelink_exptkit routines is included in the reference sections of
this document. Programmers may also want to look at the w32_exptsppt2.h and
eyelink.h C header files.
2.4 Displays and Experiments
The eyelink_exptkit DLL library handles the details of interfacing to the eye
tracker, and of performing tasks such as calibration and setup. Its internal
Windows EyeLink Programming (8/16/2002) 2002 SR Research Ltd.
8
millisecond and microsecond clocks solve the problem of timekeeping for
experiments. The major remaining problem for programmers is the proper
display of stimuli.
It may seem straightforward to present stimuli by simply drawing graphics
directly to the display, by using Windows GDI drawing functions. However, the
finite time required to draw the display and the progressive transfer of the image
to the monitor (refresh) can cause visible display changes. It is also important to
accurately mark the moment the stimulus appears to the subject for reactiontime measurement. Careful attention to timing is required in order to produce
reliable experimental results. Two methods of presenting stimuli (drawing
directly to the display, and drawing to a bitmap which is then copied to the
display) and the appropriateness of each are discussed below.
2.4.1 Drawing Directly to the Display
For small graphics such as a few words, small pictures, or pattern masks,
drawing times may be only a few milliseconds. If drawing times are longer than
this (for example loading large pictures from disk or drawing large screens of text)
the progress of drawing will be clearly visible to the subject. This will also make
measuring reaction times problematic.
It is up to the experimenter to determine what drawing speed is acceptable.
Drawing time can be measured using the EyeLink millisecond clock, by reading
the time before and after the drawing operation, or by sending messages to the
EDF file before and after drawing. The sample experiments here use a method of
marking stimulus onset that also reports the time required for drawing. While
drawing times can be unpredictable under Windows for certain operations,
acceptable drawing operations and techniques to obtain fast drawing times are
discussed throughout this document.
2.4.2 Synchronizing to the Display
A more serious problem is determining exactly when the stimulus became visible
to the subject, for reaction time measures. Even if drawing is fast, the image
displayed on the display monitor is repainted gradually from top to bottom,
taking about 80% of a refresh period (1000 msec/refresh rate). For example, it
will take about 13 millisecond to completely repaint a display at 60 Hz refresh
rate. This repainting occurs every 16.7 milliseconds for a 60 Hz display, which
means that drawing changes will not become visible for an additional 1 to 16
milliseconds.
The exact time the display is modified can be recorded by sending a timestamped
message to the eye tracker when drawing is completed. Some of the uncertainty
caused by the delay between drawing and display on the monitor may be
Windows EyeLink Programming (8/16/2002) 2002 SR Research Ltd.
9
removed by waiting for the start of the monitor’s refresh before drawing. The
eyelink_exptkit library supplies the wait_for_video_refresh() function, which
wait until the start of the vertical retrace (0.5 to 1/5 milliseconds before the top
of the monitor begins to be updated). For drawing operations that take a few
milliseconds (about 0.5 ms at the top of the display, about 300ms/(refresh rate)
at the center of the display), the stimulus will become visible in the same refresh
cycle it is being drawn in.
To accurately mark the time of onset, we need to place a display onset message
in the EDF file. The method we will use in our examples is fast, accurate, and
can be used with any drawing method that is sufficiently fast (including bitmap
display, as we will see next). This technique requires the following steps:
•
Wait for end of refresh, using the wait_for_video_refresh()
•
Read the time using current_msec()
•
Draw the stimulus (must be fast enough to appear in same refresh!)
•
Read current_msec() again, subtract previous value. This computes the
delay from the retrace, which is also the time it took to draw the stimulus
•
Write a message with the delay from retrace followed by the keyword
“DISPLAY ON”. New EyeLink analysis tools will automatically subtract
this number from the message timestamp to get the exact time of the
retrace. The message “SYNCTIME” followed by the computed delay from
retrace may also be included, for compatibility with the older EDFVIEW
viewer.
Note
that
we
did
not
send
the
message
immediately
after
wait_for_video_refresh() returned. It may take a significant amount of time
(0.2 milliseconds or more) to send a message (the systests application can be
used to measure this delay), and delay between retrace and drawing could cause
delayed presentation or flickering of moving stimuli at the top of the display.
NOTE: Preceding the message with the delay of the message from retrace will
allow new EyeLink analysis tools to automatically correct the time of the
message. If a message begins with a number, this number will be subtracted
from the time of the message, and the second item in the message is used to
identify the message type.
This reporting method can also be used for non-synchronized displays, either by
omitting the numbers (analysis tools will assume the stimulus became visible
just before the message) or be using a best-guess value for the onset-to-message
delay.
NOTE: Previous (Windows 95/98) versions of the developer’s kit used a different
method of synchronization, where wait_for_video_refresh() was called
Windows EyeLink Programming (8/16/2002) 2002 SR Research Ltd.
10
before and after drawing. This was appropriate for the slow drawing and
uncertain delays of Windows 95/98, but is less accurate and is not appropriate
for the use of stimuli that change on each refresh. This new technique can be
adapted for most types of stimulus presentation, and will be used in the future.
The type of synchronization used can be determined by the presence of numbers
in the “SYNCTIME” and “DISPLAY ON” messages.
2.4.3 Using Bitmaps for Display
The best method in Windows for rapidly displaying complex graphics at the start
of the trial is to use a device-dependent bitmap. This is like an invisible display
stored in memory, which you can draw to using any of the Windows GDI drawing
commands. Most of the sample experiments included in the developer’s kit
(except for the “simple” experiment) use bitmaps for display. The mechanics of
using bitmaps will be discussed in the section on Windows graphics
programming.
Once the stimulus has been drawn to the bitmap, it can be rapidly copied to the
display. For most video cards and display resolutions, this can be done in much
less than one refresh period (1000ms/refresh rate). Even if the copy takes more
than one refresh period, the results are better than drawing directly to the
display. When the start of the bitmap drawing is synchronized with the vertical
retrace, the drawing will out-race the progressive updating of the monitor
display, and result in the bitmap appearing in the same refresh sweep it was
drawn in. To achieve this, a full-screen bitmap copy needs to take less than ½ of
a refresh period (actually about 70%, but a safety margin must be added). The
fastest copy rates can be achieved by high-end AGP video card and fast (1 GHz or
higher) CPUs and motherboards. The systests application included with this
developer’s kit will allow you to determine the bitmap copying speed of your
computer for various display resolutions and color depths.
Windows EyeLink Programming (8/16/2002) 2002 SR Research Ltd.
11
3. Programming Experiments
Programmers should read this section carefully, and follow the rules outlined.
These will prevent future problems with upgrading to new development kit
releases, and will make your experiments easier to modify in the future.
3.1 Important Programming Notes
The header files in this toolkit should never be modified, and only copies of
the source files should be changed. Some files are designed as templates for
creating your own experiments. These should be copied as new files in a new
folder before being modified. If problems are found with any other files, contact
SR Research Ltd. before making changes.
Do not under any circumstances edit or combine the header files. This will
make future upgrades of the toolkit or EyeLink functions impossible. SR
Research Ltd. will not support any code written in this way. It is important for
researchers to supervise their programmers to prevent unsupportable software
from being created.
You should try to preserve the functionality of each source file from the
examples, when developing new experiments. Make as few changes as possible,
and do not reorganize the files in any way. This code will be updated
regularly, and you will be responsible for making any required changes to your
modified files. If proper care is taken, file comparison utilities (such as the
windiff application included with Microsoft Visual C Studio) can be used to help
find the differences. This will only work if the order of functions in the source
code is not changed, and if there is a match between functions in old and new
source files.
3.2 Programming Tools and Environment
The templates in this toolkit were programmed with Microsoft Visual C++ 6.0,
under the Microsoft Developer’s Studio. Most 32-bit C compilers are compatible
with this compiler, when programming Windows applications. If you are using
Visual C, you can simply double-click on a workspace (.dsw) file to open and
build a sample experiment. For other compilers, you will have to create a project
using the files as listed for each project.
Windows EyeLink Programming (8/16/2002) 2002 SR Research Ltd.
12
3.3 Porting code for Version 1 of eyelink_exptkit
In order to use the eyelink_exptkit 2.1 DLL with older applications written using
version 1.1, 1.2, or 2.0, follow these steps:
•
Back up your old projects first!
•
eyelink.h,
eye_data.h,
w32_exptkit2.h,
and
Copy
the
files
eyelink_exptkit20.lib from the shared folder of the new developer’s kit to
your project folder. The eyelink_exptkit20.dll should be copied to your
project directory or the Windows system directory as well.
The following steps are only required for upgrading from versions 1.1 and 1.2:
•
Open your project. Remove eyelink_exptkit.lib from the project file list,
and add the file eyelink_exptkit20.lib.
•
Open each of your source files, and change the last “#include” statement
from “w32_exptsppt.h” to “w32_exptsppt2.h”.
•
Your older project should now compile, assuming you have not modified
the original header files in any way.
3.4 Starting a New Project
The source code for each sample experiment template’s project is stored in a
folder in the EyeLinkII_Win_API\Sample_Experiments folder. Any source files in the
projects with the same name as those in other projects are identical, and
implement functionality that is commonly required. These source files are also
found in the shared folder.
The easiest way to start a new experiment is to copy all files from the project and
the library folder together: this will prevent inadvertent edits to the header files
from influencing your work. To create a new working copy:
•
Create a new folder for your project.
•
Select all files in the directory containing the template you want to base your
new project on. Copy (drag with the Ctrl key held down) the files to your new
folder.
•
Rename the project (.dsp) file in the new folder to the new experiment’s name.
•
Rename the w32_demo.h file as your new experiment’s link header file. This
will contain declarations for and new functions and variables you may add to
your experiment. Use the Visual Studio “Find in Files” tool to find all
occurrences of “w32_demo.h” in the files, and change these to the name of
your experiment’s header file.
Windows EyeLink Programming (8/16/2002) 2002 SR Research Ltd.
13
Once an experiment has been developed, it will be almost certain that you will
need to produce several variations of it. You should duplicate and rename the
original project’s folder for each new version of the project, to prevent older
versions from being overwritten. This is also the safest way of backing up work
during development, as older versions can still be tested.
3.5 Planning the Experiment
Before beginning the implementation of a new experiment, be sure that the
overall design of the experiment is clear. Know how each trial is to be
terminated, and what the important display elements of each trial are. If
randomization is to be built into the experiment, understand how this is to be
produced.
In many cases, the experiment will need to be developed in several stages,
starting from a basic trial, which will be used to refine timing and graphics. After
initial testing, the design can be refined to create the final experiment. However,
the requirements for the basic trial will probably not change.
The most important points to determine before beginning a project are:
•
How complex are the display graphics? This will determine if the display can
be drawn directly at the start of each trial, or if you will need to draw to a
bitmap and copy it to the display.
•
What subject responses are required? Trials will usually end with a button
press by the subject, or run for a fixed period of time. Code to detect these
conditions is included in the sample code.
•
Is the display static? If not, choose a template that uses realtime mode, and
add drawing commands to the recording loop if the display is to change.
•
Is real-time eye data required during recording? Usually only gaze-contingent
displays really need to get data through the link during recording. Writing
data to the Subject PC hard disk during recording should be avoided, as this
will severely reduce the accuracy of any timing your program needs to do. If
you must analyze the data during the experiment, use data playback after the
trial ends. If possible, use data from the recorded EDF file instead of on-line
analysis.
•
What data is needed for analysis? Be sure the EDF file contains the correct
data types and messages so you can analyze the experiment later. You may
also want to include messages documenting parameters that do not change
between trials so that experiment versions can be tracked. The EDF file
should be designed as a complete archive of an experimental session.
Windows EyeLink Programming (8/16/2002) 2002 SR Research Ltd.
14
•
Do you need to change any of the default calibration settings or the display?
In almost all cases, the only changes that need to be made are setting the
target and background color, and changing the target size to match the
display resolution.
3.6 Developing and Debugging New Experiments
The quickest way to develop a new experiment is to start with one of the
experiment templates, and create a single trial. You may want to place your
graphics code in a function, and call it directly instead of from within a trial, to
simplify development.
Begin by implementing the graphics for a typical trial, as these are the most
time-critical element. Read the time from current_msec() or current_usec()
before and after drawing, in order to compute total drawing time. Note that
many profiling tools (including the profiler in Microsoft Visual C) may not give the
correct results when measuring the timing of graphics calls, due to context
switches in the Windows kernel. In fact, running under a debugger will almost
certainly disable realtime mode, so once the graphics seem to be working run the
application using the “execute” command or outside the Visual Studio
environment to measure delays.
At this stage of development, you do not need a subject or even the EyeLink
tracker to develop and test your code.
There are two ways to simplify
development, while retaining the use of the EyeLink support functions and
timing.
3.6.1 Simulated Link Mode
The link connection can be simulated for early development work, or when the
EyeLink tracker is not available. By calling open_eyelink_connection() with
an argument of 1 instead of 0, your program will not attempt to connect to the
EyeLink tracker, but simply initializes the eyelink_exptkit library. Try this with
one of the sample programs, and note that ‘Esc’ exits the Setup menu mode as
usual, while the spacebar can be used for drift correction and ‘Esc’ can be used
to end trials.
In the simulated mode, all the millisecond and microsecond timing functions are
available for benchmarking the graphics. Most EyeLink commands will return a
plausible result in the simulation mode, except that real-time data is not
available from the link. Your code can test if the link is simulated by calling
eyelink_is_connected() as usual. This will return –1 instead of 1 to indicate
that the connection is simulated.
Windows EyeLink Programming (8/16/2002) 2002 SR Research Ltd.
15
3.6.2 Mouse Simulation Mode
When real data is needed for development, or recording is needed to test the
inclusion of data messages, you can still work without a subject. Change the
argument to calling open_eyelink_connection() back to 0, and restart the
EyeLink tracker in mouse-simulation mode (Toggle the “Mouse Simulation”
button in the Set Options screen for EyeLink II, or start the EyeLink I tracker
using the ‘-m’ command line option). This allows you to run the experiment with
all eye tracking and button functions available, but without the need to setup
and monitor a subject. All tracker functions (except camera image display) are
available in mouse mode, including EDF file recording, calibration, drift
correction and real-time data.
You can skip calibrations in this mode (press ‘Esc’ as soon as the display blanks
on the Subject PC and the EyeLink display shows the calibration menu), or allow
the tracker to automatically step through the calibration sequence. Use the
tracker PC’s mouse to simulate subject gaze during recording, by moving the
cursor into the gaze window of the EyeLink II tracker, or placing the ‘X’ cursor of
EyeLink I to the position desired, and clicking the left mouse button to produce a
“saccade” to this position. Hold the left mouse button down to continuously
move the point of gaze. A blink is produced when the right mouse button is held
down.
Once the experiment has been debugged using the mouse, run yourself and at
least one other person as a subject. This will help to identify any problems such
as flickers in the display, problems with graphics, or problems with the
experimental design. Be sure to analyze the resulting data files at this point, to
detect problems such as missing data or messages.
3.7 Converting Existing Experiments
Read this section if you are porting existing non-eye tracking experiments to
EyeLink or to windows. The eyelink_exptkit library was designed to simplify the
addition of eye movement analysis to existing experiments. This involves adding
calls to perform setup and drift correction, start and stop recording, and adding
messages to record trial data. Modular code with separate functions for trials
and blocks will make conversion easier: you should split up function with more
than 200 lines, and separate out randomization, graphics, and data recording
code into separate functions.
First, any special timing code in your experiment should be replaced with calls to
the EyeLink current_msec() function. You don’t need to use timer toolbox
functions directly. Replace any special code for user input with calls to the
eyelink_last_button_press() function, which detects presses of the eye
Windows EyeLink Programming (8/16/2002) 2002 SR Research Ltd.
16
tracker buttons. These buttons are logged directly into the EDF file. You should
never use the keyboard for subject response in reaction-time experiments, as the
delays introduced by Windows are highly variable. Using responses from the
keyboard is especially problematic in realtime mode and under Windows XP.
Modify your trials to perform a drift correction at their start instead of displaying
a fixation point. Ideally, you should separate the drawing code from the old
experiment into a new function, then call it from within the recording loop, or
draw into a bitmap before the trial begins and display this during the trial (as in
most of the other templates). You can make any display changes required for
animation or masking within the recording loop, drawing directly to the display.
Most non-eye tracking experiments create an output file and write the results of
each trial into this file. Instead, you should write this data into the EDF file by
sending data messages using eyemsg_printf(). This will integrate eye data,
experiment events, and subject responses in the same file. Place trial condition
data in a “TRIALID” message before the start of the trail, and end each trial with
a “TRIAL OK” message. Send messages to mark display onset (“SYNCTIME”) or
display changes, and to record subject responses. Compute reaction times by
analyzing the EDF file later. If you must analyze eye-movement data on-line (for
example, to give feedback to the subject), play back the last trial (as in
w32_playback_trial.c) rather than trying to analyze data during recording.
Windows EyeLink Programming (8/16/2002) 2002 SR Research Ltd.
17
4. Developer’s Toolkit Files
The EyeLink eye-tracking system is designed to implement most of the required
software base for data collection and processing. The developer’s kit includes the
eyelink_exptkit library that implement the link interface and support functions
that make programming simpler.
These include functions to implement
calibration and full-screen display under Windows, as well as synchronization to
display refresh, realtime mode support, and simplified keyboard access..
4.1 Files and Libraries
This section documents the relationship between the files required for creating
an experiment program, and identifies each file and folder.
4.1.1 Libraries
The eyelink_exptkit20.dll library implements the TCP/IP link, timing, and all
functions documented in eyelink.h. It also contains the functions declared in
w32_exptsppt2.h, which simplify programming of file transfer, calibration and
camera image display, and recording. This DLL (and any other DLLs included in
the shared folder) should be copied to the \windows\system folder so it is
accessible from anywhere on your computer. You should always include the
import library for this DLL (eyelink_exptkit20.lib) in your projects. If you plan to
use sound in your experiments, the Windows import library winmm.lib should
also be linked. As well, the DriverLinx PortIO driver must be installed to use the
eyelink_exptkit library, and the nt_portio.h header included in your code if you
need direct access to hardware such as the printer port.
4.1.2 Required Source Files
Each source file of your experiment should include these header files:
#include <windows.h>
#include <windowsx.h>
#include <stdlib.h>
// standard Windows declarations
// extra Windows macros
// standard C header file (required for some functions)
#include "eyelink.h"
// eyelink declarations, definitions and types
#include "w32_exptsppt2.h" // eyelink_exptkit toolkit declarations and definitions
As well, your project’s source files should use a header file that contains
declarations for functions and variables that need to be shared between files.
Study the file w32_demo.h as an example. Experienced programmers know that
using a header file will save hours of debugging later, and helps to document
your work.
Windows EyeLink Programming (8/16/2002) 2002 SR Research Ltd.
18
This is a summary of the minimum set of header files and libraries required to
compile and run your experiment:
eyetypes.h
eye_data.h
eyelink.h
w32_exptsppt2.h
eyelink_exptkit20.dll
eyelink_exptkit20.lib
Declarations of basic data types.
Declaration of complex EyeLink data types and link
data structures
Declarations and constants for basic EyeLink
functions, Ethernet link, and timing.
Declarations of eyelink_exptkit functions and types.
This file will also reference the other EyeLink header
files.
NOTE: this replaces w32_exptsppt.h from version 1
of the developer’s kit.
implements basic EyeLink functions, Ethernet link,
eyelink_exptkit functions and timing. Should be
placed in your “\Windows\System” folder.
Import library for eyelink_exptkit20.dll. Link with your
code.
These files may be useful for specific functionality:
freeimage.h
freeimage.dll
The “freeimage” library (www.6ixsoft.com). This
is a freeware graphics file library, used by
w32_freeimage_bitmap.c to load image files.
freeimage.lib
nt_portio.h
Redefines the standard C I/O port access functions
(such as _inp() and _outp()) to use the DriverLinx port
I/O driver. Without this, direct port access is trapped
under Windows 2000 and XP, and is slow under
Windows 9x/Me.
The source and header files listed above should never be modified. If
problems are found with any other files, contact SR Research Ltd. before
making changes. Always make changes to a renamed copy of the source
file. Do not under any circumstances edit or combine the header
files, or combine parts of the source files together, or copy parts of
files to your own code. This will make it difficult for you to use future
upgrades of the toolkit.
Windows EyeLink Programming (8/16/2002) 2002 SR Research Ltd.
19
4.1.3 Organization of Projects and Files
The eyelink_exptkit folder contains several ready-to-run example experiments,
and their project directories, each containing a template experiment and source
code.
There are also some Windows utility programs in the utility folder.
track
EyeLink subject-setup practice and demonstration.
eyelink_getfile
File transfer utility
These are the sample experiment template projects and included in the
developer’s kit:
simple
Template for simple experiment that draws directly to
the display
text
Template for experiment that uses bitmaps to display
formatted pages of text
picture
Template for experiment that uses bitmaps to display
pictures (BMP files)
eyedata
Template for experiment that uses real-time link data
to display a gaze-position cursor, and plays back data
after the trial
gcwindow
Template for experiment that displays text
pictures, using a large gaze-contingent window
control
Template for experiment that uses the subject’s gaze
position to select items from a grid of letters
dynamic
Template for several types of dynamic displays
combined in one experiment. These are sinusoidal
smooth pursuit, and a saccadic task.
asc_proc
Source code and sample application for analyzing ASC
files
broadcast
Template for an application that eavesdrops on any
application, reproducing calibration targets and
displaying a gaze cursor (if real-time sample data is
enabled).
comm_listener
Templates that illustrate a dual-computer experiment.
The comm_simple template is a modified version of the
simple template, which works with the comm_listener
comm_simple
Windows EyeLink Programming (8/16/2002) 2002 SR Research Ltd.
and
20
template. This illustrates how real-time data analysis
might be performed, by reproducing the display (based
on the TRIALID messages) and displaying a gaze
cursor.
Windows EyeLink Programming (8/16/2002) 2002 SR Research Ltd.
21
5. EyeLink Programming Conventions
The eyelink_exptkit library contain a set of functions which are used to program
experiments on many different platforms, such as MS-DOS, Windows, and the
Macintosh. Some programming standards, such as placement of messages in
the EDF file by your experiment, and the use of special data types, have been
implemented to allow portability of the development kit across platforms. The
standard messages allow general analysis tools such as EDFVIEW to process
your EDF files.
5.1 Standard Messages
Experiments should place certain messages into the EDF file, to mark the start
and end of trials. These will enable the SR Research viewing and analysis
applications to process the files. Following these standards will also allow your
programs to take full advantage of the ASC analysis toolkit.
Text messages can be sent via the eyelink_exptkit toolkit to the eye tracker and
added to the EDF file along with the eye data. These messages will be
timestamped with an accuracy of 1 millisecond from the time sent, and can be
used to mark important events such as display changes.
Several important messages have been defined for EDF files that are used by
analysis tools. The “TRIALID”, “SYNCTIME”, and “TRIAL OK” messages are
especially important and should be included in all your experiments.
• “DISPLAY_COORDS” or “RESOLUTION” followed by four numbers: the left,
top, right, and bottom pixel coordinates for the display. It should be one of the
first messages recorded in your EDF file. This gives analysis software the
display coordinate system for use in analysis or plotting fixations. This is not
used to determine the size in visual degrees of saccades: angular resolution
data is incorporated in the EDF file for this purpose.
• “FRAMERATE” followed by the display refresh rate (2 decimal places of
accuracy should be used). This is optional if stimulus presentation is not
locked to the display refresh. Analysis programs can use this to correct
stimulus onset time for the vertical position on the stimulus
•
“TRIALID” followed by data on the trial number, trial condition, etc. This
message should be sent before recording starts for a trial. The message
should contain numbers ant text separated by spaces, with the first item
containing up to 12 numbers and letters that uniquely identify the trial for
analysis.
Other data may follow, such as one number for each trial
independent variable.
Windows EyeLink Programming (8/16/2002) 2002 SR Research Ltd.
22
• “SYNCTIME” marks the zero-time in a trial. A number may follow, which is
interpreted as the delay of the message from the actual stimulus onset. It is
suggested that recording start 100 milliseconds before the display is drawn or
unblanked at zero-time, so that no data at the trial start is lost.
• “DISPLAY ON” marks the start of a trial’s display, and can be used to compute
reaction time. It may be preceded by a number may follow, which is
interpreted as the delay of the message from the actual stimulus onset. It is
used like the “SYNCTIME” message, and may be used in addition to it.
• “TIMEOUT” marks the end of a trial when the maximum duration has expired
without a subject response. This can also be used when the trial runs for a
fixed time. It is suggested that recording continue for 100 milliseconds after a
timeout, in case a fixation or blink has just begun.
• “ENDBUTTON” followed by a number marks a button press response that
ended the trial. This can be used in place of the EyeLink button box for local
key responses. It is suggested that recording continue for 100 milliseconds
after the subject’s response.
• The optional message “TRIAL_RESULT” followed by one or more numbers
indicates the result of the trial. The number 0 usually represents a trial
timeout, -1 represents an error. Other values may represent button numbers
or key presses.
• “TRIAL OK” after the end of recording marks a successful trial. All data
required for analysis of the trial (i.e. messages recording subject responses
after the trial) must be written before the “TRIAL OK” message. Other
messages starting with the word “TRIAL” mark errors in the trial execution.
See w32_simple_trials.c for and example of how to generate these messages.
Messages can also be used to timestamp and record events such as calibrations,
start and end of drawing of complex displays, or auxiliary information such as
audio capture recording indexes. Be careful not to send messages too quickly:
the eye tracker can handle about 20 messages every 10 milliseconds. Above this
rate, some messages may be lost before being written to the EDF file.
5.1.1 Trial Return Codes
The recording support functions in the eyelink_exptkit library return several
standard error codes. Your trials should return these codes as well, so that
sequencing can be controlled by the return code. An example of this sequencing
is given in w32_simple_trials.c.
Windows EyeLink Programming (8/16/2002) 2002 SR Research Ltd.
23
Return Code
Message
Caused by
TRIAL_OK
“TRIAL OK”
Trial recorded successfully
TRIAL_ERROR
“TRIAL ERROR”
Error: could not record trial
ABORT_EXPT
“EXPERIMENT
ABORTED”
Experiment aborted from EyeLink Abort
menu or because link disconnected
SKIP_TRIAL
“TRIAL SKIPPED”
Trial terminated from EyeLink Abort menu
REPEAT_TRIAL
“TRIAL
REPEATED”
Trial terminated from EyeLink Abort menu:
repeat requested
The REPEAT_TRIAL function cannot always be implemented, because of
randomization requirements or the experimental design. In this case, it should
be treated like SKIP_TRIAL.
Windows EyeLink Programming (8/16/2002) 2002 SR Research Ltd.
24
6. EyeLink Data Types
The eyelink_exptkit library defines special data types that allow the same
programming calls to be used on different platforms such as MS-DOS, Windows,
and Macintosh. You will need to know these types to read the examples and to
write your own experiments. Using these types in your code will also help to
prevent common program bugs, such as signed/unsigned conversions and
integer-size dependencies.
6.1 Basic Portable Data Types
Several platform-portable data types are defined in eyetypes.h, which is
automatically included in eyelink.h and eye_data.h. This creates the data types
below:
Type Name
Data
Uses
byte
8-bit unsigned byte
images, text and buffers
INT16
16-bit signed word
Return codes, signed integers
UINT16
16-bit unsigned word
Flags, unsigned integers
INT32
32-bit signed dword
Long data, signed time differences
UINT32
32-bit unsigned dword
Timestamps
6.2 Link Data Types
You only need to read this section if you are planning to use real-time link data
for gaze-contingent displays or gaze-controlled interfaces, or to use data
playback.
The EyeLink library defines a number of data types that are used for link data
transfer, found in eye_data.h. These are based on the basic data types above. The
useful parts of these structures are discussed in the following sections.
There are two basic types of data available through the link: samples and events.
Windows EyeLink Programming (8/16/2002) 2002 SR Research Ltd.
25
6.2.1 Samples
The EyeLink tracker measures eye position 250 or 500 times per second
depending on the tracking mode you are working with, and computes true gaze
position on the display using the head camera data. This data is stored in the
EDF file, and made available through the link in as little as 3 milliseconds after a
physical eye movement.
Samples can be read from the link by eyelink_get_float_data() or
eyelink_newest_float_sample(). These functions store the sample data as a
structure of type FSAMPLE:
typedef struct {
UINT32 time;
INT16 type;
/* time of sample */
/* always SAMPLE_TYPE */
UINT16 flags;
/*
// binocular data:
float px[2], py[2]; /*
float hx[2], hy[2]; /*
float pa[2];
/*
float gx[2], gy[2];
/*
float rx, ry;
/*
UINT16 status;
UINT16 input;
UINT16 buttons;
INT16
INT16
htype;
hdata[8];
flags to indicate contents */
indices are 0 (LEFT_EYE) or 1 (RIGHT_EYE)
pupil xy */
headref xy */
pupil size or area */
screen gaze xy */
screen pixels per degree (angular resolution) */
/* tracker status flags
/* extra (input word)
/* button state & changes
*/
*/
*/
/* head-tracker data type (0=noe)
*/
/* head-tracker data (not prescaled) */
} FSAMPLE;
Each field contains one type of data. If the data in a field was not sent for this
sample, the value MISSING_DATA (or 0, depending on the field) will be stored in
the field, and the corresponding bit in the flags field will be zero (see eye_data.h
for a list of bits). Data may be missing because of the tracker configuration (set
by commands sent at the start of the experiment, from the Set Options screen of
the EyeLink II tracker, or from the default configuration set by the DATA.INI file
for the EyeLink I tracker). Eye position data may also be set to MISSING_VALUE
during a blink, but the flags will continue to indicate that this data is present.
The sample data fields are further described in the following table:
Field
Contents
time
Timestamp when camera imaged eye (in milliseconds since EyeLink tracker
was activated)
type
Always SAMPLE_TYPE
flags
Bits indicating what types of data are present, and for which eye(s)
px, py
Camera X, Y of pupil center
Windows EyeLink Programming (8/16/2002) 2002 SR Research Ltd.
26
hx, hy
HEADREF angular gaze coordinates
pa
Pupil size (arbitrary units, area or diameter as selected)
gx, gy
Display gaze position, in pixel coordinates set by the
screen_pixel_coords command
rx, ry
Angular resolution at current gaze position, in screen pixels per visual
degree
status
Error and status flags (only useful for EyeLink II, report CR status and
tracking error). See eye_data.h for useful bits.
input
Data from input port(s)
buttons
Button input data: high 8 bits indicate changes from last sample, low 8 bits
indicate current state of buttons 8 (MSB) to 1 (LSB)
htype
Type of head position data (0 if none) (RESERVED FOR FUTURE USE)
hdata
8 words of head position data (RESERVED FOR FUTURE USE)
6.2.2 Event Data
The EyeLink tracker simplifies data analysis (both on-line and when processing
data files) by detecting important changes in the sample data and placing
corresponding events into the data stream. These include eye-data events
(blinks, saccades, and fixations), button events, input-port events, and messages.
Events may be retrieved by the eyelink_get_float_data() function, and are
stored as C structures. All events share the time and type fields in their
structures. The type field uniquely identifies each event type:
#define
#define
#define
#define
#define
#define
#define
/* EYE DATA
STARTBLINK
ENDBLINK
STARTSACC
ENDSACC
STARTFIX
ENDFIX
FIXUPDATE
EVENT: all use FEVENT structure */
3
// pupil disappeared, time only
4
// pupil reappeared, duration data
5
// start of saccade, time only
6
// end of saccade, summary data
7
// start of fixation, time only
8
// end of fixation, summary data
9
// update within fixation, summary data for interval
#define MESSAGEEVENT 24
/* user-definable text: IMESSAGE structure */
#define BUTTONEVENT
#define INPUTEVENT
/* button state change: IOEVENT structure */
/* change of input port: IOEVENT structure */
25
28
#define LOST_DATA_EVENT 0x3F
/* NEW: Event flags gap in data stream */
Events are read into a buffer supplied by your program. Any event can be read
into a buffer of type ALLF_EVENT, which is a union of all the event and sample
buffer formats:
Windows EyeLink Programming (8/16/2002) 2002 SR Research Ltd.
27
typedef union {
FEVENT
IMESSAGE
IOEVENT
FSAMPLE
fe;
im;
io;
fs;
} ALLF_DATA ;
It is important to remember that data sent over the link does not arrive in strict
time sequence. Typically, eye events (such as STARTSACC and ENDFIX) arrive
up to 32 milliseconds after the corresponding samples, and messages and
buttons may arrive before a sample with the same time code. This differs from
the order seen in an ASC file, where the events and samples have been sorted
into a consistent order by their timestamps.
The LOST_DATA_EVENT is a new event, introduced for version 2.1 and later, and
produced within the DLL to mark the location of lost data. It is possible that
data may be lost, either during recording with real-time data enabled, or during
playback. This might happen because of a lost link packet or because data was
not read fast enough (data is stored in a large queue that can hold 2 to 10
seconds of data, and once it is full the oldest data is discarded to make room for
new data). This event has no data or time associated with it.
6.2.2.1 Eye Data Events
The EyeLink tracker analyzes the eye-position samples during recording to detect
saccades, and accumulates data on saccades and fixations. Events are produced
to mark the start and end of saccades, fixations and blinks. When both eyes are
being tracked, left and right eye events are produced, as indicated in the eye field
of the FEVENT structure.
Start events contain only the start time, and optionally the start eye or gaze
position. End events contain the start and end time, plus summary data on
saccades and fixations. This includes start and end and average measures of
position and pupil size, plus peak and average velocity in degrees per second.
typedef struct
{
UINT32
INT16
UINT16
INT16
UINT32
time;
/* effective time of event */
type;
/* event type */
read;
/* flags which items were included */
eye;
/* eye: 0=left,1=right */
sttime, entime;
/* start, end sample timestamps */
float
float
float
float
float
float
hstx,
gstx,
sta;
henx,
genx,
ena;
float
float
float
havx, havy;
gavx, gavy;
ava;
hsty;
gsty;
heny;
geny;
/*
/*
/*
/*
/*
/*
href position
gaze or pupil
pupil size at
href position
gaze or pupil
pupil size at
at start */
position at start */
start */
at end */
position at end */
start */
/* average href position */
/* average gaze or pupil position */
/* average pupil size */
Windows EyeLink Programming (8/16/2002) 2002 SR Research Ltd.
28
float
float
float
avel;
pvel;
svel, evel;
float supd_x, eupd_x;
float supd_y, eupd_y;
UINT16 status;
/* average velocity */
/* peak velocity */
/* start, end velocity */
/* start, end angular resolution */
/* (pixel units-per-degree) */
/* error, warning flags */
} FEVENT;
The sttime and entime fields of an end event are the timestamps of the first and
last samples in the event. To compute duration, subtract these and add 4 (even
in 500 Hz tracking modes, the internal parser of EyeLink II quantizes event times
to 4 milliseconds).
Each field of the FEVENT structure is further described in the following table:
Field
Contents
time
Timestamp of sample causing event (when camera imaged eye, in
milliseconds since EyeLink tracker was activated)
type
The event code
eye
Which eye produced the event: 0 (LEFT_EYE) or 1 (RIGHT_EYE)
read
Bits indicating which data fields contain valid data. Empty fields will
also contain the value MISSING_DATA
gstx, gsty
Display gaze position, in pixel coordinates set by the
screen_pixel_coords command. Positions at start, end, and
average during saccade, fixation or FIXUPDATE period are reported.
genx, geny
gavx, gavy
hstx, hsty
henx, heny
HEADREF gaze position at start, end, and average during saccade,
fixation or FIXUPDATE period.
havx, havy
sta, ena, ava
Pupil size (arbitrary units, area or diameter as selected), at start, and
average during fixation of FIXUPDATE interval.
svel, evel, avel,
pvel
Gaze velocity in visual degrees per second. The velocity at the start
and end of a saccade or fixation, and average and peak values of
velocity magnitude (absolute value) are reported.
supd_x, supd_y
Angular resolution at start and end of saccade or fixation, in screen
pixels per visual degree. The average of start and end values may be
used to compute magnitude of saccades.
eupd_x, eupd_y
status
Collected error and status flags from all samples in the event (only
useful for EyeLink II, report CR status and tracking error). See
eye_data.h for useful bits.
Windows EyeLink Programming (8/16/2002) 2002 SR Research Ltd.
29
Peak velocity for fixations is usually corrupted by terminal segments of the
preceding and following saccades. Average velocity for saccades may be larger
than the saccade magnitude divided by its duration, because of overshoots and
returns.
The supd_x, supd_y, eupd_x, and eupd_y fields are the angular resolution
(in pixel units per visual degree) at the start and end of the saccade or fixation.
The average of the start and end angular resolution can be used to compute the
size of saccades in degrees. This C code would compute the true magnitude of a
saccade from an ENDSACC event stored in the buffer evt:
dx = (evt.fe.genx – evt.fe.gstx) /
((evt.fe.eupd_x + evt.fe.supd_x)/2.0);
dy = (evt.fe.geny – evt.fe.gsty) /
((evt.fe.eupd_y + evt.fe.supd_y)/2.0);
dist = sqrt(dx*dx + dy*dy);
When reading real-time data through the link, event data will be delayed by 12 to
24 milliseconds from the corresponding samples. This is caused by the velocity
detector and event validation processing in the EyeLink tracker. The timestamps
in the event reflect the true (sample) times.
6.2.2.2 Button and Input Events
BUTTONEVENT and INPUTEVENT types are the simplest events, reporting
changes in button status or in the input port data. The time field records the
timestamp of the eye-data sample where the change occurred, although the event
itself is usually sent before that sample. The data field contains the data after
the change, in the same format as in the FSAMPLE structure.
Button events from the link are rarely used; monitoring buttons with one of
eyelink_read_keybutton(),
eyelink_last_button_press(),
or
eyelink_button_states() is preferable, since these can report button states at
any time, not just during recording.
typedef struct
{
UINT32 time;
INT16 type;
/* time logged */
/* event type: */
UINT16 data;
/* coded event data */
} IOEVENT;
6.2.2.3 Message Events
A message event is created by your experiment program, and placed in the EDF
file. It is possible to enable the sending of these messages back through the link,
Windows EyeLink Programming (8/16/2002) 2002 SR Research Ltd.
30
although there is rarely a reason to do this. Although this method might be used
to determine the tracker time (the time field of a message event will indicate
when the message was received by the tracker), the use of
eyelink_request_time() and eyelink_read_time() is more efficient for
retrieving the current time from the eye tracker’s timestamp clock. The eye
tracker time is rarely needed in any case, and would only be useful to compute
link transport delays.
typedef struct {
UINT32 time;
INT16 type;
UINT16 length;
byte
text[260];
/* time message logged */
/* event type: usually MESSAGEEVENT */
/* length of message */
/* message contents (max length 255) */
} IMESSAGE;
Windows EyeLink Programming (8/16/2002) 2002 SR Research Ltd.
31
7. Issues for Programming Experiments Under Windows
Programming time-critical experiments under Windows (and this includes most
eye-tracking experiments) requires an understanding of both the requirements
for proper programming of experiments, as well as the quirks of the various
versions of the Windows operating system. For programmers who have written
experiments under DOS, writing Windows applications in C environment can be
confusing and full of pitfalls. Using a “simple” scripting languages, Delphi, or
Visual Basic just hides the problems, producing experiments that have
unpredictable timing and produce suspect or useless data—worst of all, the
programmer and experimenter will not know that this is the case. In general,
Windows programmers are not exposed to the concept of deterministic timing,
and do not know how to achieve it under Windows. It is the goal of this section
to educate the programmer in the art of deterministic experiment programming
possible under Windows, and the goal of the code and libraries in this developer’s
kit to ease the development of such programs. This is a large task, but we hope
this helps.
7.1 Issues for DOS Programmers
For those programmers who have created experiments under DOS or other
deterministic programming environments, Windows can be a confusing
environment. A typical Windows programming book has hundreds of pages on
windows, dialog boxes, message handlers and other items. It assumes the
program will only act to respond to key presses or mouse clicks, or other system
events. But what you want to do in a typical experiment are a few basic things
that don’t seem to match the typical Windows programming model: display
graphics that cover the whole display, wait for user input, and execute trials in a
fixed order and with exact timing. You certainly don’t want other applications or
the Windows operating system causing long, unpredictable delays during
stimulus presentation.
Fortunately, we have done the hard work of translating the Windows
documentation for you, and this manual covers most of what you’ll need to know.
Of course, you still need to read up on basic Windows GDI (graphics) functions,
and you may want to create dialog boxes for setting up your experiment. The
basics of full-screen, deterministic experiment programming (similar to what
you’d do in DOS) can be implemented simply by reading this manual and copying
the templates provided.
Windows EyeLink Programming (8/16/2002) 2002 SR Research Ltd.
32
7.2 Issues for Windows Programmers
A typical Windows programmer relies on a high-level programming language
such as Visual Basic, Microsoft Foundation Classes, Delphi, or another language
that provides a “wrapper” over the complexity of Windows interface code. The
problem here is that such tools are designed to make your application coexist
with other programs, giving up time whenever possible to Windows and other
applications readily.
This is exactly the opposite of what needs to be done to create proper
experiments—we need to be greedy, keeping all the computer time to ourselves,
at least during trials or dynamic display sequences. Between these, it is safe to
use dialog boxes and other Windows tools. These blocks of time-critical code
should be written carefully, and Visual Basic should not be used in these
sections. It should be possible to write simple libraries in C to run trials, then to
call these from Visual basic, which can then be used to control the experiment,
load stimuli, and so on.
This manual and the sample code show how things should be done in order to
write time-critical code. Just as importantly, hard-to-write sections of the code
such as display of camera images and calibration have been encapsulated in the
EyeLink tracker and the eyelink_exptkit DLL.
7.3 Windows Timing Issues
The most important issue that needs to be covered is the timing of experiments
(and other programs) running under Windows. This determines what it is
possible to do in an experiment, and the strategy that needs to be used to obtain
the desired results
Under a single-tasking operating system such as DOS, your experiment ran
alone on the PC: except for system operations such as writing to disk, you had
control over what happened when. For example, if graphics had to be presented
at precise timings, you simply created a loop and waited until the proper time to
change the display had arrived. But Windows is a multitasking operating
systems. This means that other programs can steal time from you at any
moment. If you don’t have control over the computer at the instant you should
be updating the display, then the timing of you experiment will be off. If you’re
running a gaze-contingent window display, then the window movement may be
delayed. In addition, a large number of Windows functions are used by Windows
as an opportunity to steal time from your program, making the execution time of
these functions appear slow and unpredictable.
Windows EyeLink Programming (8/16/2002) 2002 SR Research Ltd.
33
Just how serious is the problem, and what can you do to minimize it? Under
Windows 95/98/Me, there was nothing you could do to prevent Windows from
stealing time—usually the delays were relatively short (less than 5 milliseconds),
and occurred only a few times a second. Under Windows NT, these delays were
much longer and unpredictable. Under Windows 2000 and XP, however, some
changes to the Windows kernal and the addition of new real-time priority levels
have allowed near-realtime programming while allowing graphics and Ethernet to
work—just right for EyeLink applications.
Of course, there’s no guarantee that every installation of Windows 2000 or XP
will provide the delay-free execution environment needed for experiments. The
systests application provided with this developer’s kit allows you to test a
Windows installation for graphics drawing speed, multitasking delays, and
Ethernet performance. The use of this application is discussed below.
7.3.1 Using the SYSTESTS Application
The systests application can be found in the utilities folder. Before running it on
a computer, the DriverLinx PortIO driver must be installed, to allow the refresh
detection code to function. All but the last, optional test do not require
connection to the EyeLink tracker.
After starting systests, the resolution, color depth, and refresh rate of the current
display mode will be displayed. The display rate is actually measured by
monitoring the hardware registers of your video card—if these registers do not
work, then most of the experimental applications included with the developer’s
kit will not function properly. You should try several different display resolution,
color depths, and refresh rates (set these from the “Display” application in the
Windows Control Panel. Many video cards (especially the higher-end ATI cards)
offer refresh rates up to 160 or 200 Hz, but the availability of these will depend
on your monitor, video card, and display driver. The highest refresh rates will
probably require switching to a lower resolution, such as 800x600 or even
640x480 pixels. Try another video card or look on the manufacturer’ Web site for
updated drivers if your driver does not offer these higher refresh modes.
Next, systests will test the drawing speed of the video card, by using it to copy
large bitmaps that fill the entire display. Your video card should be able to copy
these bitmaps in less than 0.5 refresh period for the selected video mode and
refresh rate—this will guarantee that displays appear at the expected times. Be
sure to measure the display speed at the refresh rate you will be using, as all
video cards draw more slowly at high refresh rates.
Now systests performs tests to determine multitasking delays and timing
stability. A dialog box will ask for how many seconds you wish to run these tests
for—10 or 20 seconds is enough to quickly check a system, but these tests
Windows EyeLink Programming (8/16/2002) 2002 SR Research Ltd.
34
should be run for an hour or more to completely validate the system. Entering 0
or clicking “Cancel” will terminate systests without performing further tests.
Under Windows 2000, pressing the ‘Esc’ key will halt these tests. This does not
work reliably under Windows XP, which does not appear to allow asynchronous
keyboard access in realtime mode or when graphics are being drawn
continuously.
The first test is for refresh-detection stability, which is important if you are
drawing refresh-locked displays, such as smooth pursuit or animations, and also
determines whether stimuli at the top of the display will appear in a timely
manner. Press ‘Y’ to start the test (any other key to skip it). A black bar appears
at the side of the screen with a short white area at the top. This entire bar is
actually white for 1 millisecond after retrace, then is changed to black; the
vertical position of the change from white to black is determined by the actual
process of refreshing the monitor. If the black bar flickers white, a refresh was
missed. The bottom of the white region indicates the vertical position on the
monitor where refresh reached after 1 millisecond—graphics drawn to this area
after 1 millisecond from retrace will no appear till the next refresh cycle, and
refresh-locked moving graphics that cross this line may flicker if still being drawn
after 1 millisecond (more time is available for drawing graphics below this
boundary).
The next test performs a tight loop, checking the time required for each loop in
order to detect if any time was stolen by Windows. Optionally, you can specify
that a bitmap copy will be done within the loop, as this increases the amount of
time used by some video drivers and some versions of Windows. Enter 0 for no
drawing, or the size of the bitmap (width and height are set to the single number
you enter). Bitmaps larger than about 50 by 50 will begin to slow the execution
of the loop, which will be clearly visible in the timing statistics. The results are
displayed in several ways. The first is the longest delay, and when it occurred
(delays within the first 50 millisecond usually happen for different reasons than
delays later in the loop). Next is a breakdown of delays by duration, from 0.25 to
5 milliseconds. Ideally, there will be few delays even in the lowest group, and
none greater than 0.5 milliseconds. Delays longer than 1 millisecond mean that
the system may not be useful for dynamic refresh-locked displays such as
smooth pursuit, and delays over ½ refresh period will seriously impact any
experiment, unless they occur rarely (0.002/second means the delay will occur
every 8 minutes, or several time during even a short experiment).
Finally, the same test can be performed while receiving real-time gaze position
data from the EyeLink tracker. This test can only be performed with the tracker
running and configured for the desired tracking mode (to set sample rate). Using
mouse simulation mode is acceptable. You can optionally open an EDF file from
the Output screen (press “O” on the tracker keyboard, or click on the “Output”
button in EyeLink II) to record the file. The test will perform drawing (the bitmap
Windows EyeLink Programming (8/16/2002) 2002 SR Research Ltd.
35
size set in the same way as for the previous test) for each sample, and will send
100 messages per second to the EDF file. After the test, EDFVIEW or EDF2ASC
can be used to examine this EDF file to check that the timestamps on the
messages differ by 9-11 milliseconds. The systests application also reports the
average and maximum delay caused by sending a message—this is usually much
less than a millisecond.
7.3.2 Minimizing Windows Delays
If systests shows that your computer is giving good performance, it may not stay
that way. Installing a new device driver, plugging in a USB device, or installing a
new application can all affect the realtime performance of Windows. It’s a good
idea to re-check the computer with systests occasionally, or even better, to add
some simple test code to your time-critical applications. For example, running a
30-second test loop for delays at the start of each experiment may be time well
spent. If a program performs refresh-locked animation (such as for smooth
pursuit) it is a good idea to compare the interval between refresh times and if
delays are longer than expected by 2 milliseconds, to place a message in the EDF
file and report the number of these delays at the end of the experiment using the
alert_printf() function.
You should always ensure that no other time-critical programs, especially games,
are running. Auto-start programs are also an issue: you should check the
“Startup” menu under the “Programs” menu in the desktop menu (the “Start”
button on the Windows task bar) to see what tasks Windows has started. Older
versions of Microsoft Office often install a “Find Fast” program in the Control
Panel: you must turn this off, as it continuously accesses the hard disk.
Even with no other programs running, the Windows kernel will try to steal some
time about once a second for maintenance tasks: this cannot be shut off under
Windows 95/98/Me, making these unsuitable for the kind of hard real-time
graphics used in this version of the developer’s kit. Because Windows 2000 and
XP allow you to place your experimental application in a new level of realtime
priority, graphics and the network continue to work while almost all other
Windows tasks are disabled. This special mode is discussed next.
7.3.3 Windows 2000/XP Realtime Mode
Under Windows 2000 and Windows XP, it is possible place your application in a
special level of realtime priority mode. This forces Windows to stop most other
activity, including background disk access, that might cause your experiment to
have unpredictable delays. The systests application uses this mode while
performing timing tests, and the sample experiment templates all use this mode
in critical sections, including trials. Unfortunately, this mode does not work well
Windows EyeLink Programming (8/16/2002) 2002 SR Research Ltd.
36
under Windows 95, 98, and Windows Me, as these versions of Windows still allow
the kernal and other applications to steal time even in realtime mode. This mode
is also not useful in Windows NT 3.51 and 4.0, as it disables important parts of
the system needed for graphics and the link.
The major problem with realtime mode is that certain system functions simply
cease to work. You will not be able to play sounds, and the keyboard will not
work properly. Under Windows XP, even the escape_pressed() and
break_pressed() functions will not work (these are fine under Windows 2000,
however, so it is possible a future release may fix this). It is possible that
DirectX library functions (DirectInput and DirectSound) may work in realtime
mode, but this has not yet been tested.
Using getkey() will probably return key presses in realtime mode, but it does
this at the expense of allowing Windows to do background activity. This appears
as unpredictable delays that can be as long as 20 milliseconds (but are usually
on the order of 5-10 milliseconds). Therefore you should try to avoid using the
Subject PC keyboard for control or subject responses (keyboards are not very
time accurate in any case). Instead, use last_button_press() to detect tracker
button responses,
break_pressed() to detect program shutdown,
eyelink_is_connected() to detect tracker disconnection, check_recording()
to detect recording aborted by the eye tracker, and, if required,
eyelink_read_keybutton() to monitor the EyeLink tracker keyboard.
7.4 Hardware I/O under Windows
Windows NT and its successors (Windows 2000 and XP) do not allow your
programs to access I/O ports directly (for example to read button boxes or to
send digital commands to external devices), and I/O access was slow under
Windows 95/98/Me.
We have included a freeware hardware I/O port driver (the DriverLink PortIO
package) with the EyeLink developer’s kit to allow you to access I/O ports quickly
and without any special programming techniques. This package must be
installed on your computer before running any of the applications, and Windows
restarted to complete installation of the driver. The driver DLL will be placed in
the Windows directory by the installation, and the library is linked into the
eyelink_exptkit DLL.
To use the I/O port functions, simply include the
nt_portio.h header file in your source code—this includes the DriverLinx function
definitions, and also redefines the usual C hardware I/O port access functions
_inp(), outp(), _inpw(), _outpw(), _inpd() and _outpd() to use the
DriverLinx functions instead.
Windows EyeLink Programming (8/16/2002) 2002 SR Research Ltd.
37
7.5 Message Pumps and Loops
An experiment needs to be deterministic: it must produce events in a sequence
determined by randomization, with accurate timing. This requires that the
program always has control over the computer, executing code and loops without
returning control to Windows. However, if you try to run programs like this
under Windows, many problems can occur: windows aren’t displayed, keys can’t
be read, and so on.
We can make Windows work with loops by calling a message pump often. This is
similar to the standard core code found in regular C programs, which calls
GetMessage(), TranslateMessage() and DispatchMessage(). This serves to
pass messages from the Windows kernel on to other parts of your experiment.
Even Microsoft Foundation Classes (MFC) and Visual Basic application have
message pumps: they are just hidden inside the run-time libraries (and are
therefore harder to avoid executing).
In general, it’s not a good idea to call message pumps during time-critical parts of
your code. Some messages require a lot of processing by other applications, or
may even redraw parts of the display. Worst of all, Windows will take whatever
time it needs during calls to this function, performing disk activity and so on.
Under Windows 95/98/Me, Windows had its own message pump that it would
use if you didn’t, so these delays were unavoidable. Most debuggers (including
the one in Visual Studio) also seem to run their own message loop, making
realtime performance worse when debugging. The lack of this internal message
loop allows much better realtime performance under Windows 2000 and XP—at
the cost of much lower responsiveness if you don’t call a message pump
occasionally. Even so, you don’t need to call a message pump except to read
keys once the full-screen experiment window has been created.
The eyelink_exptkit library supplies several message-pump functions.
The
simplest way to use a message pump is to call getkey() to check if any keys
have been pressed: this will also call the message pump each time. You can call
a message pump explicitly with message_pump(), which also allows you to
process messages for a modeless dialog box (such as the progress display window
in the EDF file transfer function).
To implement long delays in Windows, you should call pump_delay() rather
than msec_delay(). This will allow Windows to process messages while waiting.
It is possible to create loops that do not contain a message pump. In this case,
you must call break_pressed() in the loop to check if the program should
terminate. You may also want to call escape_pressed() to see if the ESC key is
pressed, which can be used to interrupt trials. Note that these functions do not
appear to work very well under Windows XP: they appear to be disabled in
realtime mode, and may take several seconds to detect a key if you are drawing
Windows EyeLink Programming (8/16/2002) 2002 SR Research Ltd.
38
graphics often, even when not in realtime mode. These functions work very well
in Windows 2000, however.
7.6 Windows Key Support
The preferred method to read keys in sections that are not time-critical is with
getkey(), which also acts as a message pump and returns any keys that were
recently pressed. This function returns TERMINATE_KEY if CTRL-C is pressed, or
if the experiment has been terminated by pressing ALT-F4: if this code is
returned, exit from any loop immediately. Some non-character keys (such as the
cursor keys) are translated into the key codes required by the EyeLink tracker:
these are defined in eyelink.h and are listed in the appendix.
In some cases, such as during subject setup, you will want to echo the Subject
PC keyboard to the tracker for remote control. Use the function echo_key(),
which is used like getkey() but also sends a copy of each key to the eye tracker
through the link.
The other method of handling key presses is to create a key message handler. In
the templates, the w32_demo_window.c module contains a message handler that
redirects key message to the process_key_messages() handler in the
eyelink_exptkit library, which saves messages for getkey(). You can replace this
with your own handler. In MFC and Visual Basic, key messages are passed to
your key message handler directly. When calibrating, eyelink_exptkit intercepts
key messages and processes them directly.
7.7 Terminating the Program
When a Windows program is terminated by ALT-F4, it receives WM_QUIT and
WM_DESTROY system messages and its window is closed. This normally would
exit the message pump in the WinMain() function, but there is no simple
message pump in our experiments. Instead, your code should detect program
shutdown by one (or all) of the following: check break_pressed() for a nonzero
return value, check if getkey() returns TERMINATE_KEY, or check if
eyelink_is_connected() returns 0. If any of these happens, your functions
must break out of any loops they are executing and return immediately. Don’t
use the getkey() test in time critical code, as this would cause delays. This is
an example of all of these tests in one loop:
Windows EyeLink Programming (8/16/2002) 2002 SR Research Ltd.
39
while (1) // our loop
{
unsigned key = getkey();
if( key == TERMINATE_KEY ) break; // check for program termination
if( break_pressed() ) break;
// an alternative way to check termination
if( escape_pressed() ) break;
// optional test for ESC key held down
if( ! eyelink_is_connected() ) break; // exit if EyeLink tracker stopped
// YOUR LOOP CODE GOES HERE
}
The method outlined above should be used in EyeLink experiments for Windows
instead of those used in DOS. You cannot use the standard C call exit() within
a Windows program. You should not use setjmp() and longjmp() to transfer
control back to the WinMain() function, as this won’t clean up Windows
resources and close windows.
It is also possible to force your program to terminate, as if ALT-F4 was pressed.
By calling terminal_break(1), the break_pressed() and getkey() functions
will behave as if the program was terminated. If the eyelink_exptkit library is
performing setup or drift correction, it will break out of these functions and
return to your code immediately if terminal_break(1) or exit_calibration()
is called. These would usually be called from a message or event handler (see the
w32_demo_window.c module for an example).
Windows EyeLink Programming (8/16/2002) 2002 SR Research Ltd.
40
8. Windows Graphics Programming
This section is intended for programmers who have at least some understanding
of Windows. If you need an introduction, read the on-line help files for C++,
about the Windows GDI. An excellent book for an introduction is “Programming
Windows, Fifth Edition: by Charles Petzold, published by Microsoft Press (1998):
chapters 4, 5, 14, and 17 are the most useful for programmers using this
development kit. Although old, this book is still a good introduction for GDI
programming in C under any version of Windows.
The eyelink_exptkit library supplies several functions that simplify GDI
programming and creating stimulus displays. As well, there are several C files
used extensively in the templates that provide easy-to-use support for fonts,
bitmaps, and images in your experiments. Where appropriate, these functions
will be discussed in this section. This is a list of the C files that directly support
graphics: you may wish to read through the code in these, or copy sections for
use in your own graphics routines (don’t modify the original files—keep them as
a reference, and create renamed versions to modify).
w32_demo_window.c
Typical window creation and support functions
w32_text_support.c
Font creation and printf()-like text output
w32_bitmap_sppt.c
Bitmap creation and display functions
w32_text_bitmap.c
Formatted text pages; create text page bitmap
w32_freeimage_bitmap.c
Load many types of image file to a bitmap
8.1 Graphics Modes
Windows supports many graphics modes, depending on your VGA card and
driver. Using the “Display” item in the Windows Control Panel, you can explore
and select the various modes available. Many video card drivers also supply a
display-mode icon that is available at the right end of the desktop toolbar.
8.1.1 Resolutions and Colors
Graphics modes vary in resolution, number of colors available, and refresh rates.
The most useful resolutions and color modes are listed below:
640 by 480
Lowest common resolution, useful for pictures, simple
graphics and single words printed in large text
Windows EyeLink Programming (8/16/2002) 2002 SR Research Ltd.
41
Refresh rates over 160 Hz are usually only available in
this mode.
800 by 600
Moderate resolution, useful for pictures and pages of
large text Some monitors will support 160 Hz refresh
rates in this mode.
1024 by 768
High resolution, useful for pages of smaller text.
Refresh rates over 120 Hz not usually available
256 colors
Indexed color modes. You need to use palettes to draw
graphics in this mode, which the templates do not
currently do. This mode is most useful for simple
graphics and text. Loaded images do not display well
in this mode.
Hi color (15 or 15 bits)
Displays real colors, but may show contour artifacts to
images that have smooth transitions, as it only
supports 32 levels of brightness.
True color (24 bits)
Displays real colors, but may draw more slowly.
Supports 256 levels of brightness (may actually be 64
levels on some video cards)
8.1.2 Drawing Speed
Drawing speed depends on the selected resolution and colors. In general, more
colors, higher resolution and faster refresh rates all result in slower graphics
drawing. For experiments that follow the templates, the time to copy a bitmap to
the display is the most critical factor in selecting a mode. This should be tested
for your card, by measuring the time before and after a bitmap copy. Ideally, the
copy should take less than one refresh period so that the drawing is not visible,
and so the subject sees the stimulus all at once. The systests application can be
used to test the speed with which a full-screen bitmap can be copied to the
display, but does not test other operations such as drawing lines, shapes, and
text.
An important difference between Windows 2000/XP and DOS or Windows
95/98/Me is that graphics are not usually drawn immediately—instead, they are
“batched” and drawn up to 16 milliseconds later. There are several ways to force
Windows 2000 and XP to draw graphics immediately. The first is to call
GdiFlush(), which forces any pending drawing operations to be performed.
Batching can also be turned off by calling GdiSetBatchLimit(1), which turns off
batching entirely (this has already been done for you in w32_demo_window.c).
Windows EyeLink Programming (8/16/2002) 2002 SR Research Ltd.
42
There are a few cases where batching might be useful, for example if a lot of
small drawing operations need to be done together, or if a moving object needs to
be erased and then redrawn at a different position as quickly as possible—
batching could be enabled before drawing and disabled afterwards, as is done in
w32_gcwindow.c for moving a gaze-contingent window.
Finally, many display drawing operations under Windows (especially copying
bitmaps to the display) are done in hardware by the display card and the drawing
function calls return immediately, long before the actual drawing is finished.
While this can be an advantage if other non-drawing operations need to be done,
this does make timing displays difficult. The function wait_for_drawing(HWND
hwnd) is supplied for you, which both forces immediate drawing and does not
return until all ongoing drawing is actually finished. The argument hwnd is a
window handle, which can be either full_screen_window for the window
created by w32_demo_window.c, or can be NULL to check for drawing operation
anywhere on the display (including a second monitor if this is installed).
void CALLTYPE wait_for_drawing(HWND hwnd)
{
HDC hdc;
RECT rc;
hdc = GetDC(validate_window(hwnd));
if(IsWindow(hwnd))
GetWindowRect(validate_window(hwnd), &rc);
else
{
rc.top = dispinfo.top;
rc.left = dispinfo.left;
}
GdiFlush();
GetPixel(hdc, rc.top, rc.left);
ReleaseDC(validate_window(hwnd), hdc);
}
The code for this function is very simple: it calls GdiFlush(), then calls
GetPixel() to read a single pixel from the display. Because Windows cannot
determine what color a pixel will be until drawing is finished, this read does not
return until drawing is completed. As you can see, most of the code is involved
with preparing for the call to GetPixel(), so if you are writing your own
graphics code it may be more efficient to simply call GetPixel() following your
own graphics code.
8.1.3 Display Mode Information
As part of initializing your experiment, you should check that the current display
mode is appropriate to your experiment. For example, a fast refresh rate may be
required, or a resolution that matches that of a picture may be needed. An
experiment should always be run in the same display mode for all subjects, to
Windows EyeLink Programming (8/16/2002) 2002 SR Research Ltd.
43
prevent small differences in appearance or readability of text which could affect
subject performance.
Information on the current display mode can be measured by calling
get_display_information(). This fills a DISPLAYINFO structure with the
display resolution, colors, and the refresh rate.
If you use the global
DISPLAYINFO structure dispinfo, then the macros SCRWIDTH and SCRHEIGHT
can be used to compute the screen width and height in pixels.
This is the definition of the DISPLAYINFO structure:
typedef struct {
INT32 left;
// left of display
INT32 top;
// top of display
INT32 right;
// right of display
INT32 bottom;
// bottom of display
INT32 width;
// width of display
INT32 height;
// height of display
INT32 bits;
// bits per pixel
INT32 palsize;
// total entries in palette (0 if not indexed)
INT32 palrsvd;
// number of static entries in palette
INT32 pages;
// pages supported
float refresh;
// refresh rate in Hz (<40 if refresh sync not available)
INT32 winnt;
// Windows: 0=9x/Me, 1=NT, 2=2000, 3=XP
} DISPLAYINFO;
Several fields in this structure require further explanation. The palsize field
will be 0 if in 32, 24 or 16-bit color modes, which are required for image file
display. If this is nonzero, you are in 256-color mode (or even 16-color) mode,
which is only useful for drawing simple graphics. The pages field is always 1, as
multiple pages are not supported. The refresh field is the measured display
refresh rate, which may differ from that reported by the operating system. If this
is less than 40, the wait_for_video_refresh() function is not working
(probably due to an incorrect implementation of VGA registers on the video card).
In this case, the system’s refresh rate can be retrieved with the following code:
refresh = (float)GetDeviceCaps(NULL,VREFRESH);
Finally, the winnt field indicates what version of Windows the application is
running under.
This can distinguish between Windows 95/98/Me (where
realtime mode is ineffective), Windows NT (for which realtime mode will stop the
network from working), Windows 2000 (realtime mode works and does the
keyboard), and Windows XP (realtime mode works but disables the keyboard).
8.1.4
Adapting to Display Resolutions
When the subject-to-display distance is twice the display width (the
recommended distance for EyeLink operation), then the display will be 30° wide
and 22.5° high. This allows you to compute pixel sizes of objects in degrees, as a
fraction of display width and height. The templates also use this method to
adapt to different display resolutions. Complete independence of display
Windows EyeLink Programming (8/16/2002) 2002 SR Research Ltd.
44
resolution is not possible, as fonts and small objects (i.e. the calibration targets)
will look different at low resolutions.
8.1.5 Synchronization to Display Refresh
The image on the phosphor of the display monitor is redrawn from the video
memory, proceeding from top to bottom in about (800/refresh rate) milliseconds.
This causes changes in graphics to appear only at fixed intervals, when the
display refresh process transfers that part of the screen to the monitor. Graphics
at the top of the screen will appear about 0.5-2 millisecond after refresh begins,
and those at the bottom will appear later.
The simplest way to determine just when graphics will be displayed to the subject
is to pause before drawing until the refresh of the display begins, using this
function wait_for_video_refresh(). This function returns only after video
retrace begins; if it is called while video retrace is active, it will continue to wait
for a full retrace period, until the retrace begins again. This is designed to
provide the maximum time for drawing to the display. If you just want to check
to see if retrace is active, call in_vertical_retrace() instead. However, be
sure to allow enough time between calls to this function, as vertical retrace can
be active for up to 4 milliseconds, and this could be interpreted as multiple video
refresh intervals passing.
Using this function is discussed in detail in the section 12.6.3“Drawing the
subject display”. In summary, if graphics can be drawn quickly enough after the
display retrace, they will become visible at a known delay that depends on their
vertical position on the monitor. Placing a message in the EDF file after drawing
which includes the delay from the vertical refresh allows applications to precisely
calculate the onset time of a stimulus.
8.2 Full-Screen Window
Every Windows program must have a window. The module w32_demo_window.c
implements the minimum functionality needed for supporting the full-screen
window needed for experiments. It includes functions to create and destroy the
window, and to clear it to any color. Also included is a function to process
messages for the window.
8.2.1 Creating the Window
The function make_full_screen_window() creates the experiment window. It
first registers a window class, which specifies the defaults for our window. It
then creates a new window with no border and sized to fill the entire screen. It
Windows EyeLink Programming (8/16/2002) 2002 SR Research Ltd.
45
then makes the window visible, and waits for it to be drawn. Since Windows
sometimes erases other windows before drawing our window for the first time, we
can’t draw to our window until it’s seen its first WM_PAINT message, or our
graphics could be erased by the redrawing of the window. The code in this
function is very critical, and should not be changed. After creating the window,
it pauses for 500 milliseconds while running the message pump, which allows
Windows to remove the taskbar from the desktop.
This functions also calls GdiSetBatchLimit(1), which forces graphics to be
drawn immediately by Windows, instead of deferred until a later time. This does
not guarantee that some drawing operations (especially bitmap copies) will be
finished before a drawing function returns—use wait_for_drawing() after
drawing to ensure this.
8.2.2 Clearing the Display
The window (and the whole display) can be cleared by calling
clear_full_screen_window()and specifying a color.
Windows colors are
specified by the red, green, and blue components, using the RGB() macro to
combine these into a COLORREF number.
8.2.3 Processing Windows Messages
All
Windows
messages
for
the
window
are
handled
by
full_screen_window_proc(). This handles key press messages by passing
them to the eyelink_exptkit library function process_key_messages(), which
passes the keystrokes to any library functions that may be running, such as
do_tracker_setup(), or saves them for later retrieval by getkey(). It also
intercepts messages that Windows sends to close the window, and calls
terminal_break(1) to inform your experiment. It makes the mouse cursor
invisible when only our window is visible, so it doesn’t interfere with our
experiment displays.
Finally, it clears parts of the window to
target_background_color which were covered by dialog boxes or other
windows. Any display information in these areas is lost, so you may want to add
redrawing calls here, or save the entire screen to a bitmap before calling up a
dialog box, then restore it afterwards.
8.2.4 Changing the Window Template
Usually, there is little reason to change the code in w32_demo_window.c, unless
you are adding functionality to the window. For example, you might add palette
support when clearing the window. The handling of messages can be changed,
for example to make the mouse cursor visible.
Windows EyeLink Programming (8/16/2002) 2002 SR Research Ltd.
46
8.2.5 Registering the Window
Your full-screen window must be registered with the eyelink_exptkit library in
order to perform calibration, drift correction, and to display camera images. This
is done by calling init_expt_graphics(). This allows eyelink_exptkit to be used
with languages such as Visual Basic, that must create their own windows.
During calls to do_tracker_setup() or do_drift_correct(), eyelink_exptkit
will intercept some messages to your window, and will draw calibration targets
and camera images into it.
You should call close_expt_graphics() to
unregister the window before closing it.
8.3 Windows Graphics Fundamentals
The great advantage to creating graphics in Windows is that there are powerful
drawing tools such as TrueType fonts, patterns, pens and brushes available, and
these work in any display mode without changes. However, this power comes at
the cost of adding setup code before drawing, and cleanup code afterwards. Also,
the Windows programming interface for some graphics operations can be rather
complex, so you’ll have to become familiar with the help files (or Visual Studio
InfoViewer topics) for the Windows API.
The following discussion only covers programming issues that need to be
considered for experiments. You should study the Windows API documentation
that came with Visual Studio on the GDI for more general information, or consult
a good book on the subject for more information.
8.3.1 Display Contexts
Drawing in Windows must always be performed using a display context (DC).
This allows drawing to the full screen, a window, or a bitmap. Usually display
contexts are allocated as needed and released immediately with
GetDC(full_screen_window) and ReleaseDC(full_screen_window).
Each time you allocate a DC, you will have to select new objects such as brushes,
pens, palettes and fonts into the DC, then reselect the original objects before
releasing the DC. You could also select stock objects (such as white brushes,
black pens, and the system font) instead of restoring the old objects.
When you allocate a DC, you need to supply a window handle (HWND). If this is
NULL (0) you will get a DC that allows writing to the whole screen. It’s better to
use the full-screen window handle (usually full_screen_window) that your
experiment created, however.
Windows EyeLink Programming (8/16/2002) 2002 SR Research Ltd.
47
8.3.2 Specifying Colors
Windows colors are specified by the red, green, and blue components, using the
RGB() macro to combine these into a COLORREF number. By combining this
value with 0x02000000, (for example, RGB(0,255,0)|0x02000000) the color will
be drawn as a solid shade. Otherwise, colors might be drawn using a dot pattern
in 256-color modes.
8.3.3 Pens and Brushes
The drawing of lines is controlled by the currently selected pen. Filling in shapes
is controlled by the currently selected brush. Both pens and brushes can be
created in any color, or made invisible by selecting the stock NULL_PEN or
NULL_BRUSH.
You must remember to remove pens and brushes from the DC before disposing of
it. You can do this by reselecting the original pens or brush, or by selecting a
stock pen or brush. Created pens or brushes must be deleted after being
deselected. For an example, see the file w32_playback_trial.c from the eyedata
sample experiment.
8.3.4 Fonts and Text
Windows has many options for selecting and using fonts. The most important
text requirements for experiments are selecting standard fonts, printing of short
text messages and words, and drawing of pages of text for reading trials and
instruction screens. These are implemented in the template support modules
w32_text_support.c and w32_text_bitmap.c.
Fonts are created by calling get_new_font(), supplying a font name, its size
(height of a line in pixels), and whether the font should be boldface. The font
created is stored in the global variable current_font, and is not deleted until a
new font is selected. The most useful standard font names are:
Arial
Courier New
A simple, proportionally spaced font.
Times New Roman
A proportionally spaced font, optimal for
reading.
Monospaced font. Rather wide characters,
so less will fit per line.
Fonts can be drawn with directly by selecting current_font into a display
context, and released after drawing by selecting the system font, as in this
example:
Windows EyeLink Programming (8/16/2002) 2002 SR Research Ltd.
48
if(current_font) SelectObject(hdc, current_font);
SetTextColor(hdc, text_color | 0x02000000L);
TextOut(hdc, x, y, text, strlen(text));
SelectObject(hdc, GetStockObject(SYSTEM_FONT));
Drawing of fonts may be slower when a character is drawn for the first time in a
new font. You can increase drawing speed by first drawing the text invisibly (in
the background color), which will cause windows to create and cache a bitmap
for each character. These cached characters will be used the when you redraw
the font in the foreground color.
When there is a need to print a few characters or a line of text, the function
graphic_printf() can be used. You can specify a foreground and an optional
background color, a position for the text, and whether to center it. The text is
generated using a format string similar to the C printf() function.
Multi-line pages of text can be printed using draw_text_box(), supplying the
margins and a line spacing in pixels. Optionally, boxes will be drawn at the
position of each word on the EyeLink tracker’s display, to serve as a reference for
the gaze cursor during recording. You need to supply a display context to this
function, which allows this function to draw to either the display or a bitmap. A
bitmap containing a page of text can be created and drawn in one step with
text_bitmap().
8.4 Drawing With Bitmaps
Drawing graphics takes time, usually more than one display refresh period
unless the graphics are very simple. The progressive drawing of complex stimuli
directly to the display will almost certainly be visible. This is distracting, and
makes it difficult to determine reaction-time latencies. One method to make the
display appear more rapidly is to draw the graphics to a bitmap (a memory
buffer), then to copy the bitmap to the display. Bitmap copies in Windows are
highly optimized, and for most video cards and modes the entire display can be
updated in one refresh period.
The type of bitmaps that need to be used for drawing are device-dependent
bitmaps (DDB). The Windows documentation is full of routines that support
device-independent bitmaps (DIBs), but these are actually only used for loading
and saving resources, and for copying images on the clipboard. Don’t use any
DIB functions with bitmaps: they will not work reliably, and are often slower.
8.4.1 Drawing to Bitmaps
The C source file w32_bitmap_sppt.c (used in the picture and text templates, and
also found in the shared folder) contains functions to copy bitmaps to the
Windows EyeLink Programming (8/16/2002) 2002 SR Research Ltd.
49
display, and blank_bitmap(), a simple function to create and clear a bitmap
that is the same size as the display. Its code is used in the discussion below.
Before accessing a bitmap, we have to create a memory device context (MDC) to
draw in. We first get a DC to the display, then create a memory device context
compatible with the display DC. We can then create a bitmap, in this case of the
same dimensions as the display. We could also make a smaller bitmap, which
would save memory when several bitmaps are required.
Then, the bitmap is selected into the MDC. We save the handle of whatever
bitmap was originally selected into the DC, to use when deselecting our bitmap
later.
hdc
mdc
hbm
obm
=
=
=
=
GetDC(NULL);
CreateCompatibleDC(hdc);
// create display-compatible memory context
CreateCompatibleBitmap(hdc, SCRWIDTH, SCRHEIGHT);
SelectObject(mdc, hbm);
// create DDB bitmap, select into context
Now, we can draw in to the bitmap using the same GDI functions as would be
used to draw to the display. In this case, we simply clear the bitmap to a solid
color:
oBrush = SelectObject(mdc, CreateSolidBrush(bgcolor | 0x02000000L));
PatBlt(mdc, 0, 0, SCRWIDTH, SCRHEIGHT, PATCOPY);
DeleteObject(SelectObject(mdc, oBrush));
Finally, we select the old bitmap to release our bitmap, and clean up by deleting
the MDC and releasing the DC:
SelectBitmap(mdc, obm);
DeleteDC(mdc);
ReleaseDC(NULL, hdc);
We now have our bitmap, which we can draw in by creating an MDC and
selecting it. Remember to delete the bitmap with DeleteObject() when it is no
longer needed.
Other functions in the template modules that draw to bitmaps are
text_bitmap()
in
w32_text_sppt.c,
draw_grid_to_bitmap()
in
w32_grid_bitmap.c, and bmp_file_bitmap() in w32_bmp_bitmap.c. All of these
files are found in the shared folder.
8.4.2 Loading Pictures
The function image_file_bitmap() defined in w32_bmp_bitmap.c loads an image
file from disk, and creates a bitmap from it. It can also resize the image to fill the
display if required. It uses the freeware “FreeImage” library for this purpose
(www.6ixsoft.com). This loads many picture formats, including BMP, PCX and
JPG (but not GIF). JPG files are smallest, but load more slowly and may have
artifacts with sharp-edged images such as text. Creating a 256-color PCX file is
much more efficient for text or simple line drawings. This library always loads
images as an RGB bitmap, so any palette information in the original image is list.
Windows EyeLink Programming (8/16/2002) 2002 SR Research Ltd.
50
This means that even 2-color images will be displayed in garish, saturated colors
in 256-color modes, and programs that use loaded images should always run in
16, 24, or 32-bit color display modes.
The arguments to this function are image_file_bitmap(fname, keepsize,
dx, dy, bgcolor). This function creates and returns a bitmap (NULL if an
error occurred) that is either the size of the image (keepsize=1) or full-screen
sized. If a full-screen bitmap is created, the bitmap is cleared to bgcolor and
the image in copied to the center of the bitmap, resized to (dx, dy), or left its
original size if dx is 0. Resizing is done using StretchBlt(), which can be
rather slow, and the results will be poor if the image contains text or other sharp
detail. It is best to create images of the same dimensions as the display mode
you will use for our experiment.
8.4.3 Copying to the Display
Copying the bitmap to the display is similar to drawing: create a memory device
context for the bitmap, get a DC for the display, and use BitBlt() to do the
copying. It’s a good idea to call GdiFlush() to ensure that drawing starts
immediately. The Windows GDI passes information to the VGA card’s driver,
which usually does the copying in hardware. This means the call to BitBlt()
may return long before the drawing is done—if this is not desirable, call
wait_for_drawing() or call GetPixel() for a point on the display. Both these
will return only once the drawing is completed.
The w32_bitmap_sppt.c source code file is used in most of the sample experiment
templates, and has two functions to copy bitmaps to the display. To copy an
entire bitmap to the display, call display_bitmap(), specifying the position at
which to place the top left corner of the bitmap. A rectangular section of a
bitmap can be copied using the display_rect_bitmap() function.
All the source code examples create a full-screen bitmap to the display. It is
obviously faster to create smaller bitmaps and copy these to the center of the
display instead, but this should only be needed for slow video cards. For
example, the margins of a page of text usually are 2° from the edges of the
display. Copying only the area of the bitmaps within the margins will reduce the
copying time by 40%.
Windows EyeLink Programming (8/16/2002) 2002 SR Research Ltd.
51
9. Controlling Calibration
The eyelink_exptkit library encapsulates much of the required functionality for
calibration, drift correction, and handling subject setup after recording aborts.
To do this, it requires you to supply a window that it can use for calibration, drift
correction, and camera image display. You can customize some parameters of
calibration and drift correction, including colors, target sizes, and sounds.
9.1 Calibration Colors
In the template, the COLORREF variables target_foreground_color and
target_background_color record the colors to be used for calibration, drift
correction, and camera image graphics. The foreground and background colors
must be set in the eyelink_exptkit library by calling set_calibration_colors().
The entire display is cleared to target_background_color before calibration
and drift correction, and this is also the background for the camera images. The
background color should match the average brightness of your experimental
display, as this will prevent rapid changes in the subject’s pupil size at the start
of the trial. This will provide the best eye-tracking accuracy as well.
The target_foreground_color is used to draw calibration targets, and for the
text on the camera image display. It should be chosen to supply adequate
contrast to the background color.
A background color of black with white targets is used by many experimenters,
especially for saccadic tasks. A full white (255,255,255) or a medium white
(200,200,200) background with black targets is preferable for text. Using white
or gray backgrounds rather than black helps reduce pupil size and increase eyetracking range, and may reduce retinal afterimages.
9.2 Calibration Target Appearance
The standard calibration and drift correction target is a filled circle (for peripheral
delectability) with a central “hole” target (for accurate fixation). The sizes of these
features may be set with set_target_size(diameter, holesize).
If
holesize is 0, no central feature will be drawn. The disk is drawn in the
calibration foreground color, and the hole is drawn in the calibration background
color.
Windows EyeLink Programming (8/16/2002) 2002 SR Research Ltd.
52
9.3 Calibration Sounds
The eyelink_exptkit library plays alerting sounds during calibration, validation and
drift correction. These sounds have been found to improve the speed and
stability of calibrations by cueing the subject, and make the experimenter’s task
easier. Three types of sounds are played: a target appearance alert sound, a
success sound, and a failure/abort sound. Separate sounds can be selected for
setup and drift correction.
Sounds are selected by strings passed to the eyelink_exptkit functions
set_cal_sounds() and set_dcorr_sounds(). If an empty string (“”) or NULL
is passed to these functions, the default sound is played. If the string is “off”,
no sound is played. Otherwise, the string is assumed to be the name of a WAV
file to be played.
If no sound card is installed, the sounds are produced as “beeps” or “ticks” from
the PC speaker. One beep marks target movement, two fast beeps mark success,
and three slow beeps mark errors. These can be turned off by passing an “off”
string for the sound.
To select the sounds to be played for calibration, validation and drift correction
during a call to do_tracker_setup(), call set_cal_sounds(char *target,
char *good, char *error). The sounds played mark the display or movement
of the target, successful conclusion of calibration or good validation, and failure
or interruption of calibration or validation.
During a call to do_drift_correct(), sounds are played as selected by
set_dcorr_sounds(char *target, char *good, char *setup). The events
are the initial display of the target, successful conclusion of drift correction, and
pressing the ESC key to start the Setup menu. Usually the good (drift correction
completion sound) will be turned off, as this would occur at the start of the trial
and might distract the subject.
9.4 Recording Abort Blanking
When a trial is aborted from the tracker (click on the “Abort” button in EyeLink
II, or press ‘Ctrl’-‘Alt’-‘A’ keys on the tracker keyboard), the eye tracker displays
the Abort menu. This is detected by the check_recording() function of the
eyelink_exptkit library, which should be called often by your code during
recording. The record abort is handled by this function by clearing the Subject
PC display to the calibration background color. This prepares the subject for the
drift correction or recalibration that usually follows, and removes the stimuli
from the display. After the experimenter selects “Skip Trial”, “Repeat Trial”, or
Windows EyeLink Programming (8/16/2002) 2002 SR Research Ltd.
53
“Terminate Experiment” from the Abort menu, check_recording() returns the
appropriate error code.
9.5 Customizing with Hook Functions
When more customization is needed than the functions above can supply, your
program can install “hook” functions. These will be called by the eyelink_exptkit
library when performing operations such as drawing calibration targets, clearing
the display, or drawing camera images. Your function can then modify the
behavior of the default display function (for example, remapping the position of a
calibration target to match the display resolution as is done in the broadcast and
comm_listener templates), or even replace the drawing operation with your own
procedure.
Hook functions are not covered in detail in this document, but a list of available
hooks are given in the header file w32_exptsppt2.h, and in the appendices.
Windows EyeLink Programming (8/16/2002) 2002 SR Research Ltd.
54
10. Connections and Multiple Computer Configurations
The EyeLink trackers and the eyelink_exptkit library (and similar EyeLink
application libraries for other platforms) support connecting multiple computers
to one eye tracker, and communication between EyeLink applications. Until
version 2.1 of the Windows developer’s kit (and tracker versions 2.1 of EyeLink I
and v1.1 of EyeLink II), these were not fully functioning under Windows due
some peculiarities of the Windows networking implementation. This release fixes
these problems and further enhances networking support for multiple computer
configurations.
NOTE: EyeLink applications running on different platforms (such as Windows
and MacOS) are designed to be able to share broadcast sessions and to
communicate using the EyeLink library. However, MS-DOS applications using
SIMTSR cannot participate in broadcast sessions or communicate with other
platforms, as SIMTSR does not use TCPIP networking.
When reading the following, keep in mind the kind of configuration you will be
needing. Some examples are:
•
One tracker and one computer (the usual configuration).
•
One tracker and one experiment computer, plus a “listener” that monitors
the connection to generate displays (including calibration targets),
perform real-time analysis, or other functions. This computer can use
messages generated by the primary experiment computer as well as eye
movement data.
The broadcast, comm_simple, and comm_listener
templates illustrate this.
•
One tracker and an experiment computer, plus one or more computers
that insert messages into the eye tracker data file.
•
One eye tracker plus two experiment computers, both of which control
the eye tracker at different times. The computer with the primary
connection can do image displays and file transfer, while the broadcastconnected computer can also control most other functions. It is of course
important that the two computers are in communication with each other
in order to remain synchronized.
•
Two eye trackers and two experiment computers, where two subjects can
observe each other’s gaze positions while performing some mutual task.
Each experiment computer connects to one eye tracker (only one eye
tracker can have a broadcast connection on a single network), and the
two experiment computers must exchange data by another channel (such
as the inter-remote EyeLink messaging system).
Windows EyeLink Programming (8/16/2002) 2002 SR Research Ltd.
55
10.1 Connection Types
10.1.1 Broadcast Connections
In the usual EyeLink experiment, an eye tracker communicates only with the
application that first opened a connection to it. If a second computer tries to
connect, the connection to the first application was closed. For multiple
connections, the EyeLink system uses broadcast connections, where data from
the eye tracker is sent to all computers on the local network (that is, on the same
network cable or connected to the same hub as the eye tracker).
One computer still has the primary connection, but up to 4 other computers can
also have broadcast connections to the eye tracker. This primary connection has
full control over the eye tracker—broadcast connections are closed when a
primary connection is opened or closed, whereas a primary connection is
unaffected by broadcast connections. This means that a primary connection
should always be opened before a broadcast connection is made from another
computer. Therefore it is critical that a “listening” application wait for a primary
connection to be made before opening a broadcast connection—the templates
comm_simple and comm_listener exchange messages for this purpose, while the
broadcast template checks the connection status of the tracker directly. Closing
a broadcast connection does not affect the primary connection or any other
broadcast connections.
A broadcast connection allows other computers to listen in on real-time data sent
from the eye tracker to the primary computer.
In addition, broadcast
connections allow computers to monitor the eye tracker’s state, draw calibration
targets, and even send commands and messages to the eye tracker. Some
functions are not available with broadcast connections, including camera image
display, data playback, and file transfers.
10.1.2 Unconnected Operation
Some functions are also available without opening any connection to the eye
tracker. These include sending key presses and messages to the eye tracker, and
requesting updates on tracker status and the current tracker time.
This
capability is designed to allow multiple computers to synchronize their clocks or
place synchronizing messages in the tracker’s data file. Another use (used in the
broadcast template) is to allow computers to wait for a primary connection before
attempting to open a broadcast connection to the tracker.
Windows EyeLink Programming (8/16/2002) 2002 SR Research Ltd.
56
10.1.3 Connection Functions
Before a connection can be opened, the EyeLink DLL and networking system
must be initialized.
The function open_eyelink_connection() does this
initialization and, if called with an argument of 0, immediately opens a
connection. If the argument is –1, it simply initializes the DLL. This allows the
application to perform unconnected operations or to open a broadcast session
later. Finally, if called with an argument of 1, it “opens” a “dummy” connection,
which can be used for debugging applications without the need for a tracker (or
even a network).
The network (IP) address of the tracker is usually “100.1.1.1”, set in the
eyenet.ini file on the eye tracker PC. If the eye tracker is not at this address, or if
multiple eye trackers are present at different addresses, the tracker address can
be
specified
by
calling
set_eyelink_address()
before
calling
open_eyelink_connection(1).
This address is also used for tracker
communication if a connection has not been opened, to request tracker status or
time or to send messages.
If the tracker address is set to “255.255.255.255”, then the DLL will broadcast
the connection request to all computers, in the hopes that the eye tracker will
respond. This did not work properly with earlier versions of the eyelink_exptkit
DLL, due to problems with broadcasting when multiple network adapters were
installed under Windows.
Newer tracker and DLL versions use subnet
broadcasting, which works properly with all versions of Windows.
If the DLL was initialized with open_eyelink_connection(-1), a primary
connection to the tracker can be opened later with eyelink_open(), or a
broadcast connection opened with eyelink_broadcast_open().
After these
connections are opened, the connection status should be checked often with
eyelink_is_connected(), which will return 0 if the connection has been
closed. This may happen if the eye tracker software was closed, if another
application opened a primary connection to the eye tracker or (in the case of a
broadcast connection) if the computer with the primary connection closed its
session. This function can also be used to determine the connection type, as it
returns 1 for a primary connection, 2 for a broadcast connection, and –1 for a
dummy “connection”.
Finally, the connection should be closed when your application exits, by calling
close_eyelink_connection(). This also releases other DLL resources, and can be
used with any connection type. If you simply want to close the connection but
still need to do unconnected communications, or need access to the highresolution timing, then call eyelink_close(1) instead.
Windows EyeLink Programming (8/16/2002) 2002 SR Research Ltd.
57
10.2 Finding Trackers and Remotes
The eyelink_exptkit library can search for all trackers and computers running
EyeLink applications (“remotes”) that are connected to the link, and report these.
This is performed by calling a polling function, then waiting a short time and
checking for a list of responses.
To search for a list of trackers, call
eyelink_poll_trackers(), and call eyelink_poll_remotes() to look for
applications. Wait 100-200 milliseconds, then call eyelink_poll_responses()
to get the count of responses received (only the first 4 responses will be
recorded).
Responses are retrieved by calling eyelink_get_node(), giving the index of the
response. This index ranges from 1 (for the first tracker or remote to respond) up
to the count returned by eyelink_poll_responses(). Several other indexes
are defined: for example, index 0 always returns the ELINKNODE (name and
address) of the computer the application is running on.
The responses are reported as an ELINKNODE data type, which contains the
name and network address (as an ELINKADDR data type) of the tracker or
remote. This allows an application or tracker to be selected by name, rather than
having to know the IP address of the computer. For trackers, this name is set in
the eyenet.ini file in the eyelink\exe directory on the eyetracker PC. For
applications, this name will be “remote” (for version of the eyelink_exptkit DLL
previous to v2.1), or the Windows computer network name for later versions.
This name can also be set by the application by calling eyelink_set_name(),
allowing other applications to find a specific application independent of the
computer it is running on. See comm_simple and comm_listener for an example
of this.
10.3 Inter-Remote Communication
10.3.1 EyeLink Messaging System
To communicate with another EyeLink application, you must have its address in
the form of an ELINKADDR. This may be done by search for it by name (as
discussed above) or by the IP address of the computer it is running on. The IP
address can be converted into an ELINKADDR by calling text_to_elinkaddr(),
supplying the “dotted” IP name and whether the target is a tracker or remote.
Messages can consist of any kind of text or data, of up to 400 bytes in length.
The message can be sent by calling eyelink_node_send(), giving the
ELINKADDR to send to, and the location and size of the data to be sent. The
message will be received by the target application in less than a millisecond, and
placed into a buffer.
This buffer can then be read by calling
Windows EyeLink Programming (8/16/2002) 2002 SR Research Ltd.
58
eyelink_node_receive(), which returns 0 if no new data is present, or the size of
the data if any has been received. The function can also supply the ELINKADDR
of the sender for use in identification.
The inter-remote receive buffer can only hold one message, so if a new message
arrives before the previous message has been read, the old message will be lost.
This means that applications should transfer data carefully, with the sender
waiting for the receiver to send a message acknowledging receipt before sending
more data. There are some situations where this is not needed, for example, if
only the most recent data is important (such as the latest gaze position data), or
where data is synchronized with other events (such as a message echoing the
TRIALID in an experiment).
10.3.2 Communication by Tracker Messages
When broadcast connections are used to let one computer listen in on real-time
data, it is possible to eliminate almost all other types of communications between
applications. This is done by enabling the inclusion of messages in the real-time
link data stream, and having the listening application interpret these in the same
way an analysis program would process the recorded EDF file. For example,
messages are usually present in the EDF file (and therefore available to the
listener)
for
trial
conditions
(“TRIALID”)
and
display
resolution
(“DISPLAY_COORDS”).
When messages are included in the real-time link data, each message sent to the
tracker is sent back through the link as well. These messages tend to be sent in
bursts every few milliseconds, and each burst may contain several messages.
EyeLink tracker software is optimized specifically to handle large amounts of
network traffic, and can usually handle messages as fast as Windows can send
them over the link. However, Windows (especially Windows 98 and 2000) is not
as good at receiving messages back, and if messages are sent too rapidly from the
main application, the listener application may drop some data. From tests on a
1.5 GHz PC running Windows 2000, it appears to be safe to send a burst of up to
5 messages every 8 milliseconds or so. Dropped data can be detected (for
eyelink_exptkit version 2.1 and later) by the presence of LOST_DATA_EVENT events
when reading link data with eyelink_get_next_data().
You should also be aware that messages and other events may arrive out of
sequence through the link. Messages tend to arrive before any other data with
the same time code. In addition, if commands are sent to the tracker just before
messages, it is possible that the message may be sent back through the link
before the command has finished executing (especially commands that change
modes). For example, a TRIALID message may arrive before the listening
application has finished processing data from the previous recording block. This
can be prevented by adding a short delay before messages, or preceding
Windows EyeLink Programming (8/16/2002) 2002 SR Research Ltd.
59
messages sent after a mode switch
eyelink_wait_for_mode_ready().
command
with
a
call
to
Examples of how to enable sending, receiving, and processing messages by a
listening application are given in the comm_simple and comm_listener templates.
One critical step is to enable sending of messages back through the link even
when the tracker is not recording data—this is always enabled in EyeLink II, but
a special version of EyeLink I (versions 2.1 and later) is required. To receive
messages and all other data, the reception of link data is turned on by
eyelink_data_switch(), and left on thereafter.
Windows EyeLink Programming (8/16/2002) 2002 SR Research Ltd.
60
11. Experiment Templates Overview
The fastest way to start developing EyeLink experiments is to use the supplied
templates included with the eyelink_exptkit kit. Full source code is supplied for
each of several experiments, each illustrating a typical experimental paradigm.
You can copy the template’s source code to a new directory and modify it to
quickly create your own experiments. A detailed analysis of the operation of each
template’s operation and its source code is included in the following section.
11.1 Template Types
Each
template
is
stored
in
a
subdirectory
of
the
All source files in these
projects with the same name as those in other projects are identical copies, and
implement functionality that is required for several experiments. These common
source files, as well as header files, DLLs, and library files, are also found in the
shared folder. Before compiling or modifying any of the templates, read the
section “Programming Experiments” carefully. Be sure to follow the guidelines on
copying files and creating new experiments. In particular, be sure to copy and
rename files and folders, and do not modify the original template!
EyeLinkII_Windows_API\Sample_Experiments folder.
The templates are described below:
simple
The basic experiment template, which is used to introduce the
structure of all the templates. The graphics in this experiment
are drawn directly to the display.
text
Introduces the use of bitmaps. It displays 4 formatted pages of
text.
picture
Similar to text, but displays 2 pictures (JPG files). It uses the
FreeImage graphics library to load and display many image
formats.
eyedata
Introduces the use of real-time link data. It records while
displaying a gaze-position cursor, then plays back the data
from the trial
gcwindow
Implements a fast gaze-contingent window.
This is
demonstrated using both text and pictures. Full source code
for the gaze contingent window is included.
control
Uses gaze position data to select items from a grid of letters.
This can be used to develop computer interfaces. The code for
Windows EyeLink Programming (8/16/2002) 2002 SR Research Ltd.
61
selection is longer than usual.
dynamic
Uses refresh-locked drawing and moveable targets to
implement sinusoidal smooth pursuit and gap-step-overlap
saccadic trials. The code for selection is longer than usual.
broadcast
Template for an application that eavesdrops on any
application, reproducing calibration targets and displaying a
gaze cursor (if real-time sample data is enabled).
comm_listener
Templates that illustrate a dual-computer experiment. The
comm_simple template is a modified version of the simple
template, which works with the comm_listener template. This
illustrates how real-time data analysis might be performed, by
reproducing the display (based on the TRIALID messages) and
displaying a gaze cursor.
comm_simple
The discussion of the “simple” template must be read before working with any of
the other templates, as it illustrates most of the shared code for all experiments.
In general, you should read through all of the templates before beginning
programming, as each section assumes you have read the all previous sections.
Windows EyeLink Programming (8/16/2002) 2002 SR Research Ltd.
62
12. “Simple” Template
The experiment first initializes the EyeLink library and connects to the EyeLink
tracker. It then creates a full-screen window, and sends a series of commands to
the tracker to configure its display resolution, eye movement parsing thresholds,
and data types. Using a dialog box built into the eyelink_exptkit library, it asks for
a file name for an EDF data file, which it commands the EyeLink tracker to open
on its hard disk.
The program then runs a block of trials. Each block begins by calling up the
tracker’s Camera Setup screen (Setup menu in EyeLink I), from which the
experimenter can perform camera setup, calibration, and validation. Four trials
are run, each of which displays a single word. After all blocks of trials is
completed, the EDF file is closed and transferred via the link from the EyeLink
hard disk to the Subject PC. At the end of the experiment, the window is erased
and the connection to the EyeLink tracker is closed.
Each trial begins by performing a drift correction, where the subject fixates a
target to allow the eye tracker to correct for any drift errors. Recording is then
started. Recording can be stopped by pressing the ‘Esc’ key on the Subject PC
keyboard, the EyeLink Abort menu (‘Ctrl’ ‘Alt’ ‘A’ on the EyeLink keyboard) or by
pressing any button on the EyeLink button box.
12.1 Source Files for “Simple”
Before proceeding, you may want to print out copies of these files for reference:
w32_demo.h
Declarations to link together the template experiment
files. Most of the declarations in this file can be used
in your experiments.
w32_demo_main.c
WinMain() function, setup and shutdown link and
graphics, open EDF file. This file is unchanged for all
templates, and can be used with small changes in
your experiments.
w32_demo_window.c
Implements the full-screen window used for
calibration, validation and presentation. This file is
unchanged for all templates, and can be used without
changes in your experiments.
w32_simple_trials.c
Called to run a block of trials for the simple template.
Performs system setup at the start of each block, then
runs the trials. Handles standard return codes from
Windows EyeLink Programming (8/16/2002) 2002 SR Research Ltd.
63
trials to allow trial skip, repeat, and experiment abort.
This file can be modified for your experiments, by
replacing the trial instance code.
w32_simple_trial.c
Implements a trial with simple graphics that can be
drawn in one screen refresh, and therefore doesn’t
need display blanking. You should be able to adapt
this file to your experiments by updating the drawing
code, messages sent to the EDF file, and changing the
handling of subject responses as required.
w32_text_support.c
Implements a simple interface for font creation and
printing. This is a support module that you can link
into your experiments.
These files are also required to compile all templates.
modified.
eyetypes.h
eye_data.h
eyelink.h
w32_exptsppt2.h
eyelink_exptkit20.lib
These must not be
Declarations of basic data types.
Declaration of complex EyeLink data types and
link data structures
Declarations and constants for basic EyeLink
functions, Ethernet link, and timing.
Declarations of eyelink_exptkit DLL functions
and types. This file will also reference the other
EyeLink header files.
Import library for eyelink_exptkit20.dll.
12.2 Analysis of “w32_demo_main.c”
This file has the initialization and cleanup code for the experiment, and is used
by all the templates. You should use as much of the code and operation
sequence from this file as possible in your experiments. Also, try to keep your
source files separated by function in the same way as the source files in this
template are: this will make the maintenance of the code easier.
12.2.1 WinMain()
Execution of every Windows program begins with WinMain(). In this case it
simply saves the experiment “instance” (used to access resources linked into the
experiment file), and calls app_main(), which actually does all the work. It also
ensures that the full-screen window is closed.
Windows EyeLink Programming (8/16/2002) 2002 SR Research Ltd.
64
// WinMain - Windows calls this to execute application
int PASCAL WinMain(HINSTANCE hInstance,
HINSTANCE hPrevInstance, LPSTR lpCmdLine, int nCmdShow)
{
application_instance = hInstance; // record this for accessing resources
full_screen_window = NULL;
app_main();
// call our real program
close_eyelink_connection();
// make sure EYELINK DLL is released
if(full_screen_window)
close_full_screen_window();
return 0;
}
12.2.2 Initialization
The app_main() function begins by initializing the EyeLink library and opening a
connection to the eye tracker. It sets up the getkey() system as well. Finally, it
checks if we are connected to an EyeLink I or EyeLink II tracker using
eyelink_get_tracker_version(), to determine what enhanced features are
available.
if(open_eyelink_connection(0)) return -1; // abort if we can't open link
set_offline_mode();
flush_getkey_queue();
// initialize getkey() system
is_eyelink2 = (2 = eyelink_get_tracker_version(NULL) );
Next, it reads information on the current display mode. The display resolution
and color depth is checked for suitability to the experiment (16-color displays are
not supported for display of the camera images, while 256-color modes are fine
for text and simple graphics but work poorly with the samples that use pictures).
Warnings or errors are reported using the alert_printf() function supplied by
the eyelink_exptkit library.
get_display_information(&dispinfo); // get window size, characteristics
if(dispinfo.palsize==16)
// 16-color modes not functional
{
alert_printf("This program cannot use 16-color displays");
goto shutdown;
}
else if(dispinfo.palsize)
// palettes not supported by this template
{
alert_printf("This program is not optimized for 256-color displays");
}
Next, a window covering the entire display is created by calling the
make_full_screen_window() function in w32_demo_window.c, which was
discussed in the section “Windows Graphics”. This window will be drawn when
we return, so graphics can be drawn to it immediately. The window is registered
with eyelink_exptkit for use in calibration and drift correction.
if(make_full_screen_window(application_instance)) goto shutdown;
if(init_expt_graphics(full_screen_window, NULL)) goto shutdown;
Calibration and drift correction are customized by setting the target size, the
background and target colors, and the sounds to be used as feedback. Target
size is set as a fraction of display width, so that the templates will be relatively
Windows EyeLink Programming (8/16/2002) 2002 SR Research Ltd.
65
display-mode independent. A gray background and black target is initially set for
the window: this will be changed before calibration to match trial stimuli
brightness. The default sounds are used for most, but the sound after drift
correction is turned off.
i = SCRWIDTH/70;
j = SCRWIDTH/300;
if(j < 2) j = 2;
set_target_size(i, j);
//
//
//
//
select best size for calibration target
and focal spot in target
minimum focal spot size
tell DLL the size of target features
target_foreground_color = RGB(0,0,0);
target_background_color = RGB(128,128,128);
set_calibration_colors(target_foreground_color, target_background_color);
set_cal_sounds("", "", "");
set_dcorr_sounds("", "off", "off");
For this template, we print a title screen.
The display is cleared by
clear_full_screen_window() from w32_demo_window.c, a font is selected, and
several lines of text are printed using graphic_printf().
clear_full_screen_window(target_background_color);
get_new_font("Times Roman", SCRHEIGHT/32, 1);
graphic_printf(target_foreground_color,
target_background_color, 1, SCRWIDTH/2, 1*SCRHEIGHT/30,
"EyeLink Demonstration Experiment: Sample Code");
graphic_printf(target_foreground_color,
target_background_color, 1, SCRWIDTH/2, 2*SCRHEIGHT/30,
"Included with the Experiment Programming Kit for Windows");
graphic_printf(target_foreground_color,
target_background_color, 1, SCRWIDTH/2, 3*SCRHEIGHT/30,
"All code is Copyright (c) 1997-2002 SR Research Ltd.");
graphic_printf(target_foreground_color,
target_background_color, 0, SCRWIDTH/5, 4*SCRHEIGHT/30,
"Source code may be used as template for your experiments.");
12.2.3 Opening an EDF file
Now an EDF file is created on the eye tracker’s hard disk. The eyelink_exptkit
library function edit_dialog() is called to ask for a file name, up to 8
characters in length. If no file name was entered, our_file_name is left blank
and no file is created. A line of text is added to the start of the EDF file, to mark
the application that created the file. This can later be viewed with a text editor.
i = edit_dialog(full_screen_window, "Create EDF File",
"Enter Tracker EDF file name:", our_file_name, 8);
if(i==-1) goto shutdown;
// ALT-F4: terminate
if(i==1) our_file_name[0] = 0;
// Cancelled: No file name
if(our_file_name[0])
// If file name set, open it
{
if(!strstr(our_file_name, ".")) strcat(our_file_name, ".EDF");
i = open_data_file(our_file_name);
if(i!=0)
{
alert_printf("Cannot create EDF file '%s'", our_file_name);
goto shutdown;
}
eyecmd_printf("add_file_preamble_text 'RECORDED BY %s' ", program_name);
}
Windows EyeLink Programming (8/16/2002) 2002 SR Research Ltd.
66
12.2.4 EyeLink Tracker Configuration
Before recording, the EyeLink tracker must be set up. The first step is to record
the display resolution, so that the EyeLink tracker and viewers will work in
display pixel coordinates. The calibration type is also set, with “HV9” setting the
usual 9-point calibration. A calibration type of “H3” would calibrate and collect
data for horizontal gaze position only.
We also write information on the display to the EDF file, to document the
experiment and for use during analysis. The “DISPLAY_COORDS” message
records the size of the display, which may be used to control data display tools.
The refresh rate is recorded in the “FRAMERATE” message, which can be used to
correct the onset time of stimuli for monitor refresh delay. This message should
not be included if refresh synchronization is not available, and is optional if
refresh-locked presentation of stimuli is not used.
eyecmd_printf("screen_pixel_coords = %ld %ld %ld %ld",
dispinfo.left, dispinfo.top, dispinfo.right, dispinfo.bottom);
eyecmd_printf("calibration_type = HV9");
eyemsg_printf("DISPLAY_COORDS %ld %ld %ld %ld",
dispinfo.left, dispinfo.top, dispinfo.right, dispinfo.bottom);
if(dispinfo.refresh>40)
eyemsg_printf("FRAMERATE %1.2f Hz.", dispinfo.refresh);
The saccade detection thresholds and the EDF file data contents are set next.
Setting these at the start of the experiment prevents changes to default settings
made by other experiments from affecting your experiment. The saccadic
detection thresholds determine if small saccades are detected and how sensitive
to noise the tracker will be. If we are connected to an EyeLink II tracker, we
select a parser configuration rather than changing the saccade detector
parameters:
// set parser saccade thresholds (conservative settings)
if(is_eyelink2)
{
eyecmd_printf("select_parser_configuration 0"); // 0 = standard
}
else
{
eyecmd_printf("saccade_velocity_threshold = 35");
eyecmd_printf("saccade_acceleration_threshold = 9500");
}
// set EDF file contents
eyecmd_printf("file_event_filter =
LEFT,RIGHT,FIXATION,SACCADE,BLINK,MESSAGE,BUTTON");
eyecmd_printf("file_sample_data = LEFT,RIGHT,GAZE,AREA,GAZERES,STATUS");
// set link data (used for gaze cursor)
eyecmd_printf("link_event_filter = LEFT,RIGHT,FIXATION,SACCADE,BLINK,BUTTON");
eyecmd_printf("link_sample_data = LEFT,RIGHT,GAZE,GAZERES,AREA,STATUS");
With the SR Research button box, the large button (#5) is often used by the
subject to start trials, by terminating the drift correction. This command to the
EyeLink tracker causes the button to be programmed to act like the ENTER key
or spacebar on the tracker.
// Program button #5 for use in drift correction
Windows EyeLink Programming (8/16/2002) 2002 SR Research Ltd.
67
eyecmd_printf("button_function 5 'accept_target_fixation'");
12.2.5 Running the Experiment
Everything is now set up. We check to make sure the program has not been
terminated, then call run_trials() to perform a block of trials. This function is
implemented in w32_simple_trials.c, and each of the templates implements this
function differently. For a multiple-block experiment, you would call this
function once for every block, and call this function in a loop. The function
run_trials() returns an result code: if this is ABORT_EXPT, the program should
exit the block loop and terminate the experiment.
if(!eyelink_is_connected() || break_pressed()) goto end_expt;
// RUN THE EXPERIMENTAL TRIALS
i = run_trials();
12.2.6 Transferring the EDF file
Once all trials are run, the EDF file is closed and transferred via the link to the
subject PC’s hard disk. The tracker is set to Offline mode to speed the transfer
with EyeLink I. The receive_data_file() function is called to copy the file. If
the file name is not known (i.e. opened from the Output menu on the tracker) the
first argument can be “” to receive the last recorded data file. If the second
argument is “”, a dialog box will be displayed to allow the file to be renamed, or
the transfer cancelled. The second argument could also be used to supply a
name for the file, in which case the dialog box will not be displayed. If the last
argument is not 0, the second argument is considered to be a path to store the
new file in.
end_expt:
// END: close, transfer EDF file
set_offline_mode();
// set offline mode so we can transfer file
pump_delay(500);
// delay so tracker is ready
eyecmd_printf("close_data_file"); // close data file
if(break_pressed()) goto shutdown;
// don't get file if we aborted
if(our_file_name[0])
receive_data_file(our_file_name, "", 0);
12.2.7 Cleaning Up
Finally, the program cleans up. It unregisters the its window with eyelink_exptkit,
closes the connection to the eye tracker, and closes its window.
shutdown:
// CLEANUP AND DISCONNECT
close_expt_graphics();
// release window
close_eyelink_connection();
// disconnect from tracker
close_full_screen_window();
Windows EyeLink Programming (8/16/2002) 2002 SR Research Ltd.
68
12.2.8 Extending the Experiment Setup
The code in app_main() is very basic. In a real experiment, you would need to
add some of these functions:
• Randomization, either computed in the program or by reading a control file
containing trial data or lists of text or image files.
• Subject instructions and practice trials.
• Messages at the start of the EDF file describing the experiment type, subject
ID, etc.
12.3 Analysis of “w32_simple_trials.c”
This module performs the actions needed to perform block of experiment trials.
There are two functions: run_trials() is called to loop through a set of trials;
and do_simple_trial(), which supplies stimuli and trial identifiers for each
trial, indexed by the trial number.
12.3.1 Initial Setup and Calibration
The run_trials() function begins by setting the calibration background color
(which should match the average brightness of the screen in the following trials),
then calling up the Camera Setup screen (Setup menu on the EyeLink I tracker),
for the experimenter to perform camera setup, calibration, and validation.
Scheduling this at the start of each block gives the experimenter a chance to fix
any setup problems, and calibration can be skipped by simply pressing the ‘Esc’
key immediately. This also allows the subject an opportunity for a break, as the
headband can be removed and the entire setup repeated when the subject is
reseated.
int run_trials(void)
{
int i;
int trial;
// Always set the background for calibration first!
// This should match the display brightness in trials
target_foreground_color = RGB(0,0,0);
target_background_color = RGB(255,255,255);
set_calibration_colors(target_foreground_color, target_background_color);
do_tracker_setup();
// PERFORM CAMERA SETUP, CALIBRATION
12.3.2 Trial Loop and Result Code Processing
Each block loops through a number of trials, which calls a function to execute
the trial itself. The trial should return one of a set of trial return codes, which
Windows EyeLink Programming (8/16/2002) 2002 SR Research Ltd.
69
match those returned by the eyelink_exptkit trial support functions. The trial
return code should be interpreted by the block-of-trials loop to determine which
trial to execute next, and to report errors via messages in the EDF file. The trial
loop function should return the code ABORT_EXPT if a fatal error occurred,
otherwise 0 or your own return code.
The standard trial return codes are listed below, and the appropriate message to
be placed in the EDF file is also given. The example uses a switch() statement
to handle the return codes.
Return Code
Message
Caused by
TRIAL_OK
“TRIAL OK”
Trial recorded successfully
TRIAL_ERROR
“TRIAL ERROR”
Error: could not record trial
ABORT_EXPT
“EXPERIMENT
ABORTED”
Experiment aborted from EyeLink Abort
menu, link disconnect or ALT-F4 key
SKIP_TRIAL
“TRIAL SKIPPED”
Trial terminated from EyeLink Abort menu
REPEAT_TRIAL
“TRIAL
REPEATED”
Trial terminated from EyeLink Abort menu:
repeat requested
The REPEAT_TRIAL function cannot always be implemented, because of
randomization requirements or the experimental design. In this case, it should
be treated as SKIP_TRIAL.
This is the code that executes the trials and processes the result code. This code
can be used in your experiments, simply by changing the function called to
execute each trial:
for(trial=1;trial<=NTRIALS;trial++)
// LOOP THROUGH TRIALS
{
if(eyelink_is_connected()==0 || break_pressed()) // break out on exit
{
return ABORT_EXPT;
}
i = do_simple_trial(trial);
// RUN THE TRIAL
end_realtime_mode();
// safety: make sure realtime mode stopped
switch(i)
// REPORT ANY ERRORS
{
case ABORT_EXPT:
/* handle experiment abort or disconnect */
eyemsg_printf("EXPERIMENT ABORTED");
return ABORT_EXPT;
case REPEAT_TRIAL:
/* trial restart requested */
eyemsg_printf("TRIAL REPEATED");
trial--;
break;
case SKIP_TRIAL:
/* skip trial */
eyemsg_printf("TRIAL ABORTED");
break;
case TRIAL_OK:
// successful trial
eyemsg_printf("TRIAL OK");
break;
default:
// other error code
Windows EyeLink Programming (8/16/2002) 2002 SR Research Ltd.
70
eyemsg_printf("TRIAL ERROR");
break;
}
} // END OF TRIAL LOOP
return 0;
}
12.3.3 Trial Setup Function
The actual trial is performed in two steps. The first is performed in the
w32_simple_trials.c module, and does trial-specific setup.
The second, in
w32_simple_trial.c, presents the stimulus and performs the actual recording. This
division of the code is ideal for most experiments, where every trial is recorded in
the same way but only stimuli and trial identification differ. If trials do differ in
function, the setup function can pass an argument to the trial execution function
specifying trial type, or call the appropriate version of this function.
The trial setup is performed by do_simple_trial(). It first sets the trial
identification title, which is displayed at the bottom right of the EyeLink tracker
display during recording. This message should be less than 80 characters long
(35 characters for the EyeLink I tracker), and should contain the trial and block
number and trial conditions. These will let the experimenter know how far the
experiment has progressed, and will be essential in fixing problems that the
experimenter notices during recording.
12.3.4 “TRIALID” Message
The “TRIALID” message is sent to the EDF file next. This message must be
placed in the EDF file before the drift correction and before recording begins, and
is critical for data analysis. EyeLink analysis software treats this message in
special ways. It should contain information that uniquely identifies the trial for
analysis, including the a number or code for each independent variable. Each
item in the message should be separated by spaces. The first item in the
TRIALID message should be a maximum of 12 characters, uniquely identifying
the trial. This item will be included in data analysis files.
int do_simple_trial(int num)
{
// This supplies the title at the bottom of the eyetracker display
eyecmd_printf("record_status_message 'SIMPLE WORDS, TRIAL %d/%d' ",
num, NTRIALS);
// Always send a TRIALID message before starting to record.
// It should contain trial condition data required for analysis.
eyemsg_printf("TRIALID %s", trial_word[num-1]);
12.3.5 Tracker Feedback Graphics
Next, tracker background graphics are drawn on the EyeLink display, to allow
the experimenter to evaluate subject performance and tracking errors using the
Windows EyeLink Programming (8/16/2002) 2002 SR Research Ltd.
71
real-time gaze cursor. Without these graphics, it is impossible to monitor the
accuracy of data being produced by the EyeLink tracker, and to judge when a
recalibration is required. Very simple boxes around important details on the
subject display are sufficient. For example, marking lines or words in text is
sufficient for reading studies.
This is a list of the most useful drawing commands, which are further
documented in the chapter “Useful EyeLink Commands”.
Command
clear_screen
draw_line
draw_box
draw_filled_box
draw_text
draw_cross
Drawing Operation
Clears EyeLink display to any color
Draw a line in any color between two points
Outlines a box in any color
Draws a filled rectangle in any color
Prints text in any color at any location
Draws a small “+” target to indicate an important visual
location
The background graphics can be very simple: in this case, a small box at the
display center to mark the drift-correction target. The tracker must first be
placed in Offline mode before drawing. Graphics drawn in Offline mode are
saved for display in the next recording session.
The command “clear_screen” erases the tracker display to color 0 (black), and
“draw_box” draws a small box in color 7 (medium gray). Drawing coordinates are
the same as used for drawing on the local display: the EyeLink tracker converts
these gaze coordinates before drawing.
set_offline_mode();
eyecmd_printf("clear_screen 0");
eyecmd_printf("draw_box %d %d %d %d
7", SCRWIDTH/2-20, SCRHEIGHT/2-12,
SCRWIDTH/2+20, SCRHEIGHT/2+12);
12.3.6 Executing the Trial
Finally, we can call the actual trial recording loop, supplying any data it needs.
In this case, this is the text to display and the maximum recording time in
milliseconds.
// Actually run the trial: display a single word
return simple_recording_trial(trial_word[num-1], 20000L);
}
Windows EyeLink Programming (8/16/2002) 2002 SR Research Ltd.
72
12.4 Control by Scripts
Another method that can be used to sequence trials is to read a text file,
interpreting each line as instructions for a single trial. These instructions might
include the title of the trial (displayed at the bottom of the EyeLink tracker
display during recording), the “TRIALID” message for the trial, location and
identity of stimuli, and independent variable values.
The script file format could be of two types. The simplest contain one line per
trial, containing all data needed to specify the trial conditions. A more flexible
format defines one parameter with each line in the file, with the first word on the
line specifying what the line contains. These lines might also be used to
command tracker setup, or the display of an instruction display. Such scripted
experiments do not require block or trial loops. Instead, a loop reads lines from
the script file, interprets each line, and carries out its instructions. This loop
must still interpret the return code from trials, and place proper messages into
the EDF file. It may be helpful to record the script lines as messages in the EDF
file as well, to help document the experiment.
Scripts can be generated by a separate C, Basic, or other program, which will do
the randomization, convert independent variables into program data (i.e. BMP file
names for graphical stimuli, or saccade target positions), and create the
“TRIALID” message and title lines. These are then written to a large text file.
These files are also more easily analyzed for randomization errors than is the
case for an experiment with a built-in randomizer.
12.5 Analysis of “w32_simple_trial.c”
The second part of the trial is the actual recording loop, implemented by
simple_recording_trial(). This is the most basic recording loop, and is the
basis for all the other template recording loops. It performs a drift correction,
displays the graphics, records the data, and exits when the appropriate
conditions are met. These include a response button press, the maximum
recording time expired, the ‘Esc’ key pressed, or the program being terminated.
12.5.1 Overview of Recording
The sequence of operations for implementing the trial is:
•
Perform a drift correction, which also serves as the pre-trial fixation target.
•
Start recording, allowing 100 milliseconds of data to accumulate before the
trial display starts
Windows EyeLink Programming (8/16/2002) 2002 SR Research Ltd.
73
•
Draw the subject display, recording the time that the display appeared by
placing a message in the EDF file
•
Loop until one of these events occurs
•
Recording halts, due to the tracker Abort menu or an error
•
The maximum trial duration expires
•
‘Esc’ is pressed, or the program is interrupted.
•
A button on the EyeLink button box is pressed
•
Blank the display, stop recording after an additional 100 milliseconds of data
has been collected
•
Report the trial result, and return an appropriate error code
Each of these sections of the code is described below.
12.6 Drift Correction
At the start of each trial, a fixation point should be displayed, so that the
subject’s gaze is in a known position. The EyeLink system is able to use this
fixation point to correct for small drifts in the calculation of gaze position that
can build up over time. Even when using the EyeLink II tracker’s corneal
reflection mode, a fixation target should be presented, and a drift correction
allows the experimenter the opportunity to recalibrate if needed.
The eyelink_exptkit DLL function do_drift_correct() implements this
operation. The display coordinates where the target is to be displayed must be
supplied. Usually this is at the center of the display, but could be anywhere that
gaze should be located at the trial start. For example, it could be located over the
first word in a page of text.
// NOTE: TRIALID AND TITLE MUST HAVE BEEN SET BEFORE DRIFT CORRECTION!
// FAILURE TO DO THIS MAY CAUSE INCOMPATIBILITIES WITH ANALYSIS SOFTWARE!
// DO PRE-TRIAL DRIFT CORRECTION
// repeat if ESC key pressed to do setup.
while(1)
{
// Check link often so we can exit if tracker stopped
if(!eyelink_is_connected()) return ABORT_EXPT;
// We let do_drift_correct() draw target in this example
// 3rd argument would be 0 if we already drew the fixation target
error = do_drift_correct(SCRWIDTH/2, SCRHEIGHT/2, 1, 1);
// repeat if ESC was pressed to access Setup menu
if(error!=27) break;
}
clear_full_screen_window(target_background_color); // blank display
//
In the template, we told do_drift_correct() to draw the drift correction
display for us, by setting the third argument to 1. It cleared the screen to the
calibration background color, drew the target, and cleared the screen again when
Windows EyeLink Programming (8/16/2002) 2002 SR Research Ltd.
74
finished. Usually, you will let eyelink_exptkit clear the display and draw the drift
correction target, as in the template. It’s a good precaution to clear the display
after
drift
correction
completes—this
should
always
cleared
to
target_background_color, to prevent abrupt display changes that could affect
subject readiness.
Sometimes it is better to draw the target ourselves, for example if the drift
correction is part of the initial fixation in a saccadic task and we want the target
to stay on the screen after the drift correction. To do this, we pre-draw the
target, then call do_drift_correct() with the third parameter set to 0. :
If the ‘Esc’ key was pressed during drift correction, the EyeLink II Camera Setup
screen (the Setup menu in EyeLink I) is called up to allow calibration problems to
be corrected, and do_drift_correct() will return 27 (ESC_KEY). In this case,
the drift correction should be repeated. Any fixation target that was pre-drawn
must also be redrawn, as this will have cleared the display. Access to the Setup
menu can be disabled by setting the fourth argument to 0, which will cause the
‘Esc’ key press to simply abort the drift correction and return 27 (ESC_KEY).
12.6.1 Starting Recording
After drift correction, recording is initiated. Recording should begin about 100
milliseconds before the trial graphics are displayed to the subject, to ensure that
no data is lost:
// Start data recording to EDF file, BEFORE DISPLAYING STIMULUS
// You should always start recording 50-100 msec before required
// otherwise you may lose a few msec of data
error = start_recording(1,1,0,0); // record samples and events to file
if(error != 0) return error;
// return error code if failed
The eyelink_exptkit function start_recording() starts the EyeLink tracker
recording, and does not return until recording has actually begun. If link data
has been requested, it will wait for data to become available. If an error occurs
or data is not available within 2 seconds, it returns an error code. This code
should be returned as the trial result if recording fails.
Four arguments to start_recording() set what data will be recorded to the
EDF file and sent via the link.
If an argument is 0, recording of the
corresponding data is disabled. At least one of the data selectors must be
enabled. This is the prototype and arguments to the function:
Windows EyeLink Programming (8/16/2002) 2002 SR Research Ltd.
75
INT16 start_recording(INT16 file_samples, INT16 file_events,
INT16 link_samples, INT16 link_events);
Argument
Controls
file_samples
Enables writing of samples to EDF file
file_events
Enables writing of events to EDF file
link_samples
Enables real-time samples through link
link_events
Enables real-time events through link
The type of data recorded to the EDF file affects the file size and what processing
can be done with the file later. If only events are recorded, the file will be fairly
small (less than 300 kilobytes for a 30-minute experiment) and can be used for
analysis of cognitive tasks such as reading. Adding samples to the file increases
its size (about 4 megabytes for a 30-minute experiment) but allows the file to be
viewed with EDFVIEW, and reprocessed to remove artifacts if required. The data
stored in the EDF file also sets the data types available for post-trial playback.
We also introduce a
100 millisecond delay after recording begins (using
begin_realtime_mode(), discussed below), to ensure that no data is missed
before the important part of the trial starts. The EyeLink tracker requires 10 to
30 milliseconds after the recording command to begin writing data. This extra
data also allows the detection of blinks or saccades just before the trial start,
allowing bad trials to be discarded in saccadic RT analysis. A “SYNCTIME”
message later in the trial marks the actual zero-time in the trial’s data record for
EDFVIEW.
// record for 100 msec before displaying stimulus
// Windows 2000/XP: no interruptions till display start marked
begin_realtime_mode(100);
12.6.2 Starting Realtime Mode
Under Windows 2000 and Windows XP, it is possible place your application in
realtime priority mode—this forces Windows to stop most other activities,
including background disk access, that might cause your experiment to have
unpredictable delays. This will make the timing of stimulus presentation more
predictable, and should be used when possible.
Realtime mode is entered by calling begin_realtime_mode(), which implements
the correct procedure for whatever version of Windows is running the application.
This function may take up to 100 milliseconds to return, and this delay may
change in future versions of the eyelink_exptkit DLL as new operating systems
are introduced.
The minimum delay of begin_realtime_mode() may be
specified (100 milliseconds in this template, to allow recording of data before the
Windows EyeLink Programming (8/16/2002) 2002 SR Research Ltd.
76
display start) so that this delay can serve a useful purpose. We end realtime
mode with end_realtime_mode(), which has no significant delay.
In the case of the simple template, the only critical temporal section is marking
the onset of the display by a message in the EDF file. We begin realtime mode
after recording starts, and will end it after the display-onset messages for the
EDF file have been sent to the EyeLink tracker. In this experiment, we don’t
need refresh-locked accuracy in determining when to erase the stimulus word. If
we needed accurate display timing (as we will in some other examples), we will
not exit realtime mode until the end of the trial. The eyelink_exptkit recording
support functions check_recording() will end realtime mode if an error occurs,
and calling check_record_exit() at the end of the trial function will also return
to normal mode.
The major problem with realtime mode is that certain system functions simply
cease to work—so try to exit realtime mode as soon as it is no longer needed.
You will not be able to play sounds, and the keyboard will not work properly
while in realtime mode. Under Windows XP, even the escape_pressed() and
break_pressed() functions will not work (these are fine under Windows 2000,
however). It is possible that the Windows DirectX library (DirectInput and
DirectSound) may work in realtime mode, but this has not yet been tested.
Using getkey() will probably return key presses, but it does this at the expense
of allowing Windows to do background activity. This appears as unpredictable
delays that can be as long as 20 milliseconds (but are usually 5-10 milliseconds).
Therefore you should try to avoid using the Subject PC keyboard for control or
subject responses (keyboards are not very time accurate in any case). Instead,
use
last_button_press()
to
detect
tracker
button
responses,
break_pressed() to detect program shutdown, eyelink_is_connected() to
detect tracker disconnection, check_recording() to detect recording aborted by
the eye tracker, and, if required, eyelink_read_keybutton() to monitor the
EyeLink tracker keyboard.
12.6.3 Drawing the Subject Display
The simple template uses the simplest possible graphics for clarity, drawing a
single word of text to the display. We let eyelink_exptkit draw the drift correction
target, so it also clears the display for us. The word is drawn rapidly, so we don’t
need to draw to a bitmap and copy it to the display. If a lot of text were being
drawn, it might be useful to first draw the text in the background color—this
allows Windows to generate and cache the font bitmaps internally (this is not
demonstrated here).
get_new_font("Times Roman", SCRWIDTH/25, 1);
wait_for_video_refresh();
drawing_time = current_msec();
// select font for drawing
// synchronize to refresh
// time of retrace
Windows EyeLink Programming (8/16/2002) 2002 SR Research Ltd.
77
trial_start = drawing_time;
graphic_printf(target_foreground_color, -1, 1,
// Draw the stimulus, centered
SCRWIDTH/2, SCRHEIGHT/2, "%s", text);
wait_for_drawing(full_screen_window);
// wait till finished drawing
drawing_time = current_msec()-drawing_time; // delay from retrace & drawing ime
eyemsg_printf("%d DISPLAY ON", drawing_time); // message for RT recording in
analysis
eyemsg_printf("SYNCTIME %d", drawing_time);
// message marks zero-plot time
for EDFVIEW
end_realtime_mode();
The drawing procedure first waits for the end of the display refresh (the start of
the vertical retrace) using wait_for_video_refresh(). It then records the time
of the retrace, which is also the time of stimulus onset (actually the stimulus is
painted on the monitor phosphors at a delay dependent on its vertical position on
the display, but this can be corrected for during analysis). Next it draws the text,
calling wait_for_drawing() to force immediate drawing and to wait until
drawing is completed. The time is read again, and used to compute the delay
from the retrace. This delay is included in the messages “DISPLAY ON” and
“SYNCTIME”, which are then placed in the EDF file to mark the time the
stimulus appeared. (NOTE that the delay is placed first in the “DISPLAY ON”
message—this allows new EyeLink analysis tools to automatically adjust the
message time, and this method should be used in all messages where delay must
be corrected for. The delay is placed last in the “SYNCTIME” message, for
compatibility with the EDFVIEW viewer). Synchronizing with the display refresh
before drawing and recording the delay from the retrace to the message writing
will allow accurate calculation of the time of stimulus onset, as the refresh time
can be recomputed by subtracting the delay from the message timestamp. The
offset between the time that the stimulus appeared on the monitor and the
message timestamp depends only on the stimulus vertical position.
This synchronizing technique works well for small words, targets, or masks that
can be drawn in one or two milliseconds. In detail, we have 0.5-1 milliseconds
from when wait_for_video_refresh() returns until the top of the image on
the monitor begins to appear. Very simple graphics may be therefore drawn even
before the display begins to be painted on the monitor. After this, our drawing
must proceed in a race with the updating of the display, which takes about 70%
of the total refresh period (1000ms/refresh rate). Fortunately, almost all video
cards draw from the top to the bottom of the display, so full-screen bitmap copies
(introduced in the next sample experiment) will update the display invisibly. The
time available for drawing may be extended by not drawing to the top of the
display (for example, up to ½ of a refresh period can be gained for drawing time
by placing stimuli near the center or bottom of the display). If many drawing
operations are required, you can improve your chances of beating the monitor
refresh by drawing those items at the top of the display first.
Windows EyeLink Programming (8/16/2002) 2002 SR Research Ltd.
78
Drawing operations that take too long may become visible one refresh period
later, or become visible across several display refreshes. This drawing time is
recorded in the “SYNCTIME” and “DISPLAY ON” messages in the EDF file, and
these messages should be checked when designing a new experiment.
12.6.4 Recording Loop
With recording started and the stimulus visible, we wait for an event to occur
that ends the trial. In the template, we look for the maximum trial duration to be
exceeded, the ‘Esc’ key on the local keyboard to be pressed, a button press from
the EyeLink button box, or the program being terminated.
Any tracker buttons pressed before the trial, and any pending events from the
local keyboard are discarded:
eyelink_flush_keybuttons(0);
while(getkey()) {};
// reset keys and buttons from tracker
// dump any pending local keys
The main part of the trial is a loop that tests for error conditions and response
events. Any such event will stop recording and exit the loop, or return an error
code. The process of halting recording and blanking the display is implemented
as a small local function, because it is done from several places in the loop:
// End recording: adds 100 msec of data to catch final events
static void end_trial(void)
{
clear_full_screen_window(target_background_color); // hide display
msec_delay(100);
// record additional 100 msec of data
stop_recording();
}
The trial recording loop tests for recording errors, trial timeout, the local ‘Esc’
key, program termination, or tracker button presses. The first test in the loop
detects recording errors or aborts, and handles EyeLink Abort menu selections.
It also stops recording, and returns the correct result code for the trial:
if((error=check_recording())!=0) return error;
Next, the trial duration is tested. This could be used to implement fixed-duration
trials, or to limit the time a subject is allowed to respond. When the trial times
out, a “TIMEOUT” message is placed in the EDF file and the trial is stopped. The
local end_trial() function will properly clear the display, and stop recording
after an additional 100 milliseconds.
if(current_time() > trial_start+time_limit)
{
eyemsg_printf("TIMEOUT");
// message to log the timeout
end_trial();
// local function to stop recording
button = 0;
// trial result message is 0 if timeout
break;
// exit trial loop
}
Next, the local keyboard is checked to see if we should abort the trial. This is
most useful for testing and debugging an experiment. There is some time penalty
Windows EyeLink Programming (8/16/2002) 2002 SR Research Ltd.
79
for using getkey() in the recording loop on the Subject PC, as this function
allows Windows multitasking and background disk activity to occur. It is
preferable to use escape_pressed() and break_pressed() to test for
termination without processing system messages, as these do not allow
interruption. However, these functions may respond slowly or not at all under
Windows XP if a lot of drawing is being done within the loop, or in realtime mode.
if(break_pressed()) // check for program termination or ALT-F4 or CTRL-C keys
{
end_trial();
// local function to stop recording
return ABORT_EXPT;
// return this code to terminate experiment
}
if(escape_pressed()) // check for ESC key to abort trial (use in debugging)
{
end_trial();
// local function to stop recording
return SKIP_TRIAL;
// return this code if trial terminated
}
Finally, we check for a subject response to end the trial. The tracker button box
is the preferred way to collect a response, as it accurately records the time of the
response. Using eyelink_last_button_press() is the simplest way to check
for new button presses since the last call to this function. It returns 0 if no
button has been pressed since recording started, or the button number. This
function reports only the latest button press, and so could miss multiple button
presses if not called often. This is not usually a problem, as all button presses
will be recorded in the EDF file.
button = eyelink_last_button_press(NULL);
if(button!=0)
// button number, or 0 if none pressed
{
eyemsg_printf("ENDBUTTON %d", button); // log the button press
end_trial();
// stop recording
break;
// exit trial loop
}
The message “ENDBUTTON” is placed in the EDF data file to record the button
press. The timestamp of this message is not as accurate as the button press
event that is also recorded in the EDF file, but serves to record the reason for
ending the trial. The “ENDBUTTON” message can also be used if the local
keyboard as well as buttons can be used to respond, with keys translated into a
button number.
12.6.5 Cleaning Up and Reporting Trial Results
After exiting the recording loop, it’s good programming practice to prevent
anything that happened during the trial from affecting later code, in this case by
making sure we are out of realtime mode and by discarding any accumulated key
presses. Remember, it’s better to have some extra code than to waste time
debugging unexpected problems.
}
end_realtime_mode();
// END OF RECORDING LOOP
// safety cleanup code
Windows EyeLink Programming (8/16/2002) 2002 SR Research Ltd.
80
while(getkey());
// dump any accumulated key presses
}
//
Finally, the trial is completed by reporting the trial result and returning the
result code. The standard message “TRIAL_RESULT” records the button pressed,
or 0 if the trial timed out. This message is used during analysis to determine
why the recording stopped.
Any post-recording subject responses (i.e.
questionnaires, etc.) should be performed before returning from the trial, to place
them before the “TRIAL OK” message.
Finally, the call to the
check_record_exit() function makes sure that no Abort menu operations
remain to be performed, and generates the trial return code.
// report response result: 0=timeout, else button number
eyemsg_printf("TRIAL_RESULT %d", button);
// Call this at the end of the trial, to handle special conditions
return check_record_exit();
12.6.6 Extending “w32_simple_trial.c”
For many experiments, this code can be used with few modifications, except for
changing the stimulus drawn. Another common enhancement would be to filter
which buttons can be used for response.
A more sophisticated modification would be to animate the display. This might
involve erasing and redrawing fixation targets for saccadic response experiments.
For this experiment, the time each target is drawn and erased must be controlled
and monitored carefully, which required leaving realtime mode on throughout the
trial. Checking for recording errors or responses can be postponed until after the
display sequence, unless it is very long (for example, a continuously moving
smooth pursuit target).
The drawing loop should call wait_for_video_refresh(), then check if the
desired time to change the display has passed. If so, it should draw or erase the
target and output an appropriate message. This will gives the most accurate
display control possible. If drawing takes less than 2 milliseconds and does not
include the top 10% of the display, the changes will appear within a few
milliseconds,
Be sure to call eyemsg_printf() to place a message in the EDF file to record
each time the time the display changed. The message “MARK <number>” will be
recognized by some EyeLink applications for RT and saccadic latency analysis.
Don’t send more than 10 messages every 20 milliseconds, or the EyeLink tracker
may not be able to write them all to the EDF file.
This sample code illustrates the above concepts:
UINT32 t = current_time();
while(t + desired_delay > current_time())
{
wait_for_display_refresh();
}
Windows EyeLink Programming (8/16/2002) 2002 SR Research Ltd.
81
/* ADD CODE TO ERASE OLD TARGET, DRAW NEW ONE HERE */
eyemsg_printf(“TARGET MOVED %d %d”, x, y); /* record time, new position */
eyemsg_printf(“MARK 1”);
/* time marker #1 */
Windows EyeLink Programming (8/16/2002) 2002 SR Research Ltd.
82
13. "Text” Template
For more complex display such as screens of text or pictures, drawing takes too
long to complete in one (or even two) display refresh periods. This makes the
drawing process visible, and there is no clear stimulus onset for reaction time
measurement. The code in the text template draws to a bitmap, then copies it to
the display, reducing the time to make the display visible. This also has the
advantage of making the trial code more general: almost any stimulus can be
displayed given its bitmap.
13.1 Source Files for “Text”
These are the files used to build text. Those that are the same as for simple are
marked with an asterisk. (Standard eyelink_exptkit header files are the same as
those used for simple, and are not listed here).
w32_demo.h *
Declarations to link together the template experiment
files. Most of the declarations in this file can be used
in your experiments.
w32_demo_main.c *
WinMain() function, setup and shutdown link and
graphics, open EDF file. This file is unchanged for all
templates, and can be used with small changes in
your experiments.
w32_demo_window.c *
Implements the full-screen window used for
calibration, validation and presentation. This file is
unchanged for all templates, and can be used without
changes in your experiments.
w32_text_trials.c
Called to run a block of trials for the “text” template.
Performs system setup at the start of each block, then
runs the trials. Handles standard return codes from
trials to allow trial skip, repeat, and experiment abort.
This file can be modified for your experiments, by
replacing the trial instance code.
w32_bitmap_trial.c
Implements a trial with simple graphics that can be
draw in one screen refresh, and therefore doesn’t need
display blanking. You should be able to use this by
replacing the drawing code, message code, and
handling any subject responses.
Windows EyeLink Programming (8/16/2002) 2002 SR Research Ltd.
83
w32_text_support.c
Implements a simple interface for font creation and
printing. This is a support module that you can link
into your experiments.
w32_text_bitmap.c
Draw left-justified multiple-line text pages. Creates
full-screen bitmaps of formatted text. This is a
support module that you can link into your
experiments.
13.2 Differences from "Simple”
The only modules changed are the block loop and trial setup code
(w32_text_trials.c) and the trial loop code (w32_bitmap_trial.c). These files will be
discussed below, but here is an outline of the differences from the equivalent files
for simple:
•
Trial title and TRIALID messages are different.
•
A bitmap of text is created as part of the trial setup.
•
The display graphics are copied from a bitmap passed to the trial loop.
The discussion of w32_bitmap_trial.c is especially important, as it forms the basis
of most later templates that use bitmaps.
13.3 Analysis of “w32_text_trials.c”
The first difference from w32_simple_trials.c is the color of the background. This is
bright white, and must be set before do_tracker_setup() and the initial
calibration, in order to maximize gaze tracking accuracy.
target_foreground_color = RGB(0,0,0);
target_background_color = RGB(255,255,255);
set_calibration_colors(target_foreground_color, target_background_color);
The function do_text_trial() is used to setup and run the text-reading trials.
This first creates a bitmap from the text by calling text_bitmap(), defined in
w32_text_bitmap.c. Margins are set at about 1.5° (1/20 of display height and
width)
from
the
edges
of
the
display.
Following
this,
the
bitmap_save_and_backdrop()function saves the entire bitmap as a file in the
specified path (“Images\\”), and transfers the image to the tracker PC as
backdrop for gaze cursors. Note that you can manipulate the file-saving option of
the function so that the existing files could be either overwritten (set the
Windows EyeLink Programming (8/16/2002) 2002 SR Research Ltd.
84
sv_options as 0) or not to be overwritten (SV_NOREPLACE). The trial title and
“TRIALID” message report the page number.
char *pages[4] = { text1, text2, text3, text4 };
int do_text_trial(int num)
{
HBITMAP bitmap;
RECT margins; // margins for text
int i;
char image_fn[100];
// image file name;
margins.top = SCRHEIGHT/20;
margins.left = SCRWIDTH/20;
margins.right = SCRWIDTH - SCRWIDTH/20;
margins.bottom = SCRHEIGHT - SCRHEIGHT/20;
// This supplies the title at the bottom of the eyetracker display
eyecmd_printf("record_status_message 'TEXT, PAGE %d/%d' ", num, NTRIALS);
// Always send a TRIALID message before starting to record.
// It should contain trial condition data required for analysis.
eyemsg_printf("TRIALID PAGE%d", num);
sprintf(image_fn, "test%d.png", num); // get the image file name
get_new_font("Times Roman", SCRHEIGHT/25, 0);
bitmap = text_bitmap(pages[num-1], RGB(0,0,0), RGB(255,255,255), margins,
SCRHEIGHT/14, 1);
// Save bitmap and transfer to the tracker pc.
// Since it takes a long to save the bitmap to the file, the
// value of sv_options should be set as SV_NOREPLACE to save time
bitmap_save_and_backdrop(bitmap, 0, 0, 0, 0,
image_fn, "Images", SV_NOREPLACE, 0, 0, BX_NODITHER|BX_GRAYSCALE);
i = bitmap_recording_trial(bitmap, 20000L);
DeleteObject(bitmap);
return i;
}
Finally, the bitmap is passed to bitmap_recording_trial() for the actual
recording. After recording is completed, the bitmap is deleted. That’s all there is
to it—the same trial function can be used to present almost any stimulus drawn
to the bitmap.
13.4 Analysis of “w32_bitmap_trial.c”
The function bitmap_recording_trial() performs straightforward recording
and presentation of bitmaps.
The code is almost identical to
simple_recording_trial(), except that drawing of text is replaced by copying
the bitmap to the display. This is performed by a call to display_bitmap(),
discussed earlier and defined in w32_bitmap_sppt.c.
wait_for_video_refresh();
drawing_time = current_msec();
trial_start = drawing_time;
// synchronize to retrace
// time of retrace
// record the display onset time
Windows EyeLink Programming (8/16/2002) 2002 SR Research Ltd.
85
display_bitmap(full_screen_window, gbm, 0, 0); // COPY BITMAP to display
wait_for_drawing(full_screen_window);
// wait till bitmap copy finished
drawing_time = current_msec()-drawing_time;
// delay from retrace & time to
draw)
eyemsg_printf("%d DISPLAY ON", drawing_time); // message for RT analysis
eyemsg_printf("SYNCTIME %d", drawing_time);
// zero-plot time for EDFVIEW
Windows EyeLink Programming (8/16/2002) 2002 SR Research Ltd.
86
14. "Picture” Template
The template picture is almost identical to text, except that images are loaded
from JPG files and displayed instead of text.
14.1 Source Files for “Picture”
These are the files used to build picture. Those that are the same as for text are
marked with an asterisk..
w32_demo.h *
Declarations to link together the template
experiment files. Most of the declarations in this file
can be used in your experiments.
w32_demo_main.c *
WinMain() function, setup and shutdown link and
graphics, open EDF file. This file is unchanged for
all templates, and can be used with small changes
in your experiments.
w32_demo_window.c *
Implements the full-screen window used for
calibration, validation and presentation. This file is
unchanged for all templates, and can be used
without changes in your experiments.
w32_picture_trials.c
Called to run a block of trials for the “picture”
template. Performs system setup at the start of
each block, then runs the trials. Handles standard
return codes from trials to allow trial skip, repeat,
and experiment abort. This file can be modified for
your experiments, by replacing the trial instance
code.
w32_bitmap_trial.c
Implements a trial with simple graphics that can be
drawn in one screen refresh, and therefore doesn’t
need display blanking. You should be able to use
this by replacing the drawing code, message code,
and handling any subject responses.
Windows EyeLink Programming (8/16/2002) 2002 SR Research Ltd.
87
w32_text_support.c
Implements a simple interface for font creation and
printing. This is a support module that you can
link into your experiments.
w32_freeimage_bitmap.c
Loads any of a number of image file formats using
the “freeimage” library, creating a device-dependent
bitmap from it. The picture can be loaded to a
bitmap matched in size, or a full-screen bitmap can
be created and the image resized to fill it.
freeimage.h
The “freeimage” library (www.6ixsoft.com). This is a
freeware graphics file library.
freeimage.dll
freeimage.lib
14.2 Differences from "Text”
The only difference is the block loop module (w32_picture_trials.c), and the use of
w32_freeimage_bitmap.c) to load an image file as a bitmap. The same trial
recording file (w32_bitmap_trial.c) is used to display the stimuli and record data.
14.3 Analysis of “w32_picture_trials.c”
The first difference from w32_text_trials.c is the color of the background. This is
medium gray, matching the average luminance of the pictures. In a real
experiment, each picture may have a different average luminance, and the
calibration background color should be reset before each trial so that the drift
correction background matches the image.
target_foreground_color = RGB(0,0,0);
target_background_color = RGB(128,128,128);
set_calibration_colors(target_foreground_color, target_background_color);
The function do_picture_trial() is used to setup and run the picturepresentation trials. The trial bitmap is created by calling create_image_bitmap
(). The bitmap_to_backdrop() function transfers the image bitmap over the
link to the tracker PC as a backdrop for gaze cursors (Unlike the previous TEXT
template, the image is not saved). The image bitmap is then passed to
bitmap_recording_trial(), where it is copied to the display at the proper
time. After the trial, be sure to delete the bitmap.
char *images[3] = { "images\\sacrmeto.jpg", "images\\sac_blur.jpg",
"images\\composite.jpg" };
int do_picture_trial(int num)
{
HBITMAP bitmap;
Windows EyeLink Programming (8/16/2002) 2002 SR Research Ltd.
88
int i;
// This supplies the title at the bottom of the eyetracker display
eyecmd_printf("record_status_message '%s, TRIAL %d/%d' ", imgname[num-1], num,
NTRIALS);
// Always send a TRIALID message before starting to record.
// It should contain trial condition data required for analysis.
// eyemsg_printf("TRIALID PIX%d %s", num, imgname[num-1]);
eyemsg_printf("TRIALID PIX%d %s", num, imgname[num-1]);
// Before recording, we place reference graphics on the EyeLink display
set_offline_mode();
// Must be offline to draw to EyeLink screen
bitmap = create_image_bitmap(num-1);
if(!bitmap)
{
alert_printf("ERROR: could not create image %d", num);
return SKIP_TRIAL;
}
// NOTE: *** THE FOLLOWING TEXT SHOULD NOT APPEAR IN A REAL EXPERIMENT!!!!
****
clear_full_screen_window(target_background_color);
get_new_font("Arial", 24, 1);
graphic_printf(target_foreground_color, -1, 1, SCRWIDTH/2, SCRHEIGHT/2,
"Sending image to EyeLink...");
// Transfer bitmap to tracker as backdrop for gaze cursors
bitmap_to_backdrop(bitmap, 0, 0, 0, 0, 0, 0, BX_MAXCONTRAST
|(is_eyelink2?0:BX_GRAYSCALE));
// record the trial
i = bitmap_recording_trial(bitmap, 20000L);
DeleteObject(bitmap);
return i;
}
14.3.1 Loading pictures and creating composite
images
The first two trials of the current template load a normal picture (sacrmeto.jpg)
and a blurred one (sac_blur.jpg) by calling image_file_bitmap(). The last trial
creates a composite image from four smaller images (hearts.jpg, party.jpg,
purses.jpg, and squares.jpg) by using composite_image(). This is achieved by
first creating a blank bitmap (blank_bitmap()) and then loading individual
images and adding them to the blank bitmap at a specific (x, y) position with the
add_bitmap()function.
In this example, the bitmap is magnified or reduced to fill the display. This will
degrade the image somewhat and slows loading, so it may be important to match
the display mode to the original image file resolution. Alternatively, if the size is
set to (0,0), the picture is not resized but is simply clipped or centered on the
Windows EyeLink Programming (8/16/2002) 2002 SR Research Ltd.
89
display. Alternatively, the image may be loaded to a bitmap of identical size, and
this bitmap copied to a blank bitmap to create a composite display with several
pictures and text.
Because loading and resizing images can take significant time, this sample code
displays a message while the picture is loading. This would not be desirable in a
real experiment, of course. It is important to check that the picture loaded
successfully before running the trial, in this example an error message is placed
in the EDF file and an alert box is displayed (again, this may not be desirable in a
real experiment).
// Adds individual pieces of source bitmap to create a composite picture
// Top-left placed at (x,y)
// If either the width or height of the display as 0, then simply copy the
//bitmap to the display without chaning its size. Otherwise, stretches the
// bitmap to fit the dimensions of the destination display area
int add_bitmap(HBITMAP src, HBITMAP dst, int x, int y, int width, int height)
{
HDC src_mdc, dst_mdc;
HBITMAP osrc, odst;
dst_mdc = CreateCompatibleDC(NULL);
src_mdc = CreateCompatibleDC(NULL);
odst = SelectObject(dst_mdc, dst);
osrc = SelectObject(src_mdc, src);
if(width==0 || height==0)
// Create a memory context for BITMAP
// Select bitmap into memory DC
BitBlt( dst_mdc, x, y, width, height, src_mdc, 0, 0, SRCCOPY);
// Use BitBlt to copy to display
else
StretchBlt( dst_mdc, x, y, width, height, src_mdc, 0, 0,
bitmap_width(src), bitmap_height(src), SRCCOPY);
// Use StretchBlt to stretch and copy to display
SelectObject(dst_mdc, odst);
SelectObject(src_mdc, osrc);
return 0;
// release GDI resources
}
// Creates a composite bitmap based on individual pieces
HBITMAP composite_image(void)
{
int i;
HBITMAP bkgr, img;
// Handle to the forground and background images
Char *small_images[4]={"images\\hearts.jpg", "images\\party.jpg",
"images\\squares.jpg", "images\\purses.jpg"}; //Filenames of four small pieces
POINT points[4]={{0, 0}, {SCRWIDTH/2, 0},
{0, SCRHEIGHT/2}, {SCRWIDTH/2, SCRHEIGHT/2}};
// Top-left x,y coordinate of the postion where the image to be displayed
bkgr = blank_bitmap(RGB(100,200,255));
if(!bkgr) return NULL;
// Create a blank bitmap
for (i=0; i<4; i++) // loop through four small pieces
{
img = image_file_bitmap(small_images[i], 1, 0, 0, 0);
// Load image, with resizing
if(!img) goto cleanup;
// Add the current bitmap to the blank bitmap at x, y position,
Windows EyeLink Programming (8/16/2002) 2002 SR Research Ltd.
90
// with a specific width and height
add_bitmap(img, bkgr, points[i].x, points[i].y, SCRWIDTH/2, SCRHEIGHT/2);
DeleteObject(img); // Be sure to delete bitmap handle before re-using it.
}
return bkgr;
cleanup:
DeleteObject(bkgr);
return NULL;
}
Windows EyeLink Programming (8/16/2002) 2002 SR Research Ltd.
91
15. "Eyedata” Template
This template introduces the use of the link in transferring gaze-position data.
This can be transferred in real time, or played back after recording has ended,
which helps to separate recording from analysis.
The eyedata template uses real-time eye position data set through the link to
display a real-time gaze cursor, using a trial implemented in w32_data_trial.c. The
data is then played back using the module w32_playback_trial.c. The bitmap for
the trial is a grid of letters, generated by w32_grid_bitmap.c. This module is not
discussed further, as it is similar to other bitmap-drawing functions discussed
previously. You may wish to read through it as an example of drawing more
complex displays using Windows.
15.1 Source Files for “Eyedata”
These are the files used to build eyedata. Those that were covered previously are
marked with an asterisk.
w32_demo.h *
Declarations to link together the template experiment
files. Most of the declarations in this file can be used
in your experiments.
w32_demo_main.c *
WinMain() function, setup and shutdown link and
graphics, open EDF file. This file is unchanged for all
templates, and can be used with small changes in
your experiments.
w32_demo_window.c *
Implements the full-screen window used for
calibration, validation and presentation. This file is
unchanged for all templates, and can be used without
changes in your experiments.
w32_data_trials.c
Called to run a block of trials for the picture template.
Performs system setup at the start of each block, then
runs the trials. Handles standard return codes from
trials to allow trial skip, repeat, and experiment abort.
This file can be modified for your experiments, by
replacing the trial instance code.
w32_data_trial.c
Implements a trial with a real-time gaze cursor, and
displays a bitmap.
w32_playback_trial.c
Plays back data from the previous trial. The path of
Windows EyeLink Programming (8/16/2002) 2002 SR Research Ltd.
92
gaze is plotted by a line, and fixations are marked with
“F”.
w32_grid_bitmap.c
Creates a bitmap, containing a 5 by 5 grid of letters.
w32_text_support.c *
Implements a simple interface for font creation and
printing. This is a support module that you can link
into your experiments.
15.2 Differences from "Text” and “Picture”
The block loop module (w32_data_trials.c) creates a grid bitmap, and runs the
real-time gaze trial (w32_data_trial.c). This is followed immediately by playback of
the trial’s data (w32_playback_trial.c).
15.3 Analysis of “w32_data_trials.c”
Before the initial setup, the calibration background color is set to dark gray
(60,60,60), matching the grid background.
target_foreground_color = RGB(255,255,255);
target_background_color = RGB(60,60,60);
set_calibration_colors(target_foreground_color, target_background_color);
Only a single trial is run by calling do_data_trial(). This marks the trial,
creates the grid bitmap, and calls realtime_data_trial() to record data while
displaying a gaze cursor. After this, playback_trial() plays back the data just
recorded, plotting the path of gaze and fixations.
Note the command “mark_playback_start” that is sent to the eye tracker just
before the “TRIALID” message. This command sets the point at which playback
of data from the EDF file will start later, and is only available in the newest
tracker software (EyeLink I version 2.1 and higher, and EyeLink II versions 1.1
and higher). If this command is not used (and for older tracker software
versions), playback begins from the start of recording, and therefore will not
include the TRIALID message. Similar to the TEXT template, the display PC
bitmap is saved as a .png file in the “images” directory. The bitmap image is also
transferred over the link to the tracker PC as a backdrop for gaze cursors.
int do_data_trial(int num)
{
int i;
HBITMAP bitmap;
eyecmd_printf("record_status_message 'GAZE CURSOR TEST' ");
// NEW command (EL I v2.1, EL II V1.1)
// Marks where next playback will begin in file
// If not used, playback begins from start of recording
Windows EyeLink Programming (8/16/2002) 2002 SR Research Ltd.
93
eyecmd_printf("mark_playback_start");
eyemsg_printf("TRIALID GRID");
bitmap = draw_grid_to_bitmap();
if(!bitmap)
{
eyemsg_printf("ERROR: could not create bitmap");
return SKIP_TRIAL;
}
// Save bitmap and transfer to the tracker pc.
// Since it takes a long to save the bitmap to the file, the
// value of sv_options should be set as SV_NOREPLACE to save time
bitmap_save_and_backdrop(bitmap, 0, 0, 0, 0, "grid.png", "images",
SV_NOREPLACE, 0, 0, BX_MAXCONTRAST|(is_eyelink2?0:BX_GRAYSCALE));
i = realtime_data_trial(bitmap, 60000L);
playback_trial();
// Play back trial's data
DeleteObject(bitmap);
return i;
}
15.4 Analysis of “w32_data_trial.c”
The w32_data_trial.c module uses real-time gaze data to plot a cursor. This is a
simple example of using transferred data, which will be expanded in a later
template into a gaze-contingent window. Link data is only required during
recording for real-time experiments, since playback is preferred for on-line
analysis.
15.4.1 Newest Sample Data
As eye movement data arrives from the tracker, the samples and events are
stored in a large queue, to prevent loss of data if an application cannot read the
data immediately. The eyelink_exptkit DLL provides two ways to access link data
immediately or in sequence. As will be shown in the playback module, samples
and events can be read from the queue in the same order they arrived. However,
data read in this way will be substantially delayed if the queue contains
significant amounts of data.
When eye position data is required with the lowest possible delay, the newest
sample received from the link must be obtained. The EyeLink library keeps a
copy of the latest data, which is read by eyelink_newest_float_sample().
This function returns 1 if a new sample is available, and 0 if no new samples
have been received since the previous call to the function. It can be called with
NULL as the buffer address in order to test if a new sample has arrived. The
sample buffer can be a structure of type FSAMPLE or ALLF_DATA, defined in
eyetypes.h.
Windows EyeLink Programming (8/16/2002) 2002 SR Research Ltd.
94
15.4.2 Starting Recording
When starting recording, we tell the EyeLink tracker to send samples to us
through the link, by setting the third argument to start_recording() to 1.
Data will be available immediately, as start_recording() does not return until
the first data has arrived. Realtime mode is also set, to minimize delays between
reading data and updating the gaze cursor.
// NEW CODE FOR GAZE CURSOR: tell start_recording() to send link data
gaze_cursor_drawn = 0;
// initialize gaze cursor state
error = start_recording(1,1,1,1);
// record with link data enabled
if(error != 0) return error;
// ERROR: couldn't start recording
// record for 100 msec before displaying stimulus
begin_realtime_mode(100);
// Windows 2000/XP: no interruptions from now on
When using data from the link queue (which will be introduced in the playback
module), some samples and/or events will build up in the data queue during the
100 millisecond delay before image display begins. These will be read later,
causing an initial burst of data processing.
This does not occur with
eyelink_newest_float_sample(), as only the latest sample is read. The queue
is not read in this example, so data simply builds up in the queue and the oldest
data is eventually overwritten.
15.4.3 Confirming Data Availability
After recording starts, a block of sample and/or event data will be opened by
sending a special event over the link. This event contains information on what
data will be available sent in samples and events during recording, including
which eyes are being tracked and (for the EyeLink II tracker only) sample rates,
filtering levels, and whether corneal reflections are being used.
The data in this event is only available once it has been read from the link data
queue, and the function eyelink_wait_for_block_start() is used to scan the
queue data for the block start event. The arguments to this function specify how
long to wait for the block start, and whether samples, events, or both types of
data are expected. If no data is found, the trial should end with an error.
if(!eyelink_wait_for_block_start(100, 1, 0)) // wait for link sample data
{
end_trial();
alert_printf("ERROR: No link samples received!");
return TRIAL_ERROR;
}
Once the block start has been processed, data on the block is available.
Because the EyeLink system is a binocular eye tracker, we don’t know which
eye’s data will be present, as this was selected during camera setup by the
experimenter. After the block start, eyelink_eye_available()returns one of
the constants LEFT_EYE, RIGHT_EYE, or BINOCULAR to indicate which eye(s)
data is available from the link. LEFT_EYE (0) and RIGHT_EYE (1) can be used to
index eye data in the sample; if the value is BINOCULAR (2) we use the
Windows EyeLink Programming (8/16/2002) 2002 SR Research Ltd.
95
LEFT_EYE. A message should be placed in the EDF file to record this, so the we
know which eye’s data to use during analysis.
eye_used = eyelink_eye_available(); // determine which eye(s) are available
switch(eye_used)
// select eye, add annotation to EDF file
{
case RIGHT_EYE:
eyemsg_printf("EYE_USED 1 RIGHT");
break;
case BINOCULAR:
// both eye's data present: use left eye only
eye_used = LEFT_EYE;
case LEFT_EYE:
eyemsg_printf("EYE_USED 0 LEFT");
break;
}
Additional information on the block data can be accessed by a number of
functions: see the reference sections of this manual and the eyelink.h file for
more information. Sample rates and other data specific to the EyeLink II tracker
is available with the new eyelink2_mode_data() function.
15.4.4 Reading Samples
Code is added to the recording loop to read and process samples. This calls
eyelink_newest_float_sample() to read the latest sample. If new data is
available, the gaze position for the monitored eye is extracted from the sample,
along with the pupil size.
During a blink, pupil size will be zero, and both x and y gaze position
components will be the value MISSING_DATA. The eye position is undefined
during a blink, and this case must be treated carefully for gaze-contingent
displays. In this example, the cursor is simply hidden. Otherwise, it is redrawn
at the new location.
if(eyelink_newest_float_sample(NULL)>0) // check for new sample update
{
eyelink_newest_float_sample(&evt);
// get a copy of the sample
x = evt.fs.gx[eye_used];
// get gaze position from sample
y = evt.fs.gy[eye_used];
if( x!=MISSING_DATA &&
y!=MISSING_DATA &&
evt.fs.pa[eye_used]>0)
// make sure pupil is present
{
draw_gaze_cursor(x,y); // show and move cursor
}
else
{
erase_gaze_cursor();
// hide cursor if no pupil
}
}
Windows EyeLink Programming (8/16/2002) 2002 SR Research Ltd.
96
15.5 Analysis of “w32_playback_trial.c”
The EyeLink system can supply data on eye movements in real time during
recording, via the Ethernet link. The high data rate (binocular, 250 or 500
samples per second) makes data processing or display generation difficult while
data is being transferred, and writing data to disk will cause significant delays
that will impact stimulus presentation. Instead, data can be written to the
EyeLink EDF file as a permanent record, then played back after recording of the
trial is finished. This is the best method to implement on-line analysis when
information is needed before the next trial, for example to implement convergent
threshold paradigms or to detect if a subject fixated outside of a region on the
display.
The w32_playback_trial.c module also demonstrates processing of samples and
events from the link queue. The data-processing code is similar to what would
be used inside a recording loop for real-time data, except that we will not lose
data if analysis takes a long time or the program is stopped by a debugger. In
fact, playback data is sent “on demand” at a rate determined by how fast the
data queue is read, so it is feasible to process thousands of samples per second
during playback.
15.5.1 Starting Playback
Data from the last trial (or the last recording block if several were recorded) can
be played back by calling the function eyelink_playback_start(), then
waiting for data to arrive by calling eyelink_wait_for_data(). If no data
arrives, this function will return an error code. The first data received during
playback will include messages and button presses written to the file just after
the end of the next-to-last recording block (or from the start of the file if the first
data block is being played back). All data up to the start of block data can be
skipped by calling eyelink_wait_for_block_start(), after which information
on sample rate and eyes recorded will also be available. Playback will fail if no
EDF file is open, or if no data has yet been recorded.
set_offline_mode();
eyelink_playback_start();
// set up eye tracker for playback
// start data playback
// wait for first data to arrive
// Failure may mean no data or file not open
// This function discards other data in file (buttons and messages)
// until the start of recording.
// If you need these events, then don't use this function.
// Instead, wait for a sample or event before setting eye_data,
// and have a timeout if no data is available in 2000 msec.
if(!eyelink_wait_for_block_start(2000, 1, 1))
{
alert_printf("ERROR: playback did not start!");
return -1;
}
Windows EyeLink Programming (8/16/2002) 2002 SR Research Ltd.
97
NOTE: the eyelink_wait_for_block_start() function reads and discards
events until the start of the recording is encountered in the data stream. This
means that any data before recording (such as the “TRIALID” message) will be
lost. If you need to read this message or other data before recording begins, do
not use this function. Instead, read and process events until the first sample is
found, or until a message such as “DISPLAY ON” is found. If this data is not
found within 100 milliseconds after playback is started, it is likely that the
playback failed for
some
reason.
Once a sample is
found,
eyelink_eye_available() and eyelink2_mode_data() may be called as
described below.
In the same way as in w32_data_trial.c, we call eyelink_eye_available() to
determine which eye’s data to use. (We could have used the messages we placed
in the EDF file as well, which will be available during playback). We also
determine the sample rate by calling eyelink2_mode_data(), which returns –1
if extended information is not available—in this case, the EyeLink I sample
interval of 4 msec is used.
eye_used = eyelink_eye_available();
if(eye_used==BINOCULAR) eye_used = LEFT_EYE; // use left eye if both available
// determine sample rate
i = eyelink2_mode_data(&sample_rate,NULL,NULL,NULL,NULL);
if(i==-1 || sample_rate<250) sample_rate = 250; // EyeLink I: 250 Hz only
The data received will match that previously recorded in the EDF file. For
example, if both samples and events were recorded, both will be sent through the
link. Also, the types of events and data selected by EyeLink configuration
commands for the file will apply to the playback data, not those selected for realtime link data.
Playback is halted when all data has been read, or when the
eyelink_playback_stop() function is called. The usual tests for the ESC key
and for program termination are performed in the loop.
if(escape_pressed() || break_pressed() || eyelink_last_button_press(NULL))
{
eyelink_playback_stop();
// stop playback
clear_full_screen_window(target_background_color);
return 0;
}
15.5.2 Processing Link Data
When the EyeLink library receives data from the tracker through the link, it
places it in a large data buffer called the queue. This can hold 4 to 10 seconds of
data, and delivers samples and events in the order they were received.
A data item can be read from the queue by calling eyelink_get_next_data(),
which returns a code for the event type. The value SAMPLE_TYPE is returned if a
sample was read from the queue. Otherwise, an event was read from the queue
Windows EyeLink Programming (8/16/2002) 2002 SR Research Ltd.
98
and a value is returned that identifies the event. The header file eye_data.h
contains a list of constants to identify the event codes.
If 0 was returned, the data queue was empty. This could mean that all data has
been played back, or simply that the link is busy transferring more data. We can
use eyelink_current_mode() to test if playback is done.
i = eyelink_get_next_data(NULL); // check for new data item
if(i==0)
// 0: no new data
{
// Check if playback has completed
if((eyelink_current_mode() & IN_PLAYBACK_MODE)==0) break;
}
If the item read by eyelink_get_next_data() was one we want to process, it
can be copied into a buffer by eyelink_get_float_data(). This buffer should
be a structure of type FSAMPLE for samples, and ALLF_DATA for either samples
or events. These types are defined in eye_data.h.
It is important to remember that data sent over the link does not arrive in strict
time sequence. Typically, eye events (such as STARTSACC and ENDFIX) arrive
up to 32 milliseconds after the corresponding samples, and messages and
buttons may arrive before a sample with the same time code.
15.5.3 Processing Events
In w32_playback_trial.c, fixations will be plotted by drawing an ‘F’ at the average
gaze position. The ENDFIX event is produced at the end of each fixation, and
contains the summary data for gaze during the fixation. The event data is read
from the fe (floating-point eye data) field of the ALLF_DATA type, and the average
x and y gaze positions are in the gavx and gavy subfields respectively.
if(i == ENDFIX)
// Was
{
eyelink_get_float_data(&evt);
if(evt.fe.eye == eye_used)
{
graphic_printf(black, -1,
}
}
it a fixation event ?
// PLOT FIXATIONS
// get copy of fixation event
// is it the eye we are plotting?
// Black "F" at average position
1, evt.fe.gavx, evt.fe.gavy, "F");
It is important to check which eye produced the ENDFIX event. When recording
binocularly, both eyes produce separate ENDFIX events, so we must select those
from the eye we are plotting gaze position for. The eye to monitor is determined
during processing of samples.
15.5.4 Detecting Lost Data
It is possible that data may be lost, either during recording with real-time data
enabled, or during playback. This might happen because of a lost link packet or
because data was not read fast enough (data is stored in a large queue that can
hold 2 to 10 seconds of data, and once it is full the oldest data is discarded to
Windows EyeLink Programming (8/16/2002) 2002 SR Research Ltd.
99
make room for new data). Versions 2.1 and higher of the library will mark data
loss
by
causing
a
LOST_DATA_EVENT
to
be
returned
by
eyelink_get_next_data() at the point in the data stream where data is
missing. This event is defined in the latest version of eye_data.h, and the
#ifdef test in the code below ensures compatibility with older versions of this
file.
#ifdef LOST_DATA_EVENT
// AVAILABLE IN V2.1 OR LATER DLL ONLY
else if(i == LOST_DATA_EVENT)
{
alert_printf("Lost data in sequence");
}
#endif
15.5.5 Processing Samples
Samples are plotted by connecting them with lines to show the path of the
subject’s gaze on the display. The gaze position for the monitored eye is
extracted from the sample, along with the pupil size. During a blink, pupil size
will be zero, and both x and y gaze position components will be the value
MISSING_DATA. Otherwise, we connect the current and last gaze position with a
line.
else if(i==SAMPLE_TYPE)
{
eyelink_get_float_data(&evt); //
if(eye_used != -1)
//
{
msec_delay(1000/sample_rate);
x = evt.fs.gx[eye_used];
y = evt.fs.gy[eye_used];
get copy of sample
do we know which eye yet?
// delay for real-time playback
// get gaze position from sample
// check if pupil is present
if(x!=MISSING_DATA && y!=MISSING_DATA && evt.fs.pa[eye_used]>0 )
{
if(last_sam_x != MISSING_DATA)
{
// connect samples with line
MoveToEx(hdc, last_sam_x, last_sam_y, NULL);
LineTo(hdc, x, y);
}
last_sam_x = x;
// record position for next line
last_sam_y = y;
}
else
// no pupil present: must be in blink
{
last_sam_x = MISSING;
// don’t draw a line
}
}
Playback data arrives much more quickly than it was recorded. You can take as
long as you want to process each data item during playback, because the
EyeLink library controls data flow for you. To approximate the original timing of
the data, we a delay of 2 or 4 milliseconds after each sample—this could be
improved by using the timestamp available for each sample.
Windows EyeLink Programming (8/16/2002) 2002 SR Research Ltd.
100
16. “GCWindow” Template
The most useful real-time experiment is a gaze-contingent display, where the
part of the display the subject is looking at is changed, or where the entire
display is modified depending on the location of gaze. These manipulations
require high sampling rates and low delay, which the EyeLink tracker can deliver
through the link.
You should run this experiment at as high a display refresh rate as possible (at
least 120 Hz). You may have to decrease the display resolution to 800x600 or
even 640x480 to reach the highest refresh rates, depending on your monitor and
display card and driver. Higher refresh rates mean lower delays between eye
movements and the motion of the window.
This template demonstrates how to use the link’s real-time gaze-position data to
display a gaze-contingent window. This is an area centered on the point of gaze
that shows a foreground image, while areas outside the window show the
background image. You supply full-screen sized bitmaps for these, and call the
eyelink_exptkit function redraw_gc_window() to update the display.
The
template demonstrates this window with text and pictures.
16.1 Gaze-Contingent Window Issues
The gaze-contingent window in this template can be used to produce movingwindow and masking paradigms. It is not intended for boundary paradigms,
however.
16.1.1 Fast Updates
The window code in gcwindow.c operates by copying areas from a foreground
bitmap to draw within the window, and from a background bitmap to draw
outside the window. Once the window and background are initially drawn, the
code needs only to redraw those parts of the window or background that changed
due to window motion. Even during saccades, only a small fraction of the
window area will need to be updated because the window is updated every 2 or 4
milliseconds.
The first time the window is drawn, both the background and window are
completely drawn. This takes much longer than the incremental updates during
window motion, and is similar to the time it takes to copy a bitmap to the entire
display. This depends on your CPU speed, VGA card, and display mode. If the
window is hidden, or drawn after being hidden, it will also take more time to
Windows EyeLink Programming (8/16/2002) 2002 SR Research Ltd.
101
draw. This is also true if the window movement between updates is larger than
the window size.
At high display resolutions (where pixels are as small as 0.02°), eye tracker noise
and microsaccades can cause “jitter” of the window, which makes the edges of
the window more visible. This constant drawing also makes Windows XP less
responsive. The gaze contingent window code implements a “deadband” filter to
remove the jitter while not adding any effective delay. This filter can be
visualized as a washer on a tabletop being moved by a pencil through its hole—
the washer only moves when the pencil reaches the sides of the hole, and small
motions within the hole are ignored. The deadband filter is set to 0.1°, which
results in a negligible error in window position.
16.1.2 Windowing and Masking
The window can be used for two purposes: to show new information at the fovea,
or to mask information from the fovea. When initializing the window, you must
specify which operation the window is performing. The window code uses this to
optimize its drawing to pass the minimum foveal information. This is done by
erasing unwanted sections of the window first when showing new information,
and by drawing new sections of the window (mask) first when masking foveal
information. The effect is most important during large saccades.
16.1.3 Eye Tracker Data Delays
An important issue for gaze-contingent displays is the system delay from an eye
movement to a display change. There are three elements to this delay: the eye
tracker delay, the drawing delay, and the display delay.
The EyeLink tracker delay from an eye movement to data available by
eyelink_newest_sample() is shown in the table below. This delay includes a
time of ½ sample, which is the average delay from an eye movement to the time
the camera takes an image. Note that this delay only affects the latency of data
available from the link—sample timestamps are still accurate to the time the
camera imaged the eye.
It is not recommended to disable the heuristic filter for the EyeLink I tracker, as
this will increase likelihood of false saccades in the output data. The EyeLink II
tracker has separate link and file filter settings, so the link filter can be disabled
without affecting recorded data. The heuristic filter setting is controlled by the
heuristic_filter command, sent to the tracker by the eyecmd_printf()
function. (See the reference section of this manual for information on the
EyeLink tracker configuration commands). The heuristic filter is automatically
re-enabled at the end of each recording session, so needs to be explicitly changed
for each trial.
Windows EyeLink Programming (8/16/2002) 2002 SR Research Ltd.
102
Mode
Delay
Notes
500 Hz, heuristic 3 ms
filter off
EyeLink II only, high jitter
500 Hz, level 1 5 ms
heuristic filter
EyeLink II only
500 Hz, level 2 7 ms
heuristic filter
EyeLink II only, minimizes jitter
250 Hz, no filter
EyeLink I, heuristic filter off (high jitter)
6 ms
EyeLink II, heuristic filter off (high jitter)
250 Hz, level 1 10 ms
heuristic filter
250 Hz, level 2 14 ms
heuristic filter
EyeLink I, heuristic filter on
EyeLink II, standard heuristic filter
EyeLink II only, minimizes jitter
16.1.4 Display Delays
The second component of the delay is the time to draw the new gaze-contingent
window, and for the changed image data to appear on the monitor. The drawing
delay is the time from new data being read until drawing is completed. This
depends on CPU speed, VGA card, and display resolution. This is usually less
than 1 millisecond for typical saccades using a 10° gaze-contingent window, as
only small sections of the window are erased and redrawn. This delay will be
higher for large display changes, such as hiding or re-displaying a large window.
In any case, the delay will be less that the full-screen bitmap copy time, as
reported by the systests application..
The final delay is caused by the time it takes to read out the image from the VGA
card’s memory to the monitor. This takes at most one refresh period, ranging
from 17 milliseconds (for a 60 Hz display) to 6 milliseconds (for a 160 Hz display).
The gcwindow sample experiment redraws the window whenever new eye position
data in available and does not wait for a display refresh, which reduces the
average delay to ½ of a refresh period. This unsynchronized drawing does not
cause any issues because only sections of the window that have changed are
redrawn—only a few pixels are changed even during saccades.
The average delay for a gaze-contingent display therefore can be as low as 7
milliseconds (for 500 Hz sample rate, no filter, and a 160 Hz refresh rate). Worstcase delays will be higher by ½ refresh period and 1 sample, or 15 milliseconds.
Windows EyeLink Programming (8/16/2002) 2002 SR Research Ltd.
103
This delay has been confirmed using an electronic artificial pupil and a light
sensor attached to a monitor.
16.2 Gaze-Contingent Window Implementation
This template demonstrates how to use the link’s real-time gaze-position data to
display a gaze-contingent window. This is an area centered on the point of gaze
that shows a foreground image, while areas outside the window show the
background image. You supply full-screen sized bitmaps for these, and call the
eyelink_exptkit function redraw_gcwindow() to update the display.
16.2.1 Initializing Gaze-Contingent Window
The window is rectangular in shape, and may be set to extend completely across
the display horizontally or vertically, and to any size. The size of the display is
initially set by a call to initialize_gc_window(), which must be called before
the window is drawn for the first time. The syntax of the call is:
int initialize_gc_window( int wwidth,
HBITMAP fgbm,
HWND window,
int is_mask,
int wheight,
HBITMAP bgbm,
RECT disp_rect,
int deadband);
The parameters of the call are:
Windows EyeLink Programming (8/16/2002) 2002 SR Research Ltd.
104
wwidth
The width of the window, in pixels. If –1, the window will extend
the entire width of the display.
wheight
The height of the window, in pixels. If –1, the window will
extend the entire height of the display.
fgbm
The bitmap that will appear inside the window.
bgbm
This bitmap will fill the areas outside the window. This bitmap
will be copied to the entire display the first time the window is
drawn.
window
The Windows window in which the display is being drawn. This
should be the handle of your experiment window, or NULL.
disp_rect
The left, top, right, and bottom edges of the area to draw the
gaze-continent window in. Usually these will be the sides of
your experiment window.
is_mask
Set to 0 if the window is revealing information to the fovea, or 1
if the window is a mask that is hiding information.
deadband
Pixels of noise reduction applied to the window motion. This is
not an averaging filter, but simply ignores data that would move
the window slightly from its current position. A typical value is
0.1° (SCRWIDTH/300), which removes pixel-threshold jitter
while not significantly affecting delay or position.
16.2.2 Drawing the Gaze-Contingent Window
The gaze-contingent window is drawn, moved, and erased by calling
draw_gc_window().
The first time this function is called after
initialize_gc_window(), it draws the background as well as the window. This
takes about the same time as copying a bitmap that fills the entire display,
which is considerably more time than simply moving the window.
The
background is always drawn around the window, then the window is filled in.
On subsequent calls, the window is moved by copying changed regions of the
display from foreground and background bitmaps as required. The window is
always drawn centered on the supplied position, and is clipped by the edges of
the display. This position can be offset from gaze position if an asymmetrical
window is desired.
The window can be erased by supplying the value
MISSING_VALUE (defined in eye_data.h) for the X or Y coordinate. This could be
used to erase the window during blinks, but this will cause objectionable
flickering.
The syntax of the call is:
Windows EyeLink Programming (8/16/2002) 2002 SR Research Ltd.
105
int draw_gc_window( int x,
int y );
The parameters of the call are:
X
The horizontal pixel coordinates of the center of the window. If
MISSING_VALUE, the window is erased.
Y
The vertical pixel coordinates of the center of the window. If
MISSING_VALUE, the window is erased.
16.3 Source Files for “GCWindow”
These are the files used to build gcwindow. Those that were covered previously
are marked with an asterisk.
w32_demo.h *
Declarations to link together the template
experiment files. Most of the declarations in this file
can be used in your experiments.
w32_demo_main.c *
WinMain() function, setup and shutdown link and
graphics, open EDF file. This file is unchanged for
all templates, and can be used with small changes
in your experiments.
w32_demo_window.c *
Implements the full-screen window used for
calibration, validation and presentation. This file is
unchanged for all templates, and can be used
without changes in your experiments.
w32_gcwindow_trials.c
Called to run a block of trials for the “gcwindow”
template. Performs system setup at the start of
each block, then runs the trials. Handles standard
return codes from trials to allow trial skip, repeat,
and experiment abort. This file creates multiple
stimuli: text and pictures.
w32_gcwindow_trial.c
Implements a trial with a real-time gaze-contingent
window, displayed using two bitmaps.
w32_gcwindow.c
Source code for rectangular gaze-contingent window
drawing. This is already present in the
eyelink_exptkit DLL, but linking this code overrides
the DLL version.
w32_gcwindow_trial.c
Implements a trial with a real-time gaze-contingent
Windows EyeLink Programming (8/16/2002) 2002 SR Research Ltd.
106
window, displayed using two bitmaps.
w32_text_support.c *
Implements a simple interface for font creation and
printing. This is a support module that you can
link into your experiments.
w32_text_bitmap.c *
Draw left-justified multiple-line text pages. Creates
full-screen bitmaps of formatted text. This is a
support module that you can link into your
experiments.
w32_freeimage_bitmap.c
Loads any of a number of image file formats using
the “freeimage” library, creating a device-dependent
bitmap from it. The picture can be loaded to a
bitmap matched in size, or a full-screen bitmap can
be created and the image resized to fill it.
freeimage.h
The “freeimage” library (www.6ixsoft.com). This is a
freeware graphics file library.
freeimage.dll
freeimage.lib
16.4 Analysis of “w32_gcwindow_trials.c”
There are 5 trials to demonstrate different types of gaze-contingent window
conditions, two using text and three using pictures. This requires some care
with background colors. The code for each type of trail setup is similar to the
modules w32_text_trials.c and w32_picture_trials.c.
16.4.1 Setup and Block Loop
The block loop for w32_gcwindow_trials.c is similar to w32_data_trial.c from the
eyedata template, except that the brightness of the calibration background is
darker. This allows it to approximately match both the text and picture trials. In
an actual experiment, mixing stimuli with extreme differences in background
brightness is not optimal.
// INITIAL CALIBRATION: matches following trials
target_foreground_color = RGB(0,0,0);
// color of calibration target
target_background_color = RGB(200,200,200);
// background for calibration
set_calibration_colors(target_foreground_color, target_background_color);
if(SCRWIDTH!=800 || SCRHEIGHT!=600)
alert_printf("Display mode is not 800x600, resizing will slow loading.");
Windows EyeLink Programming (8/16/2002) 2002 SR Research Ltd.
107
We also alert the user if the video mode resolution does not match that of the
picture BMP files. This forces the images to be resized, which dramatically
increases the time to load them.
16.4.2 Setting Up Trials
The 5 trials each have differences in their setup, unlike previous templates. The
setup code for each trials is executed within a switch() statement.
For trials 1 and 2, two bitmaps of text are created, one with characters and the
other with “Xxx” words. A monospaced font (Courier) is used so that the two
displays overlap. For trial 1, the normal text is in the foreground, and the “Xxx”
text is outside the window.
switch(num)
{
// #1: gaze-contingent text, normal in window, "xx" outside
case 1:
eyecmd_printf("record_status_message 'GC TEXT (WINDOW)' ");
eyemsg_printf("TRIALID GCTXTW");
if(create_text_bitmaps())
{
eyemsg_printf("ERROR: could not create bitmap");
return SKIP_TRIAL;
}
bitmap_save_and_backdrop(fgbm, 0, 0, 0, 0, "text.png", "images",
SV_NOREPLACE, 0, 0, BX_NODITHER|BX_GRAYSCALE);
i = gc window trial(fgbm, bgbm, SCRWIDTH/4, SCRHEIGHT/3, 0, 60000L);
DeleteObject(fgbm);
DeleteObject(bgbm);
return i;
For trial 2, the bitmaps are reversed, and the window type is set to masking (fifth
argument to gc_window_trial() ).
case 2:
// #2: gaze-contingent text, "xx" in window, normal outside
eyecmd_printf("record_status_message 'GC TEXT (MASK)' ");
eyemsg_printf("TRIALID GCTXTM");
if(create_text_bitmaps())
{
eyemsg_printf("ERROR: could not create bitmap");
return SKIP_TRIAL;
}
bitmap_save_and_backdrop(fgbm, 0, 0, 0, 0, "text.png", "images",
SV_NOREPLACE, 0, 0, BX_NODITHER|BX_GRAYSCALE);
i = gc_window_trial(bgbm, fgbm, SCRWIDTH/4, SCRHEIGHT/3, 1, 60000L);
DeleteObject(fgbm);
DeleteObject(bgbm);
return i;
For trials 3, 4, and 5, a mixture of pictures and blank bitmaps are used. For
trial 3, the background bitmap is blank, and the foreground image is a picture (a
peripheral mask).
case 3:
// #3: Image, normal in window, blank outside
eyecmd_printf("record_status_message 'GC IMAGE (WINDOW)' ");
Windows EyeLink Programming (8/16/2002) 2002 SR Research Ltd.
108
eyemsg_printf("TRIALID GCTXTW");
if(create_image_bitmaps(0))
{
eyemsg_printf("ERROR: could not create bitmap");
return SKIP_TRIAL;
}
bitmap_to_backdrop(fgbm, 0, 0, 0, 0, 0, 0, BX_MAXCONTRAST|
(is_eyelink2?0:BX_GRAYSCALE));
// Gaze-contingent window, normal image
i = gc_window_trial(fgbm, bgbm, SCRWIDTH/4, SCRHEIGHT/3, 0, 60000L);
DeleteObject(fgbm);
DeleteObject(bgbm);
return i;
For trial 4, the foreground bitmap is a picture, and the background bitmap is the
picture (a foveal mask).
case 4:
// #4: Image, blank in window, normal outside
eyecmd_printf("record_status_message 'GC IMAGE (MASK)' ");
eyemsg_printf("TRIALID GCTXTM");
if(create_image_bitmaps(1))
{
eyemsg_printf("ERROR: could not create bitmap");
return SKIP_TRIAL;
}
bitmap_to_backdrop(fgbm, 0, 0, 0, 0, 0, 0, BX_MAXCONTRAST|
(is_eyelink2?0:BX_GRAYSCALE));
// Gaze-contingent window, masked image
i = gc_window_trial(fgbm, bgbm, SCRWIDTH/4, SCRHEIGHT/3, 1, 60000L);
DeleteObject(fgbm);
DeleteObject(bgbm);
return i;
In trial 5, the foreground bitmap is a clear image and the background is a
blurred image of the same picture (a simple variable-resolution display).
case 5:
// #5: Image, blurred outside window
eyecmd_printf("record_status_message 'GC IMAGE (BLURRED)' ");
eyemsg_printf("TRIALID GCTXTB");
if(create_image_bitmaps(2))
{
eyemsg_printf("ERROR: could not create bitmap");
return SKIP_TRIAL;
}
bitmap_to_backdrop(fgbm, 0, 0, 0, 0, 0, 0, BX_MAXCONTRAST|
(is_eyelink2?0:BX_GRAYSCALE));
// Gaze-contingent window, masked image
i = gc_window_trial(fgbm, bgbm, SCRWIDTH/4, SCRHEIGHT/3, 0, 60000L);
DeleteObject(fgbm);
DeleteObject(bgbm);
return i;
The function create_image_bitmaps() creates the proper set of bitmaps for
each trial, and checks that the bitmaps loaded properly. It also generates the
EyeLink graphics, and sets the background color for the drift correction to match
the images.
switch(type)
Windows EyeLink Programming (8/16/2002) 2002 SR Research Ltd.
109
{
case 0:
// blank background
fgbm = image_file_bitmap("images\\Sacrmeto.jpg", 0,
SCRWIDTH,SCRHEIGHT,target_background_color);
bgbm = blank_bitmap(target_background_color);
break;
case 1:
// blank fovea
fgbm = blank_bitmap(target_background_color);
bgbm = image_file_bitmap("images\\Sacrmeto.jpg", 0,
SCRWIDTH,SCRHEIGHT,target_background_color);
break;
case 2:
// normal and blurred bitmaps, stretched to fit display
fgbm = image_file_bitmap("images\\Sacrmeto.jpg", 0,
SCRWIDTH,SCRHEIGHT,target_background_color);
bgbm = image_file_bitmap("images\\Sac_blur.jpg", 0,
SCRWIDTH,SCRHEIGHT,target_background_color);
break;
}
For trials 3 and 5, the window contains the maximum information, and the
window masking type is set to 0 (erase before draw). In trial 4, the foreground
bitmap is blank, and the window masking type is set to 1 (draw before erase).
The masking type is set by the fifth argument to gc_window_trial().
16.5 Analysis of “w32_gcwindow_trial.c”
This module displays the gaze-contingent window. It uses special functions from
the eyelink_exptkit library to draw the window, ensuring fast updates.
16.5.1 Initializing the Window
Before starting recording, the gaze-contingent window is initialized. A RECT
structure is filled with the window size, and initialize_gc_window() is called
to set the display bitmaps, size, and masking type.
RECT display_rect;
display_rect.top
= dispinfo.top;
display_rect.bottom = dispinfo.bottom;
display_rect.left
= dispinfo.left;
display_rect.right = dispinfo.right;
initialize_gc_window(wwidth, wheight, fgbm, bgbm,
full_screen_window, display_rect, mask, 2);
16.5.2 Drawing the Window
The code for moving the gaze-contingent window is similar to that used to move
the gaze cursor in the eyedata template. However, we don’t copy any bitmap to
the display. The function redraw_gc_window() will draw the background the
first time it is called. We place code here to accurately mark the time of the
display onset, in case reaction time needs to be determined.
Windows EyeLink Programming (8/16/2002) 2002 SR Research Ltd.
110
There are two ways to handle a blink. The preferred way is to freeze the gazecontingent window by not calling redraw_gc_window() during the blink.
Another possibility is to erase the window, but this takes longer to draw and
causes distracting flickering, and is not recommended.
if(eyelink_newest_float_sample(NULL)>0) // check for new sample update
{
eyelink_newest_float_sample(&evt);
// get the sample
x = evt.fs.gx[eye_used];
// yes: get gaze position from sample
y = evt.fs.gy[eye_used];
if(x!=MISSING_DATA &&
y!=MISSING_DATA &&
evt.fs.pa[eye_used]>0)
// make sure pupil is present
{
if(first_display) // mark display start AFTER first drawing of window
{
wait_for_video_refresh(); // synchronize for accurate onset time
drawing_time = current_msec(); // time of retrace
trial_start = drawing_time;
// record the display onset time
}
redraw_gc_window(x, y);
// move window if visible
if(first_display) // mark display start AFTER first drawing of window
{
first_display = 0;
// mark that we’ve handled display onset
drawing_time = current_msec() - drawing_time;
eyemsg_printf("%d DISPLAY ON", drawing_time);
eyemsg_printf("SYNCTIME %d", drawing_time);
}
}
else
{
// Don't move window during blink
// To hide window, use:
redraw_gc_window(MISSING, MISSING);
}
}
16.6 Other Gaze-contingent Paradigms
16.6.1 Saccade Contingent Displays
Although the EyeLink system makes start-of-saccade and end-of-saccade events
available through the link, these will not usually be used for gaze-contingent
displays, unless the display change is to occur at a significant delay after the
saccade ends. The EyeLink on-line saccade detector uses a velocity-detection
algorithm, which adds 4 to 6 samples (16 to 24 msec) delay to the production of
the event, in addition to the regular (3 to 14 msec) sample delay from an eye
movement. The timestamps in saccade events are modified to indicate the true
time of the eye movement. As well, saccade size data is only available in the endof-saccade event, which is available after the saccade ends.
For a gaze-contingent saccade detector, we recommend the use of a positionbased algorithm computed from sample data. To detect the start of a saccade,
compute the difference between the position of the eye in a sample and the
Windows EyeLink Programming (8/16/2002) 2002 SR Research Ltd.
111
average position of the last 6 samples. Do this separately for X and Y directions,
then sum the absolute value of the differences and compare to a threshold of 0.3°
to 0.6°. This will detect saccade onset with a delay of 2 to 4 samples in addition
to the sample data delay, and is most sensitive to large (> 4°) saccades. This
delay is largely due to the time it takes the eye to move a significant distance at
the beginning of a saccade, so the detector will usually trip before the eye has
moved more than 1°.
16.6.2 Boundary Paradigms
In a boundary paradigm, all or part of the display changes depending on where
the locus of gaze is. For example, a line of text may change when the reader
proceeds past a critical word in the sentence.
The best way to implement this is to modify the display when at least two
samples occur within a region (in the reading case, the right side of the display).
The display change would be made by copying a bitmap to the display. To keep
the delay low, only part of the display should be copied from the bitmap, in this
case the line of text. The area that can be changed to meet a given delay depends
on your VGA card, CPU speed, and the display mode.
Windows EyeLink Programming (8/16/2002) 2002 SR Research Ltd.
112
17. "Control” Template
This template implements a computer interface that is controlled by the subject’s
gaze. The subject can select one of a grid of letters by fixating on it. The
template contains code to support many rectangular selection regions, but can
be simplified if gaze in a single region is all that needs to be detected.
The “Control” template is implemented using the module w32_gcontrol_trial.c. The
bitmap for the trial is a grid of letters, generated by w32_grid_bitmap.c, which is
not covered in this manual, as it is similar to other bitmap-drawing functions
discussed previously.
17.1 Source Files for “Control”
These are the files used to build “Control”. Those that were covered previously
are marked with an asterisk..
w32_demo.h *
Declarations to link together the template experiment
files. Most of the declarations in this file can be used
in your experiments.
w32_demo_main.c *
WinMain() function, setup and shutdown link and
graphics, open EDF file. This file is unchanged for all
templates, and can be used with small changes in
your experiments.
w32_demo_window.c *
Implements the full-screen window used for
calibration, validation and presentation. This file is
unchanged for all templates, and can be used without
changes in your experiments.
w32_control_trials.c
Called to run the trial: just calls the trial, and so is not
analyzed in this manual
w32_gcontrol_trial.c
Implements a gaze-controlled interface: creates and
displays a grid of letters, sets up an array of gazeactivated regions, and performs gaze-activated
selection.
Windows EyeLink Programming (8/16/2002) 2002 SR Research Ltd.
113
w32_grid_bitmap.c *
Creates a bitmap, containing a 5 by 5 grid of letters.
w32_text_support.c *
Implements a simple interface for font creation and
printing. This is a support module that you can link
into your experiments.
17.2 Analysis of “w32_gcontrol_trial.c”
This module implements a computer interface controlled by the subject’s gaze. A
grid of letters is displayed to the subject, each of which can be selected by
fixating it for at least 700 milliseconds. This demonstration also performs
“dynamic recentering”, where drift correction is performed concurrently with the
selection process.
The type of gaze control in this example is intended for multiple gaze-selection
regions, and long dwell threshold times. There is a substantial amount of extra
code added to the module that supports this. If your task is to detect when gaze
falls within one or two well-separated areas of the display, then there are simpler
methods then that discussed here. For example, a saccade to a target can be
detected by waiting for 5 to 10 samples where gaze position is within 2° of the
target. This is not suitable for detecting if gaze leaves an area, however.
17.2.1 Fixation Update Events
A common use for real-time link data is to monitor eye position, to ensure the
subject’s gaze stays within a prescribed location throughout a trial. The obvious
method of checking that each gaze-position sample falls within the prescribed
region may not work, because blinks may cause gaze position to change rapidly,
giving a false indication. Monitoring average gaze position during fixations is
more reliable, as this excludes data from blinks and saccades, but this data is
not available until the end of the fixation.
The EyeLink tracker implements fixation update (FIXUPDATE) events, which
report the average gaze position during a period of a fixation. By configuring the
tracker to produce a FIXUPDATE event every 50 to 100 milliseconds, fixation
position is monitored in an efficient and timely manner. By looking at events
instead of samples, the amount of processing required is also reduced. Blinks
also are automatically excluded, and the sum of the time of fixation events in a
region represent the true time of continuous gaze.
Windows EyeLink Programming (8/16/2002) 2002 SR Research Ltd.
114
17.2.2 Enabling Fixation Updates
By default, fixation updates are disabled. Commands must be sent to enable
fixation updates before recording is started, and to disable them afterwards. This
code produces fixation updates every 50 milliseconds, and enables only
FIXUPDATE events to be sent by the link (other events may be enabled if desired
as well):
/* Configure eyelink to send fixation updates every 50 msec */
eyecmd_printf("link_event_filter = LEFT,RIGHT,FIXUPDATE");
eyecmd_printf("fixation_update_interval = 50");
eyecmd_printf("fixation_update_accumulate = 50");
/* Start data recording to EDF file, BEFORE DISPLAY. */
/* You should always start recording 50-100 msec before required */
/* otherwise you may lose a few msec of data */
error = start_recording(1,1,0,1);
Commands are added to the end_trial() function to disable fixation updates:
static void end_trial(void)
{
record_abort_hide();
/* hide display */
end_realtime_mode();
// NEW: ensure we release realtime lock
pump_delay(100);
// CHANGED: allow Windows to clean up
// while we record additional 100 msec of data
stop_recording();
// Reset data, disable fixation events
eyecmd_printf("link_event_filter = LEFT,RIGHT,FIXATION");
eyecmd_printf("fixation_update_interval = 0");
eyecmd_printf("fixation_update_accumulate = 0");
}
17.2.3 Processing Fixation Updates
The code to read FIXUPDATE events for the link is similar to that used in
w32_playback_trial.c, except that only events are processed:
i = eyelink_get_next_data(NULL);
// Check for data from link
if(i == FIXUPDATE)
// only process FIXUPDATE events
{
eyelink_get_float_data(&evt);
// get a copy of the FIXUPDATE event
if(evt.fe.eye == eye_used)
// only process if from correct eye
{
// Process average position and duration of the update
process_fixupdate(evt.fe.gavx, evt.fe.gavy,
// avg. position
evt.fe.entime-evt.fe.sttime); // duration
}
}
The function process_fixupdate() is passed the average x and y gaze data and
the total time accumulated during the fixation update, which may vary. Each
event will be processed to determine which letter’s region it falls within. The time
of consecutive fixation updates in a region is accumulated into the region’s dwell
field. If a fixation update does not fall into the currently accumulating region, it
is assumed that gaze has shifted and the total time in all regions is reset to zero.
To prevent noise or drift from inadvertently interrupting a good fixation, the first
event in a new region is discarded.
Windows EyeLink Programming (8/16/2002) 2002 SR Research Ltd.
115
Once the dwell time in a region exceeds the threshold, the letter is selected by
inverting its rdraw region. A drift correction is performed, based on the
difference between the average fixation position during selection, and the center
of the selection region. This assumes that the visual center of the stimulus in
the region is at the location set by the cx and cy fields of the region’s data. Each
drift correction may cause a jump in eye-position data, which can produce a false
saccade in the eye-movement record
void process_fixupdate(int x, int y, long dur)
{
int avgx, avgy;
int i = which_region(x, y);
// which region is gaze in
if(i == -1)
// NOT IN ANY REGION:
{
// allow one update outside of a region before
resetting
if(last_region == -1)
// 2 in a row: reset all regions
{
reset_regions();
}
}
else if(i == current_region)
// STILL IN CURRENT REGION
{
rgn[i].dwell += dur;
// accumulate time, position
rgn[i].avgxsum += dur * x;
rgn[i].avgysum += dur * y;
// did this region trigger yet?
if(rgn[i].dwell>dwell_threshold && !rgn[i].triggered)
{
trigger_region(i);
// TRIGGERED:
avgx = rgn[i].avgxsum / rgn[i].dwell; // compute avg. gaze position
avgy = rgn[i].avgysum / rgn[i].dwell;
// correct for drift (may cause false saccade in data)
eyecmd_printf("drift_correction %ld %ld %ld %ld",
(long)rgn[i].cx-avgx, (long)rgn[i].cy-avgy,
(long)rgn[i].cx, (long)rgn[i].cy);
// Log triggering to EDF file
eyemsg_printf("TRIGGER %d %ld %ld %ld %ld %ld",
i, avgx, avgy, rgn[i].cx, rgn[i].cy, rgn[i].dwell);
}
}
else if(i == last_region)
{
// TWO UPDATES OUTSIDE OF CURRENT REGION: SWITCH TO NEW REGION
reset_regions();
// clear and initialize accumulators
rgn[i].dwell = dur;
rgn[i].avgxsum = dur * x;
rgn[i].avgysum = dur * y;
current_region = i;
// now working with new region
}
last_region = i;
}
17.2.4 Multiple Selection Region Support
Each selection region is defined by a REGION structure. This defines the
rectangular area where it senses gaze, a rectangular area to highlight when
selected, and the expected gaze position during selected for use in drift
correction. It also contains accumulators for dwell time and gaze position.
Windows EyeLink Programming (8/16/2002) 2002 SR Research Ltd.
116
typedef struct {
int triggered;
long avgxsum; //
long avgysum;
long dwell; //
RECT rsense; //
RECT rdraw; //
int cx, cy; //
} REGION;
// is triggered
average position accumulators
total time in region
region for gaze
rectangle for invert
center for drift correction
REGION rgn[NREGIONS];
The selection regions are created by init_regions(), which creates regions to
match the display.
void init_regions(void)
{
int i;
int x,y;
for(i=0;i<NREGIONS;i++)
// For all regions:
{
// compute center of region
x = (i%5) * (SCRWIDTH / 5) + (SCRWIDTH / 10);
y = (i/5) * (SCRHEIGHT / 5) + (SCRHEIGHT / 10);
rgn[i].cx = x;
// record center for drift correction
rgn[i].cy = y;
SetRect(&(rgn[i].rdraw), x,y,x,y);
SetRect(&(rgn[i].rsense), x,y,x,y);
// define highlighting rectangle
InflateRect(&(rgn[i].rdraw), SCRWIDTH/30, SCRHEIGHT/22);
// define gaze-accumulation rectangle
InflateRect(&(rgn[i].rsense), SCRWIDTH/10, SCRHEIGHT/10);
}
}
When a fixation update event arrives, its gaze position is checked against all
selection regions:
int which_region(int x, int y)
{
int i;
POINT pt;
pt.x = x;
// set POINT with gaze location
pt.y = y;
for(i=0;i<NREGIONS;i++)
// scan all regions for gaze position match
if(PtInRect(&(rgn[i].rsense), pt)) return i;
return -1;
// not in any region
}
Finally, a mechanism is needed to update the highlighted region on the display.
In this example, the highlight stays on the selected region. It may be more
ergonomic to simply flash the region momentarily once selected.
void trigger_region(int region)
{
int i;
for(i=0;i<NREGIONS;i++)
// scan thru all regions
{
if(i==region)
// is this the new region?
{
if(rgn[i].triggered==0)
// highlight new region
invert_rect(&(rgn[i].rdraw));
Windows EyeLink Programming (8/16/2002) 2002 SR Research Ltd.
117
rgn[i].triggered = 1;
}
else
{
if(rgn[i].triggered)
// unhighlight old region
invert_rect(&(rgn[i].rdraw));
rgn[i].triggered = 0;
}
}
}
Windows EyeLink Programming (8/16/2002) 2002 SR Research Ltd.
118
18. “Dynamic” Template
The dynamic sample experiment is moderately complex, but very powerful. It
uses refresh-locked drawing to present dynamic, real-time displays, including
sinusoidal smooth pursuit and a saccade performance task. The display timing
achieved in both of these is extremely precise, and the source code was written
so that the programmer does not need to modify any time-critical drawing code
for most uses.
In addition, this template demonstrates one-dimensional
calibration which results in greater accuracy and faster setup, and shows how to
seamlessly integrate drift correction into the task.
You should run this experiment at as high a display refresh rate as possible (at
least 120 Hz). You may have to decrease the display resolution to 800x600 or
even 640x480 to reach the highest refresh rates, depending on your monitor and
display card and driver. Higher refresh rates mean smoother motion during
smooth pursuit, and better temporal resolution for displaying stimuli.
The code consists of several new modules.
The code that is specific to
experiments is largely isolated in one file, w32_dynamic_trials.c, which contains
the usual do_trials() function with the block-of-trials loop, and calls
do_dynamic_trial() to set up trial identifier and call the proper execution
functions. These are do_sine_trial() which executes a sinusoidal pursuit
trial, and do_saccadic_trial() which executes a saccadic trial using the gapstep-overlap paradigm.
Each of these functions then sets up a number of variables to define the trial,
and calls run_dynamic_trial(), supplying a background bitmap and a pointer
to a trial-specific “callback” function.
This function is called by
run_dynamic_trial() after each vertical retrace, to handle computing of target
positions and visibility, update the target position and visibility, and send any
required messages to the EDF file. These callback functions are fairly simple,
because almost all the work is handled by target-drawing code in w32_targets.c
and the realtime trial loop in w32_dynamic_trial.c.
Windows EyeLink Programming (8/16/2002) 2002 SR Research Ltd.
119
18.1 Source Files for “Dynamic”
These are the files used to build dynamic. Those that were covered previously are
marked with an asterisk..
w32_demo.h *
Declarations to link together the template experiment
files. Most of the declarations in this file can be used
in your experiments.
w32_demo_main.c *
WinMain() function, setup and shutdown link and
graphics, open EDF file. This file is unchanged for all
templates, and can be used with small changes in
your experiments.
w32_demo_window.c *
Implements the full-screen window used for
calibration, validation and presentation. This file is
unchanged for all templates, and can be used without
changes in your experiments.
w32_text_support.c *
Implements a simple interface for font creation and
printing. This is a support module that you can link
into your experiments.
w32_dynamic_trials.c
Called to run the trials, and implements setup and
callback functions for saccadic and smooth pursuit
trials. Implements 1-D calibration.
w32_dynamic_trial.c
Implements a real-time, refresh locked trial loop. This
includes monitoring of delayed or missed retrace to
ensure the quality of data from the experiment.
w32_targets.c
Creates a set of targets, which can have one of 3
shapes or can be hidden. Multiple targets may be
visible at the same time.
w32_targets.h
18.2 Analysis of “w32_targets.c”
This module implements a complete target graphics system, which can draw,
erase, and move multiple targets. This code will not be examined in detail, as it
should not have to be changed except to create new target sizes and styles. A set
of target “shapes” are created by create_shape() and initialize_targets(),
with shape 0 always being invisible. The set of available shapes may be
expanded by redefining NSHAPES and adding code to the switch() function in
create_shape() to draw the foreground of the new target image.
Windows EyeLink Programming (8/16/2002) 2002 SR Research Ltd.
120
Target shapes consist of a small bitmap, which has the target image on a
rectangular background. This entire bitmap, including the background, is copied
to the display when drawing the target. Since the target background will be
drawn it should match the background on which the targets will be displayed.
The foreground color of the targets will usually be white or red (the red phosphor
of most VGA monitors has very low persistence, which virtually eliminates the
“trail” left by moving targets.
Targets are erased by copying sections of a background bitmap to the display,
which should be assigned to the variable target_background_bitmap. This
bitmap is also copied to the display by run_dynamic_trial() before drift
correction.
Usually the background bitmap will be blanked to
target_background_color, but it may optionally contain cues or patterns.
These are the useful functions in w32_targets.c, extracted from w32_targets.h:
extern HBITMAP target_background_bitmap;
// bitmap used to erase targets
// Create the target patterns
// Targets: 0=none (used to clear), 1=0.5 degree disk, 2=\, 3=/
// redfine as eeded for your targets
int initialize_targets(COLORREF fgcolor, COLORREF bgcolor);
// call to delete target resources
void free_targets(void);
// draw target, using pattern n, centered at x, y
void draw_target(int n, int x, int y, int shape);
// erase target by erasing to background color
void erase_target(int n);
// call after screen erased so targets know they're not visible
void target_reset(void);
// handles moving target, changing shape,
// and hides it if shape = 0
void move_target(int n, int x, int y, int shape);
18.2.1 Modifying Target Shapes
The only modifications you should do to w32_targets.c are to add or change the
size or shape of targets—any other changes could cause the code to stop working
properly. These changes are made to the function create_shape(), and should
be limited to the sections of code shown below.
The modifiable section of create_shape() consists of two switch() statements
that set the size of the shapes and draw the foreground parts of the target shape
bitmaps:
switch(n)
{
case 0:
case 1:
// set size of target
// invible target
// filled circle
Windows EyeLink Programming (8/16/2002) 2002 SR Research Ltd.
121
case 2:
// "\" line
case 3:
// "/" line
default:
width = (SCRWIDTH/30.0)*0.5;
height = (SCRHEIGHT/22.5)*0.5;
break;
// all targets are 0.5 by 0.5 degrees
}
In the example, all shapes have a size of 0.5 by 0.5 degrees, as computed for a
30º display width (distance between display and subject is twice the display
width). You can change the values assigned to height and width to change the
bitmaps sizes, and these should be referenced when drawing the shape graphics
to auto-size them to the bitmaps.
The second section of code draws the graphics for the target—the bitmap has
already been created and cleared to the background color.
switch(n)
// draw the target bitmap
{
case 0:
// invible target
default:
break;
case 1:
// filled circle
oPen = SelectObject(mdc, CreatePen(PS_NULL, 0, 0));
// no outline
oBrush = SelectObject(mdc, CreateSolidBrush(fgcolor|0x02000000L));
Ellipse(mdc, 0, 0, width-1, height-1);
// draw filled ellipse
break;
case 2:
// "\" line
oPen = SelectObject(mdc,
// set line pen
CreatePen(PS_SOLID, SCRWIDTH/200, fgcolor|0x02000000L));
MoveToEx(mdc, 0, 0, NULL);
LineTo(mdc, width-1, height-1);
// draw "\"
break;
case 3:
// "/" line
oPen = SelectObject(mdc,
// set line pen
CreatePen(PS_SOLID, SCRWIDTH/200, fgcolor|0x02000000L));
MoveToEx(mdc, width-1, 0, NULL);
// draw "/"
LineTo(mdc, 0, height-1);
break;
}
Changes should be limited to adding new cases, and increasing the number of
shapes by redefining the constant NSHAPES. Shape 0 will never be drawn, and
should be left blank. The sample shapes draw a filled ellipse and two angles
thick lines. Note that line width adapts to the display resolution to keep
constant visibility at higher resolutions. Graphics should, if possible, be drawn
in fgcolor so that your experiments can easily set the color to match
experimental requirements.
18.3 Analysis of “w32_dynamic_trial.c”
This module implements a retrace-locked drawing trial in the function
run_dynamic_trial(). The only reason to modify this code would be to remove
the ability to terminate by a button press (which was included to allow skipping
long pursuit trials), or to modify or remove drift correction (this is NOT
Windows EyeLink Programming (8/16/2002) 2002 SR Research Ltd.
122
recommended, as saccadic and pursuit tasks are typically run in non-CR modes
which require drift correction before each trial).
The trial function requires three arguments:
// first argument is background bitmap for targets
// third argument is pointer to drawing function:
//
int drawfn(UINT32 t, int *x, int *y)
// where t = time from trial start in msec (-1 for initial target)
// x, y are pointers to integer to hold a reference position
//
which is usually center or fixation target X,Y for drift correction
// this function is called immediately after refresh,
// and must erase and draw targets and write out any messages
// this function returns 0 to continue, 1 to end trial
int run_dynamic_trial(HBITMAP hbm, UINT32 time_limit,
int(* drawfn)(UINT32 t, UINT32 dt, int *x, int *y))
The first argument is a background bitmap, which will be copied to the display
before drift correction, and over which the targets will be drawn (including the
drift correction target). The second argument is the trial timeout value in
milliseconds (this can be set to a very large number, and the drawing function
can be used to determine timeout accurately). The third function is a pointer to
a function that will handle retrace-locked drawing, sending messages, and
ending the trial—this will be discussed later.
The code of this trial function has been modified in a number of ways. First, the
drift correction loop now draws its own background and target, which causes the
drift correction to be integrated with the initial fixation of the trial. The
background is drawn by displaying the background bitmap—this should not
contain stimuli, but might contain static graphics that are visible throughout the
trial. After redrawing the whole display, reset_targets() must be called so
that targets will know that they are erased and may be redrawn later. Finally,
the drawing function is called with a time of 0 to display the initial fixation
target. The coordinates of this target are placed in the variables x and y, and
used to inform the eye tracker of the drift correction target.
Note that this redrawing is done within a loop, so it will be repeated if setup was
done instead of drift correction, as this will clear the display.
target_background_bitmap = hbm;
// DO PRE-TRIAL DRIFT CORRECTION
// We repeat if ESC key pressed to do setup.
// we predraw target for drift correction in this example
while(1)
{
// Check link often so we can exit if tracker stopped
if(!eyelink_is_connected()) return ABORT_EXPT;
// (re) draw display and target at starting point
display_bitmap(full_screen_window, hbm, 0, 0);
target_reset();
drawfn(0, 0, &x, &y);
// We drift correct at the current target location
// 3rd argument is 0 because we already drew the display
error = do_drift_correct(x, y, 0, 1);
Windows EyeLink Programming (8/16/2002) 2002 SR Research Ltd.
123
// repeat if ESC was pressed to access Setup menu
if(error!=27) break;
}
The next modification is to wait for the vertical retrace, then to use the drawing
function to modify the display. Additional code is provided to mark the time of
the first retrace in the trial as the trial start, and to check for delayed retrace
detection that might cause flickers or delayed display of stimuli.
wait_for_video_refresh();
ut = current_usec();
// microseconds for retrace delay test
t = current_msec();
// milliseconds for everything else
The first step is to wait for retrace, and record the time. This is also recorded in
microseconds for use in detecting delays.
if(trial_start == 0)
// is this the first time we draw?
{
trial_start = t;
// record the display onset time
drawfn(t, 0, &x, &y);
drawing_time = current_msec() - t;
eyemsg_printf("%d DISPLAY ON", drawing_time); // message for RT recording in
analysis
eyemsg_printf("SYNCTIME %d", drawing_time);
// marks zero-plot time for
EDFVIEW
}
else
// not first: just do drawing
{
if(drawfn(t, t-trial_start, &x, &y))
{
eyemsg_printf("TIMEOUT");
// message to log the timeout
end_trial();
// local function to stop recording
button = 0;
// trial result message is 0 if timeout
break;
// exit trial loop
}
}
Next, the drawing function is called. This is supplied the time of retrace (used to
determine message delays), the time from the trial start (used to determine time
in the drawing sequence), and pointers to variables to hold the primary fixation
target position (these are only used for drift correction). For the first call after
the start of the trial, the time of trial start is set to the time of the first retrace,
and messages are placed in the EDF file. As before, messages are only written
after drawing is finished, and the delay of the message from the retrace is
appended.
If the drawing function returned 1, the trial will immediately end with a timeout.
This allows trial end to be precisely synchronized to stimulus sequences.
// check if retrace detection delayed too much
if(last_retrace_time &&
ut-last_retrace_time > 1.2*1000000.0/dispinfo.refresh)
{
delayed_retrace_count++;
eyemsg_printf("DELAYED_RETRACE %1.2f",
((double)ut-(double)last_retrace_time)/(1000000.0/dispinfo.refresh)-1.0);
}
last_retrace_time = ut;
Windows EyeLink Programming (8/16/2002) 2002 SR Research Ltd.
124
Finally, the interval between display retrace times is checked. If this is more
than 120% of the expected retrace interval, it is likely that at least part of the top
of the display was refreshed before drawing began, or that a refresh cycle was
missed entirely. These errors are marked with a message reporting the delay in
fractions of a refresh period, and counted for later alerting of the experimenter.
18.4 Analysis of “w32_dynamic_trials.c”
This is the module where almost all of the experiment is defined and
implemented, and where you will make the changes required to adapt the
template for your own experiments. This module contains the block-of-trials loop
in run_trials(), and the trial setup and selector in do_trial(), which are
similar to those in other experiments.
One important difference is that this template uses horizontal-only calibration,
which requires only 4 fixations which is ideal for use with neurologically impaired
subjects. The following code is added to run_trials() before tracker setup,
which sets the vertical position for calibration, and sets the calibration type.
After this, vertical position of the gaze data will be locked to this vertical position,
which should match the vertical position of your stimuli:
// SET UP FOR HORIZONTAL-ONLY CALIBRATION
eyecmd_printf("horizontal_target_y = %d", SCRHEIGHT/2); // vertical position
eyecmd_printf("calibration_type = H3");
// Setup calibration type
The only differences is that run_trials() reports any delayed retrace drawing
events after the block is finished (if your experiment has multiple blocks, this
should be moved to the end of the experiment). The trial dispatch function
do_trial() also uses lookup tables for trial titles and TRIALID messages.
Each type of trial is implemented by a trial setup function and a drawing
function. The setup function sets up variables used by the drawing function,
creates targets and the background bitmap, and calls run_dynamic_trial().
The
drawing
function
is
then
called
every
vertical
retrace
by
run_dynamic_trial(), and performs drawing based on the time from the start
of trial, places messages in the EDF file to record significant drawing events for
analysis, and determines if the end of the trial has been reached.
18.4.1 Saccadic Trial Setup
The function do_saccadic_trial() sets up for each trial in a gap-step-overlap
paradigm. The first step is to create a blank background bitmap and initialize
the target shapes (if these do not change, this could be done once for the entire
experiment, instead of for each trial). Next, the interval between the saccadic
goal target appearing and the fixation target disappearing is computed—if
negative, the fixation target disappears before the goal target onset. The position
Windows EyeLink Programming (8/16/2002) 2002 SR Research Ltd.
125
of the fixation and goal targets are next calculated, adapting to display resolution
to cause a saccade of the desired amplitude to the left or right. The last step of
the setup is to draw reference graphics to the eye tracker display—in this case, a
box at the position of each target.
INT32 overlap_interval = 200;
UINT32 prestep_delay = 600;
UINT32 trial_duration = 2000;
int
int
int
int
fixation_x;
fixation_y;
goal_x;
goal_y;
// gap <0, overlap >0
// time from trial start to move
// total trial duration
// position of initial fixation
target
// position of final saccade target
// gso = -1 for gap, 0 for step, 1 for overlap
// dir = 0 for left, 1 for right
int do_saccadic_trial(int gso, int dir)
{
int i;
HBITMAP background;
// blank background bitmap
background = blank_bitmap(target_background_color);
if(!background) return TRIAL_ERROR;
// white targets (for visibility)
initialize_targets(RGB(200, 200, 200), target_background_color);
overlap_interval = 200 * gso;
fixation_x = SCRWIDTH/2;
fixation_y = SCRHEIGHT/2;
// gap <0, overlap >0
// position of initial fixation
target
// position of goal (10 deg. saccade)
goal_x = fixation_x + (dir ? SCRWIDTH/3 : -SCRWIDTH/3);
goal_y = fixation_y;
set_offline_mode();
// Must be offline to draw to EyeLink screen
eyecmd_printf("clear_screen 0");
// clear tracker display
// add boxes at fixation goal targets
eyecmd_printf("draw_filled_box %d %d %d %d 7", fixation_x-16, fixation_y-16,
fixation_x+16, fixation_y+16);
eyecmd_printf("draw_filled_box %d %d %d %d 7", goal_x-16, goal_y-16,
goal_x+16, goal_y+16);
// run sequence and trial
i = run_dynamic_trial(background, 200*1000L, saccadic_drawing);
// clean up background bitmap
DeleteObject(background);
free_targets();
return i;
}
The saccadic trial is then executed by calling run_dynamic_trial(), passing it
the background bitmap and the drawing function for saccadic trials. Finally, we
delete the targets and background bitmap, and return the result code from the
trial.
18.4.2 Saccadic Trial Drawing Function
The drawing function saccadic_drawing() is called after each vertical retrace to
create the display. For the saccadic trials, this involves deciding when the
Windows EyeLink Programming (8/16/2002) 2002 SR Research Ltd.
126
fixation and saccadic targets will become visible or be hidden, and reporting
these events via messages in the EDF file.
The drawing code for saccadic trials is fairly straightforward, which was the goal
of all the support code in this template. First, the visibility of the fixation target
is determined by comparing the time after the start of the trial (dt) to the
computed delay for fixation target offset. The fixation target is redrawn, and the
process is repeated for the saccadic goal target. Note that move_target() may
be called even if the target has not changed state, as this function will not do any
drawing unless the shape, visibility, or position of the target has changed.
// compute fixation visibility
prestep_delay+overlap_interval) ? 1 : 0;
// draw or hide fixation target
move_target(0, fixation_x, fixation_y, fv);
fv = (dt <
// compute goal visibility
gv = (dt >= prestep_delay) ? 1 : 0;
// draw or hide goal target
move_target(1, goal_x, goal_y, gv);
GdiFlush();
// do only after both draws
After drawing, we can output messages without causing delays in drawing the
stimuli. We output messages only if the state of the target has changed from the
values stored from the previous call. The text of the messages simply represents
the expected change in target appearance. Note that the messages in this
example are NOT standard messages that are automatically processed by
analysis tools, and would require writing an ASC file analysis program to use
them.
if(dt > 0) // no message for initial setup
{
if(fv != fixation_visible) // mark fixation offset
eyemsg_printf("%d HIDEFIX", current_msec()-t);
if(gv != goal_visible)
// mark target onset
eyemsg_printf("%d SHOWGOAL", current_msec()-t);
}
fixation_visible = fv;
goal_visible = gv;
// record state for change detection
Finally, we send the fixation target position back to run_dynamic_trial() for use in
drift correction, and check to see if the trial is completed.
if(xp) *xp = fixation_x;
if(yp) *yp = fixation_y;
// return fixation point location
// check if trial timed out
if(dt > trial_duration)
return 1;
else
return 0;
}
Windows EyeLink Programming (8/16/2002) 2002 SR Research Ltd.
127
18.4.3 Pursuit Trial Setup
A second type of dynamic display trial implements sinusoidal smooth pursuit,
where a target moves very smoothly and is tracked by the subject’s gaze. High
refresh rates and highly accurate positioning of the target are critical to produce
the solid, subjectively smooth motion required. Drawing the target at the time of
display refresh allows this to be achieved. This template implements sinusoidal
pursuit by computing target position in the retrace drawing function. In addition
can change the target appearance at random intervals, which has been found to
improve subject concentration and pursuit accuracy.
The code for sinusoidal pursuit is somewhat more complex than the previous
example, mostly because of the code for target switching. The basics are very
simple, and can be adapted for many pursuit patterns.
The function do_sine_trial() sets up for each trial in the sinusoidal pursuit
paradigm, and in general follows the steps used in the saccadic trial setup. The
first step is to create a blank background bitmap and initialize the target shapes
(if these do not change, this could be done once for the entire experiment, instead
of for each trial). The target is pure red, as we have found that most monitors
have extremely low persistence for the red phosphor, which eliminate the “trail”
left behind the moving target.
Next, the variables that set the frequency, phase (where the sinusoidal cycle
starts), the amplitude of the motion and the target switching interval are set.
(Phase of the sinusoid is in degrees, where 0º is at the center and moving right,
90º is at the right extreme of motion, 180º is at the center and moving left, and
270º is at the left extremum. Pursuit is usually begun at the left (270º) as the
target accelerates smoothly from this position. The last step of the setup is to
draw reference graphics to the eye tracker display—in this case, a box at the
center and each end of the pursuit motion, and a line along the axis of target
motion.
#define PI 3.14159
#define FRACT2RAD(x)
#define DEG2RAD(x)
(2*PI*(x))
((2*PI/360*(x))
// fraction of cycles-> radians
// degrees -> radians
int sine_amplitude;
// amplitude of sinusoid (pixels, center-to-left)
int sine_plot_x;
// center of sineusiod
int sine_plot_y;
float sine_frequency;
// sine cycles per second
float sine_start_phase; // in degrees, 0=center moving right
int sine_cycle_count;
UINT32 min_target_duration
UINT32 max_target_duration
UINT32 next_target_time;
int current_target;
= 2000;
// random target change interval
= 4000;
// time of last target switch
// current target used
UINT32 target_report_interval = 50; // report sine phase every 50 msec
UINT32 last_report_time;
/*********** SINUSOIDAL TRIAL SETUP AND RUN **********/
Windows EyeLink Programming (8/16/2002) 2002 SR Research Ltd.
128
// setup, run sinusiodal pursuit trial
// do_change controls target changes
int do_sine_trial(int do_change)
{
int i;
// blank background bitmap
HBITMAP background;
background = blank_bitmap(target_background_color);
if(!background) return TRIAL_ERROR;
// red targets (for minimal phosphor persistance)
initialize_targets(RGB(255, 0, 0), target_background_color);
sine_amplitude = SCRWIDTH/3;
sine_plot_x = SCRWIDTH/2;
sine_plot_y = SCRHEIGHT/2;
sine_frequency = 0.4;
sine_start_phase = 270;
sine_cycle_count = 10;
if(do_change)
{
current_target =
next_target_time
last_report_time
}
else
{
current_target =
next_target_time
last_report_time
}
// about 10 degrees for 20 deg sweep
// center of display
// 0,4 Hz, 2.5 sec/cycle
// start at left
// 25 seconds
// do we do target flip?
2;
= 0;
= 0;
// yes: set up for flipping
1;
= 0xFFFFFFFF;
= 0xFFFFFFFF;
// round target
// disable target flipping
set_offline_mode();
// Must be offline to draw to EyeLink screen
eyecmd_printf("clear_screen 0");
// clear tracker display
// add box at center
eyecmd_printf("draw_filled_box %d %d %d %d 7",
sine_plot_x-16, sine_plot_y-16,
sine_plot_x+16, sine_plot_y+16);
// add boxes at left, right extrema
eyecmd_printf("draw_filled_box %d %d %d %d 7",
sine_plot_x+sine_amplitude-16, sine_plot_y-16,
sine_plot_x+sine_amplitude+16, sine_plot_y+16);
eyecmd_printf("draw_filled_box %d %d %d %d 7",
sine_plot_x-sine_amplitude-16, sine_plot_y-16,
sine_plot_x-sine_amplitude+16, sine_plot_y+16);
// add expected track line
eyecmd_printf("draw_line %d %d %d %d 15",
sine_plot_x+sine_amplitude-16, sine_plot_y,
sine_plot_x-sine_amplitude+16, sine_plot_y);
i = run_dynamic_trial(background, 200*1000L, sinusoidal_drawing);
DeleteObject(background);
free_targets();
return i;
}
The pursuit trial is then executed by calling run_dynamic_trial(), passing it
the background bitmap and the drawing function for sinusoidal pursuit trials.
Finally, we delete the targets and background bitmap, and return the result code
from the trial.
Windows EyeLink Programming (8/16/2002) 2002 SR Research Ltd.
129
18.4.4 Pursuit Trial Drawing Function
The drawing function sinusoidal_drawing() is called after each vertical retrace
to create the display. For the sinusoidal pursuit trials, this involves computing
the new target location, checking whether the target shape needs to be changed
(and choosing a random duration for the next interval), redrawing the target, and
reporting target position and appearance changes via messages in the EDF file.
The drawing code is somewhat more complex than that for the saccadic trial,
mostly due to the target shape changing code.
int sinusoidal_drawing(UINT32 t, UINT32 dt, int *xp, int *yp)
{
float phase;
// phase in fractions of cycle
int tchange = 0;
int x, y;
// phase of sinusoid
phase = sine_start_phase/360 + (dt/1000.0)*sine_frequency;
// compute target position
x = sine_plot_x + sine_amplitude*sin(FRACT2RAD(phase));
y = sine_plot_y;
Computing the target position is relatively straightforward. First, the phase of
the target is computed, as a fraction of a cycle. The sine of this phase multiplied
by 2π gives a number between 1 and –1, which is multiplied by the amplitude of
the motion and added to the center position. The vertical position of the target is
fixed for horizontal motion.
Next, we check to see if the target shape change interval has expired. If so, a
new random interval is selected and a new shape is selected (this alternates
between 2 and 3 which are left and right tilted lines). After this, the target is
redrawn with the new position and appearance:
if(dt >= next_target_time)
{
current_target = (current_target==2) ? 3 : 2;
next_target_time = dt +
(rand()%(max_target_duration-min_target_duration))+min_target_duration;
tchange = 1;
}
move_target(0, x, y, current_target);
GdiFlush(); // do after drawing
After drawing, it is safe to send messages to the EDF file. In this example,
messages containing target position are sent every 50 milliseconds (the exact
interval depends on the refresh rate, since these messages are only sent after
retrace). The position message has the X and Y position, and the last digit is the
delay of the message from the retrace.
Similarly, target appearance change is
recorded are noted. NOTE: these messages are NOT standard messages and will
not be automatically supported by future analysis tools. An alternative method
of reporting position would be to give the parameters of the saccadic motion
(phase, amplitude, center position and frequency) at the start of the trial and to
report the phase of the sinusoid at regular intervals—this would allow analysis
Windows EyeLink Programming (8/16/2002) 2002 SR Research Ltd.
130
programs to regenerate the perceived track of the sinusoid precisely for each
sample.
if(dt-last_report_time >= target_report_interval)
{
last_report_time = dt;
eyemsg_printf("%d POSN %d %d", current_msec()-t, x, y);
}
if(tchange)
{
eyemsg_printf("%d TSET %d %d %d", current_msec()-t, current_target, x, y);
}
Finally, the position of the target is reported for drift correction at the start of the
trial, and the trial duration is checked. We have set the trial to end after a
precise number of cycles of sinusoidal motion in this example.
if(xp) *xp = x;
if(yp) *yp = y;
// return fixation point location
// check if proper number of cycles executed
if(floor(phase-sine_start_phase/360) >= sine_cycle_count)
return 1;
else
return 0;
}
18.5 Adapting the “Dynamic” template
The specific example trials (saccadic tasks and sinusoidal pursuit) used in this
example are easily modified to produce tasks that use similar stimuli, or to use
slightly different target sizes and colors. However, there are many different types
of paradigms that can benefit from refresh-locked drawing, and almost all of
these can be implemented by the background bitmap and drawing function
method implemented here. Some examples are given below:
•
Other types of smooth pursuit motion can be implemented, such as linear
motion, jumps, and so on.
•
Real-time gaze position data can be combined with the target motion to
implement open-loop pursuit paradigms (NOTE: this is not trivial to
implement, but is technically possible in terms of data availability and
display timing).
•
Saccadic tasks using multiple targets, distractors, cues, and other
methods can be implemented, using either target alone, the background
bitmaps, or multiple bitmaps (see below).
•
Instead of drawing targets, the drawing function can copy previously
drawn bitmaps to the display, which can implement serial presentations,
tachistoscopic displays, and even short animations. As long as only one
Windows EyeLink Programming (8/16/2002) 2002 SR Research Ltd.
131
bitmaps (or at most a few small bitmaps) are being copied, the new bitmap
will appear in the same refresh cycle it was drawn in. This is not perfectly
compatible with the use of the target support code, as drawing the bitmap
will cover up any targets, which cannot be redrawn until the next refresh.
It is of course possible to move the drawing code into the trial function, rather
than calling an external function. However, it is less easy to re-use such code,
which was the goal of this example.
Windows EyeLink Programming (8/16/2002) 2002 SR Research Ltd.
132
19. “Comm_simple” and “Comm_listener” Templates
The comm_simple and comm_listener projects are used together to show the
required elements for an experiment where one application (comm_simple) is
controlling the experiment, while a second application (comm_listener) opens a
broadcast connection to monitor and analyze the real-time data. The programs
are synchronized at startup by exchanging messages through the eyelink_exptkit
DLL, After this, comm_listener relies on the standard messages sent by
comm_simple for synchronization and to identify the trial being executed. This
data is simply used to reproduce the stimulus display, and to plot a gaze position
cursor.
To run this experiment, you will need two computers connected by a network
hub (a low-speed hub should be used, not a high-speed or multispeed hub) to the
eye tracker. The eye tracker must be running EyeLink I version 2.1 or higher, or
EyeLink II version 1.1 or higher. Start the comm_listener application first, then
the comm_simple application. Run through the comm_simple application in the
usual way, and note that the display of the comm_listener computer follows
along, with a gaze cursor during recording. After the comm_simple application
finishes, comm_listener will wait for another session to begin.
The comm_simple application first opens a connection to the eye tracker, then
checks for the presence of the comm_listener application, and sends a message
to inform comm_listener that the experiment has begun. The comm_listener
then opens a broadcast connection to the tracker, and watches for messages
and for the start and end of recording blocks. When comm_simple disconnects
from the eye tracker, comm_listener is disconnected as well.
The source code for comm_simple is derived from the simple template, with only
a few changes to enable messages and samples in real-time link data so these are
available to comm_listener. A few minor rearrangements of commands and
messages have also been made to ensure that messages are received by
comm_listener at the proper times. The source code for comm_listener is mostly
new, with plotting of the gaze cursor derived from the w32_data_trial.c file used
in the eyedata template.
Windows EyeLink Programming (8/16/2002) 2002 SR Research Ltd.
133
19.1 Source Files for “Comm_simple”
These are the files used to build comm_simple.
previously are marked with an asterisk..
Those that were covered
w32_demo.h *
Declarations to link together the template experiment
files. Most of the declarations in this file can be used
in your experiments.
w32_demo_window.c *
Implements the full-screen window used for
calibration, validation and presentation. This file is
unchanged for all templates, and can be used without
changes in your experiments.
w32_text_support.c *
Implements a simple interface for font creation and
printing. This is a support module that you can link
into your experiments.
w32_simple_trials.c
(Same file as used in the simple template) Called to
run a block of trials for the simple template. Performs
system setup at the start of each block, then runs the
trials. Handles standard return codes from trials to
allow trial skip, repeat, and experiment abort. This file
can be modified for your experiments, by replacing the
trial instance code.
comm_simple_main.c
A modified version of w32_demo_main.c, which
changes the tracker configuration to allow messages in
the real-time link data, and enables link data even
when not recording. It also exchanges synchronizing
messages with comm_listener.
comm_simple_trial.c
A modified version of w32_simple_trial.c, from the
simple template. The only changes are to enable
samples and events over the link while recording, and
to ensure that recording has ended before returning to
the trial loop.
19.2 Analysis of “comm_simple_main.c”
This module is almost identical to the file w32_demo_main.c used in most
previous templates, and only the differences will be discussed. These are in
tracker setup to enable messages in the link data, and a new function that
synchronizes startup with the comm_listener application.
Windows EyeLink Programming (8/16/2002) 2002 SR Research Ltd.
134
19.2.1 Synchronizing with comm_listener
After connection to the eye tracker, comm_simple must inform comm_listener
that it may open a broadcast connection to the eye tracker. First, it polls the link
for a remote named “comm_listener”, calling eyelink_poll_remotes and checking
for responses. If no remote named “comm_listener” is found, the application is
probably not started and the program aborts. If the remote is found, its address
is recorded and a message is sent to it. In this case, it is the name of the
application, but in a real experiment it might be used to transfer other
information.
// finds listener application
// sends it the experiment name and our display resolution
// returns 0 if OK, -1 if error
int check_for_listener(void)
{
int i, n;
char message[100];
ELINKNODE node; // this will hold application name and address
eyelink_poll_remotes();
pump_delay(500);
// poll network for any EyeLink applications
// give applications time to respond
n = eyelink_poll_responses(); // how many responses?
for(i=1;i<=n;i++)
// responses 1 to n are from other applications
{
if(eyelink_get_node(i, &node) < 0) return -1; // error: no such data
if(!_stricmp(node.name, "comm_listener"))
{
// Found COMM_LISTENER: now tell it we're ready
memcpy(listener_address, node.addr, sizeof(ELINKADDR));
eyelink_node_send(listener_address, "NAME comm_simple", 40);
// wait for "OK" reply
if(get_node_response(message, 1000) <= 0) return -1;
if(_stricmp(message, "OK")) return -1;
// wrong response?
return 0;
// all communication checks out.
}
}
return -1;
// no listener node found
}
Next, comm_simple waits for a message confirming that the message was
received. The process of sending data and waiting for an acknowledging message
prevents data from being lost, and could be extended to transferring multiple
messages by simply repeating the process. Because it might be necessary to wait
for a response at several places in the program a “helper” function has been
supplied that waits for reception of a message, and returns an error if no
message is received within a set time limit. This function could also be extended
to check that the message address matches that of the comm_listener
application.
ELINKADDR listener_address;
// Network address of listerner application
/******** OPEN COMMUNICATION WITH LISTENER (NEW) **********/
// node reception "helper" function
// receives text message from another application
// checks for time out (max wait of 'time' msec)
int get_node_response(char *buf, UINT32 time)
Windows EyeLink Programming (8/16/2002) 2002 SR Research Ltd.
135
{
UINT32 t = current_msec();
ELINKADDR msgaddr;
// address of message sender
// wait with timeout
while(current_time()-t < time)
{
// check for data
int i = eyelink_node_receive(msgaddr, buf);
if(i > 0) return i;
}
return -1;
// timeout failure
}
Finally, code is added to app_main() to call the check_for_listener() function.
We set our network name to “comm_simple” first—this would allow an alternative
means for a listening application to find or identify our application.
eyelink_set_name("comm_simple");
// NEW: set our network name
if(check_for_listener())
// check for COMM_LISTENER application
{
alert_printf("Could not communicate with COMM_LISTENER application.");
goto shutdown;
}
19.2.2 Enabling Messages in Link Data
The remaining changes are to the tracker setup code. This has been rearranged
so that the “DISPLAY_COORDS” message is sent after the link data configuration
of the tracker is completed, to ensure that the comm_listener application will see
this message. Alternatively, we could have re-sent this message later, or
included the display resolution in the message sent directly to comm_listener
earlier.
To enable messages in link data, the MESSAGE type is added to the list of event
types for the “link_event_filter” command. This is all that is required for
EyeLink II trackers. For EyeLink I trackers, messages must also be echoed as
link data between recording blocks.
This can be achieved using the
“link_nonrecord_events” command, which supports messages for tracker
versions 2.1 and later.
// NOTE: set contents before sending messages!
// set EDF file contents
eyecmd_printf("file_event_filter =
LEFT,RIGHT,FIXATION,SACCADE,BLINK,MESSAGE,BUTTON");
eyecmd_printf("file_sample_data =
LEFT,RIGHT,GAZE,AREA,GAZERES,STATUS");
// set link data (used for gaze cursor)
// NEW: pass message events for listener to use
eyecmd_printf("link_event_filter =
LEFT,RIGHT,FIXATION,SACCADE,BLINK,BUTTON,MESSAGE");
eyecmd_printf("link_sample_data =
LEFT,RIGHT,GAZE,GAZERES,AREA,STATUS");
// NEW: Allow EyeLink I (v2.1+) to echo messages back to listener
eyecmd_printf("link_nonrecord_events = BUTTONS, MESSAGES");
// Now configure tracker for display resolution
Windows EyeLink Programming (8/16/2002) 2002 SR Research Ltd.
136
eyecmd_printf("screen_pixel_coords = %ld %ld %ld %ld",
dispinfo.left, dispinfo.top,
dispinfo.right, dispinfo.bottom);
eyecmd_printf("calibration_type = HV9");
// Setup calibration type
eyemsg_printf("DISPLAY_COORDS %ld %ld %ld %ld", // Add resolution to EDF file
dispinfo.left, dispinfo.top,
dispinfo.right, dispinfo.bottom);
if(dispinfo.refresh>40)
eyemsg_printf("FRAMERATE %1.2f Hz.", dispinfo.refresh);
19.3 Analysis of “comm_simple_trial.c”
This module is almost identical to the file w32_simple_trial.c used in the simple
template, with only two differences. The first is that samples and events are
enabled by
start_recording(1,1,1,1), to make this data available to
comm_listener.
The second difference is to call the function
eyelink_wait_for_mode_ready() at the end of the trial. The reason for this is
that we called stop_recording() to end the trial, which simply sends a
command message to the eye tracker and does not wait for the tracker to actually
stop recording data. This means that the TRIALID message for the next trial
might actually be send before recording ends, and comm_listener would see it
arrive while processing eye data, and therefore not properly process it.
// Call this at the end of the trial, to handle special conditions
error = check_record_exit();
// ensure we are out of record mode before returning
// otherwise, TRIALID message could be send before
// comm_listener sees end of recording block data
eyelink_wait_for_mode_ready(500);
return error;
Windows EyeLink Programming (8/16/2002) 2002 SR Research Ltd.
137
19.4 Source Files for “Comm_listener”
These are the files used to build comm_listener.
previously are marked with an asterisk..
Those that were covered
w32_demo.h *
Declarations to link together the template experiment
files. Most of the declarations in this file can be used
in your experiments.
w32_demo_window.c *
Implements the full-screen window used for
calibration, validation and presentation. This file is
unchanged for all templates, and can be used without
changes in your experiments.
w32_text_support.c *
Implements a simple interface for font creation and
printing. This is a support module that you can link
into your experiments.
comm_listener_main.c
A modified version of w32_demo_main.c, which does
not do calibration setup or tracker setup. Instead, it
waits for a message from comm_simple, then opens a
broadcast connection and turns on link data
reception.
comm_listener_loop.c
New code, which listens to link data and messages. It
determines the display resolution of comm_simple
from DISPLAY_COORD messages, and reproduces the
trial stimulus from TRIALID messages. When a
recording block start is found in the data stream, it
transfers control to comm_listener_record.c.
comm_listener_record.c
A modified version of w32_data_trial.c, from the
eyedata template. This version does not start
recording or draw trial stimulus (this was done
previously in comm_listener_loop.c). It uses link data
to plot a gaze cursor, and displays gaze position and
time in the trial at the top of the display. Messages
are read to determine trial start time from the
SYNCTIME message. It exits when the end of the
recording block is found in the data stream.
19.5 Analysis of “comm_listener_main.c”
This module is derived from w32_demo_main.c, but uses only some of the
application initialization code from that file. The startup code for comm_listener
Windows EyeLink Programming (8/16/2002) 2002 SR Research Ltd.
138
does not need to configure calibration graphics, open a data file, or send
configuration commands to the eye tracker—this is all done by comm_simple.
Instead, it waits for a message from comm_simple, then opens a broadcast
connection and turns on link data reception.
First, the DLL is initialized so we can send and receive messages with
comm_simple. By calling open_eyelink_connection(-1), this is done without
opening a connection to the eye tracker. We also set our network name to
“comm_listener”, so that comm_simple will be able to find us:
// open DLL to allow unconnected communications
if(open_eyelink_connection(-1))
return -1;
// abort if we can't open link
eyelink_set_name("comm_listener");
// set our network name
After the usual display and application setup, we then wait for a message from
comm_simple, by calling wait_for_connection() (described below). Once we
have been contacted by comm_simple, a broadcast connection is opened and link
data reception is enabled. Finally, we tell comm_simple that we are ready to
proceed by sending an “OK” message, and call listening_loop() (defined in
comm_listener_loop.c). When comm_simple closes its connection to the eye
tracker, our broadcast connection is closed as well, and listening_loop()
returns.
while(1)
{
// Loop through one or more sessions
// wait for connection to listen to, or aborted
if(wait_for_connection()) goto shutdown;
// now we can start to listen in
if(eyelink_broadcast_open())
{
alert_printf("Cannot open broadcast connection to tracker");
goto shutdown;
}
// enable link data reception by EyeLink DLL
eyelink_reset_data(1);
// NOTE: this function can discard some link data
eyelink_data_switch(RECORD_LINK_SAMPLES | RECORD_LINK_EVENTS);
pump_delay(500);
// tell COM_SIMPLE it's OK to proceed
eyelink_node_send(connected_address, "OK", 10);
clear_full_screen_window(target_background_color);
get_new_font("Times Roman", SCRHEIGHT/32, 1);
// select a font
i = 1;
graphic_printf(target_foreground_color, -1, 0, SCRWIDTH/15,
i++*SCRHEIGHT/26,
"Listening in on link data and tracker mode...");
listening_loop();
// listen and process data and messages
// returns when COMM_SIMPLE closes connection to
tracker
if(break_pressed())
goto shutdown;
// make sure we're still alive
}
Windows EyeLink Programming (8/16/2002) 2002 SR Research Ltd.
139
The function wait_for_connection() displays a startup message, and waits for
a message from comm_simple. The contents of this message are ignored in this
example, but the ELINKADDR of comm_simple is saved for sending our reply.
ELINKADDR connected_address;
// address of comm_simple (from message)
/********* WAIT FOR A CONNECTION MESSAGE **********/
// waits for a inter-application message
// checks message, responds to complete connection
// this is a very simple example of data exchange
int wait_for_connection(void)
{
int i;
int first_pass = 1;
// draw display only after first failure
char message[100];
while(1)
// loop till a message received
{
i = eyelink_node_receive(connected_address, message);
if(i > 0)
// do we have a message?
{
// is it the expected application?
if(!_stricmp(message, "NAME comm_simple"))
{
// yes: send "OK" and proceed
return 0;
}
}
if(first_pass)
// If not, draw title screen
{
first_pass = 0; // don't draw more than once
clear_full_screen_window(target_background_color);
get_new_font("Times Roman", SCRHEIGHT/32, 1);
// select a font
i = 1;
graphic_printf(PALETTERGB(0,0,0), -1, 0, SCRWIDTH/15, i++*SCRHEIGHT/26,
"EyeLink Data Listener and Communication Demonstration");
graphic_printf(PALETTERGB(0,0,0), -1, 0, SCRWIDTH/15, i++*SCRHEIGHT/26,
"Copyright 2002 SR Research Ltd.");
i++;
graphic_printf(PALETTERGB(0,0,0), -1, 0, SCRWIDTH/15, i++*SCRHEIGHT/26,
"Waiting for COMM_SIMPLE application to send startup message...");
graphic_printf(PALETTERGB(0,0,0), -1, 0, SCRWIDTH/15, i++*SCRHEIGHT/26,
"Press ESC to quit");
}
i = getkey();
// check for exit
if(i==ESC_KEY || i==TERMINATE_KEY) return 1;
}
}
19.6 Analysis of “comm_listener_loop.c”
The core of this module is listening_loop(), which processes all link data
broadcast from the tracker between recording blocks. It processes all messages
(which are copies of those placed in the tracker data file by comm_simple) to
determine display resolution (from DISPLAY_COORD messages) and to reproduce
Windows EyeLink Programming (8/16/2002) 2002 SR Research Ltd.
140
the trial stimulus (from TRIALIAD messages). In an actual data-listener
application, the TRIALID message might be used to determine how to process
recording data.
When the start of a recording block is encountered in the data stream, the
function eyelink_in_data_block(1, 1) will return 1.
We then call
listener_record_display() to handle this data. Note that we look in the link
data stream for the start of recording, rather than monitoring the eye tracker
mode with eyelink_current_mode(), as this ensures that we get all data and
messages between the start and end of recording. This would not be as critical if
the code for reading eye data samples and events was included in the same loop
as code to read data between trials, as messages would always be processed
properly by keyword.
/*********** LISTENING LOOP **************/
void listening_loop(void)
{
int i;
int j = 6;
char trial_word[40];
char first_word[40];
// Trial stimulus word (from TRIALID message)
// first word in message (determines processing)
tracker_pixel_left = SCREEN_LEFT;
// set default display mapping
tracker_pixel_top = SCREEN_TOP;
tracker_pixel_right = SCREEN_RIGHT;
tracker_pixel_bottom = SCREEN_BOTTOM;
// Now we loop through processing any link data and messages
// The link will be closed when the COMM_SIMPLE application exits
// This will also close our broadcast connection and exit this loop
while(eyelink_is_connected())
{
ALLF_DATA data;
// link data or messages
// exit if ESC or ALT-F4 pressed
if(escape_pressed() || break_pressed()) return;
i = eyelink_get_next_data(NULL);
if(i == 0) continue;
// check for new data item
if(i == MESSAGEEVENT)
// message: check if we need the data
{
eyelink_get_float_data(&data);
sscanf(data.im.text, "%s", first_word); // get first word
if(!_stricmp(first_word, "DISPLAY_COORDS"))
{
// get COMM_SIMPLE computer display size
sscanf(data.im.text, "%*s %f %f %f %f",
&tracker_pixel_left, &tracker_pixel_top,
&tracker_pixel_right, &tracker_pixel_bottom);
}
else if(!_stricmp(first_word, "TRIALID"))
{
// get TRIALID information
sscanf(data.im.text, "%*s %s", trial_word);
// Draw stimulus (exactly as was done in COMM_SIMPLE)
// We scale font size for difference in display resolutions
get_new_font("Times Roman",
SCRWIDTH/25.0 *
SCRWIDTH/(tracker_pixel_right-tracker_pixel_left+1), 1);
Windows EyeLink Programming (8/16/2002) 2002 SR Research Ltd.
141
graphic_printf(target_foreground_color, -1, 1,
SCRWIDTH/2, SCRHEIGHT/2, "%s", trial_word);
}
}
// link data block opened for recording?
if(eyelink_in_data_block(1, 1))
{
listener_record_display(); // display gaze cursor on stimulus
// clear display at end of trial
clear_full_screen_window(target_background_color);
}
}
}
It is very important to know the display resolution of the computer running
comm_simple, as this sets the coordinate system that gaze data is reported in.
Without this, differences in display settings between computers could cause gaze
data to be plotted on the wrong position. This display information is read from
the DISPLAY_COORDS message sent during tracker configuration. In addition,
newer EyeLink trackers (EyeLink I version 2.1 and higher, and EyeLink II version
1.1 and higher) automatically insert a “GAZE_COORDS” message just before
each recording block. Two mapping functions are supplied to convert data in the
coordinates of the comm_simple display to local display coordinates:
/******* MAP TRACKER TO LOCAL DISPLAY ************/
float
float
float
float
tracker_pixel_left =
tracker_pixel_top =
tracker_pixel_right =
tracker_pixel_bottom =
0;
0;
0;
0;
// tracker gaze coord system
// used to remap gaze data
// to match our display resolution
// remap X, Y gaze coordinates to local display
float track2local_x(float x)
{
return SCREEN_LEFT +
(x - tracker_pixel_left) * SCRWIDTH /
(tracker_pixel_right - tracker_pixel_left + 1);
}
float track2local_y(float y)
{
return SCREEN_TOP +
(y - tracker_pixel_top) * SCRHEIGHT /
(tracker_pixel_bottom - tracker_pixel_top + 1);
}
19.7 Analysis of “comm_listener_record.c”
This module processes link data during a recording block. It plots samples as a
gaze cursor (using code from the w32_data_trial.c file in the eyedata template). It
also prints the time (from the start of the trial as reported by the SYNCTIME
message), and gaze position. It exits when eyelink_in_data_block(1, 1)
return 0, indicating that the end of the recording block has been encountered in
the data stream.
Windows EyeLink Programming (8/16/2002) 2002 SR Research Ltd.
142
The first thing listener_record_display() does is to determine which eye’s
data to plot. This is available from eyelink_eye_available(), since we know
we are in a recording block.
int listener_record_display(void)
{
ALLF_DATA evt;
UINT32 trial_start_time = 0;
unsigned key;
int eye_used;
// which eye to show gaze for
float x, y;
// gaze position
float ox=-1, oy=-1; // old gaze position (to determine change)
int i,j=1;
// create font for position display
get_new_font( "Arial", SCRWIDTH/50, 0);
gaze_cursor_drawn = 0;
// init gaze cursor state
eye_used = eyelink_eye_available();
if(eye_used==BINOCULAR) eye_used = LEFT_EYE;
// use left eye if both available
Next, we loop and process events and samples until the application is
terminated, the link is closed, or the recording block ends. The time of the trial
start is computed by subtracting the time delay (following the “SYNCTIME”
keyword) from the time of the message.
while(eyelink_is_connected())
{
key = getkey();
if(key==TERMINATE_KEY)
break;
// loop while record data availablemode
// Local keys/abort test
// test ALT-F4 or end of execution
if(!eyelink_in_data_block(1, 1)) break;
i = eyelink_get_next_data(NULL);
// stop if end of record data
// check for new data item
if(i == MESSAGEEVENT)
// message: check if we need the data
{
eyelink_get_float_data(&evt);
// get message
// get trial start time from "SYNCTIME" message
if(!_strnicmp(evt.im.text, "SYNCTIME", 8))
{
trial_start_time = 0;
// offset of 0, if none given
sscanf(evt.im.text, "%*s %d", &trial_start_time);
trial_start_time = evt.im.time - trial_start_time;
}
}
It is very useful to be able to detect gaps in the link data, which might indicate
link problems, lost data due to delays in processing, or too many messages
arriving for the Windows networking kernal to handle. This can be done using
the new LOST_DATA_EVENT event, which is inserted by the eyelink_exptkit DLL
in the data stream at the position of the gap:
#ifdef LOST_DATA_EVENT
// only available in V2.1 or later DLL
if(i == LOST_DATA_EVENT)
// marks lost data in stream
alert_printf("Some link data was lost");
#endif
Samples are processed in much the same way as in the w32_data_trial.c file in
the eyedata template. Before plotting the gaze cursor, the gaze position data is
Windows EyeLink Programming (8/16/2002) 2002 SR Research Ltd.
143
first converted from the coordinates of the comm_simple display to our display
coordinates. Gaze position data is printed in its original form. The time of the
sample is also printed, if the time of the trial start has been determined from the
SYNCTIME message.
// CODE FOR PLOTTING GAZE CURSOR
if(eyelink_newest_float_sample(NULL)>0) // new sample?
{
eyelink_newest_float_sample(&evt); // get the sample data
x = evt.fs.gx[eye_used];
// get gaze position from sample
y = evt.fs.gy[eye_used];
if(x!=MISSING_DATA && y!=MISSING_DATA &&
evt.fs.pa[eye_used]>0) // plot if not in blink
{
// plot in local coords
draw_gaze_cursor(track2local_x(x),
track2local_y(y));
// report gaze position (tracker coords)
if(ox!=x || oy!=y)
// only draw if changed
{
graphic_printf(target_foreground_color,
target_background_color,
0, SCRWIDTH*0.87, 0, " %4.0f ", x);
graphic_printf(target_foreground_color,
target_background_color,
0, SCRWIDTH*0.93, 0, " %4.0f ", y);
}
ox = x;
oy = y;
}
else
{
erase_gaze_cursor();
// hide cursor during blink
}
// print time from start of trial
graphic_printf(target_foreground_color,
target_background_color,
0, SCRWIDTH*0.75, 0, " % 8d ",
evt.fs.time-trial_start_time);
}
}
erase_gaze_cursor();
return 0;
// erase gaze cursor if visible
}
19.8 Extending the “comm_simple” and “comm_listener” Templates
These templates are designed as examples of how to write cooperating
applications, where one computer listens in on an experiment in progress. The
code here is designed to show the basic elements, such as startup
synchronization, enabling and processing link data, mapping gaze coordinates for
differences in display resolution, and exchanging messages between applications.
There are other ways to do achieve these operations: for example, messages could
be exchanged directly between applications to transfer display resolution or
TRIALID data, and the connection state of the tracker could be monitored instead
Windows EyeLink Programming (8/16/2002) 2002 SR Research Ltd.
144
of exchanging messages at startup (this will be used in the broadcast template,
discussed next).
Windows EyeLink Programming (8/16/2002) 2002 SR Research Ltd.
145
20. “Broadcast” Template
The broadcast project is designed to show some alternative ways of performing
multiple-computer experiments. These include:
•
Determining when a primary connection has been made to the tracker by
reading its state, without requiring a broadcast connection or messages
from the other application. This allows it to be used with any application
that outputs samples as realtime data.
•
Reading display resolution information directly from the eye tracker,
without reading messages.
•
Reproducing calibration targets, by monitoring the tracker mode and
calibration target updates. Calibration target positions are also remapped
to our display coordinates.
The concept behind this example is to have this application listen in on any
experiment, and to generate calibration and gaze-position displays, which would
be combined with a video record of the experiment computer’s display using a
VGA-to-video overlay device. (In fact, this demonstration would need some
enhancements to be used in this way, as the overlay it generates would probably
not align precisely with the video of the experiment computer’s display. This
could be fixed by changing the display mapping functions to incorporate
additional correction factors, but the new EyeLink video overlay generation
features obviate the need for such a program).
To run this experiment, you will need two computers connected by a network
hub (a low-speed hub should be used, not a high-speed or multispeed hub) to the
eye tracker. The eye tracker must be running EyeLink I version 2.1 or higher, or
EyeLink II version 1.1 or higher. Start the broadcast application first, then the
eyedata or gcwindow application on the other computer (or any application that
uses real-time sample data). Run through the eyedata application in the usual
way, and note that the display of the broadcast computer follows along,
displaying calibration targets and with a gaze cursor during recording. After the
eyedata application finishes, broadcast will wait for another session to begin.
The broadcast application starts by requesting time and status updates from the
tracker, and checks to see if a connection has been opened by any other
application. It then opens a broadcast connection to the tracker, and watches
the tracker mode. When in the proper modes, it reproduces calibration targets or
plots a gaze cursor. Otherwise, it displays a black display that is transparent to
the video overlay device. When the other application disconnects from the eye
tracker, broadcast is disconnected as well, and begins to poll the eye tracker for
the start of the next session.
Windows EyeLink Programming (8/16/2002) 2002 SR Research Ltd.
146
The source code for broadcast is mostly new, with plotting of the gaze cursor
derived from the w32_data_trial.c file used in the eyedata template. Only those
parts that illustrate new concepts will be discussed in detail.
20.1 Source Files for “broadcast”
These are the files used to build broadcast. Those that were covered previously
are marked with an asterisk..
w32_demo.h *
Declarations to link together the template experiment
files. Most of the declarations in this file can be used
in your experiments.
w32_demo_window.c *
Implements the full-screen window used for
calibration, validation and presentation. This file is
unchanged for all templates, and can be used without
changes in your experiments.
w32_text_support.c *
Implements a simple interface for font creation and
printing. This is a support module that you can link
into your experiments.
Broadcast_main.c
A modified version of w32_demo_main.c, which does
not do tracker setup. Instead, it polls the tracker
state until another application opens a connection to
it, then opens a broadcast connection. It then
determines display resolution by reading tracker
settings, and monitors tracker modes to determine
when to display a gaze cursor or calibration targets.
broadcast_record.c
A modified version of w32_data_trial.c, from the
eyedata template. This version does not start
recording but simply turns on link data reception. It
uses link data to plot a gaze cursor, and displays gaze
position and tracker time at the top of the display. It
exits when the tracker leaves recording mode.
20.2 Analysis of “broadcast_main.c”
This module is derived from w32_demo_main.c, and does most of the usual
setup, except for configuring the tracker and opening a data file. It begins by
initializing the DLL so we can use the link to communicate with the tracker. By
calling open_eyelink_connection(-1), this is done without opening a
Windows EyeLink Programming (8/16/2002) 2002 SR Research Ltd.
147
connection to the eye tracker. We also set our network name to “broadcast”, so
that comm_simple will be able to find us:
set_eyelink_address("100.1.1.1");
// default tracker IP address
// open DLL to allow unconnected communications
if(open_eyelink_connection(-1))
return -1;
// abort if we can't open link
eyelink_set_name("broadcast");
// set our network name
The usual display and calibration are done next.
We also call
set_remap_hooks(), which set up a “hook” function to remap the location of
calibration targets to match our display resolution. We will discuss this code
later.
Next, the code calls wait_for_connection() (described later) to determine if
another application has connected to the eye tracker. Once this has occurred, a
broadcast connection is opened to the eye tracker to allow reception of link data
and monitoring of the tracker interactions with the application. Next, we read
the display resolution (actually, the gaze position coordinate system) that the
tracker has been configured for. We then call track_mode_loop() to monitor
the tracker and determine when to display calibration targets or to plot the gaze
cursor. When the other application closes its connection to the eye tracker, our
broadcast connection is closed as well, and track_mode_loop() returns.
setup_remap_hooks();
while(1)
{
// Loop through one or more sessions
// wait for connection to listen to, or aborted
if(wait_for_connection()) goto shutdown;
pump_delay(1000);
// give remote and tracker time for setup
// now we can start to listen in
if(eyelink_broadcast_open())
{
alert_printf("Cannot open broadcast connection to tracker");
goto shutdown;
}
clear_full_screen_window(transparent_key_color);
can_read_pixel_coords = 1;
// first try to read coords
tracker_pixel_left = SCREEN_LEFT;
// set defaults in case fails
tracker_pixel_top = SCREEN_TOP;
tracker_pixel_right = SCREEN_RIGHT;
tracker_pixel_bottom = SCREEN_BOTTOM;
if(eyelink_is_connected())
if(read_tracker_pixel_coords()==-1)
{
alert_printf("Cannot determine tracker pixel coords: assuming %dx%d",
SCRWIDTH, SCRHEIGHT);
can_read_pixel_coords = 0;
}
track_mode_loop();
// listen and process by tracker mode
if(break_pressed())
// make sure we're still alive
Windows EyeLink Programming (8/16/2002) 2002 SR Research Ltd.
148
goto shutdown;
}
20.2.1 Checking Tracker Connection Status
The function wait_for_connection() loops until the tracker is connected to
another application. It waits 500 milliseconds between tests (otherwise the
tracker would be overloaded with our request) using the Sleep(500) function,
which also gives other Windows applications some time.
/********* WAIT FOR A CONNECTION TO TRACKER **********/
int wait_for_connection(void)
{
int i;
int first_pass = 1;
// draw display only after first failure
while(1)
// loop till a connection happens
{
// check if tracker is connected
i = preview_tracker_connection();
if(i == -1)
{
alert_printf("Cannot find tracker");
return -1;
}
else if(i > 0)
return 0; // we have a connection!
if(first_pass)
// If not, draw title screen
{
first_pass = 0; // don't draw more than once
clear_full_screen_window(PALETTERGB(192,192,192));
get_new_font("Times Roman", SCRHEIGHT/32, 1);
// select a font
i = 1;
graphic_printf(PALETTERGB(0,0,0), -1, 0, SCRWIDTH/15, i++*SCRHEIGHT/26,
"EyeLink Broadcast Listening Demonstration");
graphic_printf(PALETTERGB(0,0,0), -1, 0, SCRWIDTH/15, i++*SCRHEIGHT/26,
"Copyright 2002 SR Research Ltd.");
i++;
graphic_printf(PALETTERGB(0,0,0), -1, 0, SCRWIDTH/15, i++*SCRHEIGHT/26,
"Waiting for another computer to connect to tracker...");
graphic_printf(PALETTERGB(0,0,0), -1, 0, SCRWIDTH/15, i++*SCRHEIGHT/26,
"Press ESC to exit from this screen");
graphic_printf(PALETTERGB(0,0,0), -1, 0, SCRWIDTH/15, i++*SCRHEIGHT/26,
"Press ALT-F4 to exit while connected");
}
i = getkey();
// check for exit
if(i==ESC_KEY || i==TERMINATE_KEY) return 1;
Sleep(500);
// go to background, don't flood the tracker
}
}
The tracker connection status is read by preview_tracker_connection(),
which communicates with the tracker without requiring a connection to be
opened. A status and time request is sent by calling eyelink_request_time(),.
When no connection has been opened by our application, this sends the request
Windows EyeLink Programming (8/16/2002) 2002 SR Research Ltd.
149
to the address set by set_eyelink_address() (or the default address of
“100.1.1.1” if this function has not been used to change this).
Next, we wait for a response to be returned from the tracker, monitoring this with
eyelink_read_time() which returns 0 until a response is received. This should
take less than 1 millisecond, but we wait for 500 milliseconds before giving up
(this means that no tracker is running at the specified address, or that the link is
not functioning).
We then look at the link status flag data, which is part of the ILINKDATA
structure kept by the eyelink_exptkit DLL. A pointer to this structure is returned
by eyelink_data_status(). Several flags indicate the connection status (for a
complete list, see the eye_data.h header file).
// checks link state of tracker
// DLL must have been started with open_eyelink_connection(-1)
// to allow unconnected time and message communication
// RETURNS: -1 if no reply
//
0 if tracker free
//
LINK_CONNECTED if connected to another computer
//
LINK_BROADCAST if already broadcasting
int preview_tracker_connection(void)
{
UINT32 t, tt;
ILINKDATA *idata = eyelink_data_status(); // access link status info
eyelink_request_time();
// force tracker to send status and time
t = current_msec();
while(current_msec()-t < 500)
// wait for response
{
tt = eyelink_read_time();
// will be nonzero if reply
if(tt != 0)
{
// extract connection state
if(idata->link_flags & LINK_BROADCAST) return LINK_BROADCAST;
if(idata->link_flags & LINK_CONNECTED) return LINK_CONNECTED;
else return 0;
}
message_pump(NULL);
// keep Windows happy
if(break_pressed()) return 1; // stop if program terminated
}
return -1; // failed (timed out)
}
20.2.2 Reading and Mapping Display Resolution
In order to properly plot gaze position and display calibration targets at the
proper location on our display, we need to know the gaze position coordinate
system used by the tracker, which was set to match the display resolution of the
application that connected to the tracker. In the template comm_listener, this
was done by intercepting the DISPLAY_COORDS message. In this example, we
will read the gaze coordinate settings directly from the eye tracker. (We will need
to read this before calibration as well, in case the resolution was changed by the
application).
Windows EyeLink Programming (8/16/2002) 2002 SR Research Ltd.
150
To read the gaze position coordinate system setting, we need to read the tracker
setting for “screen_pixel_coords”.
We request this value
by calling
eyelink_read_request("screen_pixel_coords"), then wait for a response by
calling eyelink_read_reply(). This will copy the tracker’s response (as a
series of numbers in a text string) into a buffer we supply. We then extract the
desired numbers from this string using sscanf().
Note the variable can_read_pixel_coords, which indicates if variables can be
read from the tracker. Older EyeLink trackers my not allow reading of settings
through a broadcast connection, and this variable will be set to 0 if the first read
fails, preventing wasted time and error messages later.
int can_read_pixel_coords = 1;
// does tracker support read?
float
float
float
float
// tracker gaze coord system
// used to remap gaze data
// to match our display resolution
tracker_pixel_left = 0;
tracker_pixel_top = 0;
tracker_pixel_right = 0;
tracker_pixel_bottom = 0;
// Read setting of "screen_pixel_coords" from tracker
// This allows remapping of gaze data if our display
// has a different resolution than the connected computer
// The read may fail with older tracker software
int read_tracker_pixel_coords(void)
{
char buf[100] = "";
UINT32 t;
if(!eyelink_is_connected() || break_pressed()) return 1;
// not connected
eyelink_read_request("screen_pixel_coords");
t = current_msec();
while(current_msec()-t < 500)
{
if(eyelink_read_reply(buf) == OK_RESULT)
{
sscanf(buf, "%f,%f,%f,%f",
&tracker_pixel_left, &tracker_pixel_top,
&tracker_pixel_right, &tracker_pixel_bottom );
return 0;
}
message_pump(NULL); // keep Windows happy
if(!eyelink_is_connected) return 1;
if(break_pressed()) return 1;
}
return -1; // timed out
}
Once we have the gaze-position coordinate system of the tracker, we can map
this to our display. These functions apply this mapping to X or Y position data:
// remap X, Y gaze coordinates to local display
float track2local_x(float x)
{
return SCREEN_LEFT +
(x - tracker_pixel_left) * SCRWIDTH /
(tracker_pixel_right - tracker_pixel_left + 1);
}
float track2local_y(float y)
{
return SCREEN_TOP +
Windows EyeLink Programming (8/16/2002) 2002 SR Research Ltd.
151
(y - tracker_pixel_top) * SCRHEIGHT /
(tracker_pixel_bottom - tracker_pixel_top + 1);
}
Finally, we need to ensure that calibration targets are drawn at the proper
position on our display. We do this by setting a “hook” to the eyelink_exptkit
DLL, causing it to call our function remap_cal_targets() before drawing each
calibration target. We then modify the coordinates of the calibration target, and
return HOOK_CONTINUE to have the DLL continue drawing the target at the
corrected position. (For more information on hooks, see the w32_exptsppt.h
header file, and the appendices of this document).
/************ CALIBRATION TARGET REMAP ************/
// callback for calibration target drawing
// this moves target to match position on other displays
INT16 CALLBACK remap_cal_target(HDC hdc, INT16 *x, INT16 *y)
{
*x = track2local_x(*x);
*y = track2local_y(*y);
return HOOK_CONTINUE;
}
// setup "hook" function to be called before calibration targets drawn
void setup_remap_hooks(void)
{
set_draw_cal_target_hook(remap_cal_target, 0);
}
20.2.3 Tracker Mode Loop
While connected to the eye tracker, we can monitor what mode it is in by calling
eyelink_tracker_mode(), and use this information to determine what we
should be displaying. The function track_mode_loop() contains a modemonitoring loop to do this. For each pass through the loop, it determines if the
tracker mode has changed and executes the proper operations for the new mode.
It also performs the usual checks for disconnection or program termination, and
also sends any local keypresses to the tracker (this may not be desirable for some
applications).
/*********** FOLLOW TRACKER MODES **********/
// Follow and process tracker modes
// Displays calibration and drift correction targets
// Also detects start of recording
// Black backgrounds would be transparent as video overlay
void track_mode_loop(void)
{
int oldmode = -1; // to force initial mode setup
while(eyelink_is_connected())
{
int mode = eyelink_tracker_mode();
unsigned key = getkey();
Windows EyeLink Programming (8/16/2002) 2002 SR Research Ltd.
152
if(key==27 || break_pressed() || !eyelink_is_connected()) return;
else if(key)
// echo to tracker
eyelink_send_keybutton(key,0,KB_PRESS);
if(mode == oldmode) continue;
The core of track_mode_loop() is a switch statement that performs the proper
operations for each tracker mode. For most modes, the display is cleared to
black (transparent_key_color) to allow the video to be seen. During camera
setup or calibration, a gray background is displayed, with white calibration
targets (black targets would be transparent to the video).
To handle calibration, validation, and drift correction, we call the DLL function
target_mode_display(), which handles display of calibration targets,
calibration sounds, key presses, and so on.
During recording, we call
record_target_display(),
discussed
below.
Note
that
we
call
read_tracker_pixel_coords() when entering the camera setup and
calibration modes, to update this information.
switch(mode)
{
case EL_RECORD_MODE:
// Record mode: show gaze cursor
clear_full_screen_window(transparent_key_color);
record_mode_display();
clear_full_screen_window(transparent_key_color);
break;
case EL_IMAGE_MODE:
break;
// IMAGE NOT AVAILABLE IN BROADCAST
case EL_SETUP_MENU_MODE: // setup menu: just blank display
clear_full_screen_window(target_background_color);
// read gaze coords in case changed
if(eyelink_is_connected() && can_read_pixel_coords)
read_tracker_pixel_coords();
break;
case EL_CALIBRATE_MODE:
case EL_VALIDATE_MODE:
case EL_DRIFT_CORR_MODE:
target_mode_display();
break;
case EL_OPTIONS_MENU_MODE:
break;
// show calibration targets
// no change in visibility
default:
// any other mode: transparent key (black)
clear_full_screen_window(transparent_key_color);
break;
}
oldmode = mode;
}
}
Windows EyeLink Programming (8/16/2002) 2002 SR Research Ltd.
153
20.3 Analysis of “broadcast_record.c”
This module processes link data during a recording block. It plots samples as a
gaze cursor (using code from the w32_data_trial.c file in the eyedata template). It
also prints the time (as the tracker timestamps) and gaze position. It exits when
eyelink_tracker_mode() indicates that the tracker has exited recording mode.
This method is less precise than the monitoring of the data stream used in the
comm_listener template, and can lose samples and messages at the start and
end of the recording block, but is acceptable for simply plotting a visible gaze
cursor.
Instead of starting recording, old link data is discarded by calling
eyelink_reset_data(1),
and
data
reception
is
enabled
by
eyelink_data_switch(RECORD_LINK_SAMPLES | RECORD_LINK_EVENTS). This
will probably discard the first few samples in the data stream as well.
int record_mode_display(void)
{
ALLF_DATA evt;
unsigned key;
int eye_used = -1;
// which eye to show gaze for
float x, y;
// gaze position
float ox=-1, oy=-1; // old gaze position (to determine change)
// create font for position display
get_new_font( "Arial", SCRWIDTH/50, 0);
gaze_cursor_drawn = 0;
// init gaze cursor state
while(getkey()) {};
// dump any pending local keys
// enable link data reception without changing tracker mode
eyelink_reset_data(1);
eyelink_data_switch(RECORD_LINK_SAMPLES | RECORD_LINK_EVENTS);
The code then loops until exit conditions are met: disconnection, application
termination, or the tracker switching to a non-recording mode.
while(1)
// loop while in record mode
{
if(eyelink_tracker_mode() != EL_RECORD_MODE) break;
key = getkey();
// Local keys/abort test
if(key==TERMINATE_KEY)
// test ALT-F4 or end of execution
break;
else if(key)
// OTHER: echo to tracker for control
eyelink_send_keybutton(key,0,KB_PRESS);
Finally, samples are read from the link to plot the gaze cursor. The gaze cursor
code is similar to that in the w32_data_trial.c file in the eyedata template, except
for its color and shape, and will not be discussed here. The gaze position data is
first converted to the local display coordinates by track2local_x() and
track2local_y(), which are implemented in broadcast_main.c.
The eye to be plotted is determined when the first sample is read from the link,
using eyelink_eye_available(). In addition, the gaze position data and
sample time are printed at the top left of the display.
Windows EyeLink Programming (8/16/2002) 2002 SR Research Ltd.
154
// CODE FOR PLOTTING GAZE CURSOR
if(eyelink_newest_float_sample(NULL)>0) // new sample?
{
eyelink_newest_float_sample(&evt); // get the sample data
if(eye_used == -1)
// set which eye to track by first sample
{
eye_used = eyelink_eye_available();
if(eye_used == BINOCULAR) // use left eye if both tracked
eye_used = LEFT_EYE;
}
else
{
x = evt.fs.gx[eye_used];
// get gaze position from sample
y = evt.fs.gy[eye_used];
if(x!=MISSING_DATA && y!=MISSING_DATA &&
evt.fs.pa[eye_used]>0) // plot if not in blink
{
// plot in local coords
draw_gaze_cursor(track2local_x(x),
track2local_y(y));
// report gaze position (tracker coords)
if(ox!=x || oy!=y)
// only draw if changed
{
graphic_printf(target_foreground_color,
target_background_color,
0, SCRWIDTH*0.87, 0, " %4.0f ", x);
graphic_printf(target_foreground_color,
target_background_color,
0, SCRWIDTH*0.93, 0, " %4.0f ", y);
}
ox = x;
oy = y;
}
else
{
erase_gaze_cursor();
// hide cursor during blink
}
// print tracker timestamp of sample
graphic_printf(target_foreground_color, target_background_color,
0, SCRWIDTH*0.75, 0, " % 8d ", evt.fs.time);
}
}
}
erase_gaze_cursor();
return 0;
// erase gaze cursor if visible
}
20.4 Extending “broadcast”
The broadcast example is designed mainly to illustrate some advanced concepts,
including monitoring the tracker mode and connection status, duplicating the
display of calibration targets, and reading tracker variables. These allow it to
function with almost any application that sends real-time sample data over the
link. Many of these methods could be added to the comm_listener template as
well. However, to be useful for real-time analysis broadcast would need to handle
data during recording in a similar way to comm_listener.
Windows EyeLink Programming (8/16/2002) 2002 SR Research Ltd.
155
Windows EyeLink Programming (8/16/2002) 2002 SR Research Ltd.
156
21. ASC File Analysis
The EyeLink EDF files contain many types of data, including eye movement
events, messages, button presses, and samples. The EDF file format is a highly
compressed binary format, intended for use with SR Research EyeLink viewers
and applications.
The preferred method of access for programmers writing experiment-specific
analyzers is the ASC file, created by the EDF2ASC translator program. This file
converts selected events and samples into text, and sorts and formats the data
into a form that is easier to work with. The EDF2ASC translator, EDF data
types, and the ASC file format are covered in the “EDF Files” document.
21.1 Creating ASC files with EDF2ASC
The EDF2ASC translator must be run from the DOS command prompt. This is
the procedure required:
•
In your experiments, transfer the EDF file to the Subject PC. If the transfer
fails, you may use the eyelink_getfile utility in the utilities folder to transfer
the file. You may rename it during the transfer.
•
When the experiment is completed, the EDF file will also be located in the
directory that the EyeLink tracker software was run from, on the tracker PC.
This serves as a backup, and may be deleted as disk space is required.
•
Run EDF2ASC on the file, using instructions from the “EDF Files
Documentation” document. The most useful option is ‘-ns’, to remove
samples from the output. Alternatively, EDFVIEW can be used to create ASC
files for selected parts of the data.
When the translation is completed, a file with the extension of “ASC” will be
available for processing.
21.2 Analyzing ASC Files
The ASC files may be viewed with any text editor: the Windows accessory
wordpad.exe or from the DOS prompt, EDIT.EXE. This editor can handle the MSDOS text file format. Creating and viewing an ASC file should be the first step in
creating an analyzer program, to see which messages need to be handled.
Viewing the ASC file is also important in validating a experimental application, to
see if the messages, time, etc. match those expected. The EDFVIEW program on
Windows EyeLink Programming (8/16/2002) 2002 SR Research Ltd.
157
the EyeLink computer can also be used to view messages in combination with
eye-movement data.
Programs that process an ASC file must read the ASC file line by line, determine
the type of data from the line from the first word in the line, and read words or
numbers from the rest of the line as appropriate. A set of tools for reading ASC
files is included in the asc proc folder. This is the C source file read_asc.c, and
its header file read_asc.h.
A sample analyzer using this toolkit has also been included. This is the source
file sac_proc.c which processes the sample data file data.asc. These can be used
as a template for your own analyzers.
21.3 Functions defined by “read_asc.c”
As each line is of the ASC file is read, your analyzer program must determine
which part of the experiment it is in (if in a trial, which trial, whether the display
is visible, what response has been made, etc.) and compile data on each trial and
the entire experimental session. This requires support functions to parse each
line of the ASC file, reading keywords, numbers, and text.
The ASC-file processing
operations:
support functions in read_asc.c perform these
•
Opening and closing the file
•
Reading lines, words, and numerical values
•
Matching words and messages to keywords
•
Reading data items from the file, including recording start, button presses,
eye events, and samples. These may span several lines of text.
•
Re-reading from old locations in the file, for multi-pass analysis algorithms
The implementation of these operations are described below.
21.3.1 File Reading Functions
When creating an ASC file, EDF2ASC adds the extension “.asc” to the end of the
filename.
A matching extension can be added to any file name using
add_extension(), which will not add the extension if force is 0 and an
extension is already present in the file name.
// copies file name from <in> to <out>
// if no extension given, adds <ext>
// <force> is nonzero, ALWAYS replaces extension
void add_extension(char *in, char *out, char *ext, int force);
Windows EyeLink Programming (8/16/2002) 2002 SR Research Ltd.
158
An ASC file is opened by calling asc_open_file(), which returns 0 if it was
successful. The file can be closed by asc_close_file().
// opens ASC file (adds .ASC extension if none given)
// returns 0 if OK, -1 if error
int asc_open_file(char *fname);
// closes ASC file if open
void asc_close_file(void);
Each line in the ASC file is first read by asc_read_line(), which scans the file
until it finds the first non-blank line. It separates out and returns a pointer to
the first word in the line, which can be used to determine the data in the line.
// Starts new ASC file line, returns first word
// skips blank lines and comments
// returns "" if end of file
// NOTE: word string is volatile!
char *asc_read_line(void);
Sometimes a line being processed must be re-read by asc_read_line (). The
file position can be restored by asc_rewind_line() so the current line can be
read again.
// rewinds to start of line:
// asc_read_line() can again be used to read first word.
void asc_rewind_line(void);
21.3.2 Word Read and Compare
The first word of a line is returned by asc_read_line(). This word must be
compared to expected line-type identifiers such as “ESACC”, in order to
determine how to process the line. The comparison is best done with the
match() and matchpart() macros. These compare the target string argument
to the variable token, where the return value of asc_read_line() should be
stored. These macros perform a comparison without considering uppercase or
lowercase characters.
The matchpart() macro will only check the first
characters in token, stopping when it reaches the end of the target string. For
example, the target string “ES” would match “ESS” and “ES ET” but not “ET”.
// this will check for full-word match
#define match(a)
(!_cmpnocase(token,a))
// this will check the first characters of the word
#define matchpart(a) (!_cmpnocasepart(token,a))
Numbers or words can be read from the current line using asc_long(),
asc_float(), and asc_string(). If the number was a missing value (“.” in the
ASC file) the value MISSING_VALUE is returned. Each number or word is read
from the line from left to right. The entire line from the current read point can be
fetched with asc_rest_of_line().
// NOTE: when reading a float or long,
Windows EyeLink Programming (8/16/2002) 2002 SR Research Ltd.
159
// if missing data ('.') or non-numerical values
// are encountered, MISSING_DATA is returned.
#define MISSING_DATA -32768
// reads integer or long value
// returns MISSING_VALUE if '.' or non-numeric
long asc_long(void);
// reads floating-point value
// returns MISSING_VALUE if '.' or non-numeric
double asc_float(void);
// returns pointer to next token (VOLATILE)
// returns "" if end of line
char *asc_string(void);
// returns pointer to rest of line text (VOLATILE)
// returns "" if end of line
char *asc_rest_of_line(void);
For lines of unknown length, the function asc_at_eol() can be called to test if
there are any more words or numbers to read. When the line has been read,
asc_errors() will return 0 if no errors were found, or the code of the last error
found.
// returns 0 if more tokens available, 1 if at end of line
int asc_at_eol(void);
// returns 0 if no errors so far in line, else error code
int asc_errors(void);
#define NUMBER_EXPECTED -32000
#define LINE_TOO_SHORT -32001
#define SYNTAX_ERROR
-32002
// read string when number expected
// missing token
// unexpected word
21.3.3 Reading Recording Configuration
The “START” line and several following lines in an ASC file contain information
on the data that is available. These lines can be read with asc_start_block(),
which should be called to finish reading any line with “START” as its first word.
// Before calling, the token "START" must have been read by asc_read_line()
// Scans the file for all block-start data
// Sets data flags, selects eye to use for event processing
// Returns: 0 if OK, else error encountered
int asc_start_block(void);
The asc_start_block() function processes the ASC file, setting these boolean
variables to indicate what data is present in the trial:
// This reads all data associated with block starts
// It sets flags, and selects the eye to process
extern int block_has_left;
extern int block_has_right;
// nonzero if left eye data present
// nonzero if right eye data present
extern int block_has_samples;
extern int block_has_events;
// nonzero if samples present
// nonzero if events present
Windows EyeLink Programming (8/16/2002) 2002 SR Research Ltd.
160
extern int samples_have_velocity;
extern int samples_have_resolution;
extern int events_have_resolution;
// nonzero if samples have velocity data
// nonzero if samples have resolution data
// nonzero if events have resolution data
extern int pupil_size_is_diameter;
// 0 if pupil units is area, 1 if diameter
For binocular recordings, one eye’s data may need to be selected to be processed.
If the variable preferred_eye is set to LEFT_EYE or RIGHT_EYE, then
asc_start_block() will determine if that eye’s data is available. If not, the
other eye’s data will be selected. The selected eye is stored in the variable
selected_eye. You generally won’t have to worry about eye selection, as the eye
event-reading functions can do monocular eye data filtering.
//
//
//
//
//
After opening the file, set prefferred_eye
to the code for the eye you wish to process
After starting a data block, selected_eye
will contain the code for the eye that can be used
(depends on preferred_eye and which eye(s) data is available)
#define LEFT_EYE 0
#define RIGHT_EYE 1
// codes for eyes (also index into sample data)
extern int preferred_eye;
extern int selected_eye;
// which eye's data to use if present
// eye to select events from
21.3.4 Reading Samples
If a line starts with a number instead of a word, it contains a sample. If your
analyzer expects to read both samples and events, it should call
asc_read_sample() to read each line. If this returns 1, it should then call
asc_read_line() and process an event as usual.
The data from the sample is placed in the structure a_sample, of type
ASC_SAMPLE defined below.
// Reads a file line, processes if sample
// Places data in the a_sample structure
// If not sample, rewinds line for event processing
// returns -1 if error, 0 if sample read,
// else 1 (not sample: use asc_read_line() as usual).
// x, y, p read to index of proper eye in a_sample
// For example, if right-eye data only,
// data is placed in a_sample.x[RIGHT_EYE],
// but not in a_sample.x[LEFT_EYE].
// Both are filled if binocular data.
int asc_read_sample(void);
typedef struct {
UINT32 t;
float x[2];
float y[2];
float p[2];
float resx;
float resy;
float velx[2];
float vely[2];
//
//
//
//
//
time of sample
X position (left and right eyes)
Y position (left and right eyes)
pupil size (left and right eyes)
resolution (if samples_have_resolution==1)
// velocity (if samples_have_velocity==1)
// (left and right eyes)
Windows EyeLink Programming (8/16/2002) 2002 SR Research Ltd.
161
} ASC_SAMPLE;
extern ASC_SAMPLE a_sample;
// asc_read_sample() places data here
21.3.5 Reading Events
Data from ASC events may be read by special functions. Which function to call
is determined by the first word read from the ASC file line with
asc_read_line(). All event routines return 0 if no error occurred, or –1 if an
error occurred. Eye data event readers can optionally filter out events from the
non-processed eye in binocular recordings, and return 1 if the event is to be
discarded.
A “BUTTON” line contains a button press or release event. The data from this
line is stored in the variable a_button. This includes the time of the button
press, the button number, and the state (0 if released and 1 if pressed).
// must have read "BUTTON" with asc_read_line() before calling
// returns -1 if error, 0 if read OK
int asc_read_button(void);
// "BUTTON" event data structure, filled by asc_read_button()
typedef struct {
UINT32 t;
// time of button press
int b;
// button number (1-8)
int s;
// button change (1=pressed, 0=released)
} ASC_BUTTON;
extern ASC_BUTTON a_button; // asc_read_button() places data here
Eye events are of two types: start events which contain only the time of a
saccade, blink, or fixation; and end events which contain both start and end time
(actually the time of the last sample fully within the saccade, blink or fixation),
plus summary data. All eye event reading functions can filter the data by eye: If
their argument is 1 then wrong-eye events will be discarded and 1 returned by
the function.
All eye start events (“SSACC”, “SFIX”, and “SBLINK”)
asc_start_event(), which fills in the variable a_start.
are
read
by
// must have read "SBLINK", "SSACC", or "SFIX"
// with asc_read_line() before calling
// returns -1 if error, 0 if skipped (wrong eye), 1 if read
// if <select_eye>==1, will skip unselected eye in binocular data
int asc_read_start(int select_eye);
// "SBLINK", "SSACC", "SFIX" events, read by asc_read_start()
typedef struct {
int eye;
// eye
UINT32 st;
// start time
} ASC_START;
extern ASC_START a_start;
// asc_read_start() places data here
Windows EyeLink Programming (8/16/2002) 2002 SR Research Ltd.
162
Fixation end events (“EFIX”) are read by asc_read_efix() which fills the
variable a_efix with the start and end times, and average gaze position, pupil
size, and angular resolution for the fixation.
int asc_read_efix(int select_eye);
// "EFIX" event data structure, filled by asc_read_efix()
typedef struct {
int eye;
// eye
UINT32 st;
// start time
UINT32 et;
// end time
UINT32 d;
// duration
float x;
// X position
float y;
// Y position
float p;
// pupil
float resx; // resolution (if events_have_resolution==1)
float resy;
} ASC_EFIX;
// Global event data, filled by asc_read functions
extern ASC_EFIX a_efix;
// asc_read_efix() places data here
Saccade end events (“ESACC”) are read by asc_read_esacc() which fills the
variable a_esacc with the start and end times, start and end gaze position,
duration, amplitude, and peak velocity.
Angular resolution may also be
available.
// must have read "ESACC" with asc_read_line() before calling
// returns -1 if error, 0 if skipped (wrong eye), 1 if read
// if <select_eye>==1, will skip unselected eye in binocular data
int asc_read_esacc(int select_eye);
// "ESACC" event data structure, filled by asc_read_esacc()
typedef struct {
int eye;
// eye
UINT32 st;
// start time
UINT32 et;
// end time
UINT32 d;
// duration
float sx;
// start X position
float sy;
// start Y position
float ex;
// end X position
float ey;
// end Y position
float ampl; // amplitude in degrees
float pvel; // peak velocity, degr/sec
float resx; // resolution (if events_have_resolution==1)
float resy;
} ASC_ESACC;
extern ASC_ESACC a_esacc;
// asc_read_esacc() places data here
Blink end events (“EBLINK”) mark the reappearance of the eye pupil. These are
read by asc_read_eblink() which fills the variable a_eblink with the start and
end times, and duration. Blink events may be used to label the next “ESACC”
event as being part of a blink and not a true saccade.
// must have read "EBLINK" with asc_read_line() before calling
// returns -1 if error, 0 if skipped (wrong eye), 1 if read
// if <select_eye>==1, will skip unselected eye in binocular data
int asc_read_eblink(int select_eye);
// "EBLINK" event data structure, filled by asc_read_eblink()
Windows EyeLink Programming (8/16/2002) 2002 SR Research Ltd.
163
typedef struct {
int eye;
UINT32 st;
UINT32 et;
UINT32 d;
} ASC_EBLINK;
//
//
//
//
eye
start time
end time
duration
extern ASC_EBLINK a_eblink; // asc_read_eblink() places data here
21.3.6 Rewinding and Bookmarks
It is common in experimental analysis to process a trial or an entire file more
than once: for example, to determine statistical measures to reject outliers in the
data. Several functions are supplied to allow rewinding of the ASC file processing
to an earlier position.
The simplest is to rewind to the start of a trial (the “START” line, not the
“TRIALID” message), which requires no setup.
int asc_rewind_trial(void);
You can also declare a variable of type BOOKMARK, then use it to record the
current file position with asc_set_bookmark(). When asc_goto_bookmark() is
called later, reading of the file will resume with the line where the bookmark was
set. Bookmarks may be set anywhere inside or outside of a trial.
typedef struct {
long fpos;
long blkpos;
int seleye;
int has_left;
int has_right;
int has_samples;
int has_events;
int vel;
int sam_res;
int evt_res;
int pupil_dia;
} BOOKMARK;
// which eye's data to use if present
int asc_set_bookmark(BOOKMARK *bm);
int asc_goto_bookmark(BOOKMARK *bm);
21.4 A Sample ASC Analysis Application
The sac_proc.c source file implements a complete analyzer for an express
saccade gap/overlap express saccade experiment. The experiment was run for
Windows EyeLink Programming (8/16/2002) 2002 SR Research Ltd.
164
one subject, then converted to data.asc using EDF2ASC. It should be built as
either an MS-DOS program, or a Windows console application.
21.4.1 Planning the Analysis
The first step in writing an analyzer is to know how data is to be analyzed, what
data is present, what measures are required, and under what circumstances the
trial should be discarded.
In this experiment a target was displayed at the center of the display, and served
as the drift correction target as well as part of the trial. After a short delay, a
new target was drawn to the left or right of center. The center target was erased
either before, at the same time as, or after the new target appeared. The subject
ended the trial by pressing the left button (#2) or right button (#3).
For this very rudimentary analysis, the number of saccades made during the
entire trial were counted, and the button response was scored as correct or
incorrect. Trials were flagged if a blink had occurred at any time during
recording. The most important measure is the time from the new target
appearing to the start of the next saccade.
21.4.2 Typical Trial Data
This is the ASC file content for a typical trial:
MSG
2436129 TRIALID T1Rg200 0 0 220 200
START
2436164 LEFT RIGHT EVENTS
PRESCALER 1
VPRESCALER 1
EVENTS GAZE LEFT RIGHT
SFIX L 2436164
SFIX R 2436164
MSG
2436678 SYNCTIME
MSG
2436678 DRAWN NEW TARGET
EFIX L 2436164 2436832
672
321.7
EFIX R 2436164 2436832
672
321.7
SSACC L 2436836
SSACC R 2436836
ESACC R 2436836 2436872 40 323.6 247.4 496.5
SFIX R 2436876
ESACC L 2436836 2436876 44 324.3 251.6 500.5
MSG
2436878 ERASED OLD TARGET
SFIX L 2436880
EFIX R 2436876 2437000 128 492.7 249.2 1682
SSACC R 2437004
EFIX L 2436880 2437004 128 499.8 245.0 1323
SSACC L 2437008
ESACC L 2437008 2437028 24 506.6 242.2 565.4
ESACC R 2437004 2437028 28 493.9 248.5 551.7
SFIX L 2437032
SFIX R 2437032
EFIX L 2437032 2437500
472
556.2
EFIX R 2437032 2437500
472
546.2
BUTTON
2437512 2 1
MSG
2437521 ENDBUTTON 2
246.8
242.1
1422
1683
250.2
6.75
276.4
247.4
6.93
273.3
251.1
258.4
2.35
2.29
151.4
147.2
248.2
250.2
1281
1653
Windows EyeLink Programming (8/16/2002) 2002 SR Research Ltd.
165
END
MSG
MSG
2437523 EVENTS RES 25.70
2437628 TRIAL_RESULT 2
2437628 TRIAL OK
24.98
These messages and events are placed in every trial:
•
Each trial begins with a “TRIALID” message, with the first string being an ID
for EDFVIEW, encoding the trial number, direction of motion, and gap or
overlap time. This is followed by the block and trial number, the offset of the
target (in pixels, negative for left and positive for right), and the delay between
the target onset and fixation target offset.
•
The “START” line and several following lines mark the start of recording, and
encode the recording conditions for the trial.
•
The “SYNCTIME” message marks the zero-time of the trial. This is the time
the new target was drawn for this experiment.
•
The “DRAWN NEW TARGET” message marks the time that the new, offset
target was drawn, and “ERASED OLD TARGET” marks when the center
fixation target was erased.
•
Each saccade’s end produced a “ESACC” line, which contains data on start
and end time and gaze position, saccade amplitude in degrees, and peak
velocity.
•
The “END” line marks the end of recording.
•
The “TRIAL_RESULT” reports the button press by the subject that ended the
trial, or 0 if the subject allowed the trial to time out.
•
The final message’s first word “TRIAL” marks the end of data for the trial, and
under what conditions the trial ended. The second word must be “OK” if the
data is to be kept, indicating a successful trial.
21.4.3 Analyzing a File
The program begins by requesting the file to be analyzed. You can also supply it
on the command line from the DOS prompt.
The function process_file() analyzes a singe ASC file. If the analyzer were
designed to process multiple files, this function would be called once per file.
// call with file name to process
// returns error flag if can't open file
int process_file(char *fname)
{
char ascname[120];
char *token;
long etime;
add_extension(fname, ascname, "asc", 0);
if(asc_open_file(ascname)) return -1;
// make file name
// can't open file!!!
Windows EyeLink Programming (8/16/2002) 2002 SR Research Ltd.
166
while(1)
{
token = asc_read_line();
// get first word on line
if(token[0]==0) break;
else if (match("MSG"))
// message
{
etime = asc_long();
// message time
token = asc_string();
// first word of message
if(match("TRIALID"))
{
process_trial();
// process trial data
}
}
// IGNORE EVERYTHING ELSE
}
asc_close_file();
return 0;
}
The extension “.asc” is added to the file name (unless an extension is already
specified). The file is then opened with asc_open_file().
The program now loops until it finds a message line. It does this by calling
asc_read_line(), and checking if the first word in the line is “MSG”. The time
filed is read with asc_long(), and the first word of the message read with
asc_string(). Your messages should all be designed so the first word identifies
the message uniquely. In this case, we are looking for the “TRIALID” message
that identifies a trial and marks its start. We could also look for other messages
that were written at the start of the experiment or between trials by using
match() for each case in this loop.
Once we have located a trial by finding the “TRIALID” message, we call
process_trial() to read and analyze the trial.
21.4.4 Analyzing Trials
The first thing process_trial() does is to continue reading the trial
information from the TRIALID line. After reading the numbers, a call to
asc_errors() tests to see if any problems were encountered in reading the trial
information.
asc_string();
block_number = asc_long();
trial_number = asc_long();
target_posn = asc_long();
target_delay = asc_long();
is_left = (target_posn < 320);
if(asc_errors()) return -1;
// skip ID string
// read data
// left or right?
// any errors?
In this example, analysis of the trial is handled by a loop that reads a line from
the file, determines its type, and processes it. We have a number of data
variables that are preset to a value that will not occur in the experiment, such as
zero for the time of an event. These allow us to track the point in the trial we are
in. In this analysis, the important variables are:
Windows EyeLink Programming (8/16/2002) 2002 SR Research Ltd.
167
long target_on_time = 0;
long first_sacc_time = 0;
int response_button = 0;
long button_time = 0;
//
//
//
//
set if new target has appeared
set if a saccade occurred to the target
set if a button was pressed
when the button was pressed
int num_saccades = 0;
int have_blink = 0;
// conts the number of saccades
// set if a blink occurred
int is_left;
// set if left target offset
int correct_response = 0;
// set if correct button was pressed
// THESE WERE READ FROM TRIALID MESSAGE
int target_posn;
// offset of new target
int target_delay;
// delay from new target drawn to old erased
int trial_number;
// trial and block number
int block_number;
char *token;
long etime;
// variables for reading line elements
The “START” line marks the point where recording began. We process this line
and any other recording data line by calling asc_start_block(). This will
determine whether samples and events are available, and which eye(s) were
recorded from.
Each “MSG” line contains a message. The time of the message and first word are
read with asc_long() and asc_string(), and the first word checked with match()
to determine how to process it. If the first word is “DRAWN”, it marks the offset
target being drawn and the time is recorded. The message “TRIAL_RESULT”
records the response: a button press or timeout if zero.
If the first word in the message was “TRIAL”, the second word determines the
trial status and is read with asc_string(). If this is “OK” the trial was recorded
successfully and we can process the trial data: in this case, we simply print it
out. Otherwise, the trial was aborted and we return without further processing.
Each button press or release event line starts with the word “BUTTON”, followed
by the time, button number, and state. All this can be read by calling
asc_read_button(), with the result placed in the ASC_BUTTON structure
a_button. The button number is used to determine if the subject responded
correctly.
Lines with “ESACC” as the first word contain end-of-saccade event data,
including summary data on the saccade. Call asc_read_esacc() to read the
event: this will return 0 checks if this saccade was produced by the correct eye
(determined by the call to the asc_read_start() function), and reads the line’s
contents to the ASC_ESACC structure a_esacc. This will contain the start and
end times and positions of the saccade, the amplitude, and the peak velocity.
Saccades with amplitudes of less than 1° are ignored in this analysis. The time
of the first large saccade that occurs after the offset target appeared is recorded
in the variable first_saccade.
Windows EyeLink Programming (8/16/2002) 2002 SR Research Ltd.
168
Finally, the “EBLINK” lines mark the end of a blink. In this example, we simply
use this to flag that a blink occurred. In a more complex analysis, we would use
this event to mark the next “ESACC” and belonging to a blink, not a saccade.
This is the entire analysis loop:
while(1)
{
token = asc_read_line();
if(token[0]==0) return -1;
else if (match("START"))
{
asc_start_block();
}
else if (match("MSG"))
{
etime = asc_long();
token = asc_string();
// get first word on line
// end of file
// START: select eye to process
// message
// message time
// first word of message
if(match("DRAWN"))
// new target drawn
{
target_on_time = etime;
}
else if(match("TRIAL_RESULT")) // trial result
{
response_button = asc_long();
}
else if(match("TRIAL"))
// trial is OK?
{
token = asc_string();
if(match("OK") && response_button!=0) // report data, only if OK
{
// A VERY SIMPLE DATA REPORT: FORMAT AS REQUIRED.
printf("trial:%d delay:%d sac_rt:%ld but_rt:%ld corr:%d nsac:%d blink:%d\n",
trial_number, target_delay, first_sacc_time-target_on_time,
button_time-target_on_time,correct_response,num_saccades,have_blink);
}
return 0;
// done trial!
}
}
else if (match("BUTTON"))
// button
{
asc_read_button();
if(a_button.s==1 && (a_button.b==3 || a_button.b==2))
{
button_time = a_button.t;
response_button = a_button.b;
correct_response = ((is_left==1 && a_button.b==2) ||
(is_left==0 && a_button.b==3));
}
}
else if (match("ESACC"))
// end saccade
{
if(asc_read_esacc(1)) continue; // skip if wrong eye
// ignore if smaller than 1 degree
// or if we haven't displayed target yet
if(a_esacc.ampl>1.0 && target_on_time>0)
Windows EyeLink Programming (8/16/2002) 2002 SR Research Ltd.
169
{
num_saccades++;
if(num_saccades==1) first_sacc_time = a_esacc.st;
}
}
else if (match("EBLINK"))
// blink
{
have_blink++;
}
// IGNORE EVERYTHING ELSE
}
}
Windows EyeLink Programming (8/16/2002) 2002 SR Research Ltd.
170
22. Most Useful Toolkit Functions
This section lists the most useful functions in the EXPTSPPT toolkit, and outlines
the use of each. See the template experiment source files for examples of their
use. Some routines are implemented in the EXPTSPPT files, others are part of
the EyeLink code. These are defined in eyelink.h and w32_exptsppt.h.
For each function, its C declaration is given, with the name in bold. They are
grouped by the type of operation performed.
22.1 Connection to EyeLink Tracker
22.1.1 open_eyelink_connection()
INT16 open_eyelink_connection(INT16 mode);
Initializes the EyeLink library, and opens a connection to the EyeLink
tracker. By setting <mode> to be 1, the connection can be simulated for
debugging purposes. Only timing operations and simple tests should be
done in simulation mode, and the Windows TCP/IP system must be
installed. This function is intended for networks where a single tracker is
connected to the network.
Arguments:
<mode>: 0 to connect,
1 to simulate connection to tracker
-1 to initialize link without connection (V 2.1 +)
Returns:
0 if success
else error code
22.1.2 close_eyelink_connection()
void close_eyelink_connection(void);
Closes any connection to the eye tracker, and closes the link.
NEW (v2.1): Broadcast connections can be closed, but not to affect the eye
tracker. If a non-broadcast (primary) connection is closed, all broadcast
connections to the tracker are also closed.
Arguments:
none
Windows EyeLink Programming (8/16/2002) 2002 SR Research Ltd.
171
22.1.3 set_eyelink_address()
INT16 set_eyelink_address(char *addr);
Sets the IP address used for connection to the EyeLink tracker. This is set to
“100.1.1.1” in the DLL, but may need to be changed for some network
configurations. This must be set before attempting to open a connection to
the tracker.
A “broadcast” address (“255.255.255.255”) may be used if the tracker
address is not known—this will work only if a single Ethernet card is
installed, or if DLL version 2.1 or higher, and the latest tracker software
versions (EyeLink I v2.1 or higher, and EyeLink II v1.1 or higher) are
installed.
Arguments:
<addr>: pointer to a string containing a “dotted” 4-digit IP
address
Returns:
0 if success, -1 if could not parse address string
22.1.4 eyelink_get_tracker_version()
INT16 eyelink_get_tracker_version(char *c);
After connection, determines if the connected tracker is an EyeLink I or II.
For the EyeLink II tracker, it can optionally retrieve the tracker software
version.
Arguments:
<c>: NULL, or pointer to a string (at least 40 characters) to hold
the version string. This will be “EYELINK I” or “EYELINK II
x.xx”, where “x.xx” is the software version.
Returns:
0 if not connected, 1 for EyeLink I, 2 for EyeLink II
Windows EyeLink Programming (8/16/2002) 2002 SR Research Ltd.
172
22.2 Tracker Status
22.2.1 eyelink_is_connected()
INT16 eyelink_is_connected(void);
Call this routine during loops and wherever the experiment might lock up if
the tracker is shut down. Exit the experiment (by terminating loops and
returning from all calls) if this returns 0. This call returns –1 if the
connection is simulated, 1 if connected normally, and 2 if broadcast
connected.
Arguments:
Returns
none
0 if link closed
-1 if simulating connection
1 for normal connection
2 for broadcast connection (NEW for v2.1)
22.2.2 eyelink_current_mode()
INT16 eyelink_current_mode(void);
This function tests the current tracker mode, and returns a set of flags based
of what the mode is doing. The most useful flag using the EXPTSPPT toolkit
is IN_USER_MENU to test if the EyeLink Abort menu has been activated.
Arguments:
none
Returns
Set of bitflags that mark mode function:
IN_DISCONNECT_MODE if disconnected
IN_IDLE_MODE if off-line (Idle mode)
IN_SETUP_MODE if in Setup-menu related mode
IN_RECORD_MODE if tracking is in progress
IN_PLAYBACK_MODE if currently playing back data
IN_TARGET_MODE if in mode that requires a fixation target
IN_DRIFTCORR_MODE if in drift-correction
IN_IMAGE_MODE if displaying grayscale camera image
IN_USER_MENU if displaying Abort or user-defined menu
Windows EyeLink Programming (8/16/2002) 2002 SR Research Ltd.
173
22.3 EyeLink Setup Menu
22.3.1 do_tracker_setup()
int do_tracker_setup(void);
Calling this function switches the EyeLink tracker to the Setup menu. From
this menu camera setup, calibration, validation, drift correction, and
configuration may be performed. Pressing the ‘Esc’ key on the tracker
keyboard will exit the Setup menu and return from this function. Calling
exit_calibration() from an event handler will cause any call to
do_tracker_setup() in progress to return immediately.
Arguments:
none
Returns
always 0
22.3.2 exit_calibration()
void exit_calibration(void);
This function should be called from an message or event handler if an
ongoing call to do_drift_correct() or do_tracker_setup() should
return immediately.
Arguments:
none
Returns:
nothing
else error code
Windows EyeLink Programming (8/16/2002) 2002 SR Research Ltd.
174
22.4 Perform Drift Correction
22.4.1 do_drift_correct()
int do_drift_correct(int x, int y,
int draw, int allow_setup);
Performs a drift correction before a trial. The display coordinates where the
target is to be displayed must be supplied in <x> and <y>. Usually this is the
display center, but could be anywhere that gaze should be located at the trial
start (i.e. the first word of a line of text).
If <draw> is not zero, the drift correction will clear the screen to the target
background color, draw the target, and clear the screen again when the drift
correction is done. If <draw> is zero, you must draw the fixation target
yourself.
When the ‘Esc’ key is pressed during drift correction, <allow_setup>
determines the result. If 1, the EyeLink Setup menu is accessed. This will
always clear the display, so redrawing of hidden stimuli may be required.
Otherwise, the drift correction is aborted. Calling exit_calibration() from
an event handler will cause any call to do_drift_correct() in progress to
return immediately. In all cases, the return code will be 27 (ESC_KEY).
Arguments:
Returns:
<x>, <y>: position of drift correction target
<draw>: if 1, clears screen, draws fixation target, and clears
screen when done
<allow_setup>: if 1, accesses Setup menu before returning, else
aborts drift correction
0 if successful
27 if ‘Esc’ key was pressed to enter Setup menu or abort.
Windows EyeLink Programming (8/16/2002) 2002 SR Research Ltd.
175
22.5 Configure Calibration and Drift Correction
22.5.1 set_calibration_colors()
void set_calibration_colors(COLORREF fg, COLORREF bg);
During calibration, camera image display, and drift correction, the display
background should match the brightness of the experimental stimuli as
closely as possible, in order to maximize tracking accuracy. This function
passes the colors of the display background and fixation target to the
EXPTSPPT library. This also prevents flickering of the display at the
beginning and end of drift correction.
Arguments:
<fg>: Color of target
<bg>: Color of display background
Returns:
0 if success
else error code
22.5.2 set_target_size()
void set_target_size(UINT16 diameter, UINT16 holesize);
The standard calibration and drift correction target is a disk (for
peripheral delectability) with a central “hole” target (for accurate fixation).
The sizes of these features may be set with this function. If <holesize> is
0, no central feature will be drawn.
Arguments:
<diameter>: Size of outer disk, in pixels
<holesize>: Size of central feature.
Returns:
nothing
Windows EyeLink Programming (8/16/2002) 2002 SR Research Ltd.
176
22.5.3 set_cal_sounds()
void set_cal_sounds(char *target, char *good, char *error);
Selects the sounds to be played during do_tracker_setup(), including
calibration, validation and drift correction. These events are the display or
movement of the target, successful conclusion of calibration or good
validation, and failure or interruption of calibration or validation.
If no sound card is installed, the sounds are produced as “beeps” from the
PC speaker. Otherwise, sounds can be selected by passing a string. If the
string is “” (empty), the default sounds are played. If the string is “off”, no
sound will be played for that event. Otherwise, the string should be the
name of a .WAV file to play.
Arguments:
<target>: Sets sound to play when target moves
<good>: Sets sound to play on successful operation
<error>: Sets sound to play on failure or interruption.
22.5.4 set_dcorr_sounds()
void set_dcorr_sounds(char *target,
char *good, char *setup);
Selects the sounds to be played during do_drift_correct(). These
events are the display or movement of the target, successful conclusion of
drift correction, and pressing the ESC key to start the Setup menu.
Sounds are selected as documented for set_cal_sounds().
Arguments:
<target>: Sets sound to play when target moves
<good>: Sets sound to play on successful operation
<setup>: Sets sound to play on ESC key pressed
22.6 Execute EyeLink Command
22.6.1 eyecmd_printf()
int eyecmd_printf(char *fmt, ...);
The EyeLink tracker accepts text commands through the link. These
commands may be used to configure the system, open data files, and so
on.
This function is used with the same formatting methods as
printf(), allowing numbers to be included in commands.
Windows EyeLink Programming (8/16/2002) 2002 SR Research Ltd.
177
The function waits up to 500 msec. for a success or failure code to be
returned from the tracker, then returns the error code NO_REPLY. If you
need more time, use eyelink_timed_command() instead.
Arguments:
Similar to printf(), format string plus arguments
Returns:
0 if successfully executed, else error code
22.7 Send Data Message
22.7.1 eyemsg_printf()
int eyemsg_printf(char *fmt, ...);
This sends a text message to the EyeLink tracker, which timestamps it
and writes it to the EDF data file. Messages are useful for recording trial
conditions, subject responses, or the time of important events. This
function is used with the same formatting methods as printf(), allowing
numbers to be included. Avoid end-of-line characters (“\n”) at end of
messages.
Arguments:
Similar to printf(), format string plus arguments
Returns:
0 if successfully sent to tracker, else error code
22.8 Data File Open, Close and Transfer
22.8.1 receive_data_file()
int receive_data_file(char *src, char *dest, int is_path);
This receives a data file from the EyeLink tracker PC, named in <src>: if
<src> in “”, it will ask the tracker to transfer the last EDF file recorded. If
<dest> is NULL or “”, a dialog box will prompt you for a file name.
Otherwise, the name in <dest> will be used to save the file. If <is_path> is
1, the file name will be added to <dest>, as <dest> is a used as the
directory name.
Arguments:
<src>: name of eye tracker file (including extension). If “”
(empty string), asks tracker for name of last opened data file.
<dest>: name of local file to write to (including extension). If “”
(empty string), prompts for file name.
Windows EyeLink Programming (8/16/2002) 2002 SR Research Ltd.
178
<is_path>: if nonzero, appends file name to <dest> as a
directory path.
Returns:
0 if file transfer was cancelled from prompt
Size of file if successful
FILE_CANT_OPEN if no such file
FILE_XFER_ABORTED if data error
22.8.2 open_data_file()
int open_data_file(char *name);
Opens a new EDF file on the EyeLink tracker computer’s hard disk, and
closes any currently opened file.
This may take several seconds to
complete. The file name should be formatted for MS-DOS, usually 8 or
less characters with only 0-9, A-Z, and ‘_’ allowed.
Arguments:
<name>: name of eye tracker file, 8 characters or less
Returns:
0 if file was opened successfully
else error code
22.8.3 close_data_file()
int close_data_file(void);
Closes any currently opened EDF file on the EyeLink tracker computer’s hard
disk. This may take several seconds to complete.
Arguments:
none
Returns:
0 if command executed successfully
else error code
22.9 Image File Saving and Transferring
22.9.1 bitmap_save()
int bitmap_save(HBITMAP hbm, INT16 xs, INT16 ys, INT16 width,
INT16 height, char *fname, char *path, INT16 sv_options);
This function saves the entire bitmap or selected part of a bitmap in an
image file (with an extension of .png, .bmp, .jpg, or .tif). It creates the
specified file if this file does not exist. If the file exists, it replaces the file
Windows EyeLink Programming (8/16/2002) 2002 SR Research Ltd.
179
unless SV_NOREPLACE is specified in the field of “sv_options”. The
directory to which the file will be written is specified in the path field.
Arguments:
<hbm>: handle to the bitmap image.
<xs>: specifies the x-coordinate of the upper-left corner of the
source bitmap.
<ys>: specifies the y-coordinate of the upper-left corner of the
source bitmap.
<width>: specify the width of the source image to be copied (set
to 0 to use all).
<height>: specify the height of the source image to be copied
(set to 0 to use all).
<name>: name of the image file to be saved. Currently, only
.PNG, .BMP, .JPG, and .TIF files are saved.
<path>: directory or drive path in quotes (“.” for current
directory).
<sv_options>: use SV_NOREPLACE if not to replace an existing
file; use SV_MAKEPATH to create a new path.
Returns:
0 if successful, else -1
22.9.2 bitmap_to_backdrop()
int bitmap_to_backdrop(HBITMAP hbm, INT16 xs, INT16 ys, INT16
width, INT16 height, INT16 xd, INT16 yd, UINT16 bx_options);
This function transfers the bitmap to the tracker PC as backdrop for gaze
cursors. The field "bx_options", set with bitwise OR of the following
constants, determines how bitmap is processed: BX_AVERAGE (averaging
combined pixels), BX_DARKEN (choosing darkest and keep thin dark
lines), and BX_LIGHTEN (choosing darkest and keep thin white lines)
control how bitmap size is reduced to fit tracker display;
BX_MAXCONTRAST maximizes contrast for clearest image;
BX_NODITHER disables the dithering of the image; BX_GREYSCALE
converts the image to grayscale (grayscale works best for EyeLink I, text,
etc.).
Arguments:
<hbm>: handle to the bitmap image.
<xs>: specifies the x-coordinate of the upper-left corner of the
source bitmap.
<ys>: specifies the y-coordinate of the upper-left corner of the
source bitmap.
<width>: specify the width of the source image to be copied (set
to 0 to use all).
<height>: specify the height of the source image to be copied
(set to 0 to use all).
Windows EyeLink Programming (8/16/2002) 2002 SR Research Ltd.
180
<name>: name of the image file to be saved. Currently, only
.PNG, .BMP, .JPG, and .TIF files are supported.
<path>: directory or drive path in quotes (“.” for current
directory).
<sv_options>: SV_NOREPLACE if not to replace an existing file;
SV_MAKEPATH to create a new path
<xd>: specifies the x-coordinate of the upper-left corner of the
tracker screen.
<yd>: specifies the y-coordinate of the upper-left corner of the
tracker screen.
<bx_options> is set with a bitwise OR of the following
constants:
BX_MAXCONTRAST: Maximizes contrast for clearest image;
BX_AVERAGE: averages combined pixels;
BX_DARKEN: chooses darkest (keep thin dark lines);
BX_LIGHTEN: chooses darkest (keep thin white lines);
BX_NODITHER: disables dithering to get clearest text;
BX_GREYSCALE: converts to grayscale.
Returns:
0 if successful, else -1 or -2;
22.9.3 bitmap_save_and_backdrop()
int bitmap_save_and_backdrop(HBITMAP hbm, INT16 xs, INT16 ys,
INT16 width, INT16 height, char *fname, char *path, INT16
sv_options, INT16 xd, INT16 yd, UINT16 bx_options);
This function saves the entire bitmap as a .BMP, .JPG, .PNG, or .TIF file,
and transfers the image to tracker as backdrop for gaze cursors (See
bitmap_save() and bitmap_to_backdrop() for more information).
Arguments:
<hbm>: handle to the bitmap image.
<xs>: specifies the x-coordinate of the upper-left corner of the
source bitmap.
<ys>: specifies the y-coordinate of the upper-left corner of the
source bitmap.
<width>: specify the width of the source image to be copied (set
to 0 to use all).
<height>: specify the height of the source image to be copied
(set to 0 to use all).
<xd>: specifies the x-coordinate of the upper-left corner of the
tracker screen.
<yd>: specifies the y-coordinate of the upper-left corner of the
tracker screen.
<bx_options> is set with a bitwise OR of the following
Windows EyeLink Programming (8/16/2002) 2002 SR Research Ltd.
181
constants:
BX_MAXCONTRAST: Maximizes contrast for clearest image;
BX_AVERAGE: averages combined pixels;
BX_DARKEN: chooses darkest (keep thin dark lines);
BX_LIGHTEN: chooses darkest (keep thin white lines);
BX_NODITHER: disables dithering to get clearest text;
BX_GREYSCALE: converts to grayscale.
Returns:
0 if successful, -1 if couldn't save, -2 if couldn't transfer
22.10 Recording
22.10.1 start_recording()
INT16 start_recording(INT16 file_samples, INT16 file_events,
INT16 link_samples, INT16 link_events);
Starts the EyeLink tracker recording, sets up link for data reception if
enabled. Recording may take 10 to 30 milliseconds to begin from this
command. The function also waits until at least one of all requested link
data types have been received. If the return value is not zero, return the
result as the trial result code.
Arguments:
These arguments are set to 1 to enable data type, 0 to disable:
<file_samples> to write samples to EDF file
<file_events> to write events to EDF file
<link_samples> to send samples through link
<link_events> to send events through link
Returns:
0 if successful, else trial return code
22.10.2 stop_recording()
void stop_recording(void);
Stops recording, resets EyeLink data mode. Call 50 to 100 msec after an
event occurs that ends the trial. This function waits for mode switch before
returning.
Arguments:
none
Windows EyeLink Programming (8/16/2002) 2002 SR Research Ltd.
182
22.10.3 check_recording()
int check_recording(void);
Call this function while recording. It will return 0 if recording is still in
progress, or an error code if not. It will also handle the EyeLink Abort menu
by calling record_abort_handler(). Any errors returned by this function
should be returned by the trial function. On error, this will disable realtime
mode and restore the heuristic
Arguments:
none
Returns:
TRIAL_OK (0) if no error
REPEAT_TRIAL, SKIP_TRIAL, ABORT_EXPT
TRIAL_ERROR if recording aborted.
22.10.4 check_record_exit()
INT16 check_record_exit(void);
Call this function on leaving a trial. It checks if the EyeLink tracker is
displaying the Abort menu, and handles it if required. The return value from
this function should be returned as the trial result code.
Arguments:
none
Returns:
TRIAL_OK if no error
REPEAT_TRIAL, SKIP_TRIAL, ABORT_EXPT if Abort menu
activated.
22.10.5 set_offline_mode()
INT16 set_offline_mode(void);
Places EyeLink tracker in off-line (idle) mode.
finished the mode transition.
Arguments:
Returns:
Wait till the tracker has
None
0 if mode switched, else link error
Windows EyeLink Programming (8/16/2002) 2002 SR Research Ltd.
183
22.11 Playback of Last Trial
22.11.1 eyelink_playback_start()
INT16 eyelink_playback_start(void);
Flushes data from queue and starts data playback. An EDF file must be
open and have at least one recorded trial. Use eyelink_wait_for_data()
to wait for data: this will time out if the playback failed. Playback begins
from start of file or from just after the end of the next-but-last recording
block. Link data is determined by file contents, not by link sample and event
settings.
Arguments:
None
Returns:
0 if command sent, else link error
22.11.2 eyelink_playback_stop()
INT16 eyelink_playback_stop(void);
Stops playback if in progress. Flushes any data in queue.
Arguments:
None
Returns:
0 if mode switched, else link error
22.12 Millisecond and Microsecond Clocks
22.12.1 current_time(), current_msec()
UINT32 current_time(void);
UINT32 current_msec(void);
Call this function to read the millisecond clock. This clock is very accurate
and stable, and starts with 0 when the EyeLink library is initialized.
Arguments:
None
Returns:
Number of milliseconds since EyeLink library first called
Windows EyeLink Programming (8/16/2002) 2002 SR Research Ltd.
184
22.12.2 msec_delay()
void msec_delay(UINT32 n);
Call this function to add a delay to your experiment. System functions are
not called during the delay.
Arguments:
<n>: number of milliseconds to wait. Actual delay is between
<n> and <n-1> milliseconds.
22.12.3 pump_delay()
void pump_delay(UINT32 del);
During calls to msec_delay(), Windows is not able to handle messages.
One result of this is that windows may not appear. This is the preferred
delay function when accurate timing is not needed.
It calls
message_pump() until the last 20 milliseconds of the delay, allowing
Windows to function properly. In rare cases, the delay may be longer than
expected. It does not process modeless dialog box messages.
Arguments:
<del>: Desired delay in milliseconds
22.12.4 current_usec()
UINT32 current_usec(void);
Call this function to read the microsecond clock.
Arguments:
None
Returns:
Number of microseconds since EyeLink library first used,
modulo 2^32 (32 bits)
Windows EyeLink Programming (8/16/2002) 2002 SR Research Ltd.
185
22.13 EyeLink Tracker Keys
22.13.1 eyelink_flush_keybuttons()
INT16 eyelink_flush_keybuttons(int enable_buttons);
Causes the EyeLink tracker and the EyeLink library to flush any stored
button or key events. This should be used before a trial to get rid of old
button responses.
The <enable_buttons> argument controls whether the EyeLink library will
store button press and release events. It always stores tracker key events.
Even if disabled, the last button pressed and button flag bits are updated.
Arguments:
<enable_buttons>: set to 0 to monitor last button press only, 1
to queue button events
Returns:
always 0
22.13.2 eyelink_read_keybutton()
UINT16 eyelink_read_keybutton(INT16 *mods, INT16 *state,
UINT16 *kcode, UINT32 *time);
Reads any queued key or button events from tracker.
Arguments:
<mods>: pointer to variable to hold button number or key
modifier (Shift, Alt and Ctrl key states). Can be NULL to ignore
<state>: pointer to variable to hold key or button change
(KB_PRESS, KB_RELEASE, or KB_REPEAT). Can be NULL to
ignore
<kcode>: pointer to variable to hold keyscan code. Can be NULL
to ignore
<mods>: pointer to variable to hold key modifier (Shift, Alt and
Ctrl key states). Can be NULL to ignore
<time>: pointer to a variable to hold tracker time of the key or
button change. Usually NULL to ignore time.
Returns:
Key character is key press/release/repeat,
(0xFF00) if button press or release.
KB_BUTTON
Windows EyeLink Programming (8/16/2002) 2002 SR Research Ltd.
186
22.13.3 eyelink_send_keybutton()
INT16 eyelink_send_keybutton(UINT16 code,
UINT16 mods, INT16 state);
Sends a key or button event to tracker.
remote control.
Only key events are handled for
Arguments:
<code>: key character, or KB_BUTTON (0xFF00) if sending
button event
<mods>: button number, or key modifier (Shift, Alt and Ctrl key
states).
<state>: key or button change (KB_PRESS or KB_RELEASE)
Returns:
0 if OK, else link send error code
22.14 EyeLink Tracker Buttons
22.14.1 eyelink_last_button_press()
UINT16 eyelink_last_button_press(UINT32 *time);
Reads the number of the last button detected by the EyeLink tracker. This is
0 if no buttons were pressed since the last call, or since the buttons were
flushed. If a pointer to a variable is supplied the eye-tracker timestamp of
the button may be read. This could be used to see if a new button has been
pressed since the last read. If multiple buttons were pressed since the last
call, only the last button is reported.
Arguments:
<time>: far pointer to a variable to hold tracker time of last
button press. Usually left as NULL to ignore time.
Returns:
button last pressed, 0 if no button pressed since last read, or
call to eyelink_flush_keybuttons()
22.14.2 eyelink_button_states()
UINT16 eyelink_button_states(void);
Returns a flag word with bits set to indicate which tracker buttons are
currently pressed. This is button 1 for the LSB, up to button 16 for the MSB.
Buttons above 8 are not realized on the EyeLink tracker.
Arguments:
none
Windows EyeLink Programming (8/16/2002) 2002 SR Research Ltd.
187
Returns:
Flag bits for buttons currently pressed.
22.14.3 eyelink_flush_keybuttons()
INT16 eyelink_flush_keybuttons(int enable_buttons);
Causes the EyeLink tracker and the EyeLink library to flush any stored
button or key events. This should be used before a trial to get rid of old
button responses.
The <enable_buttons> argument controls whether the EyeLink library will
store button press and release events. It always stores tracker key events.
Even if disabled, the last button pressed and button flag bits are updated.
Arguments:
<enable_buttons>: set to 0 to monitor last button press only, 1
to queue button events
Returns:
always 0
Windows EyeLink Programming (8/16/2002) 2002 SR Research Ltd.
188
22.15 Real-Time Eye Data from Link
22.15.1 eyelink_wait_for_block_start()
INT16 eyelink_wait_for_block_start(UINT32 timeout,
INT16 samples, INT16 events);
Waits for up to <timeout> milliseconds for a block containing samples,
events, or both to be opened. Items in the queue are discarded until the
block start events are found and processed. This function will fail if both
samples and events are selected but only one of link samples and events
were enabled by start_recording().
NOTE: this function did not work in version 1.0 of the eyelink_exptkit DLL
Arguments:
<timeout>: time in milliseconds to wait for data
<samples>: if nonzero, block must contain samples
<events>: if nonzero, block must contain events
Returns:
0 if time expired without any data of masked types available
22.15.2 eyelink_eye_available()
INT16 eyelink_eye_available(void);
After calling eyelink_wait_for_block_start(), or after at least one
sample or eye event has been read, can be used to check which eyes data is
available for.
Arguments:
None
Returns:
One of these constants, defined in defined in EYE_DATA.H:
LEFT_EYE if left eye data
RIGHT_EYE if right eye data
BINOCULAR if both left and right eye data
-1 if no eye data is available
Windows EyeLink Programming (8/16/2002) 2002 SR Research Ltd.
189
Deleted: Arguments:
22.15.3 eyelink2_mode_data() (EyeLink II only)
INT16 eyelink2_mode_data(INT16
INT16
INT16
INT16
*sample_rate,
*crmode,
*file_filter,
*link_filter);
After calling eyelink_wait_for_block_start(), or after at least one
sample or eye event has been read, returns EyeLink II extended mode data.
Arguments:
<sample_rate>: NULL, or pointer to variable to be filled with
samples per second
<crmode>: NULL, or pointer to variable to be filled with CR
mode flag (0 if pupil-only mode, ense pupil-CR mode)
<file_filter>: NULL, or pointer to variable to be filled with filter
level to be applied to file samples (0=off, 1=std, 2=extra)
<link_filter>: NULL, or pointer to variable to be filled with filter
level to be applied to link and analog output samples (0=off,
1=std, 2=extra)
Returns:
One of these constants, defined in defined in EYE_DATA.H:
LEFT_EYE if left eye data
RIGHT_EYE if right eye data
BINOCULAR if both left and right eye data
-1 if no eye data is available
22.15.4 eyelink_get_next_data()
INT16 eyelink_get_next_data(void *buf);
Fetches next data item from link buffer. Usually called with <buf> = NULL,
and returns the data item type. If the item is not wanted, simply ignore it.
Otherwise, call eyelink_get_float_data()to read it into a buffer.
Arguments:
<buf>: if NULL, saves data, else copies integer data into buffer
Returns:
0 if no data, SAMPLE_TYPE if sample, else event type (defined
in EYE_DATA.H)
Windows EyeLink Programming (8/16/2002) 2002 SR Research Ltd.
190
... [1]
22.15.5 eyelink_get_float_data()
INT16 eyelink_get_float_data(void *buf);
Reads the last item fetched by eyelink_get_next_data() into a buffer.
The event is converted to a floating-point format (FSAMPLE or FEVENT).
This can handle both samples and events.
The buffer type can be
ALLF_DATA for both samples and events, FSAMPLE for a sample, or a
specific event buffer.
Arguments:
<buf>: far pointer to buffer for floating-point data: type is
ALLF_DATA or FSAMPLE
Returns:
0 if no data, SAMPLE_TYPE if sample, else event type (defined
in EYE_DATA.H)
22.15.6 eyelink_newest_float_sample()
INT16 eyelink_newest_float_sample(void *buf);
Check if a new sample has arrived from the link. This is the latest sample,
not the oldest sample that is read by eyelink_get_next_data(), and is
intended to drive gaze cursors and gaze-contingent displays.
Typically the function is called with a NULL buffer pointer, to test if new data
has arrived. If a value of 1 is returned, the function is called with a
FSAMPLE buffer to get the new sample.
Arguments:
<buf>: far pointer to sample buffer type FSAMPLE. If NULL,
just checks new-sample status
Returns:
-1 if no samples, 0 if no new data, 1 if new sample
Windows EyeLink Programming (8/16/2002) 2002 SR Research Ltd.
191
22.16 Windows Keyboard Support
22.16.1 getkey()
unsigned getkey(void);
A routine for checking for Windows keystroke events, and dispatching
Windows messages. If no key is pressed or waiting, it returns 0. For a
standard ASCII key, a value from 31 to 127 is returned. For extended keys, a
special key value is returned. If the program has been terminated by ALT-F4
or a call to terminal_break(), or the “Ctrl” and “C” keys are held down, the
value TERMINATE_KEY is returned. The value JUNK_KEY (1) is returned if a
non-translatable key is pressed.
Warning: This function processes and dispatches any waiting messages.
This will allow Windows to perform disk access and negates the purpose of
realtime mode. Usually these delays will be only a few milliseconds, but
delays over 20 milliseconds have been observed. You may wish to call
escape_pressed() or break_pressed() in recording loops instead of
getkey() if timing is critical, for example in a gaze-contingent display.
Under Windows XP, these calls will not work in realtime mode at all
(although these do work under Windows 2000). Under Windows 95/98/Me,
realtime performance is impossible even with this strategy.
Some useful keys are defined in w32_exptsppt.h, as:
CURS_UP
CURS_DOWN
CURS_LEFT
CURS_RIGHT
ESC_KEY
ENTER_KEY
TERMINATE_KEY
JUNK_KEY
0x4800
0x5000
0x4B00
0x4D00
0x001B
0x000D
0x7FFF
0x0001
Arguments:
none
Returns:
0 if no key pressed, else key code
TERMINATE_KEY if CTRL-C held down or program has been
terminated.
Windows EyeLink Programming (8/16/2002) 2002 SR Research Ltd.
192
22.16.2 echo_key()
unsigned echo_key(void);
Checks for Windows keystroke events and dispatches messages; similar to
getkey(), but also sends keystroke to tracker.
Warning: Under Windows XP, this call will not work in realtime mode at all,
and will take several seconds to respond if graphics are being drawn
continuously. This function works well in realtime mode under Windows
2000.
Arguments:
none
Returns:
0 if no key pressed, else key code
TERMINATE_KEY if CTRL-C held down or program has been
terminated.
22.16.3 escape_pressed()
INT16 escape_pressed(void);
This function tests if the ESC key is held down, and is usually used to
break out of nested loops. This does not allow processing of Windows
messages, unlike getkey().
Warning: Under Windows XP, this call will not work in realtime mode at all,
and will take several seconds to respond if graphics are being drawn
continuously. This function works well in realtime mode under Windows
2000.
Arguments:
none
Returns:
1 if ESC key held down
0 if not
22.16.4 break_pressed()
INT16 break_pressed(void);
Tests if the program is being interrupted. You should break out of loops
immediately if this function does not return 0, if getkey() return
TERMINATE_KEY, or if eyelink_is_connected() returns 0.
Warning: Under Windows XP, this call will not work in realtime mode at all,
and will take several seconds to respond if graphics are being drawn
continuously. This function works well in realtime mode under Windows
2000.
Arguments:
none
Windows EyeLink Programming (8/16/2002) 2002 SR Research Ltd.
193
Returns:
1 if CTRL-C is pressed, terminal_break() was called, or the
program has been terminated with ALT-F4.
0 otherwise
22.17 Realtime Mode and Application Priority
22.17.1 begin_realtime_mode()
void begin_realtime_mode(UINT32 delay);
Sets the application priority and cleans up pending Windows activity to
place the application in realtime mode. This could take up to 100
milliseconds, depending on the operation system. Use the <delay> value
to set the minimum time this function takes, so that this function can act
as a useful delay.
Warning: Under Windows XP, this call will lock out all keyboard input. The
Task Manager will take about 30 seconds to respond to CTRL-ALT-DEL, so
press this once and be patient. The keyboard functions well in realtime
mode under Windows 2000. This function has little or no effect under
Windows 95/98/Me.
Arguments:
<delay>: minimum delay in milliseconds (should be about 100)
22.17.2 end_realtime_mode()
void end_realtime_mode(void);
Returns the application to a priority slightly above normal, to end realtime
mode. This function should execute rapidly, but there is the possibility
that Windows will allow other tasks to run after this call, causing delays of
1-20 milliseconds.
Warning: This function has little or no effect under Windows 95/98/Me.
Arguments:
None
Windows EyeLink Programming (8/16/2002) 2002 SR Research Ltd.
194
22.17.3 set_high_priority()
void set_high_priority(void);
Raises the application priority for non-realtime operations. This will
reduce the number of delays caused by Windows, however it might slow
other applications or drawing of windows and dialog boxes, so priority may
need to be reduced for these activities.
Arguments:
None
22.17.4 set_normal_priority()
void set_normal_priority(void);
Resets the application priority to normal, when time is not an issue. This
may speed opening of windows and dialog boxes. Remember to restore
high priority after this, to ensure reasonable operation in non-realtime
mode.
Arguments:
none
22.18 Windows Graphics Support
This set of functions allows your program to synchronize to the display refresh,
check the video mode, and to register its window with the EXPTSPPT library.
22.18.1 wait_for_video_refresh()
void wait_for_video_refresh(void);
This function will not return until the current refresh of the monitor has
completed (at the start of vertical retrace).
This can be used to
synchronize drawing to the scanning out of the display, and to determine
when a stimulus was first seen by the subject. The DriverLinx PortIO
driver must be installed for this function to work.
Arguments:
None
Windows EyeLink Programming (8/16/2002) 2002 SR Research Ltd.
195
Deleted: .
22.18.2 in_vertical_retrace()
INT16 in_vertical_retrace(void);
This function returns tests to see if vertical retrace is active. It will always
return 0 if vertical retrace detection is not implemented on the video
hardware.
Arguments:
None
Results:
1 if in vertical retrace
0 if not in retrace or retrace detection not available
22.18.3 get_display_information()
void get_display_information(DISPLAYINFO *di);
Measures parameters of the current display mode, and fills a
DISPLAYINFO structure with the data. This process may take over 100
milliseconds, as it measures actual refresh rate. The returned data can be
used to compute sizes for drawing, and to check that the current display
mode matches the requirements of the experiment. A global DISPLAYINFO
structure called dispinfo should be set up at the start of the program if
you wish to use the SCRWIDTH and SCRHEIGHT macros.
NOTE: if refresh cannot be measured, the “refresh” field will contain a
value less than 40.
This is the contents of the DISPLAYINFO structure:
typedef struct {
INT32 left;
// left of display
INT32 top;
// top of display
INT32 right;
// right of display
INT32 bottom;
// bottom of display
INT32 width;
// width of display
INT32 height;
// height of display
INT32 bits;
// bits per pixel
INT32 palsize;
// total entries in palette (0 if not indexed)
INT32 palrsvd;
// number of static entries in palette
INT32 pages;
// pages supported
float refresh;
// refresh rate in Hz
INT32 winnt;
// 0 for 9x/Me, 1 for NT, 2 for 2000, 3 for XP
} DISPLAYINFO;
Arguments:
<di>: pointer to DISPLAYINFO structure to fill
Returns:
always fills <di> with data
Windows EyeLink Programming (8/16/2002) 2002 SR Research Ltd.
196
22.18.4 init_expt_graphics()
INT16 init_expt_graphics(HWND hwnd, DISPLAYINFO *info);
You must always create a borderless, full-screen window for your
experiment. This function registers the window with EXPTSPPT so it may
be used for calibration and drift correction. The window should not be
destroyed until it is released with close_expt_graphics(). This window
will be subclassed (some messages intercepted) during calibration and
drift correction.
Arguments:
<hwnd>: Handle of window that is to be used for calibration
and drift correction. This should be a borderless, full-screen
window. If your language can’t give you a window handle, use
NULL and the topmost window will be detected.
<info>: NULL or pointer to a DISPLAYINFO structure to fill with
display mode data
Returns:
0 if success, -1 if error occurred internally
22.18.5 close_expt_graphics()
void close_expt_graphics(void);
Call this function at the end of the experiment or before destroying the
window registered with init_expt_graphics(). This call will disable
calibration and drift correction until a new window is registered.
Arguments:
none
22.19 Windows Dialog Boxes
These are useful dialog boxes for use in your programs. Using these can
eliminate the construction of custom dialogs for most experiments.
22.19.1 edit_dialog()
INT16 edit_dialog(HWND hwnd, LPSTR title,
LPSTR msg, LPSTR txt, INT16 maxsize);
All experiments require the input of information: EDF file name,
randomization file, and so on. This function implements a simple textentry dialog box for this purpose. A title in the window frame and a
message can be set, and the initial text set. The length of the text to be
entered can also be limited.
Arguments:
<hwnd>: The “parent” window, usually the experiment window
or NULL if no window exists.
Windows EyeLink Programming (8/16/2002) 2002 SR Research Ltd.
197
Deleted: .
<title>: Text to be displayed in the frame of the dialog box.
<msg>: Instructions to be displayed in the dialog box.
<txt>: The buffer into which text will be entered. Any text in
this buffer will be displayed as the initial contents of the edit
box.
Returns:
0 if the ENTER key was pressed or “OK” was clicked.
1 if ESC pressed or “Cancel” clicked
-1 if ALT-F4 pressed to destroy the dialog box.
22.19.2 alert_printf()
void alert_printf(char *fmt, ...);
When an error occurs, a notification must be given to the user. This
function uses the Windows MessageBox() function, but adds printf()
formatting for easy composition of the message.
Arguments:
<fmt>: A printf() formatting string
<…>: any arguments required.
22.20 Windows System Support
Because Windows is a multi-tasking, event-processing system, some special
functions have been included to support Windows messaging and windows.
22.20.1 terminal_break()
void terminal_break(INT16 assert);
This function can be called in an event handler to signal that the program
is terminating. Calling this function with an argument of 1 will cause
break_pressed() to return 1, and getkey() to return TERMINATE_KEY.
These functions can be re-enabled by calling terminal_break() with an
argument of 0.
Arguments:
<assert>: 1 to signal a program break, 0 to reset break.
Windows EyeLink Programming (8/16/2002) 2002 SR Research Ltd.
198
22.20.2 exit_calibration()
void exit_calibration(void);
This function should be called from an message or event handler if an
ongoing call to do_drift_correct() or do_tracker_setup() should
return immediately.
Arguments:
none
22.20.3 message_pump()
INT16 message_pump(HWND dialog_hook);
Almost all experiments must run in a deterministic fashion, executing
sequentially and in loops instead of the traditional Windows eventprocessing model. However, Windows messages must still be dispatched
for keyboard input and other events. Calling getkey() will dispatch
messages and return keys. The message_pump() function also dispatches
messages, but does not read the keys. It can also handle messages for a
modeless dialog box.
Arguments:
<dialog_hook>: Window handle of a modeless dialog box to
intercept messages for [using IsDialogMessage()] or NULL if
none open.
Returns:
0 normally
1 if ALT-F4 or CTRL-C pressed, or if terminal_break() called.
Any loops should exit in this case.
22.20.4 process_key_messages()
UINT16 process_key_messages(HWND hWnd, UINT message,
WPARAM wParam, LPARAM lParam);
Call this function in your window message processing function to handle
WM_CHAR and WM_KEYDOWN messages. These will be translated to an
EyeLink key code and saved for getkey().
Arguments:
Message parameters, as received by window processing
function. <hWnd> may be NULL.
Returns:
0 or JUNK_KEY if no key generated
else EyeLink key code.
Windows EyeLink Programming (8/16/2002) 2002 SR Research Ltd.
199
22.21 Windows Building Blocks
These functions are intended to support languages other than C or C++.
22.21.1 translate_key_message()
UINT16 translate_key_message(UINT message,
WPARAM wParam, LPARAM lParam);
Call this function to translate WM_CHAR and WM_KEYDOWN messages
into tracker key codes. The code JUNK_KEY may be returned if the key is
not translatable.
Arguments:
<message>: message ID (WM_CHAR or WM_KETDOWN)
<wparam>: wparam of message, or Windows key code
<lparam> lparam of message, or zero
Returns:
0 or JUNK_KEY if no key generated
else EyeLink key code
22.21.2 flush_getkey_queue()
void flush_getkey_queue(void);
Initializes the key queue used by getkey(). This should be called at the
start of your program. It may be called at any time to get rid any of old
keys from the queue.
Arguments:
none
Windows EyeLink Programming (8/16/2002) 2002 SR Research Ltd.
200
22.21.3 read_getkey_queue()
UINT16 read_getkey_queue(void);
Reads keys from the key queue. It is similar to getkey(), but does not
process Windows messages. This can be used to build key-message
handlers in languages other than C.
Arguments:
none
Returns:
0 if no key pressed
JUNK_KEY (1) if untranslatable key
TERMINATE_KEY (0x7FFF) if CTRL-C is pressed,
terminal_break() was called, or the program has been
terminated with ALT-F4.
else, code of key if any key pressed
Windows EyeLink Programming (8/16/2002) 2002 SR Research Ltd.
201
23. Other EyeLink Functions
This section briefly summarizes the standard EyeLink functions not covered in
the previous section.
These are less likely to be needed for standard
experiments.
23.1 Recording Support
23.1.1 eyelink_wait_for_data()
INT16 eyelink_wait_for_data(UINT32 timeout,
INT16 samples, INT16 events);
Waits for data to be received from the eye tracker. Can wait for an event, a
sample, or either. Typically used after record start to check if data is being
sent.
Arguments:
<timeout>: maximum time (msec) to wait for data
<samples>: if 1, returns when first sample available
<events>: if 1, returns when first event available
Returns:
1 if data available, 0 if timed out
23.1.2 eyelink_event_type_flags()
INT16 eyelink_event_type_flags(void);
After at least one button or eye event has been read, can be used to check
what type of events will be available. See EYE_DATA.H for a list of all flags.
Arguments:
none
Returns
set of bit flags, defined in EYE_DATA.H
Windows EyeLink Programming (8/16/2002) 2002 SR Research Ltd.
202
23.2 Local and Tracker Time
23.2.1 current_micro()
INT32 current_micro(MICRO *m);
Fills the MICRO structure with time formatted as milliseconds and remainder
microseconds (0..999)
Arguments:
pointer to MICRO structure to hold time
Returns:
millisecond time
23.2.2 eyelink_request_time()
INT16 eyelink_request_time(void);
Sends a request the connected eye tracker to return its current time. The
time reply can be read with eyelink_read_time().
NEW (v2.1): If the link is initialized but not connected to a tracker, the
message will be sent to the tracker set by set_eyelink_address()
Arguments:
None
Returns
0 if no error, else link error code
23.2.3 eyelink_read_time()
UINT32 eyelink_read_time(void);
Returns the tracker time requested by eyelink_request_time() or
eyelink_node_request_time()..
Arguments:
none
Returns:
0 if no response yet
else timestamp in milliseconds
Windows EyeLink Programming (8/16/2002) 2002 SR Research Ltd.
203
23.3 EyeLink Commands and Messages
23.3.1 eyelink_send_command()
INT16 eyelink_send_command(char *text);
Sends a command to the connected eye tracker. The text command will be
executed, and a result code returned that can be read with
eyelink_command_result().
Arguments:
<text>: string with command to send
Returns
0 if no error, else link error code
23.3.2 eyelink_timed_command()
INT16 eyelink_timed_command(UINT32 msec, char *text);
Sends a command to the connected eye tracker. The text command will be
executed, and a result code returned. If no result is returned by <msec>
milliseconds, then the error code NO_REPLY is returned.
Arguments:
<msec>: maximum milliseconds to wait for reply
<text>: string to send
Returns:
OK_RESULT (0) if OK
NO_REPLY if timed out
LINK_TERMINATED_RESULT id can’t send
other error codes represent tracker execution error
23.3.3 eyelink_command_result()
INT16 eyelink_command_result(void);
Check for and retrieves the numeric result code sent by the tracker from the
last command
Arguments:
none
Returns
NO_REPLY if no reply to last command
OK_RESULT (0) if OK
other error codes represent tracker execution error
Windows EyeLink Programming (8/16/2002) 2002 SR Research Ltd.
204
23.3.4 eyelink_last_message()
INT16 eyelink_last_message(char *buf);
Returns text associated with last command response: may have error
message.
Arguments:
<buf>: string to contain text
Returns:
0 if no message since last command sent
else length of string
23.3.5 eyelink_send_message()
INT16 eyelink_send_message(char *text);
Sends a text message the connected eye tracker. The text will be added to
the EDF file.
NEW (v2.1): If the link is initialized but not connected to a tracker, the
message will be sent to the tracker set by set_eyelink_address()
Arguments:
<text>: string with message to send
Returns:
0 if no error, else link error code
23.4 Read EyeLink Variables
23.4.1 eyelink_read_request()
INT16 eyelink_read_request(char *text);
Sends a text variable name whose value is to be read and returned by the
tracker as a text string.
NEW (v2.1): If the link is initialized but not connected to a tracker, the message
will be sent to the tracker set by set_eyelink_address(). However, these
requests will be ignored by tracker versions older than EyeLink I v2.1 and
EyeLink II v1.1.
Arguments:
<text>: string with message to send
Returns:
0 if no error, else link error code
Windows EyeLink Programming (8/16/2002) 2002 SR Research Ltd.
205
23.4.2 eyelink_read_reply()
INT16 eyelink_read_reply(char *buf);
Returns text with reply to last read request.
Arguments:
<buf>: string to contain text
Returns:
OK_RESULT (0) if response received
NO_REPLY if no response yet
23.5 EyeLink Tracker Modes
23.5.1 eyelink_abort()
INT16 eyelink_abort(void);
Places EyeLink tracker in off-line (idle) mode. Use before attempting to draw
graphics on the tracker display, transferring files, or closing link. Always call
eyelink_wait_for_mode_ready() afterwards to ensure tracker has
finished the mode transition.
Note: This function pair is implemented by the eyelink_exptkit library function
set_offline_mode().
Arguments:
None
Returns:
0 if mode switch begun, else link error
23.5.2 eyelink_wait_for_mode_ready()
INT16 eyelink_wait_for_mode_ready(UINT32 timeout);
After a mode-change command is given to the EyeLink tracker, an additional
5 to 30 milliseconds may be needed to complete mode setup. Call this
function after mode change functions. If it does not return 0, assume a
tracker error has occurred.
Note: Most uses for this function are supplanted by EXPTSPPT functions.
Arguments:
<timeout> milliseconds to wait for mode change
Returns:
0 if mode switch is done, else still waiting.
Windows EyeLink Programming (8/16/2002) 2002 SR Research Ltd.
206
23.5.3 eyelink_start_setup()
INT16 eyelink_start_setup(void);
Switches the EyeLink tracker to the Setup menu, for calibration, validation,
and
camera
setup.
Should
be
followed
by
a
call
to
eyelink_wait_for_mode_ready().
Arguments:
none
Returns:
0 if command sent OK
else link error
23.5.4 eyelink_in_setup()
INT16 eyelink_in_setup(void);
Checks if tracker is still in a Setup menu activity (includes camera image
view, calibration, and validation). Used to terminate the subject setup loop.
Arguments:
none
Returns
0 if no longer in the Setup mode
23.5.5 eyelink_tracker_mode()
INT16 eyelink_tracker_mode(void);
Returns raw EyeLink mode numbers, defined in eyelink.h as EL_xxxx
definitions
Arguments:
none
Returns:
raw EyeLink mode, -1 if link disconnected
23.6 Calibration and Drift Correction Support
23.6.1 eyelink_target_check()
INT16 eyelink_target_check(INT16 *x, INT16 *y);
Returns current calibration target position and state.
Arguments:
<x>: pointer to variable to hold target X position
<y>: pointer to variable to hold target Y position
Returns:
0 if target is visible, else target is visible
Windows EyeLink Programming (8/16/2002) 2002 SR Research Ltd.
207
23.6.2 eyelink_accept_trigger()
INT16 eyelink_accept_trigger(void);
Triggers the EyeLink tracker to accept a fixation on a target, similar to the
‘Enter’ key or spacebar on the tracker.
Arguments:
none
Returns:
NO_REPLY if drift correction not completed yet
OK_RESULT (0) if success
ABORT_REPLY (27) if ‘Esc’ key aborted operation
-1 if operation failed
1 if poor calibration or excessive validation error
23.6.3 eyelink_driftcorr_start()
INT16 eyelink_driftcorr_start(INT16 x, INT16 y);
Sets the position of the drift correction target, and switches the tracker to
drift-correction
mode.
Should
be
followed
by
a
call
to
eyelink_wait_for_mode_ready().
Arguments:
<x>: X position of target
<y>: Y position of target
Returns:
0 if command sent OK
else link error
23.6.4 eyelink_cal_result()
INT16 eyelink_cal_result(void);
Checks for a numeric result code returned by calibration, validation, or drift
correction.
Arguments:
none
Returns:
NO_REPLY if drift correction not completed yet
OK_RESULT (0) if success
ABORT_REPLY (27) if ‘Esc’ key aborted operation
-1 if operation failed
1 if poor calibration or excessive validation error
Windows EyeLink Programming (8/16/2002) 2002 SR Research Ltd.
208
23.6.5 eyelink_apply_driftcorr()
INT16 eyelink_apply_driftcorr(void);
Applies the results of the last drift correction. This is not done automatically
after
a
drift
correction,
allowing
the
message
returned
by
eyelink_cal_message() to be examined first.
Arguments:
none
Returns:
0 if command sent OK
else link error
23.6.6 eyelink_cal_message()
INT16 eyelink_cal_message(char *buf);
Returns text associated with result of last calibration, validation, or drift
correction. This usually specifies errors or other statistics.
Arguments:
<buf>: string to contain text
Returns:
0 if no message since last command sent
else length of string
23.7 User Menu Support
23.7.1 eyelink_user_menu_selection()
INT16 eyelink_user_menu_selection(void);
Checks for a user-menu selection, clears response for next call.
Arguments:
none
Returns:
0 if no selection made since last call
else code of selection
Windows EyeLink Programming (8/16/2002) 2002 SR Research Ltd.
209
23.8 Link Data Receive Control
23.8.1 eyelink_reset_data()
INT16 eyelink_reset_data(INT16 clear);
Prepares link buffers to receive new data. If <clear> is nonzero, removes old
data from buffer.
Arguments:
<clear>: if nonzero, any buffer data is discarded
Returns:
always 0
23.8.2 eyelink_data_status()
void *eyelink_data_status(void);
Updates buffer status (data count, etc), returns pointer to internal
ILINKDATA structure.
Arguments:
None
Returns:
Pointer to ILINKDATA structure
23.8.3 eyelink_wait_for_block_start()
INT16 eyelink_wait_for_block_start(UINT32 timeout,
INT16 samples, INT16 events);
Reads and discards events in data queue until in a recording block. Waits
for up to <timeout> milliseconds for a block containing samples, events, or
both to be opened. Items in the queue are discarded until the block start
events are found and processed. This function will fail if both samples
and events are selected but only one of link samples and events were
enabled by start_recording().
NOTE: this function did not work in versions previous to 2.0 of the
eyelink_exptkit DLL
Arguments:
<timeout>: time in milliseconds to wait for data
<samples>: if nonzero, block must contain samples
<events>: if nonzero, block must contain events
Returns:
0 if time expired without any data of masked types available
Windows EyeLink Programming (8/16/2002) 2002 SR Research Ltd.
210
23.8.4 eyelink_in_data_block()
INT16 eyelink_in_data_block(INT16 samples, INT16 events);
Checks to see if framing events read from queue indicate that the data is in a
block containing samples, events, or either. The first item in queue may not
be a block start even, so this should be used in a loop while discarding items
using eyelink_get_next_data(NULL).
NOTE: this function did not work reliably in versions of the SLL before v2.0
(did not detect end of blocks).
Arguments:
<samples>: if nonzero, checks if in a block with samples
<events>: if nonzero, checks if in a block with events
Returns:
0 if no data of either masked type is being sent
23.8.5 eyelink_wait_for_data()
INT16 eyelink_wait_for_data(UINT32 timeout,
INT16 samples, INT16 events);
Waits for up to <timeout> milliseconds for samples, events, or either to be
available in queue. The first item in queue may not be of the desired type,
however, in which case this function will time out, unless you discard items
in a loop using eyelink_get_next_data(NULL).
Arguments:
<timeout>: time in milliseconds to wait for data
<samples>: if nonzero, checks if samples available
<events>: if nonzero, checks if events available
Returns:
0 if time expired without any data of masked types available
23.8.6 eyelink_get_next_data()
INT16 eyelink_get_next_data(void *buf);
Gets an integer (unconverted) copy of the next link data item (sample or
event). When used with a NULL argument, reads and discards data items.
Arguments:
NULL, or pointer to buffer (ISAMPLE, IEVENT, or ALL_DATA
type)
Returns:
0 if no data, SAMPLE_TYPE if sample, else event type code
Windows EyeLink Programming (8/16/2002) 2002 SR Research Ltd.
211
23.8.7 eyelink_get_last_data()
INT16 eyelink_get_last_data(void *buf);
Gets an integer (unconverted) copy of the last link data (sample or event)
seen by eyelink_get_next_data().
Arguments:
Pointer to buffer (ISAMPLE, IEVENT, or ALL_DATA type)
Returns:
0 if no data, SAMPLE_TYPE if sample, else event type code
23.8.8 eyelink_get_sample()
INT16 eyelink_get_sample(void *buf);
Gets an integer (unconverted) sample from end of queue, discards any events
encountered.
Arguments:
Pointer to buffer (ISAMPLE or ALL_DATA type)
Returns:
0 if no data, 1 if sample retrieved
23.8.9 eyelink_newest_sample()
INT16 eyelink_newest_sample(void *buf);
Gets an integer (unconverted) copy of the latest sample received from link.
Arguments:
Pointer to buffer (ISAMPLE or ALL_DATA type): may be NULL to
just test for new sample
Returns:
-1 if no data, 0 if old sample retrieved, 1 if new sample retrieved
23.8.10 eyelink_data_count()
INT16 eyelink_data_count(INT16 samples, INT16 events);
Counts total items in queue: samples, events, or both.
Arguments:
<samples>: if nonzero, counts samples
<events>: if nonzero, counts events
Returns:
total selected items in queue
Windows EyeLink Programming (8/16/2002) 2002 SR Research Ltd.
212
23.8.11 eyelink_data_switch()
INT16 eyelink_data_switch(UINT16 flags);
Sets what data from tracker will be accepted and placed in queue. This does
not start the tracker recording, and so can be used with
eyelink_broadcast_connect(). It also does not clear old data from the
queue. The data is set with a bitwise OR of these flags:
RECORD_LINK_SAMPLES /* send samples on link */
RECORD_LINK_EVENTS
/* send events on link */
Arguments:
<flags>: bitwise OR of flags
Returns:
0 if OK
else link error
23.8.12 eyelink_data_start()
INT16 eyelink_data_start(UINT16 flags, INT16 lock);
Switches tracker to Record mode, enables data types for recording to EDF file
or sending to link. These types are set with a bitwise OR of these flags:
RECORD_FILE_SAMPLES
RECORD_FILE_EVENTS
RECORD_LINK_SAMPLES
RECORD_LINK_EVENTS
(1) - only active if file open
(2) - only active if file open
(4) - accept samples from link
(8) - accept events from link
If <lock> is nonzero, the recording may only be terminated through
stop_recording() or eyelink_data_stop(), or by the Abort menu
(‘Ctrl’’Alt’’A’ keys on the eye tracker). If zero, the tracker ‘Esc’ key may be
used to halt recording.
Arguments:
<flags>: bitwise OR of flags to control what data is recorded. If
0, recording will be stopped.
<lock>: if nonzero, prevents ‘Esc’ key from ending recording
Returns:
0 if command sent OK
else link error
Windows EyeLink Programming (8/16/2002) 2002 SR Research Ltd.
213
23.8.13 eyelink_data_stop()
INT16 eyelink_data_stop(void);
Places tracker in Idle (off-line) mode, does not flush data from queue. Should
be followed by a call to eyelink_wait_for_mode_ready().
Arguments:
none
Returns:
0 if command sent
else link error
23.8.14 eyelink_event_data_flags()
INT16 eyelink_event_data_flags(void);
Returns the event data content flags (bits are defined in EYE_DATA.H). This
will be 0 if the data being read from queue is not in a block with events.
Arguments:
None
Returns:
event data content flags (defined in EYE_DATA.H)
Windows EyeLink Programming (8/16/2002) 2002 SR Research Ltd.
214
23.8.15 eyelink_position_prescaler()
INT16 eyelink_position_prescaler(void);
Returns the divisor used to convert integer eye data to floating point data.
Arguments:
None
Returns:
divisor (usually 10)
23.9 Special Link Connections
The EyeLink library allows you to have multiple trackers and computers on the
same link. Each tracker and computer is called a node, and is identified by a
name and an ELINKADDR, which is unique to each computer. It is possible to
poll the network for a list of all trackers and remotes (non-eyetracker computers).
You may connect to a specific eyetracker by specifying its ELINKADDR, and send
messages or time requests to any tracker. Also, remotes may exchange data
packets.
23.9.1 open_eyelink_system()
UINT16 open_eyelink_system(UINT16 bufsize, char *options);
Use this function to initialize the EyeLink library. This will also start the
millisecond clock. No connection is attempted to the eyetracker yet. It is
preferable to call open_eyelink_connection(-1) instead, as this prepares
other parts of the DLL for use.
Arguments:
<bufsize>: size of sample buffer. 60000 is the maximum
allowed
<options>: text specifying initialization options. Currently no
options are supported.
Returns:
0 if error
else nonzero
Windows EyeLink Programming (8/16/2002) 2002 SR Research Ltd.
215
23.9.2 close_eyelink_system()
void close_eyelink_system(void);
Resets the EyeLink library, releases the system resources used by the
millisecond clock.
Arguments:
none
23.9.3 eyelink_open()
INT16 eyelink_open(void);
Attempts to open a link connection to the EyeLink tracker. Under Windows,
the DLL will connect to the tracker at the address set by
set_eyelink_address(). If this address was “255.255.255.255” (and for
non-Windows implementations) the DLL will “broadcast” a request to any
tracker, however this may fail under Windows if multiple Ethernet cards are
installed, unless the proper versions of the DLL (v2.1 or higher) and tracker
software (EyeLink I v2.1 or higher, EyeLink II v1.1 or higher) are installed.
Before using this command, call either open_eyelink_connection(-1) or
eyelink_open_system() to prepare the link for use.
Arguments:
None
Returns:
0 if connected or error code:
LINK_INITIALIZE_FAILED if the network driver is missing
CONNECT_TIMEOUT_FAILED if tracker didn't respond
WRONG_LINK_VERSION
if the EyeLink DLL and EyeLink
tracker link versions do not match
23.9.4 eyelink_dummy_open()
INT16 eyelink_dummy_open(void);
Sets the EyeLink library to simulate an eyetracker connection. Functions
will
return
plausible
values,
but
no
data.
The
function
eyelink_is_connected() will return –1 to indicate a simulated connection.
Arguments:
None
Returns:
always 0
Windows EyeLink Programming (8/16/2002) 2002 SR Research Ltd.
216
23.9.5 eyelink_close()
INT16 eyelink_close(int send_msg);
Sends a disconnect message to the EyeLink tracker, resets the link data
system. Usually <send_msg> is 1, but 0 might be used to reset the EyeLink
system if it is listening in on a broadcast data session. This does not shut
down the link, which remains available for other operations.
Arguments:
<send_msg>: 1 normally, 0 if broadcast mode link listener
Returns:
0 if success, else link error
23.9.6 eyelink_broadcast_open()
INT16 eyelink_broadcast_open(void);
NOTE: With older tracker and DLL versions, these may not function under
Windows with multiple Ethernet cards. This requires EyeLink I v2.1 or higher,
EyeLink II v1.1 or higher, and eyelink_exptkit20.dll v2.1 or higher.
Allows an third computer to listen in on a session between the eye tracker
and a controlling remote. This allows it to receive data during recording and
playback, and to monitor the eye tracker mode. The local computer will not
be able to send commands to the eye tracker, but may be able to send
messages or request the tracker time.
Arguments:
None
Returns:
0 if succeeds
LINK_INITIALIZE_FAILED if link failed
CONNECT_TIMEOUT_FAILED if tracker didn't respond
WRONG_LINK_VERSION if the versions of the EyeLink library
and tracker are incompatible
Windows EyeLink Programming (8/16/2002) 2002 SR Research Ltd.
217
23.9.7 eyelink_open_node()
INT16 eyelink_open_node(ELINKADDR node, INT16 busytest);
Allows the local computer to connect to a specific eye tracker, when there are
several trackers on the same network. The <node> must be an address
returned by eyelink_poll_trackers() and eyelink_poll_responses()
to connect to any tracker. If <busytest> is nonzero, the eyetracker will refuse
the connection if already connected to another computer.
Arguments:
none
Returns:
0 if succeeds
LINK_INITIALIZE_FAILED if link failed
CONNECT_TIMEOUT_FAILED if tracker didn't respond
WRONG_LINK_VERSION if the versions of the EyeLink library
and tracker are incompatible
TRACKER_BUSY if <busytest> is set, and tracker is connected
to another computer
Windows EyeLink Programming (8/16/2002) 2002 SR Research Ltd.
218
23.9.8 eyelink_broadcast_open()
INT16 eyelink_broadcast_open(void);
NOTE: With older tracker and DLL versions, this may not function under
Windows with multiple Ethernet cards. This requires EyeLink I v2.1 or
higher, EyeLink II v1.1 or higher, and eyelink_exptkit20.dll v2.1 or
higher.
Allows an third computer to listen in on a session between the eye tracker
and a controlling remote. This allows it to receive data during recording and
playback, and to monitor the eye tracker mode. The local computer will not
be able to send commands to the eye tracker, but may be able to send
messages or request the tracker time.
Arguments:
None
Returns:
0 if succeeds
LINK_INITIALIZE_FAILED if link failed
CONNECT_TIMEOUT_FAILED if tracker didn't respond
WRONG_LINK_VERSION if the versions of the EyeLink library
and tracker are incompatible
23.9.9 eyelink_quiet_mode()
INT16 eyelink_quiet_mode(INT16 mode);
Controls the level of control an application has over the tracker. This is used
in combination with broadcast mode (multiple applications connected to one
tracker) to ensure that “listener” applications do not inadvertently send
commands, key presses, or messages to the tracker. This is mostly useful
when quickly converting an existing application into a listener.
Arguments:
<mode>:
0 to allow all communication
1 to block commands (allows only key presses, messages, and
time or variable read requests).
2 to disable all commands, requests and messages
-1 to just return current setting
Returns:
Previous setting
Windows EyeLink Programming (8/16/2002) 2002 SR Research Ltd.
219
23.10 Tracker and Application Search
NOTE: With older tracker and DLL versions, these functions may not under
Windows with multiple Ethernet cards installed. This requires EyeLink I v2.1 or
higher, EyeLink II v1.1 or higher, and eyelink_exptkit20.dll v2.1 or higher.
NOTE: an ELINKADDR is a specific network address for a tracker or application. An
ELINKNODE contains both an ELINKADDR and a name string.
23.10.1 eyelink_set_name()
void eyelink_set_name(char *name);
Sets the node name of this computer (up to 35 characters) .
Arguments:
string to become new name
Returns:
None
23.10.2 text_to_elinkaddr()
INT16 text_to_elinkaddr(char *addr, ELINKADDR node, int
remote);
Converts a text IP address (for example, “100.1.1.1”) to an ELINKADDR. This
can then be used to communicate directly with trackers or applications at
known addresses. The <remote> argument must be 0 if the address is a
tracker, or 1 if the address is another application.
Arguments:
<addr>: pointer to a string containing a “dotted” 4-digit IP
address
<node>: an ELINKADDR
<remote>: 0 for tracker, 1 for remote
Returns:
0 if success, -1 if could not parse address string
Windows EyeLink Programming (8/16/2002) 2002 SR Research Ltd.
220
23.10.3 eyelink_poll_trackers()
INT16 eyelink_poll_trackers(void);
Asks all trackers (with EyeLink software running) on the network to send
their names and node address.
Arguments:
None
Returns:
0 if succeeds, else link error
23.10.4 eyelink_poll_remotes()
INT16 eyelink_poll_remotes(void);
Asks all non-tracker computers (with an EyeLink application running) on the
network to send their names and node address.
Arguments:
None
Returns:
0 if succeeds, else link error
23.10.5 eyelink_poll_responses()
INT16 eyelink_poll_responses(void);
Returns the count of node addresses received so far. You should allow about
100 milliseconds for all nodes to respond. Up to 4 node responses are saved.
Arguments:
none
Returns:
0 if no nodes responded, else number of nodes
Windows EyeLink Programming (8/16/2002) 2002 SR Research Ltd.
221
23.10.6 eyelink_get_node()
INT16 eyelink_get_node(INT16 resp, void *data);
Reads the responses returned by other trackers or remotes in response to
eyelink_poll_trackers() or eyelink_poll_remotes(). It can also read
the tracker broadcast address and remote broadcast addresses. The data
buffer must be of the type ELINKNODE, defined in eye_data.h.
Arguments:
<resp>: number of response (0 is first), -1 to read tracker
broadcast address, -2 to read remote broadcast address.
<data>: pointer to buffer of ELINKNODE type, to hold name
and ELINKADDR of the respondent.
Returns:
0 if OK, -1 if node response number is too high
23.11 Inter-application Communication
23.11.1 eyelink_node_send()
INT16 eyelink_node_send(ELINKADDR node,
void *data, UINT16 size);
Sends a packet containing the data pointed to by <data>, and containing
<size> bytes.
Arguments:
<node>: ELINKADDR node address
<data>: pointer to buffer containing data to send
<size>: number of bytes of data
Returns:
0 if succeeds, else link error
23.11.2 eyelink_node_receive()
INT16 eyelink_node_receive(ELINKADDR node, void *data);
Checks for and gets the last packet received, stores the data and the node
address sent from. Data can only be read once, and is overwritten if a new
packet arrives before the last packet has been read.
Arguments:
<node>: ELINKADDR node address of sender
<data>: pointer to buffer to hold data
<size>: number of bytes of data
Returns:
0 if no data, else number of bytes of data in packet
Windows EyeLink Programming (8/16/2002) 2002 SR Research Ltd.
222
23.11.3 eyelink_node_send_command()
INT16 eyelink_node_send_command(ELINKADDR node,
char *text);
Sends a command to a specific eye tracker. The text command will be
executed, and a result code returned that can be read with
eyelink_command_result().
Arguments:
<node>: ELINKADDR address of tracker to send to
<text>: string with command to send
Returns:
0 if no error, else link error code
23.11.4 eyelink_node_send_message()
INT16 eyelink_node_send_message(ELINKADDR node,char *text);
Sends a text message a specific eye tracker. The text will be added to the
EDF file.
Arguments:
<node>: ELINKADDR address of tracker to send to
<text>: string with message to send
Returns:
0 if no error, else link error code
23.11.5 eyelink_node_request_time()
INT16 eyelink_node_request_time(ELINKADDR node);
Sends a request to a specific eye tracker to return its current time. The time
reply can be read with eyelink_read_time().
Arguments:
<node>: ELINKADDR address of tracker to request time from
Returns:
0 if no error, else link error code
23.12 Calibration and Image Support Hooks
This section has not yet been formatted by function. However, the relevant
portion of w32_exptsppt.h has been included here, which documents all available
hooks.
Several points will be made that will simplify reading this section. First, the
functions defined here are used to set the hooks to point to your new hooking
function. The first argument is always the hooking function, and the “option”
argument is always 0. The type of the hooking function can be derived from the
hook-setting function prototype, for example the function to set the calibrationtarget drawing hook:
Windows EyeLink Programming (8/16/2002) 2002 SR Research Ltd.
223
extern INT16 CALLTYPE set_draw_cal_target_hook(
INT16 (CALLBACK * draw_cal_target_hook)( HDC hdc,
INT16 * x,
INT16 * y),
INT16 options);
would require a hooking function like this:
INT16 CALLBACK draw_cal_target_hook(HDC hdc, INT16 * x, INT16 * y)
{
*x = *x + 10;
// offset the X and Y co-ordinates of the target
*y = *y + 10;
return HOOK_CONTINUE; // let the DLL finish drawing at the new location
}
In addition, hooking functions will always return HOOK_CONTINUE to let the
DLL continue to handle the operation (perhaps with modified parameters, such
as target location in the example above), or HOOK_NODRAW if you have already
implemented the operation yourself.
Here is the relevant section of w32_exptsppt2.h:
// These give access to internal calls similar to those
// that the programmer must supply in the DOS version.
// Each DOS function has a corresponding hook function
// Use set_expt_graphics_hook() to register a function that will
// be called before any operation is performed by the WIN95 exptkit.
// A return value from this hook will prevent the normal operations from being
performed
// These functions set the hook functions for calibration graphics.
// These hooks will be called to before drawing.
// A NULL hook function can be used to disable hook.
// In most cases the hook functions should work like the DOS (exptsppt.h)
functions.
// Return HOOK_CONTINUE to let built-in handler continue
// else HOOK_NODRAW if you have implemented the function yourself.
#define HOOK_ERROR
-1
#define HOOK_CONTINUE 0
#define HOOK_NODRAW
1
// if error occurred
// if drawing to continue after return from hook
// if drawing should not be done after hook
// Some routines supply a HDC, which is set up for drawing in the
// calibration window, including the palette in 256-color modes.
// The HDC will not be valid if you return HOOK_NODRAW from
setup_cal_display_hook()
// For compatibility, <options> in hook-set calls should be 0
// These functions return 0 if OK, else couldn't set hook
// If you return HOOK_NODRAW from setup_cal_display_hook() then
// you must implement all the calibration graphics functions in your own code.
extern INT16 CALLTYPE set_setup_cal_display_hook(
INT16 (CALLBACK * setup_cal_display_hook)(void), INT16
options);
extern INT16 CALLTYPE set_clear_cal_display_hook(
INT16 (CALLBACK * clear_cal_display_hook)(HDC hdc),
INT16 options);
// The <x> and <y> values may be changed and HOOK_CONTINUE returned
// to allow the normal drawing to proceed at different locations
extern INT16 CALLTYPE set_erase_cal_target_hook(
Windows EyeLink Programming (8/16/2002) 2002 SR Research Ltd.
224
INT16 (CALLBACK * erase_cal_target_hook)(HDC hdc),
INT16 options);
extern INT16 CALLTYPE set_draw_cal_target_hook(
INT16 (CALLBACK * draw_cal_target_hook)(HDC hdc, INT16
* x, INT16 * y), INT16 options);
extern INT16 CALLTYPE set_exit_cal_display_hook(
INT16 (CALLBACK * exit_cal_display_hook)(void), INT16
options);
// This intercepts a trapped tracker recording abort
// (ESC or CTRL-ALT-A during recording)
extern INT16 CALLTYPE set_record_abort_hide_hook(
INT16 (CALLBACK * record_abort_hide_hook)(void), INT16
options);
// Uses the constants below to specify predefined sound.
// You can modify <sound> and return HOOK_CONTINUE, or
// produce your own sounds and return HOOK_NODRAW.
extern INT16 CALLTYPE set_cal_sound_hook(
INT16 (CALLBACK * cal_sound_hook)(INT16 * error),
INT16 options);
// These are the constants in the argument to cal_sound_hook():
#define CAL_TARG_BEEP
#define CAL_GOOD_BEEP
#define CAL_ERR_BEEP
#define DC_TARG_BEEP 3
#define DC_GOOD_BEEP 2
#define DC_ERR_BEEP
//
//
//
//
//
1
0
-1
-2
CAMERA IMAGE DISPLAY FUNCTIONS:
Usually you use these to monitor start and end of of image mode
If you need to implement your own image display you have to
return HOOK_NODRAW from setup_image_display_hook() then
implement all functions in your own code.
extern INT16 CALLTYPE set_setup_image_display_hook(
INT16 (CALLBACK * setup_image_display_hook)(INT16
width, INT16 height), INT16 options);
extern INT16 CALLTYPE set_image_title_hook(
INT16 (CALLBACK * image_title_hook)(INT16 threshold,
char *cam_name), INT16 options);
extern INT16 CALLTYPE set_draw_image_line_hook(
INT16 (CALLBACK * draw_image_line_hook)(INT16 width,
INT16 line, INT16 totlines, byte *pixels), INT16 options);
extern INT16 CALLTYPE set_set_image_palette_hook(
INT16 (CALLBACK * set_image_palette_hook)(INT16
ncolors, byte r[], byte g[], byte b[]), INT16 options);
extern INT16 CALLTYPE set_exit_image_display_hook(
INT16 (CALLBACK * exit_image_display_hook)(void),
INT16 options);
Windows EyeLink Programming (8/16/2002) 2002 SR Research Ltd.
225
24. Useful EyeLink Commands
These commands may be sent by the eyecmd_printf() function to the EyeLink
tracker. You will need to use only a few of these: rarely more than those used in
the template source.
For current information on the EyeLink tracker configuration, examine the *.INI
files in the EYELINK\EXE\ directory of the eye tracker computer.
24.1 Calibration Setup
24.1.1 calibration_type
calibration_type = <type>
This command sets the calibration type, and recomputed the calibration
targets after a display resolution change.
Arguments:
<type>: one of these calibration type codes:
H3: horizontal 3-point calibration
HV3: 3-point calibration, poor linearization
HV5: 5-point calibration, poor at corners
HV9: 9-point grid calibration, best overall
24.1.2 gaze_constraint
x_gaze_constraint = <position>
y_gaze_constraint = <position>
Locks the X or Y part of gaze position data. Usually set to AUTO: this will
use the last drift-correction target position when in H3 mode.
Arguments:
<position>: a gaze coordinates, or AUTO
Windows EyeLink Programming (8/16/2002) 2002 SR Research Ltd.
226
24.1.3 horizontal_target_y
horizontal_target_y = <position>
Sets the Y position (vertical display coordinate) for computing targets
positions when the H3 calibration mode is set. Set before issuing the
“calibration_type = H3” command.
Arguments:
<position>: Y display coordinate for targets in H3 calibration
mode
24.1.4 enable_automatic_calibration
enable_automatic_calibration = <YES or NO>
“YES” enables auto-calibration sequencing, “NO” forces manual calibration
sequencing.
Arguments:
YES or NO
24.1.5 automatic_calibration_pacing
automatic_calibration_pacing = <time>
Slows automatic calibration pacing. 1000 is a good value for most subject,
1500 for slow subjects and when interocular data is required.
Arguments:
<time>: shortest delay
24.2 Configuring Key and Buttons
See the tracker file “BUTTONS.INI” and “KEYS.INI” for examples.
24.2.1 key_function
key_function <keyspec> <command>
Look at the tracker “KEYS.INI” file for examples.
Arguments:
<keyspec>: key name and modifiers
<command>: command string to execute when key pressed
Windows EyeLink Programming (8/16/2002) 2002 SR Research Ltd.
227
24.2.2 create_button
create_button <button> <ioport> <bitmask> <inverted>
Defines a button to a bit in a hardware port.
Arguments:
<button>: button number, 1 to 8
<ioport>: address of hardware port
<bitmask>: 8-bit mask ANDed with port to test button line
<inverted>: 1 if active-low, 0 if active-high
24.2.3 button_function
button_function <button> <presscmd> <relcmd>
Assigns a command to a button. This can be used to control recording
with a digital input, or to let a button be used instead of the spacebar
during calibration.
Arguments:
<button>: hardware button 1 to 8, keybutton 8 to 31
<presscmd>: command to execute when button pressed
<relcmd>: command to execute when button released
24.2.4 button_debounce_time
button_debounce_time = <delay>
Sets button debounce time. Button responds immediately to first change,
then is ignored until it is stable for this time.
Arguments:
<delay>: debounce in milliseconds.
24.2.5 write_ioport
write_ioport <ioport> <data>
Writes data to I/O port. Useful to configure I/O cards.
Arguments:
<ioport>: byte hardware I/O port address
<data>: data to write
24.2.6 read_ioport
read_ioport <ioport>
Performs a dummy read of I/O port. Useful to configure I/O cards.
Arguments:
<ioport>: byte hardware I/O port address
Windows EyeLink Programming (8/16/2002) 2002 SR Research Ltd.
228
24.3 Display Setup
24.3.1 screen_pixel_coords
screen_pixel_coords = <left> <top> <right> <bottom>
Sets the gaze-position coordinate system, which is used for all calibration
target locations and drawing commands. Usually set to correspond to the
pixel mapping of the subject display.
Issue the calibration_type
command after changing this to recompute fixation target positions.
You should also write a DISPLAY_COORDS message to the start of the
EDF file to record the display resolution.
Arguments:
<left>: X coordinate of left of display area
<top>: Y coordinate of top of display area
<right>: X coordinate of right of display area
<bottom>: Y coordinate of bottom of display area
24.3.2 screen_write_prescale
screen_write_prescale = <multiplier>
Sets the value by which gaze position data is multiplied before writing to
EDF file or link as integer. This is nominally 10, but should be reduced
for displays with greater than 1500x1500 pixels, or increased for gaze
coordinate systems with less than 150x150 units.
Arguments:
<multiplier>: integer value, 1 to 1000
24.4 File Open and Close
24.4.1 open_data_file
open_data_file <name>
Opens an EDF file, closes any existing file
Arguments:
<name>: name of data file
Windows EyeLink Programming (8/16/2002) 2002 SR Research Ltd.
229
24.4.2 add_file_preamble_text
add_file_preamble_text <text>
Must be used immediately after open_data_file, to add a note on file
history.
Arguments:
<text>: text to add, in quotes
24.4.3 close_data_file
close_data_file
Closes any open EDF file
Arguments:
None
24.4.4 data_file_path
data_file_path = <path>
Can be used to set where EDF files are to be written.
information in file name overrides
Arguments:
Any directory
<path>: directory or drive path in quotes, “.” for current
directory
24.5 Tracker Configuration
These commands are used to set tracker configuration. This should be done at
the start of each experiment, in case the default setting were modified by a
previous experiment.
24.5.1 Configuration: Eyes Tracked
active_eye = <LEFT or RIGHT>
Controls which eye is recorded from in monocular mode
Arguments:
LEFT or RIGHT monocular eye selection
binocular_enabled = <YES or NO>
Controls whether in monocular or binocular tracking mode .
Arguments:
YES for binocular tracking
NO for monocular tracking
Windows EyeLink Programming (8/16/2002) 2002 SR Research Ltd.
230
24.5.2 Anti-Reflection Control
NOTE: EyeLink I only!!!
head_subsample_rate = <0, -1, or 4>
Can be used to disable monitor marker LEDS, or to control antireflection
option.
Arguments:
0 for normal operation
4 for antireflection on
-1 to turn off markers
24.5.3 heuristic_filter (EyeLink I)
heuristic_filter = <ON or OFF>
Can be used to disable filtering, reduces system delay by 4 msec. NEVER
TURN OFF THE FILTER WHEN ANTIREFLECTION IS TURNED ON.
Arguments:
ON enables filter (usual)
OFF disables filter
24.5.4 heuristic_filter (EyeLink II)
heuristic_filter = <ON or OFF>
heuristic_filter = <linkfilter>
heuristic_filter = <linkfilter> <filefilter>
Can be used to set level of filtering on the link and analog output, and on
file data. An additional delay of 1 sample is added to link or analog data
for each filter level.
If an argument of <on> is used, link filter level is set to 1 to match EyeLink
I delays. The file filter level is not changed unless two arguments are
supplied. The default file filter level is 2.
Arguments:
0 or OFF disables link filter
1 or ON sets filter to 1 (moderate filtering, 1 sample delay)
2 applies an extra level of filtering (2 sample delay).
24.5.5 pupil_size_diameter
pupil_size_diameter = <YES or NO>
Arguments:
YES to convert pupil area to diameter
NO to output pupil area data
Windows EyeLink Programming (8/16/2002) 2002 SR Research Ltd.
231
24.5.6 simulate_head_camera
simulate_head_camera = <YES or NO>
Can be used to turn off head tracking if not used.
calibration
Arguments:
Do this before
YES to disable head tracking
NO to enable head tracking
24.5.7 simulation_screen_distance
simulation_screen_distance = <mm>
Used to compute correct visual angles and velocities when head tracking
not used.
Arguments:
<mm>: simulated
millimeters.
distance
from
display
to
subject
in
24.6 Drawing Commands
24.6.1 echo
echo <text>
Prints text at current print position to tracker screen, gray on black only
Arguments:
<text>: text to print in quotes
24.6.2 print_position
print_position <column><line>
Coordinates are text row and column, similar to C gotoxy() function.
NOTE: row cannot be set higher than 25. Use “draw_text” command to
print anywhere on the tracker display.
Arguments:
<col>: text column, 1 to 80
<row>: text line, 1 to 25
Windows EyeLink Programming (8/16/2002) 2002 SR Research Ltd.
232
24.6.3 clear_screen
clear_screen <color>
Clear tracker screen for drawing background graphics or messages.
Arguments:
<color>: 0 to 15
24.6.4 draw_line
draw_line <x1> <y1> <x2> <y2> <color>
Draws line, coordinates are gaze-position display coordinates.
Arguments:
<x1>,<y1>: start point of line
<x2>,<y2>: end point of line
<color>: 0 to 15
24.6.5 draw_box
draw_box <x1> <y1> <x2> <y2> <color>
Draws empty box, coordinates are gaze-position display coordinates.
Arguments:
<x1>,<y1>: corner of box
<x2>,<y2>: opposite corner of box
<color>: 0 to 15
24.6.6 draw_filled_box
draw_filled_box <x1> <y1> <x2> <y2> <color>
Draws a solid block of color, coordinates are gaze-position display
coordinates.
Arguments:
<x1>,<y1>: corner of box
<x2>,<y2>: opposite corner of box
<color>: 0 to 15
24.6.7 draw_line
draw_line <x1> <y1> <x2> <y2> <color>
Draws line, coordinates are gaze-position display coordinates.
Arguments:
<x1>,<y1>: start point of line
<x2>,<y2>: end point of line
<color>: 0 to 15
Windows EyeLink Programming (8/16/2002) 2002 SR Research Ltd.
233
24.6.8 draw_text
draw_text <x1> <y1> <color> <text>
Draws text, coordinates are gaze-position display coordinates.
Arguments:
<x1>,<y1>: center point of text
<color>: 0 to 15
<text>: text of line, in quotes
24.6.9 draw_cross
draw_cross <x> <y>
Draws a small “+” to mark a target point.
Arguments:
<x1>,<y1>: center point of cross
<color>: 0 to 15
24.7 File Data Control
24.7.1 file_sample_data
file_sample_data = <list>
Sets data in samples written to EDF file. See tracker file “DATA.INI” for
types.
Arguments:
<list>: list of data types
GAZE
screen xy (gaze) position
GAZERES units-per-degree screen resolution
HREF
head-referenced gaze
PUPIL
raw eye camera pupil coordinates
AREA
pupil area
STATUS warning and error flags
BUTTON button state and change flags
INPUT
input port data lines
24.7.2 file_event_data
file_event_data = <list>
Sets data in events written to EDF file.
types.
Arguments:
See tracker file “DATA.INI” for
<list>: list of data types
Windows EyeLink Programming (8/16/2002) 2002 SR Research Ltd.
234
GAZE
GAZERES
HREF
AREA
VELOCITY
STATUS
FIXAVG
NOSTART
screen xy (gaze) position
units-per-degree angular resolution
HREF gaze position
pupil area or diameter
velocity of eye motion (avg, peak)
warning and error flags for event
include ONLY average data in ENDFIX events
start events have no data, just time stamp
24.7.3 file_event_filter
file_event_filter = <list>
Sets which types of events will be written to EDF file.
“DATA.INI” for types.
Arguments:
See tracker file
<list>: list of event types
LEFT, RIGHT events for one or both eyes
FIXATION
fixation start and end events
FIXUPDATE
fixation (pursuit) state updates
SACCADE
saccade start and end
BLINK
blink start an end
MESSAGE messages (user notes in file)
BUTTON
button 1..8 press or release
INPUT
changes in input port lines
24.7.4 mark_playback_start
mark_playback_start
NEW for EyeLink I v2.1, EyeLink II v1.1
Marks the location in the data file from which playback will begin at the
next call to eyelink_playback_start(). When this command is not
used (or on older tracker versions) , playback starts from the beginning of
the previous recording block. This default behavior is suppressed after
this command is used, until the tracker software is shut down.
Arguments:
NONE
Windows EyeLink Programming (8/16/2002) 2002 SR Research Ltd.
235
24.8 Link Data Control
24.8.1 link_sample_data
link_sample_data = <list>
Sets data in samples sent through link.
types.
Arguments:
See tracker file “DATA.INI” for
<list>: list of data types
GAZE
screen xy (gaze) position
GAZERES units-per-degree screen resolution
HREF
head-referenced gaze
PUPIL
raw eye camera pupil coordinates
AREA
pupil area
STATUS
warning and error flags
BUTTON button state and change flags
INPUT
input port data lines
24.8.2 link_event_data
link_event_data = <list>
Sets data in events sent through link.
types.
Arguments:
See tracker file “DATA.INI” for
<list>: list of data types
GAZE
screen xy (gaze) position
GAZERES units-per-degree angular resolution
HREF
HREF gaze position
AREA
pupil area or diameter
VELOCITY velocity of eye motion (avg, peak)
STATUS
warning and error flags for event
FIXAVG
include ONLY average data in ENDFIX events
NOSTART start events have no data, just time stamp
Windows EyeLink Programming (8/16/2002) 2002 SR Research Ltd.
236
24.8.3 link_event_filter
link_event_filter = <list>
Sets which types of events will be sent through link.
“DATA.INI” for types.
Arguments:
See tracker file
<list>: list of event types
LEFT, RIGHT events for one or both eyes
FIXATION
fixation start and end events
FIXUPDATE
fixation (pursuit) state updates
SACCADE
saccade start and end
BLINK
blink start an end
MESSAGE
messages (user notes in file)
BUTTON
button 1..8 press or release
INPUT
changes in input port lines
24.8.4 recording_parse_type
recording_parse_type = <type>
Sets how velocity information for saccade detection is to be computed.
Almost always left to GAZE.
Arguments:
<type>: GAZE or HREF
24.8.5 link_nonrecord_events
link_nonrecord_events = <list>
Selects what types of events can be sent over the link while not recording
(e.g between trials).
This command has no effect for EyeLink II, and messages cannot be
enabled for versions of EyeLink I before v2.1..
Arguments:
<list>: event
MESSAGE
BUTTON
INPUT
types seperated by spaces or commas:
messages (user notes in file)
button 1..8 press or release
changes in input port lines
24.9 Parser Configuration
NOTE: for EyeLink II, you should use select_parser_configuration rather
than the other commands listed below.
Windows EyeLink Programming (8/16/2002) 2002 SR Research Ltd.
237
24.9.1 select_parser_configuration
select_parser_configuration = <set>
EyeLink II ONLY!
Selects the preset standard parser setup (0) or more sensitive saccade
detector (1). These are equivalent to the cognitive and psychophysical
configurations listed below.
Arguments:
<set>: 0 for standard, 1 for high sensitivity saccade detector
configuration
The remaining commands are documented for use with EyeLink I only.
24.9.2 saccade_velocity_threshold
saccade_velocity_threshold = <vel>
Sets velocity threshold of saccade detector: usually 30 for cognitive
research, 22 for pursuit and neurological work.
Arguments:
<vel>: minimum velocity (°/sec) for saccade
24.9.3 saccade_acceleration_threshold
saccade_acceleration_threshold = <accel>
Sets acceleration threshold of saccade detector: usually 9500 for cognitive
research, 5000 for pursuit and neurological work.
Arguments:
<accel>: minimum acceleration (°/sec/sec) for saccades
24.9.4 saccade_motion_threshold
saccade_motion_threshold = <deg>
Sets a spatial threshold to shorten saccades. Usually 0.15 for cognitive
research, 0 for pursuit and neurological work.
Arguments:
<deg>: minimum motion (degrees) out of fixation before saccade
onset allowed
Windows EyeLink Programming (8/16/2002) 2002 SR Research Ltd.
238
24.9.5 saccade_pursuit_fixup
saccade_pursuit_fixup = <maxvel>
Sets the maximum pursuit velocity accommodation by the saccade
detector. Usually 60.
Arguments:
<maxvel>: maximum pursuit velocity fixup (°/sec)
24.9.6 fixation_update_interval
fixation_update_interval = <time>
Normally set to 0 to disable fixation update events. Set to 50 or 100 msec.
to produce updates for gaze-controlled interface applications.
Arguments:
<time>: milliseconds between fixation updates, 0 turns off
24.9.7 fixation_update_accumulate
fixation_update_accumulate = <time>
Normally set to 0 to disable fixation update events. Set to 50 or 100 msec.
to produce updates for gaze-controlled interface applications. Set to 4 to
collect single sample rather than average position.
Arguments:
<time>: milliseconds to collect data before fixation update for
average gaze position
24.9.8 Typical Parser Configurations
These are suggested settings for the EyeLink I parser. For EyeLink II, you
should use select_parser_configuration rather than the other commands
listed below.
The Cognitive configuration is optimal for visual search and reading, and ignores
most saccades smaller than 0.5°. It is less sensitive to set up problems.
The Pursuit configuration is designed to detect small (<0.25°) saccades, but may
produce false saccades if subject setup is poor.
Windows EyeLink Programming (8/16/2002) 2002 SR Research Ltd.
239
24.9.8.1 Cognitive Configuration:
recording_parse_type = GAZE
saccade_velocity_threshold = 30
saccade_acceleration_threshold = 9500
saccade_motion_threshold = 0.15
saccade_pursuit_fixup = 60
fixation_update_interval = 0
24.9.8.2 Pursuit and Neurological Configuration:
recording_parse_type = GAZE
saccade_velocity_threshold = 22
saccade_acceleration_threshold = 5000
saccade_motion_threshold = 0.0
saccade_pursuit_fixup = 60
fixation_update_interval = 0
Windows EyeLink Programming (8/16/2002) 2002 SR Research Ltd.
240
Page 190: [1] Deleted
Arguments:
None
Returns:
Unknown
One of these constants, defined in defined in EYE_DATA.H:
LEFT_EYE if left eye data
RIGHT_EYE if right eye data
BINOCULAR if both left and right eye data
-1 if no eye data is available