1
Pro Maintenance Tools User Manual
1
Pro Maintenance Tools
User Manual
Pro Maintenance Tools (formerly Pro Maintenance Tools) is a utility pack designed to keep
your Final Cut Studio, Final Cut Pro X, Avid Media Composer, Avid Symphony or Adobe
Premiere Pro for Mac running at optimal performance and help resolve problems when they
arise.
The suite contains tools to repair corrupt QuickTime movies, locate corrupt clips within a
timeline, diagnose crash logs, manage plugins, repair Final Cut Pro projects, manage
autosaves, salvage movie data from corrupt files, and much more.
Show-stopping problems always seem to occur on a deadline - Pro Maintenance Tools is
designed to rapidly diagnose and fix common issues, ensuring users get back on track as
quickly as possible. With the Task Scheduler utility, maintenance tasks can even be
scheduled to run in the background for convenience.
Pro Maintenance Tools includes:
Autosave Manager – Flexible autosave management offering automatic archival or removal
based on criteria including age and file size.
Supports Final Cut Studio, Final Cut Pro X, Avid Media Composer, Avid Symphony and Adobe
Premiere Pro
Compressor Repair – Repairs the fragile links between Compressor and Qmaster.
Supports Final Cut Studio and Final Cut Pro X
Corrupt Clip Finder – Automatically locates corrupt clips in a project, saving hours of manual
Last updated Aug 18, 2014
Pro Maintenance Tools User Manual
2
reconnecting. Supports Avid MXF with a third-party plugin such as MXF4Mac.
Supports Final Cut Studio, Final Cut Pro X, Avid Media Composer, Avid Symphony and Adobe
Premiere Pro
Crash Analyzer – Analyzes your editing application crash logs, attempts to diagnose the
cause of the crash and suggests ways to solve the problem.
Supports Final Cut Studio, Final Cut Pro X, Avid Media Composer, Avid Symphony and Adobe
Premiere Pro
CS Repair - Fixes common problems with Adobe Premiere Pro.
Supports Adobe Premiere Pro
Housekeeper – Trashes various caches and temporary files to keep your editing application
in peak operating condition. Housekeeper is even more useful when used in conjunction with
Task Scheduler to run these tasks automatically.
Supports Final Cut Studio, Final Cut Pro X, Avid Media Composer, Avid Symphony and Adobe
Premiere Pro
FCS Remover – Removes Final Cut Studio, Final Cut Pro X, Express and Server. Can
remove the entire suite or individual applications.
Supports Final Cut Studio and Final Cut Pro X
MC Repair - Fixes common problems with Avid Media Composer and Symphony.
Supports Avid Media Composer and Avid Symphony
Media Salvage – Extracts video and audio data from corrupt movie clips and places it into a
new file.
Supports Final Cut Studio, Final Cut Pro X, Avid Media Composer, Avid Symphony and Adobe
Premiere Pro
Path Manager - Manages the locations of user and content directories on your system. It can
inform you if the extra content that ships with Final Cut Studio is missing or invalid and allow
you to easily move and synchronize content.
Supports Final Cut Studio, Final Cut Pro X and Adobe Premiere Pro
Last updated Aug 18, 2014
Pro Maintenance Tools User Manual
3
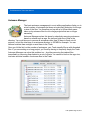
Plugin Manager – Allows you to quickly and easily organize your editing system plugins. You
can group them together, install new plugins and selectively enable and disable them - all
without having to worry about where the plugins are physically located on disk.
Supports Final Cut Studio, Final Cut Pro X, Avid Media Composer, Avid Symphony and Adobe
Premiere Pro
Preference Manager – Manages Final Cut Studio, Final Cut Pro X, Avid Media Composer
and Adobe Premiere Pro preference files. Allows you to trash, backup, lock and restore
preferences. Can also be configured to restore a particular set of preferences before a certain
Final Cut Pro project is launched for per-project preferences.
Supports Final Cut Studio, Final Cut Pro X, Avid Media Composer, Avid Symphony and Adobe
Premiere Pro
Project Repair – Attempts to repair non-launching Final Cut Pro and FCPX projects and
events so that they can be opened again.
Supports Final Cut Studio, Final Cut Pro X and Adobe Premiere Pro
QT Repair - Verif ies, repairs and rebuilds the structure of QuickTime movies. Also repairs
invalid CLUT IDs and optionally restores trimmed or edited media. For more heavily damaged
files, it can combine the movie data of the damaged file with the QuickTime structure of a
working file.
Supports Final Cut Studio, Final Cut Pro X, Avid Media Composer, Avid Symphony and Adobe
Premiere Pro
QuickFix – Performs common troubleshooting tasks with just one button press, allowing you
to get back to work quicker than ever. This should be your first port of call when things go
wrong.
Supports Final Cut Studio, Final Cut Pro X, Avid Media Composer, Avid Symphony and Adobe
Premiere Pro
System Toolkit – A wealth of options to tweak and tune up your system, including:
•
Extra launch and display options for Final Cut Studio applications
•
Tools to manage Final Cut Studio registration
•
Scan, repair, refresh files and remove temp files from disks
•
Adjust system and per-application scaling
Last updated Aug 18, 2014
Pro Maintenance Tools User Manual
•
•
4
Streamline your applications by removing unused languages and architectures
Access many options hidden in OS X
Supports Final Cut Studio, Final Cut Pro X, Avid Media Composer, Avid Symphony and Adobe
Premiere Pro
XML Repair – Repairs invalid Final Cut Pro XML files and can convert XML files to different
XMEML versions for compatibility with earlier versions of Final Cut Pro.
Supports Final Cut Studio, Final Cut Pro X and Adobe Premiere Pro
Quick Start
After installation a launcher application can be found at /Applications/Digital Rebellion App
Launcher. This launcher is provided to make it easier and more convenient to launch the
applications in the suite.
The applications themselves are installed by default to /Applications/Digital Rebellion/Pro
Maintenance Tools.
Last updated Aug 18, 2014
Pro Maintenance Tools User Manual
5
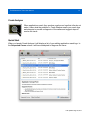
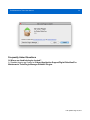
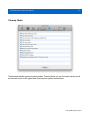
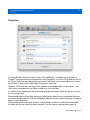
Digital Rebellion App Launcher
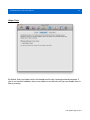
The first application you will see after installing Pro Maintenance Tools is
the launcher. This can be a useful way of launching the applications, but
you can still launch them with another launcher such as Spotlight or
manually through the Finder if you prefer.
All Digital Rebellion applications inside your Applications folder will
appear in the list. To launch an application, double-click it or press Enter.
The Quick Fix button at the bottom is a fast way of solving problems. Press it and it will run a
QuickFix repair.
If you find yourself overwhelmed by the number of applications in the list, you can go to View
> Hide Groups and hide groups that you don't currently need. You can also change the
sorting preferences in the View menu so that it sorts applications by their groups rather than
alphabetically.
Last updated Aug 18, 2014
Pro Maintenance Tools User Manual
6
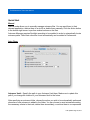
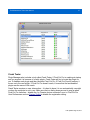
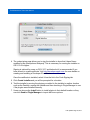
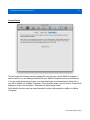
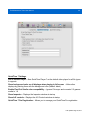
Registration
To register Pro Maintenance Tools, first visit http://www.digitalrebellion.com/promaintenance and
click the Buy Now button to purchase the suite. Our system will automatically email a license
to the email address used to make the purchase.
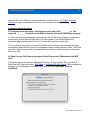
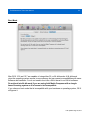
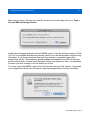
To display the registration dialog, either go to Help > Register > Pro Maintenance Tools in
the launcher or Help > Enter Registration Key in one of the applications.
In the dialog that appears, enter the registration information exactly as written in the
registration email, with no variations. For example, if it says “Alan” on the license, you must
enter “Alan” and not “Al” or any other variation.
The company name field is optional and is set when making the purchase. If this field is blank
on your license, you must leave it blank when registering.
The product key field is best copied and pasted directly from the email. It consists of numbers
and capital letters only.
Click Register to complete registration. If no error is reported and the window closes
automatically, it means your registration information was accepted. If an error is reported,
double-check that the information entered exactly matches the contents of the registration
Last updated Aug 18, 2014
Pro Maintenance Tools User Manual
7
email. If you have purchased multiple Digital Rebellion products, check you are entering the
registration information for Pro Maintenance Tools and not another product.
Last updated Aug 18, 2014
Pro Maintenance Tools User Manual
8
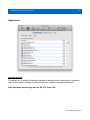
Autosave Manager
The basic autosave management in most editing applications limits you to
a total number of autosaves but does not make any distinction for the age
or size of the files. You therefore end up with a lot of hard disk space
taken up by autosave files for old or large projects that are no longer
necessary.
Autosave Manager solves this issue by selectively removing autosaves
based on criteria such as age, file size and total size of files in the
directory. You could choose to remove all autosaves older than 30 days to flush out old
projects, or limit the total size of an autosave directory to 300 MB for example. You can
choose to delete them outright or send them to the Trash.
Once you hit the limit on the number of autosaves, your Trash steadily fills up with discarded
files. If you are working on a long project, you'll end up having to frequently empty the Trash.
Autosave Manager can solve this problem too – by either removing the trashed files
immediately or removing them based on a set of criteria. You can set a limit on the age, size,
total size and total number of autosave files in the Trash.
Last updated Aug 18, 2014
Pro Maintenance Tools User Manual
9
Quick Start
Manual
Manual mode allows you to manually manage autosave files. You can send them to their
relevant application, archive them to a zip file or delete them manually. Click the Action button
in the bottom-right corner to perform manual actions on the files.
Autosave Manager requires Spotlight searching to be enabled in order to automatically locate
autosave paths. Paths that cannot be found automatically can be added in Preferences.
Auto Clean
Autosave Vault – Specify the path to your Autosave Vault here. Make sure to update this
path if you change the location of your Autosave Vault in the future.
After specifying an autosave folder, choose the action you wish to be automatically performed
whenever a new autosave is added to the folder. You can choose to send autosaves meeting
the necessary criteria to the trash, delete them immediately, or archive them to a compressed
Last updated Aug 18, 2014
Pro Maintenance Tools User Manual
10
file.
The options below this allow you to specify the criteria used for performing actions on files.
You must select at least one of these options.
Auto Clean Trash
Auto Clean Trash will automatically clean your trash as discarded autosaves are moved there.
This saves you from repeatedly emptying your trash when working on a long project.
Many of the options in this tab are identical to those in the Auto Clean tab.
Last updated Aug 18, 2014
Pro Maintenance Tools User Manual
11
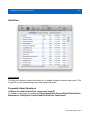
Corrupt Clip Finder
If you have a corrupt video or audio clip on your timeline, your editing
application will simply crash with no indication as to which clip is causing
the issue. Corrupt Clip Finder can scan Final Cut Studio projects, Final
Cut Pro X events, XML files, Avid Bins, Adobe Premiere projects or a
directory of audio and video clips in order to locate the problematic file.
Quick Start
When you launch Corrupt Clip Finder, it will prompt you to open a project file or directory
containing movie clips. Upon selecting a file or folder, the software begins scanning.
Corrupt Clip Finder works by automatically tests each movie clip to see if it can be opened. If
corrupt or incompatible clips are found, they will be added to a list.
Once the scan is complete, you can use the Action button in the bottom-left corner to color
Last updated Aug 18, 2014
Pro Maintenance Tools User Manual
12
code the files in the Finder for easy identif ication, send the files to QT Repair or Media
Salvage for repair, or quarantine the files by moving them to a separate folder.
Frequently Asked Questions
Q. A message pops up saying “searching for movie data in file ________” or “the
movie file ________ cannot be found. Without this file, the movie cannot play properly.”
A. These are QuickTime messages which indicate that the file being scanned is a reference
movie linking to files that no longer exist. This can happen if you deselect Make SelfContained when exporting from Final Cut Pro and then trash your render files.
This is nothing to worry about. Corrupt Clip Finder will close these error message windows
automatically and continue if they do not disappear within a certain amount of time. It will then
report the clips as corrupt, and it is worthwhile moving them to another location or removing
them from disk.
Q: Does Corrupt Clip Finder only support QuickTime movies? What about Avid MXF
files?
A: Avid Bins can be scanned for AMA QuickTime files. To scan for MXF files, you need a
QuickTime MXF Importer such as MXF4Mac or Calibrated {Q} MXF Import. After installing the
importer, go to Preferences in Corrupt Clip Finder and select Open MXF Files via
QuickTime.
Last updated Aug 18, 2014
Pro Maintenance Tools User Manual
13
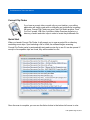
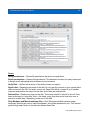
Crash Analyzer
When applications crash, they produce cryptic error logs that often do not
make it clear what the problem is. Crash Analyzer scans your crash logs
and attempts to provide a diagnosis of the cause and suggest steps to
resolve the issue.
Quick Start
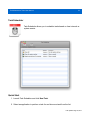
When you launch Crash Analyzer it will display a list of your editing application crash logs. In
the Suspected Cause column it will have attempted to diagnose the issue.
Last updated Aug 18, 2014
Pro Maintenance Tools User Manual
14
If you select a log, the lower section of the window will display more information about the
cause and offer suggestions to solve the issue. Some actions can be performed automatically
via the Suggested Actions section at the bottom.
You can also double-click the log to view it in a new window. This window has the option to
view the entire log or just the thread that crashed, making it useful for filtering out extra
information that may not be essential.
If the cause appears as Unknown or you feel that Crash Analyzer has not diagnosed the
cause for your crash correctly (the Relevant line section at the bottom of the info panel
shows which line the software used to reach a conclusion), you can select the log and click
Send Log to Digital Rebellion in the top right corner of the application window. We will then
look at the log and update our crash definitions to accommodate it in a future version.
To import crash logs from other users on the system, go to Tools > Consolidate logs. You
will need to enter an administrator password.
Last updated Aug 18, 2014
Pro Maintenance Tools User Manual
15
Tip: Crash Analyzer is not limited to crash logs residing on your computer. If you are
diagnosing an issue remotely, you can paste text from a crash log into the main Crash
Analyzer window and it will create a new log on your system and analyze it. This is very
useful when assisting other people on internet forums.
Crash Analyzer is also useful when an error message pops up without a crash. In this
instance, click the Error lookup button in the toolbar and you will be presented with a list of
error messages.
Search or select the error message you received and a description and suggested actions will
be displayed in the box below.
If the error message you received isn't displayed in the list, click the Action button next to the
search field to submit your message to Digital Rebellion. It will be supported in a future
version of the software.
Last updated Aug 18, 2014
Pro Maintenance Tools User Manual
16
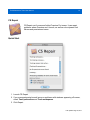
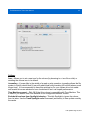
CS Repair
CS Repair can fix common Adobe Premiere Pro issues. It can repair
problems where Premiere won't launch, as well as solve dynamic link
failures and permissions issues.
Quick Start
1. Launch CS Repair.
2. If you are experiencing launch issues or problems with windows appearing off-screen,
check Trash preferences and Trash workspaces.
3. Click Repair.
Last updated Aug 18, 2014
Pro Maintenance Tools User Manual
17
Housekeeper
Many problems such as slowdowns, errors and crashes are a result of
invalid cache data. Trashing caches is an important part of maintaining
your editing system and Housekeeper simplif ies this process signif icantly.
Quick Start
1. Launch Housekeeper.
2. Choose a preset or select items to trash manually. The Basic preset is good for
Last updated Aug 18, 2014
Pro Maintenance Tools User Manual
18
everyday housekeeping and optimization and the Comprehensive preset is a more
advanced function designed for fixing problems.
3. Click Clean.
4. Empty your Trash.
Tip: these tasks can be automated quickly and easily with Task Scheduler.
Last updated Aug 18, 2014
Pro Maintenance Tools User Manual
19
MC Repair
MC Repair can fix common Avid Media Composer issues. It can repair
problems where Media Composer won't launch, as well as solve
permissions issues.
Quick Start
1. Launch MC Repair.
2. If you are locked out of a bin on a Unity system because the system accessing it
crashed, select Trash Unity lock files. Only do this in emergency situations.
3. Click Repair.
Last updated Aug 18, 2014
Pro Maintenance Tools User Manual
20
Media Salvage
Sometimes the headers of movie clips can become corrupt, rendering the
clip unreadable in spite of the fact that the underlying movie data is
undamaged. Even if the data itself is corrupt, it is unusual for every single
frame to be damaged.
Media Salvage extracts valid video and audio data from the file and
deposits it into a new file.
Quick Start
1. Load the application and browse for a damaged movie clip.
2. Go to File > Copy Settings from Similar File and browse for a working movie clip
with the same encoding settings as the corrupt file (the same audio and video codec,
Last updated Aug 18, 2014
Pro Maintenance Tools User Manual
21
same frame size, same frame rate, same audio sample rate and the same number of
audio and video tracks).
3. The settings will be taken from the working file and applied to the corrupt clip in the
batch window. Correct any settings that are incorrect and then click Salvage.
4. Media Salvage will begin going through the batch, processing each file one at a time.
Please note that the trial version of this software is limited to 900 frames (30 seconds
at 30 fps) per file. This limitation does not exist in the registered version of the
application.
Frequently Asked Questions
Q. What is the Raw option offered for some formats?
A. Some video formats do not need a QuickTime container and the raw data can simply be
output to a file. Audio will only be supported if the audio data is interleaved with the video data
(as opposed to being in a separate QuickTime track). Choose this option if you have difficulty
outputting to a QuickTime movie.
Q. Why is the audio sometimes out of sync?
A. It is impossible for Media Salvage to determine when a particular track starts so it just
assumes that all tracks begin at frame 1. For the majority of movie clips this will be fine, but if
your audio does not begin at frame 1 it will be out of sync. To fix this it is simply a case of
slipping it back into sync within your editing application.
Q. Why do some formats have no frame size or frame rate listed?
A. Some video formats have a specif ic frame size and/or frame rate as part of the
specif ication which cannot be changed. In other cases, Media Salvage does not need this
information in order to salvage the data. Media Salvage will only request this information
when it actually needs it.
Note: Media Salvage detects whether a DV or DVCPRO50 movie is NTSC or PAL and
adjusts this data accordingly.
Last updated Aug 18, 2014
Pro Maintenance Tools User Manual
22
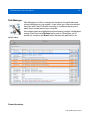
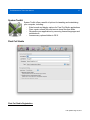
Path Manager
Path Manager is a utility to manage the locations of scratch disks and
content directories on your system. It can inform you if the extra content
that ships with Final Cut Studio is missing or invalid and allows you to
easily move content around your computer.
Non-existent paths are highlighted red and missing content is highlighted
orange. Each item has a Browse button next to it that allows you to
browse for a location and Reset button that sets the path back to its
default value.
Parent directories
Last updated Aug 18, 2014
Pro Maintenance Tools User Manual
23
For convenience, it is possible to enter a parent directory for each application so that all
content and user paths are stored under the same parent directory for easy organization. For
instance, if you set the Color parent path to /Color, all subdirectories will be grouped
underneath like so:
This is a quick and convenient way of organizing your content and user directories.
It is also possible to set a global parent directory so that all paths are organized by application
name inside a central directory. This is a quick and simple way of moving your content to
another drive.
Searching
Click the Search button in the top left corner of the application to search for paths.
Path Manager will display a list of content and user paths for each application. Click the check
boxes next to each item and hit Set Paths to update the relevant paths. If more than one type
of path is found (such as if you have two separate Motion autosave folders on two different
Last updated Aug 18, 2014
Pro Maintenance Tools User Manual
24
drives) you will only be able to select one at a time.
Locking and Syncing
Each item has a lock icon next to it that allows you to lock the path to prevent it being
modif ied within Path Manager. Locked paths cannot be edited or reset and do not appear in
searches. Locked paths are not modif ied when a parent directory is set, which is useful if you
do not want to have every folder placed underneath the parent.
Although Path Manager cannot prevent other applications from modifying locked paths, it will
notify you if a locked path is modif ied from outside the application.
Modif ied paths display an out-of-sync notif ication message. To resynchronize the path back to
the locked state, press the Resync button. To make the message disappear, unlock the path
and lock it again or disable out of sync notif ications in Preferences.
Frequently Asked Questions
Q. Why don't my Final Cut Pro paths update in Path Manager after I have changed them
in the Final Cut Pro System Settings dialog?
A. Sometimes these changes will not be written to disk until you close Final Cut Pro. This
doesn't happen every time but if you experience this issue, try closing and reopening Final
Cut Pro.
Last updated Aug 18, 2014
Pro Maintenance Tools User Manual
25
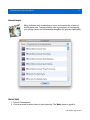
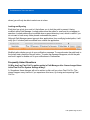
Plugin Manager
Plugin Manager allows you to quickly and easily organize your editing
application plugins. You can group them together, install new plugins and
selectively enable and disable them – all without having to worry about
where the plugins are physically located on disk.
Plugins are scanned when your editing application starts up so it makes
sense to run as few plugins as possible in order to speed up boot times
and decrease resource usage. Plugin Manager makes it easy to group
plugins by project or category and then quickly enable them on demand.
Installing plugins has long been confusing for users because different types of plugins belong
in different folders on the disk. Plugin Manager does the work for you – just drag in a plugin
and it will automatically copy it to the correct location.
Quick Start
1. Launch Plugin Manager. Your currently installed plugins will be listed.
Last updated Aug 18, 2014
Pro Maintenance Tools User Manual
26
2. Click the + icon to add a new group. Categorize the groups however you wish, then
drag the relevant plugins into the groups.
3. Disable all unnecessary groups by selecting them and clicking Disable in the toolbar.
4. Use the All Users / Current User toggle to make the plugins available to either all users
on the computer or just the current user.
When you wish to use a plugin group, enable it on demand before launching your editing
application.
Installing Plugins
There are three ways to install plugins – either go to File > Install Plugin, drag the file into
the Plugin Manager window or ctrl-click the file in Finder and select Open With > Plugin
Manager.
Plugin Manager will then ask you if you want to make the plugin available to all users or just
the currently logged in user. Select your option, then click Install.
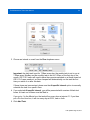
Audio Unit validation
Plugin Manager includes a tool to validate Audio Units. When you launch it, it will display a list
of Audio Units installed on your computer along with an indication of whether each Unit
passed or failed the validation process. You can click the Inspect button to view the test
results in more detail.
Last updated Aug 18, 2014
Pro Maintenance Tools User Manual
27
Crash Tester
Plugin Manager also includes a tool called Crash Tester. If Final Cut Pro is crashing at startup
and you suspect it is because of a faulty plugin, Crash Tester will try to locate the plugin for
you. It disables each plugin and then launches Final Cut Pro. If Final Cut Pro still crashes, it
moves on to the next plugin. If Final Cut Pro doesn't crash, it knows that the last disabled
plugin was the cause of the crash.
Crash Tester requires no user intervention – it is best to leave it to run automatically overnight
or when the computer is not in use. Make sure that no dialog boxes are set to pop up when
Final Cut Pro launches – disable the “no Firewire device connected” error in Final Cut Pro
User Preferences and use System Toolkit to disable the registration dialog.
Last updated Aug 18, 2014
Pro Maintenance Tools User Manual
28
Plugin Installers
If you are a plugin developer, Plugin Manager can be used to create installers. These provide
an easy way for end-users to install plugins quickly and easily with very little setup required
from the developer. Installers are completely self-contained so end-users do not need Pro
Maintenance Tools installed.
To create an installer:
1. In the main plugin view, select the plugins or groups that you would like to add to the
installer. You can have more than one plugin in an installer.
2. Go to Tools > Create Plugin Installer.
3. In the window that appears, specify a name for the plugin or group or plugins, the
version number and author.
Last updated Aug 18, 2014
Pro Maintenance Tools User Manual
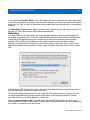
29
4. The code signing page allows you to sign the installer to show that it hasn't been
modif ied by an unscrupulous third party. This is necessary for running the installer on
OS X 10.8 or higher.
Signing is optional for users on OS X 10.7 and below but it is recommended if you
have access to a valid certif icate. Visit http://developer.apple.com for more details on
creating and installing a Developer ID certif icate.
Once the certif icate is installed, select it from the list in the Code Signing tab.
5. Click Create Installer and you will be prompted for a location.
6. Test the installer by moving the plugins you added to the installer to another location
such as the Desktop, running the installer and then checking in Plugin Manager to see
if the plugins were installed correctly.
7. Users can choose the Install button to install plugins to their default location or they
can click Send to Plugin Manager to import with more options.
Last updated Aug 18, 2014
Pro Maintenance Tools User Manual
30
Frequently Asked Questions
Q. Where are disabled plugins located?
A. Disabled plugins are located at /Library/Application Support/Digital Rebellion/Pro
Maintenance Tools/Plugin Manager Disabled Plugins.
Last updated Aug 18, 2014
Pro Maintenance Tools User Manual
31
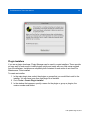
Project Repair
Project Repair can attempt to repair Final Cut Pro, Final Cut Pro X and
Adobe Premiere projects and events that refuse to open or open with an
error message.
Quick Start
1. Browse to the location of the project file.
2. Click Repair.
Tip: Repairing Final Cut Pro X projects and events also optimizes them so it is useful to repair
them even if they are not broken. After repairing they should take up less space on disk.
If your Adobe Premiere project still crashes after the repair, try looking in your project folder
for a recovery project. Sometimes Project Repair will fix the file enough so that Premiere can
Last updated Aug 18, 2014
Pro Maintenance Tools User Manual
32
generate a recovery project and this can then be restored.
Frequently Asked Questions
Q. Does it repair corrupt data?
A. No, you are recommended to keep regular backups and periodically export to XML to
prevent corruption. We offer a backup solution called Pro Versioner that we recommend for
automatically backing up and archiving projects.
Last updated Aug 18, 2014
Pro Maintenance Tools User Manual
33
QT Repair
QT Repair is designed to repair the structure of QuickTime movie files. It
is intended as an alternative to salvaging the entire file.
It checks the following:
•
Incorrect type/creator code
•
Missing / invalid file extension
•
Invalid atom sizes
•
Invalid ImageDescription extensions
It can also repair invalid CLUT IDs. Since QuickTime 7.3, QT has expected CLUT IDs to be -1
by default and it no longer recognizes the previous default of 0. This caused compatibility
issues with certain pre-QT 7.3 movie clips, producing the error message “An invalid public
movie atom was found in the movie”. This has caused issues for owners of P2 cameras. QT
Repair can restore these fields to the correct values to enable the file to be opened
successfully.
Last updated Aug 18, 2014
Pro Maintenance Tools User Manual
34
If you select the Remove Edits option, QT Repair will remove all edits that have been made
to the file and restore any media that has been trimmed, providing the media still resides
within the file. This is useful in situations where media has been accidentally or erroneously
trimmed.
The Renumber Tracks option makes sure that each track in the file has a unique track ID. If
they do not, QuickTime cannot differentiate between them.
Rebuilding
If a repair does not fix the problem, you may experience better results by rebuilding the file
using data from another file. To do this, select the Rebuild option and click the Rebuild button.
A new dialog will appear asking you to browse for a working file with the same encoding
settings. This could be a file captured by the same camera or exported with the same
settings. The working file must have the same video codec, frame rate, audio codec, audio
sample rate and the same number of video, audio and timecode tracks as the corrupt movie
clip.
Hit Rebuild and QT Repair will take the video and audio data from the corrupt file and insert it
into the working file to produce a new movie clip.
The default settings should work for most cases but if the rebuild does not work on the first
try, adjust the Advanced Settings options to skip some of the integrity checks QT Repair
performs, allowing you to fix particularly corrupt files.
Selecting Ignore track counts no longer aborts the rebuild if the number of tracks in the
source and working files do not match. This can help if tracks have been split up or duplicated
as a result of corruption in the source file.
Last updated Aug 18, 2014
Pro Maintenance Tools User Manual
35
Ignore skipped atoms ignores tracks inside free space or skip atoms, which are designed to
be ignored by QuickTime. Switch this off if important tracks inside your source file have ended
up inside one of these atoms.
Ignore tracks outside movie atom ignores tracks that are outside the moov atom (which
they shouldn't be). Switch this off if your movie atom is corrupt.
If you don't know the nature of the corruption within your source file, try different variations of
these settings.
Tip: For best results, use a working movie clip that originated from the same camera or
encoding software.
Frequently Asked Questions
Q. My camera lost power while recording – can QT Repair fix the corrupt file?
A. QT Repair needs correct sample tables in order to rebuild corrupt files. When the camera
is switched off suddenly, these tables often don't get written, meaning QT Repair won't be
able to fix them. In such instances, Media Salvage is a better choice.
Last updated Aug 18, 2014
Pro Maintenance Tools User Manual
36
QuickFix
QuickFix performs common troubleshooting tasks with one button press.
This gives you a single button to press when things go wrong, allowing
you to get back to work even faster. QuickFix should be your first port of
call when things go wrong.
•
•
•
•
It performs the following tasks:
•
Housekeeper Comprehensive clean
•
Backup and trash preferences
Repair Compressor (if the skip admin tasks checkbox is unselected)
Repair Adobe Creative Suite (if the skip admin tasks checkbox is unselected)
Repair Avid Media Composer (if the skip admin tasks checkbox is unselected)
Runs all of the takss in the Cleanup Tasks section of System Toolkit (if the skip admin
tasks checkbox is unselected)
QuickFix is intended as a convenient way of performing repairs. For more control over exactly
which files are trashed, run the above tasks manually.
When a problem occurs, launch QuickFix and press the Quick Fix button. The software will
take several seconds to run and will notify you when it has completed its tasks.
Skip tasks that require an admin password makes the process even quicker because it
does not have to ask for an admin password. Switching this on makes QuickFix work with a
single button press.
Tip: You can assign keyboard shortcuts for QuickFix by going to the Preferences menu.
Last updated Aug 18, 2014
Pro Maintenance Tools User Manual
37
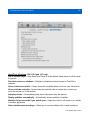
System Toolkit
System Toolkit offers a wealth of options for tweaking and maintaining
your computer, including:
•
•
•
•
Extra launch and display options for Final Cut Studio applications
Scan, repair, refresh files and remove temp files from disks
Streamline your applications by removing unused languages and
architectures
Access many options hidden in OS X
Final Cut Studio
Final Cut Studio Registration
Last updated Aug 18, 2014
Pro Maintenance Tools User Manual
38
First Name, Last Name, Company – Change the registered owner and company information
Banish registration dialog – Prevent the registration dialog from appearing
Show registration dialog on next run – Make sure the registration dialog appears when you
next run a Final Cut Studio application
Reset serial – Reset your registration information so that it asks for your serial upon the next
run
Per-Application Settings
Maximize screen space – maximizes screen space by hiding the dock and menu bar (they
will appear when the mouse is hovered at the top or bottom of the screen respectively)
Disable minimum requirement check – If your computer does not meet the minimum
system requirements for a Final Cut Studio application, clicking this box forces the application
to launch regardless.
Show welcome dialog at startup – restores the welcome dialog for certain applications.
Last updated Aug 18, 2014
Pro Maintenance Tools User Manual
39
Avid MC
General
Maximize screen space for Media Composer - maximizes screen space by hiding the dock
and menu bar (they will appear when the mouse is hovered at the top or bottom of the screen
respectively)
Last updated Aug 18, 2014
Pro Maintenance Tools User Manual
40
Helper Tools
By default, Avid runs helper tools in the background to help it manage external hardware. If
you do not use this hardware, there is no reason to run the tools and you can disable them to
free up memory.
Last updated Aug 18, 2014
Pro Maintenance Tools User Manual
41
License Reset
This will make the licensing screen reappear the next time you launch Media Composer. It
can be useful if you are having problems with your Media Composer license and activation.
If you are using electronic activation, you must deactivate your license before doing this or
you will be locked out of Media Composer. If this situation arises, you will need to contact Avid
support to unlock your activation. This does not affect dongle users.
Note that this function may also reset licenses for other Avid products in addition to Media
Composer.
Last updated Aug 18, 2014
Pro Maintenance Tools User Manual
42
Creative Suite
Maximize screen space for Premiere Pro - maximizes screen space by hiding the dock and
menu bar (they will appear when the mouse is hovered at the top or bottom of the screen
respectively)
Enable hardware acceleration – Adobe has qualif ied a small number of CUDA-compatible
NVIDIA cards for use in Premiere Pro. This option lets Premiere Pro use the hardware
acceleration features of the card even if it is not on Adobe's list of qualif ied cards.
The card must be a CUDA-compatible NVIDIA card with at least 768 MB of VRAM. Using
unqualif ied cards could potentially cause issues so use this feature with caution.
(note: these settings apply to all versions of Adobe Premiere Pro installed on the system)
Last updated Aug 18, 2014
Pro Maintenance Tools User Manual
43
Disks
Info
Displays various information about the drive, including the file system, media type, UUID, etc.
Last updated Aug 18, 2014
Pro Maintenance Tools User Manual
44
Scans
Verify permissions – Checks file permissions but does not repair them.
Repair permissions – Repairs file permissions. This has been known to fix many issues and
is always worth attempting when problems are encountered.
Verify Disk – Verif ies the structure of the disk but does not repair it.
Repair disk – Repairs the structure of the disk. Do not use this function on your system drive
while booted into the OS. It is better to boot into Target Disk Mode, connect it up to another
computer and perform the repair on the drive as if it were an external disk.
Refresh files – Reads every byte on the disk. This can be useful to “refresh” a drive if it has
been in storage for a long time. Note – this takes a very long time and is best done over a
period of several days, depending on the size of the disk.
Strip Windows and Mac thumb/temp files – Both Windows and Mac systems create
temporary files that are used to cache thumbnails, store folder preferences, etc. This function
goes through each folder on the disk and deletes these files.
Last updated Aug 18, 2014
Pro Maintenance Tools User Manual
45
Settings
Icon – Allows you to set a new icon for the volume (by browsing to a .icns file on disk) or
resetting the volume icon to its default.
Journaling – If power fails in the middle of a read or write operation, journaling allows the file
system to quickly rebuild itself (it can still rebuild itself with journaling off but this takes a much
longer time). It is recommended to have this switched on for your system drive, but media
and scratch drives are advised to have it switched off as it can impact performance.
Time Machine support – Tells OS X that this volume is compatible with Time Machine. This
is useful if you want to use Time Machine on an unsupported network volume.
Exclude this volume from Spotlight indexing – This tells Spotlight to ignore the volume
from its index. Use the Trash Spotlight cache command (see below) to free up data used by
the cache.
Last updated Aug 18, 2014
Pro Maintenance Tools User Manual
46
Tools
Force unmount – If a volume refuses to unmount, you can use this command to force it to
unmount. However, you run the risk of data loss if the volume is being written to at the time.
Trash Spotlight cache – Trashes Spotlight data for the volume, forcing Spotlight to reindex it
when it is next mounted.
Mount Lion Recovery Partition – Mac OS X 10.7 Lion boot drives have a hidden partition on
them that contains data for restoring the operating system in the event of failure. This
command mounts the partition so that it can be booted from. Do not touch any files on this
volume. This command will work even if you are running Snow Leopard as long as a Lion
boot disk is attached to the computer.
Last updated Aug 18, 2014
Pro Maintenance Tools User Manual
47
Cleanup Tasks
Trashes and rebuilds various system caches. Clearing these out can fix certain issues (such
as incorrect icons for file types) and often improve system performance.
Last updated Aug 18, 2014
Pro Maintenance Tools User Manual
48
QuickTime
Components
This lists your system's codecs and allows you to enable, disable or remove them at will. This
is useful if you are experiencing issues with a particular codec.
Frequently Asked Questions
Q. Where are disabled QuickTime components located?
A. Disabled components are located at /Library/Application Support/Digital Rebellion/Pro
Maintenance Tools/System Toolkit Disabled QuickTime Components.
Last updated Aug 18, 2014
Pro Maintenance Tools User Manual
49
QuickTime 7 Settings
Set as Default Player – Sets QuickTime Player 7 as the default video player for all file types
it supports
Show background color on all displays when playing in full screen - Hides other
displays by painting them with the background color (default: black)
Enable Final Cut Studio color compatibility – Ignores Colorsync and converts 2.2 gamma
media to 1.8
Show Inspector – Displays the Inspector window at startup
Show A/V controls – Displays the A/V Controls window at startup
QuickTime 7 Pro Registration – Allows you to manage your QuickTime Pro registration
Last updated Aug 18, 2014
Pro Maintenance Tools User Manual
50
QuickTime X Settings (OS X 10.6 and 10.7 only)
Set as Default Player – Sets QuickTime Player X as the default video player for all file types
it supports
Rounded corners on windows – Enables or disables rounded corners on QuickTime
windows
Never autoshow controller – Never shows the controller when you hover over the window
Never autohide controller – Never hides the controller after a certain time or when you
move the mouse out of the window
Autoplay movies – Automatically plays movie clips when they are opened
Display subtitles automatically – Automatically shows subtitles if available
Maintain full-screen mode if you switch apps – Keeps the video in full screen if you alt-tab
to another application
Allow simultaneous recordings – Allows you to record multiple video or audio sessions
Last updated Aug 18, 2014
Pro Maintenance Tools User Manual
51
simultaneously
Show audio track when editing – Shows audio waveforms in the trim window
Show framework versions in About dialog – Lists the version numbers of key frameworks
in QuickTime's About window. This is useful for troubleshooting.
Title bar always has active appearance – When switched on, if you click away from the
window, the title bar does not dim.
Scale the movie to the screen when opening a movie – Automatically scales the movie
clip up to fill the entire screen when it is opened.
Last updated Aug 18, 2014
Pro Maintenance Tools User Manual
52
Streamline
Universal Binaries contain multiple copies of the application – perhaps one optimized for
PowerPC processors and one optimized for Intel processors, or one for 32-bit and one for 64bit. This is useful because developers only need to distribute one Universal Binary and users
do not need to worry about which type of processor they have.
However, OS X only uses the copy of the application compatible with your processor – the
other one is redundant and just takes up space on your hard disk.
In addition, many applications install multiple language resources which the majority of users
do not end up using.
Streamlining strips out this data, leaving you with just the binary that is compatible with your
processor and only the files that are compatible with your current system language, freeing up
space on your hard disk.
Streamlining works for the vast majority of applications, however it modif ies the executable
file which can trip up a few anti-piracy systems. For this reason, backups are created at
Last updated Aug 18, 2014
Pro Maintenance Tools User Manual
53
/Applications/Application Backups/[current date and time]. Backups can be restored from
the Backups tab.
System Toolkit will preserve the current system language by default but you can preserve
additional languages within the Preferences dialog.
Last updated Aug 18, 2014
Pro Maintenance Tools User Manual
54
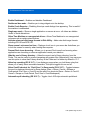
Appearance
Interface Scaling
This allows you to scale the interface downward to increase screen real estate or upward to
improve text legibility. Scaling can be performed on a global or per-application basis.
Note that these options only work on OS X 10.5 and 10.6.
Last updated Aug 18, 2014
Pro Maintenance Tools User Manual
55
UI Responsiveness
Sheet display speed – This controls the speed at which sheets slide down from the top of an
application's window. Setting this to Very Fast makes the sheet appear almost
instantaneously.
App launch animation – This enables the bouncing effect of the application's icon as it is
launched.
App zoom animation – This enables the zoom effect when you double-click a file.
App background alert animation – This enables bouncing of the application icon when the
application requires your attention.
Get Info animation – Enables animations when clicking the disclosure triangles in the Get
Info dialog.
Snap to Grid animation – Enables animation for snapping files into position.
Window zoom animation – Enables the zoom animation when opening a new folder in the
Last updated Aug 18, 2014
Pro Maintenance Tools User Manual
56
Finder.
Auto-expand save dialogs – Automatically expands save dialogs, saving you from having to
press the disclosure button each time.
Auto-expand print dialogs – Automatically expands print dialogs, saving you from having to
press the disclosure button each time.
Enable QuartzGL – QuartzGL accelerates Quartz 2D drawing via the graphics card. In some
cases it can boost interface performance (for example when scrolling within an application)
but in other cases it can reduce performance.
Disable BeamSync – BeamSync forces application windows to refresh at 60Hz on an LCD
screen. Disabling BeamSync enables them to refresh more times per second, which can
boost performance in some cases. Flickering can sometimes occur as a side-effect though.
Last updated Aug 18, 2014
Pro Maintenance Tools User Manual
57
Misc
3D Dock – Toggles between a 3D and 2D dock.
Double scroll arrows – Places up and down scroll arrows at both ends of the scroll bar
Show Exposé button on desktop – Adds a big blue button to the desktop. Clicking the
button activates Exposé for the selected application.
Stack highlight effect – This highlights Stack items as you hover over them.
Make hidden app icons transparent in dock – Makes application icons semi-transparent
when you hide the application.
Striped lines in Finder list view – Toggles between alternating blue and white lines and a
plain white background in Finder's list view.
Play window launch animations (OS X 10.7) – Toggles the window launch “zoom” effect in
Lion.
Last updated Aug 18, 2014
Pro Maintenance Tools User Manual
58
Restore windows when relaunching an application (OS X 10.7) – Toggles Lion's Resume
feature that restores previously open windows when relaunching an application.
Last updated Aug 18, 2014
Pro Maintenance Tools User Manual
59
Misc
General
Show hidden files and folders in Finder – Allows you to see hidden files
Show path bar in Finder window – Shows a path control bar at the bottom of the window
with the full path of the current directory
Show full path in Finder title bar – Instead of the current folder name, Finder shows the
entire path in the title bar
Don't write thumbnail caches to network stores – Disables the writing of .DS_Store files to
network volumes
Verify disk images – Switching this off speeds up disk image mounting but does not notify
you if the disk is corrupt.
Last updated Aug 18, 2014
Pro Maintenance Tools User Manual
60
Enable Dashboard – Enables and disables Dashboard.
Dashboard dev mode – Enables you to drag widgets onto the desktop
Enable Crash Reporter – Disabling this stops crash dialogs from appearing. This is useful if
the machine is unattended.
Single-app mode – Shows a single application on screen at once - all others are hidden.
Useful to avoid distractions.
Allow Time Machine on unsupported drives – Allows Time Machine to use unsupported
volumes such as certain network drives.
Activate advanced disk image formats in Disk Utility – Adds extra disk image formats
including ATA HD and SCSI HD.
Show screen Lock menu bar item – Displays a lock icon in your menu bar that allows you
to lock the screen for security when leaving the computer.
Prevent Dock icons bouncing – Allows you to prevent Dock icons from bouncing when
applications are launching or when an application needs your attention.
Hide the user's Library directory – Hides the current user's Library directory from the
Finder. This can be useful to prevent tampering with system files. Alternatively, Lion users can
use this option to show their Library directory in the Finder as it is hidden by default in 10.7.
Allow key repeating (OS X 10.7) – Lion displays a popup when you hold down a key that
allows you to easily insert accented characters. This option toggles this on and off.
Allow Cmd+D shortcut for “Don't Save” in Save panels (OS X 10.7) – Toggles between
the pre-Lion keyboard shortcuts for Save dialogs (Save = Return, Cancel = Escape or
Cmd+period, Don't Save = Cmd+D) and the post-Lion shortcuts (Save = Return or Cmd+S,
Cancel = Escape or Cmd+Period, Don't Save = Cmd+Backspace).
Automatic spell-checking (OS X 10.7) – Toggles Lion's iOS-style automatic spellcheck.
Last updated Aug 18, 2014
Pro Maintenance Tools User Manual
61
Screen Captures
Format – Change the file format of captured images
Filename prefix – The text to be added before the image number and file extension. Leave
this field blank to specify the default.
Save location – The location to save the captured images to. Leave this blank to specify the
default (the user's desktop).
Save shadows on windows – Toggles whether or not to include the window's shadow in the
saved image.
Last updated Aug 18, 2014
Pro Maintenance Tools User Manual
62
Boot Mode
Mac OS X 10.6 and 10.7 are capable of using either 32- or 64-bit kernels. A 64-bit kernel
gives the operating system access to more memory but can cause incompatibilities with some
software and hardware. You do not need to boot into a 64-bit kernel to run 64-bit software.
Do not boot into 64-bit mode if you are using Avid Media Composer with a donglebased licensing system as it is known to be incompatible.
If you choose a boot mode that is incompatible with your hardware or operating system, OS X
will ignore it.
Last updated Aug 18, 2014
Pro Maintenance Tools User Manual
63
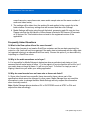
Task Scheduler
Task Scheduler allows you to schedule tasks based on time intervals or
system events.
Quick Start
1. Launch Task Scheduler and click New Task.
2. Select an application to perform a task for and choose a task from the list.
Last updated Aug 18, 2014
Pro Maintenance Tools User Manual
64
3. Choose an interval or event from the Run dropdown menu.
Important: the daily task is set for 7:00am every day, the weekly task is set to run at
7:00am every Monday and the monthly task is set for 7:00am on the first day of the
month. OS X 10.5 users will need to have the computer switched on at these times but
OS X 10.6 users need not, as Snow Leopard will automatically run the task the first
time you switch it on after this date.
If these times are inconvenient, please use the At specific interval option to manually
schedule the task for a specif ic time.
4. If you selected At specific interval, you will be presented with a series of blank text
boxes. At least one of these must be filled in.
If you put a 1 in the Minute box, the task will run every hour at minute 01. If you then
put a 5 in the Hour box, it will run every day at 05:01, and so forth.
5. Click Add Task.
Last updated Aug 18, 2014
Pro Maintenance Tools User Manual
65
Double-click a task to edit it and use the Enabled dropdown menu to enable or disable it.
Last updated Aug 18, 2014
Pro Maintenance Tools User Manual
66
XML Repair
XML Repair verif ies and repairs Final Cut Pro and Final Cut Pro X XML
files. Sometimes third-party applications or plugins may output illegal
characters to the XML file, rendering it unreadable by Final Cut Pro.
XML Repair will remove illegal characters, escape conflicting characters,
check for malformed XML and alert you to missing tags within the file. It
will also alert you to elements that are not supported in the current Final
Cut Pro XML (XMEML) version.
Converting to a different XML Interchange version
Earlier versions of Final Cut Pro will not read more recent Final Cut Pro XML (XMEML) files
so these must either be exported to an earlier XMEML version within Final Cut Pro's Export
XML dialog or else converted with XML Repair. This function is disabled on Final Cut Pro X
(FCPXML) files.
Last updated Aug 18, 2014
Pro Maintenance Tools User Manual
67
Make sure you have a file path set in the File text box of the main dialog, then go to Tools >
Convert XML Interchange Version.
A dialog box will appear listing the current XMEML version of the file (and the versions of Final
Cut Pro it is compatible with) and the minimum version it can be downgraded to without losing
information. If you choose a version lower than this minimum, unsupported tags will be
stripped from the file. These tags are generally additional metadata so the XML file will work
just fine without them, however some third-party utilities may depend on them. It is worthwhile
to ensure you have a backup of the file before you do this.
To convert, select the XMEML version from the drop-down box and click Convert. If tags need
to be stripped from the file you will receive a warning message before the file is converted.
Last updated Aug 18, 2014
Pro Maintenance Tools User Manual
68
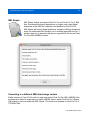
FCS Remover, Preference Manager and Compressor Repair
These applications have individual user manuals accessible from their respective Help
menus.
Last updated Aug 18, 2014
Pro Maintenance Tools User Manual
69
Software Updates
By default, all applications are set to check for updates at startup. This can be disabled by
launching Digital Rebellion Software Update (in /Applications/Digital Rebellion) and disabling
Check for updates whenever a Digital Rebellion application is opened in the Preferences
dialog.
Support
Email support can be accessed directly within each application.
To report a bug or any other issue, go to Help > Report a Bug.
To request a new feature, go to Help > Suggest a Feature.
When emailing customer support, it is helpful to include log files from the relevant application,
if available. To access the logs, go to Help > Troubleshooting > View Log or Help >
Troubleshooting > View Task Log (for tasks started by Task Scheduler). Note, however, that
not all applications have this menu.
Before contacting support, remember to visit our support site at
http://support.digitalrebellion.com/promaintenance to see if your question has already been
answered.
Last updated Aug 18, 2014