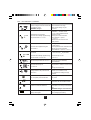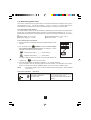
1
C.A 6115N ■ INSTALLATION TESTER E N G L I S H User's manual 1 symbol: Meaning of the WARNING! Please refer to the User’s Manual before using the instrument. In this User’s Manual, instructions preceded by the symbol above, should they not be carried out as shown, can result in a physical accident or damage to the instrument and installations. Meaning of the symbol: This instrument is protected by double or reinforced insulation. It does not require connection to the protective conductor terminal to ensure electrical safety. Thank you for purchasing a C.A 6115N Installation Tester. To get the best service from this instrument: n read this user’s manual carefully, n respect the safety precautions detailed. SAFETY PRECAUTIONS ■ Do not splash or immerse the C.A 6115N tester in water under any circumstances. ■ This instrument may be used on category III installations for voltages not exceeding 300 V in relation to earth. Category III meets with strict reliability and environmental requisites corresponding to permanent use on fixed industrial installations (see IEC 664-1). ■ Do not use the C.A 6115N tester on installations exceeding 300 V in relation to earth. ■ Use connection accessories of overvoltage category and service voltage greater than, or equal to, the measurement instrument (300 V Cat III). Only use accessories that comply with safety standards (EN 61010-2-032). ■ If a fuse should blow, please follow the instructions detailed in this brochure to replace it! ■ All repairs and metrological checks must be carried out by qualified and approved personnel! WARRANTY Our guarantee is applicable for twelve months after the date on which the equipment is made available (extract from our General Conditions of Sale, available on request). 2 CONTENTS 1. 2. 3. 4. 5. 6. 7. 8. 9. 10. 11. GENERAL PRESENTATION ............................................................................................................ 4 DESCRIPTION OF THE INSTRUMENT ........................................................................................... 6 USING FOR THE FIRST TIME ......................................................................................................... 7 GENERAL USE ................................................................................................................................ 8 4.1 Automatic checks of measurement conditions ........................................................................ 8 4.2 Connecting the instrument ....................................................................................................... 8 4.3 C.A 6115N Operating principle ................................................................................................ 9 4.4 Changing settings (thresholds …) .......................................................................................... 9 4.5 “SET UP” = General settings ................................................................................................. 10 4.6 Standby mode (Power down-Pd) ........................................................................................... 11 4.7 Power up information ............................................................................................................. 11 4.8 Remote control probe ............................................................................................................ 11 4.9 Error codes CA 6115N (listed according to Software Version) ............................................. 11 MEASUREMENTS .......................................................................................................................... 12 5.1 Checking phase position with the mains plug ....................................................................... 12 5.2 Checking the protective conductor PE (earth) ...................................................................... 13 5.3 Measuring voltage and frequency ......................................................................................... 14 5.4 Measuring current and leakage current with a clamp ........................................................... 15 5.5 Measuring insulation resistance ............................................................................................ 17 5.6 RCD testing ............................................................................................................................ 20 5.7 Measuring earth resistance RA (Za since Software version 2.8) ......................................... 25 5.8 Measuring loop impedance : Short-circuit current / Fault voltage /Earth .................................. impedance/selective Resistance ........................................................................................... 29 5.9 Measuring resistance / testing continuity .............................................................................. 36 5.10 Determining phase order ....................................................................................................... 38 5.11 Measurement lead compensation .......................................................................................... 39 RS232 INTERFACE / MEMORY .................................................................................................... 40 6.1 Technical specification of the RS232 ..................................................................................... 40 6.2 Saving / Calling up measured values .................................................................................... 41 6.3 Printing measured values ...................................................................................................... 43 6.4 Saving or printing at programmable intervals ........................................................................ 45 SERIAL-TO-PARALLEL ADAPTER (RS232 - CENTRONICS) (OPTIONAL) .............................. 46 C.A 6115 UTILITY WINDOWS SOFTWARE FOR PC (OPTIONAL) ............................................. 47 CONTINUITY TEST ADAPTER (OPTIONAL - UK MARKET ONLY) ........................................... 47 9.1 Description ............................................................................................................................. 47 9.2 Procedure ............................................................................................................................... 48 9.3 Calculating values ..................................................................................................................... 48 9.4 Comments on the 2 different methods .................................................................................. 48 CLEANING AND MAINTENANCE ................................................................................................. 49 10.1 Cleaning ................................................................................................................................. 49 10.2 Charging the battery .............................................................................................................. 49 10.3 Replacing the fuses ............................................................................................................... 49 10.4 Storage .................................................................................................................................. 50 10.5 Metrological check ................................................................................................................ 50 10.6 After-sales service ................................................................................................................ 50 ORDERING REFERENCES ........................................................................................................... 51 3 1. GENERAL PRESENTATION The C.A 6115N is a measurement instrument designed for testing the safety of electrical installations. Measurement functions: Voltage, frequency, current/leakage current, insulation resistance, RCD’s, earth resistance – selective earth resistance, fault voltage, loop impedance, shortcircuit current, resistance/continuity, phase order, protective conductor testing, checking connections Display: 3 ½ digits (1999 counts), LCD – with back-light L L COM R Operating controls: Central selector switch and control buttons ENVIRONMENTAL CONDITIONS Altitude: up to 2000 m Operating temperature: -10° C. . .+ 50° C Temperature rating: 0° C. . .+ 35° C Storage temperature: -20° C. . .+ 60° C Temperature coefficient: ± 0.1% L/K Relative humidity: 80% max up to 31°C without condensation Indoor use Permissible errors and use errors: concern nominal temperature range and sine current or voltage Pollution degree: 2, absence of pollution or dry, non-conductive, pollution. From time to time, temporary conductivity caused by condensation may be allowed. E.g., closed and heated surroundings without fog or vapour. SAFETY Protection index: Protection class: Safety: Input protection: Permissible overload: EMC: Power supply: IP 40 as per EN 60529 IK 04 as per EN 50102 (Ed. 95) compliant with protection class II as per EN 61010-1 (Ed. 95) EN 61010-1 300 V installation category III, Pollution degree 2 + EN 61557 (Ed.97) By software lock, with varistors against voltage Urms 600 V and HRC fuse: M-3.15 A-500 V-10 kA-6.3 x 32 mm Fuse-protected clamp input: M-2 A-380 V-10 kA-5 x 20 mm Urms max. = 500 V for all functions Emission according to EN 50081-1 (Ed. 92) Immunity according to EN 50082-2 (Ed. 95) NiMH 7.2 V/1000 mAh rechargeable battery with incorporated charger Connection via test lead 4 Charge time: max. 120 Min. (fast charge) Number of measurements per charge: Min. of 1500 with use of maximum current (i.e. insulation measurements at 500 V) Dimensions: 295 mm x 230 mm x 108 mm (L x W x H) with cover; Weight: approx. 2.1 kg with rechargeable battery 5 2. DESCRIPTION OF THE INSTRUMENT 12 11 13 14 10 9 1 3 2 4 15 16 5 6 7 17 8 1 Rotating selector switch, used to select the required measurement function and to switch OFF the instrument. 2 Charge indicator LED, comes on or flashes during automatic charging when the selector switch is on the “OFF/CHARGE” position and the instrument is plugged into the mains. 3 Button used to start the test chosen using the selector switch. The TEST is begun when this button is released, except for INSULATION or CONTINUITY tests that start immediately. This button also enables the operator to check for possible voltage presence or breaks in the protective conductor PE (ground). 4 Button used to display additional information and values measured besides the main value, and/or to turn on the display backlight (press for over 2 seconds). 5 Multi-function button used to select the insulation test voltage (100V, 250V or 500V), for function ); AC positive phase ( ) ; AC negative phase selection during RCD testing: without tripping ( ( ) ; DC positive phase ( ) ; DC negative phase ( ). For setting limit values, for choosing memory locations and for switching statuses : from an indication of measurement results into active voltage measurements. 6 6 Multi-function button for selecting functions during RCD testing: measurement of trip current with RAMP( ); measurement of tripping time in pulse mode: test at I∆N ; selective test at 2 I∆N( ); 5 I∆N, 150 mA or 250 mA. Also used for setting limit values, choosing memory locations. And switching statuses: from an indication of measurement results into active voltage measurements. 7 Multi-function button for saving measured values (MEM), or for calling up saved values (MR). 8 Multi-function button for printing out measured values (PRINT), or accessing the “SET UP” menu (PROGRAMMING) if pressed for longer than 2 seconds. 9 2000 count LCD display , 17 mm digits with automatic decimal point, different symbols and units, back-light with auto switch-off. 10 Input for current clamps (two 4mm ∅ safety sockets) WARNING: Only to be used with original clamps, compliant with the EN 61010 standard, with safety leads! 11 Fuse for the current clamp input (M-2 A-380 V-10 kA-5 x 20 mm). 12 Terminal for earth probe (4 mm ∅ safety socket). 13 Measurement connection terminals, (3 x 4mm Ø safety sockets). 14 RS232 Interface, 9-pole SUB-D (for wiring, see “ RS232 Interface “ chapter). 15 Mechanism for securing the lid in different positions. To change the position, pull the LH and RH slides simultaneously upwards and pivot the lid. 16 Carrying strap. 17 Label with the technical specifications and wiring diagrams. WARNING: Maximum voltage in relation to earth = 300 V. CAUTION! Never force the lid open! 3. USING FOR THE FIRST TIME The C.A 6115N is fitted with NiMH rechargeable batteries that should be charged up before using the instrument for the first time. To do this, proceed as described in §9.2. Opening the instrument lid: Pull the slides on either side of the lid, opening it up at the same time. Then let go of the slides and angle the lid in the desired position. CAUTION: Never force the lid open! The position for on-site use (lid open at 115°) is a locked position, for greater ease-of-use during measurements. Always use the slides to release this position by moving them backwards or forwards. To close the lid, use the slides and close. NOTE : When the lid is opened to 180°, it can even be removed. When replacing the lid, check that it is correctly in place before trying to rotate it. Never use force. 7 4. GENERAL USE The C.A 6115N is extremely easy to use, irrespective of the measurement function selected. 1. Turn the selector switch to the required measurement function. The instrument is in standard set-up. 2. Connect the instrument following the wiring diagrams specified in this User’s Manual. 3. Start measurement using the “TEST” button. NOTE: Beginning with the version 2.8 of the C.A 6115N, there are two ways to start a measurement with the test button. A short press starts a normal measurement. A long press (> 2 sec. till the buzzer sounds) causes the instrument to measure the mean value out of 10 single measurements. This is useful in case of heavy disturbances. This feature is applicable in all functions where a loop resistance or an earth resistance is carried out. 4. Read off the measurement result or call up additional results using the “MORE” button. 5. Save the results using the “MEM/MR” button or print them out using the “PRINT” button. 4.1 Automatic checks of measurement conditions The C.A 6115N automatically tests the measurement conditions before the start of each test, e.g.; - Mains voltage - Frequency - Temperature inside the tester unit - Battery charge state - Lack of voltage when measuring insulation and resistance - Lack of voltage on the protective conductor PE (ground) - Correct connection of leads: an earth is checked for with every measurement, thanks to the TEST button. If these conditions do not prove to be satisfactory for measurement to take place, the instrument will not undertake any measurement and displays the reason why. The values measured are also checked automatically. For example, should the programmed limit values be exceeded, a visible and audible alarm is triggered! If the fuses necessary for measurement are defective, the instrument indicates “- - - -” on the LCD screen. 4.2 Connecting the instrument On installations with mains outlet sockets, use the test lead with the mains plug. This way you will avoid wiring errors and make best use of all the instrument’s measurement possibilities. The C.A 6115N automatically indicates the mains phase position. It also indicates if the neutral wire is not connected with “L”. NOTE: to avoid indication errors, use only the original measurement cables. For resistance, insulation resistance and phase order measurements, as well as for distribution switchboard measurements, use the measurement cable with 3 separate leads. If measurements have to be carried out with the earth probe, the probe lead (green lead with winder) must be connected to the " "terminal. The instrument automatically checks that the connection is made and displays the corresponding non-flashing symbol. If the symbol does flash however, this is either because the probe is necessary but not connected, OR because the probe is prohibited for the measurement in question. If the current clamp is connected, the corresponding symbol comes up on the display. If this symbol flashes, this means that the clamp is necessary for the selected measurement but that it is not connected OR that the clamp is connected but prohibited for the selected measurement. 8 4.3 C.A 6115N Operating principle The C.A 6115N has two main operating modes: 1. Before measurement (having just turned the selector switch to one of the different positions) : The C.A 6115N is monitoring the measurement conditions. By pressing the “MORE” button, you can read off: the voltage between different connected terminals, the frequency, the current measured by the clamp (if connected), the limit values that have been programmed-in, as well as other parameters depending on the function chosen with the selector switch: limit of contact voltage, reference voltage for short-circuit current calculation, insulation test voltage… ■ At this point you can consult all of these values with the “MORE” button and change them if need be using the “SELECT” and “CHANGE” buttons when it is possible. ■ If you press the “MEM / MR” button, the C.A 6115N switches to Memory Recall mode (MR), since no measurement has yet been started (see chapter 6.2). ■ If you press the “PRINT” button, the C.A 6115N switches to ‘Printing measured values’ mode (see chapter 6.3). 2. After measurement (you have pressed the “TEST” button) : The C.A 6115N indicates the different measurement results, which can be read off by pressing the “MORE” button. ■ If the instrument shows “ - - -” as being the measurement result, the measurement was interrupted by a problem (test leads not connected to the instrument, defective fuse…) or by some other disturbance. Start again. ■ If you press on the “MEM / MR” button, the C.A 6115N switches to Saving mode to store the measurement made. See chapter 6.2. ■ If you press the PRINT button, the C.A 6115N switches to immediate Printing mode to print out the measurement made. Before or after a measurement, the procedure for displaying secondary parameters by pressing the “MORE” button can be simplified and made shorter by going to the “SET-UP” menu (see chapter 4.5), or even more simply still by using the optional PC software with the C.A 6115N. Return to the status “Before measurement” (voltage measurement). Switch the main rotary switch to another position, or push “CHANGE” or “SELECT”. Measured values are then erased. 4.4 Changing settings (thresholds …) Several variables can be set on the C.A 6115N (thresholds, …) depending on the selected measurements. This enables the operator to easily evaluate measurement results. All of these variables are factory pre-set to practical values. If necessary, they can be changed directly on site in the instrument. However, for safety reasons, these modifications are lost when the C.A 6115N is switched off again. Each time the instrument is switched off, the factory pre-set values are restored. If the modifications have to be permanent, they must be carried out using the optional PC software for the C.A 6115N. Function Default variable values Insulation test Test voltage, UN = 500 V, Limit Rlim = 500 kΩ, Buzzer bu = ON RCD test UL = 50 V, Measurement of ZS = ON, Display of IK = ON, UREF = 230 V, Buzzer bu = ON Earth test RA lim = 100 Ω, Lead compensation R∆ = ON Loop test ZS lim = 100 Ω, Reference voltage UREF = 230 V, Lead compensation R∆ = ON Continuity test Limit Rlim = 5 Ω, Lead compensation R∆ = ON Phase rotation test No variable 9 Changing variable settings: 1. Turn the selector switch to the required position. 2. Press the “MORE” button several times in order to display the variables. Change them using the “CHANGE” and “SELECT” buttons. 3. To save the changes, press the “MORE” button. 4.5 “SET UP” = General settings This mode makes it possible to adapt the general settings on the C.A 6115N to the specific needs of the operator, including: setting standby mode on/off, the buzzer, date, time, lead compensation, RS232 baud rate … This makes it possible to either set up the C.A 6115N either as an extremely easy to use instrument that displays just the main measurement results/parameters, or as a more comprehensive instrument that besides displaying the main measurement results/parameters, also gives a number of useful secondary results/parameters depending on the function selected. Below is the list of general settings that are possible: Pd Standby mode on/off Set to off - prevents the standby mode from coming into effect (saves batteries) when not used for several minutes bu Buzzer on/off Set to off - prevents monitoring of limits with audible beep dAt Date 06 05 96 Set date using “SELECT” and “CHANGE” tim Time AM 12:31 Set time using “SELECT” and “CHANGE” R∆ Compensation R: on/off Set to off - removes lead compensation bd Baud rate: 300...9.6 K..- - - RS232 interface speed When “- - -” is displayed, this signifies serial-to-parallel mode (to be chosen for A4 parallel printer with optional adapter. See § 7) When “ -P-” is displayed, this means the remote control probe can be used (see § 4.7). prt Print format: doc/prt doc prt : “Documentation”-type printing : “Protocol”-type printing The rest of the SET-UP menu below lists the secondary parameters/results that can be shown or hid for each function. The “x”’s indicate the functions where there is a parameter/result display “ON/OFF” option: Parameter int UL UREF IK ZS ZS lim RS RA lim R lim ZA Interval selection (auto recording mode) Contact voltage limit Reference voltage for I K Short-circuit current Loop impedance Loop impedance limit Loop resistance Earth resistance limit Resistance limit Earth impedance (1) Setting RCD 0.1...199.9 min on/off on/off on/off on/off on/off on/off on/off on/off on/off (1) Only settable with the Utility Software Version 3.2 10 EARTH LOOP INSULATION LOW Ω X X X X X X X X X X X X X X X X X To change settings: 1. Turn the selector switch to the required position. 2. Press the “Print / SET-UP” button for over 2 seconds. – All segments of the display come on. 3. You can now press the “MORE” button several time to go through the “SET-UP” parameters and change them accordingly using the “CHANGE” and “SELECT” buttons. 4. To quit “SET UP” and save the changes made, press the “MORE” button until you have worked all the way through SET-UP, or press the “TEST” button. If you turn the selector switch, the changed parameter settings will not be saved after the instrument is switched off. 4.6 Standby mode (Power down-Pd) To prolong battery life, the instrument switches to standby mode approximately 1 minute after being left idle – the screen indicates “ - - -”. The display can be reactivated by pressing any button. This standby function can be deactivated in “SET UP”. 4.7 Power up information After a short display test with all segments some numbers are indicated before the instrument switches into the voltage measurement status. The numbers show the software version (2 digits on the left) and the instrument number, composed of 6 digits :3 digits main display and 3 digits upper right. Example: 28 300 001 Means: 2.8 Software version 300 001 Instrument number 4.8 Remote control probe This probe plugs into the C.A 6115N’s RS232 socket. It is fitted with a 4 mm safety socket on its underside, making it possible to connect one of the three test leads, L, N, or PE. All measurements can be carried out using the yellow button on the probe, which is the equivalent of the “TEST” button on the C.A 6115N. WARNING: The test for PE-voltage (connected to earth) is not carried out with the probe. A push button on the back of the probe enables the operator to light up the measurement point (approx. 500 lux. Illumination). This function can be very handy when making measurements on powered down installations for example. To use the probe, first set the “bd = baud rate” to “-P” in the “SET-UP” menu (see § 4.5). Croc-clips 4.9 Error codes CA 6115N (listed according to Software Version) V2.3: E00 - microcontroller program check-sum error E01 - stack overflow E02 - program status error E03 - display value out of range E04 - memory (MEM/MR) check-sum error E05 - EEPROM check-sums (one of 4) E06 - watchdog reset E07 - EEPROM communication E08 - RTC initialisation or access error E09 - bistable relays control 11 Remote control probe RS232 socket Extensions in V2.4: E05 - EEPROM E15 - EEPROM E25 - EEPROM E35 - EEPROM check-sum - printer data check-sum - rotary switch calibration data check-sum - measurement calibration data check-sum - instrument number Extensions in V2.7: E09 – shows the number of a faulty relay if test fails in the right upper display corner Extensions in V2.8: E45 – EEPROM – wrong contents for constants for measurement These error messages help to find the right diagnosis for repair. In any case, it is necessary to send the instrument to an authorised service center. 5. MEASUREMENTS 5.1 Checking phase position with the mains plug This function is useful for quickly identifying the conductor with more than 20 Volt detected at the PE input (phase) in mains sockets, thus avoiding the use of the traditional test lamp. The test lead with the mains plug on it should be used for this. A non connected neutral wire is also indicated. 5.1.1 Description of the function The voltage of “L” and “N” conductors is measured in relation to the “PE” conductor (ground). The highest voltage (> 20 V) is designated as a phase and indicated by the L in the " L L" symbol shown on the instrument’s LCD screen. This position indication is made in relation to the marking situated on the mains plug (white point). If both “L” segments are indicated you, the voltage indications make it possible to identify the problem. If the voltages L-PE and N-PE show the same mains voltage e.g. 230 V, the N wire is poorly connected to phase. If the voltage N-PE shows half of the mains voltage e.g. 115 V, then the N wire is not connected. WARNING: It cannot be assumed that contact with the conductor that is not designated by “L” is safe. The instrument only indicates the highest voltage in relation to the PE! If using the measurement cable with 3 separate leads, make sure that the PE lead (white) is correctly connected to the network. 5.1.2 Technical specifications Voltage rating : 20 - 300 V; 15.3 ... 420 Hz Internal resistance : Approx. 400 kΩ Maximum overload : Vrms max. = 500 V 5.1.3 Performing a measurement 1. Connect the C.A 6115N to the installation, as illustrated. 2. Select any position with the switch Check that the white point on the mains plug can be seen from above. 3. Meaning of the different indications displayed: L L1 L2 L3 N PE = the highest voltage in relation to the earth (PE) is on the left-hand pin of the mains plug 12 L = the highest voltage in relation to the earth (PE) is on the right-hand pin of the mains plug If using the measurement cable with 3 separate leads: If " L" appears, this means that L1 (red) presents the highest voltage in relation to the PE conductor (white). If " L " appears, this means that L2 (yellow) is connected to the highest voltage. NOTE: To avoid indication errors, use original measurement cables only. 5.2 Checking the protective conductor PE (Earth) When the user touches the conductive “TEST” button, the instrument checks whether a voltage > 50 V is present on the protective conductor (PE) compared with the neutral earth, whether the protective conductor is there or not or whether there is a break in it. If no PE earth is detected by the instrument but you wish all the same to carry out a measurement that does not use the earth, you must press the “TEST” button with an insulating tool: glove, pen… 5.2.1 Description of the function An integrated network of high resistance values between L, N and PE enables the protective conductor PE to be polarised. When making contact with the conductive “TEST” button, the operator establishes a link with the potential of the protective earth connection via the resistance of his body. If the protective conductor is live or is missing, a difference in potential is detected, evaluated by the processor and reported by “PE”. An audible signal is triggered at the same time. 5.2.2 Technical specifications Test: Protective conductor, to check for voltage presence or a break. Voltage: > 50 V - 300 V AC 16-300 Hz Measurement of the voltage difference between the contact electrode ( “TEST” button) and the PE line Interruption: Automatic marking and locking of the measurement, at a network voltage of 90 – 440 V ; 16 – 65 Hz Internal resistance: approx. 700 kΩ 5.2.3 Making a measurement 1. Connect the C.A 6115N to the installation, L1 as illustrated opposite. L2 L3 2. Select any position with the switch except N phase order determination. PE When using the measurement cable with 3 separate leads, check that the PE (white lead) is correctly connected. 3. Touch the “TEST” button (the user’s body must not be insulated from earth: do not wear insulating shoes, or use a plastic object to make contact with the “TEST” button, but rather touch an earthed element such as a water pipe…) The indications mean: ■ “PE” with UL-N = network voltage and UL-PE, UN-PE = approximately 50% network voltage. The protective conductor PE (earth) is interrupted or connected to high ohmic values! ■ “PE” with UL-N = 0 , and UL-PE, UN-PE = 100% network voltage. The protective conductor PE (earth) is at network voltage! WARNING! Risk of electrocution! Power down the installation, make it safe and eliminate the faults. 13 5.3 Measuring voltage and frequency 5.3.1 AC/DC voltage measurements - Technical specifications All measured values are calibrated for a sine wave. Measurement range Range Resolution Frequency range 95 … 440 V 0 … 500 V 1V DC - AC 15.3 … 450 Hz Accuracy: ± (1 % of R. + 1 ct) Internal resistance: Approx. 400 kΩ (L - N - PE) Permissible overload: Urms max. = 500 V 5.3.2 Frequency measurement – Technical specifications This is possible in all switch positions. Measurement range Resolution Operating range 15.3 … 99.9 … 450 Hz 0.1 … 1 Hz 5 … 400 V Accuracy: ± (0.01 % of R. + 1 ct) Internal resistance: Approx. 400 kΩ (L - N - PE) Permissible overload: Urmsmax. = 500 V 14 5.3.3 Measuring voltage and frequency 1. Connect the instrument according to the diagram opposite. 2. Select any position with the switch 3. Read off all the measurements using the “MORE” button. 4. To save or print out voltages and frequencies, a live TEST (RCD, earth, loop, phase rotation) must be run with the TEST button; voltages and frequencies are always saved or printed with the test made. L1 L2 L3 N PE WARNING!: Voltages and frequencies saved by a TEST can only be displayed whilst printing out or transferring measurements stored in memory to a PC and EXCEL; The environmental parameters of measurements (voltages, frequency, current) cannot be displayed on the LCD screen in Memory Recall mode): see chapter 6.2. 5.3.4 Error indications - Comments Display Meaning Comments Measurement range exceeded Voltage above 500 V Measurement not possible, frequency outside of the nominal range or DC Frequency above 450 Hz Measurement not possible, no voltage present Measurement not possible Battery discharged Frequency less than 15.3 Hz or DC Voltage < 0.1 V Charge batteries if the indication appears several times à After-sales service 5.4 Measuring current and leakage current with a clamp This function is used to measure very low currents of around a few mA (fault currents, leakage currents, etc...) up to currents of around 300 A AC. Using a clamp gives the best safety possible during measurement. 5.4.1 Description of the function A current clamp with a 1000:1 transformation ratio is connected via an operational amplifier input (OP). The resulting power-less flow of current considerably broadens the clamp’s measurement range, enabling even traditional high current measurement clamps to measure down in the mA region. 15 5.4.2 Technical specifications Clamp Measurement range Resolution Bandwidth Accuracy C103 0.004 … 300 A MN21 0.003 … 200 A 1 mA … 1 A 45 ... 450 Hz ± 2% of R. ± 1 ct * 1 mA … 1 A 45 … 450 Hz ± 2% of R. ± 1 ct* * in relation to current clamps C 103 and MN 21 NOTE: If the measured values fluctuate greatly, this means that the network voltage is disturbed, (voltage peaks, interruptions to supply etc.) or that the frequency is not stable. In such cases, one must also expect fluctuations in the values measured depending on the network voltages, for example loop (ZS), earth (RA), RCD (DDR-RCD-FI), etc... WARNING:If the instrument is connected to the network or the red indicator is on, the input terminals may be live! Only connect clamps compliant with EN 61010 to these terminals, with safety leads such as those supplied optionally for the C.A 6115N. WARNING: No foreign voltage should be applied to the clamp inputs! Otherwise the protective fuse will blow and the input may be damaged! 5.4.3 Performing a measurement 1. Turn the selector switch to any position and connect the clamp to the “Clamp” terminal. " is displayed automatically, " -If not, bring up the indication “I...A” on the display using the “MORE” button. . 2. Connect the clamp to the circuits whose current is to be measured, as shown on the connection diagram. 3. Read off the measurement. L1 L2 L3 N PE To save or print out the current measured, a TEST (RCD, earth without clamp, loop without clamp, phase rotation) should be started with the TEST button; the current as well as voltages and frequency are always saved or printed with the test made. To save the leakage current values at regular intervals, see chapter 6.4. WARNING: The current value saved by a TEST can only be displayed when printing or transferring measurements stored in memory to a PC and spreadsheet (EXCELTM...) software. The environmental parameters of measurements (voltages, frequency, current) cannot be displayed on the LCD screen in Memory Recall mode): see chapter 6.2. NOTE: If the instrument’s red “Clamp Input” terminal is connected to a lead and the LCD does not display the “Clamp” symbol, the clamp’s fuse has without a doubt blown (changing it is possible via the front of the instrument). 16 5.4.4 Error indications Display Meaning Measurement range exceeded 5.5 Comments Measured current too high, wrong clamp (e.g. 100:1) or foreign voltage connected Measurement not possible Frequency out of 45…450Hz range or current too low Measurement not possible Battery discharged Charge batteries If the indication appears several times à After-sales service Measuring insulation resistance This function is used to measure insulation resistance up to 600 MΩ (300 MΩ at 100-250 V). There is a choice between test voltages of 500, 250 and 100 V DC, with a nominal current > 1 mA, complying with DIN VDE 0413 and EN 61557 (Ed. 97). Insulation resistance measurement can be made automatically between 3 points, L - N - PE for example, without changing the position of the leads. 5.5.1 Description of the function The voltage present on the terminals is measured first. If less than 20 V, the selected test voltage (500/ 250/100 V DC) is generated upon pressing “TEST”. After each measurement, capacitances that are possibly still charged are discharged across an internal resistance; the voltage is then displayed automatically, provided that it is exceeds 20 V. In the “L - N - PE” function, the instrument automatically measures the insulation resistance between the terminals in one go: L-N, L-PE and N-PE. 5.5.2 Technical specifications Measuring insulation resistance according to EN 61557-2 (Ed. 97) / DIN VDE 0413 part 1 (9/80) Nominal voltage: 100 ; 250 ; 500 V DC switchable Voltage at open circuit: ≤ 1.05 x UN ±5V Nominal current: ≥ 1 mA DC Short-circuit current: < 12 mA DC Permissible overload: Urms max. = 600 V AC Max.: Urms = 50 V AC (Measurement is not made) Measurement duration: For as long as “TEST” is pressed down, or 4 s in automatic mode Automatic discharge after each measurement, across 400 kΩ. 17 Measurement range Resolution Accuracy 5 kΩ …9.99 MΩ …600/300* MΩ 1 … 10 … 100 kΩ … 1 MΩ ± (6 % R + 1 ct) Measurement range of DC voltage Resolution Accuracy 1 … 520 V 1V ± (1 % of R + 1 ct) * only at 100 V, 250 V 5.5.3 Diagram of measurement voltage at closed circuit Graph of voltage/resistance at 250 V 300 100 80 250 200 Voltage (V) Voltage (V) Graph of voltage/resistance at 100 V 120 60 40 20 0 0,5 1 2 5 10 20 50 100 200 500 150 100 50 0 1000 1 0,5 2 5 200 500 Resistance (kW ) 100 10 20 50 Resistance (kW ) 200 500 Graph of voltage/resistance at 500 V Voltage (V) 600 500 400 300 200 100 0 0,5 1 2 5 100 10 20 50 Resistance (kW ) 1000 5.5.4 Performing a measurement L1 L2 L3 N PE Force de 750 N (sol) 250 N (paroi) Plaque de bois Plaque métallique N Tissu humide PE L 18 Sol 1000 1. Connect the instrument as shown in the connection diagram. 2. Turn the selector switch to “INSULATION”, automatic L - N - PE or L-PE (2 poles) If using a measurement cable with 3 separate leads for a bipolar L-PE measurement, the N lead (yellow) that is not used should be connected to the PE lead (white). If using the measurement cable with the mains plug, the instrument considers that the phase is found to the right of the white point situated on the mains plug. 3. Press the “TEST” button. For a bipolar L-PE measurement, hold down the button until the indicated value stabilises. To stop the measurement, let go of the button. 4. Read off the measurement. The residual direct voltage following the measurement is automatically displayed. During this process, all the capacitances discharge at the same time. This function is automatically activated after each measurement until the voltage is less than 20 V ! To start a new measurement, press the “TEST” button once more. To return to the display of the network voltage UL-N, turn the selector switch or press CHANGE or SELECT. WARNING: If there is a capacitive component in the tested element, the measurement can produce voltages of 510 V which is hazardous for the user. Always let the tested element discharge through the instrument following measurement. Devices that are sensitive to overvoltages, e.g. microprocessor- controlled systems, should be disconnected for safety reasons during measurement. CAUTION! Insulation resistance measurements are only authorised on non-live installations. The absence of voltage is automatically checked for during connection. If the voltage is > 20 V, measurement will not be carried out. NOTE: If users are connected to the network before measurements, ensure that they are disconnected during the measurement on at least one terminal, (by removing the fuse for example). If the required insulation resistance values are not achieved, appliances should be completely disconnected from the network. 5.5.5 Evaluation of the measurement values The table below gives the minimum values that should be displayed, taking into account error in measurement, so as to be sure of having sufficient insulation. (see standards). Theoretical insulation value Minimum values displayed 100 kΩ 250 kΩ 500 kΩ 1000 kΩ 10 MΩ 100 MΩ 0.107 0.266 0.531 1.061 10.61 106.1 MΩ MΩ MΩ MΩ MΩ MΩ 19 5.5.6 Error indications Display Meaning Comments Measurement not possible, Voltage present on measurement input Measured value greater than 600 MΩ (at 500V) or 300 MΩ (at 100V - 250 V) Measured value below set LIMIT Voltage > 20 V on the input, for example network voltage not cut Resistance exceeding the measurement range, lead cut or badly connected Activation of user alarm! Short-circuit on line, possibly N – PE bridges Measurement not possible Wrong connection of instrument test leads Measurement not possible, Battery too low Charge the battery – if this is not possible, the charging fuse is perhaps defective see “Replacing the fuses” 5.6 RCD testing The RCD-FI measurement function enables the correct working order of RCD’s to be checked. Nominal fault currents I∆N of 10 / 30 / 100 / 300 / 500 mA and “VAR” position of 6 mA to 1000 mA can be selected. The fault voltage “UF”(at I∆N), the trip current “IA” and the trip duration “tA” can be measured. Additionally, the test currents 2x I∆N, 5x I∆N and 150/250 mA are also available. When using the earth probe, the earth resistance “R A” can also be measured! Without the earth probe, the loop resistance “RS” and the short-circuit current “Ik” can also be measured. For all test currents, measurement of the fault voltage, loop resistance, short-circuit current and earth resistance is possible at the same time as an RCD test, without tripping 30 mA RCD’s. When measuring tripping time, for safety reasons the current is interrupted after 500 ms if the RCD doesn’t trip. To test the permitted fault voltage on old installations (65 V) with tripping, a self-adaptive measurement procedure is used which, if the fault voltage increases, reduces the permitted tripping duration to 100 ms, in compliance with EN 61010. If using the earth probe, parasite voltages of up to 70 V can be displayed and do not distort the measurement. If the interference voltage exceeds 70 V, measurement is not begun. The maximum earth probe resistance tolerated is 15 kΩ. NOTE: Unstable measurements caused by heavy disturbances in the mains supply can be reduced by making a long press on the “TEST” button (available since Version 2.8) 5.6.1 Description of the function After the test of voltages UL-PE and UN-PE , the current source is applied to the highest voltage in relation to the PE. First of all, the instrument circulates a current < 40% of I∆N, so as to calculate the fault voltage and the loop resistance (ZS then the fault voltage UF = ZS x I∆N) without tripping the RCD. If the earth probe is used, the voltage of this probe is measured in a closed circuit and the fault voltage and the earth resistance are calculated from this value. 20 Next, a non-tripping test of the RCD is carried out automatically. To do this, the network is charged throughout 50 periods (> 1000 ms) with 50% of I∆N. Depending on the user’s initial choice, the following test is either a “Ramp” test to obtain the exact RCD tripping current, or a “Pulse” test to obtain the tripping time of the RCD: ■ In the “RAMP” function, the fault current generated is increased in seventeen steps from 50 % to 103 % of I∆N. Each step (current level) is held constant for 200 ms. The exact current (IA) and the tripping duration (tA) for the step that causes the RCD to trip are both measured and displayed. ■ In the “PULSE” function the nominal fault current (I∆N) set is applied constantly for a maximum of 500 ms. During a selective RCD test ( ), twice the nominal fault current (2x I∆N) is applied. If the RCD trips, the tripping duration is measured and displayed (tA). If this duration is between 200 ms and 500 ms, the result flashes to indicate that this time is above the standards currently in effect. No matter which test is chosen, the phase (0-180°) and the form (sine/DC pulse) of the test current can be selected. " symbol is brought up on the LCD screen, only the initial test at I < 40 I∆N is made: fault If the " voltage, loop resistance ..., without tripping the RCD. These tests (loop, earth…) are very useful for quickly analysing an installation but are of lower accuracy than with the specific functions. Check against N-PE wire exchange. If a RCD does not trip within the test period the instrument tests the same RCD again with inversed N-PE connections automatically. If the RCD trips then, there might be a failure in the wiring of the installation. The instrument answers with an error message in blinking N-PE symbols. The same function is carried out when a no tripping measurement is chosen. 5.6.2 Technical specifications Measurement method: Measurement of line drop (without probe) or of the voltage difference (with probe) as per DIN VDE 60413 part 6 (8/87) RCD test as per EN 61557-6 Nominal voltage: 95-145, 175-300 V sine Frequency range: 15.3...17.5 Hz, 45...65 Hz Permissible overload: Urms max. = 500 V (No measurement is made beyond 300 V) Duration of measurement (with triggering): 1.5 s in Pulse mode, 1 s if 5 I∆N , 3.4s maximum in Ramp mode Duration of measurement (without triggering) : 1 s Adjustable nominal fault current I ∆N Accuracy ...% theoretical value Comments 0 ... + 7 % I∆N max. 1000 mA 10, 30, 100, 300, 500 mA Variable : 6 … 1000 mA x1, x2, x5 I∆N, 150, 250 mA Internal resistance: approximately 400 kΩ Nominal fault current I∆N (mA) 10 30 100 300 500 1000 Measurement range RA and ZS 20 … 999 Ω - 9.99 kΩ 2 … 999 Ω - 3.33 kΩ 2 … 999 Ω 0.2 …333 Ω 0.2 …199 Ω 0.2 … 99.9 Ω Resolution (Ω) 1…10 0.1… 10 0.1 …1 0.01 … 1 0.01 … 1 0.01 Accuracy 10 % of R. + 4 cts Measurement range of the contact voltage (UF) Resolution Accuracy 0.1 ... 1,5 ... 99.9 V 0.1 V 0...+15 % of R. + 2 cts 21 Measurement range of tripping time (tA) Range Ramp: 0...200 ms Pulse: 0...500 ms Without tripping: 0...1000 ms (automatic warning if tA > 200 ms) Resolution 0.1...7...500 ms 0.1 ms Accuracy ± 2 ms Measurement range of tripping current Resolution Accuracy 17 steps of 0.5 to 1.033 I∆N between 6...1000 mA 3.33% of I∆N ± (0...+7 % of R + 3.33% of I∆N) With probe Measurement range of probe voltage Resolution Accuracy 0 ... 4 ... 70 V 1V ± (2 % of R. + 1 ct) Internal resistance: Approximately 1.6 MΩ Max. probe resistance : ≤ 15 kΩ Parasite voltage: Max. 70 V in relation to PE potential; No measurements are made beyond this voltage. 5.6.3 Performing a measurement The diagram above represents a TT network. It is also possible to make RCD tests on TN and IT networks. Tests are always made in single-phase, with the instrument connected to phase, neutral and earth terminals. Connection to the neutral is not obligatory, (in such a case, connect the “neutral” and “earth” test leads to the earth. In that case, the N-PE inversion test does not work. L1 L2 L3 N S > 20 m 1. Connect the instrument as illustrated (use of the earth probe is optional! It is necessary if you want the instrument to measure the earth resistance at the same time as carrying out the RCD test). 2. Turn the selector switch to the “RCD/FI” function, on the required nominal fault current l∆N . If you want to change the test method (ramp, pulse, fault voltage test) or the type of wave (AC+, AC, DC+, DC-), press “CHANGE” or “SELECT” to set as required. The corresponding symbol is displayed ! These 2 buttons also enable the selection of the RCD rating in position VAR 6 … 1000 mA, for the first 3 seconds after rotation of the selector switch, if not after the display of this rating using the MORE button. 3. Start the measurement with the “TEST” button. 4. Read off the fault voltage “UF” that comes up as the first result. 5. Press the “MORE” button several times to bring up the additional values (time, current…) 6. Save the measurements with the “MEM/MR” button or print them out with “PRINT”. 22 Before and after method: This method makes it possible to trip an RCD even if another RCD of lower rating comes before it. If this is the case, connect the instrument to a phase before the RCD to be tested and connect the remaining test leads (neutral and earth) to the neutral after the RCD to be tested. This method can only be used on single-phase or three-phase networks with a neutral, since the phase-to-phase voltage exceeds the operating range of the instrument (95...300 V) on three-phase networks with no neutral. ), the connections of the network are automatically checked in In the fault voltage test function ( order to test for the possible inversion of N-PE. WARNING: in this case, in the event of an insulation fault on the installation, the RCD will not work. To start a new measurement, press the “TEST” button again. To go back to the display of the network voltage UL-N, turn the selector switch or press CHANGE or SELECT. CAUTION! To ensure that the RCD is working properly, the first measurement on each circuit (power outlet, appliance…) must be a test “with tripping”. Only the measurement points connected in parallel can be tested “without tripping”. When testing three-phase protective RCD’s, each phase (L1, L2, L3) should be checked in relation to the protective conductor PE, to ensure that all of the phases are correctly connected to the RCD. - Fluctuations in the measured fault voltage values If substantial differences between values are noted when making consecutive measurements, this indicates that there are strong fluctuations in the network voltage. In this case, you can make a measurement with the earth probe as described below: - Measurements with the earth probe applicable in TT supply systems In this case, the fault voltage is no longer derived from the Zs x I∆N calculation, but is calculated from RA x I∆N. Network interference has a much greater influence on ZS than on RA (since ZS is the loop going through the transformer), so the value of UF is more precise if a probe is used. For measurements with a probe, as well as the connections shown on the diagram, connect the probe lead to the “S / “ terminal on the instrument. The “ “ symbol comes up. The other end of the lead should be connected to the earth with an earth testing rod. Make sure to position the probe outside of any region carrying a potential - at a distance of approximately 20 m in relation to active earthing points. (see connection diagram). Make the measurement, read off the earth value measured or save it. Move the probe to ±10% of the distance and repeat the measurement. If the measurement remains unchanged, this means that the distance is sufficient. If the value does change, move the probe until the value stabilises. If it is not possible to plant a rod in the earth, the probe lead can be connected to an earthed neutral conductor (N conductor). In this case, the measurement accounts for the transformer earth connection resistance (as per DIN VDE 0100 max. 2 Ω). - Testing installations with a maximum fault voltage of 25 V (humid environments) Before starting a test, bring up the UL voltage limit on the display with the MORE button and change the limit, 25 V/50 V, with the CHANGE button. - Comments on the selective RCD ( ) test procedure The measurement procedure is the same as for the standard test, but the calculation of measured values and the trip test (as per DIN VDE 0100) is carried out on the basis of the formula RA = UL / 2 x I∆N (the trip test is done with twice the nominal fault current). Also, a 30 second pause is added between the initial tests (at I < 40% I∆N) and the trip test. A counter comes up on the screen and counts down the seconds from 30 to 0. When 0 comes up, the RCD test is started. This 30 wait can be shortened by pressing “TEST” again. The reason for this pause is due to the design of selective RCD’s, which are not sensitive to overvoltages able to intervene on networks. They have an energy accumulation capacity, which charges up following initial tests made with the instrument (with I < 40% I∆N). The trip time of this sort of RCD is then changed. This “hysteresis” effect is corrected over the discharge time of 30 s. 23 5.6.4 Error indications - Comments Display Meaning Comments Contact voltage cannot be measured, Earth resistance too high as it is above 100 V Test current setting may be WARNING: danger ! incorrect Measurement not possible The RCD was already tripped during the previous test at I < 0.4 I∆N The RCD was tripped during the test at 50% I∆N Leakage current in the installation + the test current < 0.4 I∆N have tripped the RCD. Inductive circuit. Wrong test current selected RCD defective - trips at I < 40 % I∆N. Reduce the test current in the VAR position. Leakage currents in the installation + test current have tripped the RCD. Inductive circuit Wrong test current selected. RCD defective - trips at I < 50 % I∆N Measurement of trip time impossible Leakage currents in the installation + 40% or 50 % I∆N trip the RCD The RCD was already tripped during the test at 40% or 50 % of I∆N The RCD trips at 40% or 50 % I∆N. The RCD did not trip with the Ramp function at 103 % I∆N. Possible N - PE connection, wrong test current selected, RCD defective RCD defective or incorrectly connected. Repeat test in selective mode if need be. Wrong test current set. The RCD did not trip at I∆N in 500 ms Measurement not possible, Voltage between the probe and PE above 70 V Voltage across probe above 70 V in relation to PE, e.g. interference voltage, foreign network Measurement not possible, Non-compliant probe connection RA too high, No probe Inversion between N and PE Warning: the installation’s RCD protection will not be able to work! Protective conductor defective Measurement impossible, Battery discharged Protective conductor (PE) interrupted, incorrectly connected or live, WARNING: Danger of electrocution! Charge the battery – see “Charging the battery” 24 5.7 Measuring earth resistance RA and ZA (since Software version 2.8) The instrument must be connected to the live network and the earth to be measured must not be disconnected. A single auxiliary earth testing rod (probe) is needed, saving a great deal of time compared to the traditional 2 auxiliary earth testing rod method. The test is carried out by measuring the potential difference between the probe (earth testing rod), serving as a reference point, and the earth to be measured. As a function of the current injected, the earth resistance (going up to 10 k Ω) is calculated. The instrument tolerates and measures parasite voltages of up to 20 V. If these voltages are higher, measurement is not possible. In this case, the probe has to be moved. An automatic test of the probe’s resistance takes place before measurement. The instrument tolerates probe resistances of up to 15 kΩ. If, during measurement, fault voltages > 50 V in relation to the earth are experienced, the measurement stops automatically within 200 ms. In some cases, inductive components may be essential (long tower line in TT systems, or poor earth conditions in TN systems). In these cases the CA 6115N with Version 2.8 has the ability to show the ZA impedance. Normally this function is inhibited, but combined with the Utility Software 3.2, this function can be set valid in the set up panel. See also chapter 5.8. For measurements on RCD-protected installations, make sure to use the "RA "measurement function. This function enables measurement of the earth resistance without tripping 30 mA RCD’s. Furthermore, it is also possible to selectively measure a single earth among several, without having to disconnect the earth from the installation. A current clamp (optional) must be connected to the C.A 6115N (See also chapter 5.8). NOTE: unstable measurements, caused by heavy disturbances in the mains supply can be reduced by making a long press on the “TEST” button (available since Version 2.8). 5.7.1 Description of the function During the test, the current source is connected to the conductor with the highest voltage in relation to the “PE”. The network is then charged with a current that varies according to the earth resistance and the drop in voltage on the earth connection is measured in relation to the reference earth (probe). The earth resistance is calculated from the two values I and U. If using a current clamp, only the current measured by the clamp is used in the calculation. NOTE: in case of very low parallel earth resistances, the contact resistance and the lead resistance of the PE connection influences greatly the measurement result. Therefore it is advisable to compensate the lead resistances at the point of connection before the measurement is carried out. Please place the clamp very close to the PE connection. Earth resistance (with probe), as per EN 61557–5 (Ed. 97). Measurement method: Measurement of the potential difference with a probe and current (DIN VDE 0413 part 7 - 7/82) Nominal voltage: 95 . . . 145 V, 175 ... 300 V Frequency ranges: 15.3 ... 17.5 Hz, 45 ... 65 Hz Permissible overload: Urms max. = 500 V (measurements are not started beyond 300 V) RA function: RA, Za (since Version 2.8) Measurement range 0.15 … 6.99 Ω 0.7 ...19.99 Ω 20.0 … 199.9 Ω 200 … 1.999 kΩ 2.0 … 9.99 kΩ Resolution (Ω) Test current (Pulses) 0.01 1500 mA peak ± (10 % of R.+ 3 cts) (if selective measurement) 0.1 1 10 650 mA peak 80 mA peak 10 mA peak ± (15 % of R. + 10 cts) (if selective measurement) 25 Accuracy Measurement duration: 3 … 60 Periods, depending on the earth resistance and test current. Probe voltage measurement range Resolution Accuracy 1 …70 V 0.1 V ± (2 % of R. + 1 ct) NOTE: The inductive component of Za is measured within the values 0 ≤ Za ≤15 Ω. RA function (without tripping 30 mA RCD’s) : Measurement range Resolution (Ω) 0.15 … 199.9 Ω 0.1 0.200...1.999 kΩ 1 2.00... 9.99 kΩ 10 Test current Accuracy 10 mA rms ± (10 % of R + 3 cts) RA SEL function (using a current clamp): Measurement range Resolution (Ω) Test current (mA) Accuracy 0.7 … 19.99 Ω 0.01 1500 ± (15 % of R. + 10 cts) 20.0 ... 199.9 Ω 0.1 650 Probe voltage: Max. 20 V in relation to the PE potential Measurement is not started beyond this voltage. Probe resistance: Max. 15 kΩ Selective measurement: Check that the measurement current ISEL is not < 10 mA, (for RA = 0...18 Ω) or < 5 mA for RA > 18 Ω. In this case, the measurement will be outside of the (RA SEL) instrument’s accuracy range (displays “- - - -” as selective earth RA SEL measurement result). NOTE: To get highly accurate measurement of low earth resistance, test lead compensation (5.11) can be put into effect. The same Rsel function is available in position Zs (chapter 5.8) with better resolution 26 5.7.2 Performing a measurement TT system L1 L2 L3 N PE S > 20 m RA IT system L1 L2 L3 N Z PE S > 20 m RA TN system PEN L1 L2 L3 N PE S > 20 m In this function, connection to the neutral is not necessary for “RA” measurement but is for "RA For “RA”, you can connect the “neutral” and “earth” test leads to the PE earth. ". 1. Connect the instrument as shown on the diagram above. NOTE: In the case where the earth conductor is connected to the earth by several connections in parallel (on a TN system for example, where this enables the potential of the PEN conductor to be kept at 0 all along it whilst neutral currents flow), use the “RA SEL” measurement function with a current clamp (available as an option), to measure each earth selectively without disconnecting them. WARNING: In such cases, connect the clamp and the PE test lead (white) as close as possible to the required earth to be measured and compensate for the leads before starting the measurement! 27 2. 3. 4. 5. TT system: This is the ideal diagram for quick and easy measurement of the ground earth: no earth connection to disconnect and just one extra earth testing rod to plant! IT system: It is also easy on a TT system but BEWARE: The supply transformer must be connected to the earth by an impedance. It must not be totally isolated from this, otherwise the measurement current cannot flow. The ground earth RA” and the transformer earth must also be distinct, otherwise the measurement current will not go through the earth. The network must not be in a state of single fault that has not been rectified, since the measurement creates a second fault at the earth! Check the indication given on your CPI. TN system: You can easily measure each earth in parallel with the PEN using the current clamp (selective measurement). Without using the clamp, the measurement gives the value of the entire earthing system connected to the network, which is of little use or significance. In fact, on a TN system, the fault currents do not flow, or flow very little, in what is a purely “functional” earth. The fault currents loop back, mainly by the neutral, and, except in the presence of RCD’s, the low impedance of the fault loop makes these currents very high. They are then cut by fuses or RCD’s. It is therefore much more useful to measure the fault voltage according to the RCD’s in place (protection of persons against indirect contact), as well as the fault loop impedance to calibrate the fuses and circuit-breakers. Set the selector switch to the RA position. If the " " symbol flashes, then the probe necessary for the measurement is not connected to the “S / “ terminal. To start a measurement, press the “TEST” button. Read off the Ra or Za (since Version 2.8) or that of RA sel. NOTE: the Za function is accessible with the Utility Version 3.2 (Default setup is Za inhibited) Read off the RA measurement or that of RA SEL If you want to, save the measurements with the “MEM” button, or print them out with the “PRINT” button. To start a new measurement, press the “TEST” button once more. To return to the display of the network voltage UL-N, turn the selector switch or press CHANGE or SELECT. CAUTION! To avoid any influence, make sure to position the probe in a potential-free zone – at a distance of approximately 20 m from the active earths (see connection diagrams). Carry out the measurement, reposition the probe and repeat the measurement. If the measurement remains unchanged, this means that the distance is sufficient. If not, relocate the probe until the value stabilises. Measuring without the probe If it is impossible to use the probe, the probe lead can be connected to the earthed neutral conductor (conductor N). Since the earth resistance of the transformer neutral (RB) is included in the calculation, the measurement is therefore of an excessive earth value. Evaluating measurement values The table below gives the maximum values that should be displayed, accounting for measurement errors, to be sure of having a maximum earth resistance (see standards). Theoretical maximum earth resistance (Ra) Maximum values displayed 0.1 Ω 0.3 Ω 0.5 Ω 0.7 Ω 1.0 Ω 3.0 Ω 5.0 Ω 10.0 Ω 0.06 Ω 0.24 Ω 0.42 Ω 0.60 Ω 0.88 Ω 2.70 Ω 4.52 Ω 9.06 Ω 28 5.7.3 Error indications - Comments Display Meaning Measurement not possible, as the voltage is outside of the nominal range Comments Voltage less than 90 V Poor connection possible Voltage too high Measurement not possible, frequency outside of the nominal range Frequency below 15.3 Hz Measurement not possible, no voltage present The installation’s RCD was tripped during measurement, Use the RA function Measurement not possible, voltage between the probe and the PE > 70 V Connection of the probe generates a voltage in relation to the PE greater than 70 V, e.g. parasite voltage, foreign network Protective conductor defective Protective conductor possibly interrupted, badly connected or live WARNING: Danger of electrocution! Measurement not possible Incorrect connection of the probe The earth probe’s resistance is too high (> 15KΩ). The cable has a break. Measurement not possible, Non-compliant probe connection Earth probe’s resistance is too high. Probe not connected. Temperature limit exceeded After approx. 3 minutes, press the “TEST” button again. Measurement interrupted Error 03 detected Error – Restart. If this occurs several times, a factory inspection is necessary. Measurement impossible Frequency above 450 Hz Battery too low Charge the battery 5.8 Measuring loop impedance : Short-circuit current / Fault voltage /Earth impedance/selective Resistance On TT, TN and IT networks, this function enables the testing of the protective systems that have been implemented. The instrument makes quick and easy measurement possible of the loop impedance between L and PE (except for on an IT system) and the network impedance between L and N or L and L, as well as the corresponding short-circuit current, on 95 - 440 V AC networks. The correct polarity of the network (L and N positions) is automatically detected. On a TT system, the measurement of L – PE loop impedance is a quick and practical way of measuring the earthing resistance without having to plant a single earth testing rod! The result found is an excessive value of the earth resistance, since it includes the distribution transformer earthing resistance and the resistance of cables which are normally both negligible. So if the result is good, then you can be sure that the earth is good! 29 To measure the fault voltage (UF) according to the SEV 3569 standard, and the voltage between the PE and the probe when a short-circuit current appears, the probe must be connected (earth testing rod). The fault voltage in a short -circuit is calculated as: UF = IK x RA, (ZA) = Uref x ZA / Zs IK: short cut current RA, ZA: earth resitance (impedance) ZA is accessible in C.A 6115N Version 2.8 combined with the Utility Software 3.2. In function Zs L-PE, the following measurements are possible depending on the connection of the inputs. The instrument automatically performs the different measurements (Application: TT or TN systems) : Connection Main measurement results 1. L, PE, (N optionell) Zs, Rs, IK 2. L, PE, Sonde, (N opitionell) Zs, Rs, IK, UF, (Za) 3. L, PE, Sonde, Zange, (N optionell) Zs, Rs, IK, UF, Zsel In this function the Rsel measurement has the best resolution due to high test current. The maximum measurement limit for Rsel is: The ratio between Rsel to Zs could reach 1000 but the clamp current must be higher than 5 mA. In function Zi L-N, the following measurements are possible (Application: TT, TN or IT systems) : Connection Main measurement results 1. L, N (PE optionel) Zi, Ri, IK 2. L, L Phase to Phase (PE optional) Zi, Ri, I K In function Zs no trip L-P, the following measurements are possible (Application: TT, TN systems) : Connection Main measurement results 1. L, N, PE Zs, Rs, IK If the network to be measured is fitted with RCD’s, the special " Zs " function enables measurement behind 30 mA RCD’s without risk of tripping them. (“ALT” system, patented by CHAUVIN ARNOUX). If there is a high level of disturbance on the installation brought about by a number of existing leakage currents, it is possible to reduce further still the measurement current with the optional PC software for the C.A 6115N. If the measurement is unstable, this could come from fluctuations in the network voltage. Repeat the measurements several times to get a stable value or take the average of 5 measurements. NOTE: In this function L; N and PE must be connected. NOTE: Unstable measurements, caused by heavy disturbances in the mains supply, can be reduced by making a long press on the “TEST” button (available since Version 2.8) 5.8.1 Description of the function The network voltage is first tested by the instrument. On the L-PE position of the selector switch, the charge is applied to the higher of the two voltages measured (L-N ; L-PE). Next, the network is alternately non-charged (open circuit) , then charged (with I< 5A in normal mode or I < 15 mA in " Zs "mode). On the basis of the difference between the two voltages measured (open circuit / closed circuit) and the phase difference, the processor calculates and displays the loop impedance. The short-circuit current (IK) is calculated according to IK = UNetwork/ZS. The reference UNetwork value corresponds here to the nominal network voltage selected (110/127/220/230/380/400 V) or to the voltage actually measured. Use the MORE and CHANGE / SELECT buttons to set this reference voltage before measuring (so that the actual voltage is used , bring up “- - - ” on the display.). 30 So that the fault voltage (earthing voltage at the nominal current of the RCD) is measured and displayed in position L - PE, the earth probe must be connected. If the earth probe and a current clamp are connected to the instrument, the selective earth measurement is also automatically carried out (position Zs SEL). 5.8.2 Technical specifications Measurement method: Loop impedance Z, Loop resistance R as per CEI 61557 - 3 Nominal voltage: 95 ... 145 V, 175 ... 300 V, 330 ... 440 V (L - N or L - L) Frequency range: 15.3 ... 17.5 Hz, 45 ... 65 Hz Test current: < 5 A at 230 V / 400 V, max. 15 mA for Zs Measurement duration: 4 to 50 periods Permissible overload: Urms max. = 500 V (measurement is not started beyond this value) Measuring Zs without tripping 30 mA RCD’s: Measurement range Resolution Accuracy 0.20 … 1.99 Ω 0.01 Ω ± (15 % of R. + 3 cts) 2.00 … 199.9 Ω 0.01 … 0.1 Ω ± (5 % of R. + 3 cts) Measuring Zs with a higher current (< 5 A) for greater accuracy: Measurement range Resolution Accuracy 0.080 … 0.500 Ω 0.001 Ω ± (10 % of R. + 16 cts) 0.500 … 1.999 … 19.99 … 199.9 Ω 0.001 … 0.1 Ω ± (5 % of R. + 3 cts) If the selective earth resistance is simultaneously measured (using the earth probe and the clamp), the measurement range is limited to 199.9Ω. See chapter 5.7 for other specifications that remain unchanged (accuracy, test current). Measuring the earth connection voltage (SEV 3569) Uref x ZA / Zs Measurement range Resolution Result calculation 0 … 200 V 1V 1.Measurement of IK, then 2.Measurement of ZA (not displayed), then 3.Calculation of ZA x IK = Fault voltage Max. probe resistance: ≤ 15 kΩ Max. parasite voltage: 70 V in relation to PE potential. Measurement not started beyond these voltages. Measuring Rsel with leads compensation Range Resolution Accuracy 0.0800 ... 1.999 Ω 0.001 Ω ± (10% +16 digit) 2 ... 19.99 Ω 0.01 Ω ± (10% +16 digit) 20 ... 199.9 Ω 0.1 Ω ± (20% + 16 digit) Short-circuit current: IK range Resolution Calculation formula 0.1 A ... 29.9 kA 0.1 A ... 100 A IK = U REF / RS 31 5.8.3 Performing a measurement In this function, connection to the neutral is only obligatory for "ZS "measurement. For “ZS”, the “neutral” test lead can be connected to the earth and for “Zi”, it can be connected to a phase (phasephase loop measurement). 1. Connect the instrument according to the diagrams below. TT System L1 L2 L3 N PE S > 20 m RA TT System : L-PE loop measurement enables quick earth measurement without planting an earth testing rod (excess value). L-N loop measurement enables the short-circuit current to be calculated and makes it possible to scale protective devices (fuses or circuit-breaker) L1 L2 L3 N TN System PE S > 20 m TN System : L-PE or L-N or L-L loop measurement enables measurement of fault loops and calculation of short-circuit currents for scaling of fuses or circuit-breaker. IT System L1 L2 L3 N Z PE S > 20 m IT System : RA Measuring L-N or L-L loops enables fault loop measurement and calculation of shortcircuit currents for scaling of fuses or circuit-breakers. The L-PE loop cannot be measured on account of the high impedance of the supply transformer’s earth connection (> measurement range) , even total insulation from the earth. 32 2. Turn the selector switch to the LOOP “ZS” L-PE position for the earth loop impedance or “Zi” L-N for the network impedance. So that the fault voltage is automatically measured on the LOOP ZS position, connect the earth probe to the instrument. . In the case of simultaneous selective earth measurement at the loop (using a probe and a clamp), connect the clamp and the PE measurement lead (white) of the cable with 3 leads as close as possible to the earth to be measured and proceed with lead compensation before starting the measurement! 3. Press the “TEST” button. 4. With the “MORE” button, display the extra measurements (short-circuit current (IK)), reference voltage (UREF), loop resistance (R ) or (R ) and, if using a probe and a clamp, selective earth resistance (R ), S i SEL measurement current (I ) and fault voltage (UF)). SEL To start a new measurement, press the “TEST” button again. To come back to the display of network voltage UL-N, turn the selector switch or press CHANGE or SELECT. Note : For measurements on three-phase systems, the loop impedance must be measured between each phase conductor (L1, L2, L3), the neutral conductor and the protective conductor (PE). NOTE: This instrument can operate at voltages of 95 to 440 V. According to the current regulations in force, the calculation of short-circuit current (IK) and of earth connection voltage (US-PE) must refer to the “nominal voltage”. The instrument uses the setting chosen with the MORE, CHANGE and SELECT buttons for calculations before starting the measurement. These settings can be modified: 1. New nominal voltage in Europe (230/400 V) – Delivery configuration 2. Old nominal voltage in Europe (220/380 V) 3. Voltage actually measured (shown with “- - -“) NOTE: To achieve very precise measurements of low loop or network impedances, the leads can be compensated (see 5.11). The following table gives the maximum loop resistance values and the minimum short-circuit current values (based on 230 V), accounting for measurement error, to stay within the tolerated limits (see standards). Short-circuit current = Network voltage / Loop impedance (Maximum value displayed) Loop impedance / Network impedance Short-circuit current Theoretical value Max. displayed value Theoretical value Min. displayed value 0.08 Ω 0.1 Ω 0.3 Ω 0.5 Ω 0.7 Ω 1.0 Ω 3.0 Ω 5.0 Ω 10.0 Ω 15.0 Ω 0.056 Ω 0.075 Ω 0.257 Ω 0.473 Ω 0.6664 Ω 0.949 Ω 2.854 Ω 4.73 Ω 9.49 Ω 14.25 Ω 2875 A 2300 A 766.67 A 460 A 328.57 A 230 A 76.67 A 46 A 23 A 15.33 A 4.11 kA 3.07 kA 895 A 486 A 346 A 242 A 85.5 A 48.6 A 24.2 A 16.1 A 33 Maximum loop impedance authorised for different protective devices, according to table A1 of the DIN VDE 100 standard, part 610 (example). U0 = 220 V 4) In (A) Low voltage fuse as per DIN standard VDE 0636 Circuit-breaker as per DIN standard VDE 0641 with characteristic L Ia (5 s) (A) Zs (5 s) (Ω) 2 9.21 23.9 20 11.0 10 22 30 7.3 4 19.2 11.5 40 5.5 20 11 60 3.7 6 28 7.9 60 3.7 30 7.3 90 2.4 10 47 4.7 100 2.2 50 4.4 150 1.5 16 72 3.1 148 1.5 80 2.8 240 0.9 20 88 2.5 191 1.2 100 2.2 300 0.7 25 120 1.8 270 0.8 125 1.8 375 0.6 32 156 1.4 332 0.7 160 1.4 480 0.5 35 173 1.3 367 0.6 175 1.3 525 0.4 40 200 1.1 410 0.5 200 1.1 600 0.37 50 260 0.8 578 0.4 250 0.9 750 0.29 63 351 0.6 750 0.3 315 0.7 945 0.23 80 452 0.5 - - 400 0.6 1200 0.18 100 573 0.4 - - 500 0.5 1500 0.15 125 751 0.3 - - 625 0.4 1875 0.12 160 995 0.2 - - 800 0.3 2400 0.09 1) 2) 3) 4) Ia (0.2 s) (A) Zs (0.2 s) (Ω) Characteristic G as per CEE 19/1 publication Characteristic K as per DIN VDE 0660 part 101 Characteristic U as per CEE 19/2 publication Nominal voltage of conductor in relation to earth 34 5 In (A) Zs (≤ 0.2 s) (Ω) Circuit-breaker with characteristics 1), 2), 3) 15 In (A) Zs (≤ 0.2 s) (Ω) 5.8.4 Error indications Display Meaning Comments Voltage less than 90 V Connection may be defective Measurement not possible, as the voltage is outside the nominal range Voltage above 440 V Protective conductor defective Measurement not possible, as the frequency is outside of the nominal range Protective conductor possibly interrupted, Incorrectly connected or live. WARNING: Danger of electrocution! Frequency above 450 Hz Frequency below 15.3 Hz Instrument temperature too high Allow the instrument to cool down. Restart after approximately 5 minutes. Measurement interrupted Error noted Error – Restart If this occurs several times, a factory inspection is necessary. Measurement not possible The short-circuit current cannot be calculated, as ZS > 200 Ω Measurement range exceeded Calculated short-circuit current > 29.9 kA Measurement not possible Probe incorrectly connected Earth connection voltage cannot be measured Resistance of the earth probe is too high (> 15KΩ). The cable has a break in it. Calculation limits for fault voltage exceeded, ZS > 200 Ω, the probe voltage cannot be measured, possibly > 50 V The RCD may have tripped during measurement. Use the ZS function without tripping 30 mA RCD’s. No measurement result Measurement impossible, Battery discharged 35 Charge the battery see “Charging the battery” 5.9 Measuring resistance / testing continuity This function enables resistance measurement up to 1999 Ω, with DC voltage and automatic polarity inversion. To take into account the resistance of the leads, it is possible to compensate for their resistance. Additionally, a maximum resistance threshold can be programmed, with an audible signal to confirm the measurement. 5.9.1 Description of the function A measurement is first of all carried out to ensure that the voltage present is less than 3 V. If this condition is met, the measurement begins. The battery is used as the voltage source. The DC voltage and the current passing through the sample are measured, processed by the processor and displayed as a resistance. By inverting the current flow, the second resistance R 2 is obtained. To avoid voltage peaks at the switching relay due to the possible presence of inductance in the test circuit, the inversion is only carried out once the measurement current has decreased. For this reason the measurement time depends on the possible presence of inductance, it may amount to several seconds if the inversion current is authorised. It is possible to inhibit the automatic polarity inversion. Simply leave your finger on the TEST button. In this case, the measurement is much quicker and gives out an audible signal of confirmation almost instantaneously. 5.9.2 Technical specifications Resistance (low impedance measurement) as per EN 61557-4 (Ed. 97) / DIN VDE 0413 part 4 (7/77) Measurement range Resolution Accuracy 0.16 … 2.99 …19.90 Ω ... 1999 Ω 0.01 … 0.1 - 1 Ω ± (5 % of R. + 4 cts) Internal resistance: Approx. 20 Ω Measurement time: Approx. 5 s in the case of automatic polarity inversion, otherwise 1s Permissible inductance: Max. 5 H without damage Permissible parasite voltage in series: ≤ 3 V AC / DC, measurement is not started beyond this value Nominal voltage: 18 V DC Short-circuit current: ≥ 200 mA DC up to 10Ω, < 250 mA DC Permissible overload: Urms max. = 500 V AC Lead compensation: up to 5 Ω max. (= R∆) RIndicated= Rmeasured - R∆ 5.9.3 Evaluation of measurements The table below gives the maximum continuity values displayed, taking into account the measurement error, so as to remain within the tolerated limits (see standards) Theoretical resistances Maximum displayed resistances 0.2 Ω 0.15 Ω 0.4 Ω 0.35 Ω 0.6 Ω 0.54 Ω 0.8 Ω 0.73 Ω 1.0 Ω 0.92 Ω 10.0 Ω 9.47 Ω 36 5.9.4 Performing a measurement 1. Connect the C.A 6115N according to the suggested L1 L2 connection diagram with the cable with 3 separate leads. L3 Connect lead L 3 (white) the lead L 2 (yellow). The N measurement can be made between the earthing rod and PE the different points of the ground circuit: earth terminals on mains plugs, metal radiator housing or light fittings… 2. Turn the selector switch to the “LOW Ω “ function. 3. Press the “TEST” button to start a resistance measurement. The positive pole of the voltage is on L1 and ground on L3 – The indication is R1. Hold the “TEST” button down to check whether R < LIMIT, with immediate confirmation by audible beep. 4. Once the “TEST” button is released, the current is inverted. R = (R1 + R2)/2 is displayed. R1 and R2 are visible by means of the MORE button. If R > LIMIT, an audible warning beep sounds. 5. Save the measured values using the “MEM/MR” button, or print them out using the “PRINT” button. To begin a new measurement, press the “TEST” button again. To return to the display of the network voltage UL-N ,turn the selector switch or press CHANGE or SELECT. To achieve very precise measurement of low resistances, lead compensation can be brought into effect. (see 5.11.) WARNING! Resistance can only be measured without voltage. This criteria is checked for to authorise a test. If, for a measurement, a voltage > 300 V is applied by mistake, the protective fuse blows. If this voltage is < 300 V, the instrument is protected without fuse. 5.9.5 Error indications Display Meaning Comments . Measurement not possible Parasite voltage on input Voltage above 3 V AC/ DC Measurement range exceeded Resistance above 1999 Ω Error – Restart. Lead compensation exceeds the limit perhaps. If this problem persists, a factory inspection is necessary. Measurement interrupted Error noted Measurement impossible, Battery discharged 37 Charge battery see “Charging the battery” 5.10 Determining phase order This function is used to check the phase order on three-phase networks with voltages of 20 V to 440 V and frequencies of 15.3 … 450 Hz. The voltages L1 – L2 or L2 - L3 and L3 – L1 and the frequency are also indicated. The rotation can be also be checked between two conductors and the neutral. 5.10.1 Description of the function The microprocessor carries out the measurement by evaluating the points at which the voltage passes through zero. The voltages between all the conductors are measured and indicated as U1-2, U2-3 or U3-1. Determination of phase order according to EN 61557-7 (Ed. 97) according to DIN VDE 0413 Part 9 (02/ 84) ■ Nominal voltage: 20 - 440 V AC ■ Permissible overload: Urms max. = 500 V ■ Frequency range: 15.3 - 450 Hz ■ Max. fault current: ≤ 1 mA 5.10.2 Performing a measurement 1. Connect the instrument using the cable with 3 separate leads as shown opposite. L1 L2 L3 N PE 2. Turn the switch to the " PHASES " position. If all the voltages and a rotating magnetic field are present,, the voltage “U1-2” will be indicated, at the same time as the symbol. " " Positive phase order ( L1 - L2 - L3 phase order) or " " Negative phase order (L3 - L2 - L1 phase order). If a single voltage is missing or if there is no phase shift between the voltages, the " " symbol will start to flash. 3. Press the “MORE” button to display the voltages U2-3 / U3-1 and the frequency. If you must save or print out the result, press first the “TEST” button – the indication is now “frozen” and you can either save it with the “MEM/MR” button, or print it out with the “PRINT” button. NOTE: In the event of a break in the L3 conductor, half the value of the voltage U1-2 will be indicated for U3-1 and U2-3. 5.10.3 Error indications - Comments Display Meaning Comments Impossible to determine the phase order (L1,L2,L3) are all live < 20 V no phase shift, at least two phases are missing 38 5.11 Measurement lead compensation This function is used to save the resistances of auxiliary accessories: test probes, croc-clips, leads, etc. before measuring. These resistance values are automatically deducted from measurements during all resistance measurements (RA,ZS,R). Values up to 5 Ω can be compensated for. The resistance of the original measurement cables supplied is compensated for during manufacturing and applies even when RD = 0.000 is displayed. 5.11.1 Technical specification Measurement range Resolution Accuracy 0.01 … 0.15 … 2.99 … 5.0 Ω 0.01 … 0.1 Ω ± (5 % of R. + 3 cts) Measurement time: Approx. 1 sec, no voltage polarity inversion Permissible inductance: Max. 5 H without damage Parasite voltage permissible in series: ≤ 3 V AC / DC, measurement is not started beyond this value. Nominal voltage: Battery voltage : ≥ 6.5 V; max. 18 V DC Short-circuit current: ≥ 200 mA DC Permissible overload: Urms max. = 500 V (measurement not made) Lead compensation: up to 5 Ω max. (R∆) Rindicated = Rmeasured - R∆ 5.11.2 Performing a measurement 1. Turn the selector switch to the RCD, EARTH, LOOP or LOW Ω functions 2. Press the “MORE” button as many times as necessary until “R∆” is displayed. 3. Short circuit the cable with 3 separate leads and/or their extensions. 4. Press the “TEST” button. 5. The measurement is saved and will be automatically deduced from measurements in all the functions concerned: RCD (Ra), EARTH, LOOP, LOW Ω. The " R " symbol is displayed, to indicate compensation, complying with EN 61557. 5.11.3 Deleting compensation To delete the saved value, proceed as indicated above (steps 1+2), separate the leads (remove shortcircuit), press the “TEST” button. “R∆ 0.000 Ω”, is displayed, indicating that the value has been deleted. The saved resistance compensation value is deleted when the instrument is switched off. 39 6. RS232 INTERFACE / MEMORY This instrument is equipped with an RS232 serial interface (SUB-D 9 poles) and memory capable of storing approximately 800 groups of values (a measurement + secondary measurements + context : voltage, current, frequency, date, time ….). The instrument has a real time clock for the date and time. The interface enables measured or saved values to be printed out or transferred to a computer with the C.A. 6115 UTILITY software (optional). Furthermore, the instrument can be controlled remotely via the RS-232. Thanks to internal insulation, the instrument can also be used to carry out measurements at the same time. Interface : RS232, 9 poles, galvanic separation, for printing or transferring measured or saved values and to enable remote control (REMOTE). Direct protocol printing (summary table) on a parallel A4 printer is possible, as is the printing out on a serial printer of measurement ‘slips’. Time : Non-volatile, self-powered clock, for date and time. Memory : Memory capable of containing up to 800 groups of values, Group of values = all the values measured per function, 6.1 Technical specification of the RS232 Test voltage: 4 kV Data format: 1 start bit, 8 data bits, 1 stop bit, without parity Protocol Xon/Xoff handshake Baud rate: 300 bauds … 9.6 kbaud , can be adjusted in “SET UP”. The “- P -” display enables the remote control probe to be used. The “- - - -” display makes it possible to print out on a parallel printer via the optional adapter. NOTE: Select the Baud Rate of 9600 Bd in the CA6115 when transferring data from the instrument into the PC with the Utility Software Voltage supply: Via the interface Connection to the serial printer front view front view 2 2 3 3 5 5 male 9 pin connector to to serial printer Female 9-pin connector to CA 6115N 40 Connection to a PC or to a parallel printer ➀ ➂ 9-pin connector to C.A 6115N 9-pin connector to PC ➁ 25-pin connector ■ 25-pin connector to PC or serial-to-parallel adapter ➀ → ➁) Necessary links DB9 ➔ B25 (➀ (null cable - standard modem) : 2 ➔ 2 6 ➔ 20 3➔3 8➔4 4➔6 5➔7 ■ DB9 ➔ DB9 conversion ( ➀ → ➂ ) : 2➔3 3➔2 4➔6 5➔5 6➔4 8➔7 6.2 Saving / Calling up measured values The instrument can save 800 groups of values (total of all the values measured per function) in the internal memory (MEM function). Saving values can be done in two different ways: 1. Saving in series: once MEM is pressed after a new measurement, the instrument automatically suggests saving under the number of the first free memory space that comes after the last filled space. This number can be changed manually, between 1 and 999. This way, measurements are saved one after the other. 2. Saving in groups: for the printing out of protocols in A4 format where each line represents a space in the memory, and the columns represent the functions, it is useful to group together measurements made under several functions (e.g. RCD’s, insulation, loop, etc.) in the same memory space so as to completely fill each line. It is thus possible to save results of measurements made under different functions (insulation measurement, RCD measurement, earth measurement etc…) under the same number... In both cases, the internal management of the memory is based on: 1. the save number, 2. the measurement function / selector switch position. 41 6.2.1 Saving measured values (MEM) 1. Carry out the required measurement and wait for the measured value to come up on the display. Press on the “MEM/MR” button to call the save function. “MEM” flashes and the free memory save number following the last filled space is suggested, for example: The display of “FREE” means that the memory space is not occupied for the chosen function The display of “OCC ” means that the memory space is already occupied for the chosen function If you want to change the number, press on the “SELECT” button to select the figure to be changed and press on the “CHANGE” button to change this figure from between 0 and 9. If you choose a memory space number already occupied by different measurements, you will be in “Saving in groups” mode. If you choose different memory spaces each time, you will be in “Saving in series” mode. NOTE: in “Saving in groups” mode, you can press the “CHANGE” button for 2 seconds to return to the last save number. Pressing the “SELECT” button selects the next 10’s digit ! 2. Press the “MEM” button to validate the selected number and save the values 3. Pressing “MEM” or “MORE” displays the date of the measurement. The “MORE” button is used to display the data that has just been saved in memory. To start a new measurement, press the “TEST” button.. To return to the display of the network voltage UL-N, turn the selector switch or press CHANGE or SELECT. 6.2.2 Memory recall To make access to the memory as quick as possible, the Memory recall function (MR) is directly linked to the exact position of the selector switch. So when a number of values are saved, simply choose the function under which you want to recall measurements with the selector switch. When looking through with the SELECT and CHANGE buttons (see below), the instrument suggests ONLY memory space numbers containing measurements made under the selected function. Example : An RISO L-N-PE measurement was carried out and saved under the memory number N°5. Memory recall procedure: 1. Turn the selector switch to the INSULATION “RL-N-PE” position: 2. Press the “MR” button to activate memory recall. 3. Select n° 5 with the “CHANGE” + “SELECT” buttons. 4. Confirm by pressing “MR”: the message “OK 05” is displayed. 5. With “MORE”, bring up the saved values on the display. 6.2.3 Wiping the memory 1. Switch off the instrument with the selector switch. 2. Press the “MEM/MR” button, hold it down for 2 sec. and at the same time turn the selector switch to switch on the instrument. 3. An indication is displayed, for example: The display of “OCC + a figure” indicates the last space occupied by a value. You can release the “MEM/MR” button. 42 4. Press the “MEM/MR” once more. The display goes back to voltage measurement. All the values stored in the memory are deleted. To verify this, press “MEM/MR”. MR This display indicates that the memory is empty. You can also easily delete values in memory with the optional PC software. WARNING: All the saved values are irreversibly deleted! 6.3 Printing measured values The instrument offers two possibilities for printing: 1. Printing protocols (prt) Saved measurements, in groups or under successive numbers, can be printed out in A4 format in the form of a general summary table, on an external printer with an RS232 interface, or on parallel A4 printers via an optional “serial-to-parallel” adapter. If protocol printing is used with saving in groups, a clear summary table of the tests carried out on installations is obtained. The header of the protocol contains all the details of the instrument user (to be written in by hand or automatically printed if they have been stored in the instrument via the PC software). On the table, the measurement functions are listed by column and the allotted memory space numbers are by line. 43 2. Printing documents (doc) Measurements that have not yet been saved or saved measurements can be printed out one after the other on a serial RS232 printer in A6 format, or on parallel A4 printers via an optional “serial-toparallel” adapter. 6.3.1 Preparing the printout The settings below, defined in the SET-UP menu, are used to configure the default printing parameters. 1. Switch on the instrument or turn the selector switch. 2. Press the “PRINT / SET UP” button for over 2 secs. All the segments of the LCD are displayed (Display Test) = 1st screen in SET-UP mode. 3. Press the “MORE” button as many times as necessary until “bd” (baud rate) is displayed. With the SELECT and CHANGE buttons, choose the speed of the RS232 interface by changing the “baud rate (bd)” between 300 bauds and 9.6 k bauds. If using a parallel A4 printer and therefore the serial-to-parallel adapter, then you must choose “- - -” as the interface speed. 4. Press the “MORE” button again, so that “prt” is displayed. Use the following buttons: “SELECT” – To make the print format (A4 / A6) or the type of printout (“prt” OR “doc”) flash “CHANGE” – To choose the A4 or A6 print format and the Protocol (prt ) or Document (doc) type of printout. Note that with the A6 format, only the “Documents” type printout is available. 5. To quit “SET UP” and store the changes made, press “MORE” until you have worked through all of SET-UP, or press “TEST”. If you turn the selector switch, the changed settings will not be saved after the instrument is switched off. Printing can be done in 10 different languages (French, English, German, Italian, Spanish, Swedish, Norwegian, Lithuanian, Dutch and Czech). The optional PC software needs to be used in order to change the default language: English. 6.3.2 Immediate printing of unsaved measurements (doc) This function is used to print out the displayed value immediately, in the “doc” form. (measurement with the date and time etc…). 1. Connect the instrument to the printer with the appropriate cable (see chapter 6.1). Do not switch on the serial printer before having first of all switched on the instrument. Otherwise, “ ?” signs are printed indefinitely. 2. Perform the required measurement. 3. When the measurement is displayed, press the “PRINT” button. 4. Printing begins. If the printing is being done on a parallel A4 printer via an optional serial-to-parallel adapter, first of all select the A4 format and set the baud rate to = “- - -” in “SET UP”! Once the print out is finished, you can save the measurement with “MEM/MR”. To begin a new measurement, press the “TEST” button. To go back to the display of the network voltage UL-N, turn the selector switch or press CHANGE or SELECT. 44 6.3.3 Printing saved values This function is used to print out saved values stored in the memory in “doc” format (measurements one after the other with the date, time etc…) or in “prt” format (measurement protocol = general summary table in A4 format). 1. Connect the instrument to the printer with the appropriate cable (see chapter 6.1). Do not switch on the serial printer until after having switched on the instrument, otherwise “?” signs are printed indefinitely. 2. Turn the selector switch so that the instrument is in “voltage measurement” mode. 3. Press the PRINT button: “Pr” is displayed. The A4 or A6 printing format programmed in SET-UP is displayed (changing this is possible with CHANGE). 4. Press PRINT again: The type of print out programmed in SET-UP is displayed (“ Prt “ or “doc”, changing this is possible with CHANGE). The small display at the top indicates the memory address corresponding to the start of the print job. The large central display shows the memory address at the end of the print job (changing this is possible with SELECT and CHANGE). 5. Press PRINT for a third time: Validation and start of print job. 6.3.4 Error indications Display COM Meaning Comments Defective cable, Wrong printer set-up, Wrong baud rate (bd) The interface cannot establish a connection Interface error Data in the EEPROM Is lost Use the PC software reconfigure the instrument 6.4 Saving or printing at programmable intervals “Interval” mode is used for automatic saving or printing out of “Loop” or “Earth” measurements at a programmed rate. It is also possible to monitor the changes in these parameters with time, as a function of the weather for example. The interval between each measurement (int.) can be set from 0.1 to 199.9 minutes. As the environment of measurements (voltage, frequency, current…) is always measured and saved at the same time as the measurements, this function can serve, for example, to record the leakage currents of an installation over a long period of time. WARNING: if the current clamp is connected on positions Ra SEL and Zs SEL, then it is the selective earth current measurement and not the leakage current of the installation that will be recorded. For leakage currents, use the Zs function instead without RCD tripping ( ). Recording begins at the first memory address that comes free after the last occupied address. Running “Interval” mode: 1. Turn the selector switch to the required measurement function (RA, ZS Zi) 2. Press the “SET UP” button for over 2 secs All segments on the LCD light up 3. Press the “MORE” button as many times as it is necessary until “‘int.” is displayed. 45 4. Set the rate, in minutes (0,1 … 199,9), using the buttons: “SELECT” – to select the figure to be changed “CHANGE” – to change the selected figure between 0 - 9. 5. After having set the time interval between each measurement, press the “SELECT” button – until “MEM” or “COM” flash. Using the “CHANGE” button, choose from between: MEM – the measured values will be stored in the memory, or COM – all the measurements will be transmitted to the RS232 interface. NOTE: If you want to print out measurements, see the settings described in chapter 6.3 “Printing measured values” 6. Press the “TEST” button to save the settings and run interval mode. 7. Stop measurement by turning the selector switch. 7. SERIAL-TO-PARALLEL ADAPTER (RS232 - CENTRONICS) (OPTIONAL) The RS232/Centronics adapter, available as an option, makes it possible to convert the serial interface (RS232) into a parallel printer interface (Centronics), enabling the direct printing of all measurements on office printers in A4 format, without having to use a personal computer. ■ Using the adapter SET-UP : 1. Switch on the instrument or turn the selector switch. 2. Press the “PRINT / SET UP” button for over 2 secs. All segments of the LCD light up. 3. Press the “MORE” button as many times as it is necessary until “bd” (baud rate) is displayed. Using the SELECT and CHANGE buttons, choose the speed of the RS232 interface by changing the “ baud rate (bd)” so that “- - -” is displayed. 4. Press the “MORE” button again, so that “prt” is displayed. Use the following buttons: “SELECT” – To make the (A4/A6) print format and the (“prt” OR “doc”) printout type flash “CHANGE” – To select A4 or A6 print format and the Protocol (prt ) or Document (doc) type of printout Note that with the A6 format, only the “Document” type format is available. 5. To quit “SET UP” and save the changes made, press “ MORE “ until you have gone through the whole of SET-UP, or press “TEST”. If you turn the selector switch, the changed parameters will not be saved after the instrument is switched off. ■ 1. 2. 3. 4. 5. 6. Printing with the adapter: Connect the null - modem RS232 cable to the C.A 6115N. Connect this cable to the adapter, then the adapter to the printer cable. Switch on the C.A 6115N and wait for the voltage to be displayed. Switch on the printer. To start printing unsaved measurements (immediate printing), press PRINT after the measurement. To start printing saved measurements, press the “PRINT” button (see § 6.3) in “Voltage measurement” mode. CAUTION: This adapter is exclusively designed to be used with the C.A 6115N and should not be used for any other purpose. 46 8. C.A 6115 UTILITY WINDOWS SOFTWARE FOR PC (OPTIONAL) A Windows (3.11 or 95 or 98 or NT) run software package is available as an option for the C.A 6115N. This software enables the saved measurements to be read off, the setting of variables (date, time, limit values etc…), the establishment of test protocols and the creation of text files that can be read by spreadsheet software such as EXCEL for example. Installation 1. Insert disk 1 into the disk drive. 2. Read the disk by means of the file manager 3. Double-click on “SETUP”. 4. Follow the instructions of the installation manager. Using the software 1. Check that the speed of the RS232 interface, in the instrument’s SET-UP menu, is set to 9.6 kbauds. 2. Connect the C.A 6115N to your PC via the RS 232 cable (Cabling, see “RS232 interface”) 3. Run the program by clicking on the “C.A 6115” icon. 4. Switch on the C.A 6115N check that the Power Down (Pd) setting is set to “OFF” in SET-UP 5. How to use the software is described in the software’s “Help” menu and in the file engred.doc If you have a 15'’ screen, it may be necessary to change the display format (in the “Control panel” in Windows) so as to have at least 800 x 600 points. This will enable you to view all the software windows. Display Meaning Comments Interface error The data in the EEPROM has been lost Use the PC software to reconfigure the instrument 9. CONTINUITY TEST ADAPTER (Optional - UK market only) 9.1 Description This optional adapter unit plugs into the C.A 6115N using the standard three-pin connector, and is terminated at the other end with a 13 A mains plug. A four position switch is mounted in the unit further down from the plug. The switch positions are marked Off, A (L-E), B (L-N) & C (N-E). The unit is designed for carrying out continuity tests on dead systems. It offers 2 different methods of continuity testing, depending on the measurement required. Method 1 enables the measurement of R1+R2 by making a temporary connection between Live & Earth at the dead distribution board. Method 2 enables the individual values of R1 (Live), R2 (Earth) and Rneutral to be simply calculated by making a temporary connection between Live, Earth & Neutral at the dead distribution board. 47 9.2 Procedure WARNING! Make sure that the electrical network is NOT live before making a continuity test with the adapter unit. ■ Method 1 To measure R1 + R2 only: 1) Implement a temporary Live-Earth link at the distribution board. 2) Plug the adapter unit into the outlet socket furthest away from the distribution board. 3) Select position A (L-E) on the adapter unit. 4) Make a low Ohms measurement with the C.A 6115N. This is the value of R1 + R2. 5) Disconnect the temporary link at the distribution board after the test. Result: R1 + R2 = A N.B. Lead resistance can be deducted from A, B & C, see below ■ Method 2 To measure individual values for R1, R2 and Rneutral: 1) Implement a temporary Live-Earth-Neutral link at the distribution board. 2) Plug the adapter into the outlet socket furthest away from the distribution board. 3) Select position A (L-E) on the adapter unit and make a low Ohms measurement and note the reading. 4) Next, make a measurement with the switch in the B (L-N) position and note this reading. 5) Finally, make a measurement with the switch in the C (N-E) position and note this reading. 6) Disconnect the temporary link at the distribution board after the test. 9.3 Calculating values The different values are calculated as below: R1 + R2=A R1 = (A + B - C)/2 R2 = (A - B + C)/2 Rneutral = (B + C - A)/2 9.3.1 Deducting lead resistance Below are typical lead resistance values that can be deducted from A, B & C: - For A: 0.09 Ohms (typical) - For B: 0.09 Ohms (typical) - For C: 0.06 Ohms (typical) It should be noted that the value of C may be higher or lower than A and B depending on the rating of the fuse in the plug. 9.4 Comments on the 2 different methods ■ Use method 1 for routine periodic inspections where it is necessary to record the actual value for R1 + R2, although normally an Earth loop impedance measurement is sufficient, and arguably, is a much better measurement to make. ■ Method 2 may be used to test the continuity of conductors in a new installation and has the advantage that a long lead of known resistance is not required (the use of this latter is not always practical, especially when some circuits are located on a different floor from the distribution board). It also avoids the needs to subtract the resistance of a long lead from each measurement. 48 10. CLEANING AND MAINTENANCE 10.1 Cleaning The C.A 6115N does not require any specific care if it is used correctly. To clean the instrument, simply use a cloth lightly dampened with soapy water. Do not use abrasive products under any circumstances, as this risks damaging the instrument. WARNING! Before carrying out any cleaning or maintenance work, or replacing components or fuses, disconnect the instrument from any voltage source. 10.2 Charging the battery 1. Connect the C.A 6115N to the mains supply (90-250 V AC 50 / 60 Hz) via the cable with a mains plug. 2. Turn the selector switch to the “OFF/CHARGE” position. Charging begins automatically within a few seconds – the indicator goes red. NOTE: If the LED flashes slowly, this means that the battery is ready to prepare quick charging (may last several minutes when temperature is below 5°C). If the LED is lit constantly : the quick charging is taking place. If the LED flashes rapidly: the batteries are fully charged and the charging is on stand by. CAUTION: In the case of temperatures outside of the +10....40 °C range, or defective batteries, the quick charge cannot be activated! 3. Charge the instrument until the charge indicator flashes regularly (after approximately 120 min if the battery was completely discharged). 4. The instrument is now ready to be used. CAUTION: If the C.A 6115N is plugged into the mains and battery charging is activated (the indicator comes on or flashes), the current clamp inputs may be live! Consequently, test leads with accessible contacts etc. are not to be connected, only connect a clamp that complies with EN 61010, with protected connection terminals, as supplied as an optional accessory with the C.A 6115N ! Changing the battery, after several years of use, should be carried out by a competent service centre recognised by CHAUVIN ARNOUX, foe example MANUMESURE. 10.3 Replacing the fuses If the fuses necessary to measurement are defective, the instrument shows “- - - -” on the LCD. The fuses used are those specified by CHAUVIN ARNOUX, otherwise risking exclusion from warranty cover. 10.3.1 Fuse at current clamp input (11) (M 2 A - 380 V - 5 x 20 mm) CAUTION : Before replacing the fuse, disconnect all instrument connections from sources of voltage! 1. 2. 3. 4. Open the fuse carrier with an appropriate tool, such as a screwdriver or a coin. Replace the fuse with a similar or original fuse. Close the fuse carrier and lock it correctly. Check that the instrument works properly. The instrument is once again ready for use. 49 10.3.2 Measurement input protection CAUTION: The instrument contains high rupturing capacity fuses (M - 3.15 A - 500 V - 10 kA 6.3 x 32 mm) with a trip capacity of 10 kA which do not come into effect in correct use. If the fuses blow, “- E -” is displayed. In this case, inspection of the C.A 6115N by a recognised service centre is necessary. 10.4 Storage If the C.A 6115N remains in storage or unused for a prolonged period of time, charge the batteries from time to time to avoid any damage. 10.5 Metrological check IIt is essential that all measuring instruments are regularly calibrated. We advise you to check this instrument at least once a year. For checking and calibration of your instrument, please contact our accredited laboratories (list on request) or the Chauvin Arnoux subsidiary or Agent in your country. 10.6 After-sales service Repairs under or out of guarantee: please return the product to your distributor 50 11. ORDERING REFERENCES ■ C.A. 6115N (GB) Tester ..................................................................................................................... P01.1454.12A Comes with a small shoulder bag containing a cable for measuring or charging with a schuko-type mains plug, a measurement cable with 3 separate leads, 3 test probes, 3 croc-clips, 1 green lead + test probe and the user’s manual in English. ■ C.A. 6115N (GB) + T Tester ................................................................................................................ P01.1454.22A Comes with a shoulder bag for the instrument + accessories, a cable for measuring or charging with a schuko-type mains plug, a measurement cable with 3 separate leads, 3 test probes, 3 croc-clips, one green lead + test probe, a 30 m long cable on a winder + an earth testing rod (for earth measurement with an auxiliary earth testing rod) and the user’s manual in English. FOR A CUSTOM ORDER (USER’S MANUAL LANGUAGE, MAINS LEAD, …), COMPLETE THE FORM BELOW: State of delivery: As described on the form + ‘3-leads’ cable, 3 test probes, 3 croc-clips, 1 green lead + test probe. ■ Installation tester ......................... C A 6 1 1 5 N User’s manual language & lexan label (connections) : French ...................................................................................................... F English ..................................................................................................... G German .................................................................................................... D Italian ......................................................................................................... I Spanish .................................................................................................... E X B X X X Mains cable for charging and measurement: France/Germany/Spain (schuko) ............................................................................. F Great-Britain ........................................................................................................... G Italy ......................................................................................................................... I Switzerland .............................................................................................................. C USA / Brazil .............................................................................................................U R B T H S Bags: For mains cable and ‘3-leads’ cable ....................................................................................... 1 Earth kit + shoulder bag for instrument and accessories ....................................................... 2 ■ Accessories Continuity Test Adapter (Optional - UK market only) ....................................................................................... 9000.30 Remote control probe N°2 ....................................................................................................................... P01.1019.42 “C.A 6115 UTILITY” PC software for Windows ....................................................................................... P01.1019.02 Comes with DB9F-DB25F cable x2 + DB9M-DB9M adapter “C.A 6115 UTILITY” PC software for Germany ........................................................................................ P01.1019.02A Comes with DB9F-DB25F cable x2 + DB9M-DB9M adapter Serial printer N° 05 .................................................................................................................................. P01.1029.03 Comes with DB9F-DB9M cable + DB9M-DB9M gender changer Adapter for parallel printer + DB9F-DB25Fcable x 2 + DB9M-DB9M adapter ......................................... P01.1019.04 Earth set (1 x ‘T’ earth testing rod + 1 x 30 m long green cable on reel) ................................................. P01.1019.03 Reinforced carrying case (capable of holding the instrument and all the accessories) ............................ P01.2980.31 Current clamp C103 1000/1 .................................................................................................................... P01.1203.03 Current clamp MN21 200/0.2 .................................................................................................................. P01.1204.18 ■ Spares Set of 3 croc-clips (red, yellow, white) ..................................................................................................... P01.1019.05 Set of 3 test probes (red, yellow, white) ................................................................................................... P01.1019.06 Measurement/charge cable - 3 separate leads ........................................................................................ P01.2951.32 Measurement/charge cable for mains socket (FRA/GER/SPA) ................................................................ P01.2951.23 Measurement/charge cable for mains socket (CH) .................................................................................. P01.2951.24 Measurement/charge cable for mains socket (GB) .................................................................................. P01.2951.25 Measurement/charge cable for mains socket (ITA) .................................................................................. P01.2951.26 Measurement/charge cable for mains socket (USA / Brazil) .................................................................... P01.2951.88 3 m long green lead (set of 4 colours) ..................................................................................................... P01.2950.98 51 Green test probe ..................................................................................................................................... P01.1019.20 30 m long green lead on reel (for earth measurements) .......................................................................... P01.2951.28 T-shaped earth testing rod ....................................................................................................................... P01.1018.29 Shoulder bag for the 2 measurement/charging cables ............................................................................. P01.2980.32 PC RS232 DB9F-DB25F cable x2 + DB9M-DB9M adapter .................................................................... P01.2951.72 RS232 DB9F-DB9M serial printer cable + DB9M-DB9M adapter ............................................................ P01.2951.73 Roll of paper (set of 5) ............................................................................................................................. P01.1018.42 Fuse: 2A-380 V-10 kA-5 x 20 M (set of 10) for clamp input ...................................................................... P01.2970.26 Fuse: 3.15A-500 V-10 kA-6.3 x 32 M (set of 10) for measurement input .................................................. P01.2970.80 52 53 54 55 09 - 2001 Code 688 732 B00 - Ed. 2 Deutschland : CA GmbH - Straßburger Str. 34 - 77694 Kehl / Rhein - Tel : (07851) 99 26-0 - Fax : (07851) 99 26-60 España : CA Iberica - C/Roger de Flor N° 293 - 08025 Barcelona - Tel : (93) 459 08 11 - Fax : (93) 459 14 43 Italia : AMRA MTI - via Sant' Ambrogio, 23/25 - 20050 Bareggia Di Macherio (MI) - Tel : (039) 245 75 45 - Fax : (039) 481 561 Österreich : CA Ges.m.b.H - Slamastrasse 29 / 3 - 1230 Wien - Tel : (1) 61 61 9 61 - Fax : (1) 61 61 9 61 61 Schweiz : CA AG - Einsiedlerstrasse 535 - 8810 Horgen - Tel : (01) 727 75 55 - Fax : (01) 727 75 56 UK : CA UK Ltd - Waldeck House - Waldeck road - Maidenhead SL6 8BR - Tel : (01628) 788 888 - Fax : (01628) 628 099 USA : CA Inc - 99 Chauncy Street - Boston MA 02111 - Tel : (617) 451 0227 - Fax : (617) 423 2952 USA : CA Inc - 15 Faraday Drive - Dover NH 03820 - Tel : (603) 749 6434 - Fax : (603) 742 2346 190, rue Championnet - 75876 PARIS Cedex 18 - FRANCE Tél. (33) 01 44 85 44 85 - Fax (33) 01 46 27 73 89 - http://www.chauvin-arnoux.com 56